Edward Gore
-
Posts
701 -
Joined
-
Last visited
Content Type
Profiles
Forums
Events
Gallery
Everything posted by Edward Gore
-

STRIPPER with LOTS of PICTURES * repainting a Beetle
Edward Gore replied to Edward Gore's topic in WIP: Model Cars
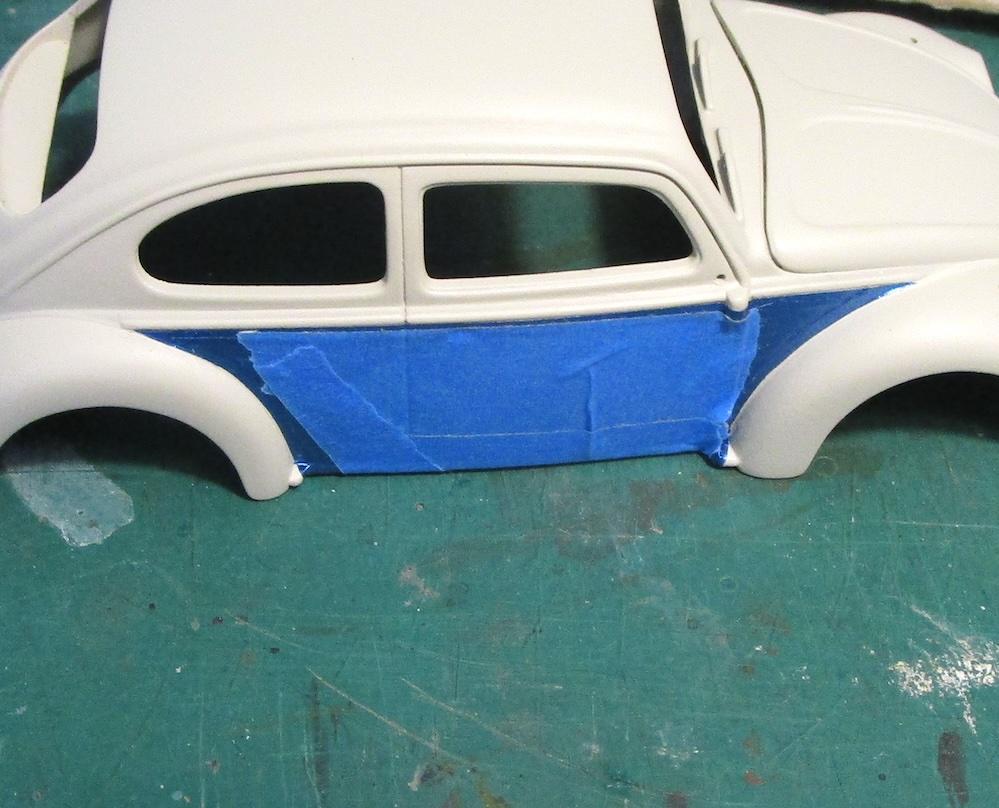
@David G., Thanks again for following along and commenting. So-far the masking worked. The different paint systems worked together as well. Testors enamel and Testors lacquer. -
Thank you all so much for the comments.
-
STRIPPER with LOTS of PICTURES * repainting a Beetle
Edward Gore replied to Edward Gore's topic in WIP: Model Cars
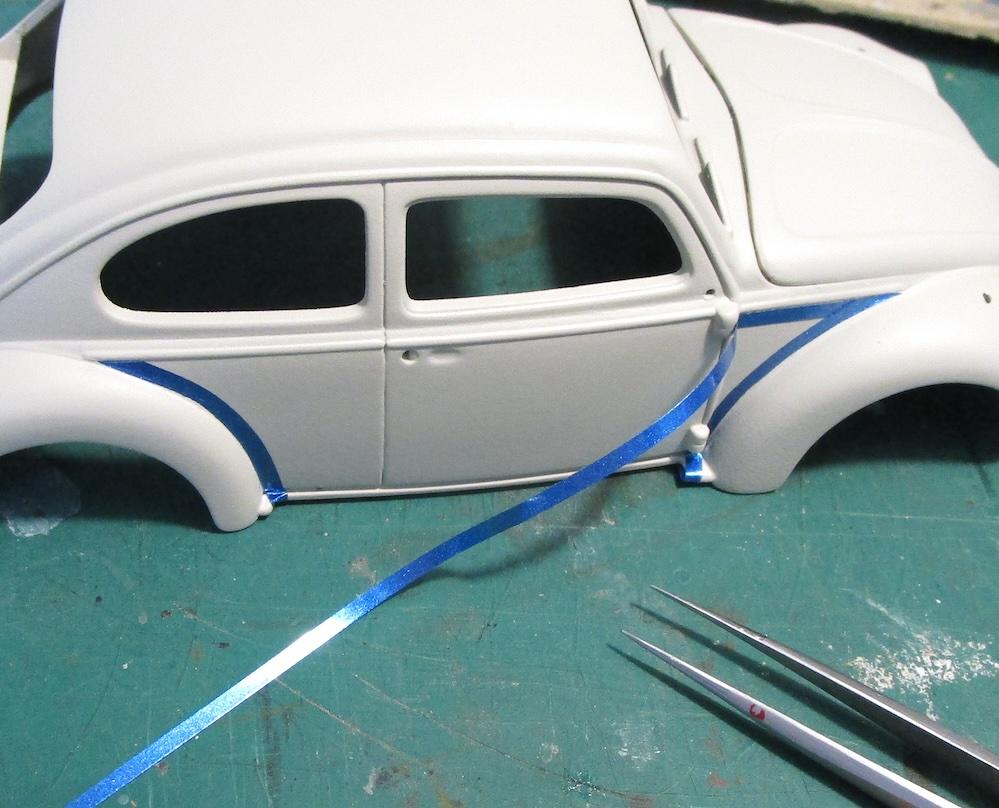
I have a roll of Scotchcal 220 by 3M. It’s a vinyl material that I cut into strips for masking. This was very helpful for this project.
-
Love the details!
-
1/12 Kustom bicycle
Edward Gore replied to Lownslow's topic in All The Rest: Motorcycles, Aviation, Military, Sci-Fi, Figures
Very nice. The wheels are outstanding -
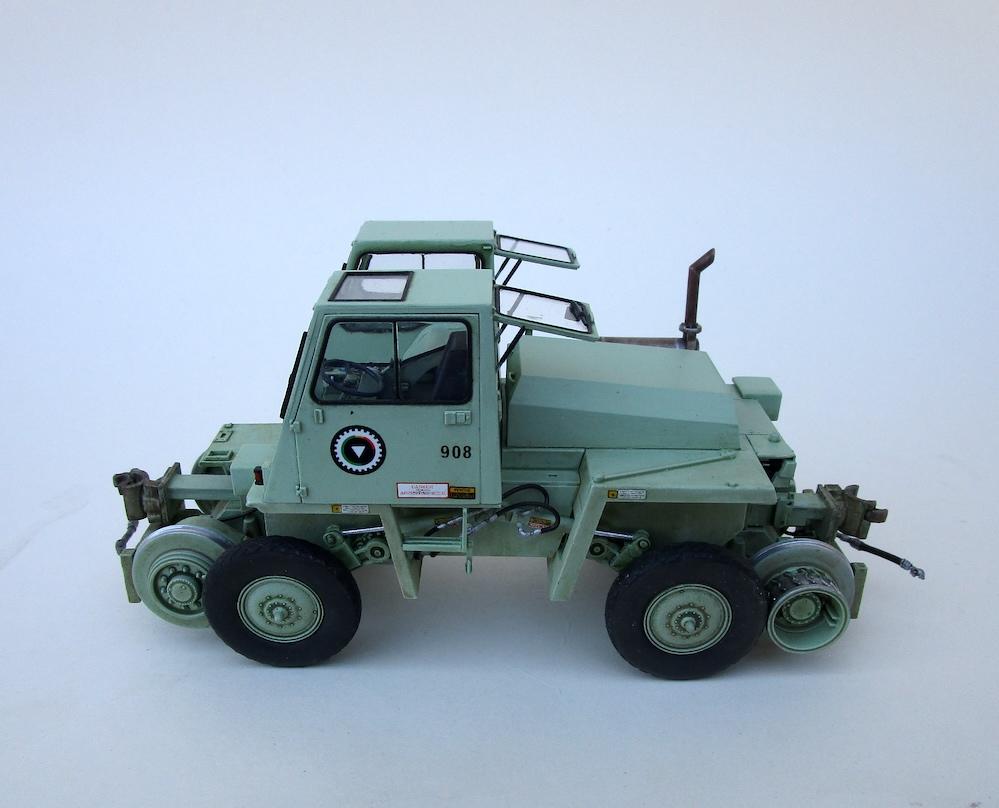
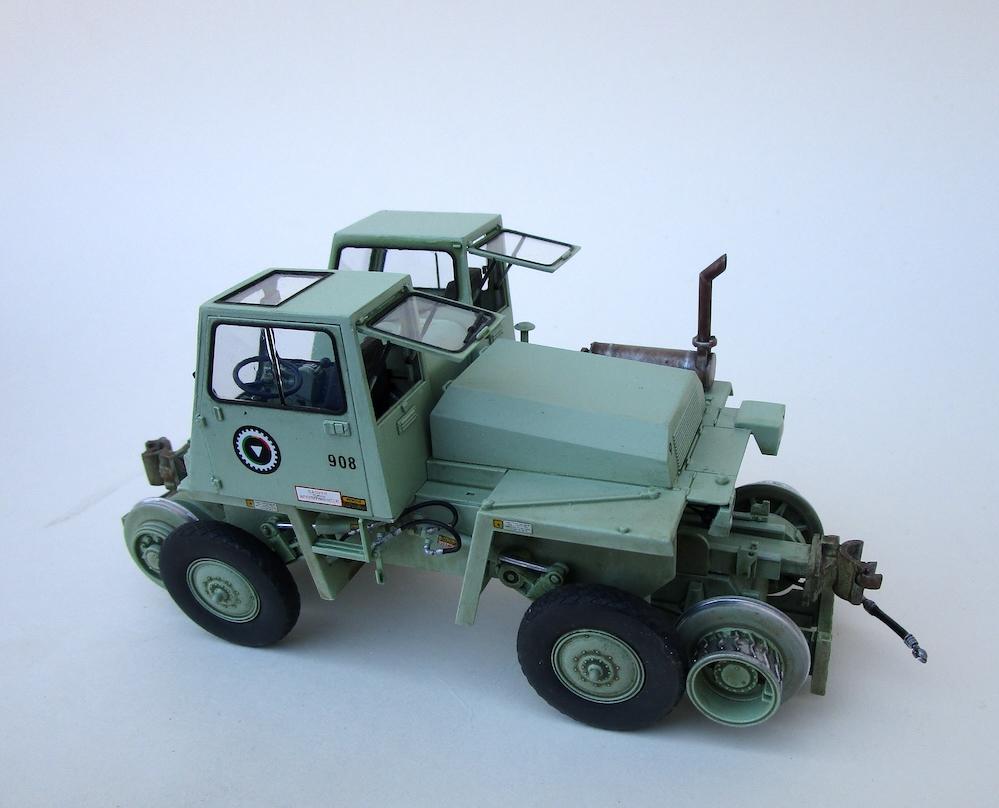
M-20 Prime Mover
Edward Gore replied to Chariots of Fire's topic in WIP: Model Trucks: Big Rigs and Heavy Equipment
Nice. Brass fabrication is not easy to do and you're making it look easy ? -
Appreciate the compliments, gentlemen ?
-
Thanks for checking in and appreciate your compliments ?
-
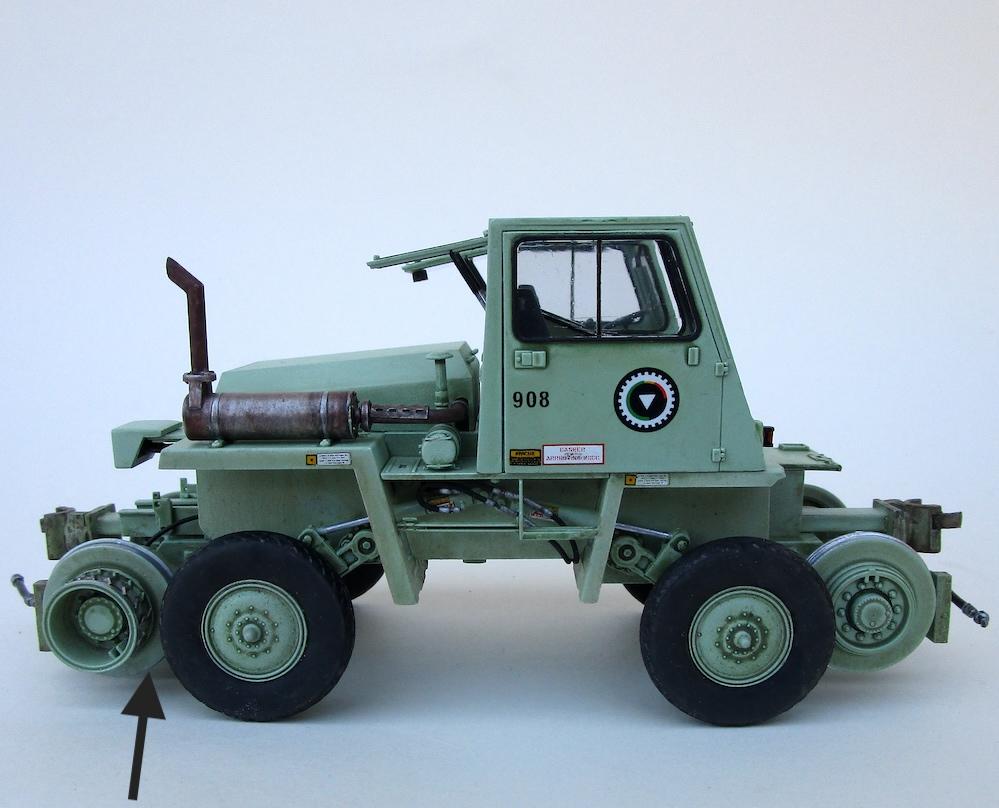
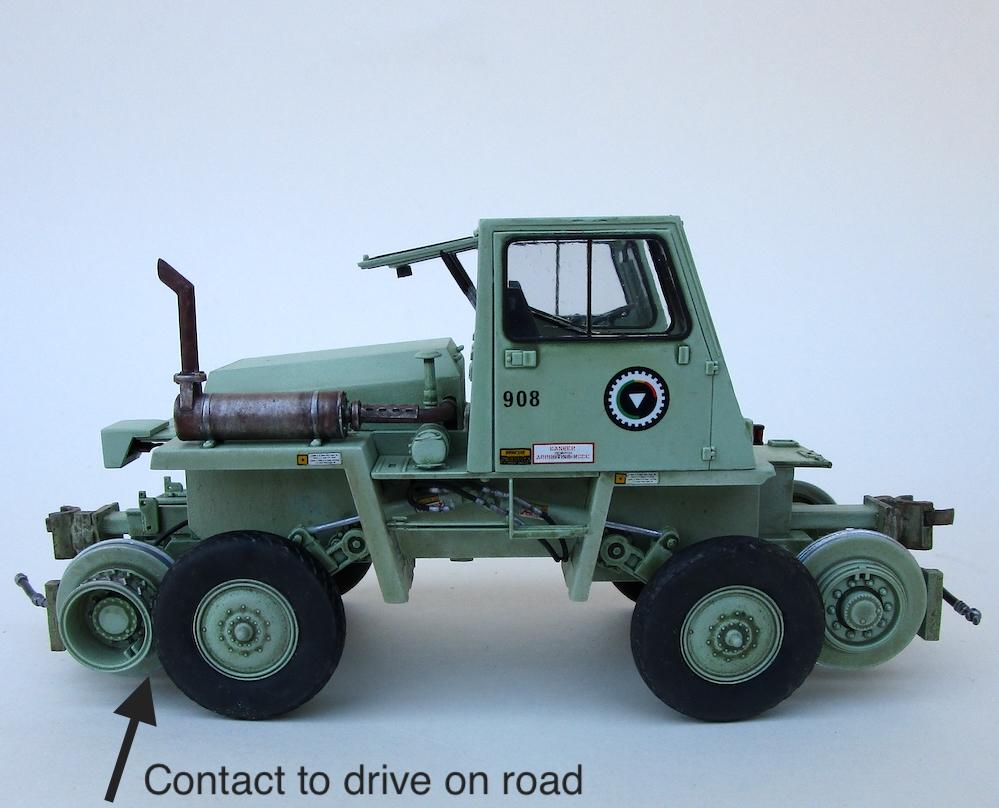
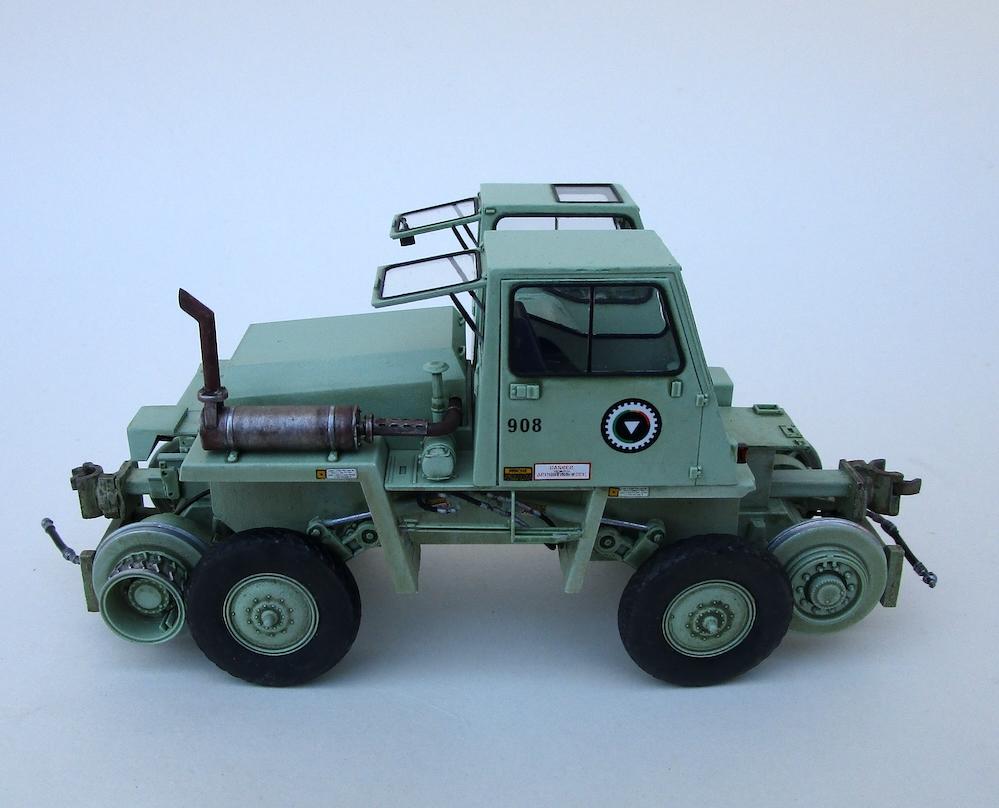
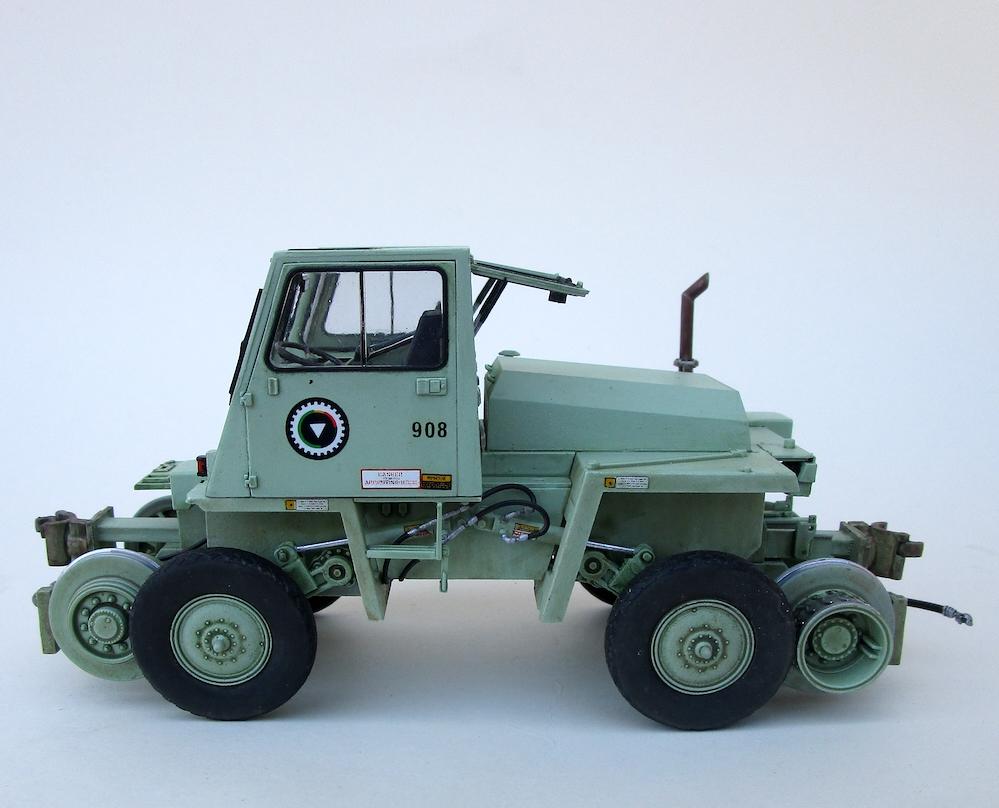
More finished pictures here if interested ? https://www.modelcarsmag.com/forums/topic/192135-switcher-locomotive-switcher-engine-designed-after-a-trackmobile/ The traction wheel cones of the rear articulate to make contact with the rear rubber road wheels to drive on paved road. Just like the real thing! The road wheel arms also articulate up and down for either railroad operation or paved road operation. Thanks for looking...
-
WIP thread is here if you're interested ? https://www.modelcarsmag.com/forums/topic/189264-switcher-locomotive-switcher-engine-designed-after-a-trackmobile/ Finished pics of the 1:35 scale Switcher Locomotive designed after a Trackmobile. I painted mine US Forest Service green because actual Trackmobiles were usually UP yellow or orange. More pics later of it on railroad track. Thanks for looking ?
-
STRIPPER with LOTS of PICTURES * repainting a Beetle
Edward Gore replied to Edward Gore's topic in WIP: Model Cars
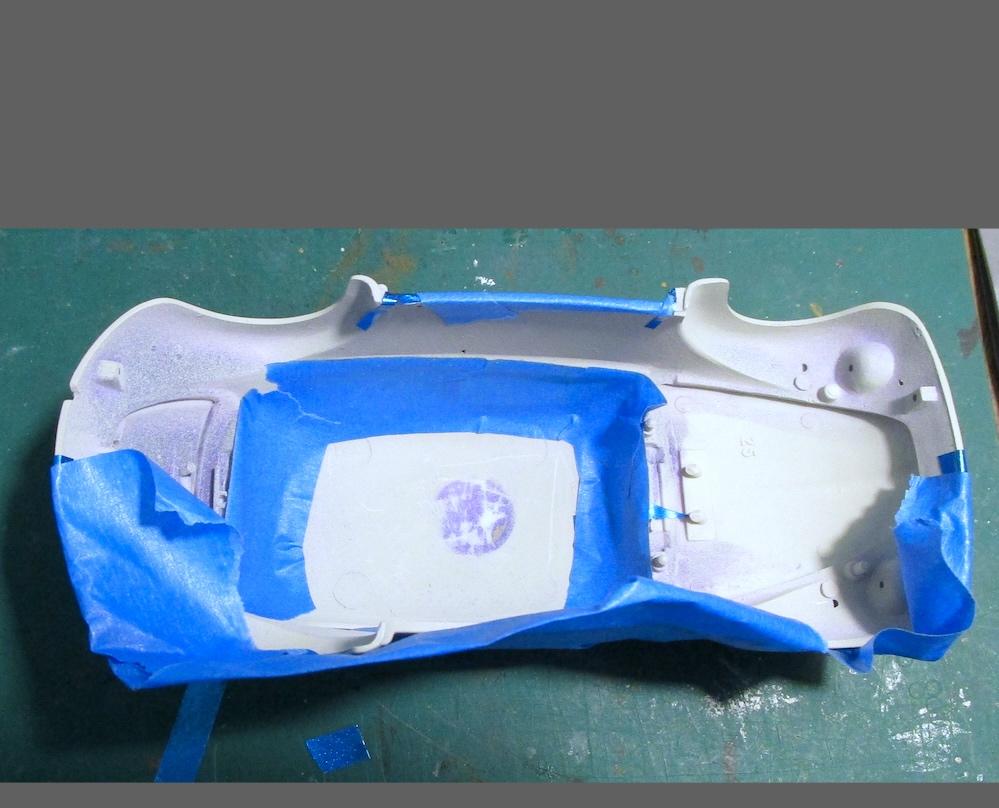
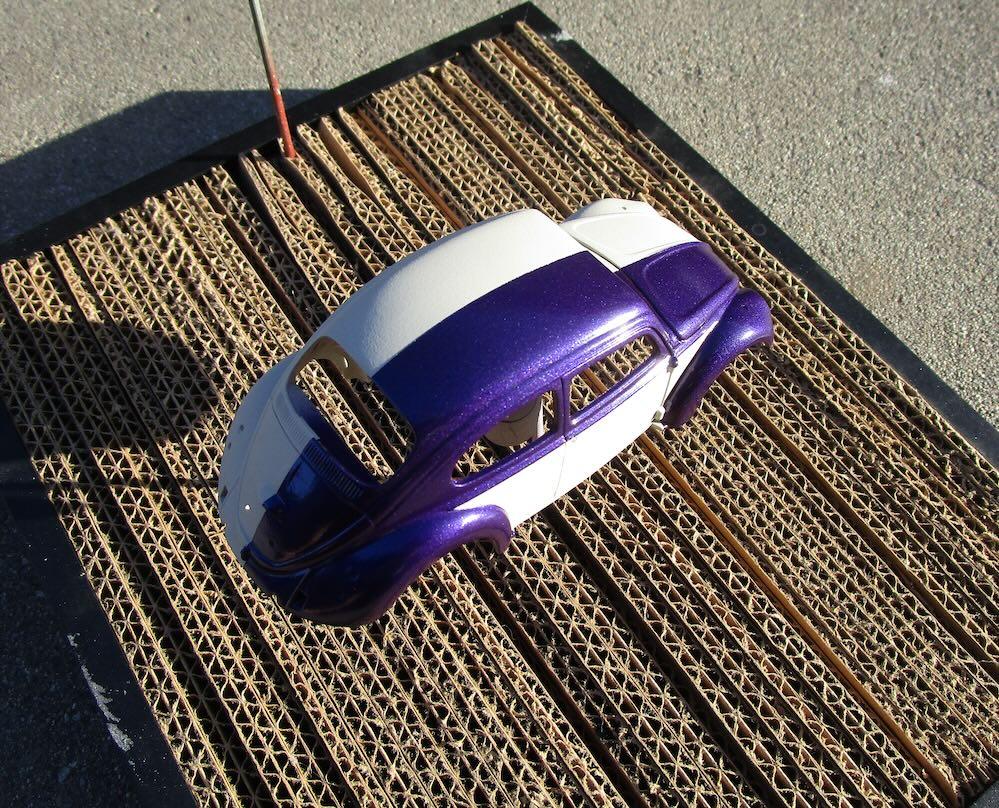
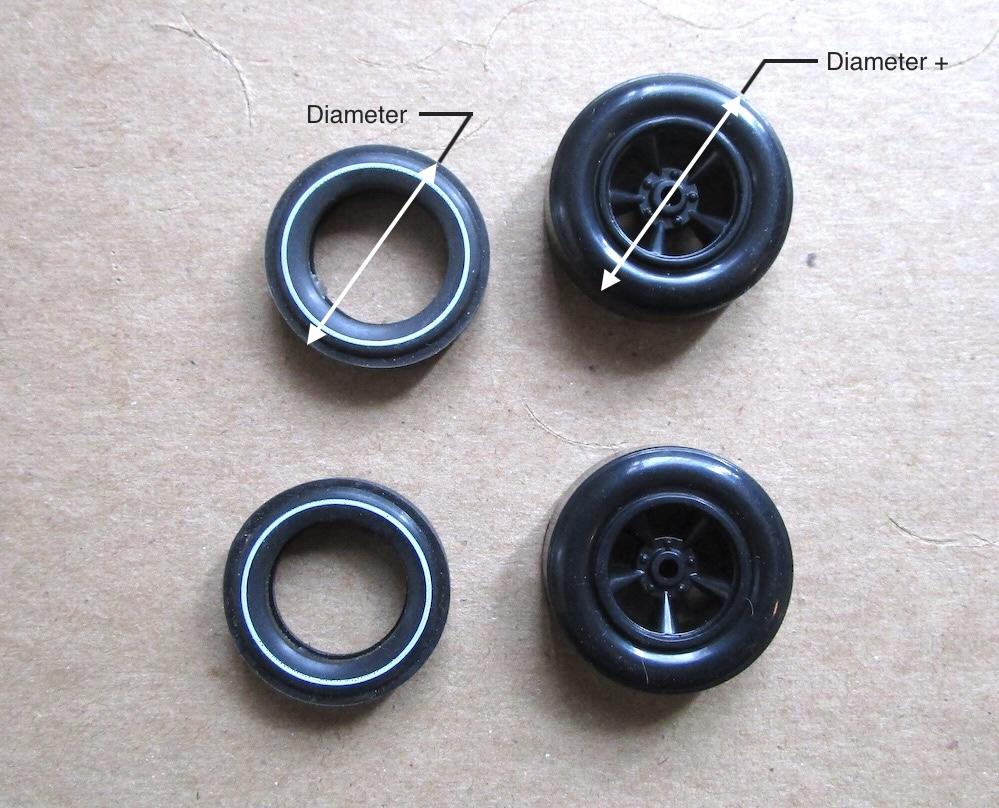
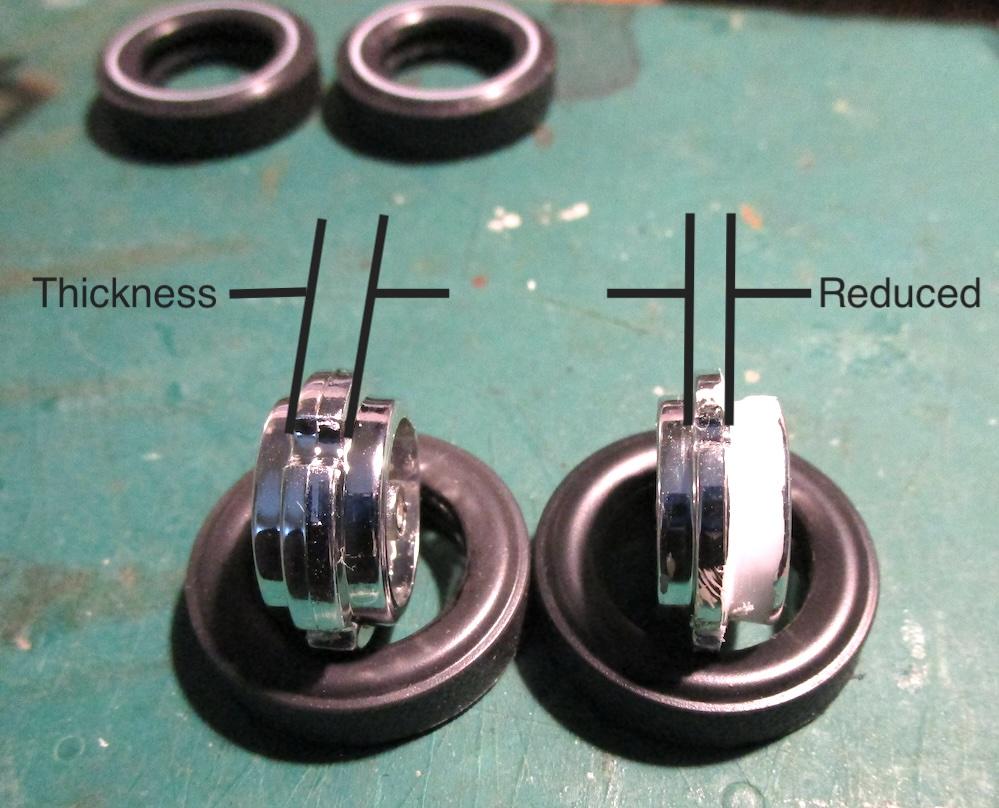
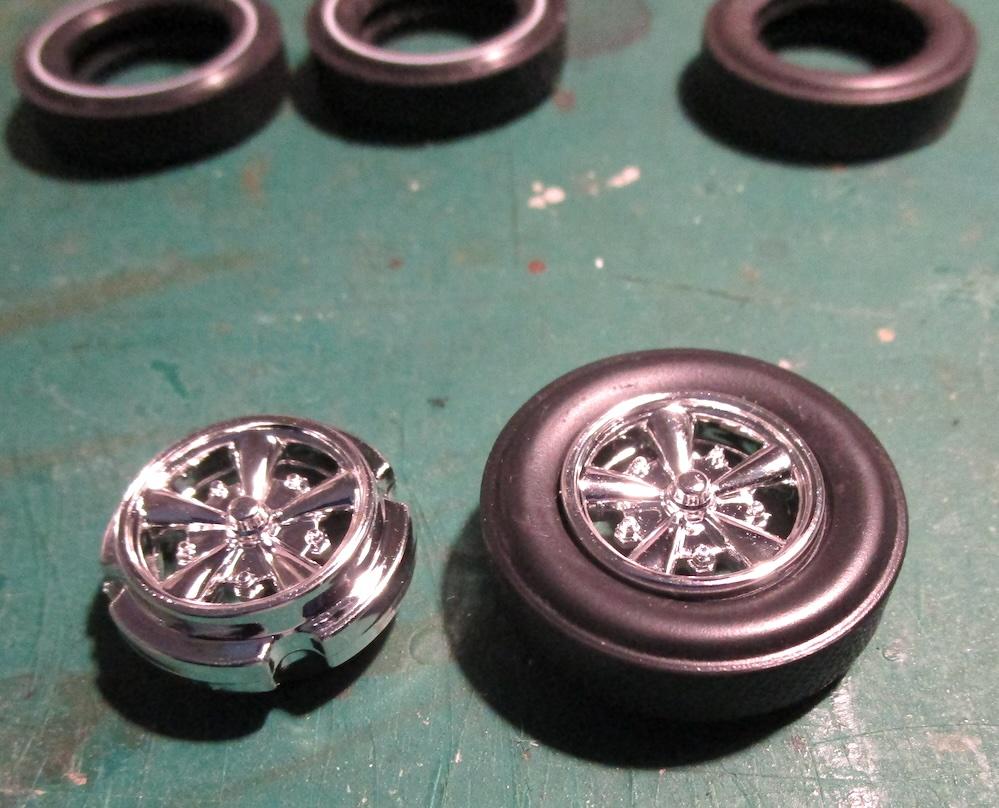
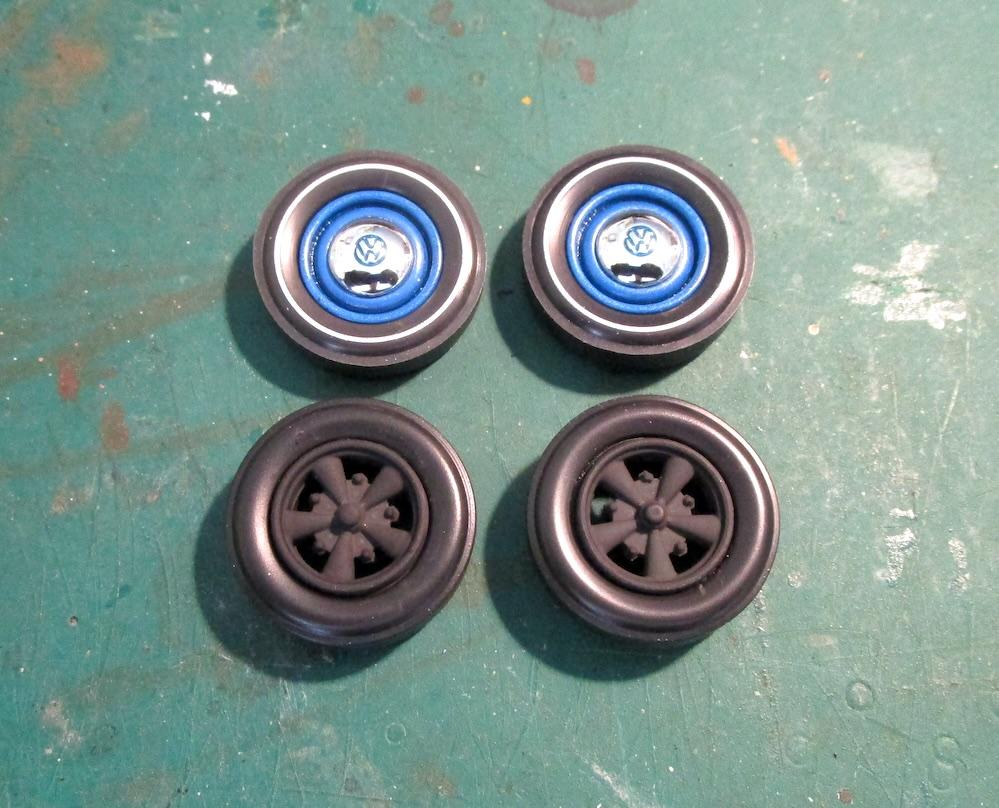
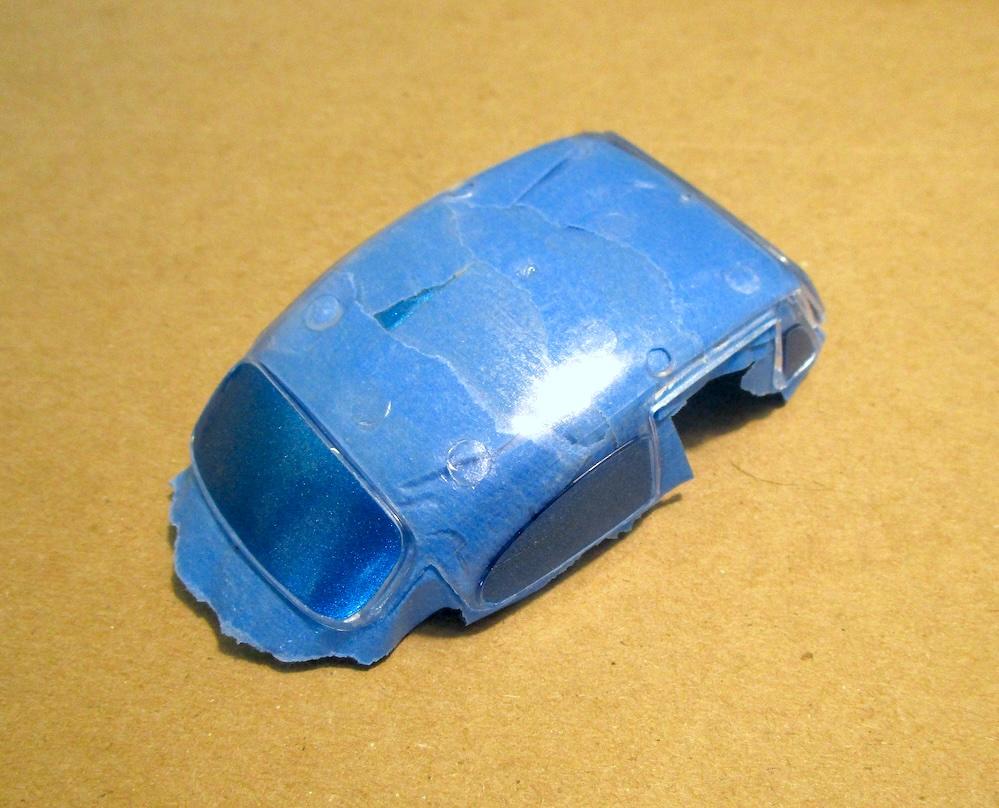
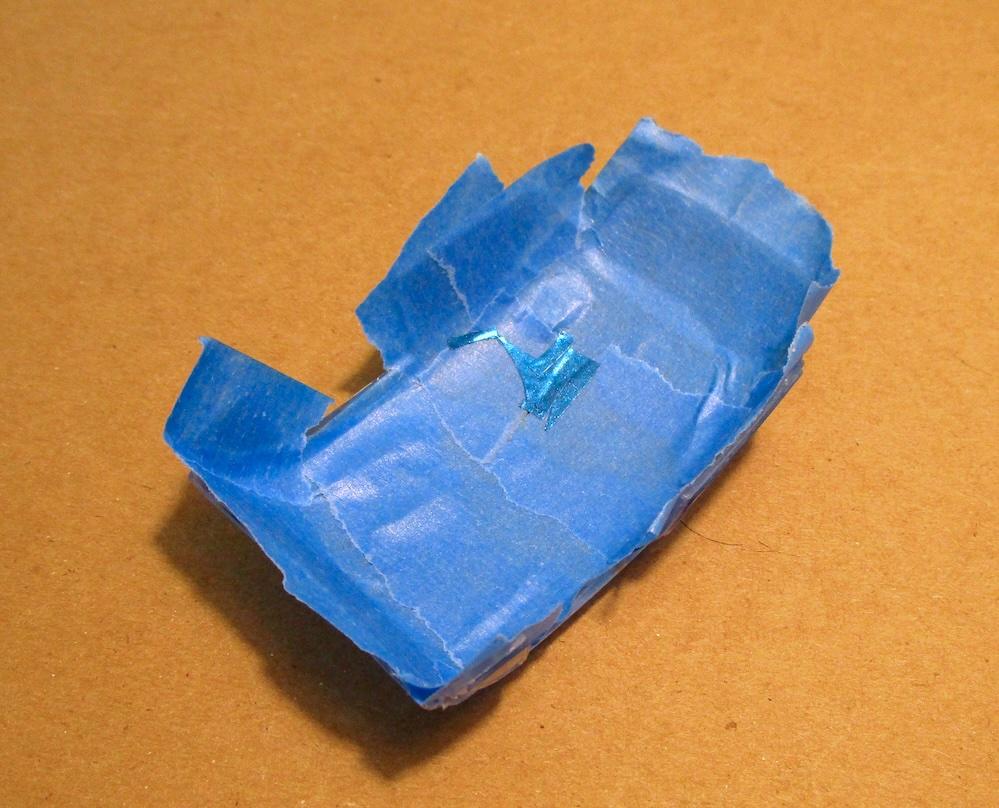
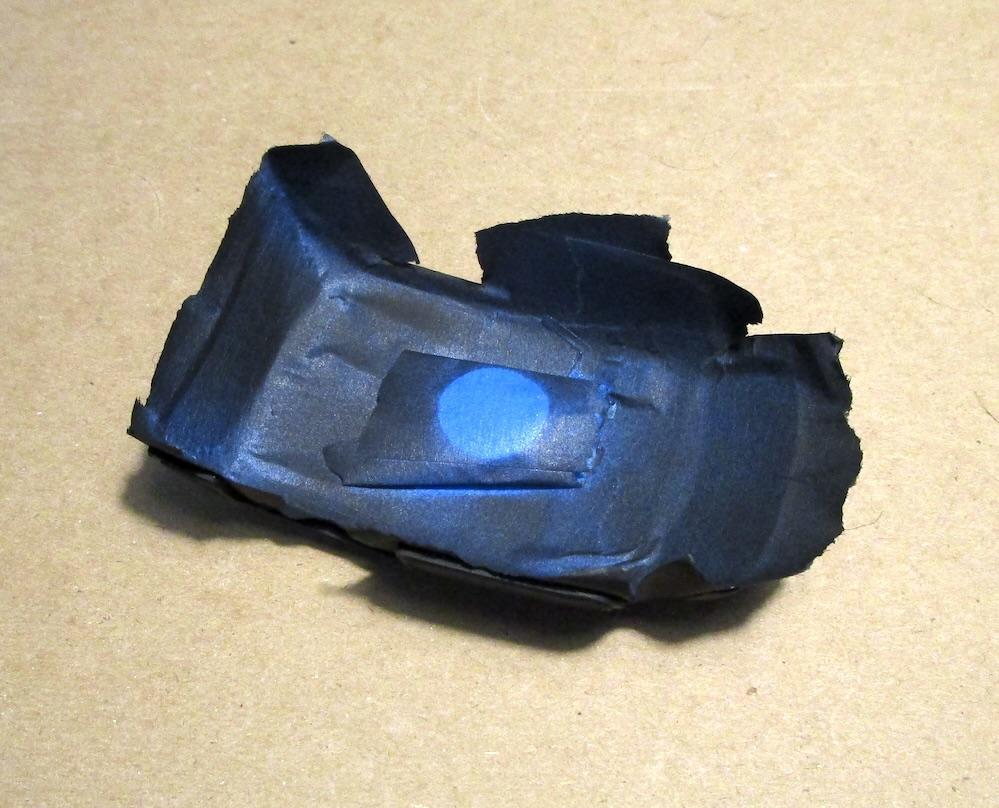
Waiting for the enamel side to cure for a week (Wednesday) before masking. In the meantime I’ll work on the wheels. Different wheels for each side. I couldn’t use the wider slicks with mags because the diameters are different so the bug won’t sit level. I have to file material down to accept the same tires as the left side. Left side represents a Dodgers fan so Dodger blue rims and a Tamiya metallic blue wash into the VW. White walls out. Flat black over the chrome rims for the right side. White walls in.
-
STRIPPER with LOTS of PICTURES * repainting a Beetle
Edward Gore replied to Edward Gore's topic in WIP: Model Cars
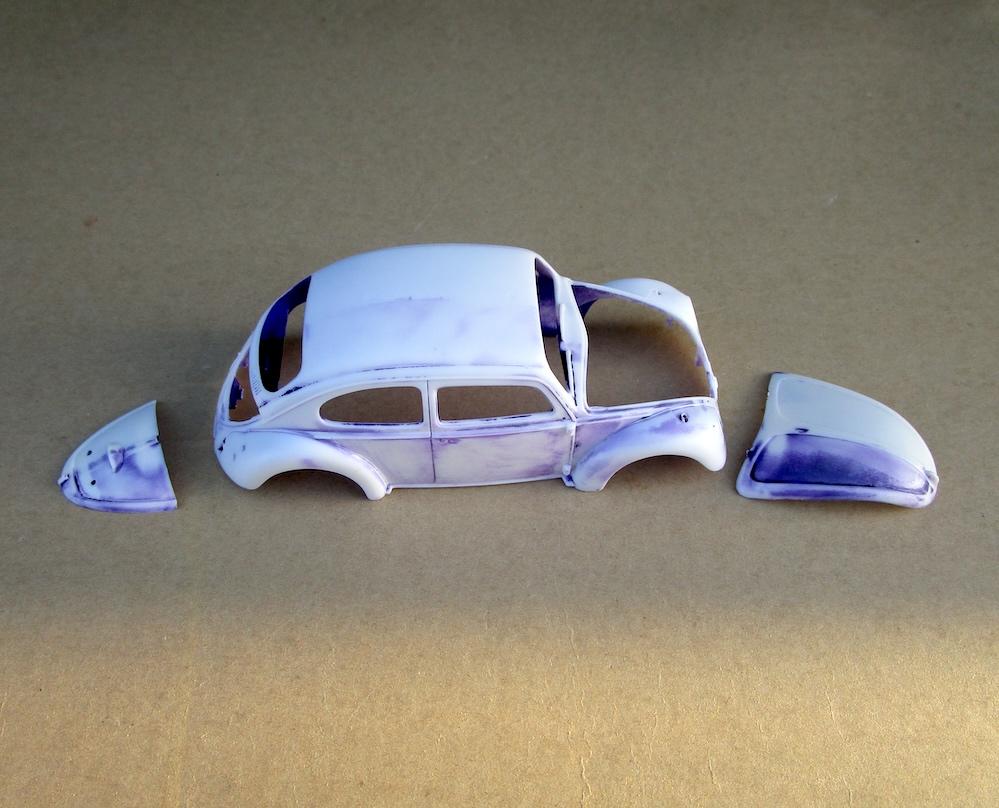
Hi @Tom Geiger, This is a good technique when spraying the same system paints. The paints he gave me to work with are tan enamel and purple lacquer. Both Testors but I don't want the lacquer to attack the enamel. I'm waiting 1 week for the tan enamel to cure (Wednesday). I don't for sure if the lacquer will do anything funny with the enamel. I just don't want to take chances. Hi @David G., Yes, the plastic is fine. Just the stubborn purple lacquer didn't want to come completely off. Had to use sanding sticks then light coat of primer then sanding sticks then light coat of primer, etc... Got it to where I needed it to be tho -
STRIPPER with LOTS of PICTURES * repainting a Beetle
Edward Gore replied to Edward Gore's topic in WIP: Model Cars
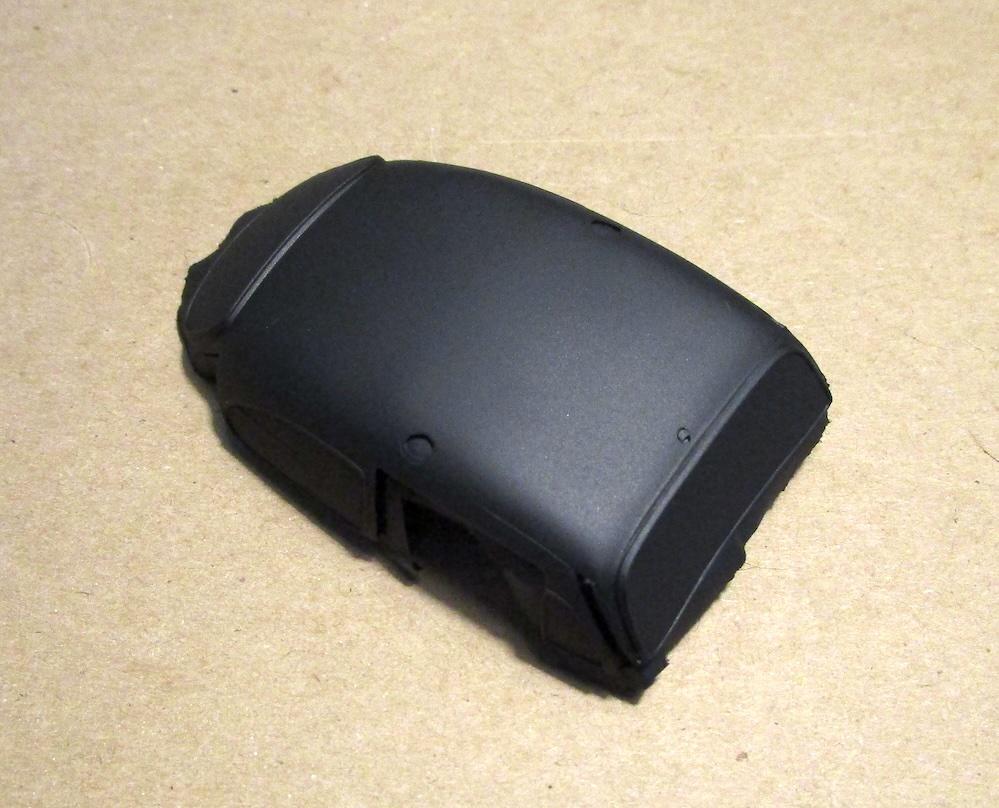
Sanded putty, primer, then sanding a little more, then final primer. Then repaint base coat with Testors Tan flat enamel. I’ll let this sit for a week ⏲️
-
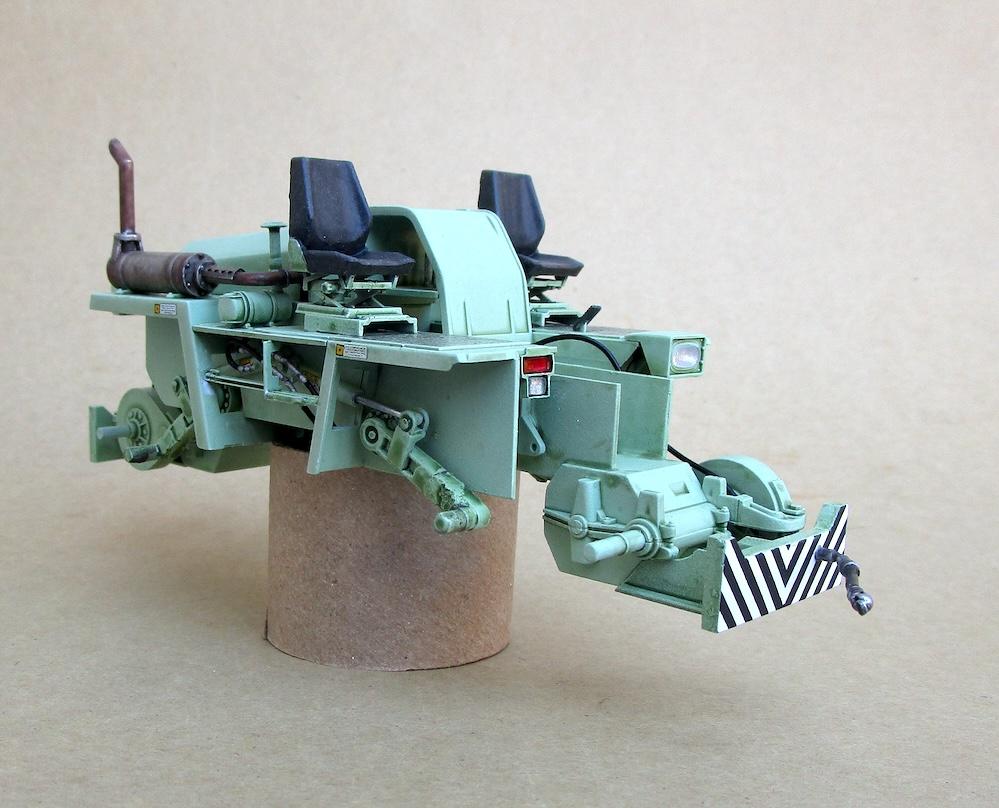
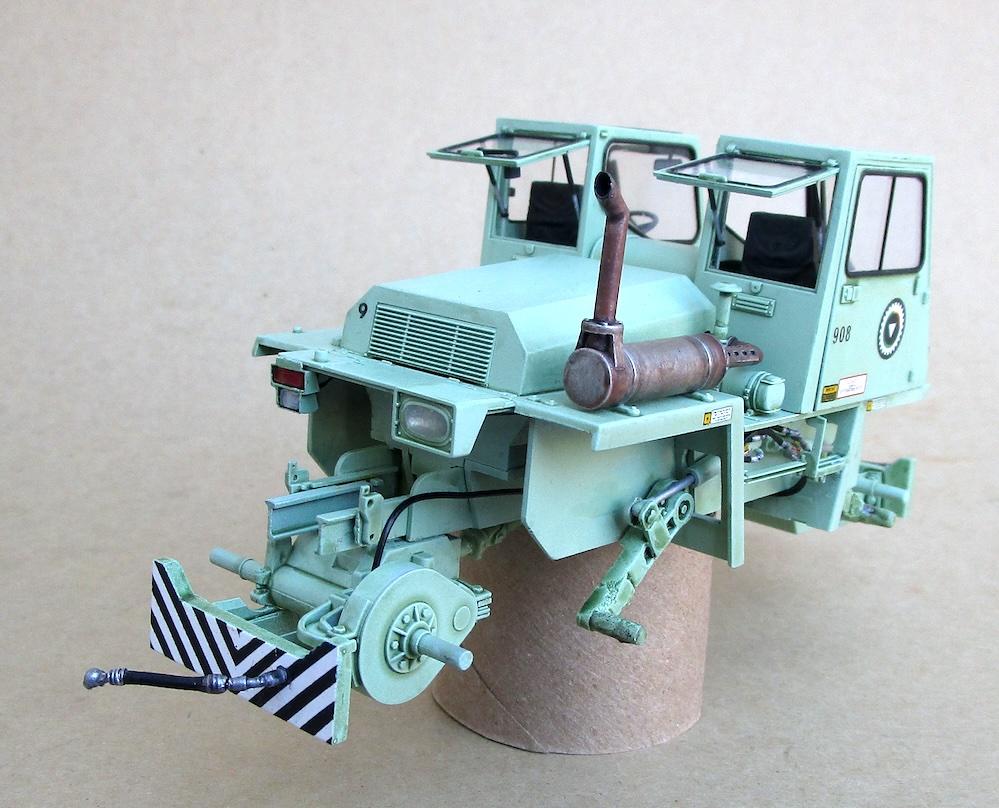
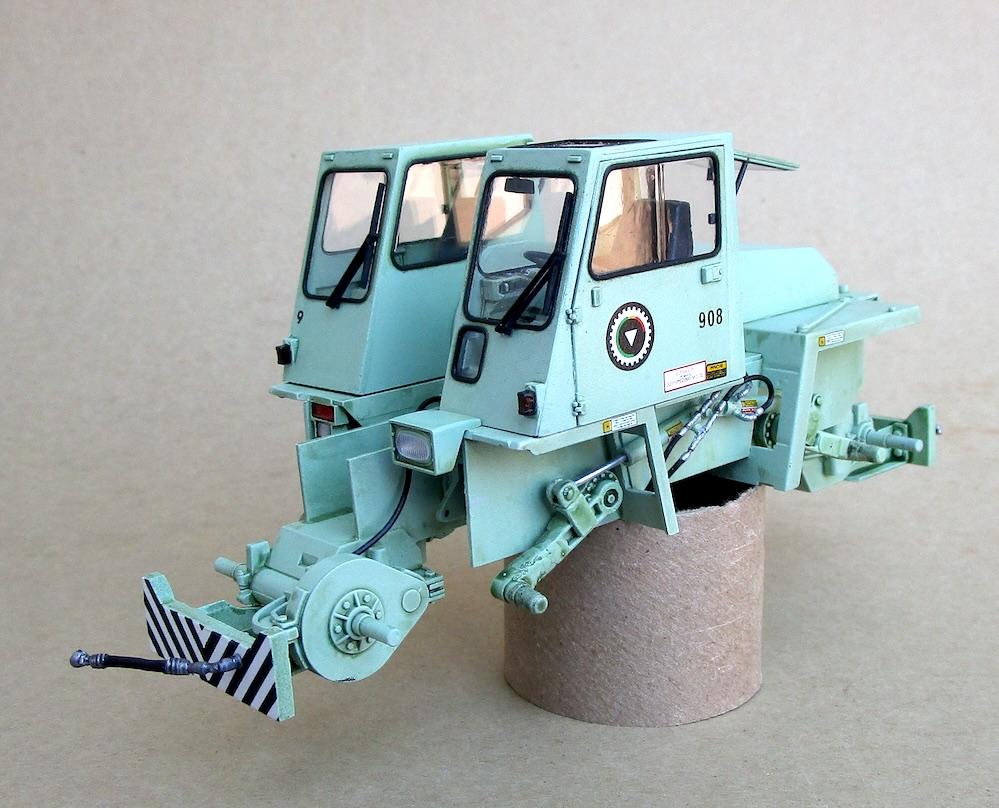
Appreciate the compliment ? The most time consuming part was getting everything below deck to articulate together operationally.
-
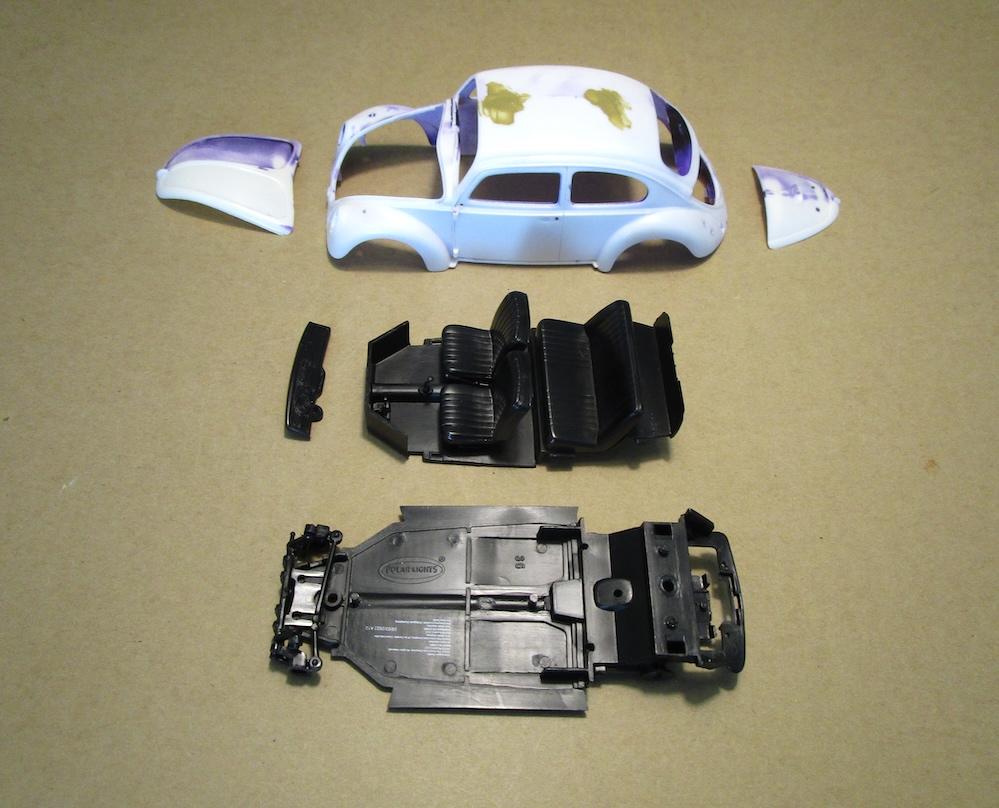
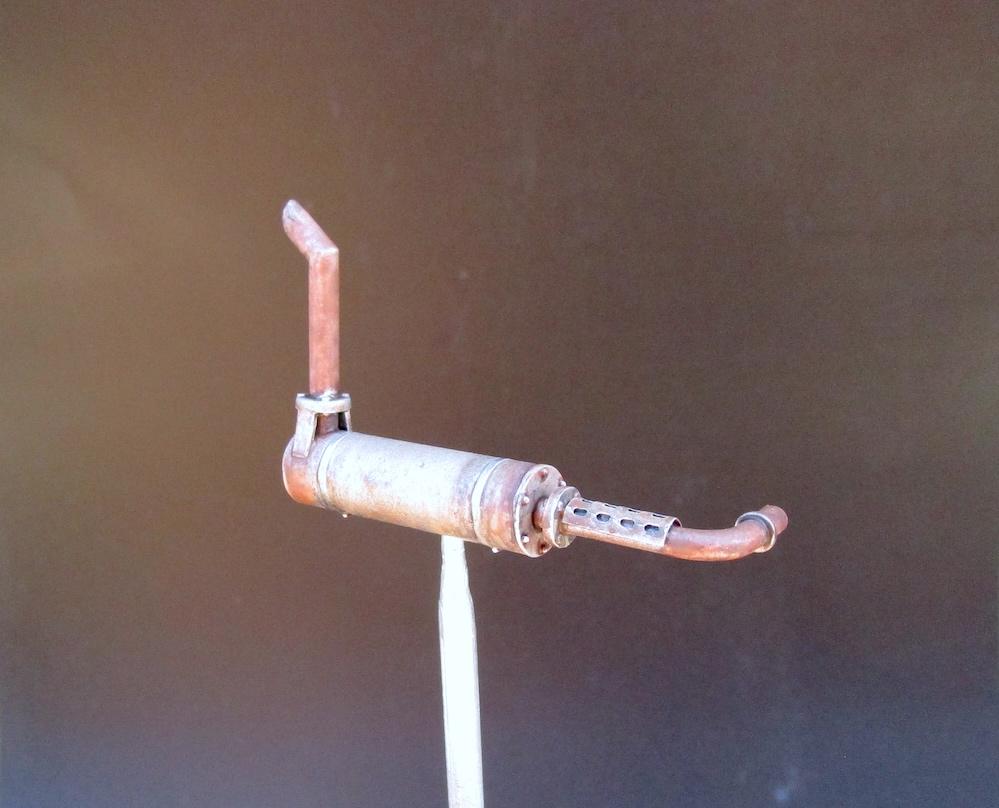
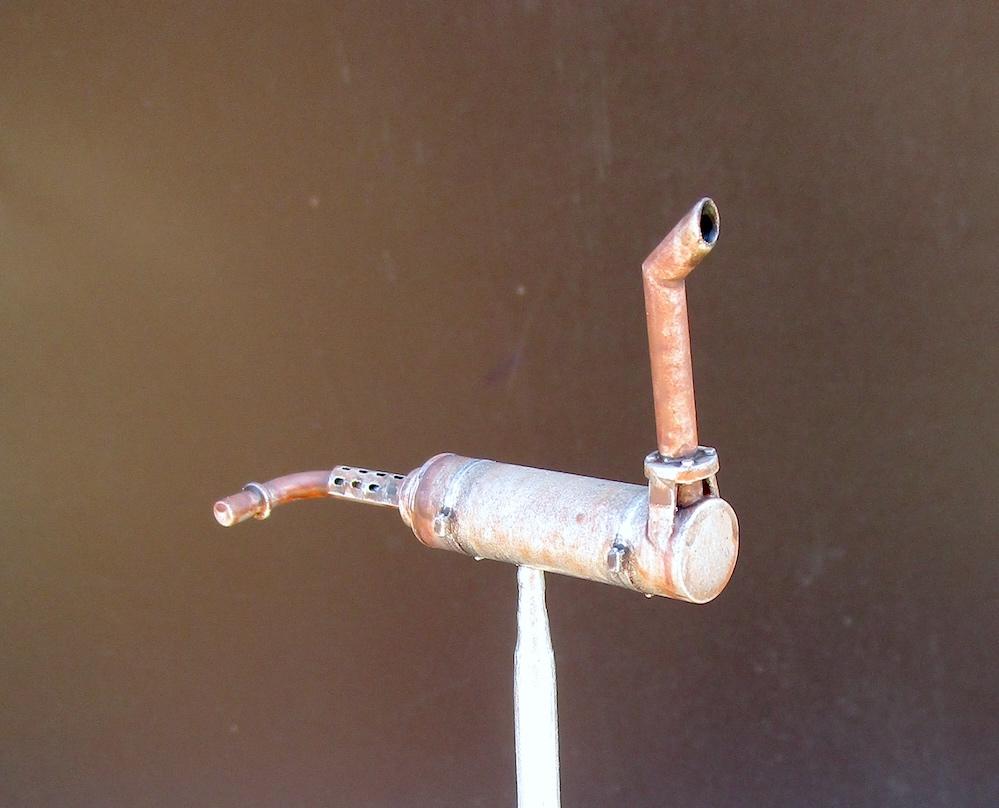
Installed the Pilots, wiper blade assemblies, a couple marker lights, and muffler exhaust system. Wiper blades and muffler are both box stock from the FUG kit. Wheels are next...
- 88 replies
-
- 1
-

-
- trackmobile
- tractor
- (and 2 more)
-
STRIPPER with LOTS of PICTURES * repainting a Beetle
Edward Gore replied to Edward Gore's topic in WIP: Model Cars
That chrome detailing you added looks great on your Beetle. I don't have the skill yet to keep it that consistent all the way around each window like you did. My friend said that just black all around is what he wants anyway so I lucked out ? -
That's cool. I do the same thing with multiple projects ?
-
Following this build for sure!
-
STRIPPER with LOTS of PICTURES * repainting a Beetle
Edward Gore replied to Edward Gore's topic in WIP: Model Cars
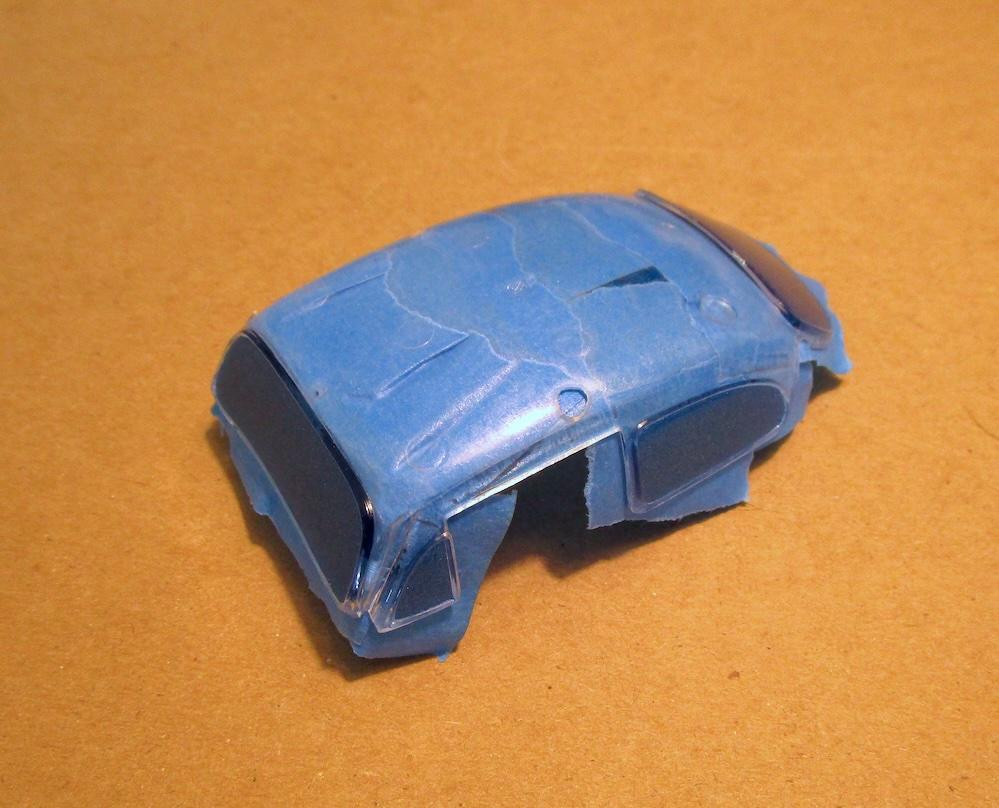
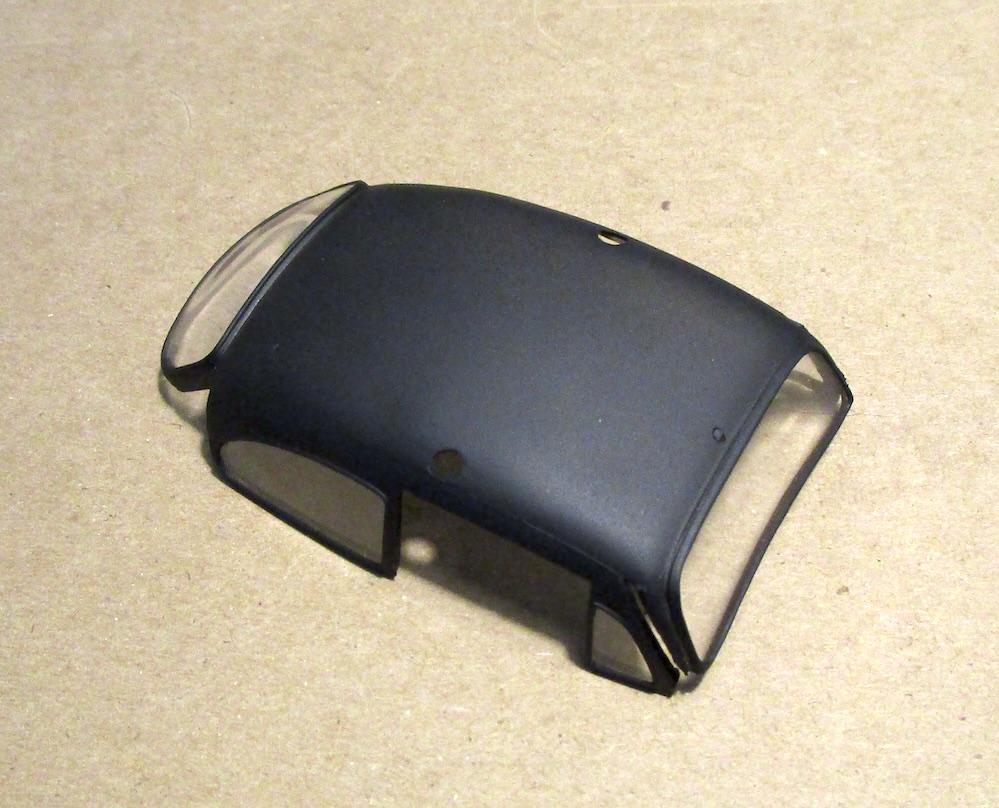
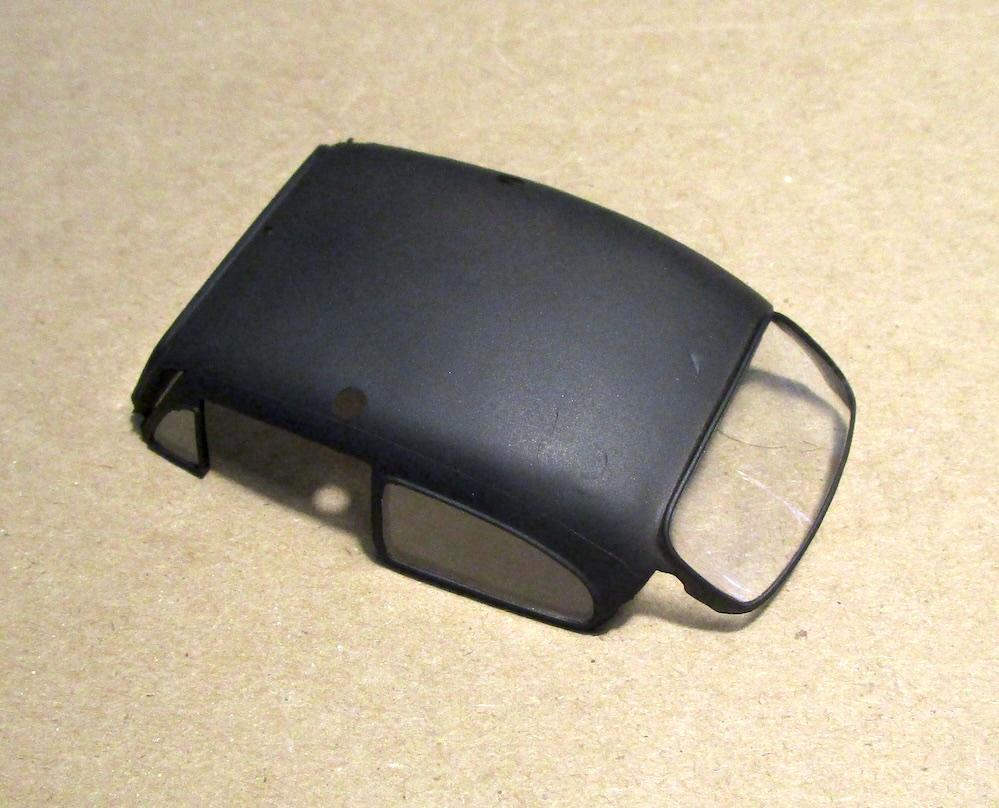
The “glass” is all one part. I masked to paint the weather stripping* and to paint the edges black to block the prism effect. This makes the “glass” look more to scale. I’ll post a bunch of pictures of this because I haven’t built and painted an aircraft model in a long long time so I was very stoked on how this turned out. * there's that word again ...
-
STRIPPER with LOTS of PICTURES * repainting a Beetle
Edward Gore replied to Edward Gore's topic in WIP: Model Cars
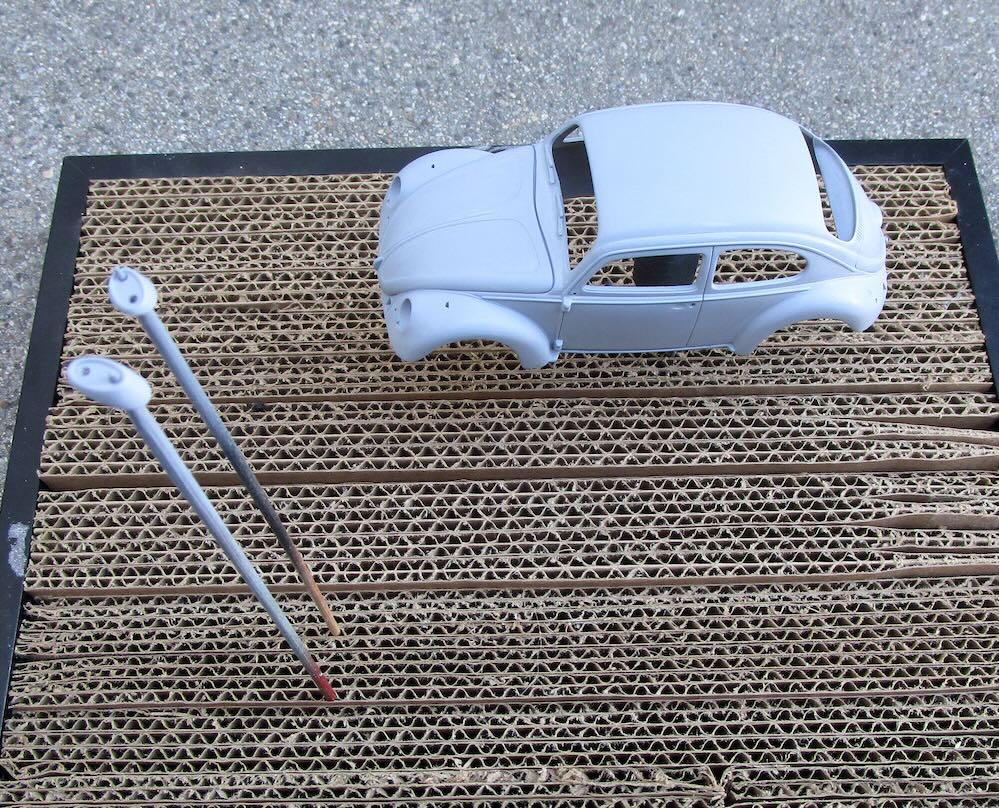
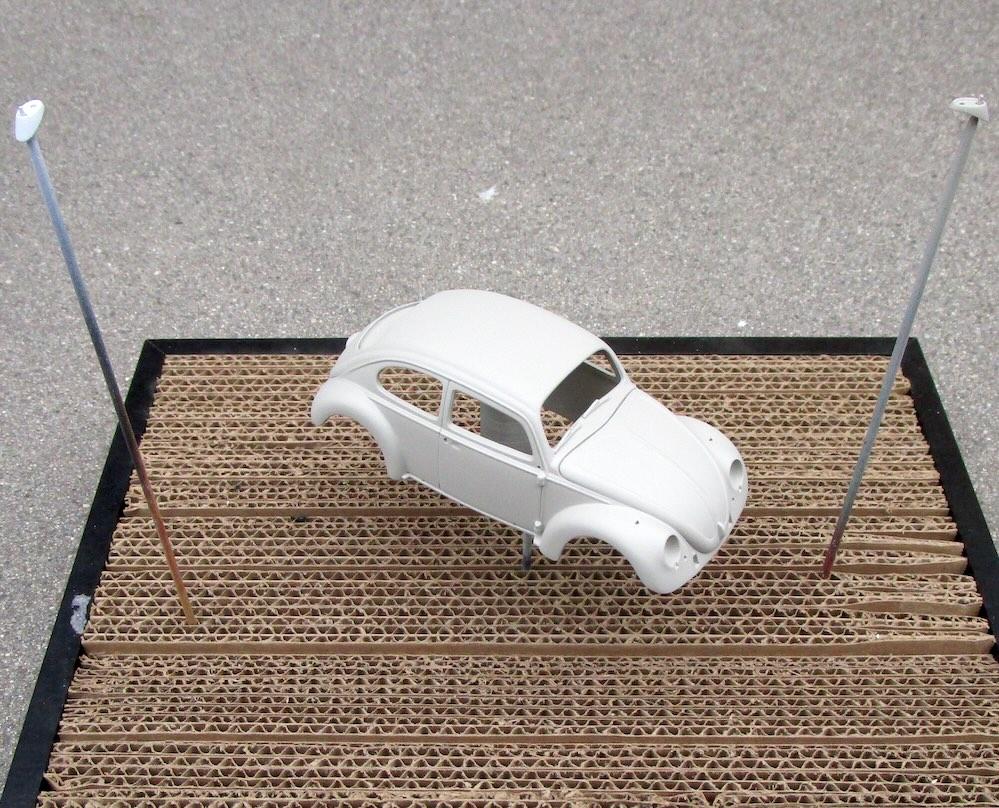
Some putty work was needed on the edges some parts and the roof had two sink marks. While this was curing, I built the suspension and interior.
-
STRIPPER with LOTS of PICTURES * repainting a Beetle
Edward Gore replied to Edward Gore's topic in WIP: Model Cars
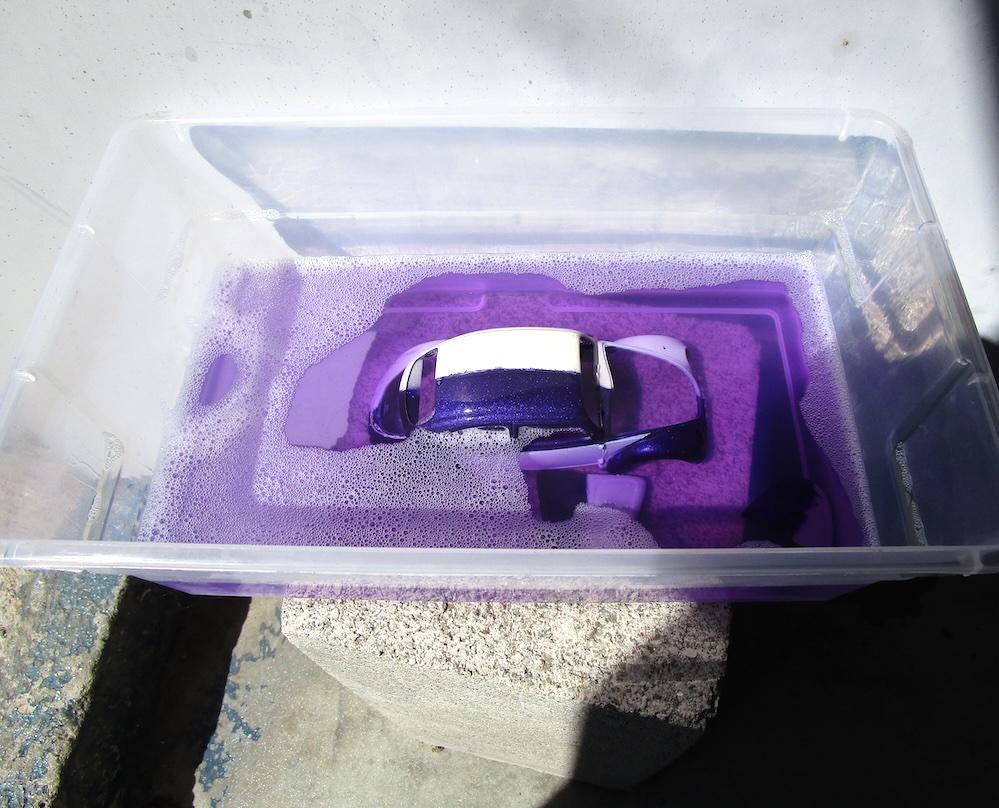
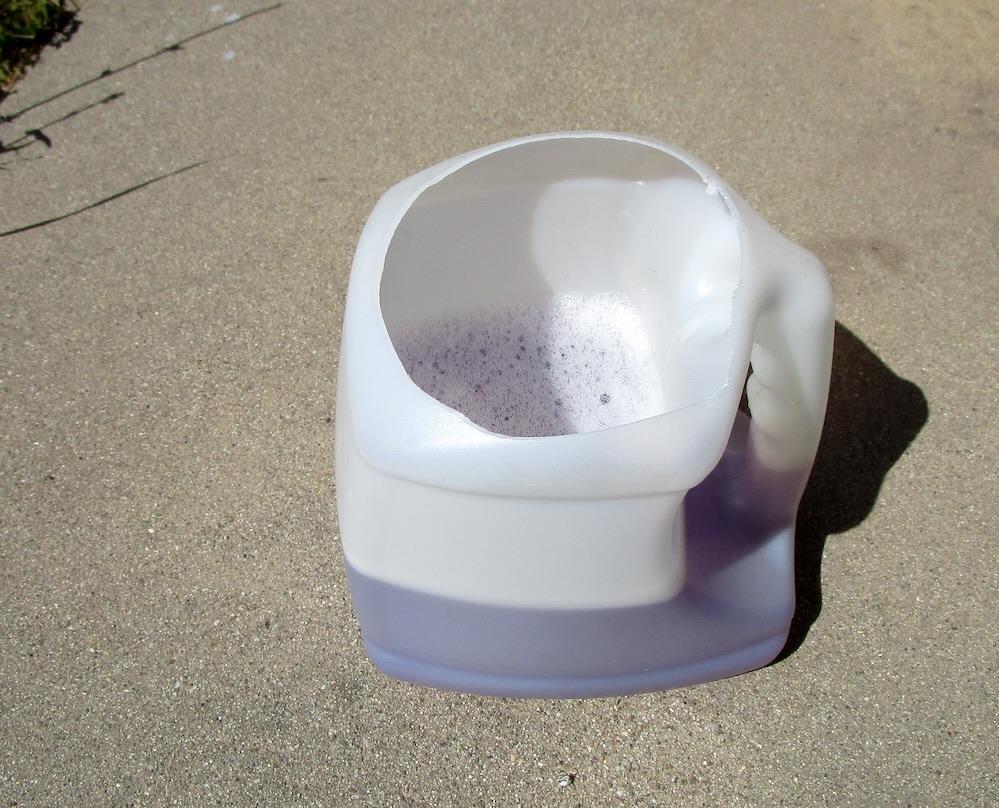
@blubaja Maybe they are. Maybe SuperClean "purple pond" is really that good! ? @David G. Yes, it cleaned up just fine. Well enough anyway. @espo I actually did that at first as well. A little part of the roof was still above the surface to I opted for an old, empty laundry detergent container. My Spyderco quickly removed the top ?️ -
I must say it's been a very exhausting day. Built box stock from the FUG kit then painted and weathered.
- 88 replies
-
- 1
-
-
- trackmobile
- tractor
- (and 2 more)
-
Hi David, I'm starting it here https://www.modelcarsmag.com/forums/topic/191687-stripper-with-lots-of-pictures-repainting-a-beetle/
-
STRIPPER with LOTS of PICTURES * repainting a Beetle
Edward Gore replied to Edward Gore's topic in WIP: Model Cars
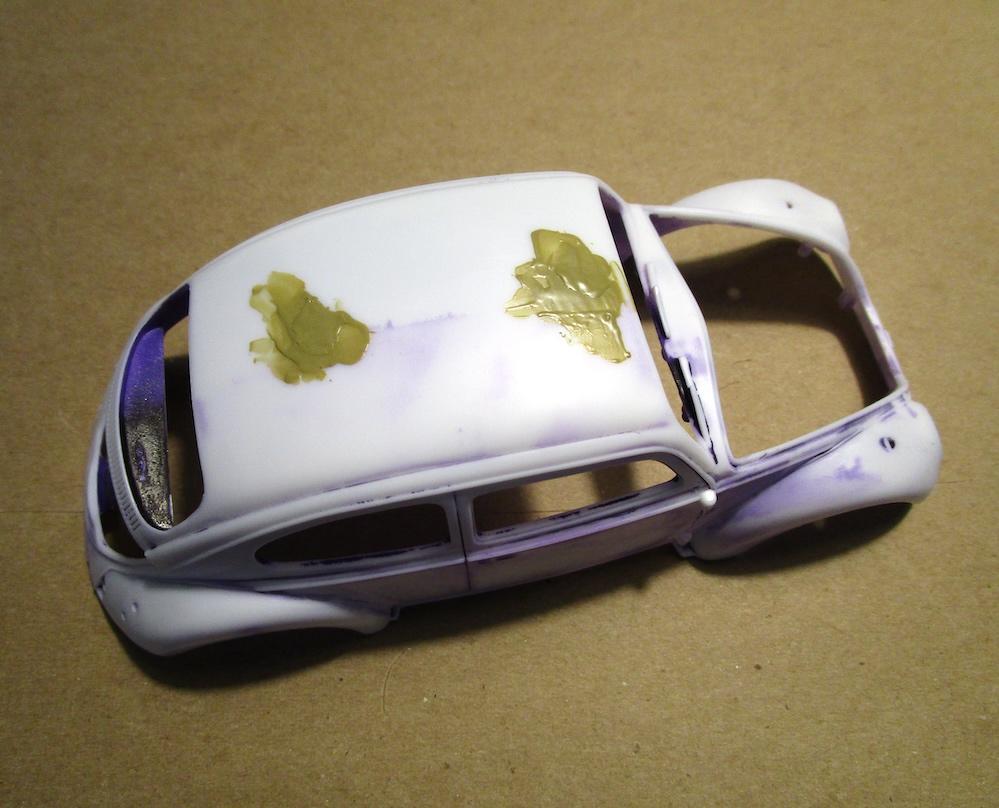
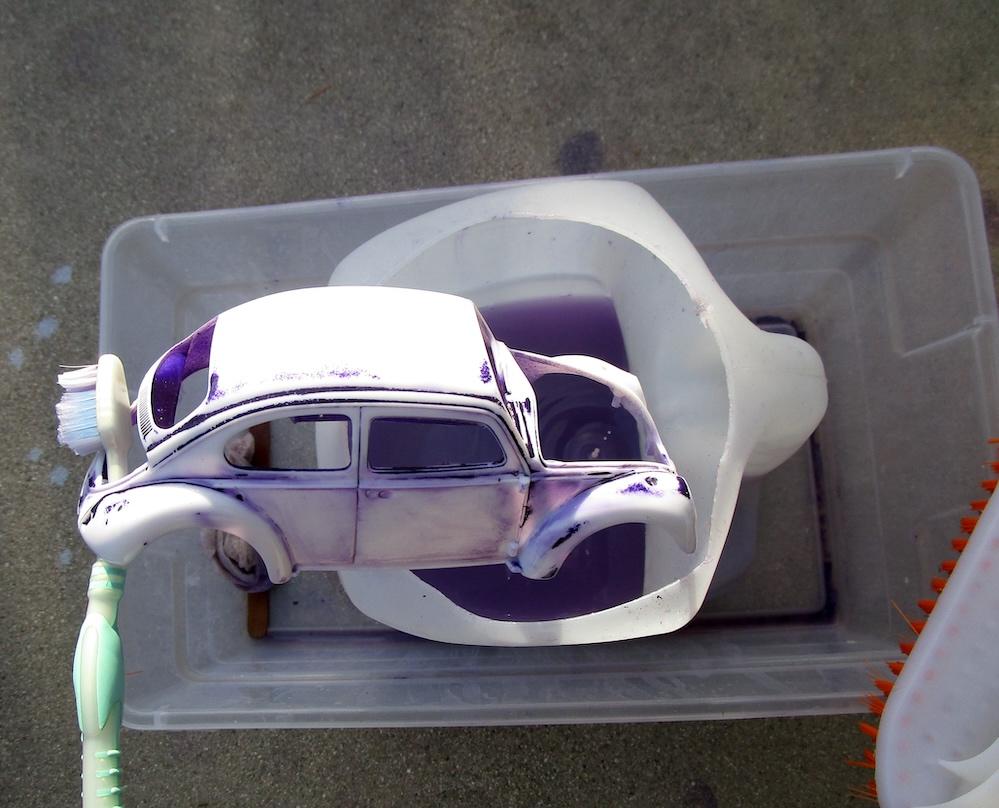
Yes, the Testors Lacquer had to soak for 3 days. I scrubbed some paint off each day after work. I stopped after the 3rd day because it looked good enough and I was getting bored with this step. -
STRIPPER with LOTS of PICTURES * repainting a Beetle
Edward Gore replied to Edward Gore's topic in WIP: Model Cars
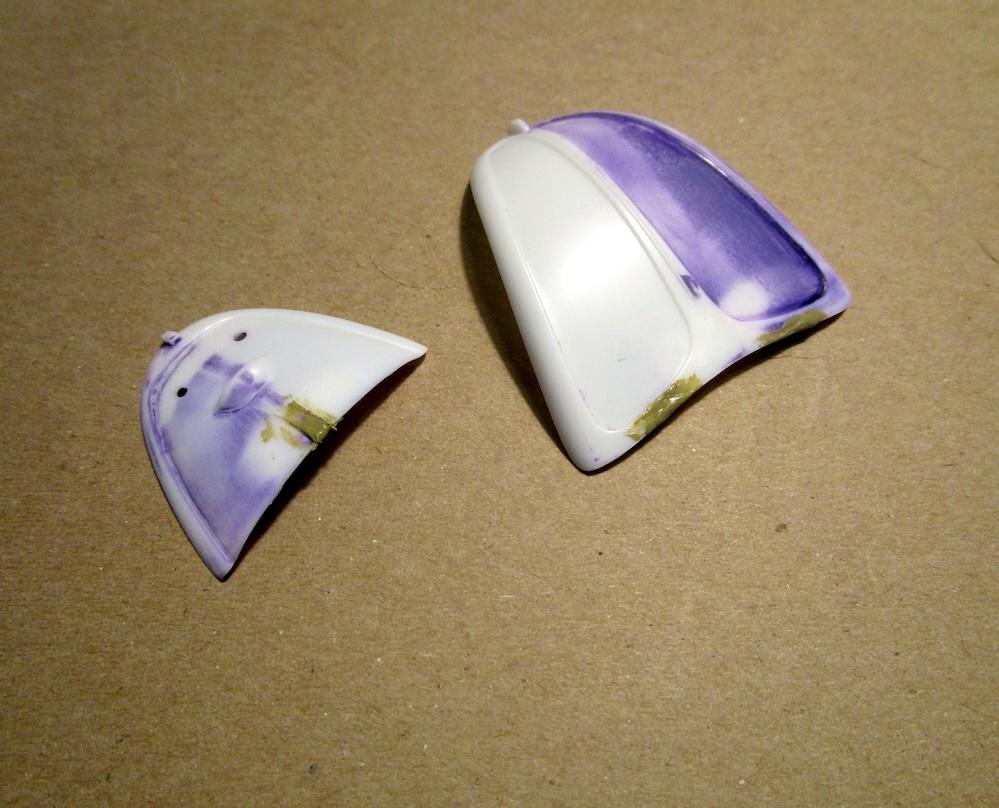
First thing to do is strip the paint off. The Purple Pond was too shallow because of the container but then I switched to a smaller footprint container that fit the body perfectly under the Pond. The beige side was painted with Testors enamel which came off easily but the metallic purple was Testors lacquer. This required a lot of scrubbing to remove and I didn’t get it all off.