SpeedShift
-
Posts
493 -
Joined
-
Last visited
Content Type
Profiles
Forums
Events
Gallery
Everything posted by SpeedShift
-
 I won't use the tack cloth again. Unless I'm missing something, I think the MCW website needs to post some warnings on how best to achieve a gloss finish with their enamel (a what to do - what to avoid). When I called and spoke to the guy at MCW, he said he didn't think their enamels needed a gloss applied, they were glossy enough. Yes, the finish is pretty good as is. But my experience: if you try and polish out the finish or get a dust particle or blemish that requires you to wet sand/polish off, the glossy finish goes away. Since they sell a gloss enamel and hardener to go with their enamel line and I followed their mixing ratios, if a tack cloth is the culprit due to a waxy residue that fisheyes their enamel - that should be one of the warnings.
 -
Wet sand/ buff/ vs clear coat?
SpeedShift replied to Nicholas's topic in Model Building Questions and Answers
"I buff/polish the paint, but what seems to happen is I always get a slight haze and the paint never looks as good as I shot it " The same thing happens to me when I wet sand and polish after airbrush/painting with Testors bottle enamel thinned with lacquer thinner, so it's not a problem with MCW enamel paint. The glossy sheen after first spraying the lacquer thinned Testors enamel is the best glossy finish I've ever achieved. Beautiful. But dealing with that one dust speck while waiting for enamel to dry and cure results in the same setback you mentioned, - no amount of polishing (I use all the same things you do Novus 2 and 1, Tamiya fine and finish etc.) brings back that first glossy sheen. I was hoping trying MCW enamel with their enamel hardener would speed the dry/cure time to avoid dust and that part seems to work well. It sets up quicker to avoid dust. That part works ok. But trying to get a glossy finish using MCW's clear gloss has not been pleasant to say the least. I'm tearing my hair out now using MCW enamel clear gloss on a project right now (see my posts here): I'm trying to get a nice gloss on the MCW enamel - but it is the worst finish I've ever had painting. I'm hoping to find some kind of clear gloss to work with MCW's fast drying enamel with hardener to get that same glossy sheen I got using Testors enamel with lacquer thinner. -
I was working in my office den which is clean (not a garage or basement) ...all painting was done outside with low humidity and with good ventilation.
-
"Something not playing nice together and separating. But I haven't used the enamel yet." While I've heard the term, I'm not sure what to look for regarding fisheye problems and what causes them. Seems to me that MCW's own brand clear gloss enamel should be compatible with their base coat enamels. But maybe you are on to something. What does fish eyes in paint mean? Generally speaking, that contaminant is light oil (silicon), which has, by whatever means, found its way to the surface of the vehicle. When paint is applied on top of this contaminant, the paint is unable to adhere to the oily surface and a “fish eye crater” is caused. Is it possible that the Testors tack cloth leaves a slight wax film on the surface if pressed hard enough, and that area on the model surface repels the paint leveling out and pooling. ?
-
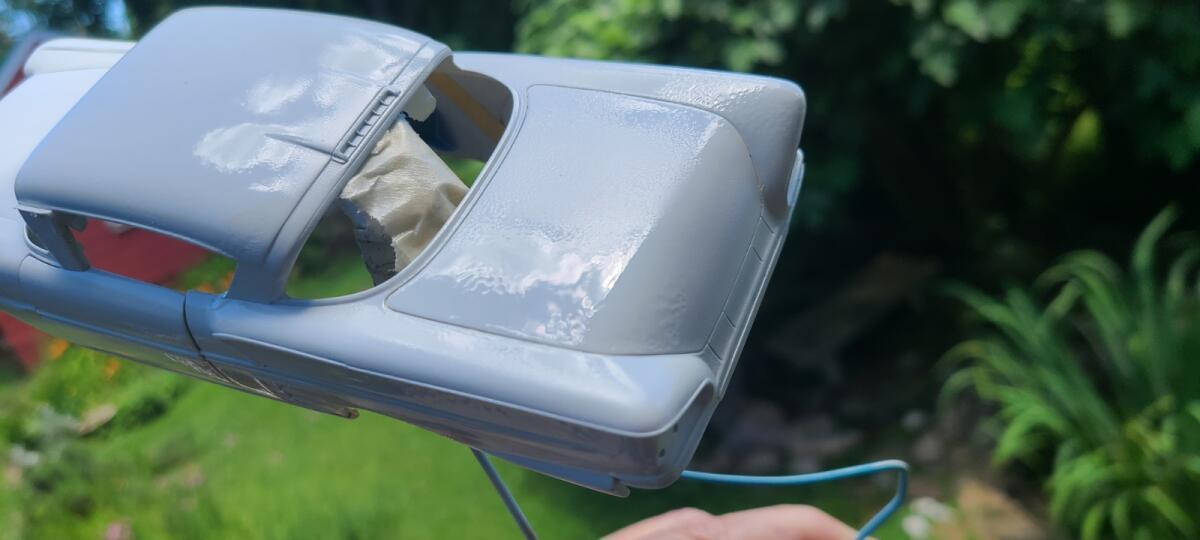
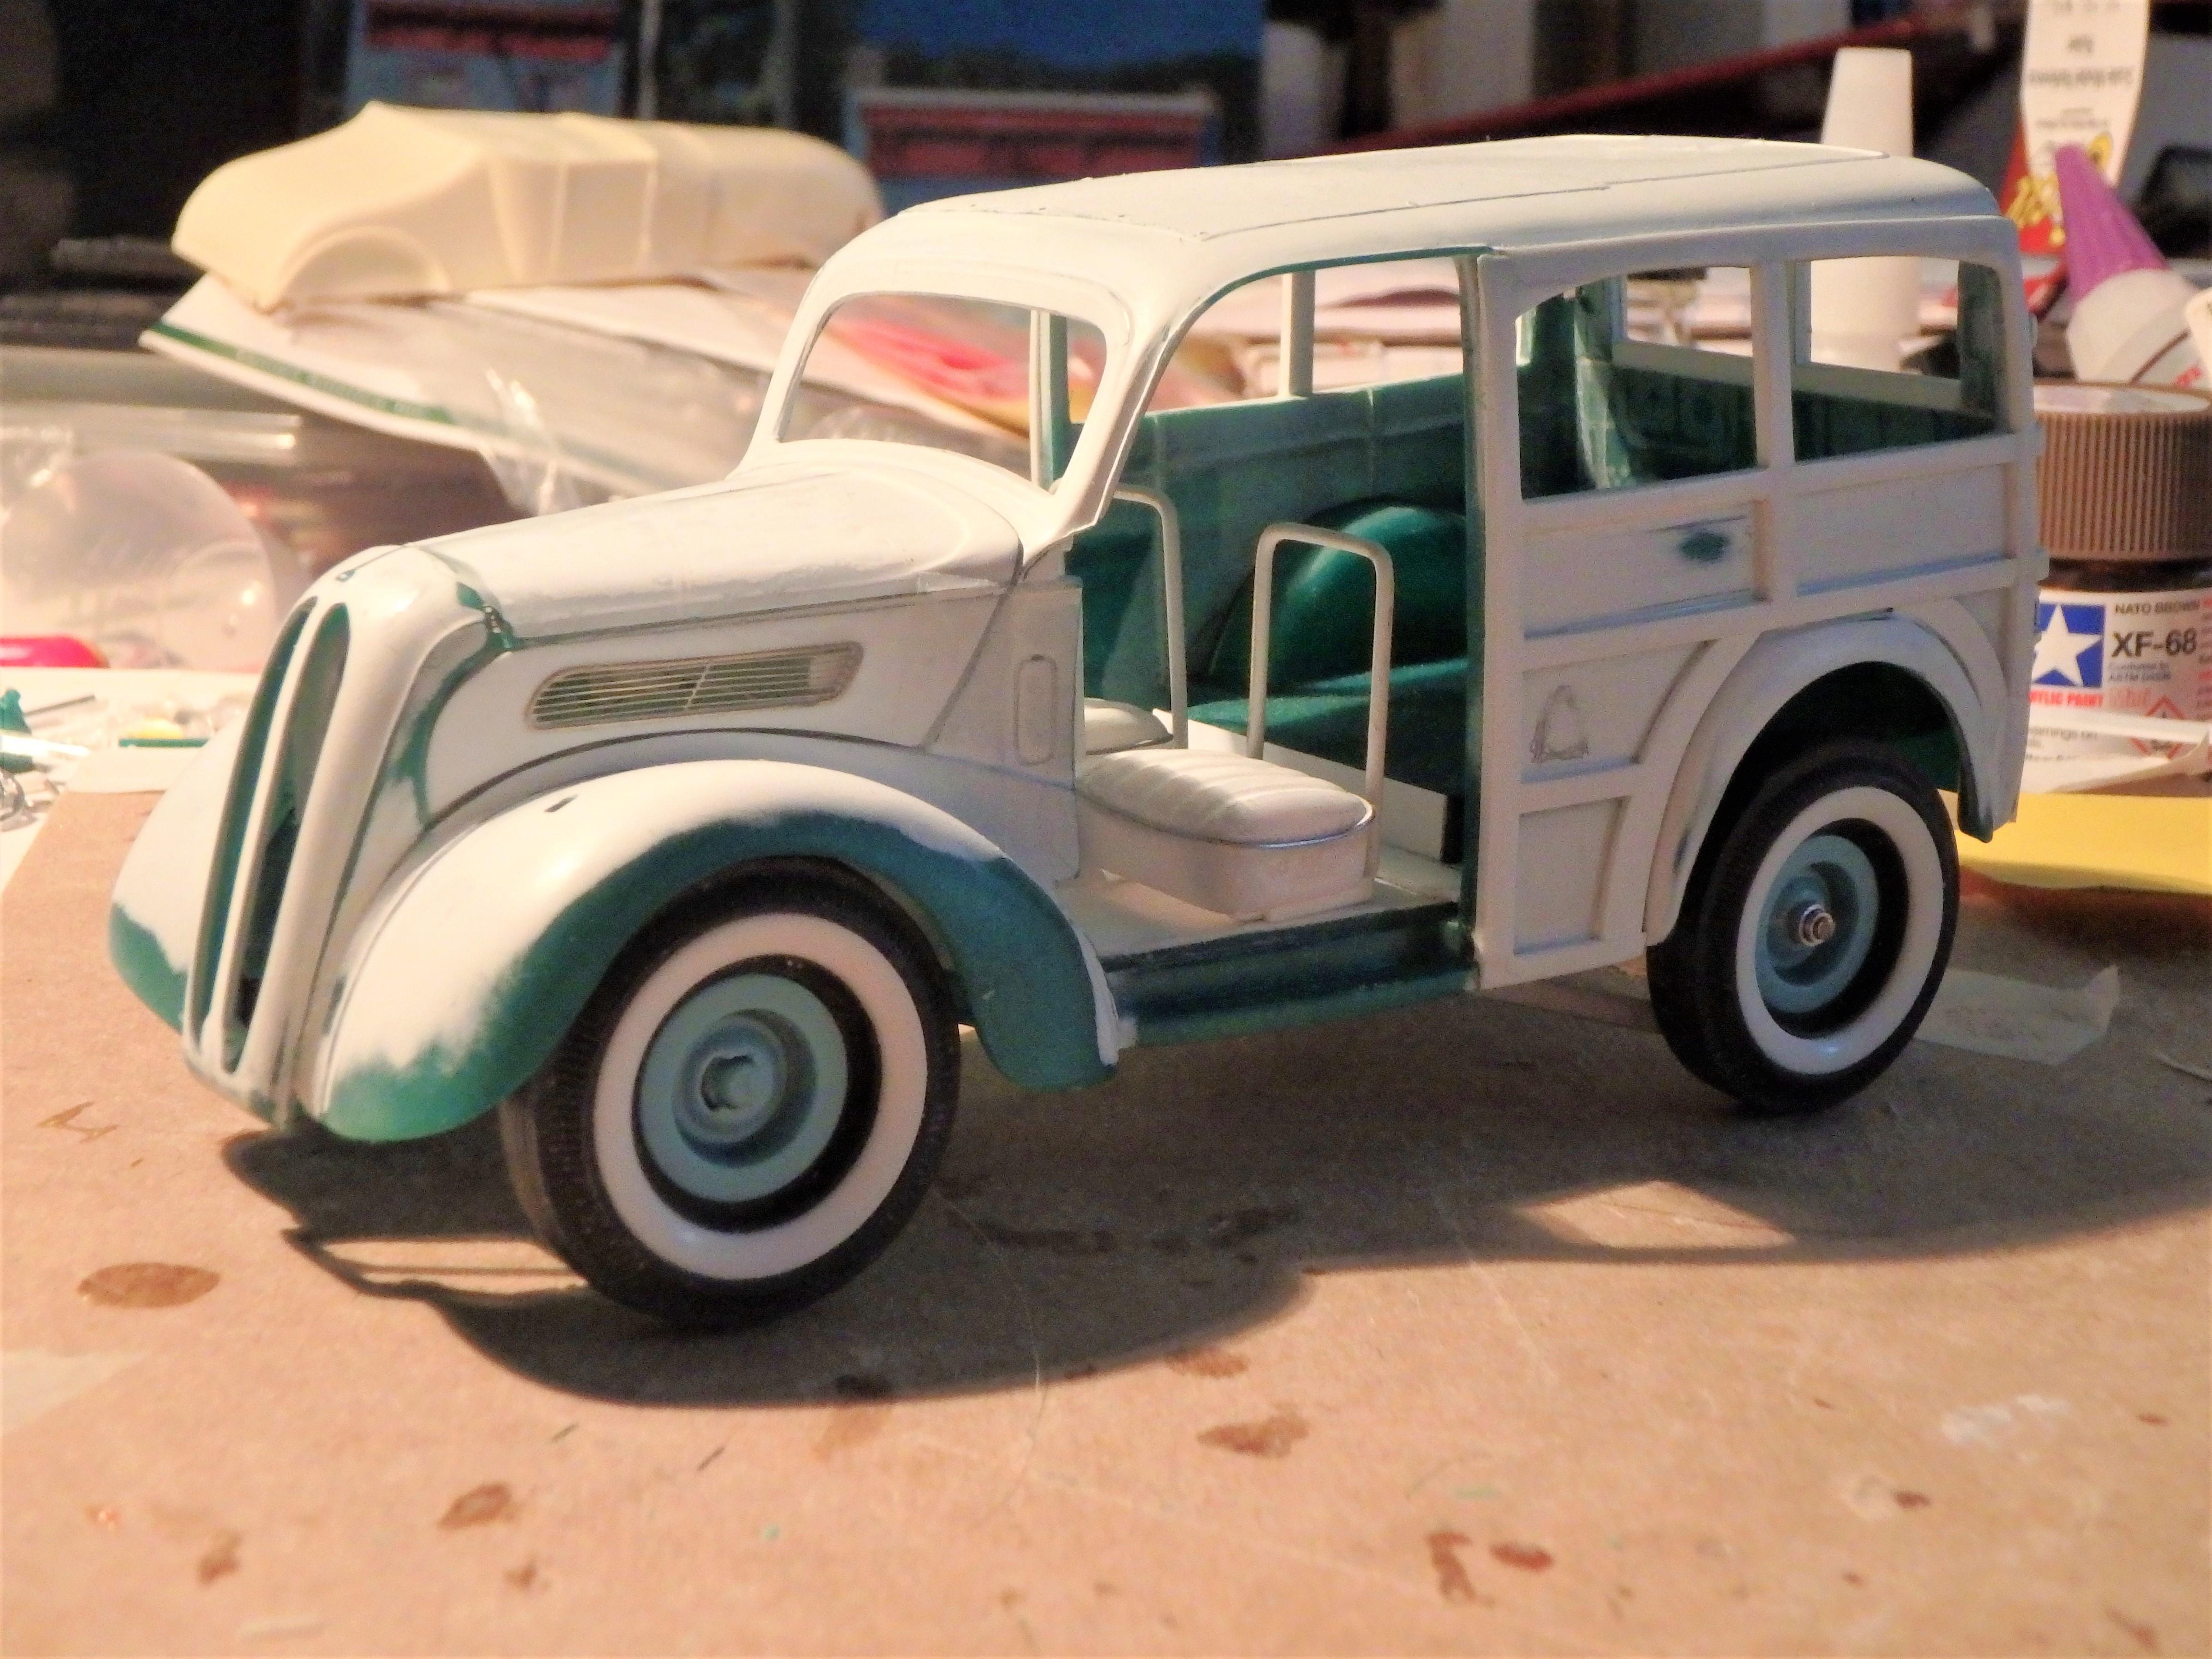
"I'll try to use as much of the old kit as possible, I enjoy saving these things." Me too, hate to toss a built up in the trash. I'll check out your progress...I rescued a built up Futurista off Ebay. Like your 49, the window glass was the worst....a lost cause, it was glue bombed - at least the rear bubble top was, the front glass was in good shape. Wet sanding and polishing didn't help much. Needs an engine, think I found a reasonable substitute.

-
I'm just about ready to quit using MCW clear gloss enamel. Maybe I'm doing something wrong and you guys may have some tips on how to address the issue. While I liked the results using regular MCW enamel with their hardener, my experience so far with the MCW clear gloss and hardener has been a disappointment. My first experience ended up with not just orange peel - but orange lumps on some of the surface. I had to sand off the gloss coat to get the surface level again. That required respraying much of the MCW white enamel base coat where the white color got removed. After sanding, polishing and cleaning the body and getting the nice white base back, I thought I might give the gloss another try. Today is a nice day, low humidity. I figured the problem with the first attempt was not thinning the gloss clear enough when I airbrushed it - I had used the MCW gloss and the MCW gloss hardener per their ratio , with just a drop of Tamiya lacquer thinner. Maybe that was too thick, not thinned enough. This morning, after cleaning the body with a Testors Model Master tack cloth, I did a near 1 to 1 thinner ratio to the same 2 to 1 gloss(#1017E)/gloss hardener (#1017EH) and decided to go with light mist coats first. Well, the mist coats went on ok - but had some slight eggshell surface texture. When I attempted to apply the final wet coat - it did the orange peel /lumps thing again. Didn't seem to want to level out at all. I have a new GREX airbrush, spraying with a static tank pressure of 30 which goes to 20 when applying paint. My feeling - what's the point continuing with this gloss clear...if I have to keep wet sanding the gloss off if I want to get a smooth surface. Not sure where to go ........I don't have any Furure/Pledge and I didn't like the results using Quick Shine on clear windshields...it dried very wavy. If there is a decent clear gloss that will work with MCW enamel I might try that. I like the faster drying time of MCW enamel with their enamel hardener, - it dries quicker, thereby avoiding the dust accumulation of a longer dry/cure of Testors enamel.
-
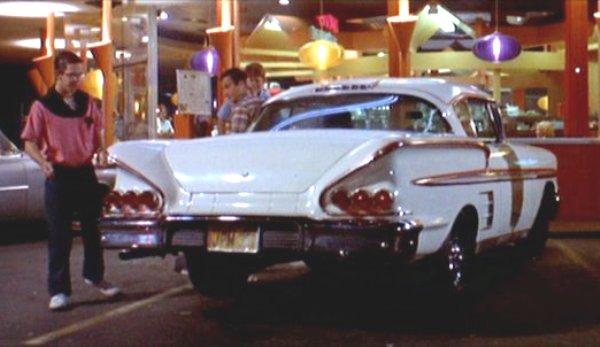
'58 Impala - "I just love tuck 'n roll."
SpeedShift replied to SpeedShift's topic in WIP: Model Cars
I'm just about ready to quit using MCW clear gloss enamel. Maybe I'm doing something wrong and you guys may have some tips on how to address the issue. While I liked the results using regular MCW enamel with their hardener, my experience so far with the MCW clear gloss and hardener has been a disappointment. My first experience ended up with not just orange peel - but orange lumps on some of the surface. I had to sand off the gloss cote to get the surface level again. That required respraying much of the MCW white enamel base coat where the white color got removed. After sanding, polishing and cleaning the body and getting the nice white base back, I thought I might give the gloss another try. Today is a nice day, low humidity. I figured the problem with the first attempt was not thinning the gloss clear enough when I airbrushed it - I had used the MCW gloss and the MCW gloss hardener per their ratio , with just a drop of Tamiya lacquer thinner. Maybe that was too thick, not thinned enough. This morning, after cleaning the body with a Testors Model Masters tack cloth, I did a near 1 to 1 thinner ratio to the same 2 to 1 gloss(#1017E)/gloss hardener (#1017EH) and decided to go with light mist coats first. Well, the mist coats went on ok - but had some slight eggshell surface texture. When I attempted to apply the final wet coat - it did the orange peel /lumps thing again. Didn't seem to want to level out at all. I have a new GREX airbrush, spraying with a static tank pressure of 30 which goes to 20 when applying paint. My feeling - what's the point continuing with this gloss clear...if I have to keep wet sanding the gloss off if I want to get a smooth surface. Not sure where to go next...I don't have any Furure/Pledge and I didn't like the results using Quick Shine on clear windshields...it dried very wavy. (also posting in the Model Building Questions and Answers hoping to get some help).
-
Supercharged Ardun....good choice.
-
Good build.
-
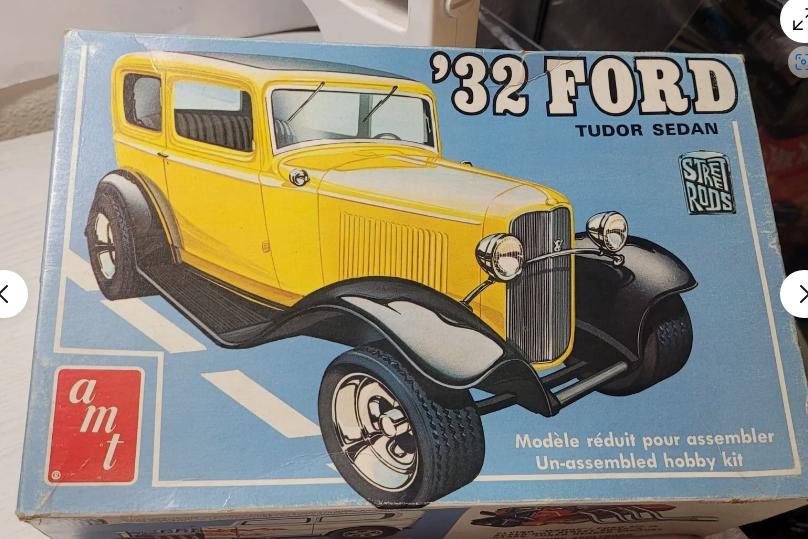
Oooops. Forget everything I said. ---------------------------------------------------------------------------------------------------------------------------------------------------------------------------------------- Some really simple rules: * ONLY 1932 Tudor Sedans in 1:25/1:24, no matter the kit manufacturer. No Vickies, no Phaetons (even if based on chopped Tudor), no '31s, no Woodies etc... you get the idea. * Any body allowed. Kit's, 3D printed, resin... as long as it is a '32 Tudor Sedan. Some of the great resin cast four door bodies are also permitted. Delivery sedan conversions also allowed. Chopped or stock. * No previously finished models permitted in this thread. This is a fresh challenge. You can enter an already started project, but only if it is no more than 30% complete. *Build-off starts now and the finish line is October 15th. That's almost 5 months, which should give everyone plenty of time to complete their Tudor, considering the subject matter.
-
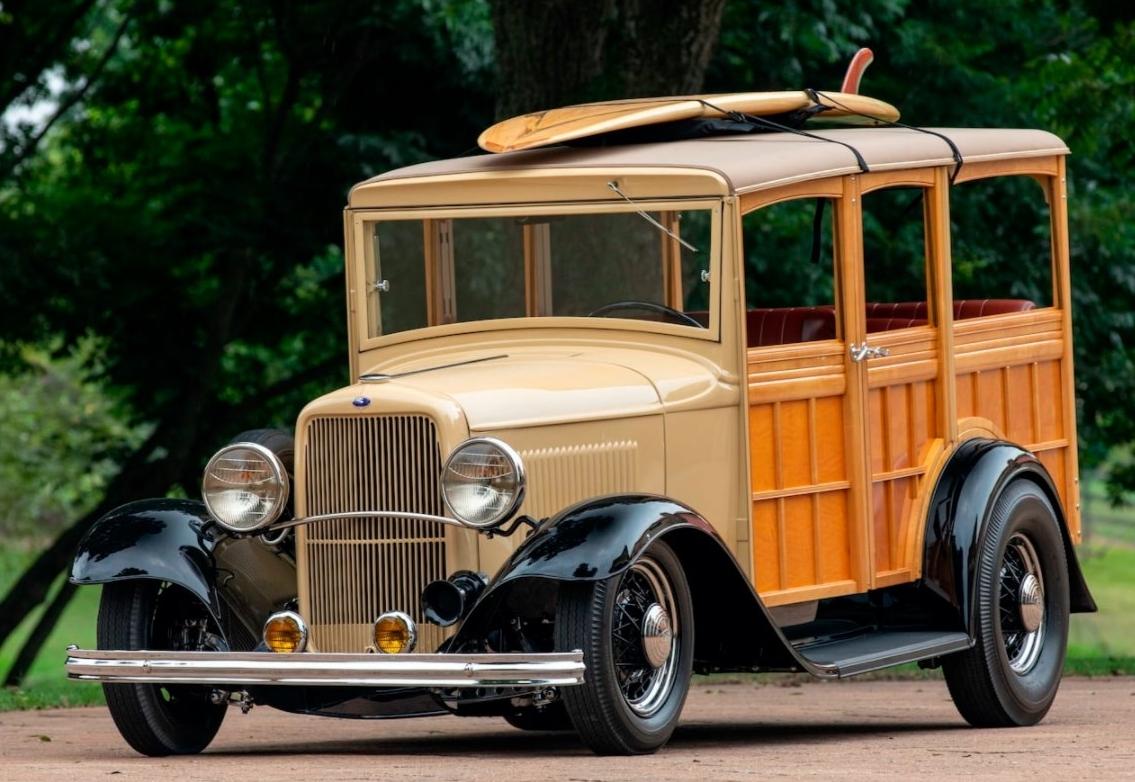
Then again, appears there was a full size '32 Tudor Sedan in wood as well.
-
Then again, appears there was a full size '32 Tudor Sedan in wood as well.
-
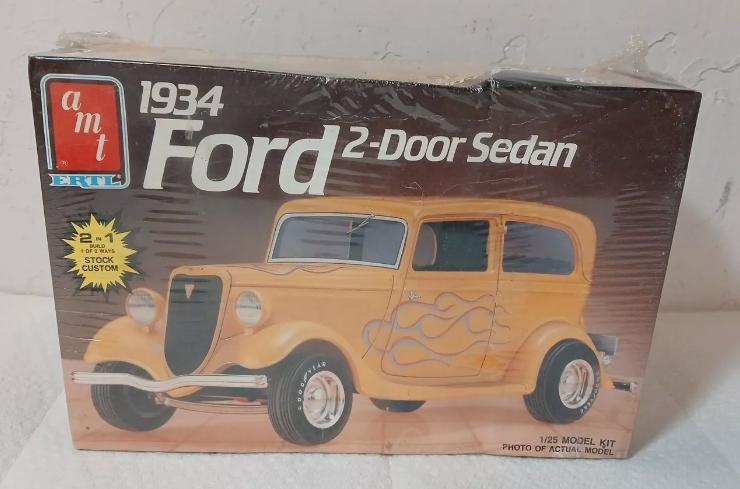
"Seems to me it received a lot of criticism from experienced modelers back in the day as having inaccuracy issues ...body-wise." Yes, the AMT '34 sedan may be obsolete since the Revel releases. Since I've never found a 1/25th '34 sedan woody, maybe I'll que up the AMT '34 sedan kit for some major "wood" body work...for a woody conversion. Did it with the Revell Thames drag panel van......? Doable!
-
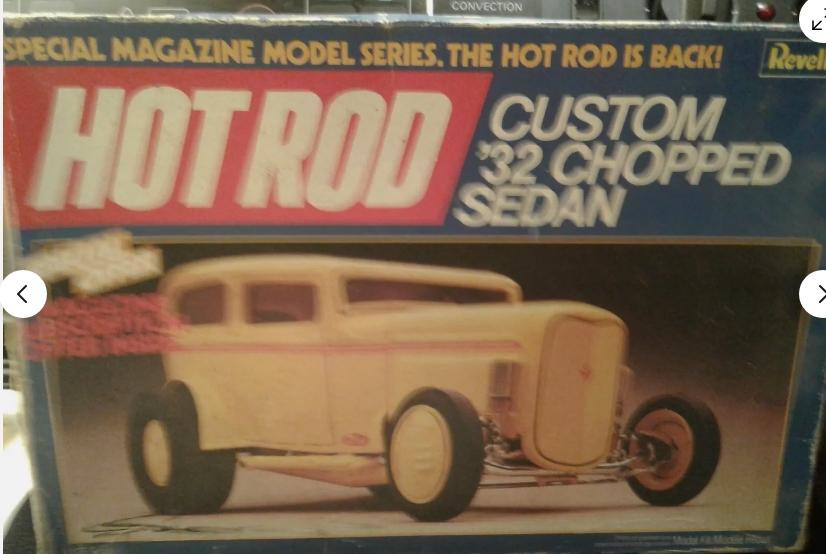
"Before Revell offered the Deuce Sedan the only other model out there was the Orange Crate! " Kit, I recall (IIRC) - AMT had both a 32 and a 34 Ford Tudor Sedan. Probably not in general retail release when the Revell kit was out, but they were out there, around the time Revell reissued the "Orange Crate" - ( the reissue with the resin hood to replace the one they butchered to do a "Custom Chopped" '32 street rod). I bought several of the AMT kits back in the day. I can't speak to the quality of either one since right after I bought them, they went into the man cave kit storage closet. Now, if I could only find a '34 woody wagon :
-
Looks very promising...'29 body on a '32 frame. Engine?
-
Nice flames.
-
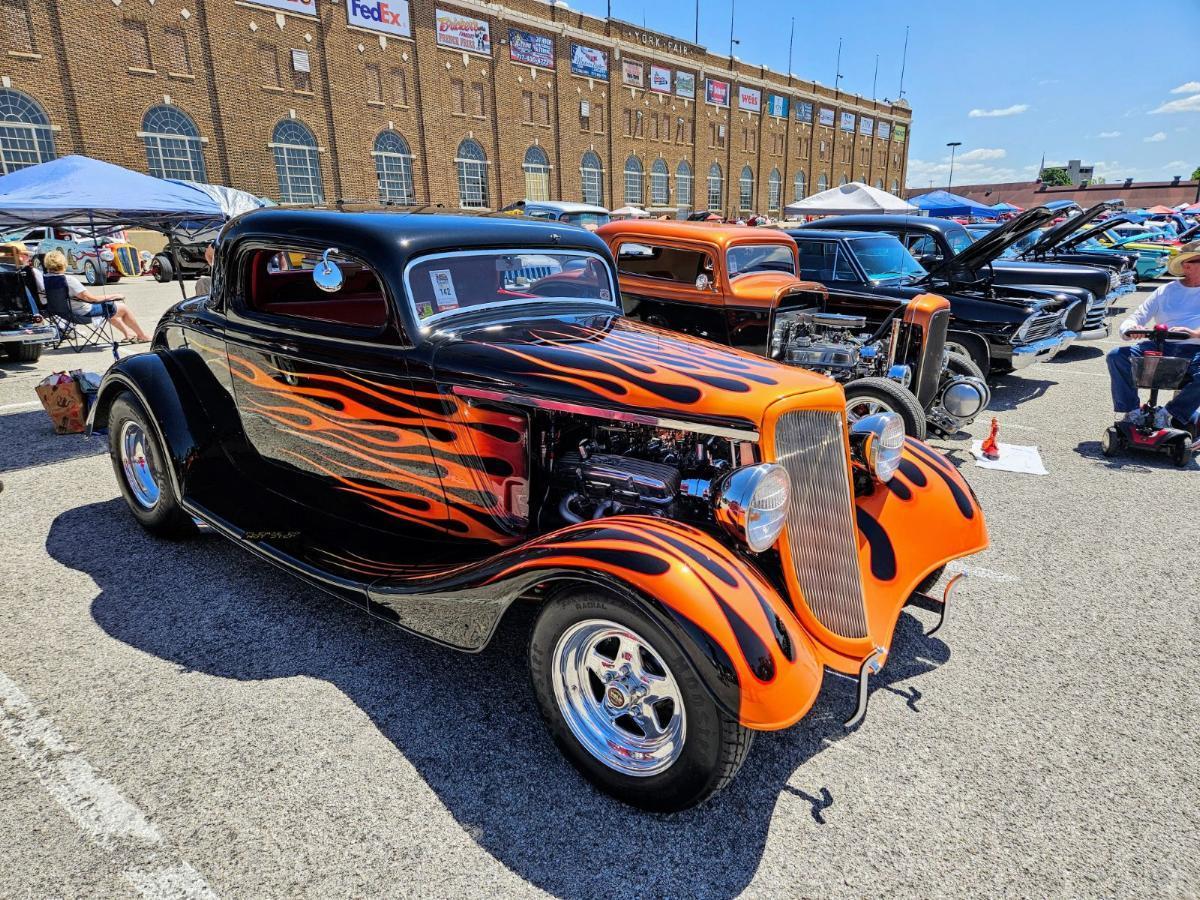
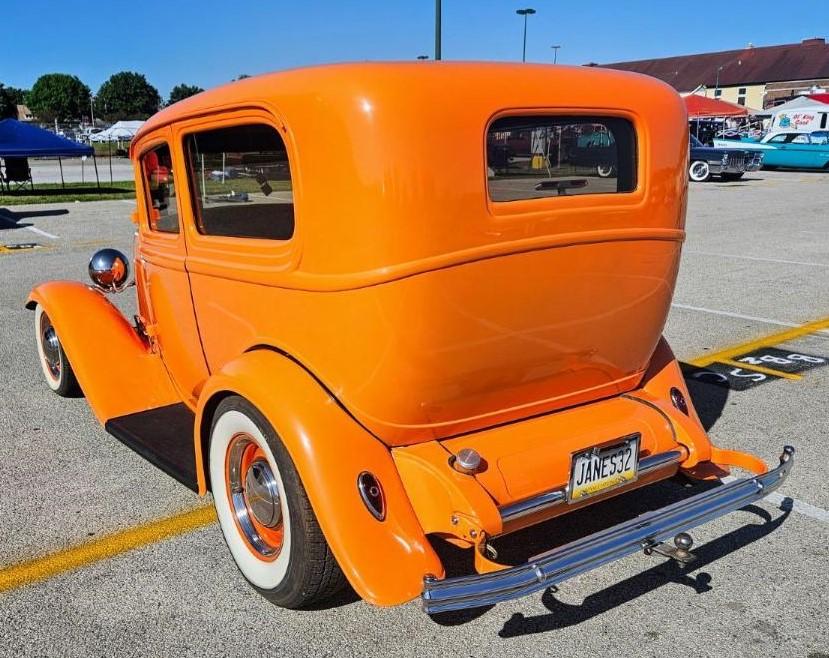
My brother (Styromaniac on the forum) just attended the 50th Street Rod Nationals in York PA this weekend. Saw this full fendered '32 sedan, among the 3000 plus cars.
-
Wow...video has Ken Miles of Ford vs Ferrari fame......2:33 and 3:30
-
Those were simpler rules. Guess with some kits now putting in PE and resin parts, IPMS National had to make a "single medium" basic kit building (BKB) rule to eliminate those kinds of PE, resin, metal parts that would unfairly enhance a basic "OTB" build, or else someone could argue they should be in OTB category, - as they were simply using "what came in the box" .
-
So....did you paint the body yellow, and then mask the yellow with BMF, then paint the body purple...or....paint the body purple and then mask the purple and paint yellow flames?
-
"The flame job is all Tamiya paint, no decals. Topped off with 2K clear. It has earned this model quite few “Box Stock” trophies. " All paint? Man, you got mad skills dude. Tell me you at least used a flame masking tool.
-
Somewhere along the line I noticed that some more expensive kits over the years were marketed as "Hi Tech".....they included photo etched parts, wiring etc. perhaps to keep up with the aftermarket options that were gaining popularity. If you use only what comes in the kit, (PE parts Resin parts, wiring etc.z) isn't it still OTB? I see in the IPMS rules that there were clarifications, IPMS MODEL CLASSIC: 4. Separate Out of Box categories: Out of Box models may also be entered in the appropriate regular categories if desired but will be judged as NOT Out of Box against their peers in the category. Models entered in the appropriate Out of Box Categories must be constructed using only the parts that came in the kit. There are a few exceptions such as adding simple seat belts, rigging or ship railings. Check with the Head Judge if necessary. These entries must be accompanied by kit instructions or original box art IPMS NATIONAL RULES (WITH 2022 CHANGES) I don't see an Out of the Box category, but there is something called a Basic Kit Build : BKB rule, given all the confusion resulting from packaging of "aftermarket" parts (resin, photo etch) in some modern kits. G. Basic Kit Build (BKB) – Single Media Only, General Guidelines: (in effect for 2022, 2023, and 2024 contests) i. The IPMS/USA National Contest will include separate categories in selected Classes for Basic Kit Build (BKB) entries. An exception to this is the Junior Class; since the number of Junior entries are relatively low, most Junior entries are regularly built as basic kit builds. ii. The model builder should note that entering a model in any Basic Kit Build category is their choice. Models in these categories have limitations applied to them that are not applied to entries in the rest of the categories. iii. The spirit of building BKB is two-fold: (a) First, to limit yourself to using only those components supplied by the kit makers of older/simpler/less expensive kits, and yet work to get the best result regardless of any shortcomings in the base kit, such as may exist with its detailing or accuracy. (b) Second, to compete at a more basic level, knowing that basic modeling skills are the only difference-maker - not what variety of detailing materials is supplied by the kit manufacturer, nor by after-market detailing sets, nor by using more advanced re-building or scratch-building skills. iv. The general BKB approach is to build what came in the kit box. In some cases, this may result in a perceived incomplete or inaccurate model. While prior guidelines for out-of-the-box were modified for exceptions/inclusions, the BKB approach will return to “what came in the kit box”. You are not required to make-up for any perceived kit deficiencies/inaccuracies based on detailing accessories. Some examples are: (a) Aircraft models aren’t required to have antennas, rigging wires, seatbelts, nor can they be added unless they’re included or noted in kit instructions. IPMS/USA © 2022 National Contest Rules All Rights Reserved Page 4 of 6 (b) Automotive models aren’t required to have seatbelts, radio antennas, battery cables, spark-plug wires, or fan belts, nor can they be added unless they’re included or noted in kit instructions. (c) Military Vehicle models aren’t required to have closed sponsons, separate tow cables, or radio aerials, nor can they be added unless they’re included or noted in kit instructions. (d) Ship models aren’t required to have railings, radar antennas, or rigging, nor can they be added unless they’re included or noted in kit instructions. v. All Class Head Judges and the Chief Judge will have final say as to what is permitted for any BKB entries within their Classes. vi. Models that meet the Basic Kit Build criteria (outlined below) may be entered in the BKB categories, but they are not required to be entered there. Modelers may, therefore, choose to place their model in a standard category, where it will be judged against the other entries with no reference to it being a BKB kit. vii. Basic Kit Build (BKB), Specific Guidelines: The BKB entries will be governed by the following rules: (a) Kits. Any commercially available kit may be used as long as the kit is constructed as a predominantly single medium product. It can consist of an all-polystyrene kit, an all-resin kit, an all-photoetch kit, or any other ‘single’ material. Kits with various other materials included (e.g., cast-resin or 3D-resin detailing accessories, etched metal detailing frets, turned-metal detailing parts, and other similar detailing parts) will not be permitted. Examples of other material parts that will be allowed are kit-supplied vacuum-formed windscreens, canopies, windows for Aircraft and Automotive models; kit-supplied rubber/vinyl tires and poly-caps to retain wheels and/or parts attached to pylons; metal gearboxes and/or metal rod axles for Armor and Automotive models. (b) As a general guideline, kit parts that are necessary to complete and support the overall structure of the completed model are allowed. However, other kit parts that provide enhanced surface-detailing to a completed model will not be allowed for a BKB entry. (c) Construction. The modeler may fill seams and gaps; sand off rivets; drill out gun ports, exhaust pipes, or other appropriate openings; thin to-scale such parts as trailing edges, flaps, and doors; re-scribe panel lines lost in construction, and add rigging and antennas, if shown on the kit’s instructions. No major reconstruction or modifications will be allowed for BKB entries. (d) Decals: Decals other than those included with the kit may be used. They may be used to replace old/damaged/missing kit decals. They may also be used to provide alternative insignia and markings to those originally provided with a kit. However, their use for BKB entries is restricted to 2-dimensional water-slide or dry transfer products. 3-dimensional products such as 3D printed or resin-dot printed instrument panels, access panels, fasteners, bolts, rivets, stitching, etc., are commercially offered as after-market improved-detailing products, and so fall outside of the intended/ accepted usage as decals for BKB entries. (e) Finish. All painting/finishing techniques are allowed. Insignia, markings, and instrument panels may be hand painted instead of using decals. Weathering is permitted. (f) Exclusions. It is not permitted to vacuum-form, manufacture, or replace any part, or substitute parts from another kit; cut or separate canopies, surfaces, hatches, doors, etc. (no major surgery); combine a standard kit with a conversion kit; add anything other than specified on the instruction sheet. (g) Instruction Sheets. Modelers must attach at least the first page of the kit instruction sheet to the entry form and have the rest of the instruction sheet accessible to the judges for review during judging (preferably, directly under the table from the model). Models entered without an attached kit instruction sheet cannot be considered for a BKB award, since judges then cannot verify if the builder used only kit-supplied parts
-
LOL - Well, I guess until the day that judges are required to mandate "originality" when awarding prizes in contests, OTB will always be popular. Some OTB contest rules don't even allow you to wire an engine, or change decals.
-
Paint compatibility
SpeedShift replied to Camaro lover's topic in Model Building Questions and Answers
Back in the day, those of you that built models with Pactra, Testors, and AMT lacquer recall that lacquer over enamel was a no no. I believe Don Yost, who promoted airbrushing Testors bottle enamels thinned with lacquer thinner, said you could use Wet Look gloss (a lacquer) over the enamel. Not sure about post Model Master Testors Extreme Lacquer - Wet look Clear from Rustoleum over enamel, per Steven : maybe it is a hotter lacquer. Recently used the newer Rustoleum/Testors Extreme Lacquer - Wet look Clear over a "pre Rustoleum" - Testors Model Master "Custom Lacquer System" Custom Lacquer paint, no problem, as expected. I've also accumulated a lot of older rattle cans (inc the Boyds brand) but these days, with the newer formulations often changing, I wouldn't try older paints without testing on a throwaway subject. As Mark said, "Paint, being one of the last things you do on a model (besides final assembly), isn't the place to experiment, at least on the model itself." Or as Bill/Ace said: "TEST TEST TEST TEST and TEST SOME MORE." FWIW - I've tried the inexpensive Testors bottle enamel /lacquer thinner airbrushed method Don Yost promoted and was very impressed with the high gloss sheen it has. Didn't even need a gloss overcoat. It was that good. Unfortunately dealing with a dust particle or blemish with some light wet sanding and then polishing never seemed to bring that impressive high gloss sheen back to the same level