SpeedShift
-
Posts
493 -
Joined
-
Last visited
Content Type
Profiles
Forums
Events
Gallery
Everything posted by SpeedShift
-
'58 Impala - "I just love tuck 'n roll."
SpeedShift replied to SpeedShift's topic in WIP: Model Cars
Thanks, I'd like to do those five and a couple of others I liked that had brief appearances...the custom painted Tom Hoker '40 Ford coupe and the black '39 Ford.
-
'58 Impala - "I just love tuck 'n roll."
SpeedShift replied to SpeedShift's topic in WIP: Model Cars
Yes, one of several American Graffiti builds. BTW, Nice job on your Milner '32., looks great. I'll get to a '32 eventually, chopped the roof and added bobbed fenders to the body shell on a 5 window I also started the modifications to a '49 merc to make it a '51 "Pharoahs" Merc. Looking to finish this '58 impala first.
-
'58 Impala - "I just love tuck 'n roll."
SpeedShift replied to SpeedShift's topic in WIP: Model Cars
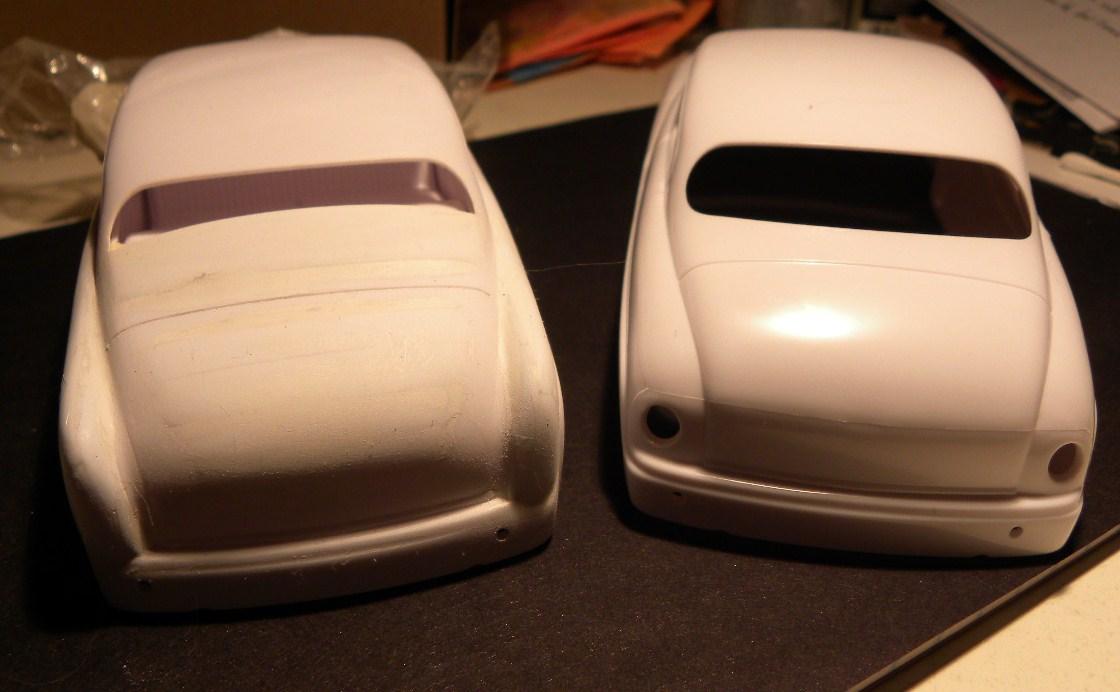
Needed to re-scribe some areas and get it primed for paint.
- 43 replies
-
- 10
-

-
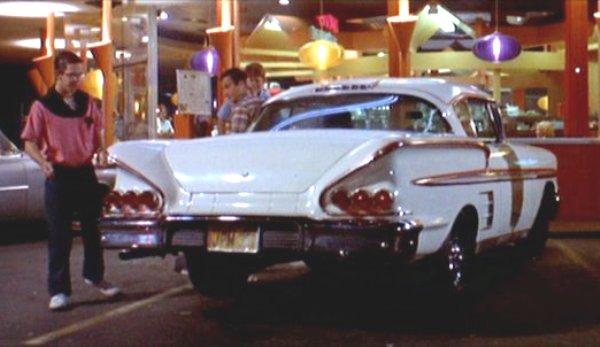
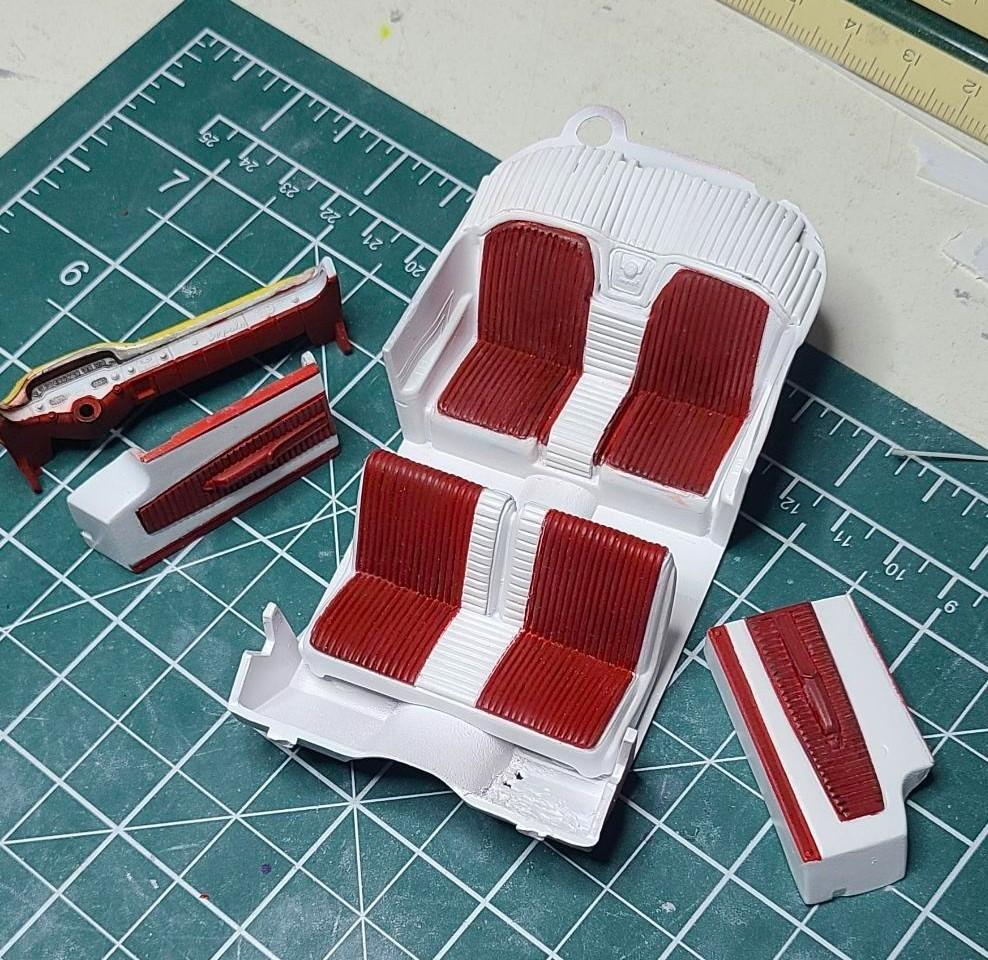
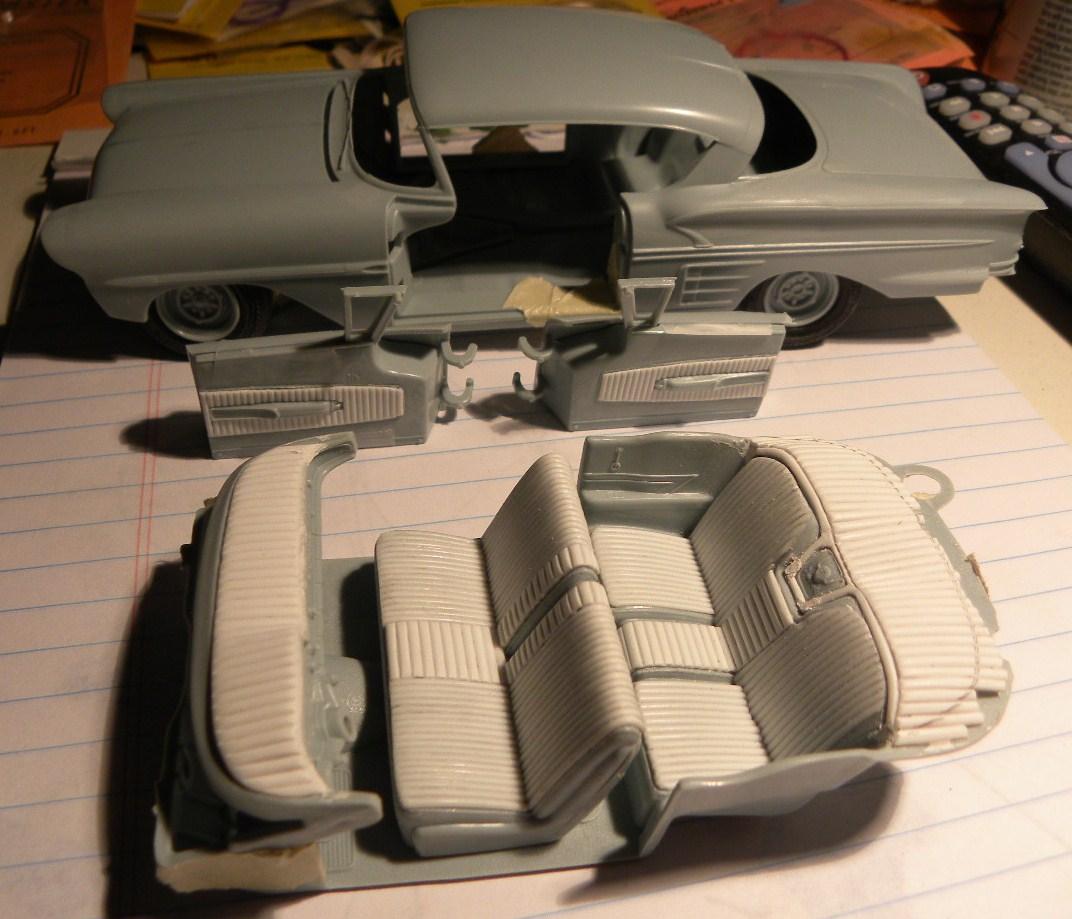
While sourcing parts for another project and waiting for paint to cure on others, I dug up this older build. After emptying out my Evergreen half round plastic supply and gluing in the individual pleats (two hundred and forty-three pieces total) , I had to set this build aside. Picking it back up. The second picture shows the stock kit interior and also the interior after tuck and roll pleats were applied. got 327 and six strombergs.mp4
-
work in progress.
-
Shutdown - Corvette Stingray vs. Super Stock Dodge
SpeedShift replied to SpeedShift's topic in WIP: Model Cars
Ok...can you tell us how this snap kit is better, as far as body proportions? -
Shutdown - Corvette Stingray vs. Super Stock Dodge
SpeedShift replied to SpeedShift's topic in WIP: Model Cars
And for anyone that wonders if the fuel injected 63 Vette ever really shutdown the Max Wedge Dodge Dart ..................... Shut Down: Revised Correct Mopar Version of Song (ornocar.com) And the real world evidence: Mopar Action magazine featured a 1962 Dodge besting the Sting Ray in its 1990 issue: Copyright 1990, Harris Publications, Inc. Used with Permssion. All rights reserved. High Performance Mopar magazine featured a Max Wedge again stomping the Corvette: Max Wedge Mania: SHUT EM UP AND SHUT EM DOWN Donnie Chapmans 1962 413 Max Wedge Dart whipped the Sting Rays in straight sets. by Jim Campisano Tom Sloe made everyone a promise. "Im gonna beat that Dodge," said the owner of a damn-quick 1964 fuel-injected Corvette roadster. He made this proclamation after the National Muscle Car Associations event at Milan Dragway in Michigan, where he lost three close races to Donnie Chapmans 1962 Max Wedge Dart. It followed a precedent that was set by Edison, N.J.s Ron Papaleo, whose 1963 fuelie got snuffed by the 413-powered Dart a month earlier in Darlington, S.C. But while Papaleo never came close to beating Chapman, Sloe did. Papaleos split-window coupe was more of a show car, while Sloes 1964 was tuned to the cutting edge. Still, Chapman beat him in five straight races, running a best of 12.64 to Sloes 13.37. Strong for a stock small-block Chevy, but not nearly enough to top Mother Mopar. What brought these warriors together was the NMCAs intention to breathe some life into the Beach Boys song "Shut Down." Everyone knows the story: Corvette meets Dodge, Corvette races Dodge, Corvette beats Dodge. Whoa. Were talking about a 13.5:1 compression ratio engine, dual- quad-fortified machine with a race-prepped TorqueFlite transmission. Does such a stout Corvette exist on this planet? We did a little homework before the first round of the event. In an old issue of _Hot Rod_ Magazine, we found a 1962 Vette that was running 12.63 in HGRA A/Sports. Modifications were limited to engine blueprinting, slicks and headers. In the same issue, we noted that the Super Stock ET record was held by Dick Ladeen of Portland, Ore., at 12.71. We figured we had some kind of horse race on our hands. Sloes machine was fitted with the most powerful incarnation of Chevrolets small-block, the 375-horsepower 327, and a Muncie 4-speed. Though his 1964 is not the showpiece that Papaleos Vette is, its still plenty nice. Chapmans 413 actually started life as a 361-equipped Tennessee state police vehicle. He had all the necessary parts available to make the car a 413 and figured, "Why not?" He built his Dart specifically for the NMCAs Shut Down series. Marshall Jeffers put the Ramcharger V8 together using stock factory goodies. Donnie maintains the only deviations from stock are an .030-inch overbore and a Racer Brown cam. The 727 TorqueFlite was also freshened up by Jeffers, and for good measure he added a TCI converter with a 3000-rpm stall speed. The 8 3/4-inch rear houses 4.30 gears. Body and paint chores were handled by Steve Elkens, who also refurbished the interior. The entire car, an undeniable show-stopper, was completed in two months time. Down in Memphis, home of Elvis Presley, barbecue cooking and mosquitoes with the tenacity of pit bulls, Sloe made good on his promise--sort of. In the first round, neither gentleman ran a particularly good race, but Sloe cut the better light and emerged the winner with a 14.211 at 101.63 to Chapmans 14.193 at 91.05. The Corvettes finally got on the scoreboard. Unfortunately for them, it would be the last time they would do so. In the next round, Donnie ran an unreal 12.27 at 109.38 to Sloes 13.15 at 104.48. "I put in a set of those Japanese spark plugs," said Chapman, explaining how he managed to knock .5 second off his previous low ET. From that point on, it was Dodge all the way, though Sloe did a commendable job driving the plastic Chevy. His last three races netted him ET slips that read 13.36, 12.96 and 13.41. Impressive but hardly up to the task, since Donnies times were 12.41, 12.51 and 12.69. As for Ron Papaleo and his 1963 split-window Vette, he was content to watch the action from the sidelines and take the events Best of Show award. Now the Beach Boys know why there was nobody meaner than the Little Old Lady from Pasadena. Source: Campisano, Jim. , Shut Em Up and Shut Em Down. High Performance Mopar magazine -- March 1991, pp. 14-15. Did you know? That Gary Usher, the writer of 409 by the Beach Boys never owned a 409, but DID own a new 426 Plymouth Hemi Superstock, which he conceded was much faster than a 409 anyway. ? (Source; The Illustrated Discography of Hot Rod Music 1961-1965 by John Blair and Stephen J. McParland, 1990, forward section) High Performance Mopa -
Shutdown - Corvette Stingray vs. Super Stock Dodge
SpeedShift replied to SpeedShift's topic in WIP: Model Cars
Thanks...Ill check that one. -
Very cool build idea John, was thinking about doing one like that, .....a "factory delivery" Dodge Hemi Dart with the black fiberglass hood and front fenders. There was one of those 68 Dodge "factory delivery" Darts with the black front end on the Barret Jackson auction the other night...the commentator implied it was the inspiration for the "Little Old Lady from Pasadena" but given the song came out in '64 I think it had to be a Dodge of that year, not the '68. Very cool car any way.
-
One of my other hobbies.......painting. These two are done with acrylic.
-
Shutdown - Corvette Stingray vs. Super Stock Dodge
SpeedShift replied to SpeedShift's topic in WIP: Model Cars
Thanks - I checked my inventory list..I DO have the '63 split window stingray (as posted by bill here). Somewhere .....LOL. -
Shutdown - Corvette Stingray vs. Super Stock Dodge
SpeedShift replied to SpeedShift's topic in WIP: Model Cars
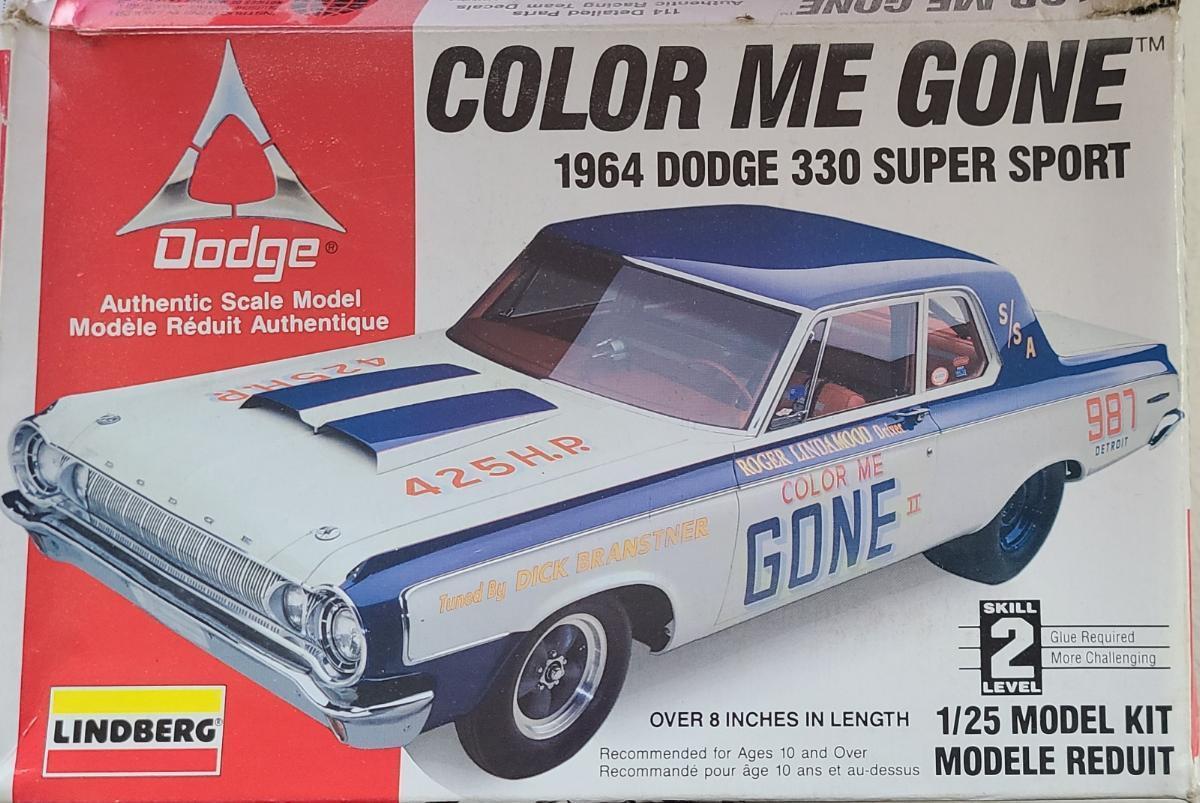
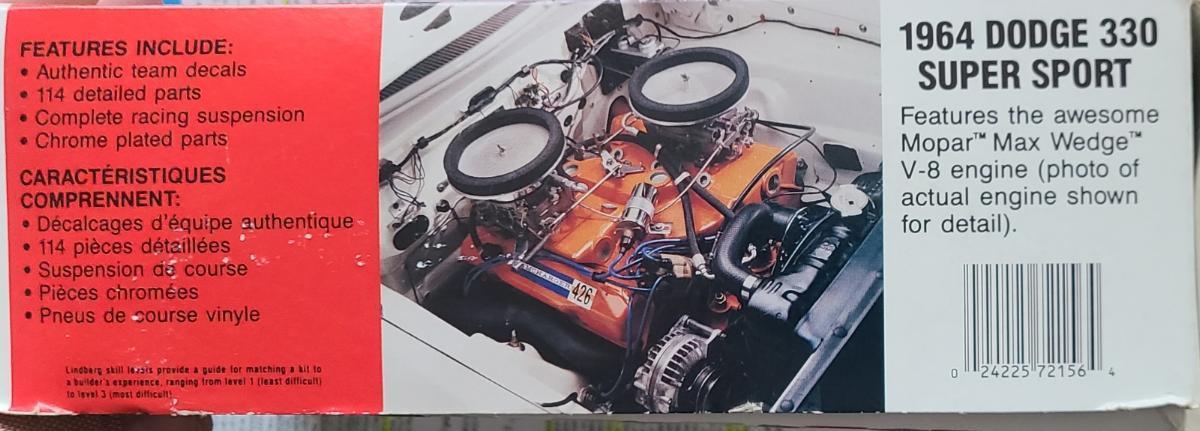
Had an opportunity to dig into my kit stash and found a couple of Lindberg Color Me Gone - 1964 Dodge 330 Super Sport kits. The 426 engine is pictured on the side panel. When I pull the AMT 49 Merc kit I'll be able to compare the two kit engines and see which might be a good candidate for the 413. I think the AMT kit engine has the upturned exhaust headers.
-
Shutdown - Corvette Stingray vs. Super Stock Dodge
SpeedShift replied to SpeedShift's topic in WIP: Model Cars
Well, nonetheless, the 426 is in the lineage...'62 413, vs the '63 426. I have some history on the 426 as well, enough to sort out the differences if the 426 kit engine can be a starting point for a 413. Internal displacements would not be noticeable in a scale engine, header routing and induction system details between the two might be. -
Shutdown - Corvette Stingray vs. Super Stock Dodge
SpeedShift replied to SpeedShift's topic in WIP: Model Cars
I'm intrigued...I have several AMT 49 merc kits, one (black car on cover, more recent release) and it has the two engine choices. Appears this one particular AMT kit has a dual quad 440, according to the side panel.
-
Shutdown - Corvette Stingray vs. Super Stock Dodge
SpeedShift replied to SpeedShift's topic in WIP: Model Cars
I'm pretty sure the 413 is a 1963 engine, although there may be dual quad manifolds with Holley 4 bbls in many kits. Looks like Bill confirms the 49 Mercury kit - check the side box panel - right there- thanks guys. -
Shutdown - Corvette Stingray vs. Super Stock Dodge
SpeedShift replied to SpeedShift's topic in WIP: Model Cars
Well, - looks like there were some resin 413 engines in 1/25th scale at one time : Ross Gibson and an outfit called BNL as well.
-
Shutdown - Corvette Stingray vs. Super Stock Dodge
SpeedShift replied to SpeedShift's topic in WIP: Model Cars
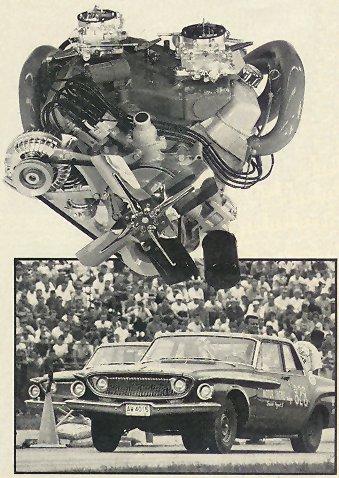
Dug up this ancient 1962 magazine that previewed the 1963 Corvette Stingray:
-
Shutdown - Corvette Stingray vs. Super Stock Dodge
SpeedShift replied to SpeedShift's topic in WIP: Model Cars
This project was started back in 2019 on this forum - maybe he can chime in. Same Jo-Han kit. -
Shutdown - Corvette Stingray vs. Super Stock Dodge
SpeedShift replied to SpeedShift's topic in WIP: Model Cars
Nice website for 1962 Mopar Max Wedge : //1963_dodge.fortunecity.ws/wedge2.htm https://1963_dodge.fortunecity.ws/wedge2.htm -
Shutdown - Corvette Stingray vs. Super Stock Dodge
SpeedShift replied to SpeedShift's topic in WIP: Model Cars
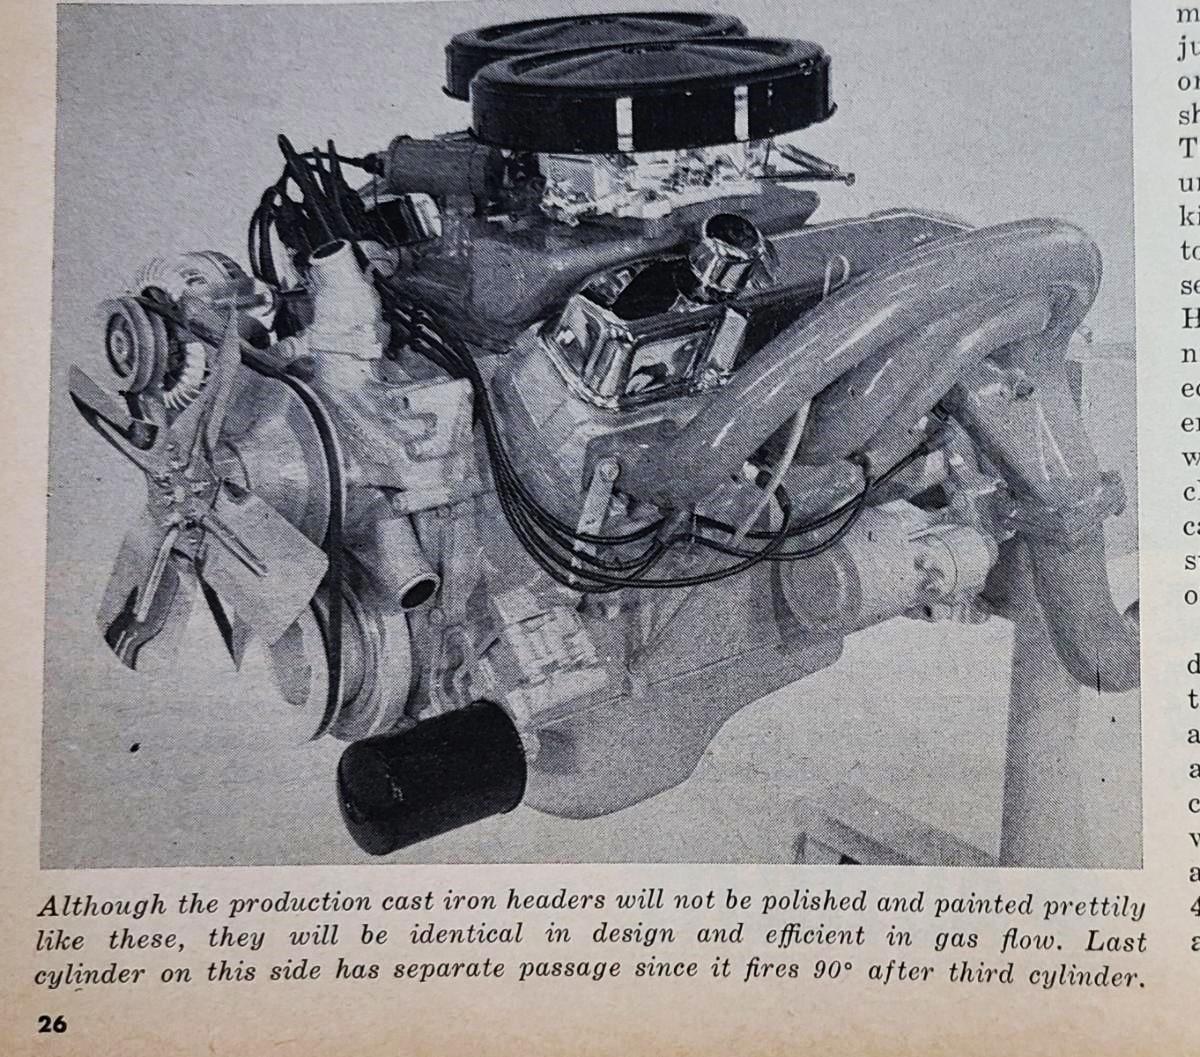
So a check of my ancient Hot Rod and other 62/63 era magazines turned up some pictures and info on the 413. That's one honking engine in that picture. I have no idea if there is a kit or an aftermarket resin offering of the 413. The 426 of Ramchargers fame is probably more well known. Not sure a Lindberg kit with a 426 might offer a reasonable starting point for the block. The cross-ram induction and headers would need to be crafted.
-
Shutdown - Corvette Stingray vs. Super Stock Dodge
SpeedShift replied to SpeedShift's topic in WIP: Model Cars
Thanks Bill, I've seen that kit before. If not in my stash somewhere, it might be in my brother's stash...he's the sports car fan. And thanks for the insight on the kit. -
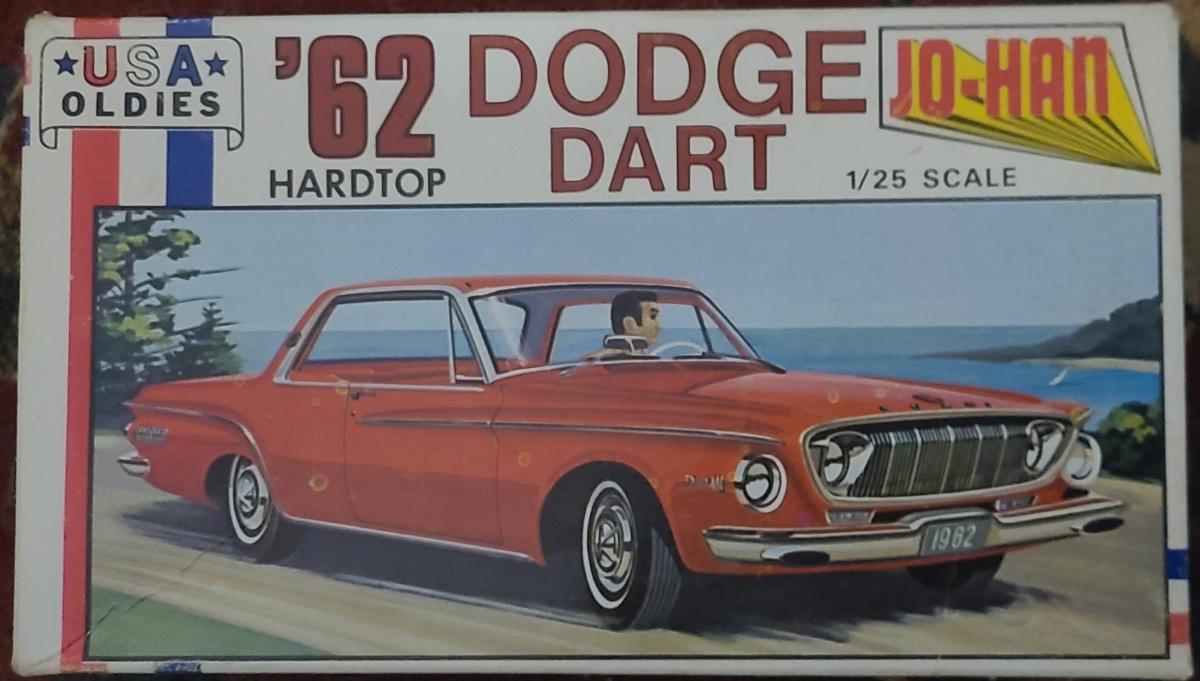
Most you have probably heard the Beach Boys song, "Shutdown" released back in 1963 (or the Jan and Dean cover). I've often wondered about the details of these two cars, and how realistic was the implied victory of the Corvette Stingray vs the Dodge 413. Looking into the history I thought it might make an interesting build or diorama as well. But what kits in 1/25th scale are out there - if you were to build it? THE KITS: What we can derive from the 1963 song lyrics is we are looking at a time period of 1963 for a Dodge and Corvette Stingray- or possibly an earlier version of each car. The Fuel Injected Stingray I believe the Corvette Stingray first came on market in 1963 - probably the split window version. Guess it was the latest and greatest stock bad ass when the song came out. No details on the car, except the song lyrics mention it has fuel injection (I got a fuel injected engine sitting under my hood) with manual transmission (To get the traction I'm riding the clutch) And slicks (My Stingray is light the slicks are starting to spin). Looking for suggestions on what '63 Corvette Stingray kit is out there and recommended. The Super Stock Dodge 413 The Dodge is most likely the 1962 Dodge Dart - as to my knowledge - the 1963 year Dodge trim packages didn't have the famous 413 engine as addressed in the song lyrics. So, I just happen to have a Jo-Han Dodge Dart hardtop kit, kit C-4162. That takes care of half the kit search, unless there is something better out there. Fortunately, Jo-Han kits have a fan base, I've read builders like the Jo-Han kit representation of many stock cars. The kit I have has some age on it....I have no idea how or when I acquired it. The instruction sheet is a yellowed one page 8 1/2 by 11- both sides. Kinda primitive and clunky as far as kits go........the underside has the differential, rear axle and exhaust molded in (ick!!). Major surgery required there if we want detailed chassis. The kit has a single carb engine - not the dual quad 413 Ram Induction as the song lyrics reference (Pedal's to the floor, hear the dual quads drink) (He's hot with Ram Induction). An accurate representation of the 413 will require some searching/kit bashing - or some scratch building. ----------------------------------------------------------------------------------------------------------------------------------------- So on with the search for parts/kit and reference material. I know I have some old Super Stock magazines periodicals to peruse. In the meantime: Tack it up, tack it up Buddy, gonna shut you down It happened on the strip where the road is wide (tack it up now) Two cool shorts standin' side by side (tack it up now) (tack it up now) Yeah, my fuel injected Stingray and a four-thirteen (tack it up now) A revvin' up our engines, and it sounds real mean (tack it up now) Tack it up, tack it up Buddy, gonna shut you down Declinin' numbers at an even rate (tack it up now) At the count of one we both accelerate (tack it up now) My stingray is light, the slicks are startin' to spin (tack it up now) But the four-thirteen's really diggin' in (tack it up now) Gotta be cool now, power shift, here we go Superstock dodge is windin' out in low But my fuel injected Stingray's really startin' to go To get the traction, I'm ridin' the clutch My pressure plate's burnin', that machine's too much Pedal's to the floor, hear the dual quads drink (tack it up now) And now the four-thirteen's lead is startin' to shrink (tack it up now) He's hot with ram induction, but it's understood (tack it up now) I got a fuel-injected engine sittin' under my hood Shut it off, shut it off Buddy, now I shut you down
-
And that's why there's nobody meaner than the "Little Old Lady from Pasadena".
-
Ghosted in some grille artwork.
-
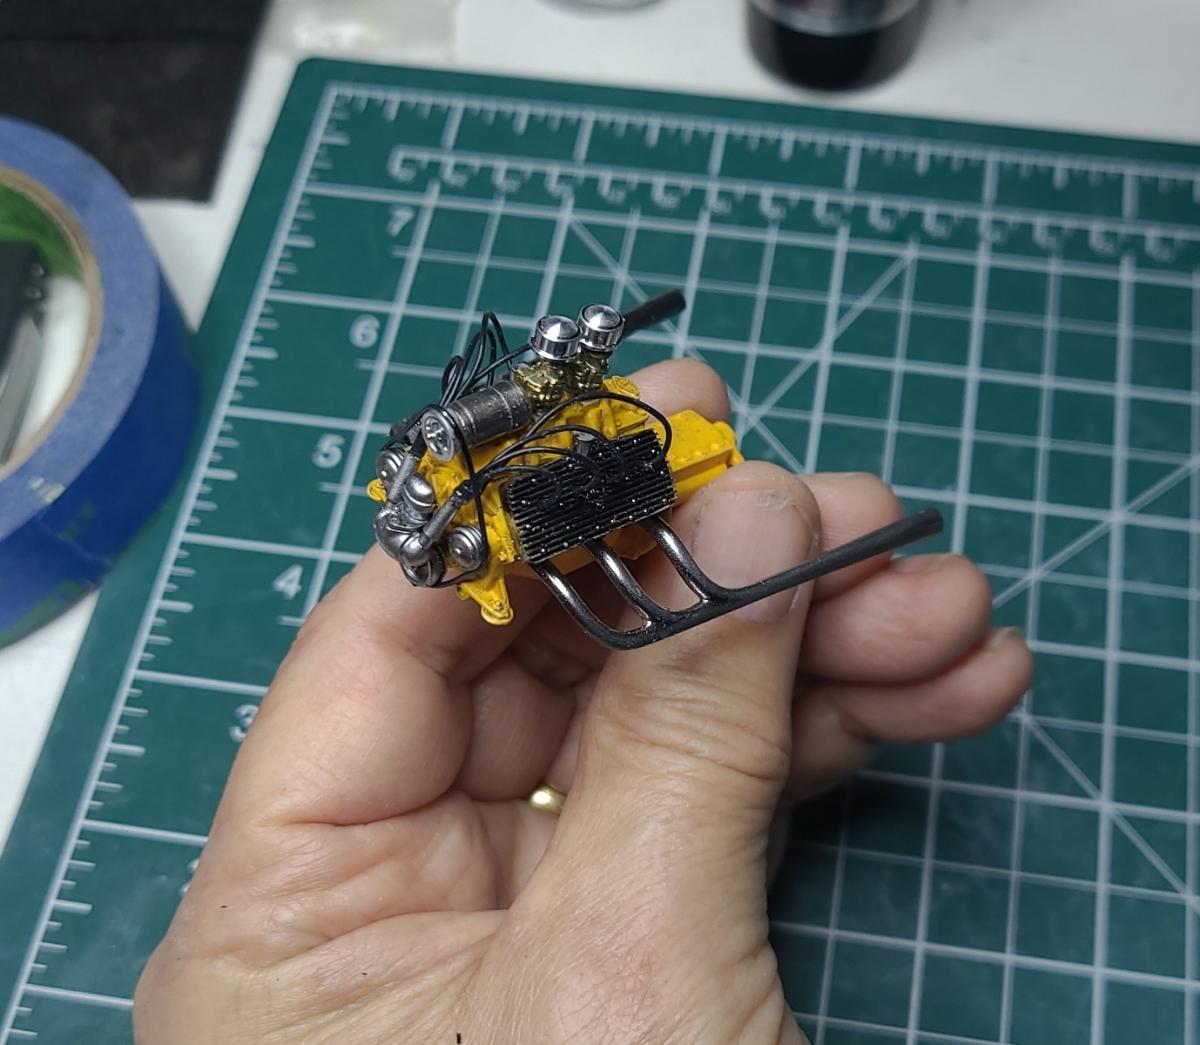
Took some time to add a few things, added distributor and wiring for the flathead engine, trial fit the windshield frame and wheels on disc backing plates, dashboard interior fitting and steering column.


.jpg.e756f9e26f171595f160f045238ee0c8.jpg)