SpeedShift
-
Posts
493 -
Joined
-
Last visited
Content Type
Profiles
Forums
Events
Gallery
Everything posted by SpeedShift
-
Very nice!
-
Couldn't do it again if I tried
-
What engine do you have in mind?
-
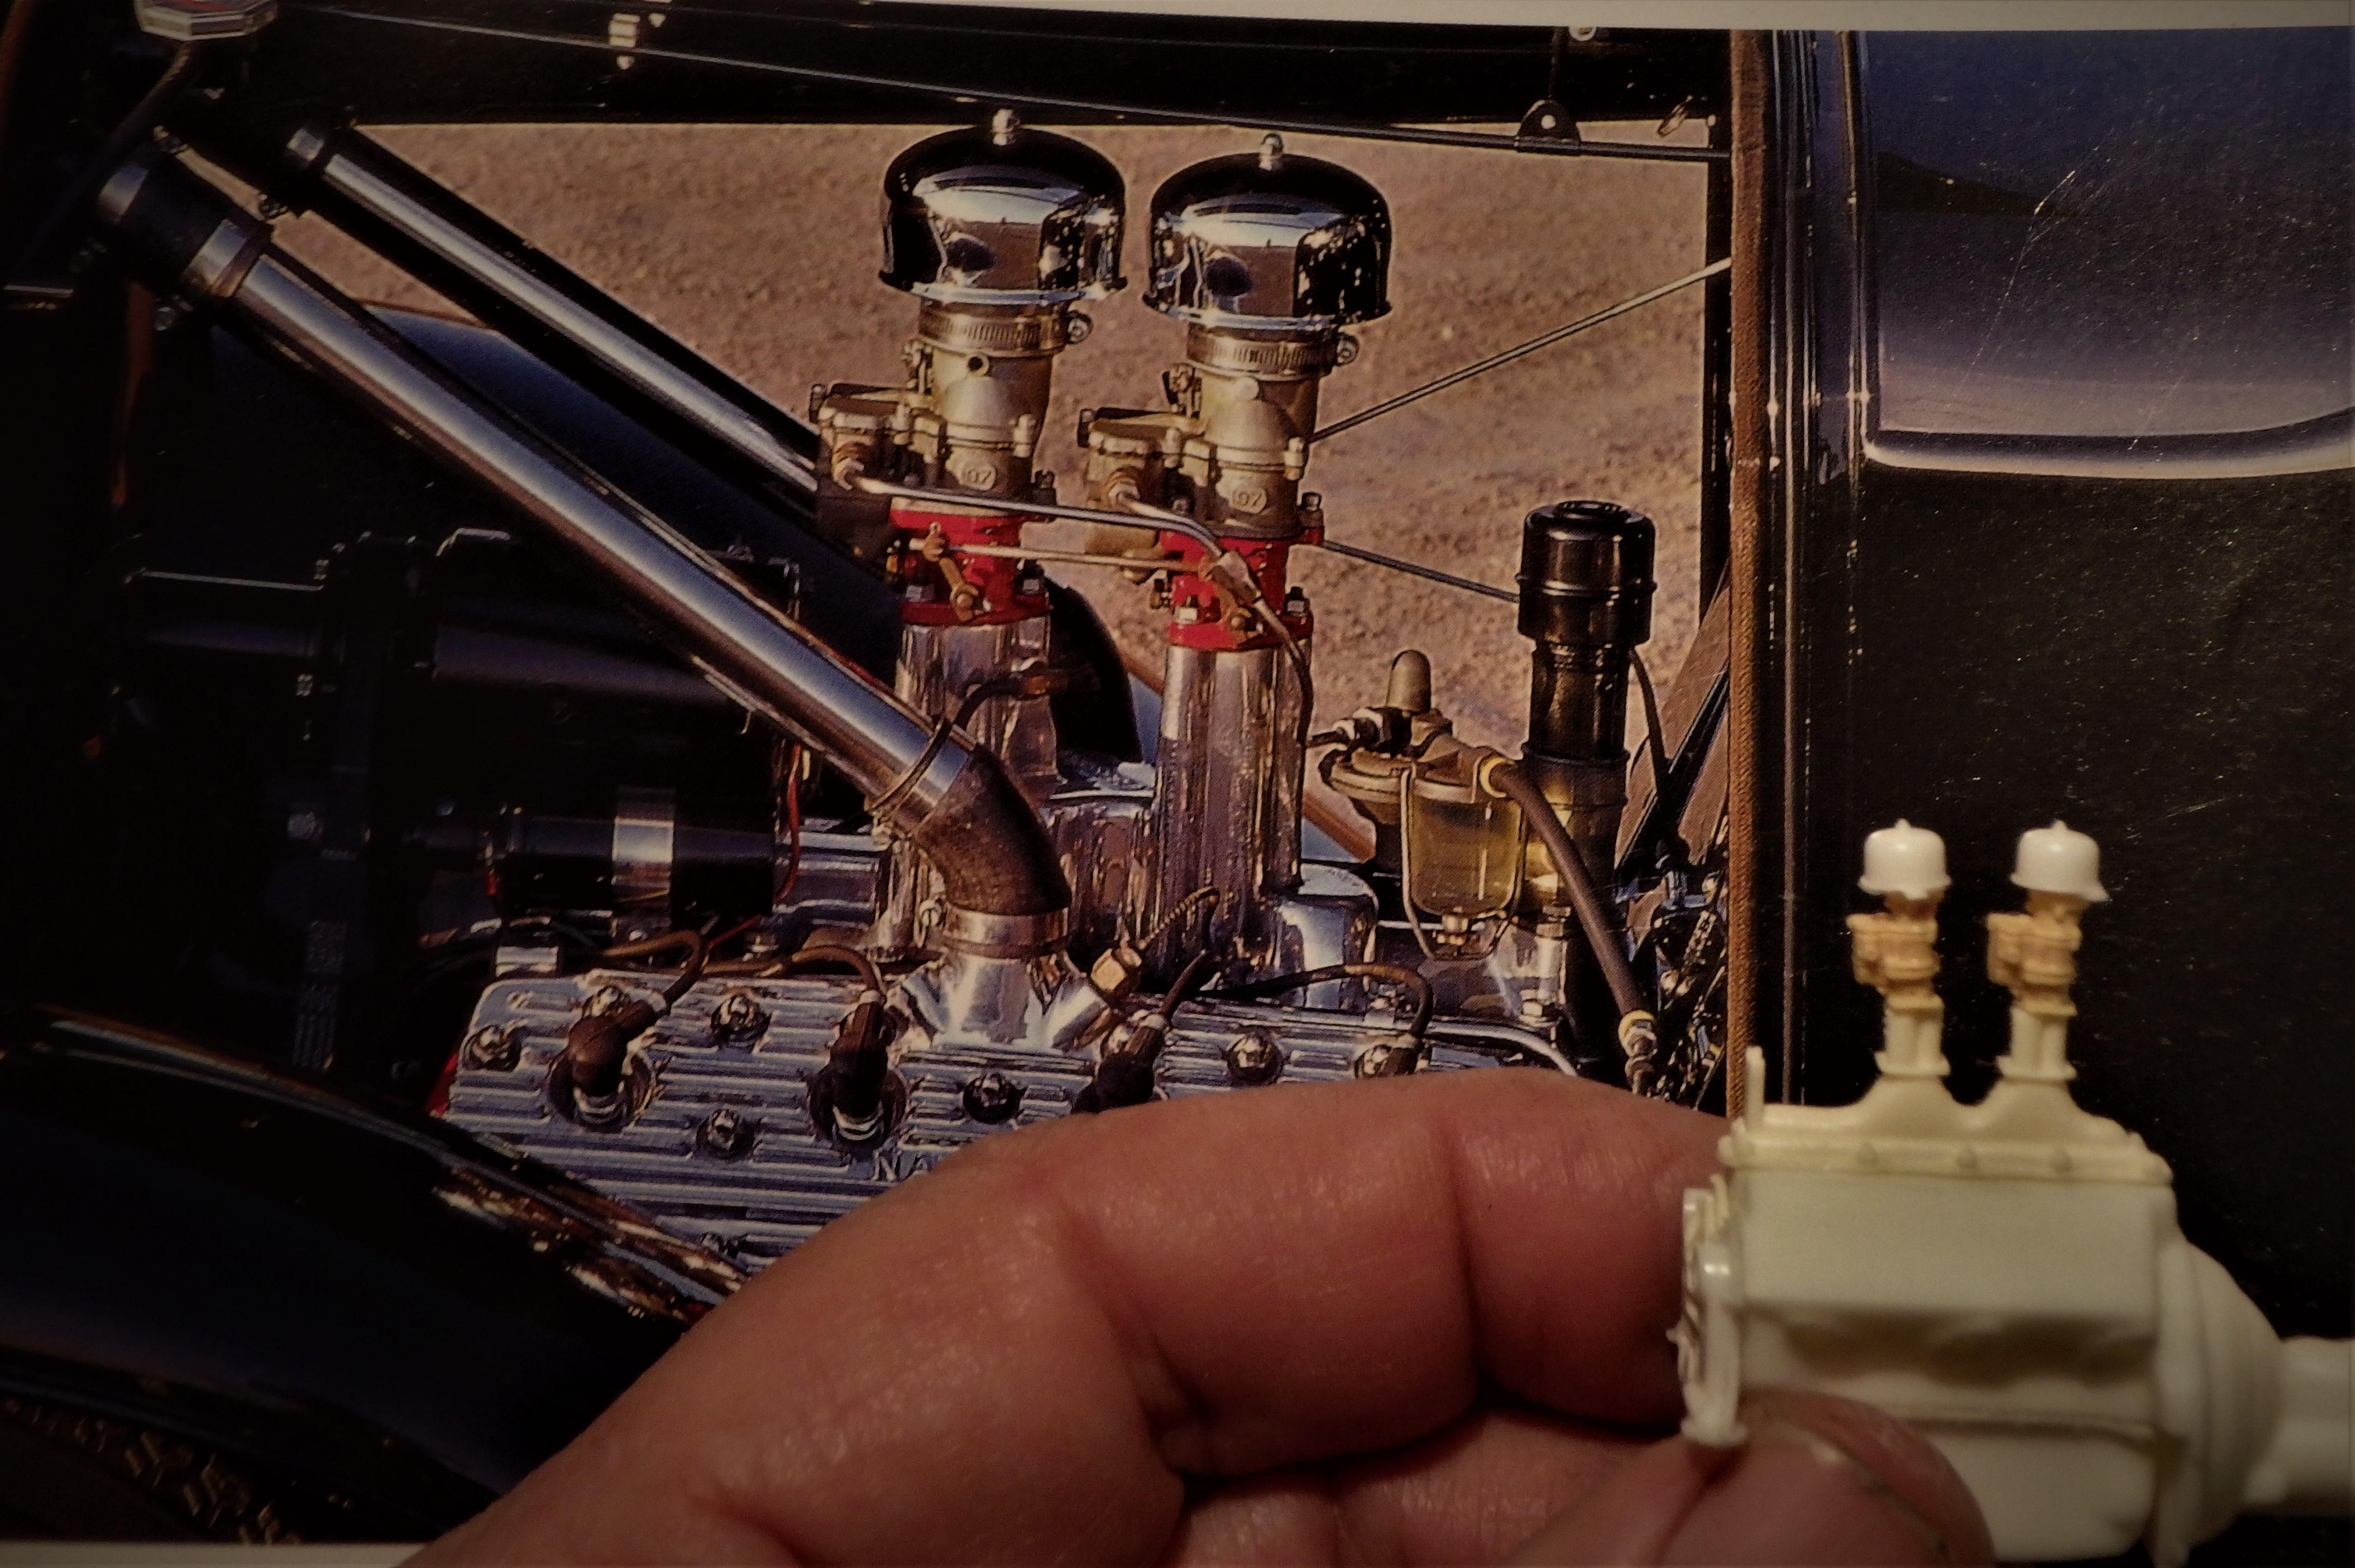
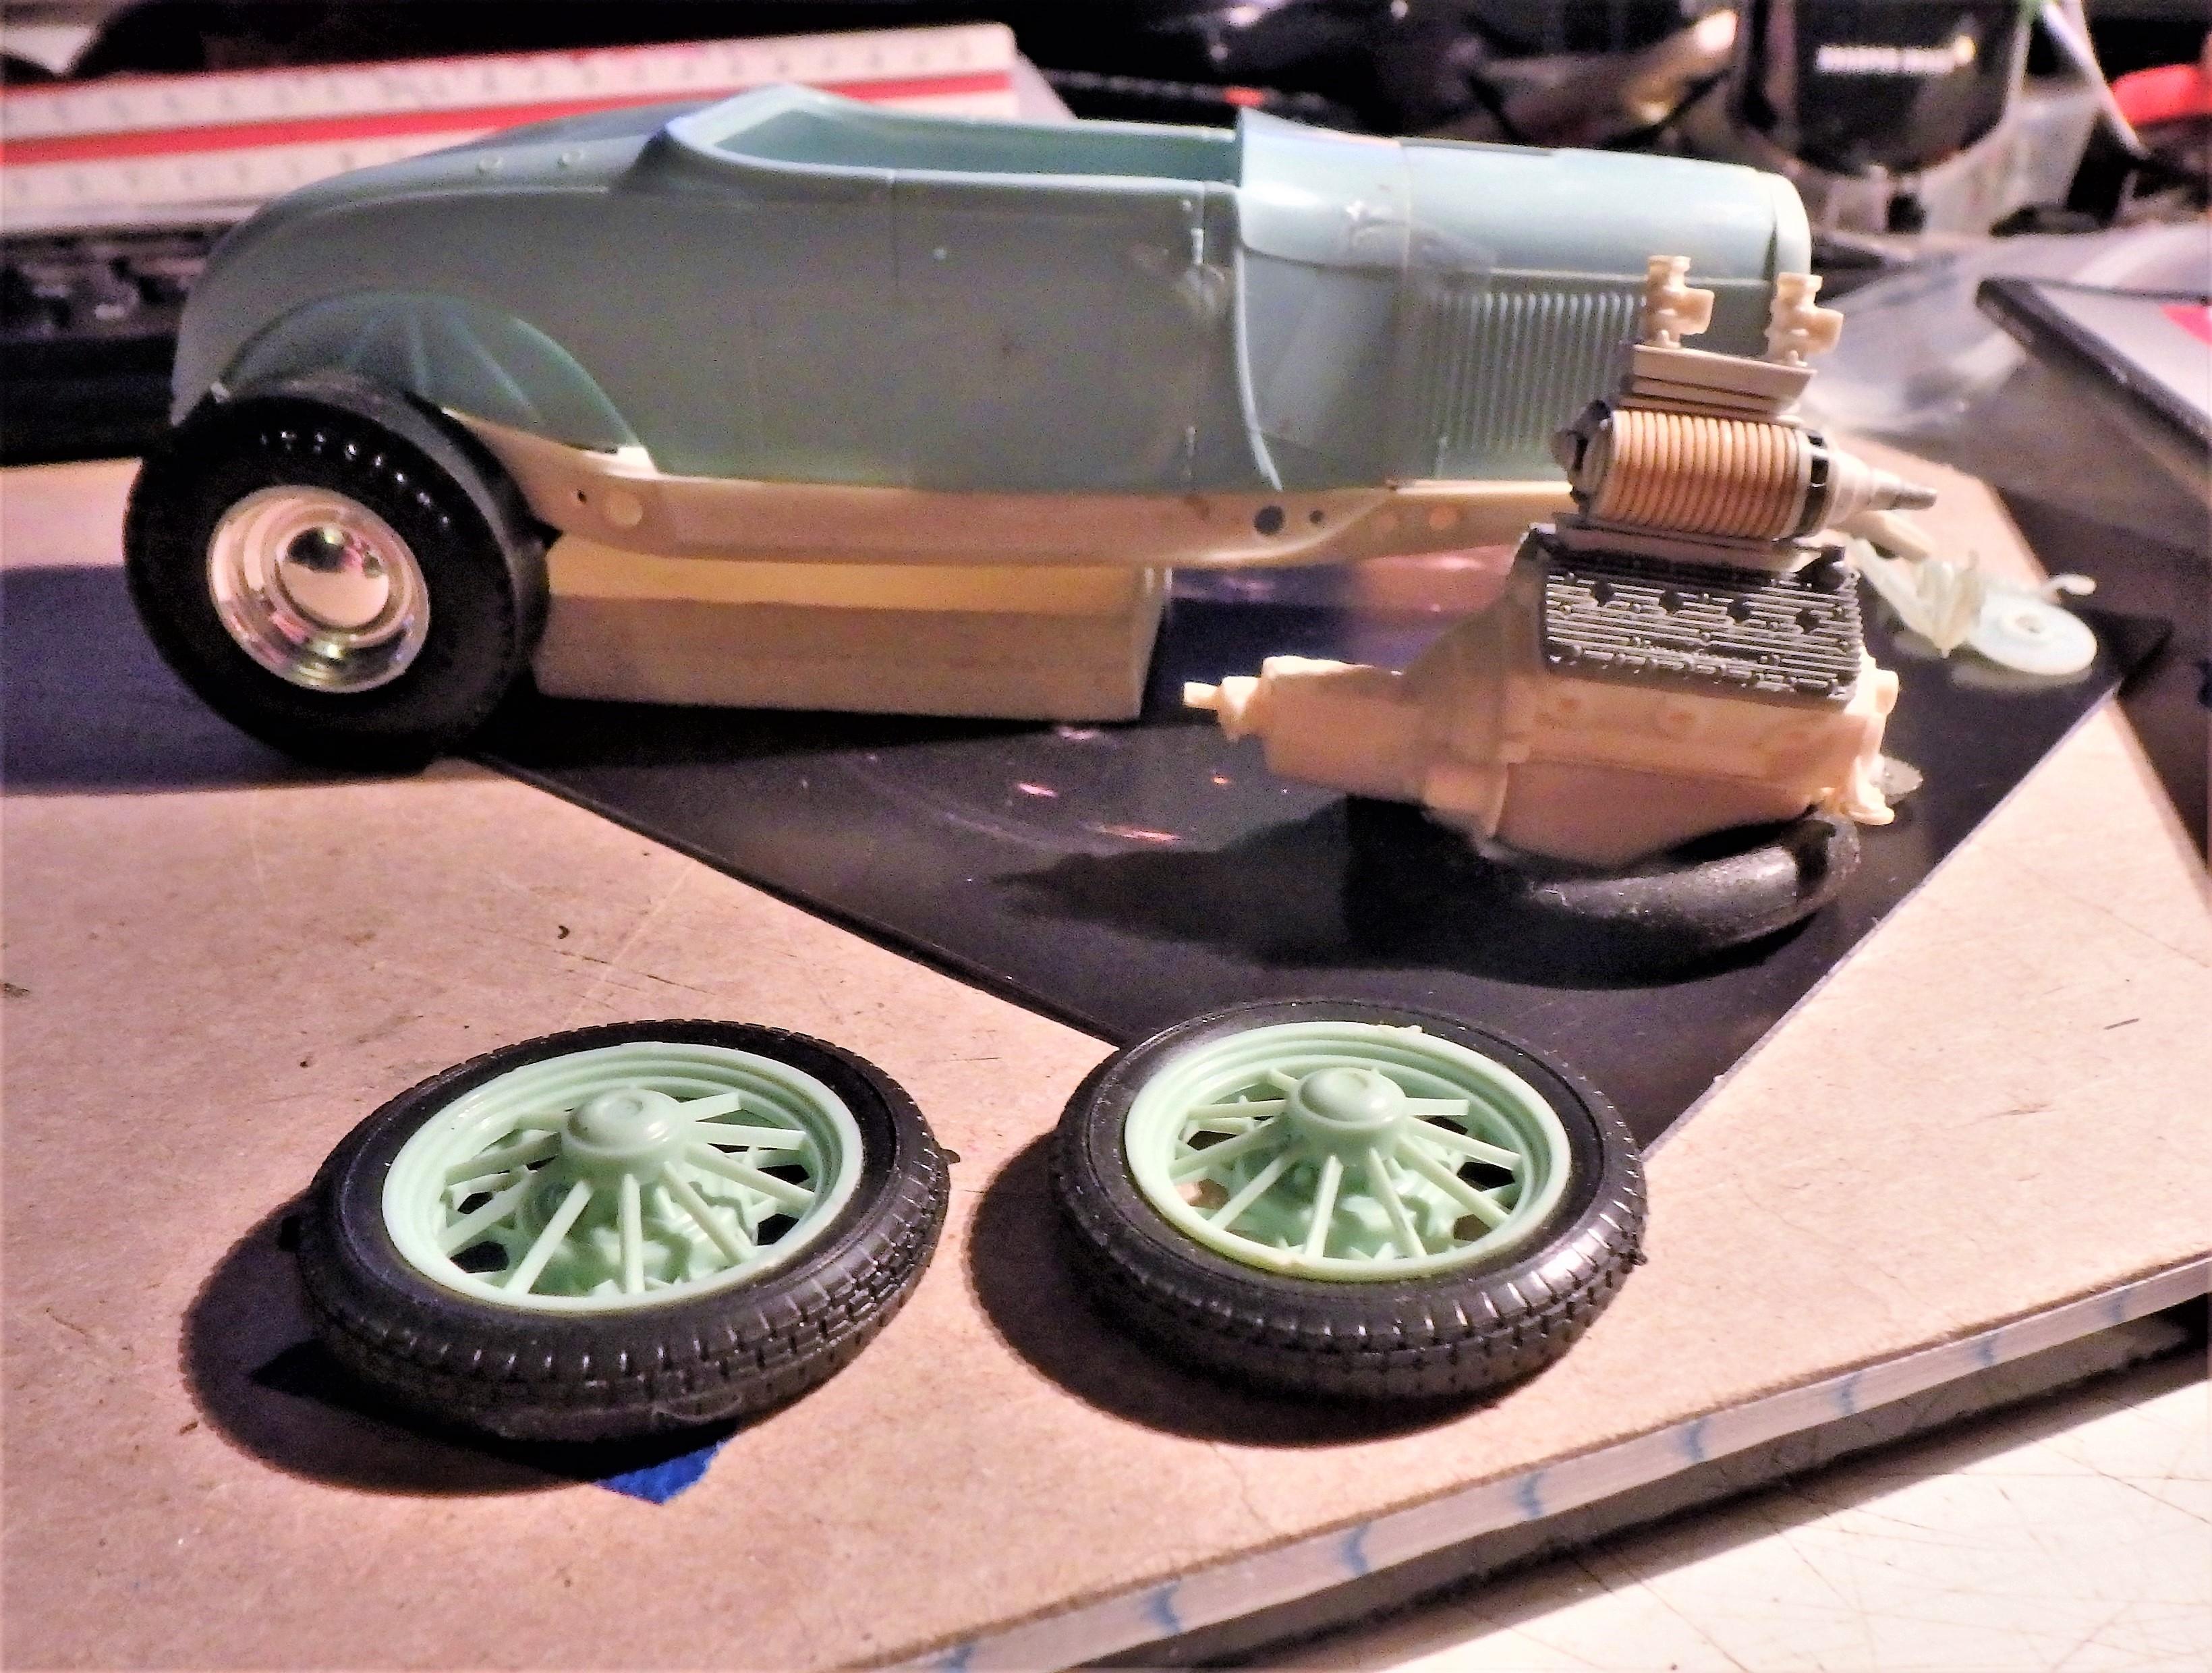
Warmed up a bit this afternoon for an hour to allow me to shoot some ALCLAD white aluminum over their black base on the blower unit. .

-
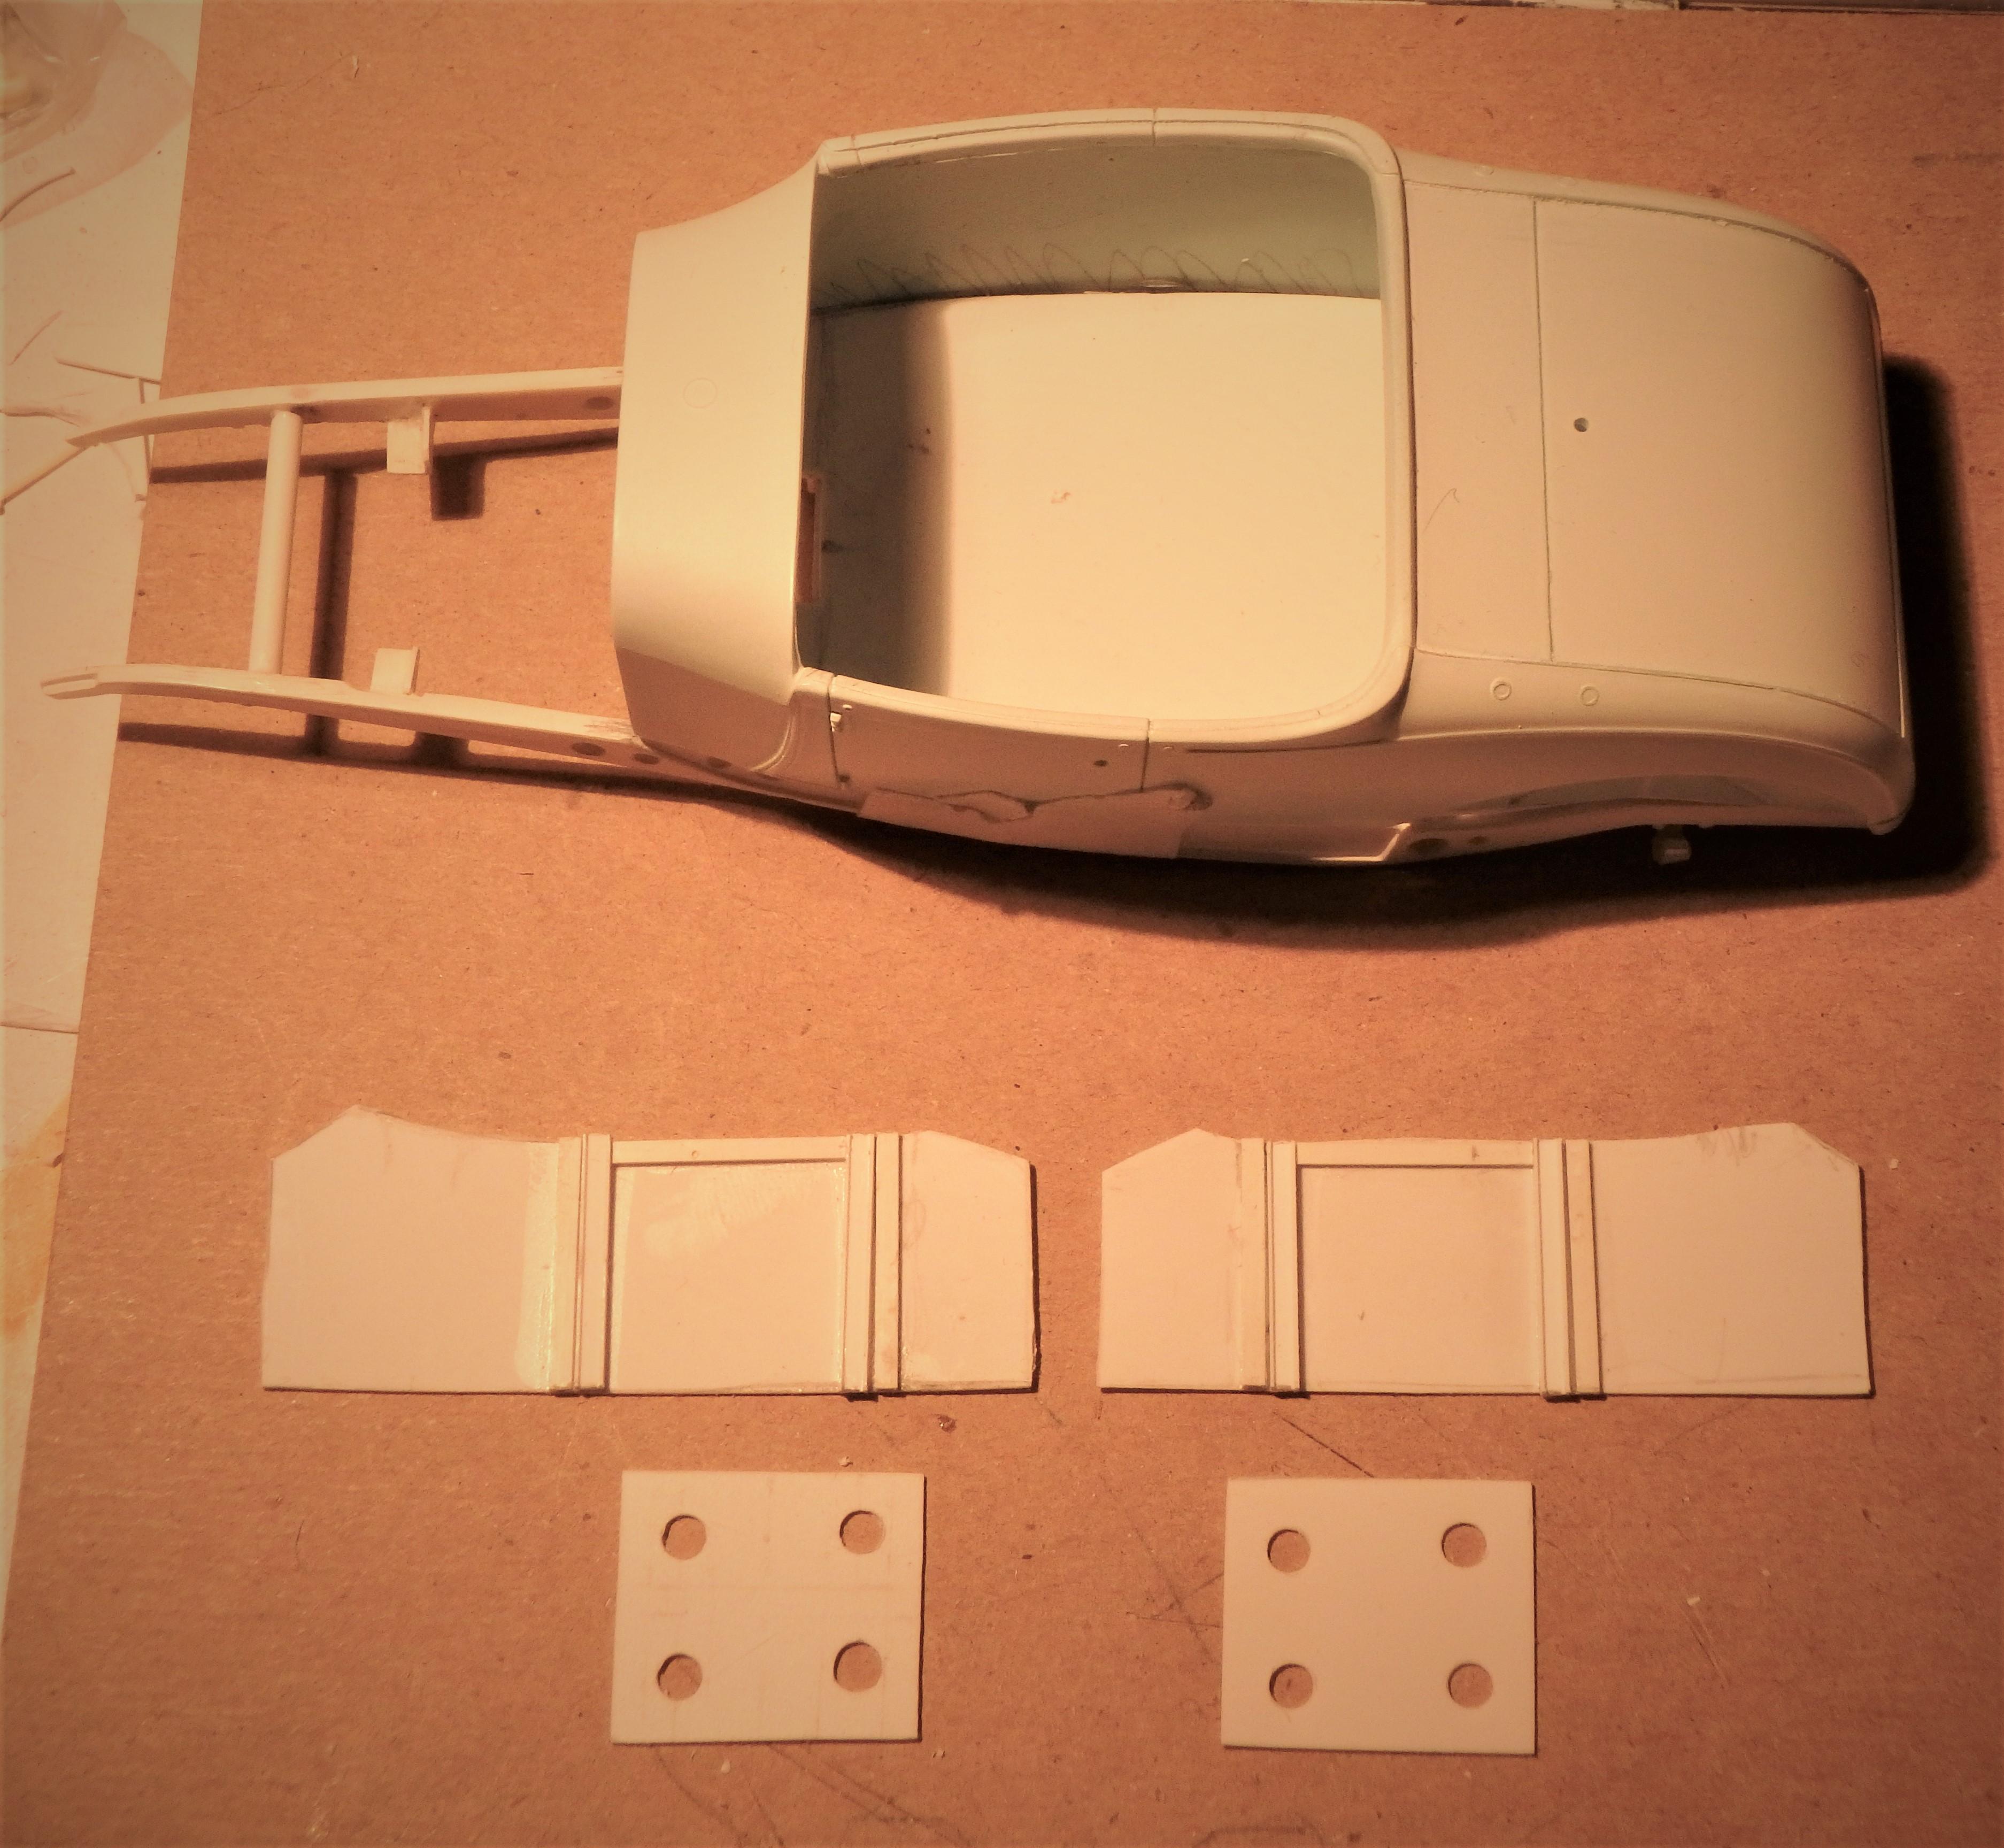
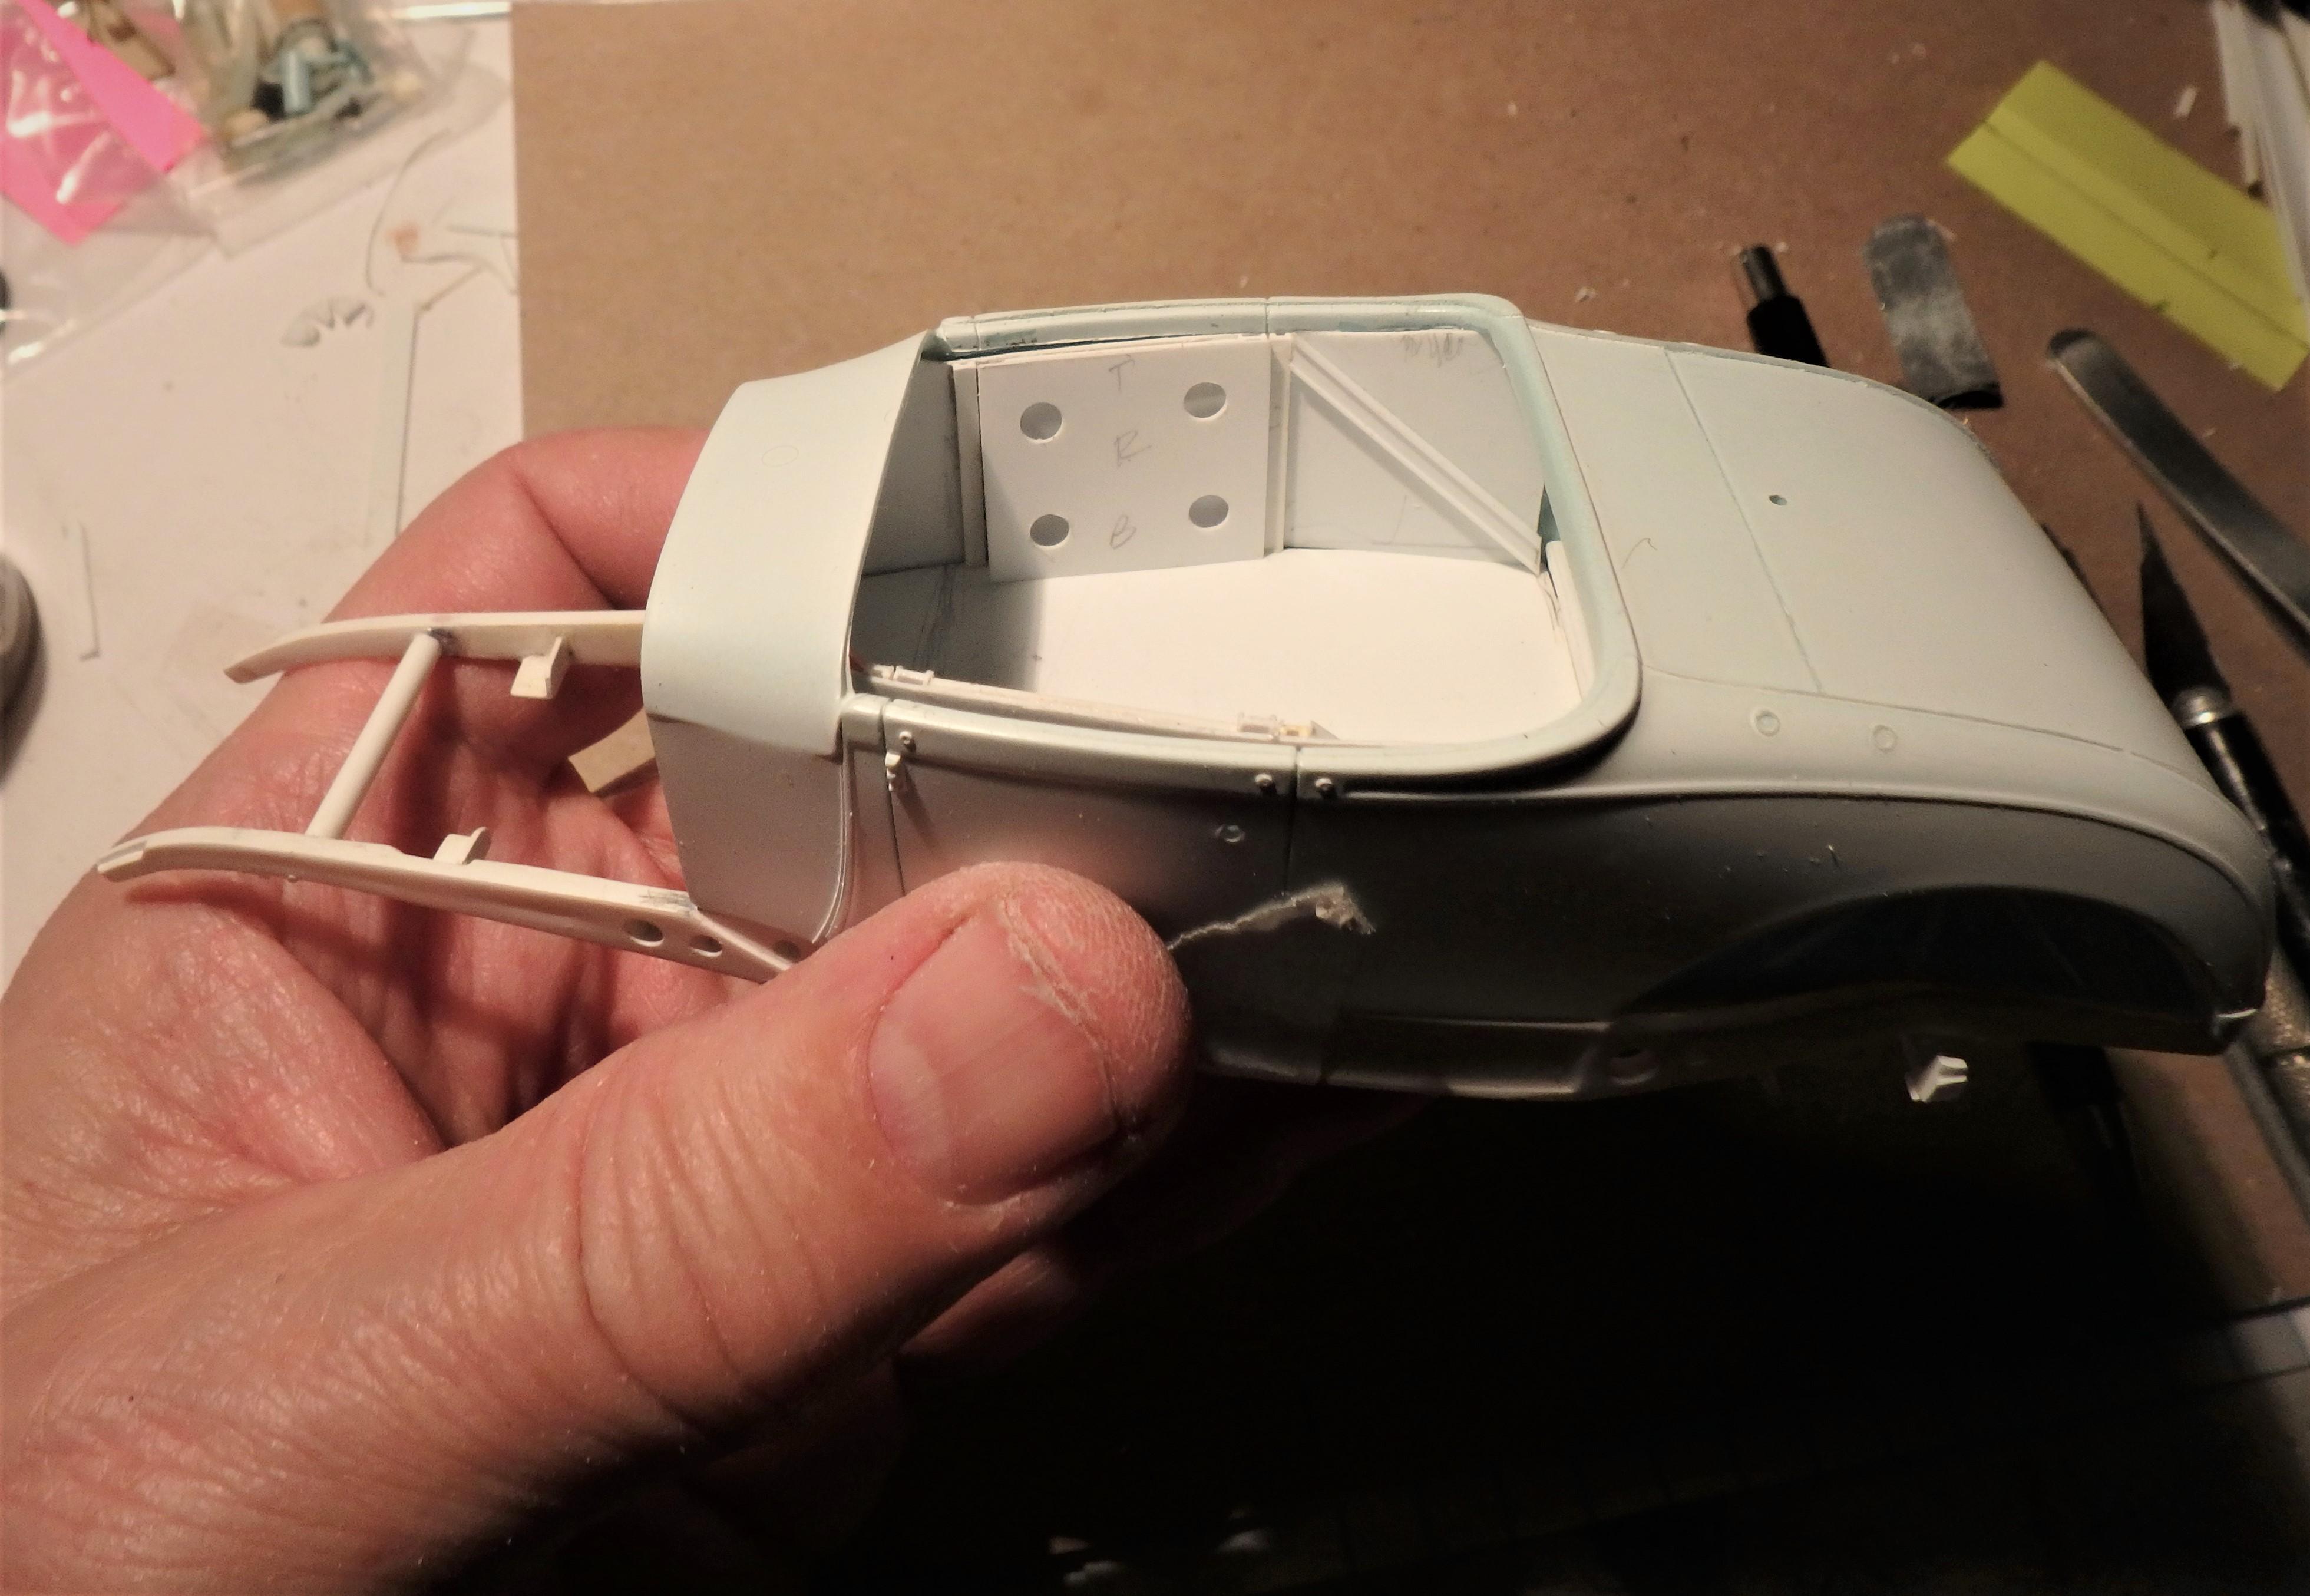
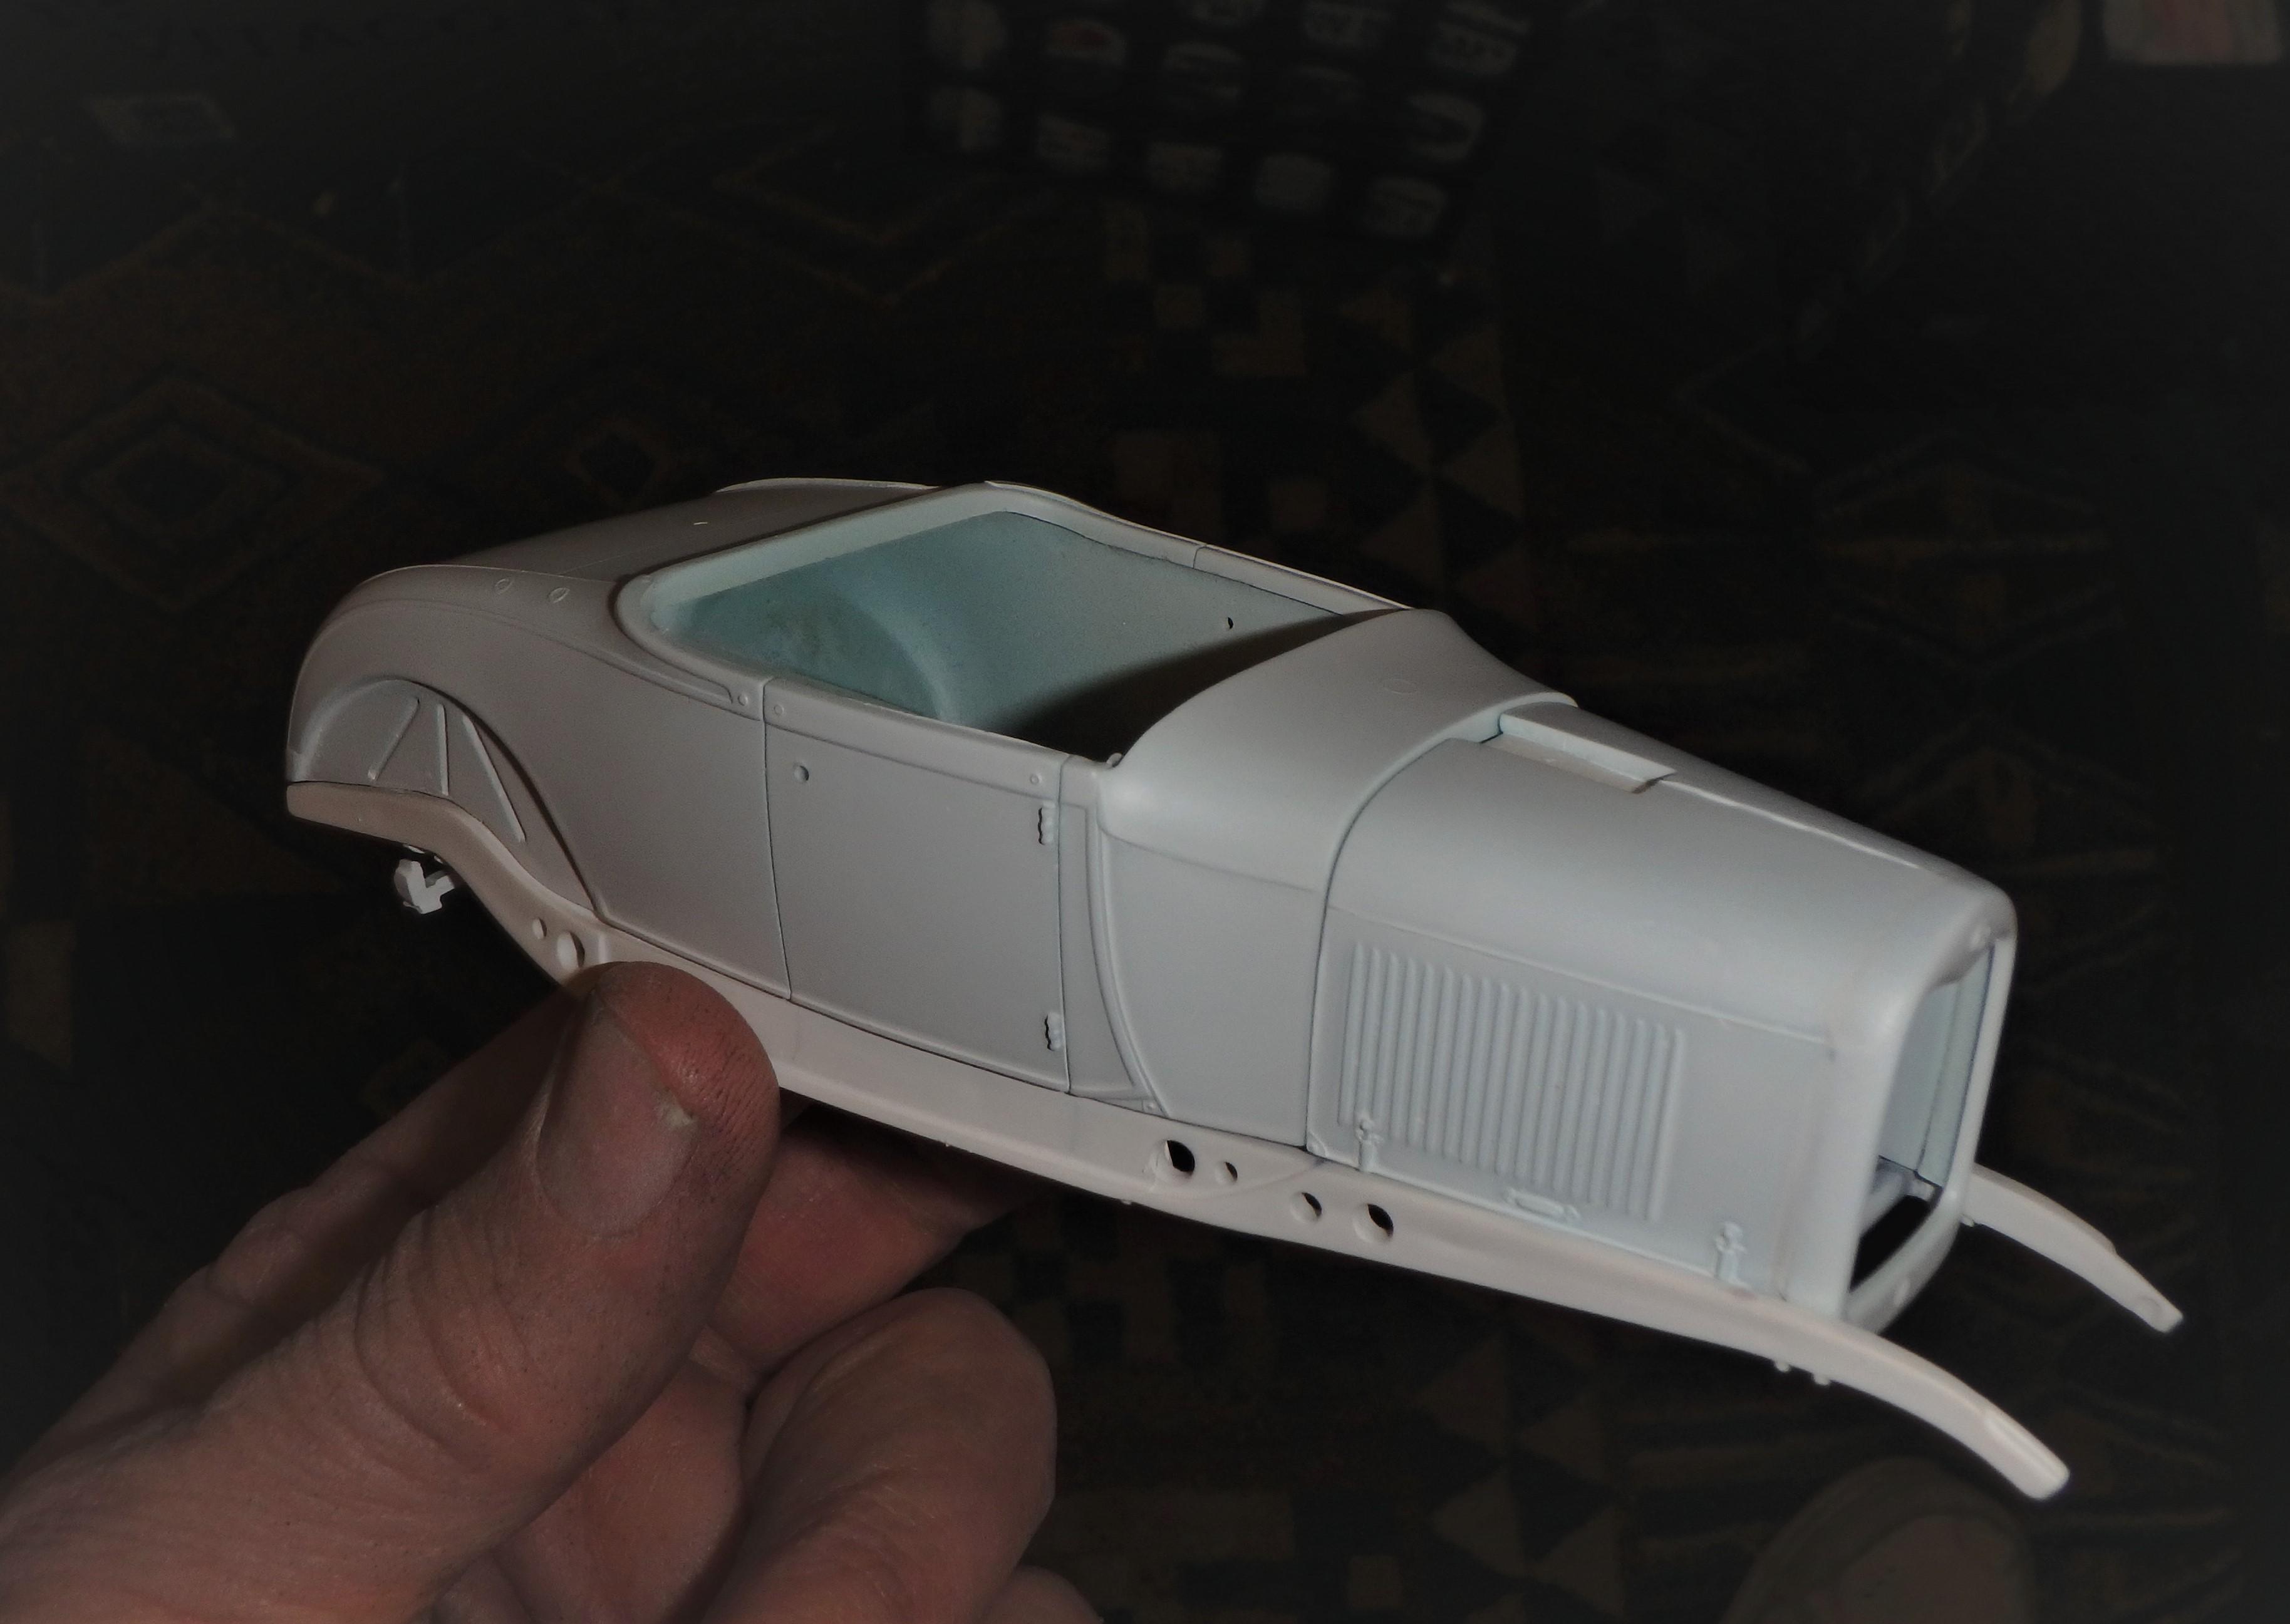
Interior is mocked up with Evergreen sheet styrene and strip for aluminum panels.
-
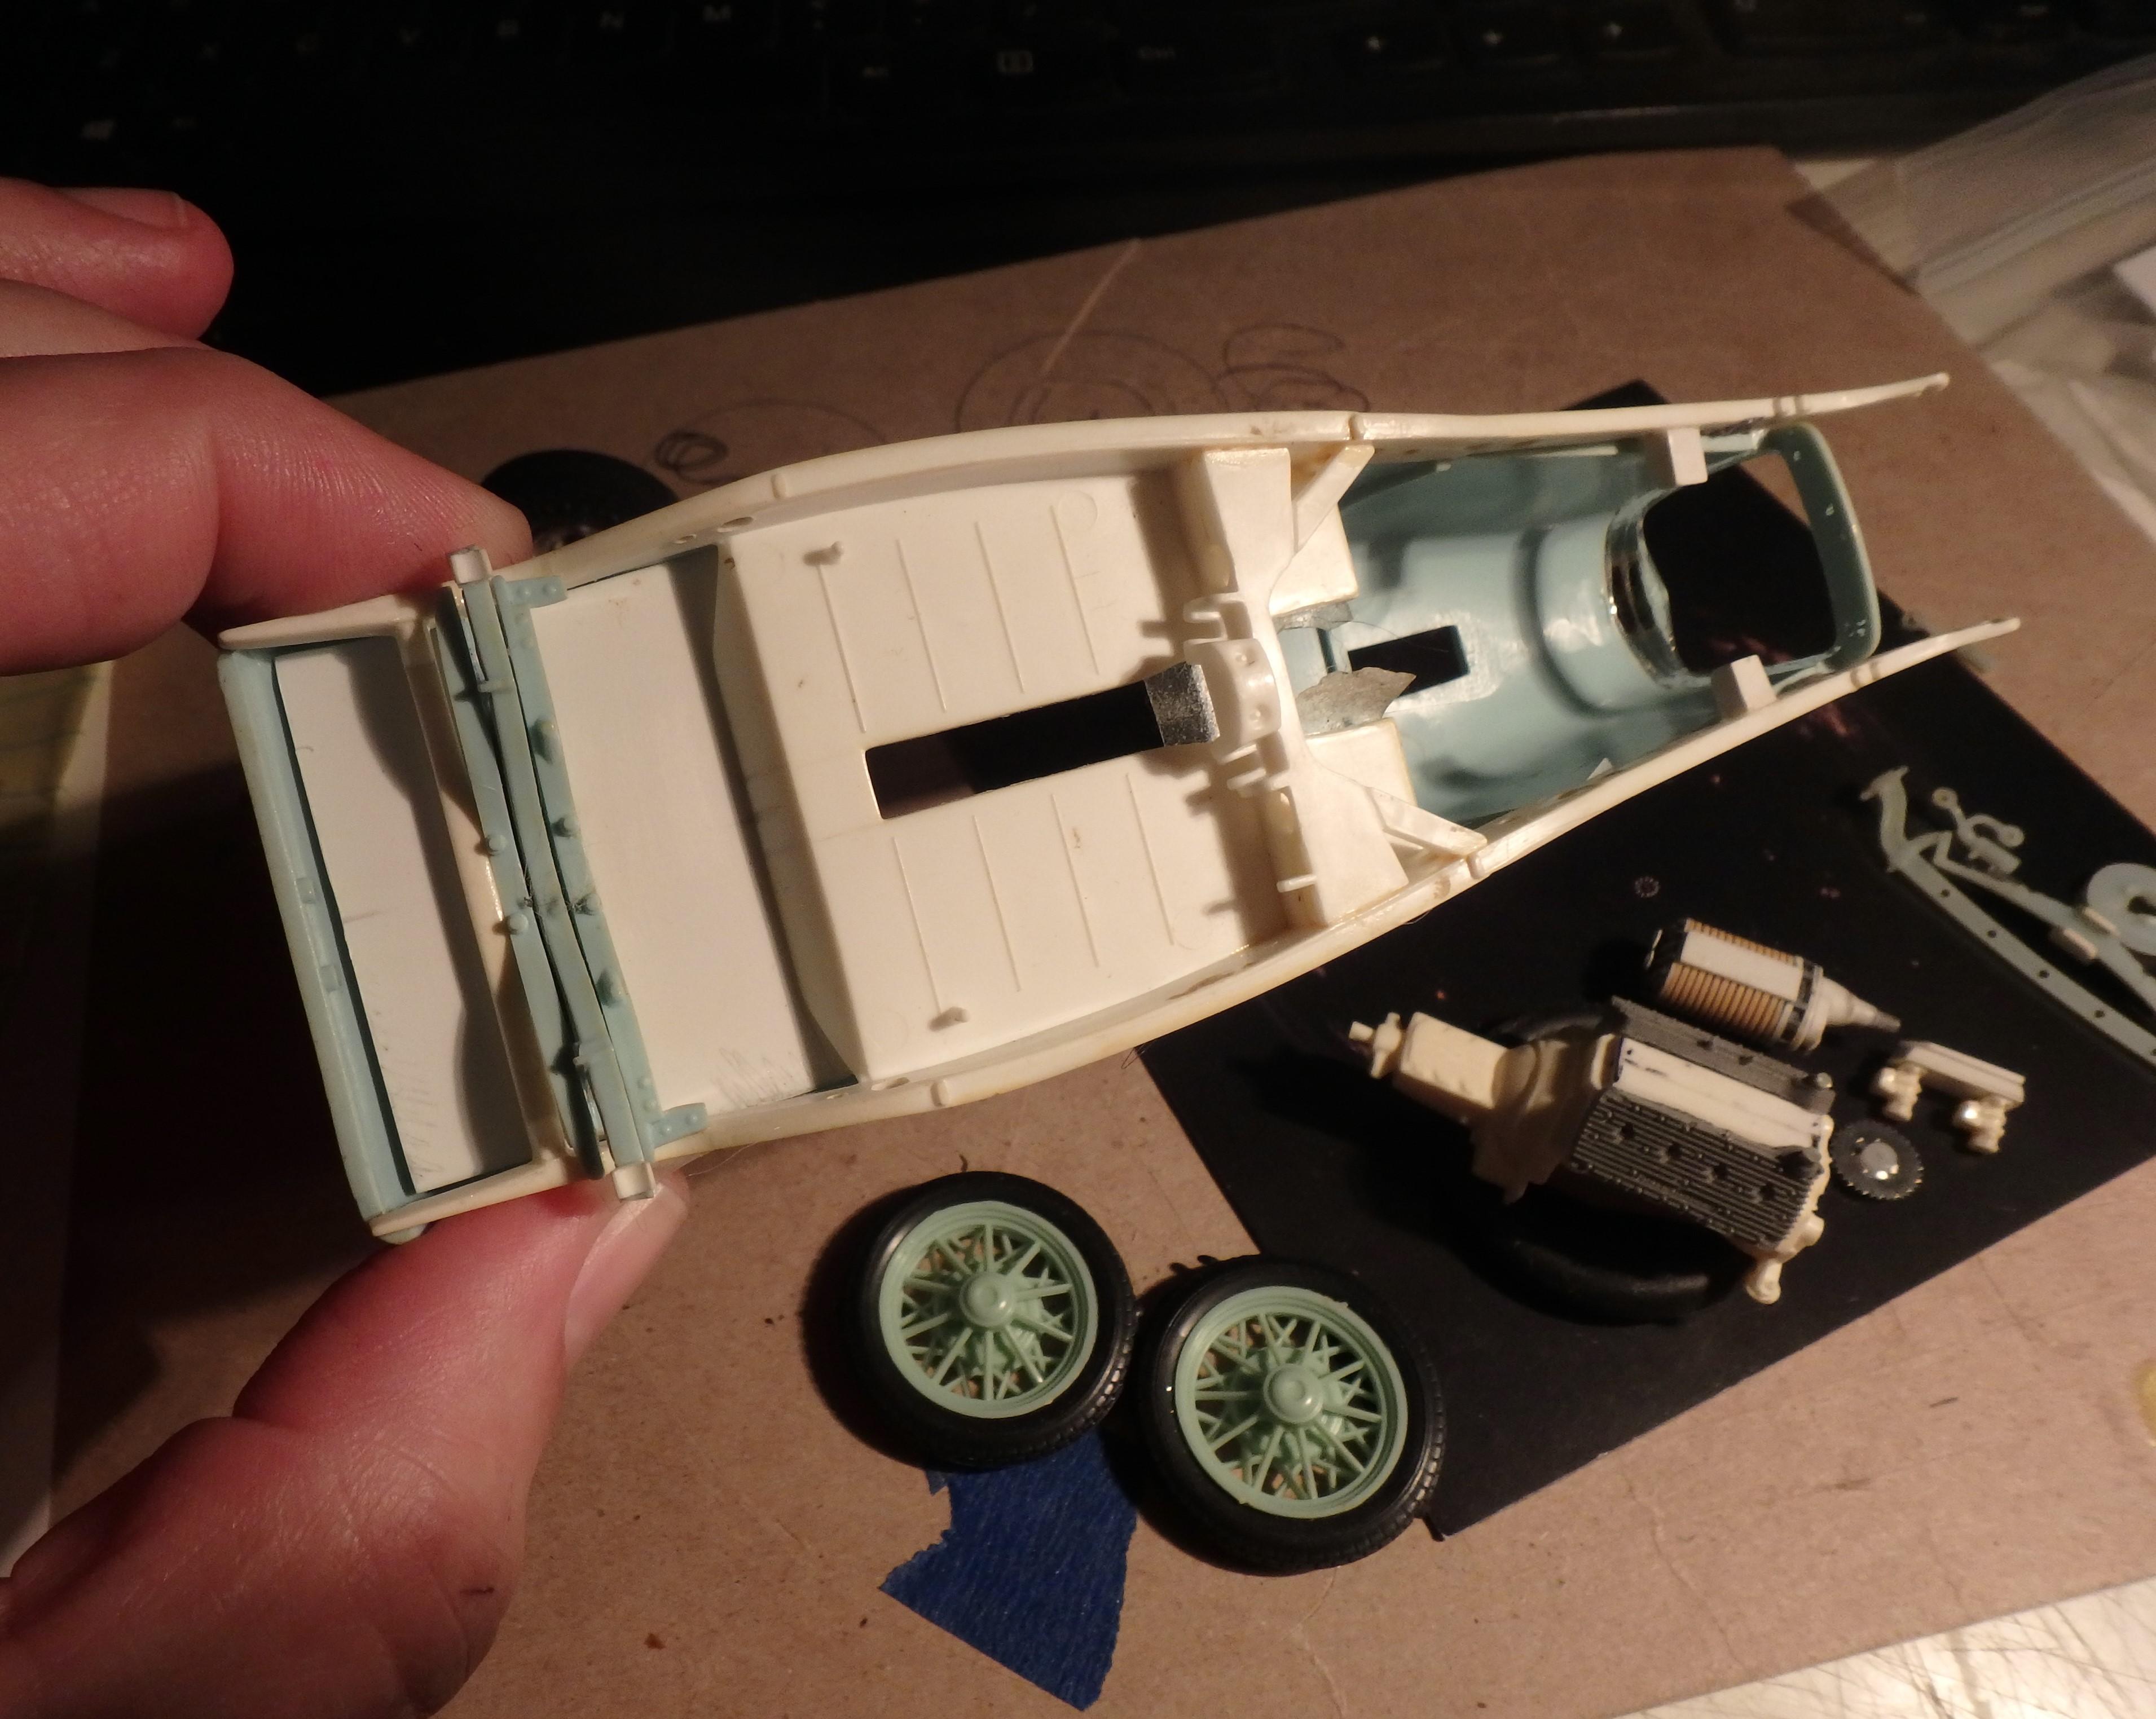
Took the Halibrand rear end from an Attempt One kit. Narrow Firestone drag slicks are a black resin product from R & M
-
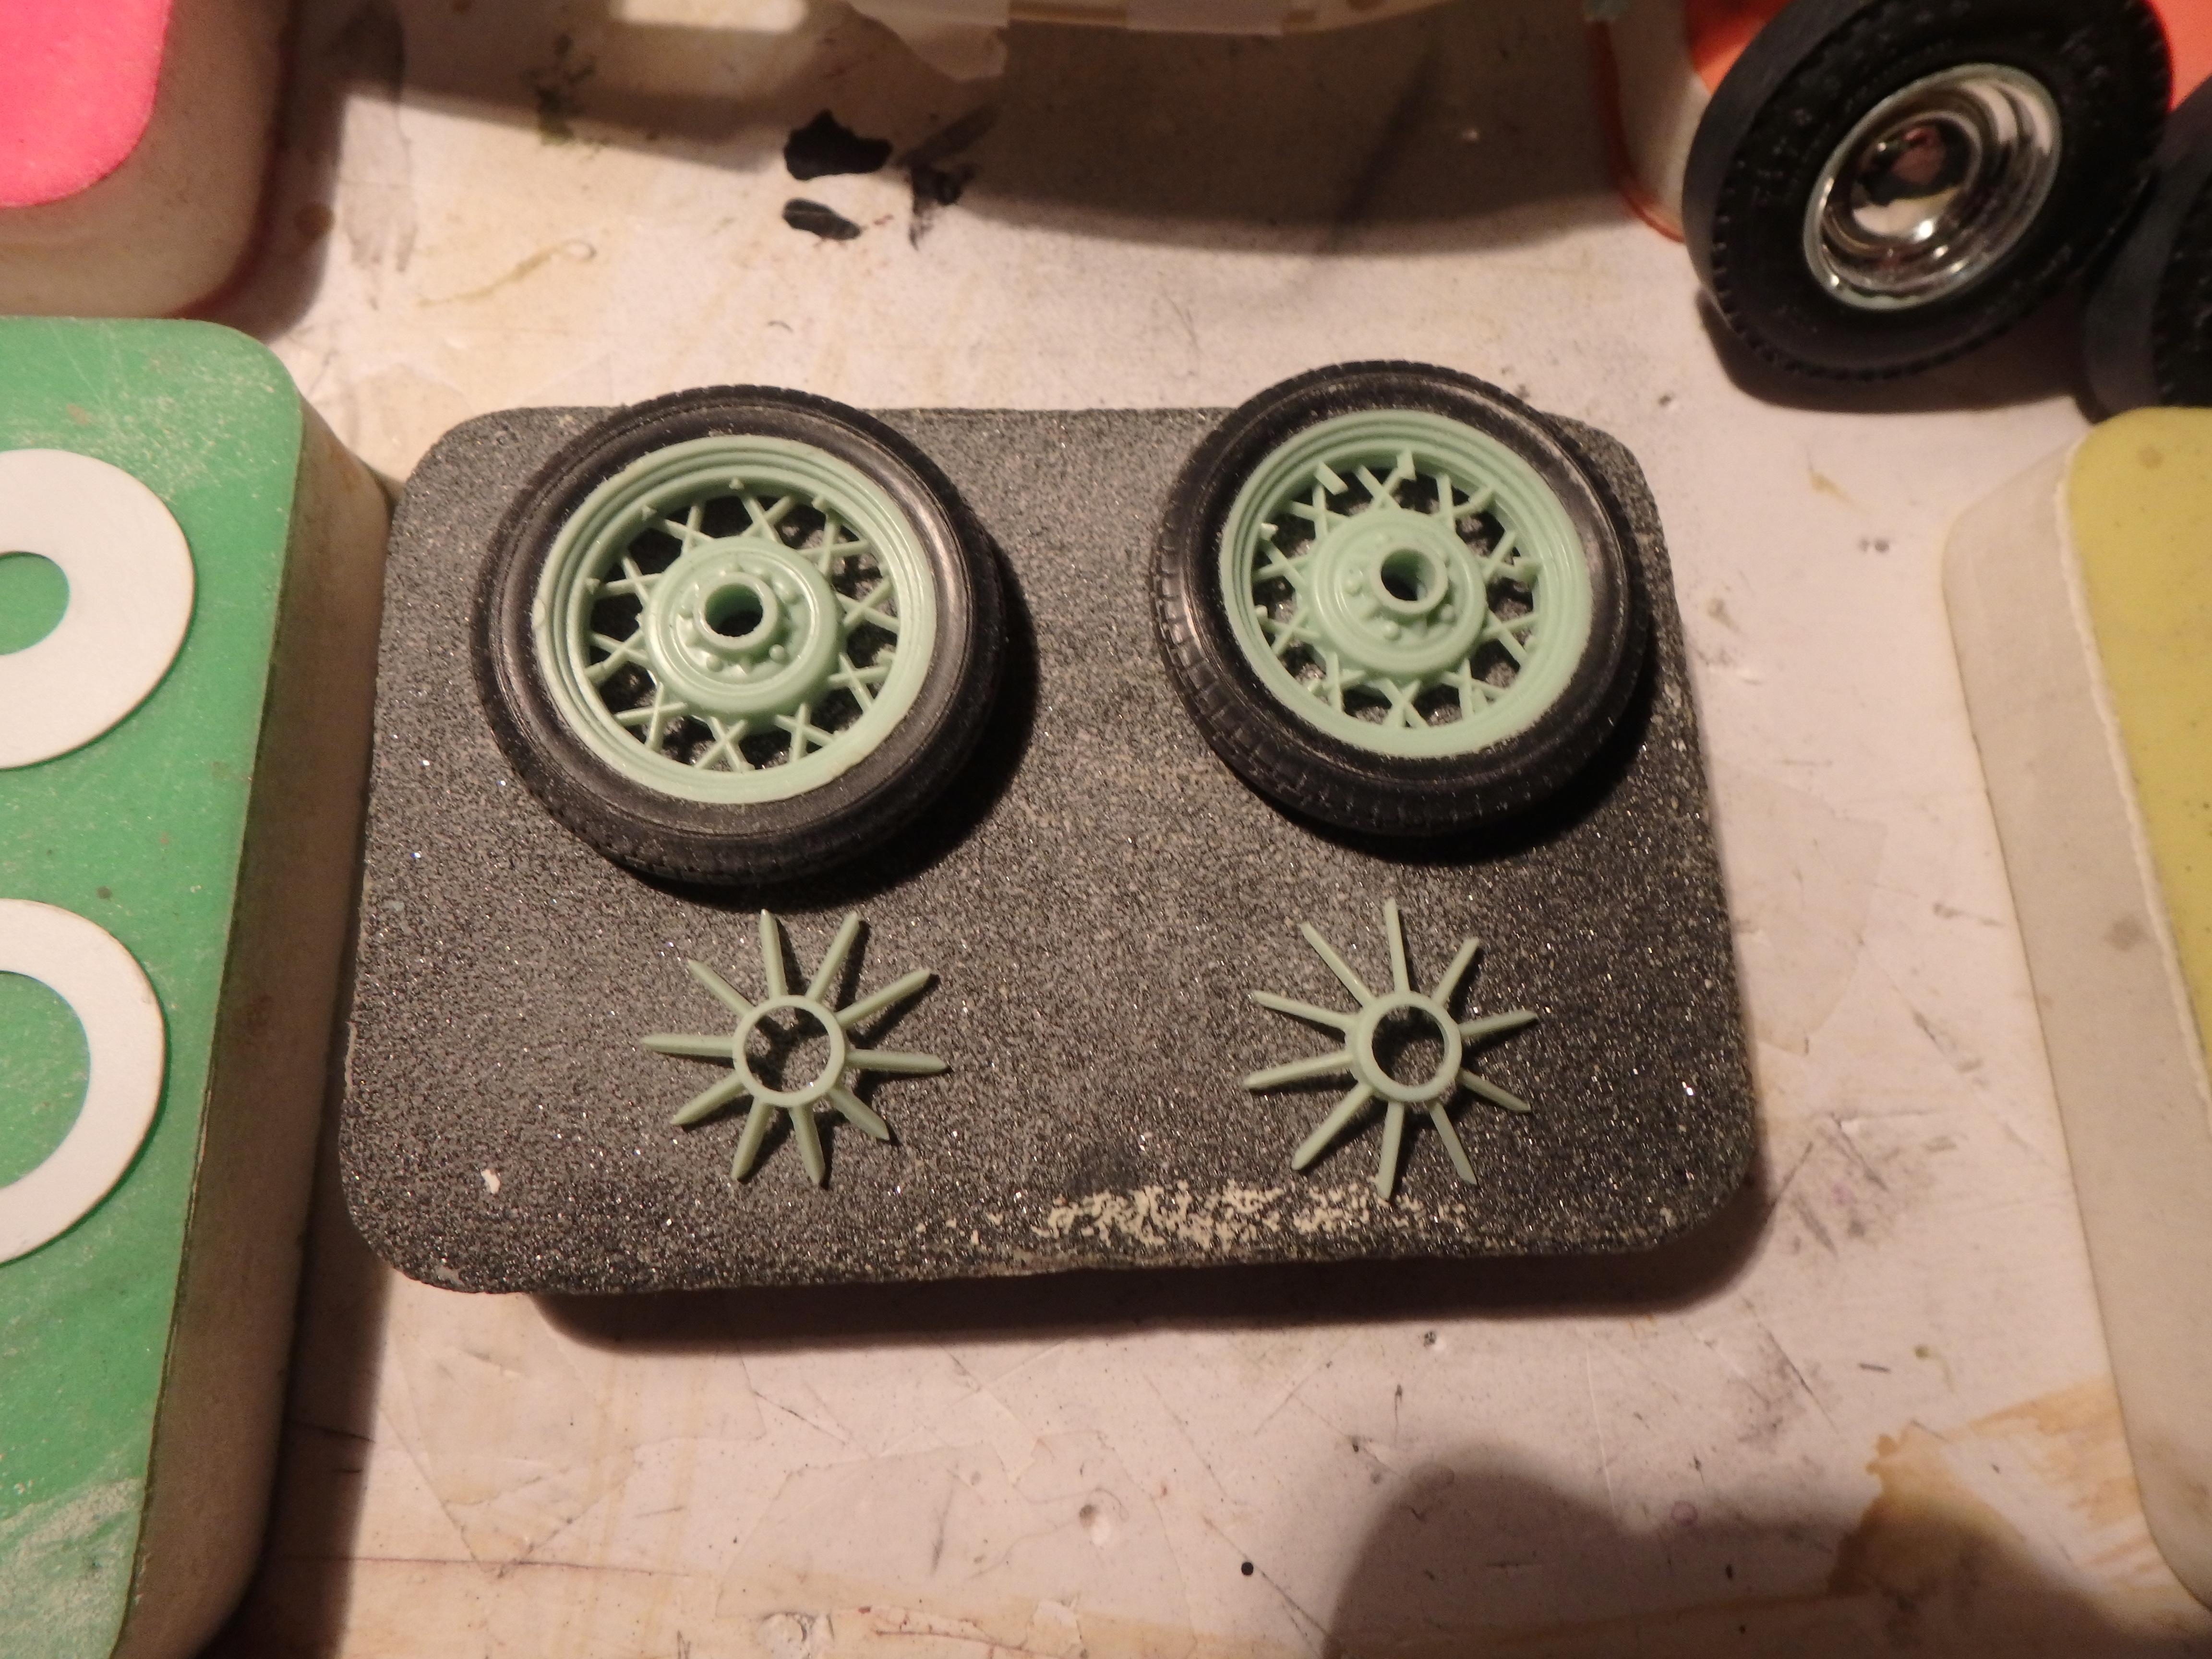
Roadsters in this era often used moon disc type wheel covers on narrow implement tires, so I took spoked kit wheels from the Monogram 31 Ford and removed the protruding spokes from the front wheel to allow the flat discs. The rear wheel has some nice bolt detail that may look ok.
-
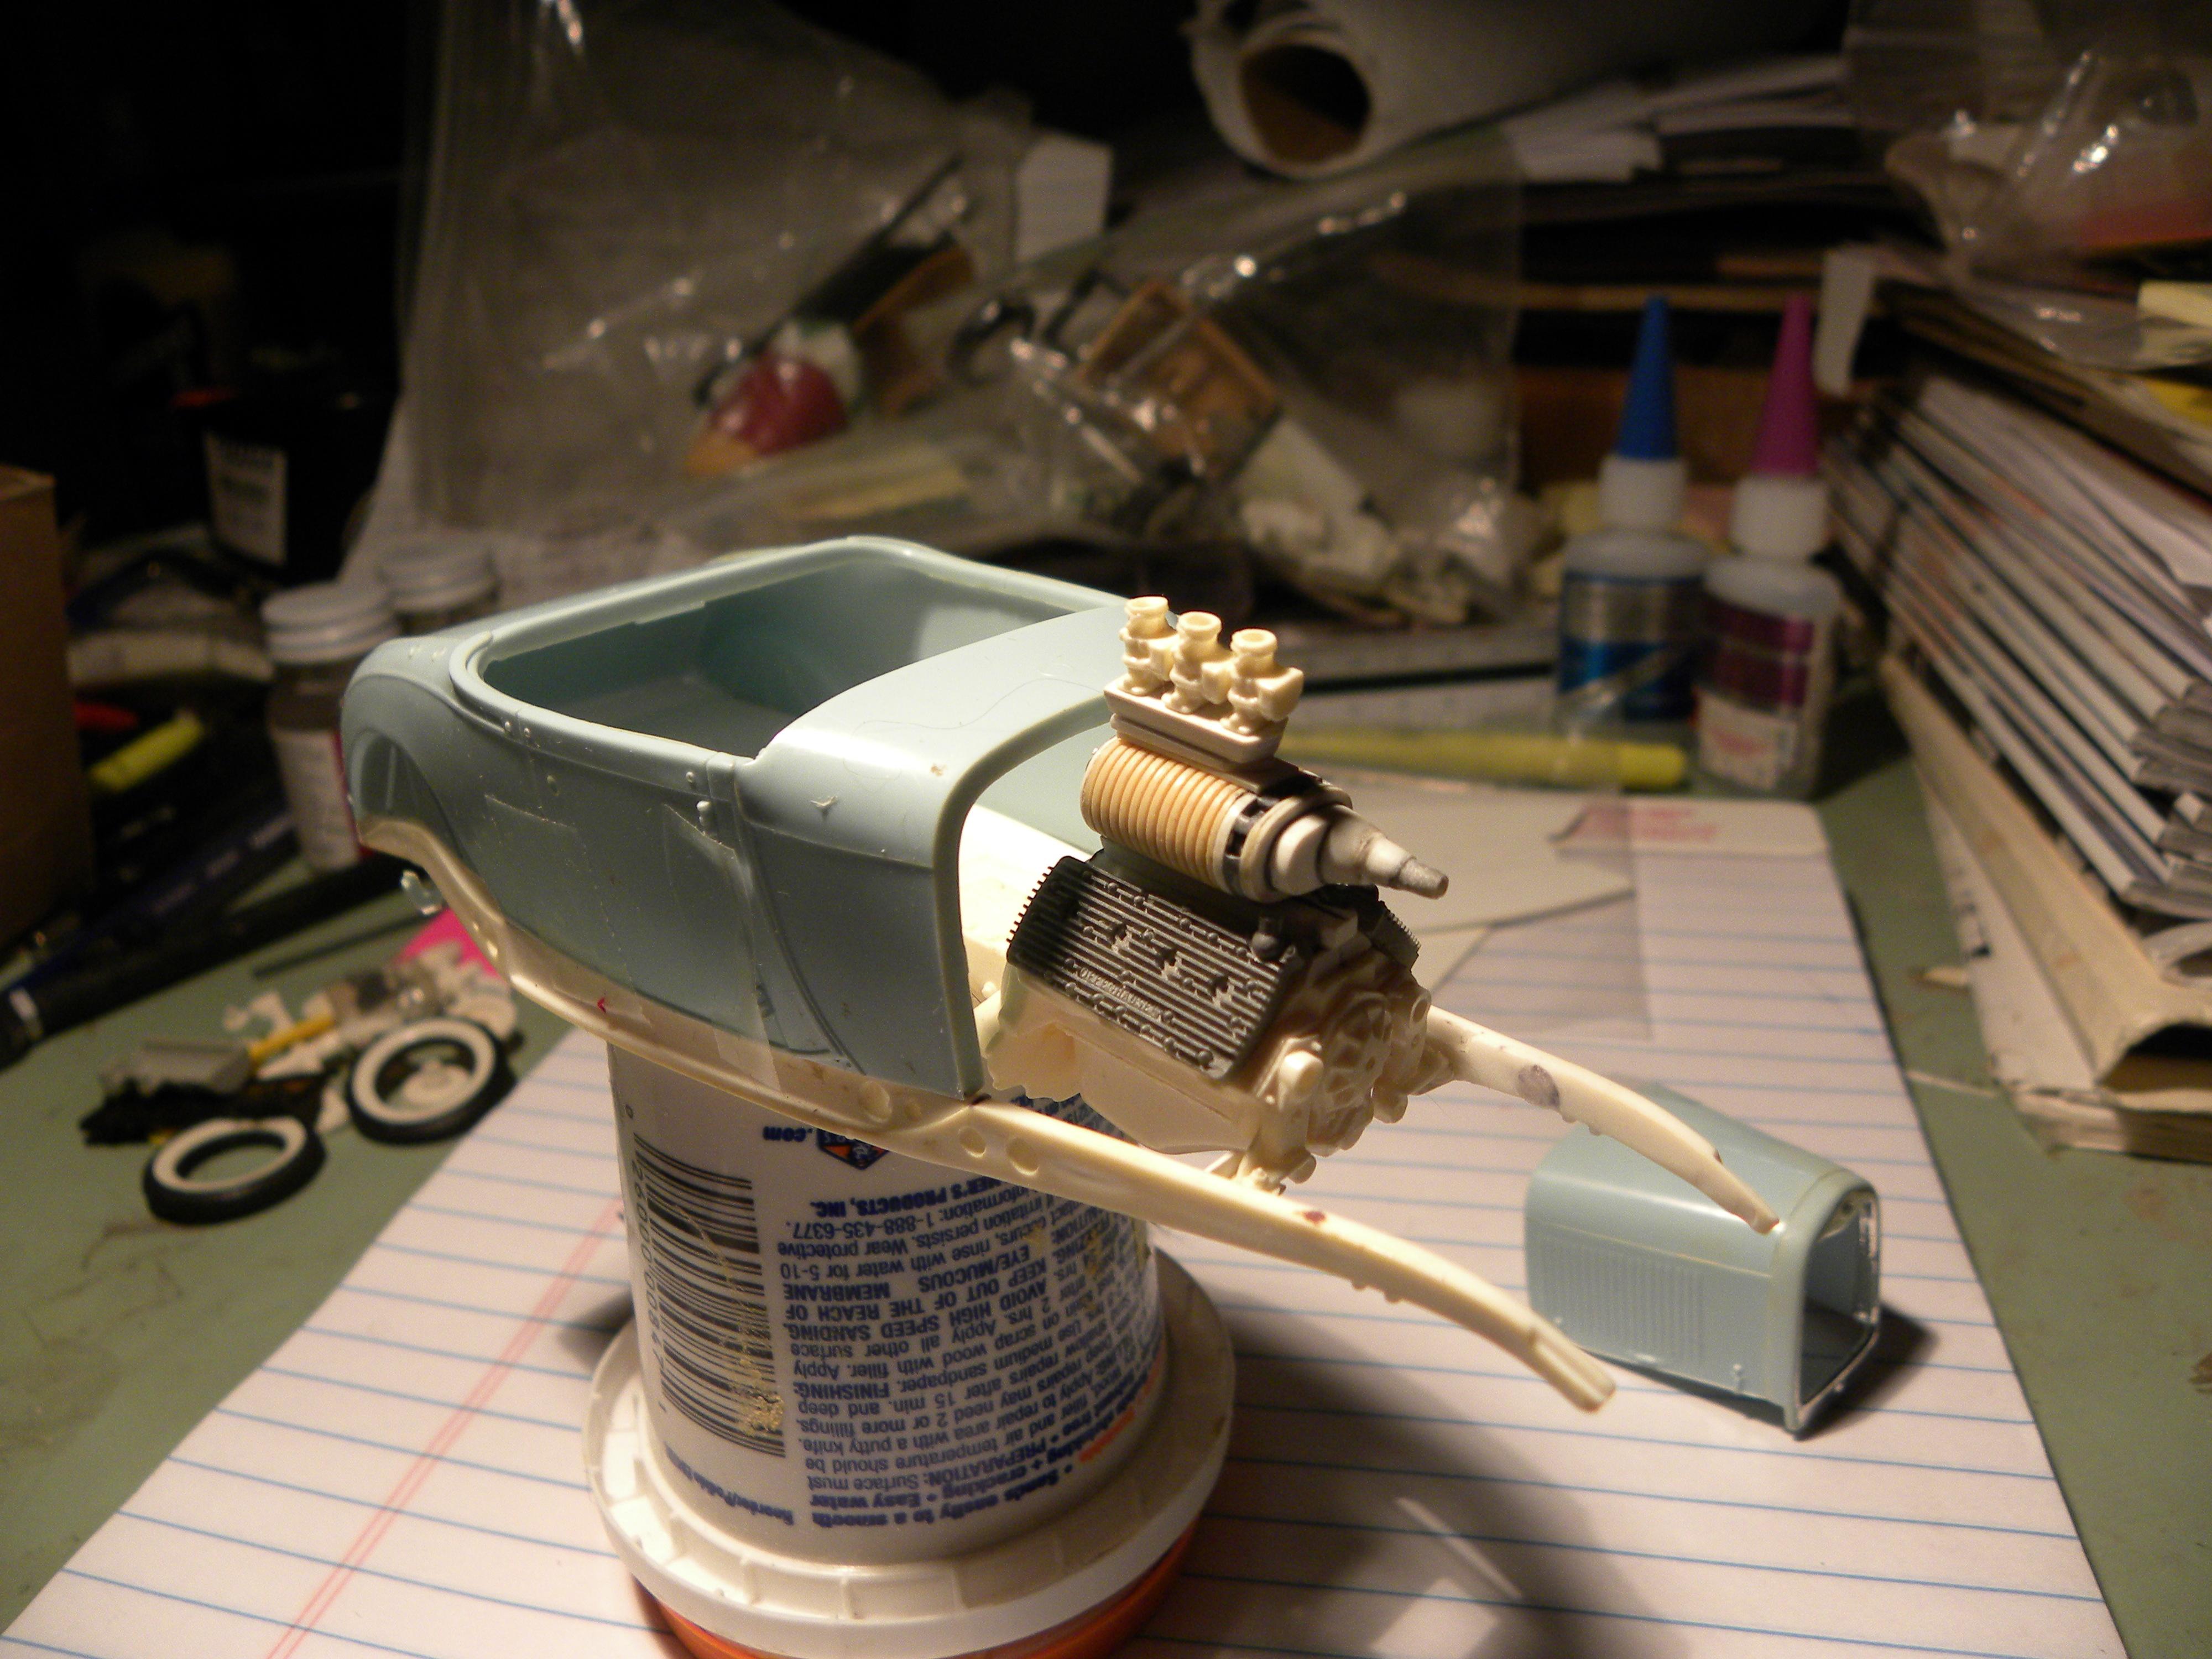
Looking at engine fit to the hood with the scratch built blower fit.
-
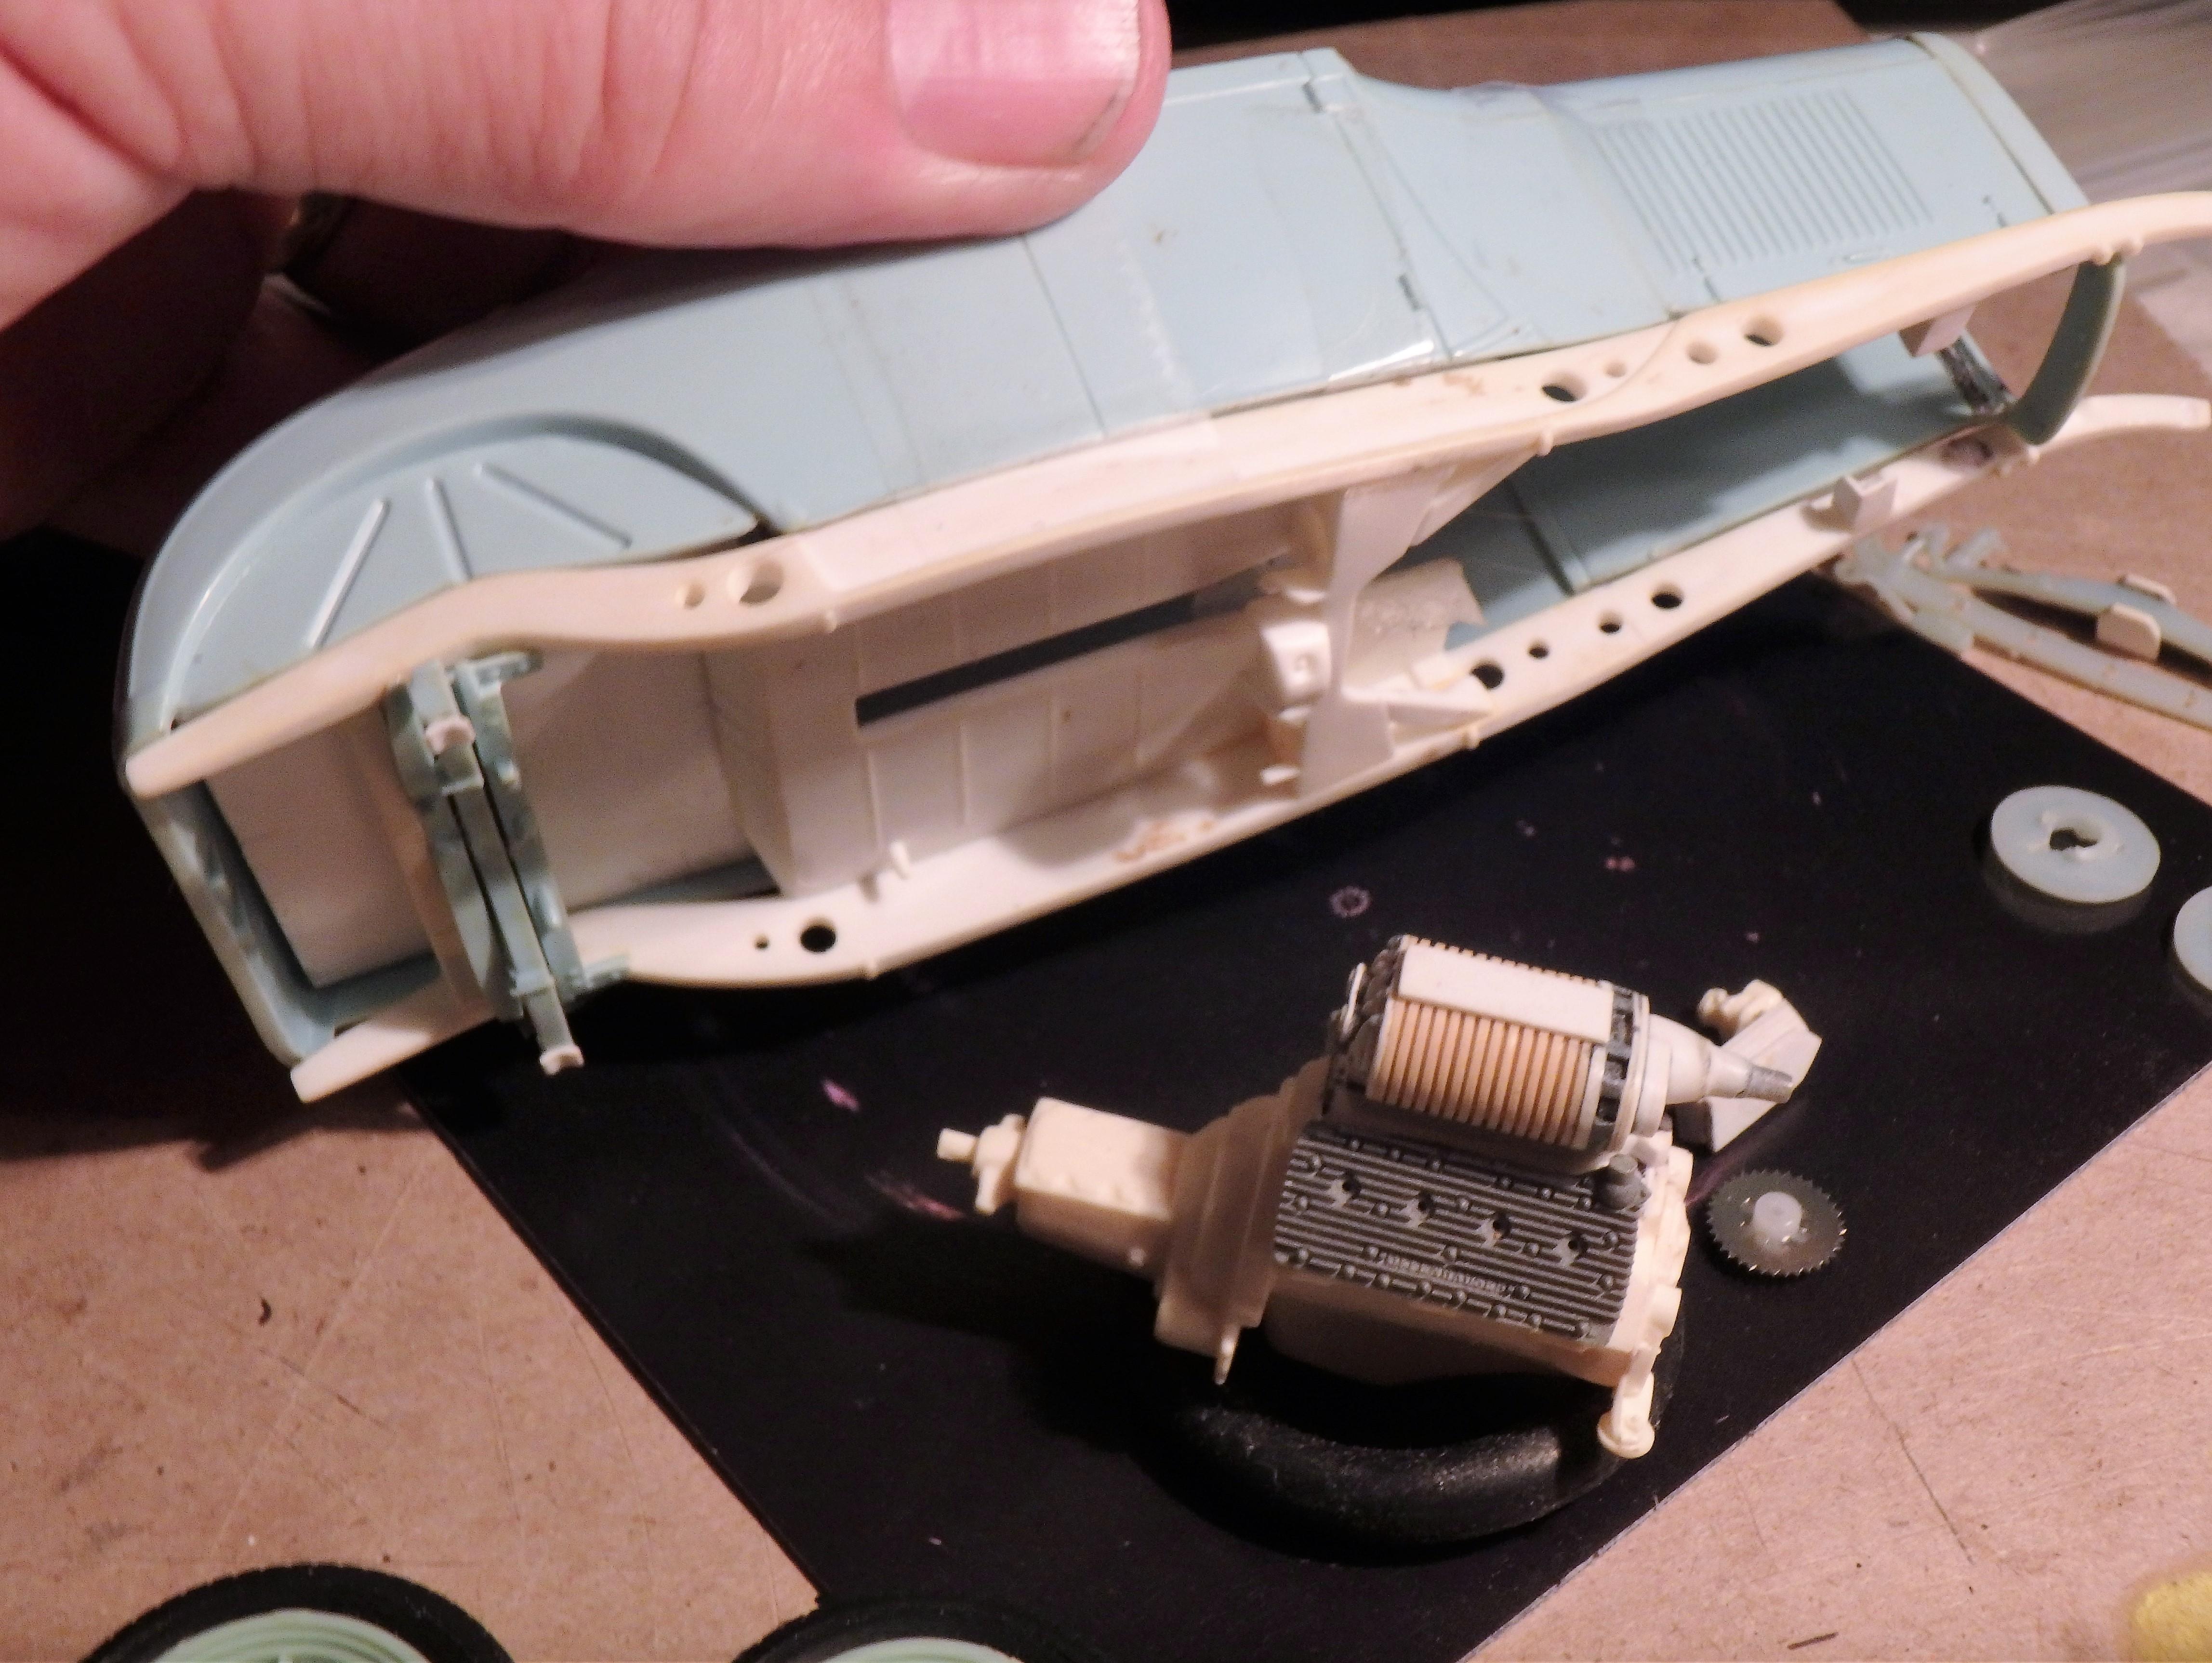
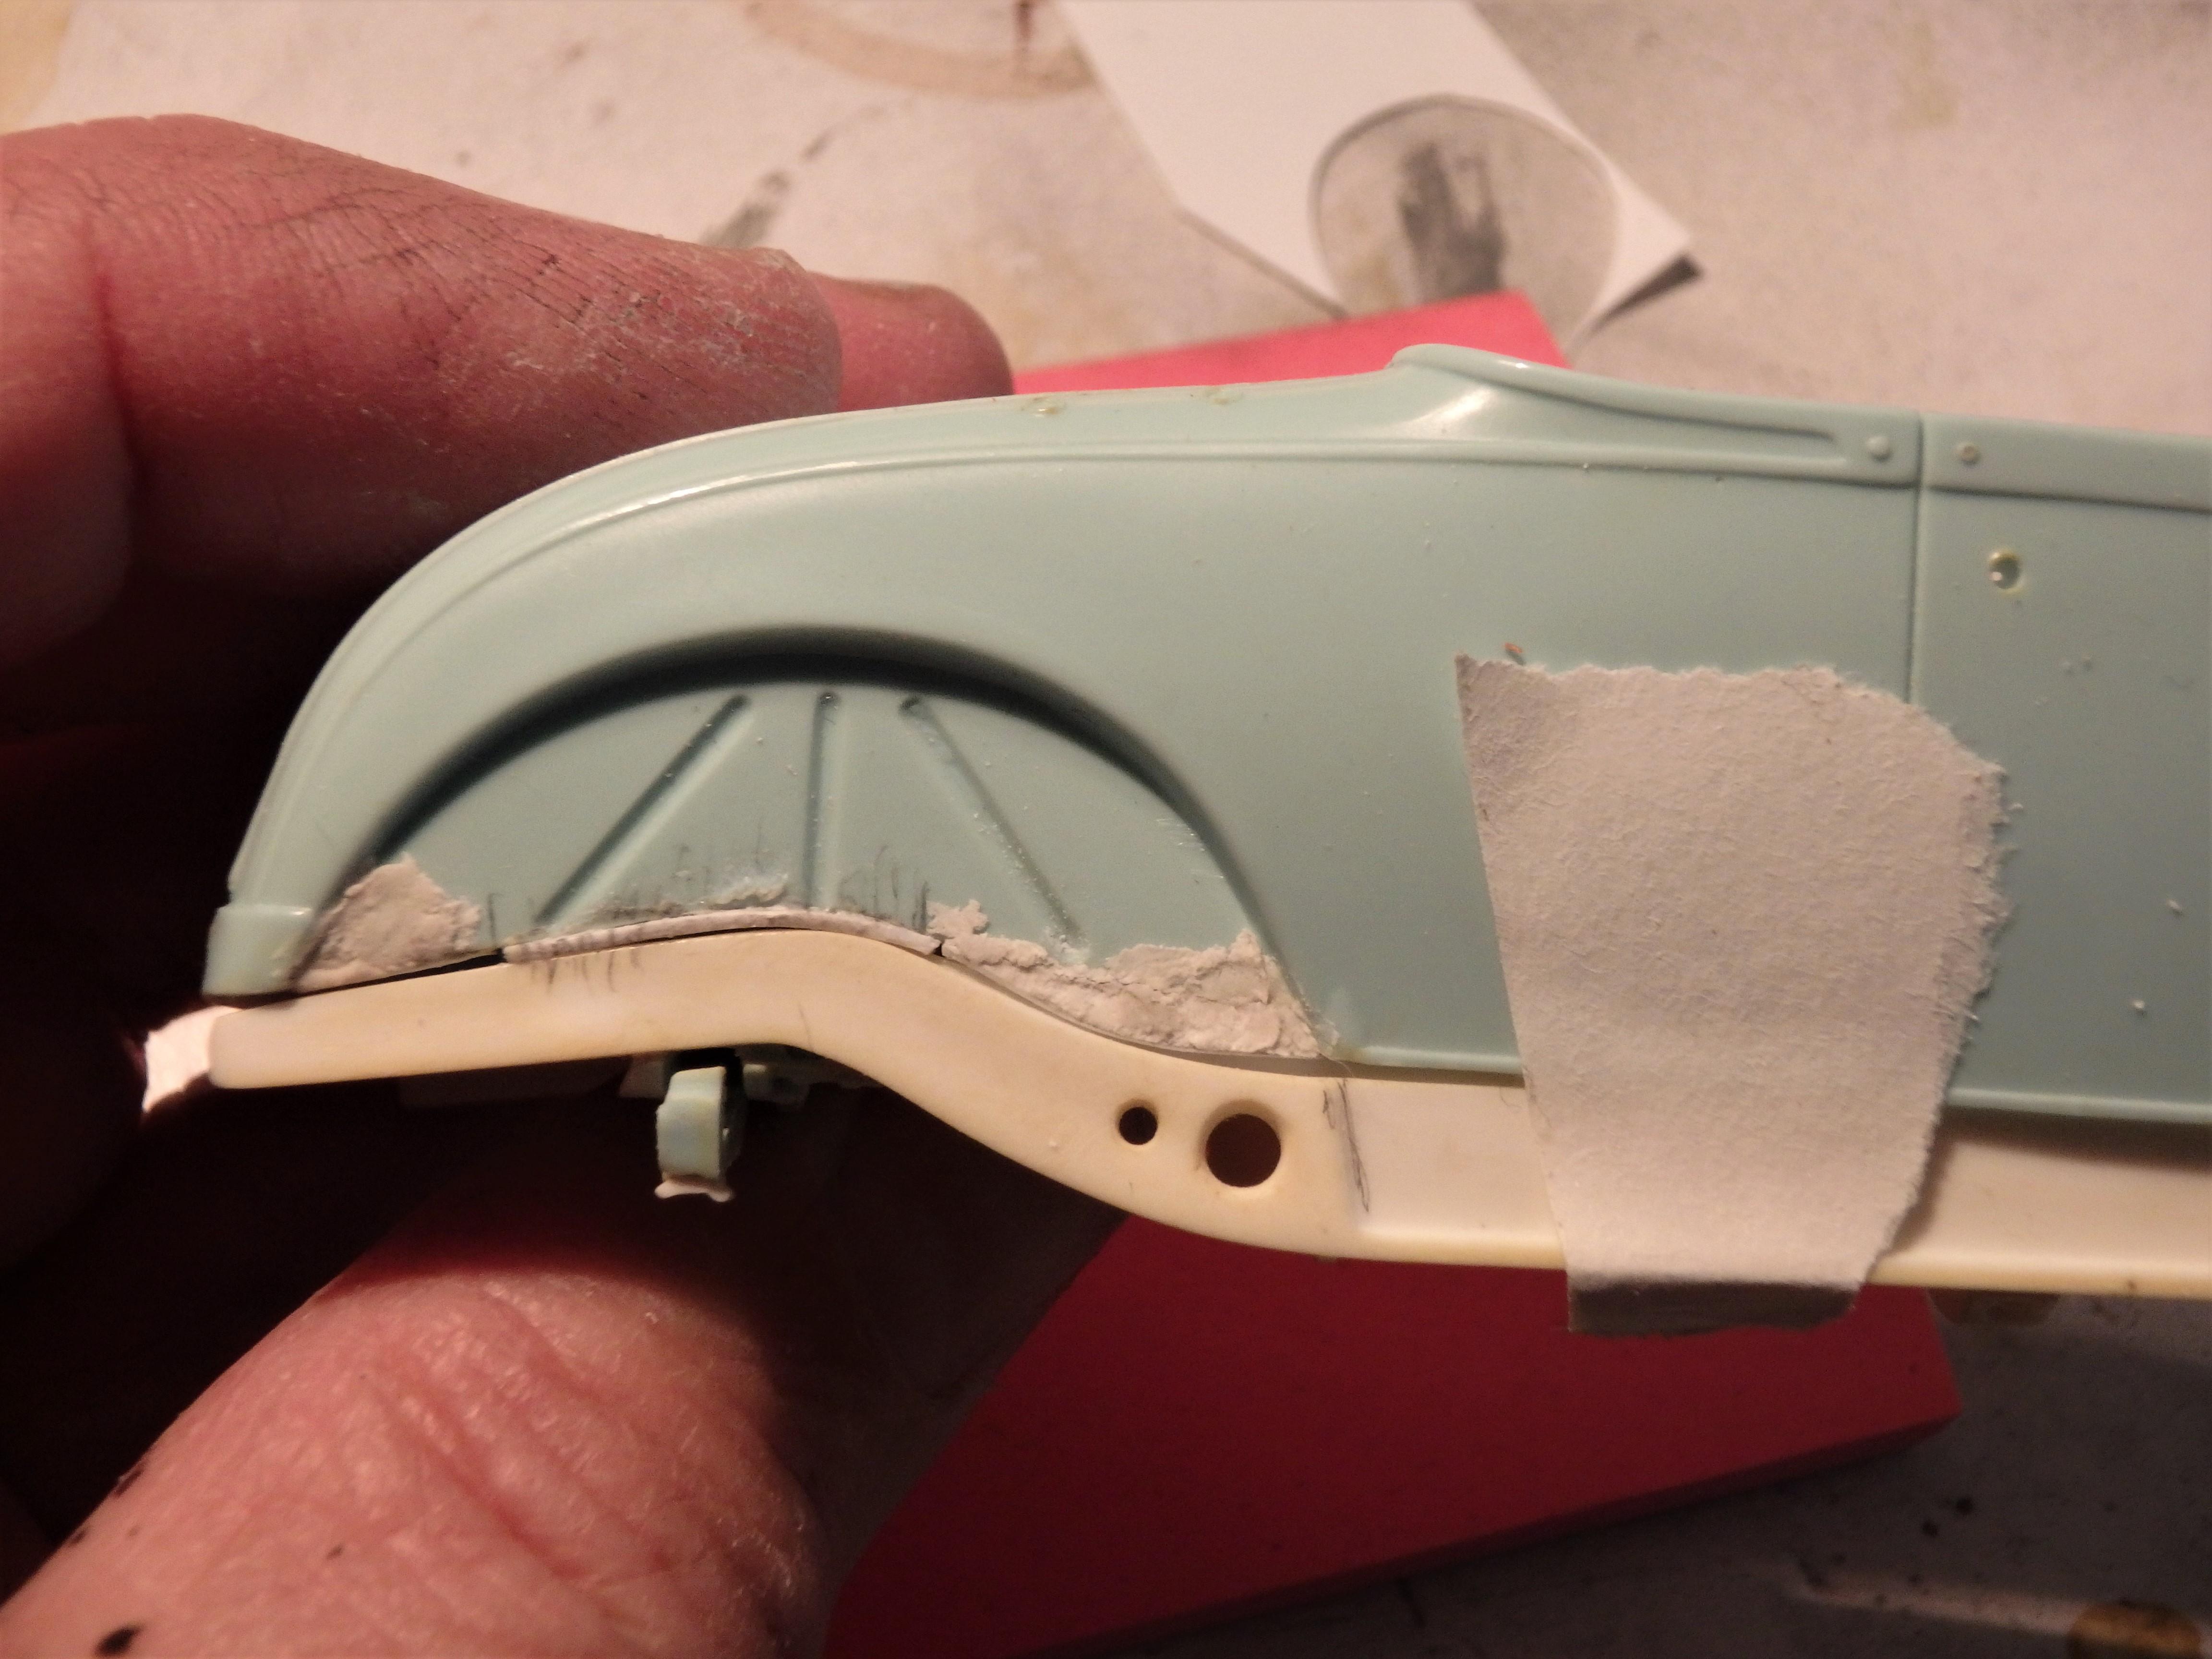
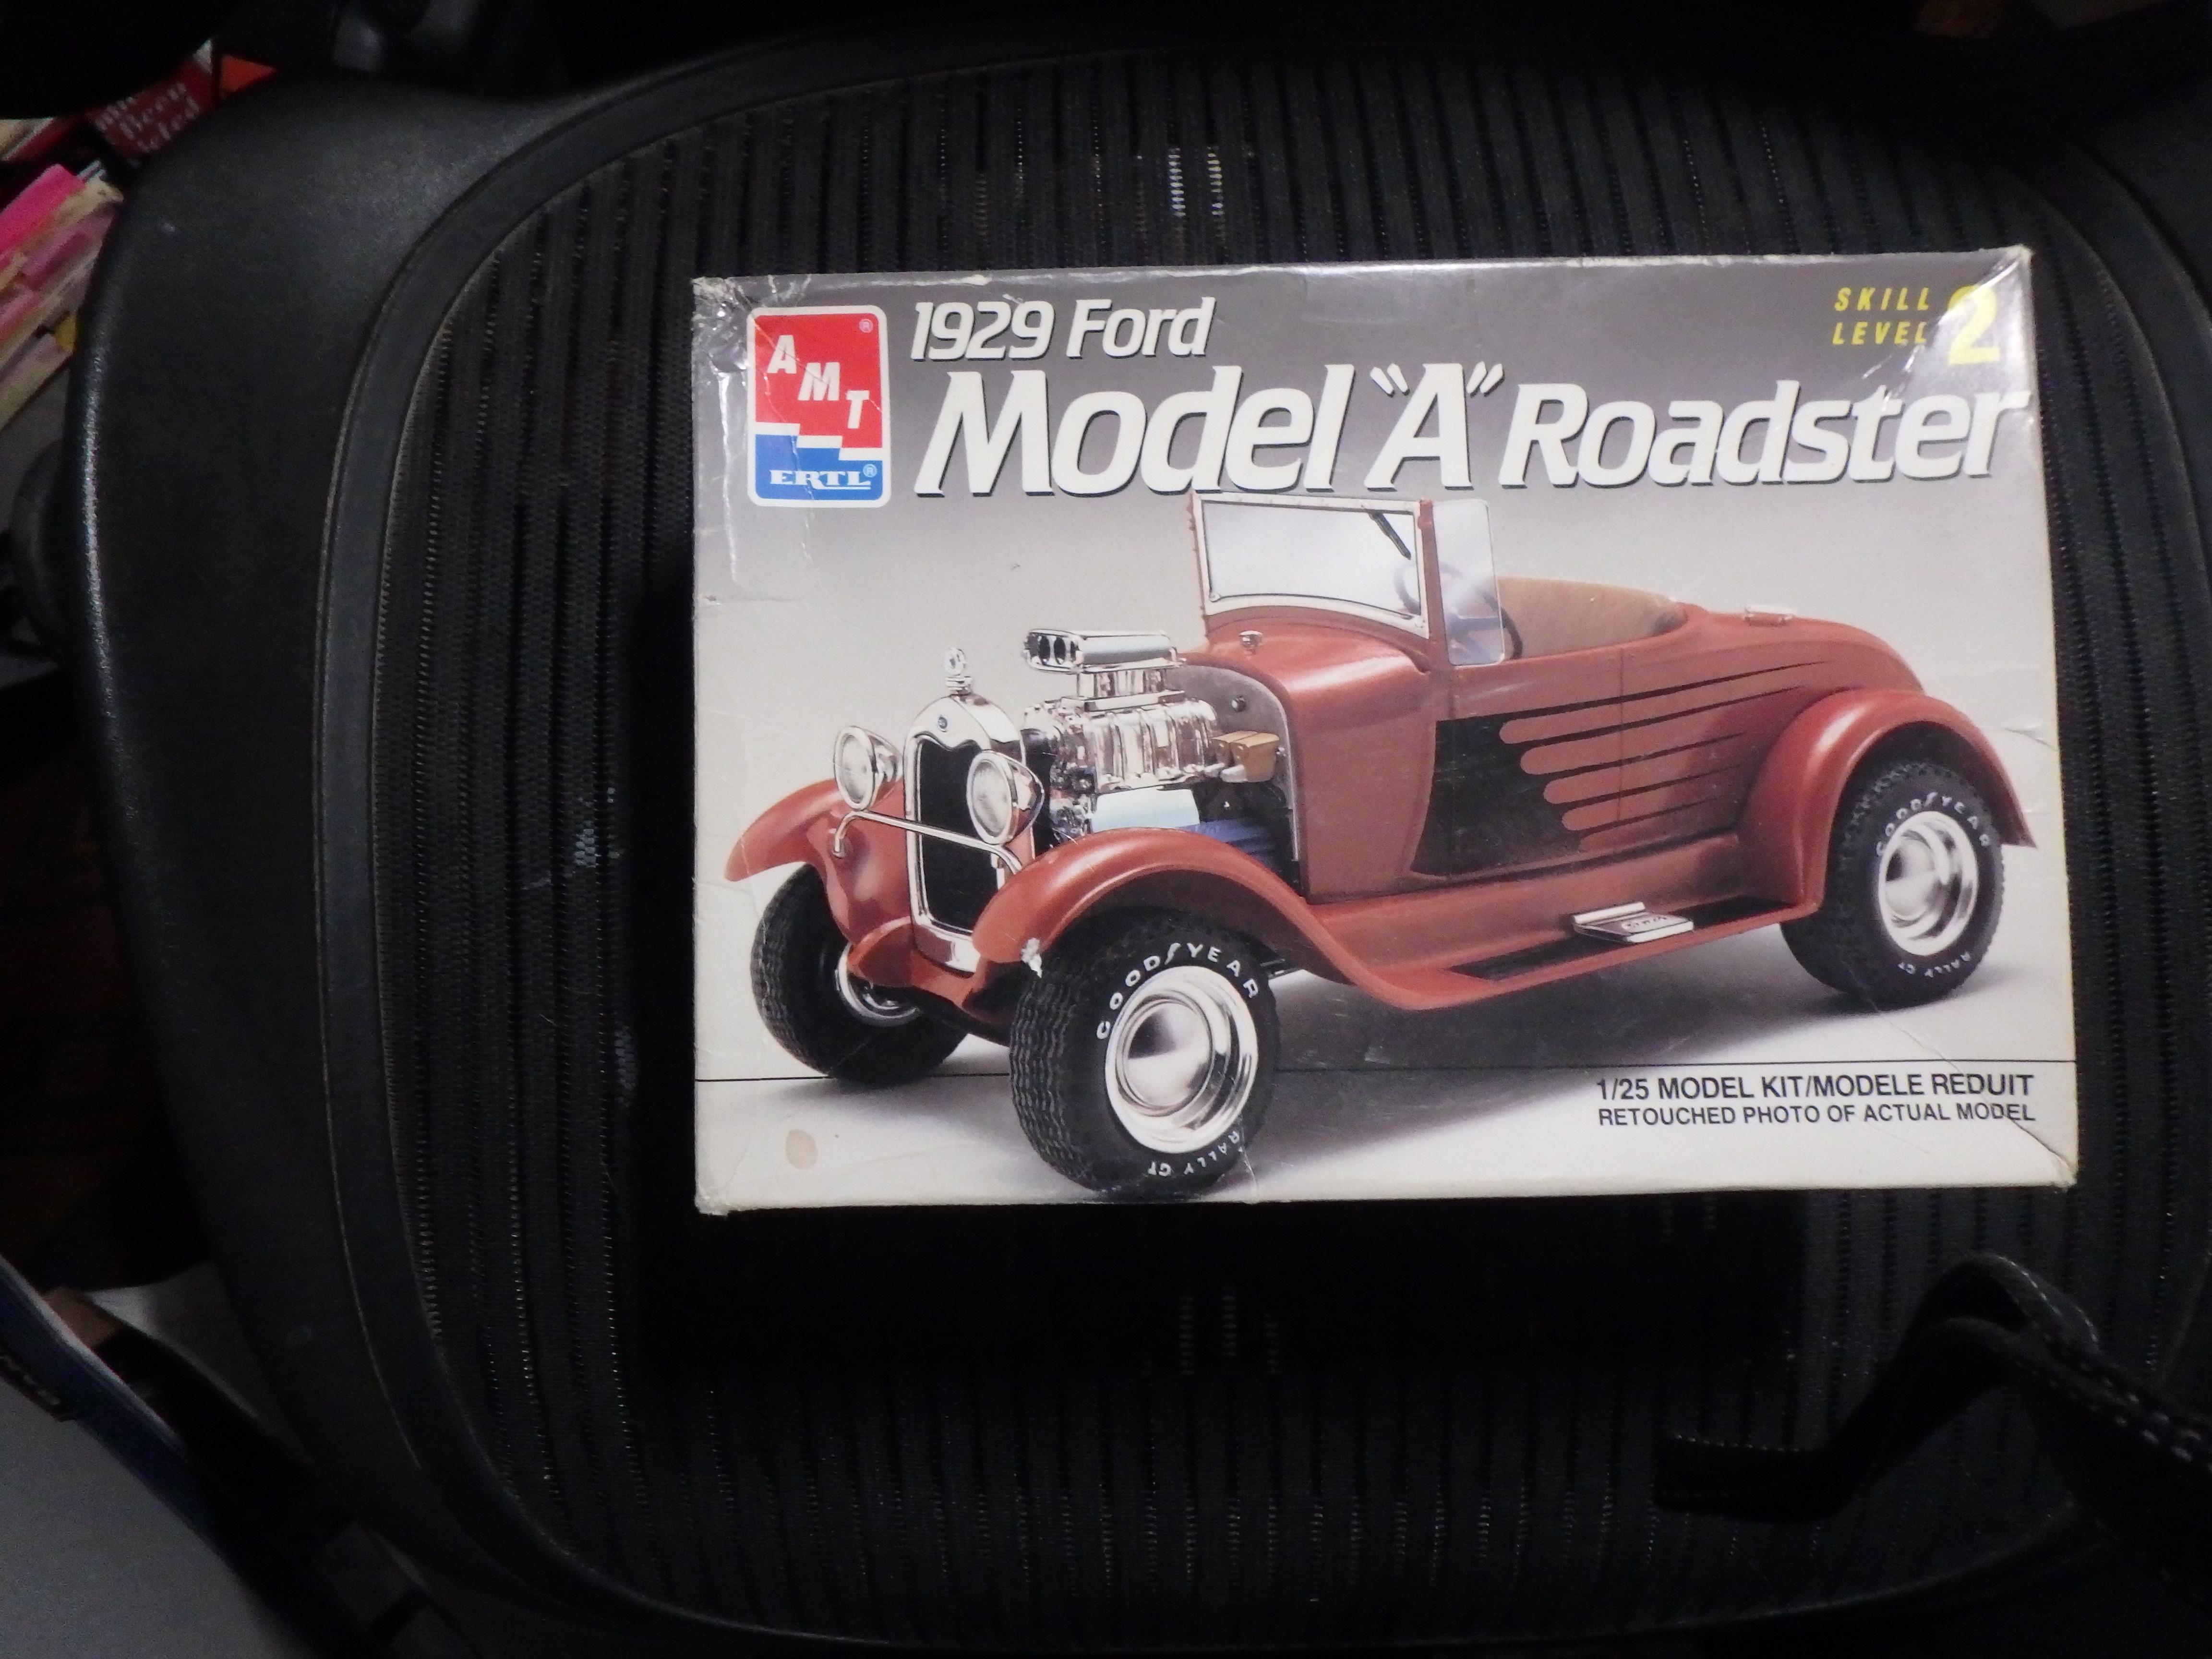
I picked this one back up recently while waiting for decent paint conditions on other projects. Started the build years ago but stashed it away until I figured out what to do next, saved the progress pictures and retrieved them. I had several old AMT 1929 roadster kits that I wanted to try a fifties style roadster for dragstrip with. This could go in the WIP Drag Racing Models, but is replicating kind of a vintage show car as well. After trimming and drilling out lightening holes in a Revell 32 frame I set about fitting the rear wheel fender wells to fit the frame contours. The engine is a Replicas and Miniatures resin flathead block with Model Car Garage valve covers (which I managed to chip some of the fins off while fitting the engine so I'll have to replace them). Way back when this started, I attempted to scratch build an old fashioned Italmechannica blower...(before R&M produced their very nice resin SCOT blower). I set this project aside when I hears the were vintage SCOT blowers in the very old AMT 57 Chevy and R & M was working on one.
-
Well done!
-
Nice work!
-
Very cool. If you want to sell any vacuum formed shots let me know. Like to do a belly tank in 1/25th myself.
-
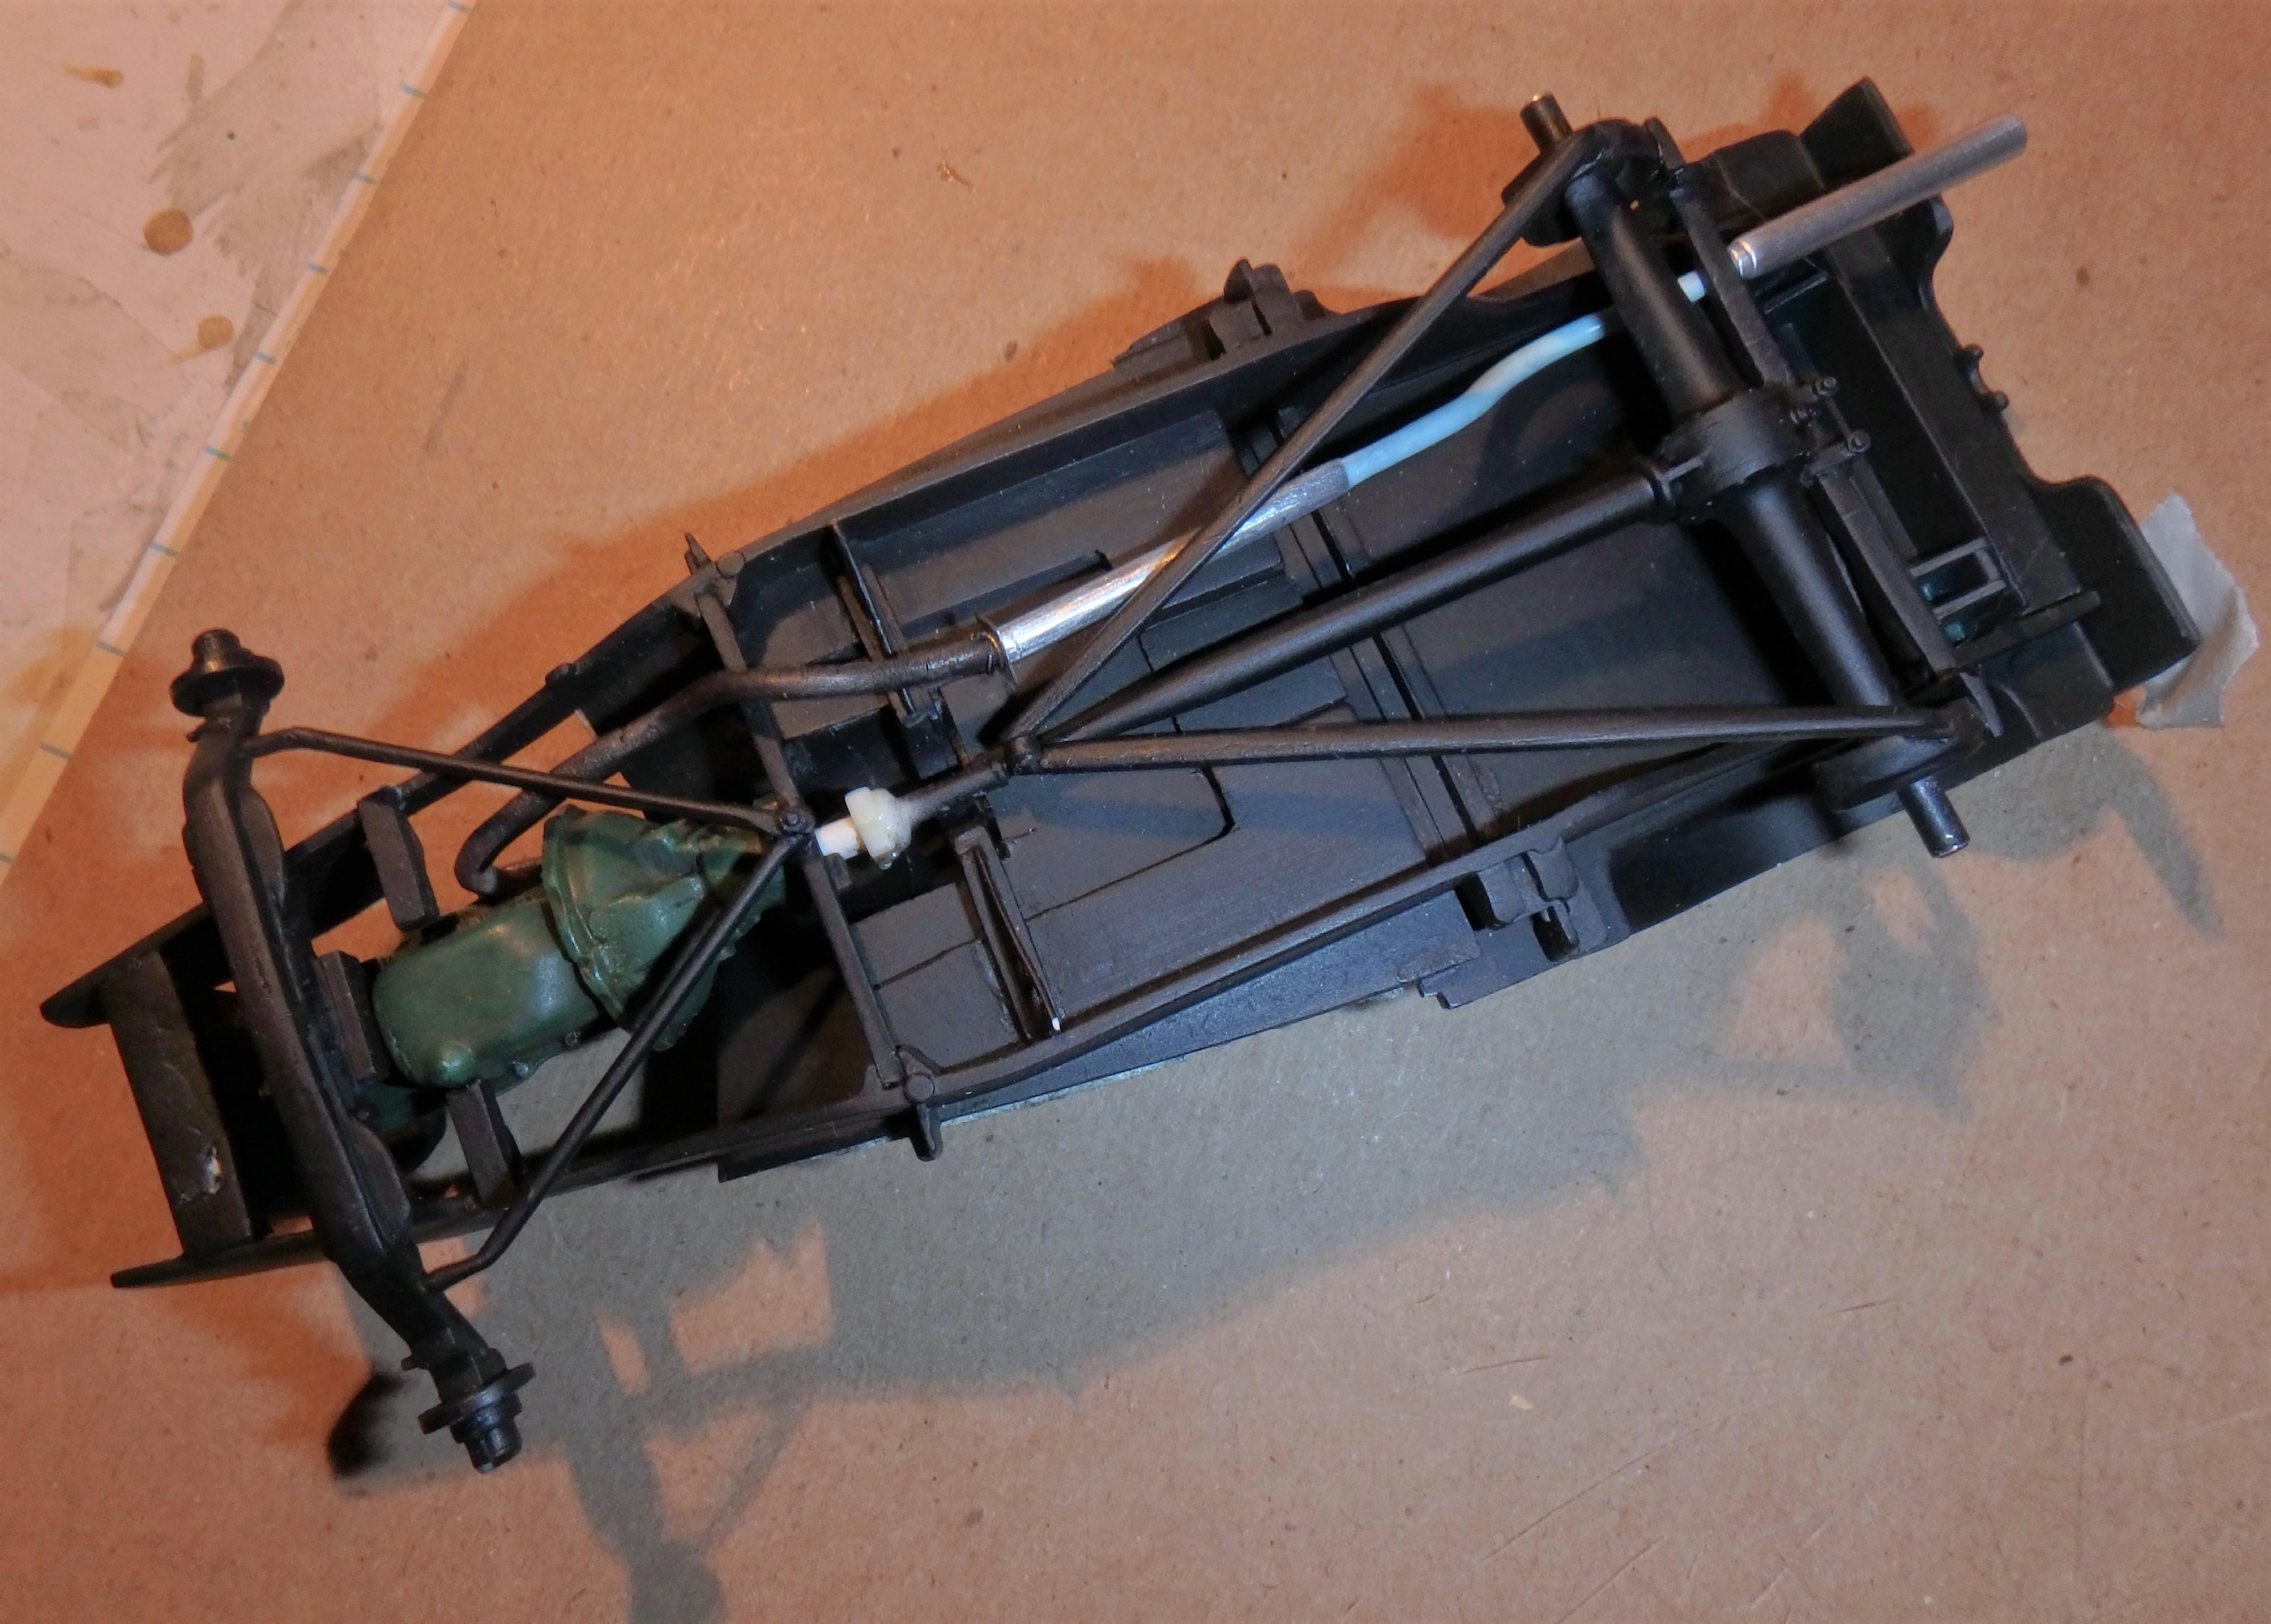
Worked on chassis and suspension, measured and routed exhaust pipes for the muffler...this kind of work is tedious and really bores me to no end, but has to be done.
-
Now that I have an engine block to work with I made a driveshaft , and can get some other suspension chassis work done. Exhaust headers and mufflers are in black base coat for ALCLAD.
-
Rob, looking good. Can you tell me what metallic green paint you used on that engine block...I'd like to get some for a project. On the career life thing...I rarely wish bad things for anyone but I have nothing but ill will for the company that bought out your former employer, and hope they suffer the consequences of terminating you and your fellow workers so abruptly. They surely will suffer from not having the skilled people that made the company worth acquiring in the first place. Wishing you all the best as you enter the next phase.
-
Can't post pics with posts after phone update
SpeedShift replied to styromaniac's topic in How To Use This Board
Don't think you can. Try searching on Google for tips on accessing Google picture files using a Galaxy. Google Photos: The Best Tips and Tricks | Digital Trends Google Photos lets you share albums with groups of people, who can also add to a common photo collection for ongoing updates of events and memories. You can share directly to anyone with a Google account. For everyone else, you can create a sharable link. When you share photos or albums, a link will be sent to the people you share with, but anyone who has the shared link can view the shared album or photos. If you share an album that automatically adds photos, anyone with the album link can view added photos in real time. Launch the Google Photos app and sign in. In the menu on the left, tap Photos. Tap a photo you want to include in an album and tap the three-dot icon at the top. Choose add to Album. Tap + New album or choose an existing album. Name the new album. Tap Add photos and choose other pictures for the album. Tap the Share button to invite others to view the album. If your recipients do not have a Google account, they can still view the album and add new photos to it via a link. To share that album, tap Share at the bottom of the screen, and there you will see some third-party apps you can also share those images with, including Twitter, Notes, AirDrop, Messages, and Mail. Alternatively, you can create a link to share with other people or apps. How to sync Samsung Gallery with Google Photos - Android Forums at AndroidCentral.com A Beginner's Guide To Google Photos -- Store, organize, and share your photos for free! (theedublogger.com) Google Photos guide: Everything you need to know (androidauthority.com) using Google Photos in forums using - Google Photos Community Very true. The below method gets no awards for efficiency, has the advantage of keeping the content on the Google cloud. Tried Flickr, Imgr, etc, all have their unique issues. Crop, do limited editing from within Google photos Download the file(s) Re-upload to Google Drive Right-click the file(s), select 'Get Shareable Link', which will be in the format of https://drive.google.com/open?id=1uN8q2gBGICUjTP4IlRrjC2LrDfsrJpgv Substitute, 'https://drive.google.com/open?id=' with 'http://drive.google.com/uc?export=view&id=' & append the unique file name(s) Now you can use this URL to insert link into a forum posting -
eBay took action against the seller, and because he could not provide a tracking number, PayPal refunded me the item cost plus shipping cost, and will probably bill seller.
-
Can't post pics with posts after phone update
SpeedShift replied to styromaniac's topic in How To Use This Board
That might be a good workaround.....see if your individual images in google have URL links.....can you see and identify (as in right click) on the images in google and see if they have a URL link, and then copy and paste the URL link address ........ An example from FOTKi, It should start with the http: https:// ...................and it continues with : images34.fotki.com/v1623/photos/8/4112148/16319951/mockup2-vi.jpg When pasted in the insert other media, (insert image from URL) it looks like this: https://images34.fotki.com/v1623/photos/8/4112148/16319951/mockup2-vi.jpg -
I think Revel 48 Ford coupe has Navarro flathead valve covers.
-
Can't post pics with posts after phone update
SpeedShift replied to styromaniac's topic in How To Use This Board
So you store all your photos on Google....in a photo album from your smartphone. And previously you simply clicked "Share Link", and you got a photo album link or icon to do the upload from Google. And now that doesn't work. The alternative method, " Insert other media" only connects to previously posted photos. That alternative method has two options....one "Inserts existing attachments" (and it sounds like that is working), the the other option "inserts an image from URL" which requires you have a photo service like FOTKI where you paste in an "image link" to your photo service. Sounds like something is going on with your Google account and your automatic link to your Google photo album from your smart phone has an issue...has that Google app been updated in any way? -
Can't post pics with posts after phone update
SpeedShift replied to styromaniac's topic in How To Use This Board
Hmmm....for some reason.....first try took me to a window with past pictures I've posted here on this site. Started a new response....Second try was normal....linked to my pc files to select a file folder for a picture.
-
Can't post pics with posts after phone update
SpeedShift replied to styromaniac's topic in How To Use This Board
I post from my PC not from my smartphone/Galaxy.....so I won't have a suggestion. I'll post a pic to see if something is different on my side...from chose files (not drag files) gif, jpeg, jpe, jpg, png, mp4, 3gp, mov, ogg, ogv, mpg, mpeg, flv, webm, wmv, avi, m4v Insert other media Drag files here to attach, or choose files... Accepted file types gif, jpeg, jpe, jpg, png, mp4, 3gp, mov, ogg, ogv, mpg, mpeg, flv, webm, wmv, avi, m4v Insert other media -
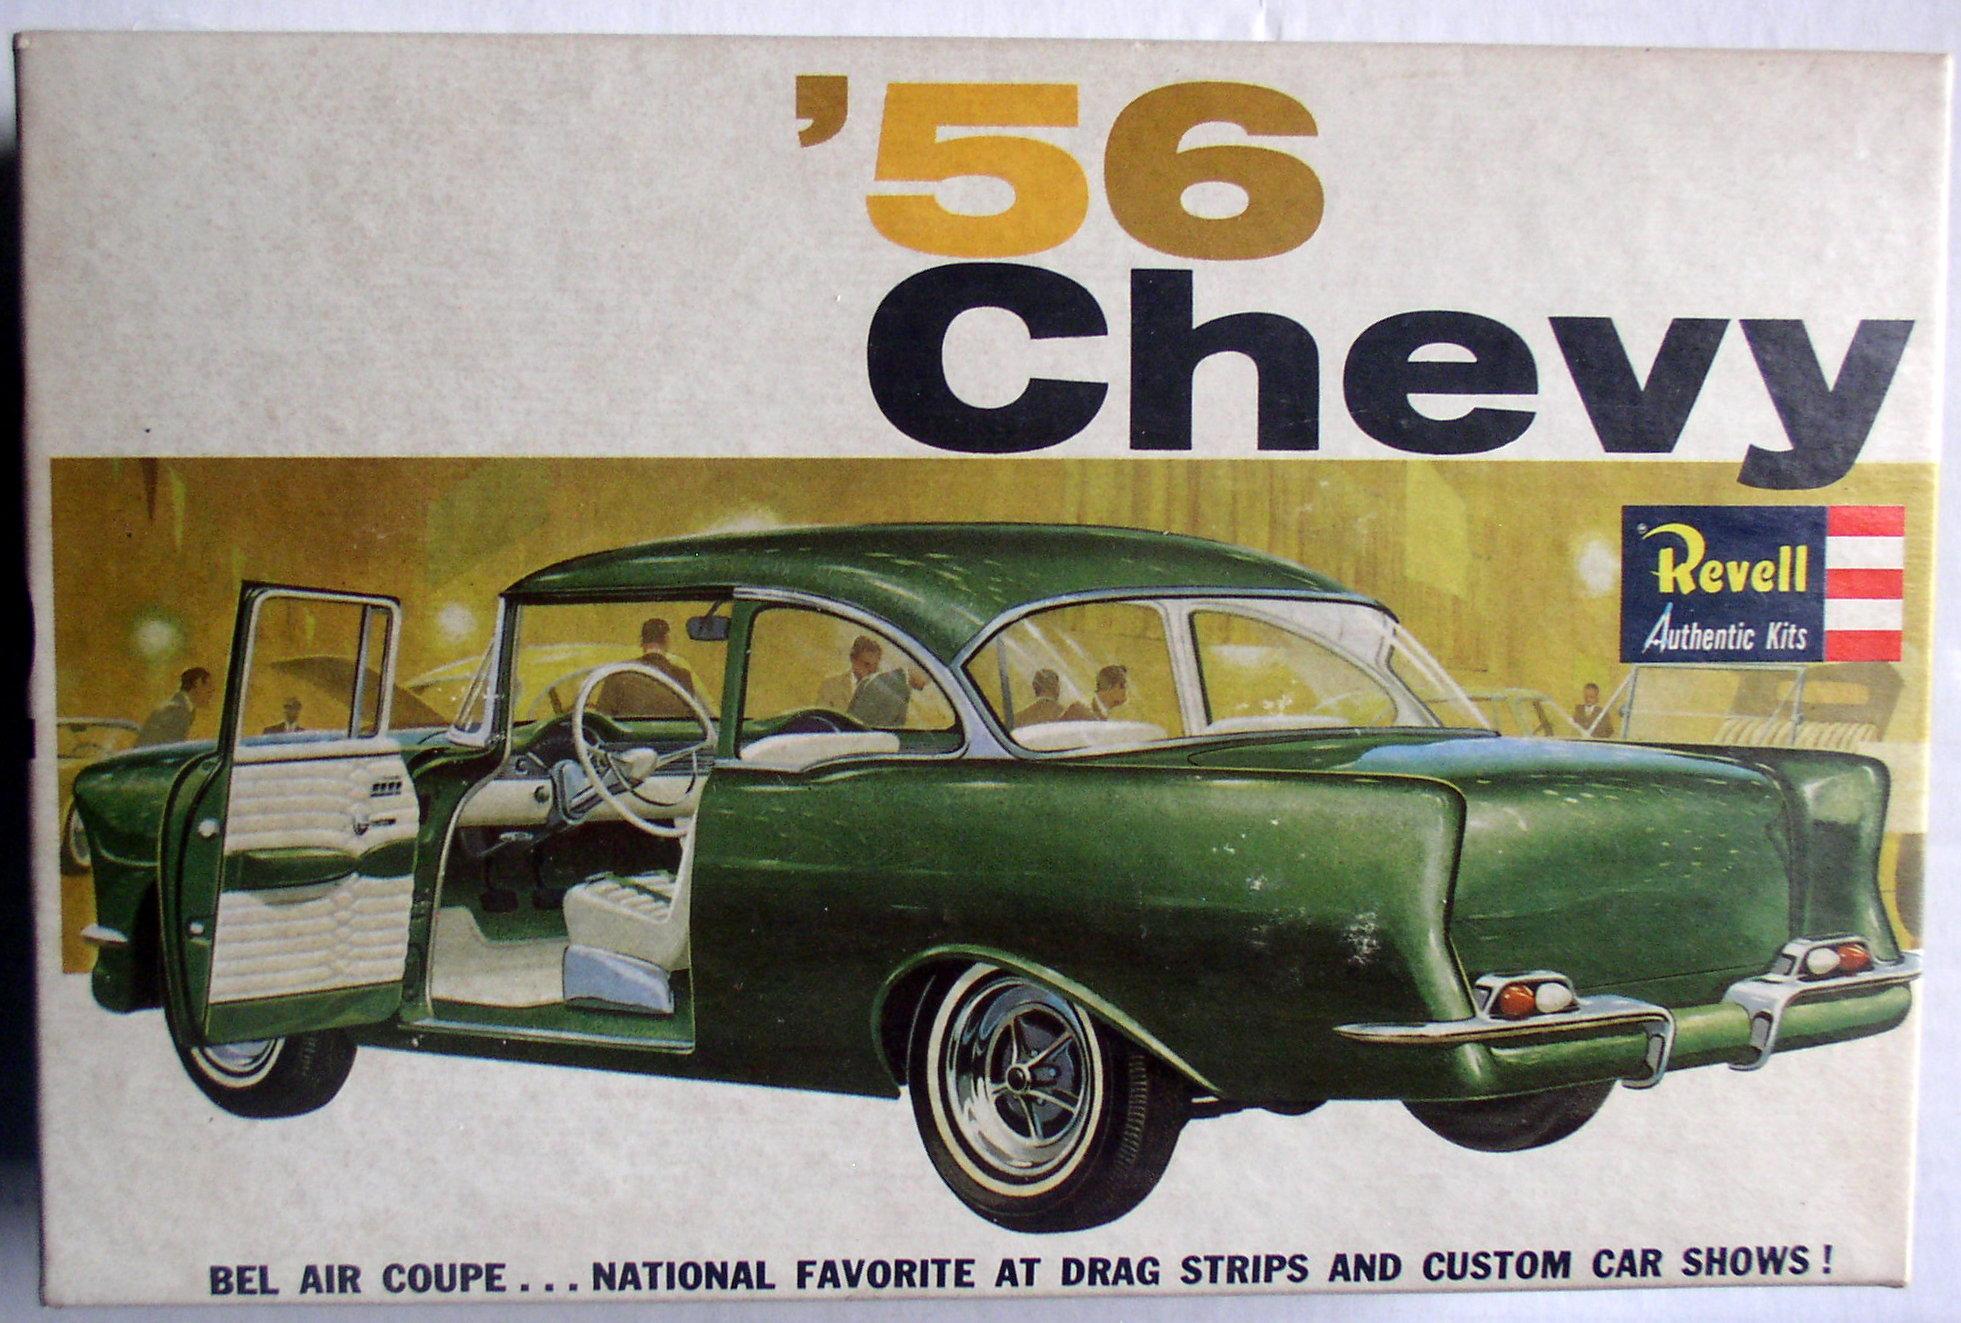
When I Was Young & Dumb: Building the Unbuildable '56 Chevy!
SpeedShift replied to John Goschke's topic in Model Cars
"Guys who remember this kit from the '60s no doubt remember the cool artwork of a green custom with the door open that tempted them to buy, then discovered the nightmare of trying to build it!" WAS THIS IT?
-
Reported. Hi James, We’re sorry to hear that you didn’t receive your item. We have asked the seller to respond to your request. Your purchase is covered by eBay Money Back Guarantee. If your request is not resolved, you can ask us to step in and help beginning Feb 26, 2021.
-
I need to get those pictures we took with Ed Big Daddy scanned.


.JPG.54609408dfb1956755994ff188f5e1f1.JPG)


.jpg.10f3e64aa2a9a53664c119154552bcf1.jpg)

.jpg.6a10b60697823ed6b4db031998992d21.jpg)