Sergey
-
Posts
634 -
Joined
-
Last visited
Content Type
Profiles
Forums
Events
Gallery
Everything posted by Sergey
-
1973' Chevrolet El Camino
Sergey replied to Sergey's topic in WIP: Model Trucks: Pickups, Vans, SUVs, Light Commercial
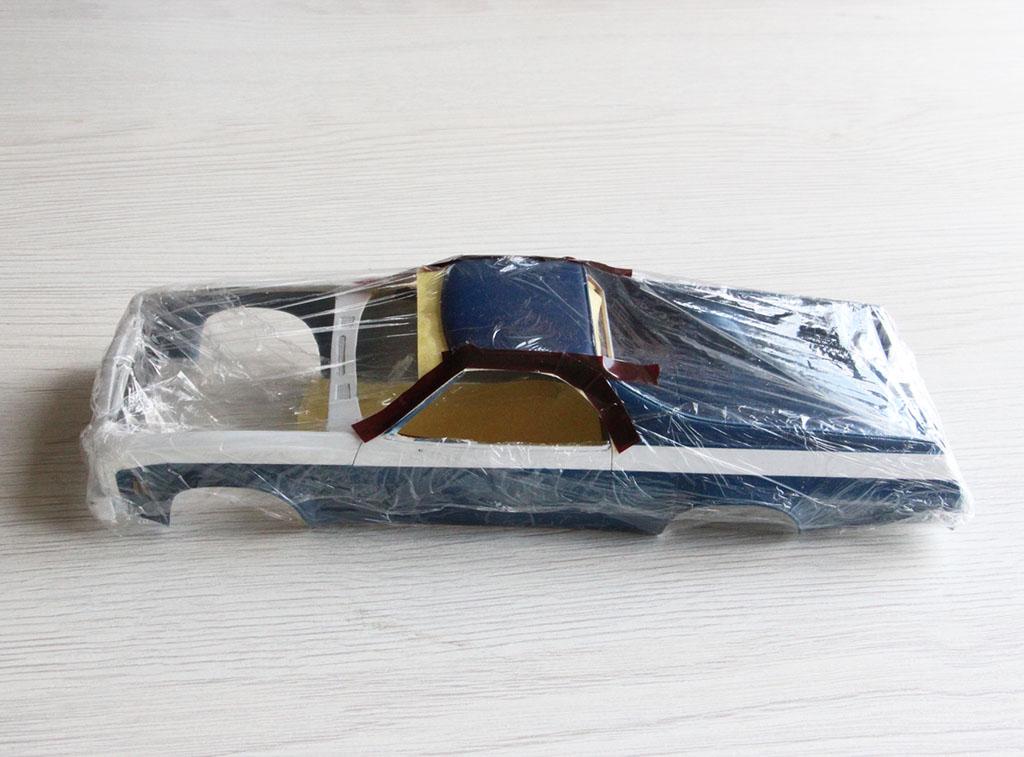
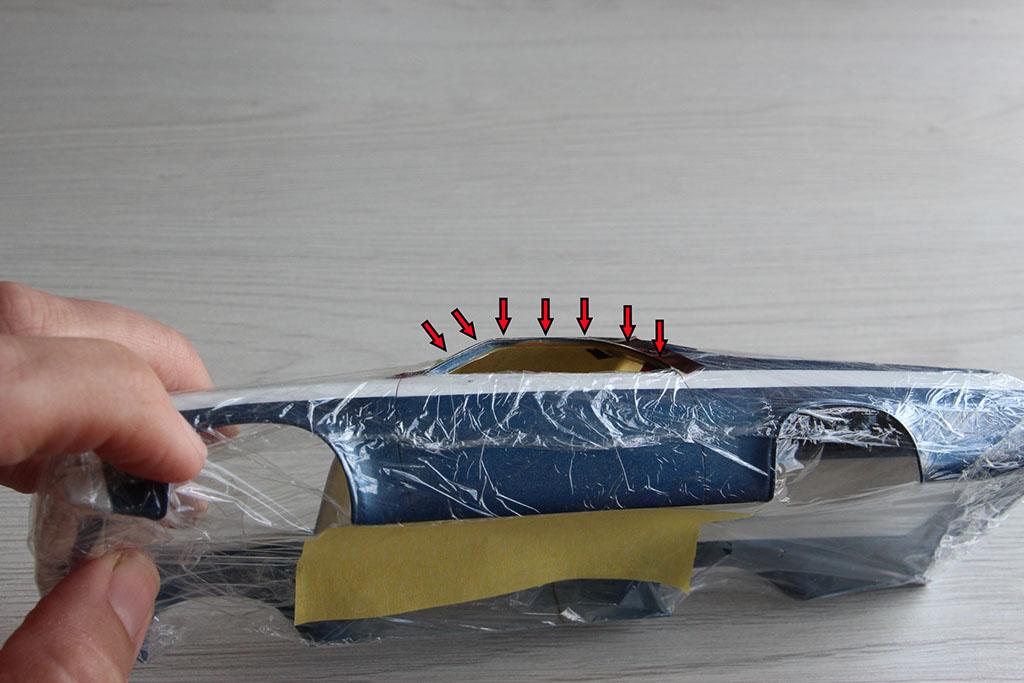
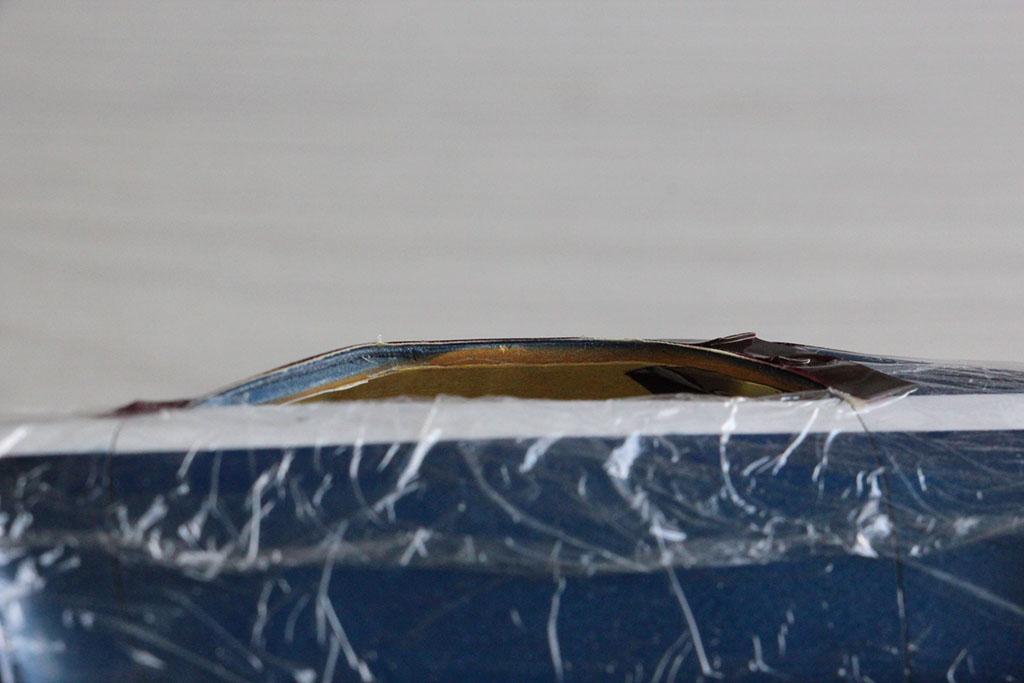
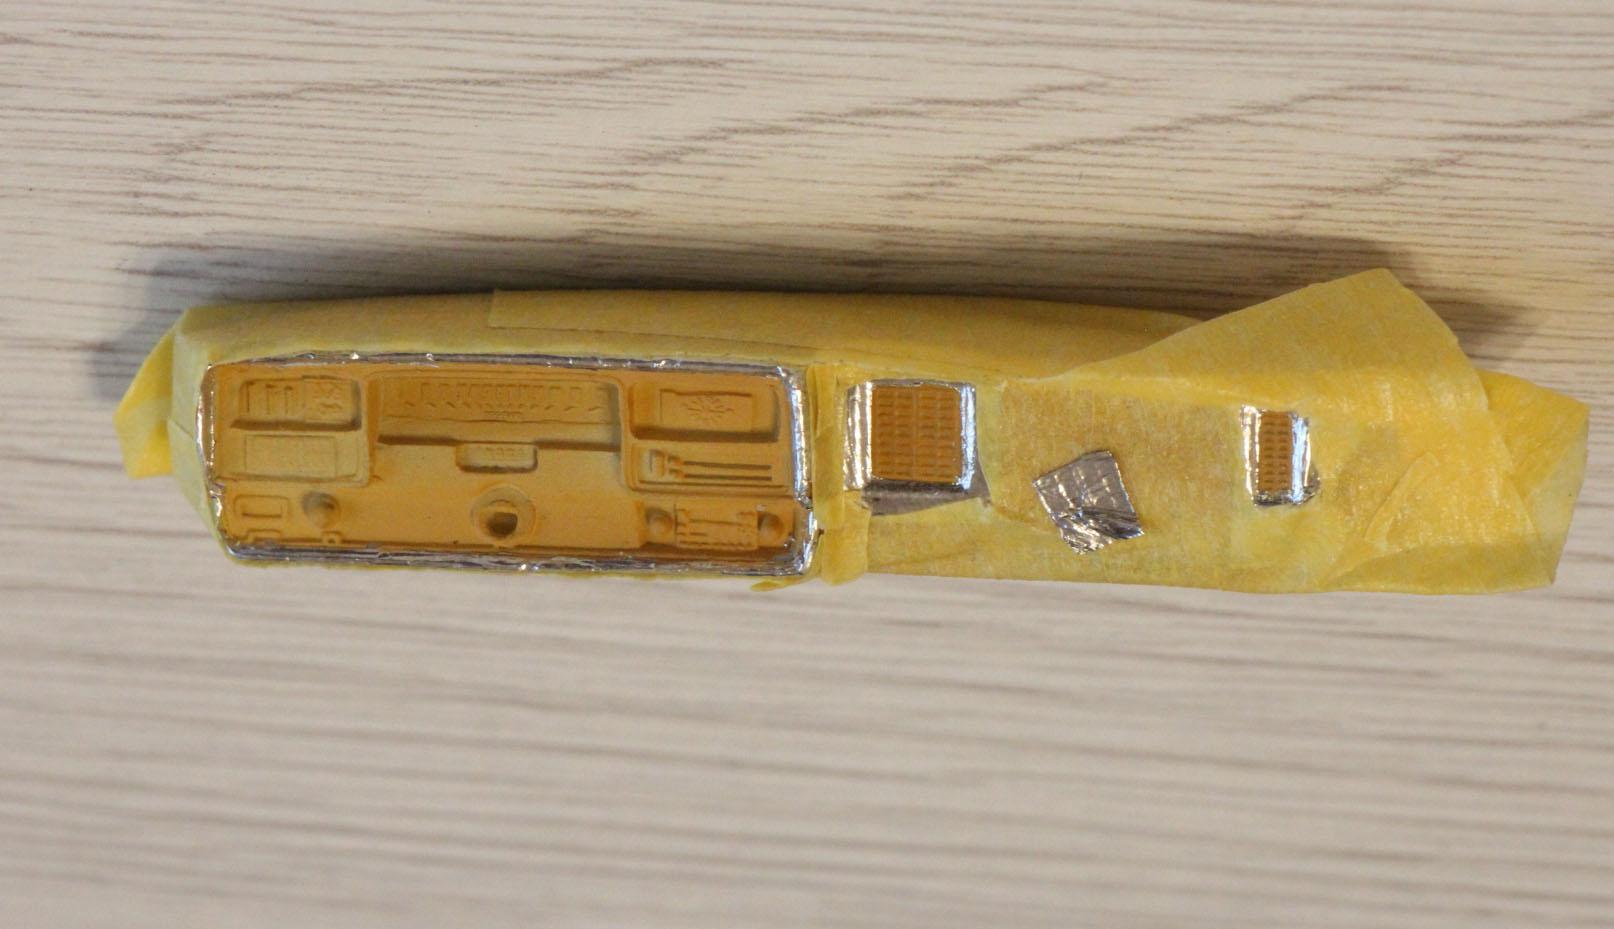
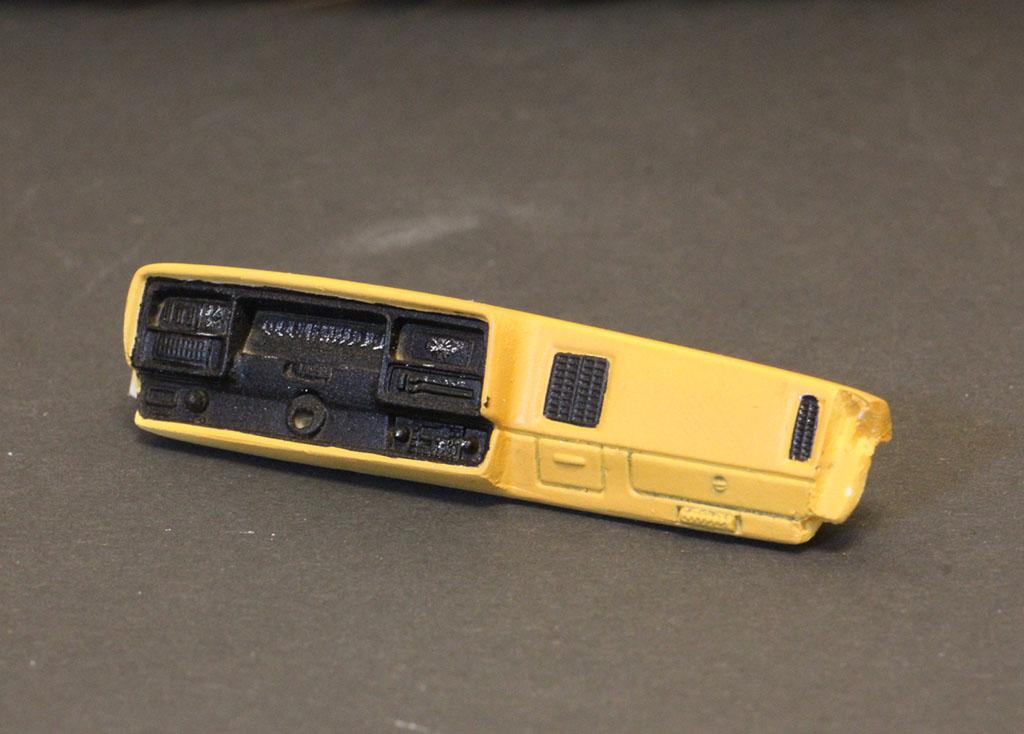
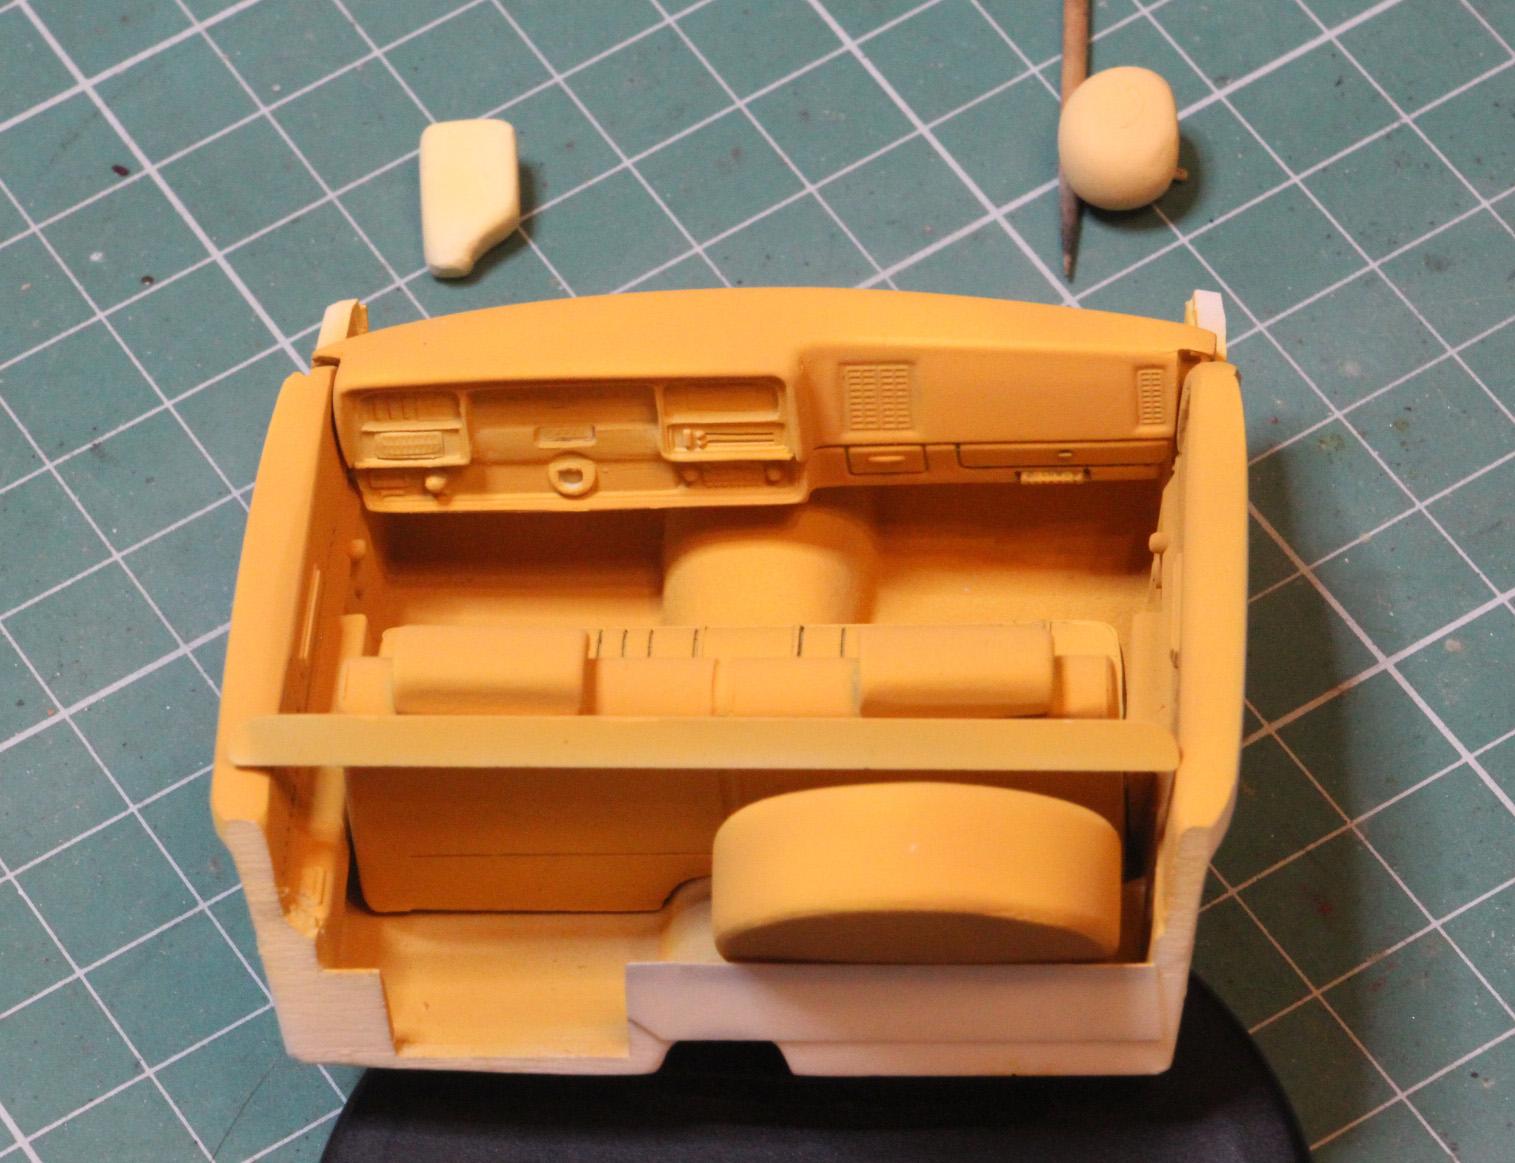
Hello, dear colleagues! Been busy with work last 4 months. Thank you for attention to my work! Now there's some progress. I've masked and painted the door window seals. ...And the dashboard Also made a chrome trimming around Thank you for watching!
-
1973' Chevrolet El Camino
Sergey replied to Sergey's topic in WIP: Model Trucks: Pickups, Vans, SUVs, Light Commercial
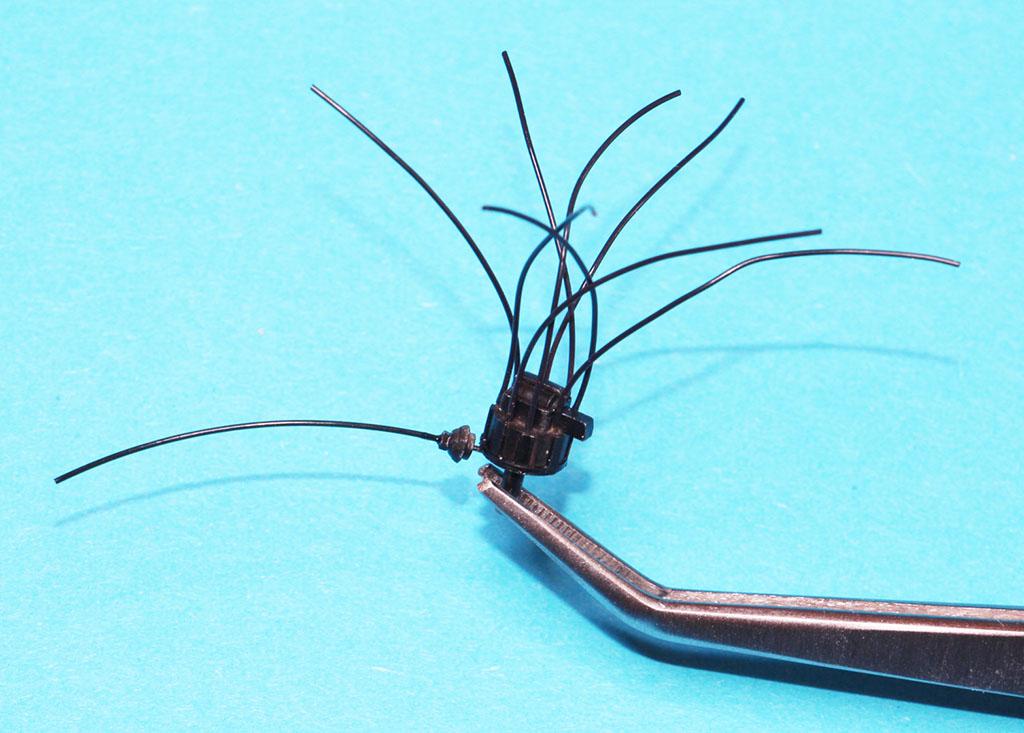
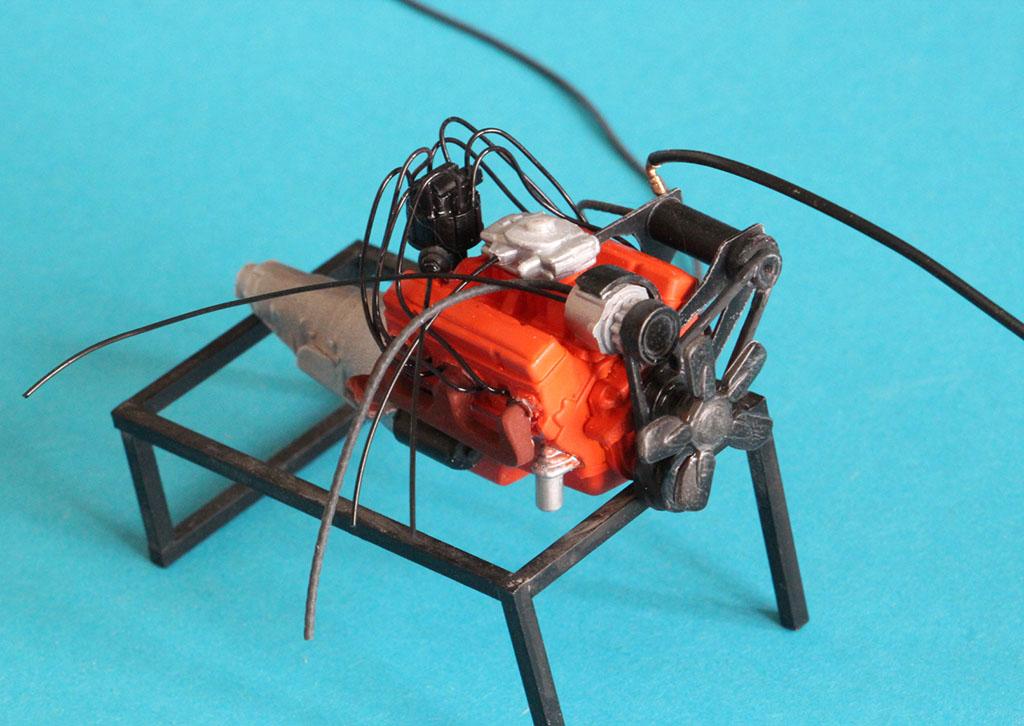
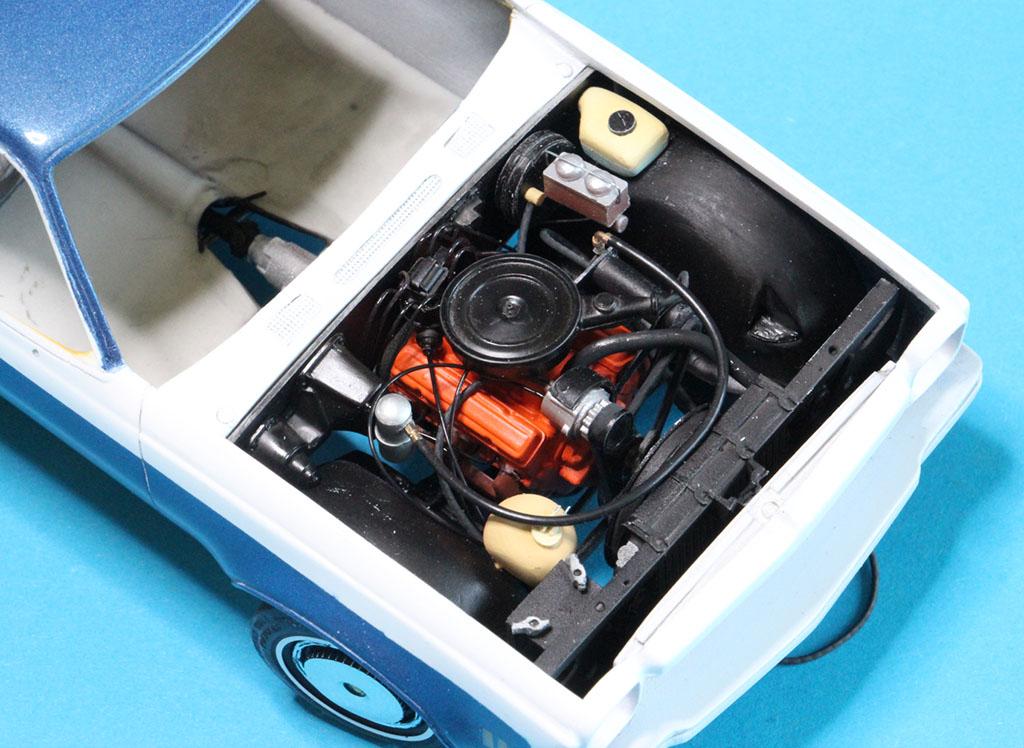
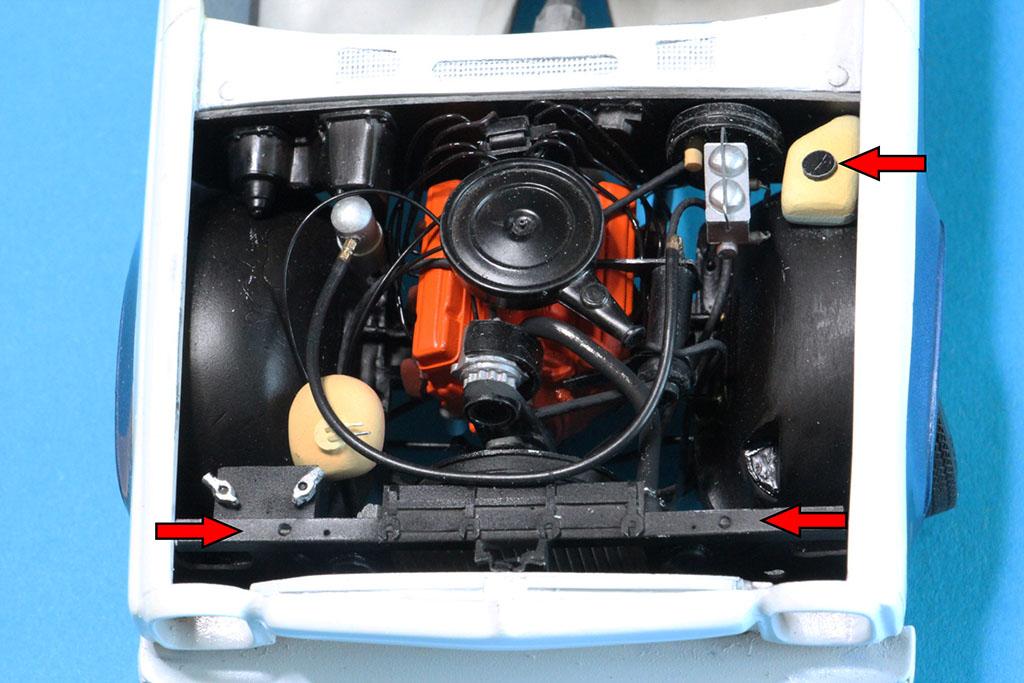
Engine bay wiring + extra parts By the way some of them didn't want to fit under the hood lid I was have to file down excess resin It is not a final result. I keep on working on it further. To be continued.... Good luck with your modeling!
-
1973' Chevrolet El Camino
Sergey replied to Sergey's topic in WIP: Model Trucks: Pickups, Vans, SUVs, Light Commercial
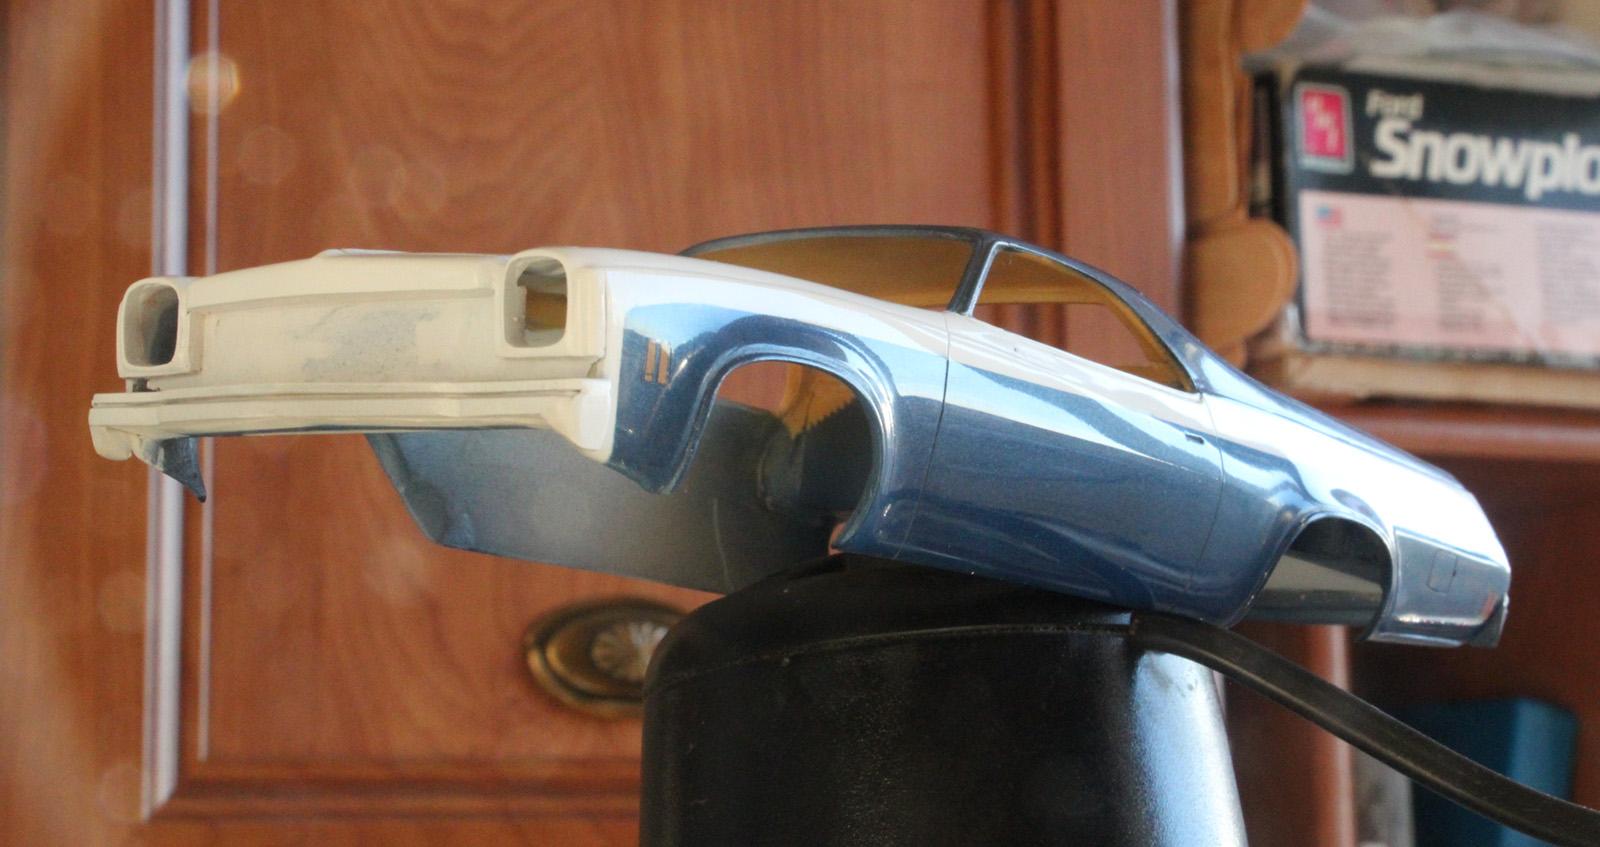
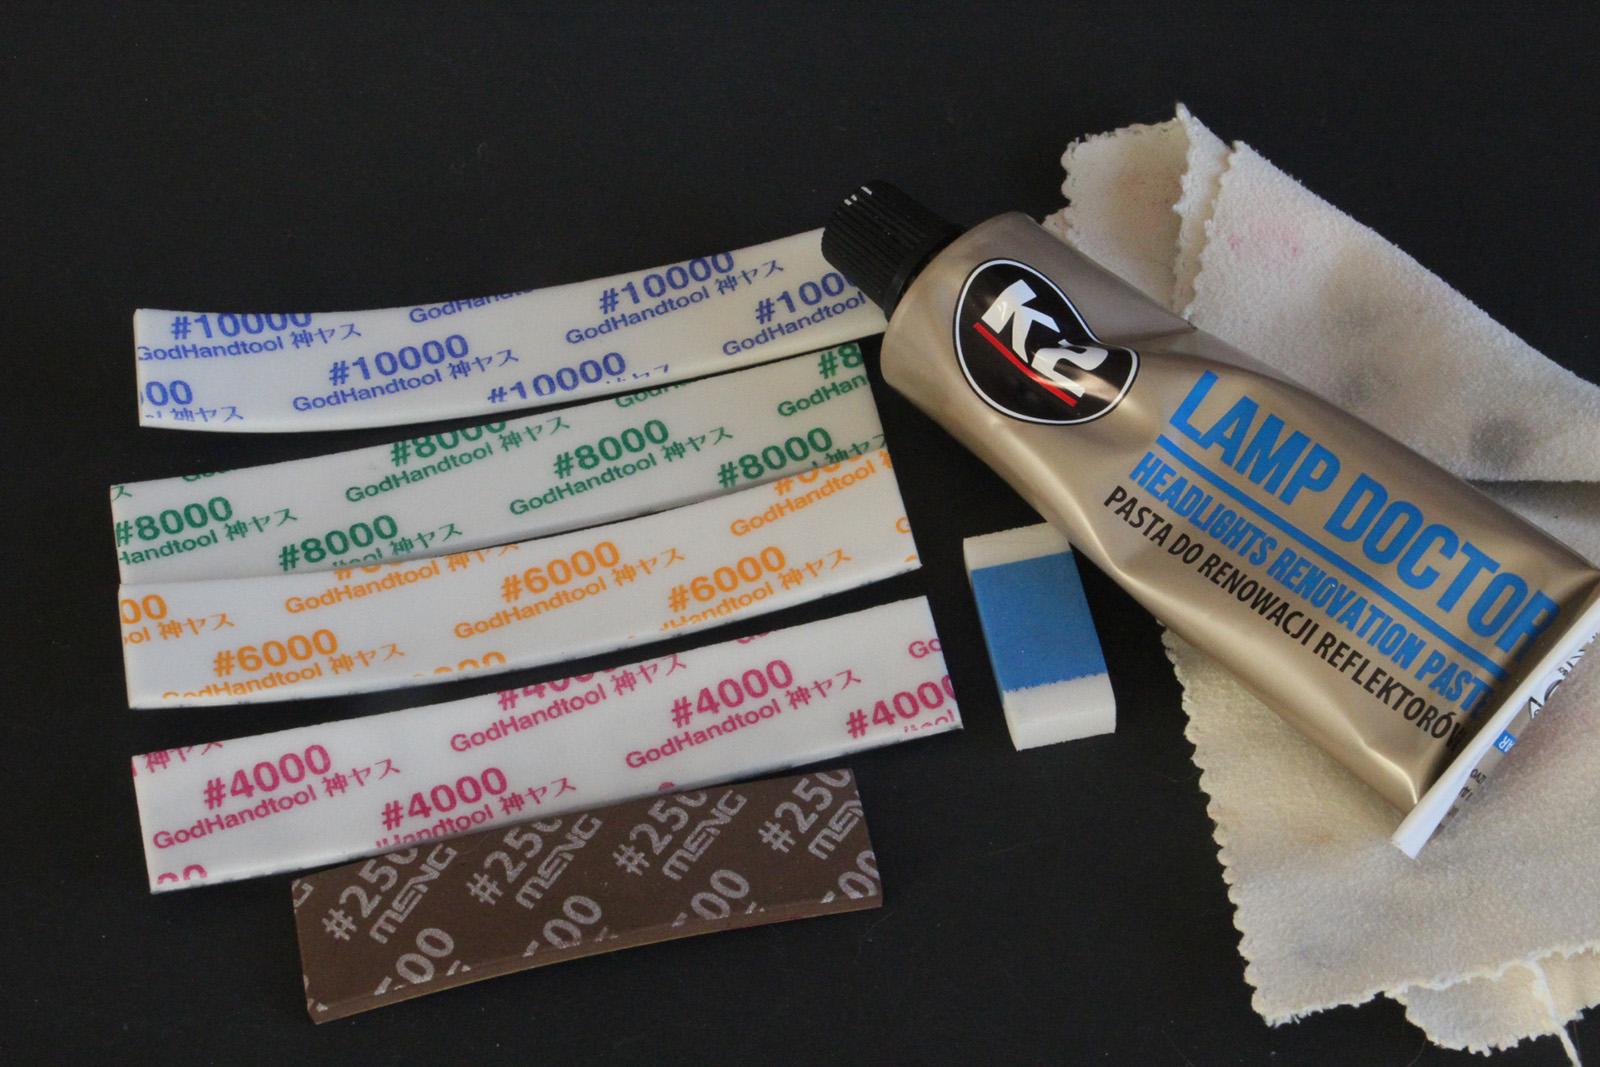
Thank you Dennis, Micah & Anton! Some polishing I used this
-
Farm Floater Truck 1/24th scale
Sergey replied to Randy D's topic in WIP: Model Trucks: Big Rigs and Heavy Equipment
Thank you, Randy to sharing us your outstanding project! It's so global and almost every part is made of steel. It makes me thing: 'How much effort (time, power and nerves) should it take!" You are very patient and skilled person! Make me your disciple! 😌 -
1973' Chevrolet El Camino
Sergey replied to Sergey's topic in WIP: Model Trucks: Pickups, Vans, SUVs, Light Commercial
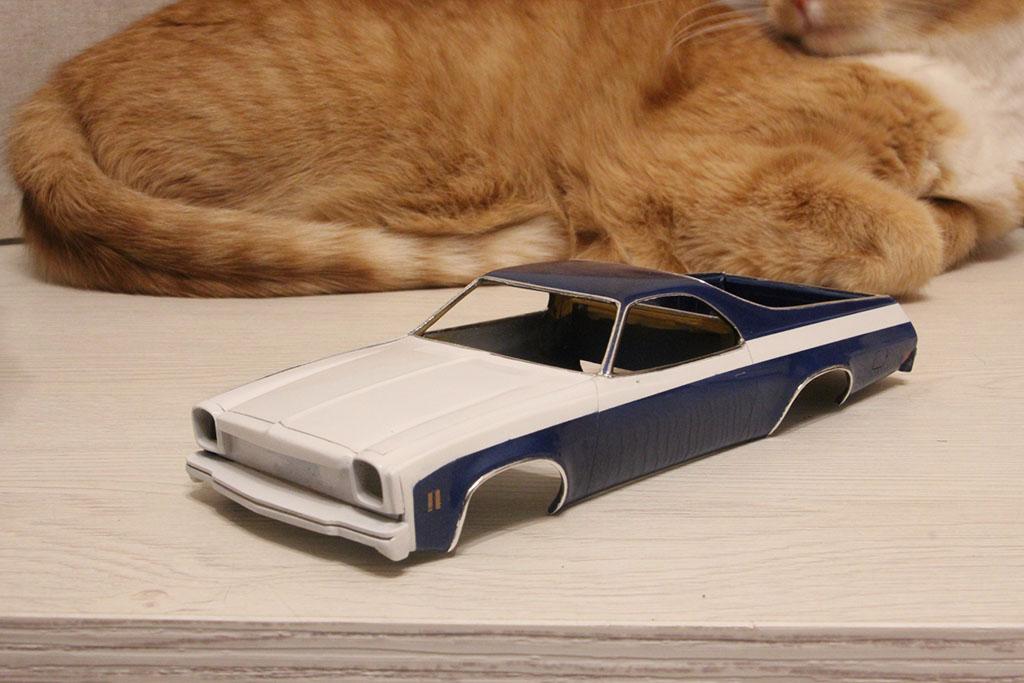
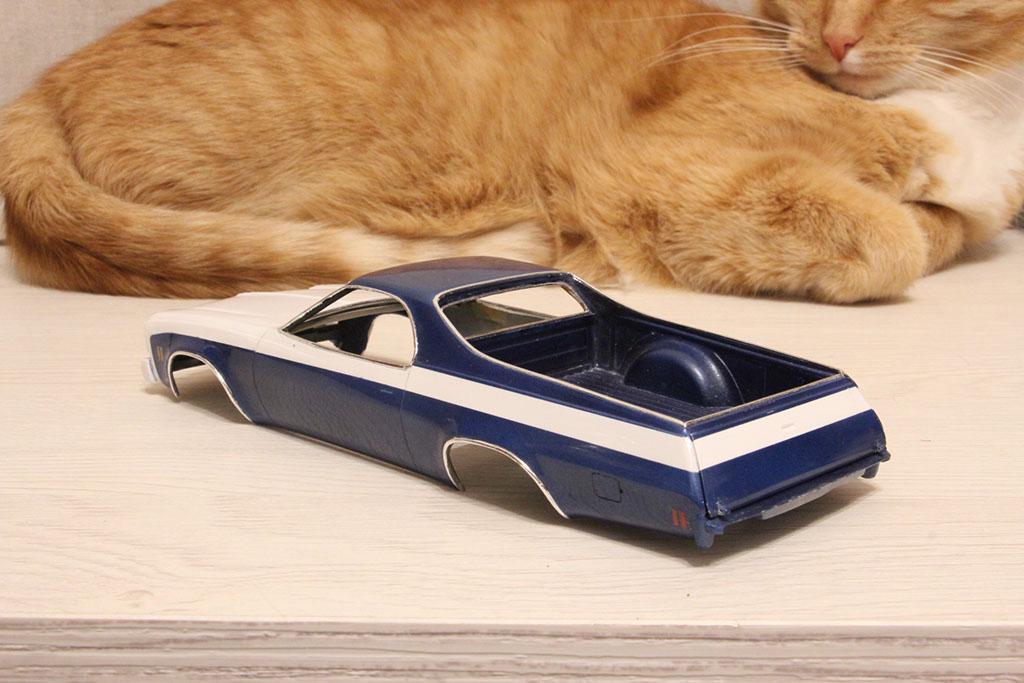
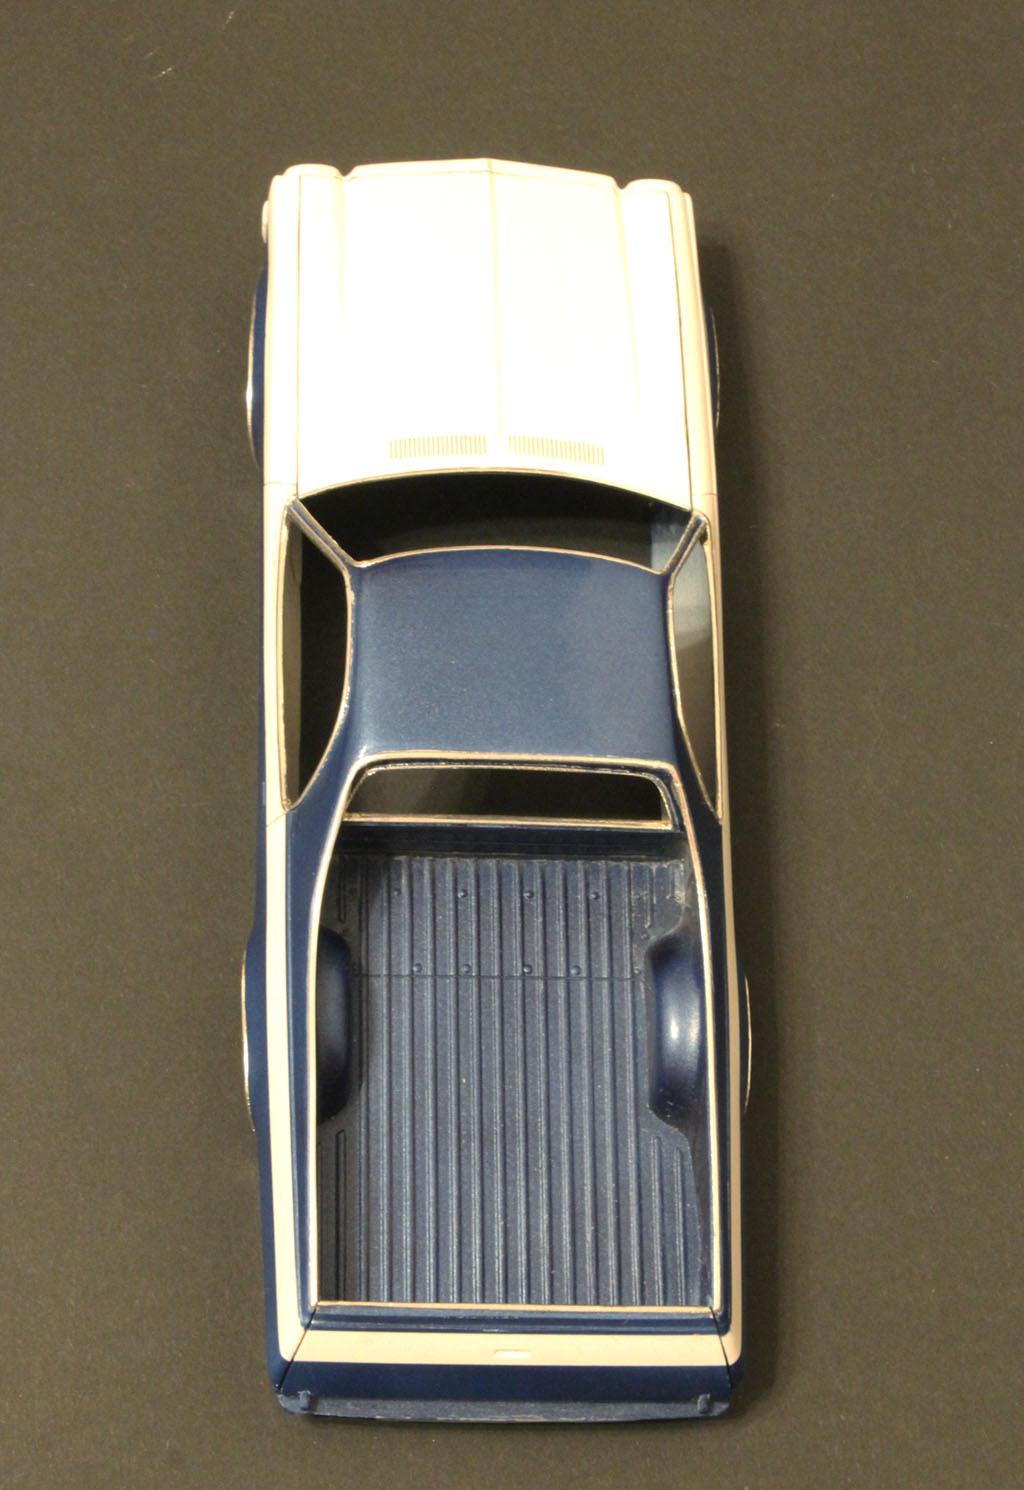
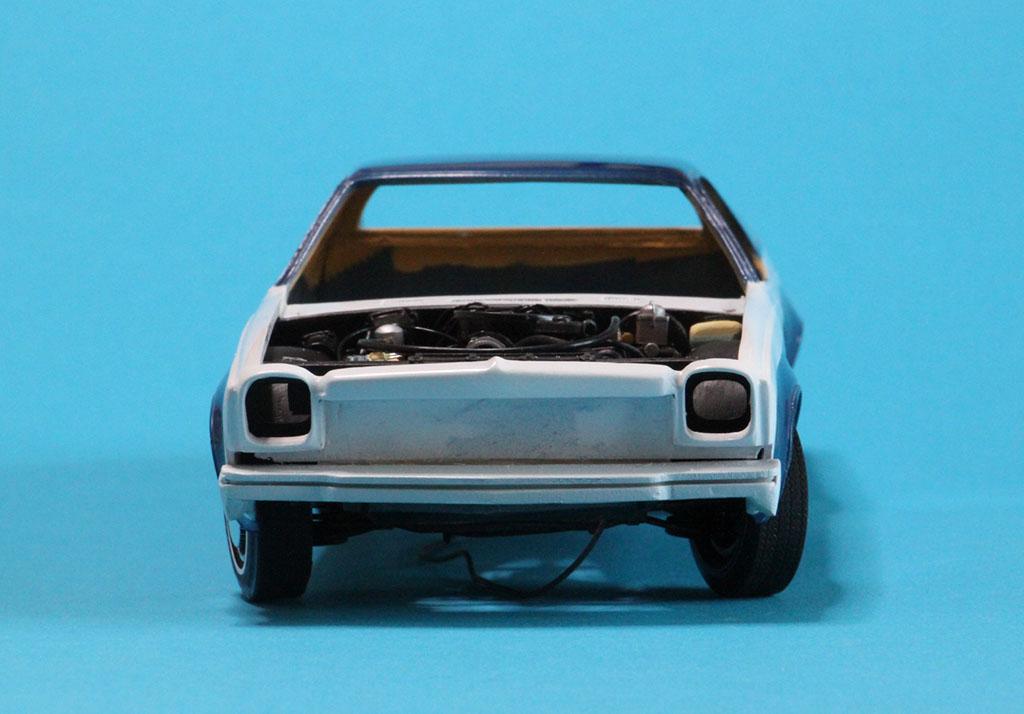
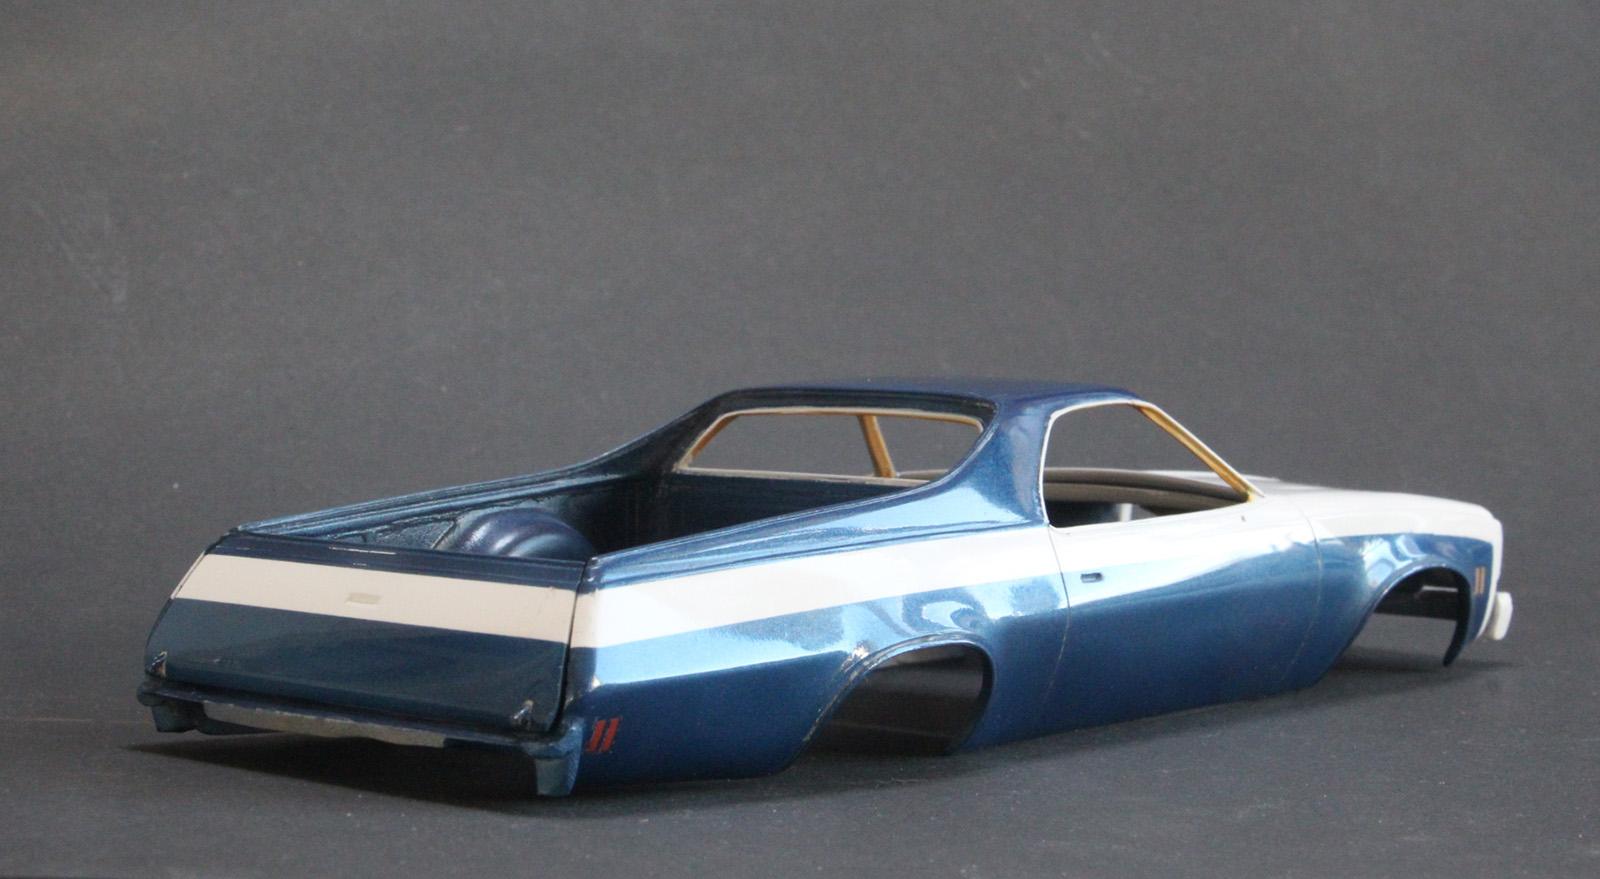
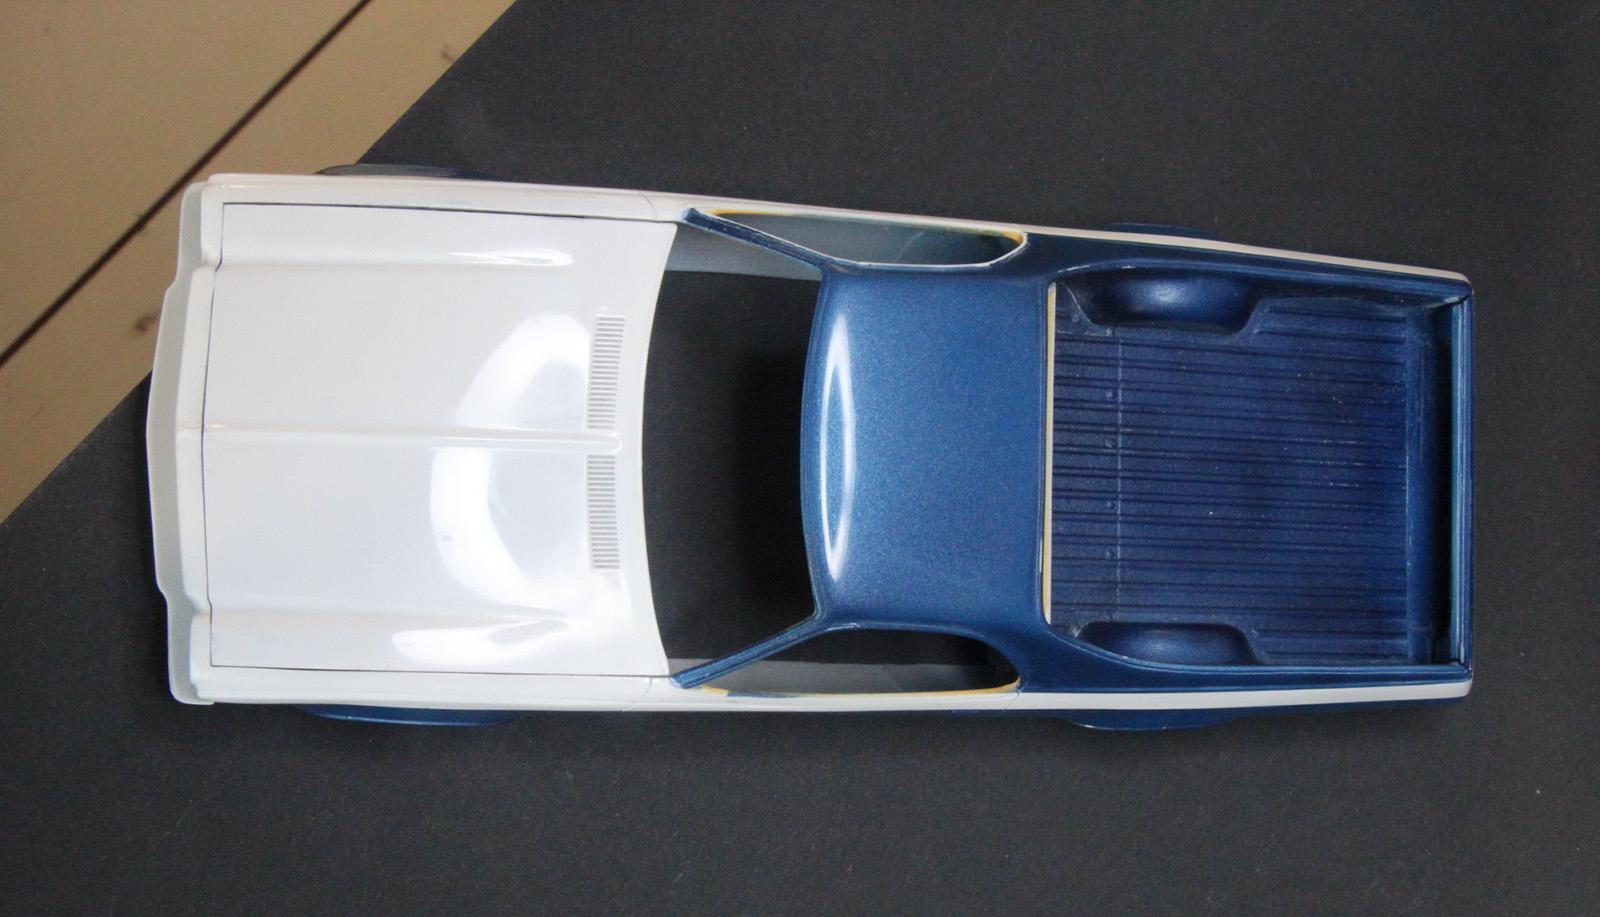
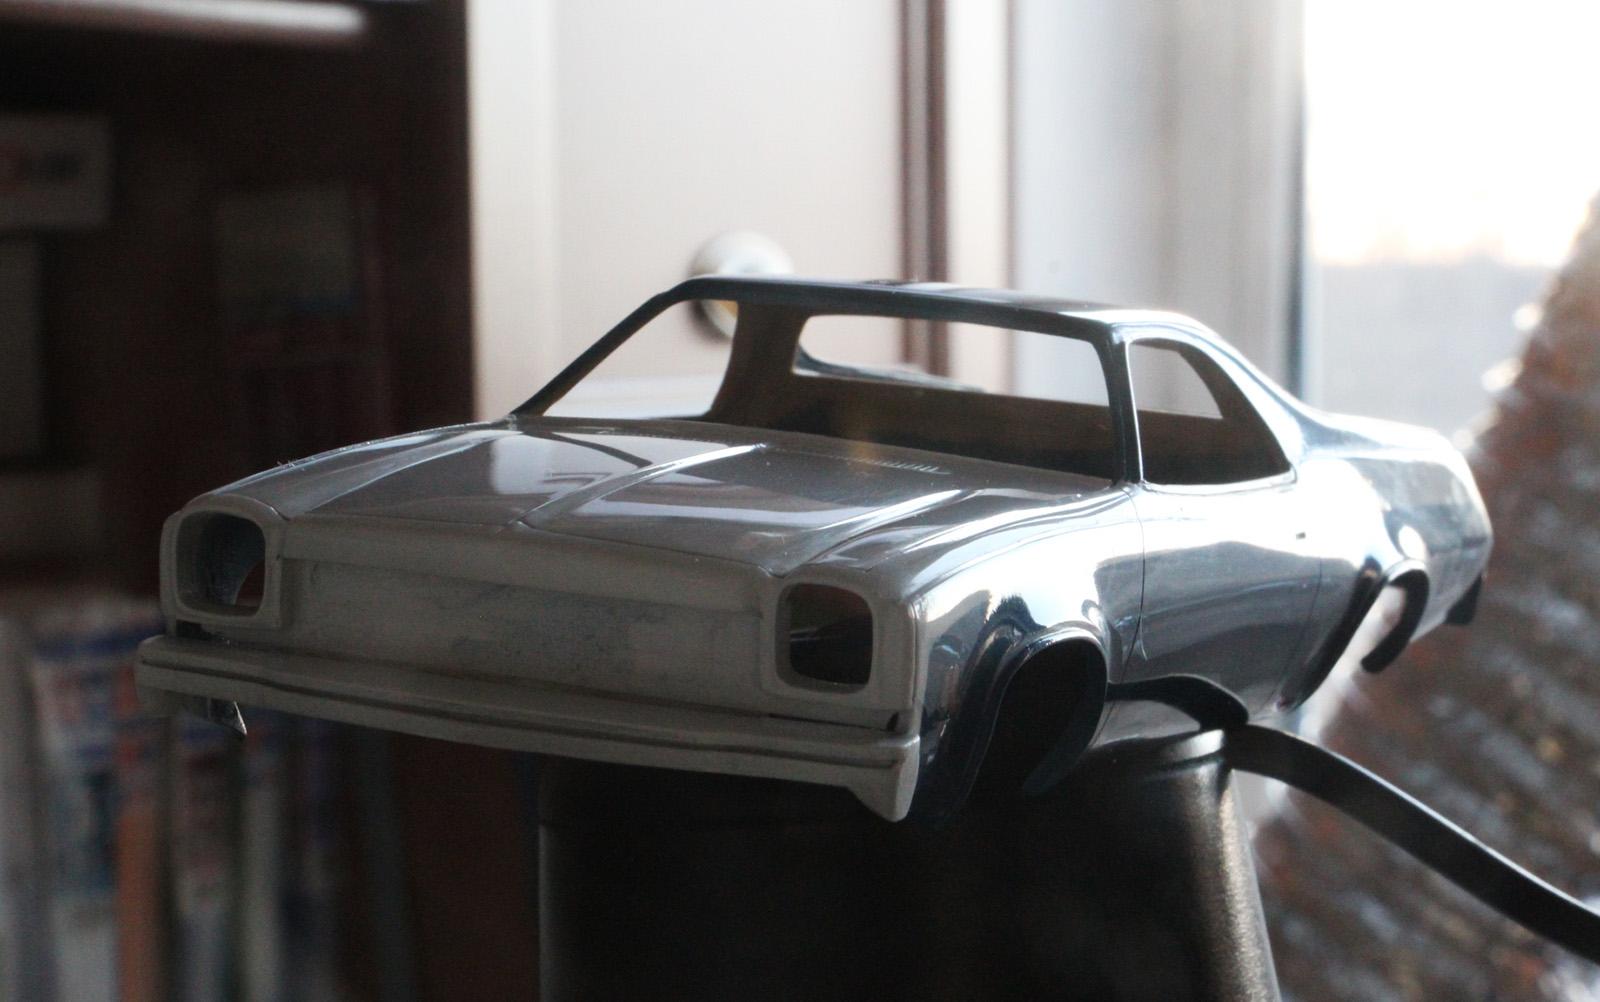
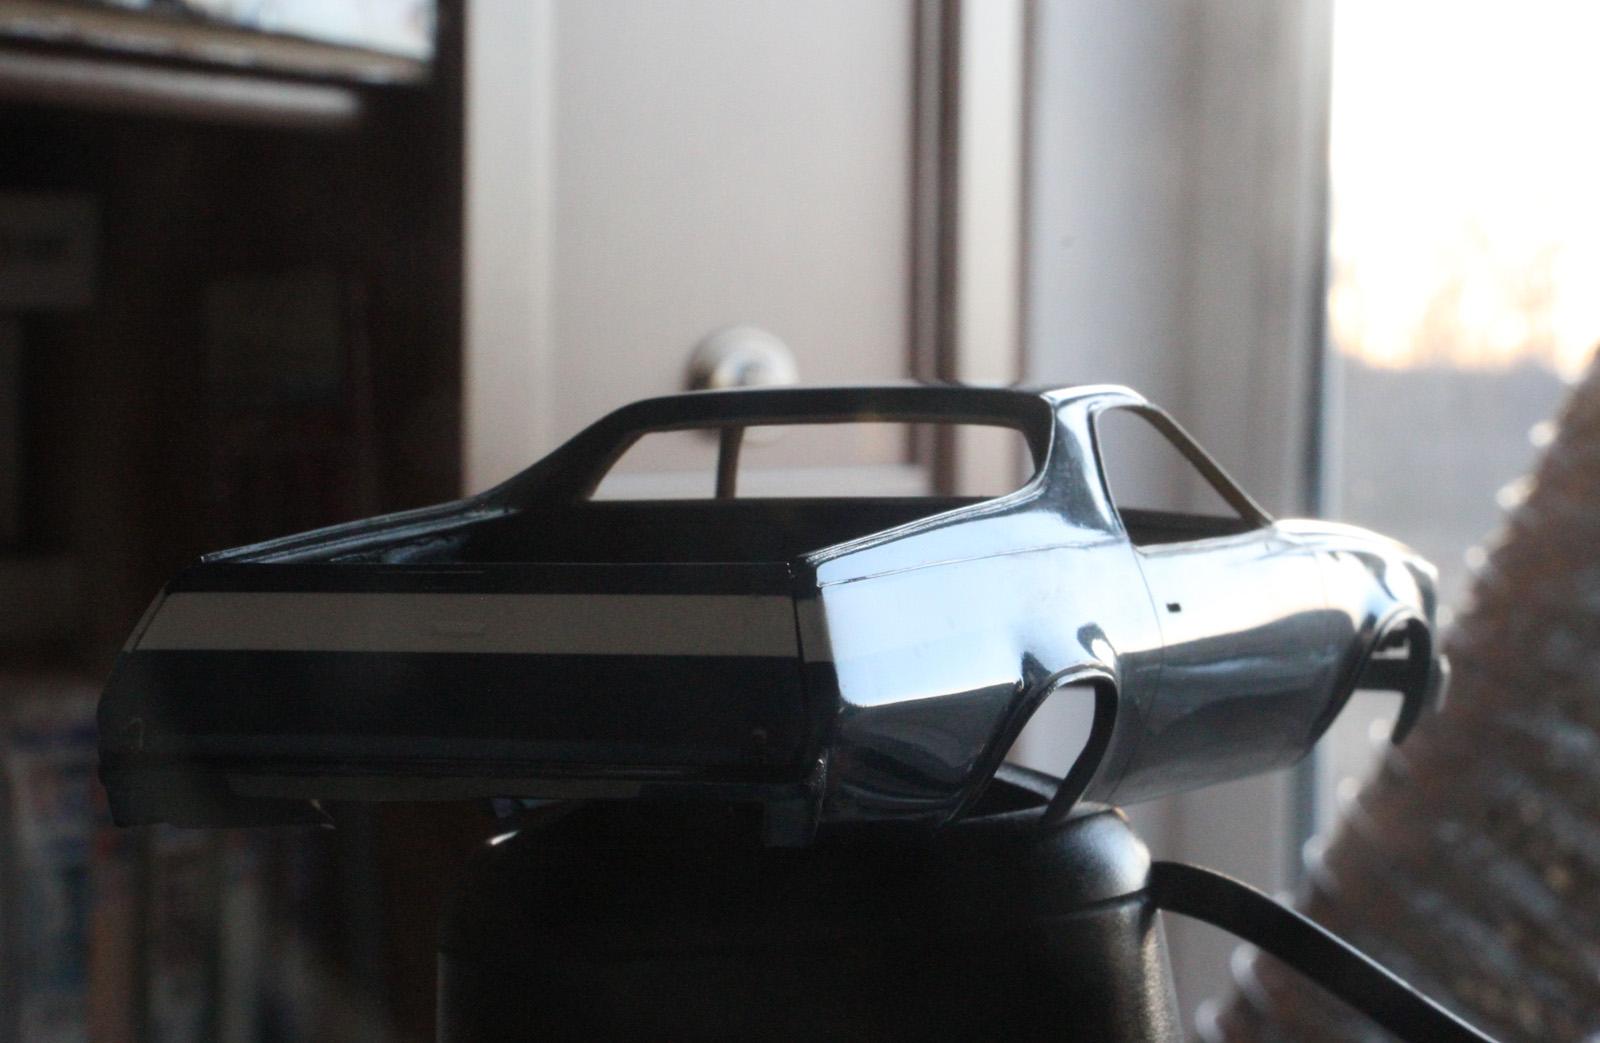
Hi, Gents! Have sprayed the body with 4 coats of Mr.Hobby GX 100 Light for front & tail bumper are ready Thank you for following my work! Good luck with your builds!🙂
-
Looks great!
-
Hummer H1
Sergey replied to Sergey's topic in WIP: Model Trucks: Pickups, Vans, SUVs, Light Commercial
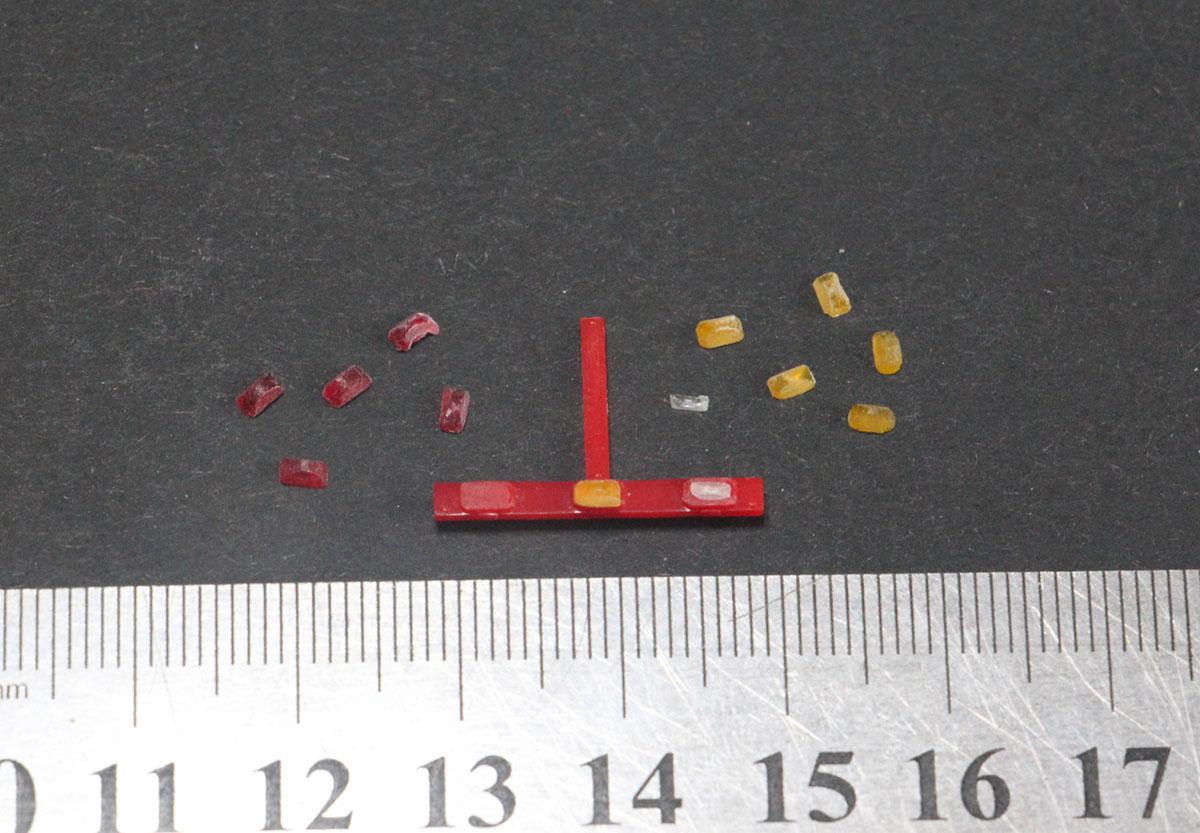
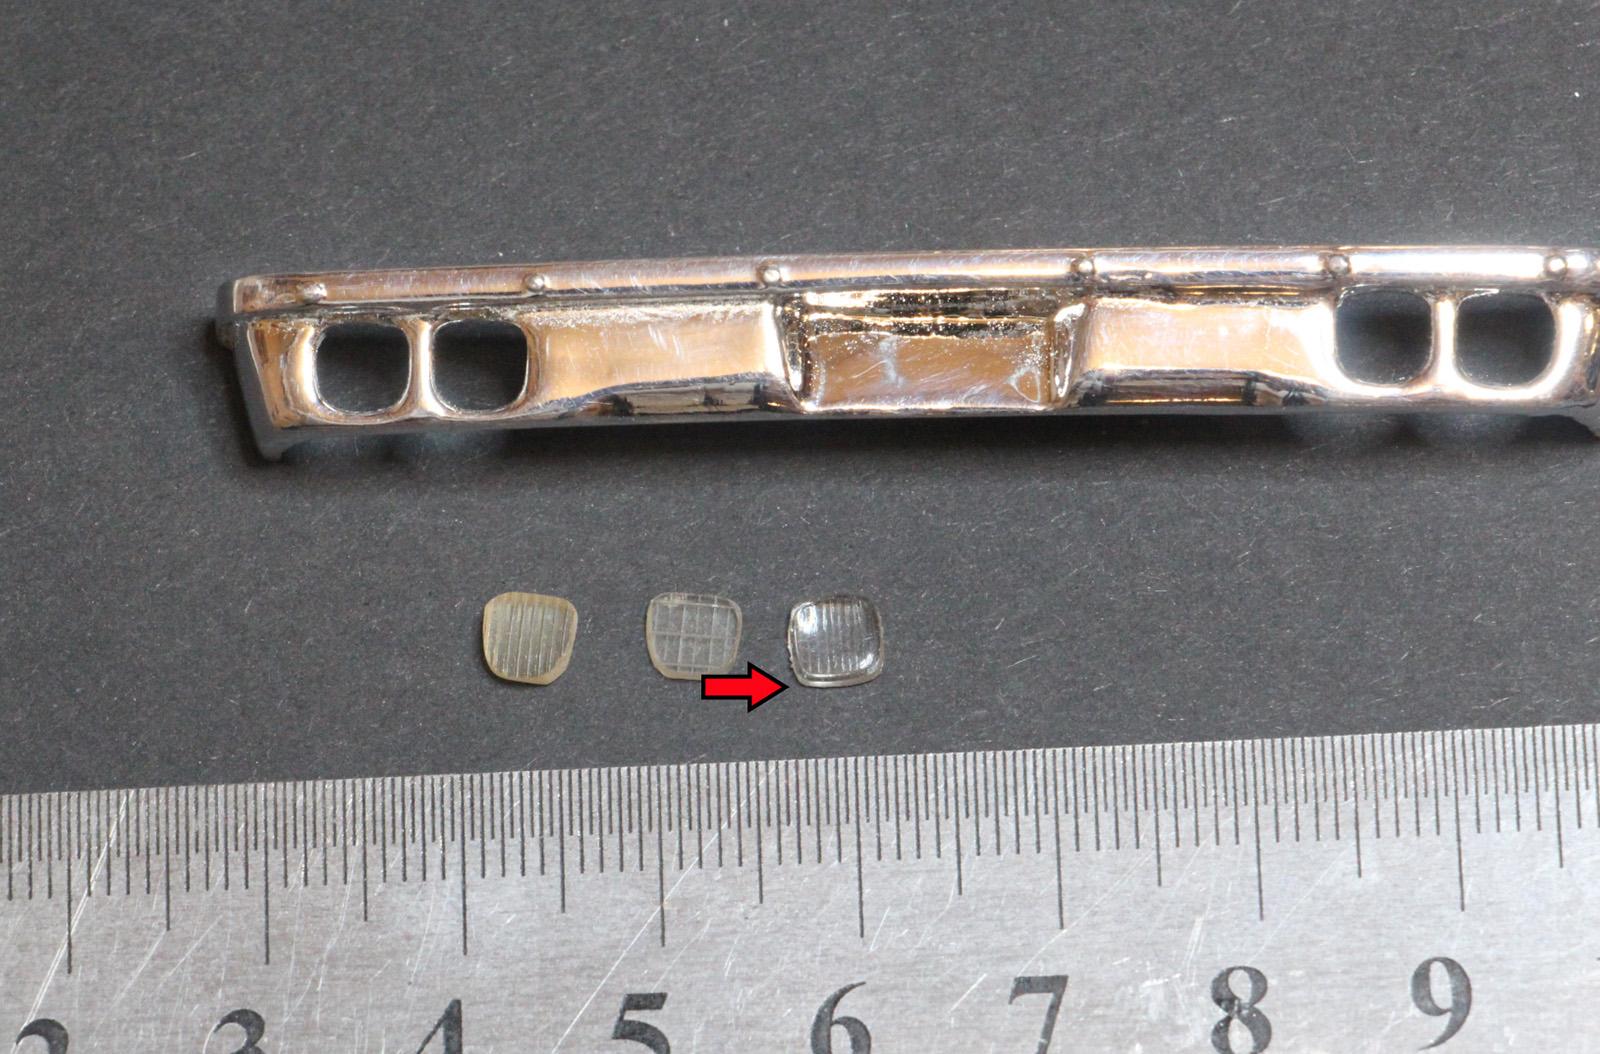
Thanks to everyone for your comments! Nov I will load pics on the forum. I started painting the interior, but first the shadows: After copying out a dozen marker lights, I realized that MENG's were 3 times smaller than needed. For comparison: transparent ones are a copy of the MENG's, colored ones are homemade That's the real one Painted with clears See you later!
-
Hummer H1
Sergey replied to Sergey's topic in WIP: Model Trucks: Pickups, Vans, SUVs, Light Commercial
Thanks to everyone for your comments! Nov I will load pics on the forum. -
1973' Chevrolet El Camino
Sergey replied to Sergey's topic in WIP: Model Trucks: Pickups, Vans, SUVs, Light Commercial
Thank you again, Anton! Happy modeling!
-
FDNY Wrecker
Sergey replied to Scott Eriksen's topic in WIP: Model Trucks: Big Rigs and Heavy Equipment
I might have guessed. Now we can't get these beautiful stuff. I suppose the air dryer came from the same source? Interesting: what do you use to tie up some pipes/wires? -
FDNY Wrecker
Sergey replied to Scott Eriksen's topic in WIP: Model Trucks: Big Rigs and Heavy Equipment
Well done, Scott! It seems I have never seen so much piping work and wireing on a model. It turn out a great bilding with all these stuff! Sorry, I have not follow all the topik. Where are those perfectly painted & decaled accumulators from? -
1973' Chevrolet El Camino
Sergey replied to Sergey's topic in WIP: Model Trucks: Pickups, Vans, SUVs, Light Commercial
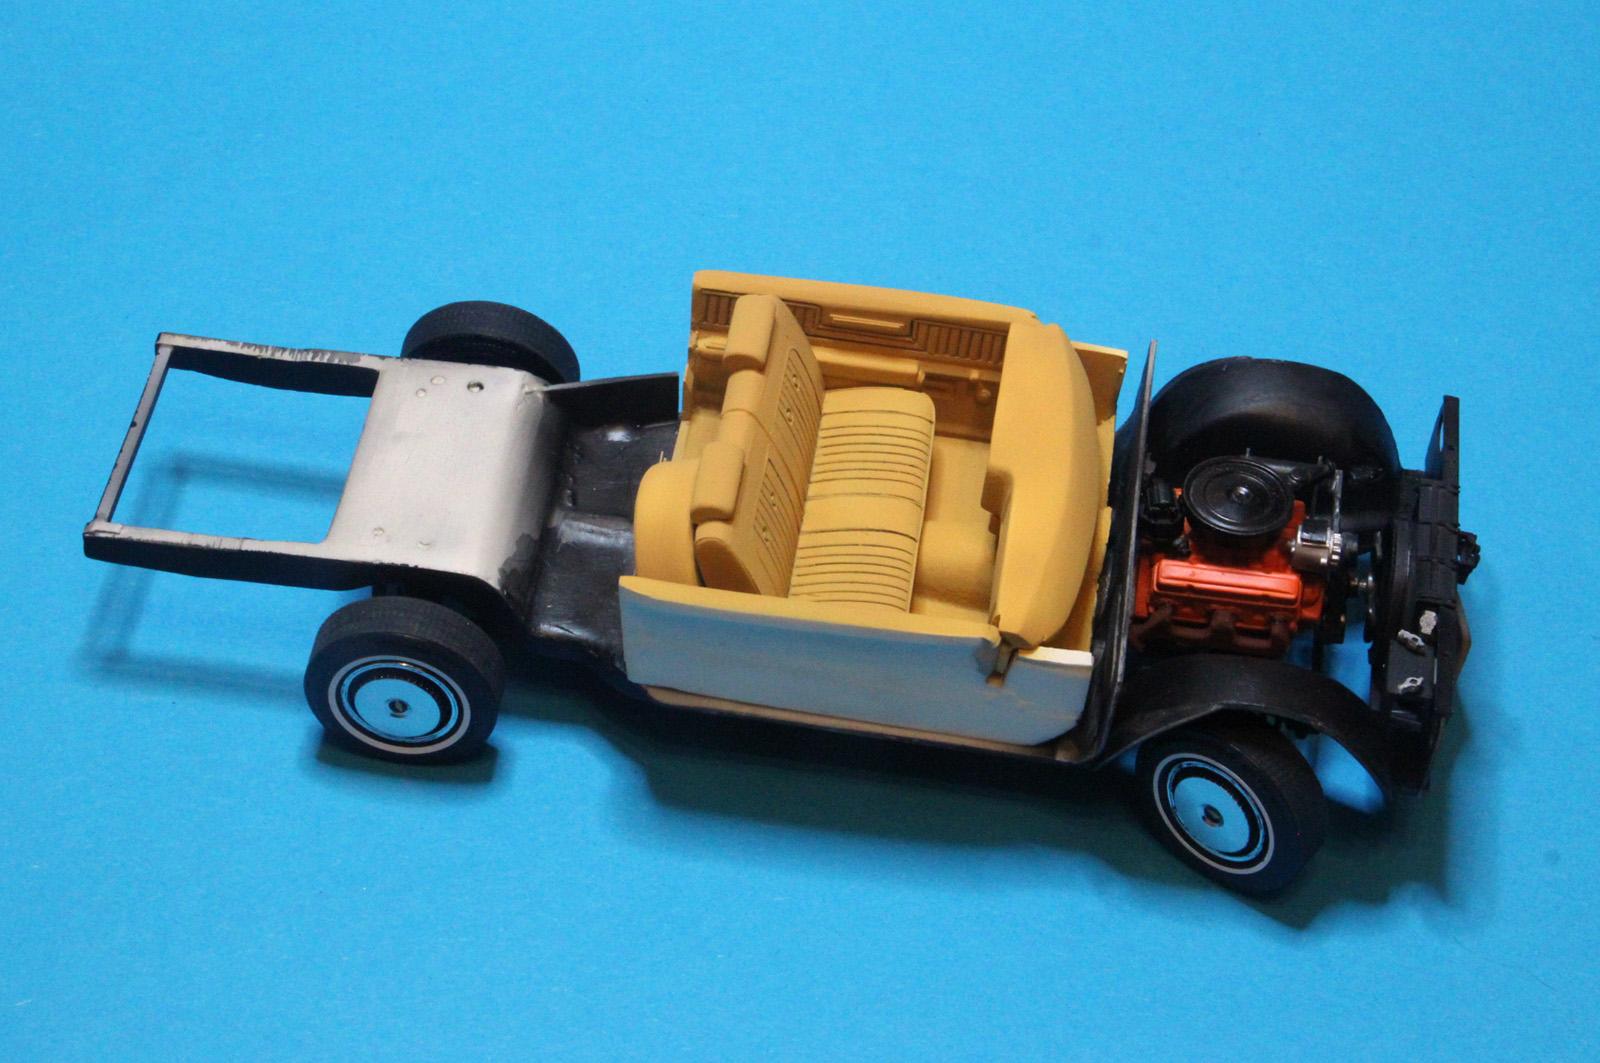
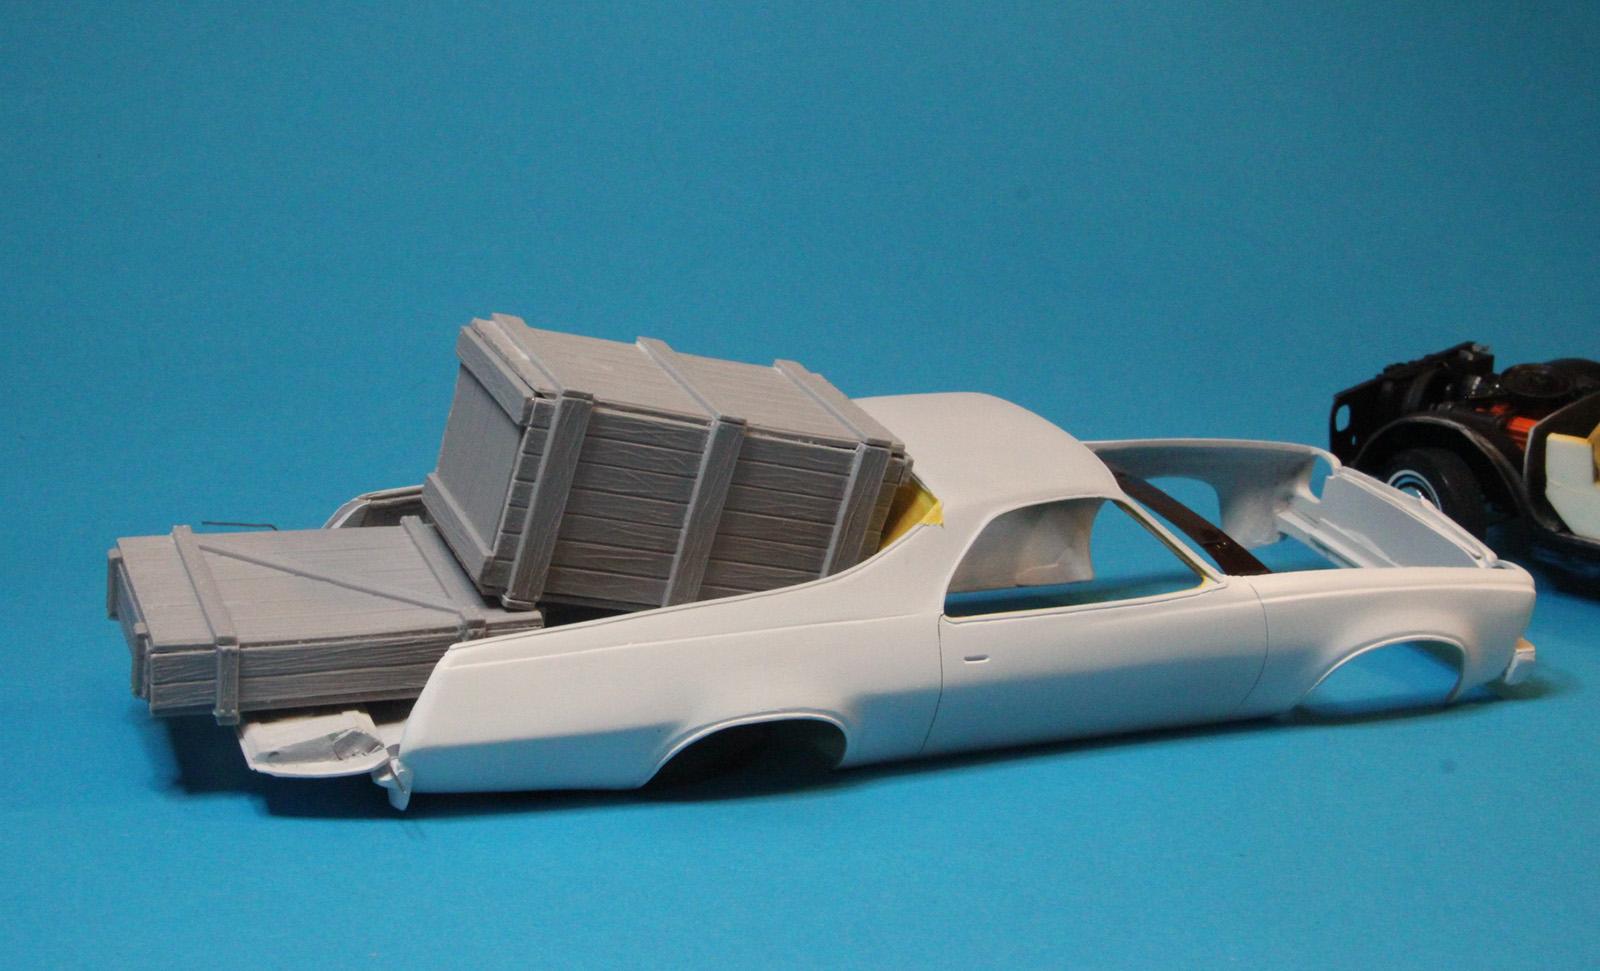
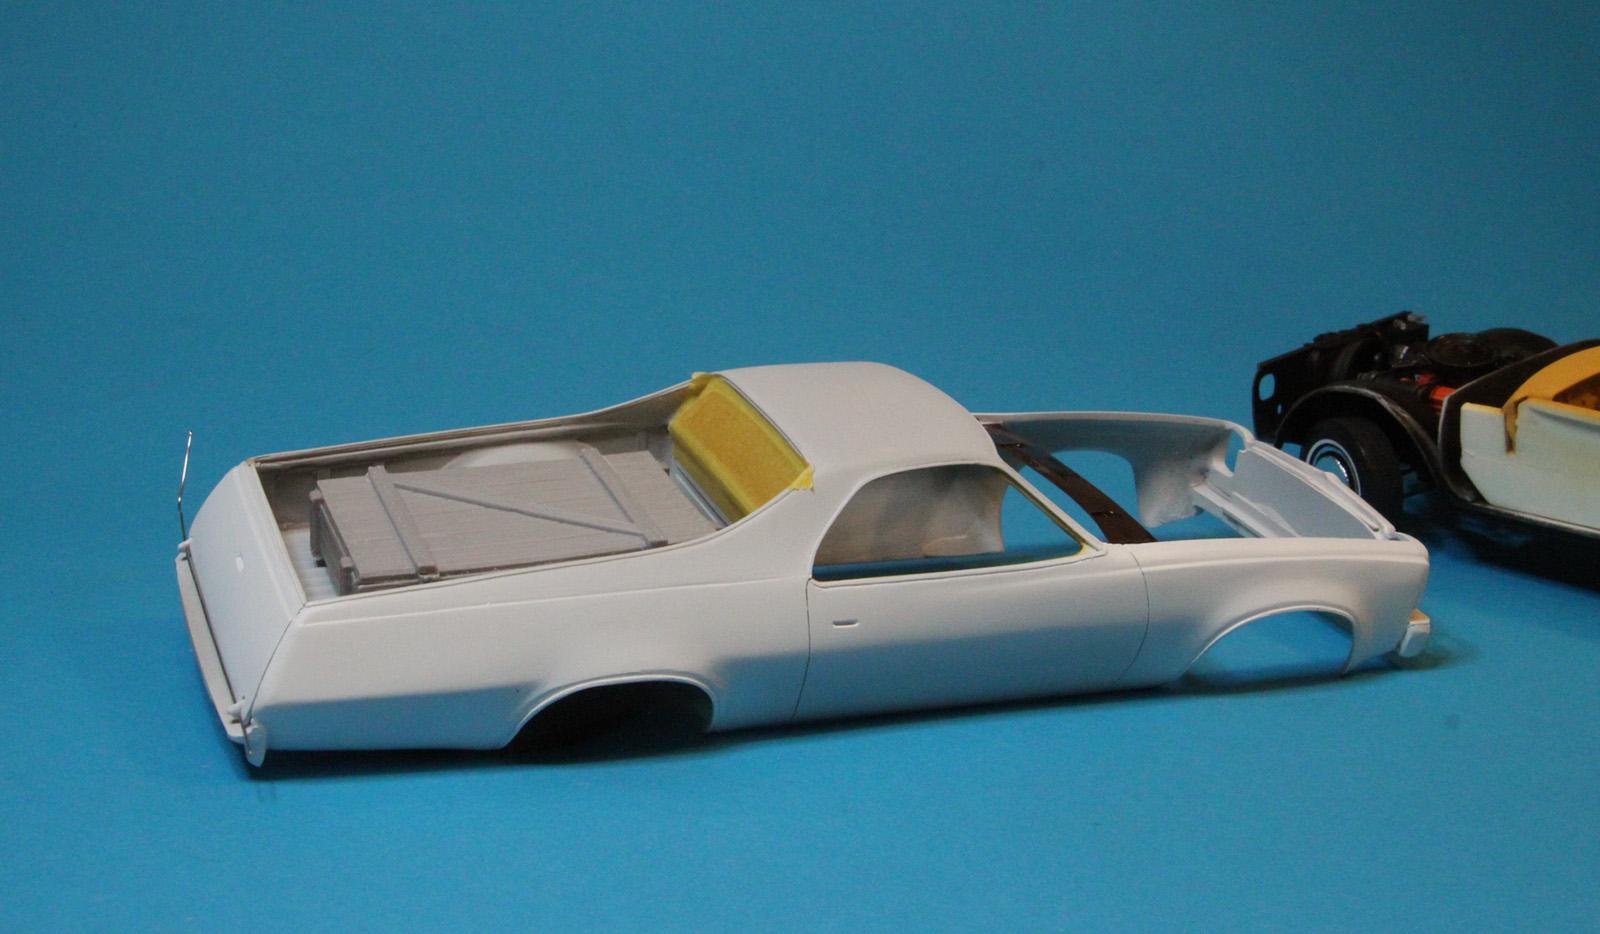
Hello again! Something is coming to show: I've added couple horns, copied from 1969 Ford F-100 Couple boxes were glued for load I can not choose which one to use. May be - both? Stay turned!
-
1973' Chevrolet El Camino
Sergey replied to Sergey's topic in WIP: Model Trucks: Pickups, Vans, SUVs, Light Commercial
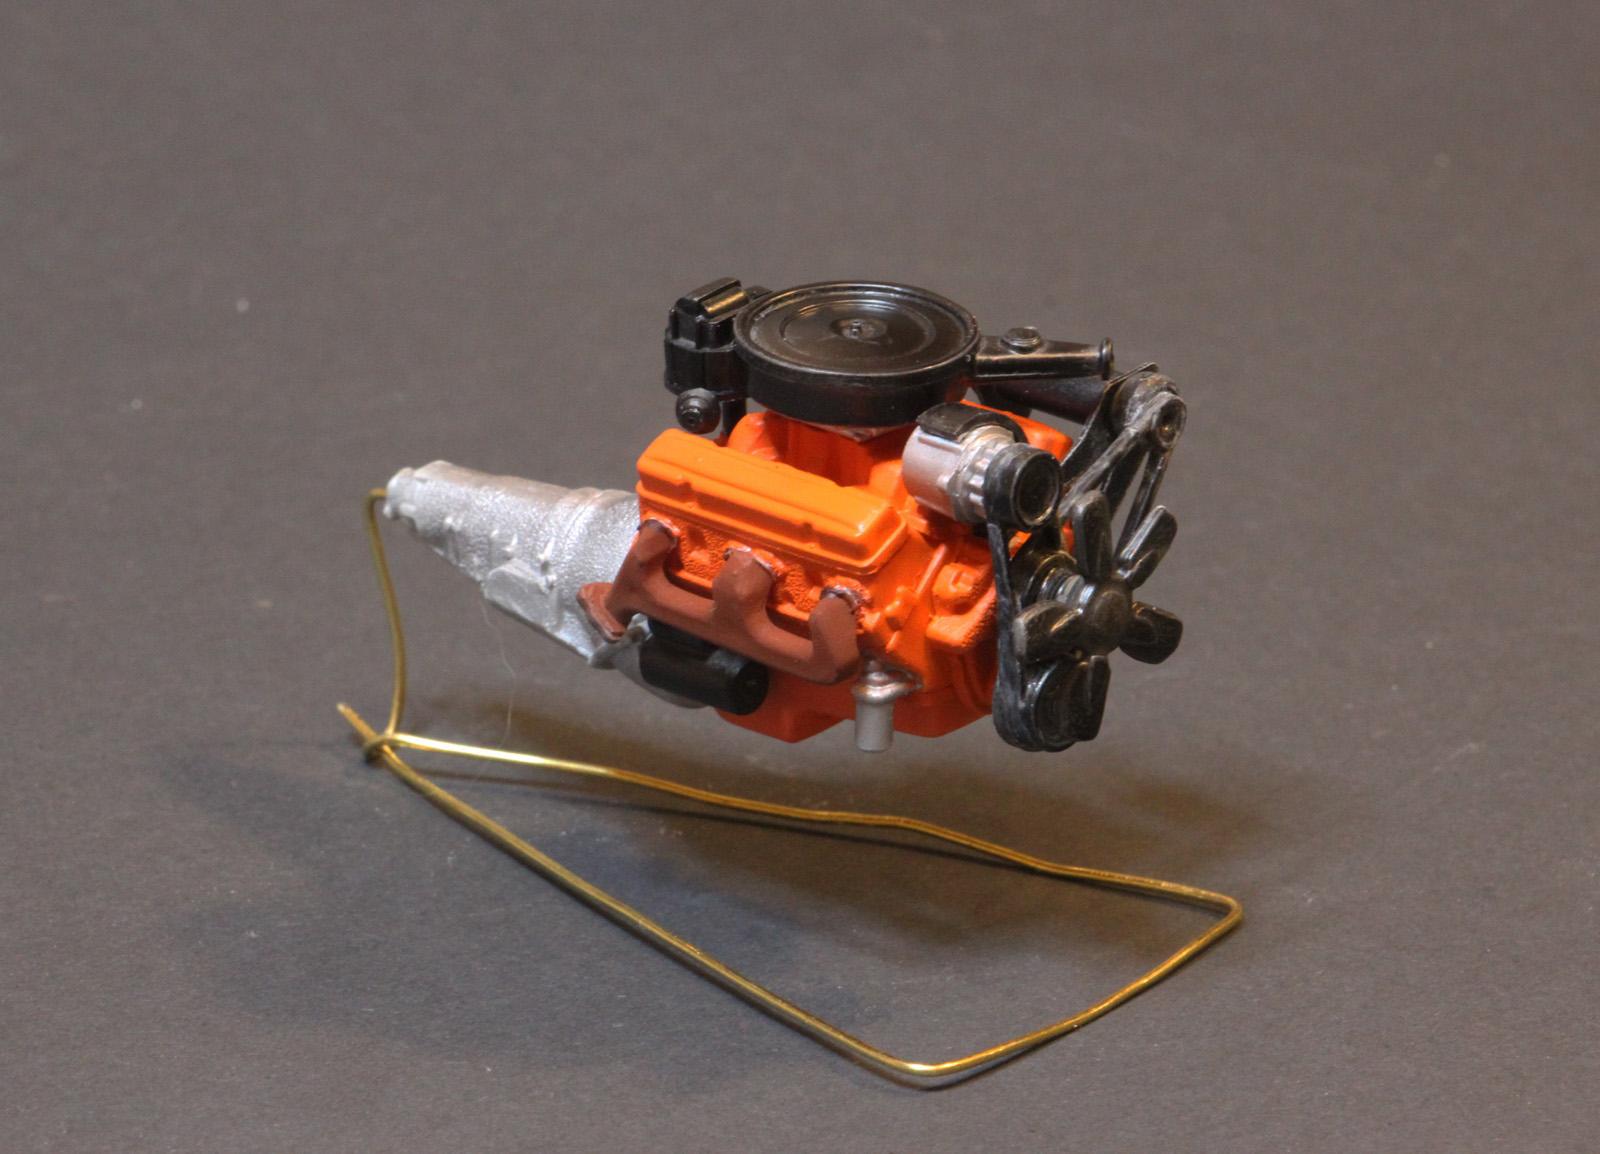
Thank you, Anton! The engine painted and assembled
-
1973' Chevrolet El Camino
Sergey replied to Sergey's topic in WIP: Model Trucks: Pickups, Vans, SUVs, Light Commercial
Thanks to everyone! The Paint is mix of Humbrol's 24, 62 & Tamiya's flat white. It seems I should cover the bench, spare wheel & door cards with semigloss varnish. Here is some wheels progress:
-
1973' Chevrolet El Camino
Sergey replied to Sergey's topic in WIP: Model Trucks: Pickups, Vans, SUVs, Light Commercial
Hello again! Some interior (and not only) progress Masking for roof interior painting Thank you for stay turned!
-
1973' Chevrolet El Camino
Sergey replied to Sergey's topic in WIP: Model Trucks: Pickups, Vans, SUVs, Light Commercial
Hello again! I was tormented by vague doubts that the wheel disk (top right) and the rim (under it) won't meet together when put on the tire. I took a 16mm pipe for electrical wiring and cut off the millimeter ring with a knife. I rubbed it with sandpaper and got about 0.6 mm. The indicated rings are highlighted with arrows. I haven't buzer with the rear wheels. I used 16mm puncher to get a 0.4mm polystyrene disk and drilled holes for the axles. Many people don't remember, and the older ones didn't tell them, there was levers on the steering wheel. Like this: It doesn't take long to bend the wire, but the handle needs to be sharpened. Remind me to buy a ball joint vise for Proxxon next time. "Back in Black!" (c) Some PreShading Yes, I tried the Chinese stylus. Well, what can I say. You need to get used to it. It is, of course, suits for perfect seams. Approximately 0.3mm wide and the drain is the same depth. Otherwise, the styls flushing refuses to drain. -
1973' Chevrolet El Camino
Sergey replied to Sergey's topic in WIP: Model Trucks: Pickups, Vans, SUVs, Light Commercial
Thank you, Anton! No, Ihave not seen. Where can I watch it? -
Hummer H1
Sergey replied to Sergey's topic in WIP: Model Trucks: Pickups, Vans, SUVs, Light Commercial
It's sad to read. Does anyone have same trouble? -
1973' Chevrolet El Camino
Sergey replied to Sergey's topic in WIP: Model Trucks: Pickups, Vans, SUVs, Light Commercial
Thank you! -
Hummer H1
Sergey replied to Sergey's topic in WIP: Model Trucks: Pickups, Vans, SUVs, Light Commercial
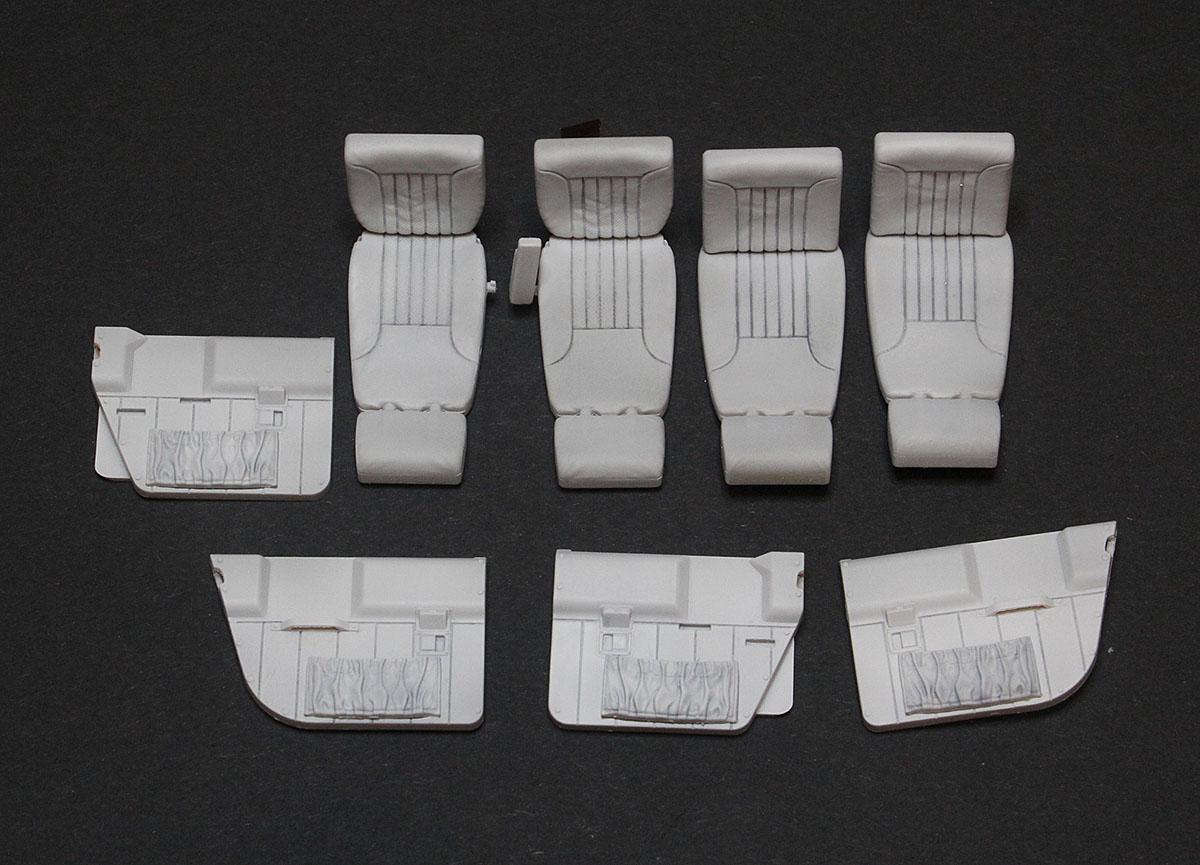
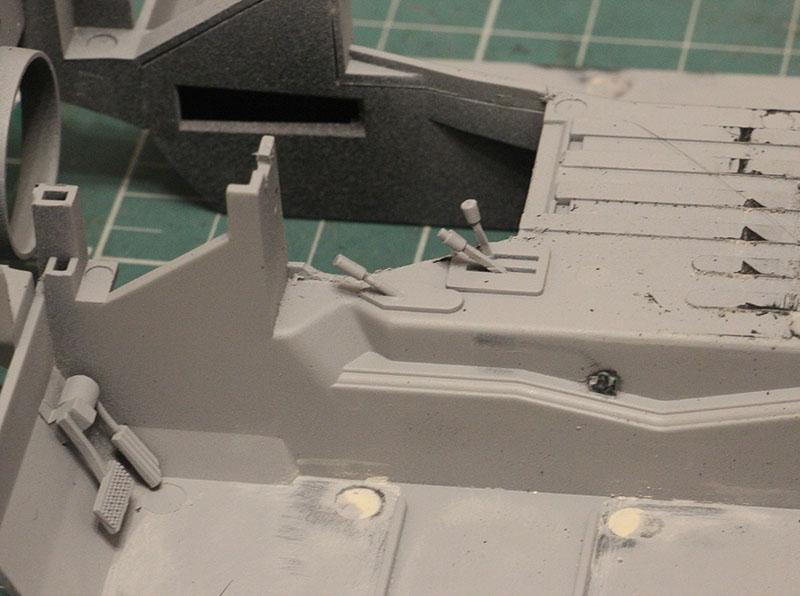
Thank you Anton and Brian! Let's continue to approach the final. I decided to remove all levers and pedals during the painting. I dug through the Tamiya Thin Cement. However, not all the details have come off. Gear shifts were turn off. I removed the child seats in the middle, i.e. sawed off the mounting frame and sanded the ribs on flor. Then I'll cover the place with a velvet paper rug. Also the gap on the back of roth was filled and sanded To be continued
-
1973' Chevrolet El Camino
Sergey replied to Sergey's topic in WIP: Model Trucks: Pickups, Vans, SUVs, Light Commercial
Hello again! Thank you Anton, Carl & Ron! "The patient is more alive than dead" (c) After the primer, I had to fix something there and ere The base: I'm glad you're still with me! -
1973' Chevrolet El Camino
Sergey replied to Sergey's topic in WIP: Model Trucks: Pickups, Vans, SUVs, Light Commercial
Hello everyone! It turned out to be a free evening, I covered the body and a couple more parts with light gray primer -
Hummer H1
Sergey replied to Sergey's topic in WIP: Model Trucks: Pickups, Vans, SUVs, Light Commercial
Hello again! I finally got to the primer. Chassis: Interior tub The body Thank you for interest! -
Hummer H1
Sergey replied to Sergey's topic in WIP: Model Trucks: Pickups, Vans, SUVs, Light Commercial
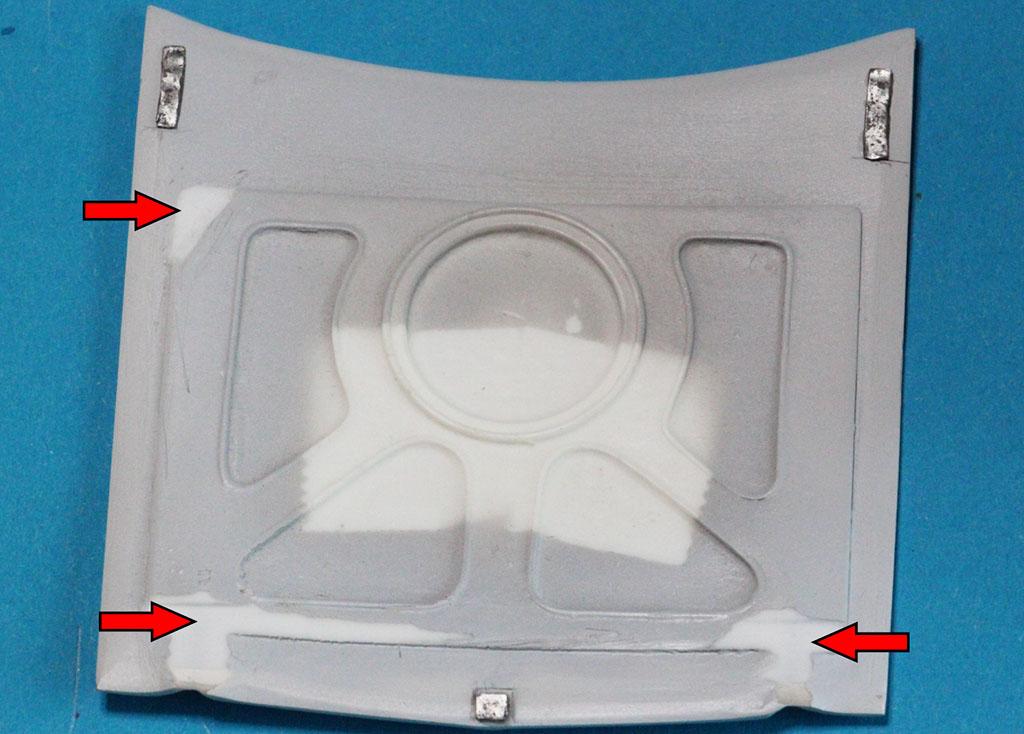
Thank you James! Hello again, dear fans of plastic and other non-traditional materials! Finally glued the Hummer body, but first..... According to the idea of the Meng's engineers, all the body panels are glued around the interior tub. Not our strategy. I had to saw through the adjacent surfaces in the interior and body in order to later insert the painted interior into the painted cabin. This profile is at the back of the sidewall, to which the roof with rear windows is glued. The mate is smooth and glued all along the ends. By the way, I glued it with this glue (apparently the red plastic in this kit is ABS): And what are we doing? Right! We glue up different profiles to get a flat surface First, a triangle profile, that is, a square profile, sawn lengthwise. Next - a semicircular profile of 1mm In other places, the gaps had to be filled, but the panel lines around the doors are now normal. Thanks for your attention! Stay turned! -
Hummer H1
Sergey replied to Sergey's topic in WIP: Model Trucks: Pickups, Vans, SUVs, Light Commercial
Thank you for interest, Dan! I strongly welcome you! I had a little time to work on the Hummer. Filler necks were separated from the sidewall panel This is to pull the glued body onto the interior. I had to tinker with the front one to keep it solid. But the protruding part of a tail one was just sawed off from the inside. The cuts on the hood (shown with arrows) were filled with glue-putty. At the same time, the step from the joint of the molds was filled too. I deepened the bezels for the taillights - on the left. The initial state is on the right. I tried to do something that is not in the kit - the brake master cylinder and the brake booster. As far as it was possible with my fingers. I'm still having a hard time with modeling. It's faster, using hands for me. I wasted (using Dremel) a little space for the brake tank. The casing had thick plastic. I was guided by this photo to make brake master cylinder and the brake booster. Thanks for your attention! The feedback is very valuable to me.