LDO
-
Posts
3,165 -
Joined
-
Last visited
Content Type
Profiles
Forums
Events
Gallery
Everything posted by LDO
-
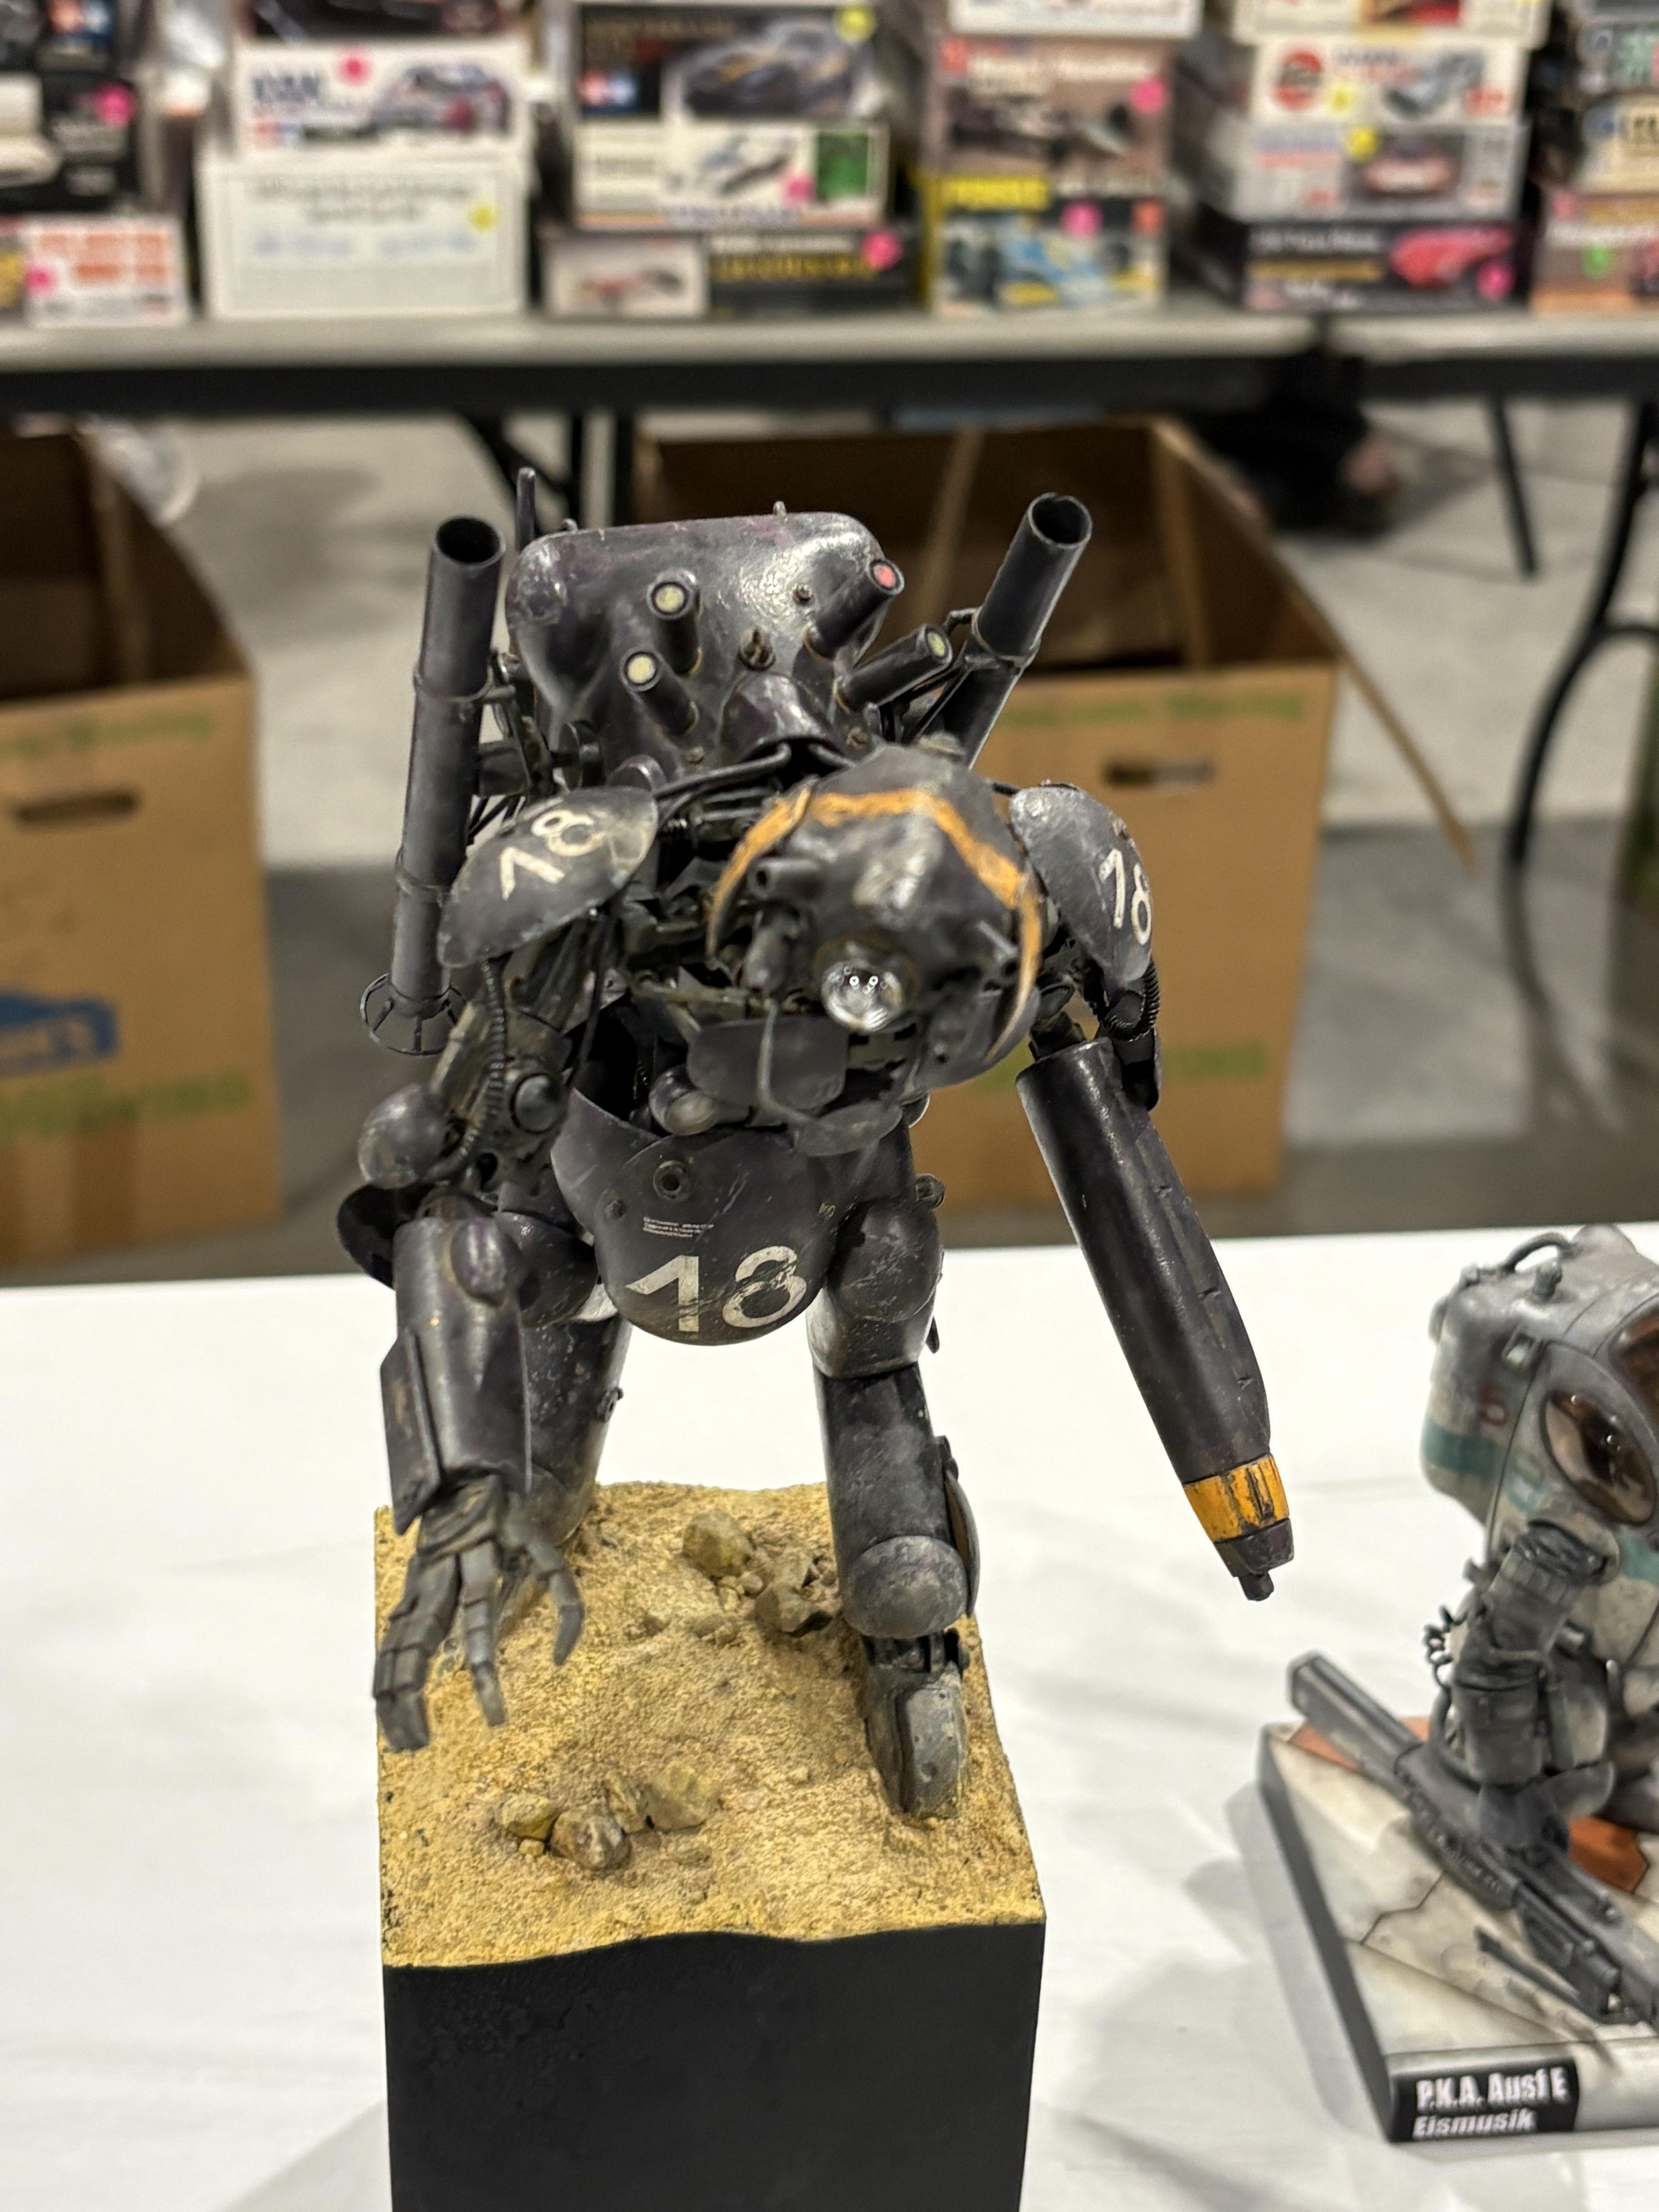
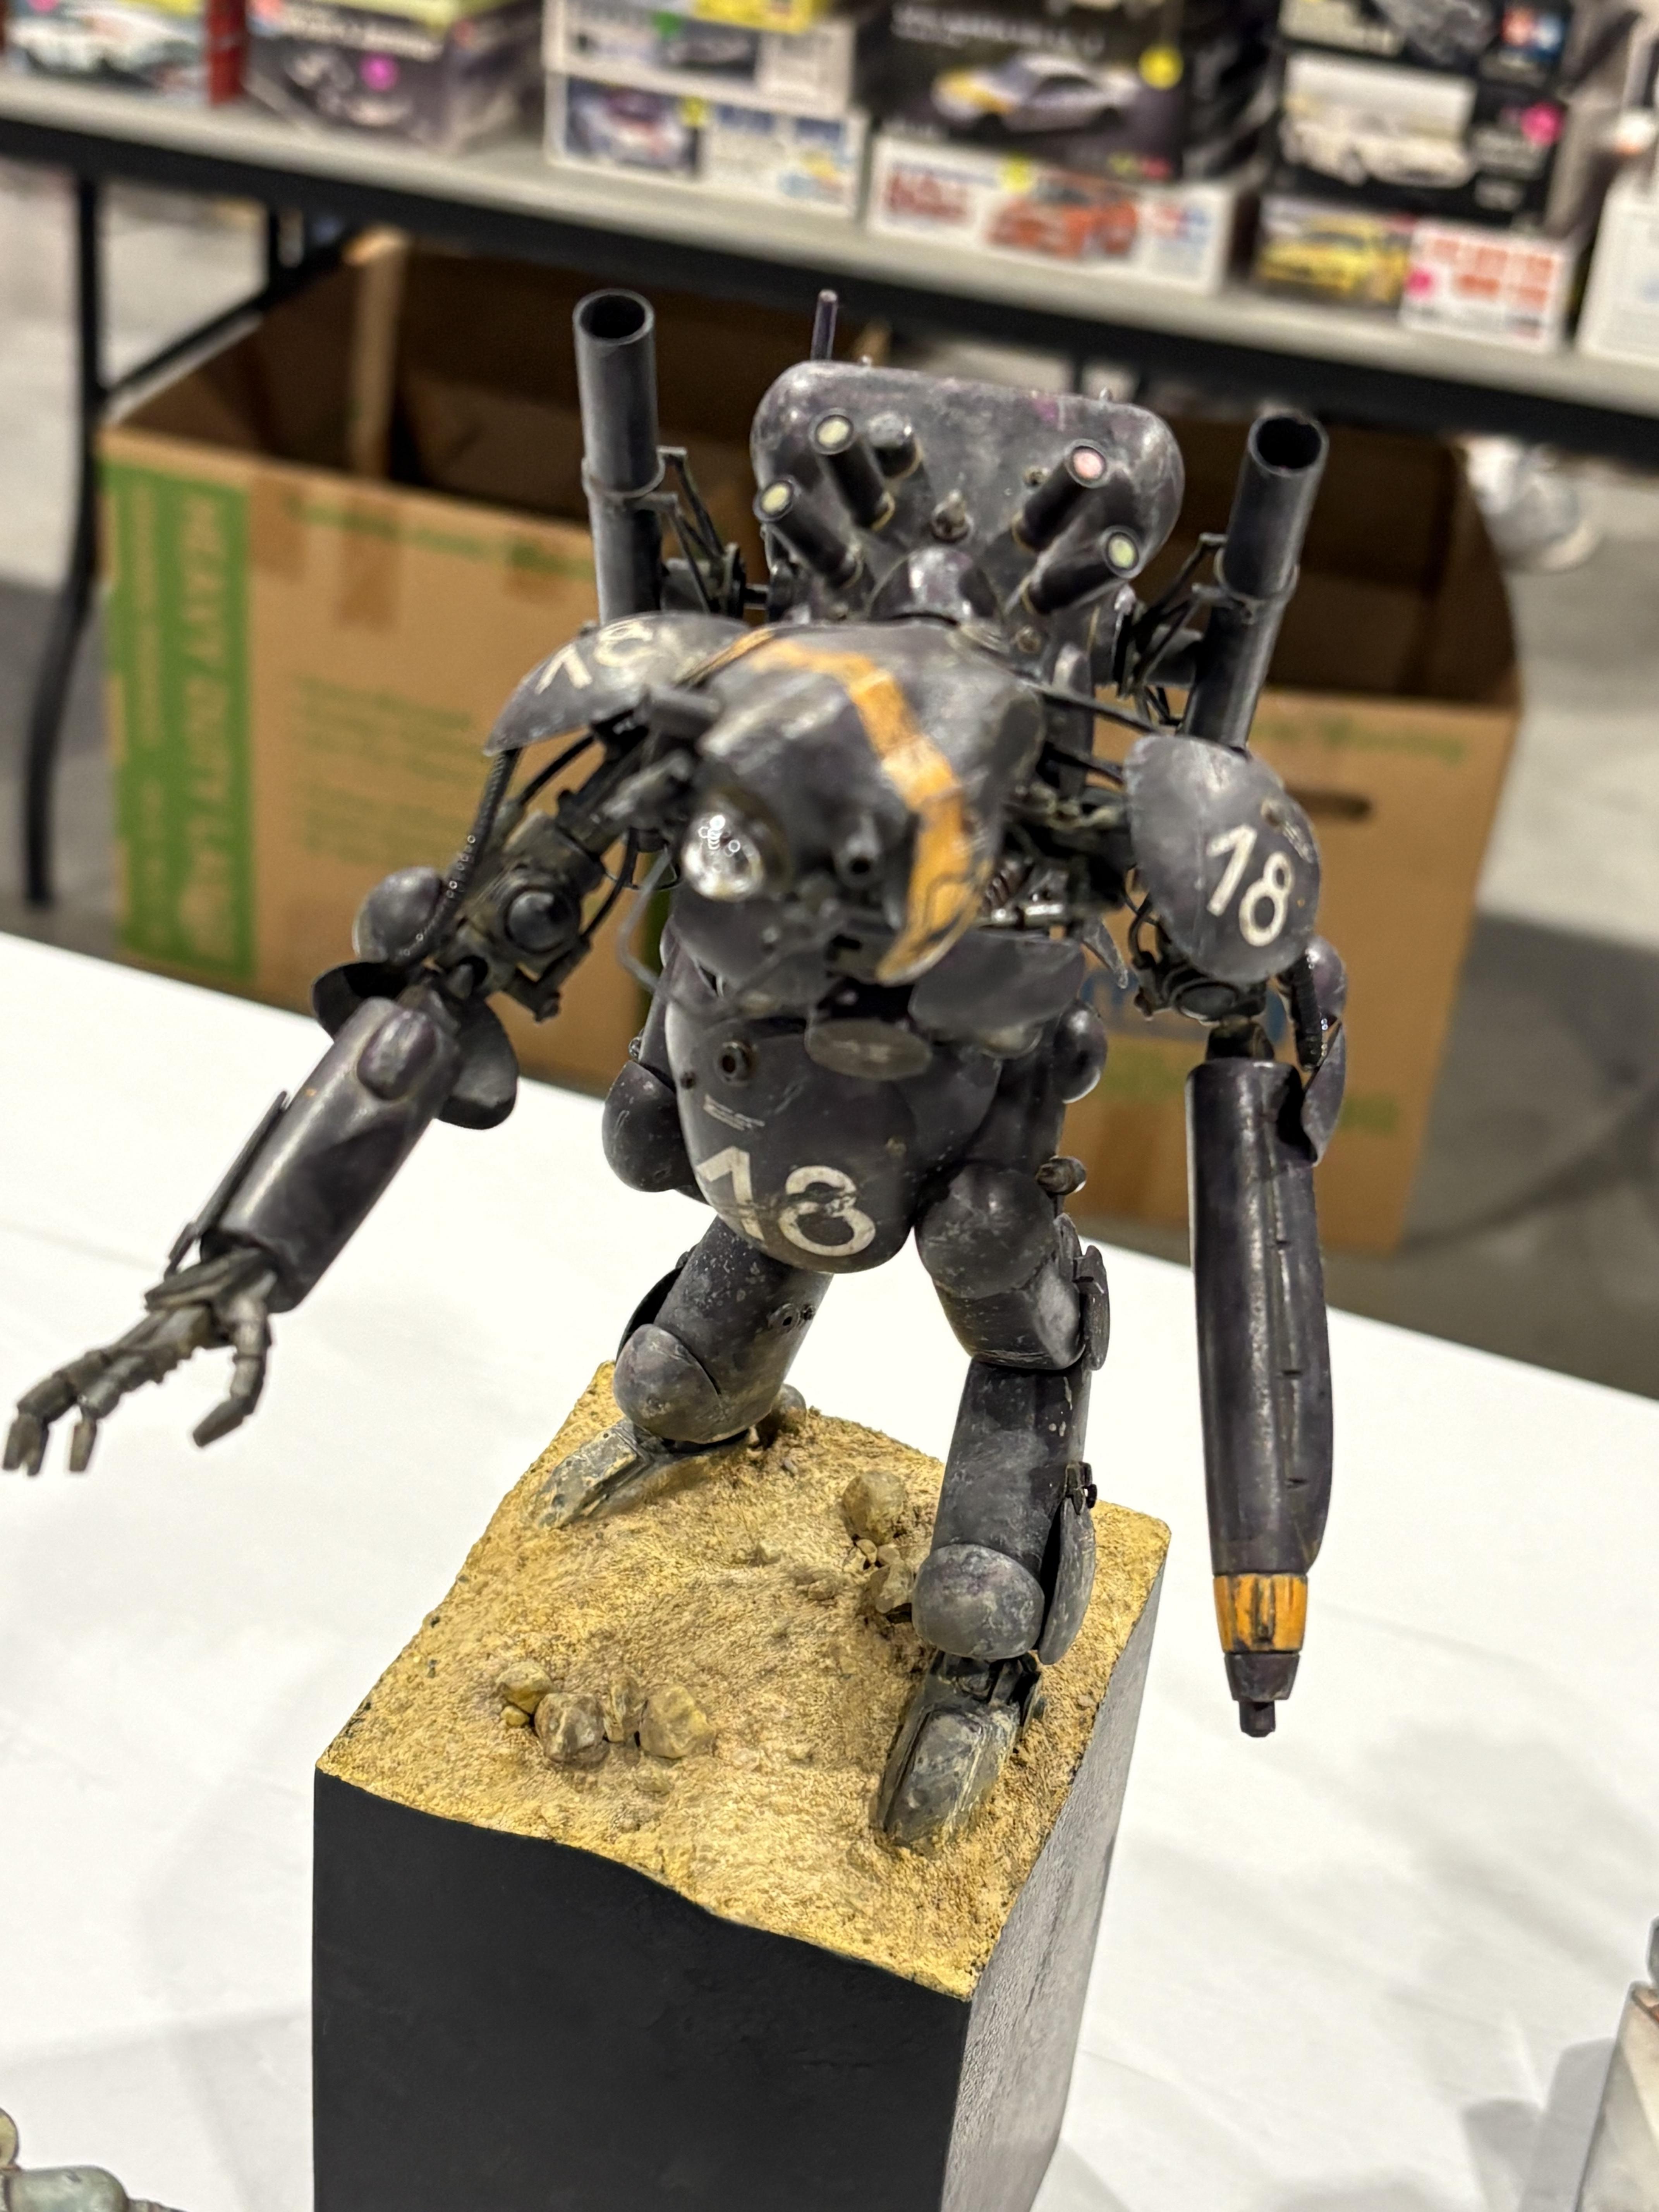
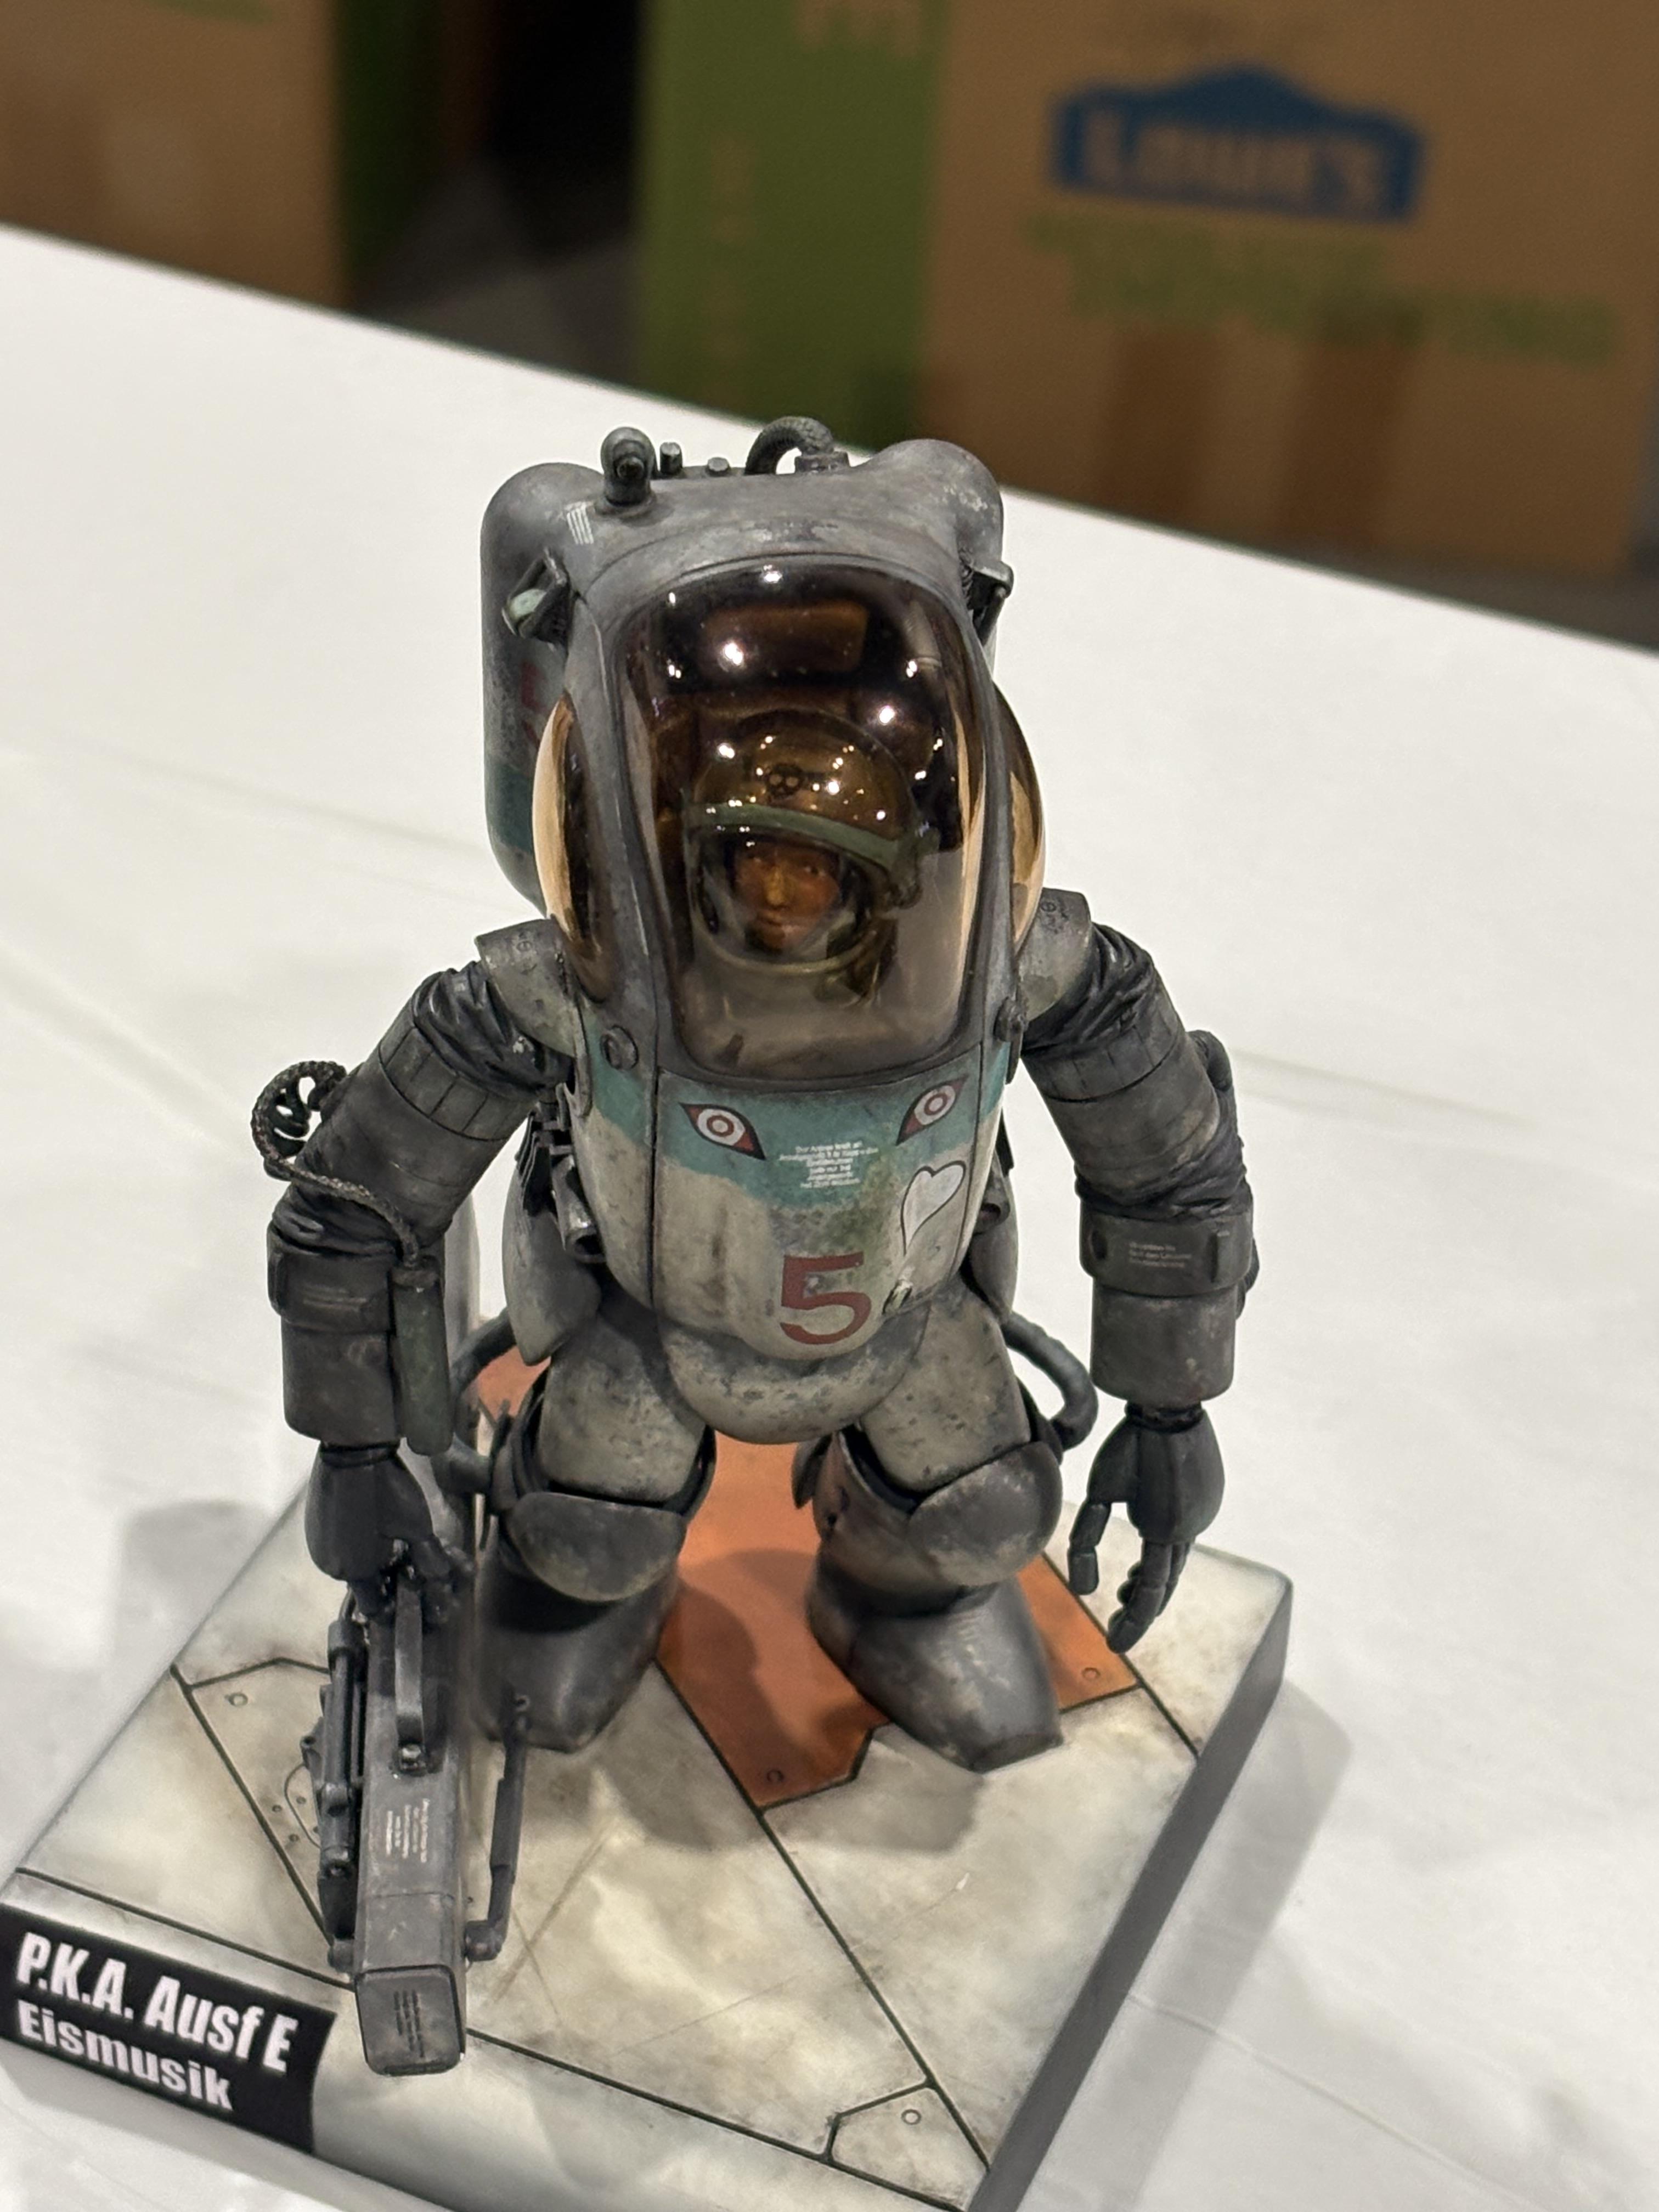
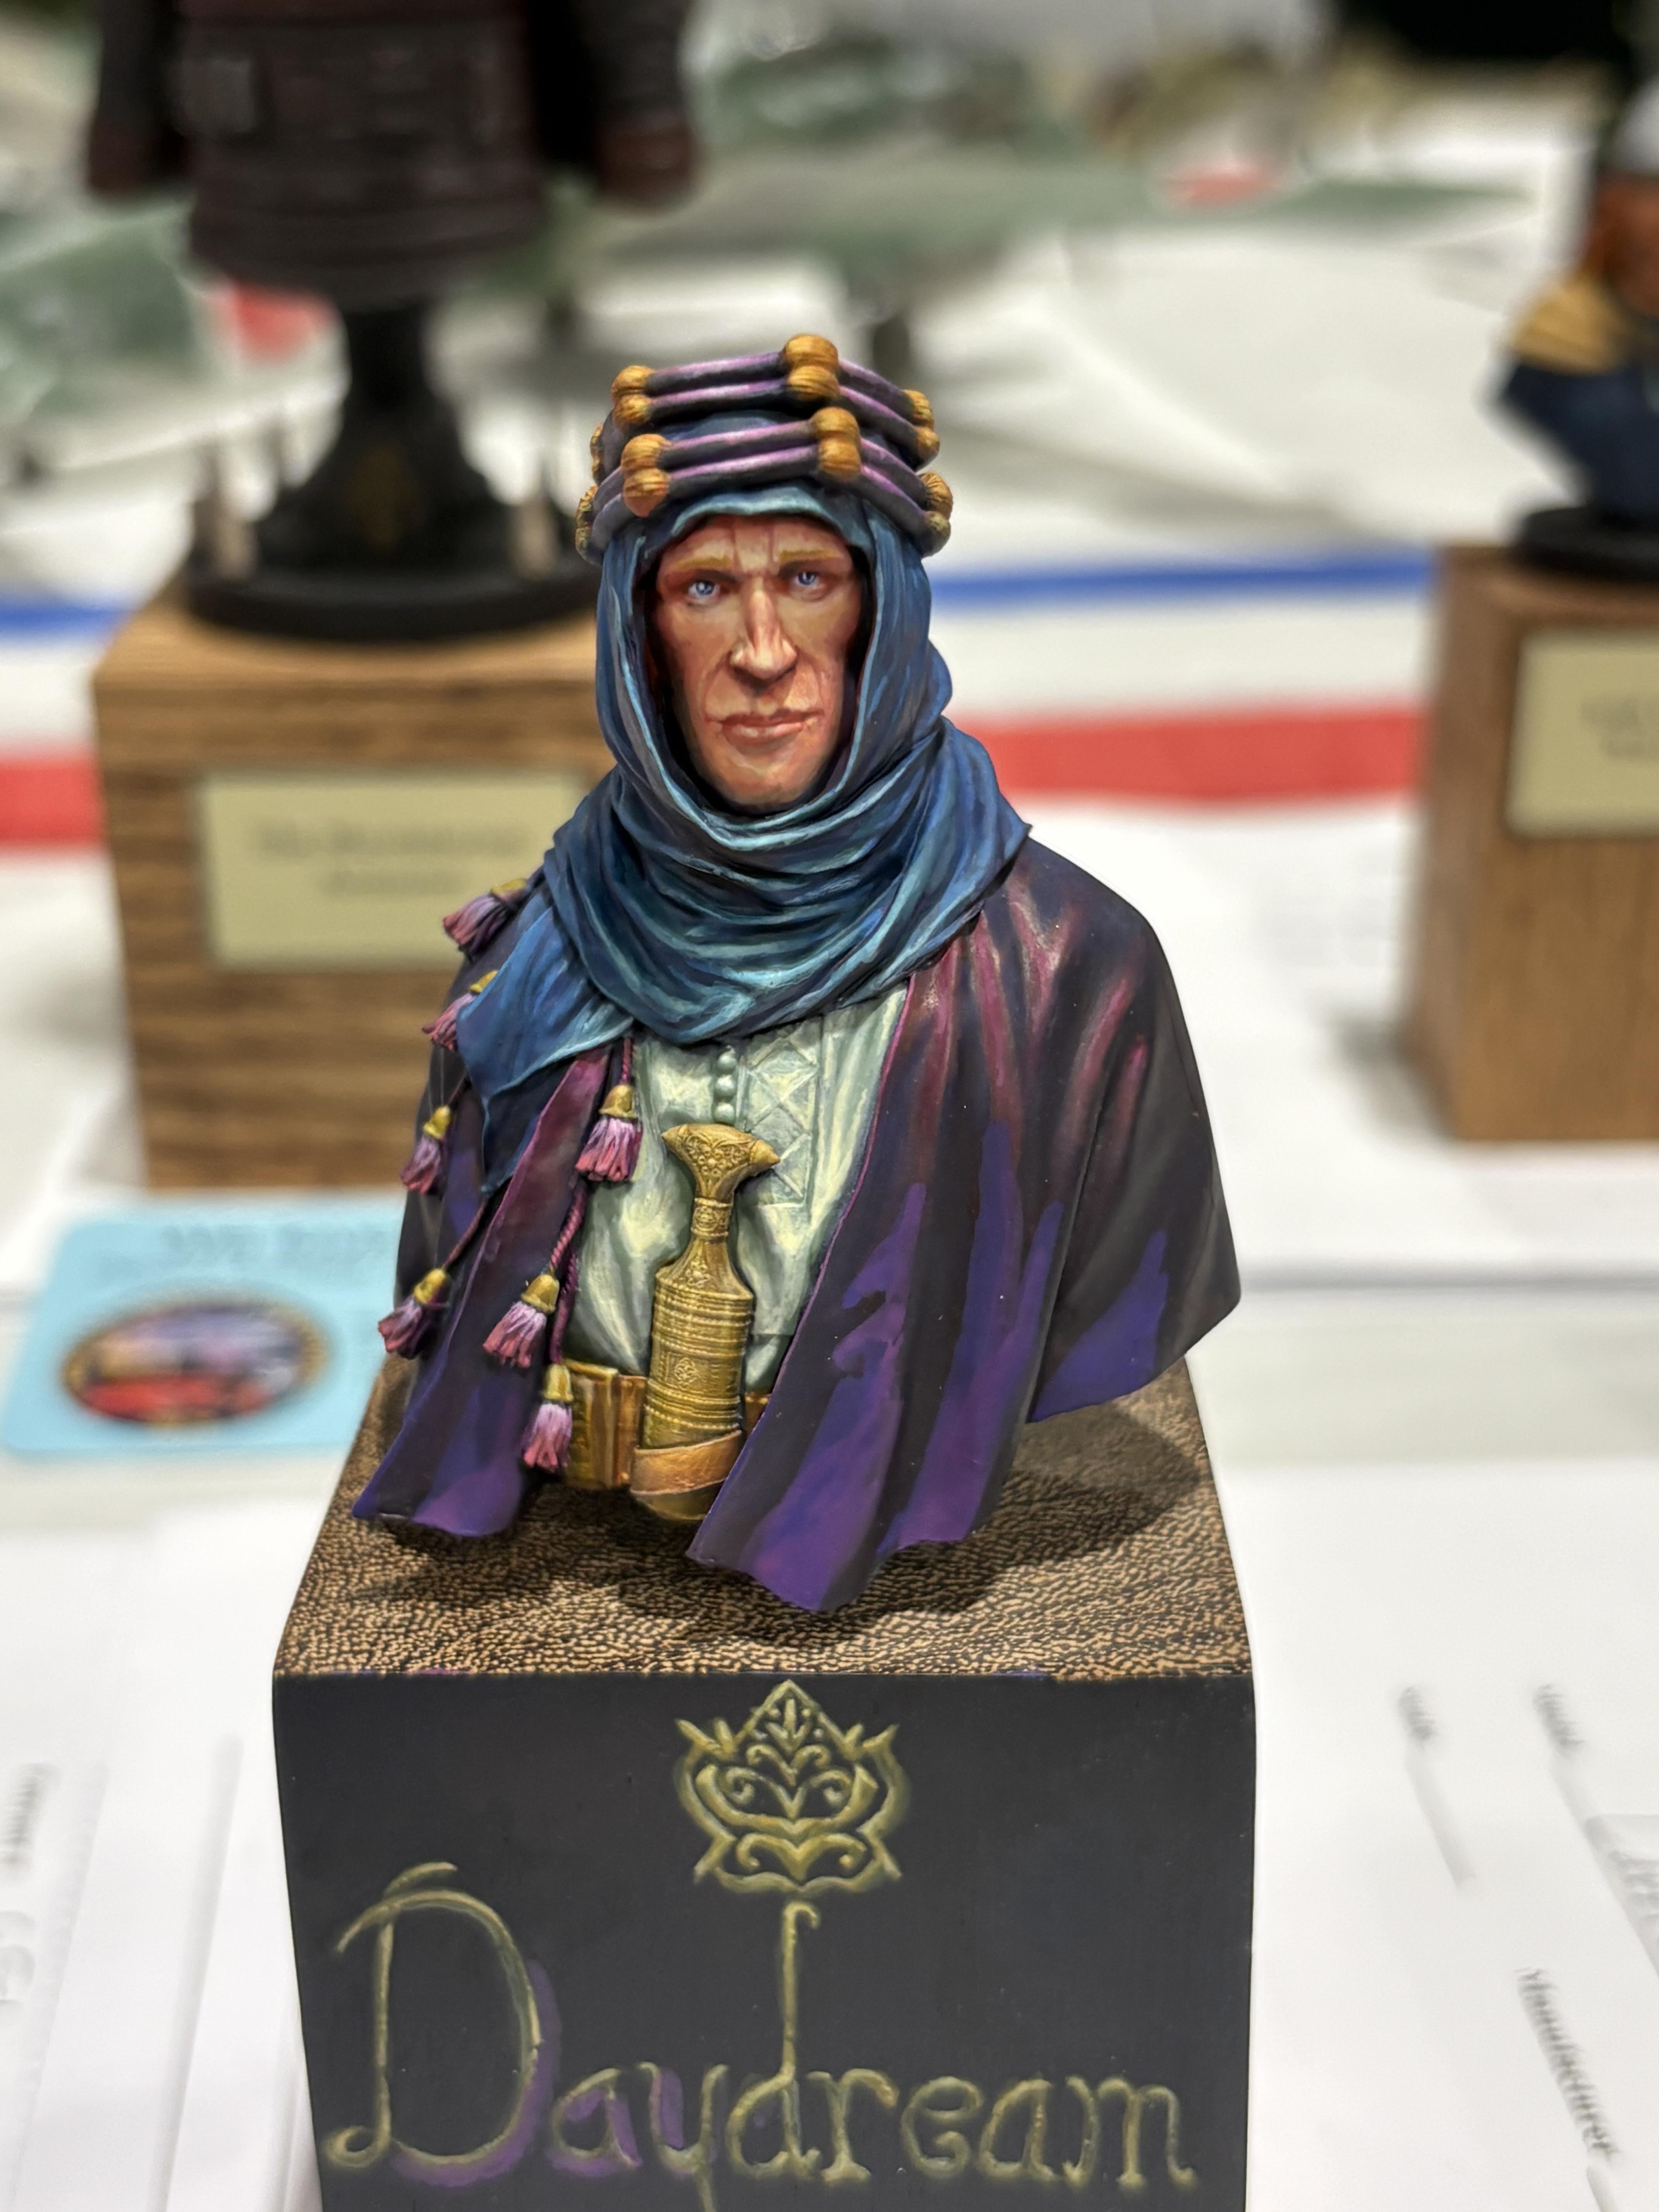
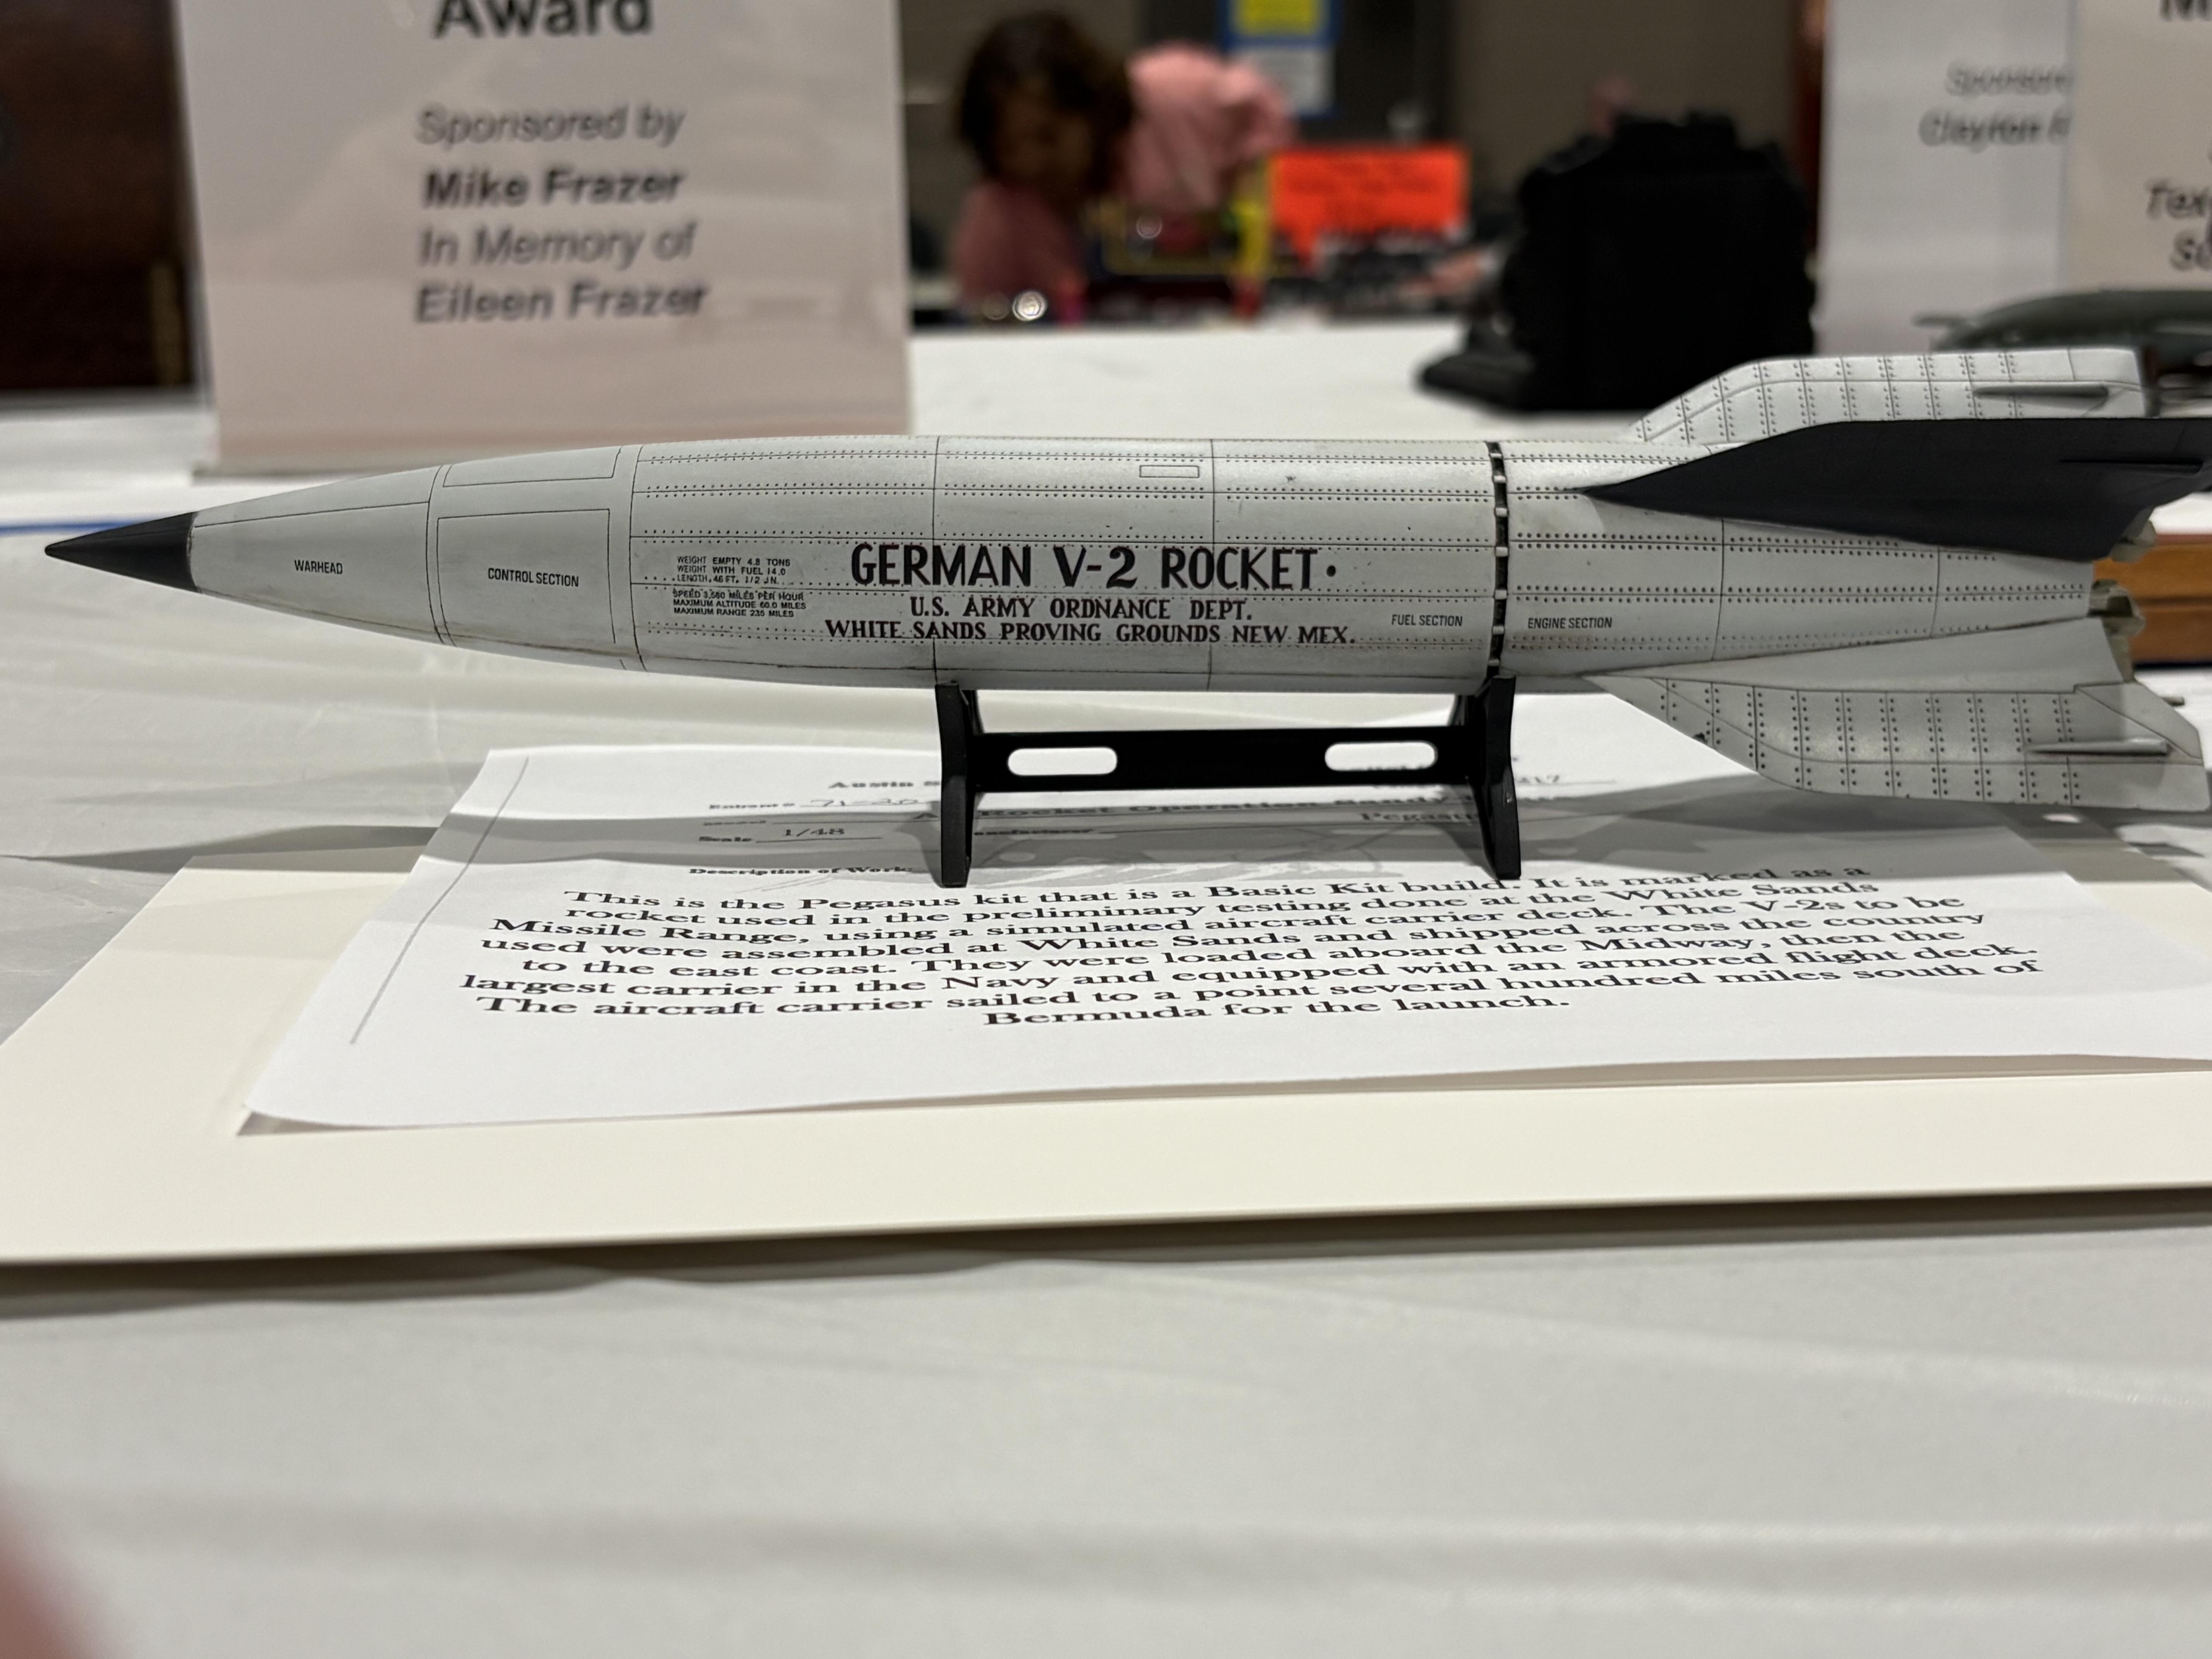
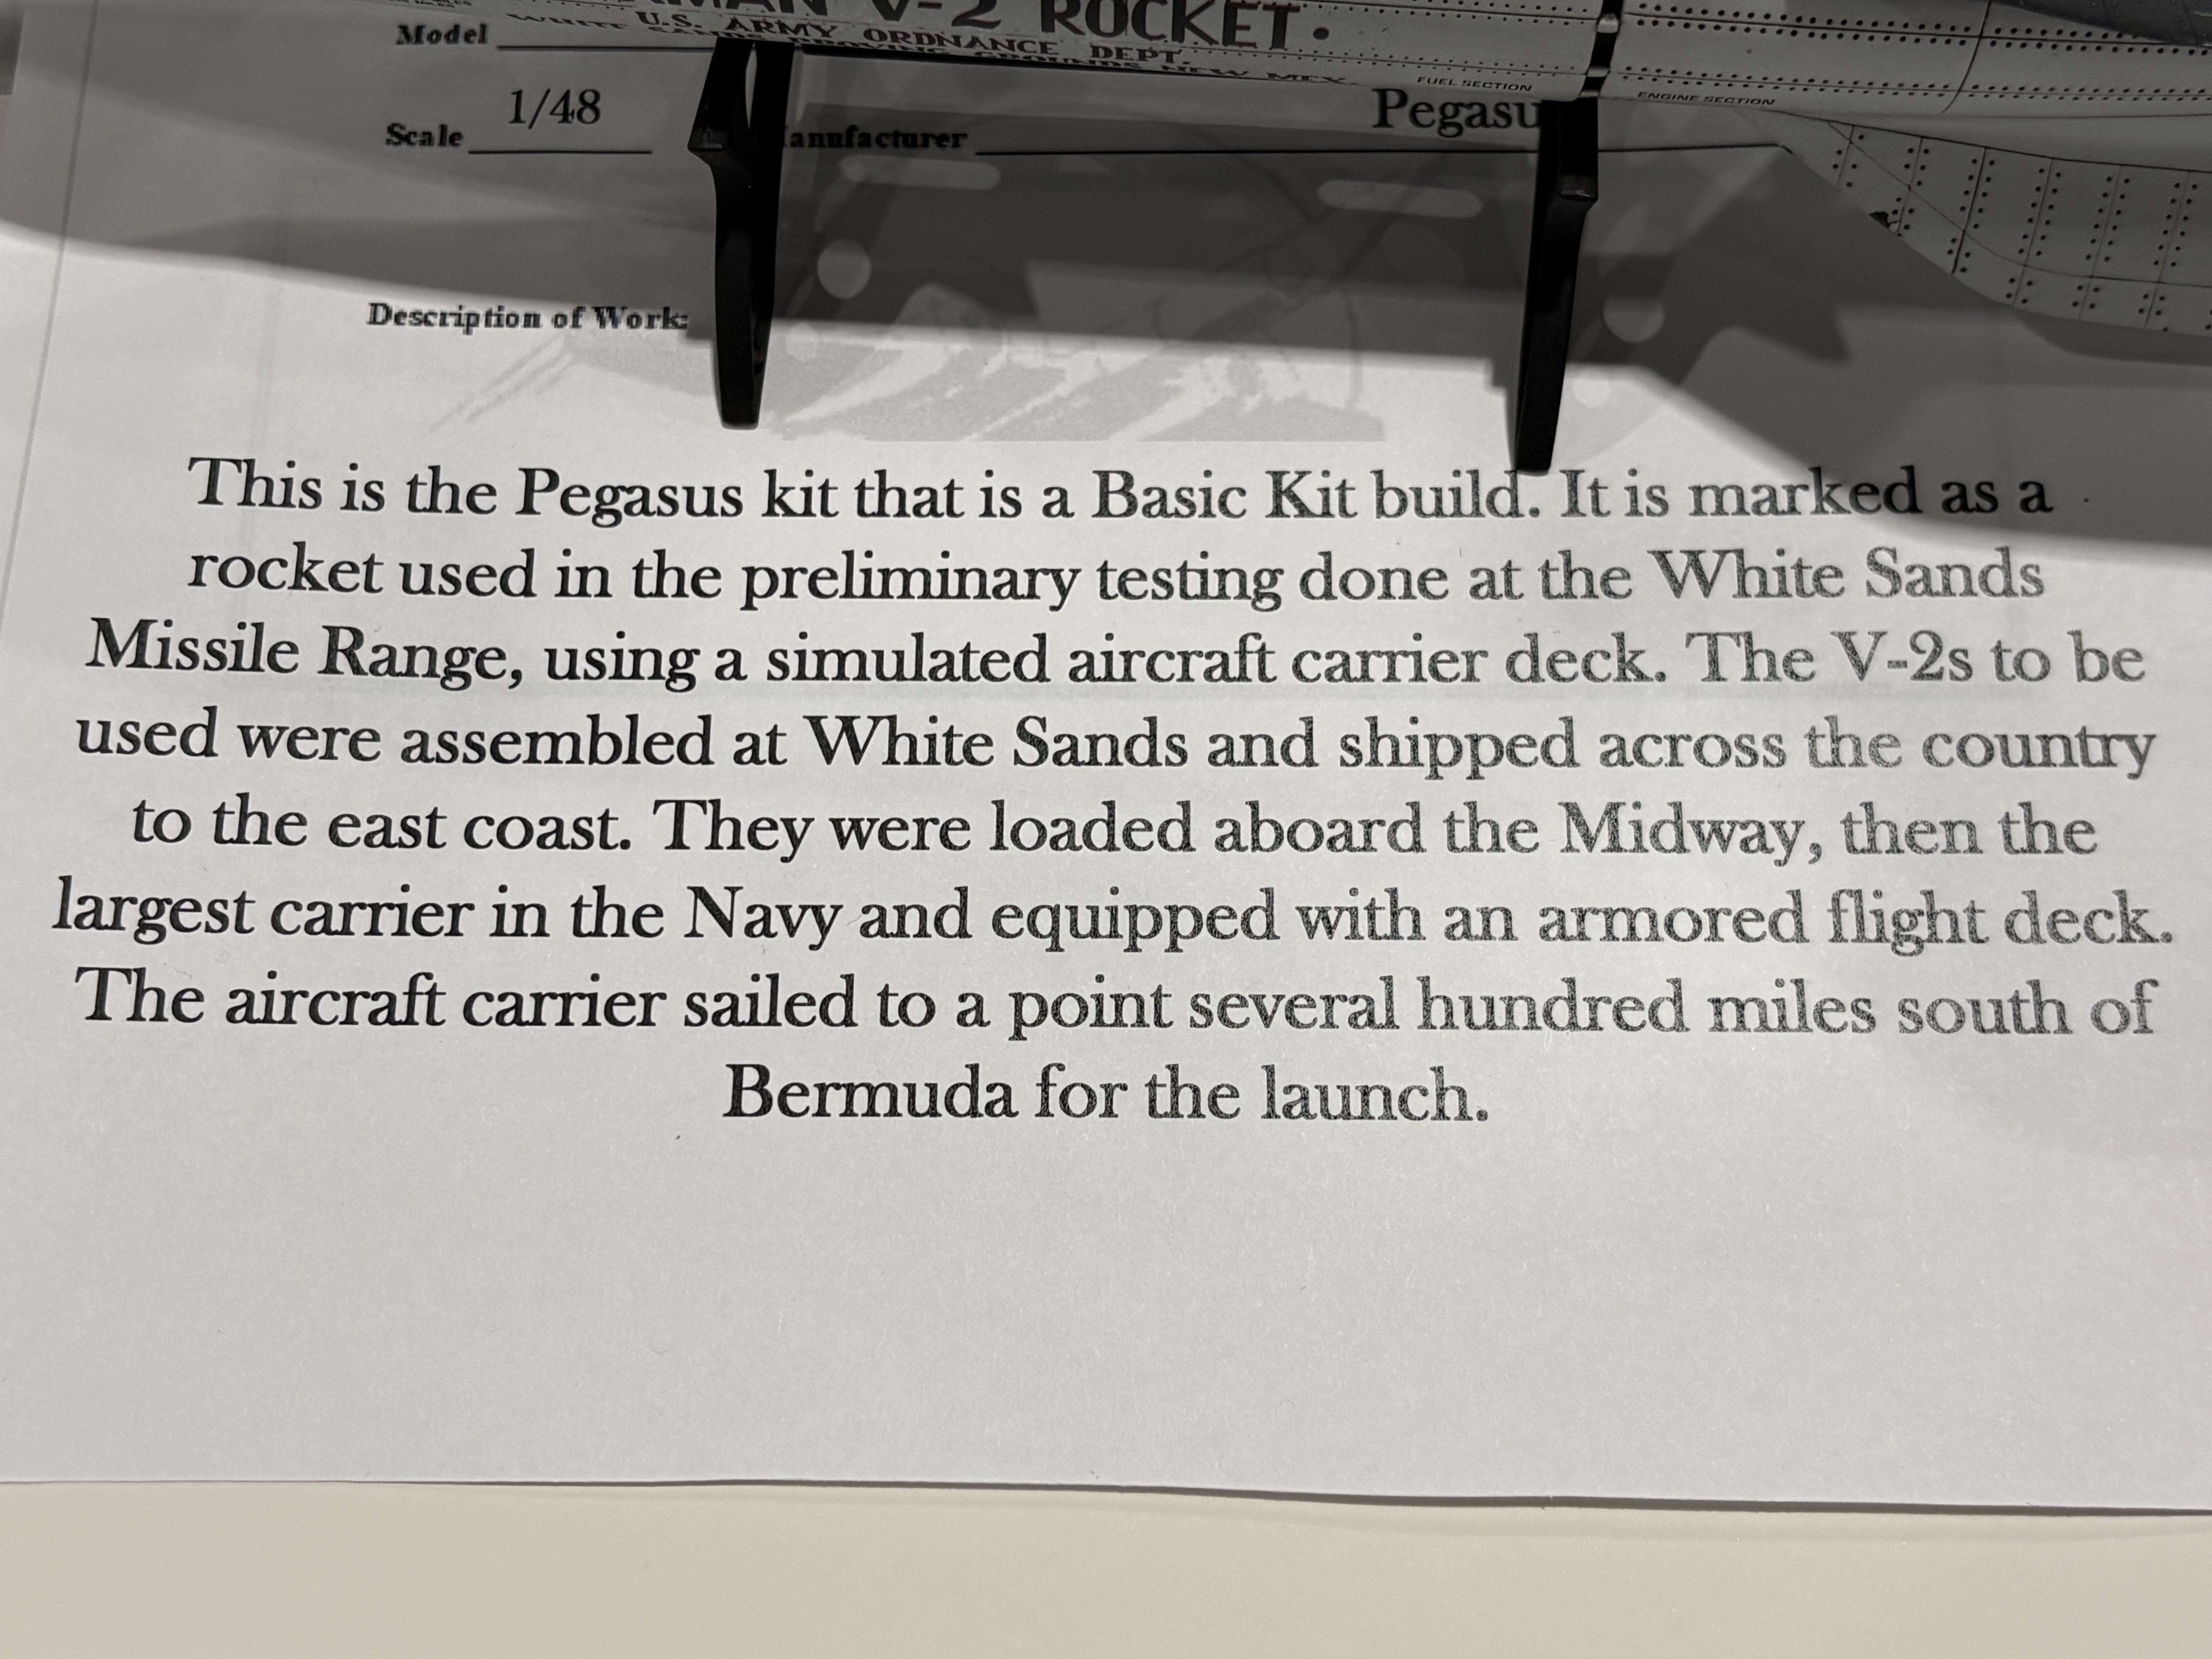
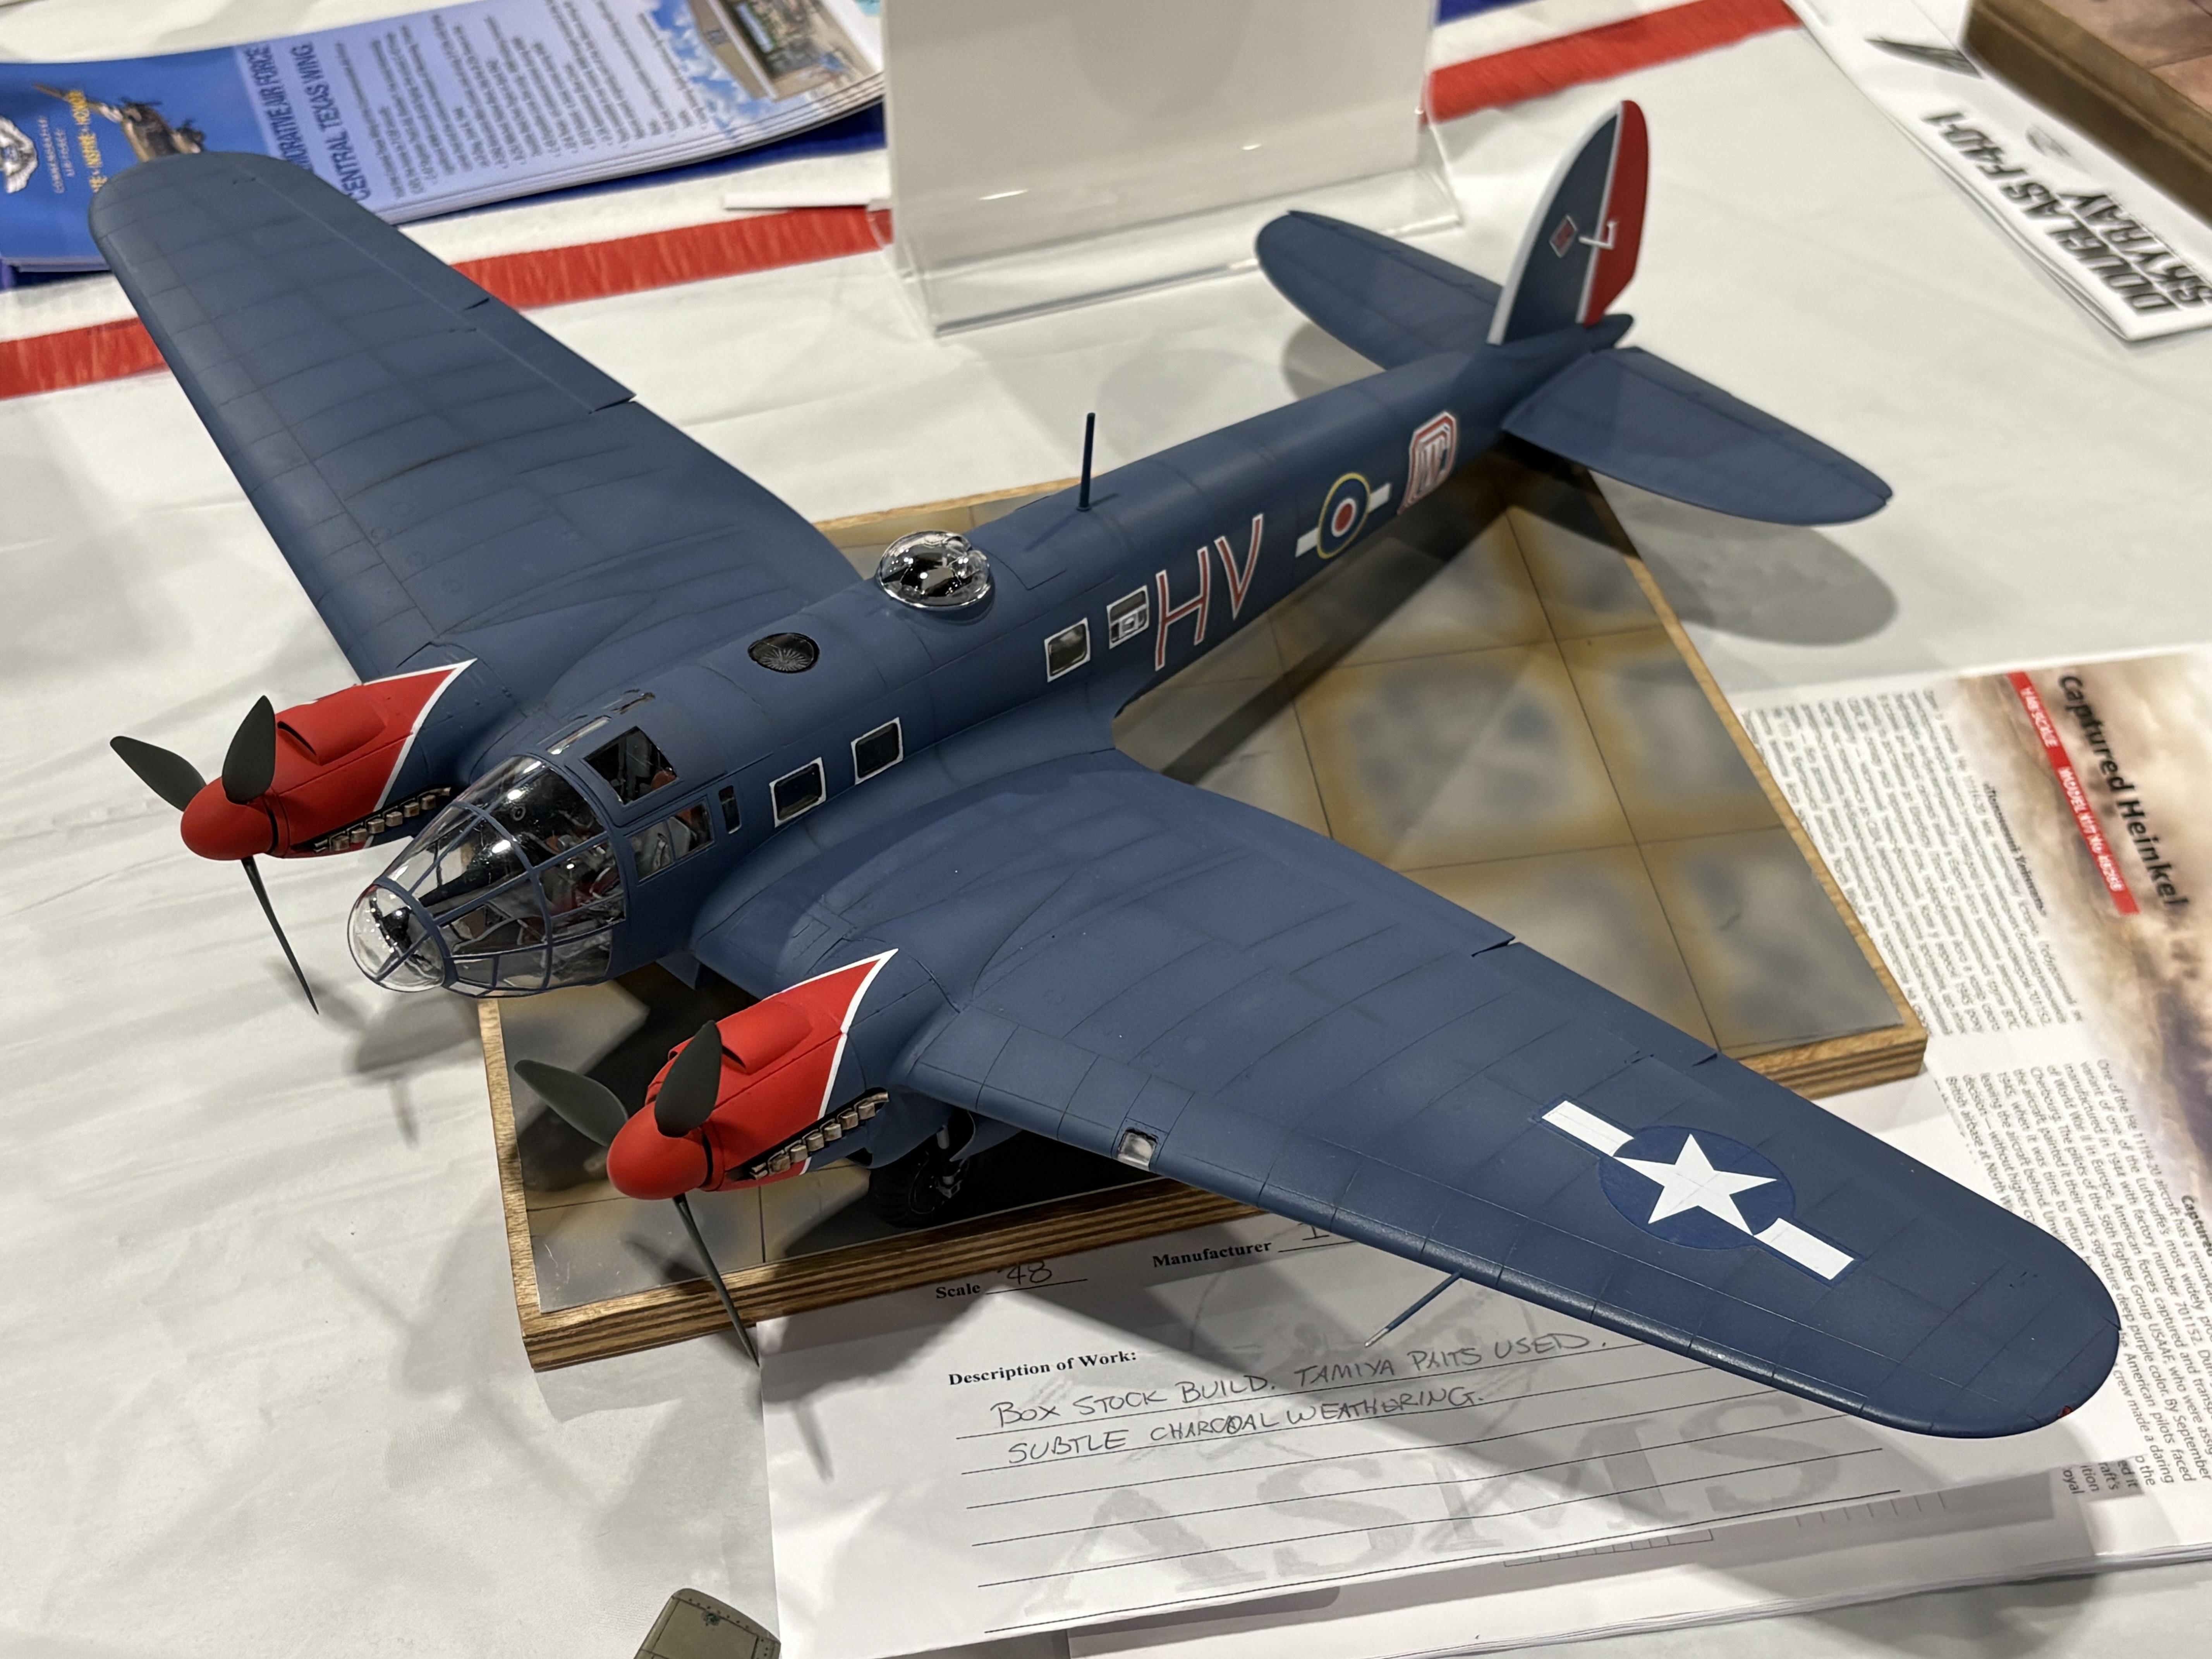
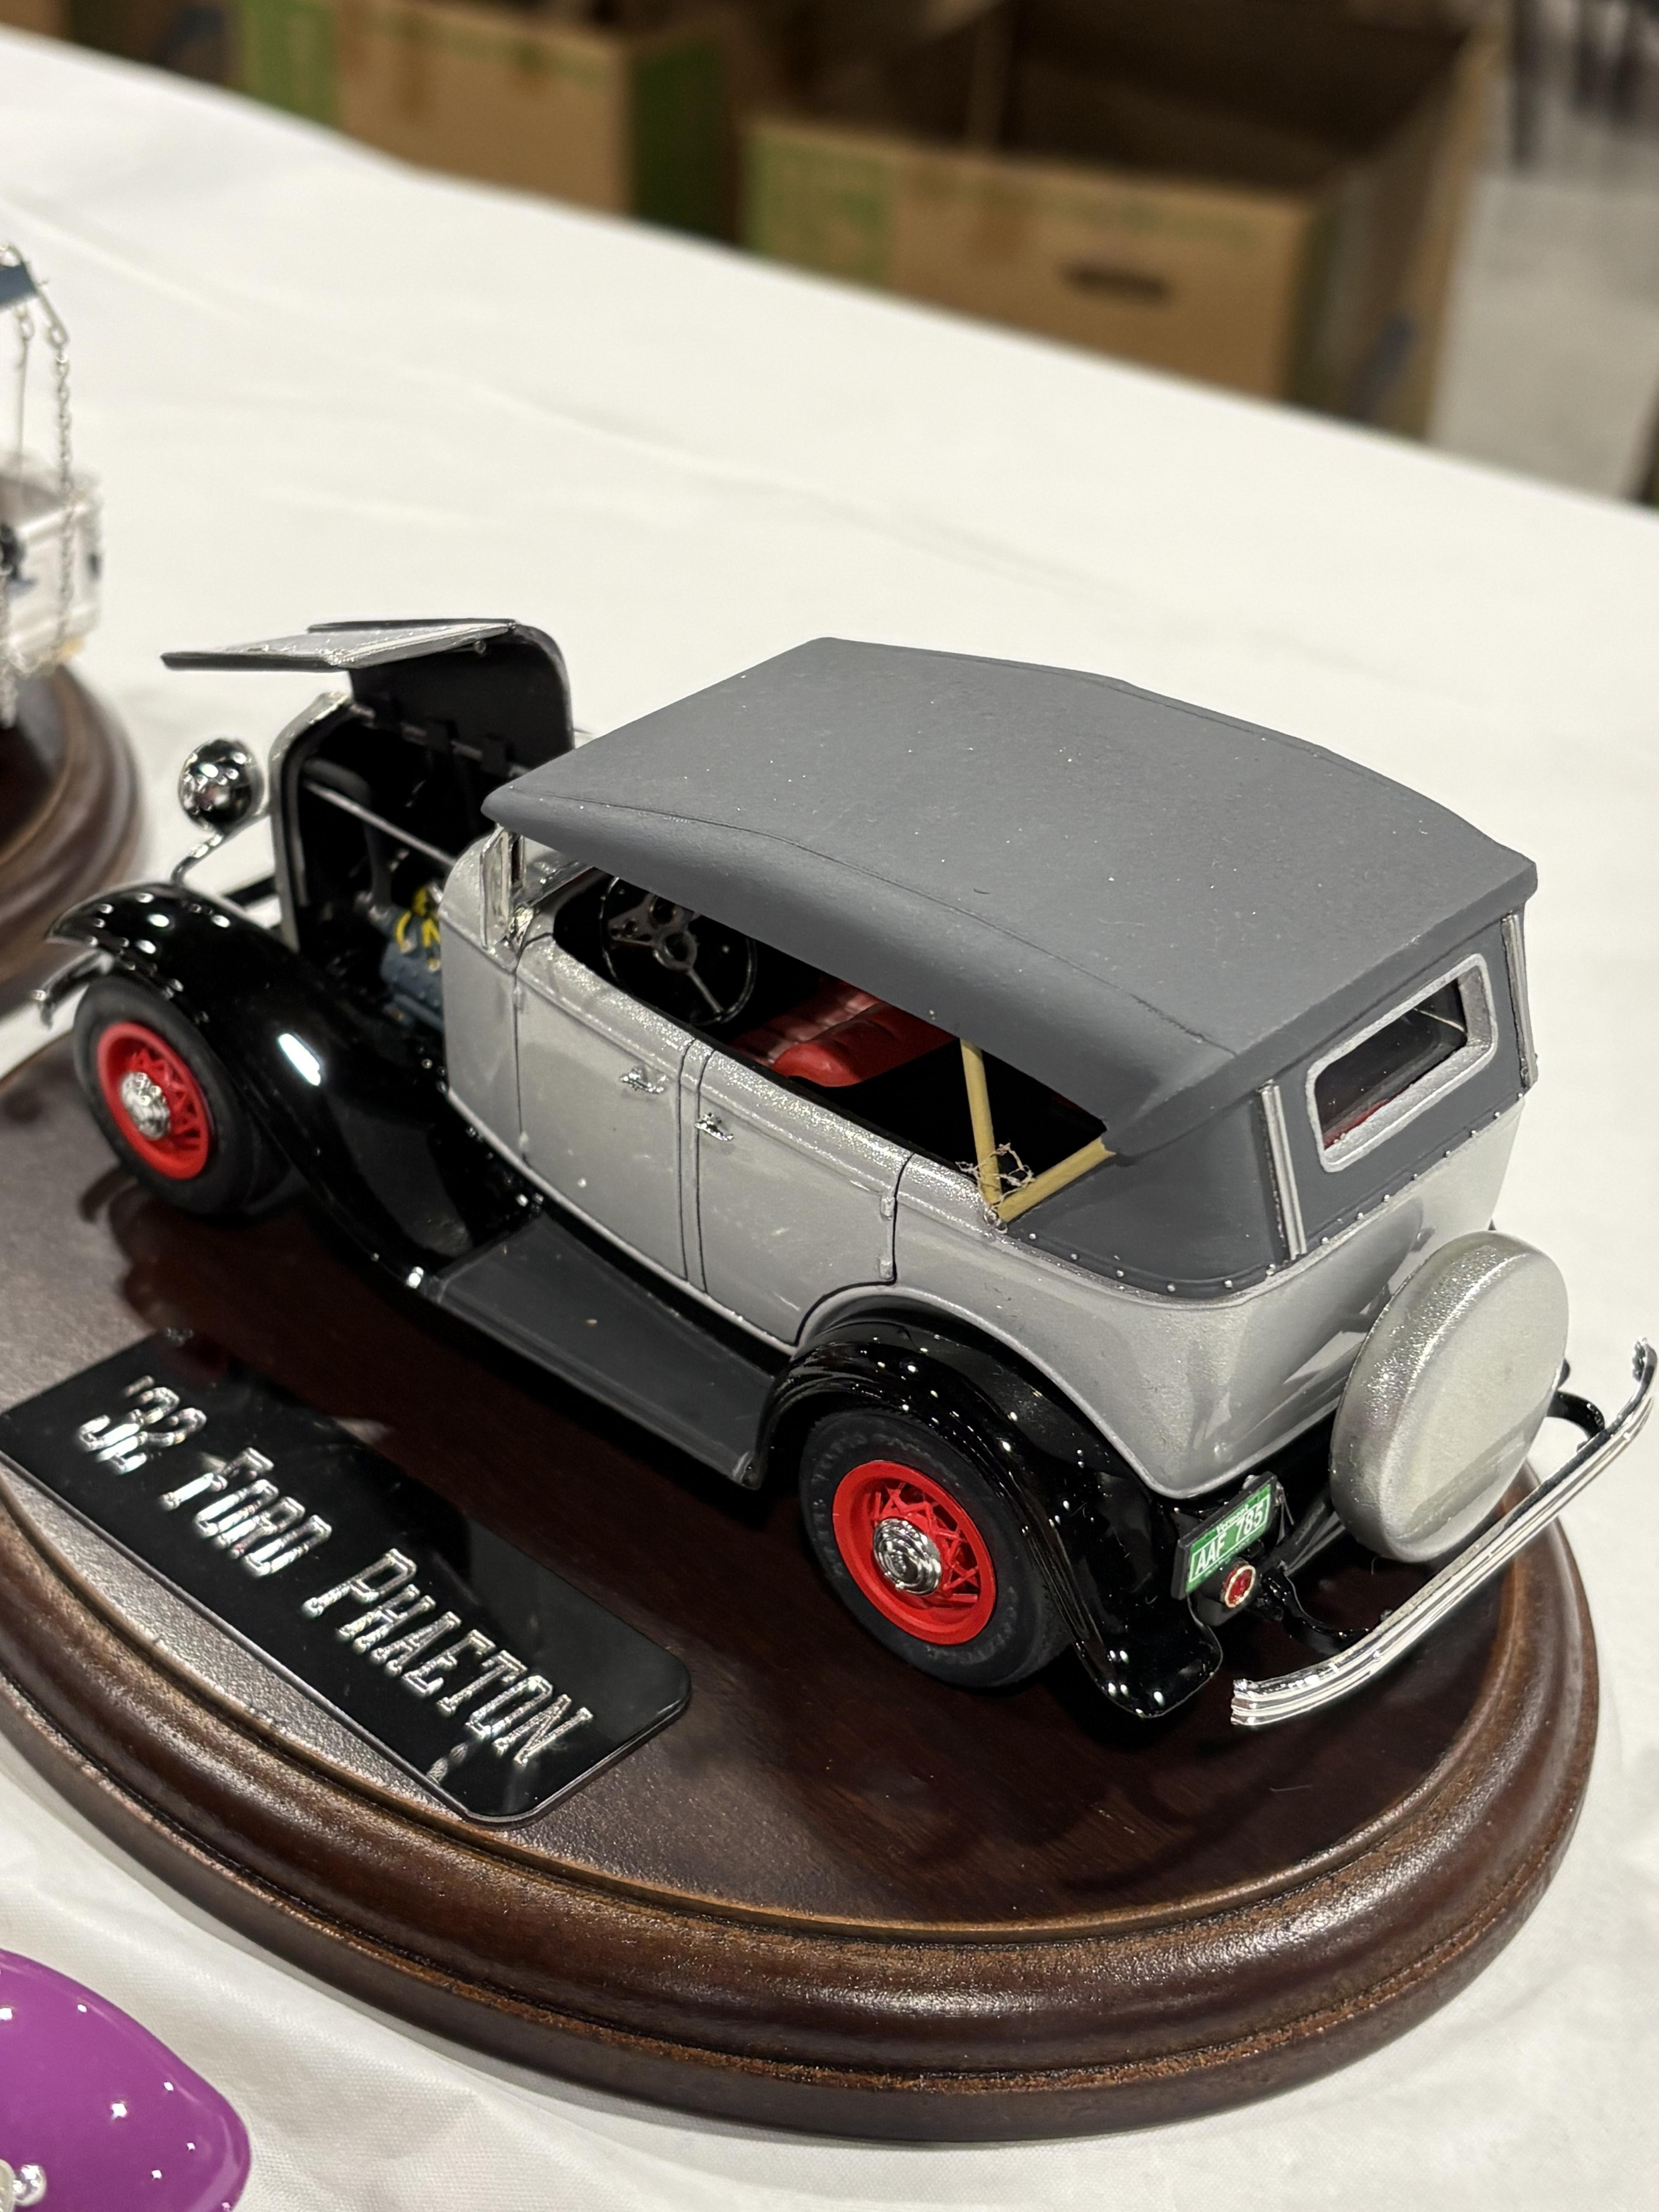
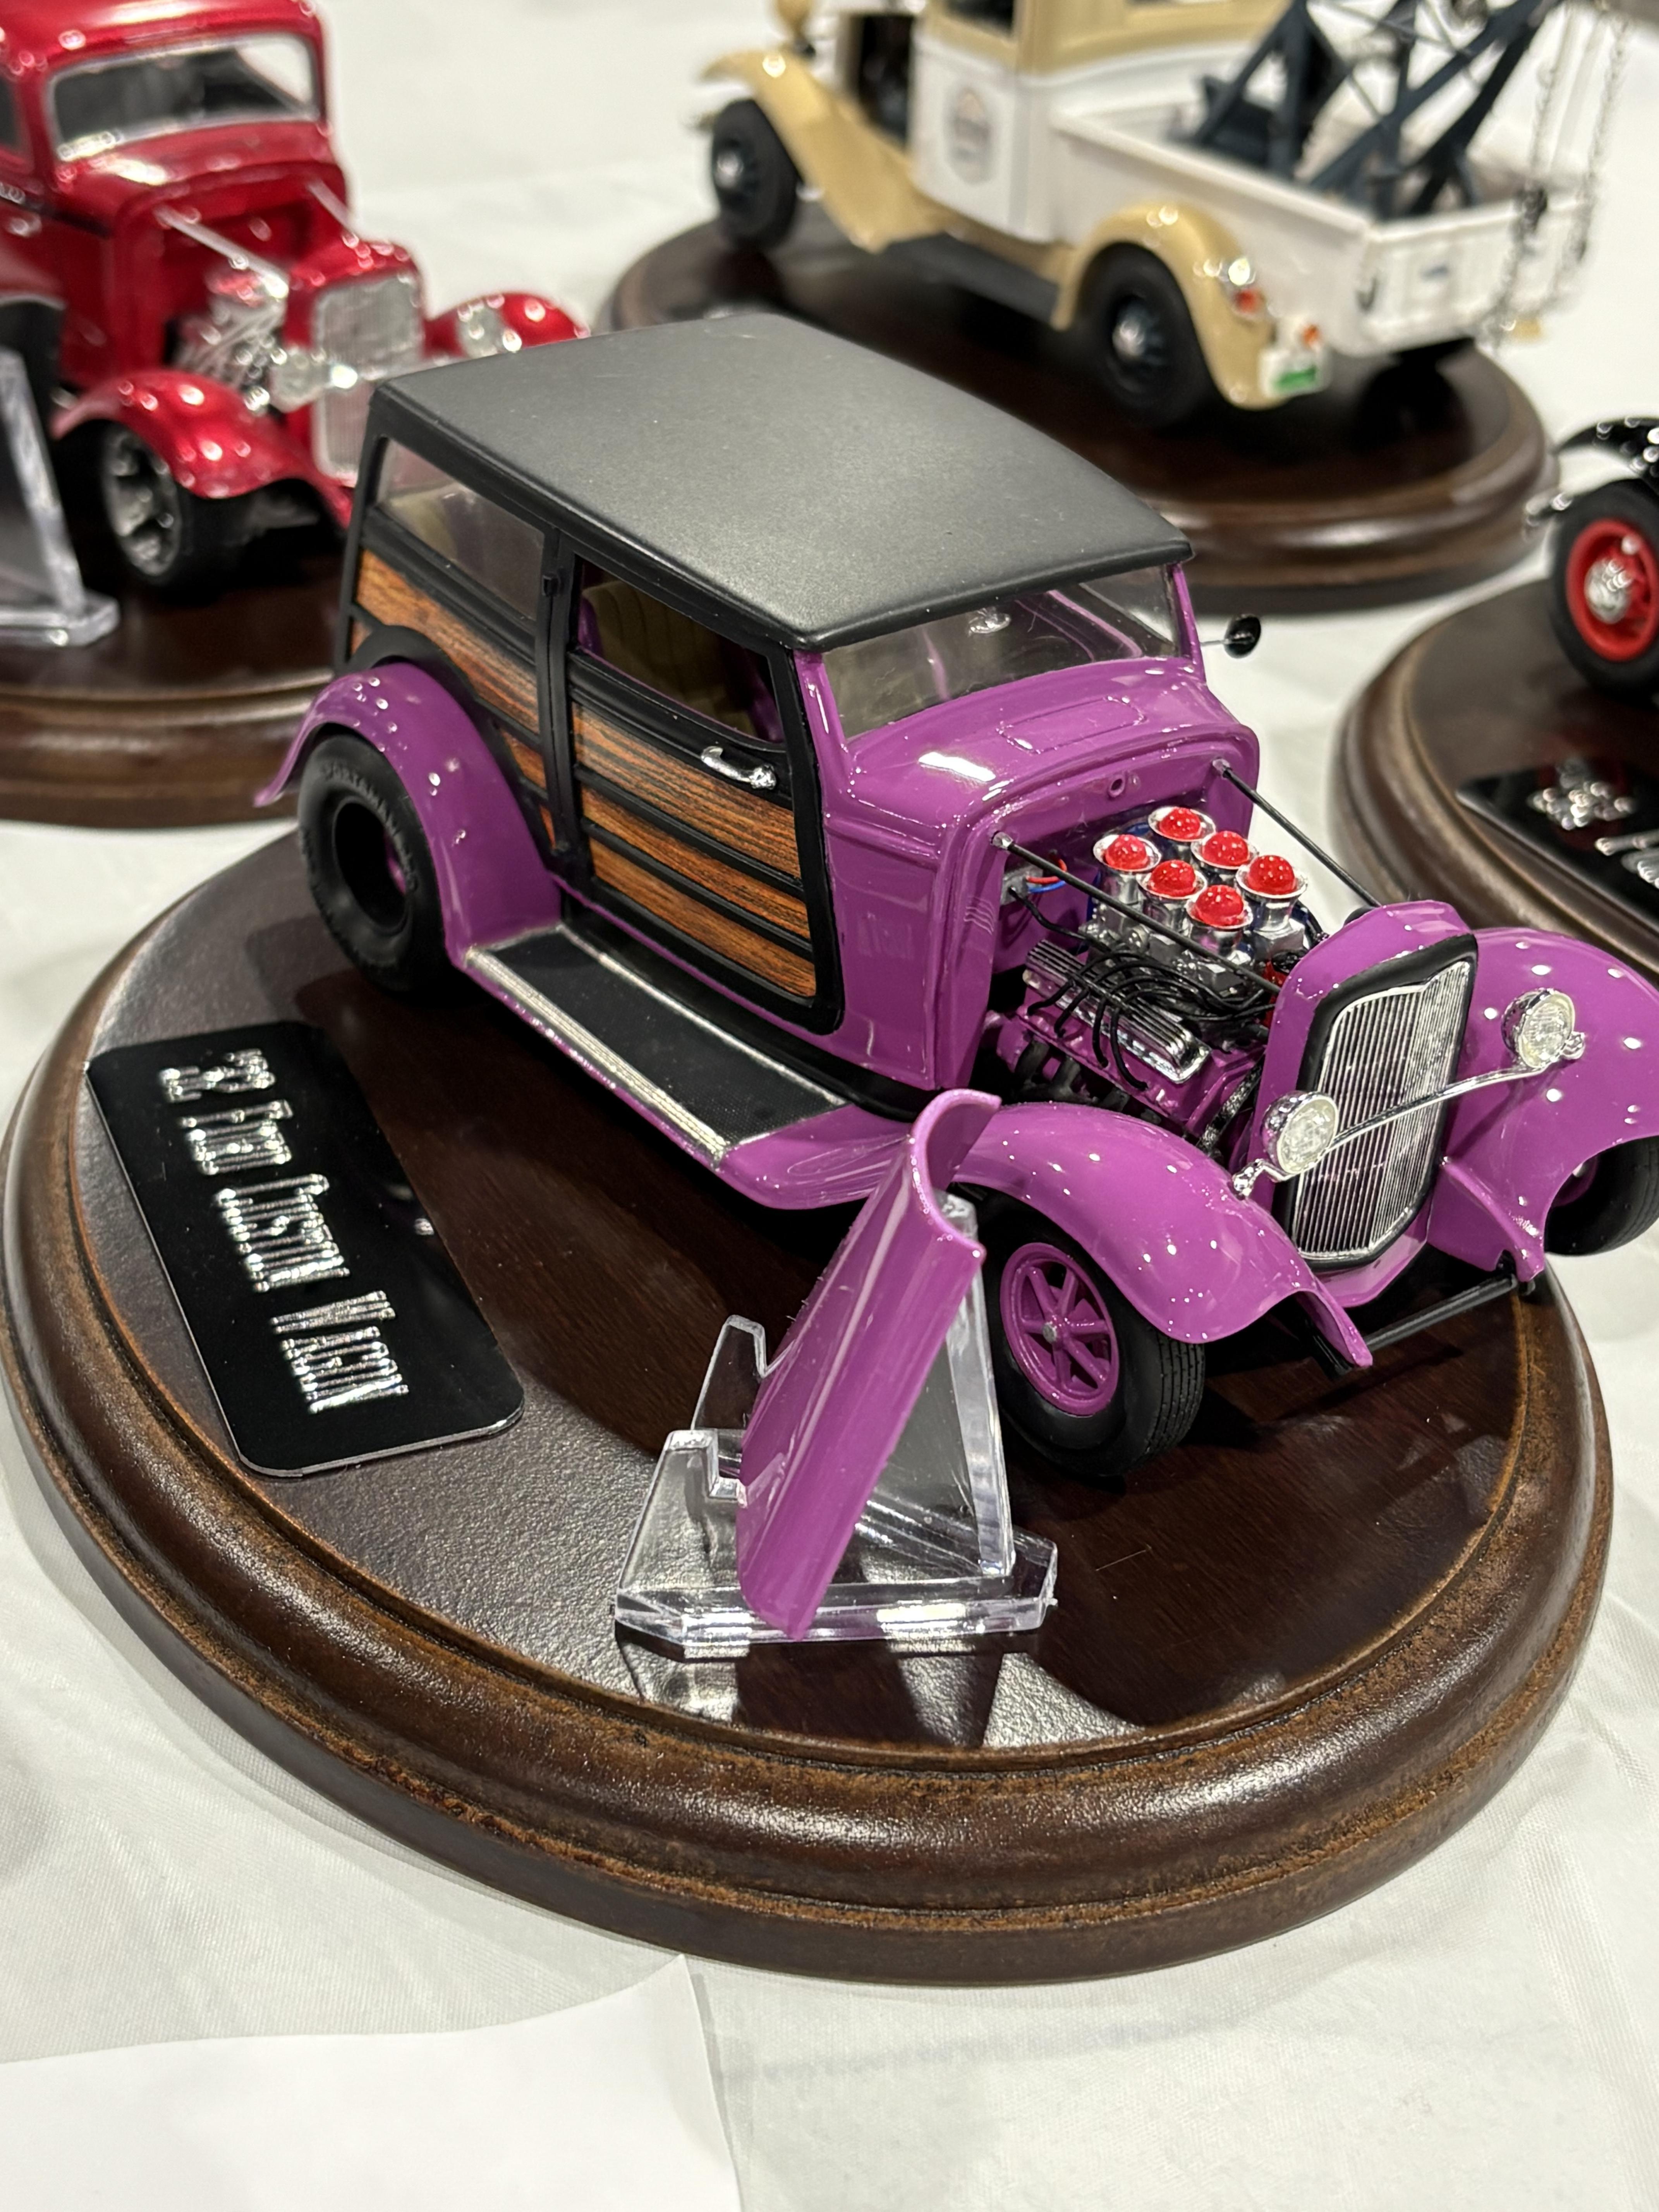
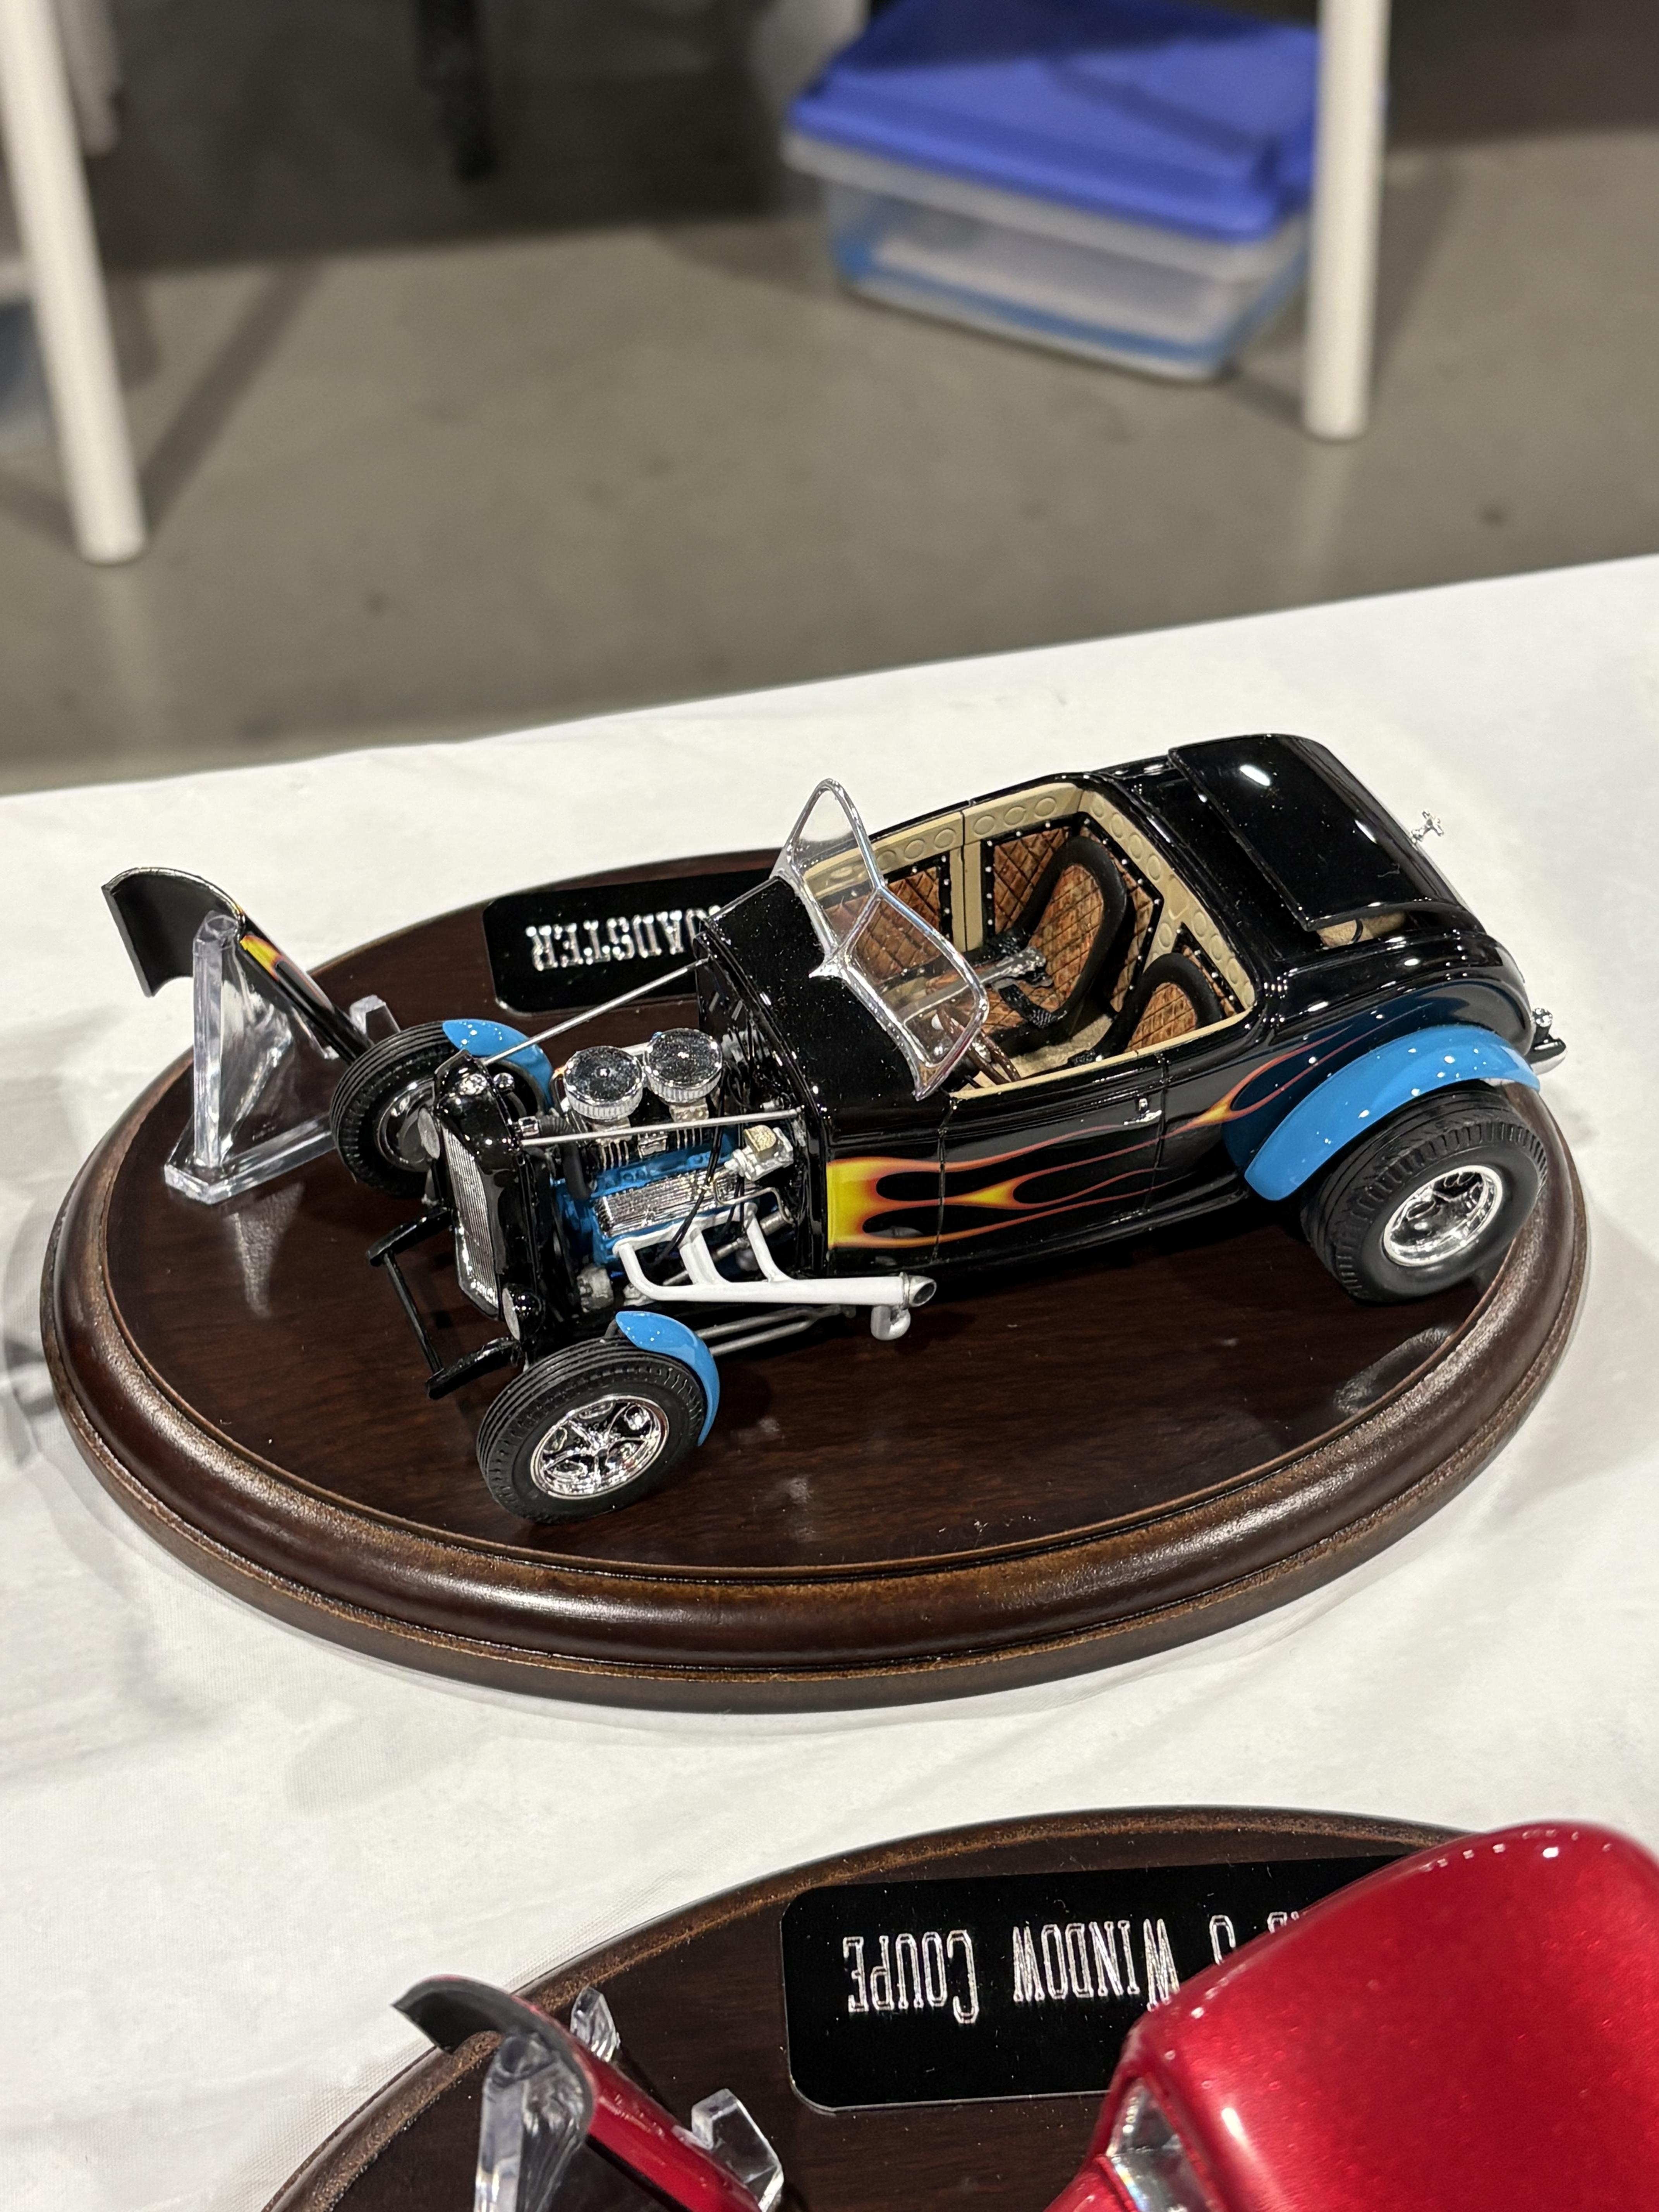
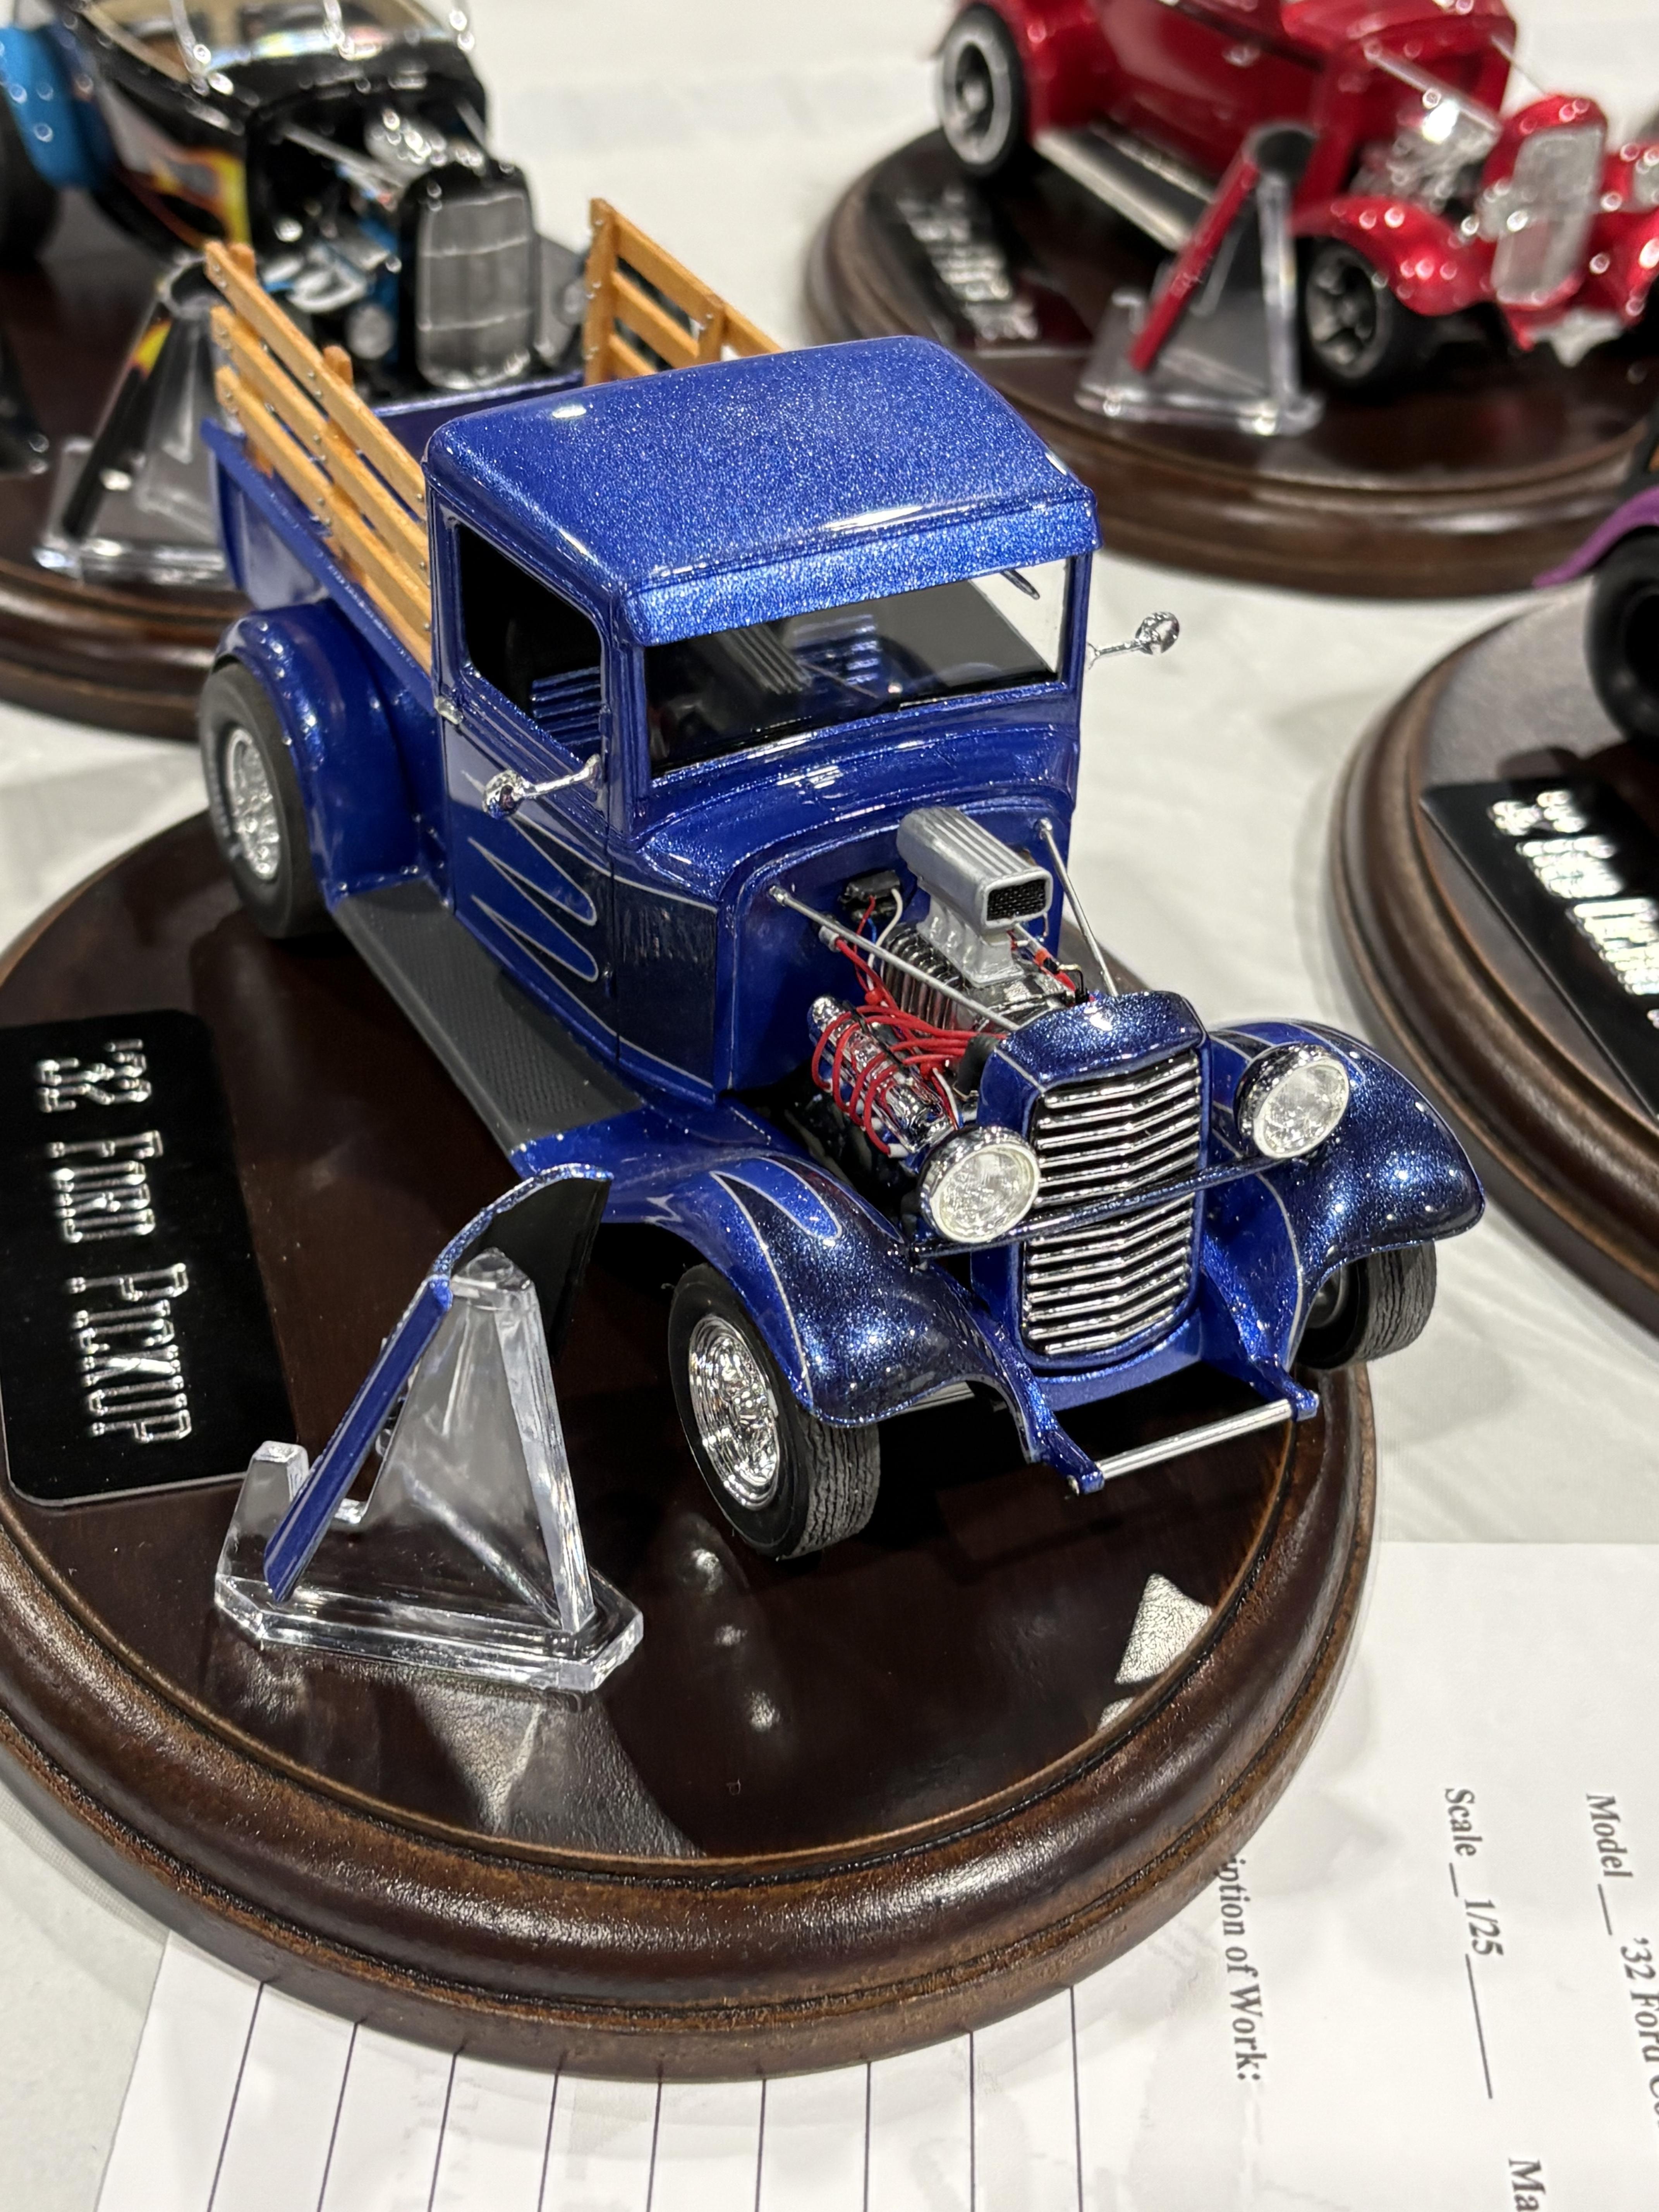
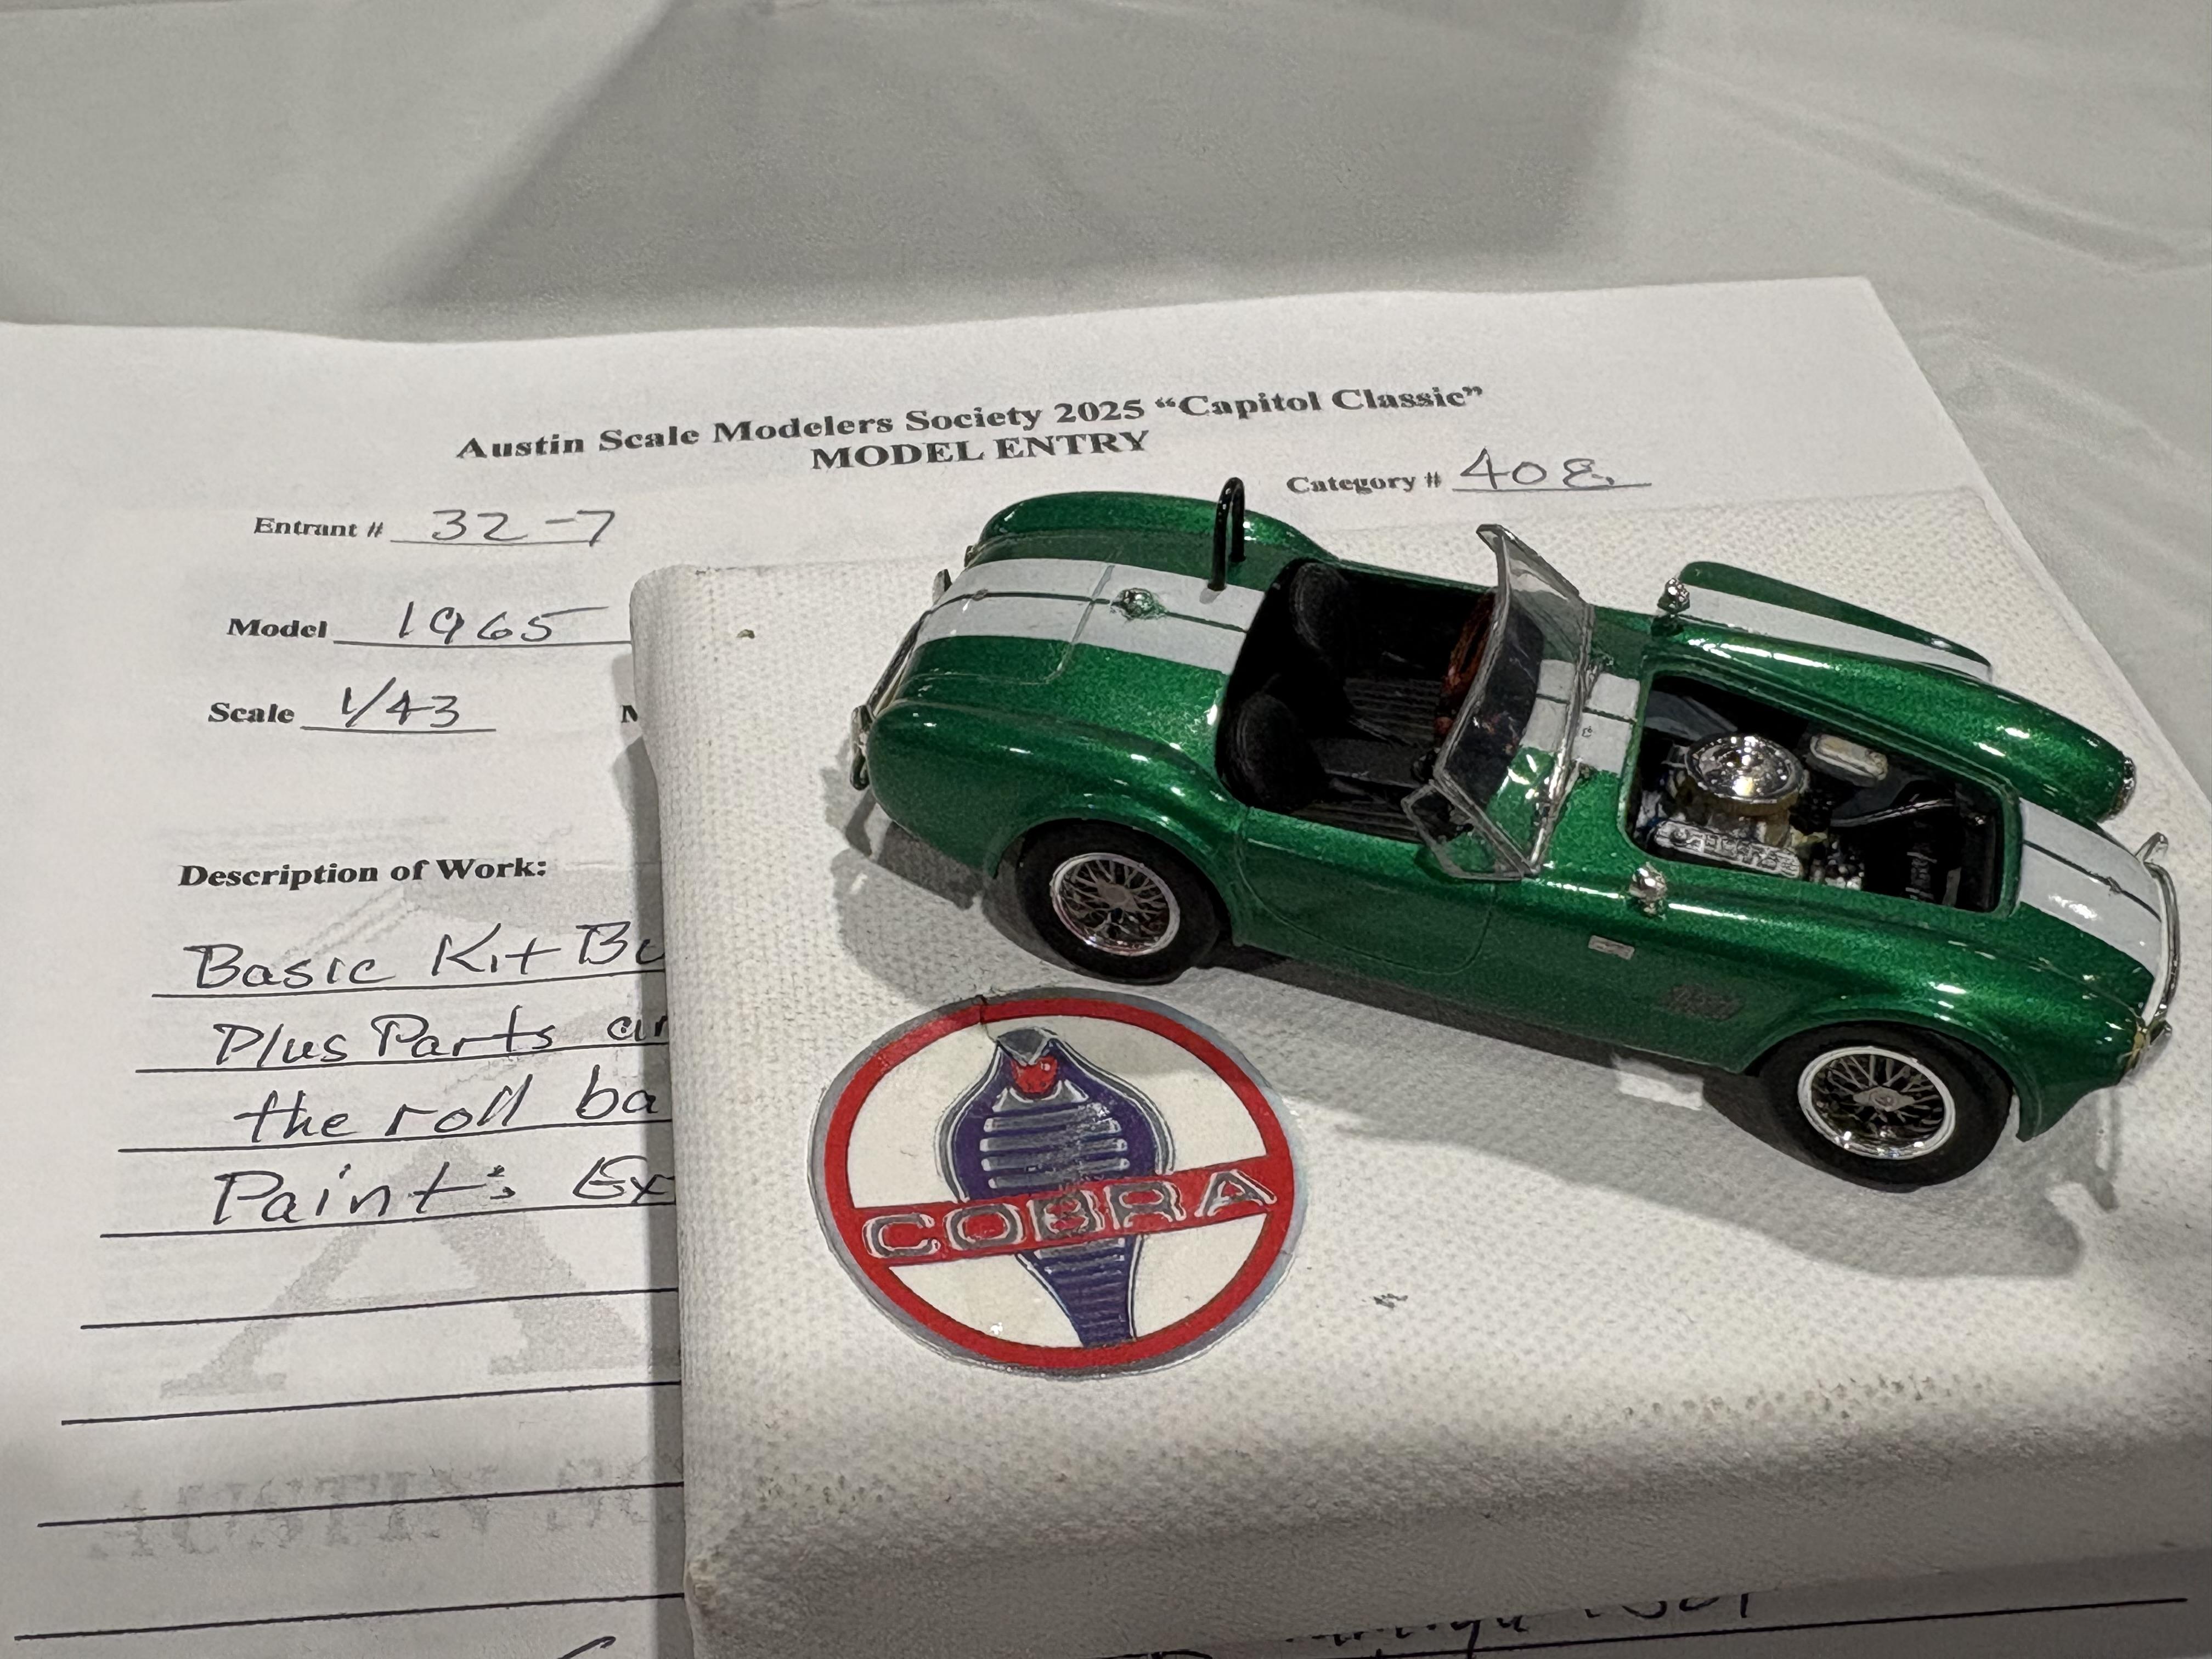
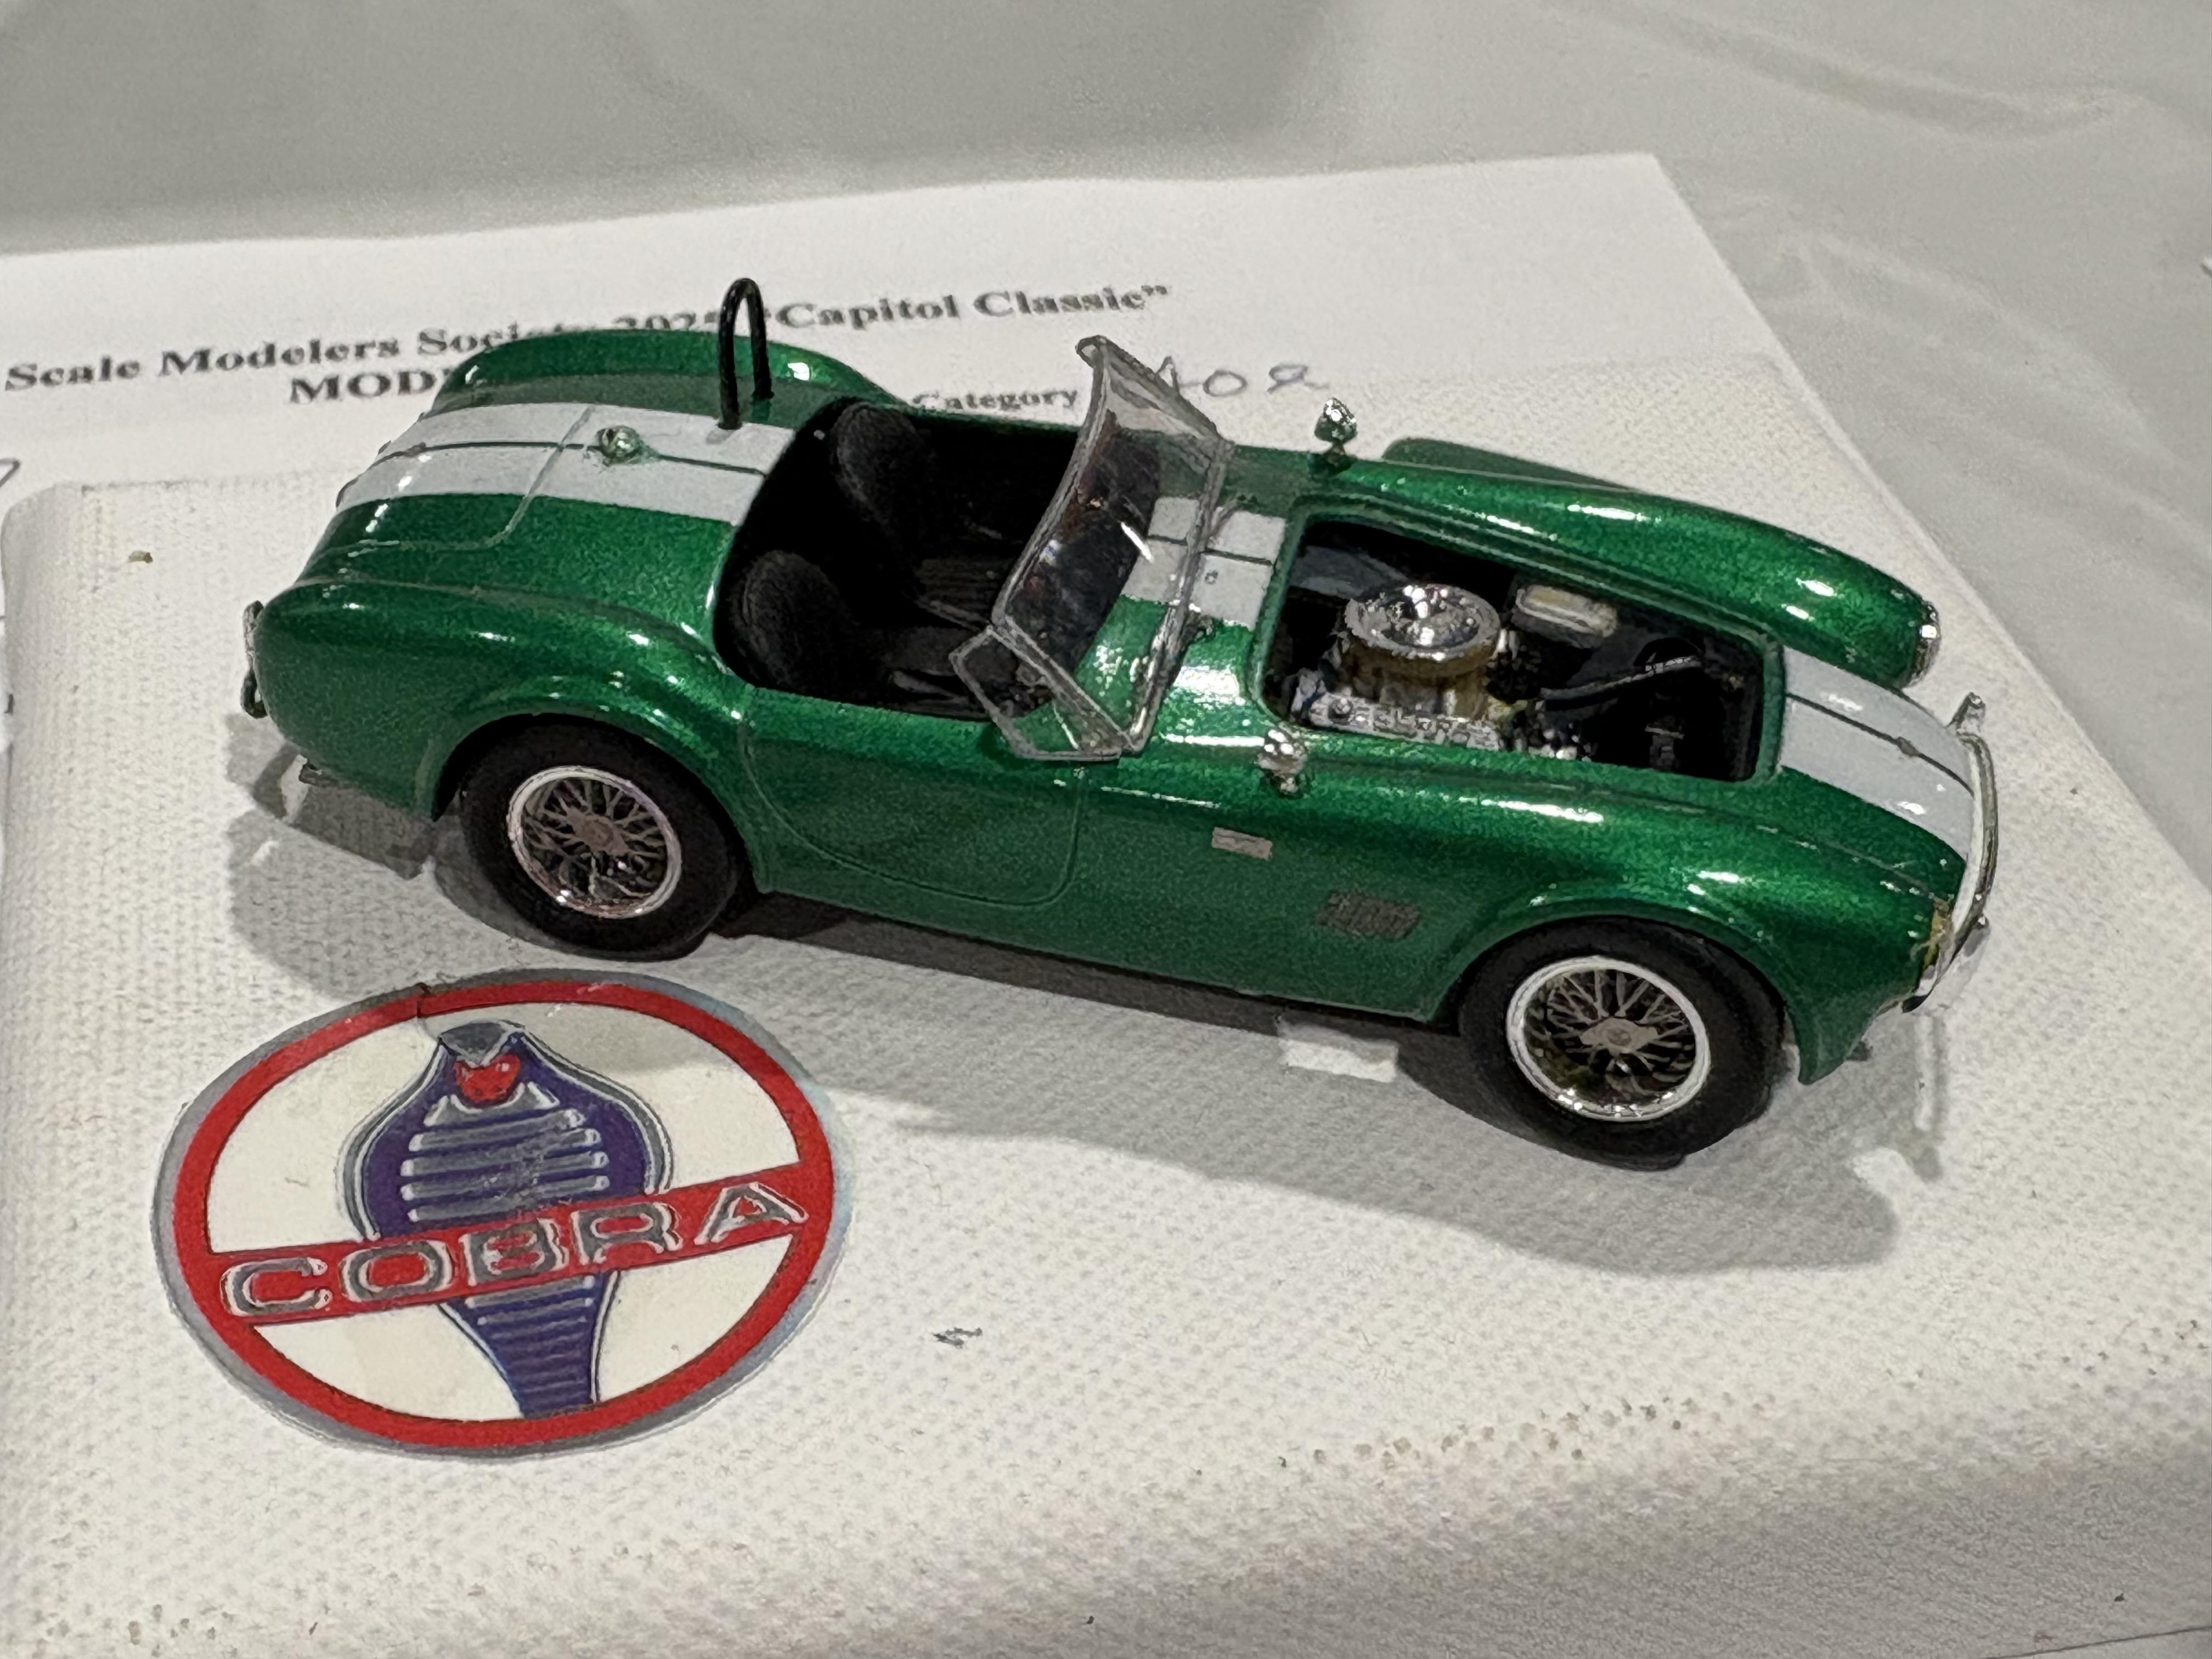
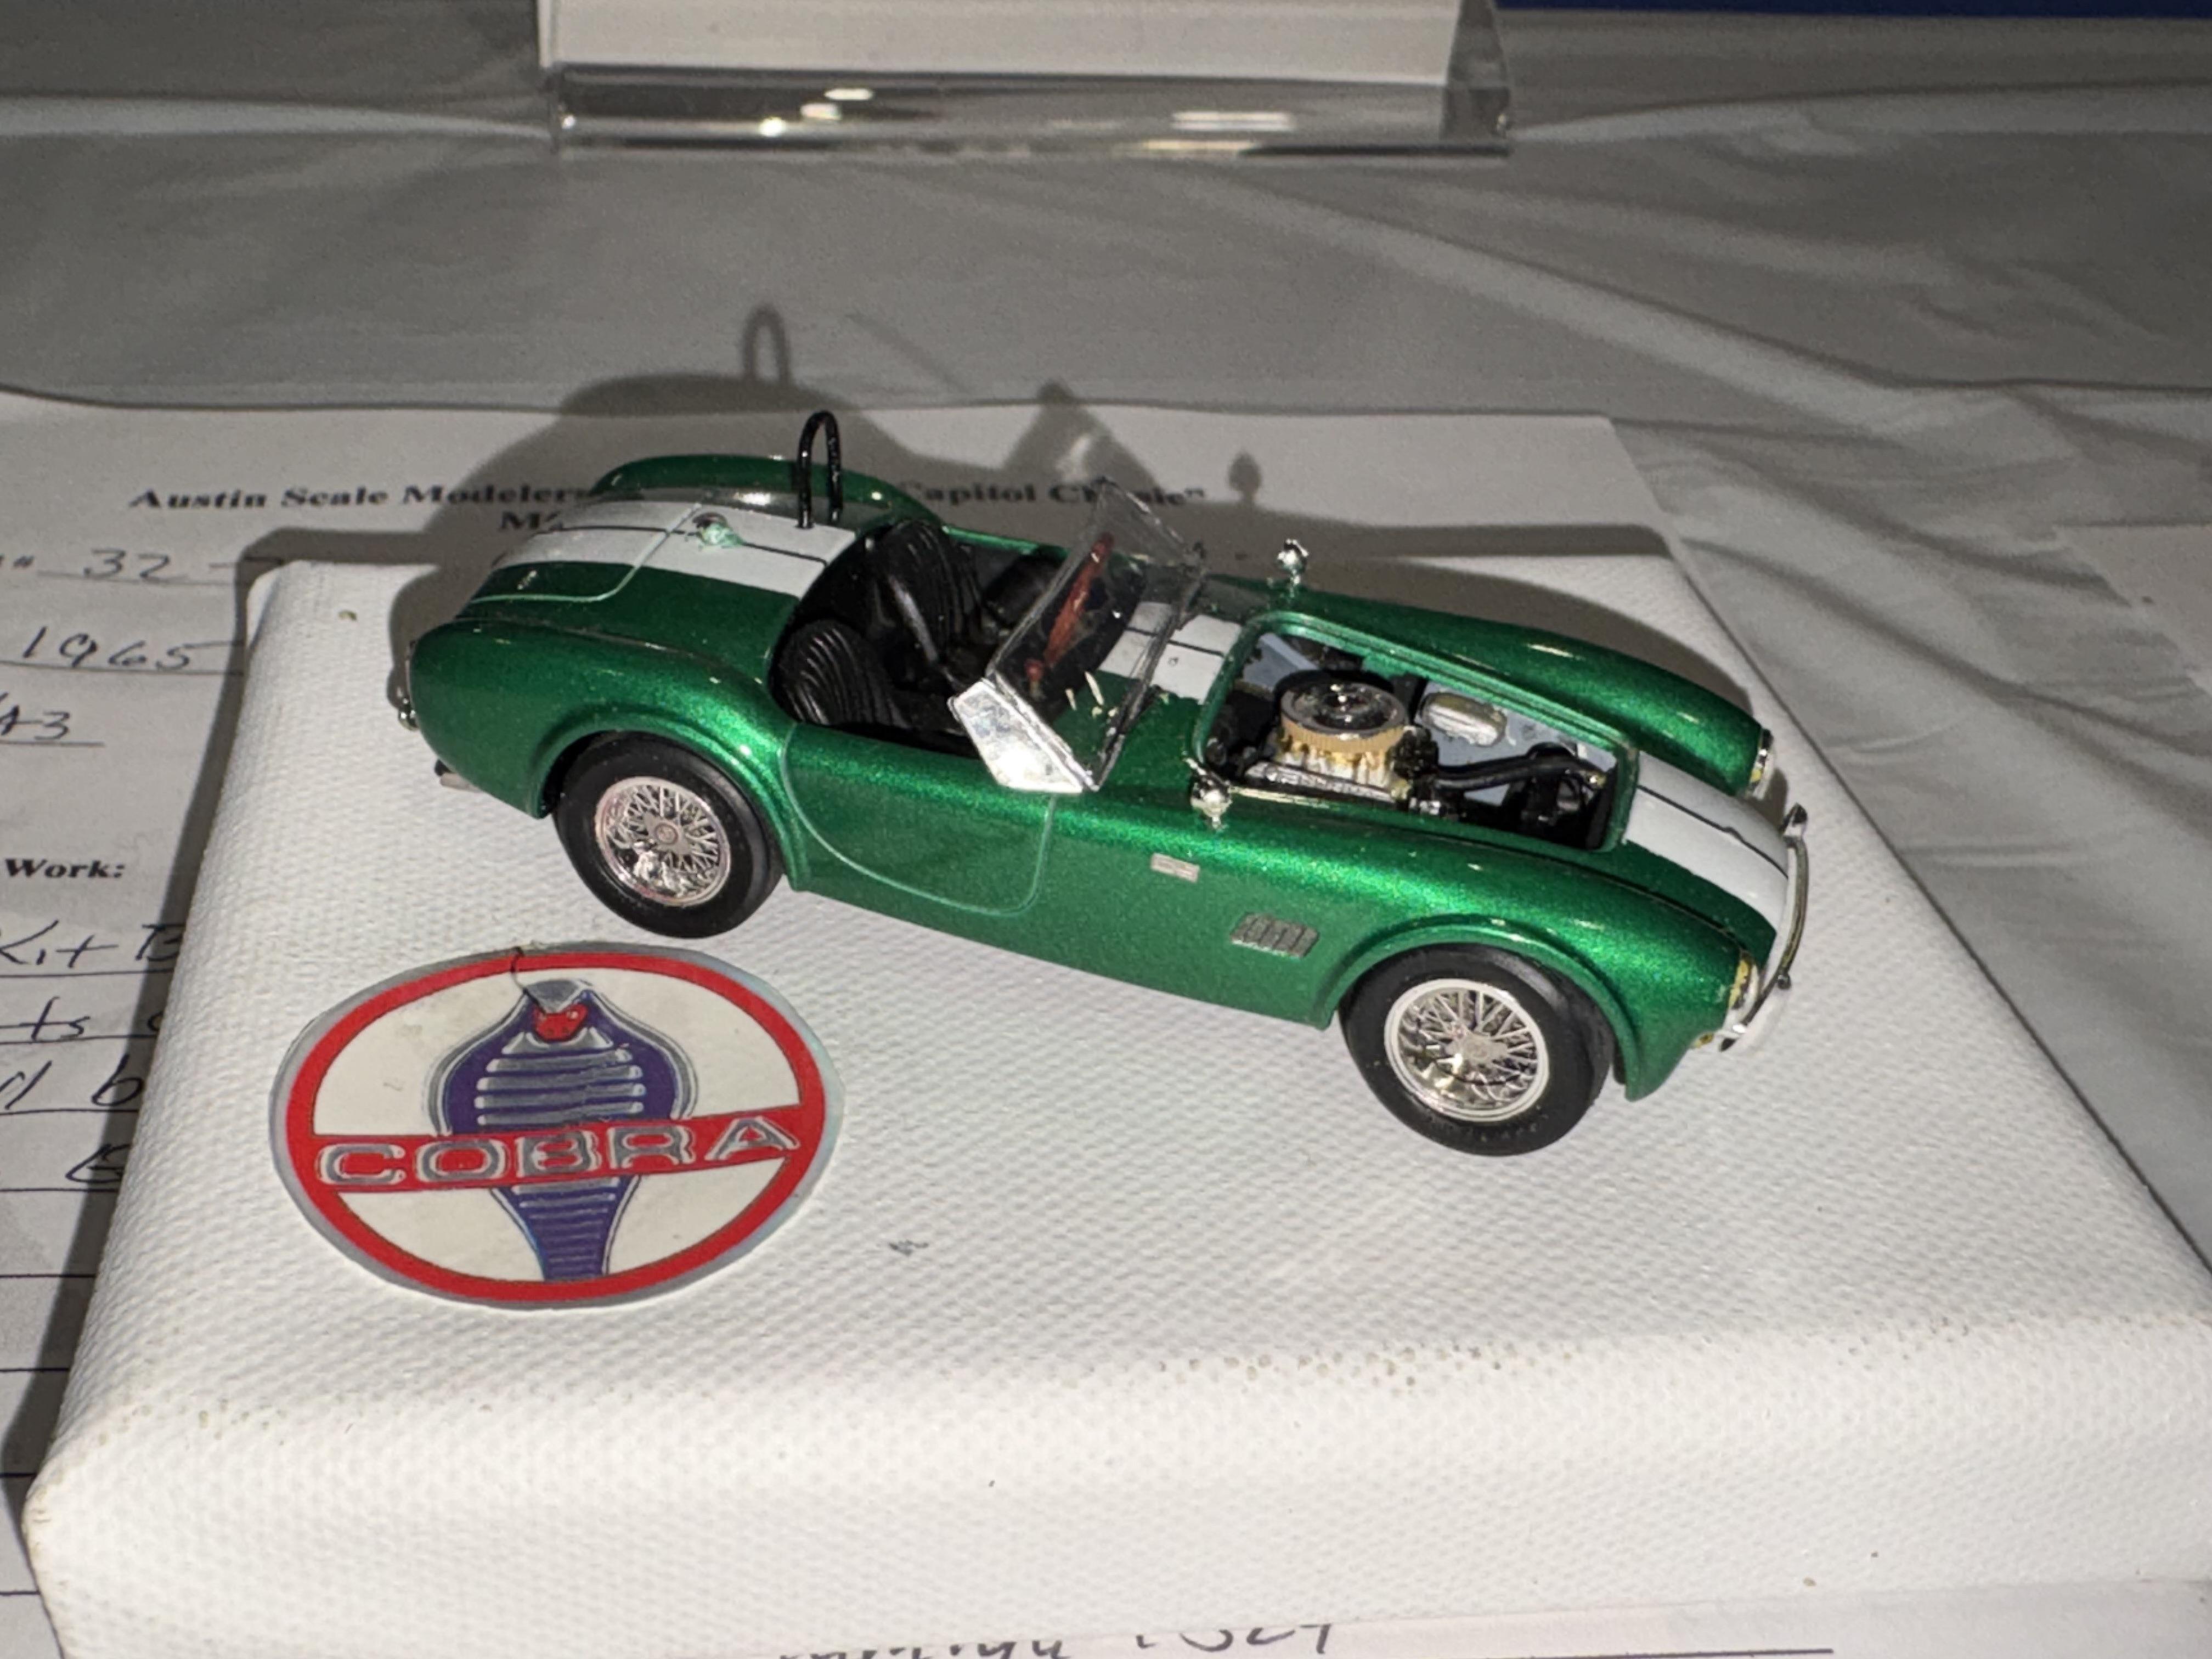
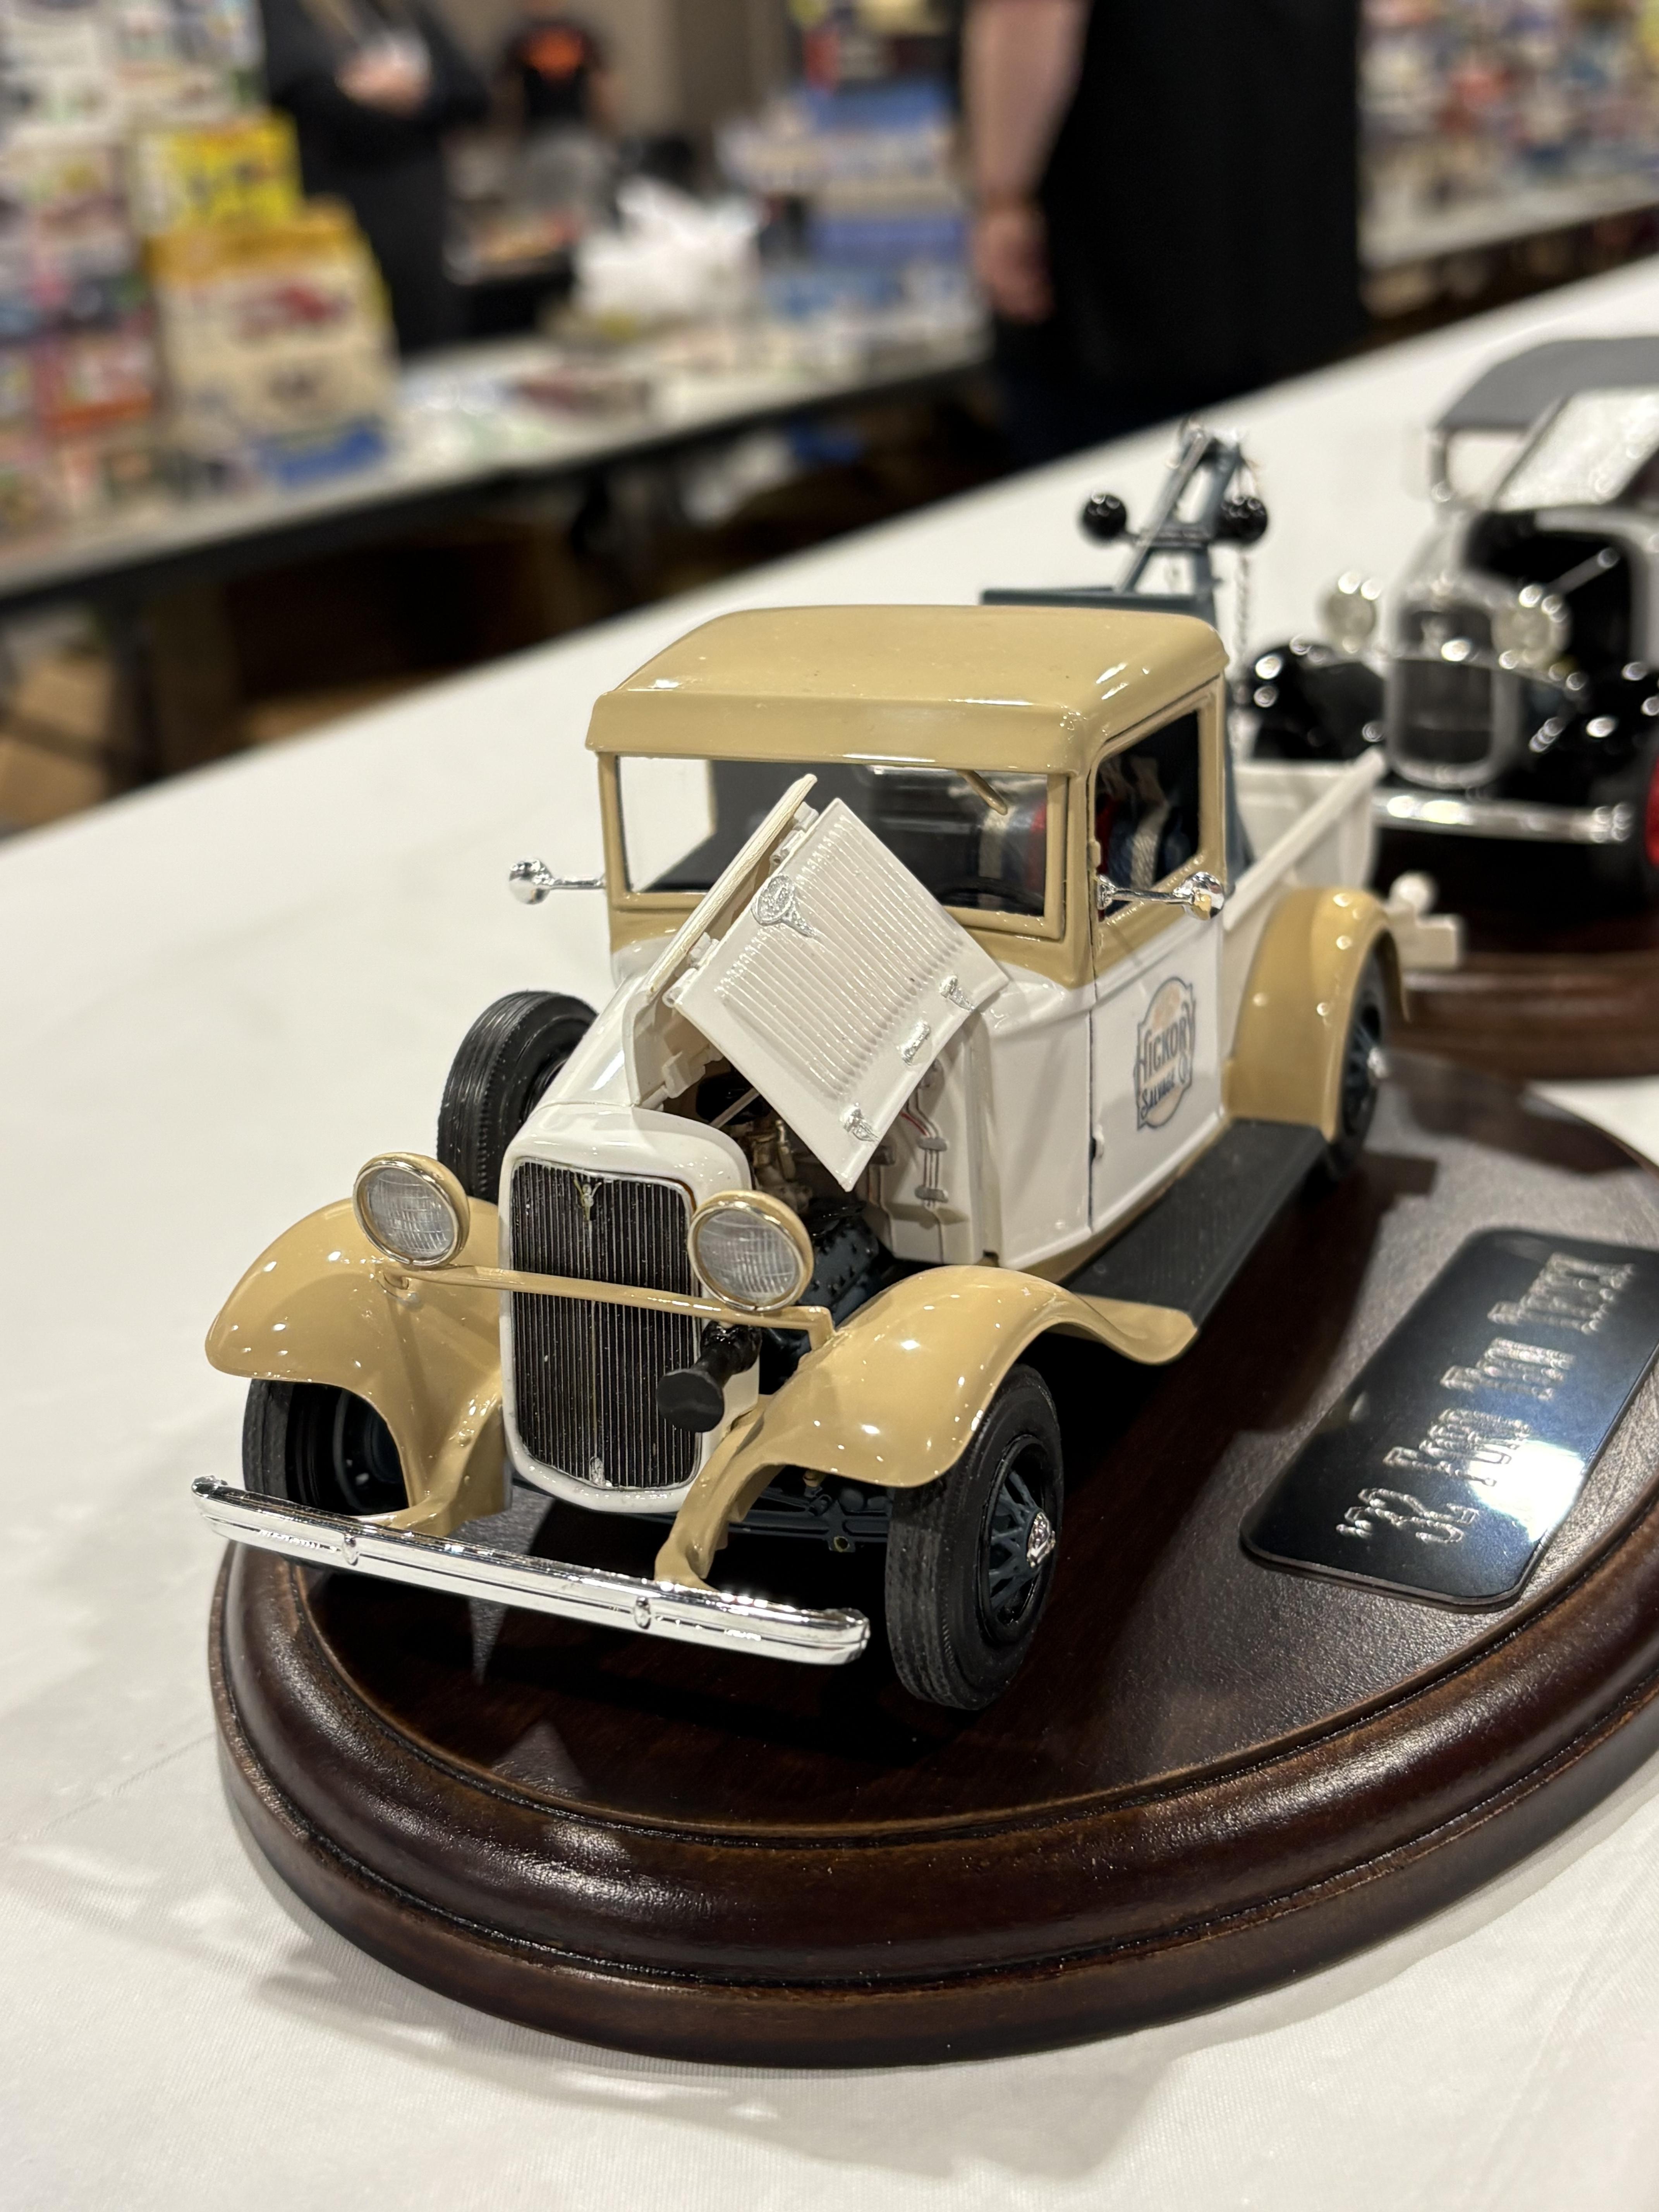
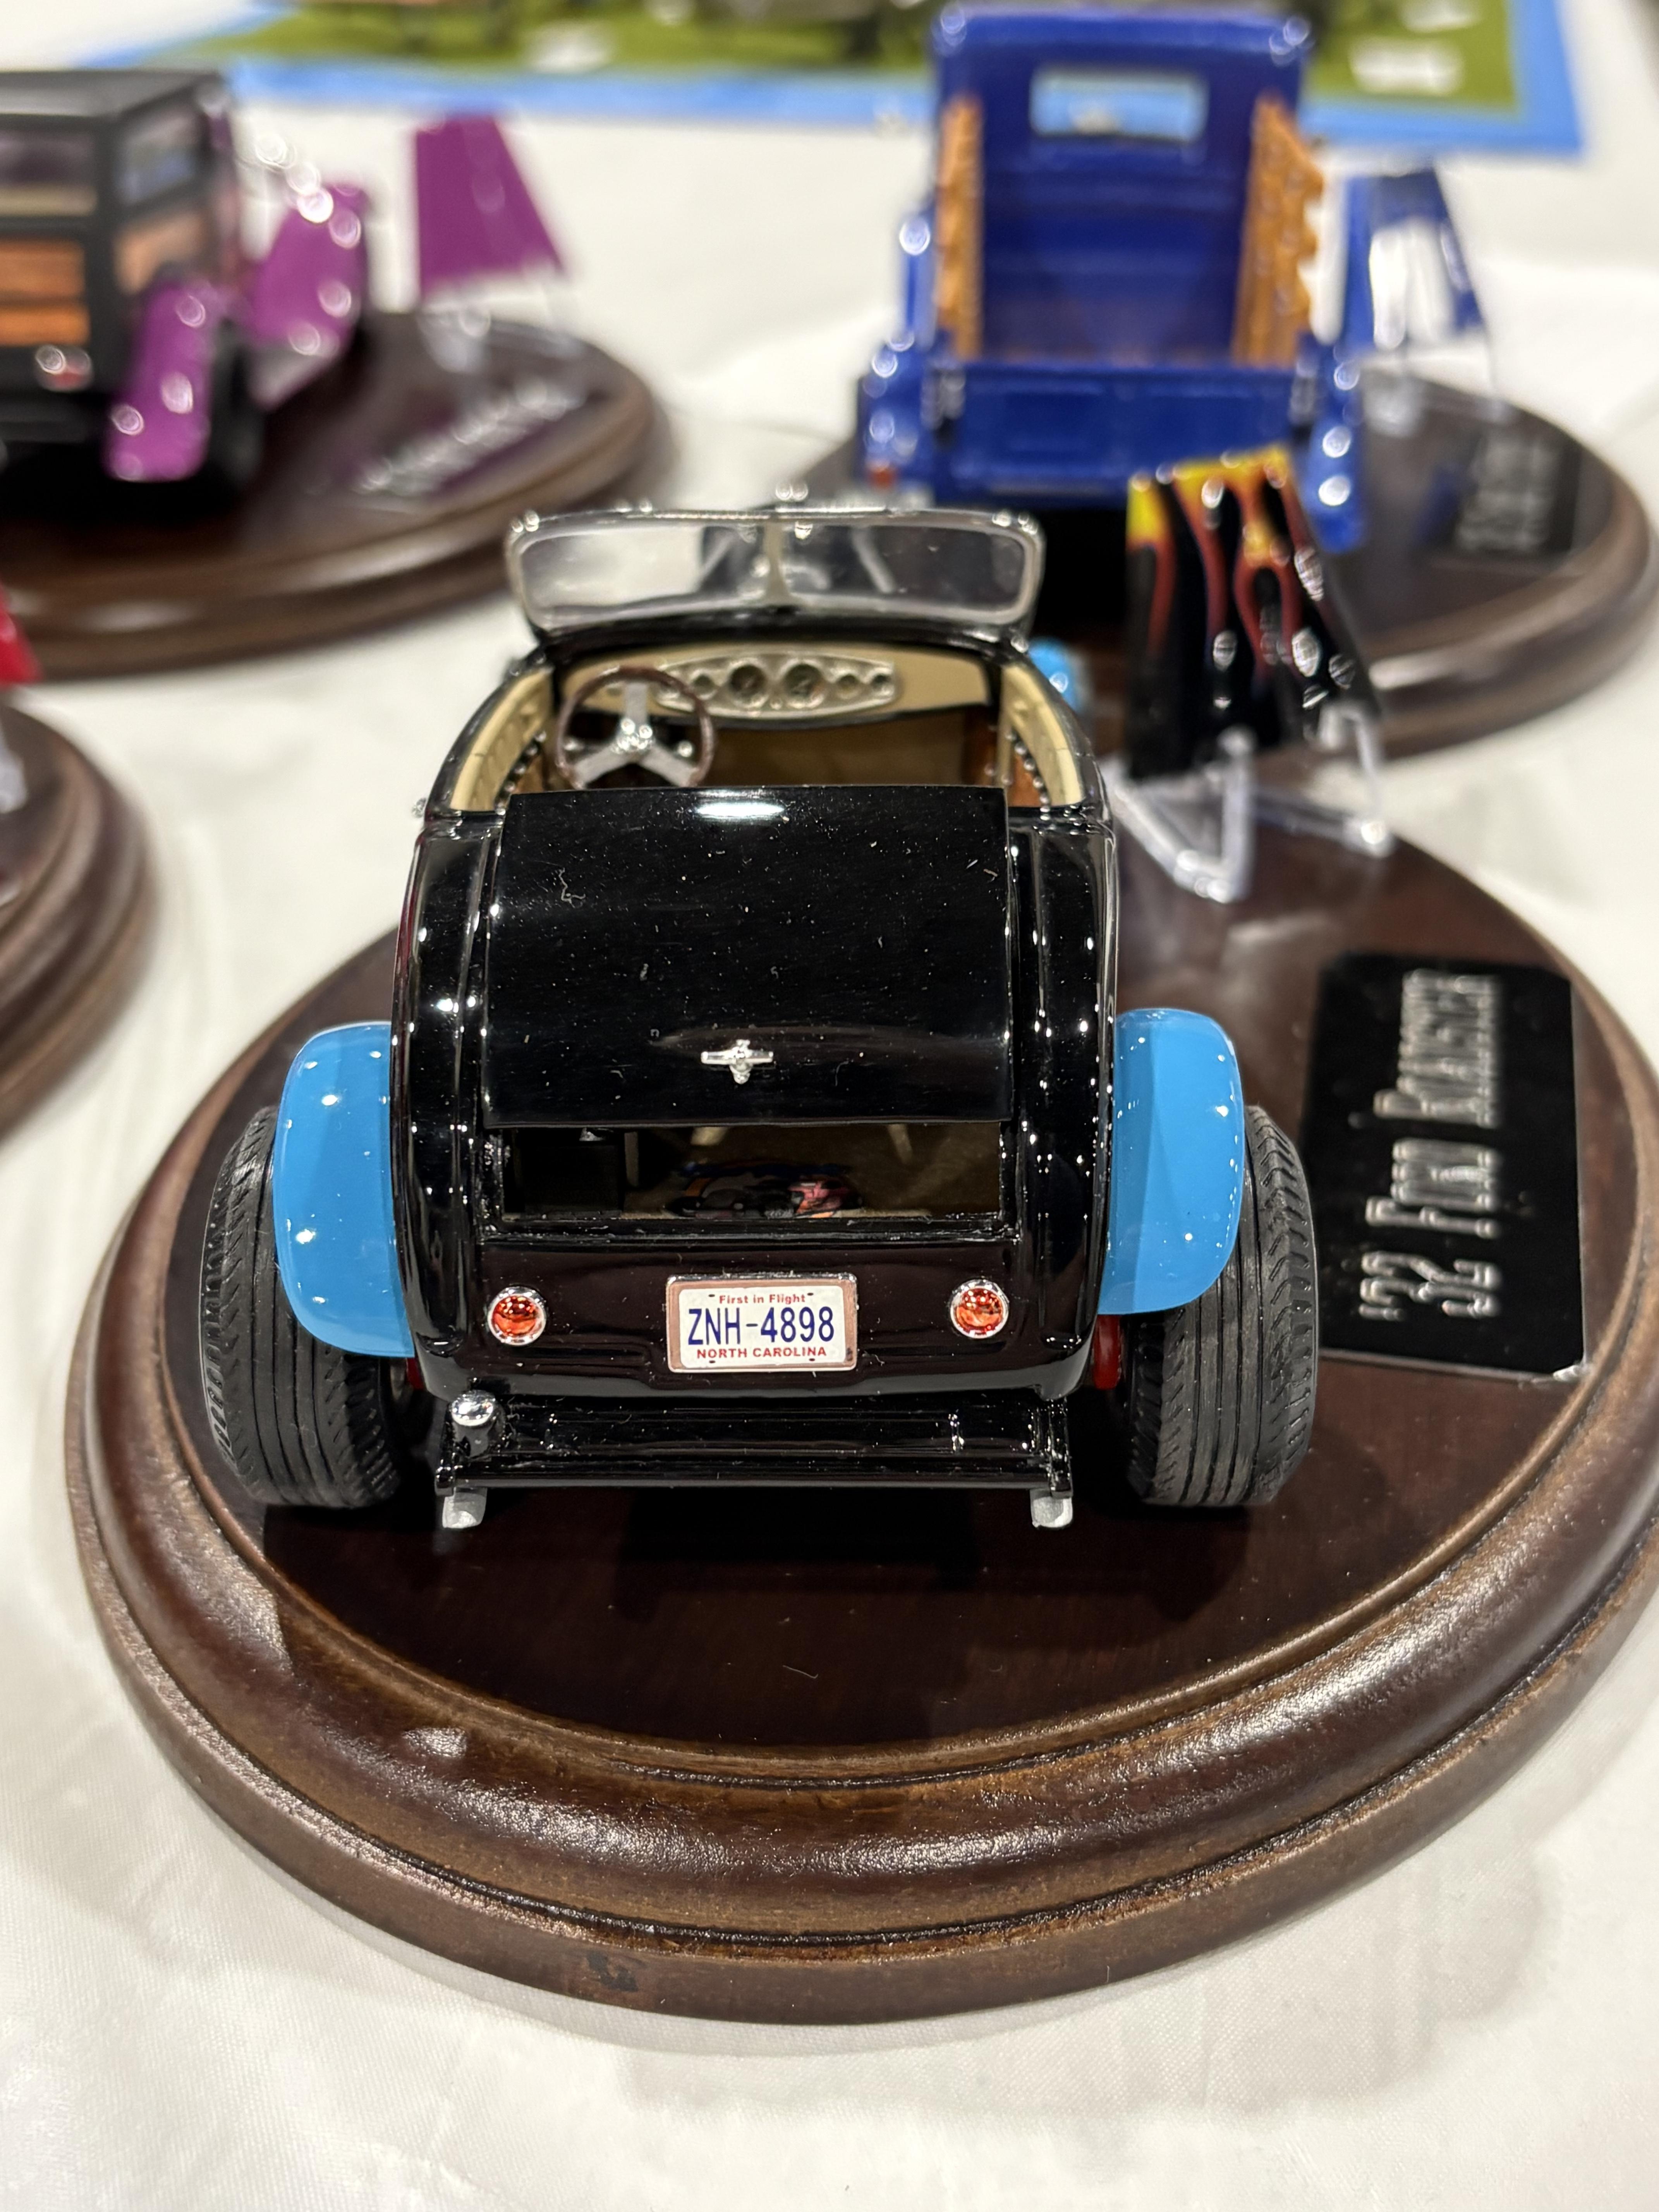
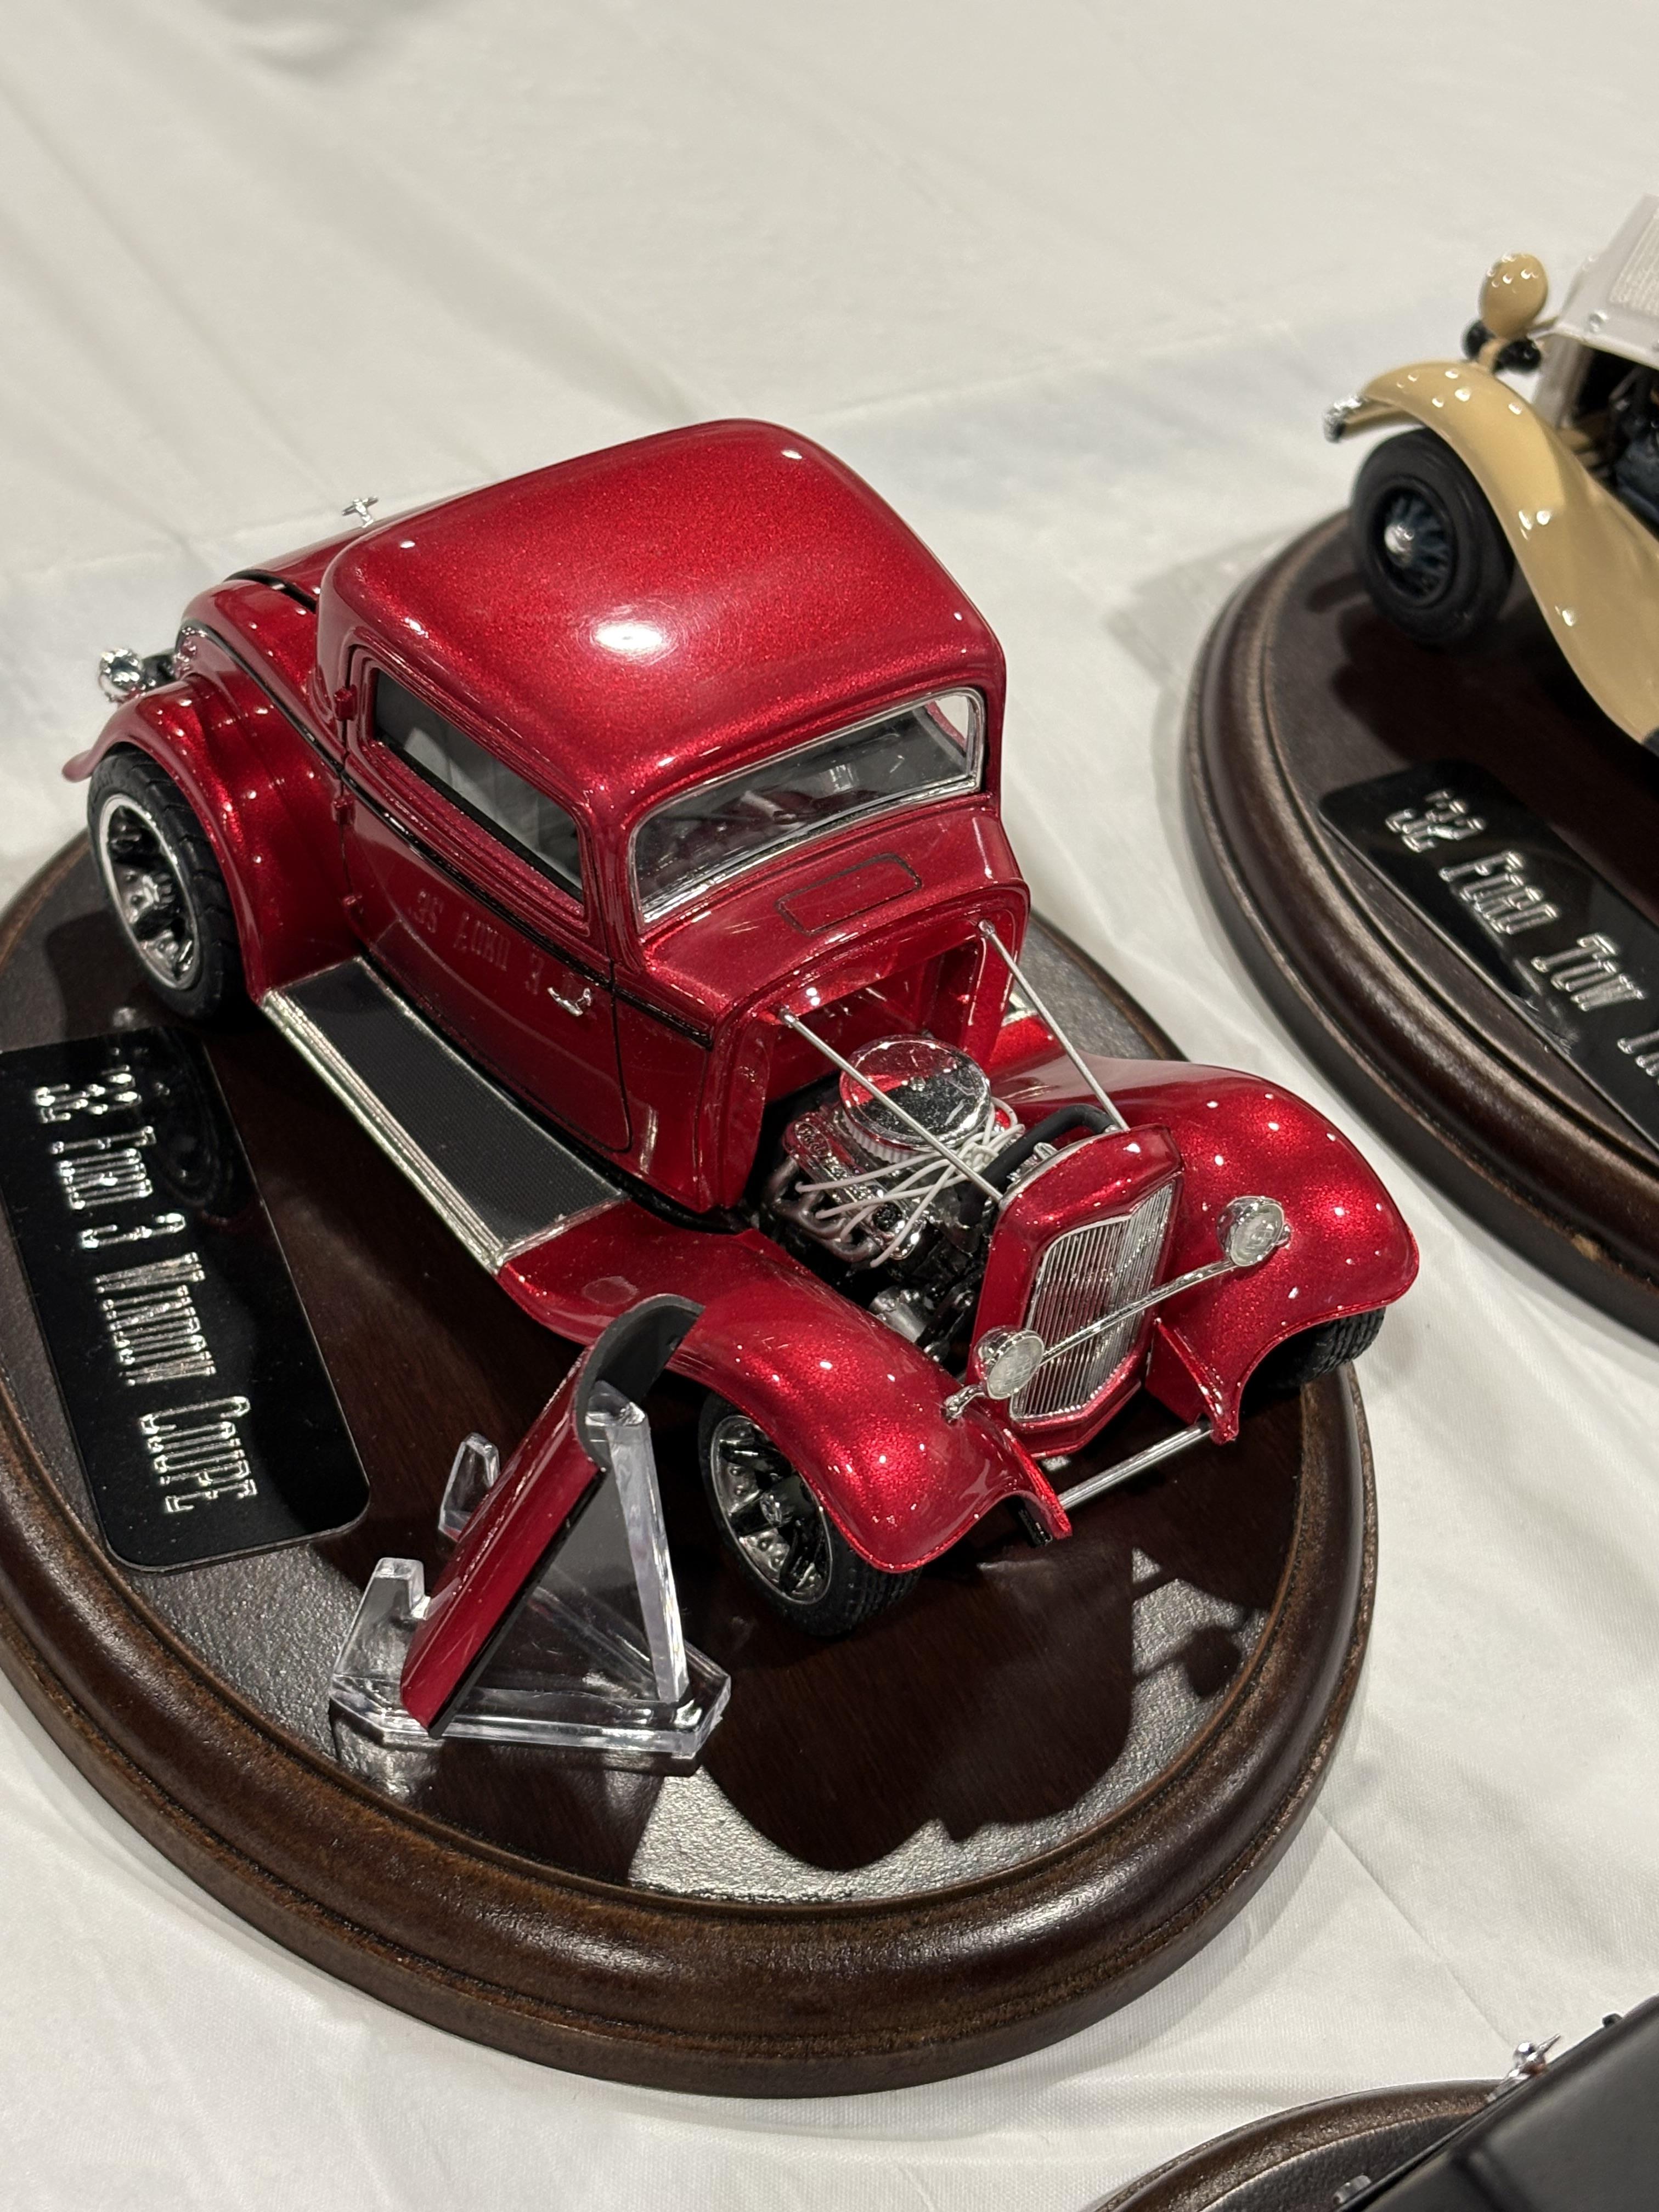
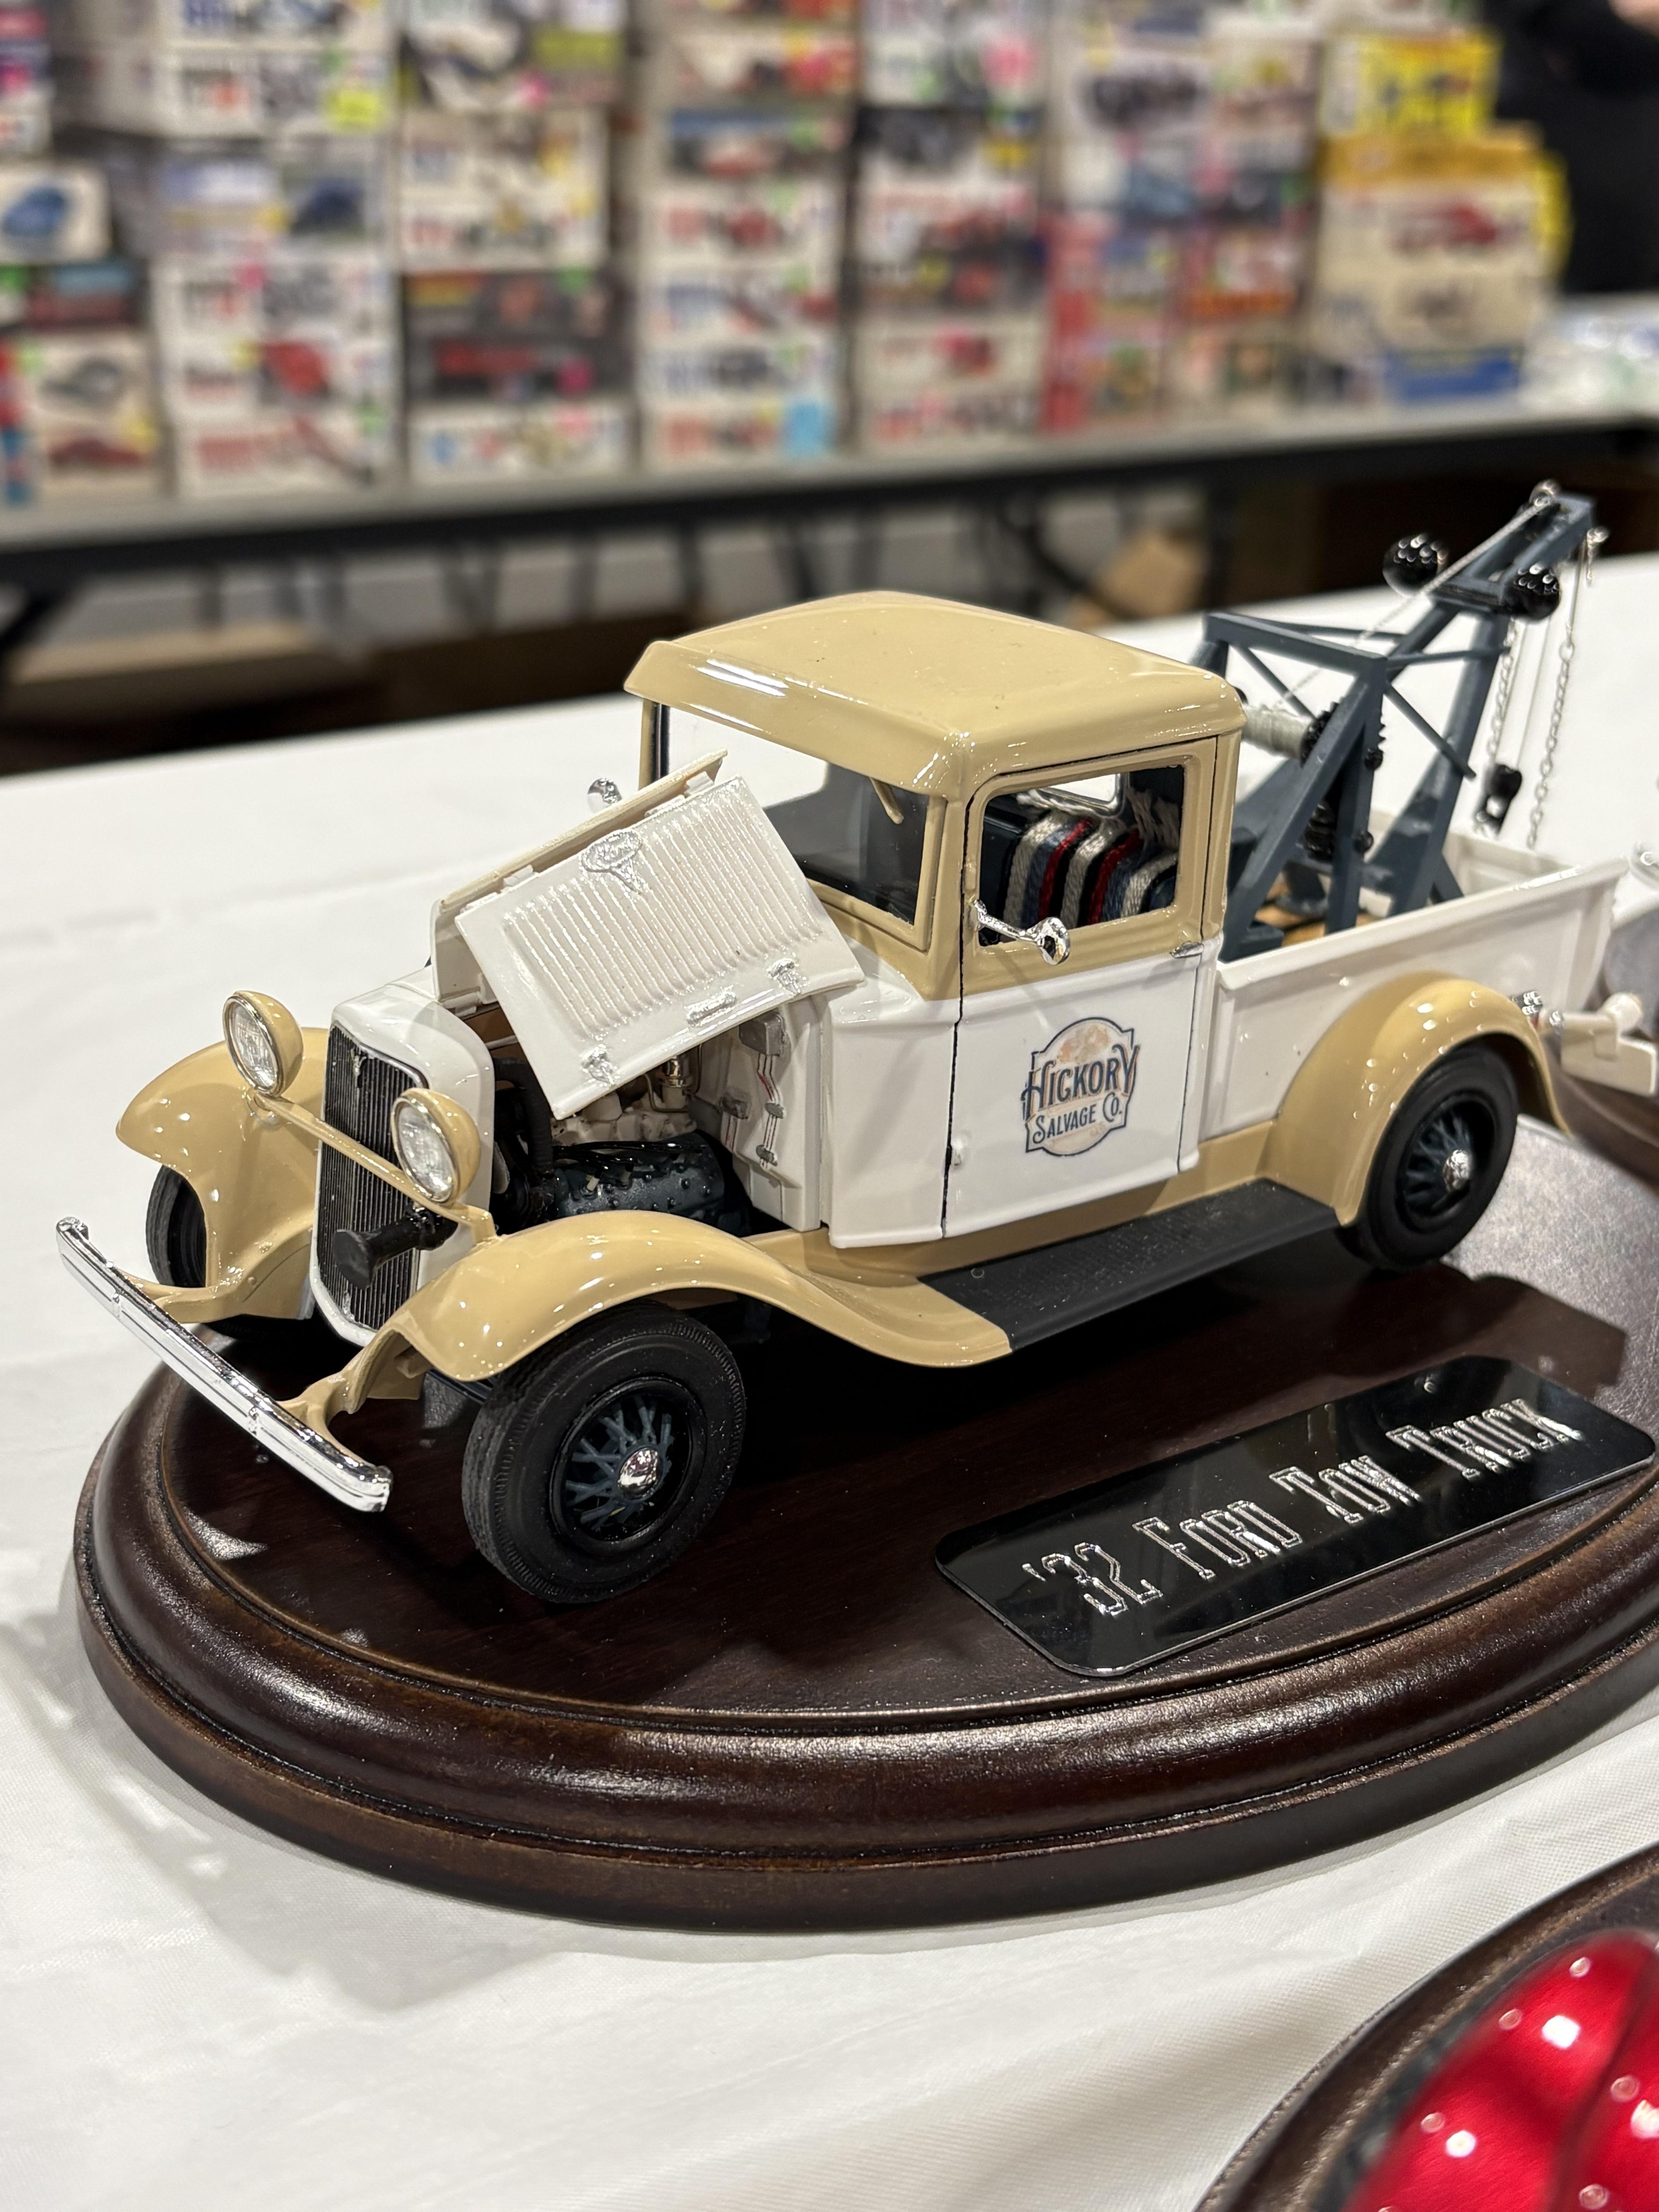
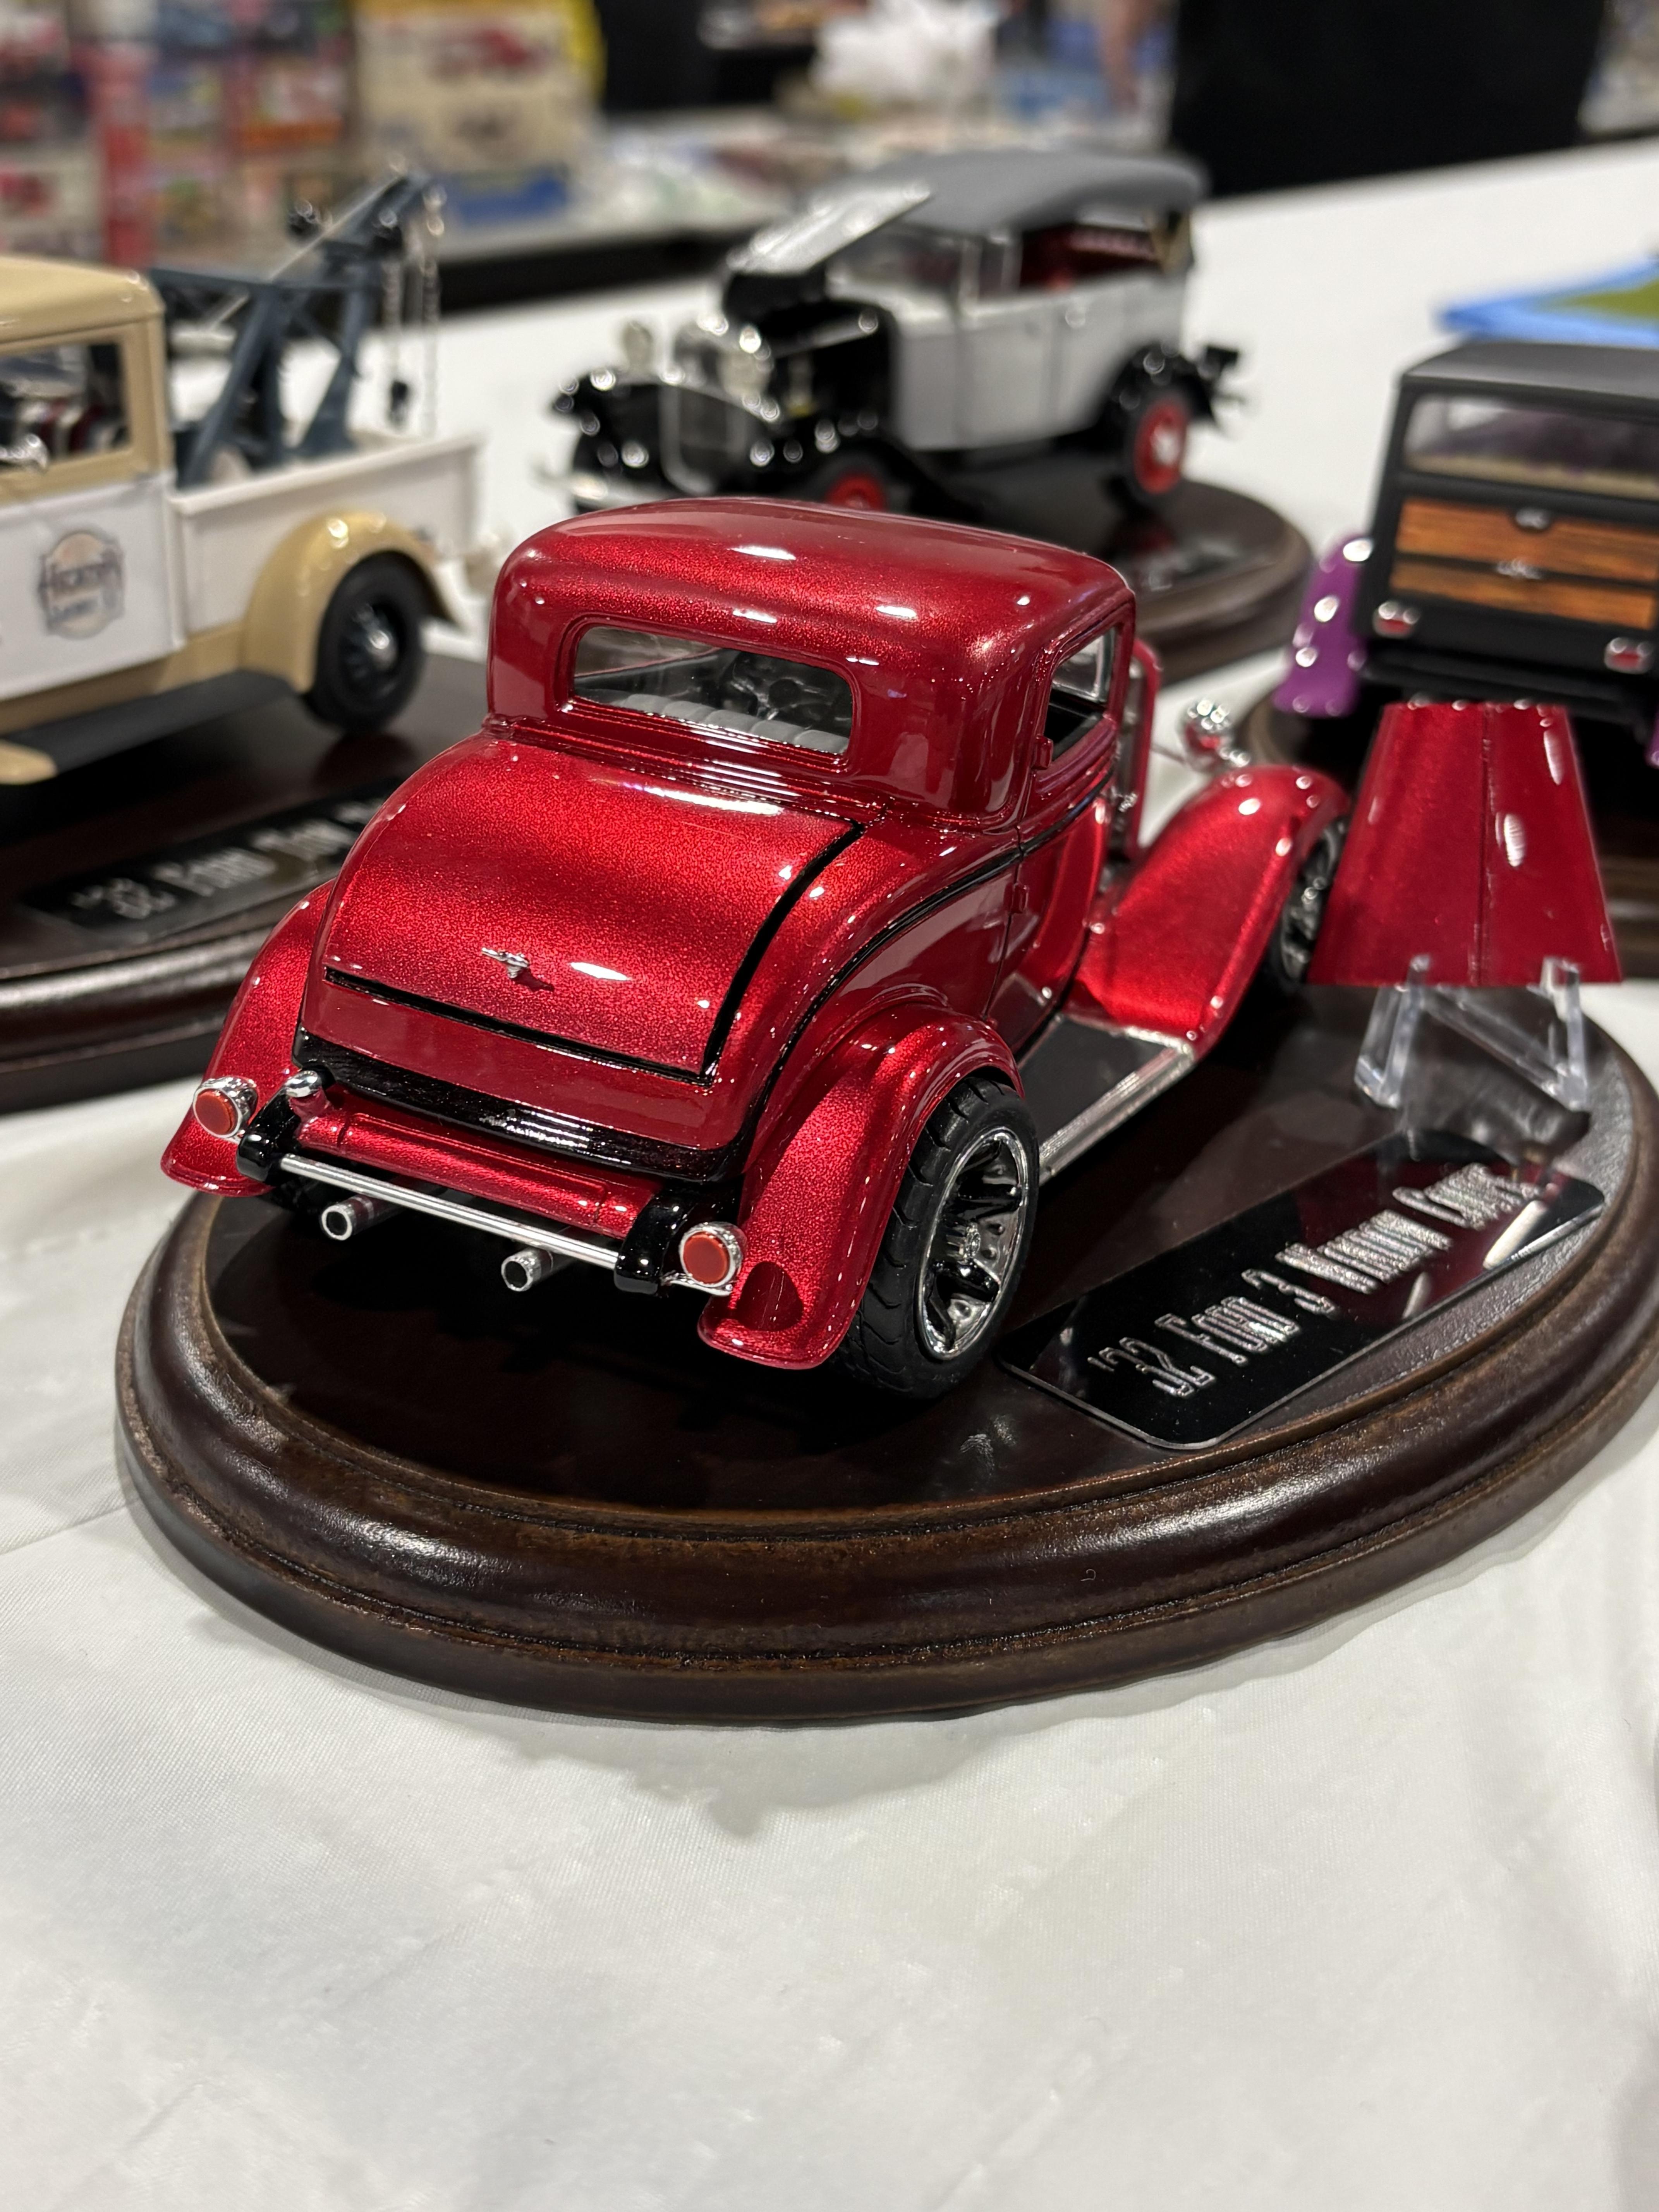
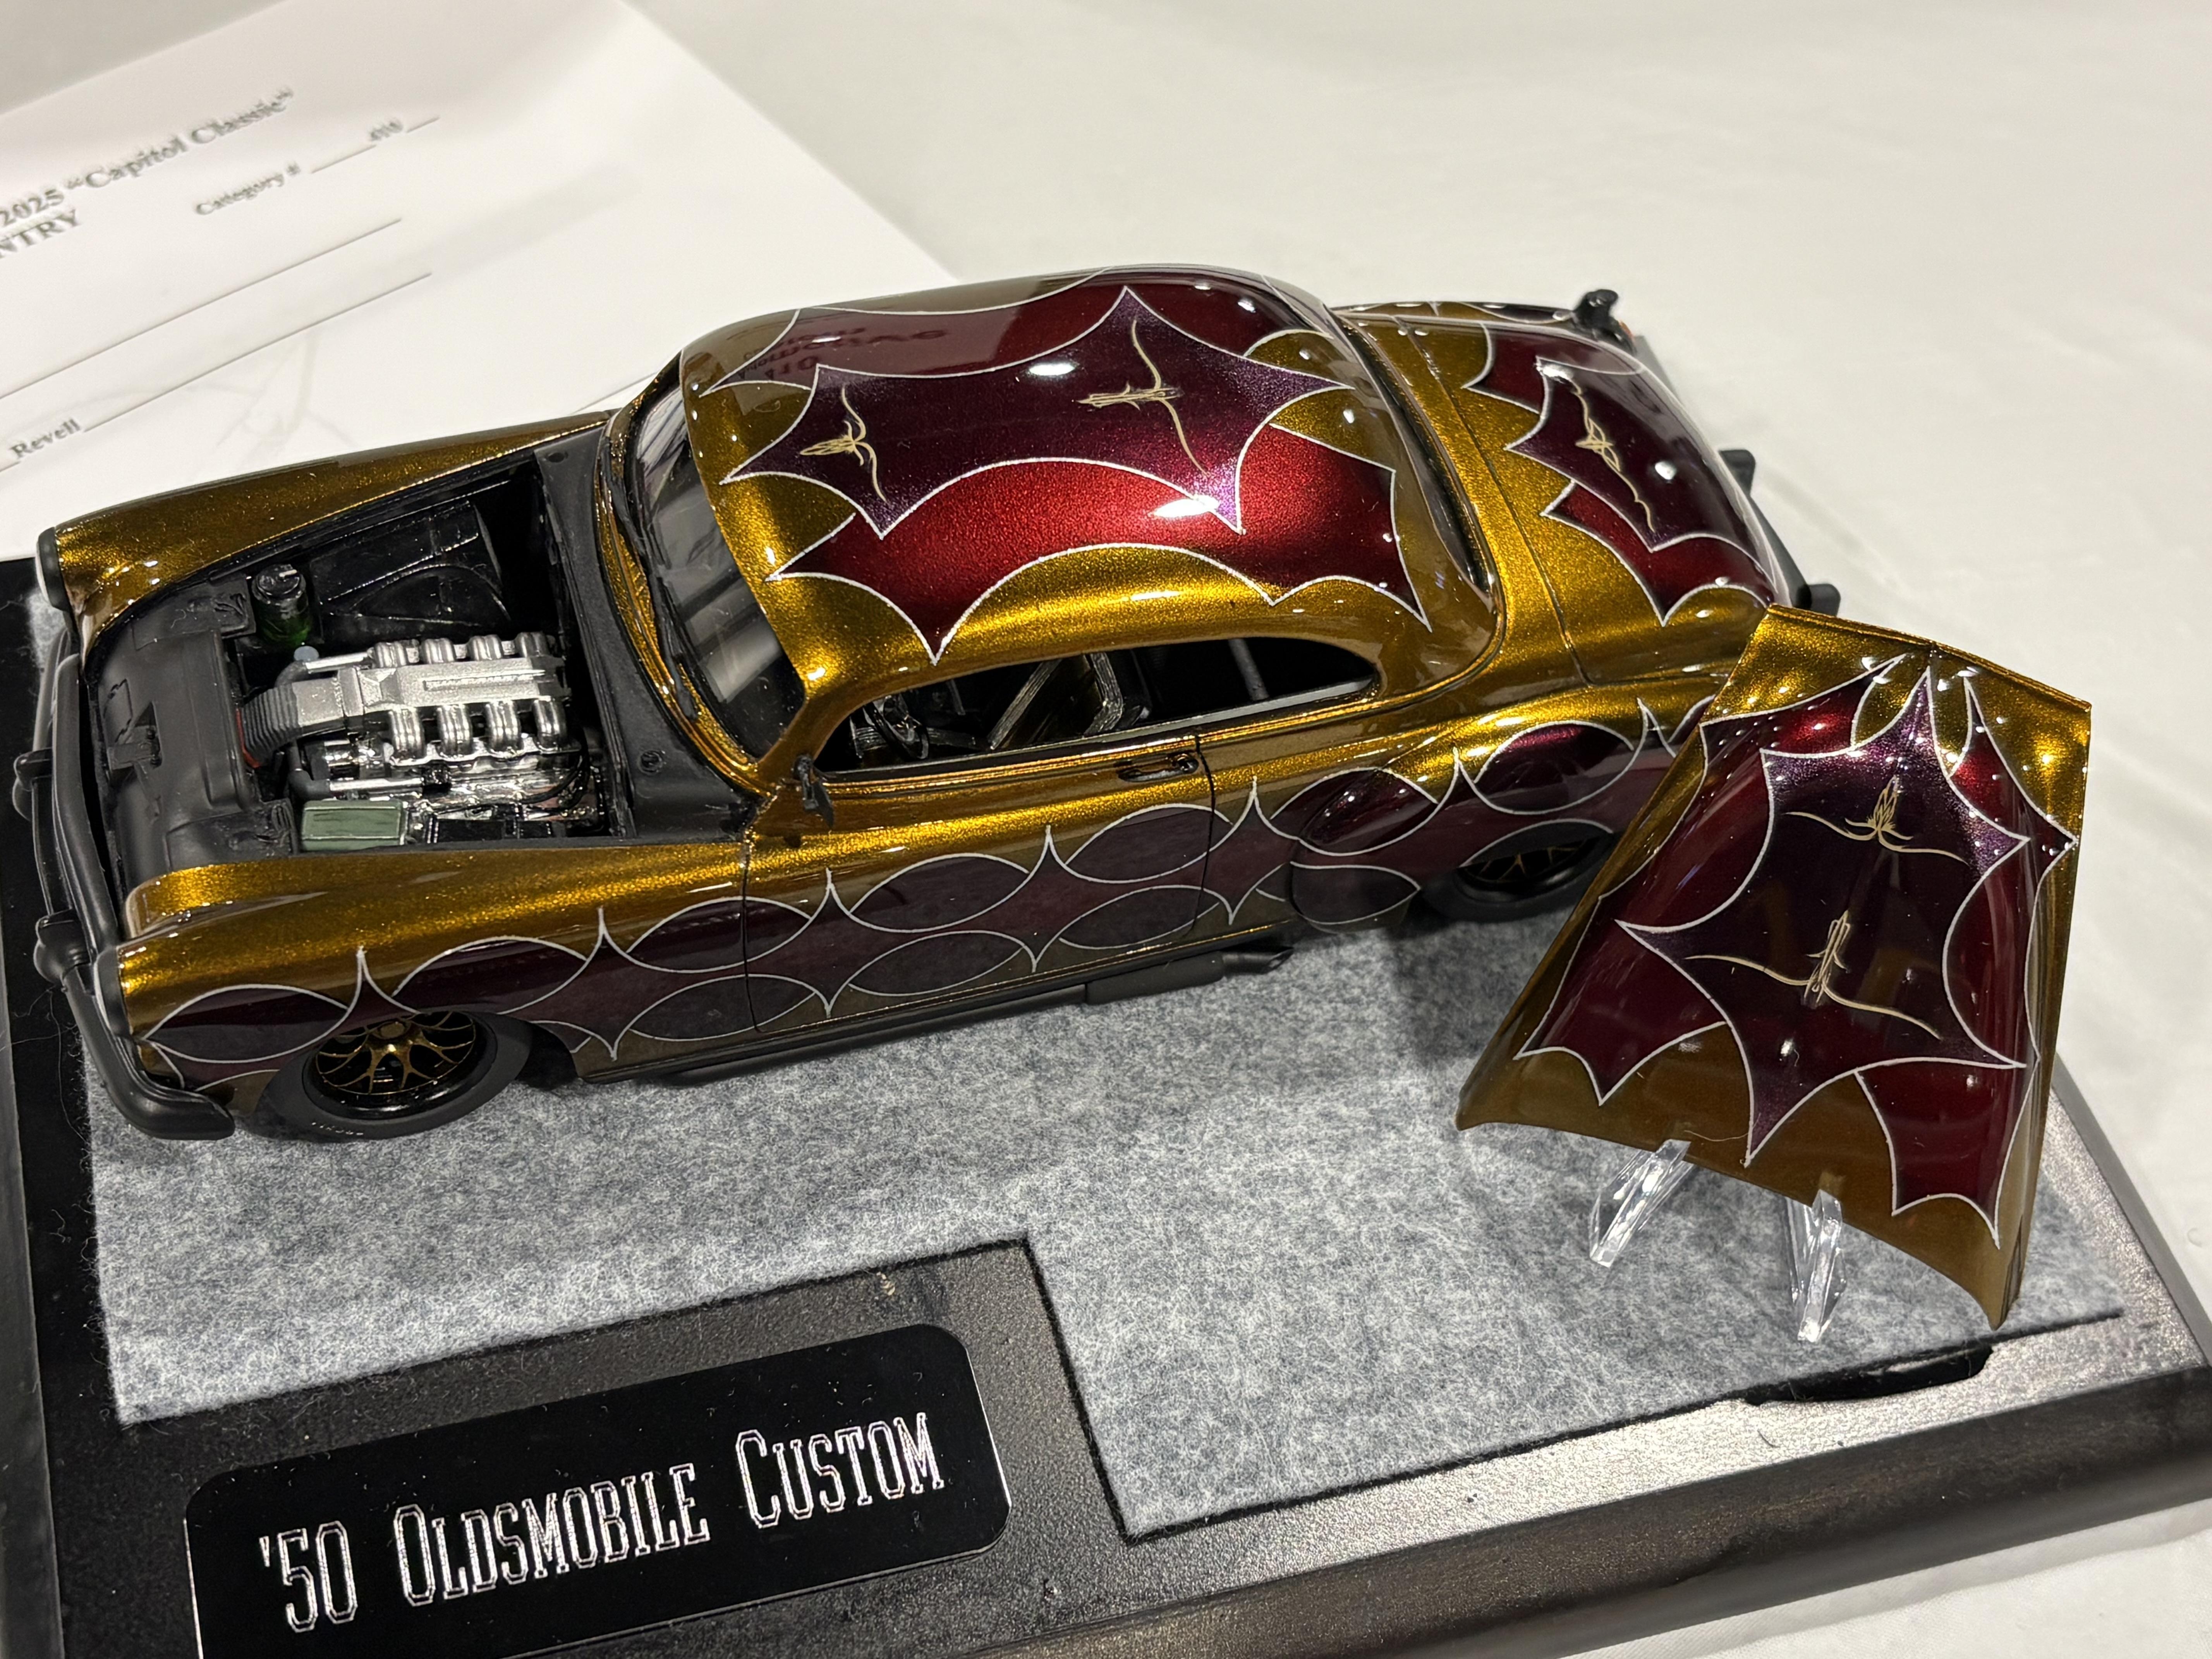
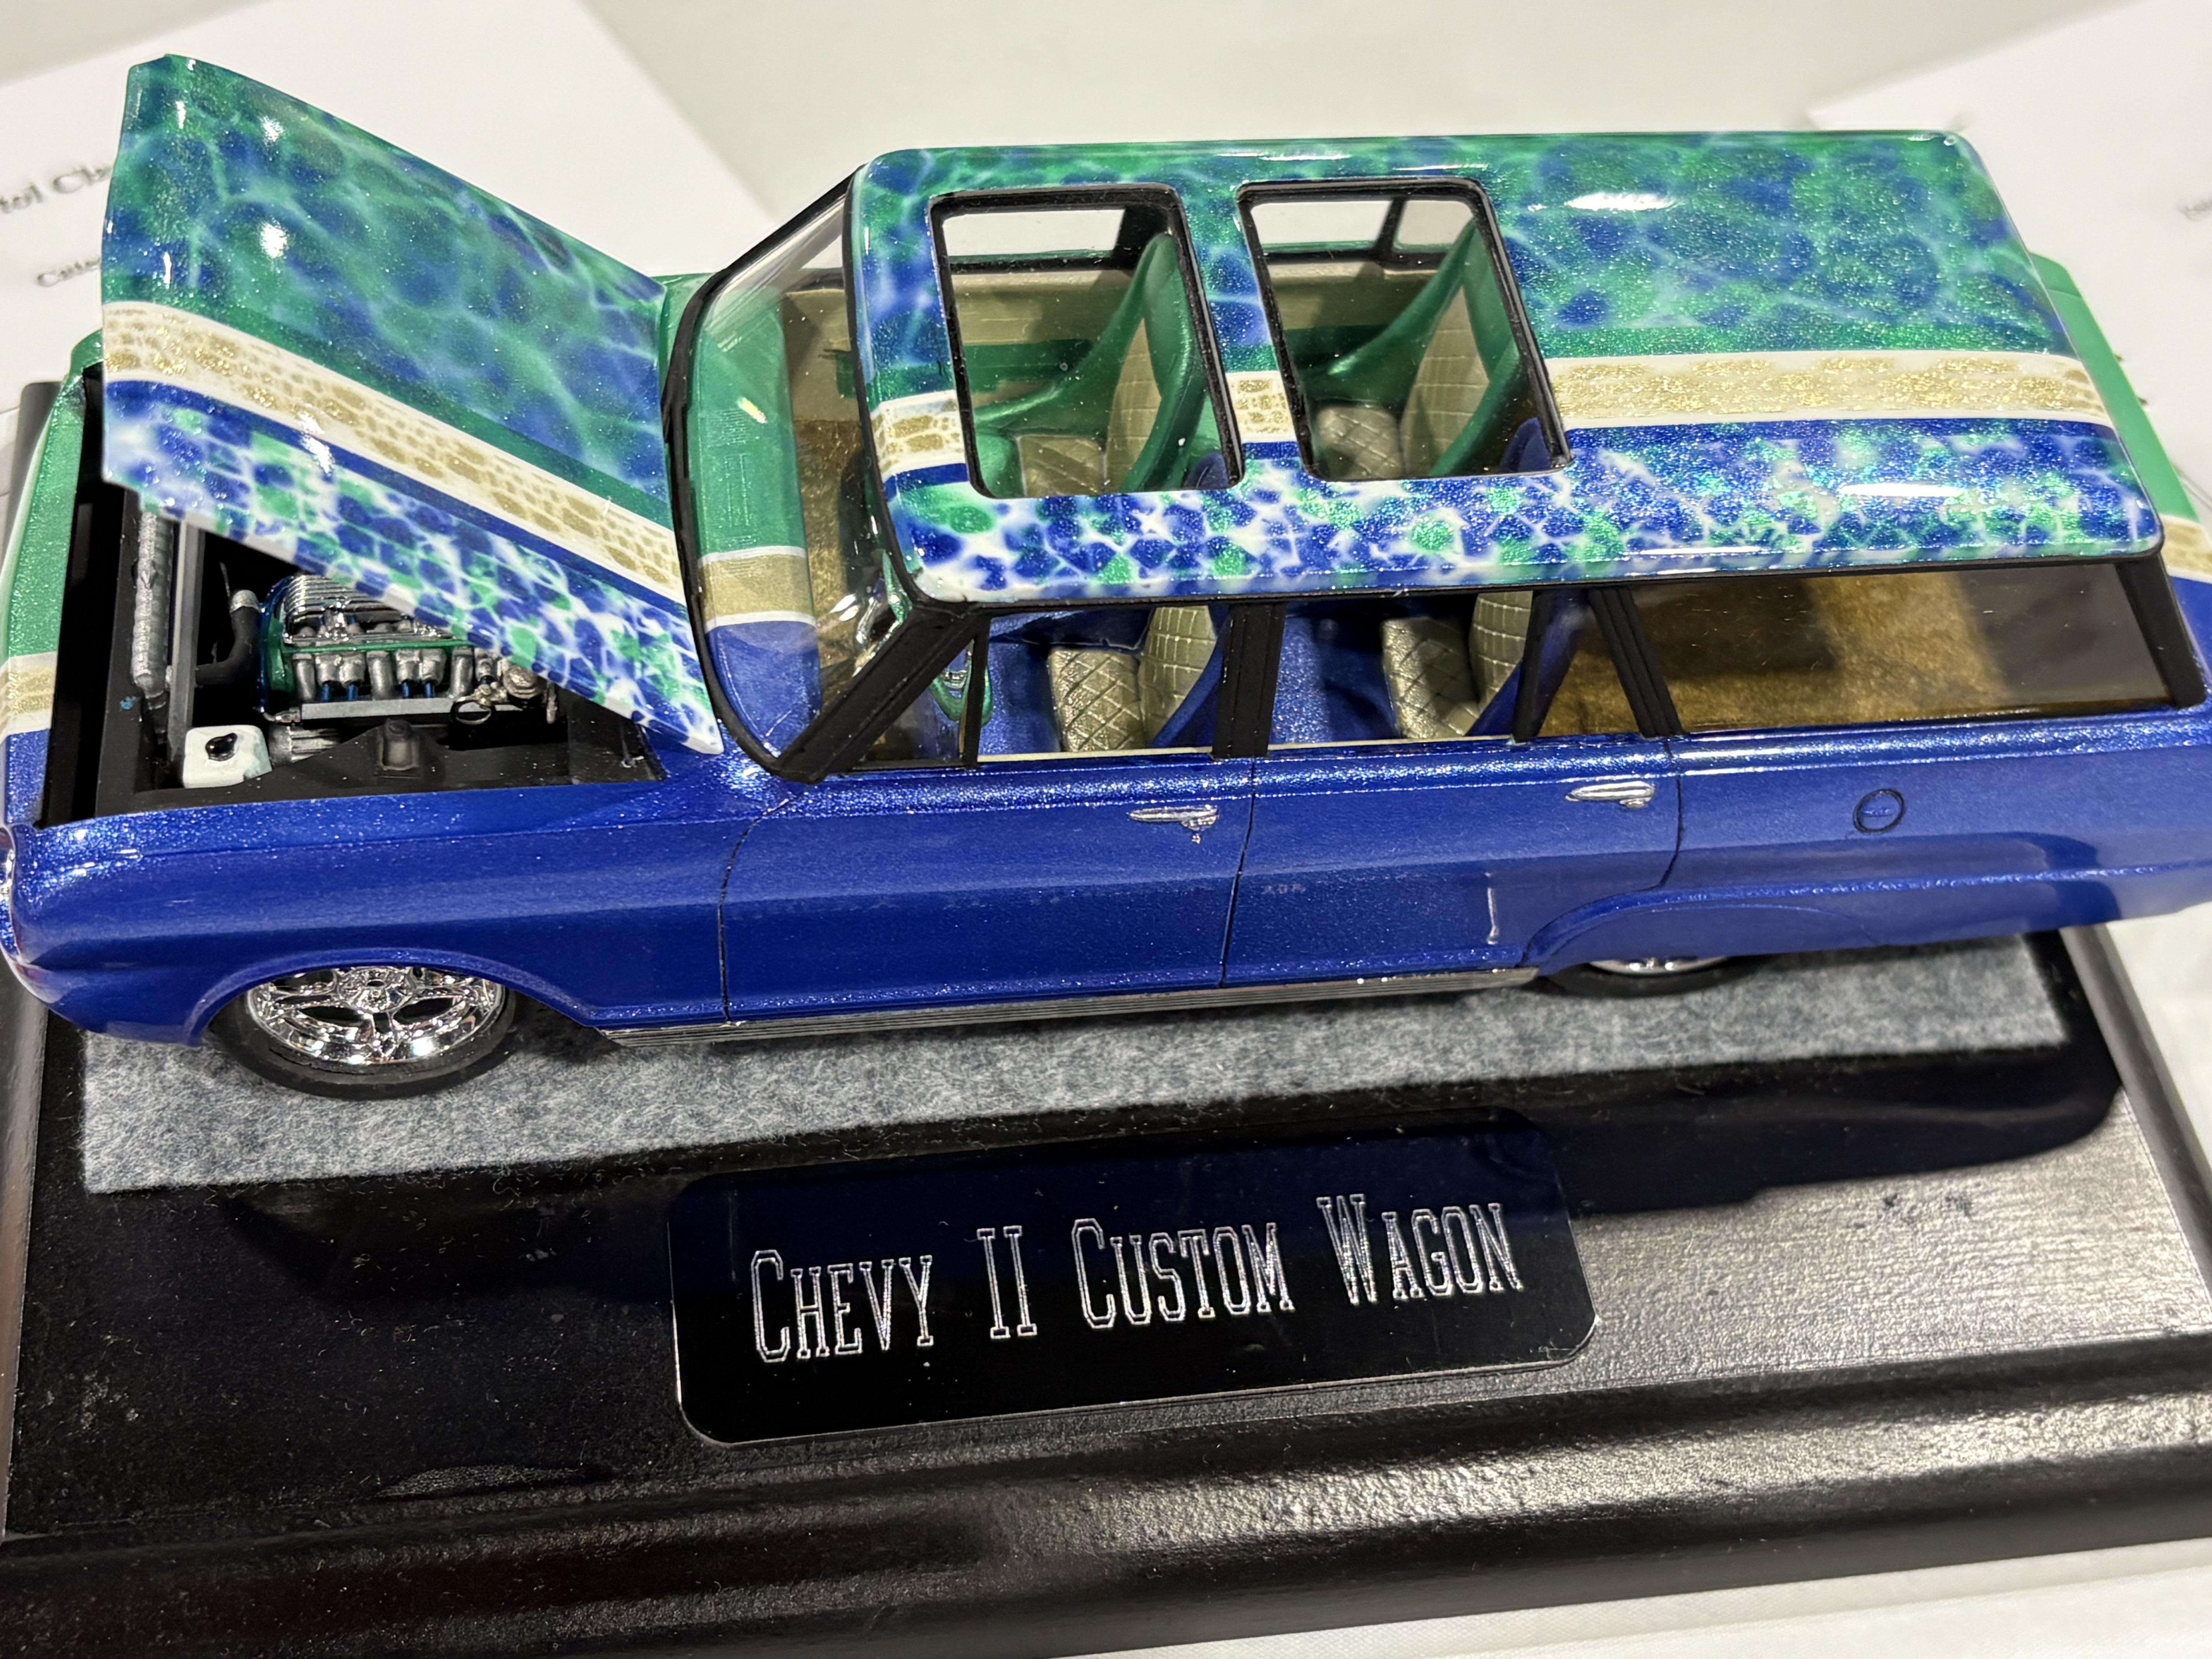
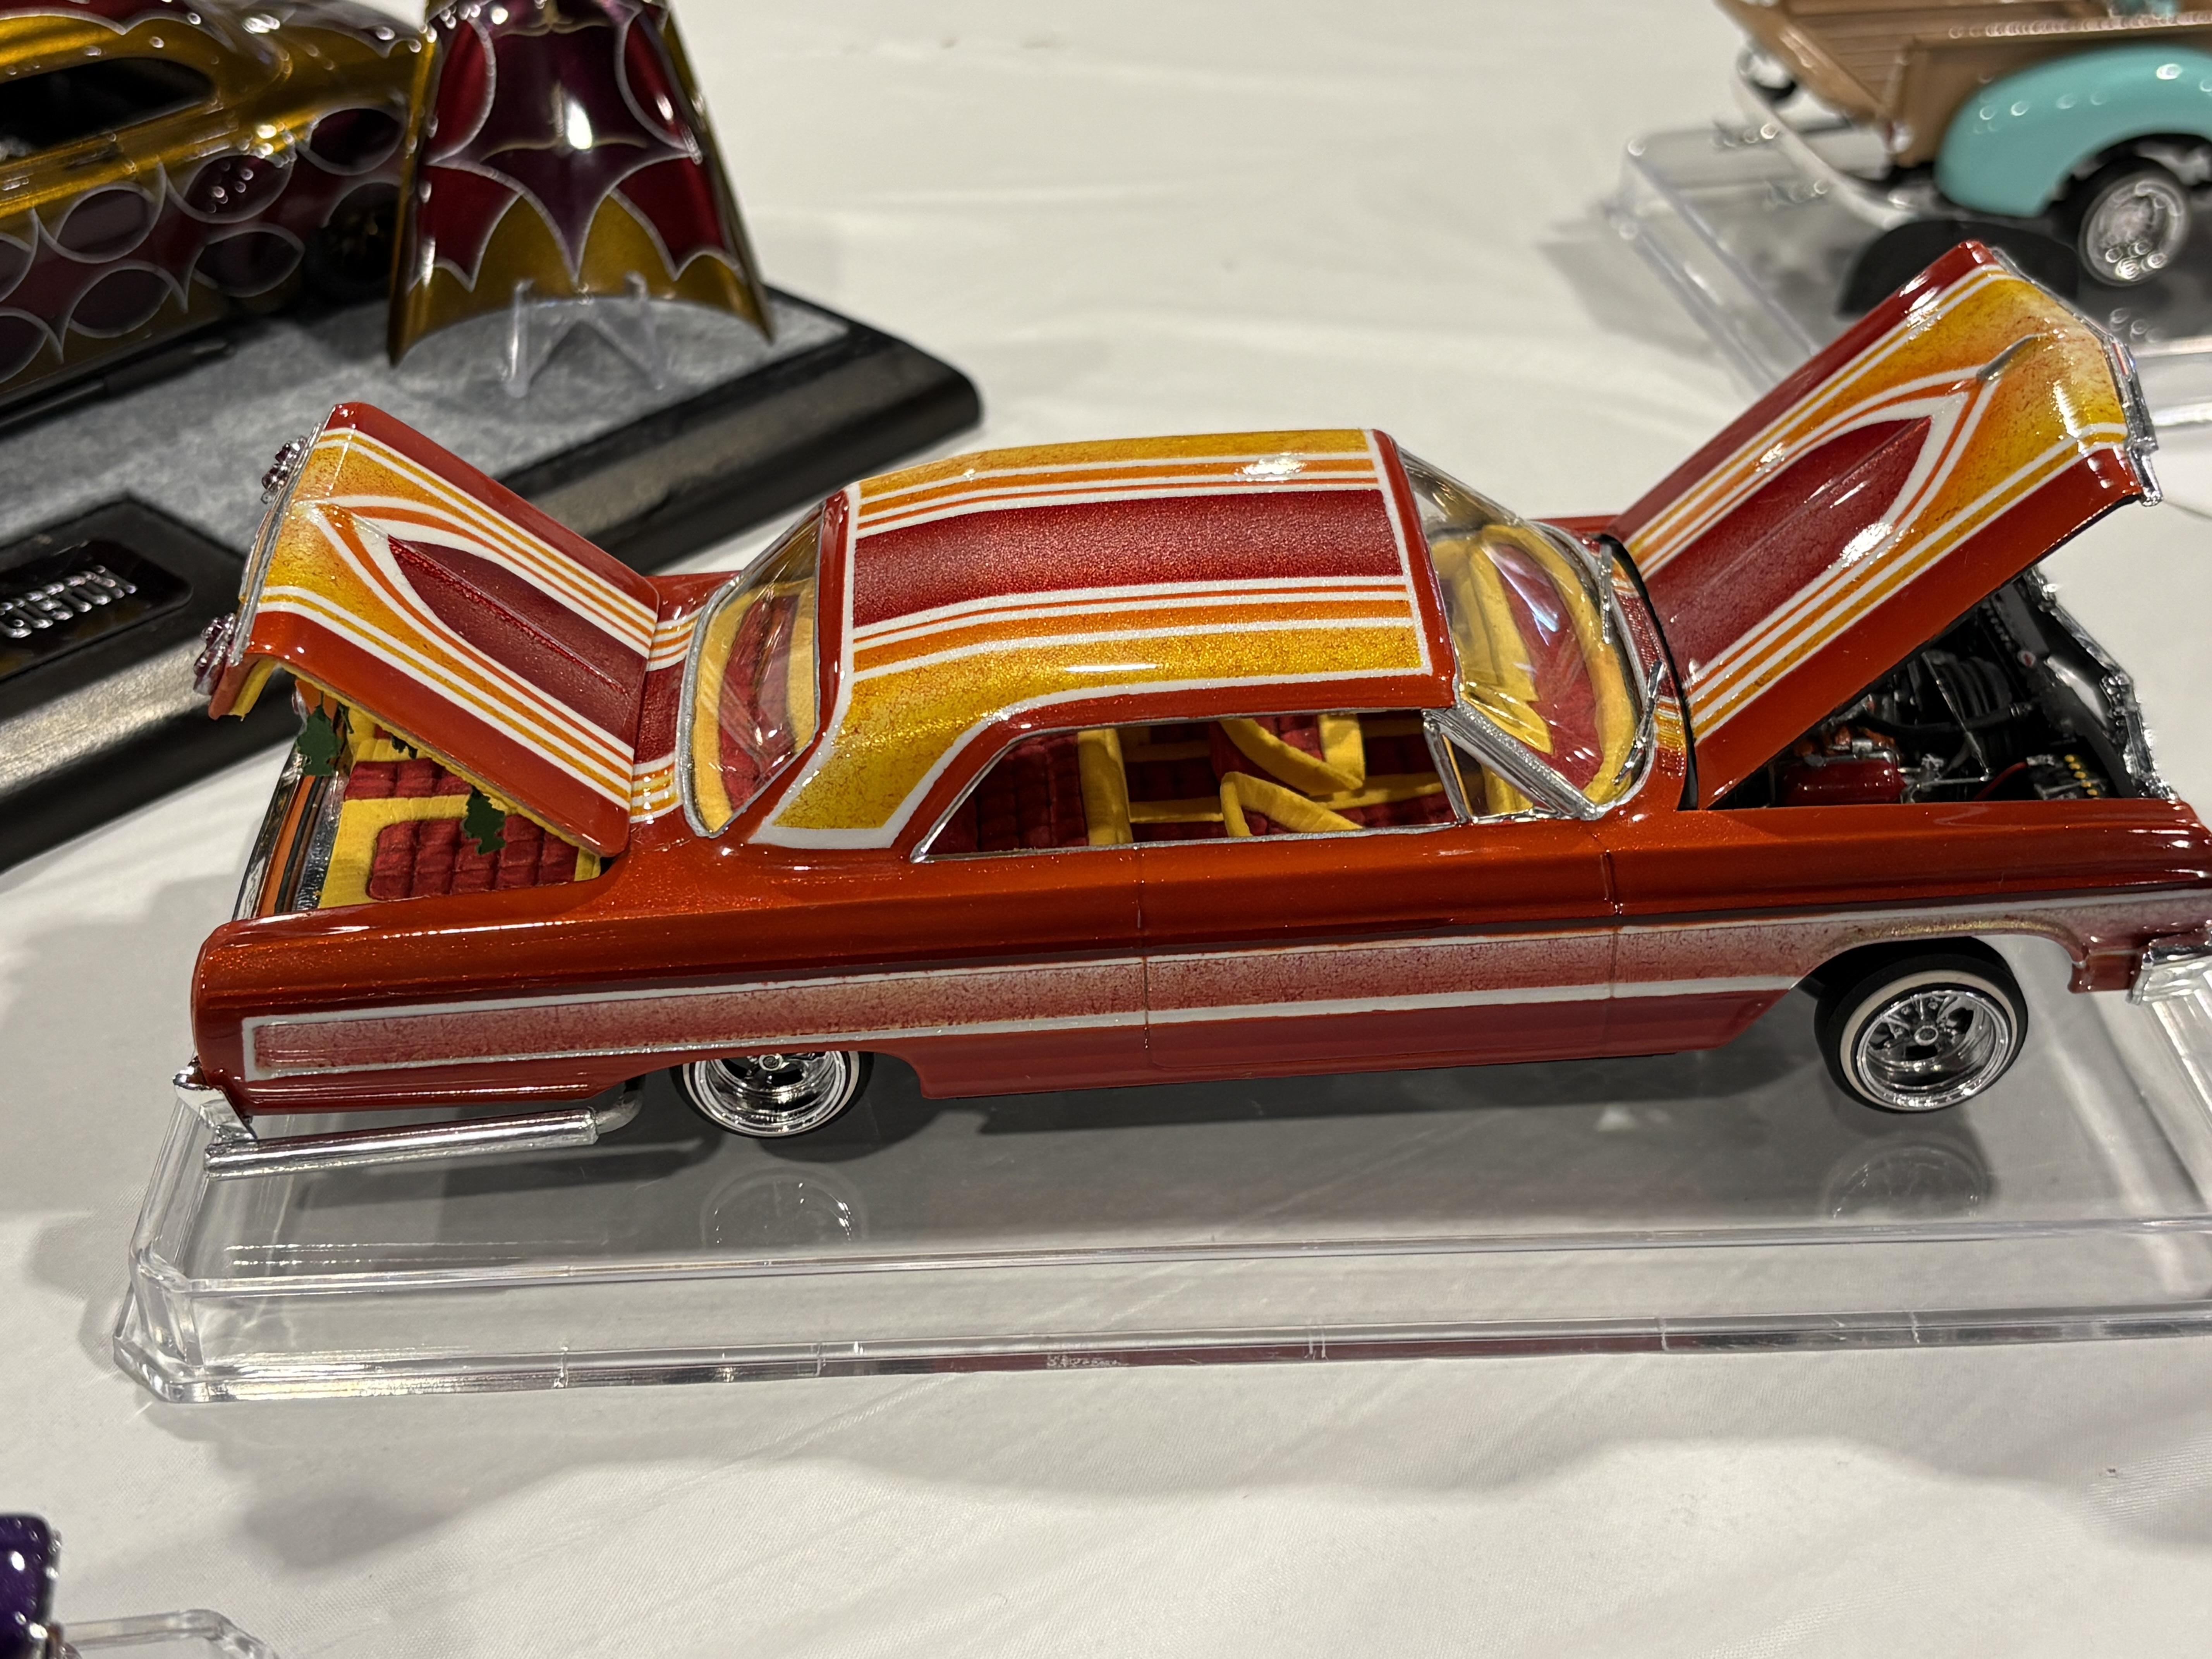
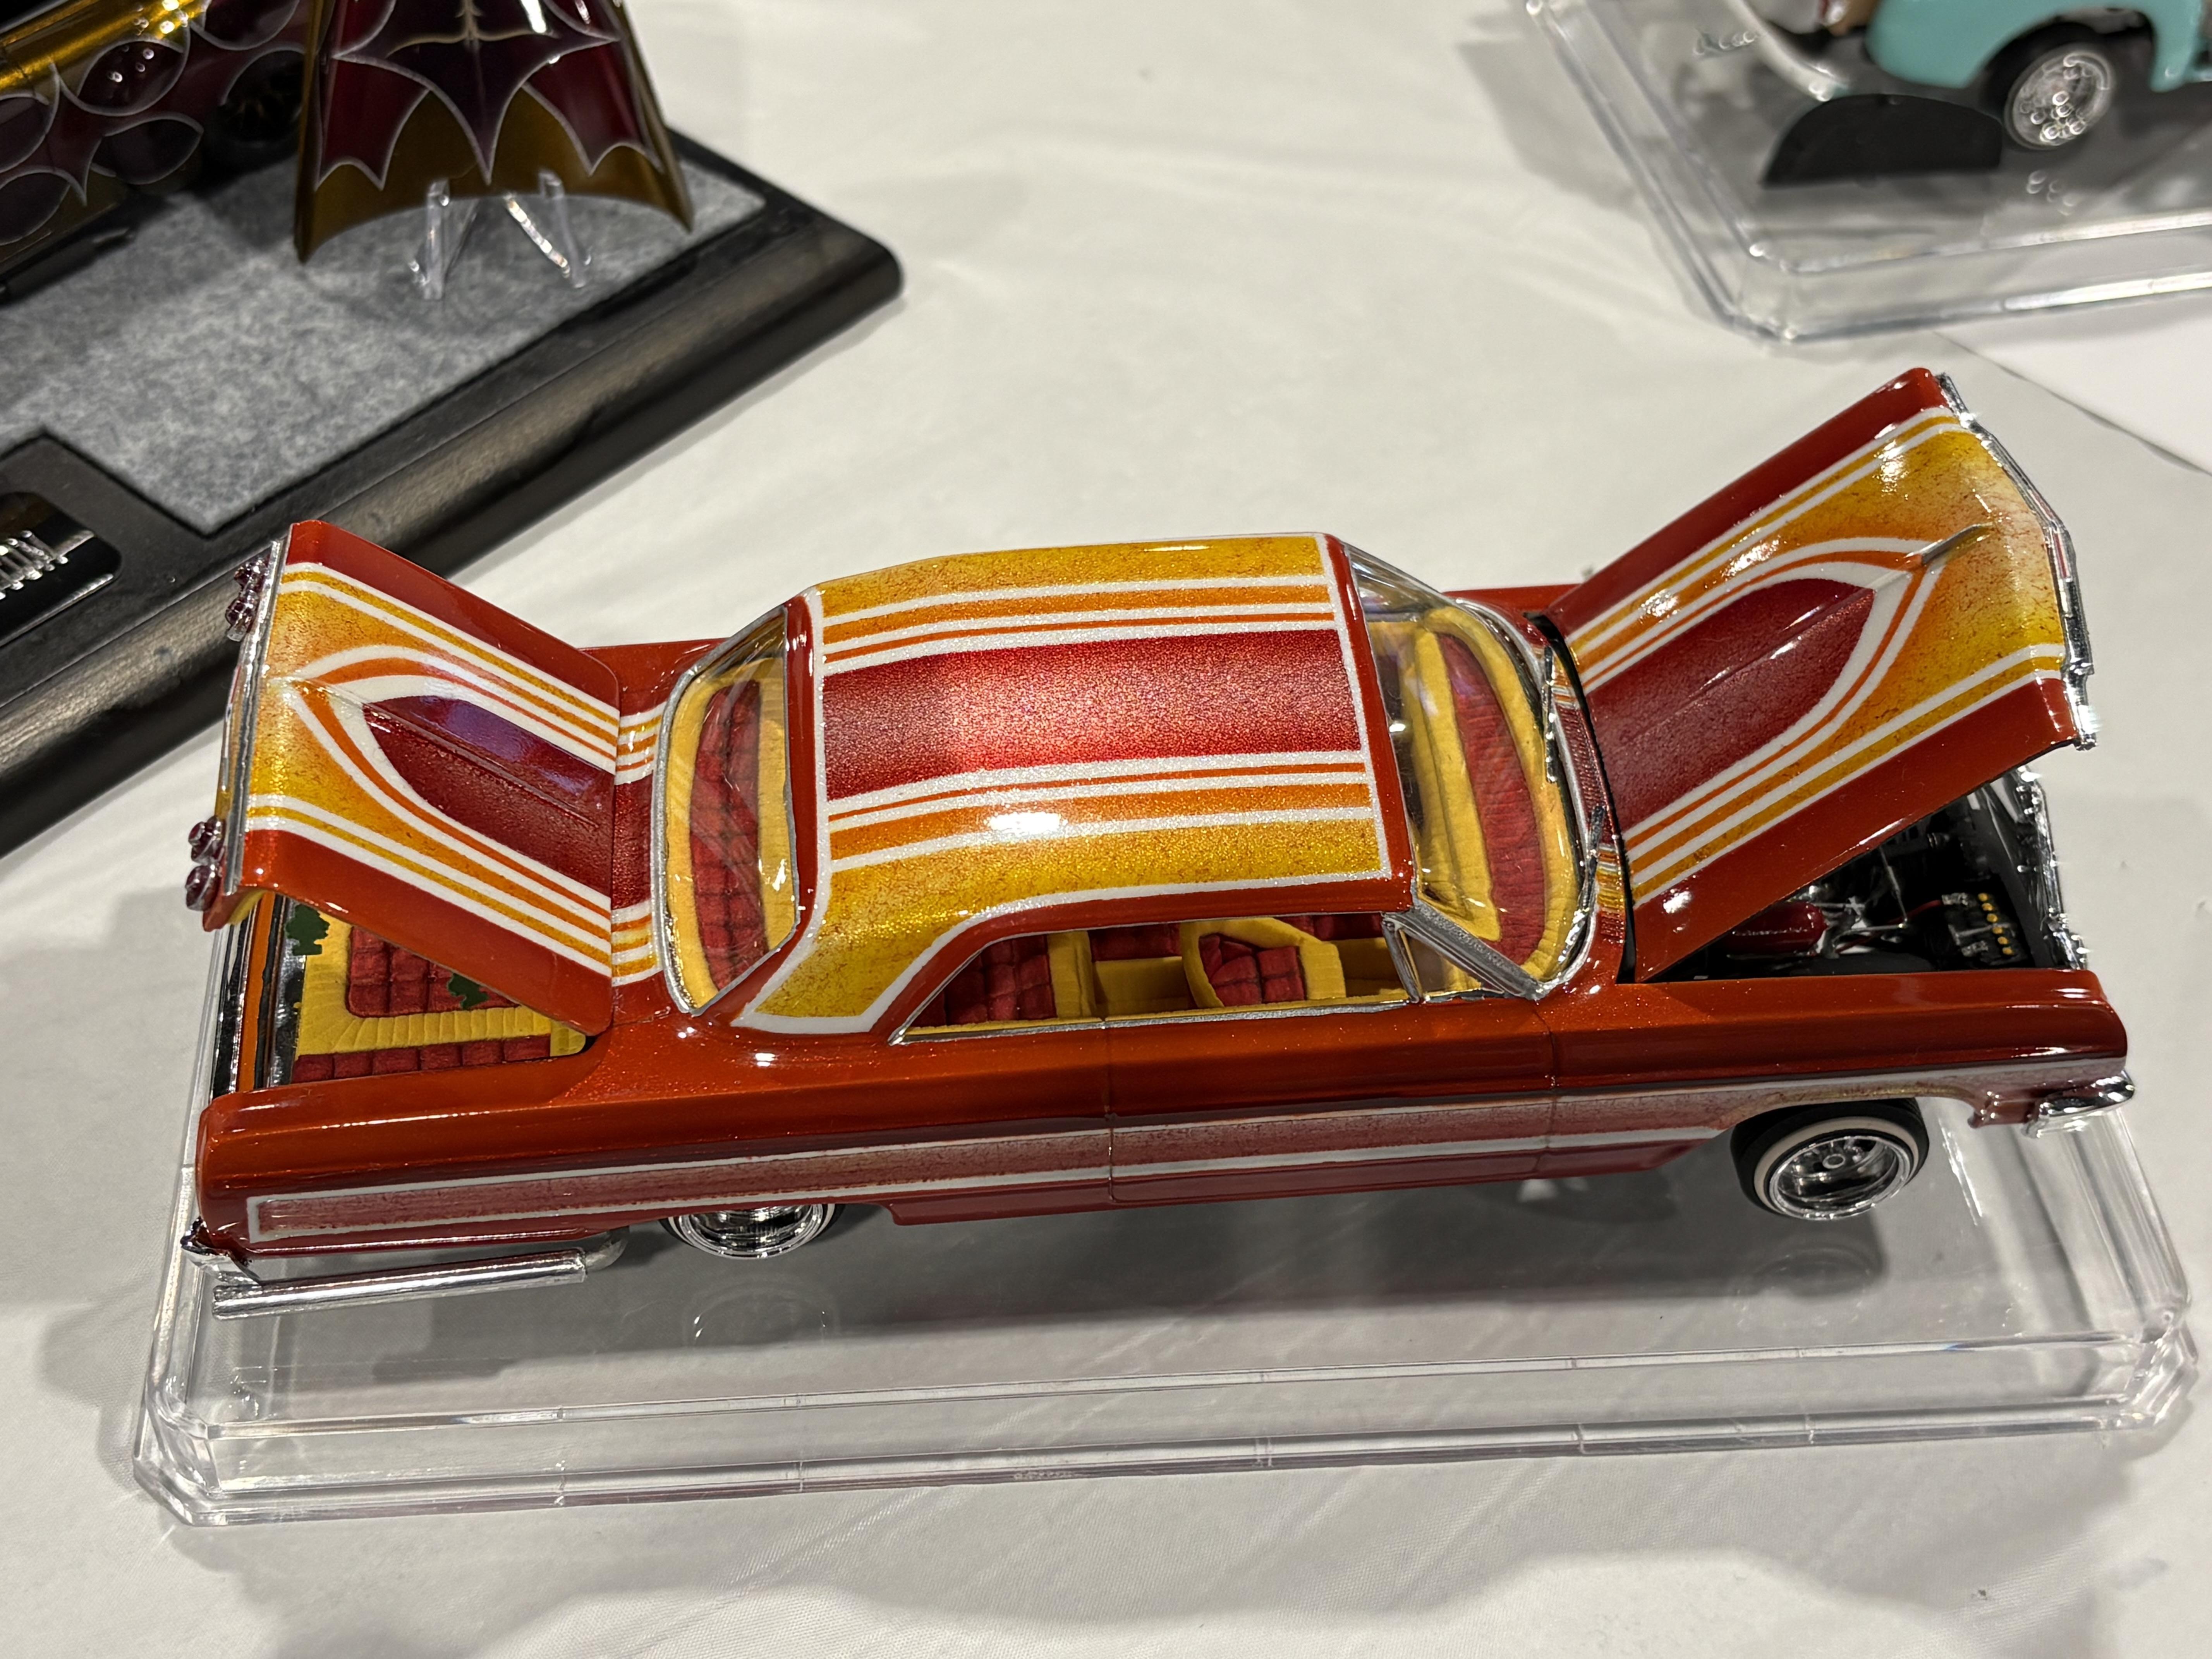
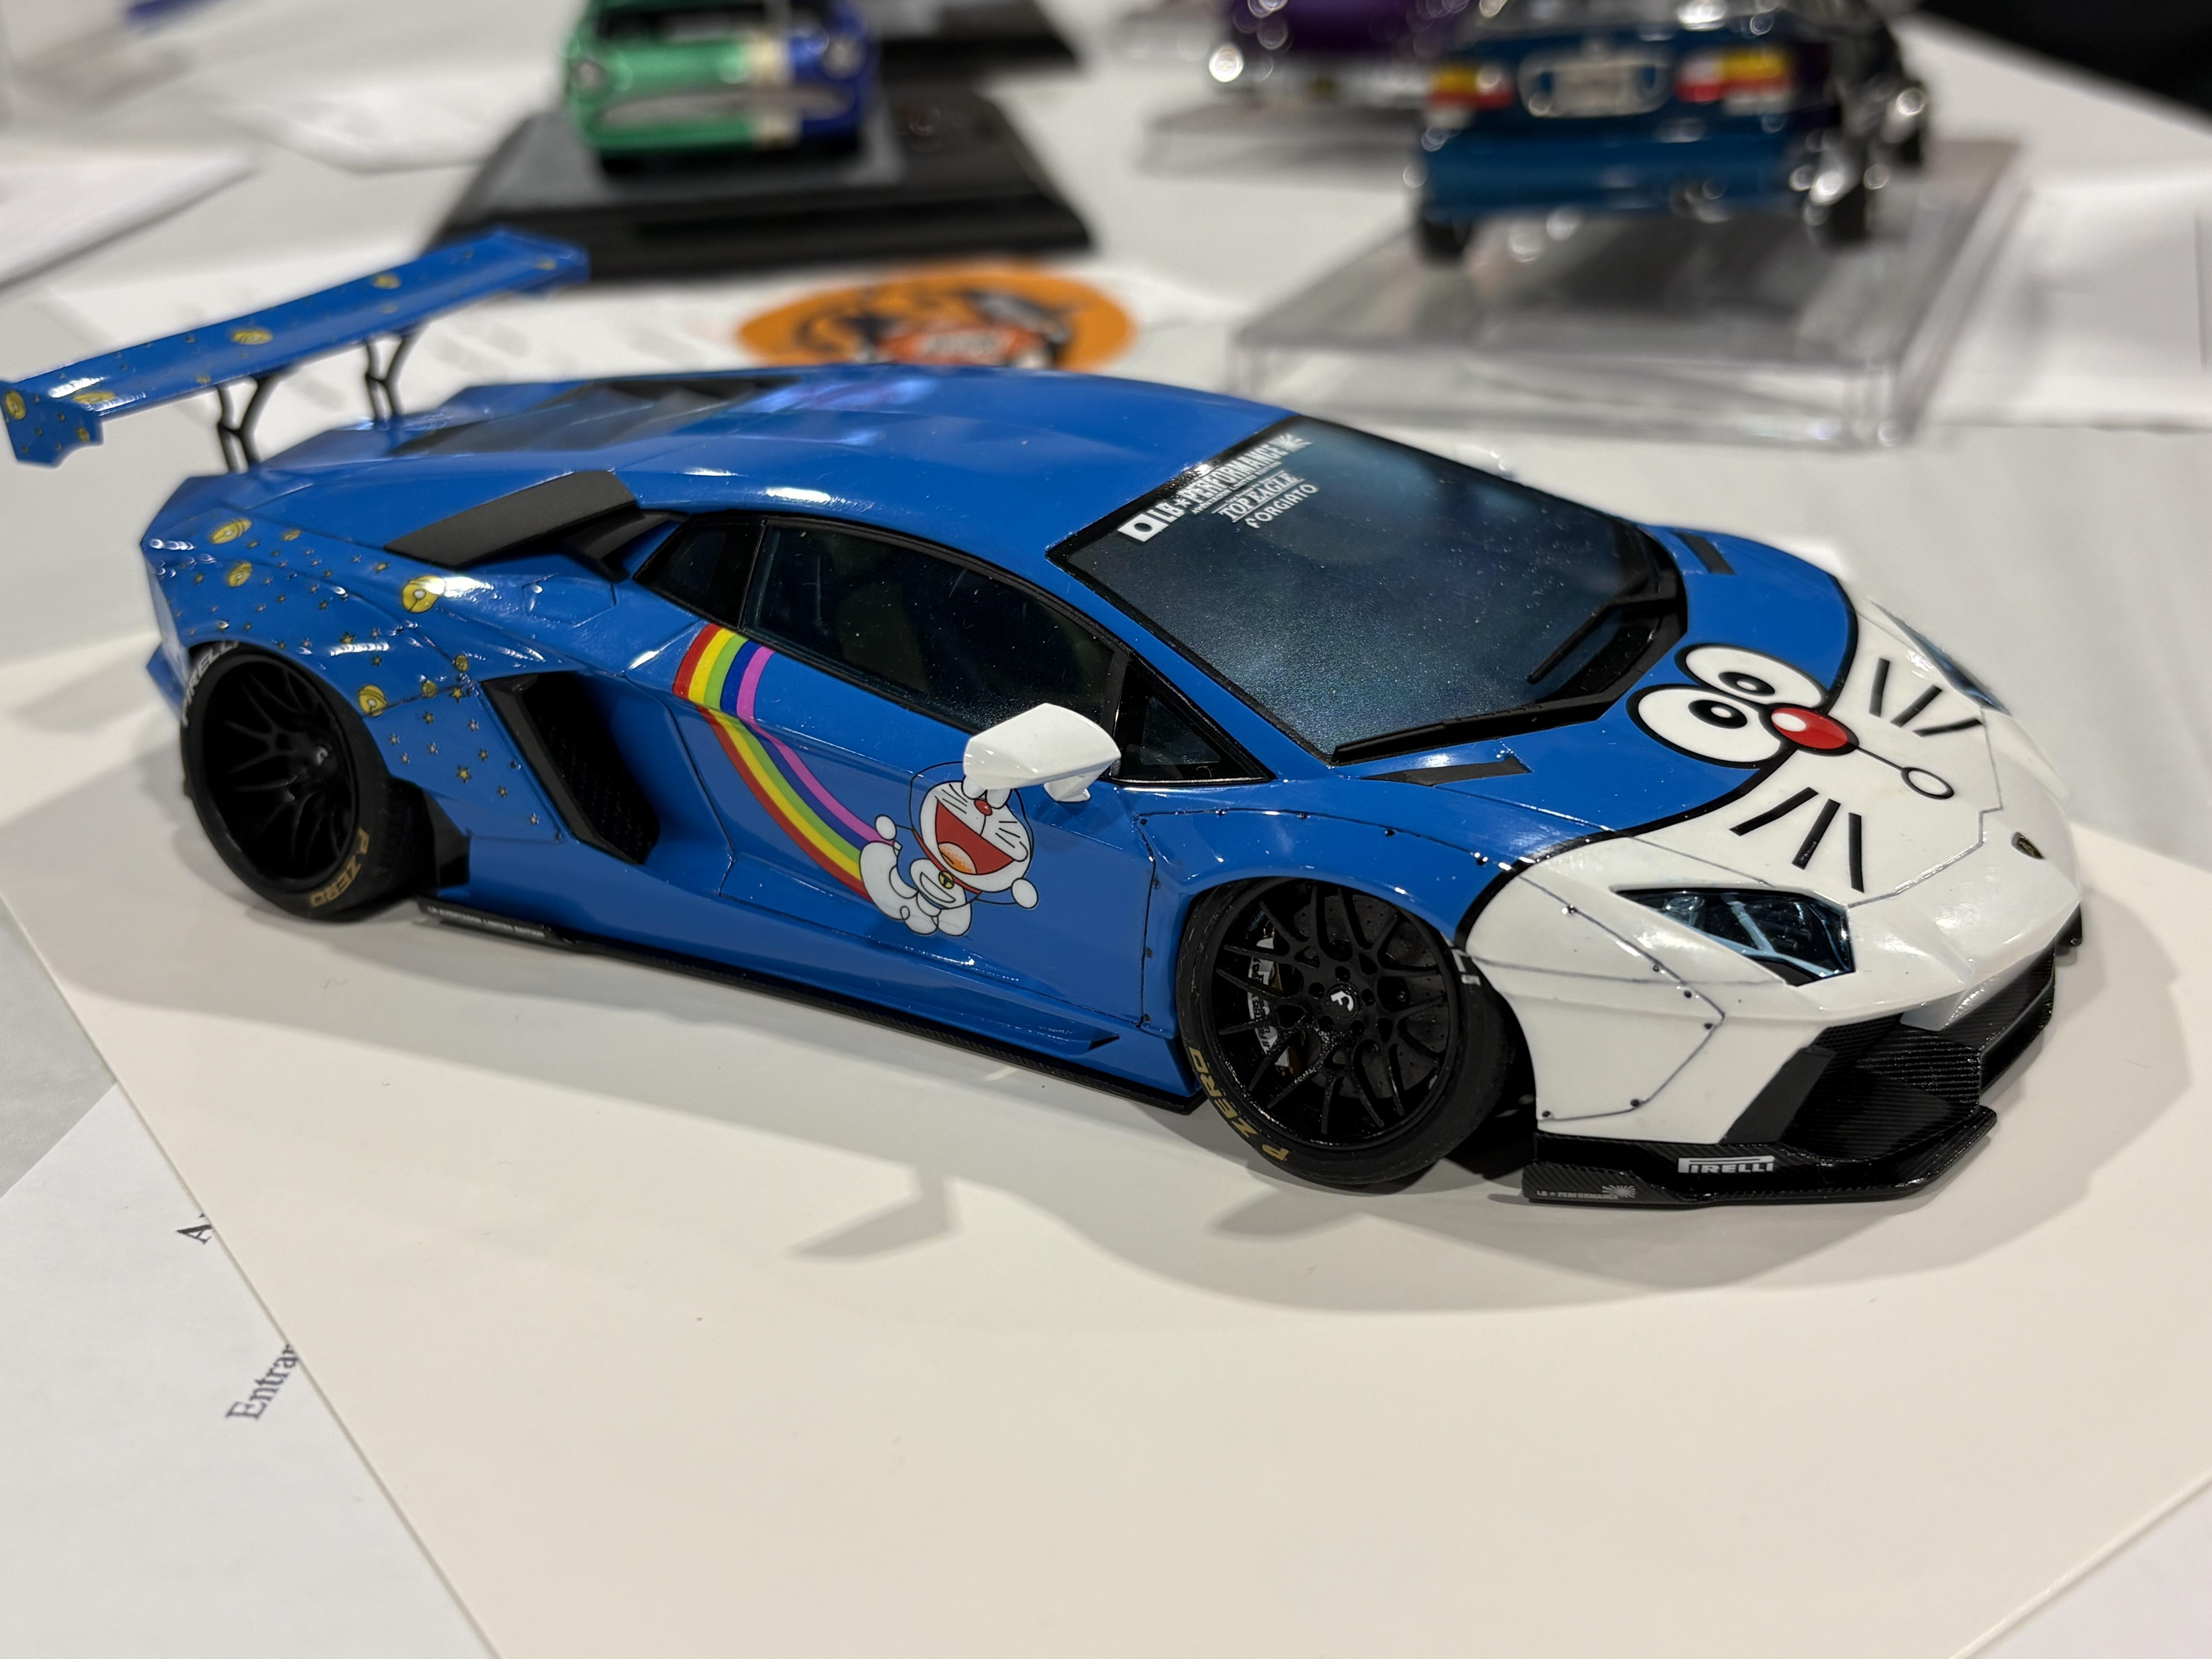
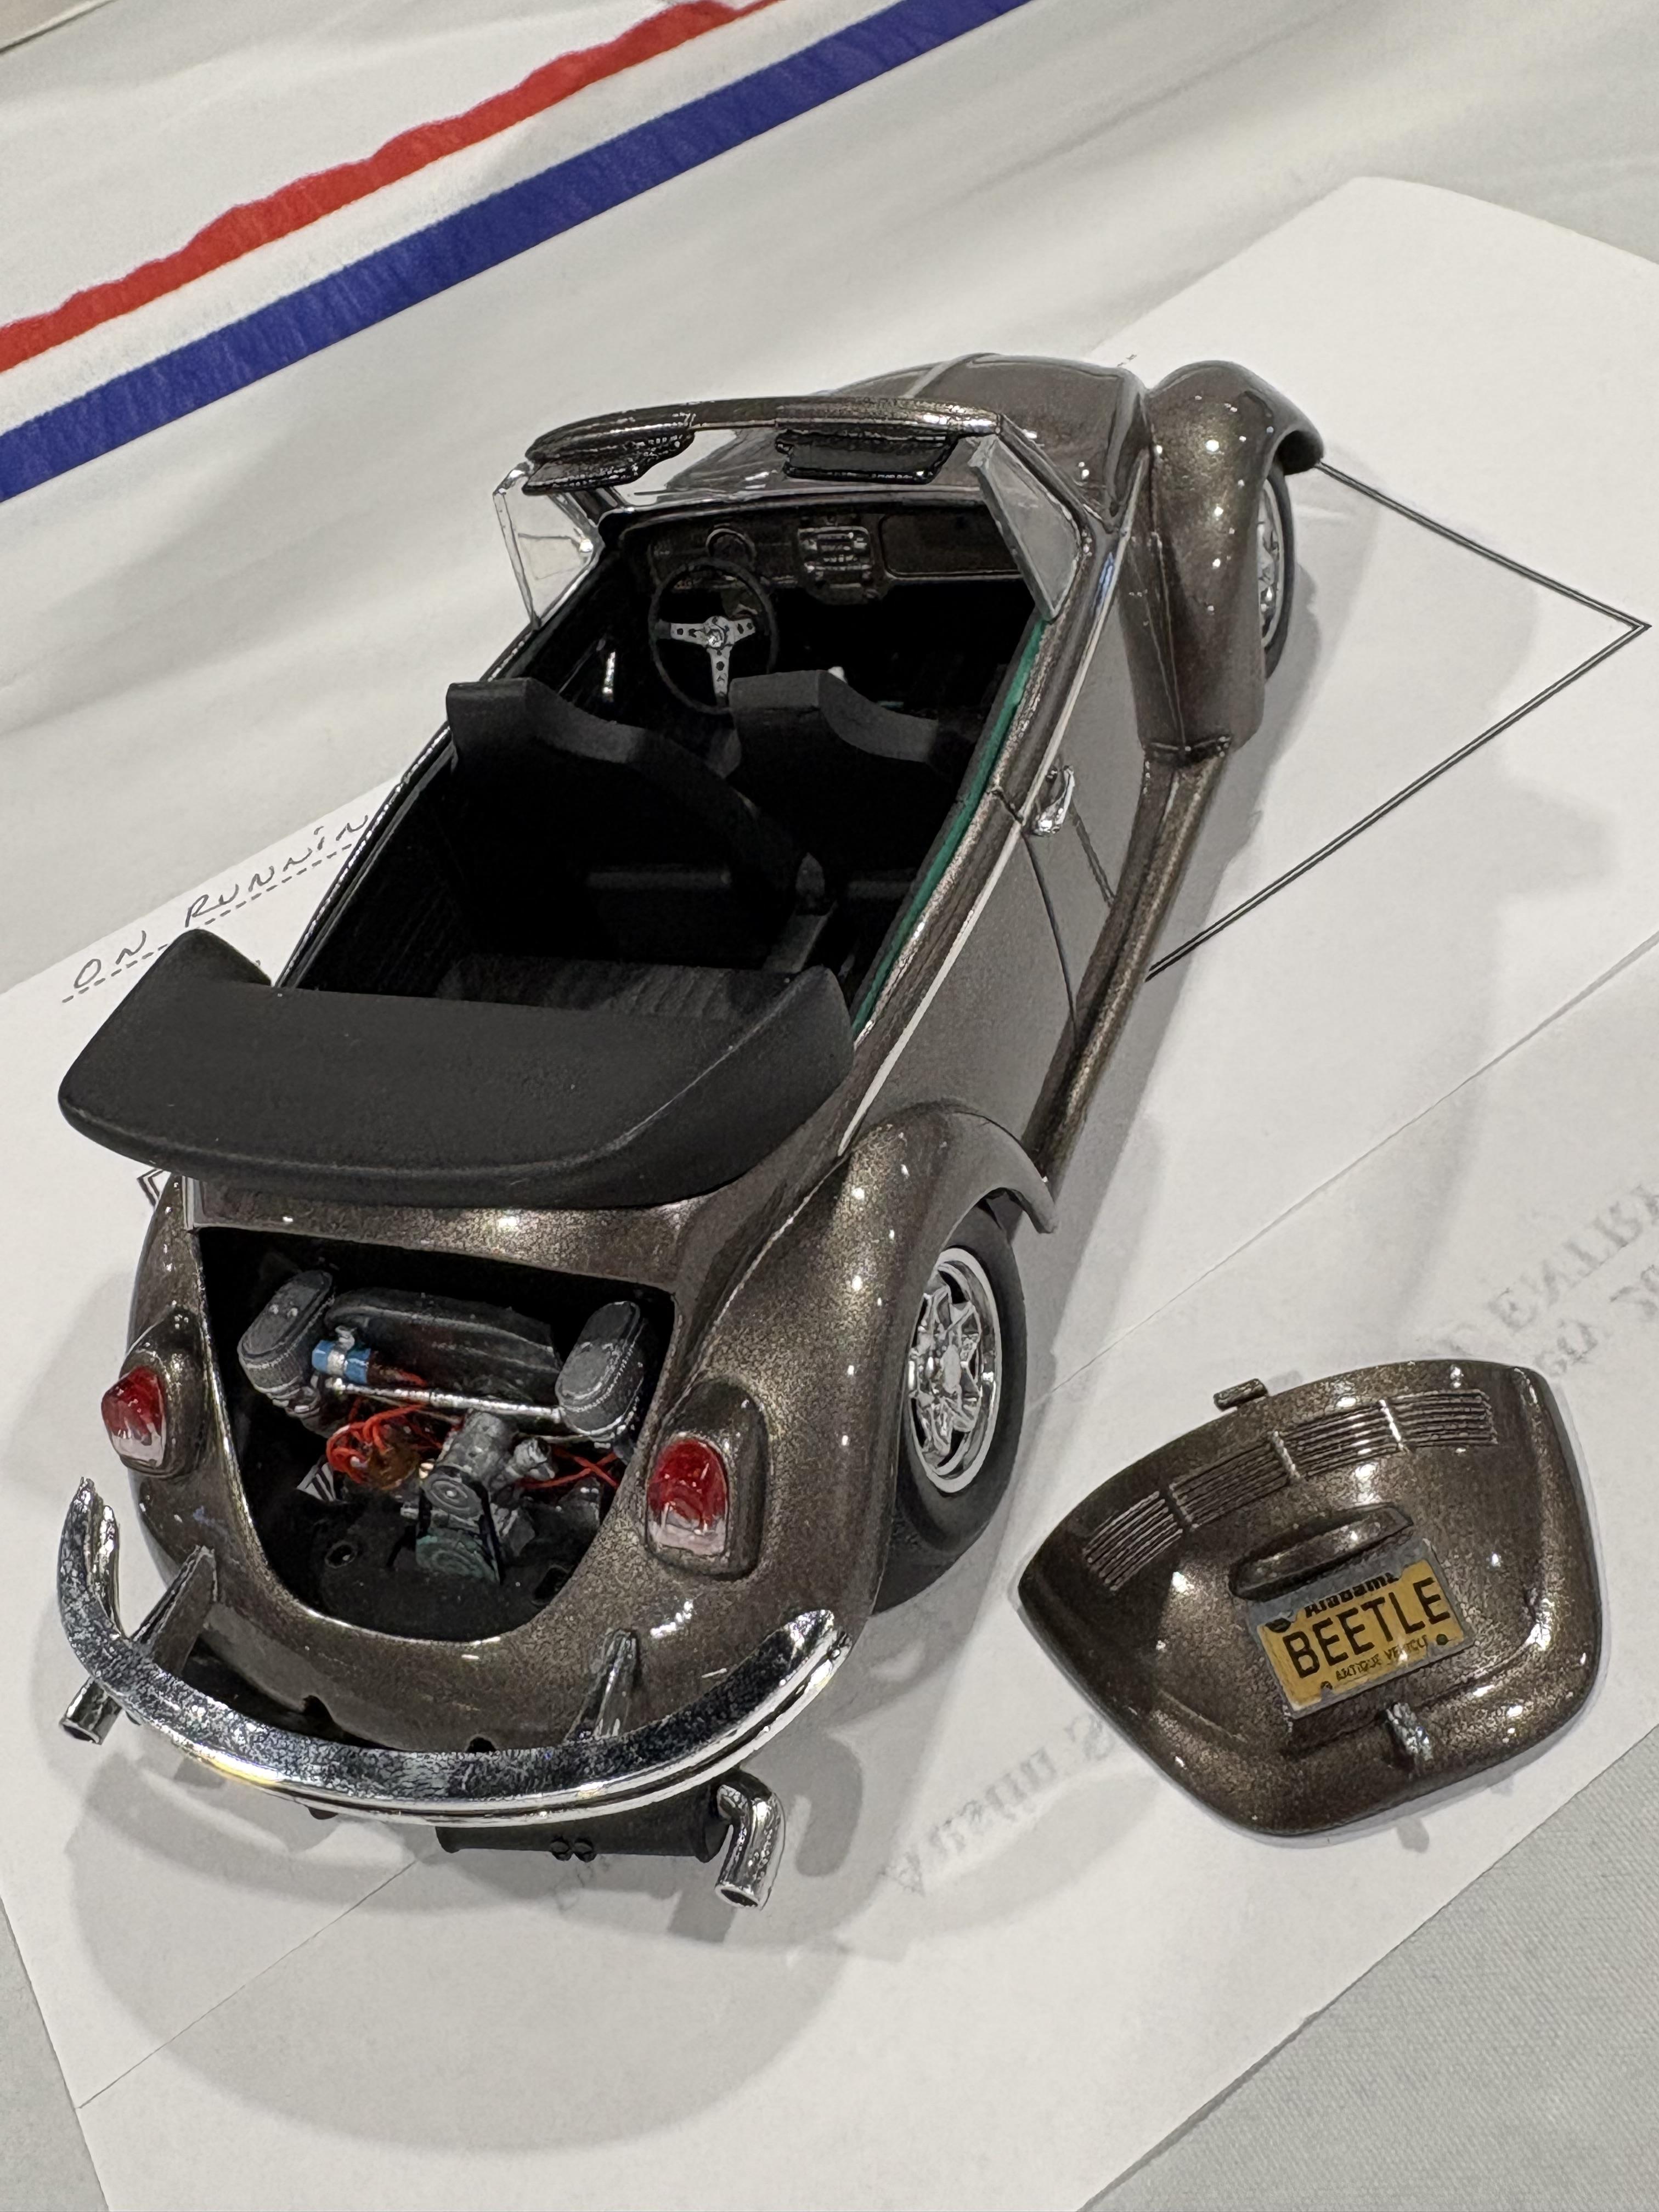
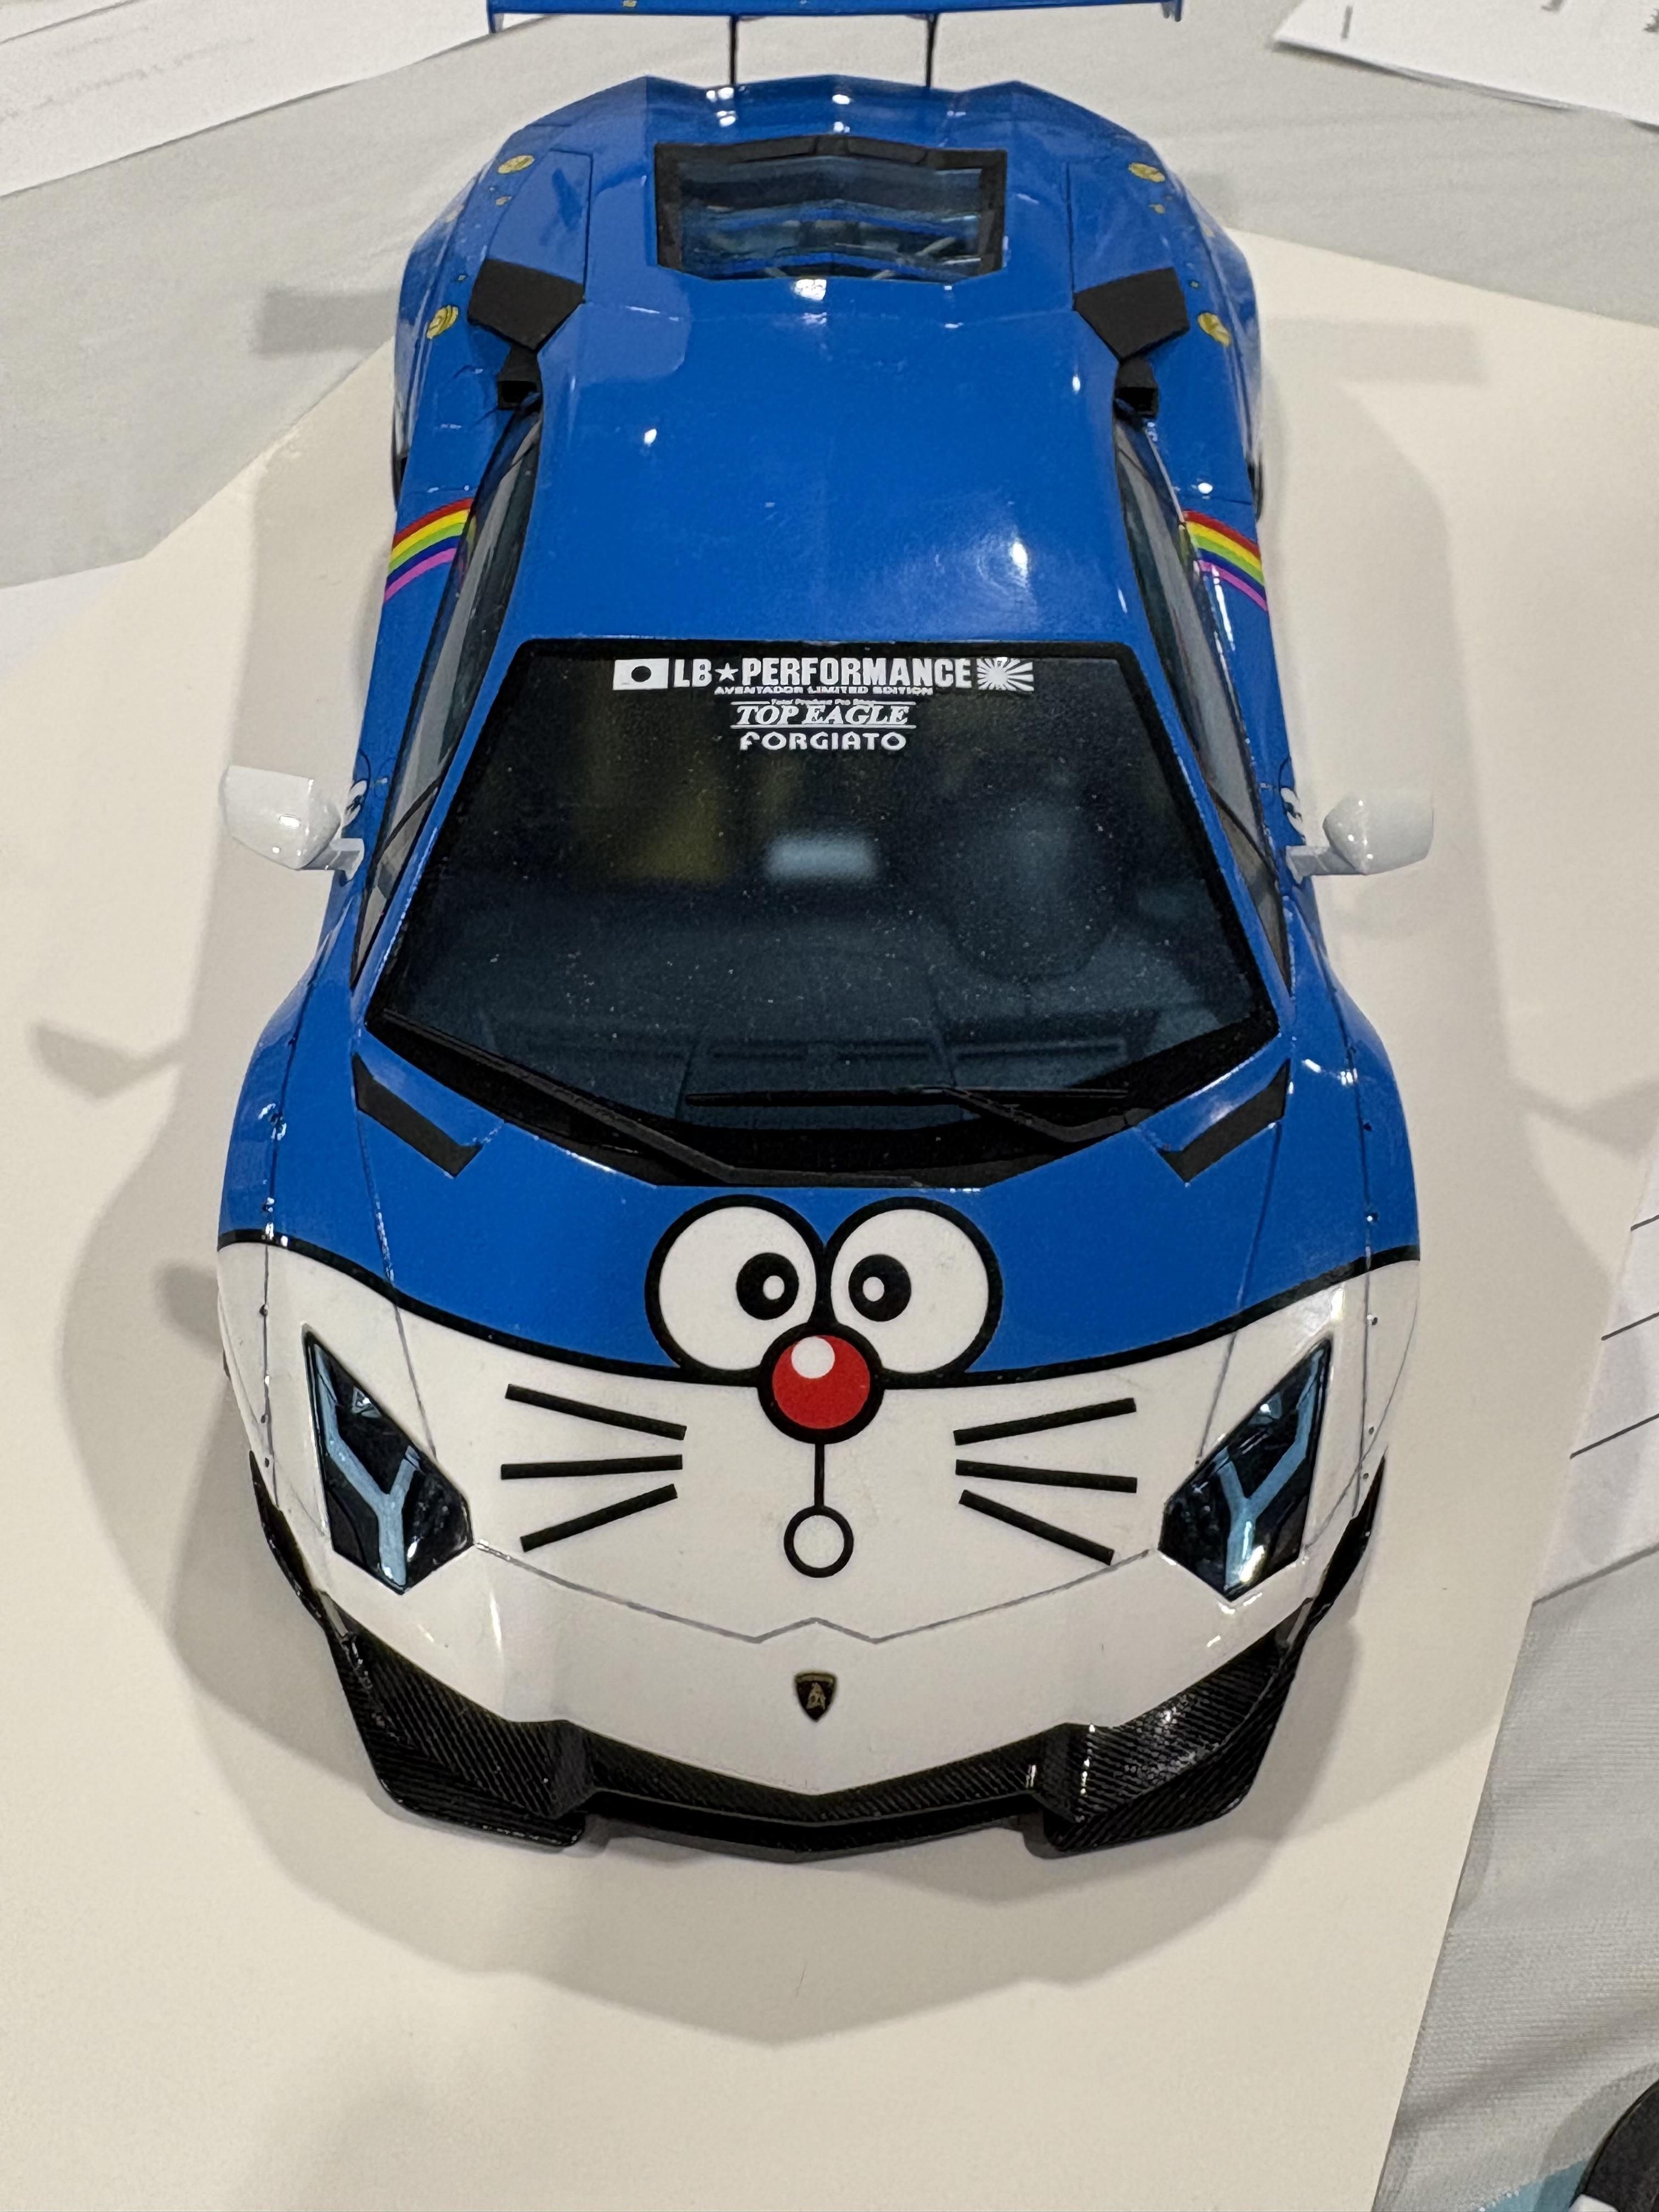
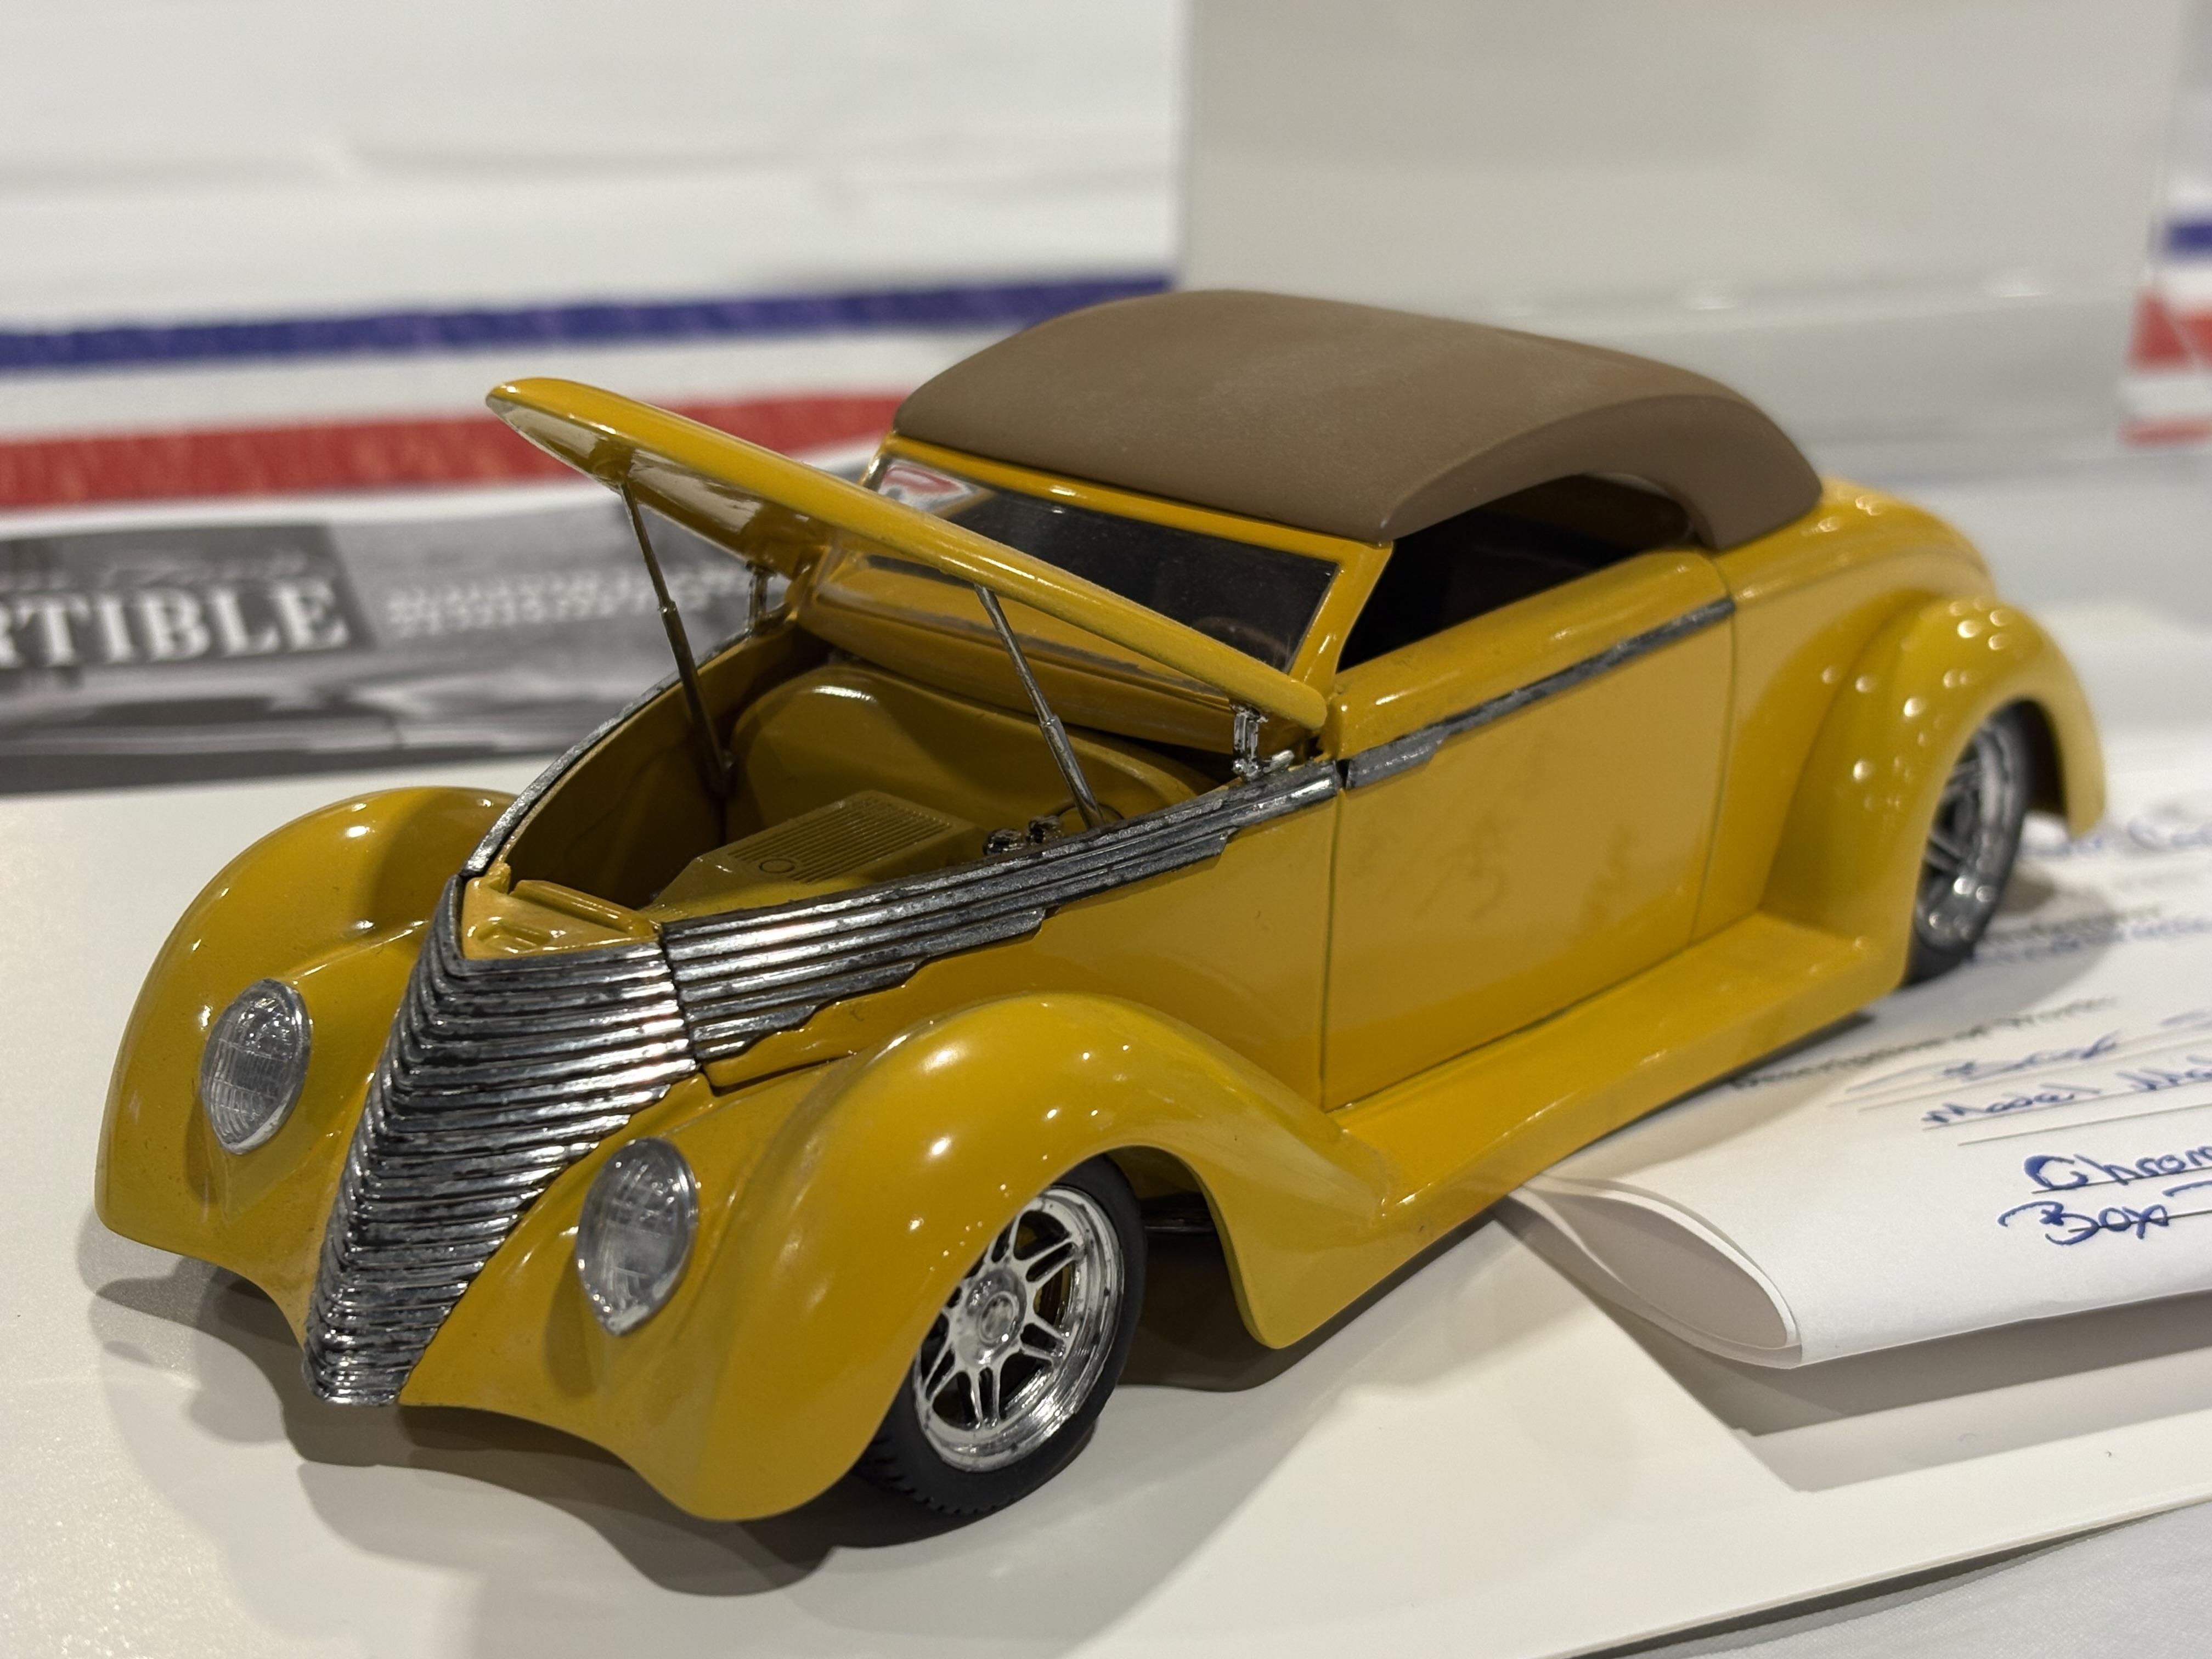
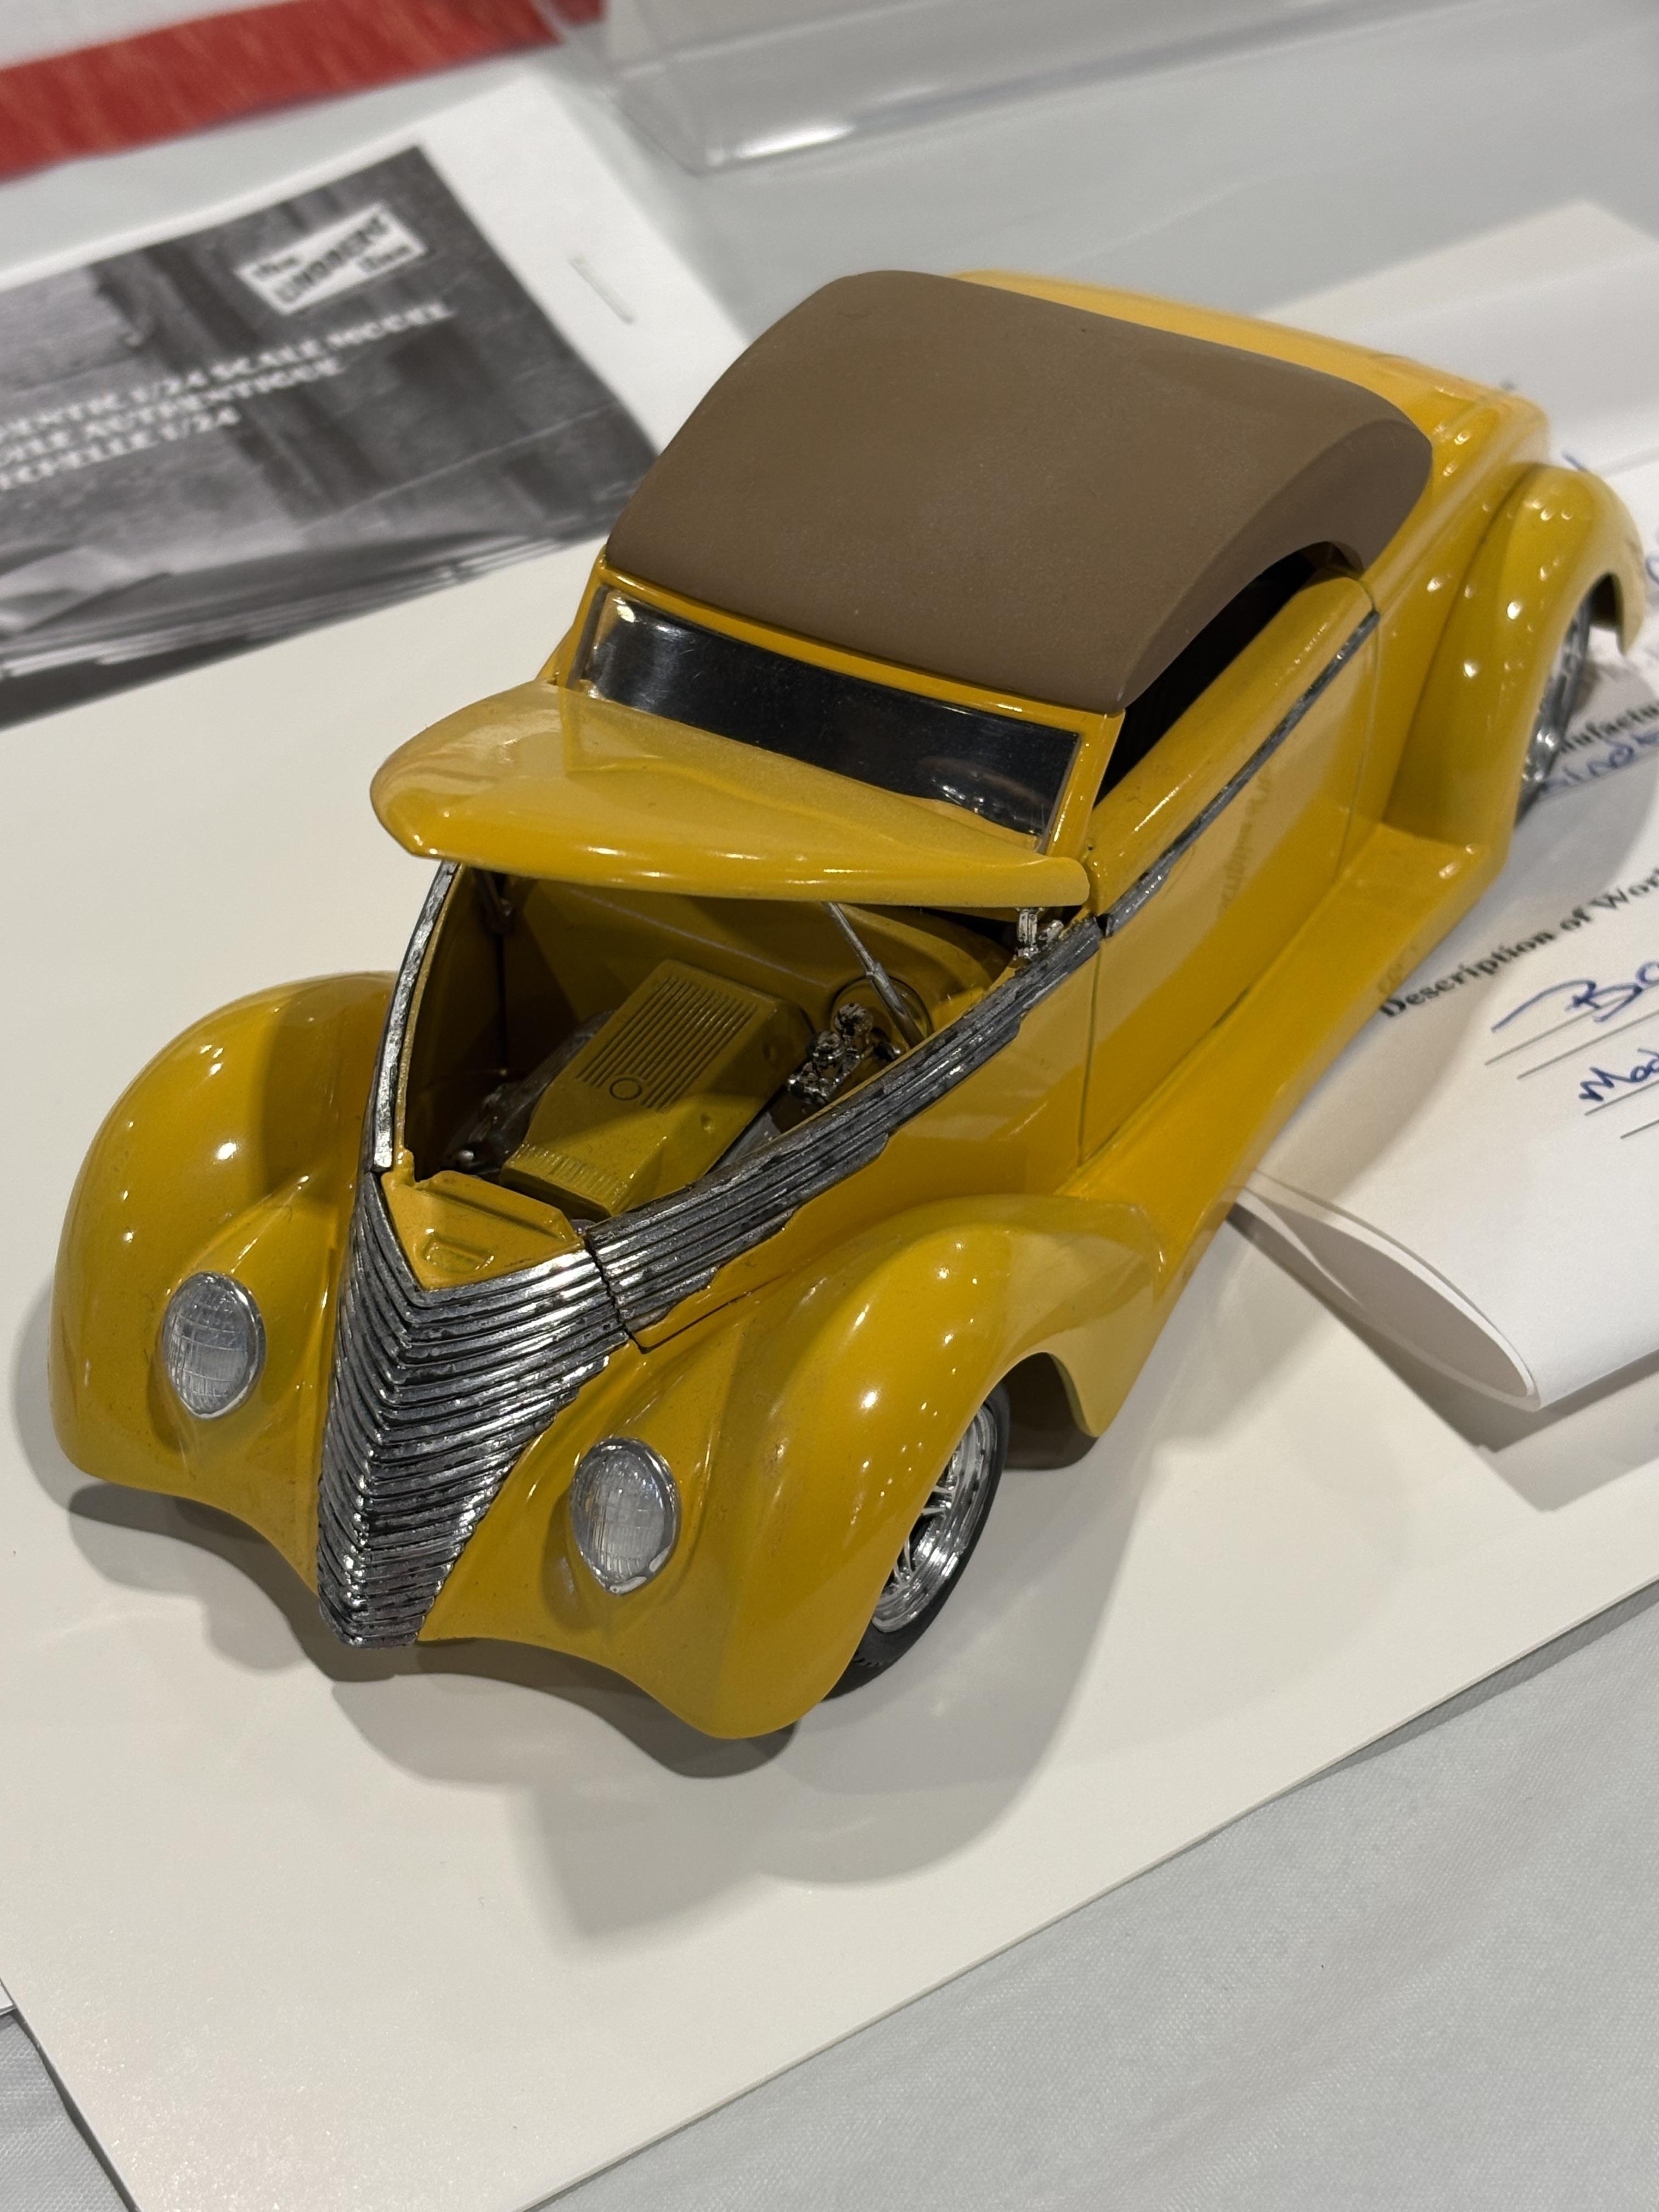
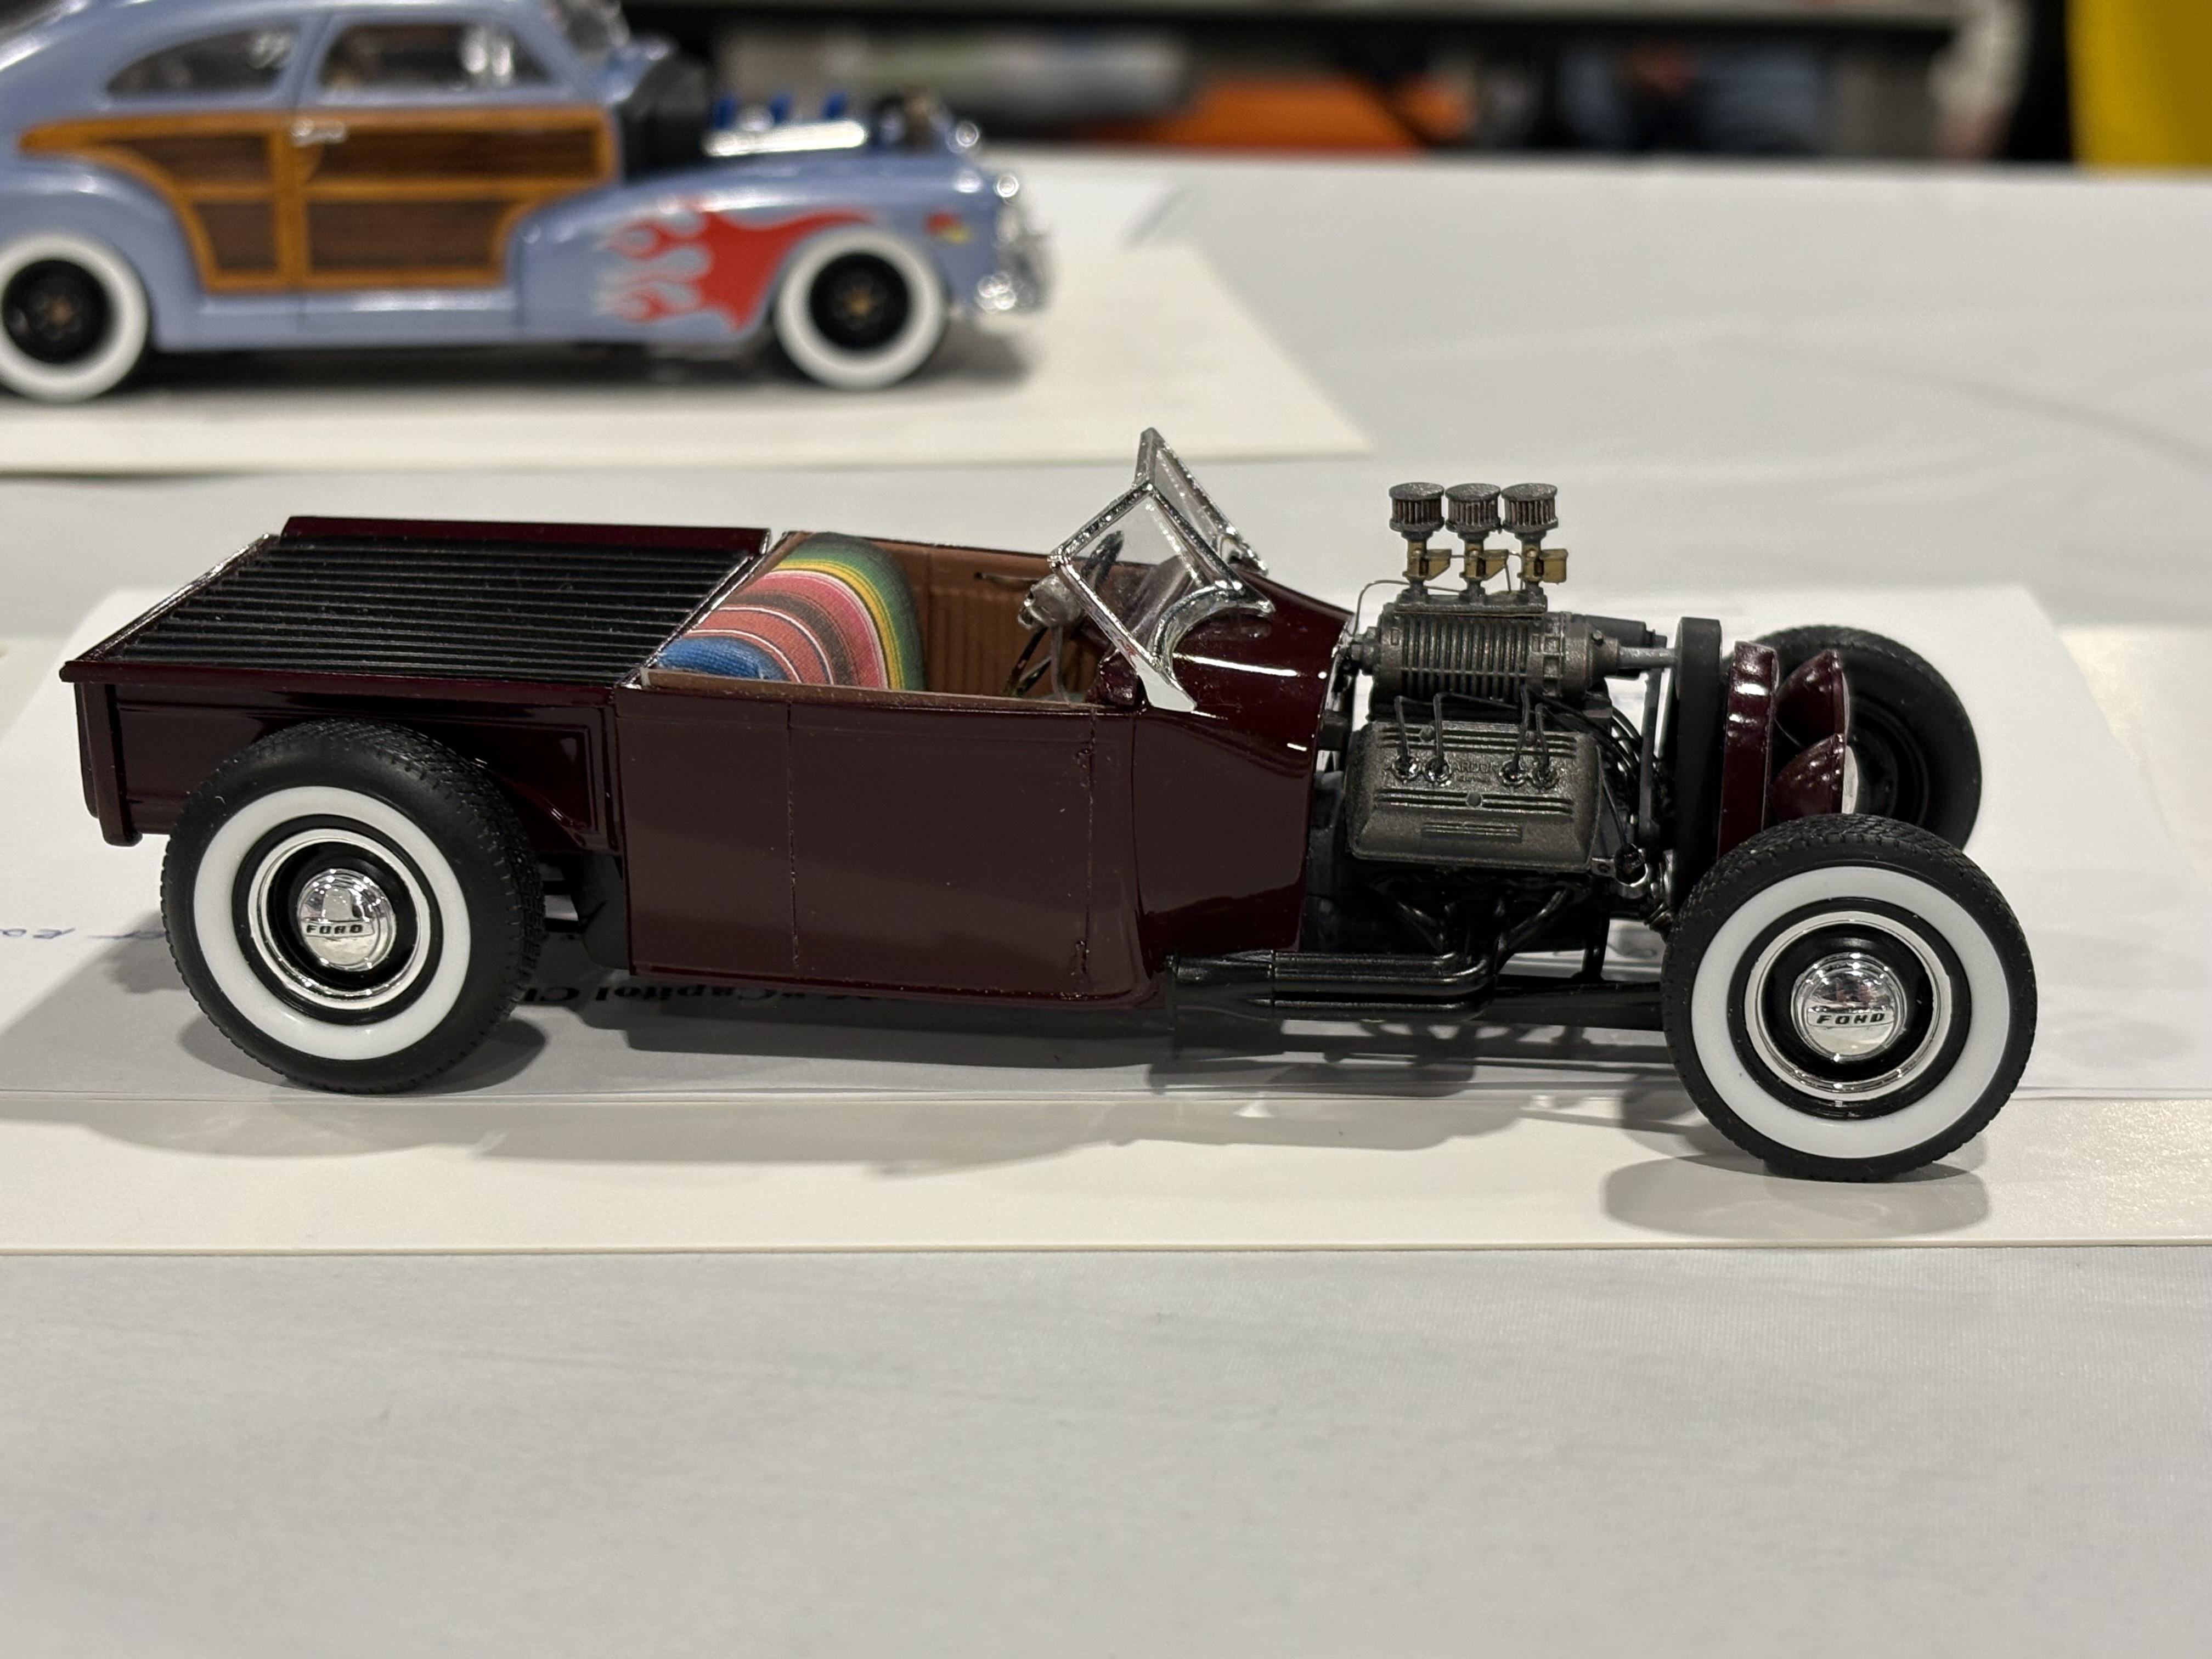
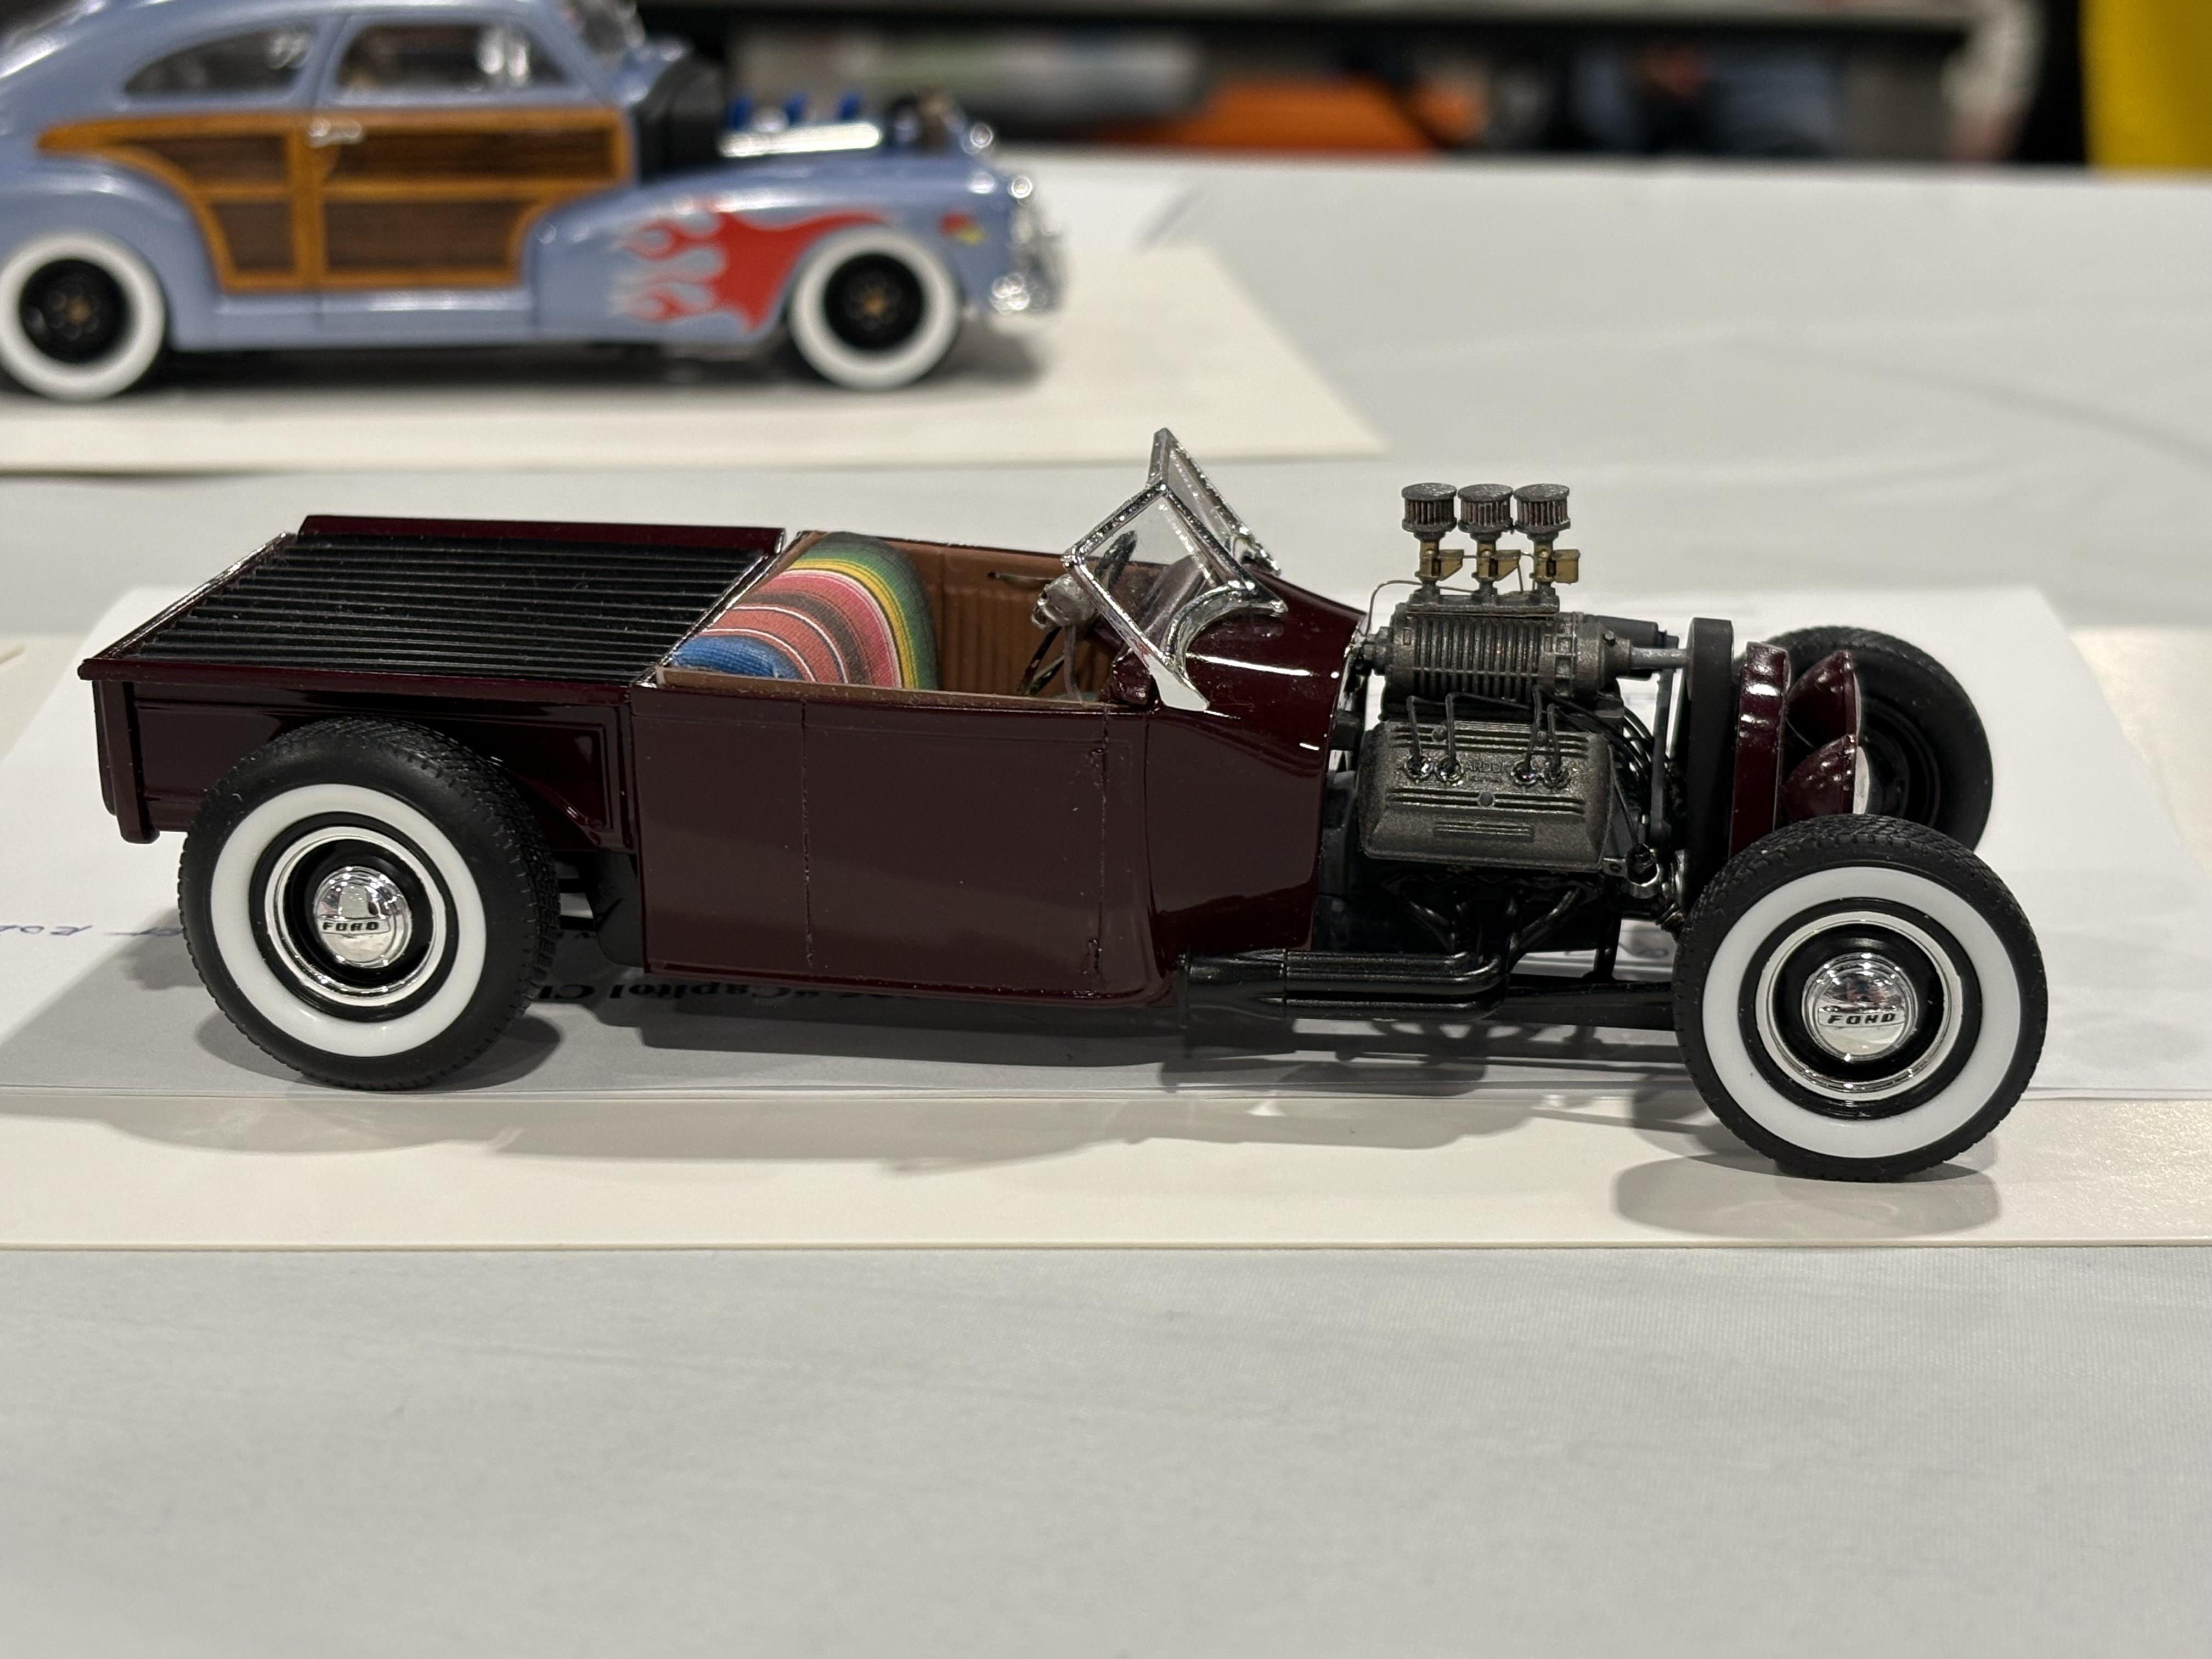
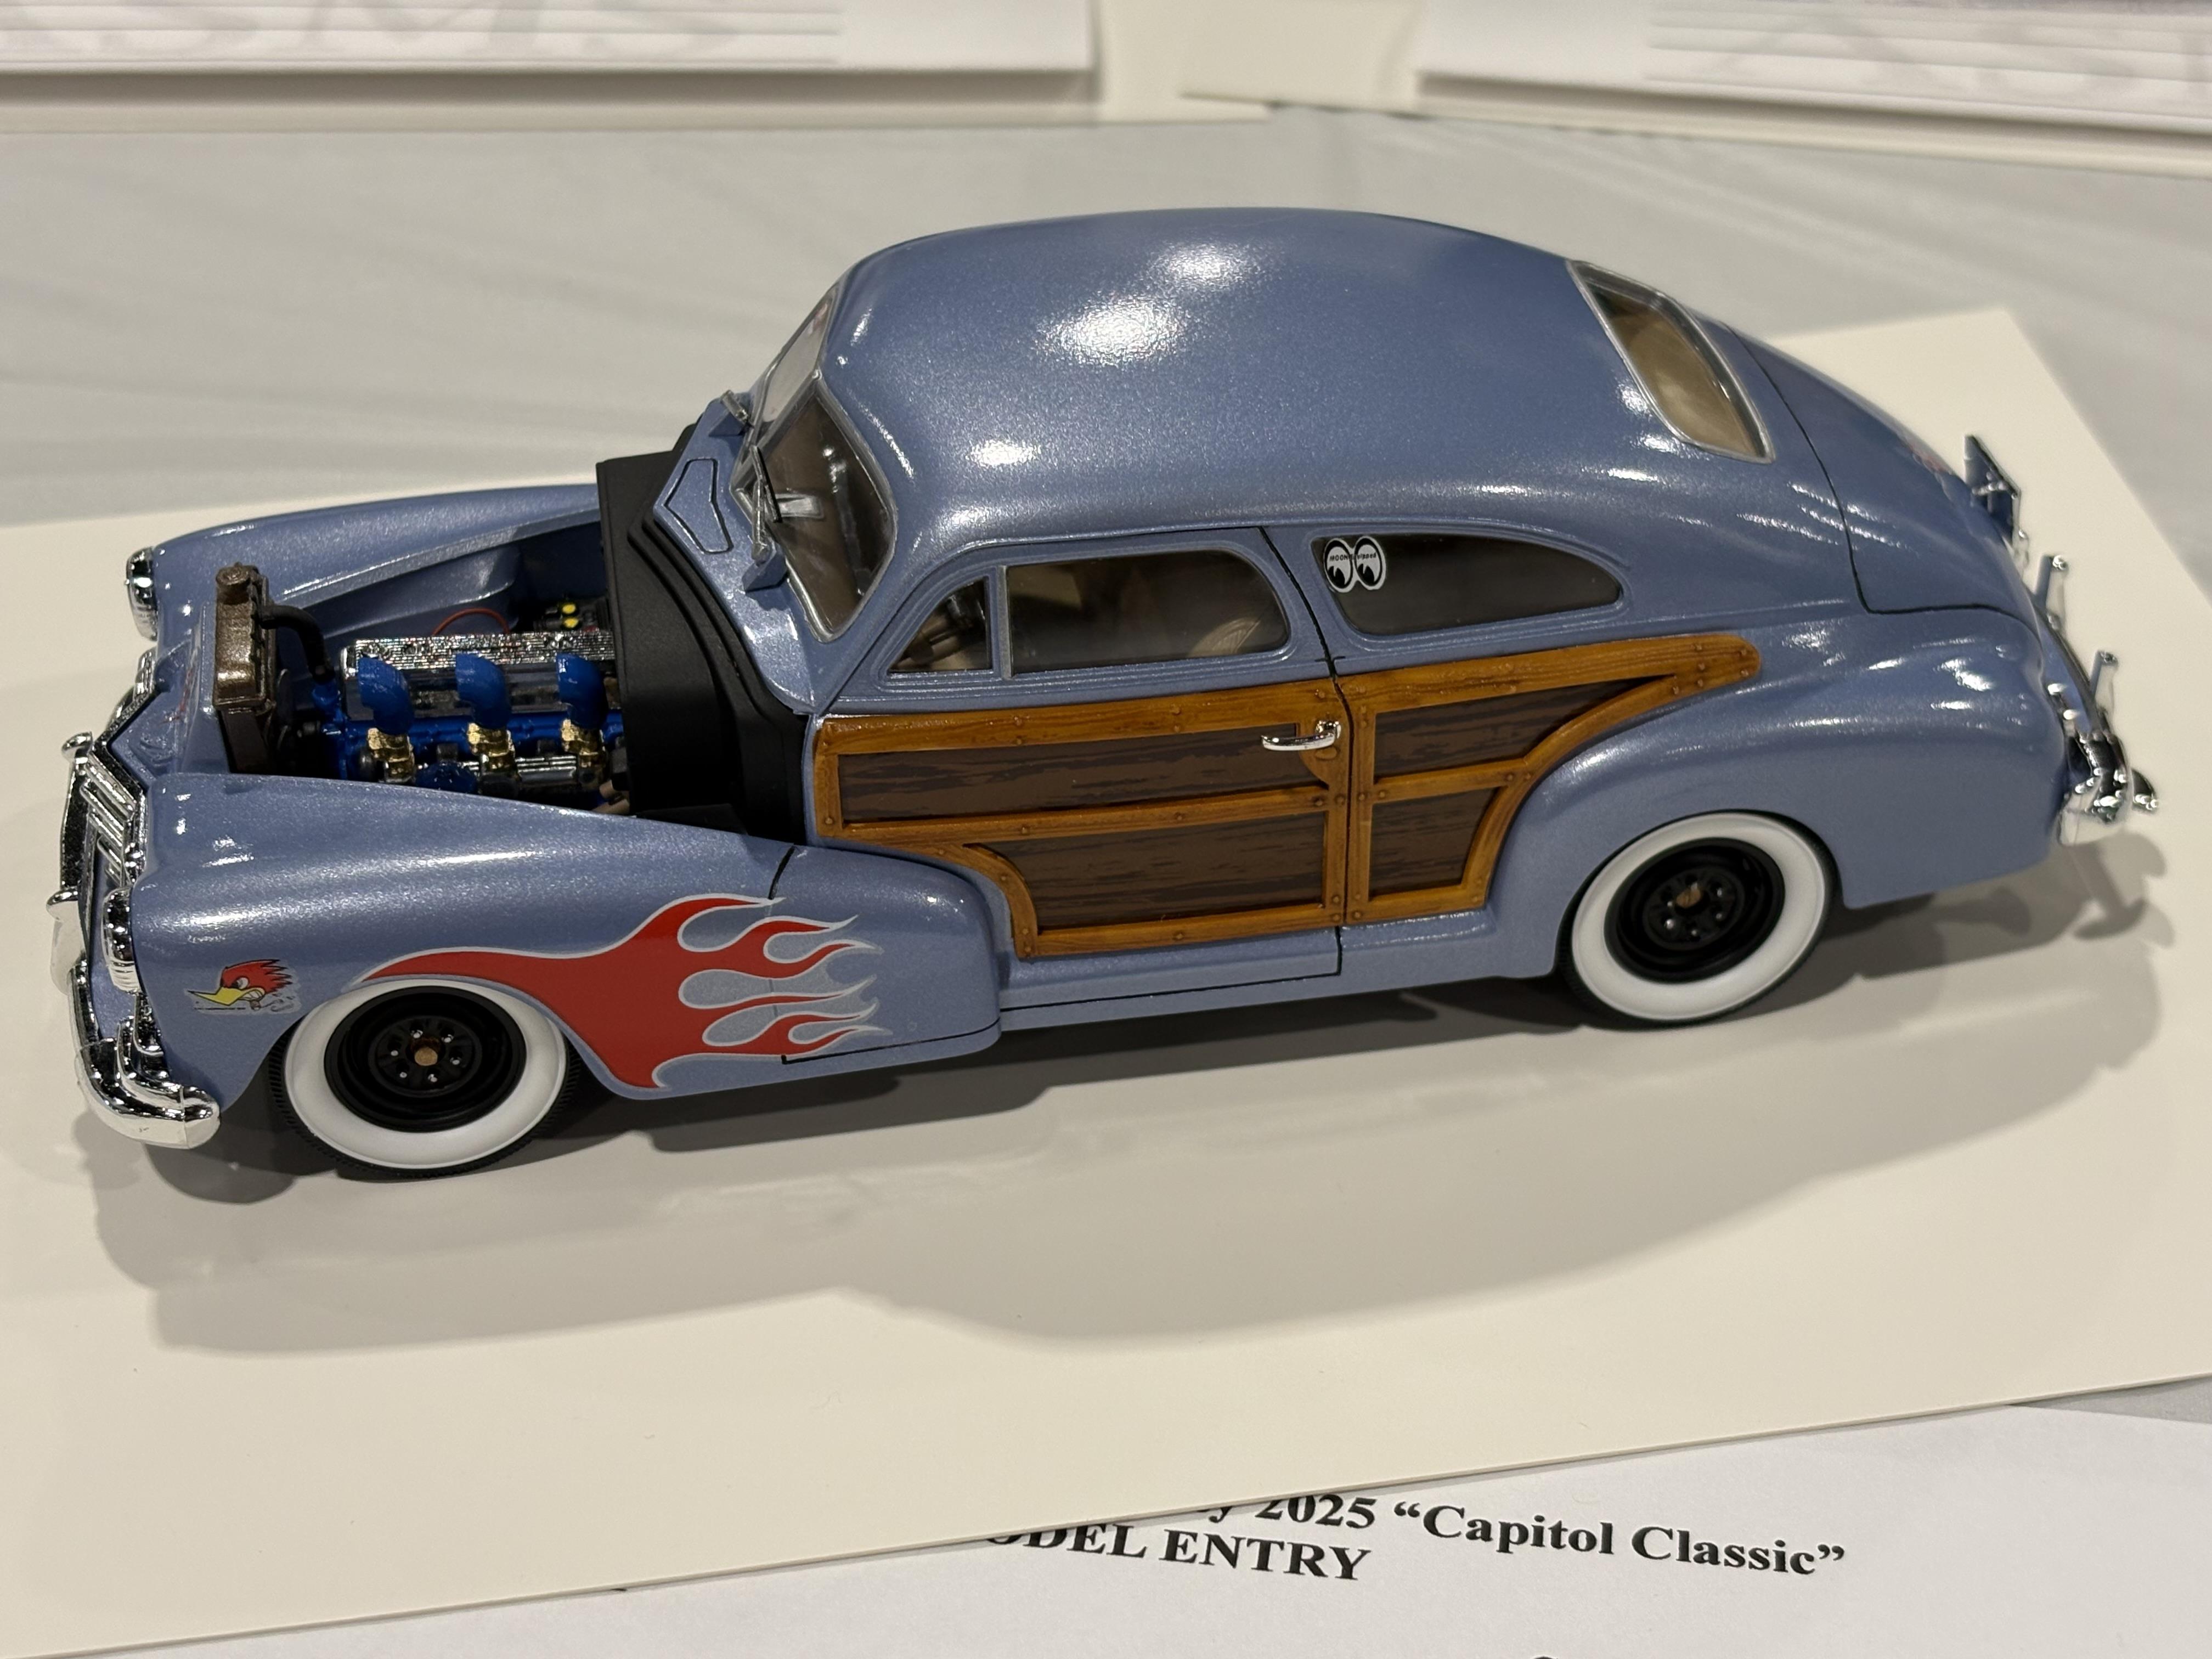
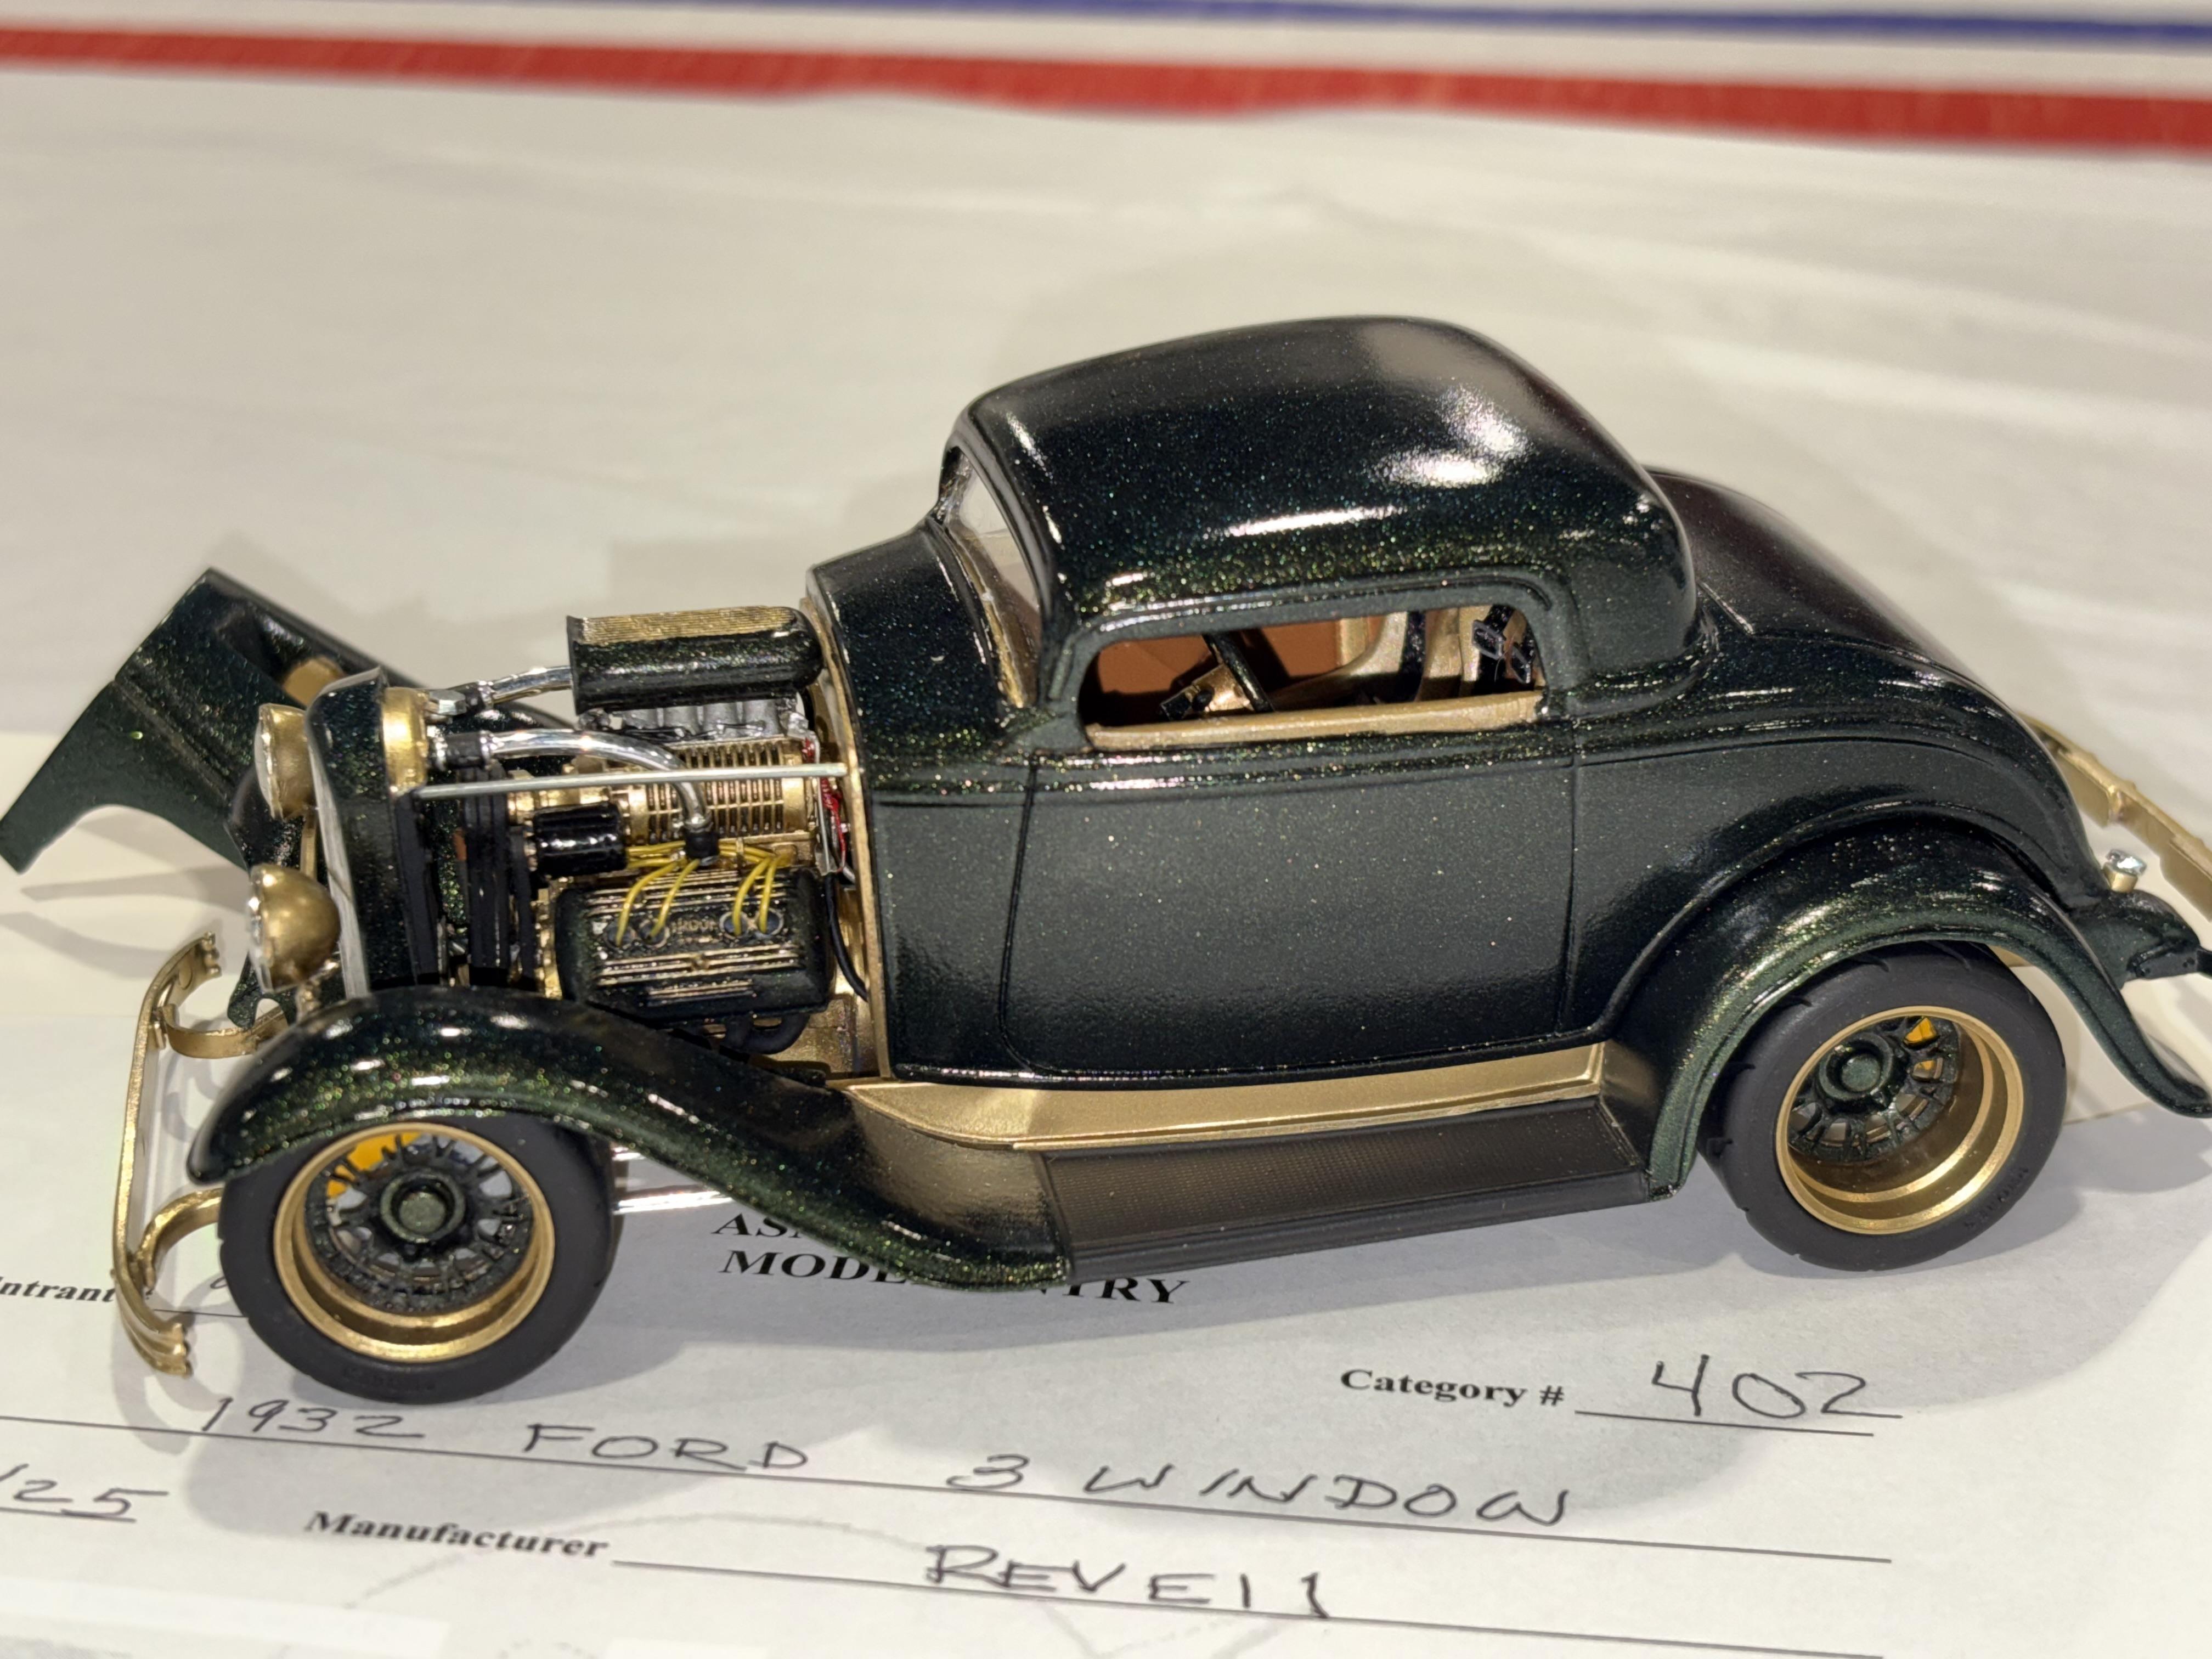
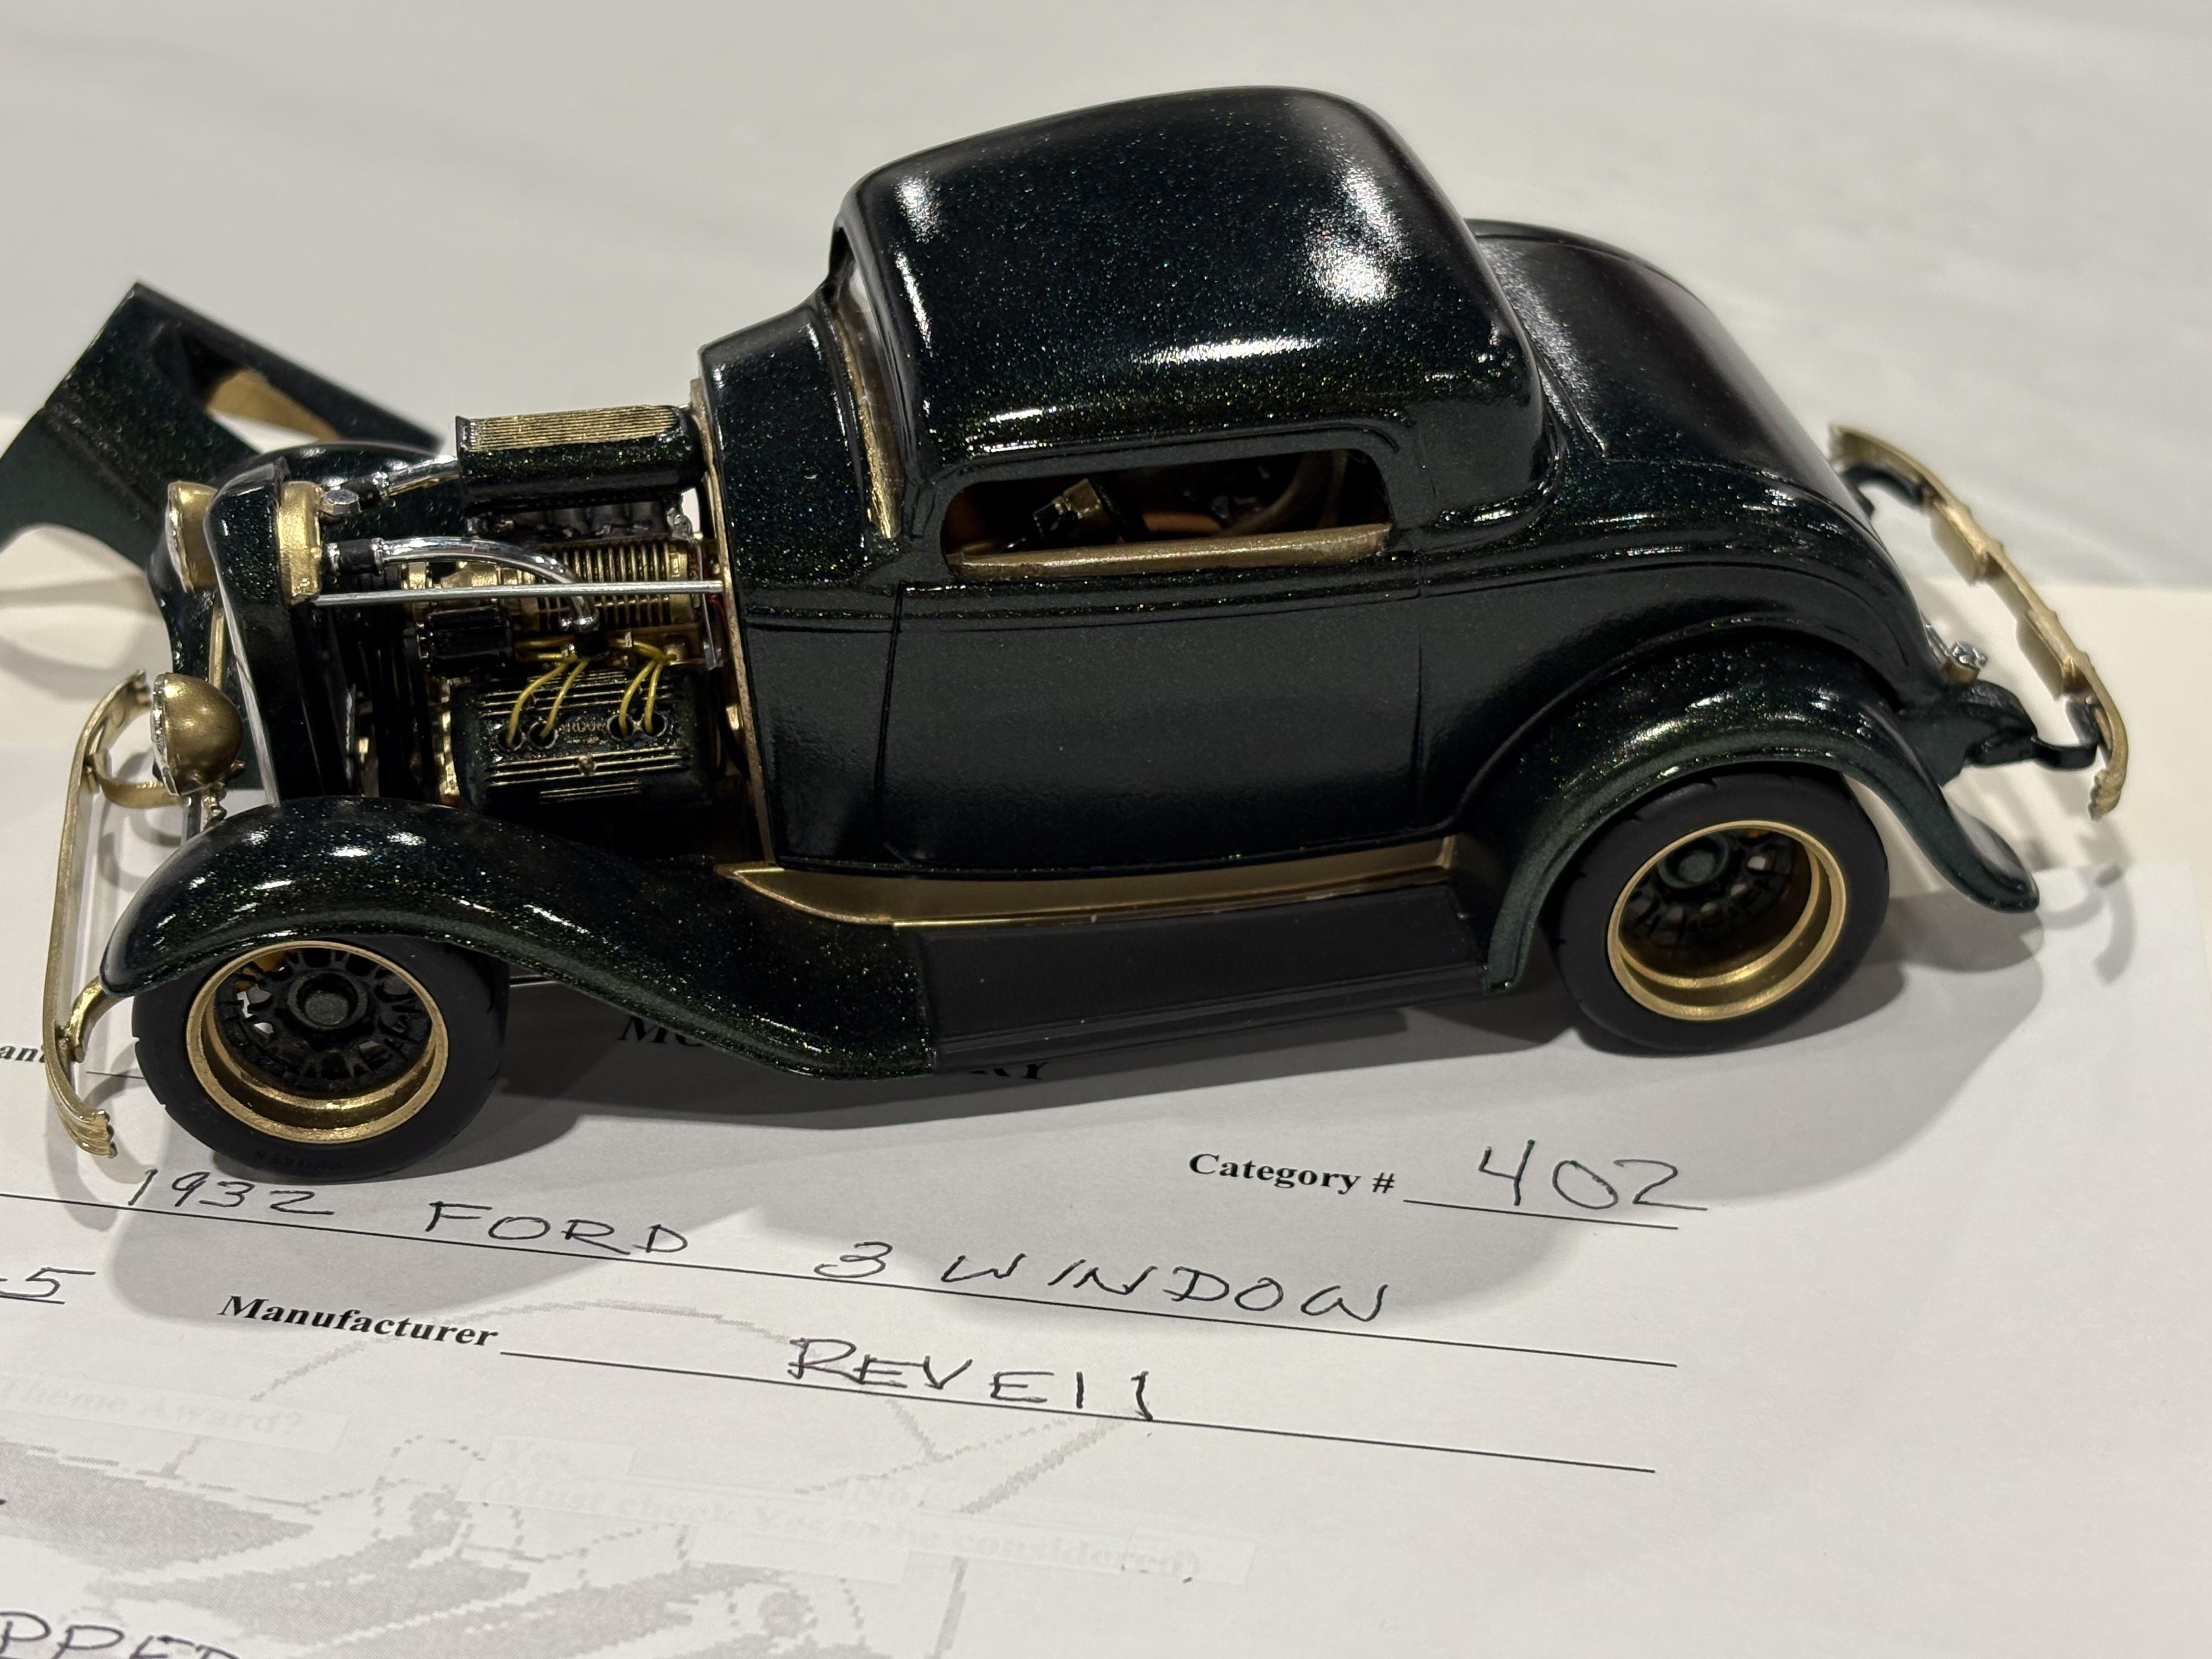
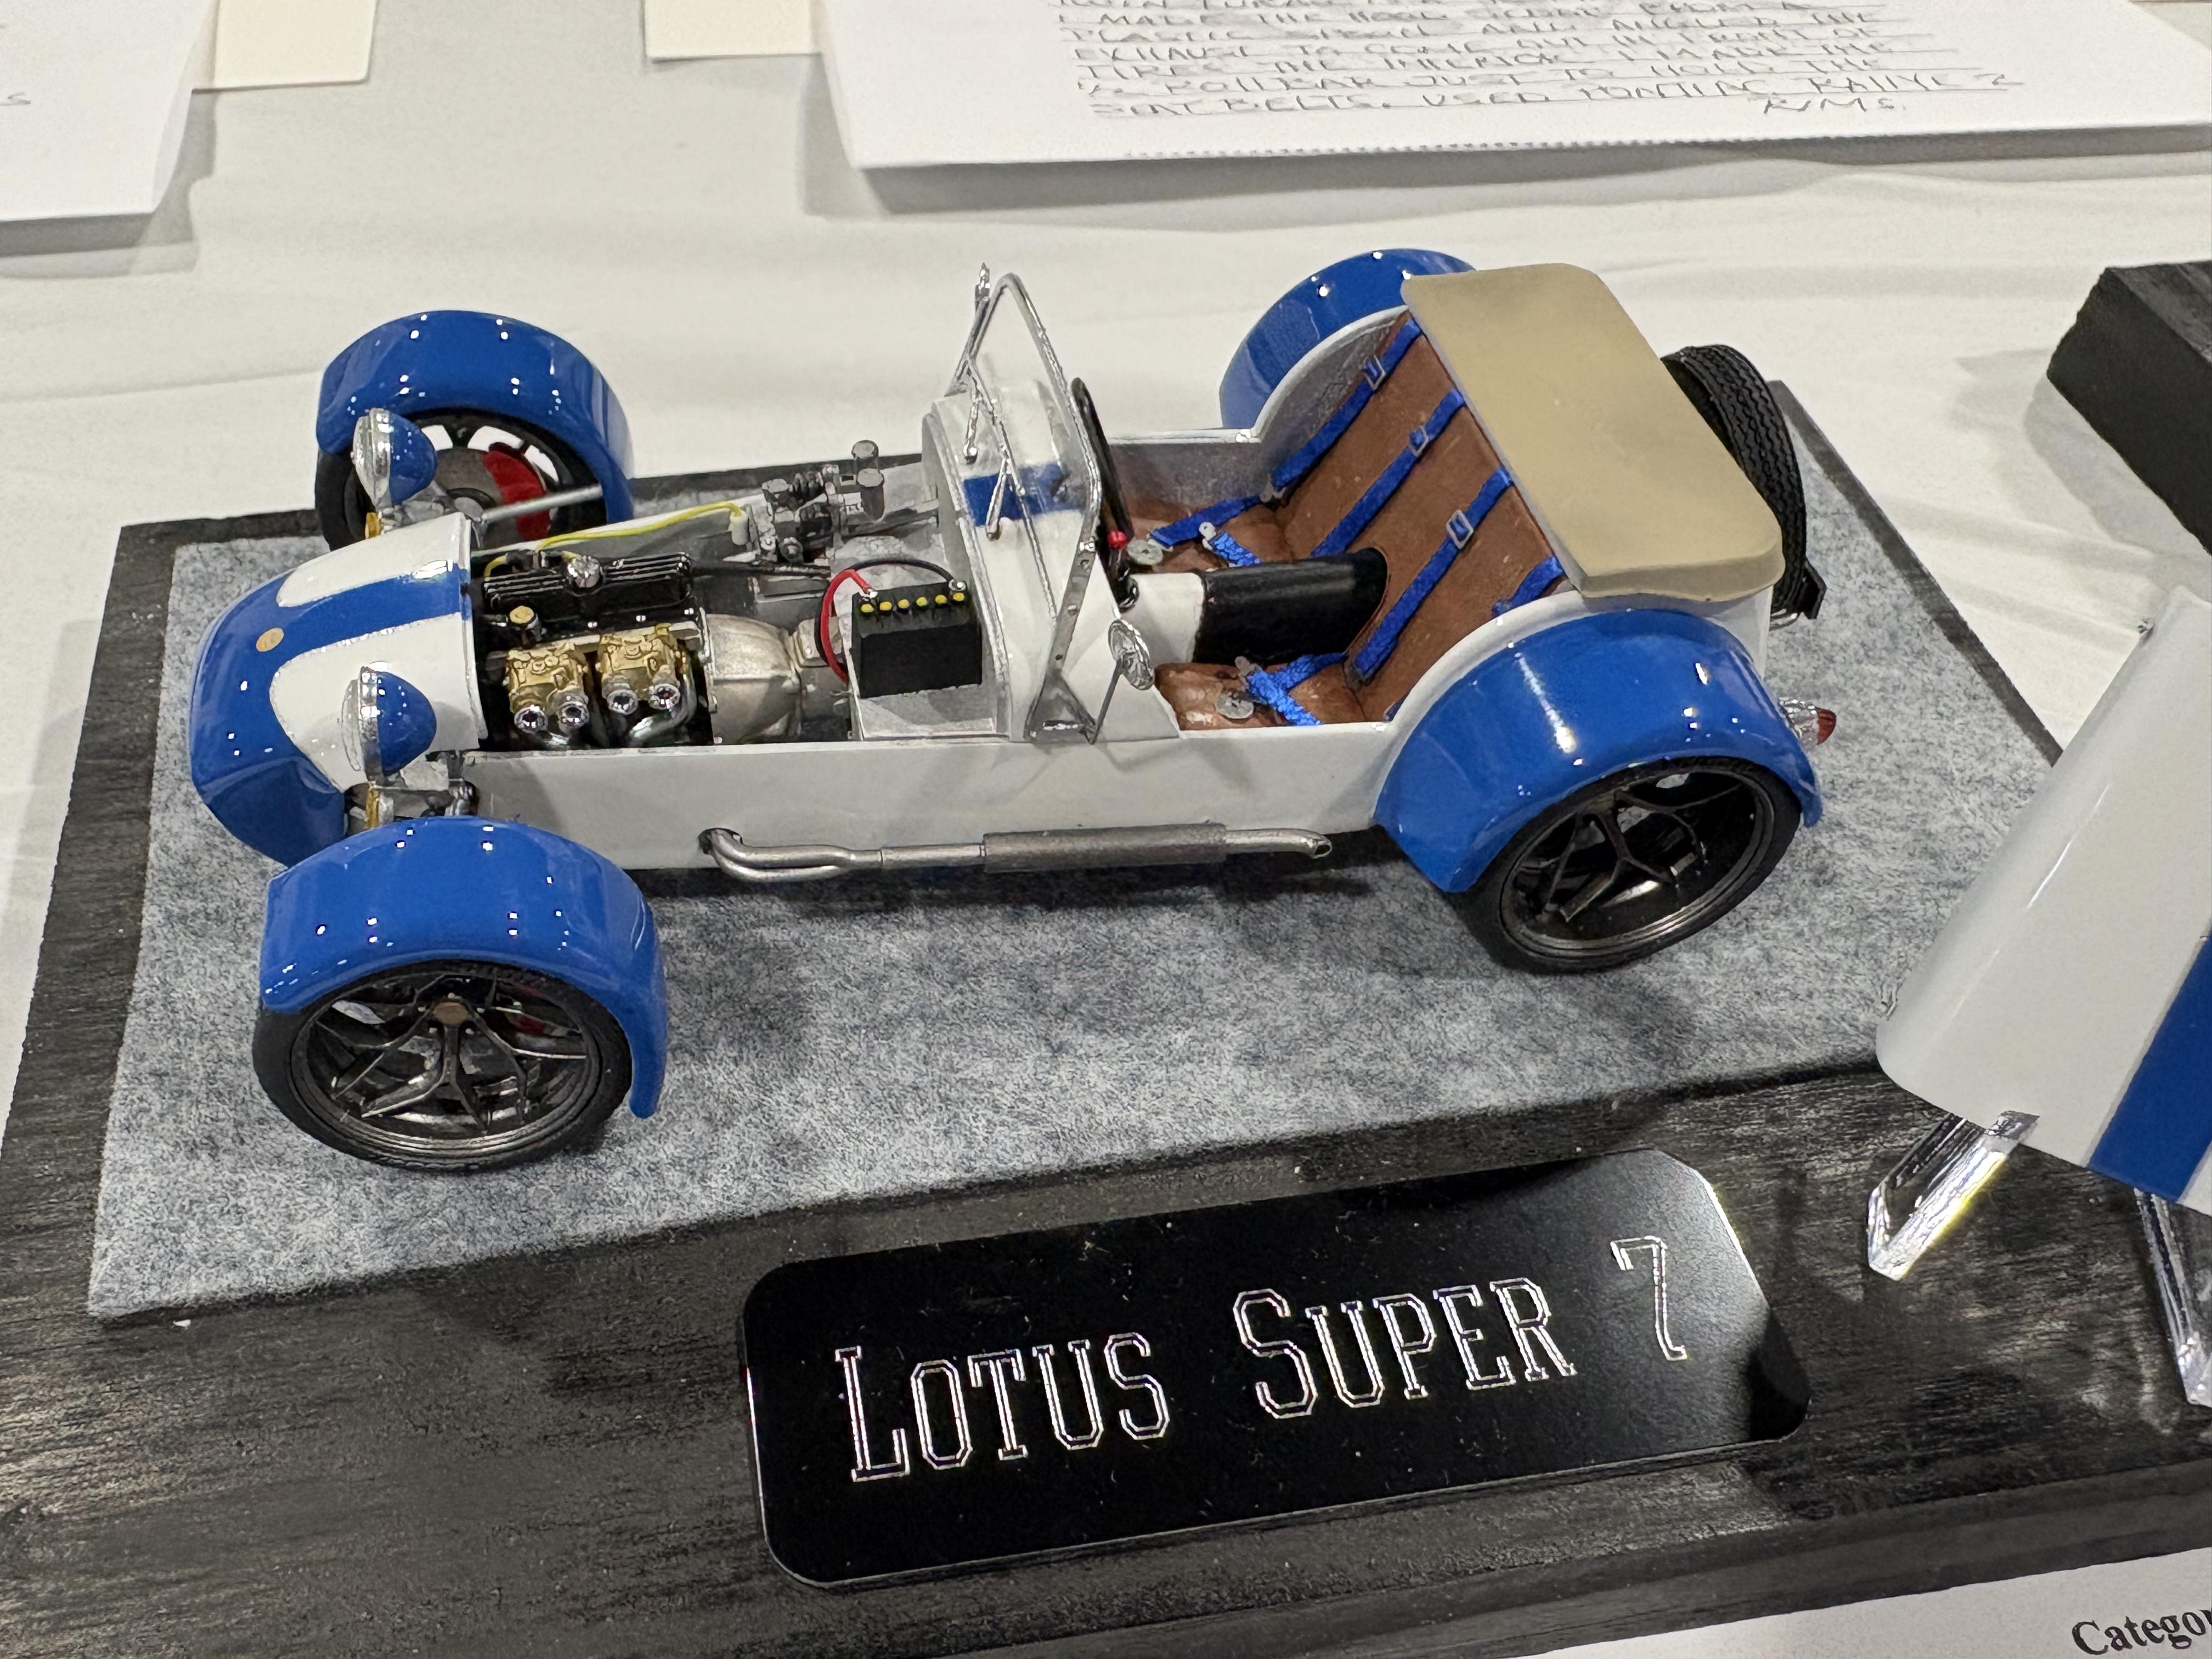
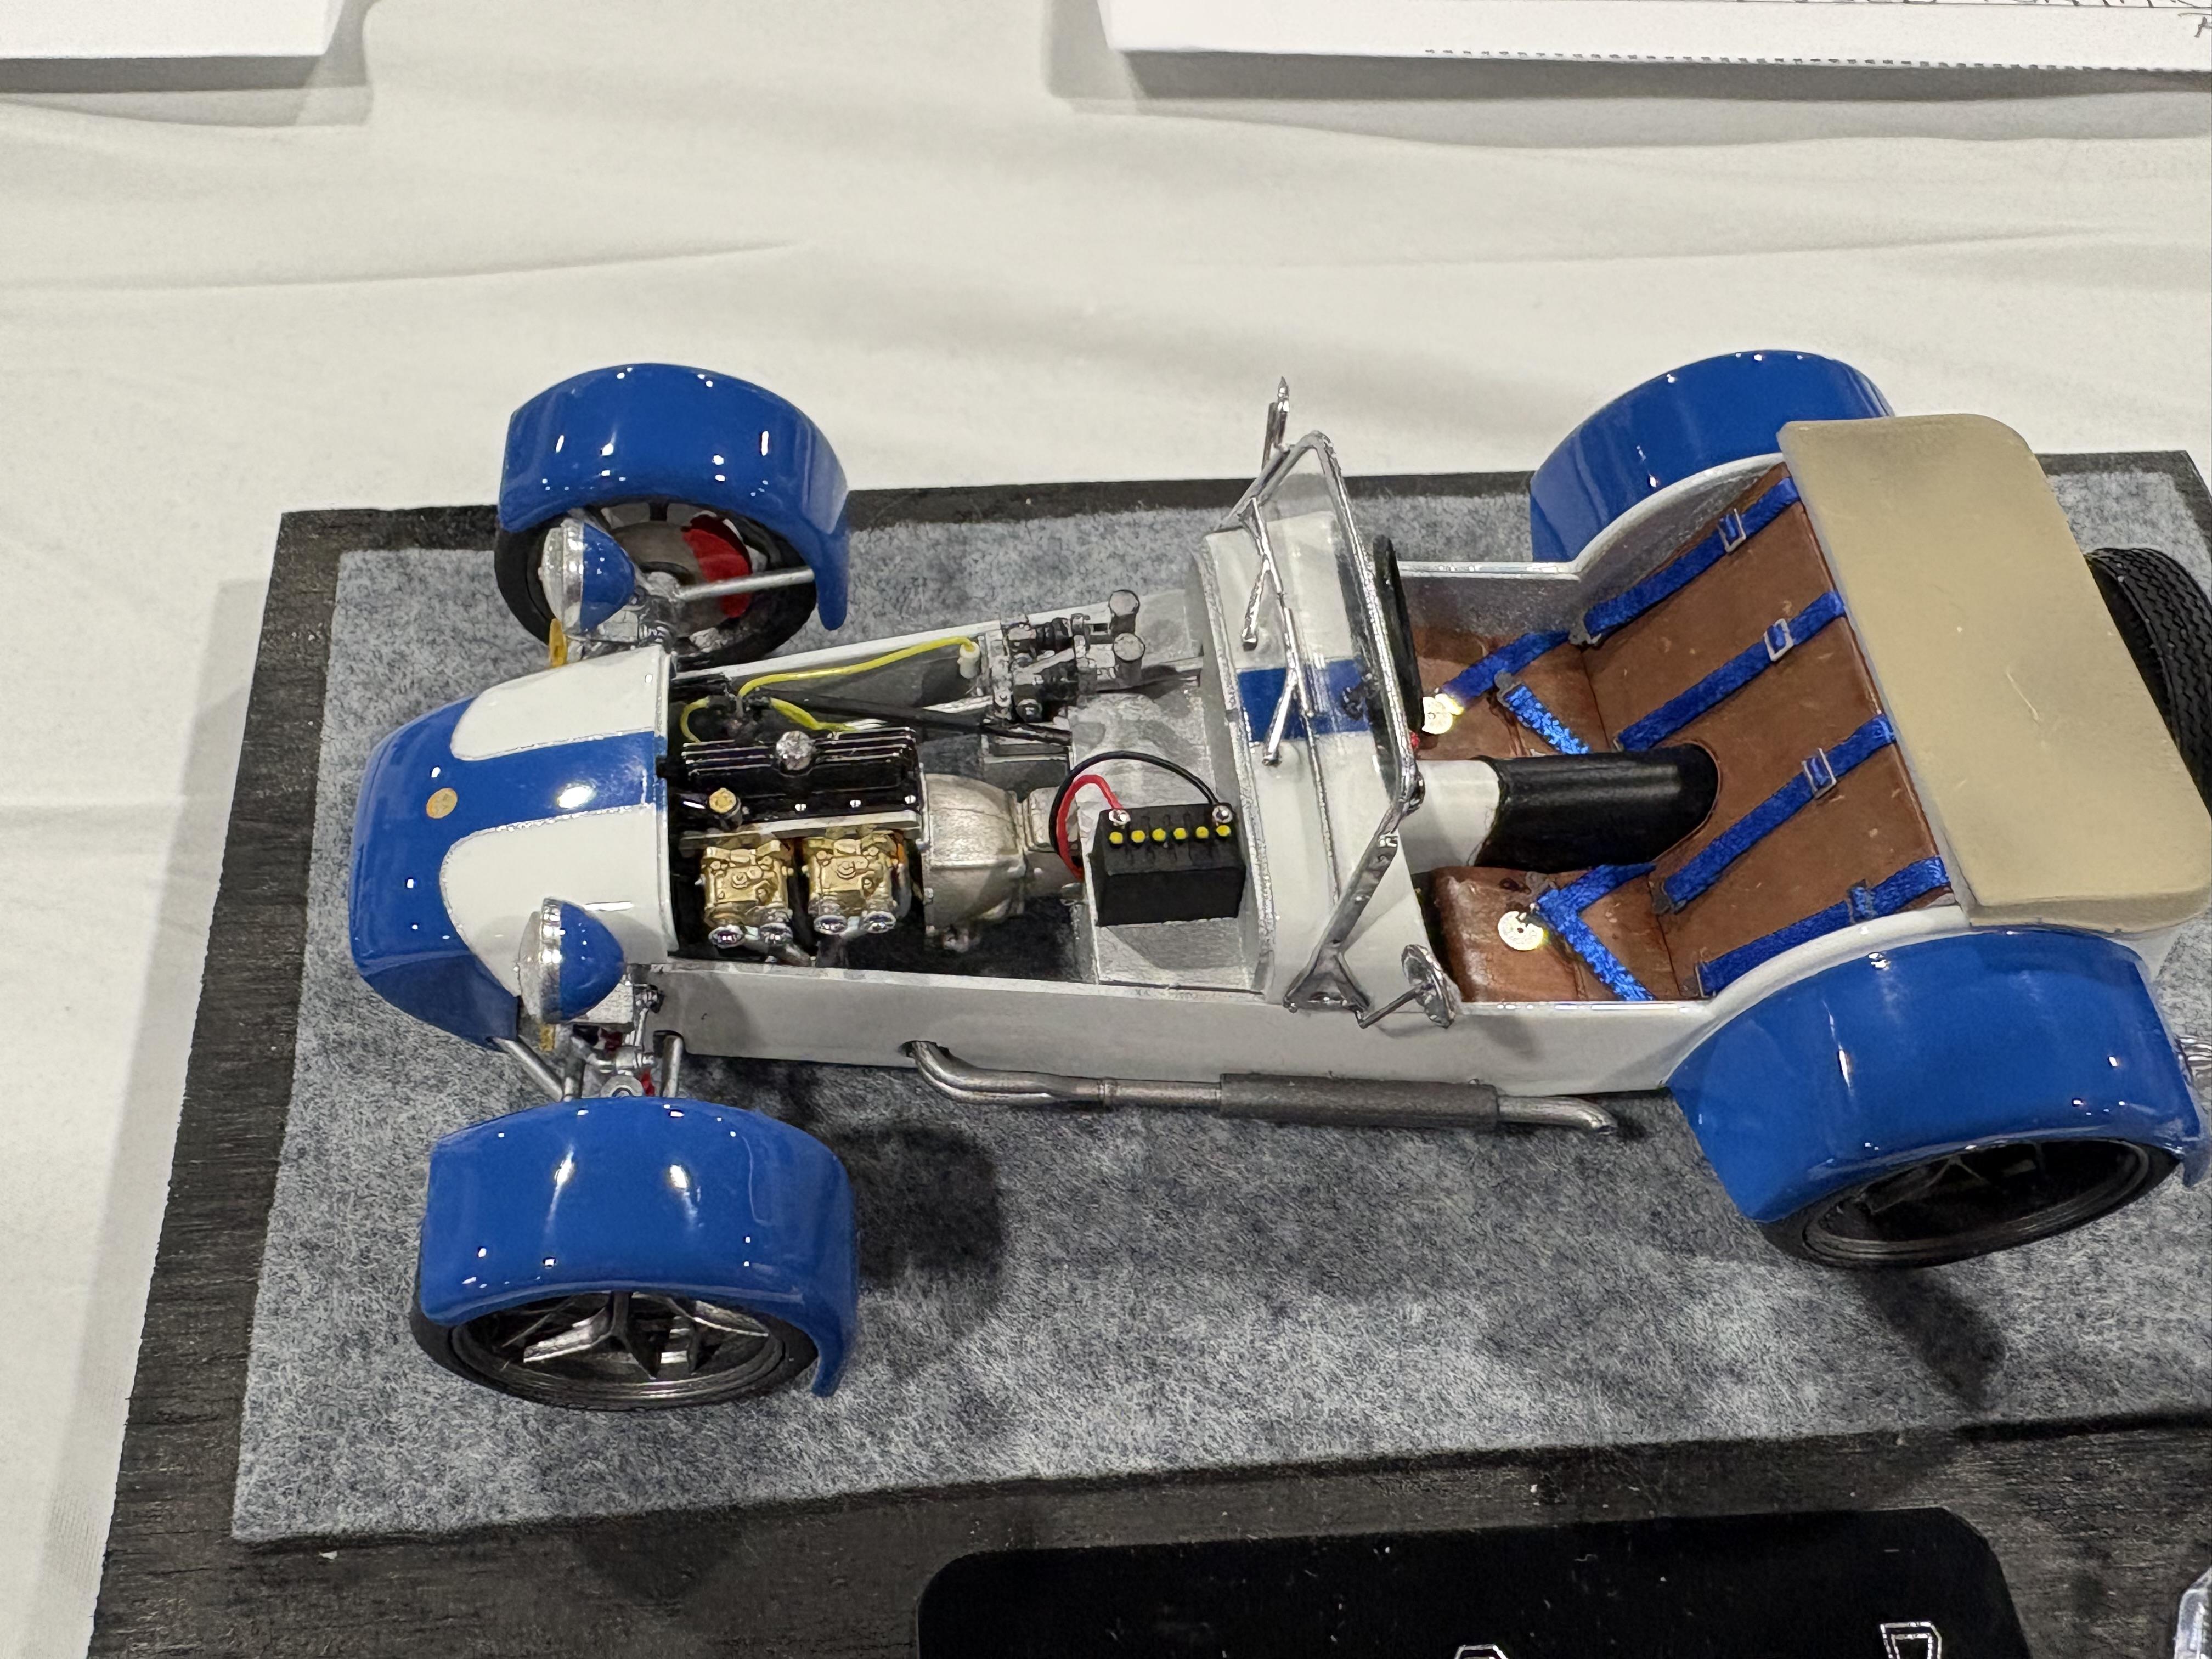
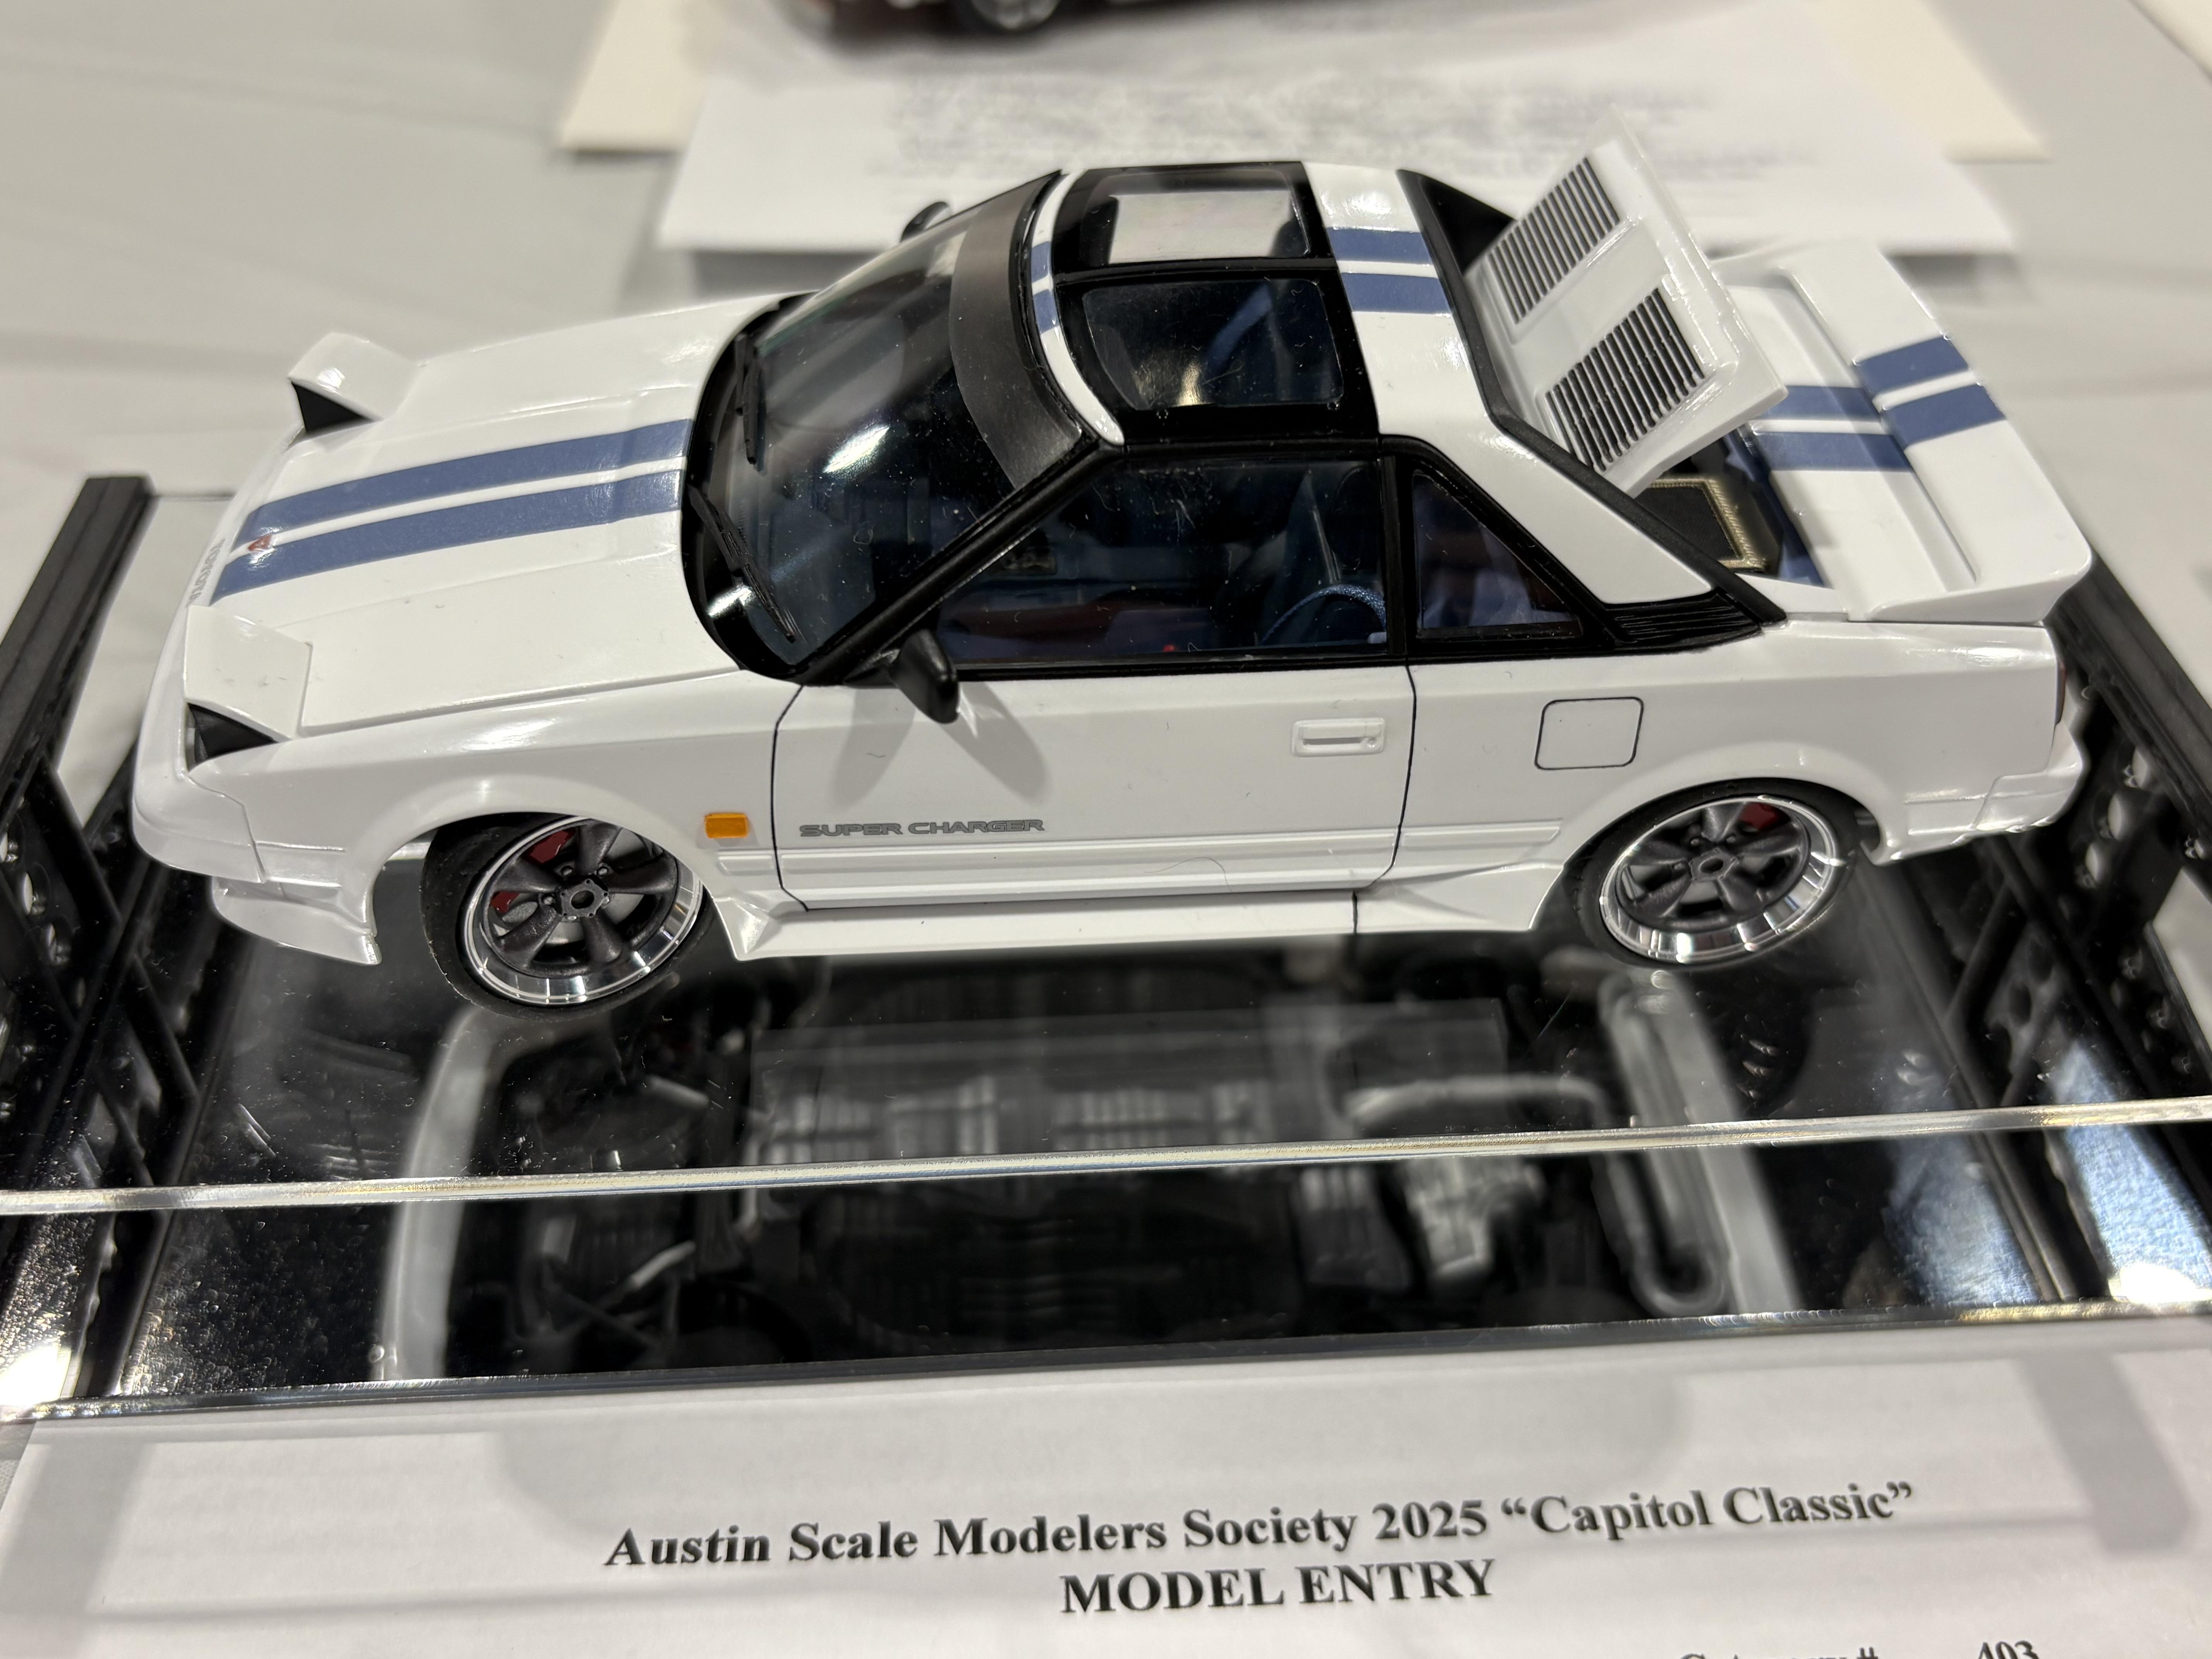
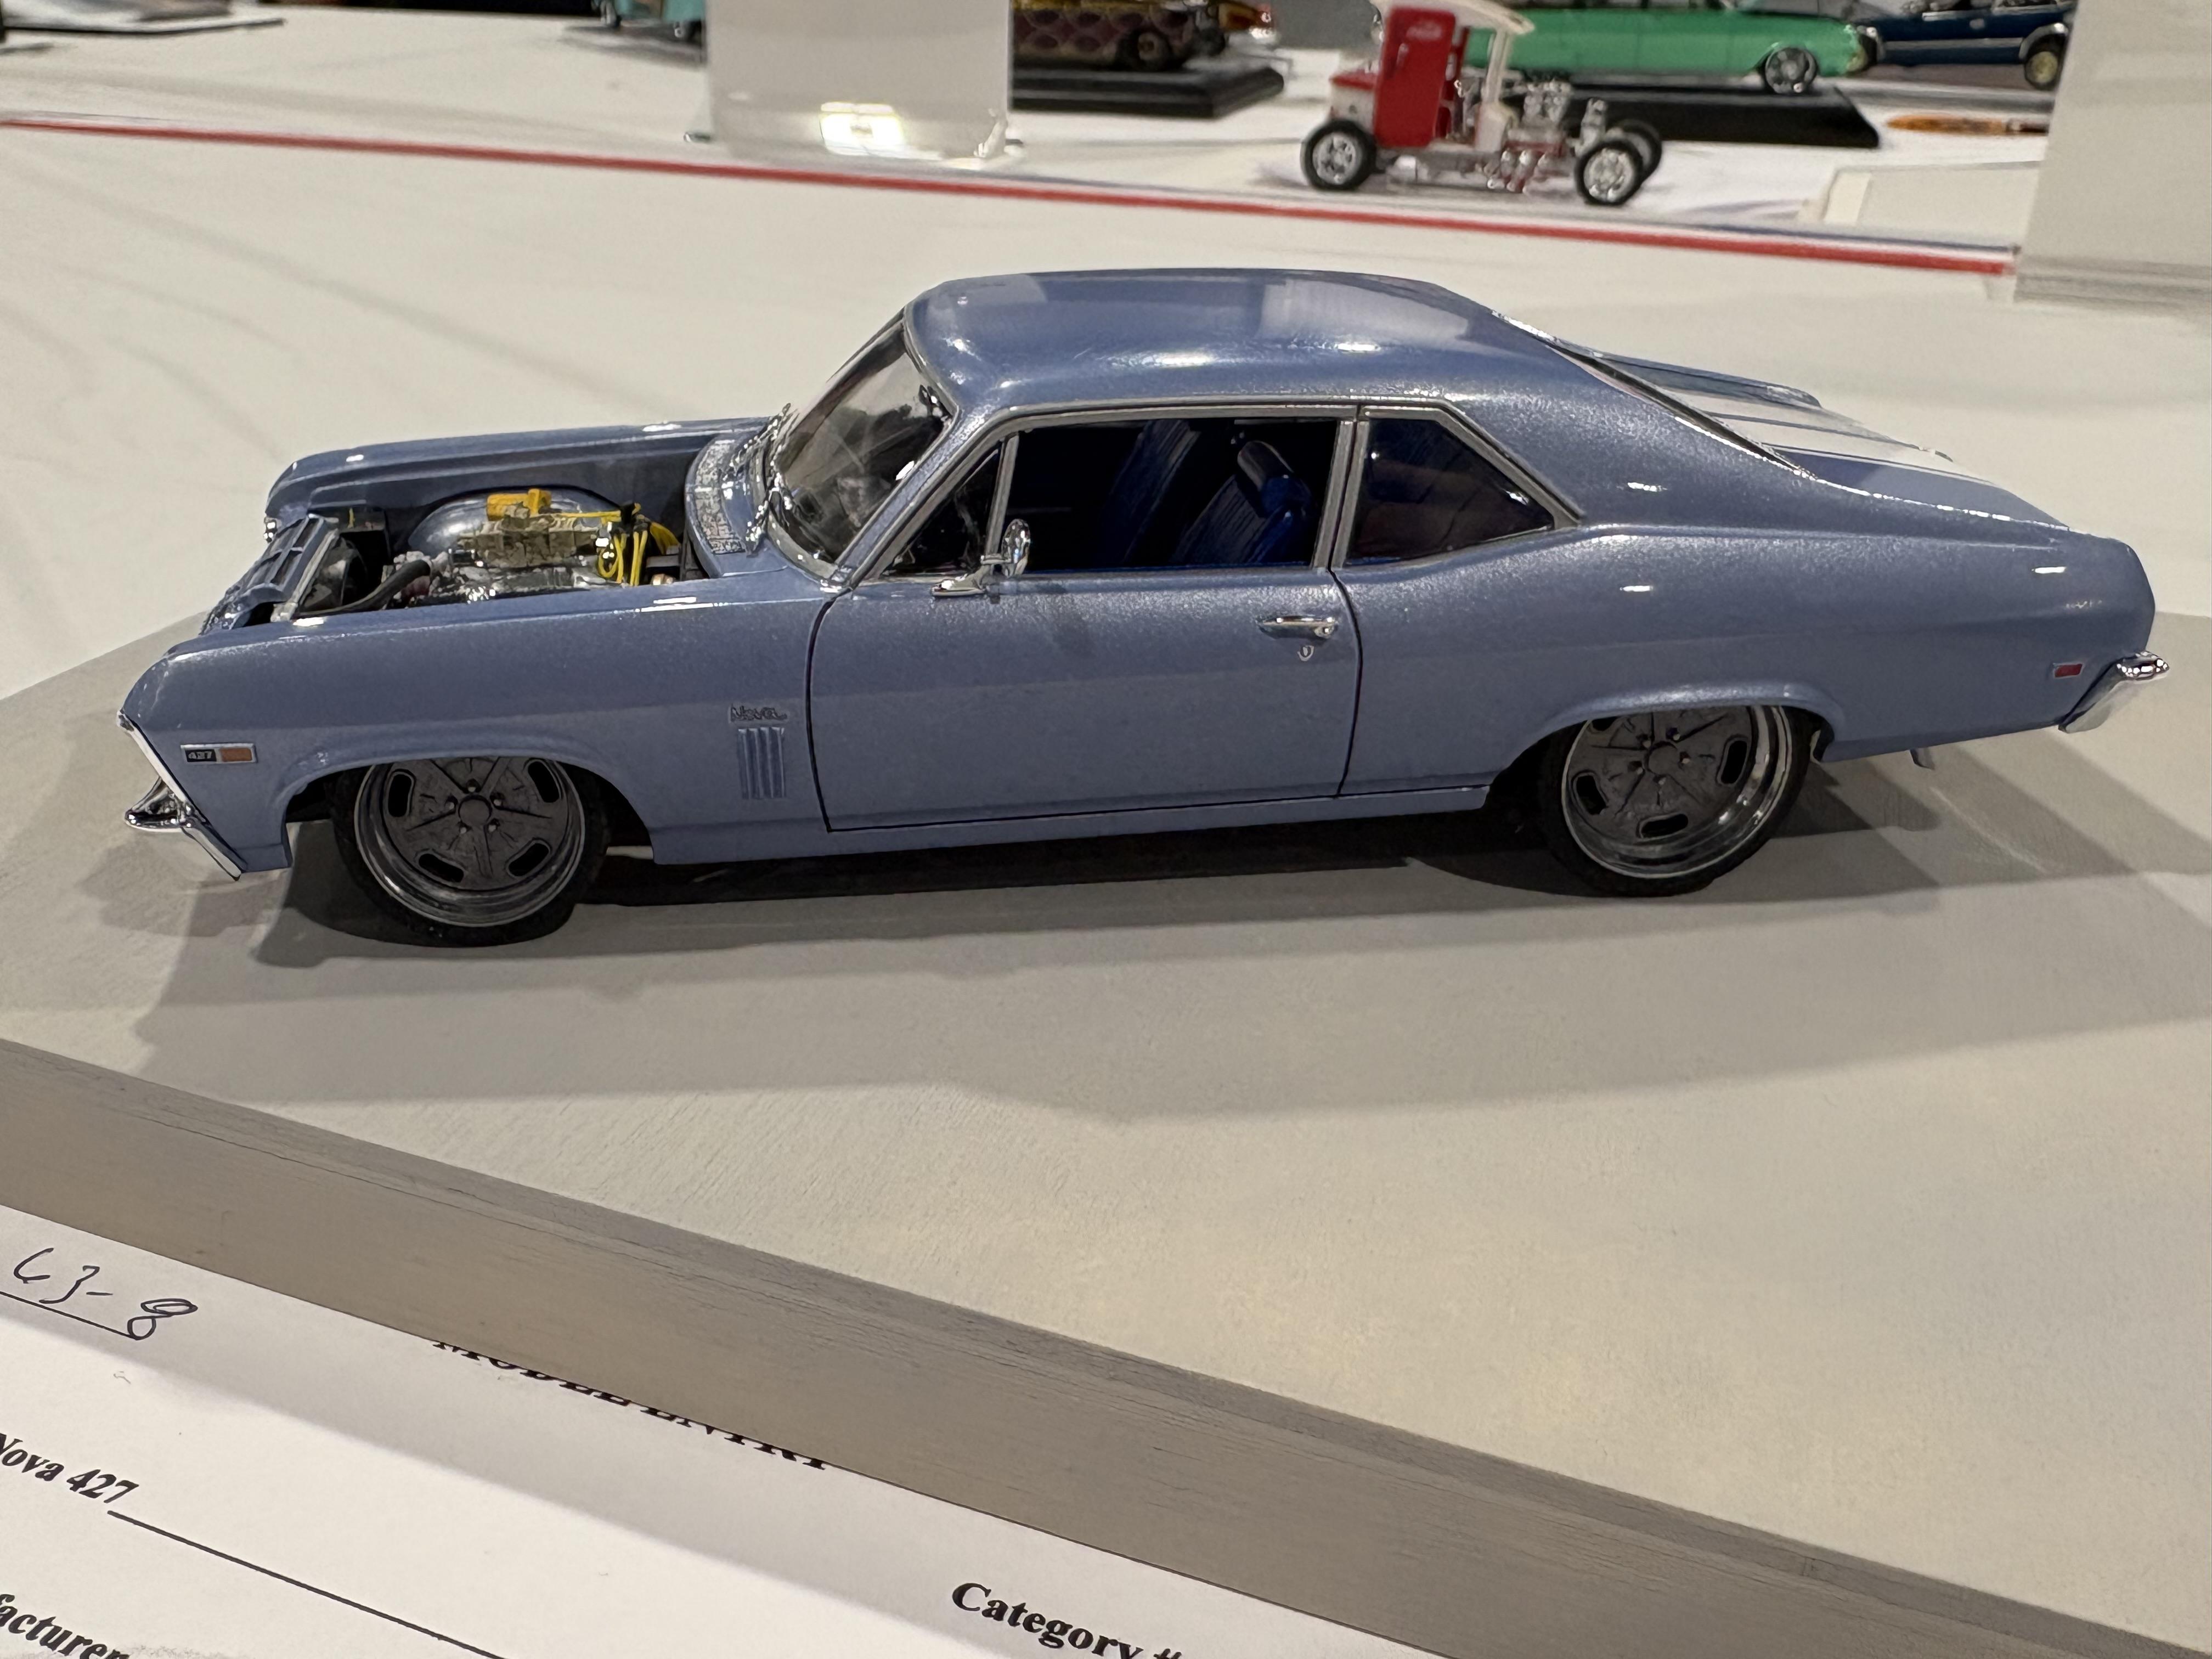
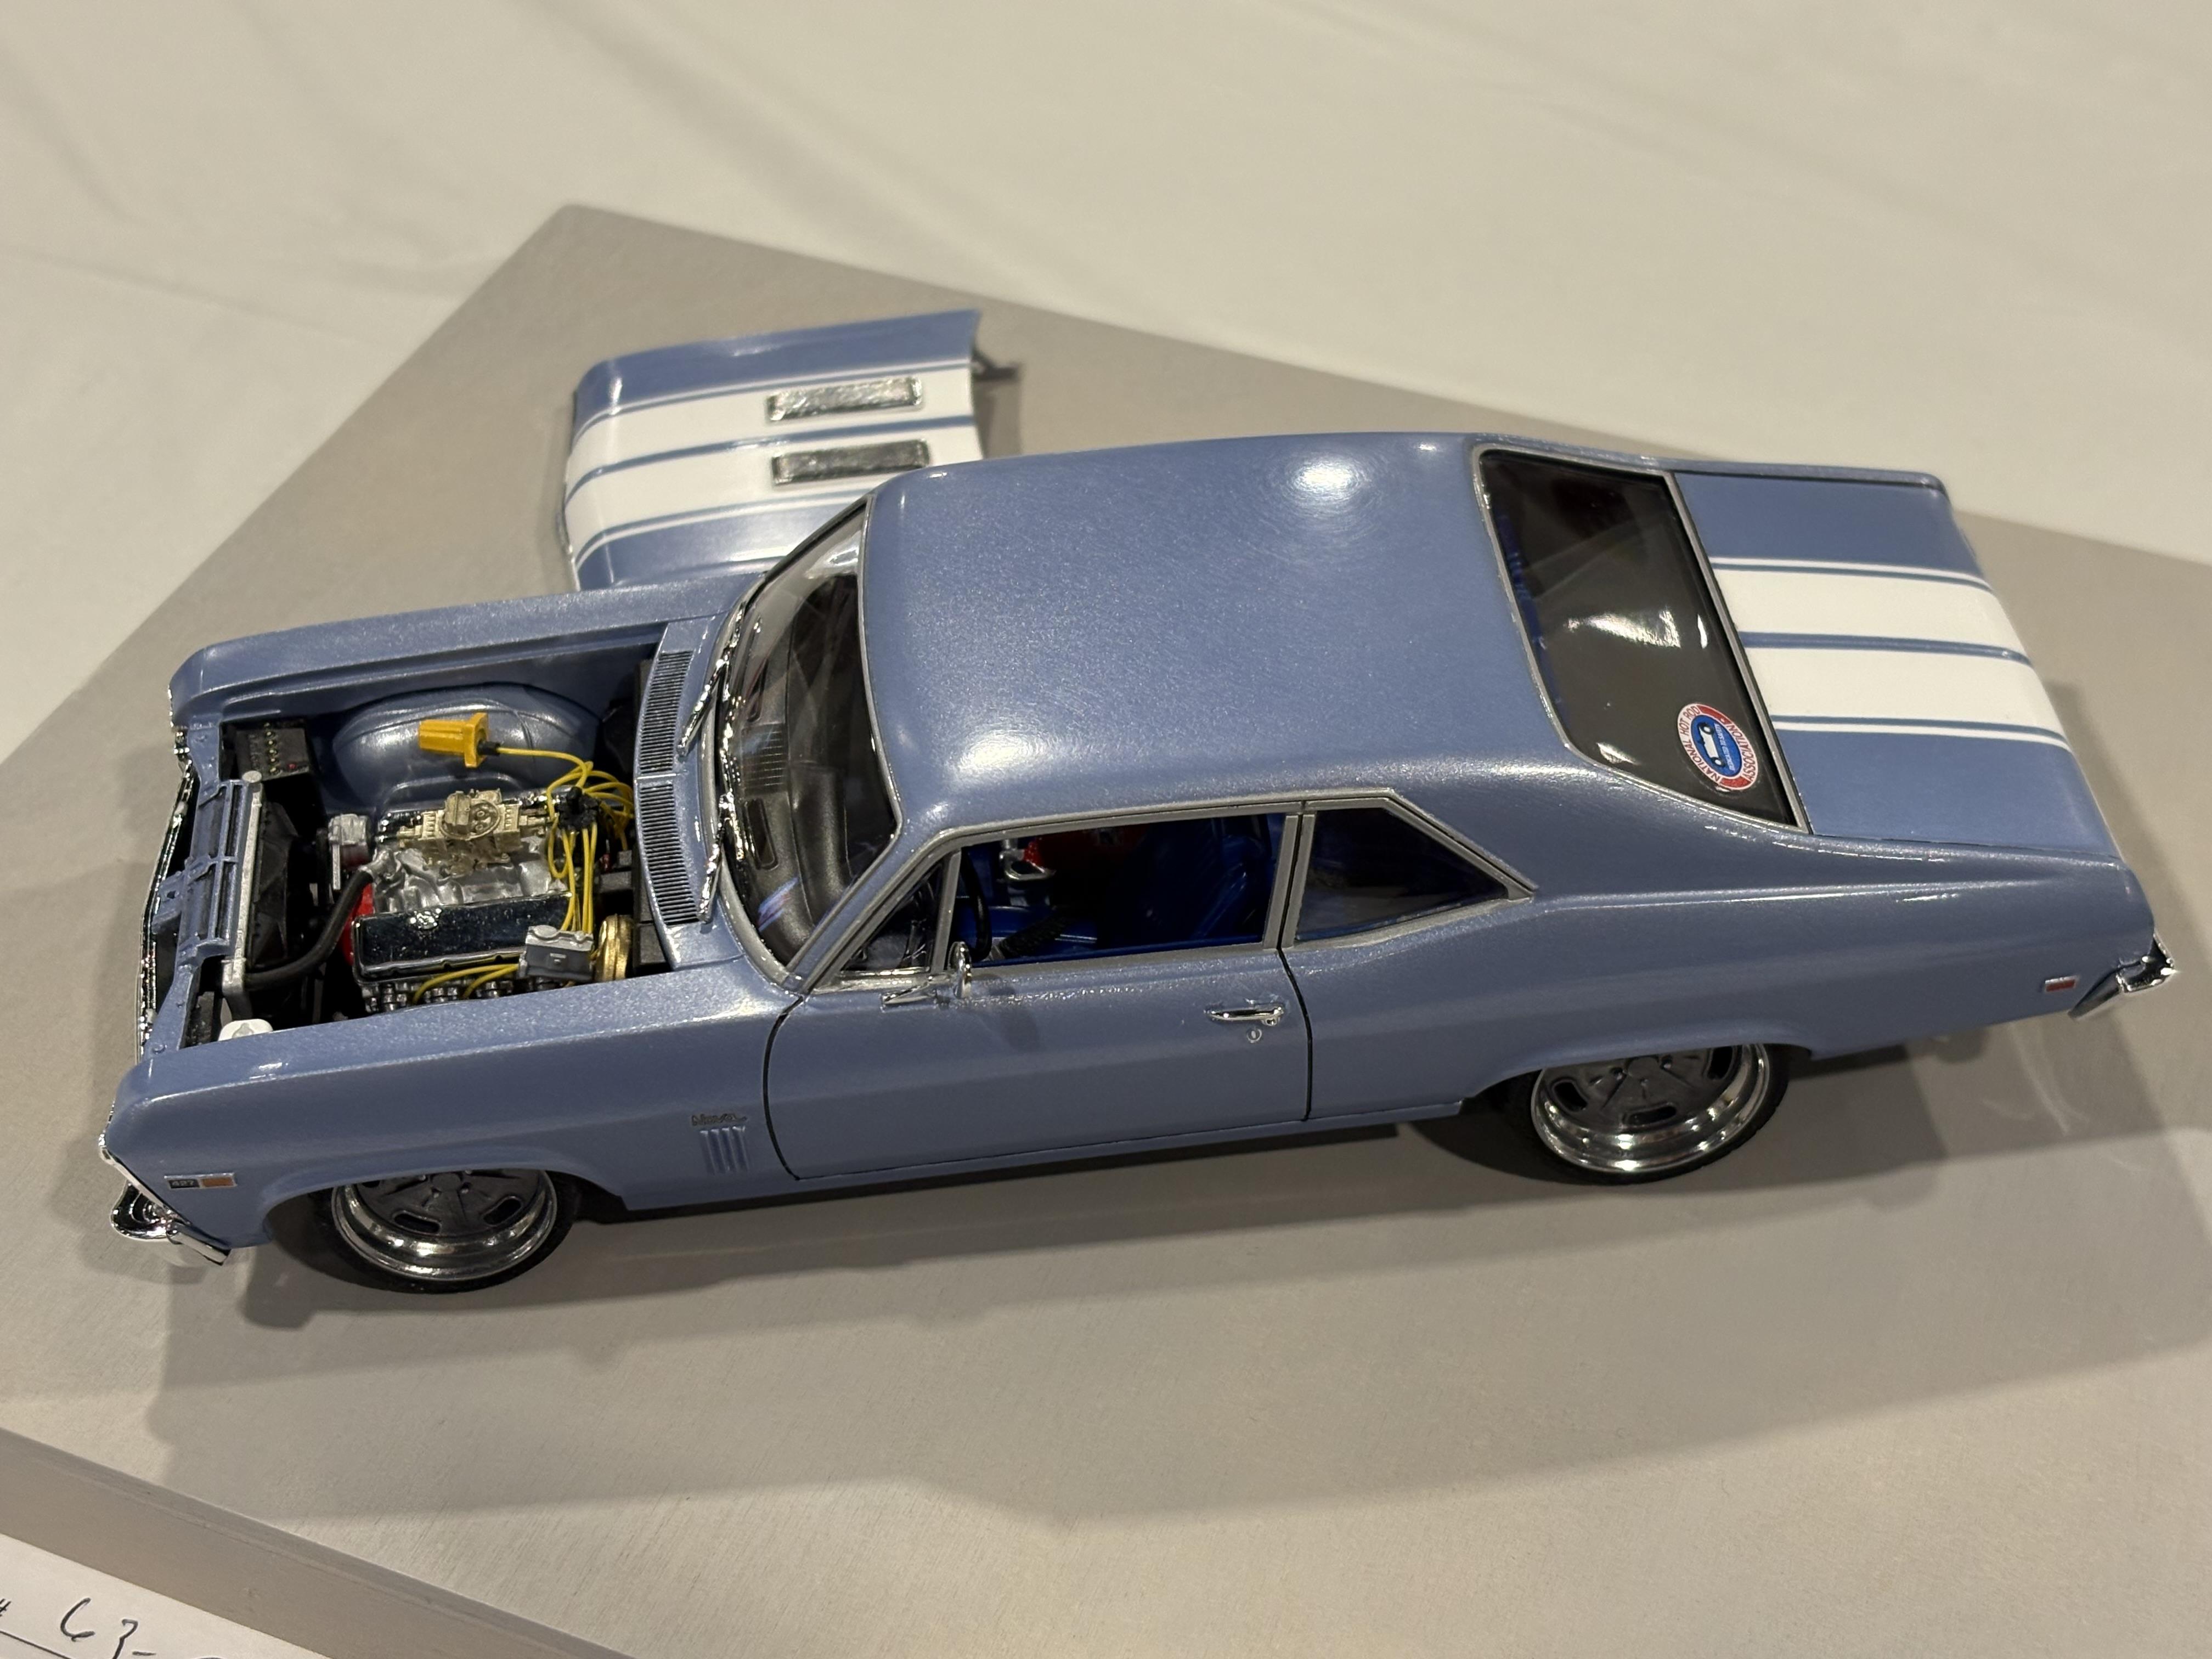
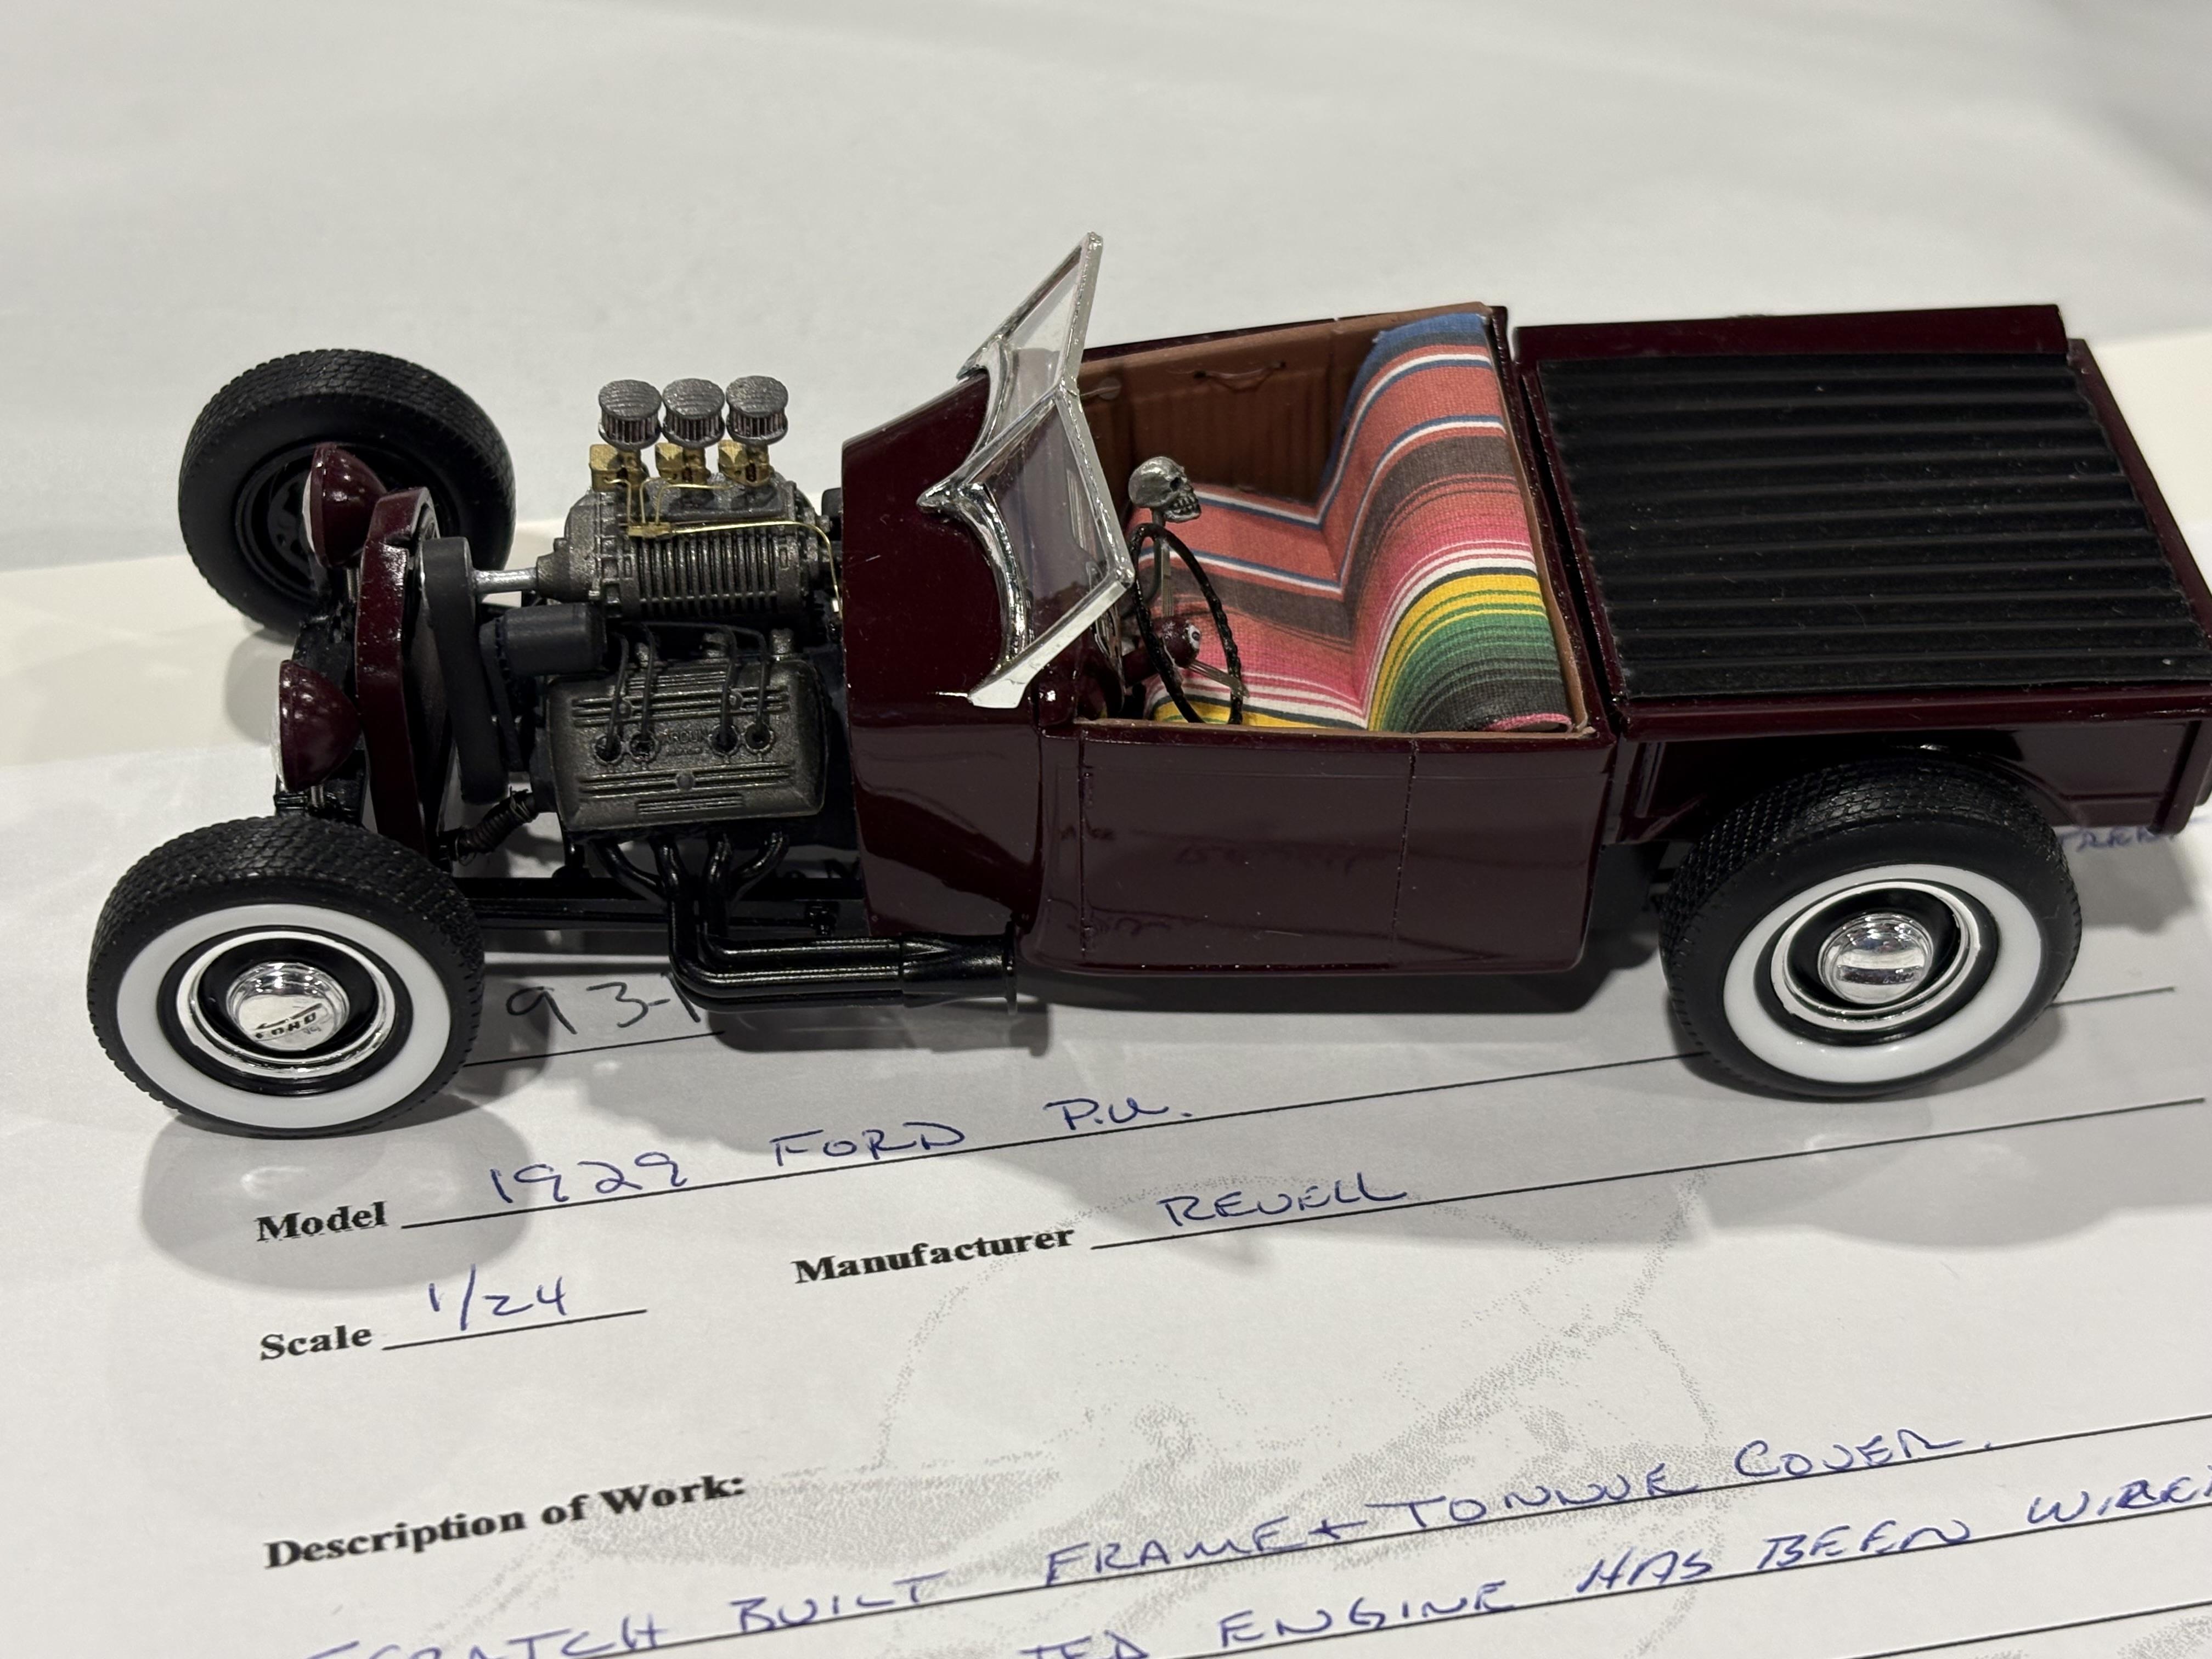
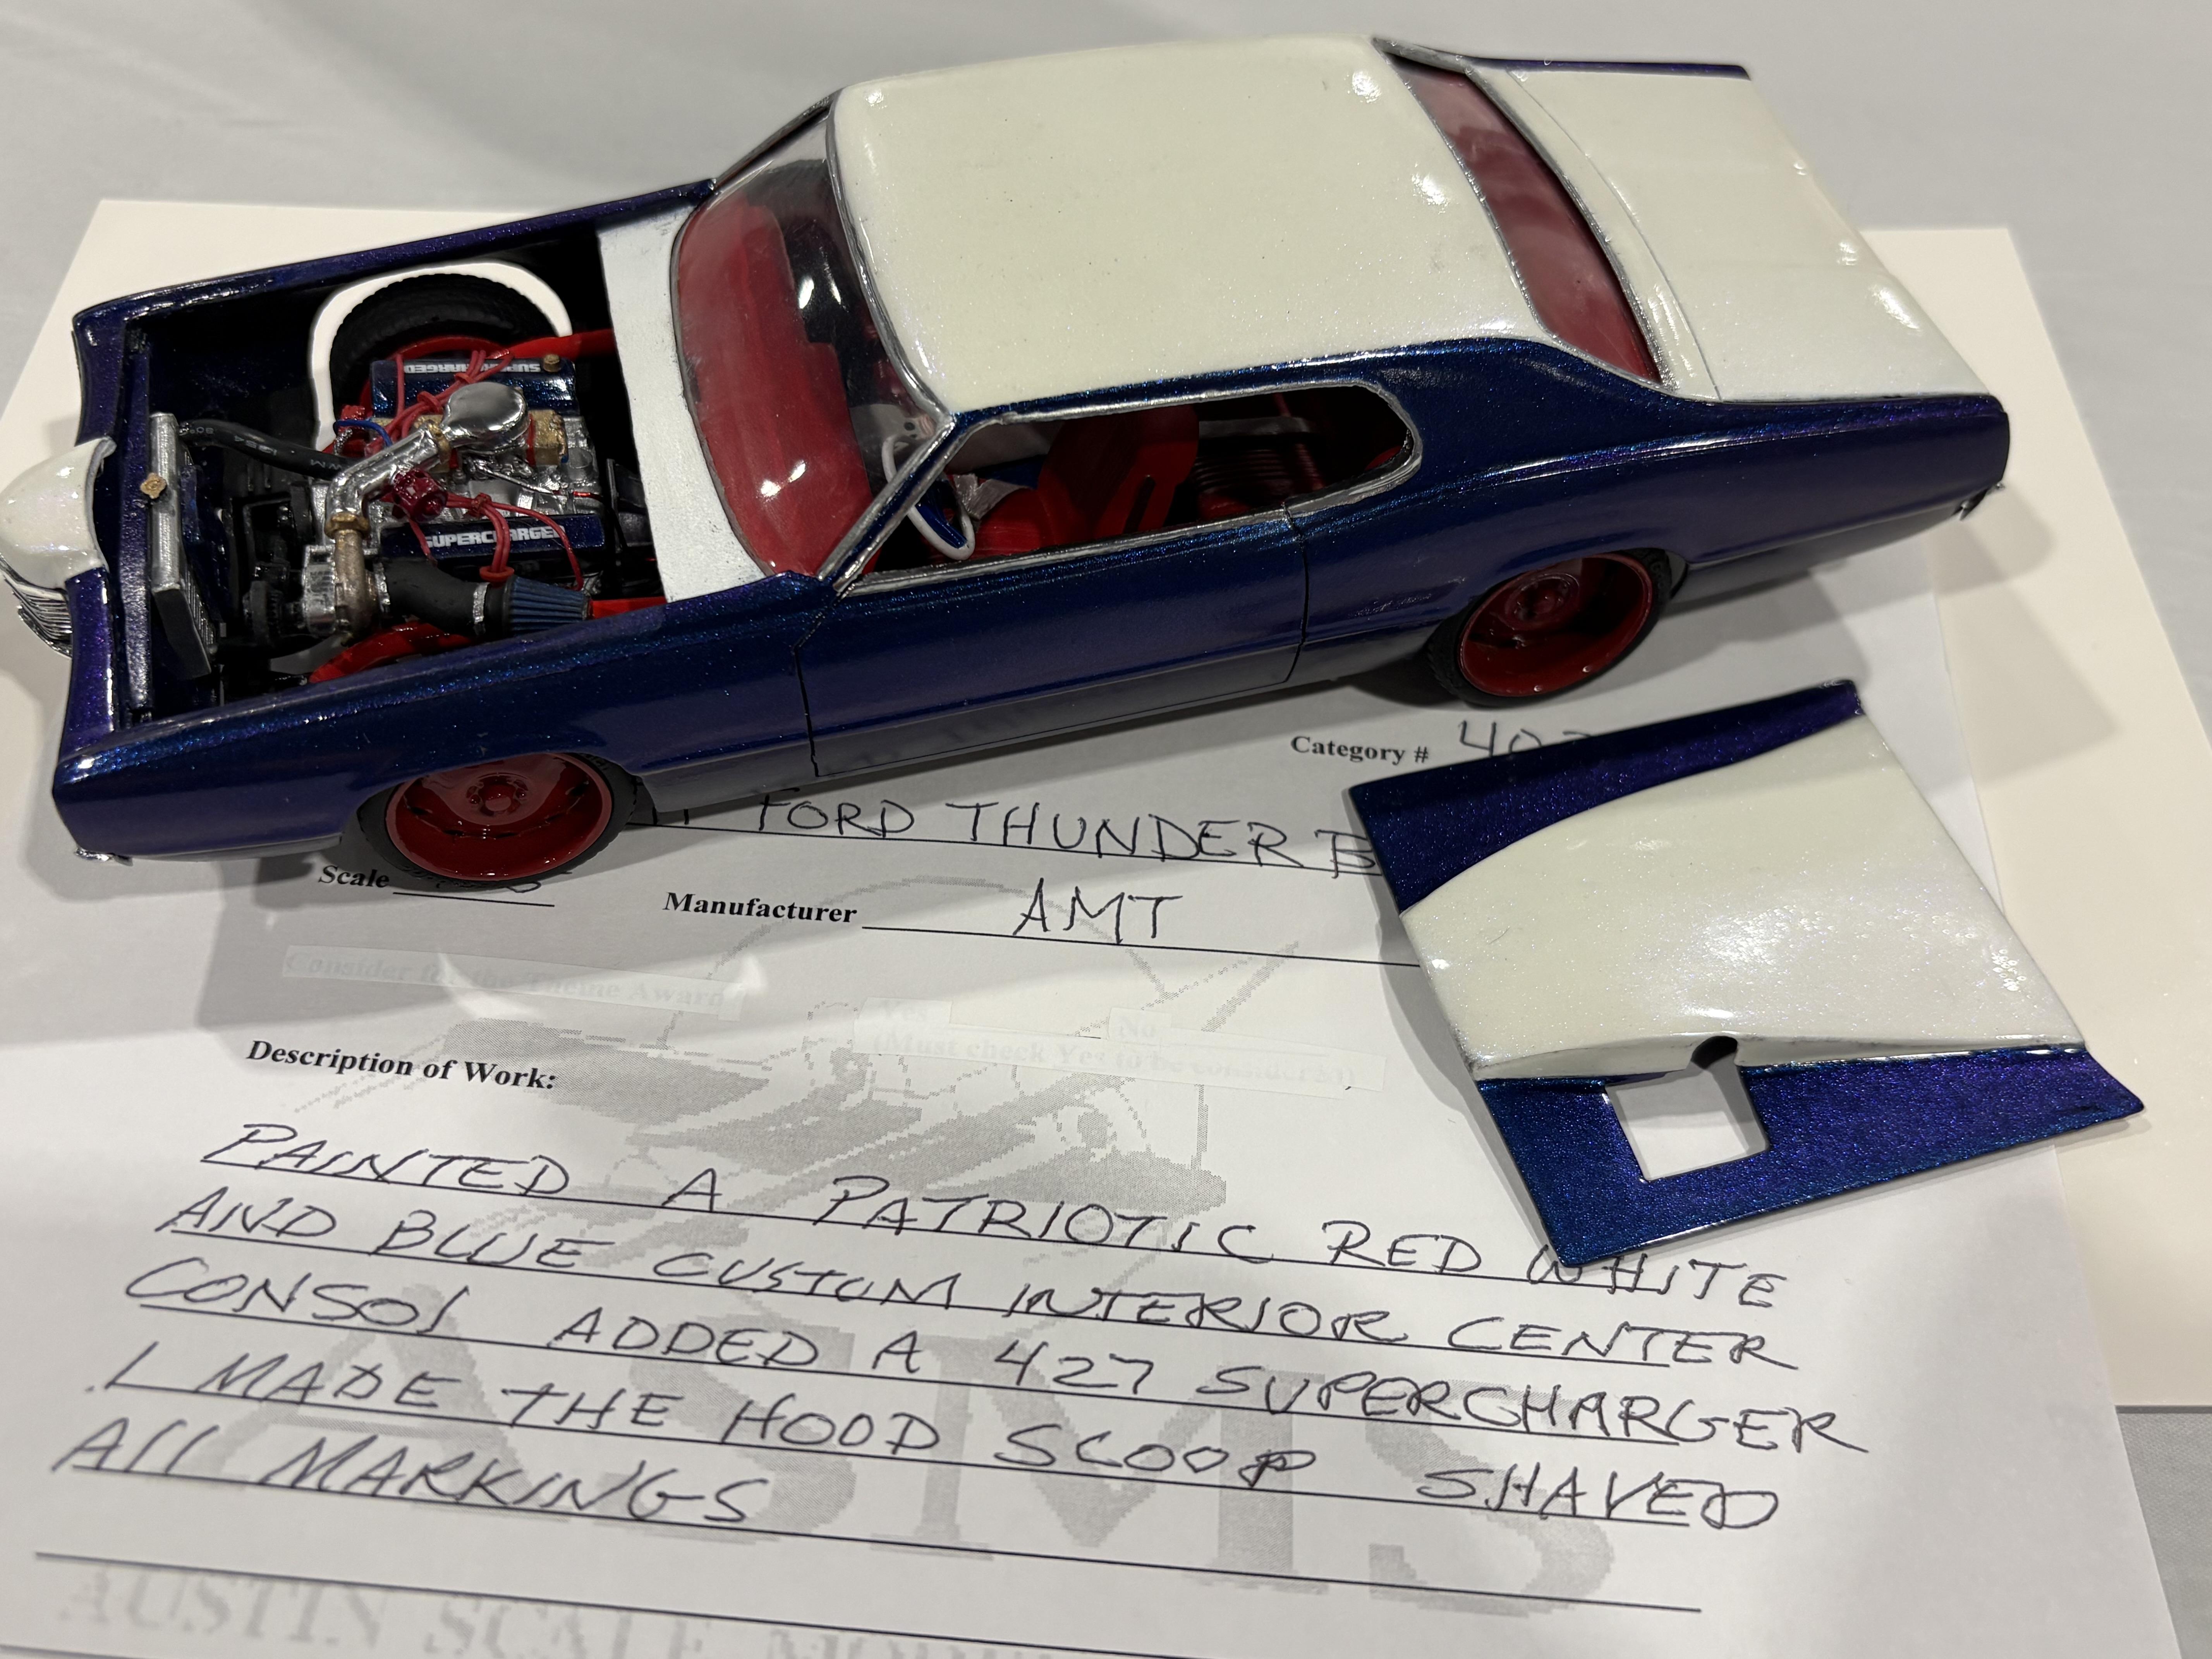
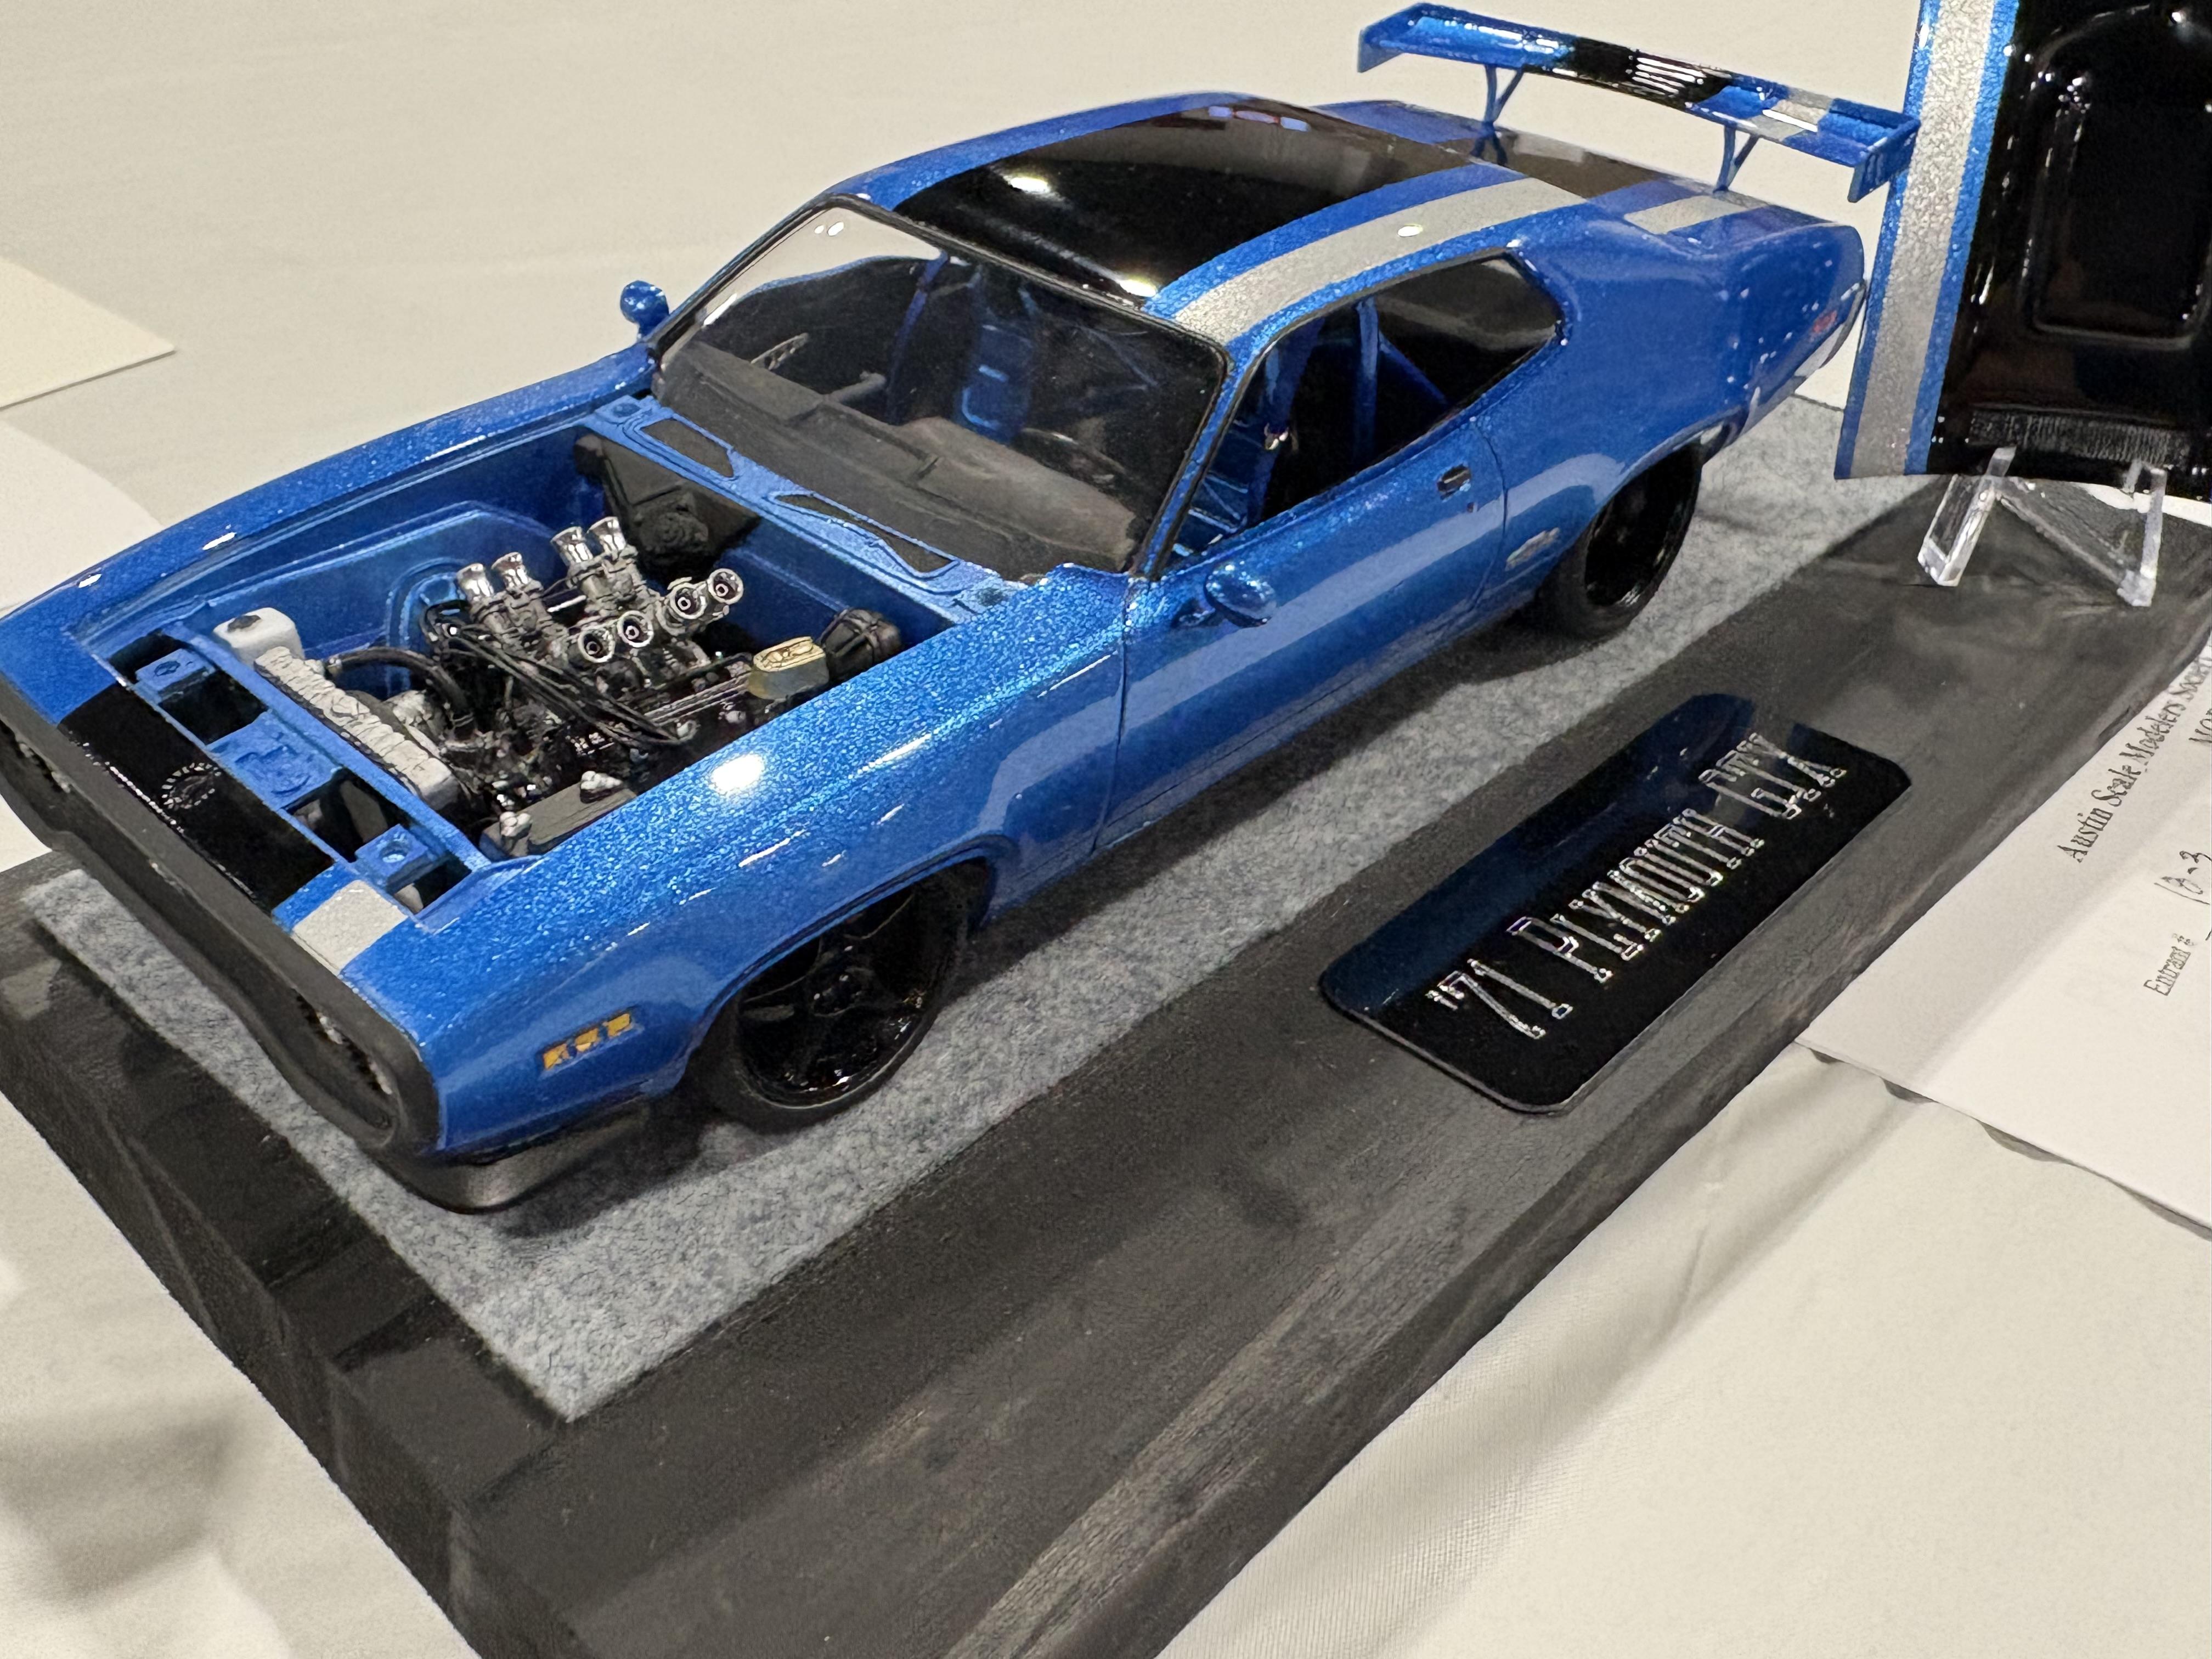
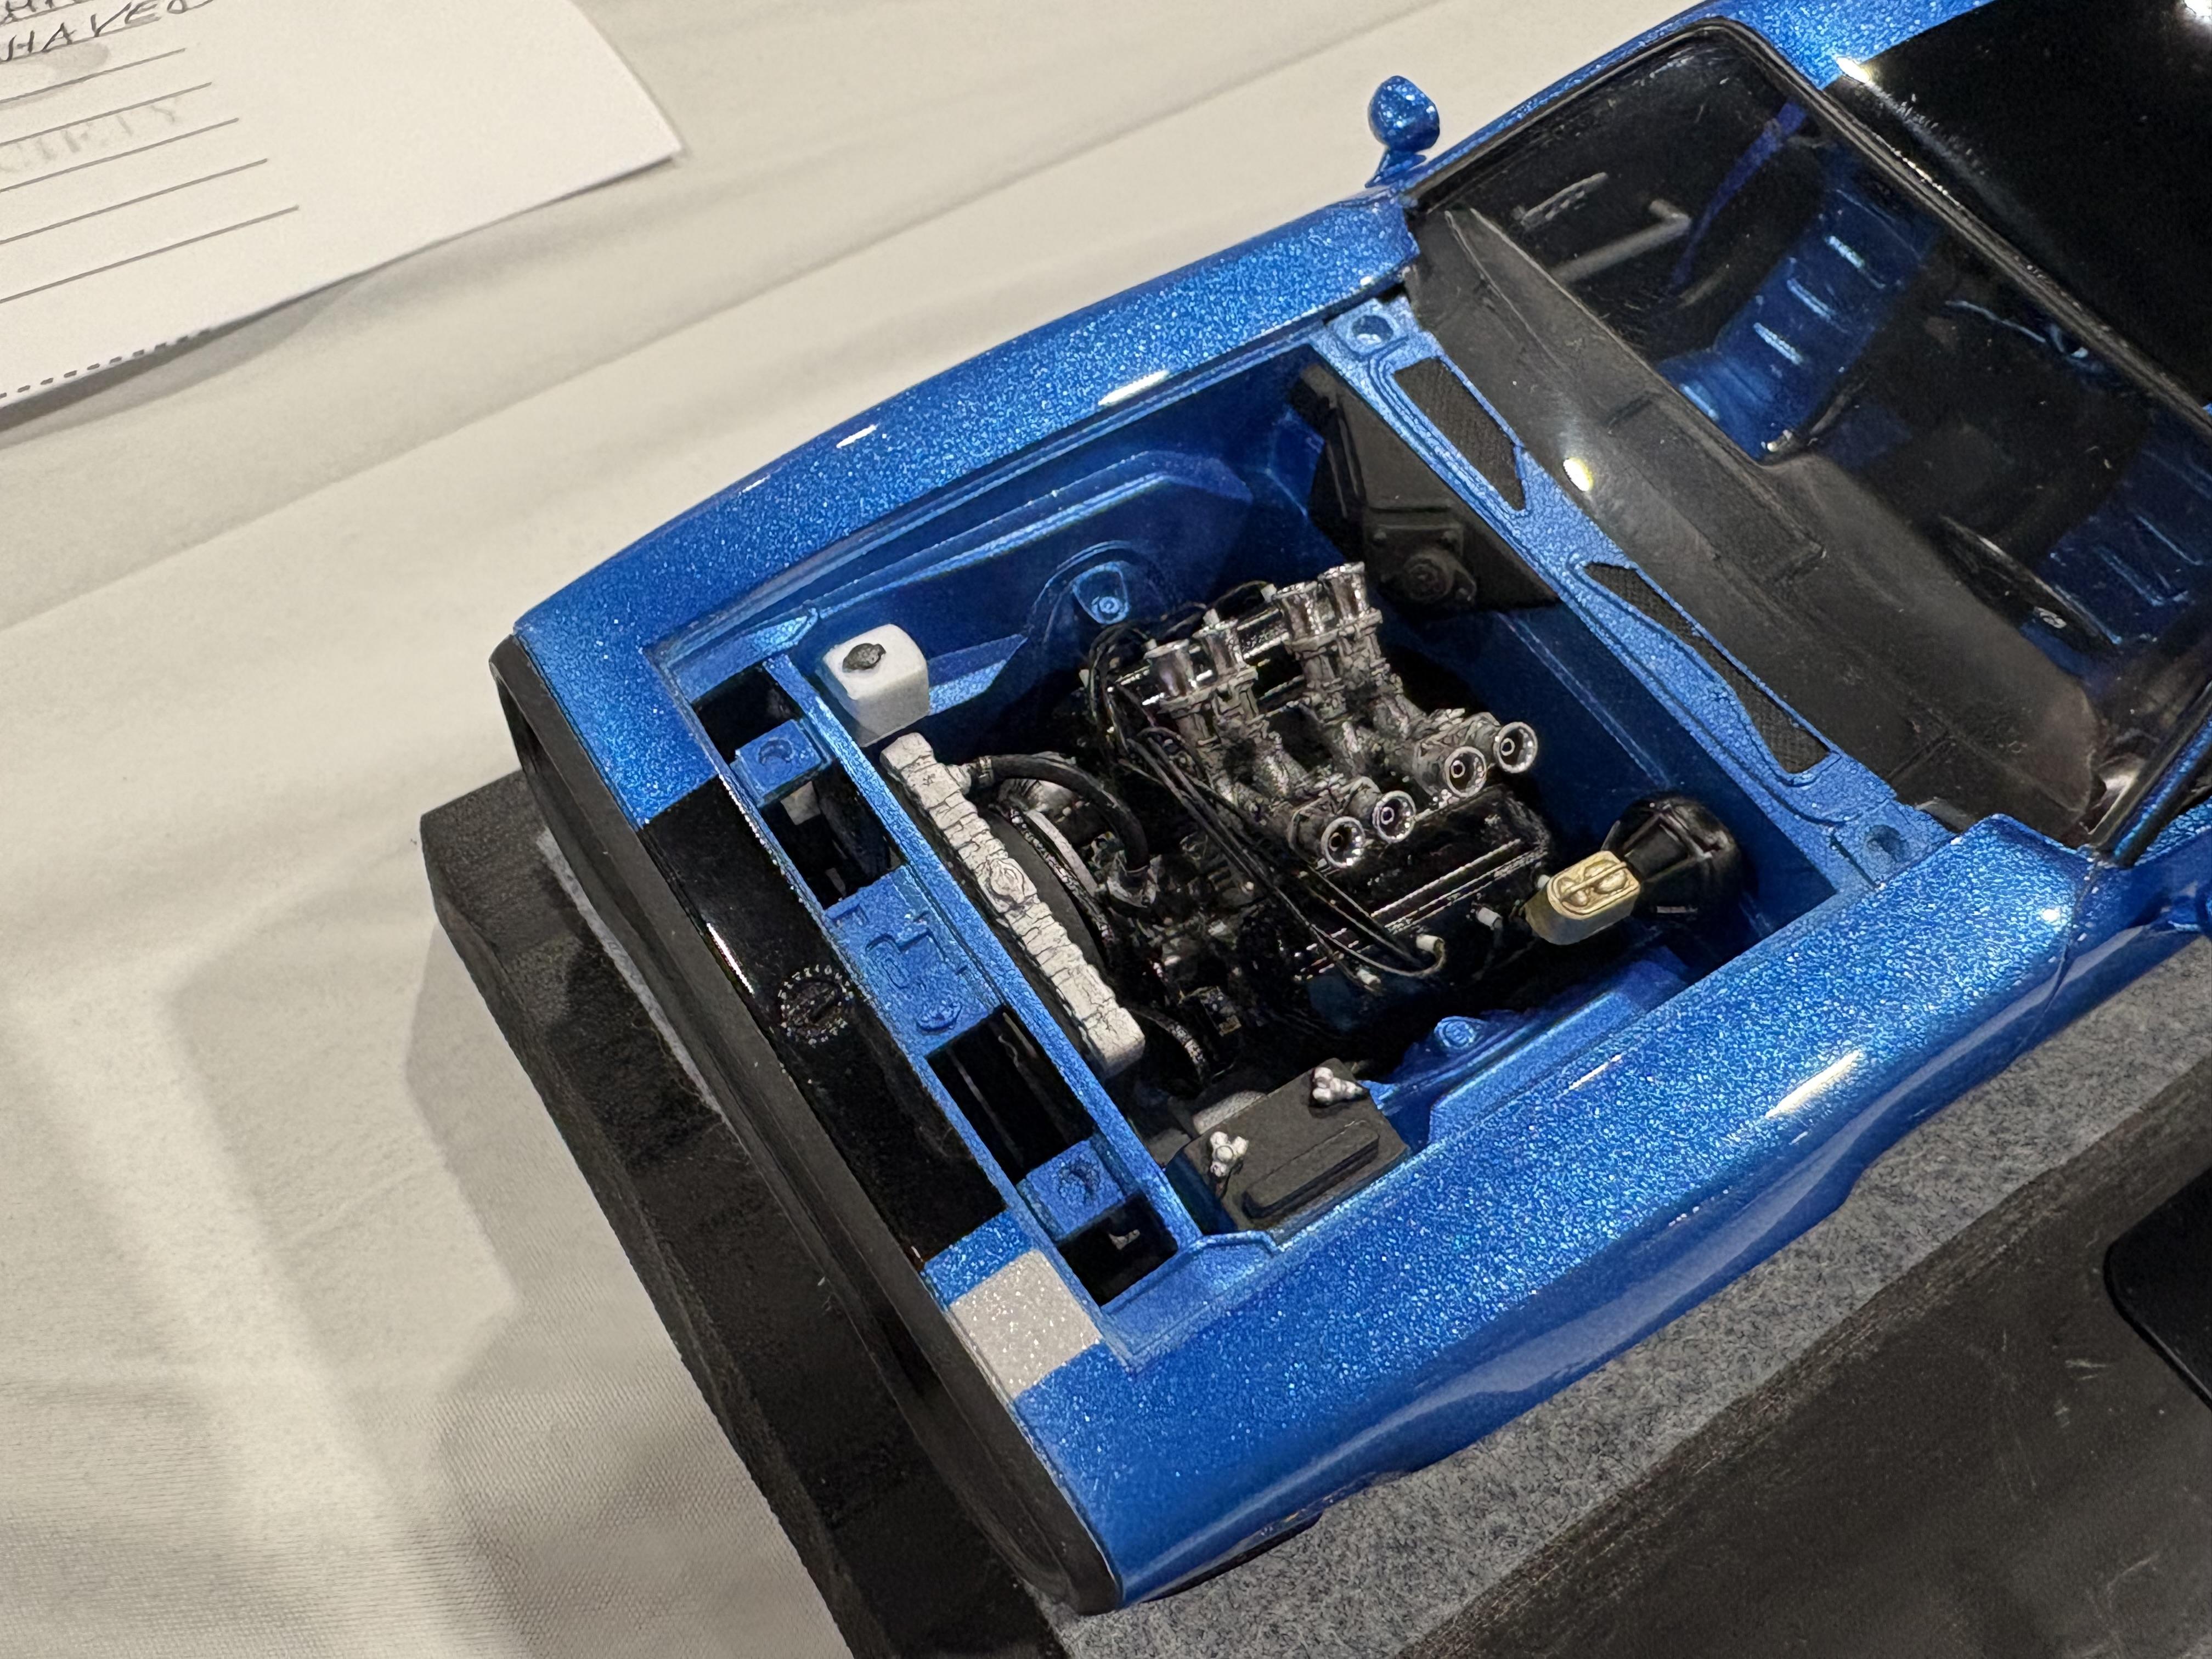
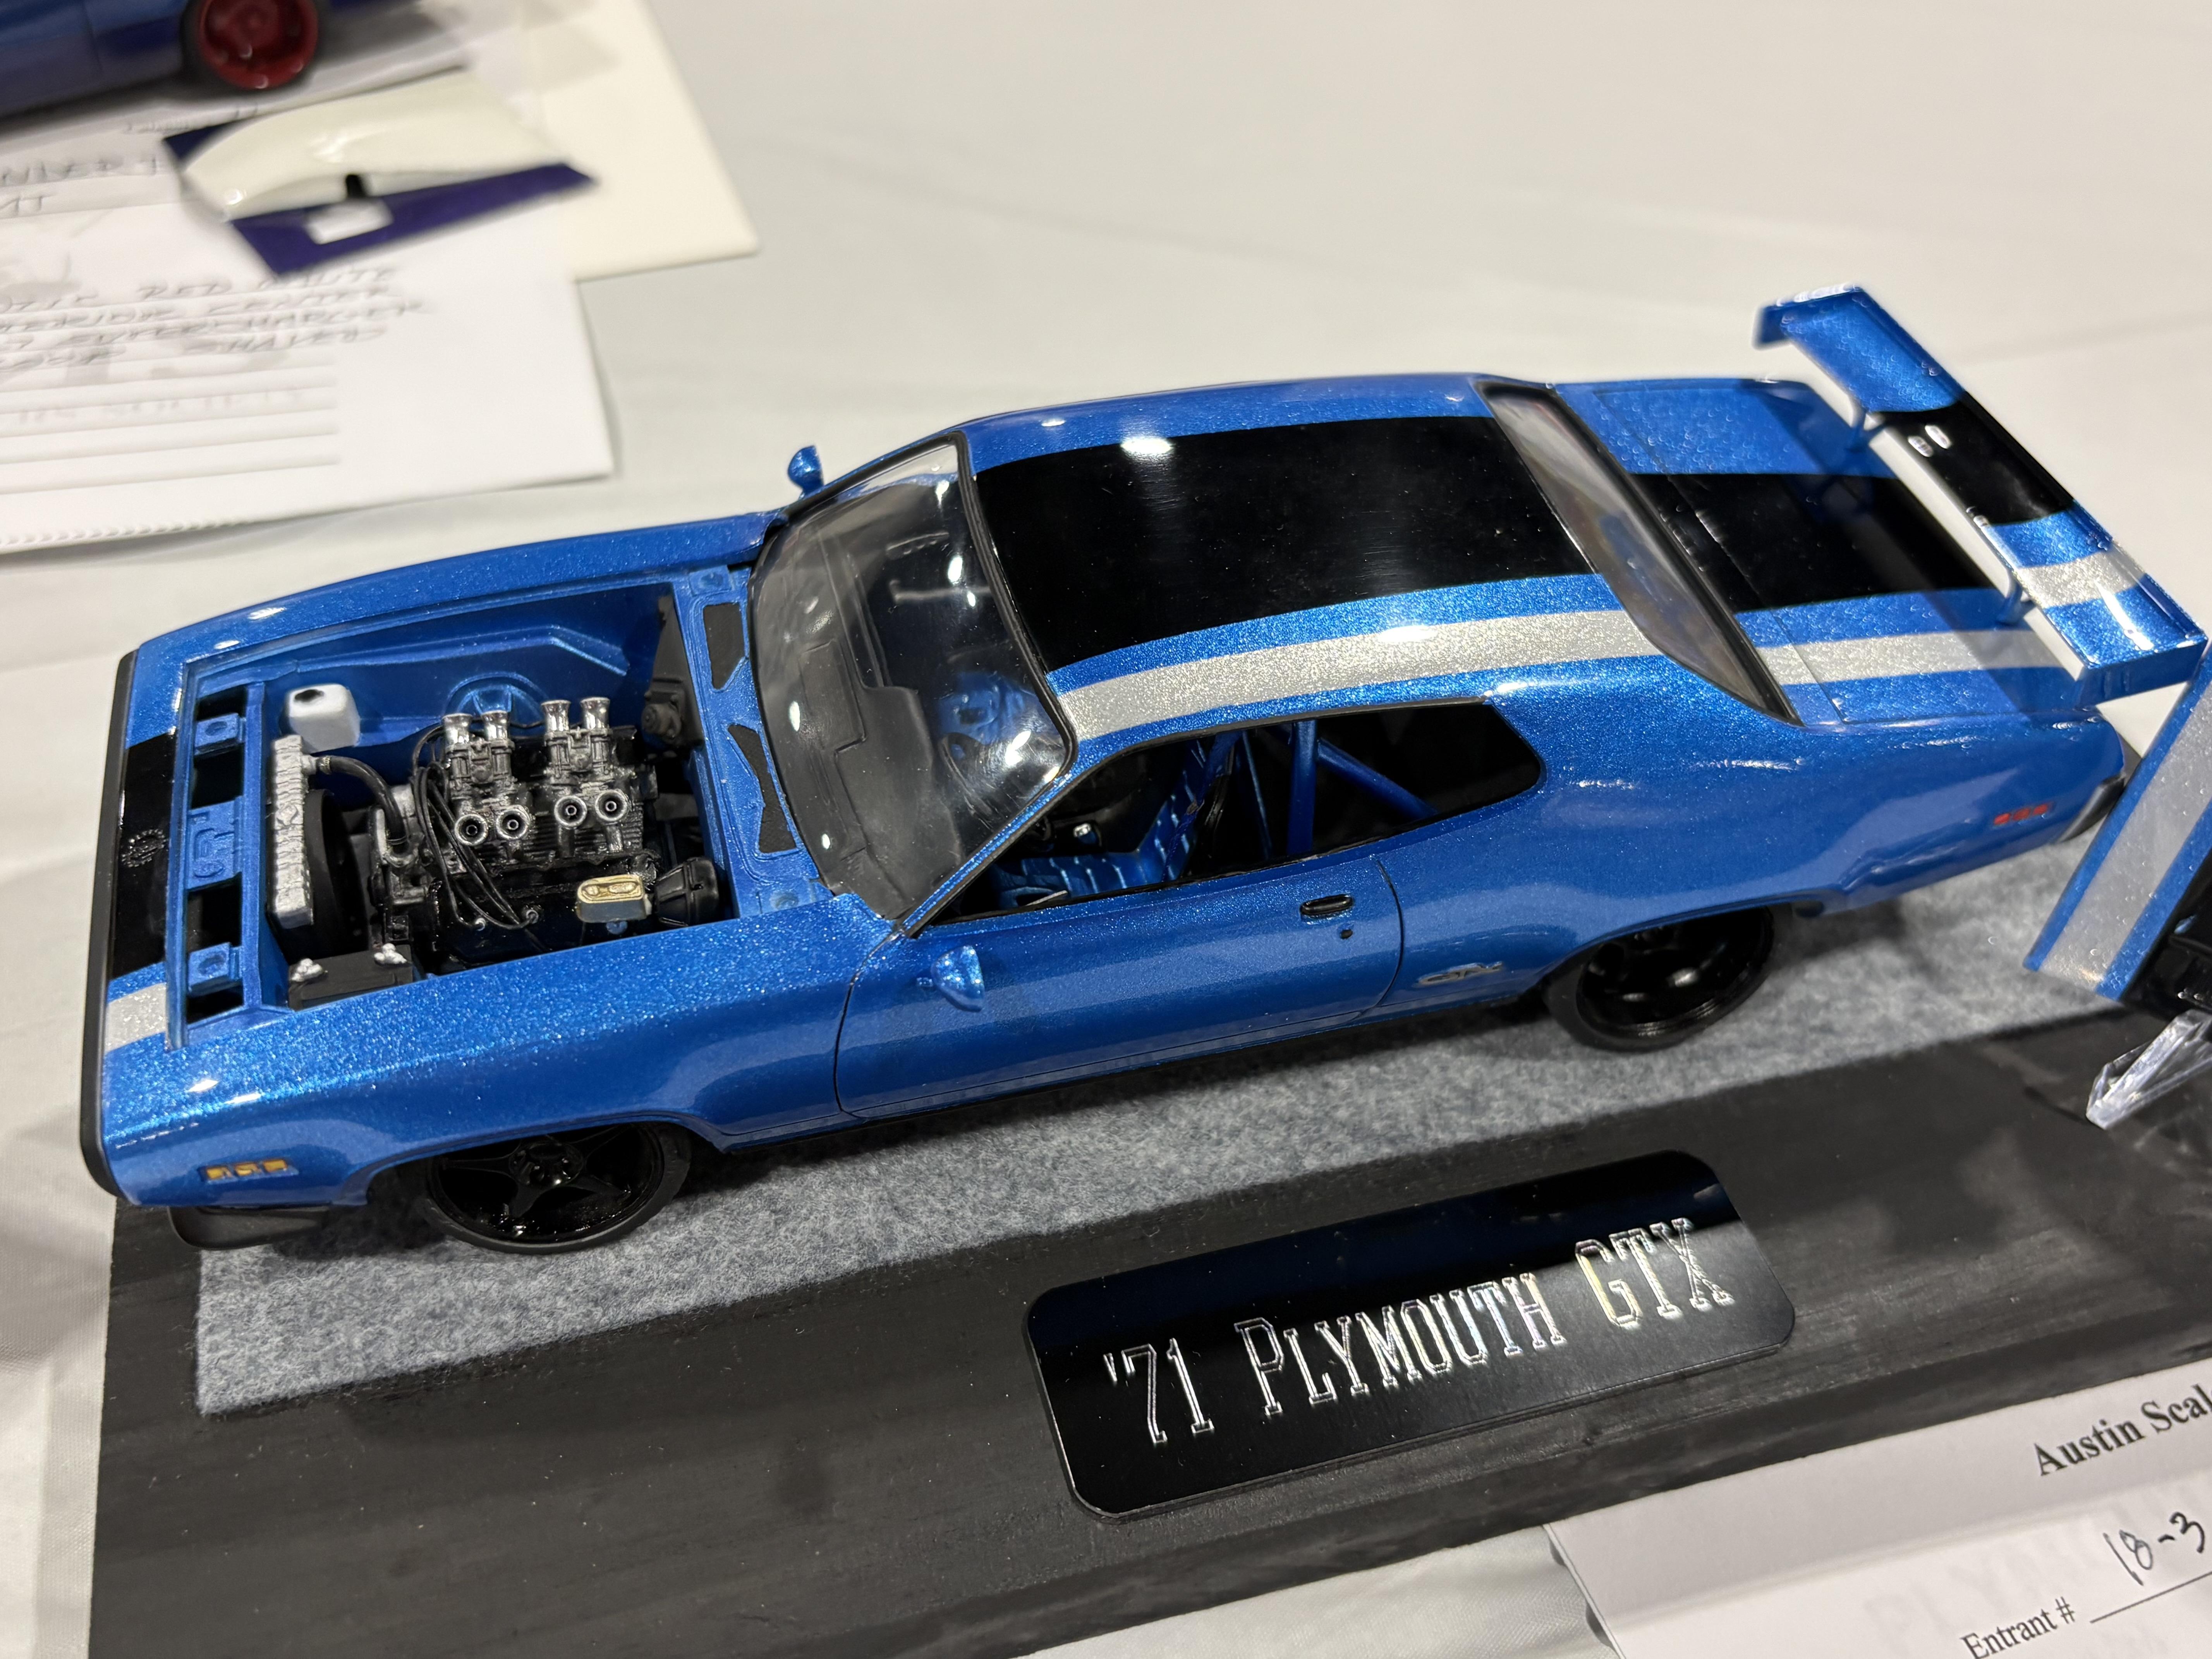
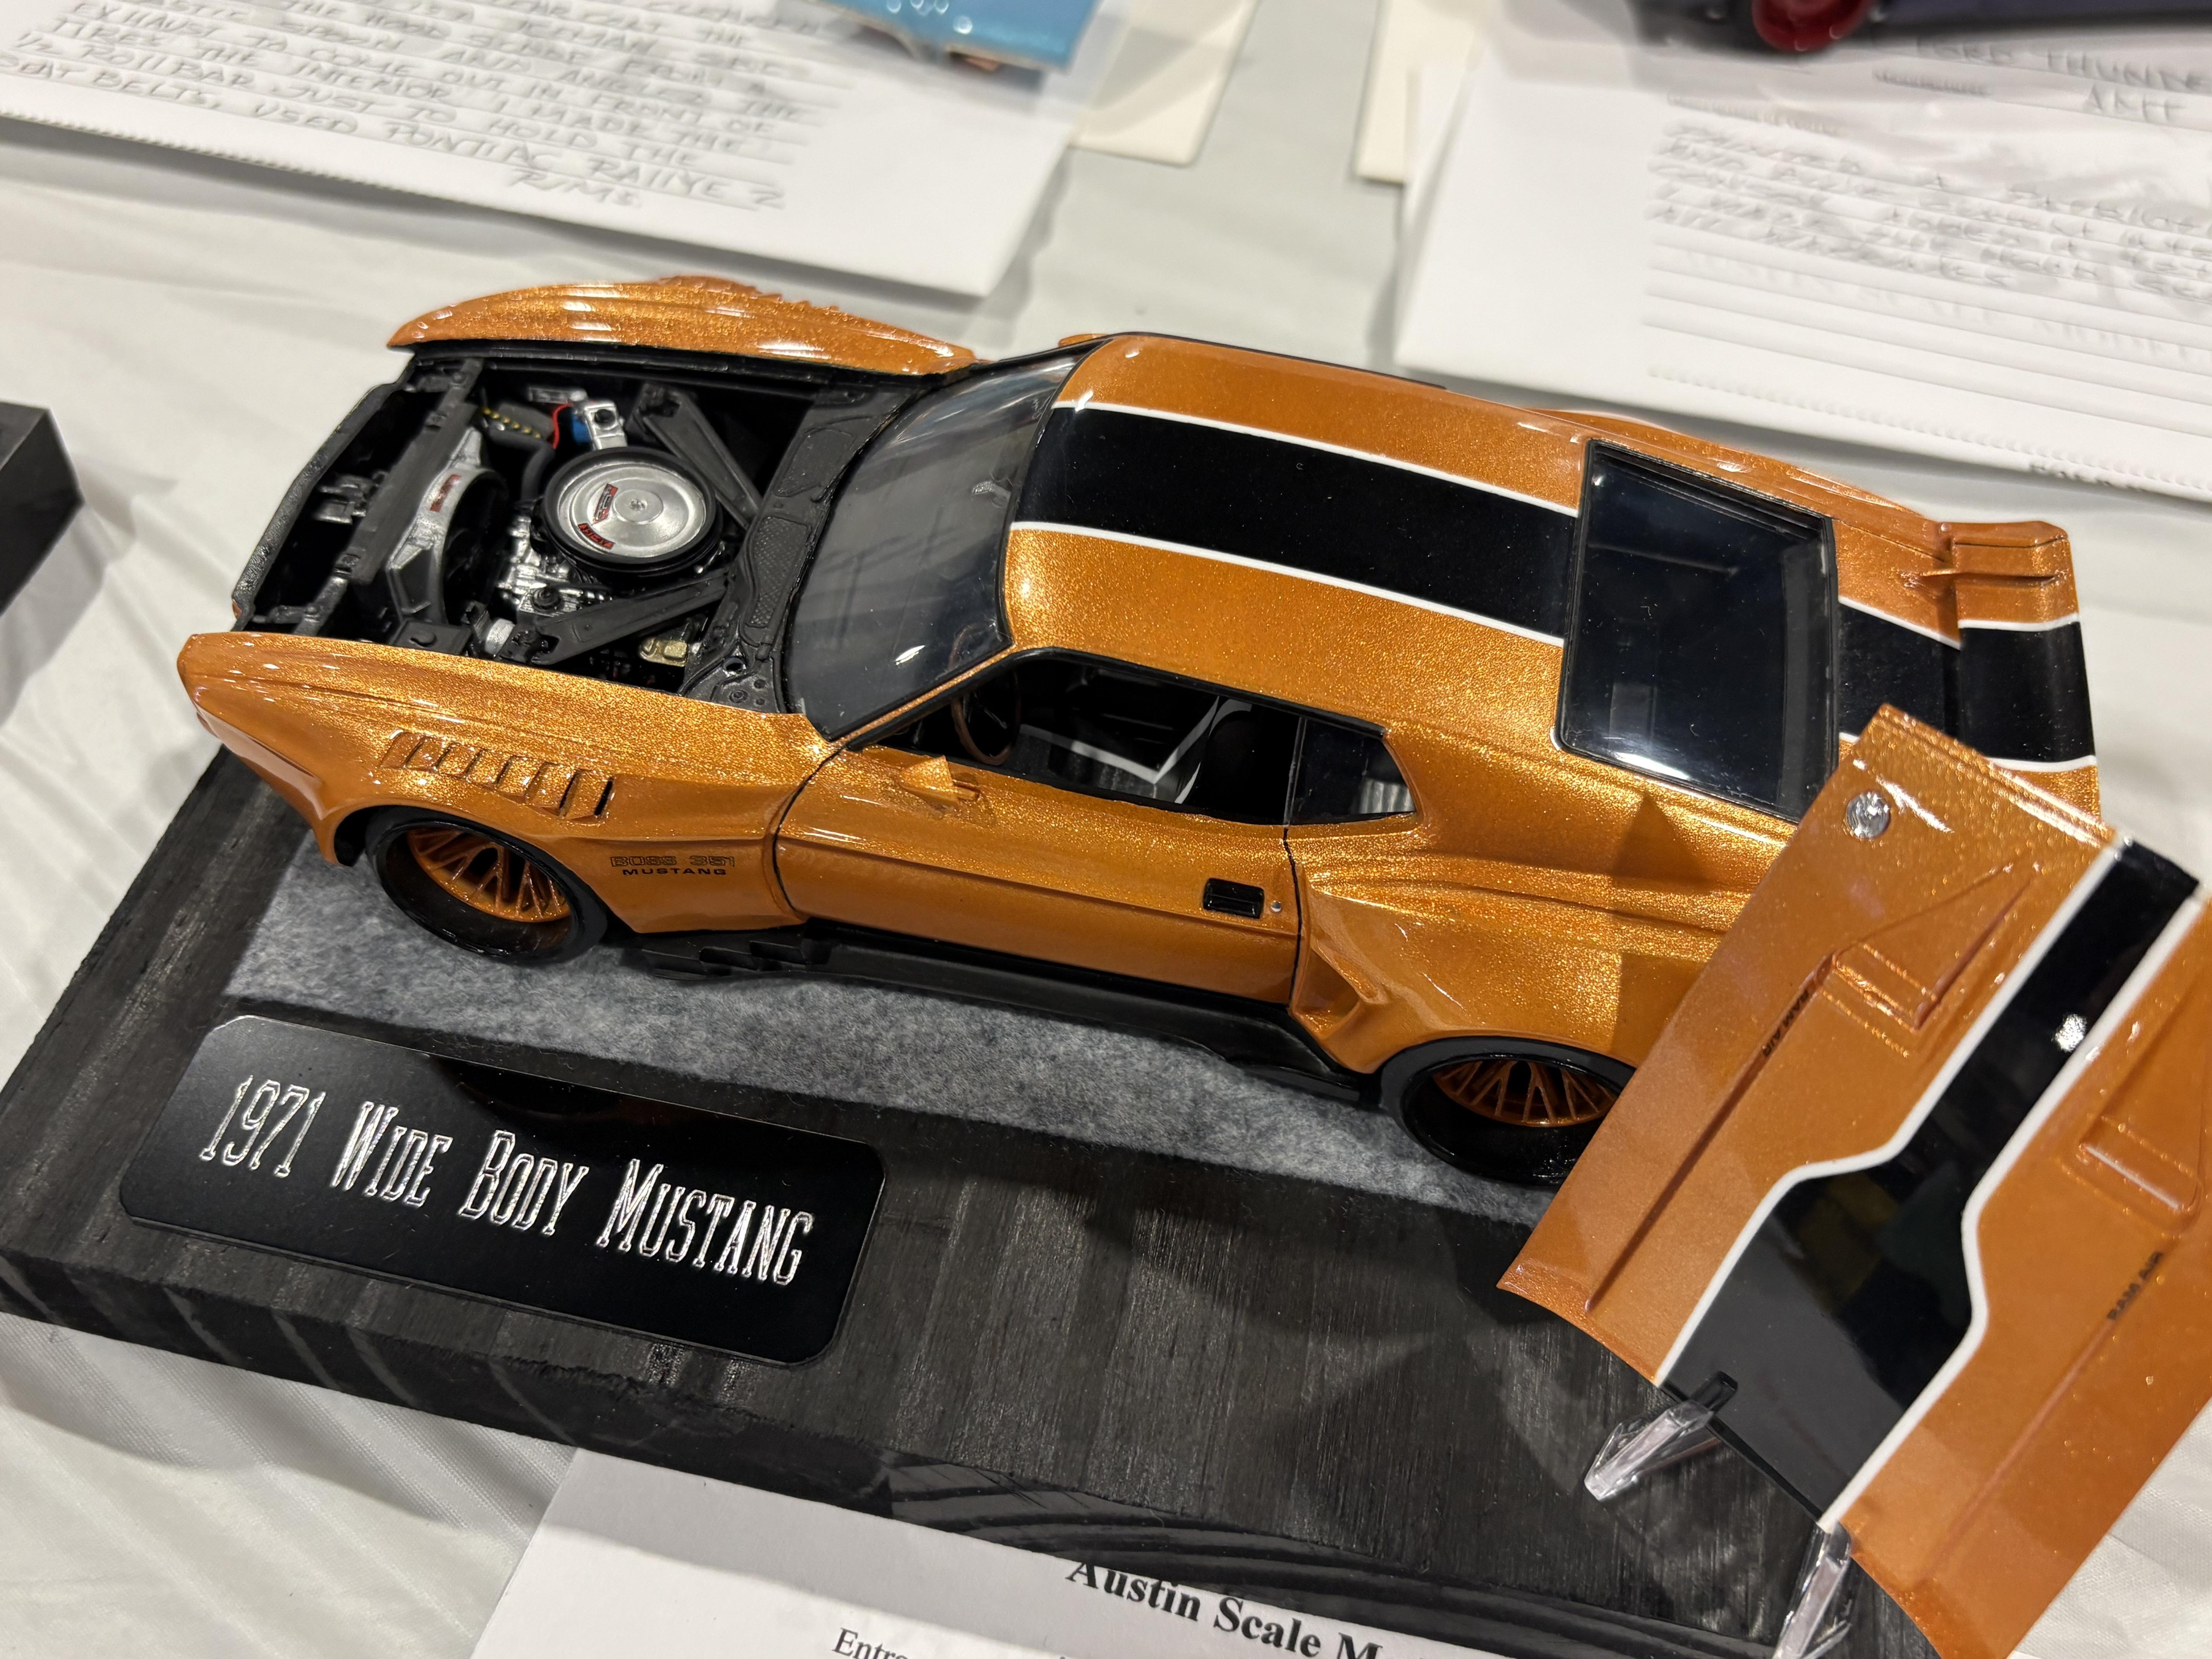
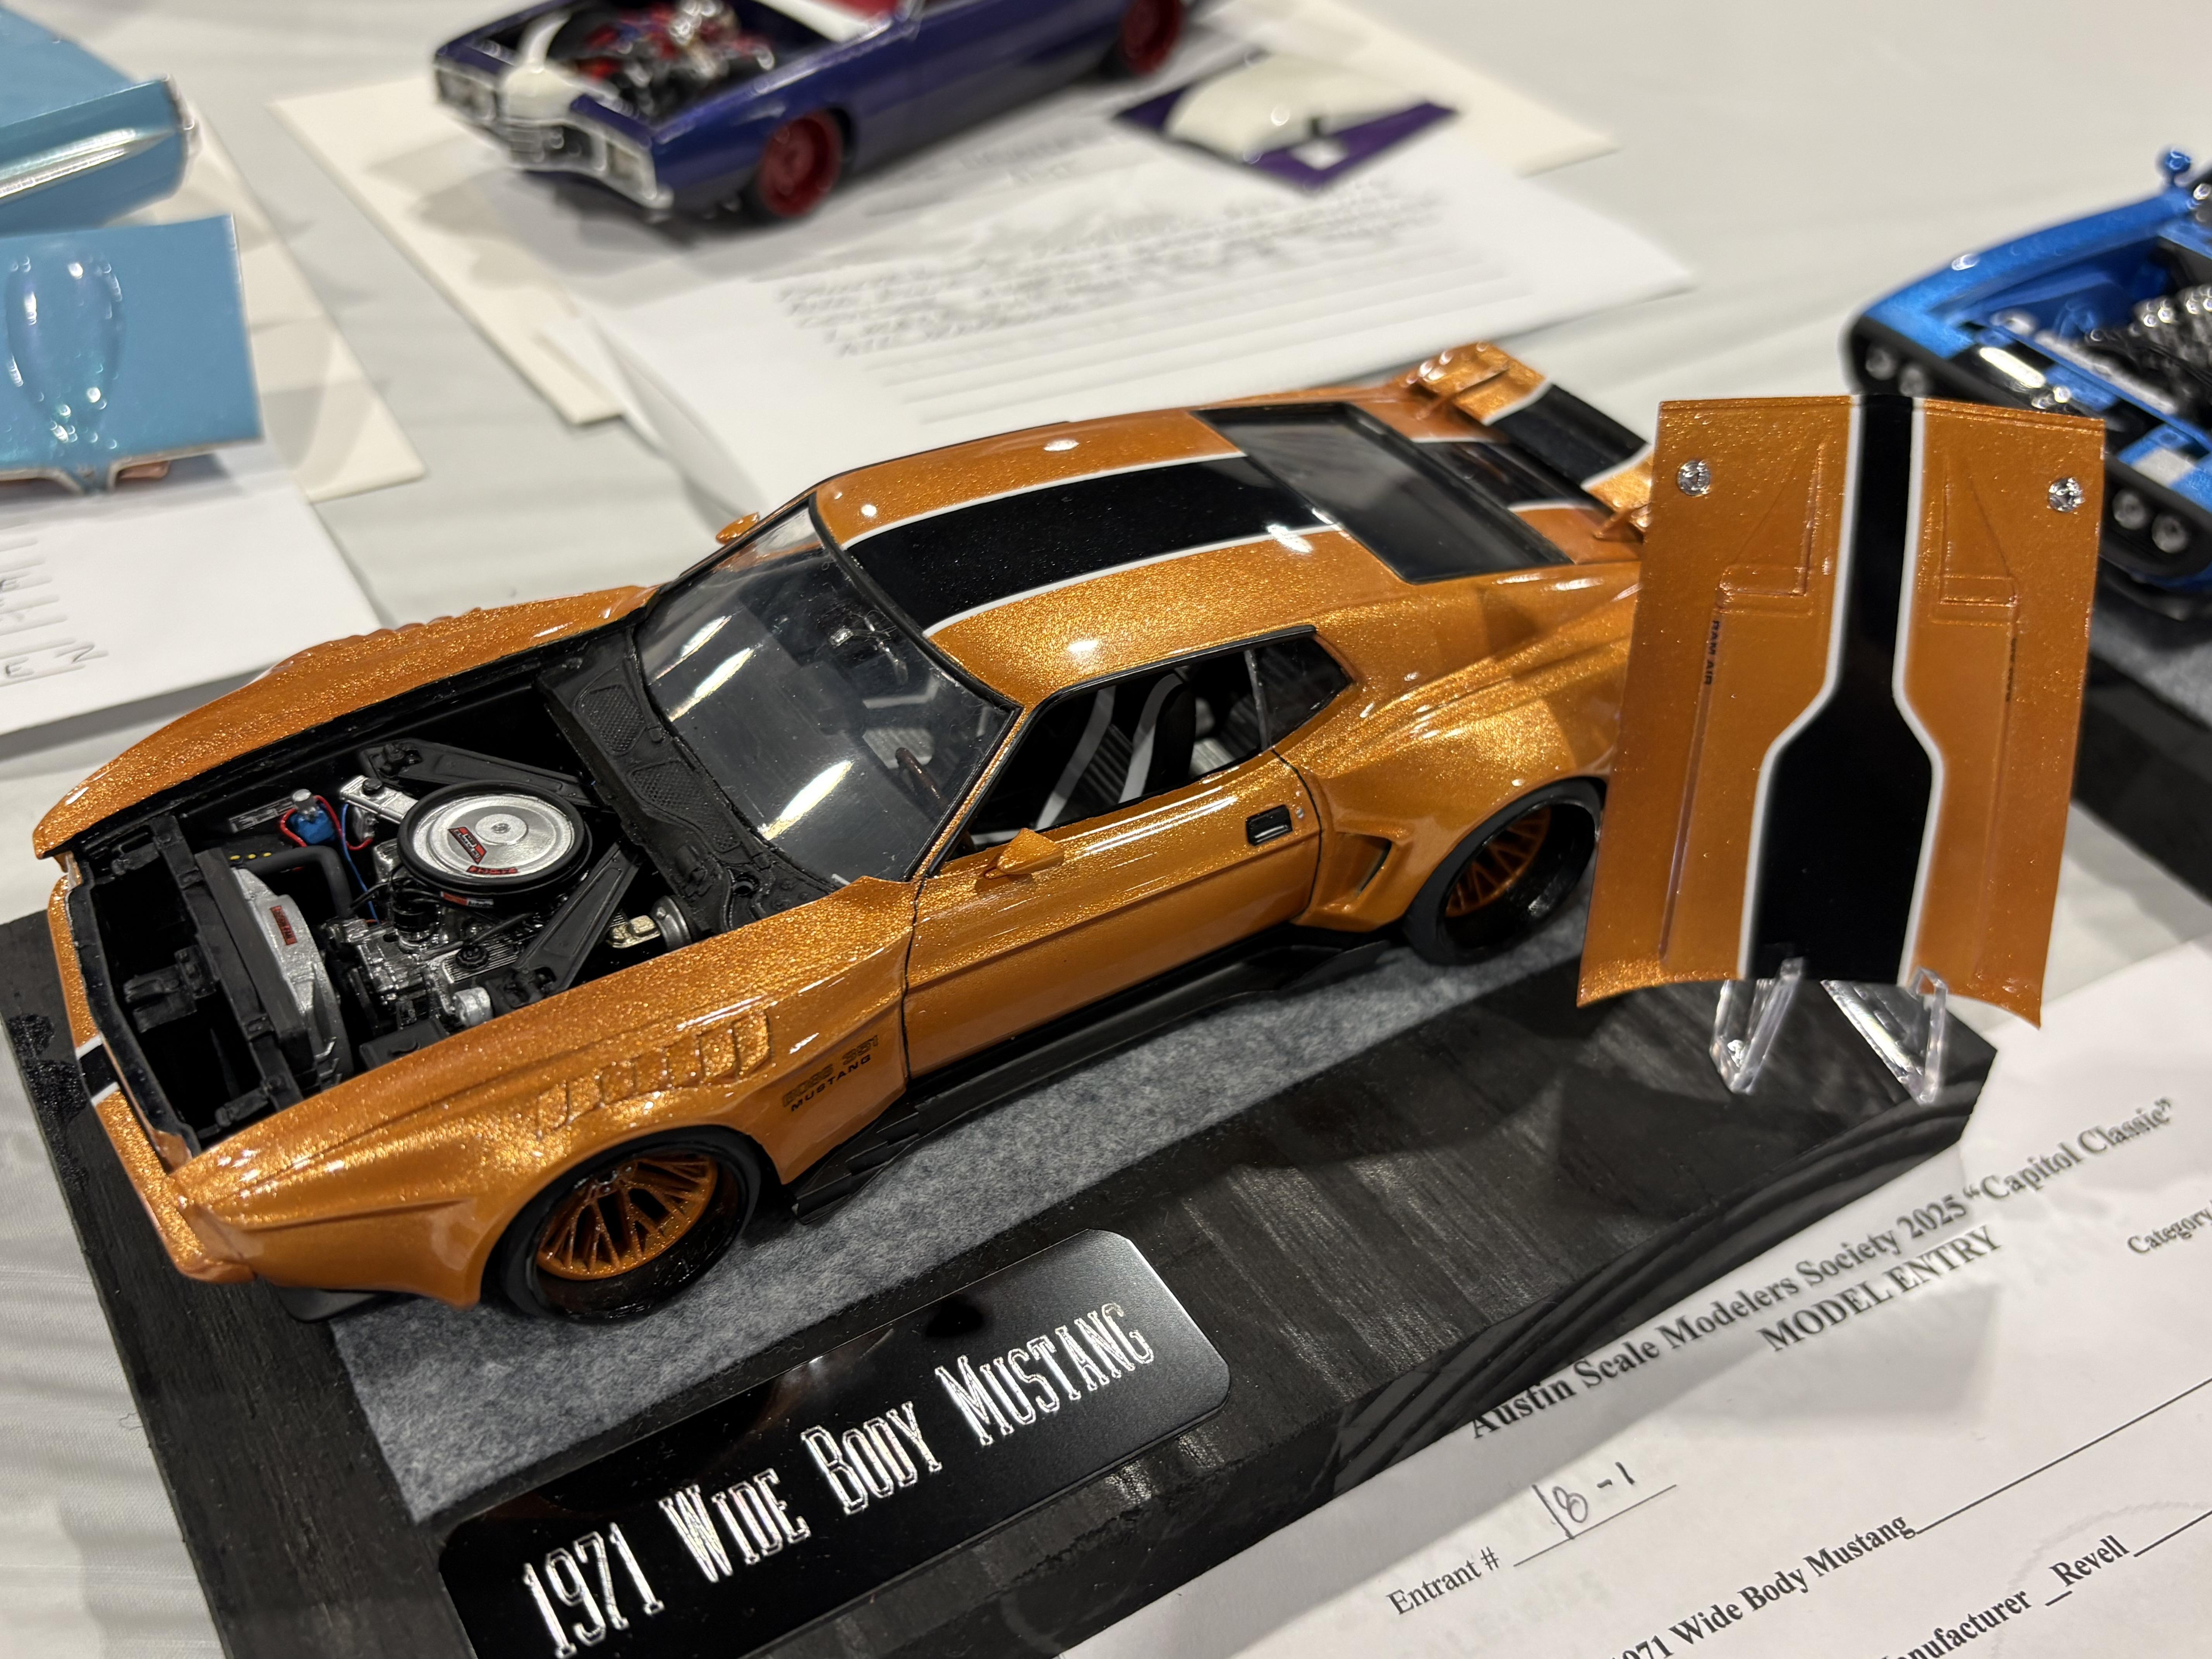
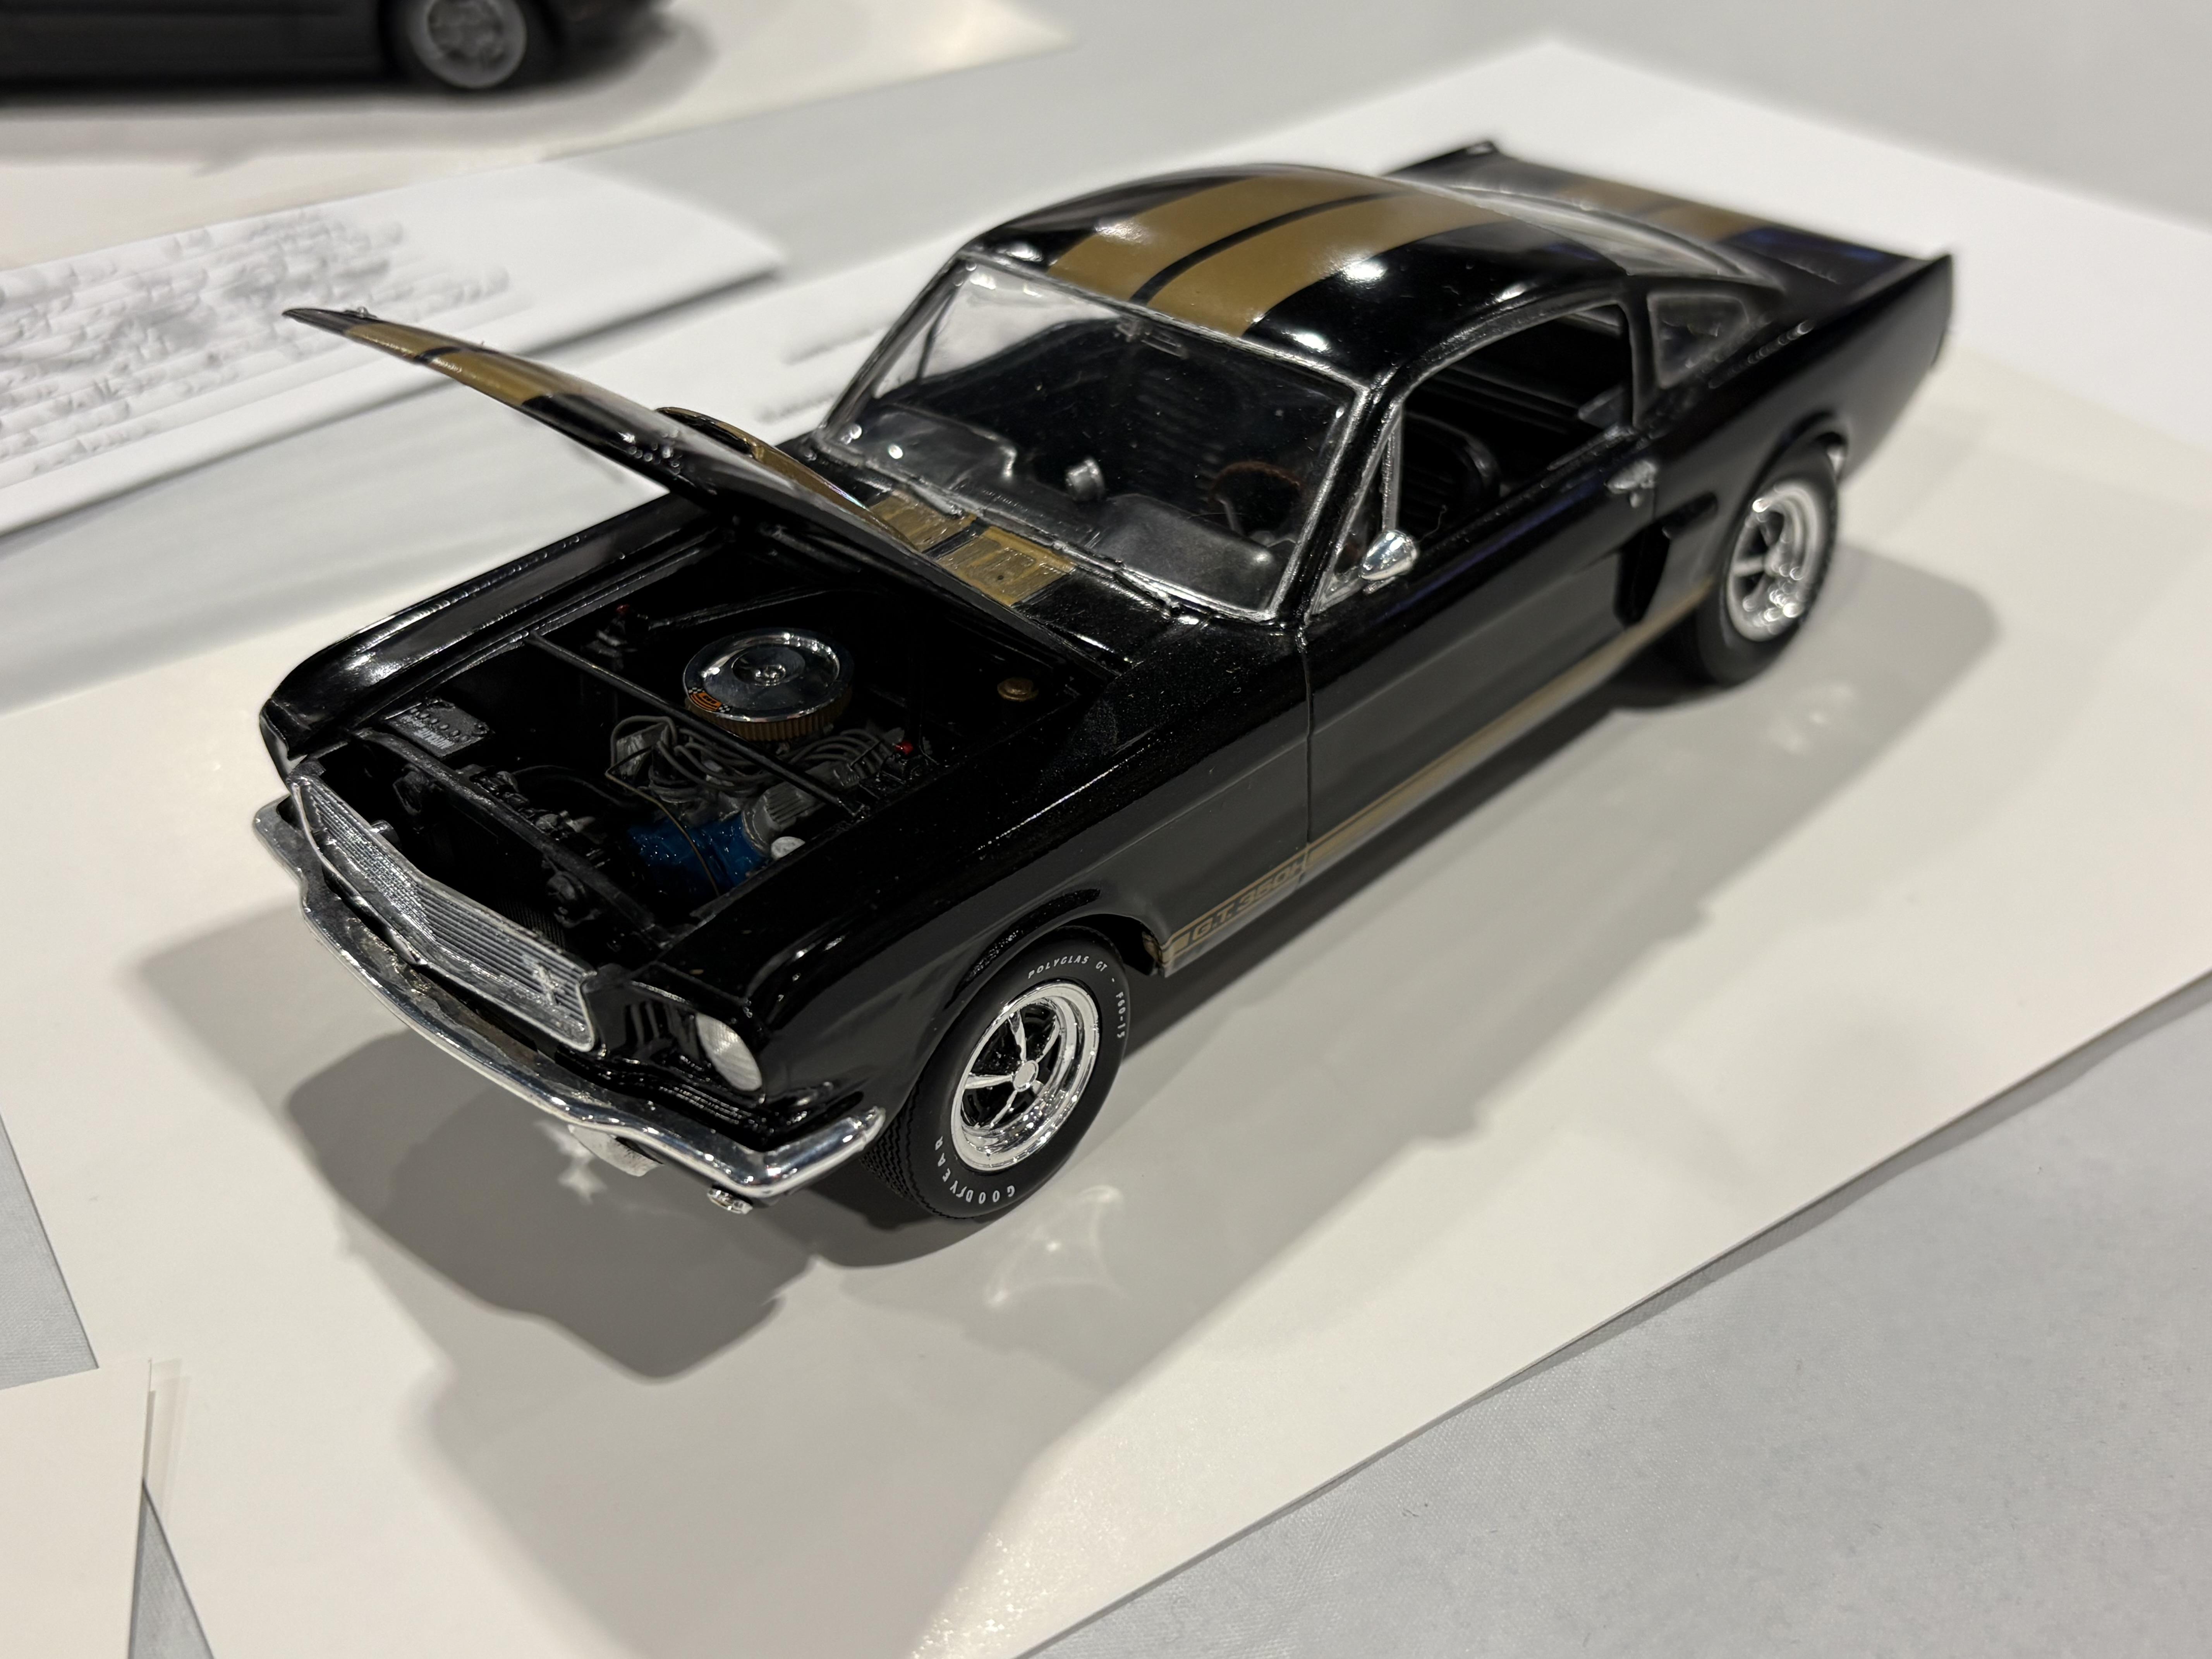
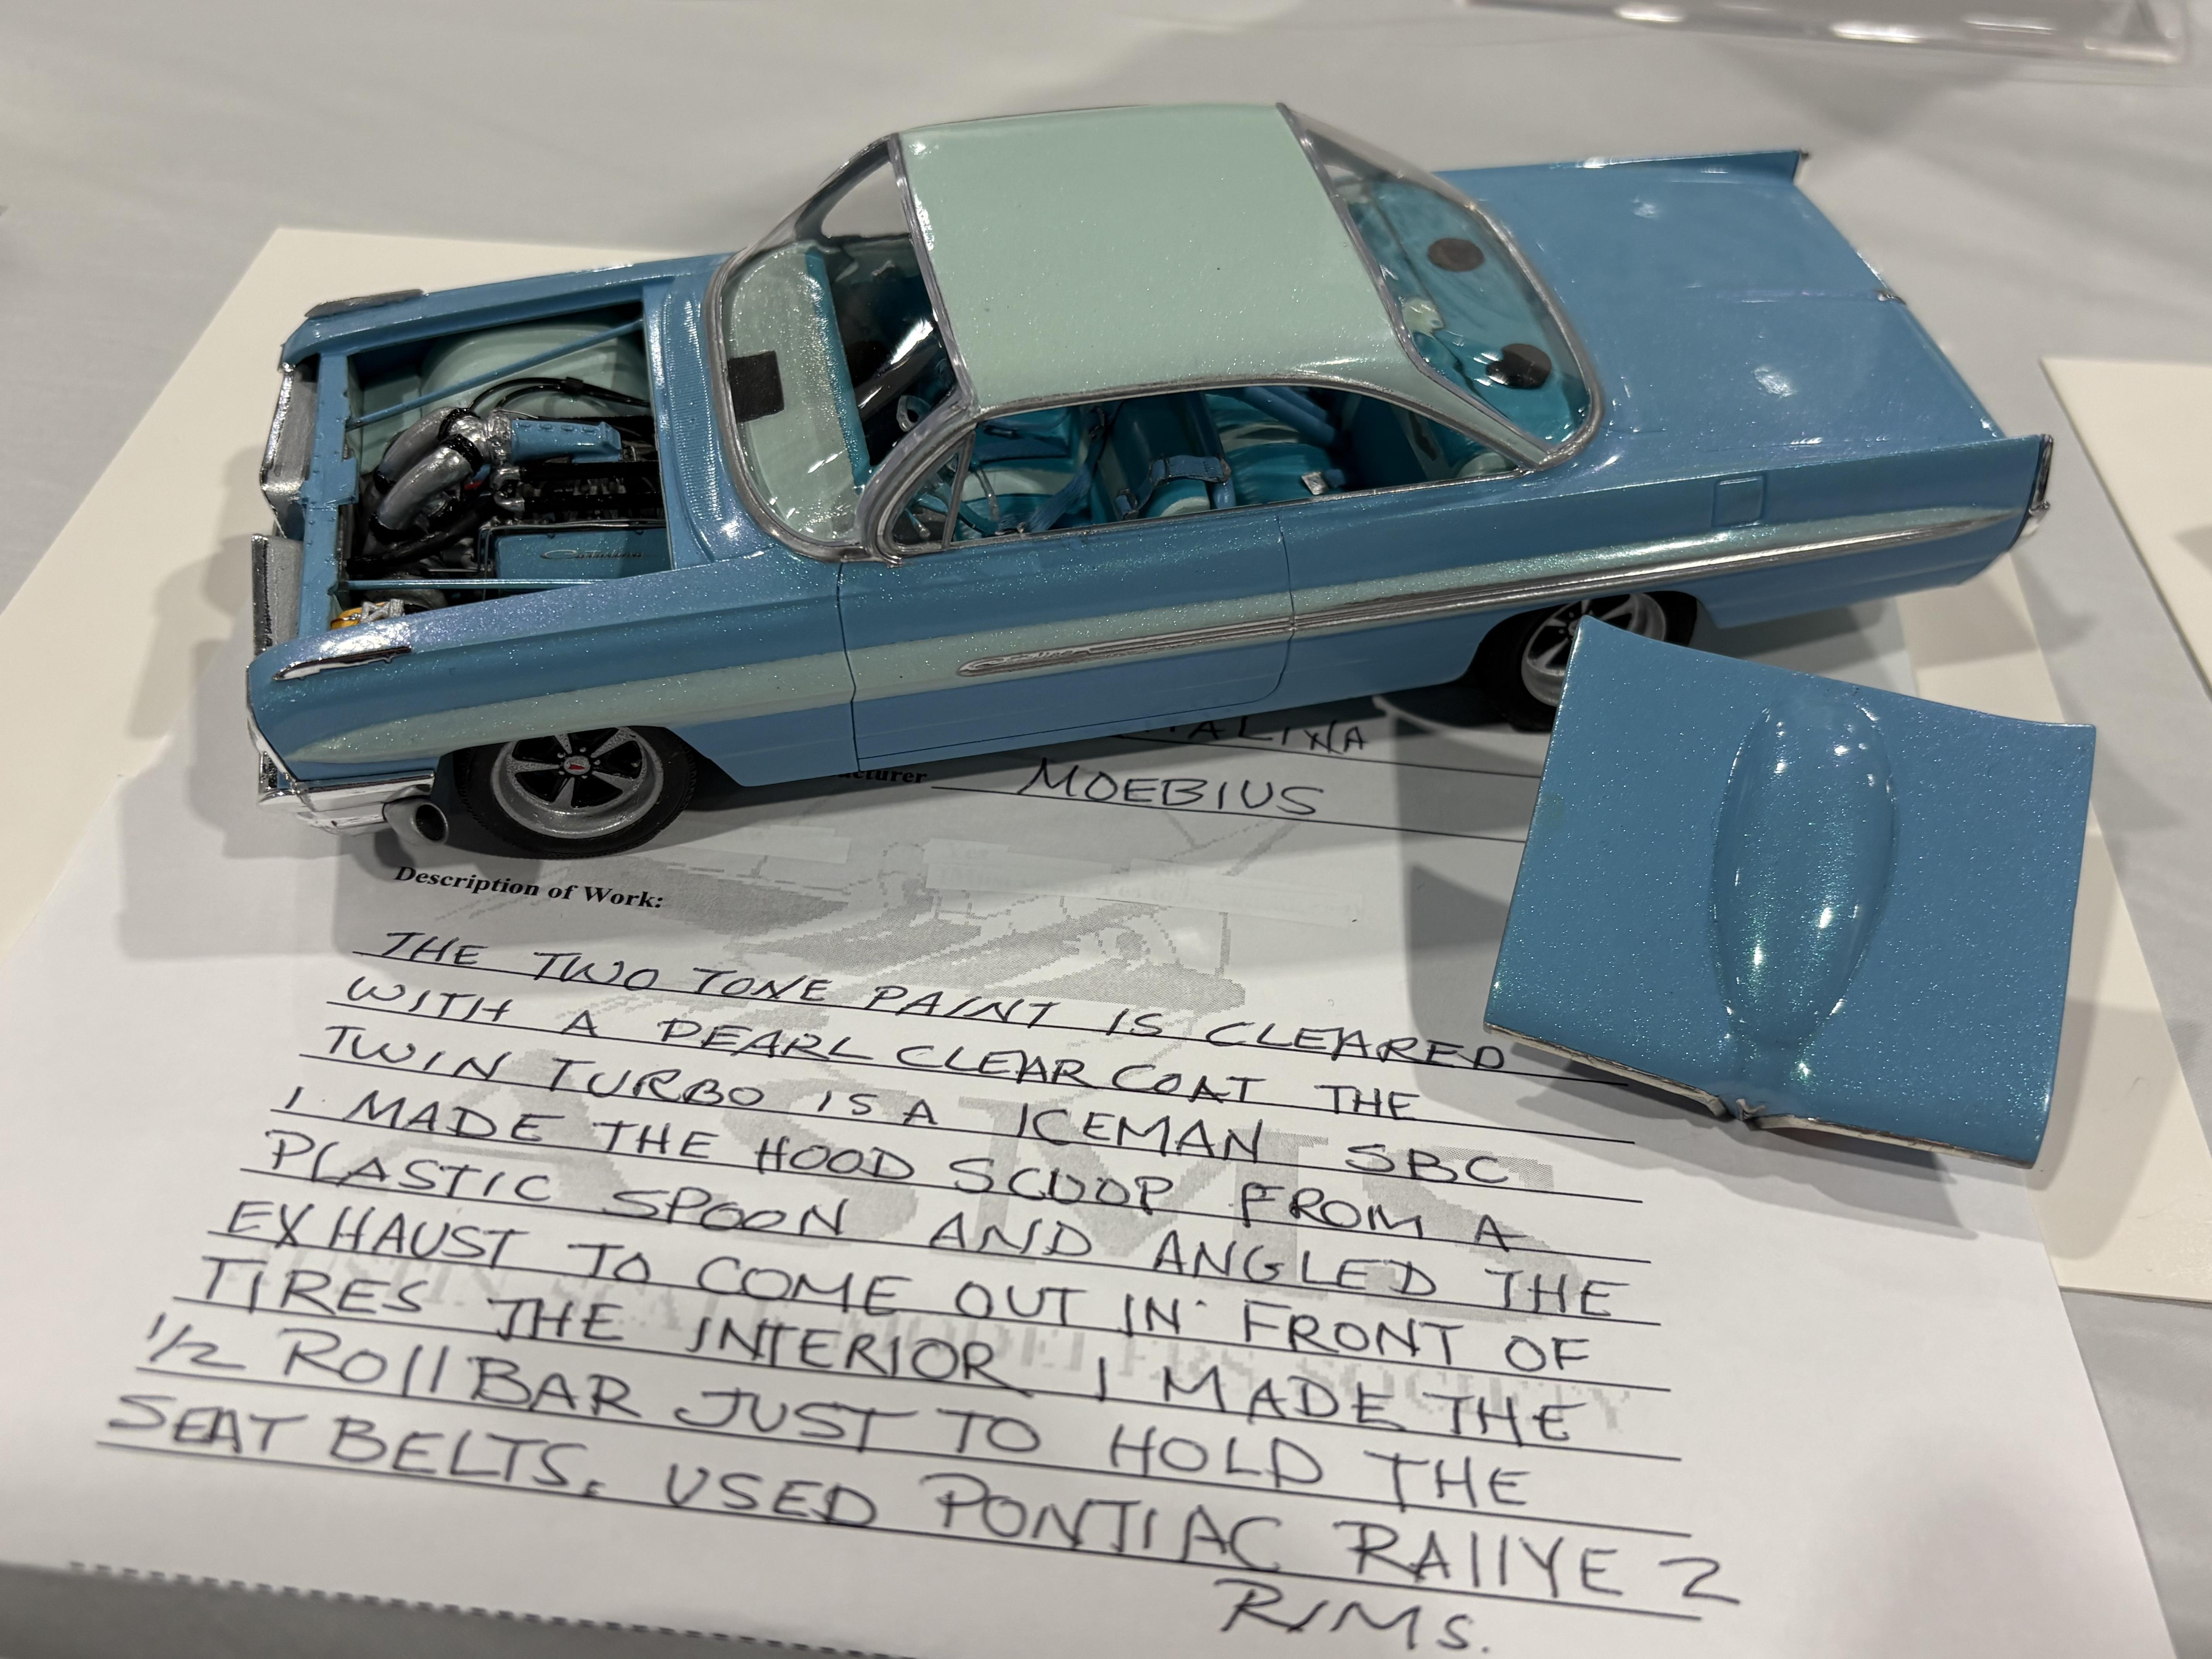
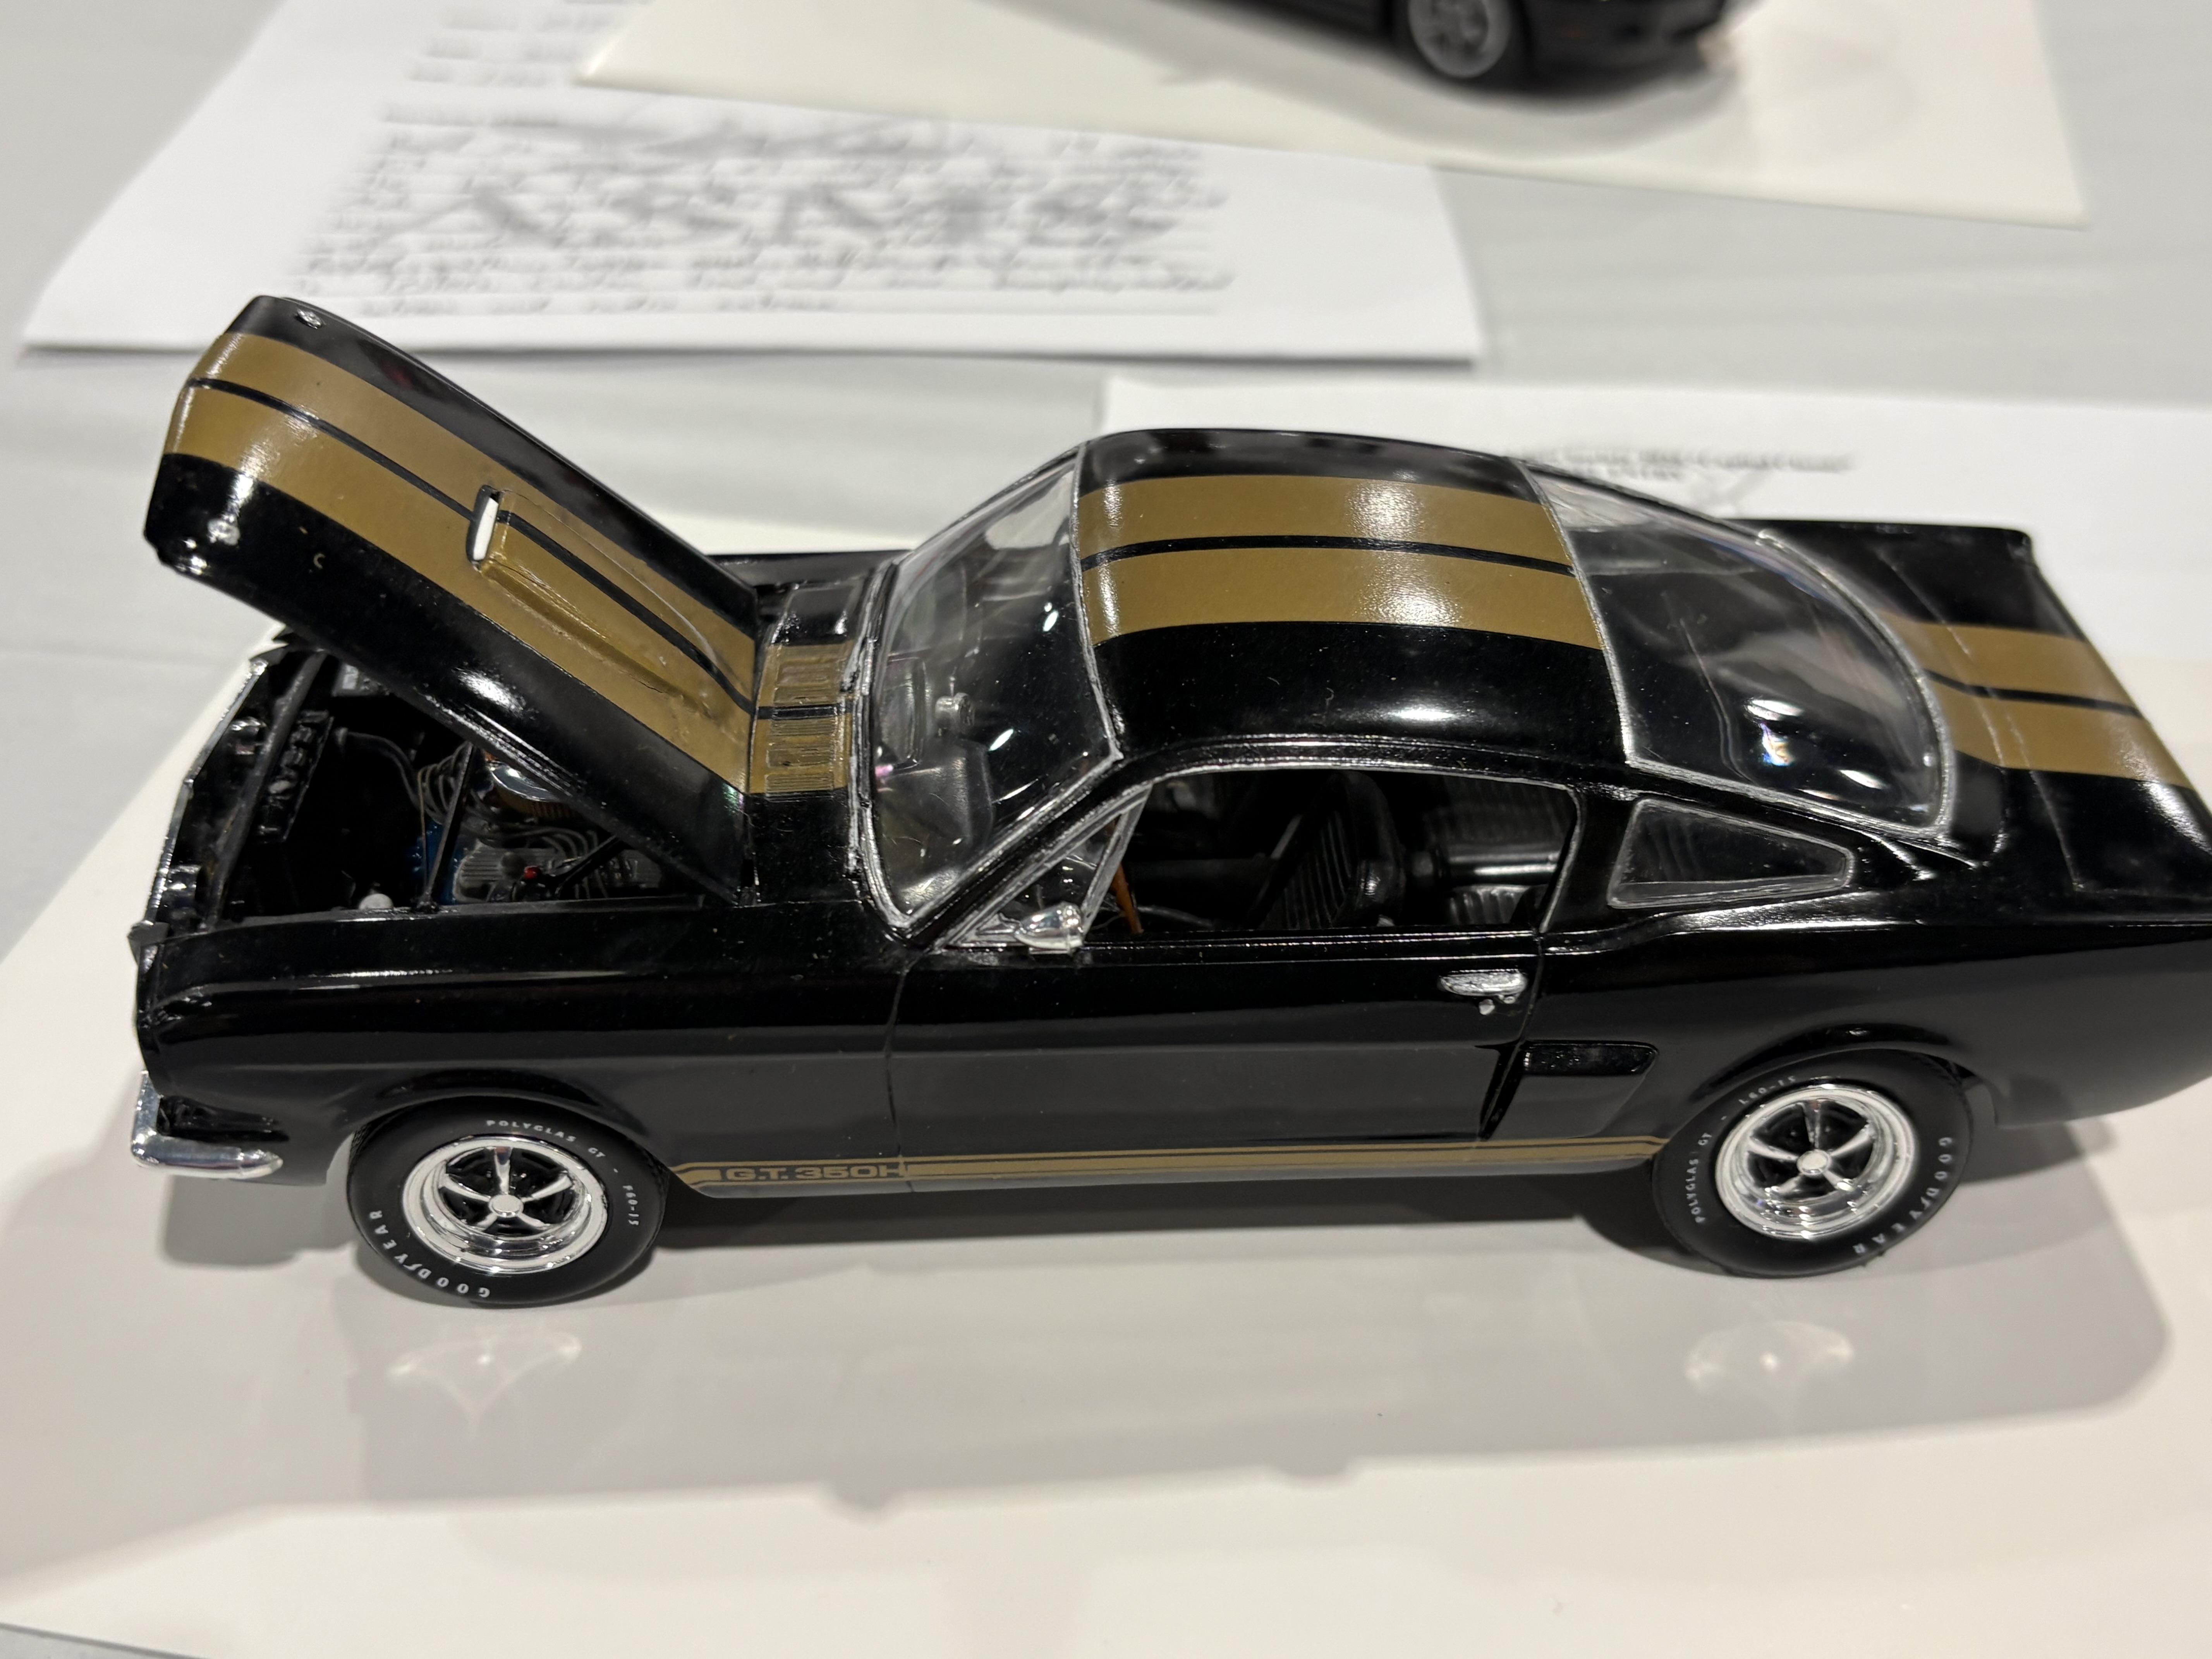
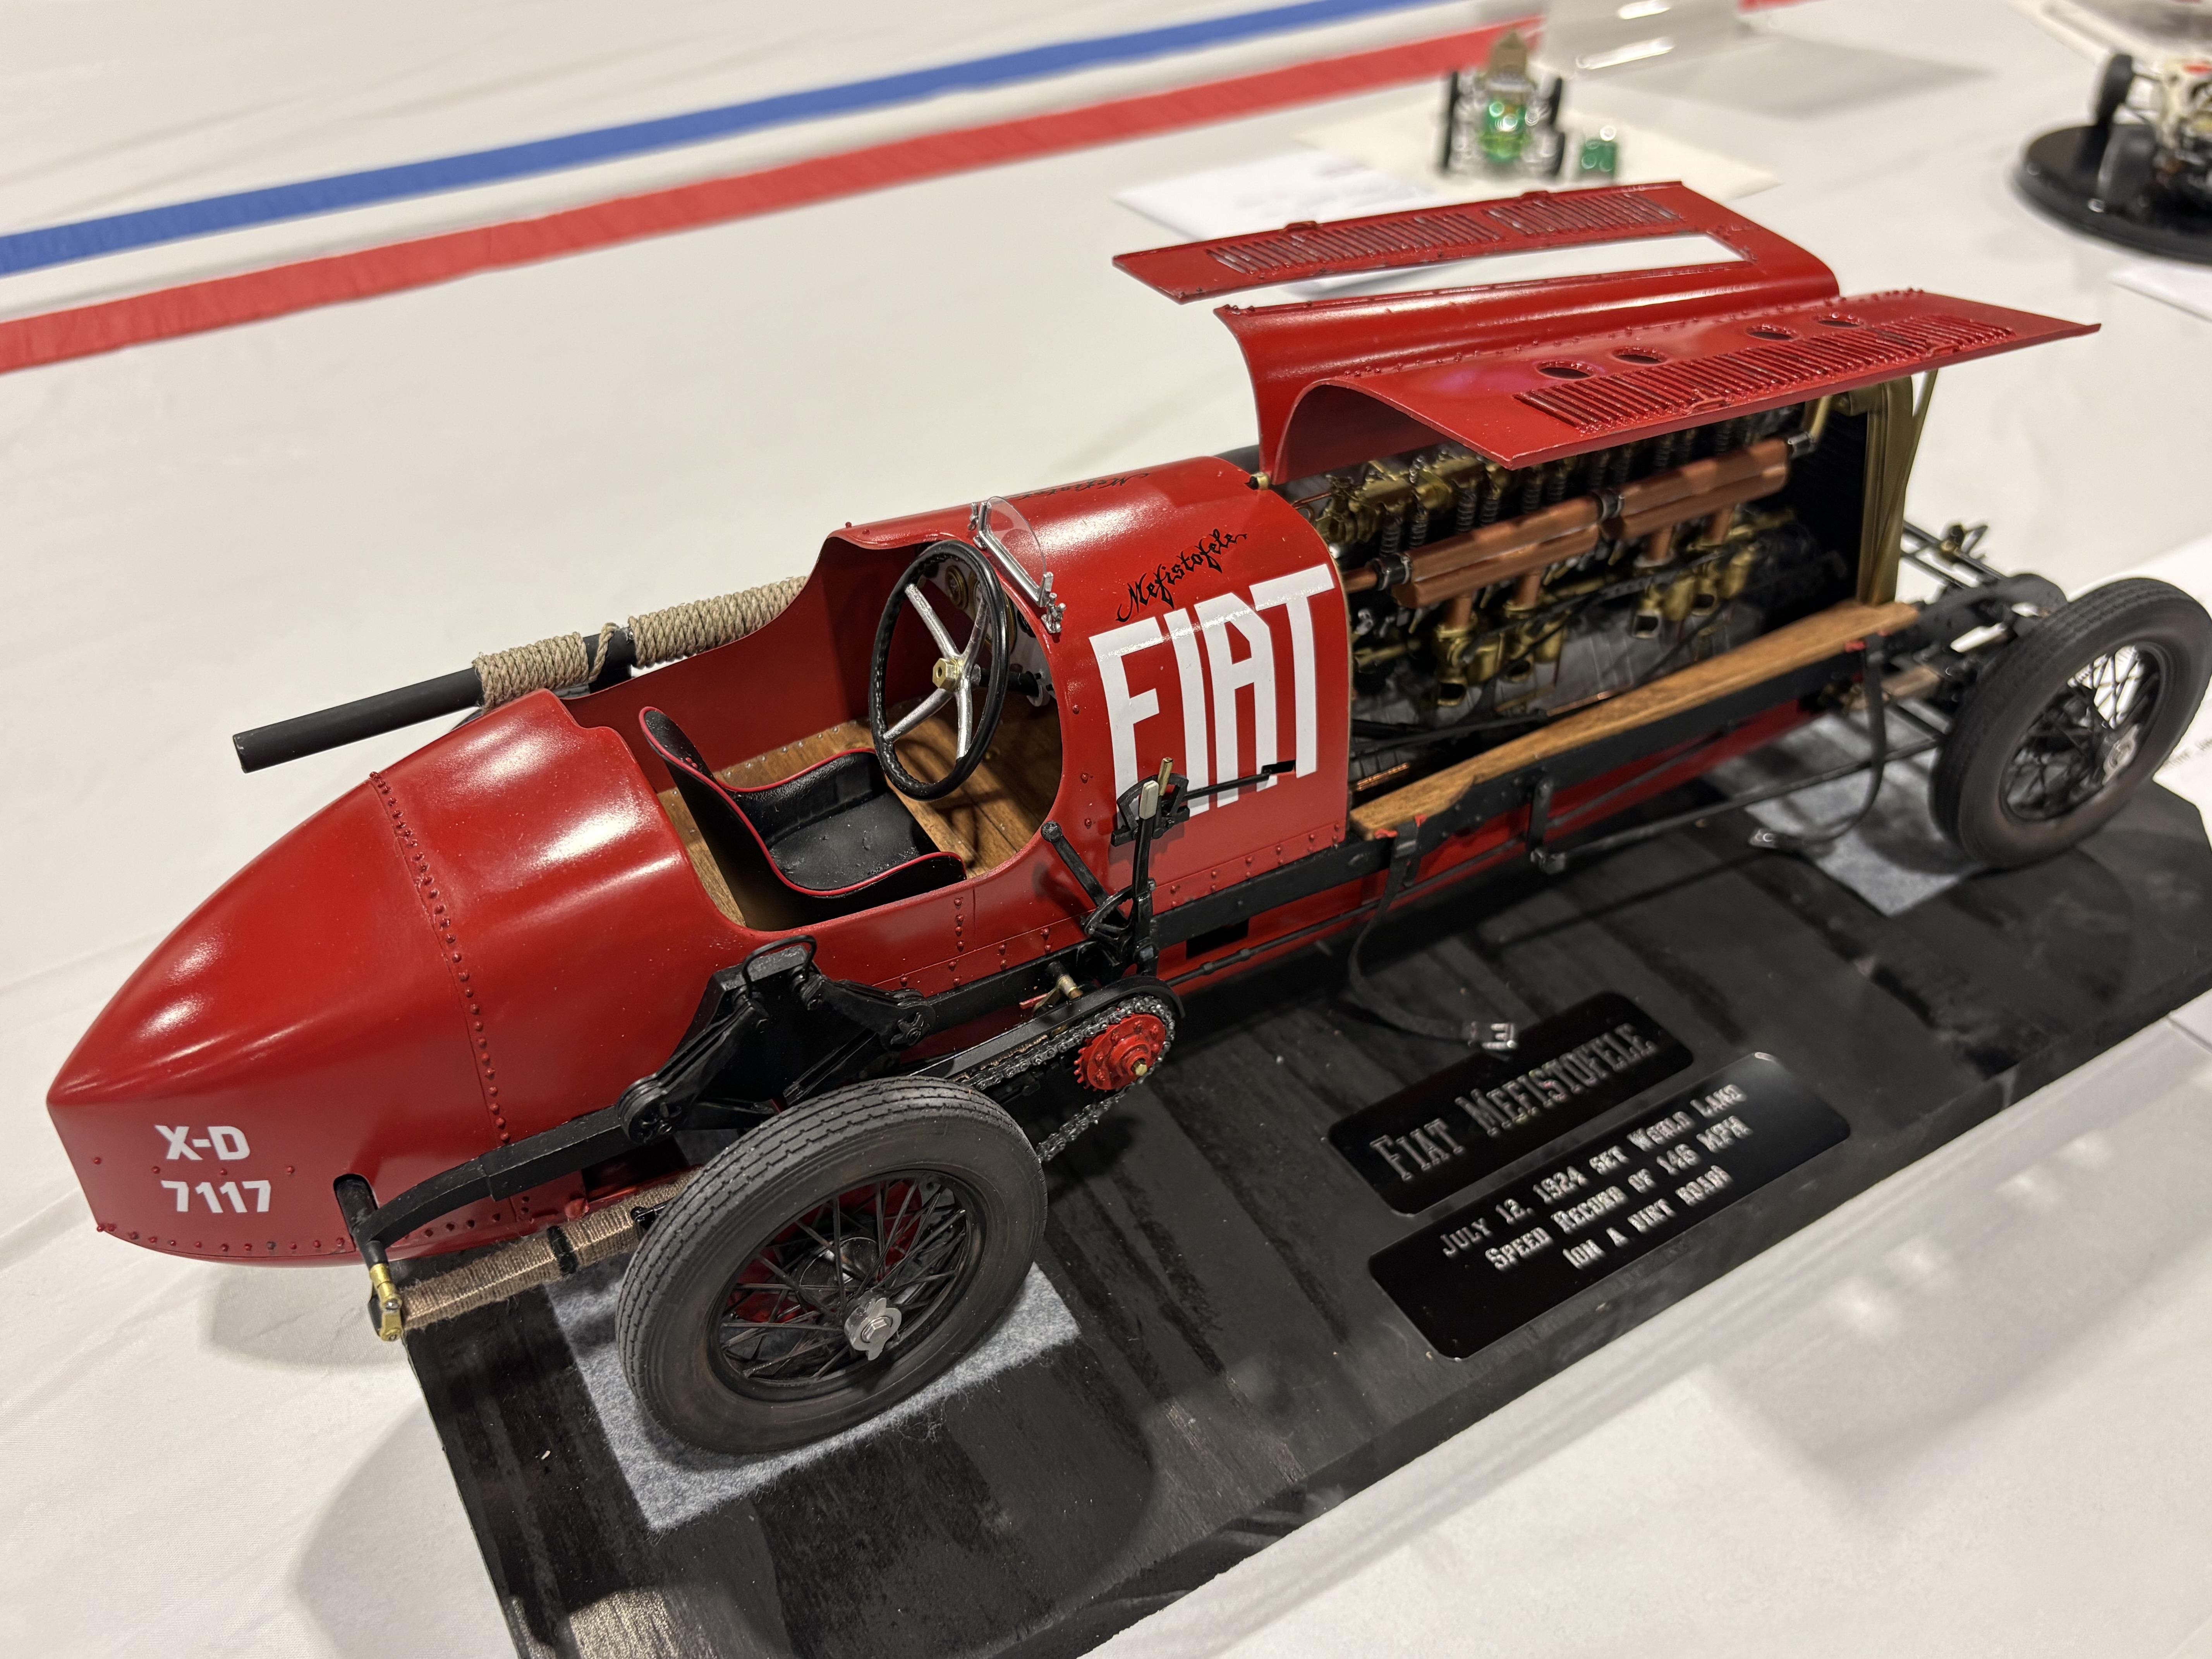
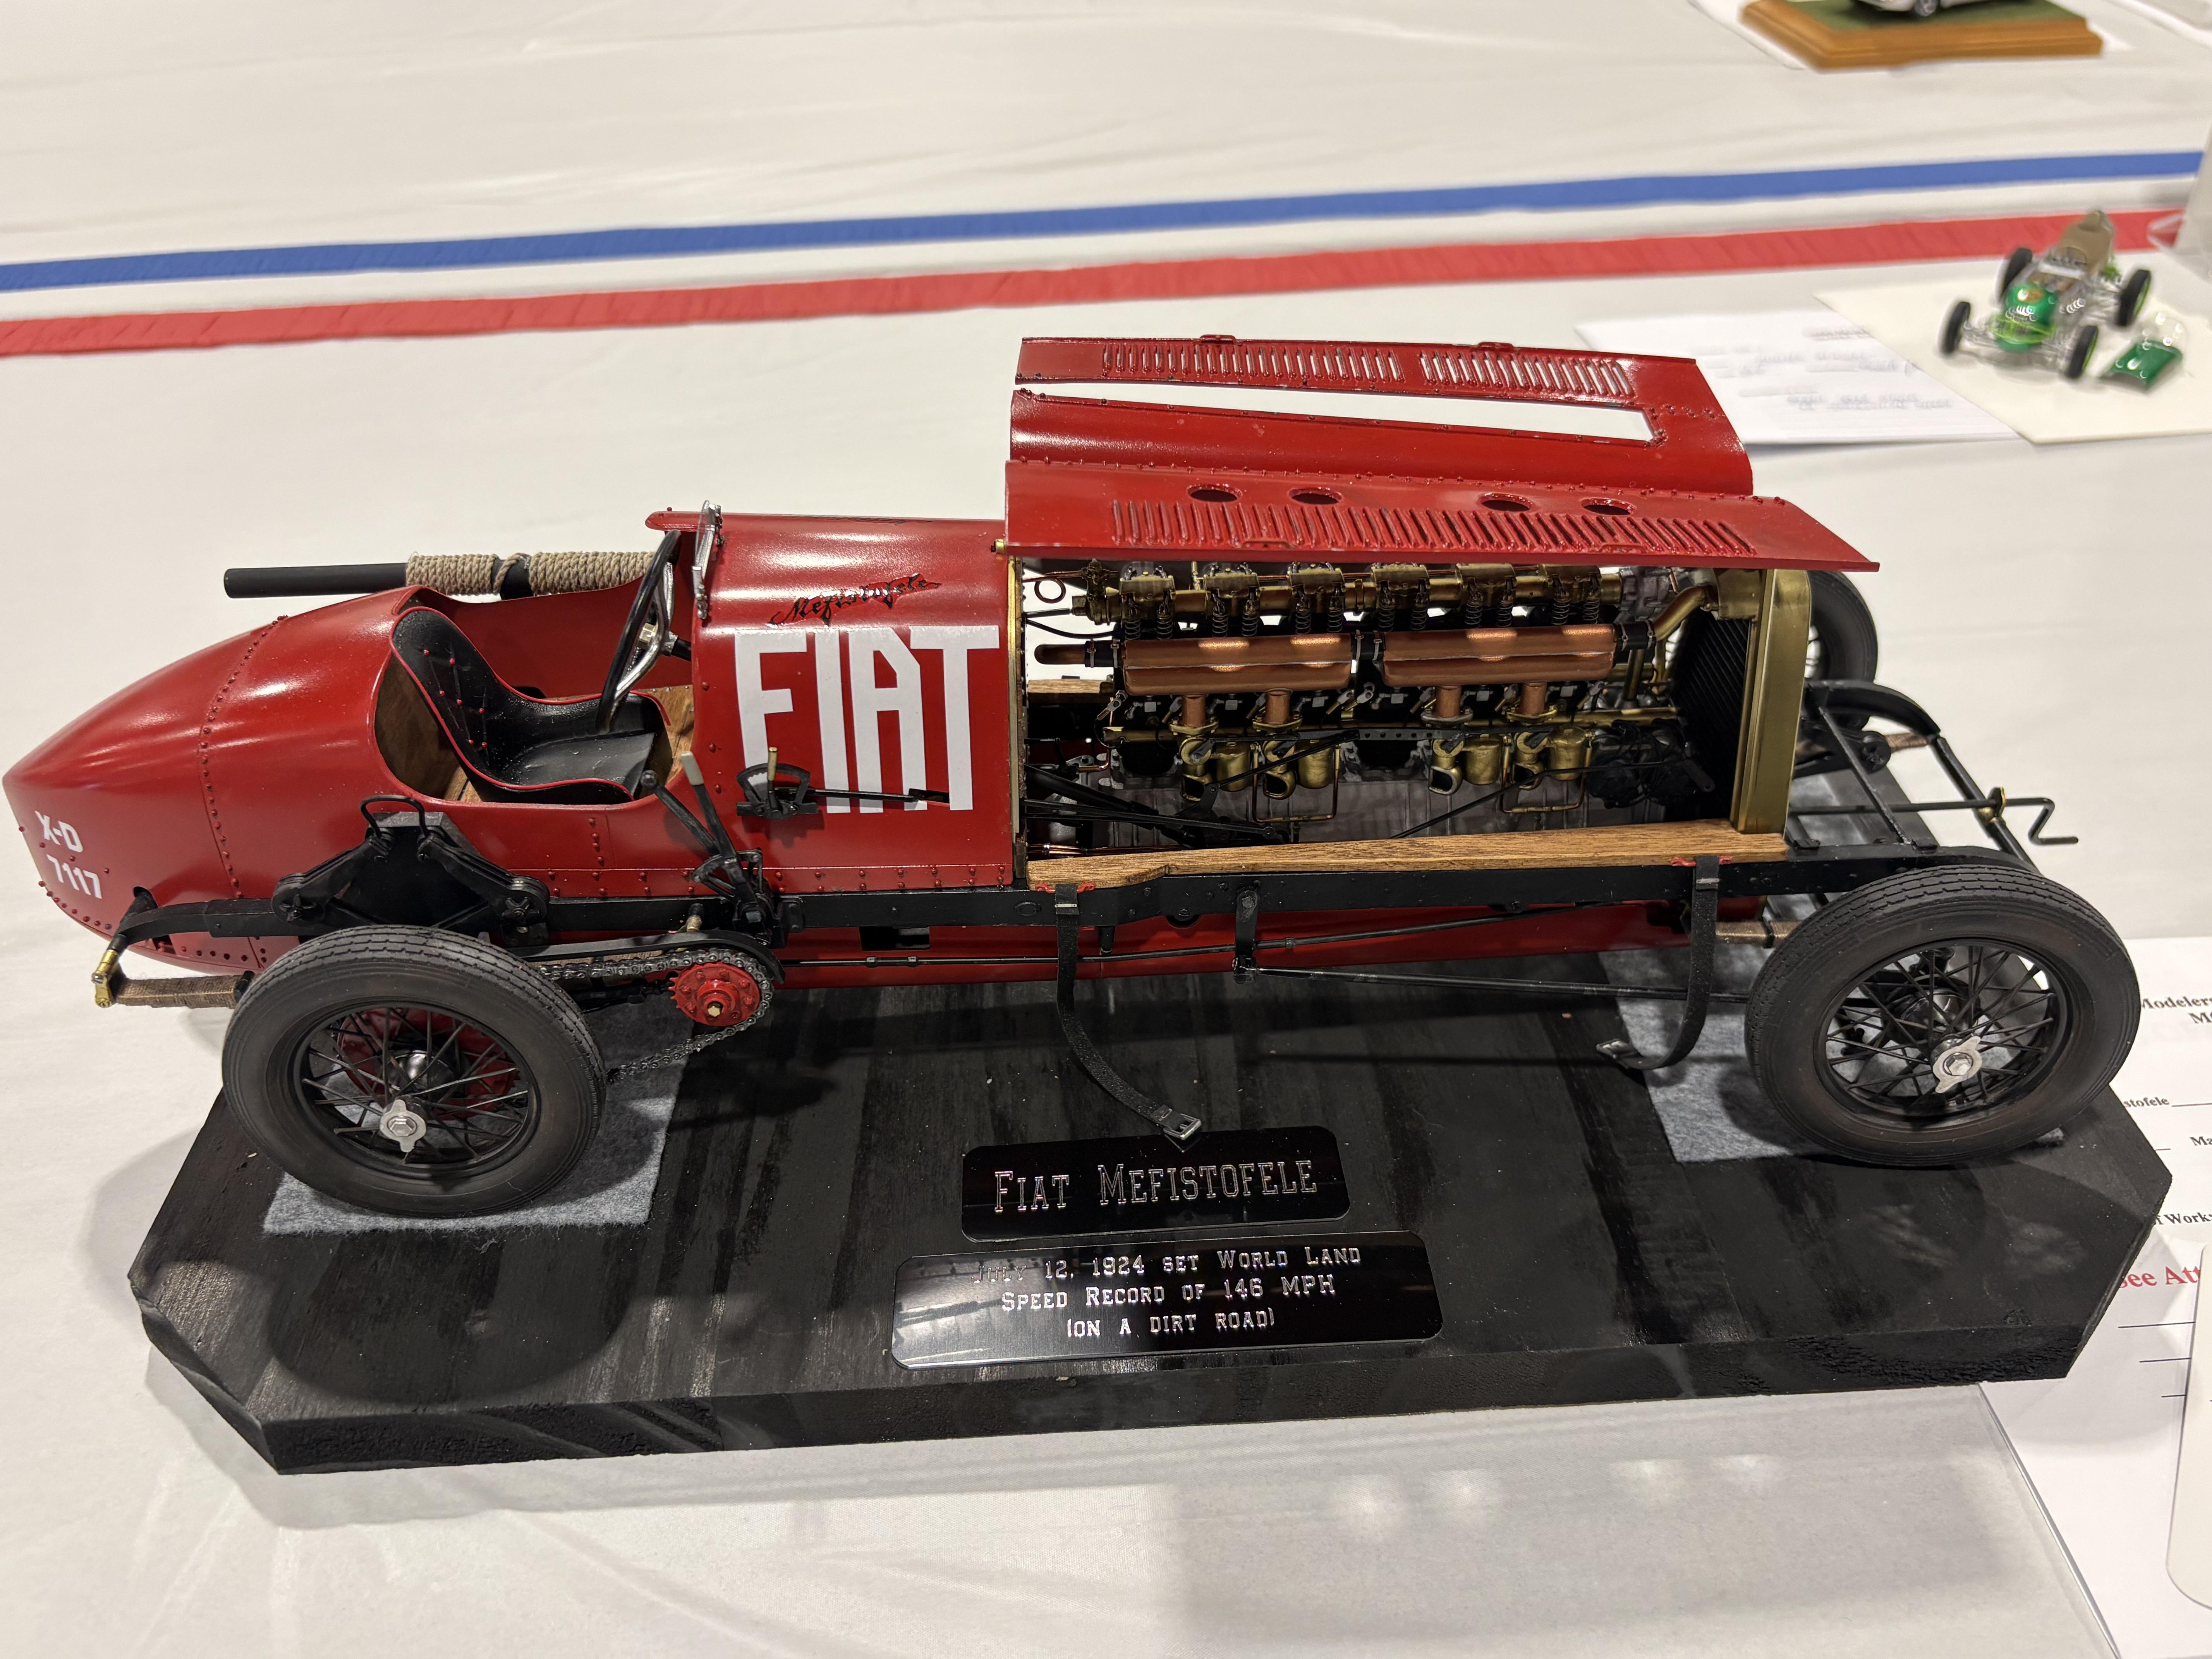
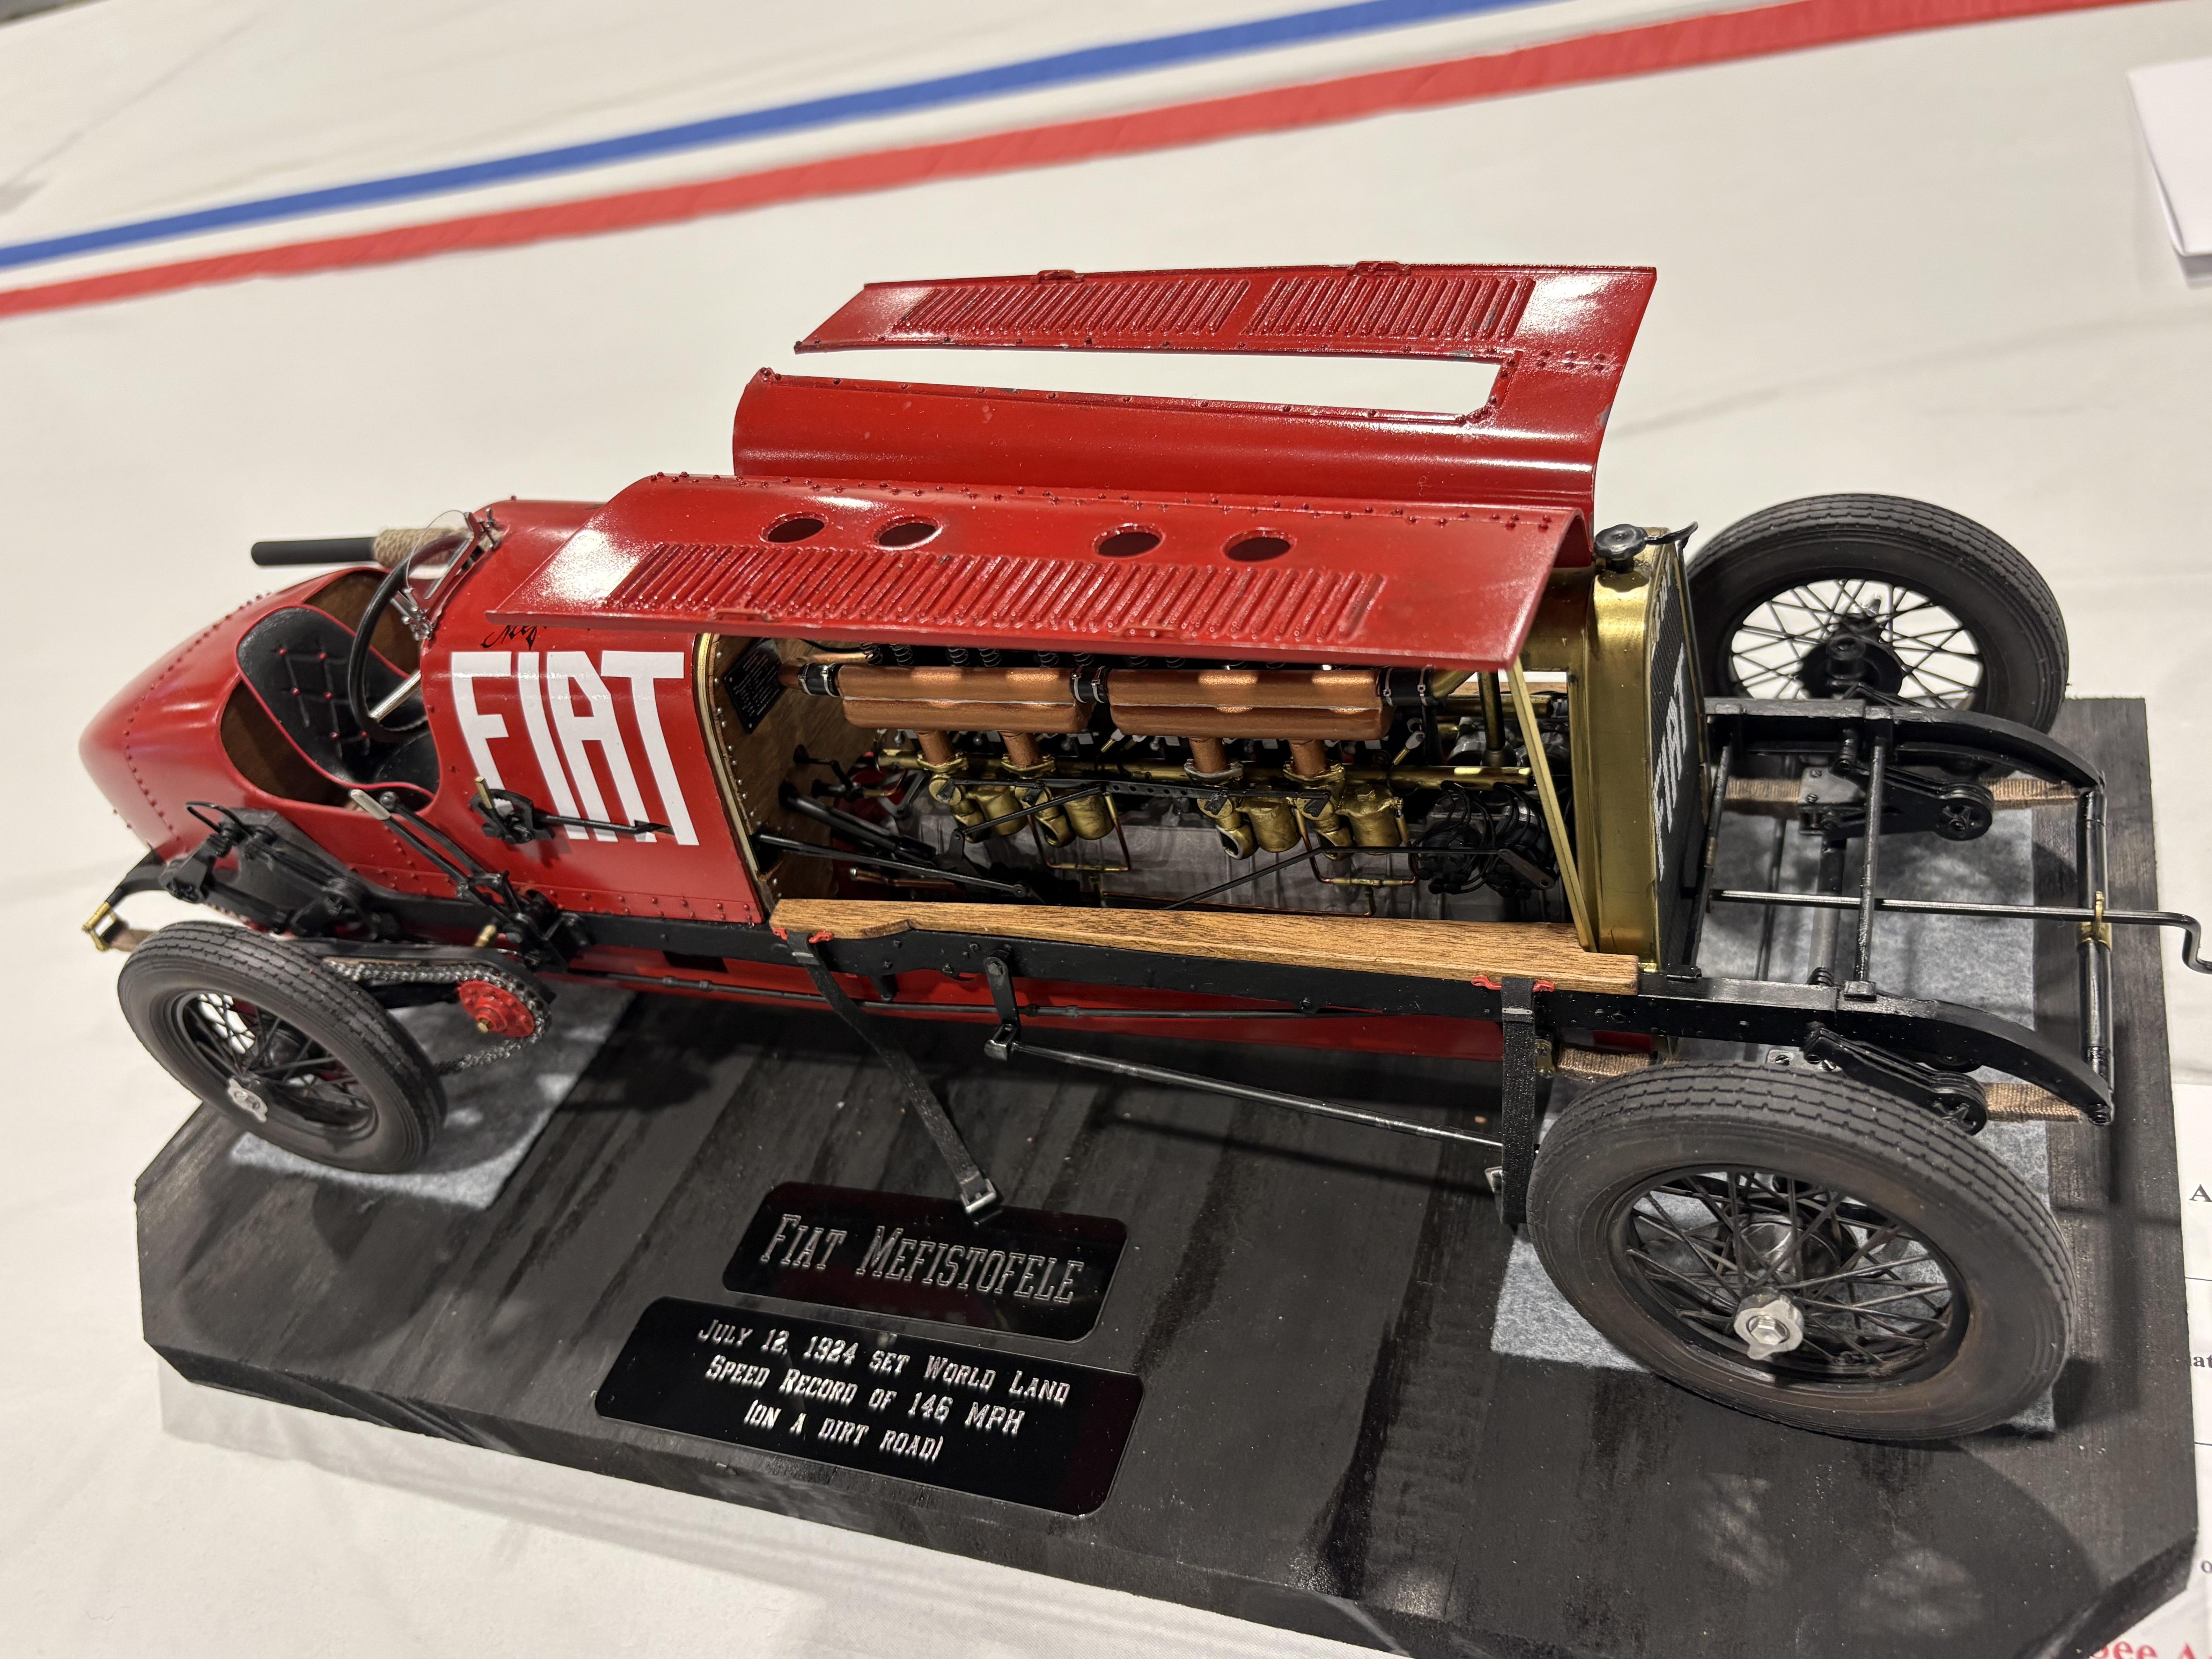
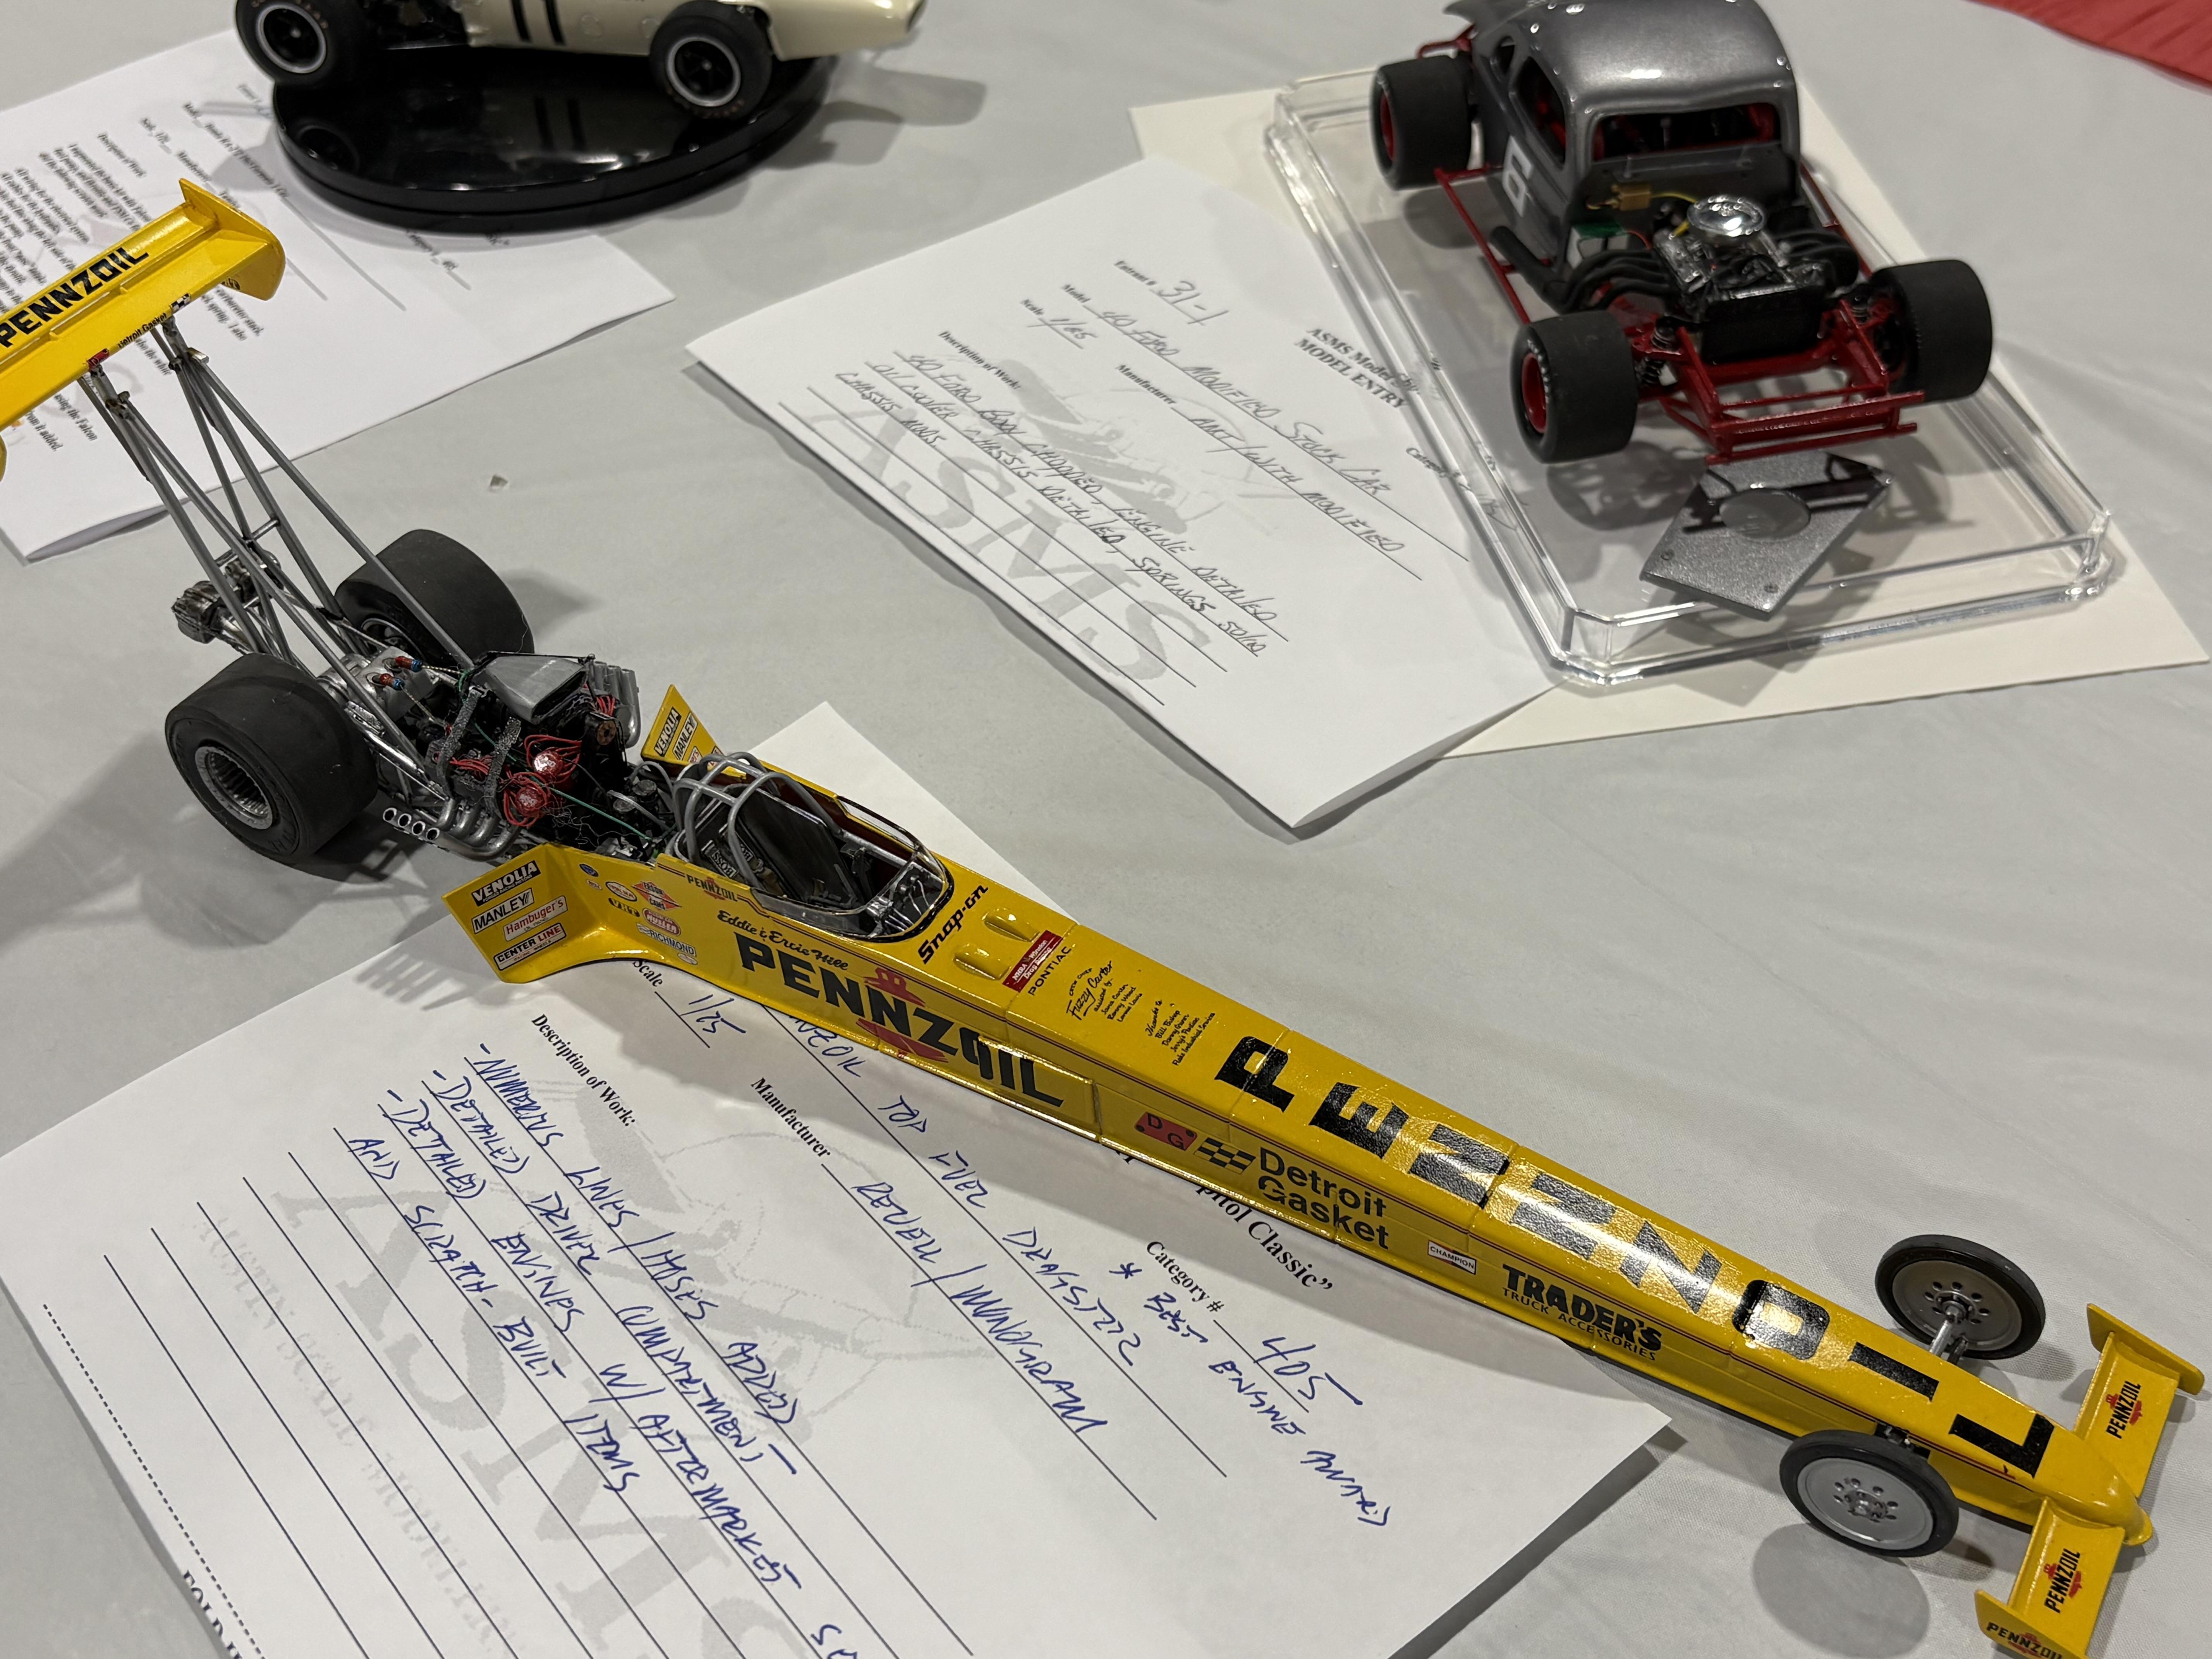
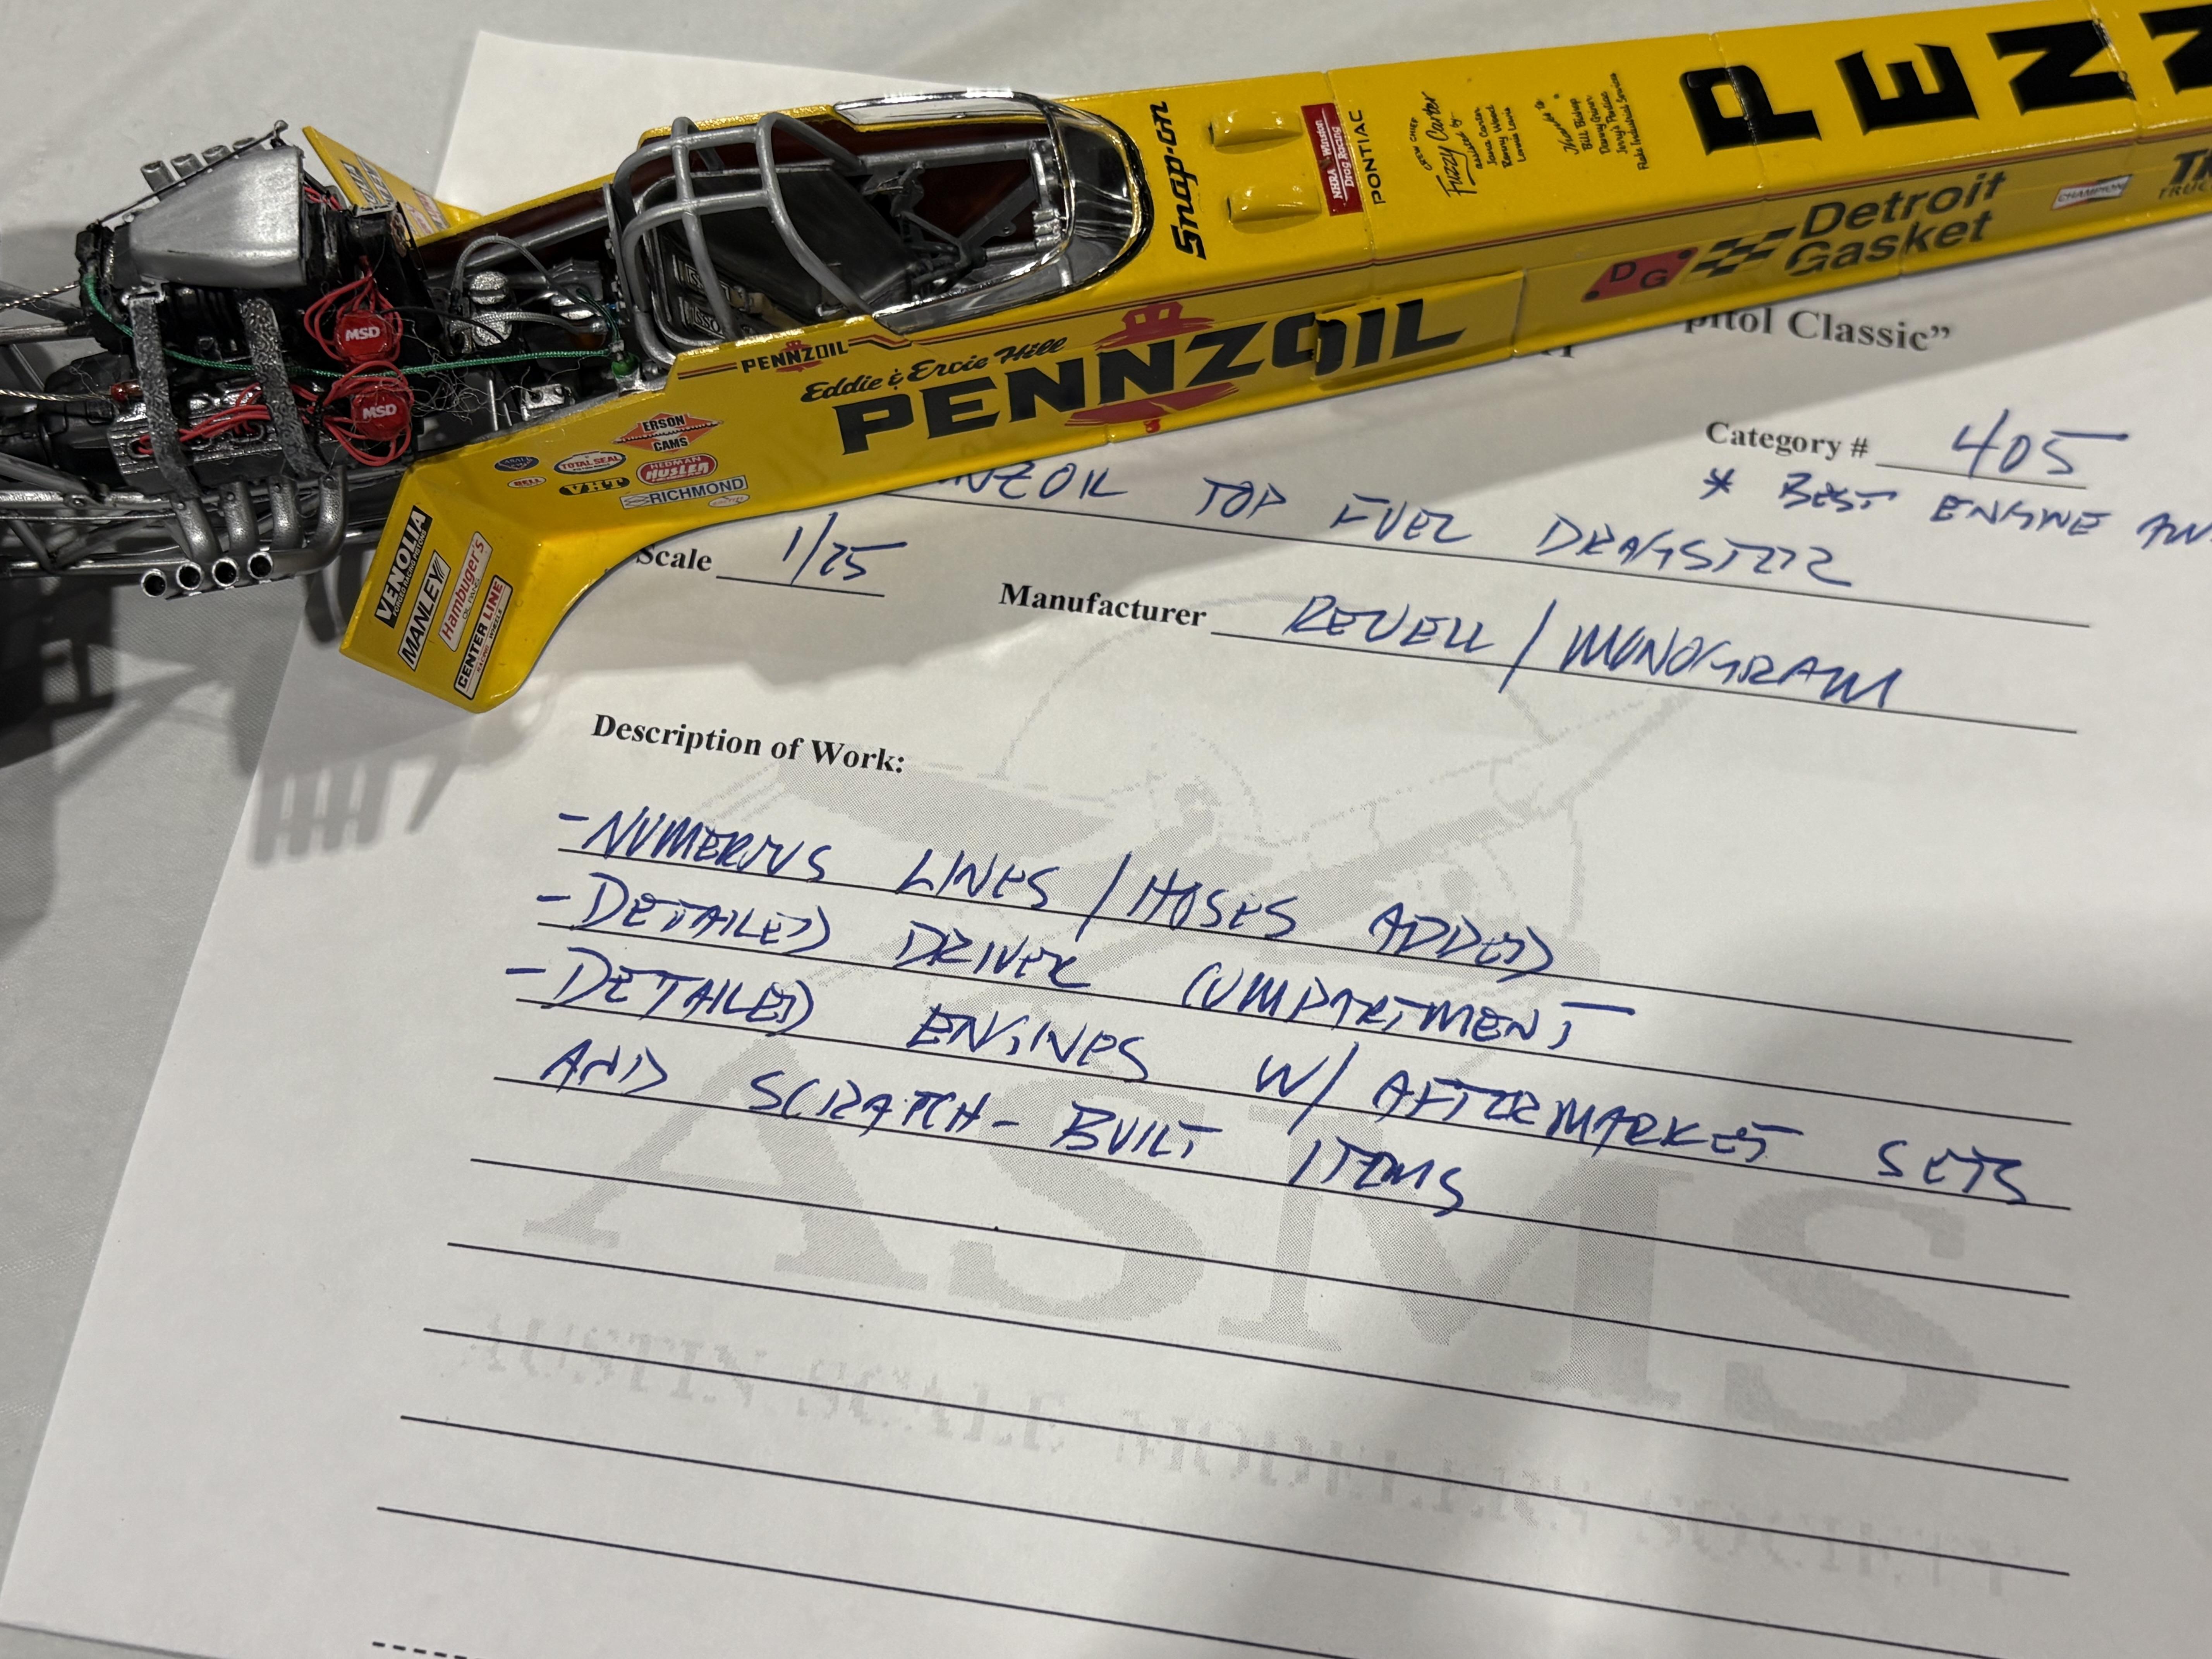
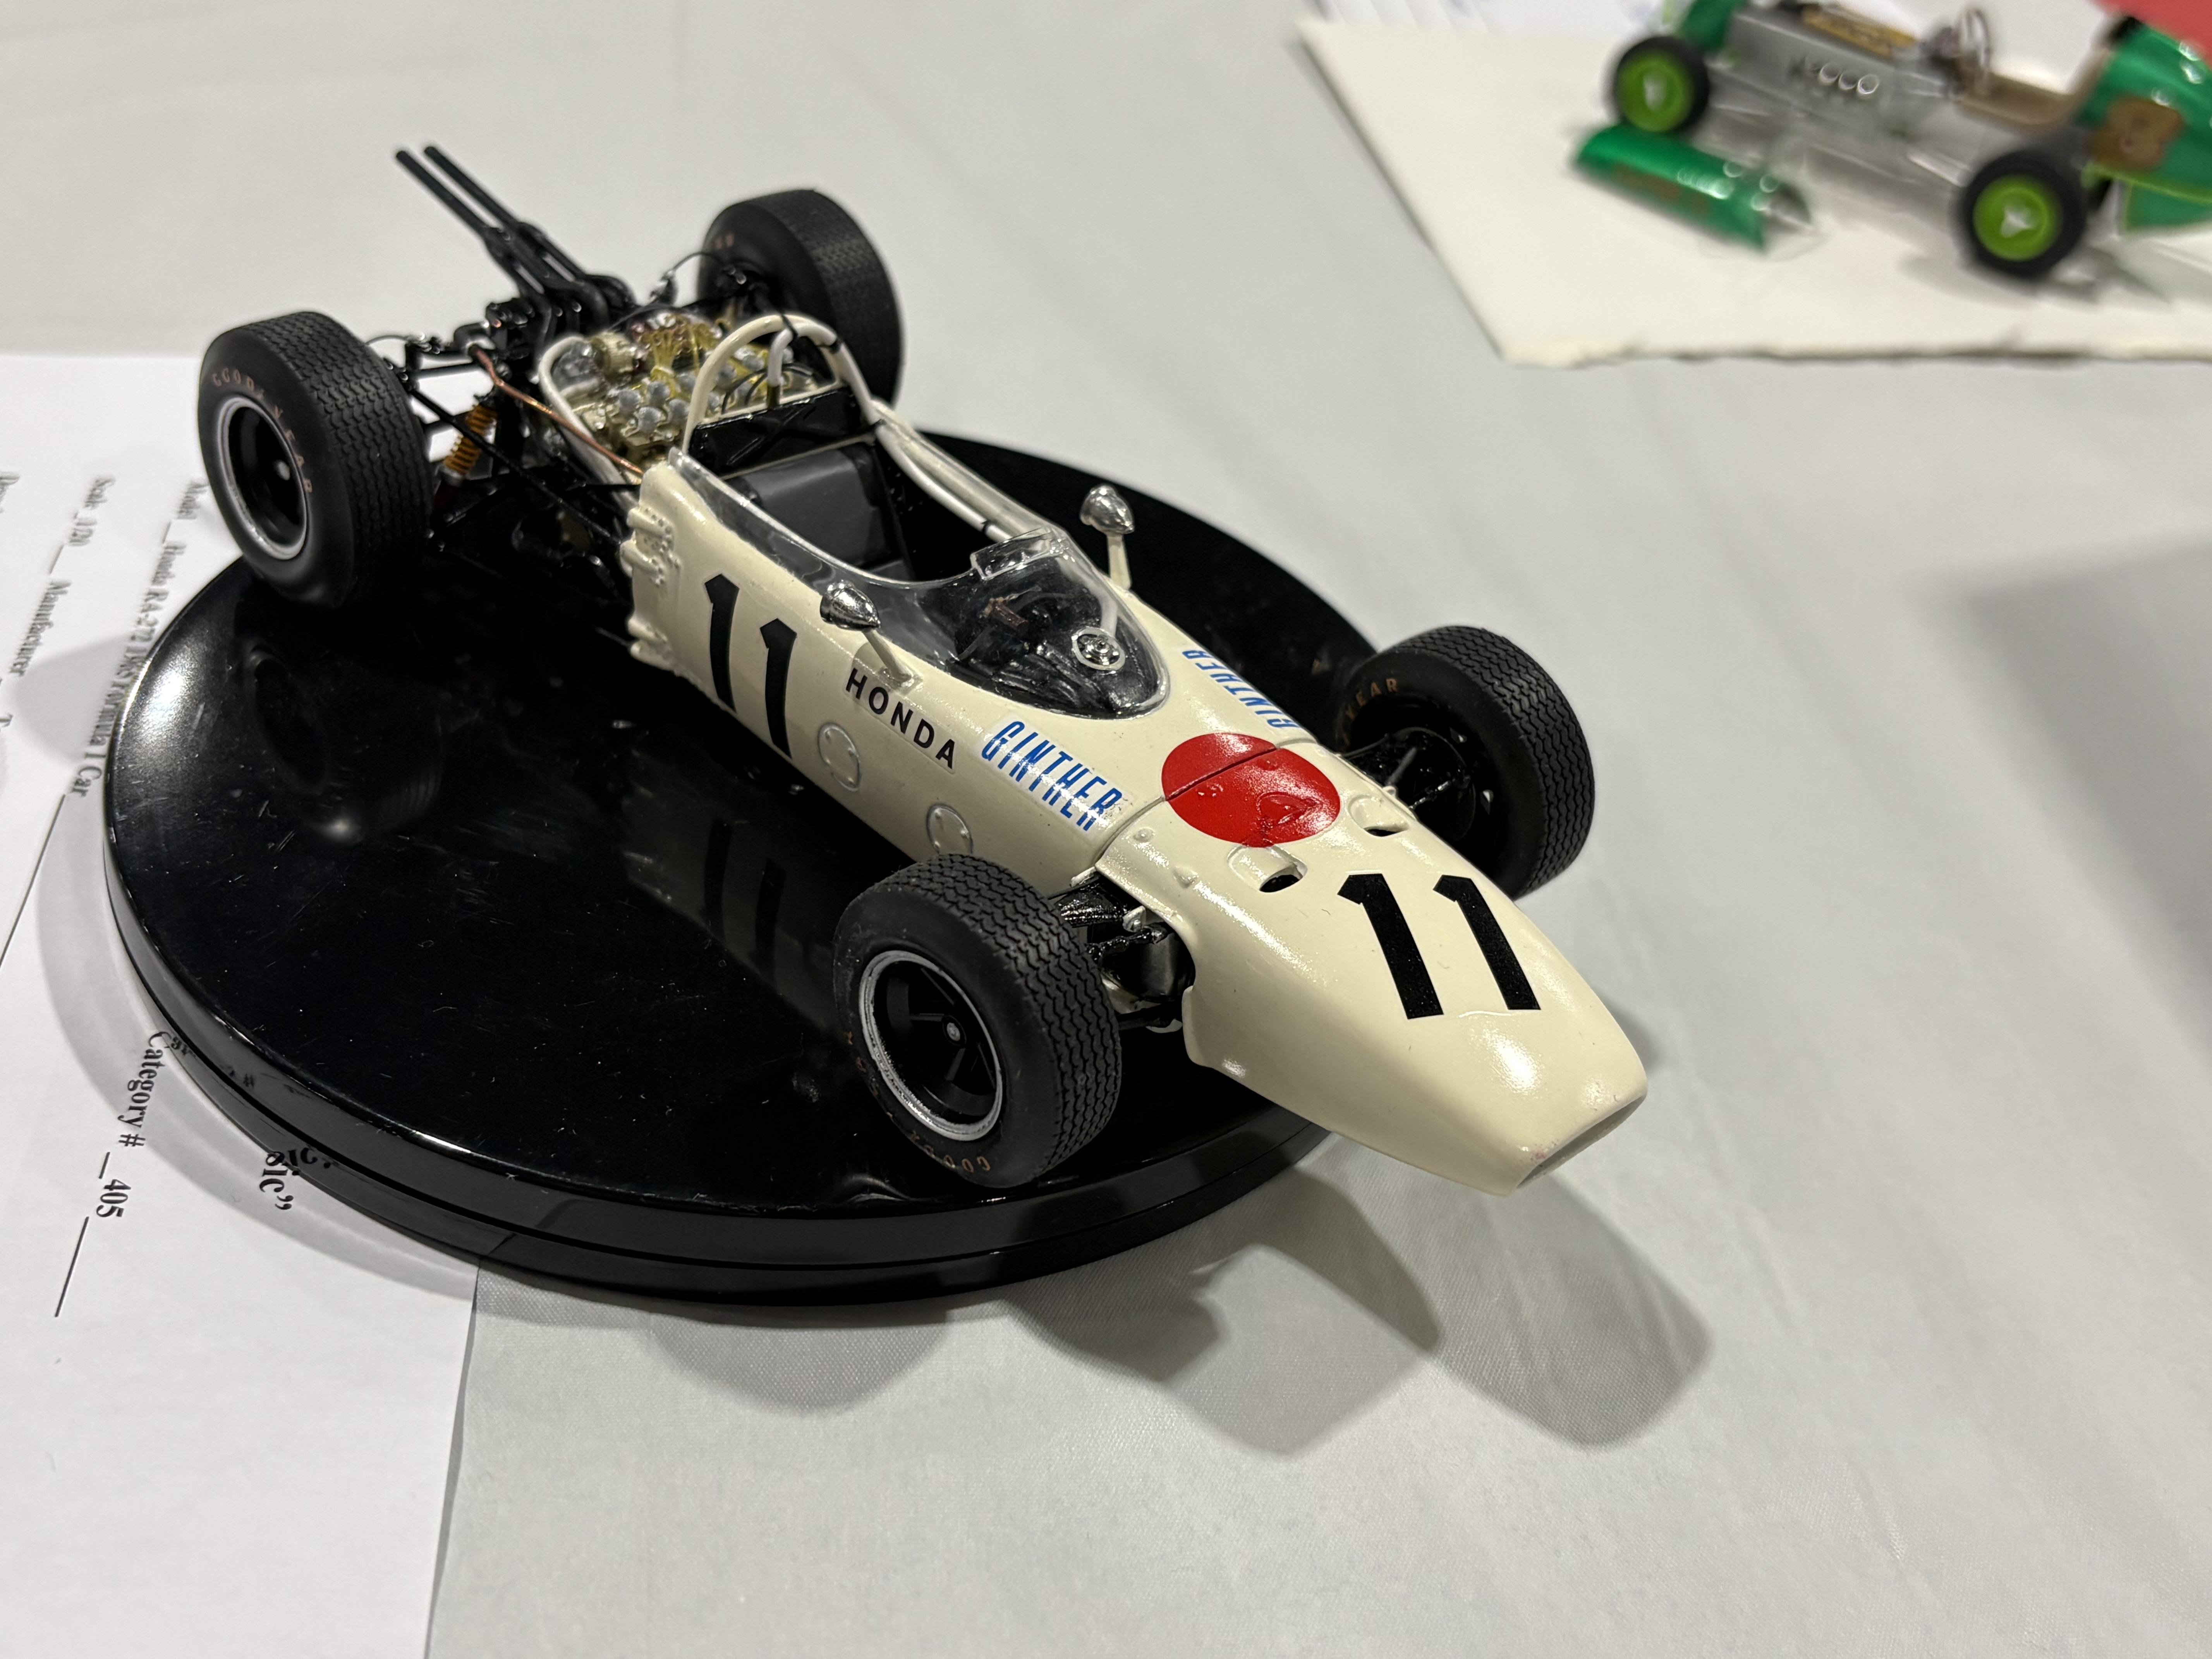
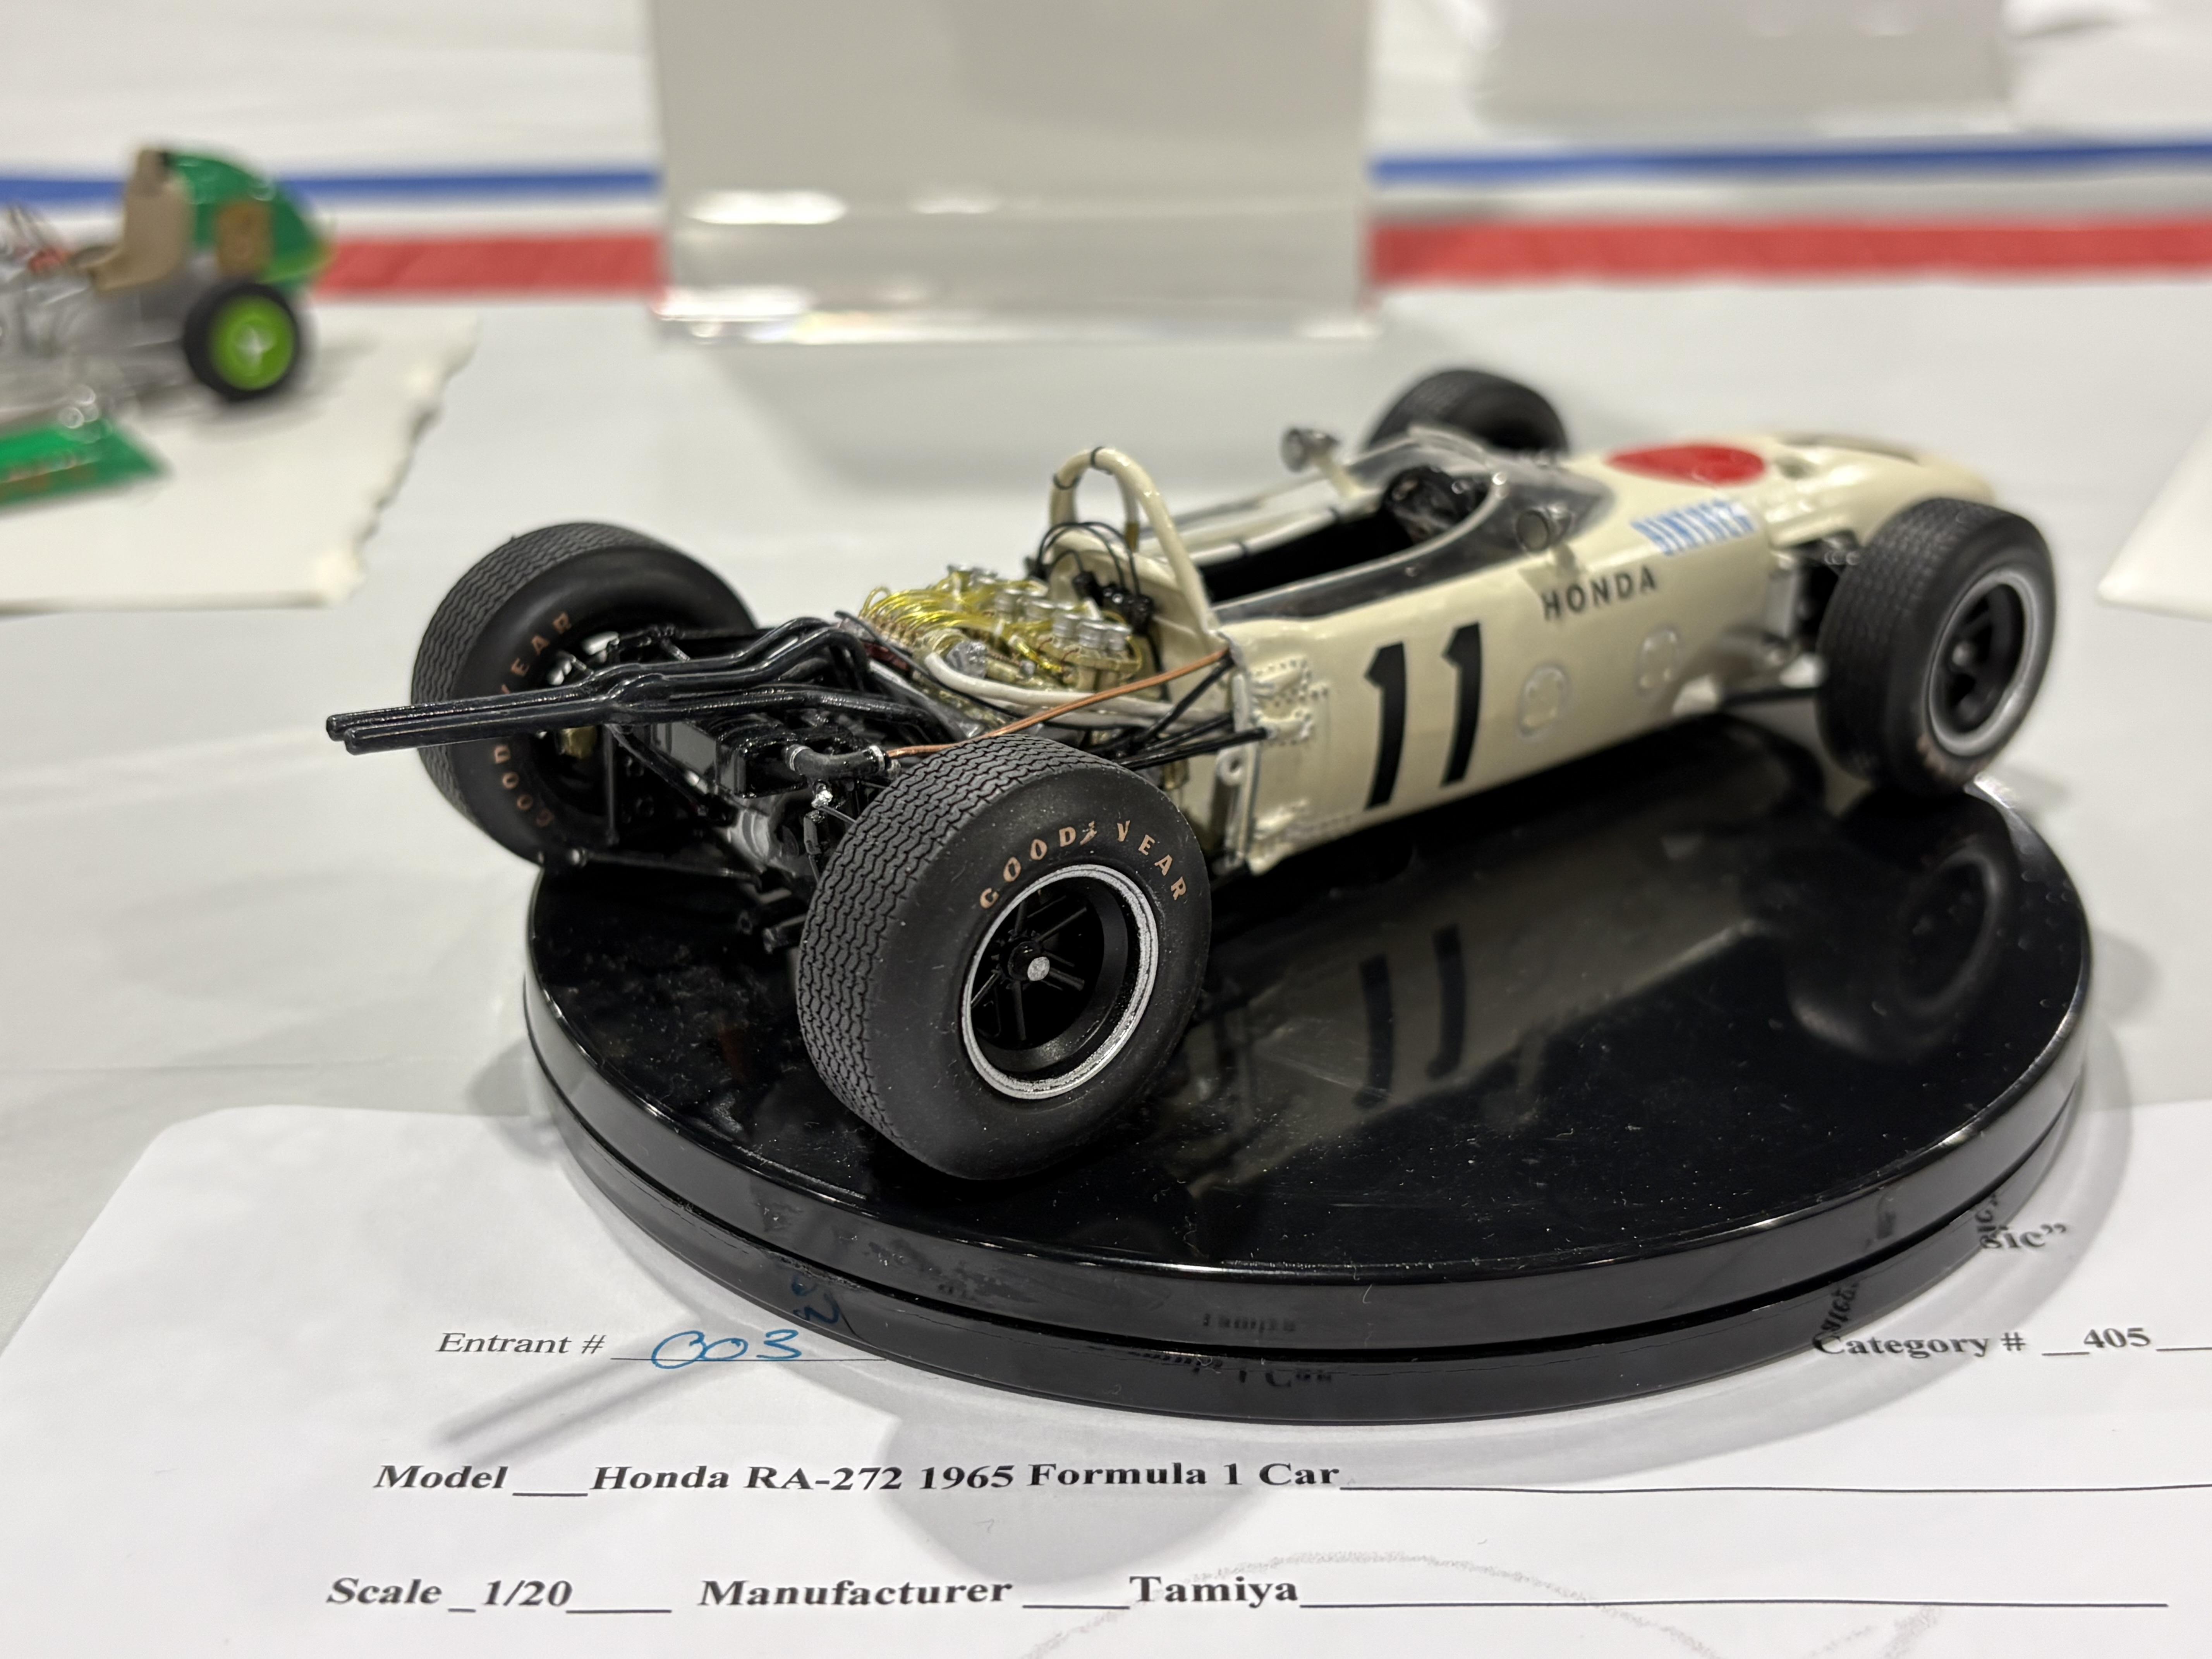
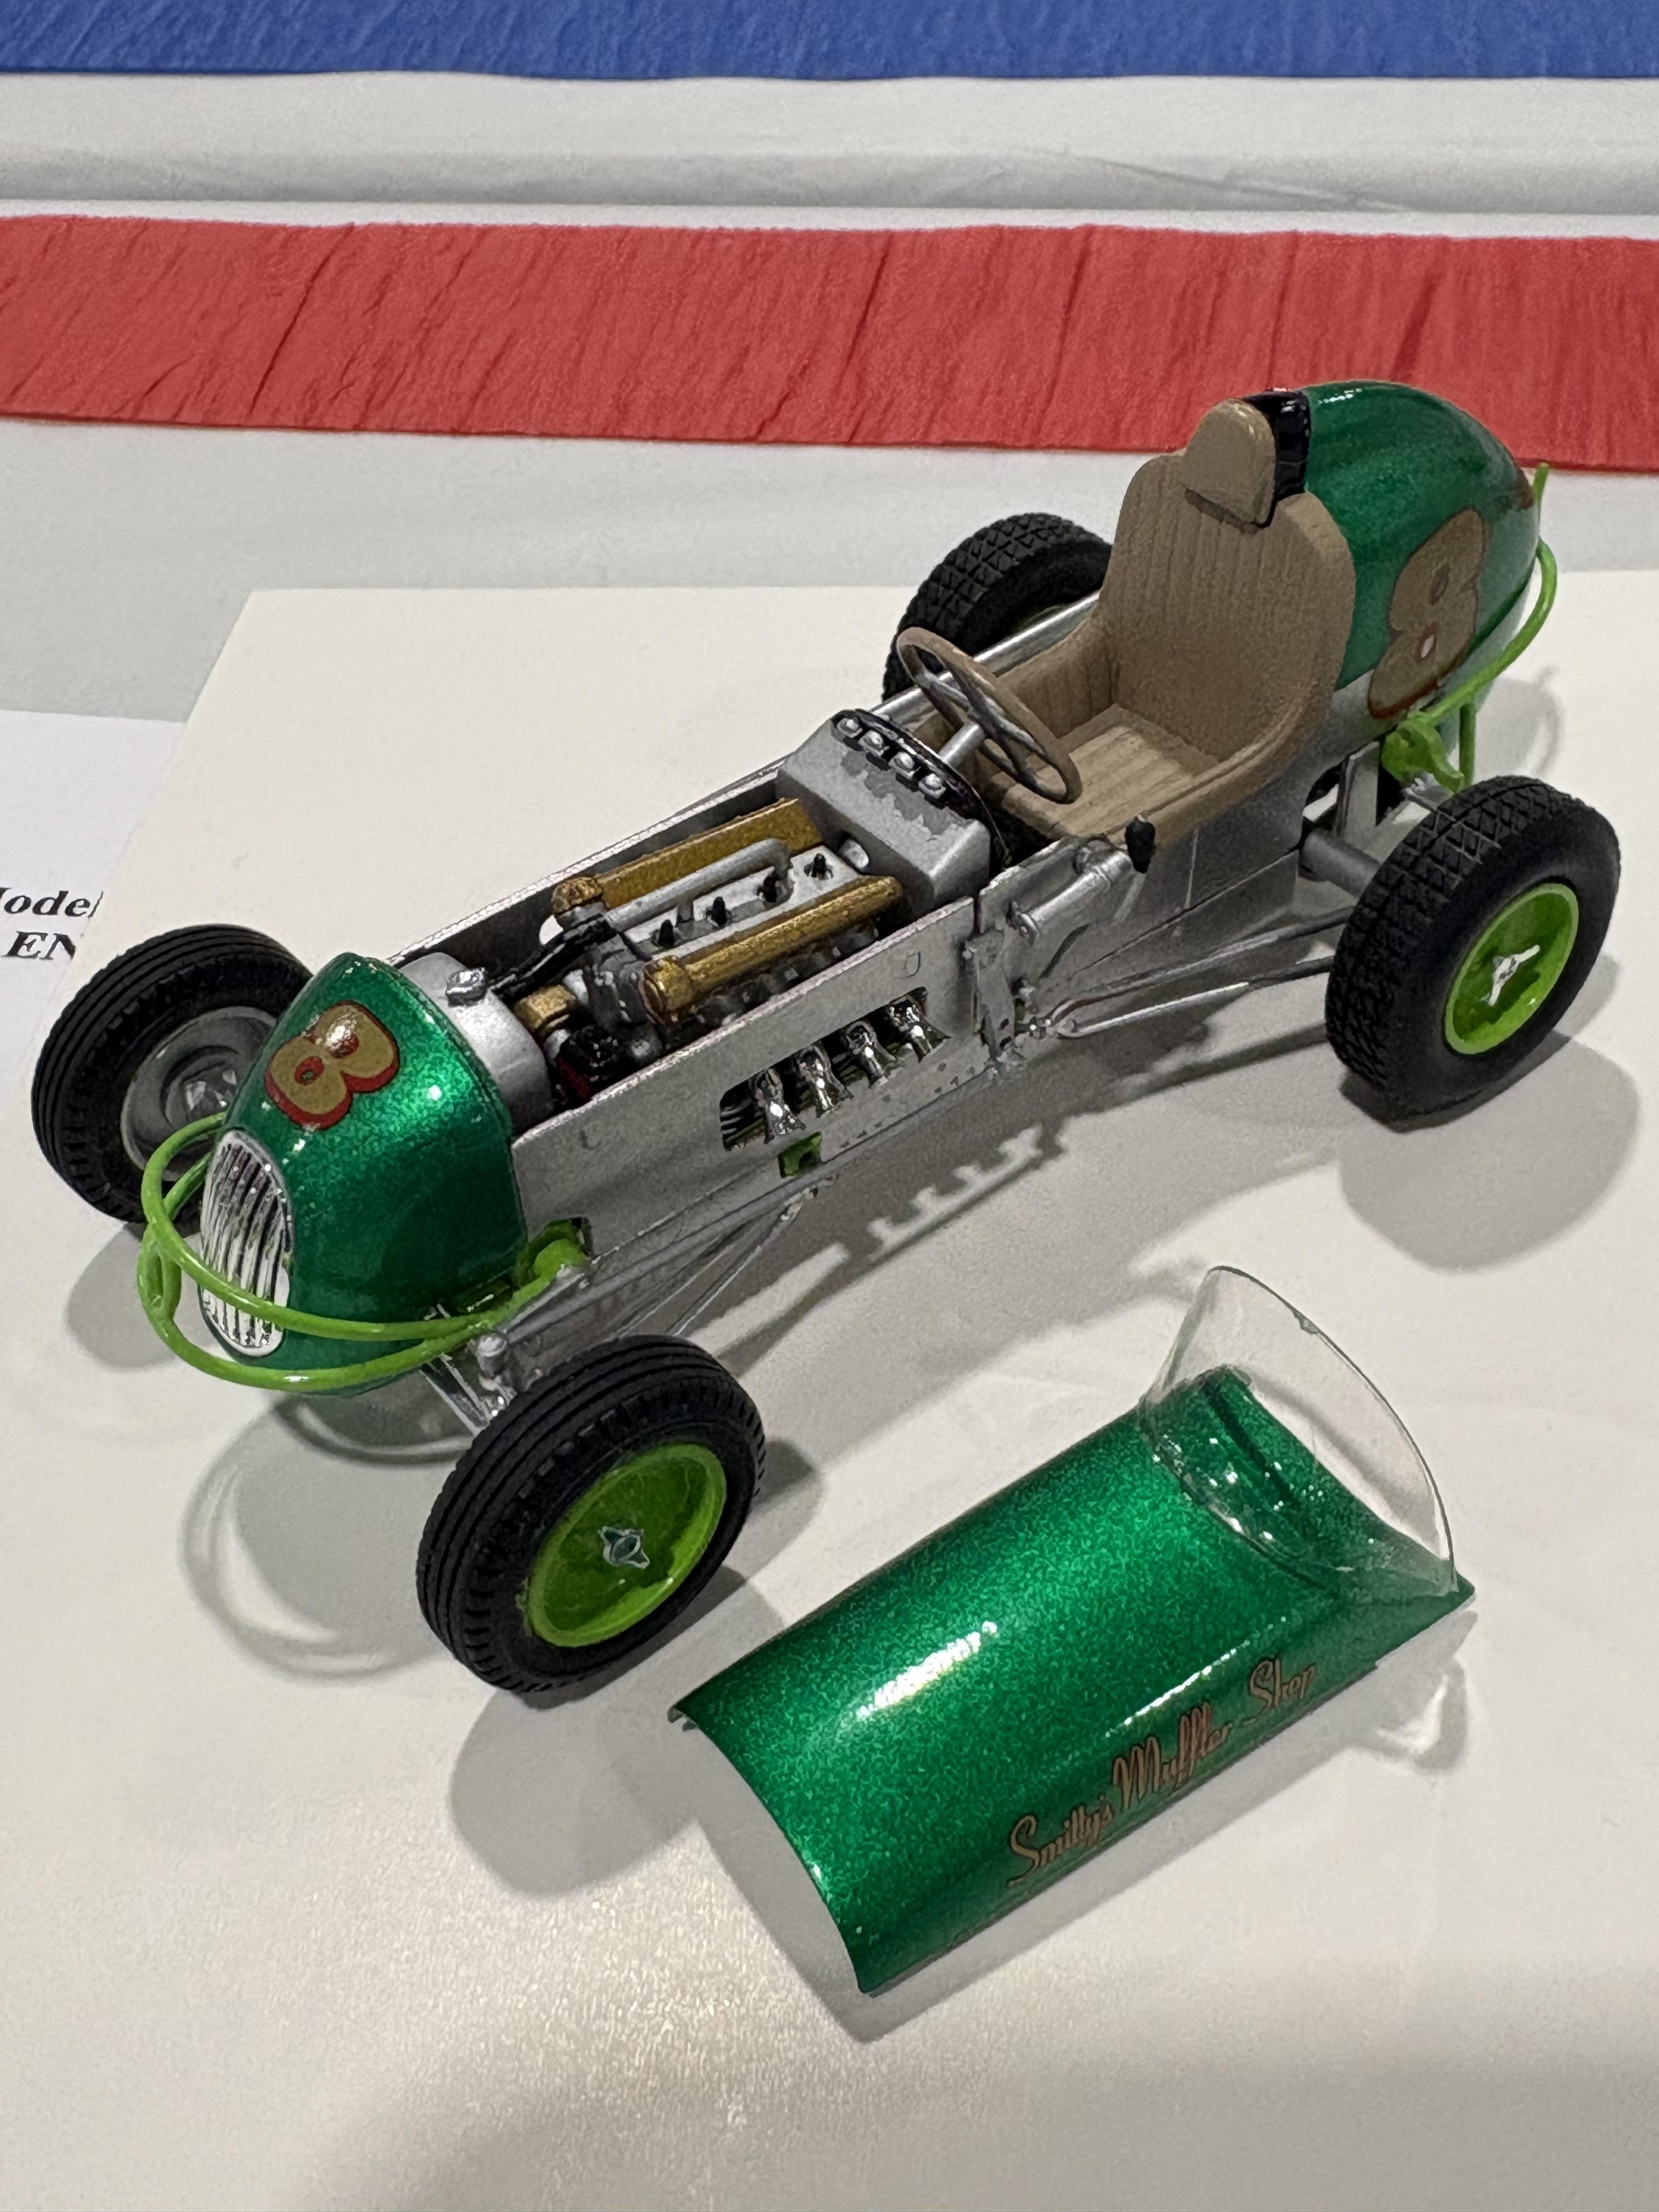
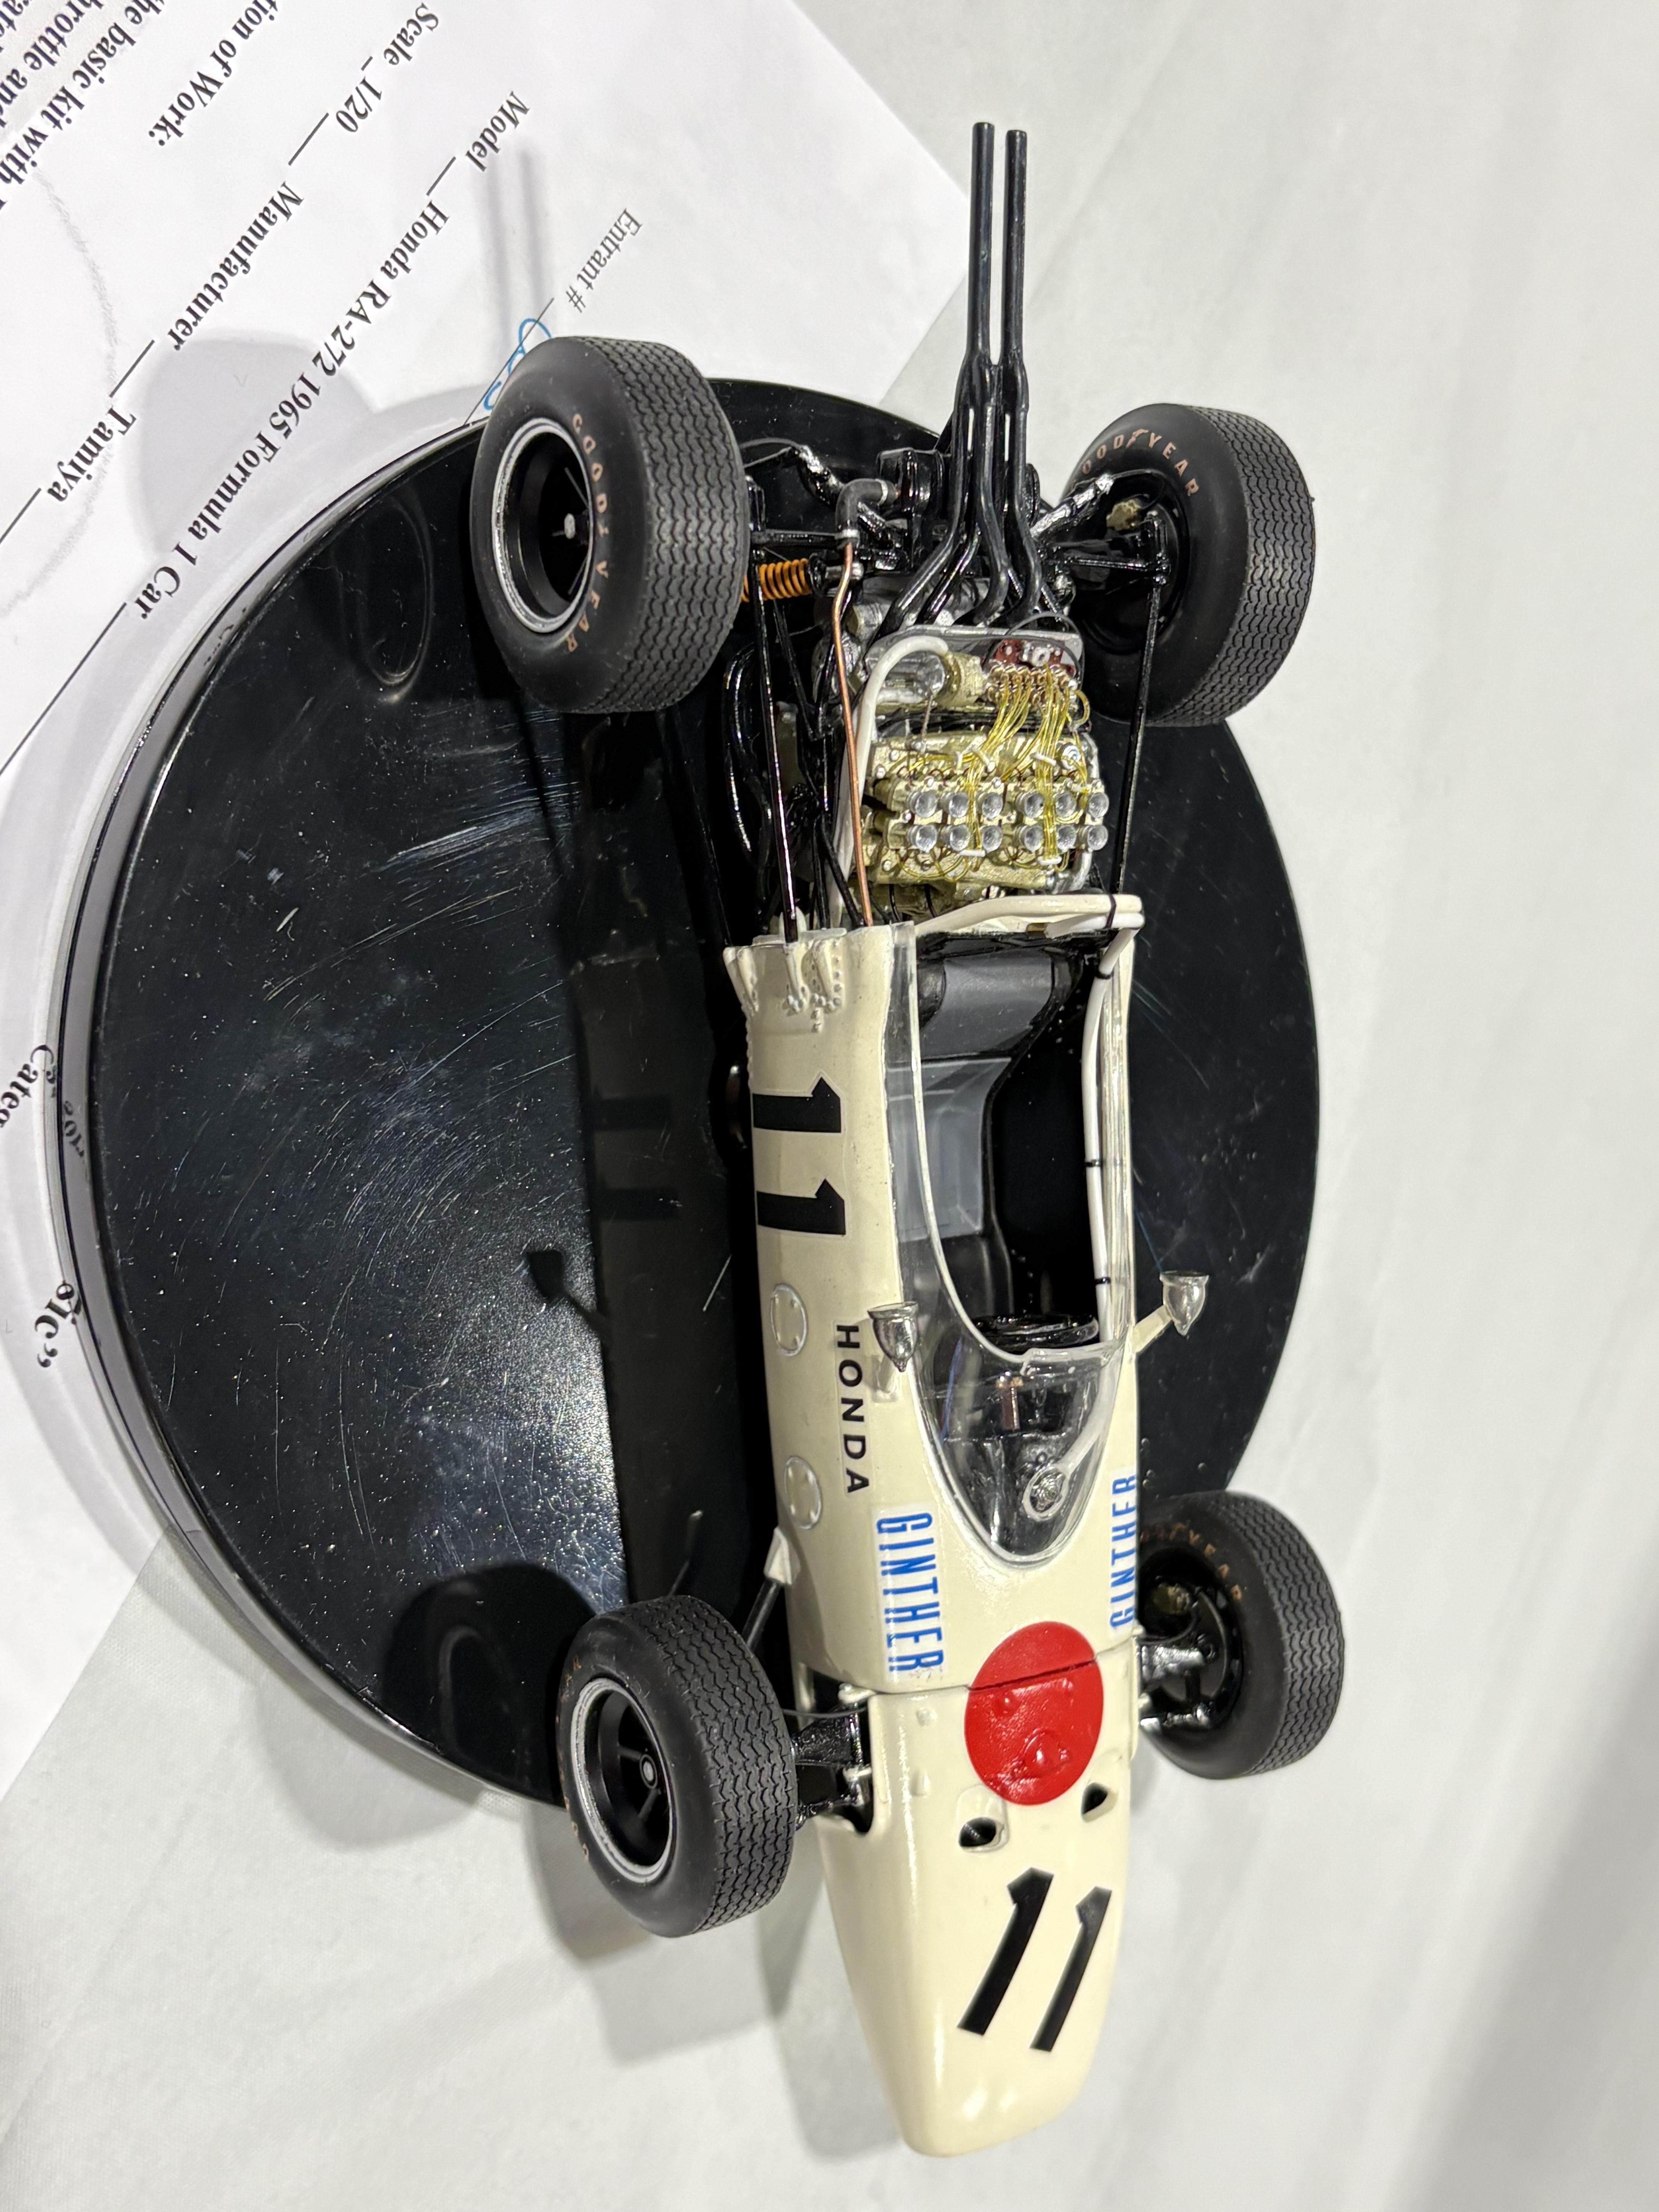
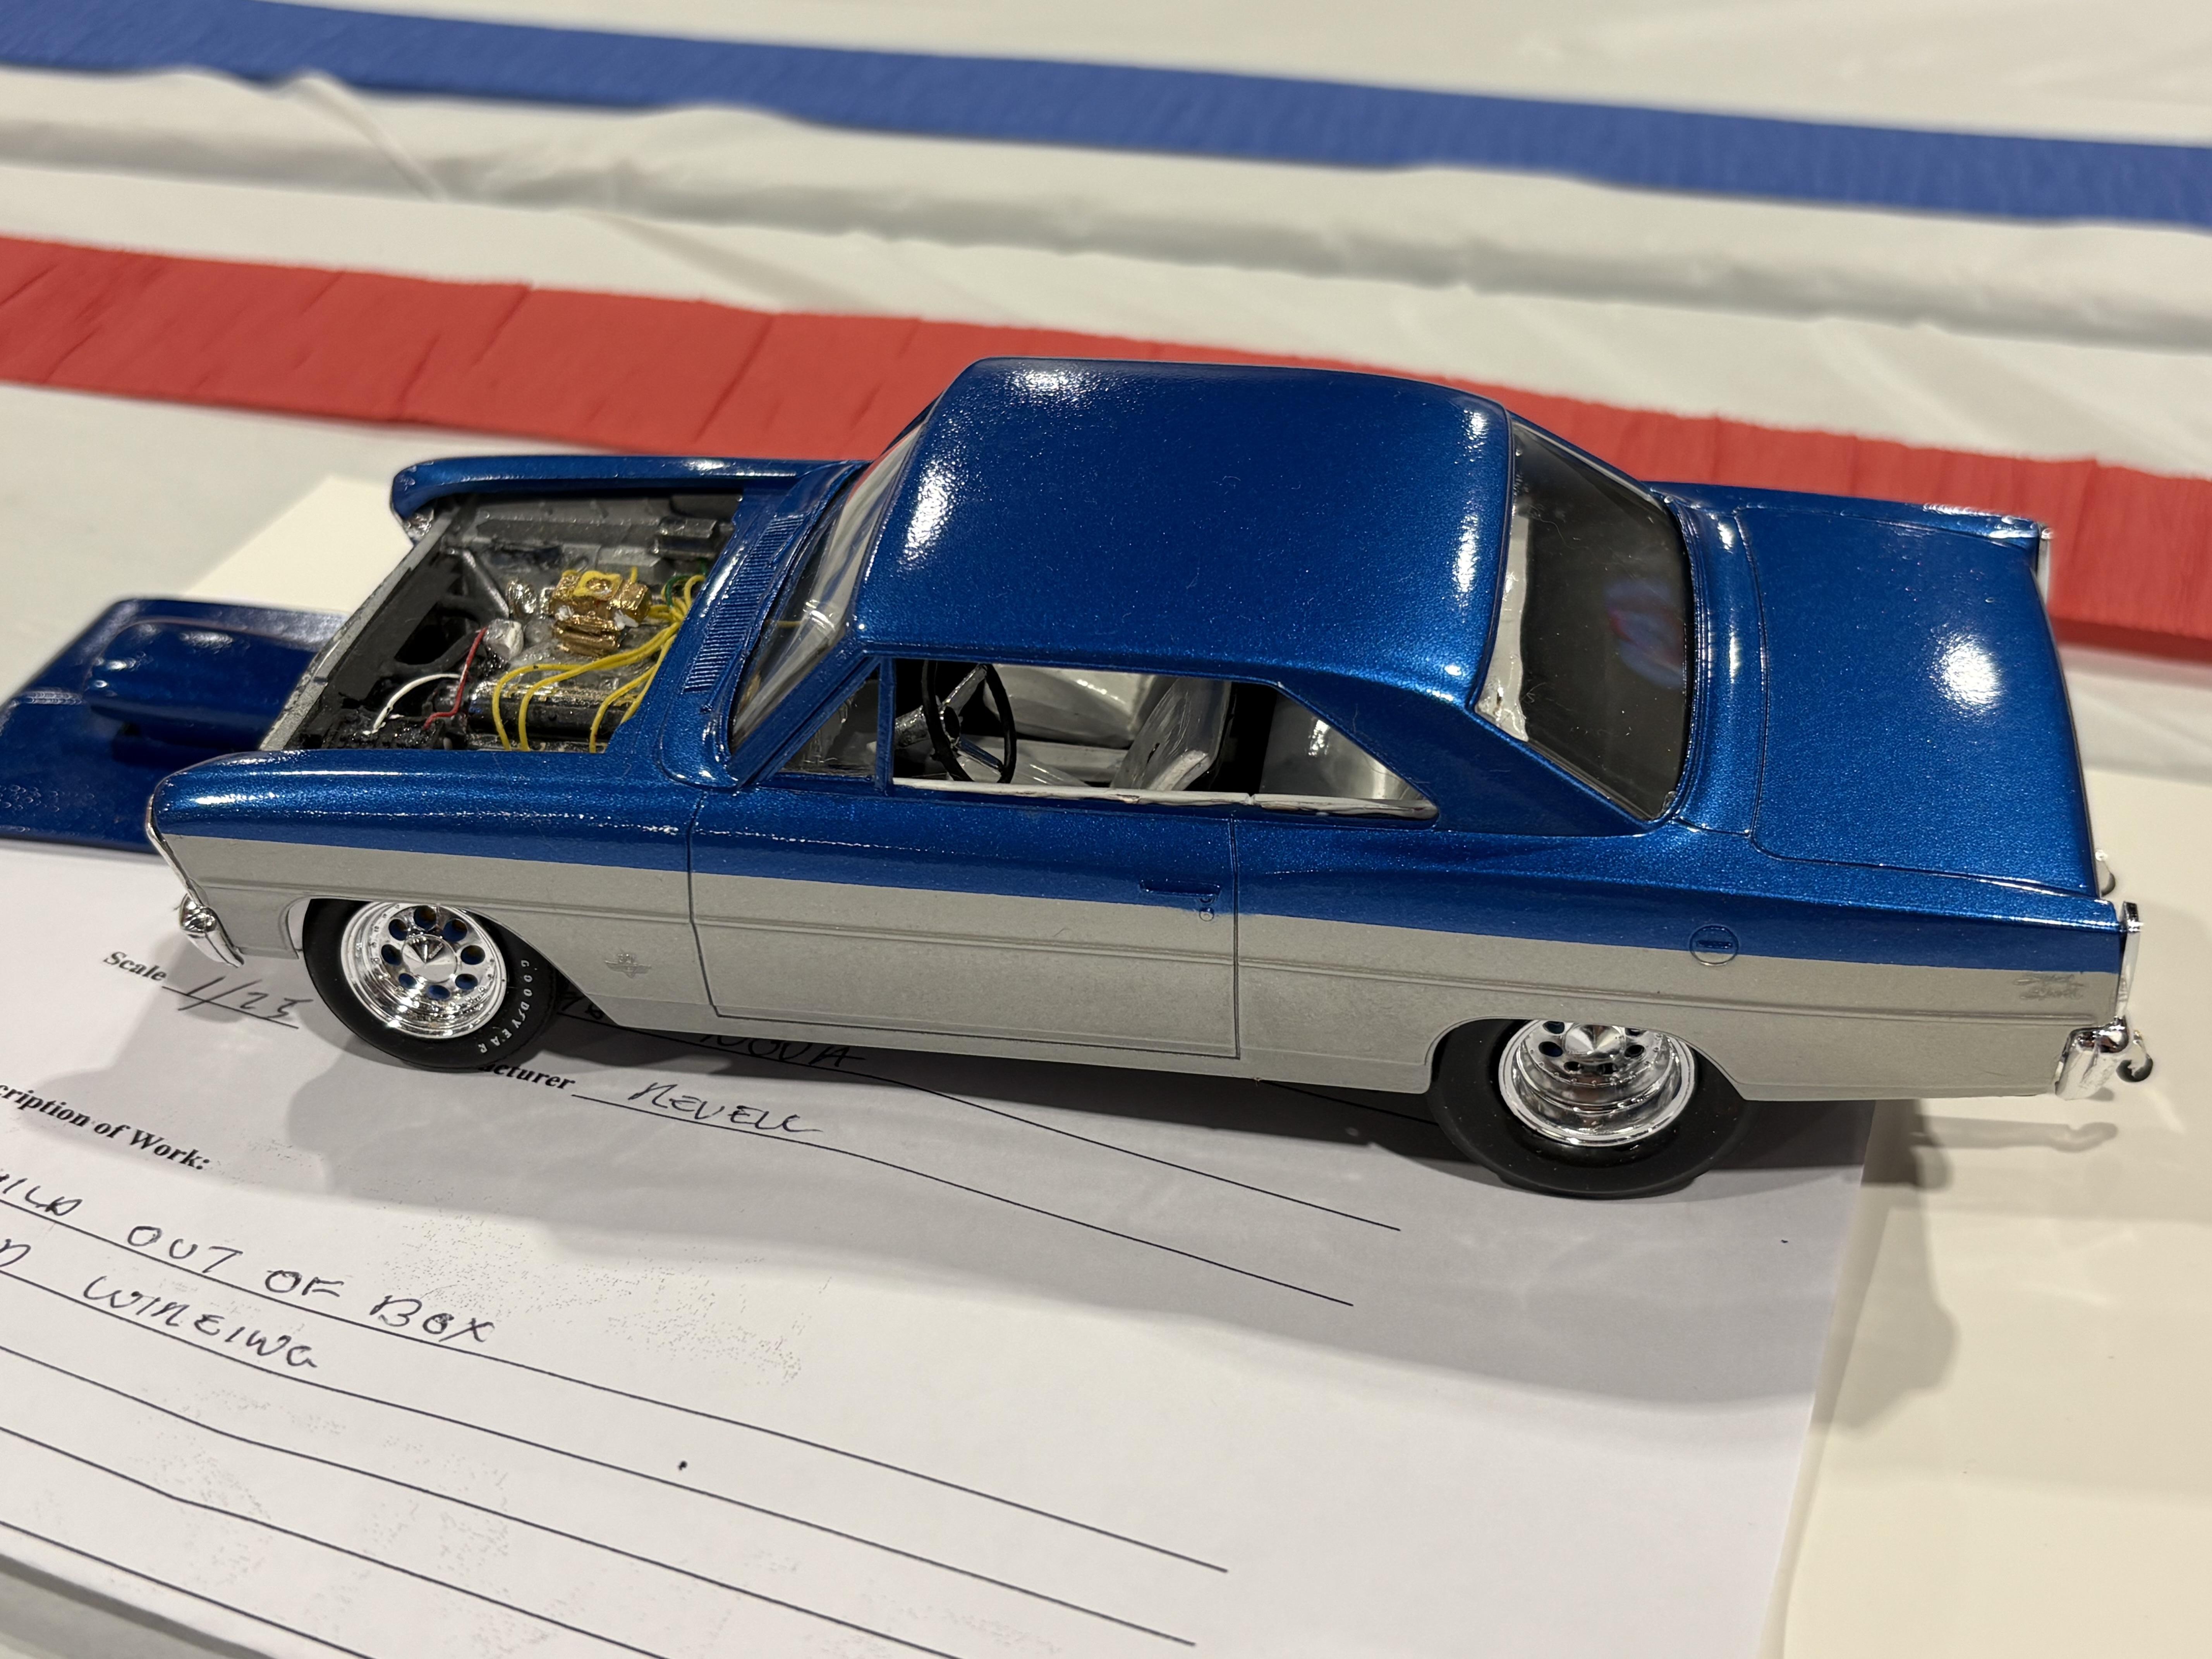
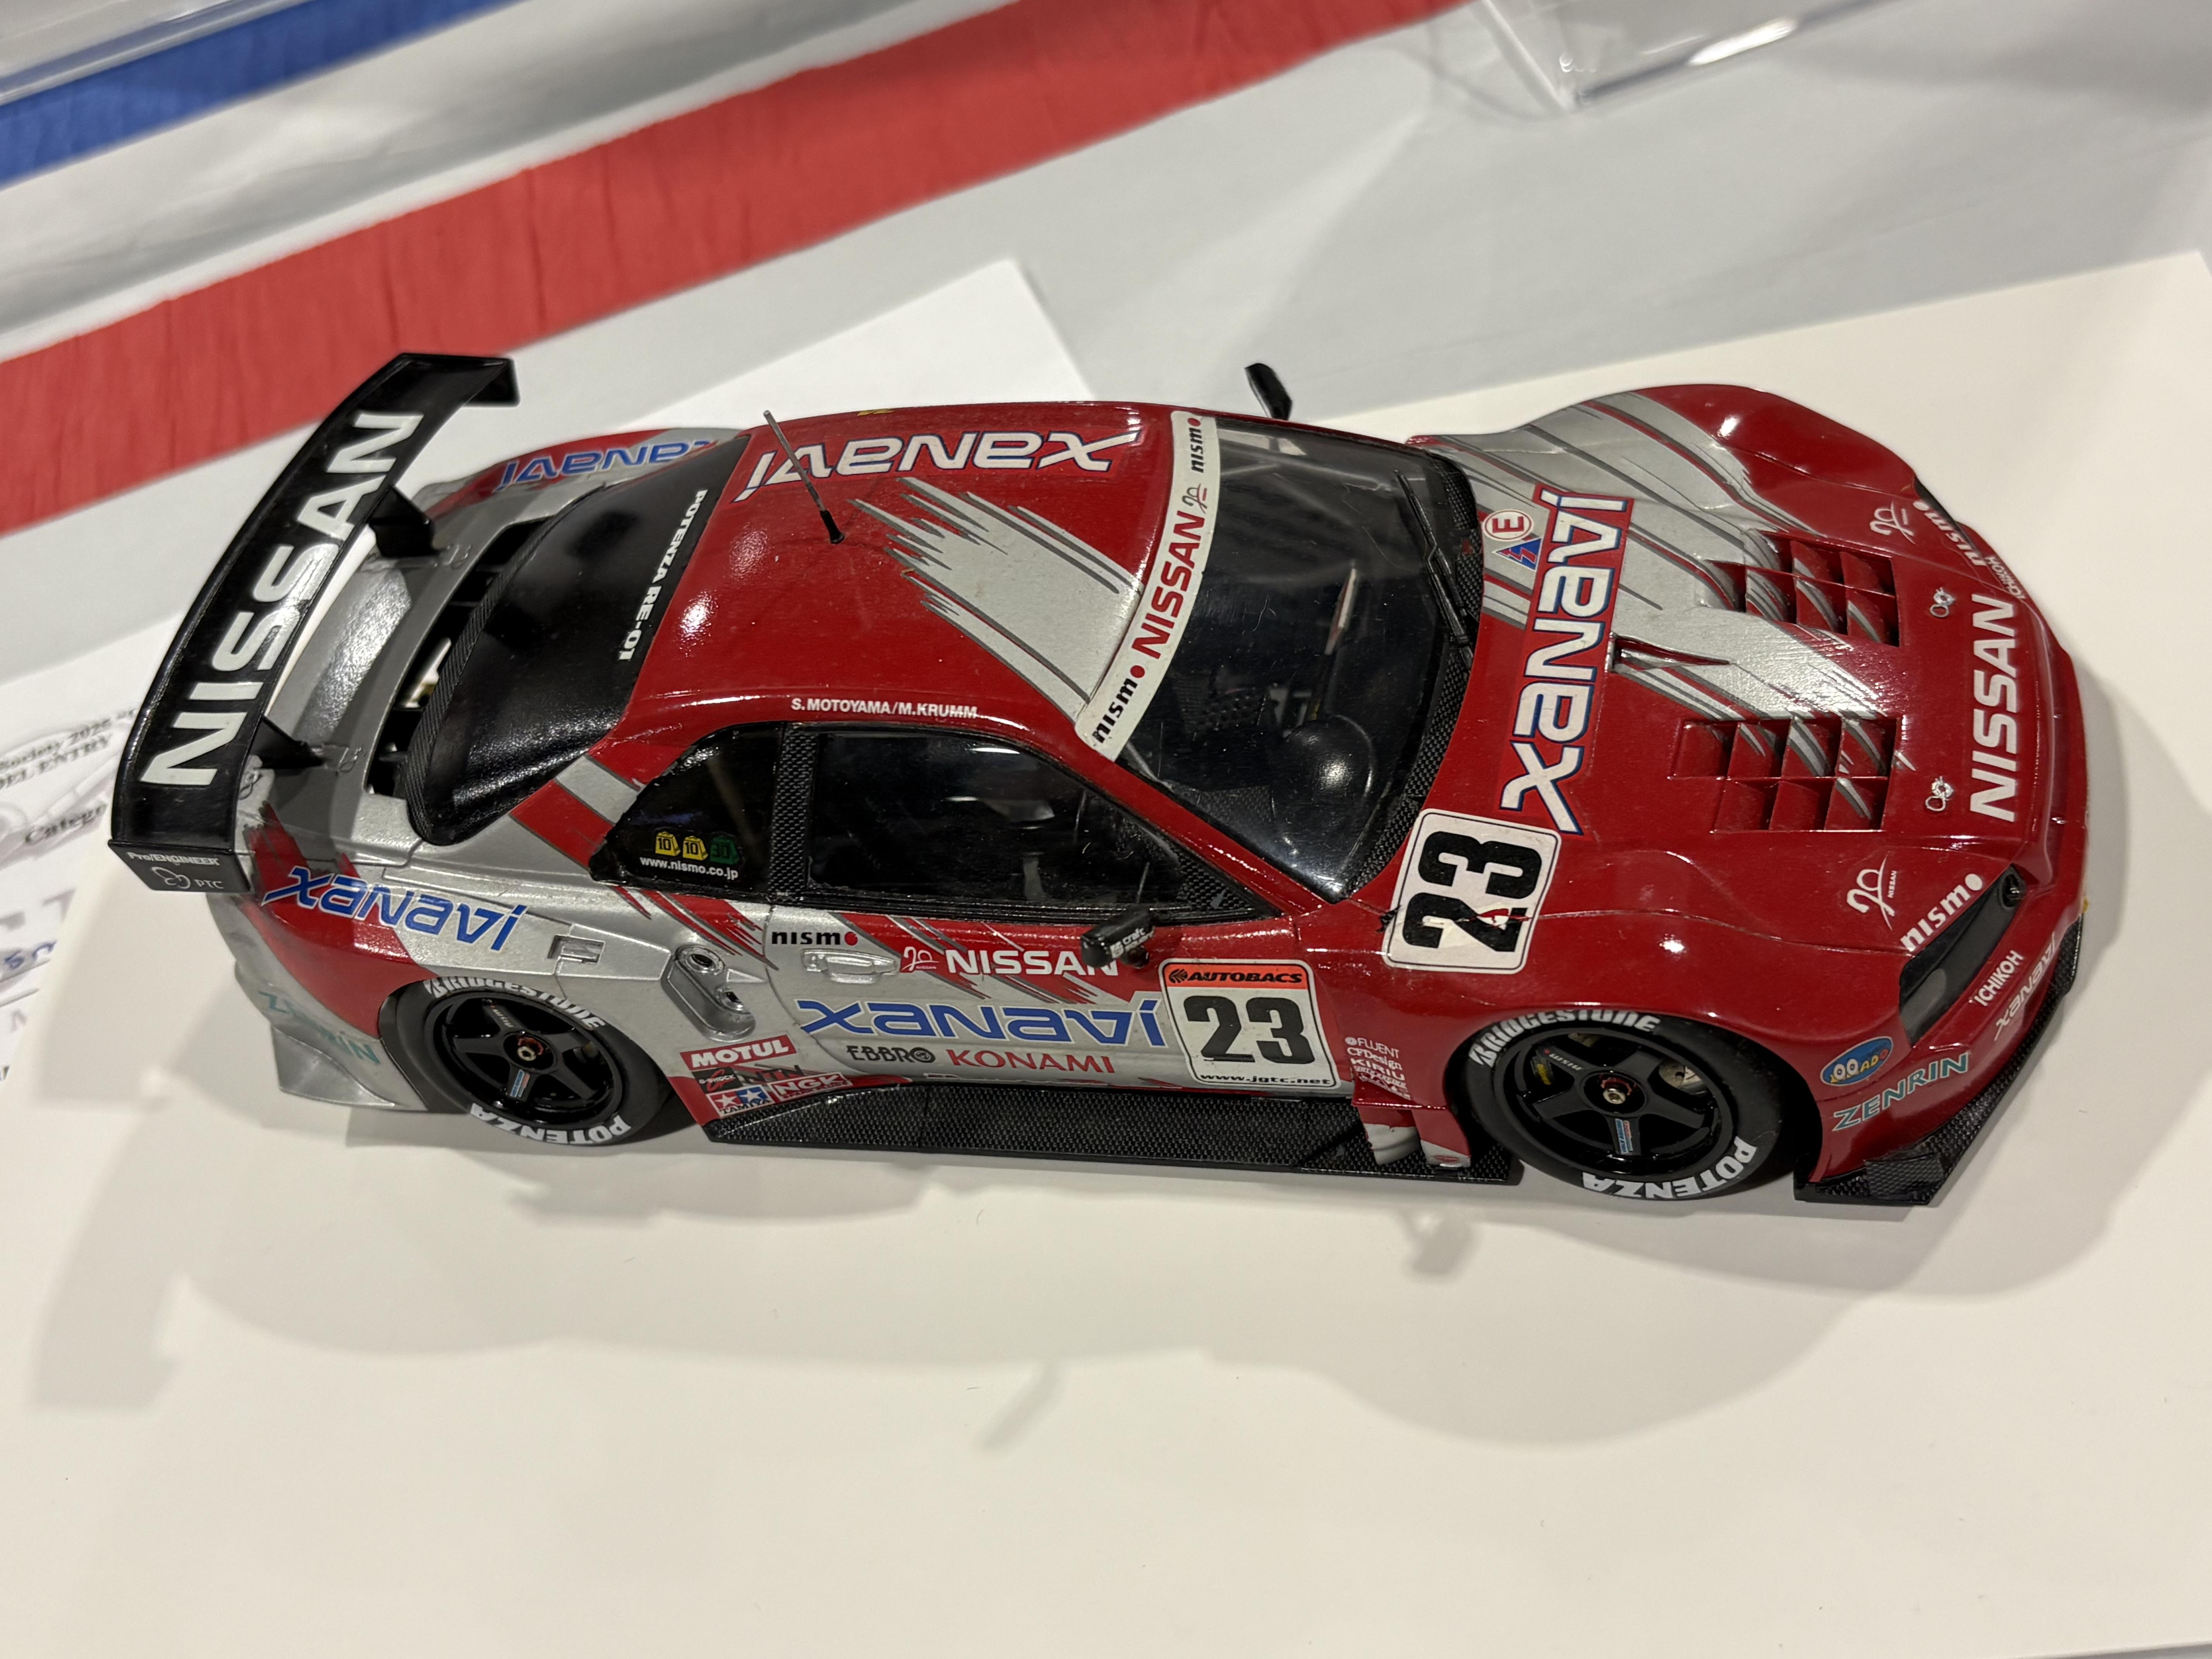
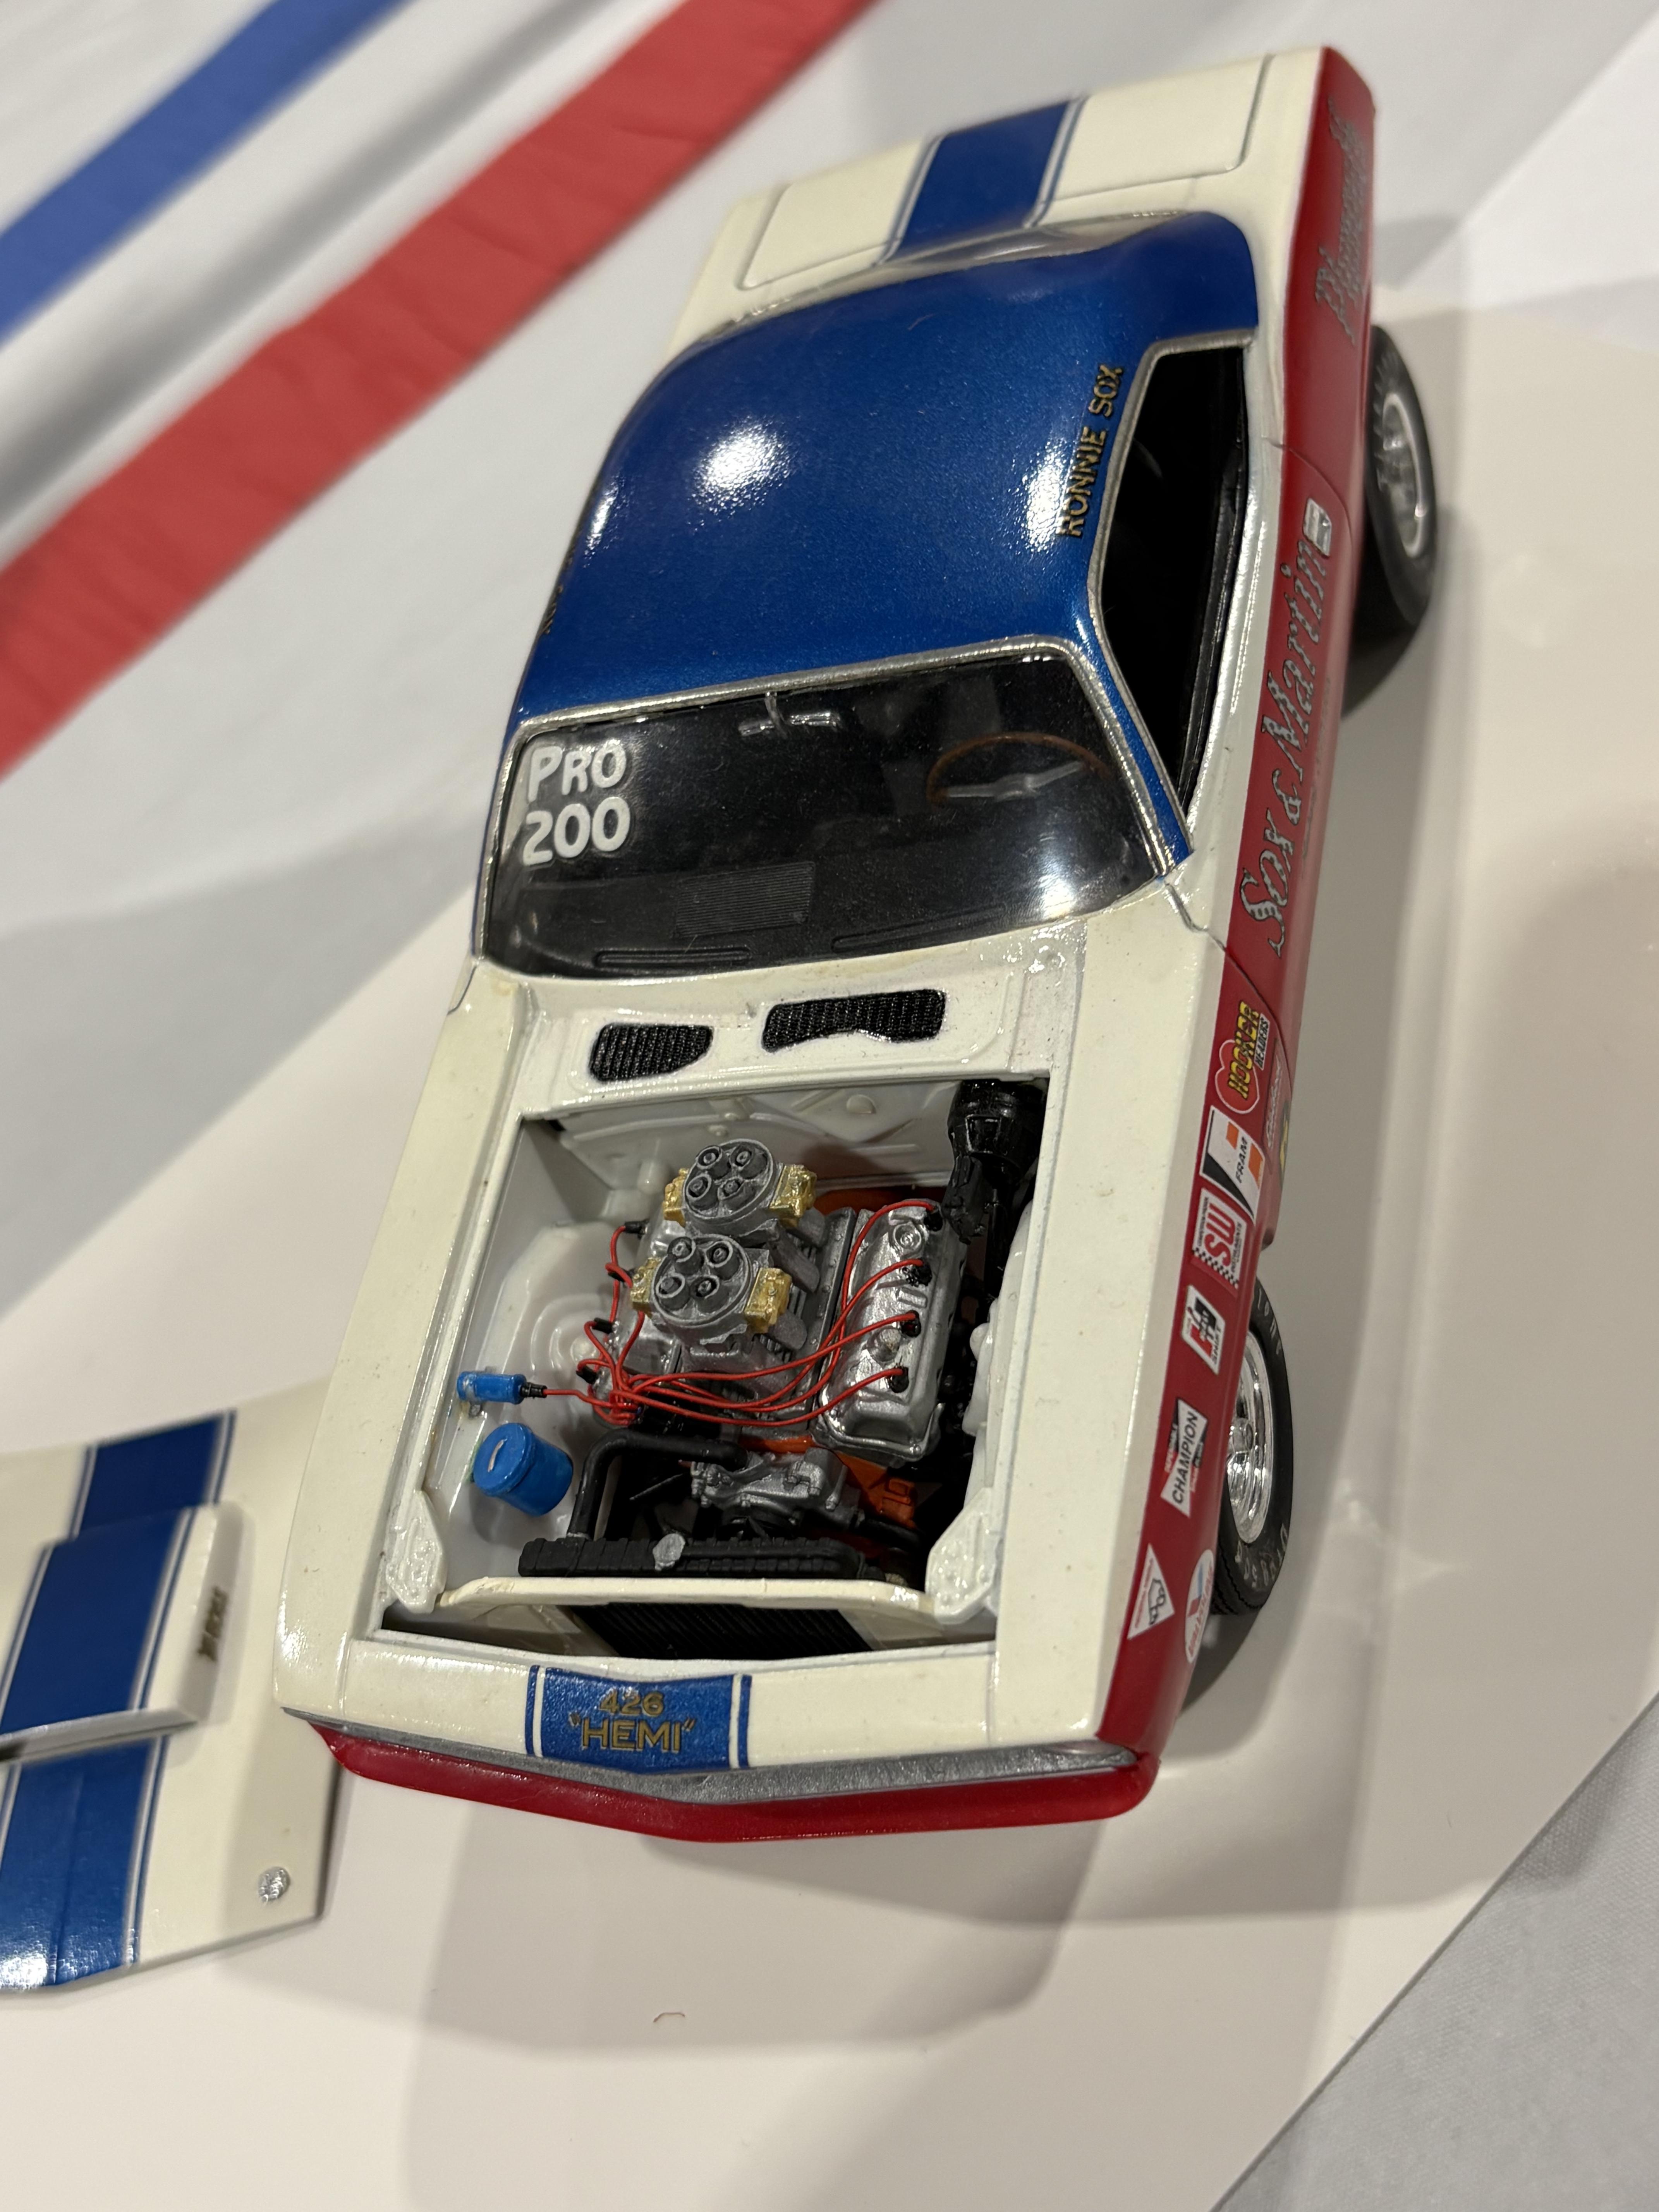
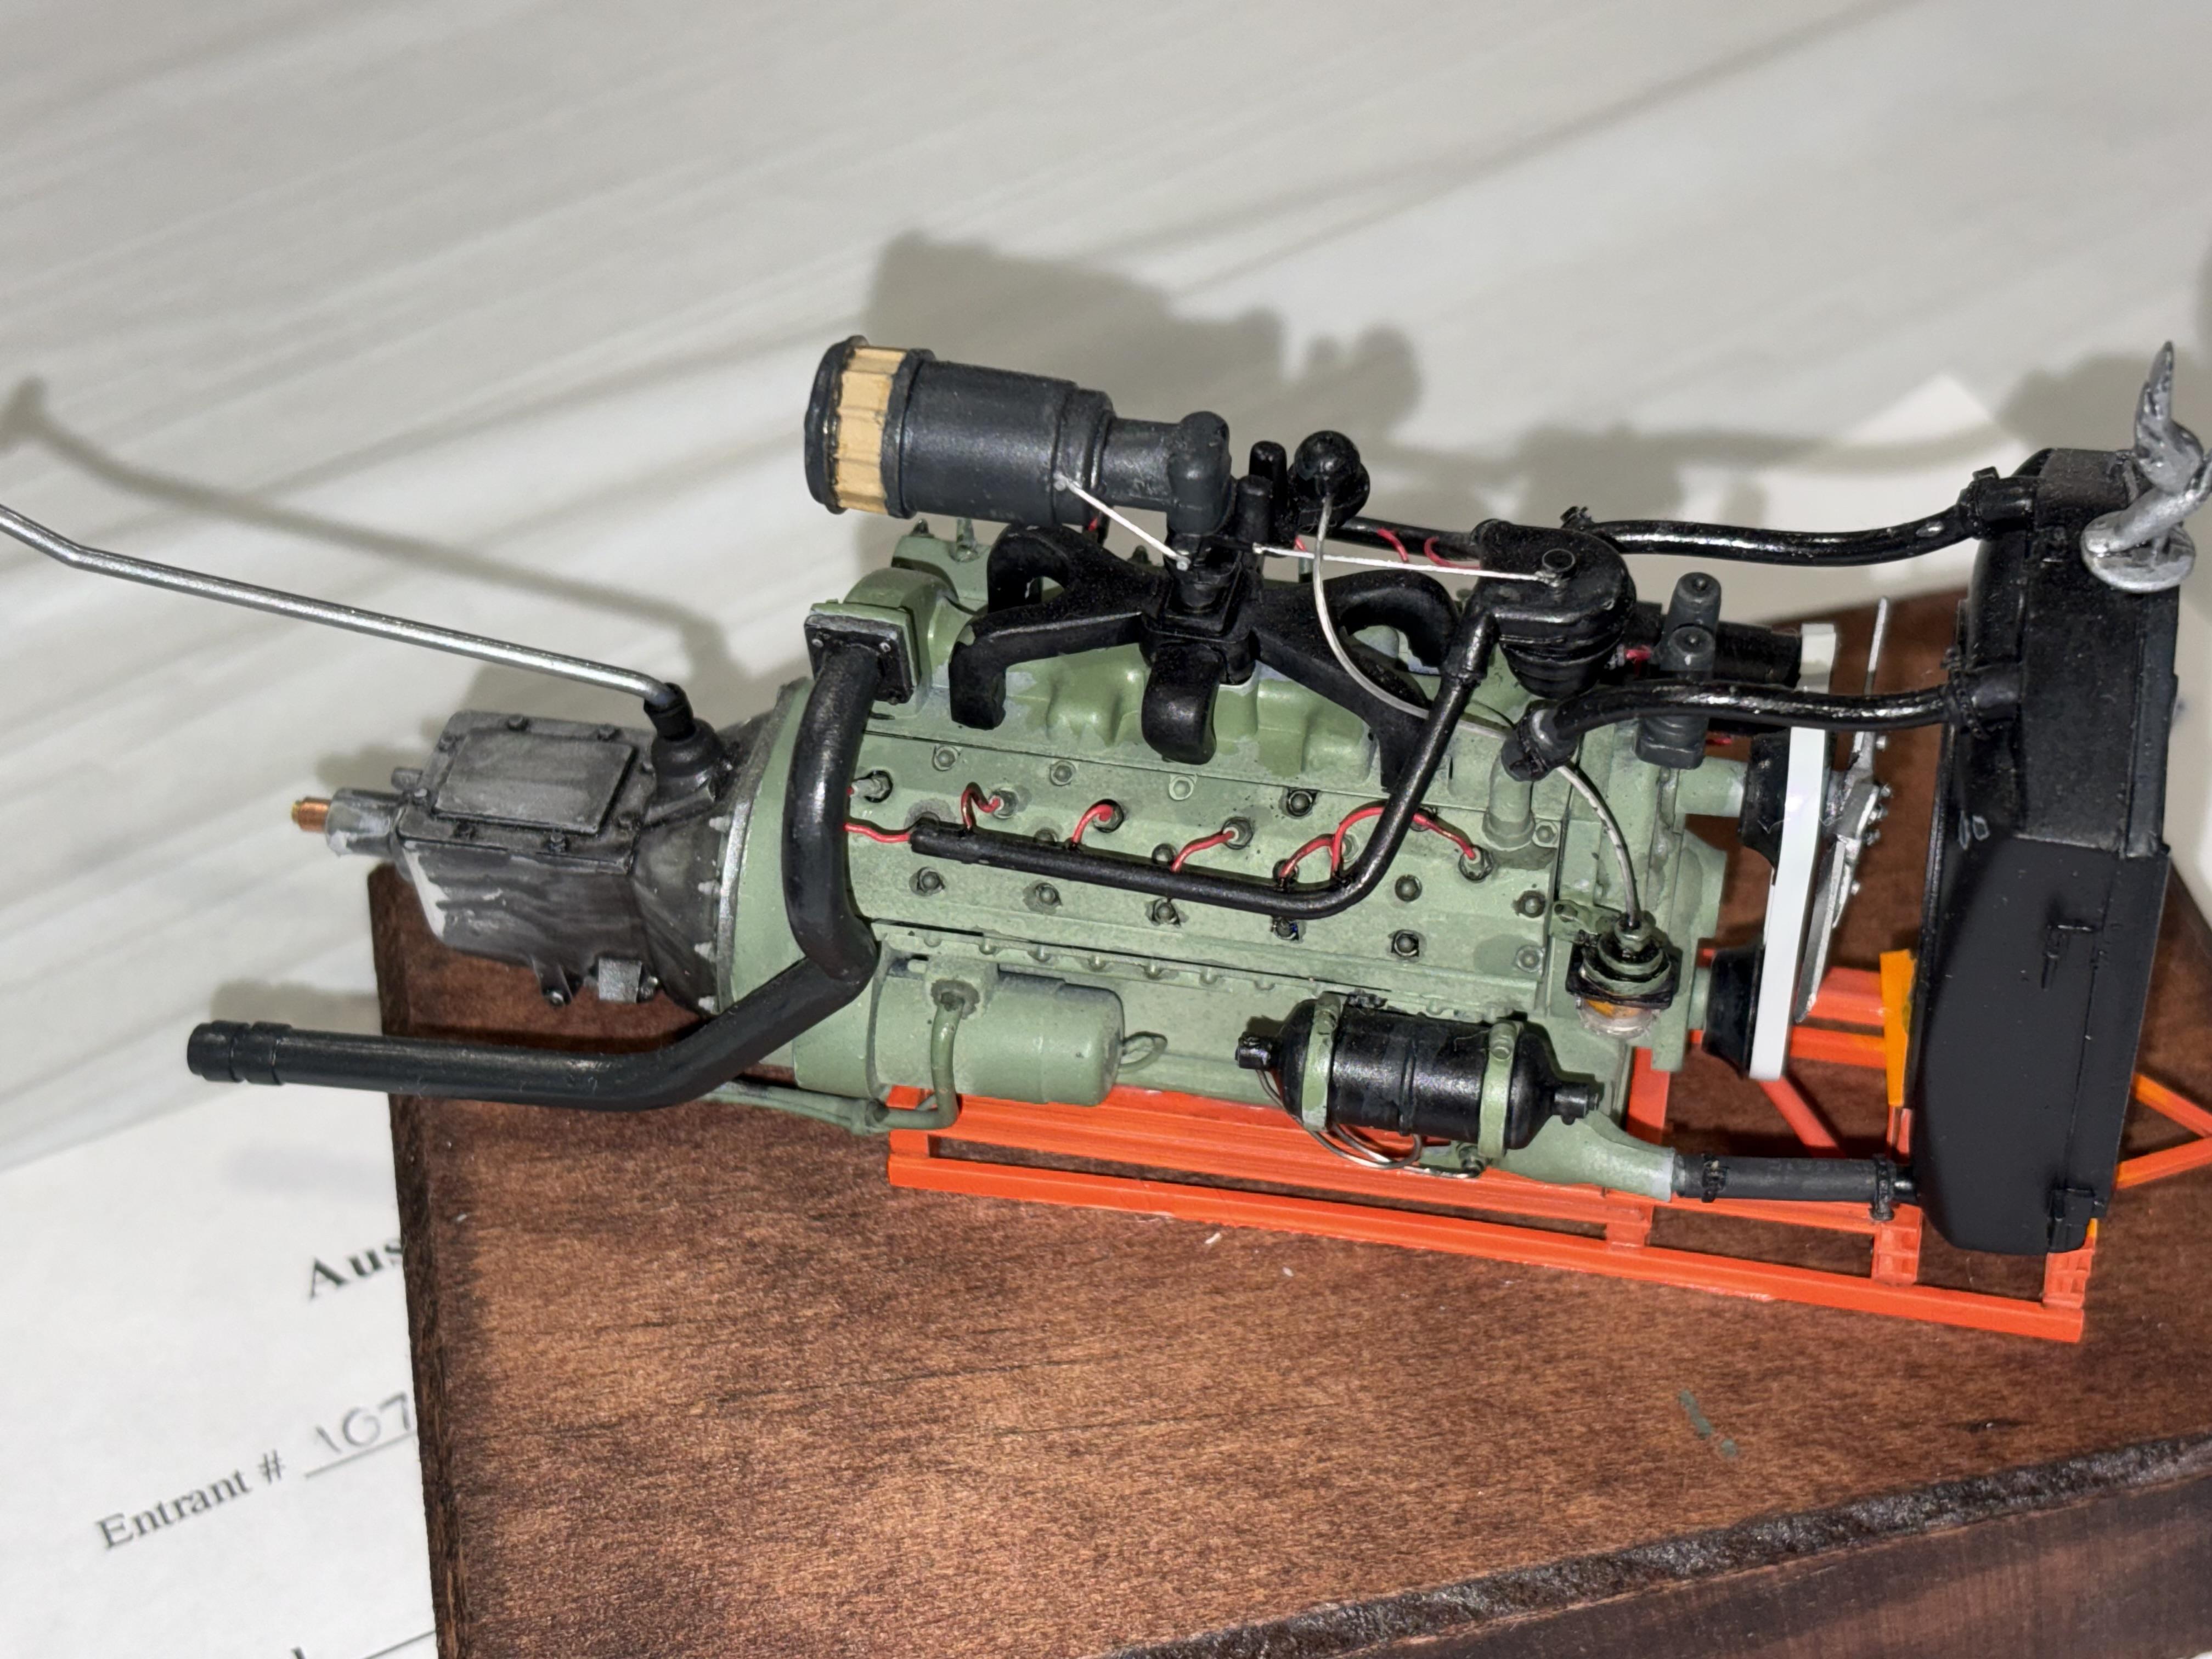
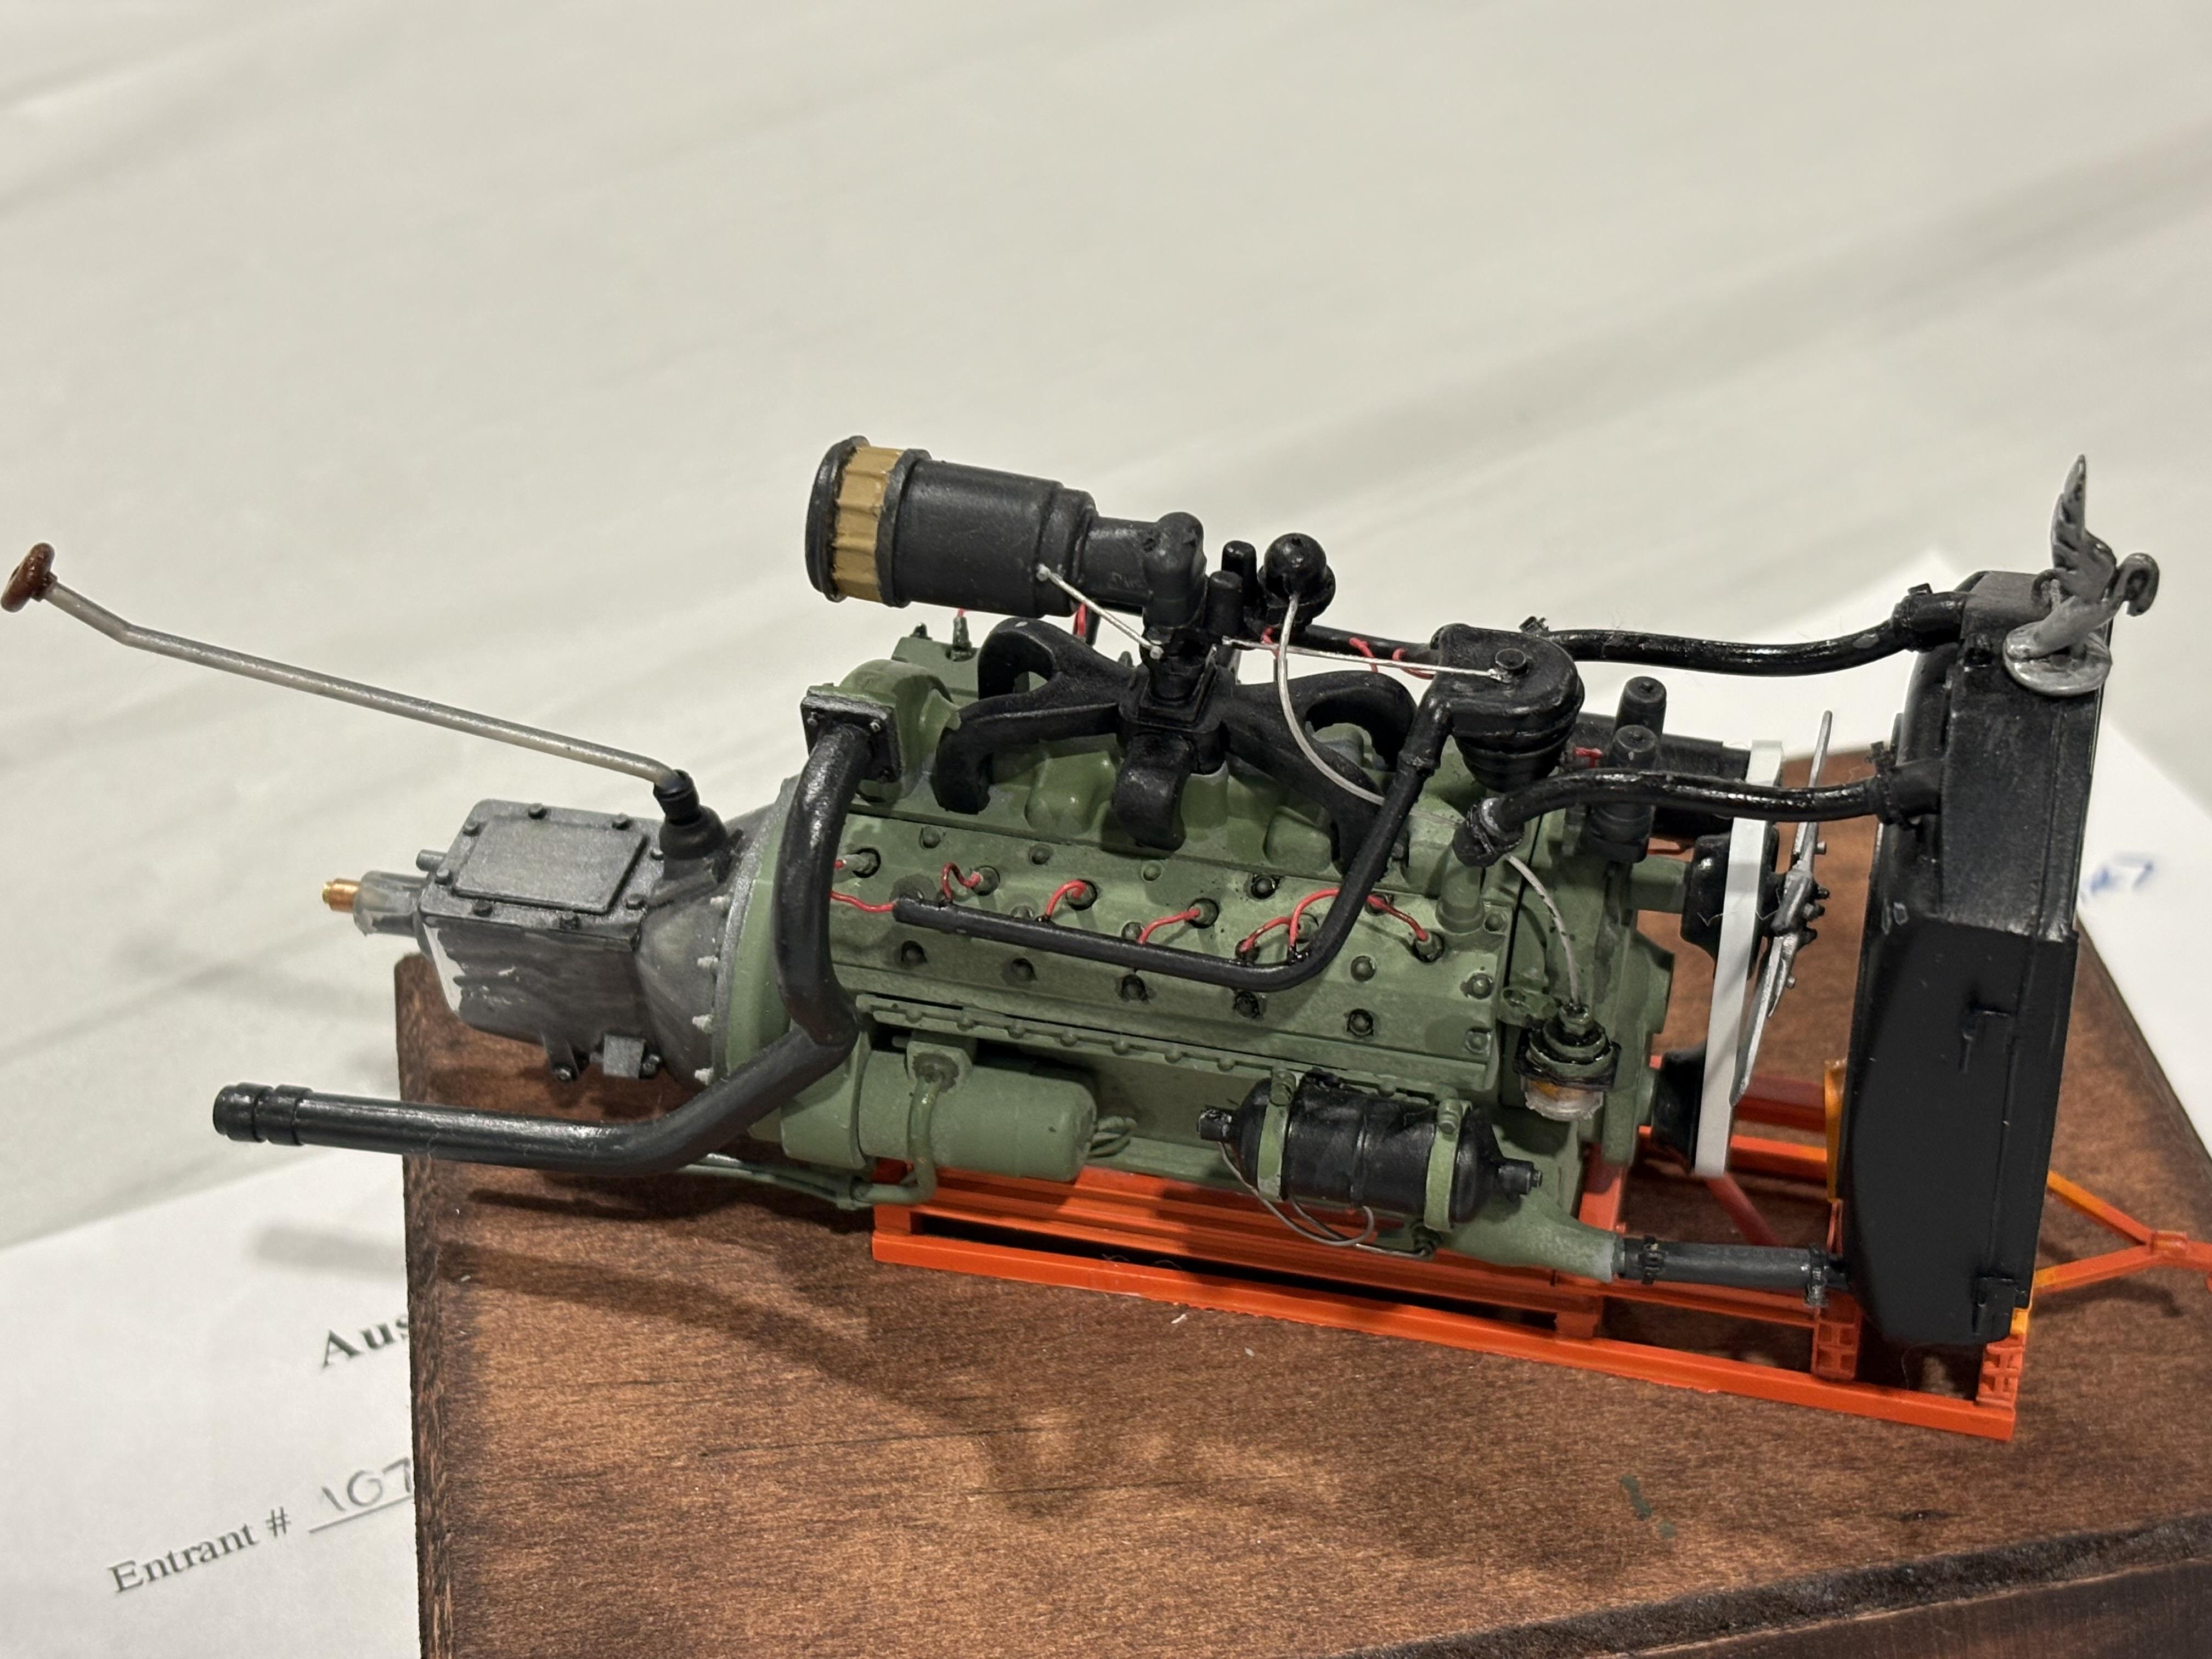
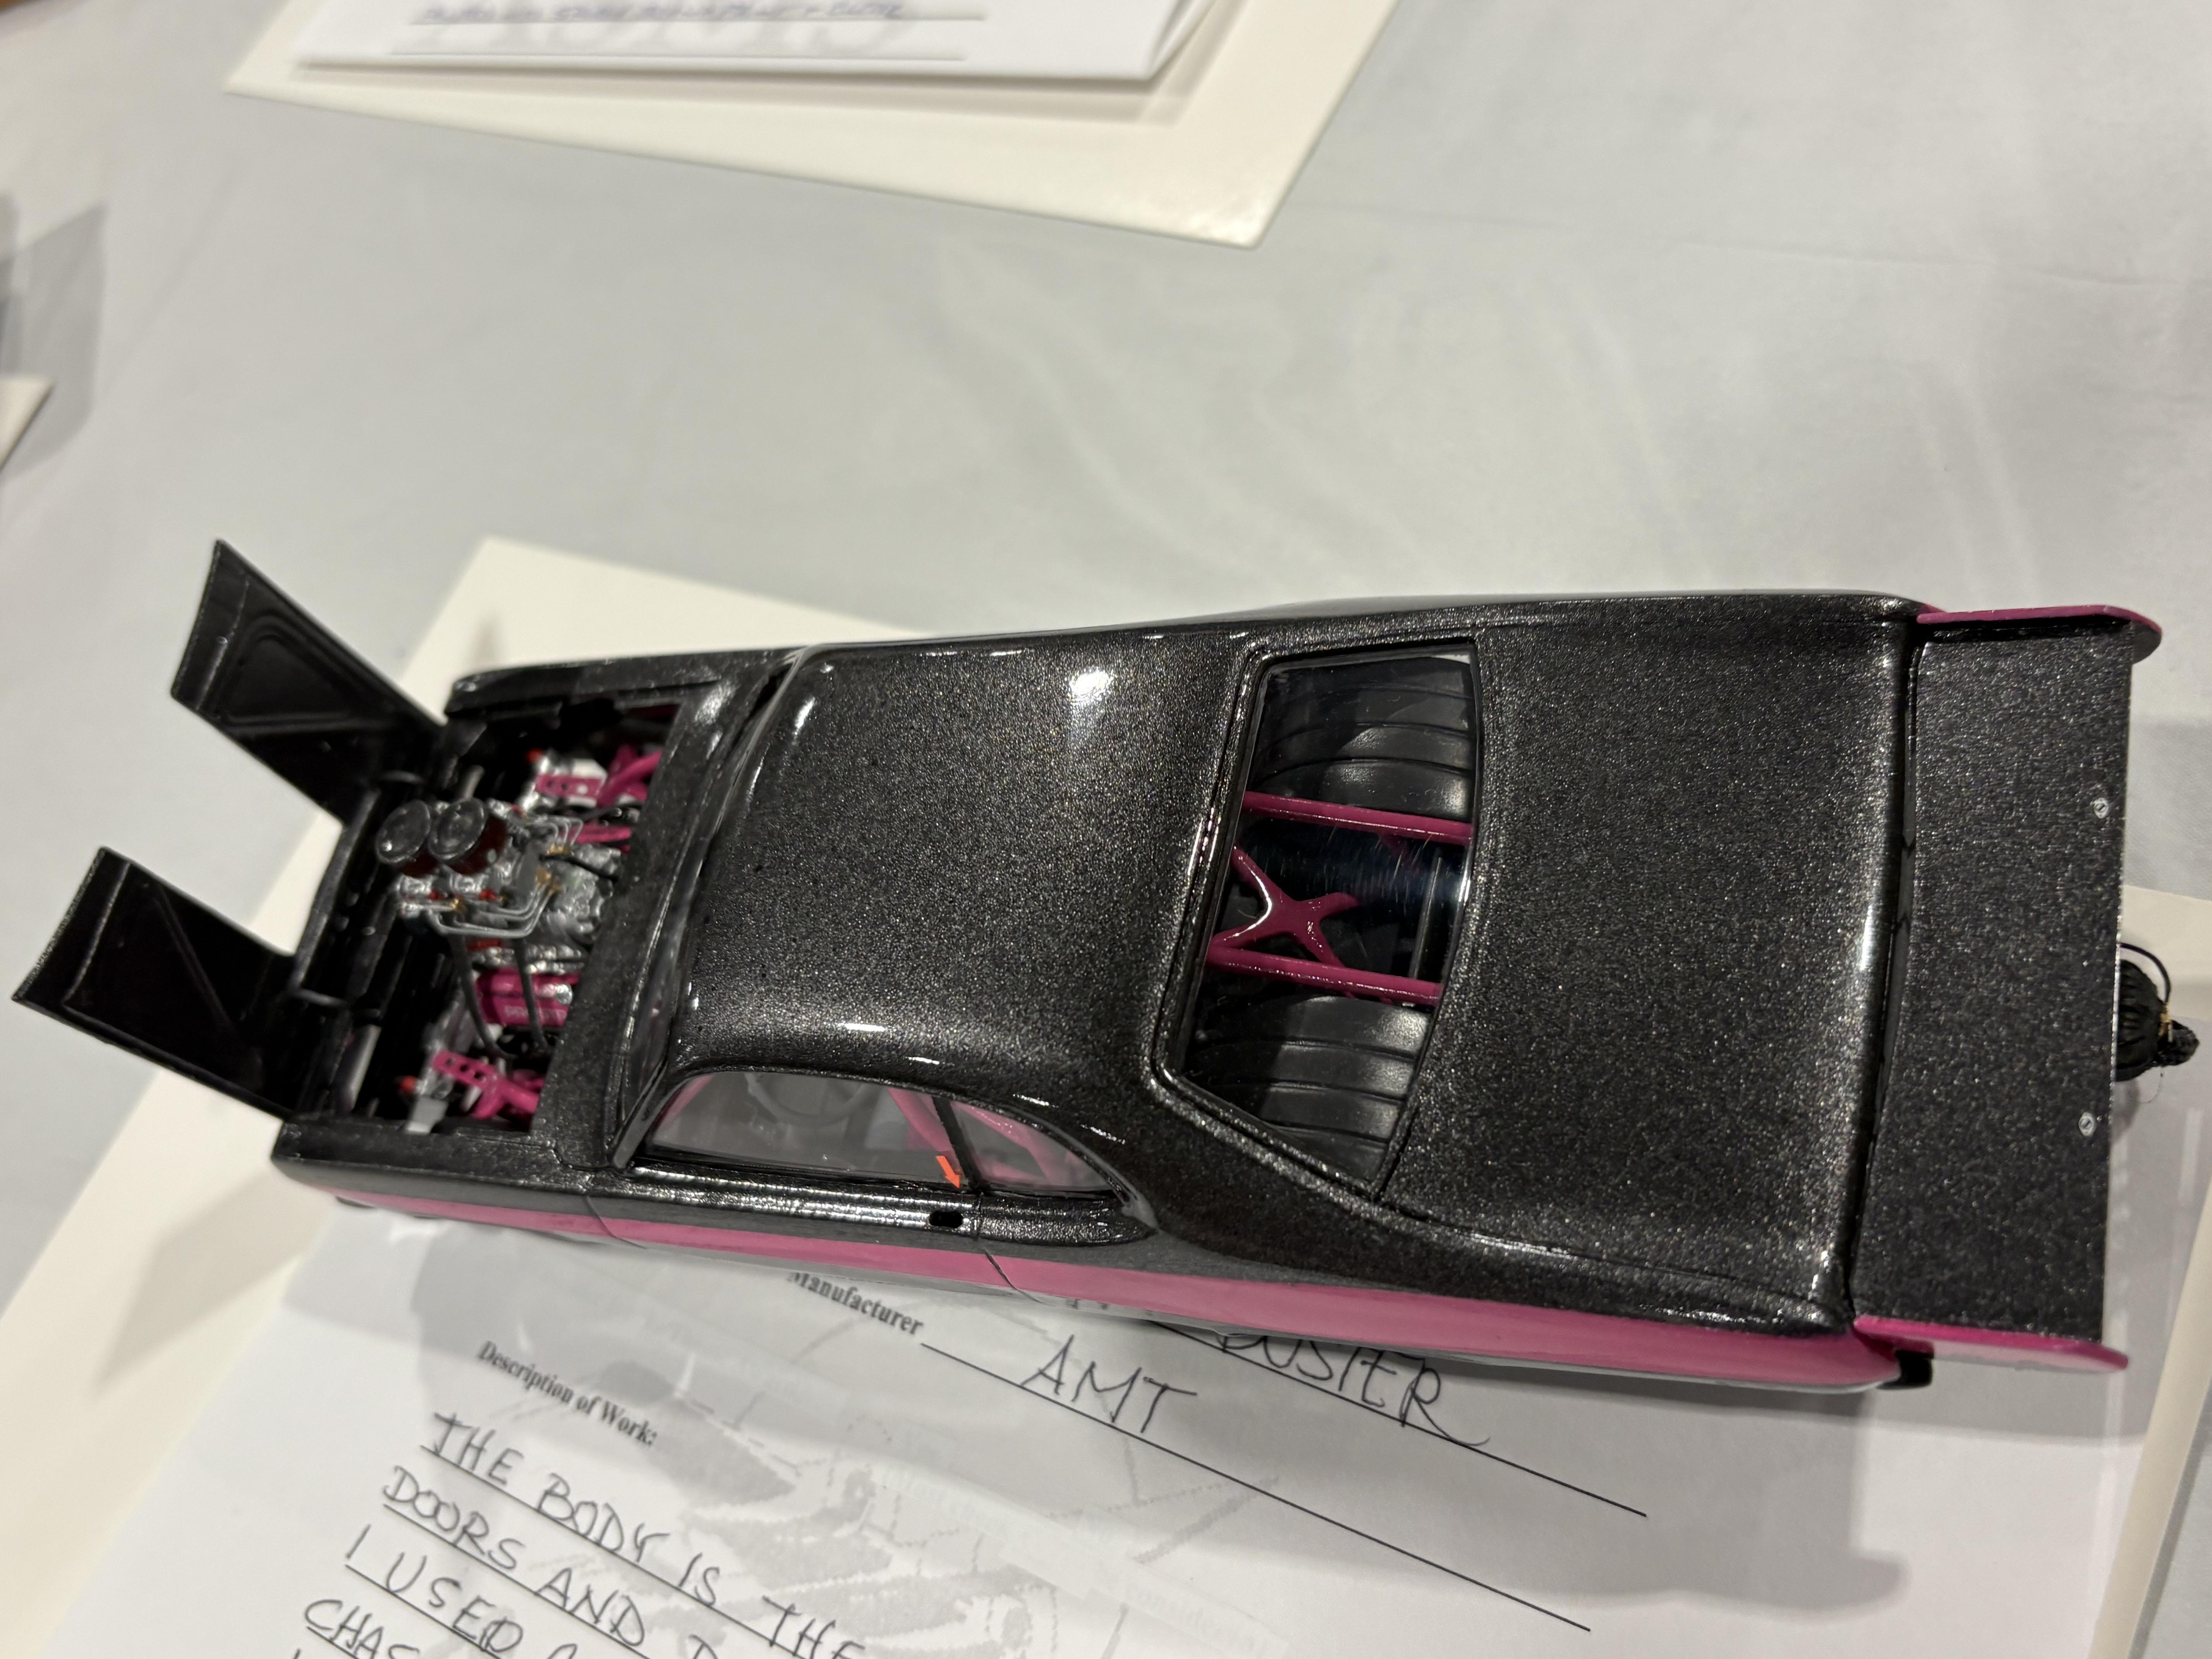
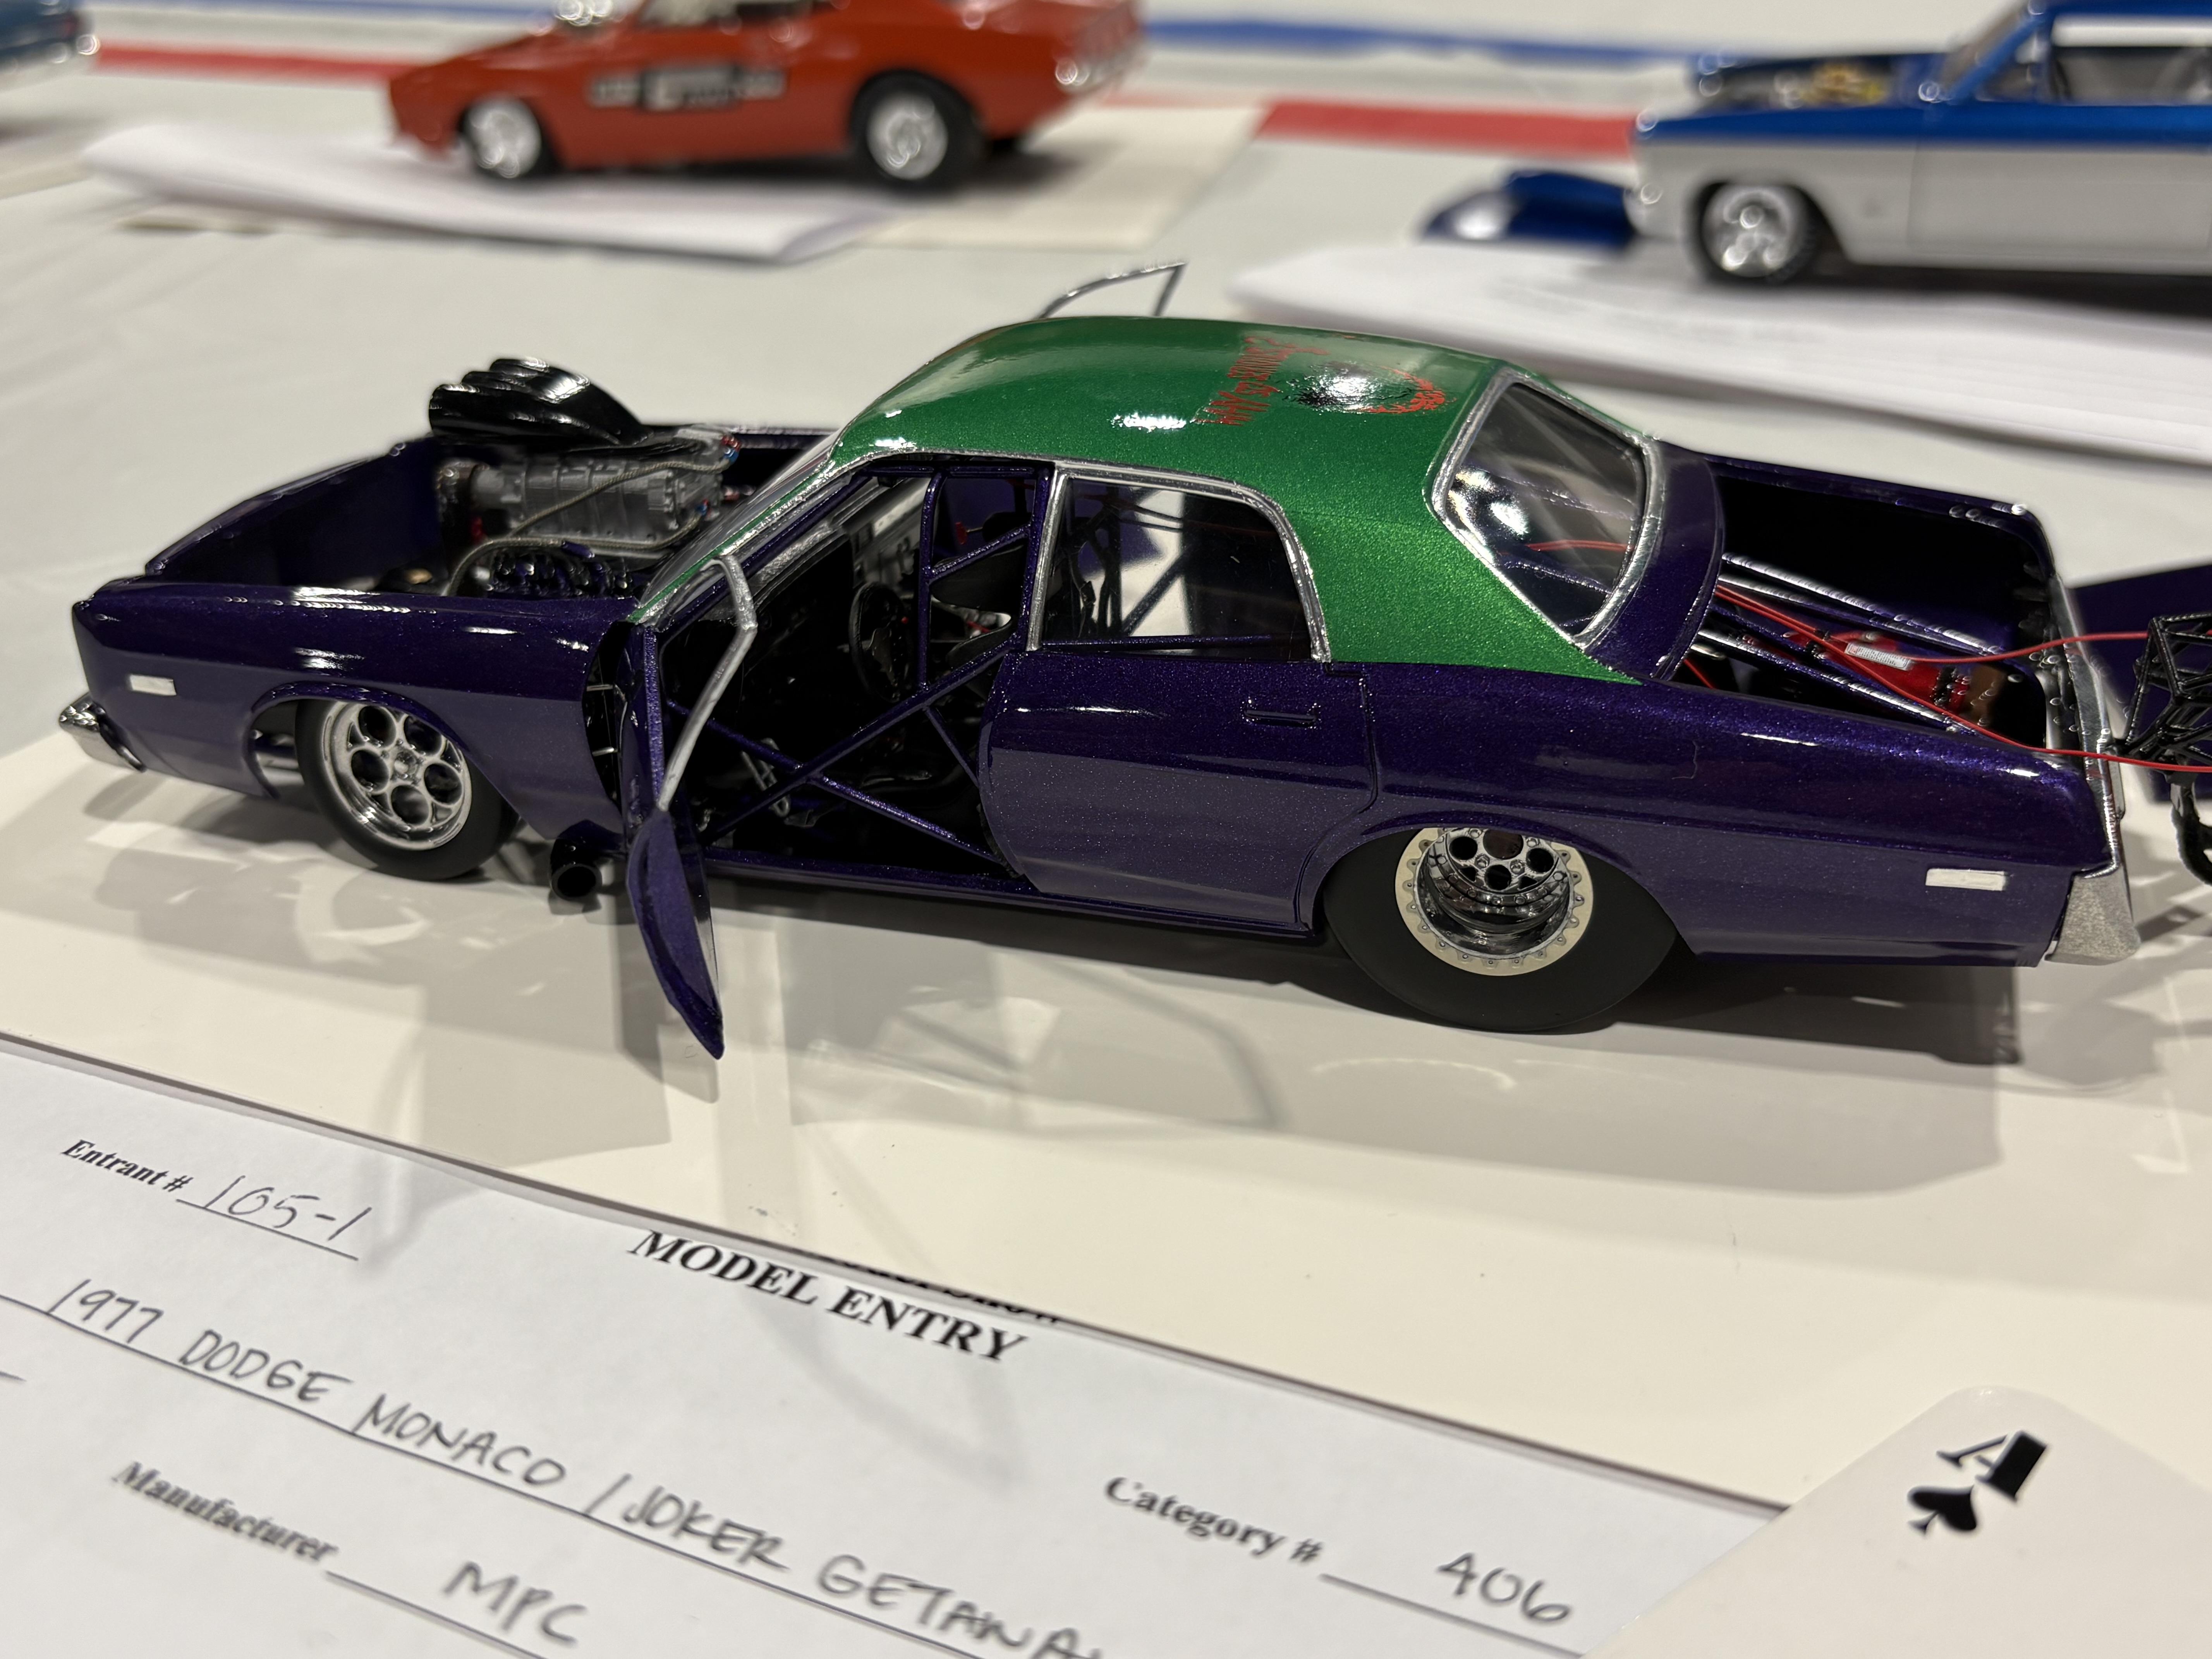
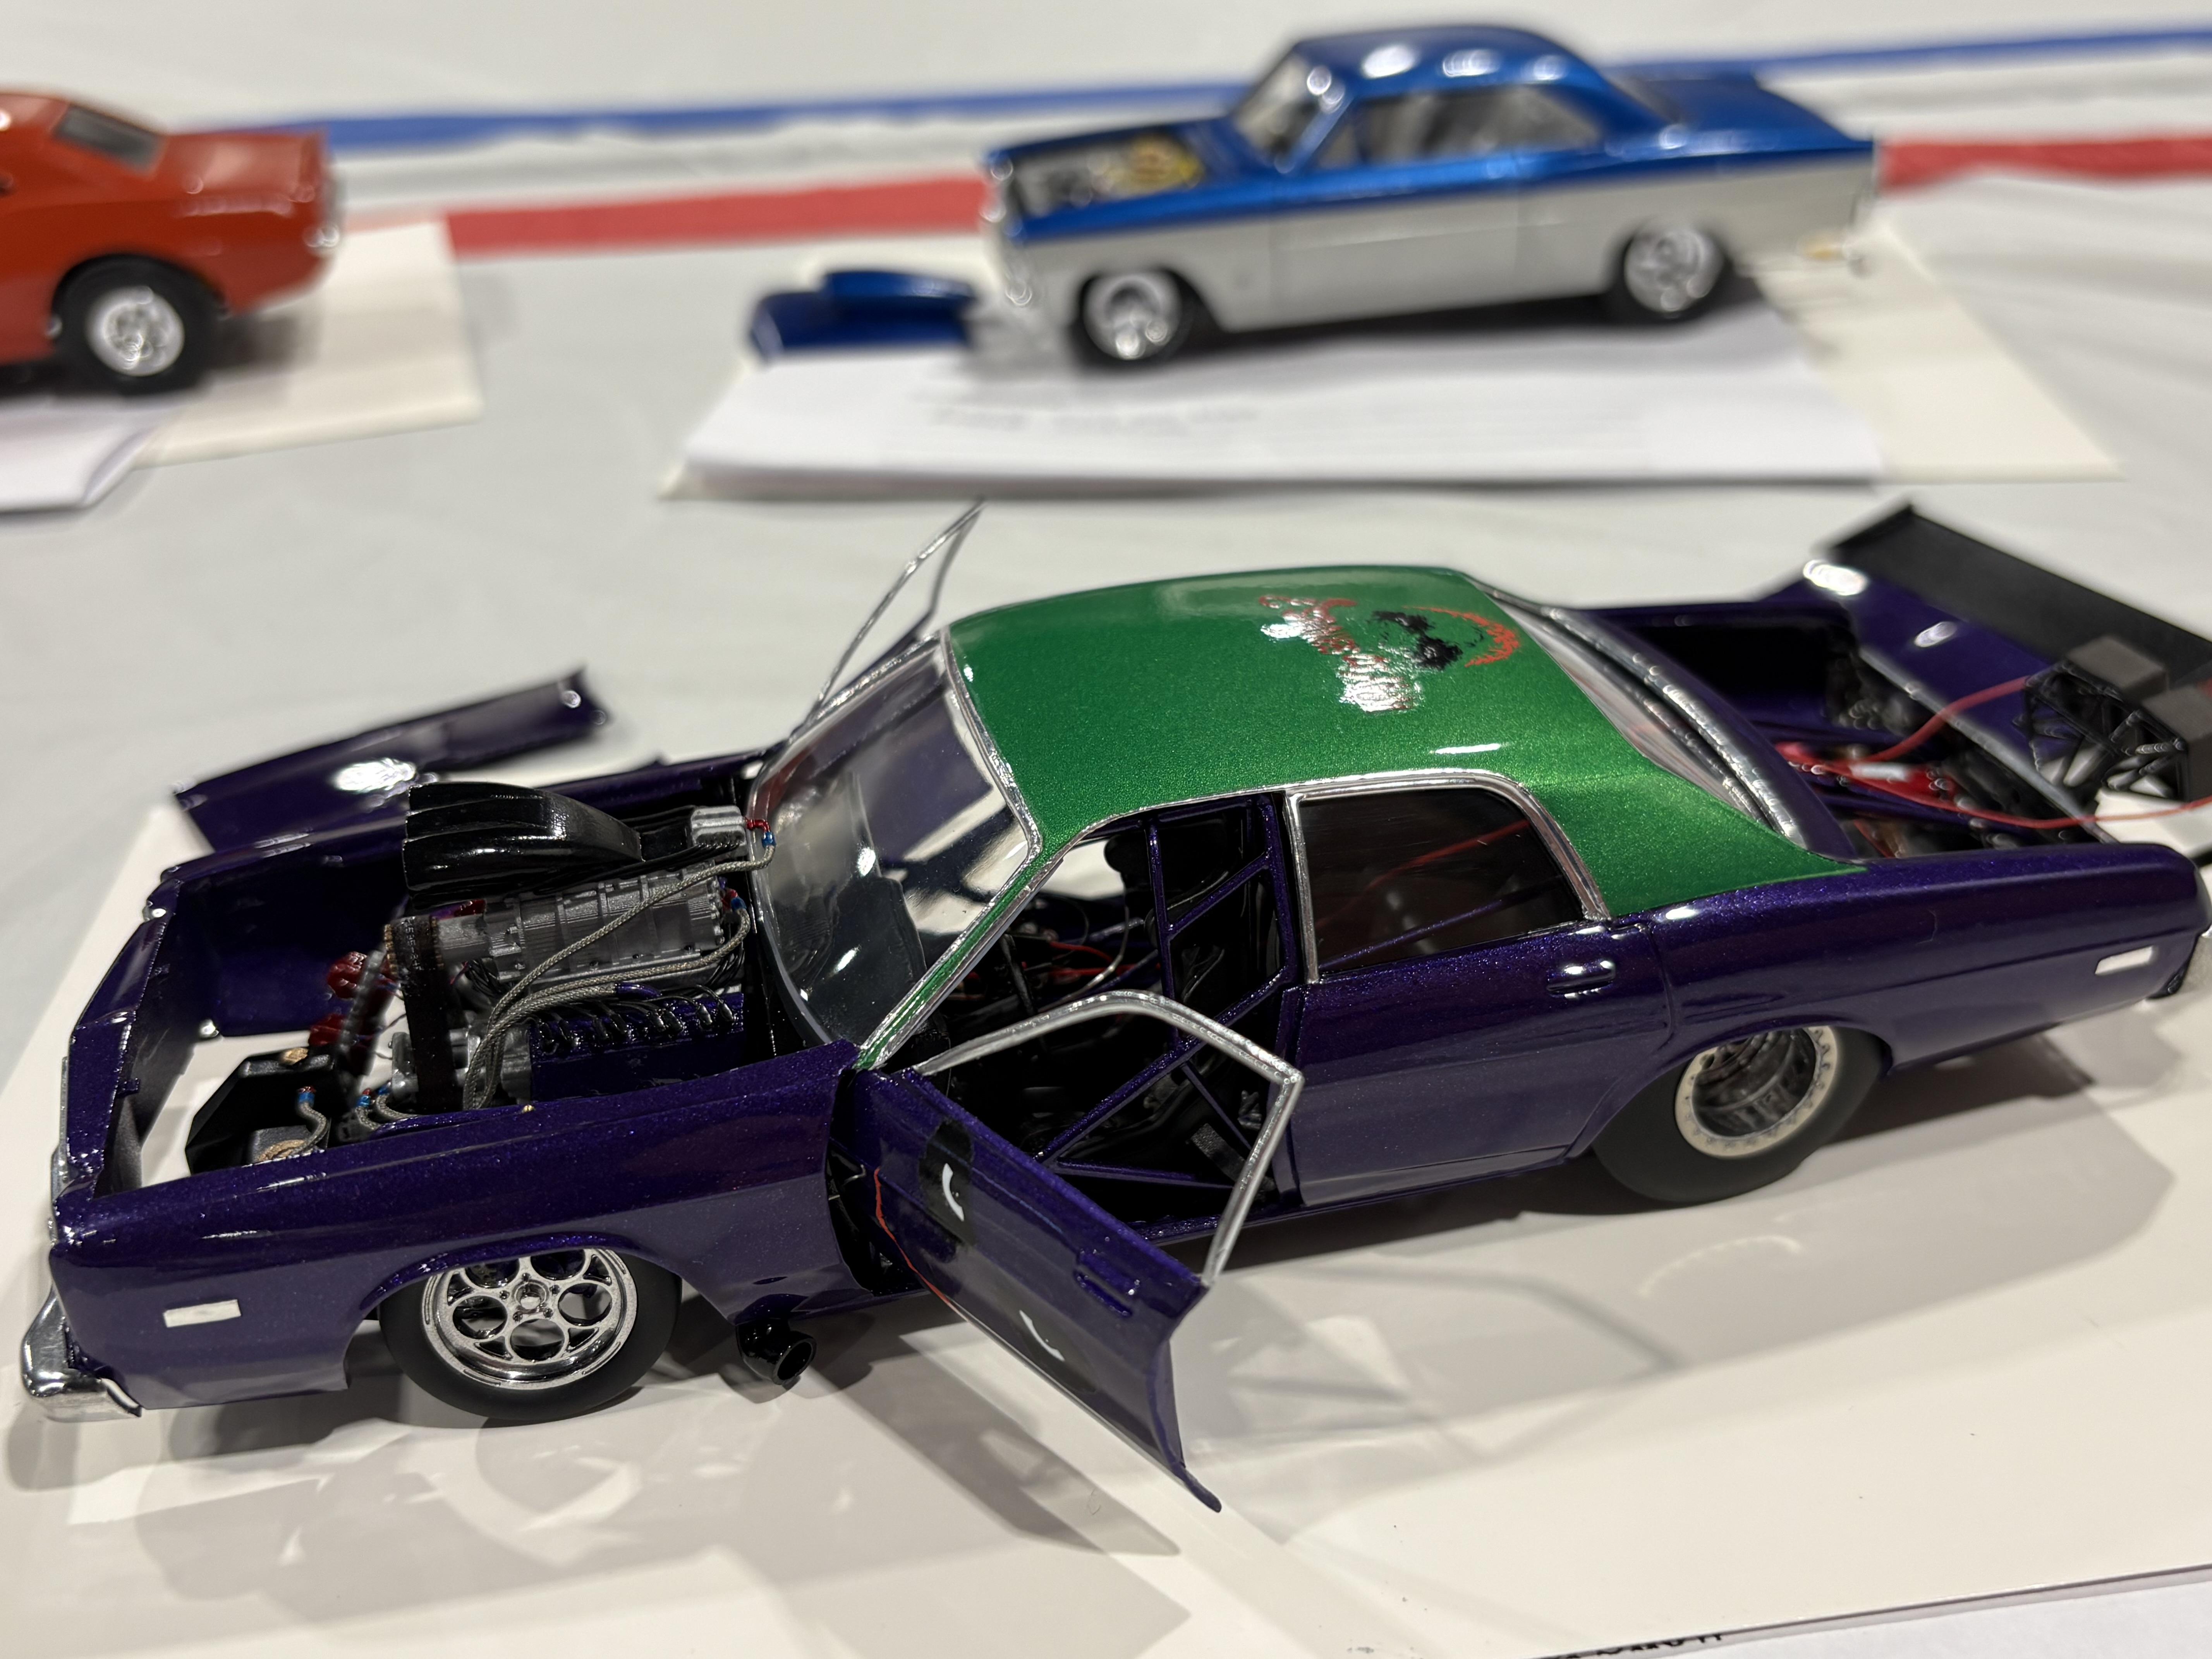
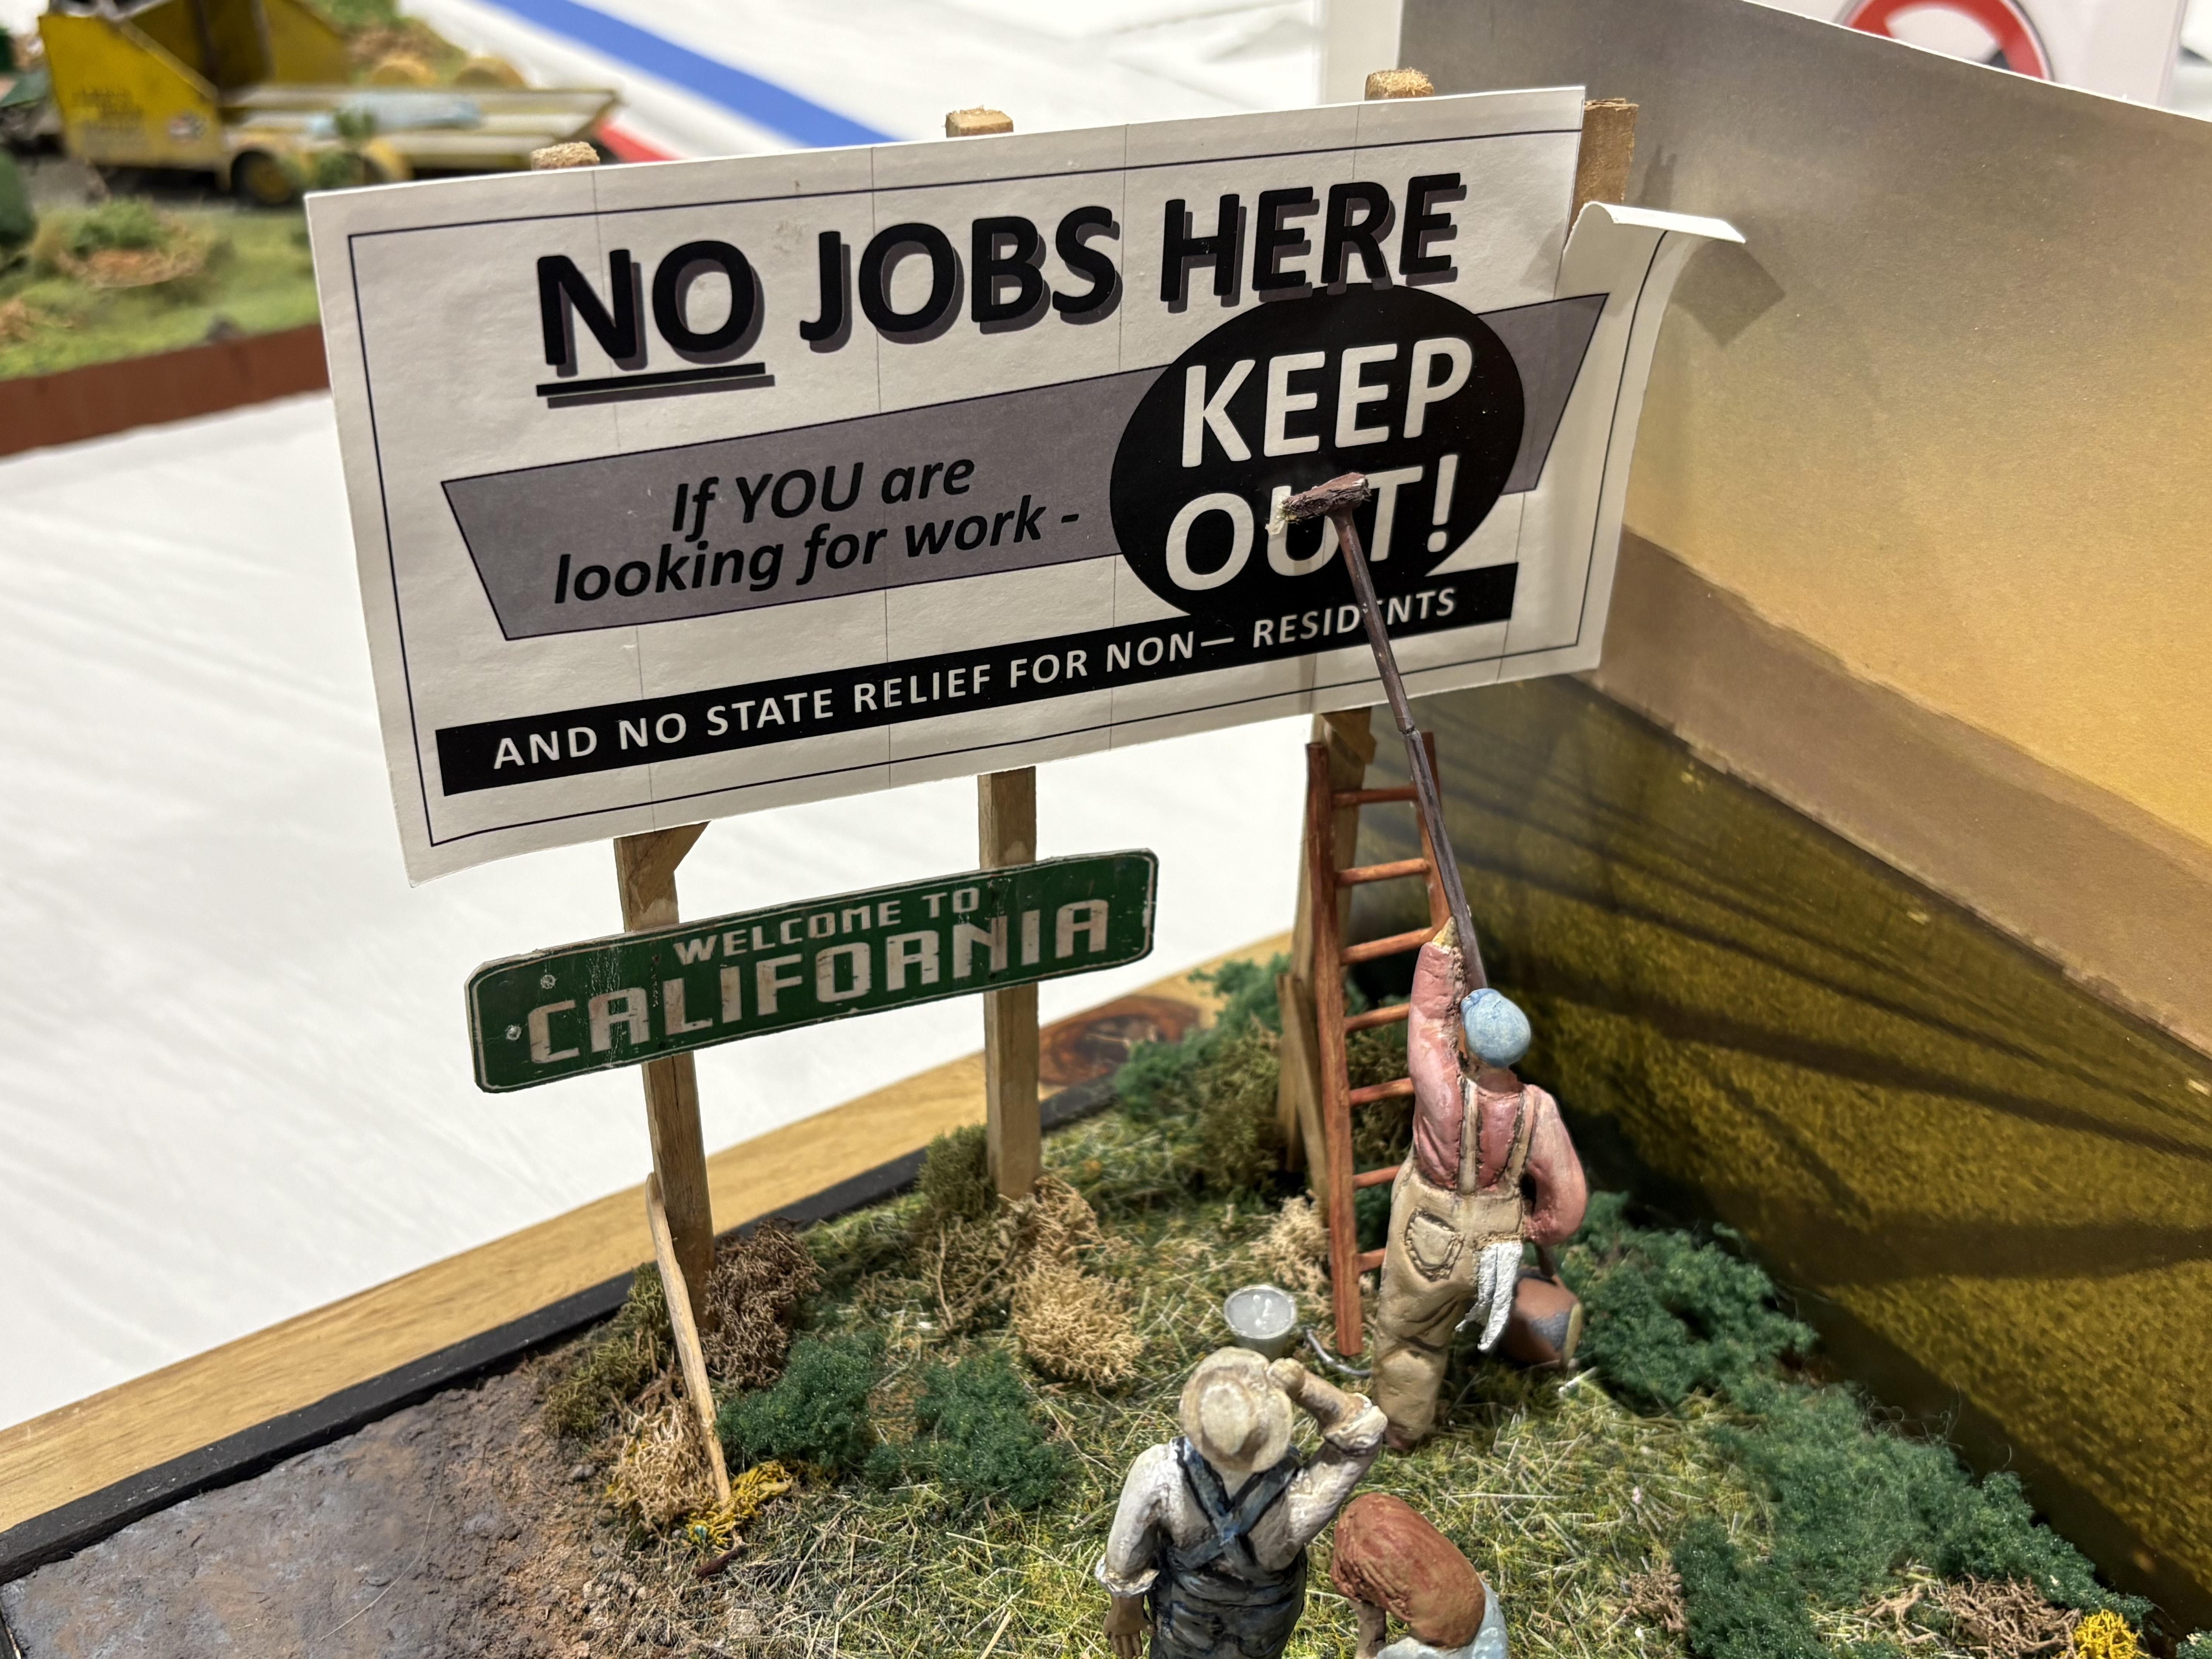
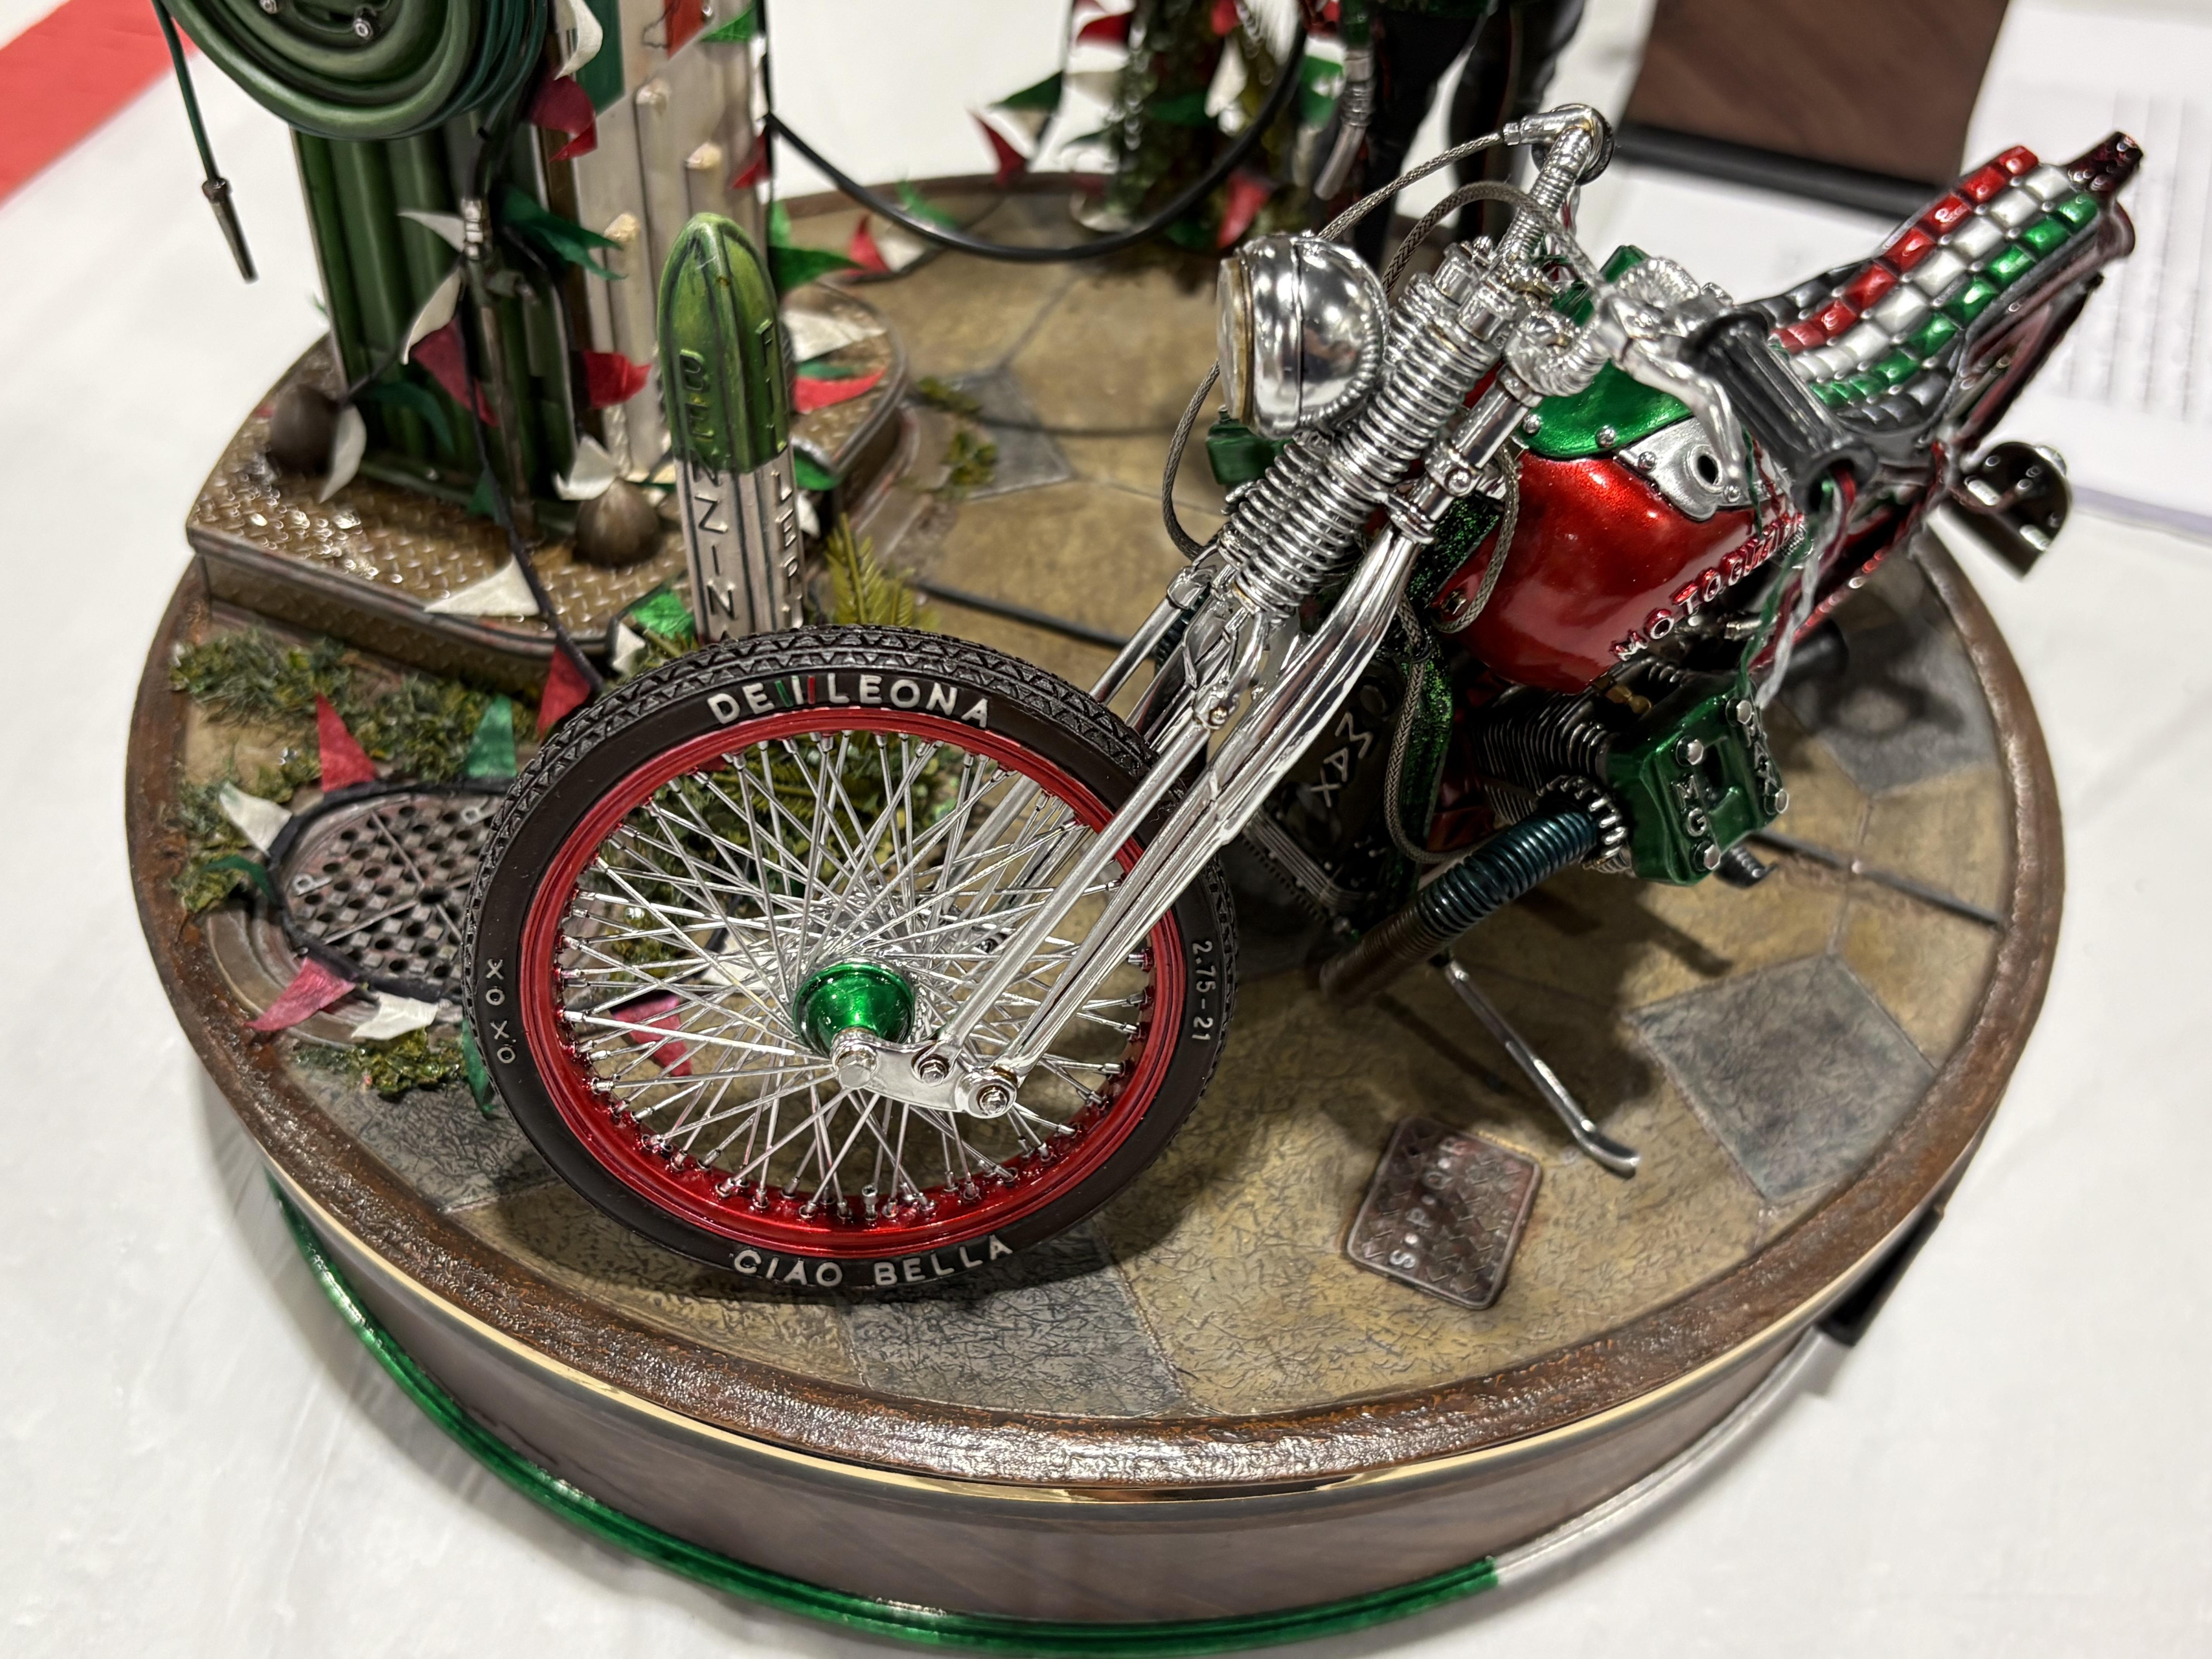
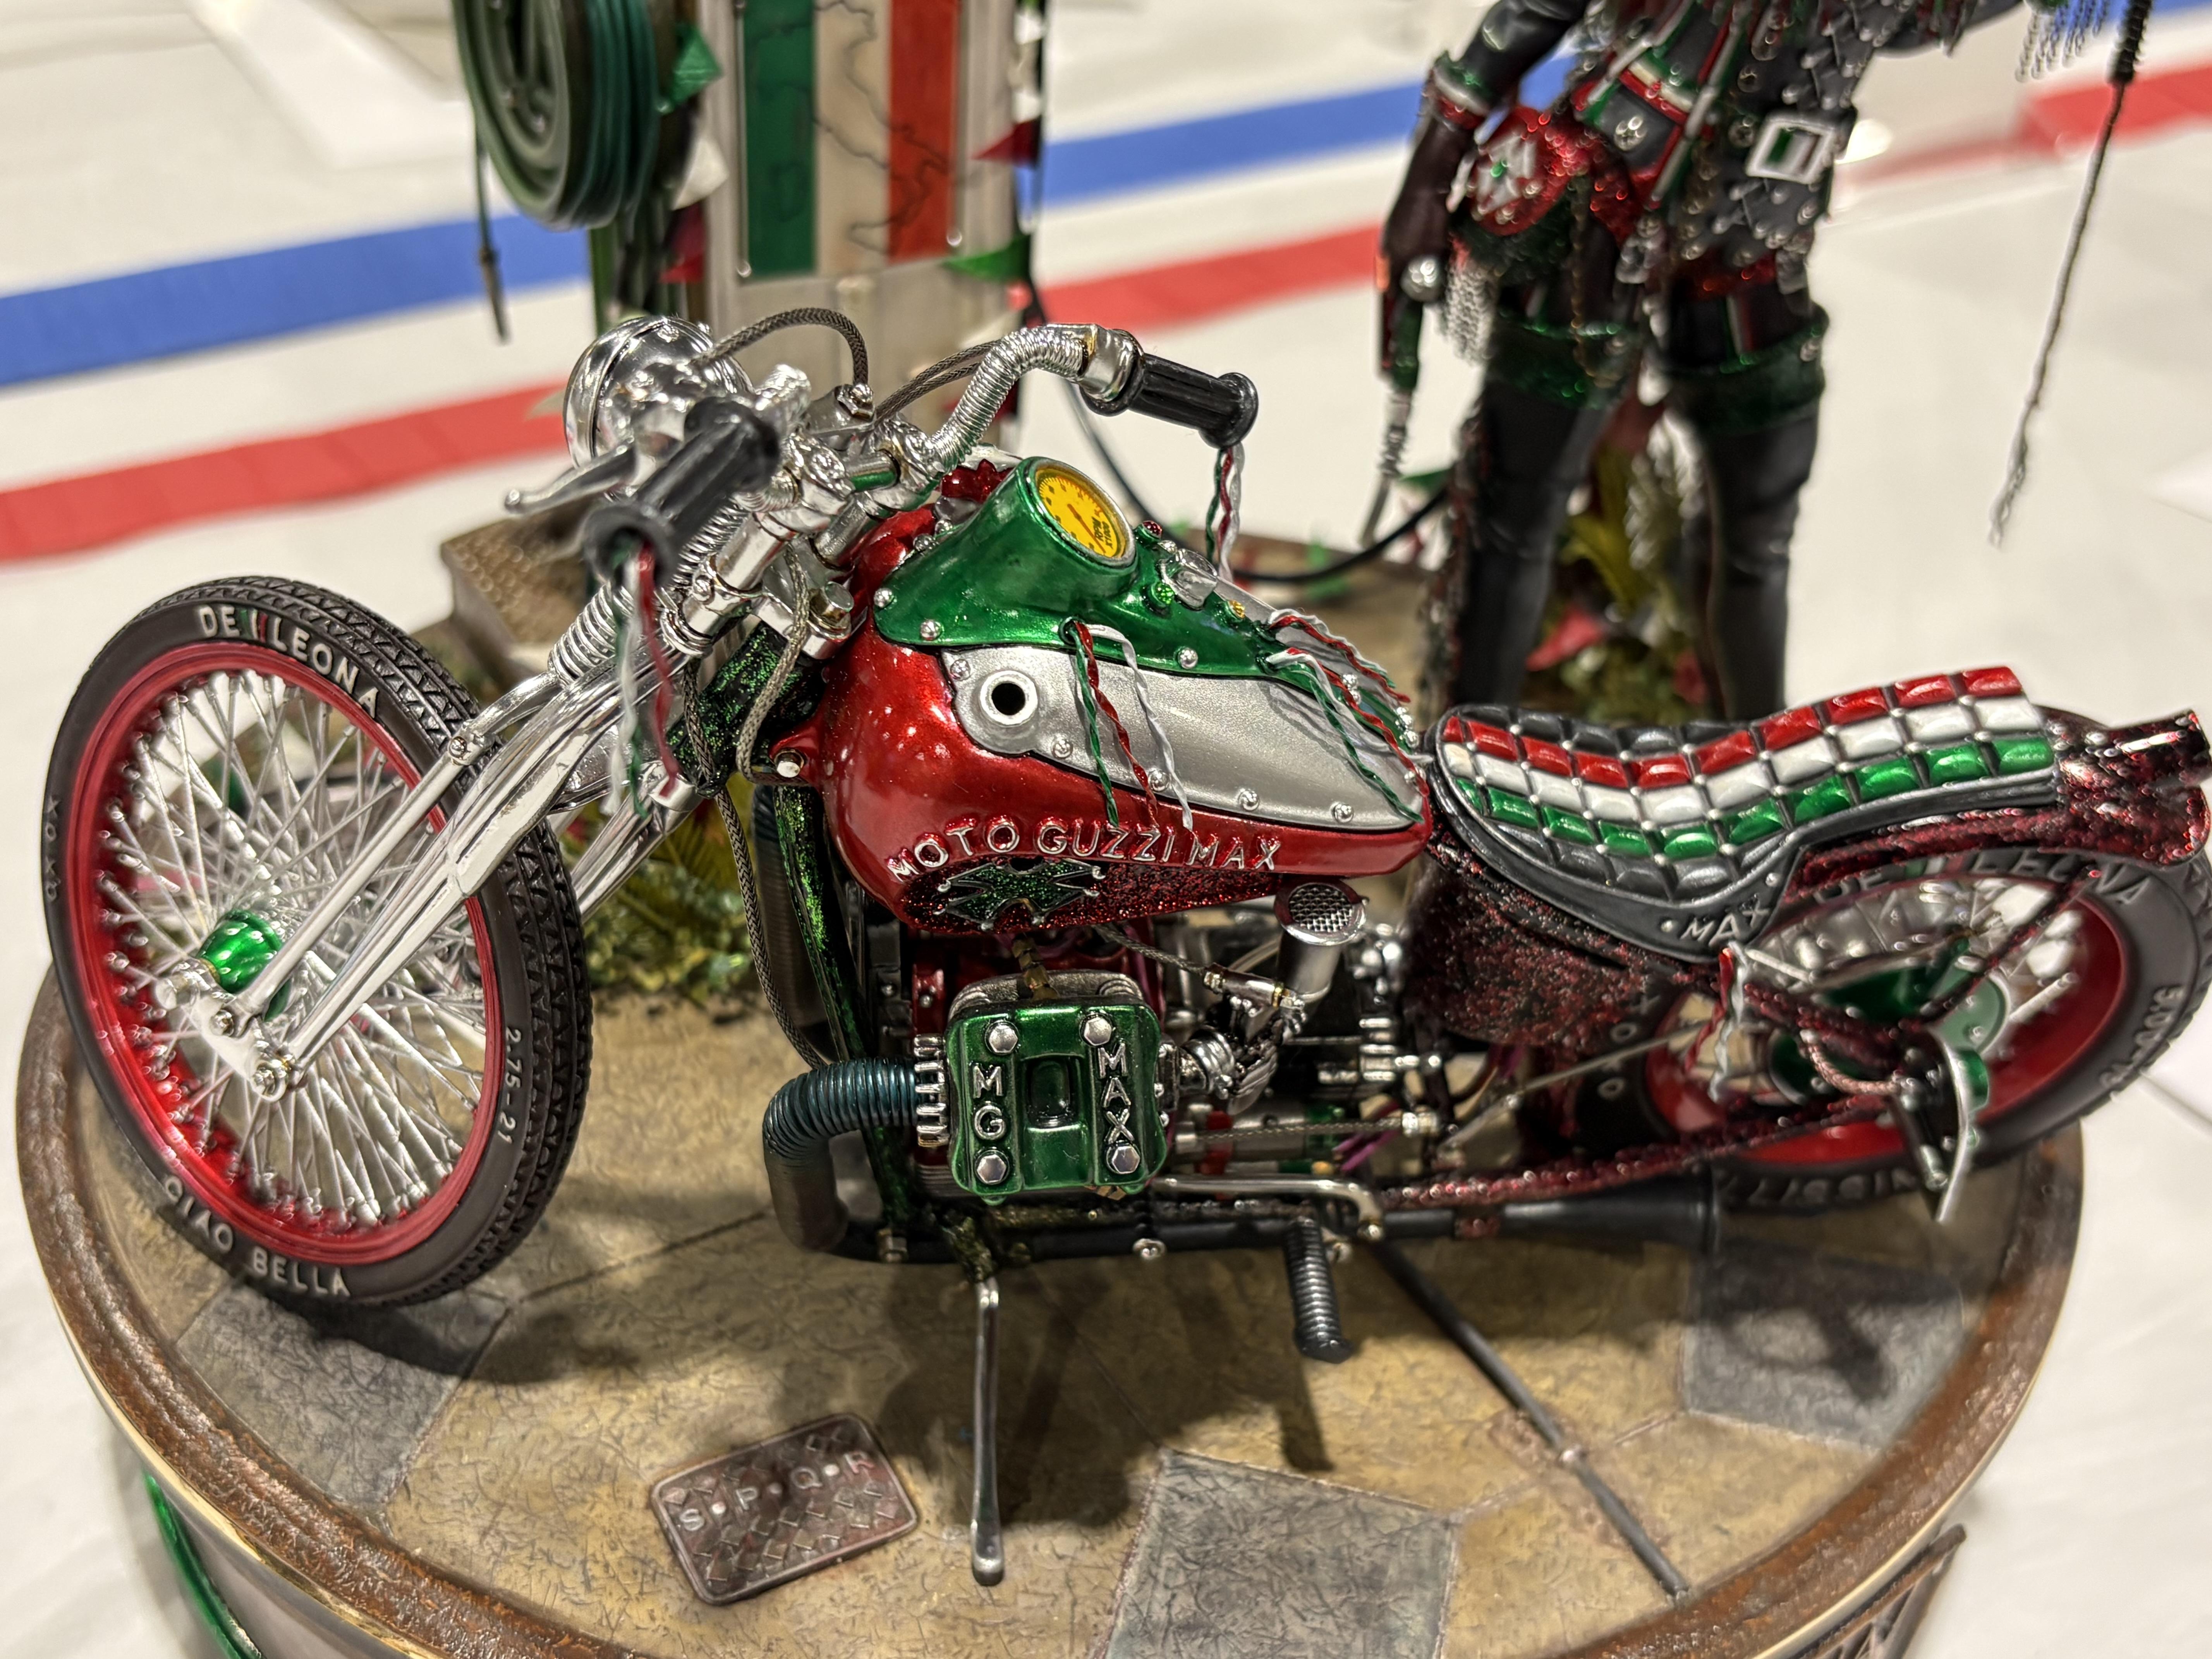
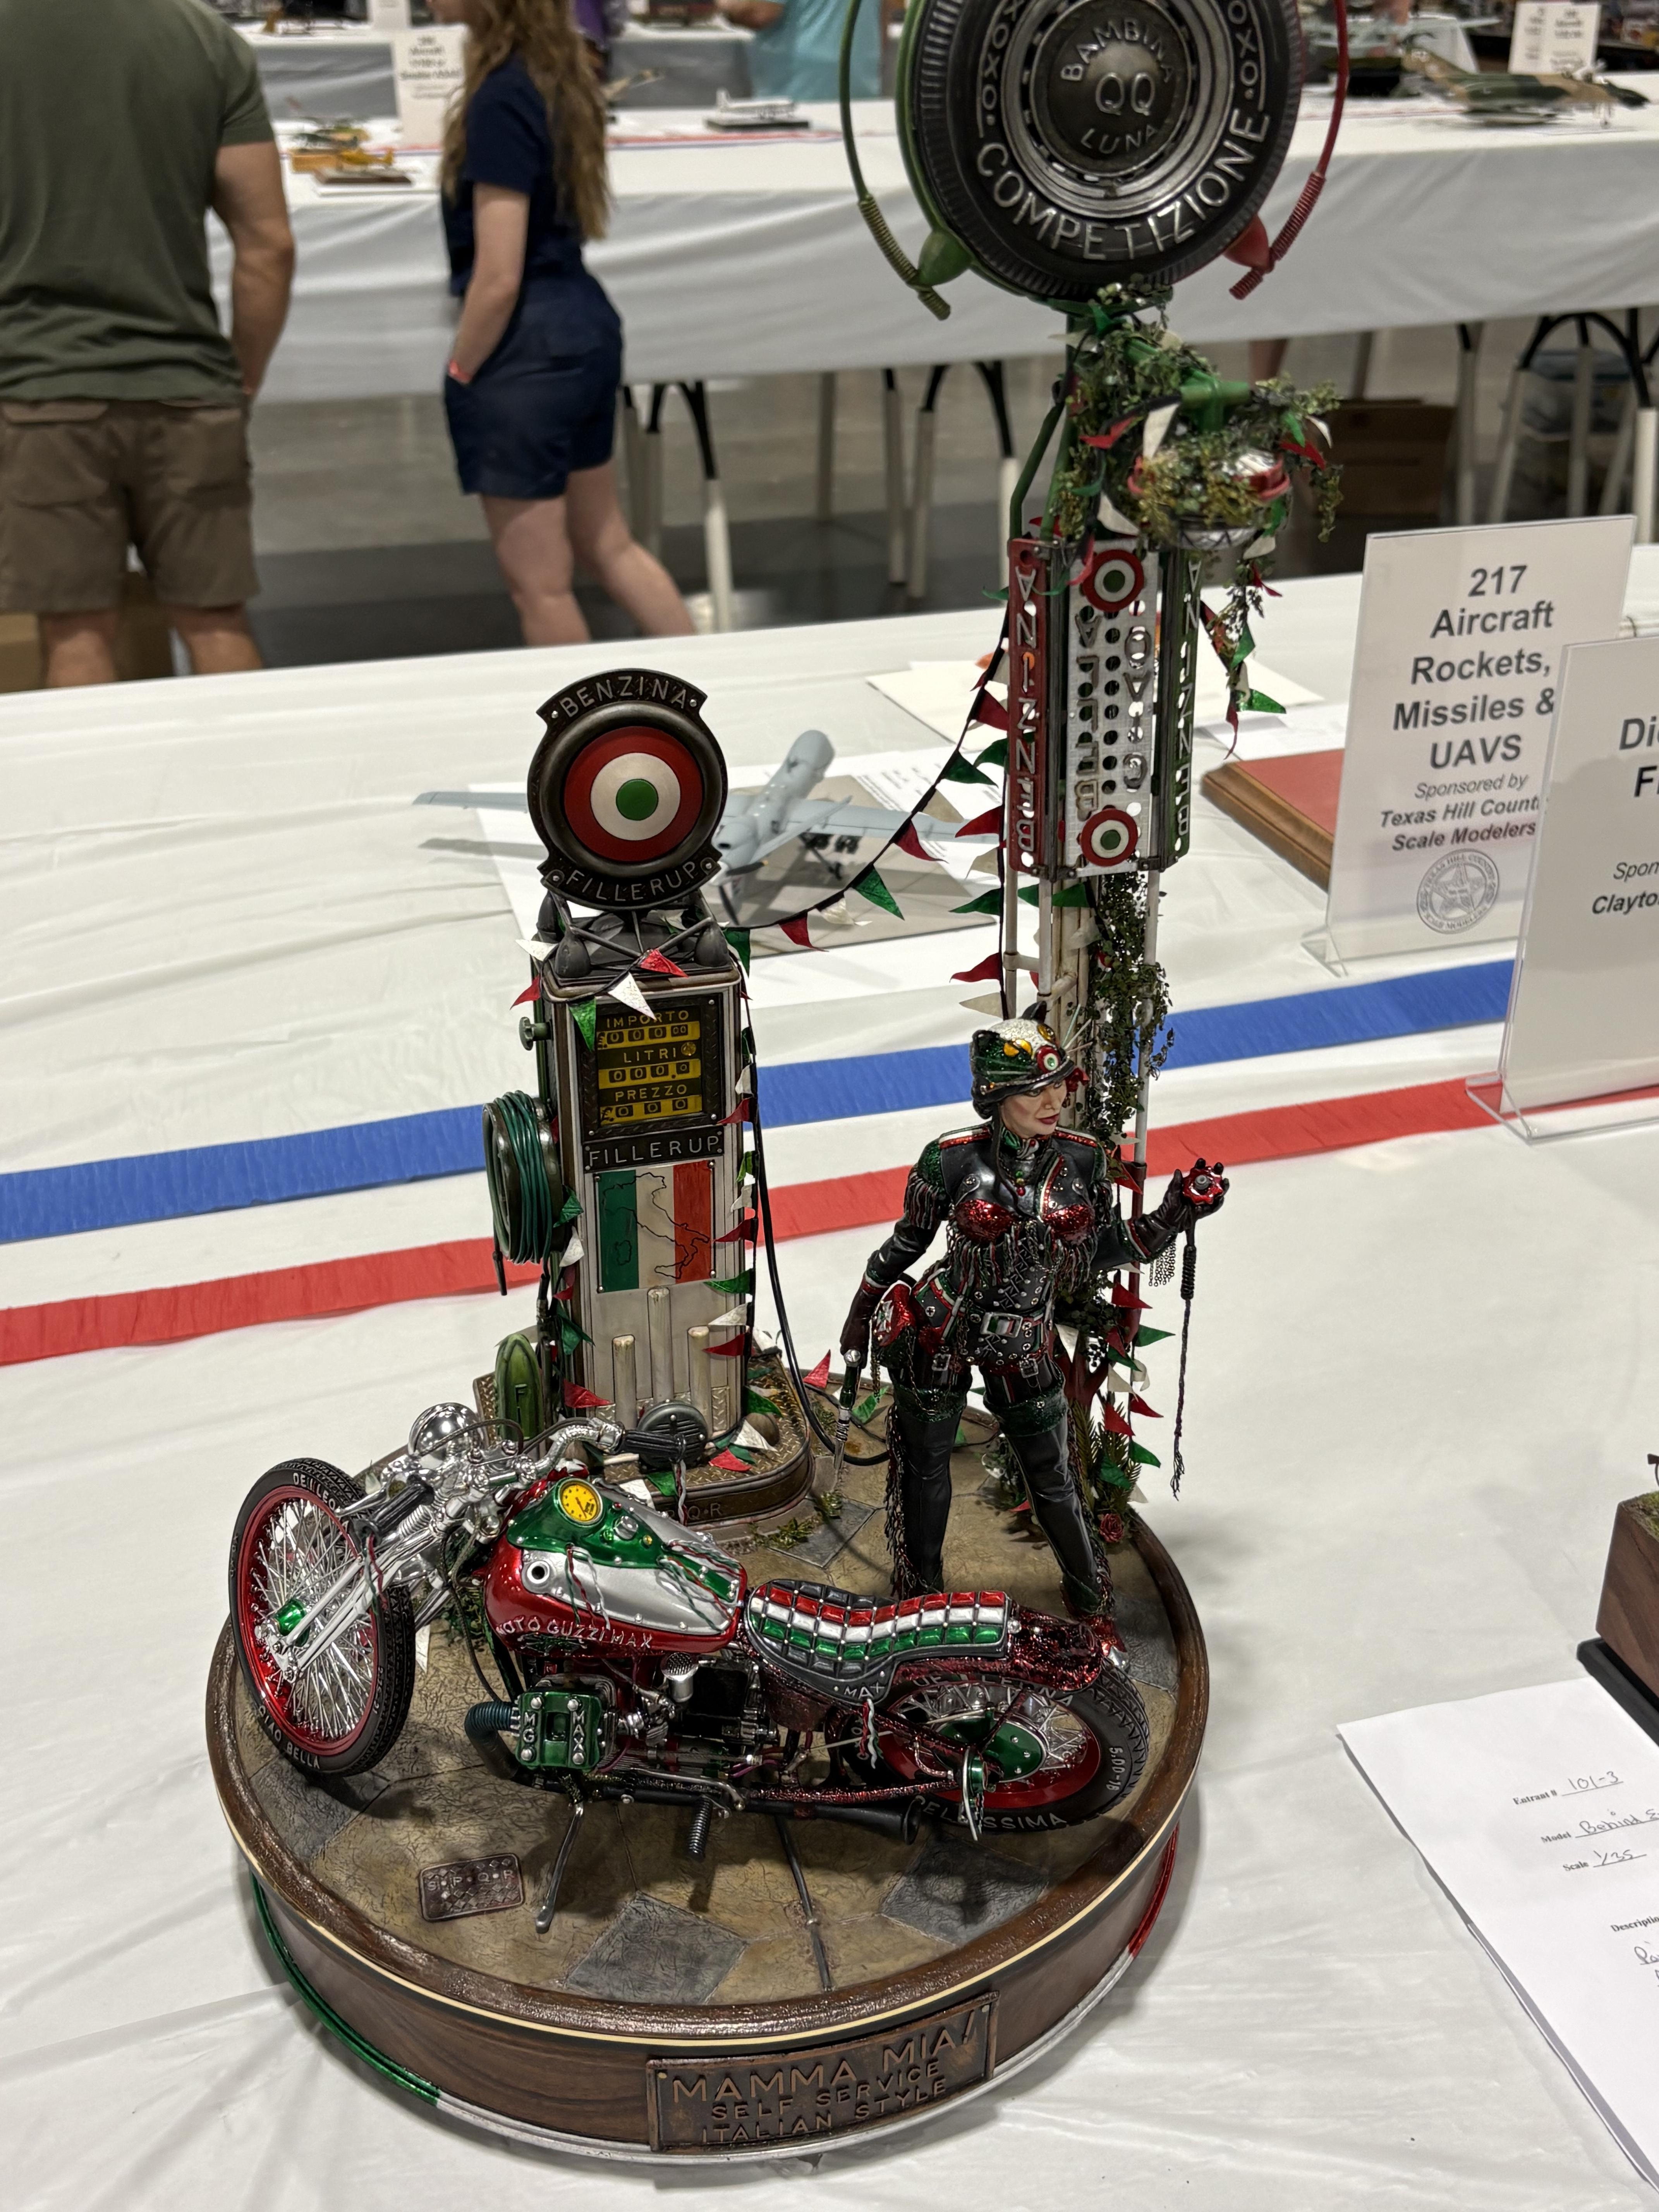
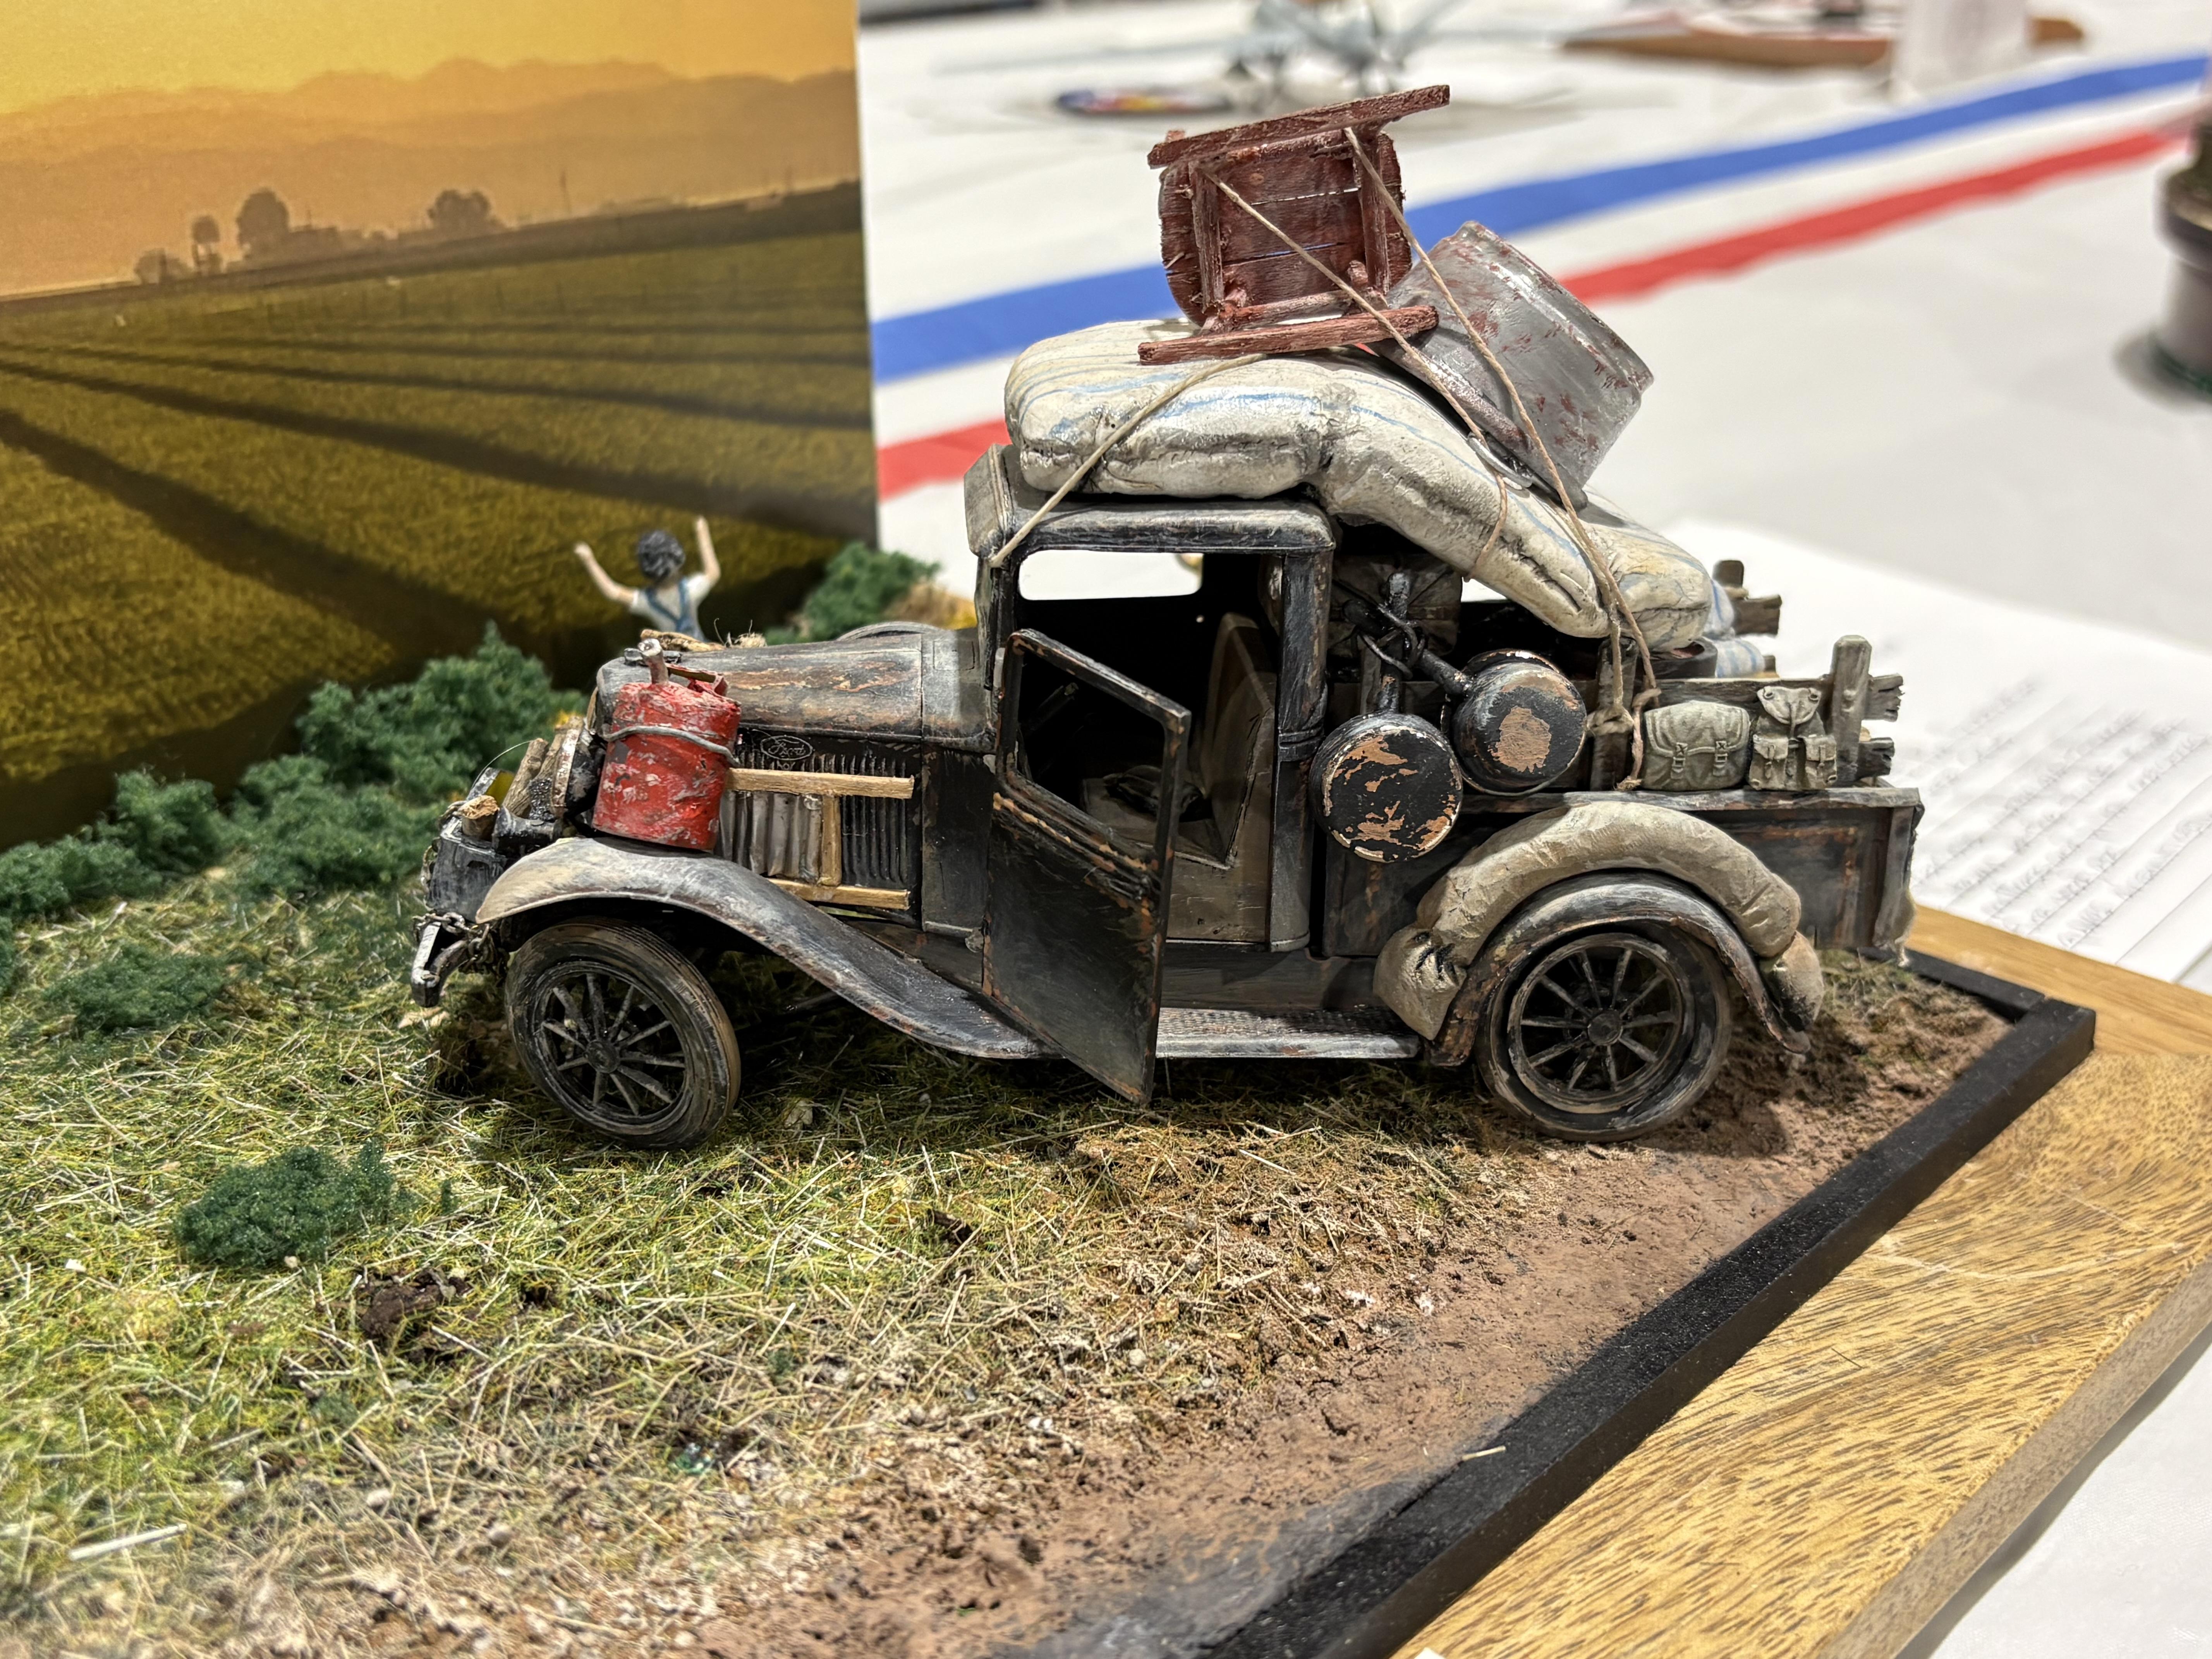
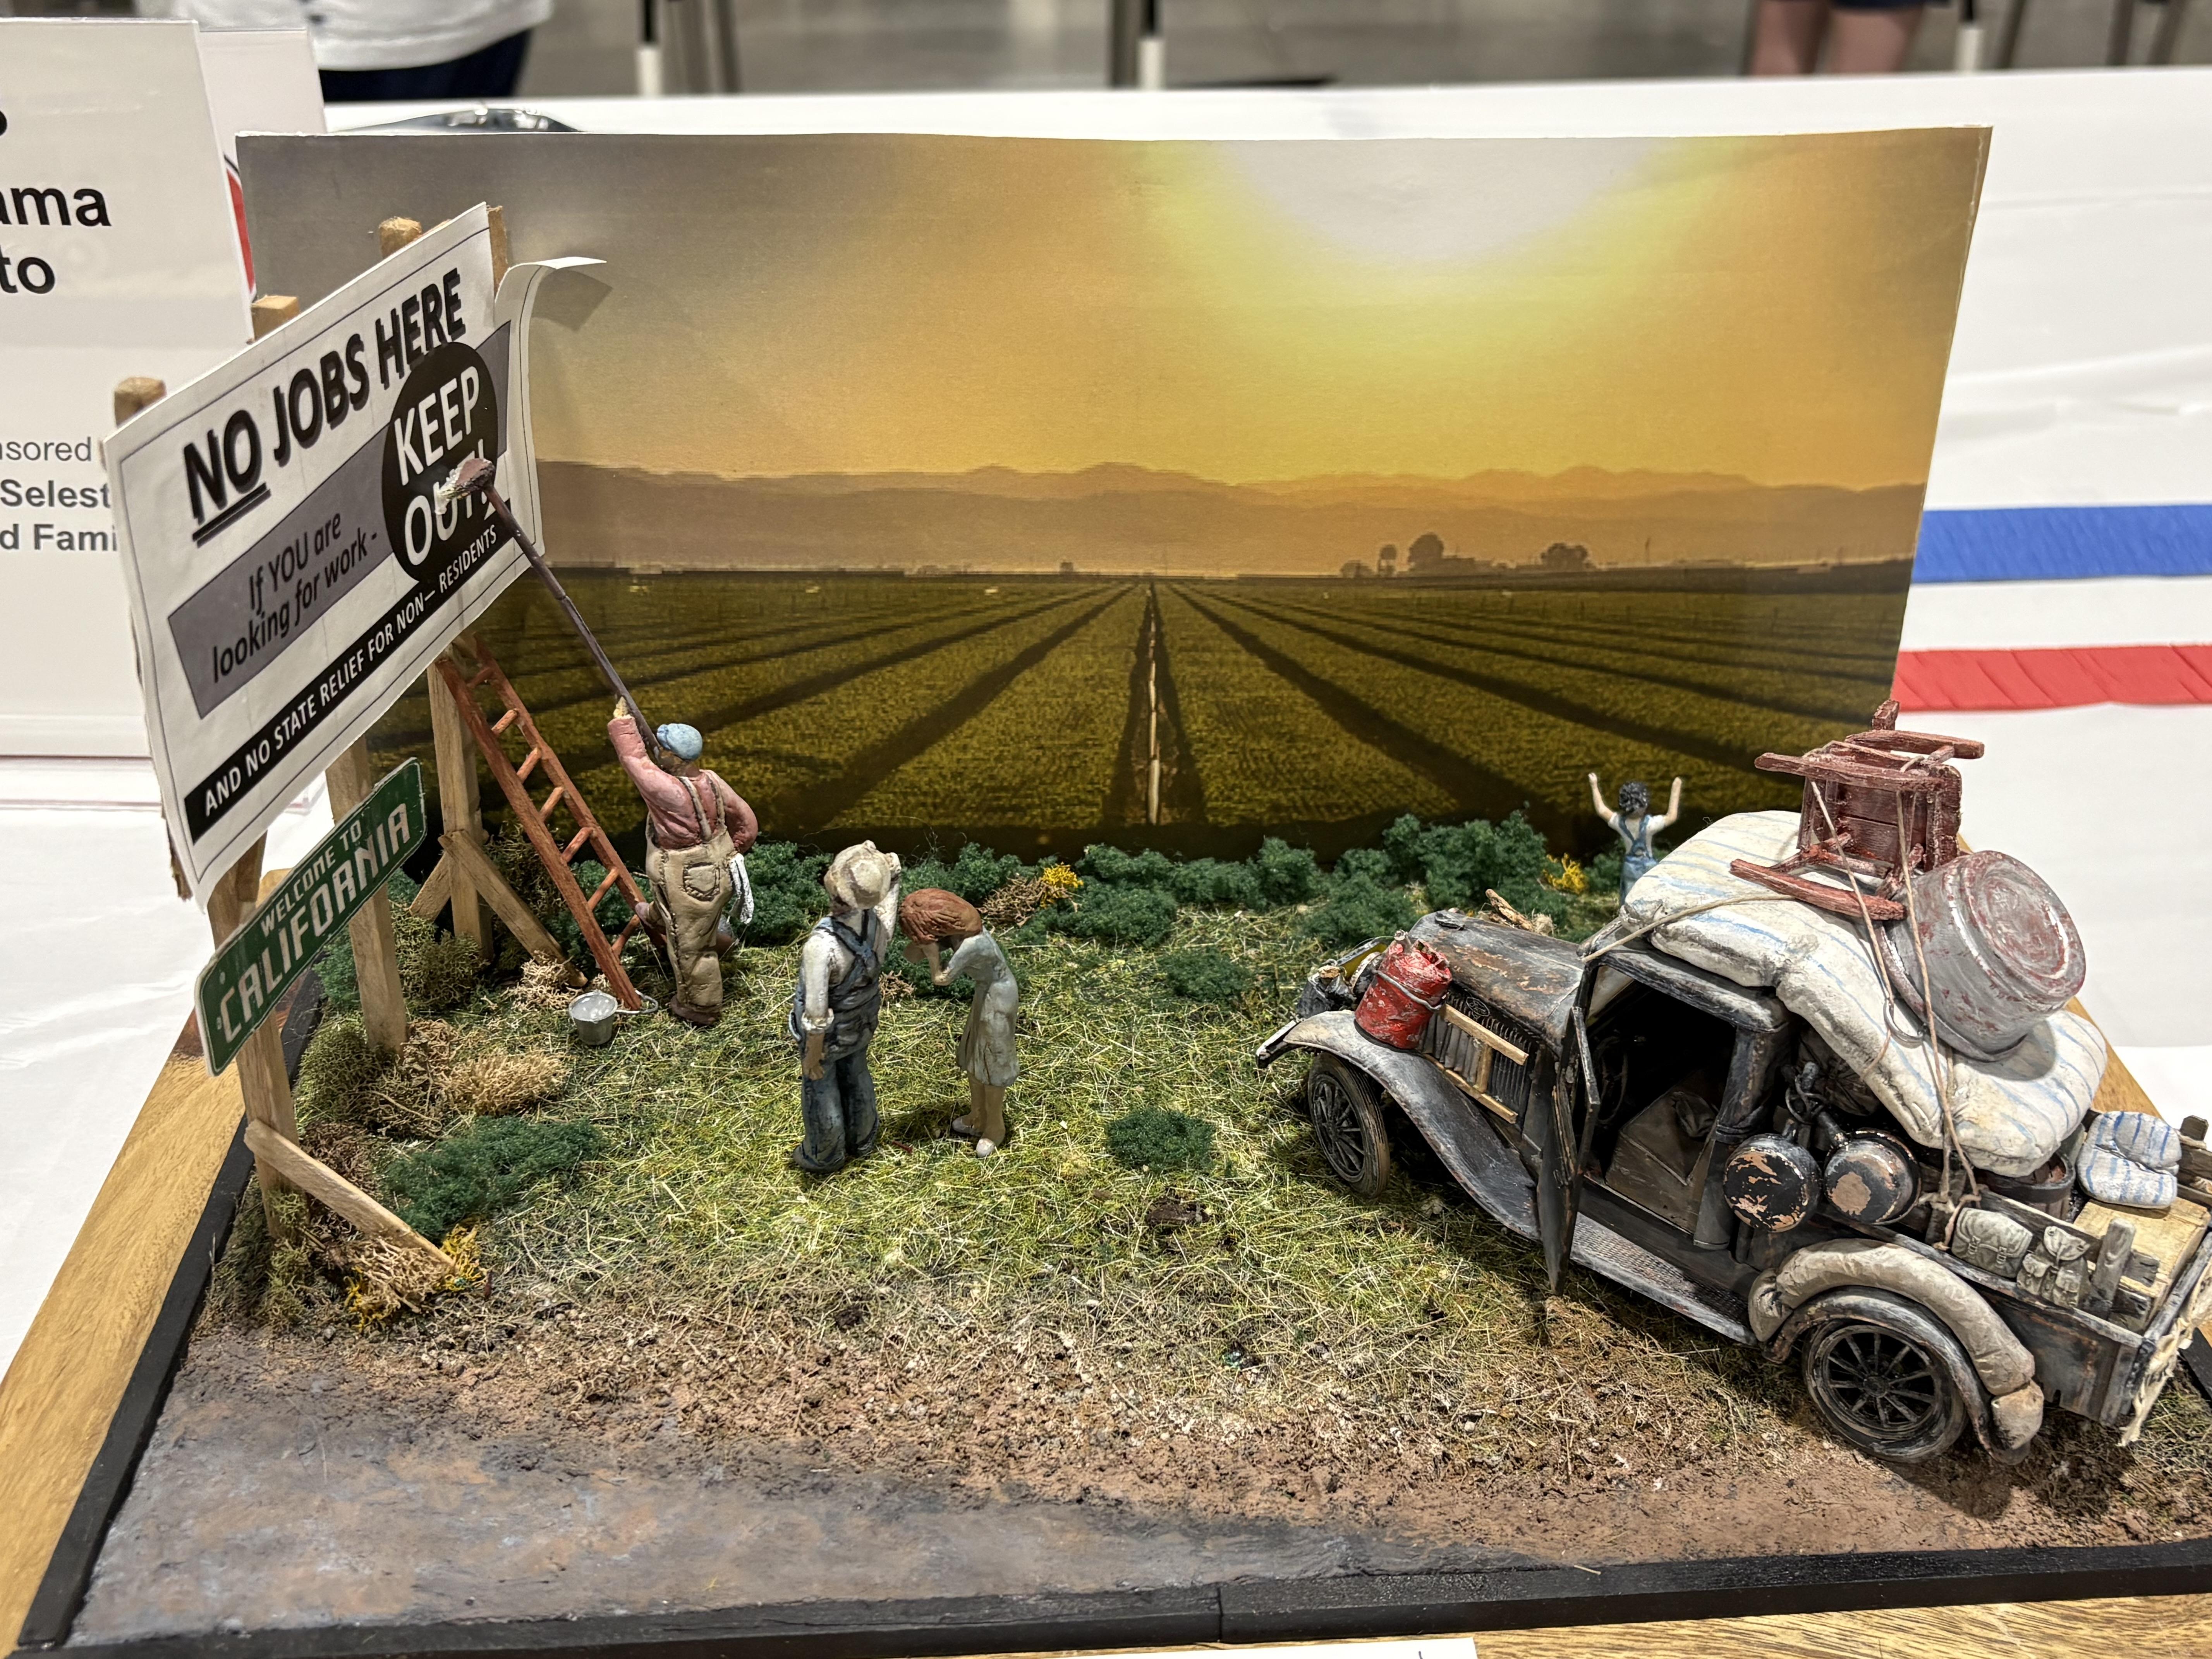
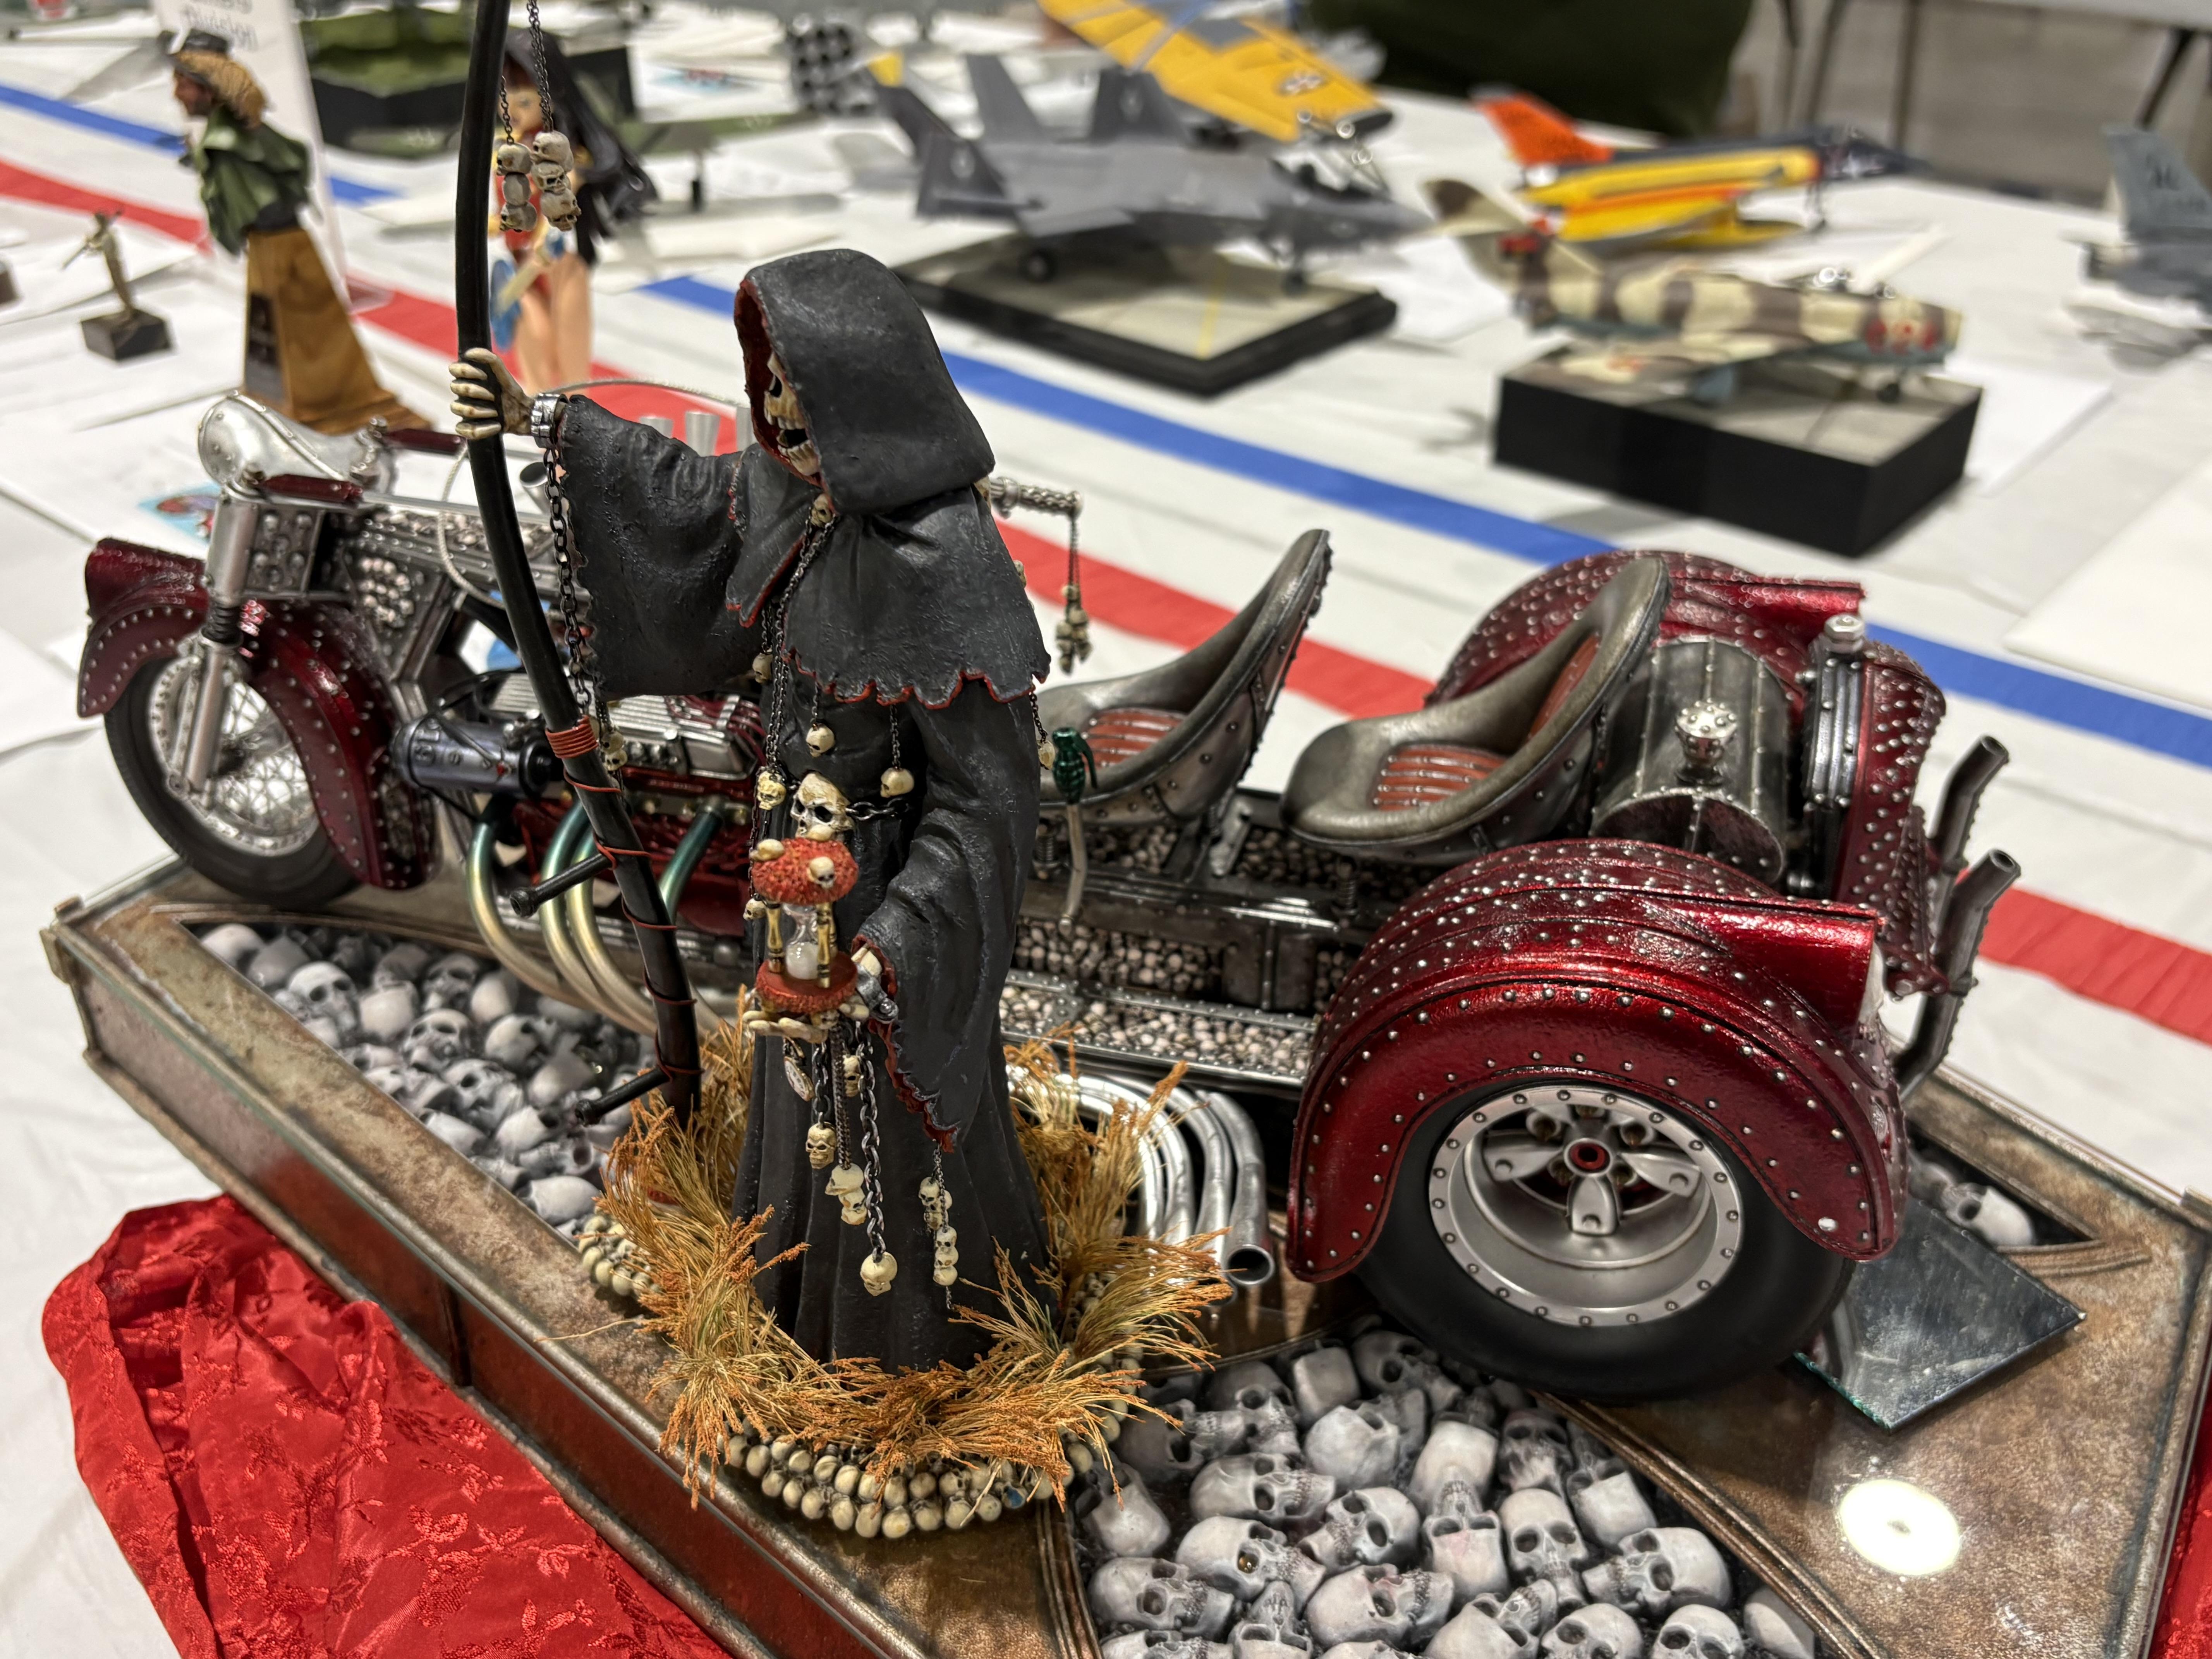
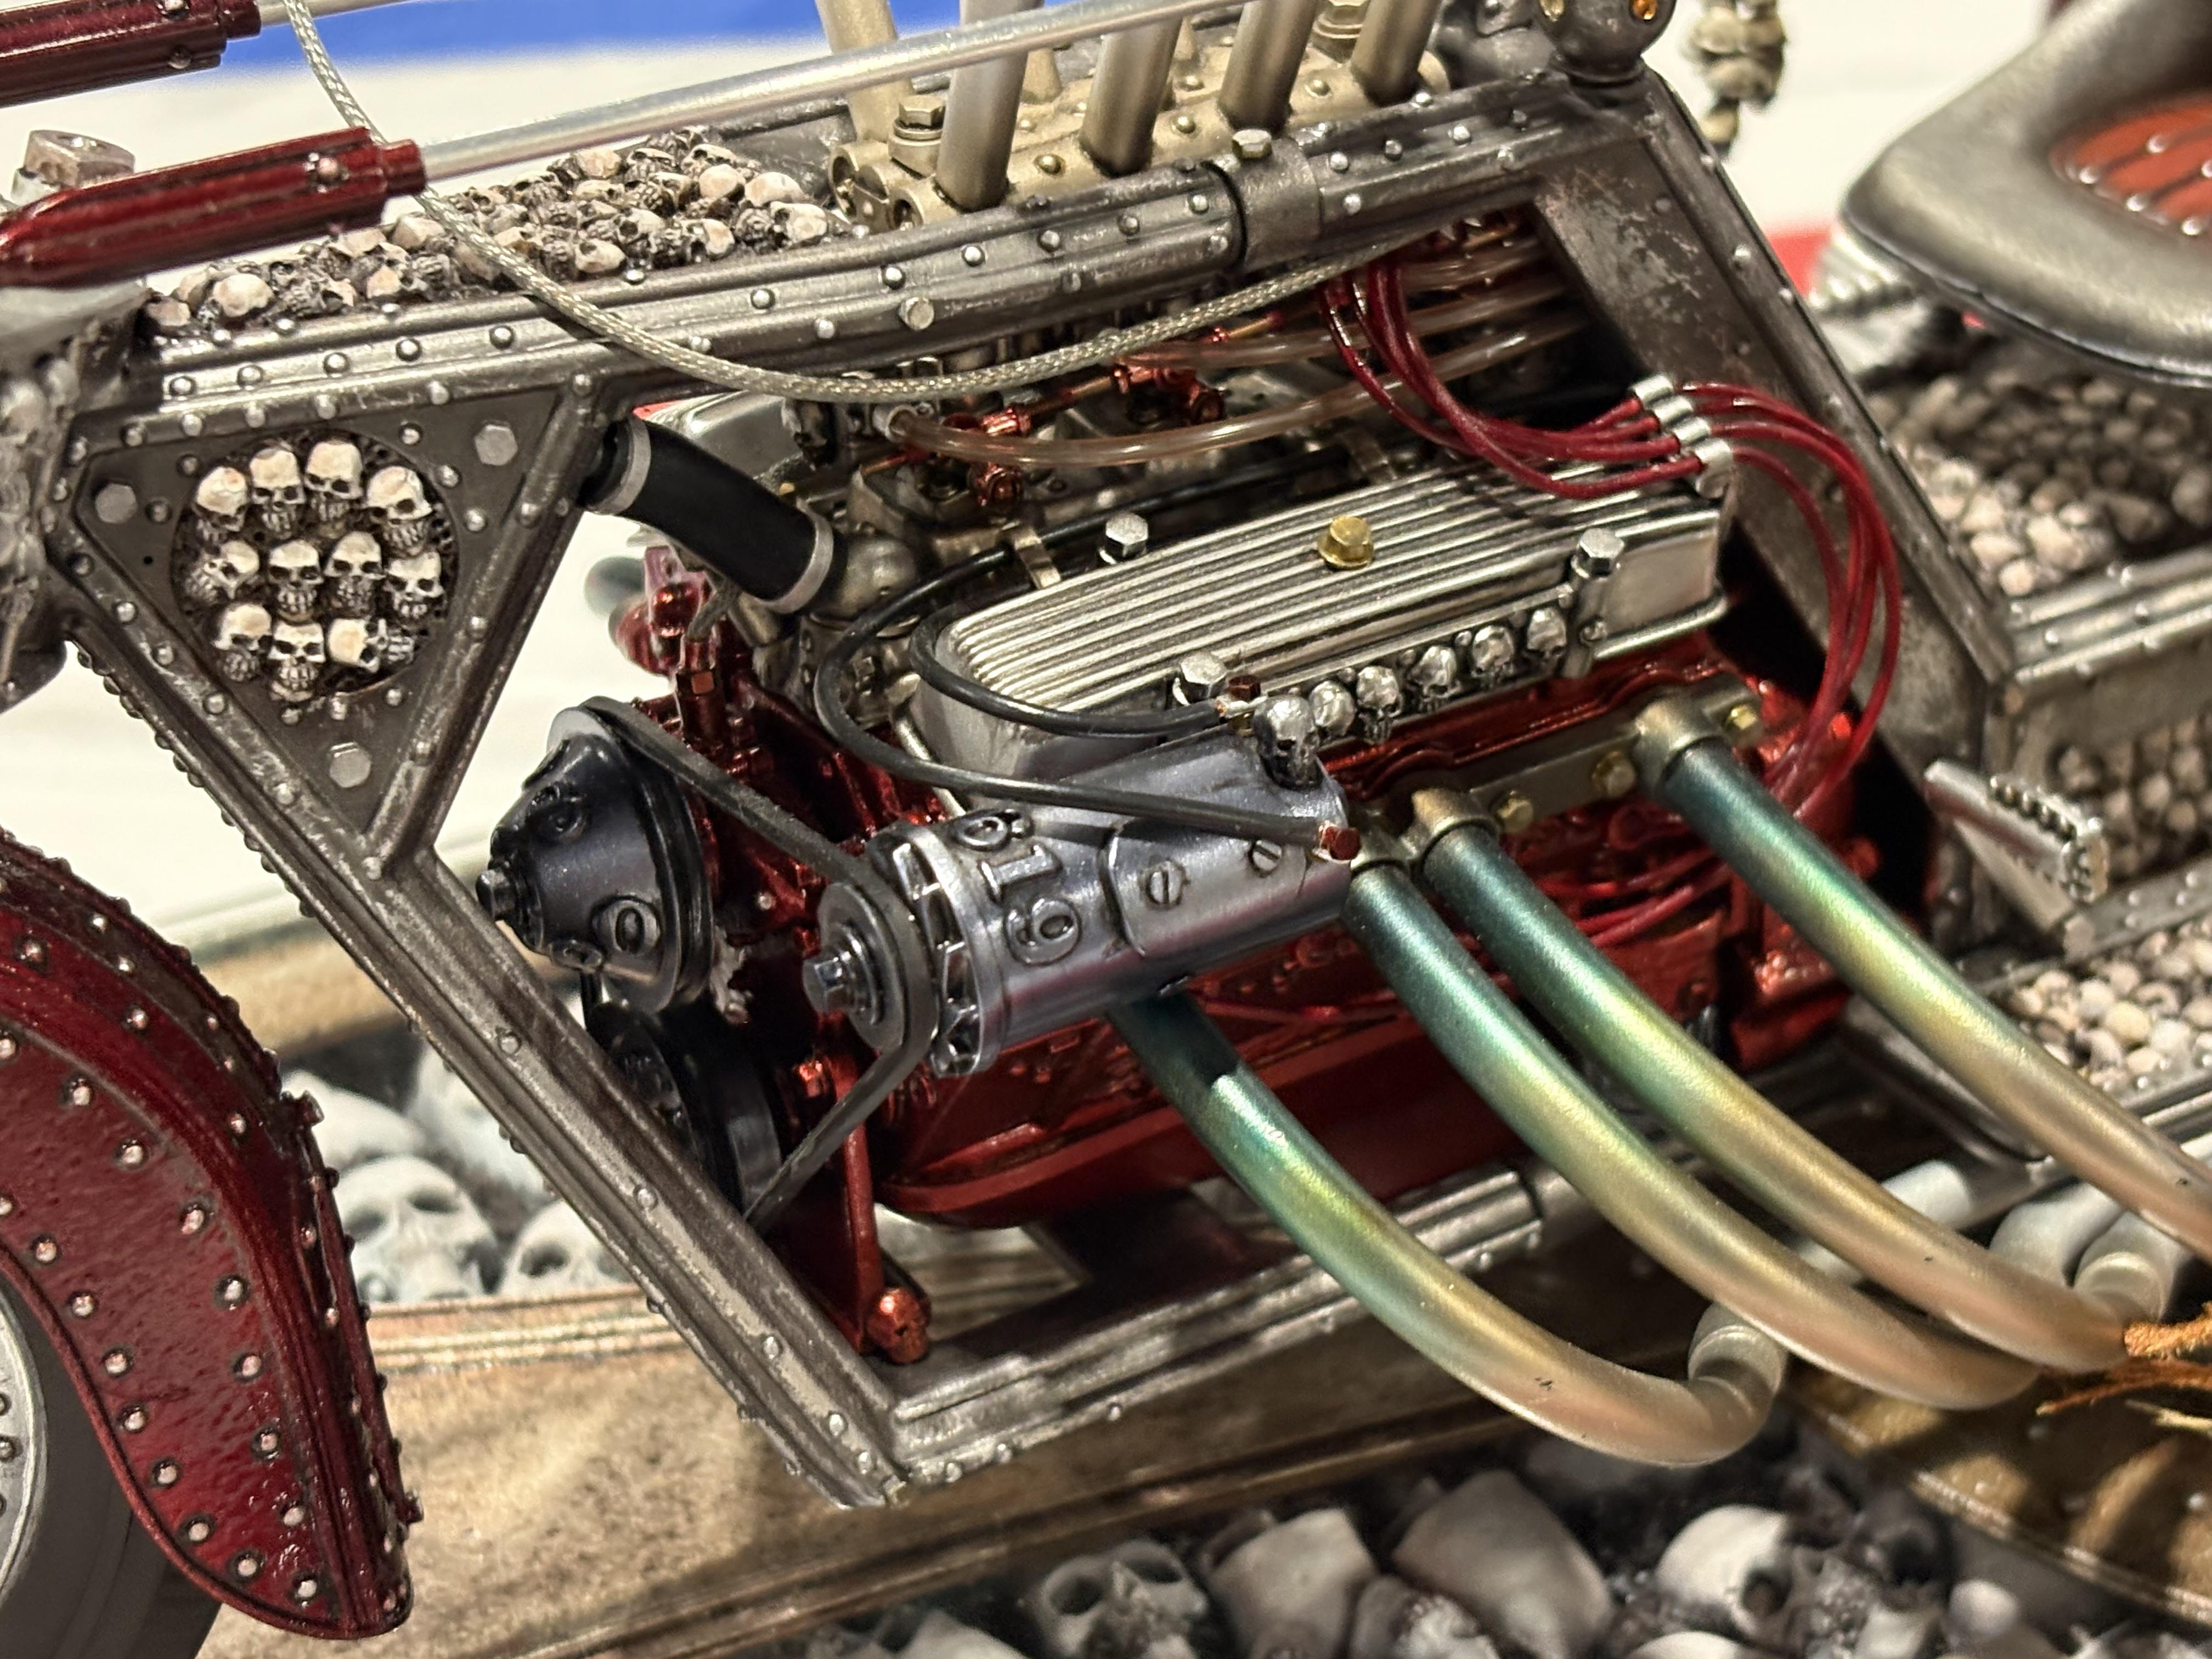
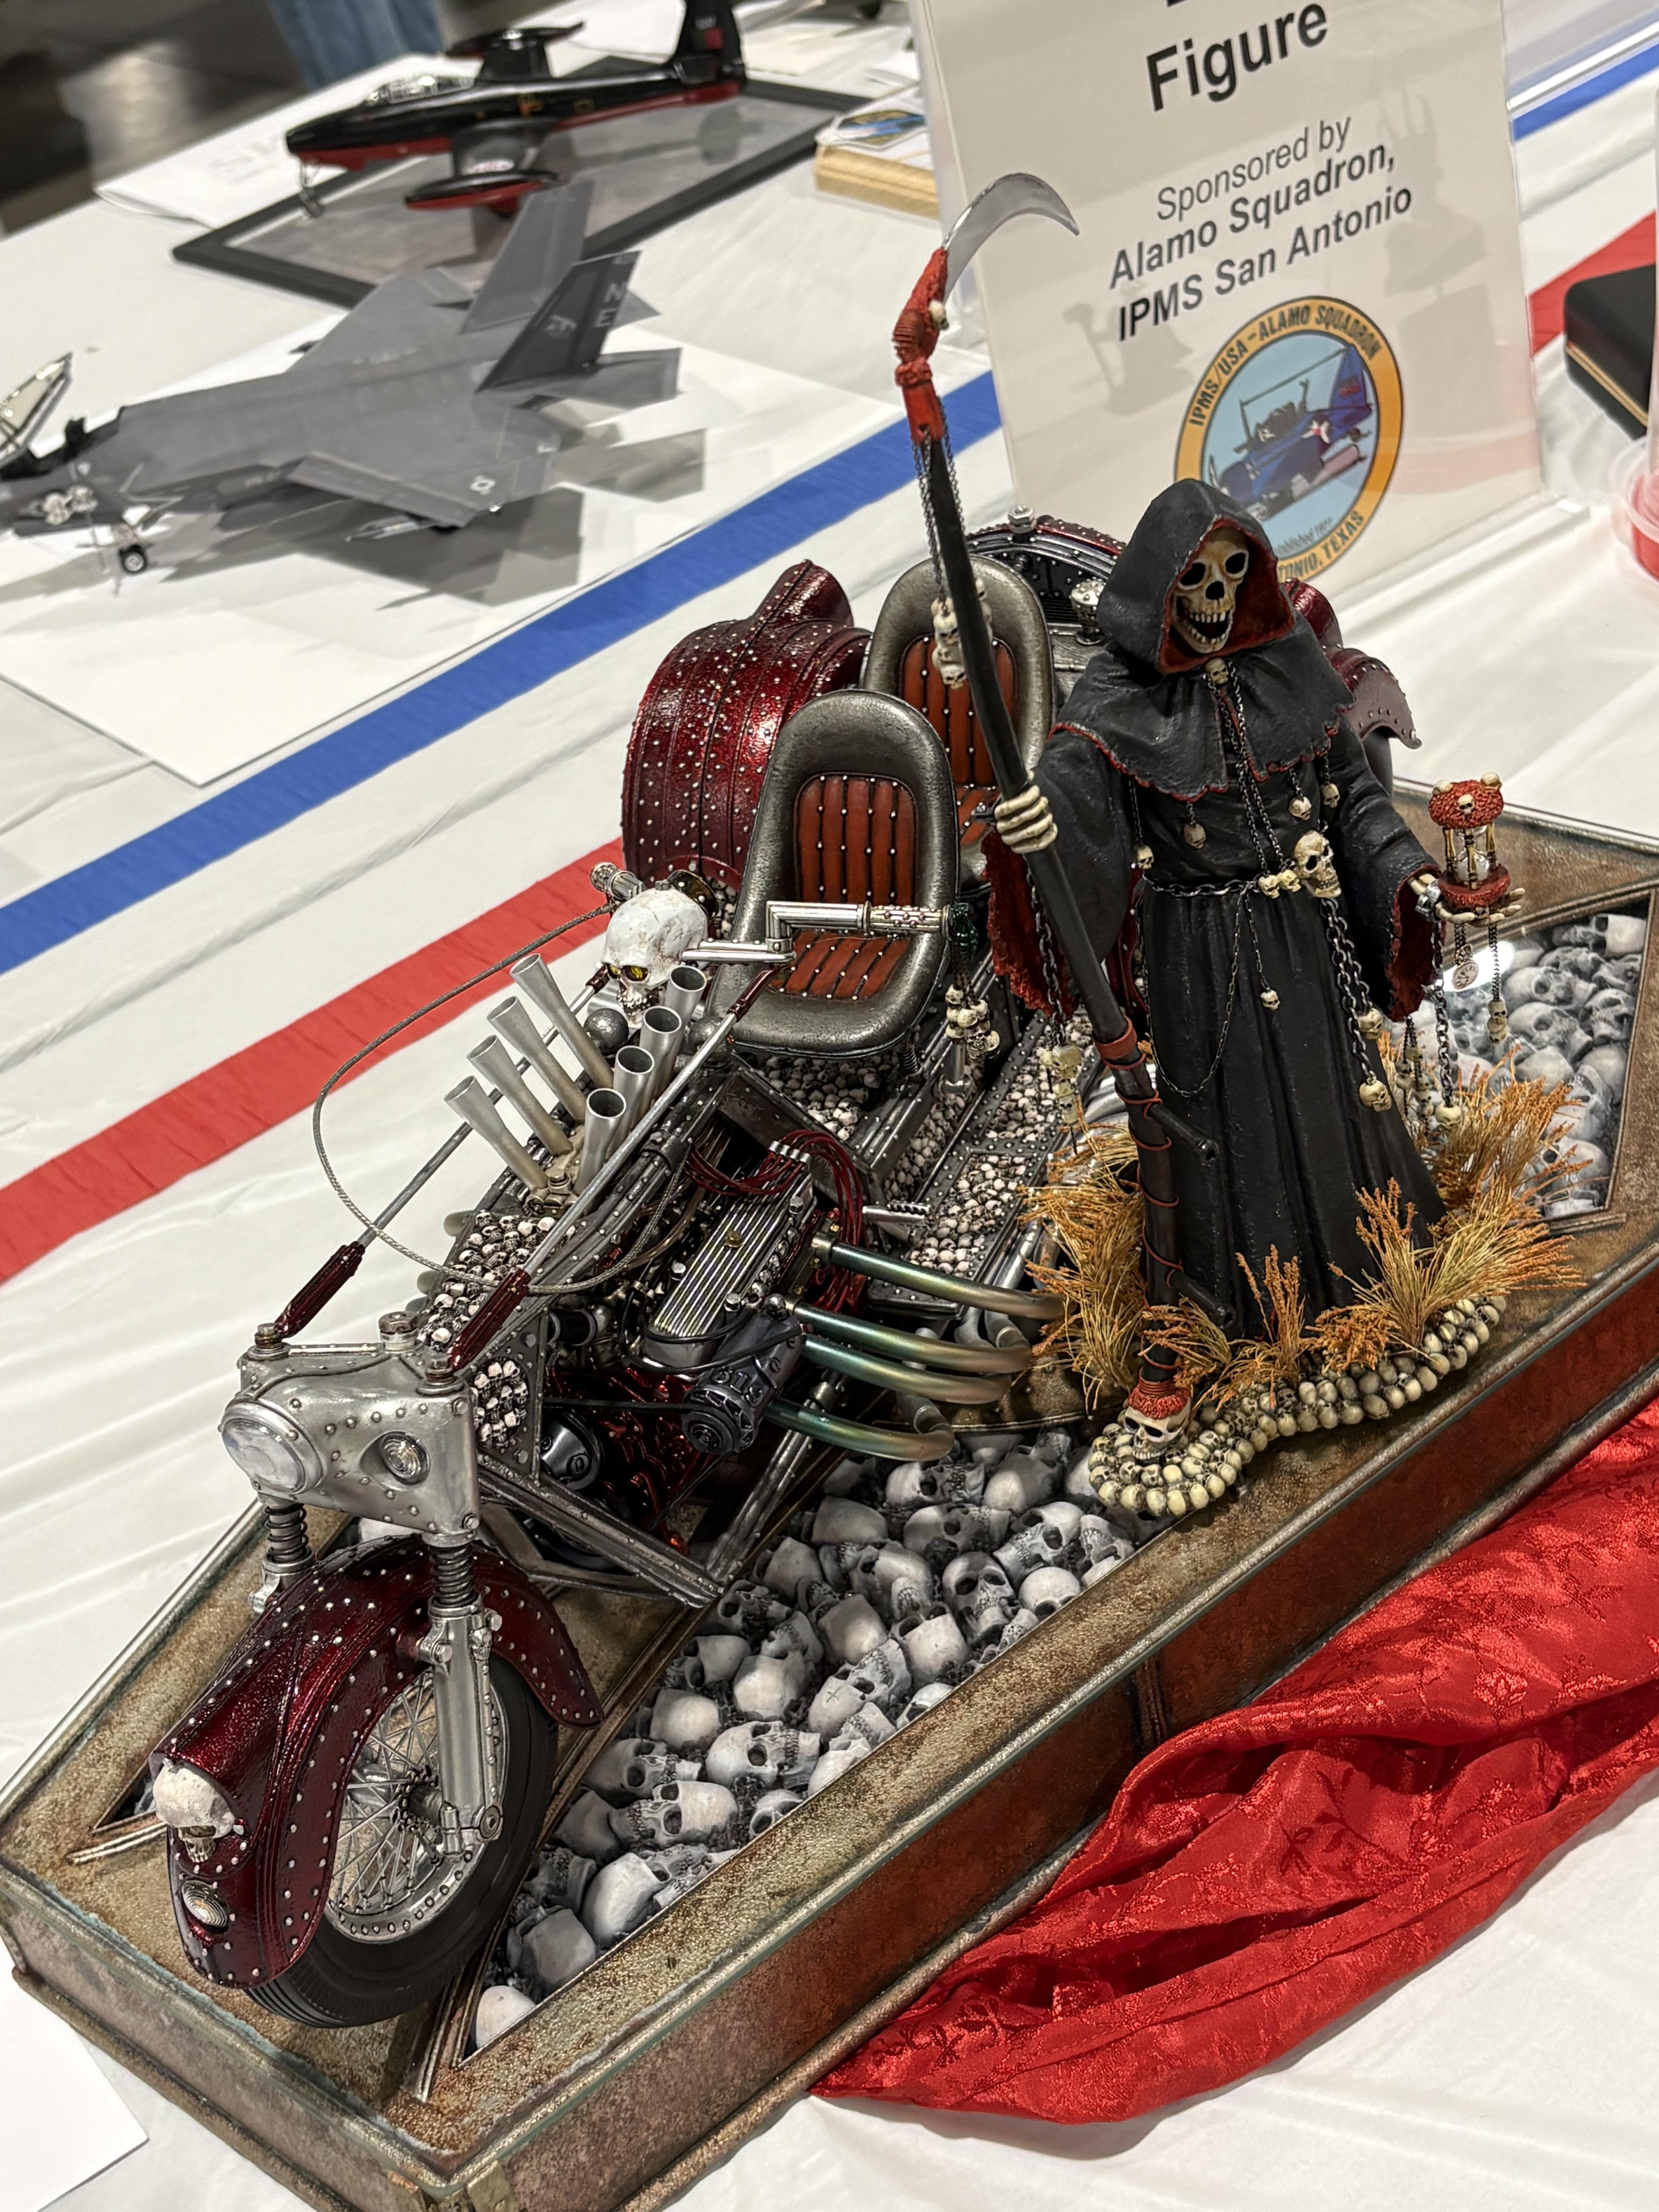
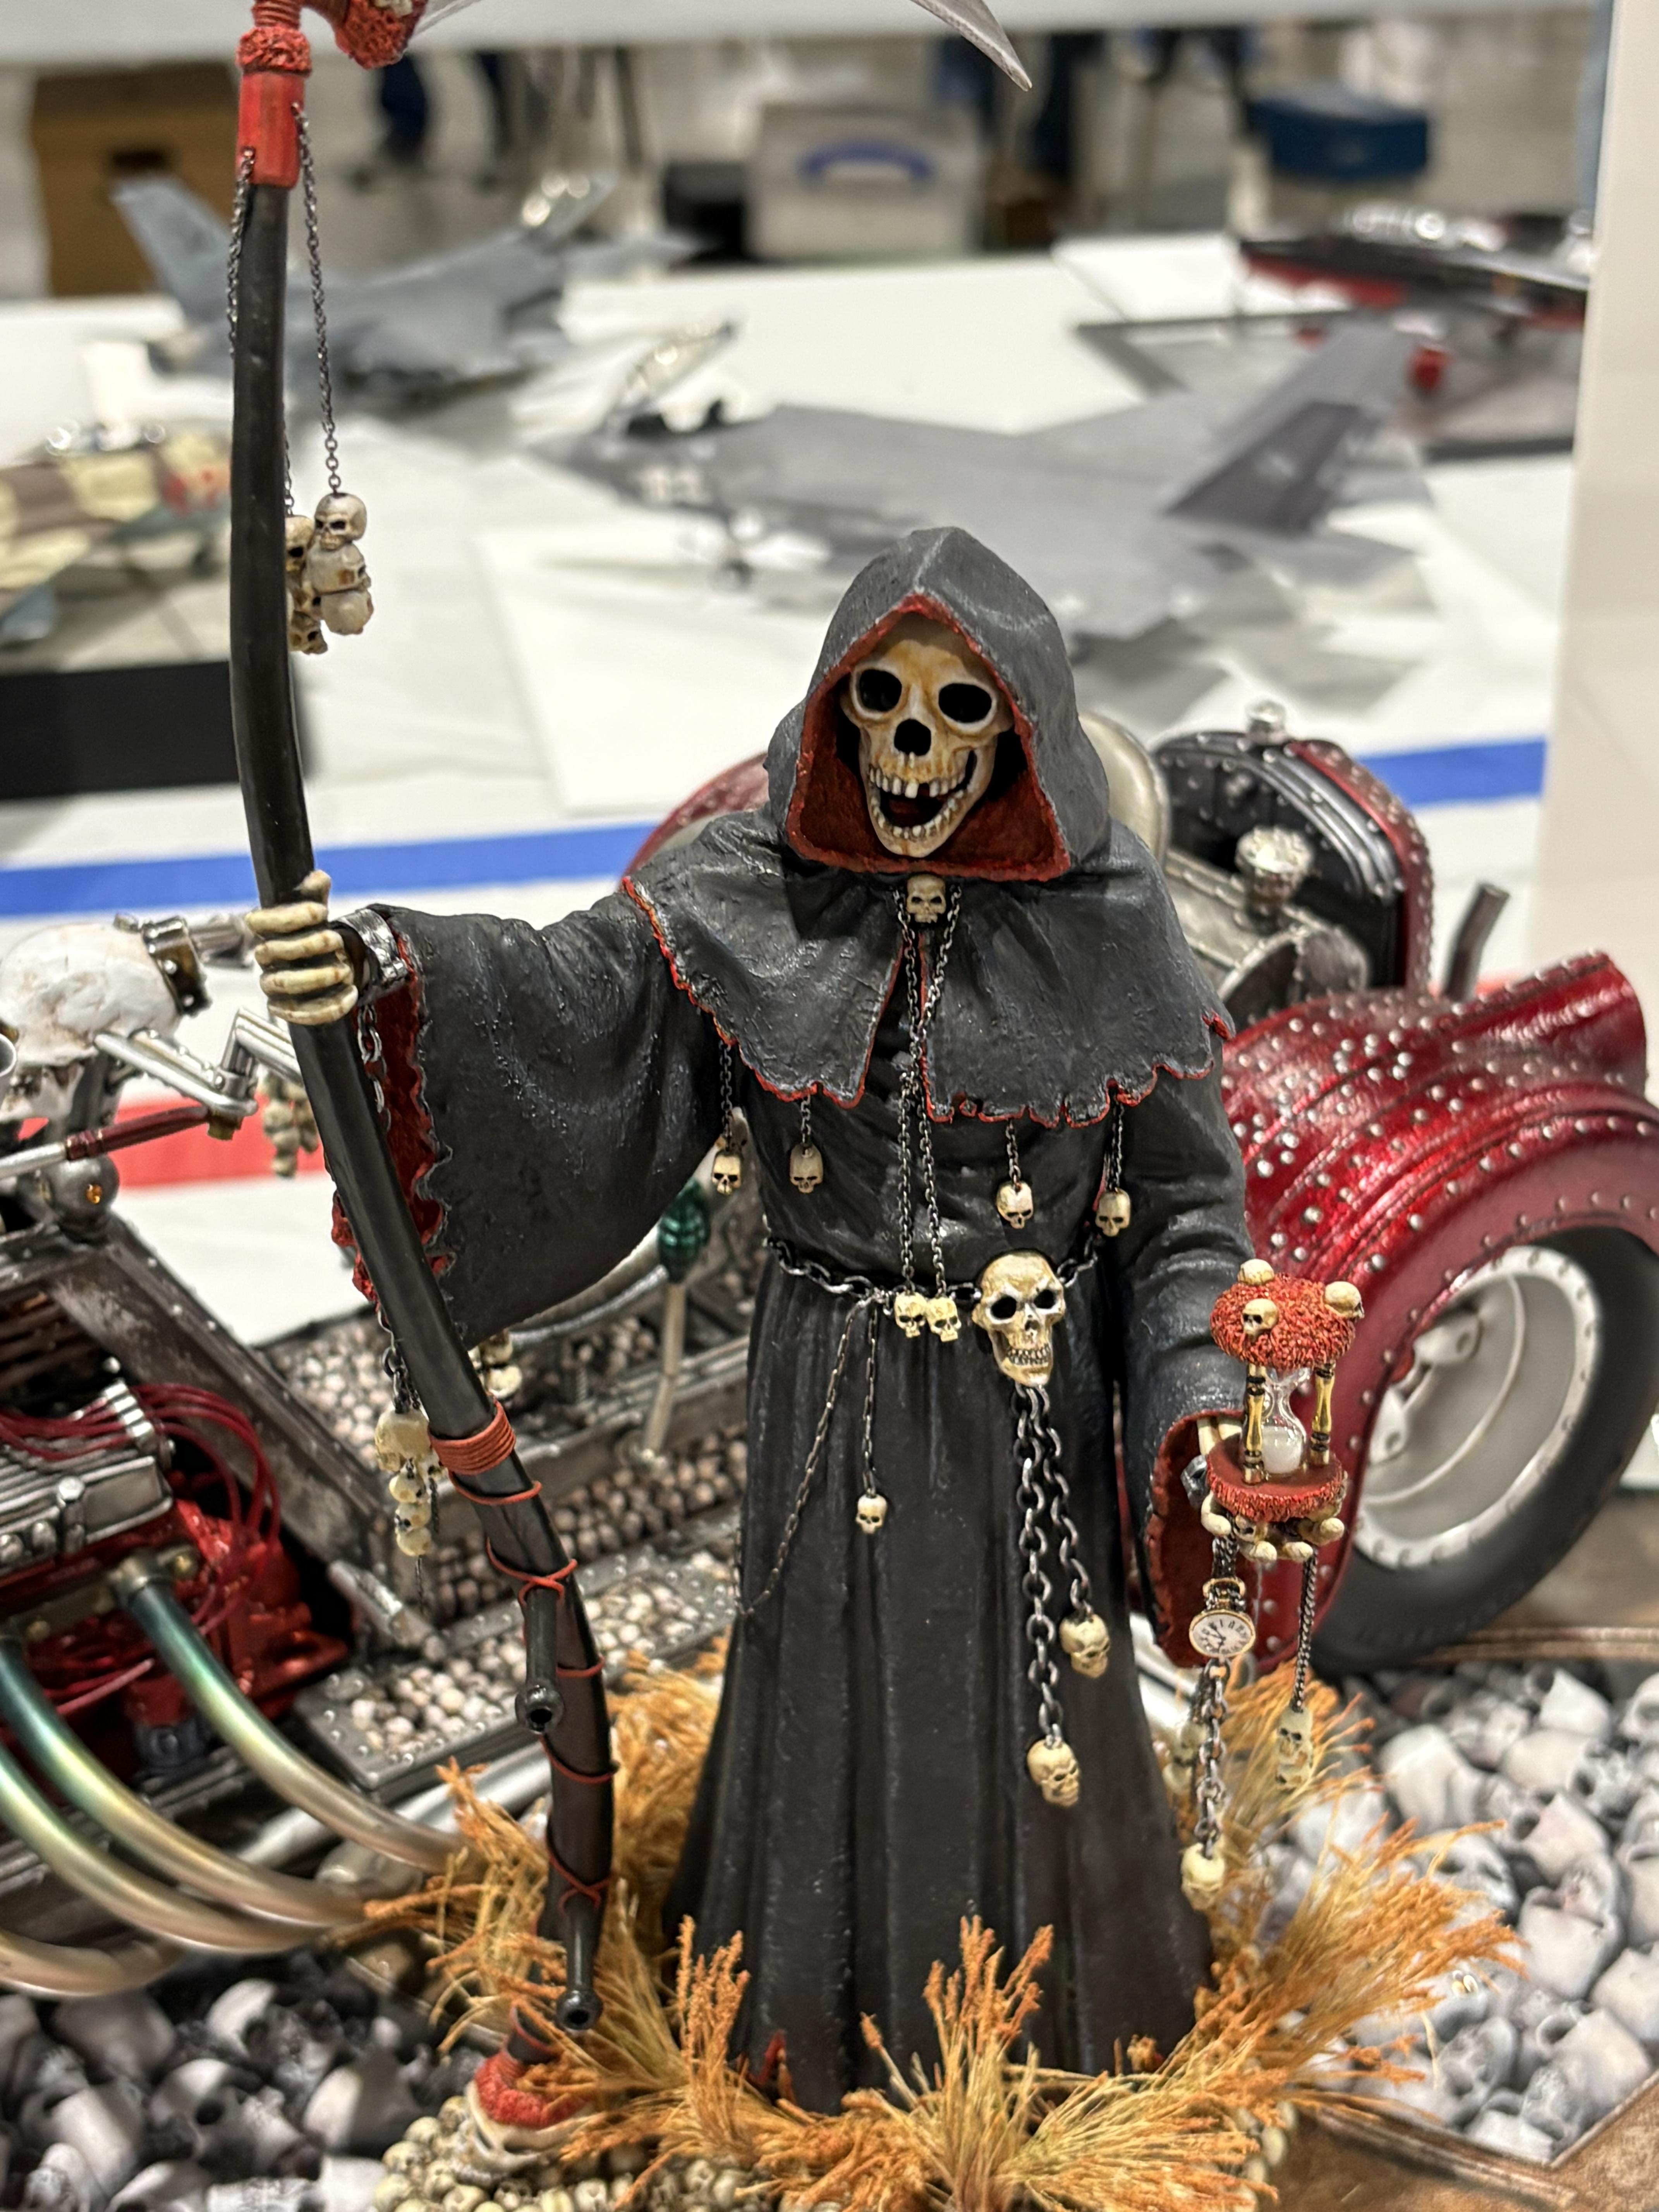
Pics from Austin Capitol Classic contest. November 8, 2025
LDO replied to LDO's topic in Contests and Shows

-
Pics from Austin Capitol Classic contest. November 8, 2025
LDO replied to LDO's topic in Contests and Shows
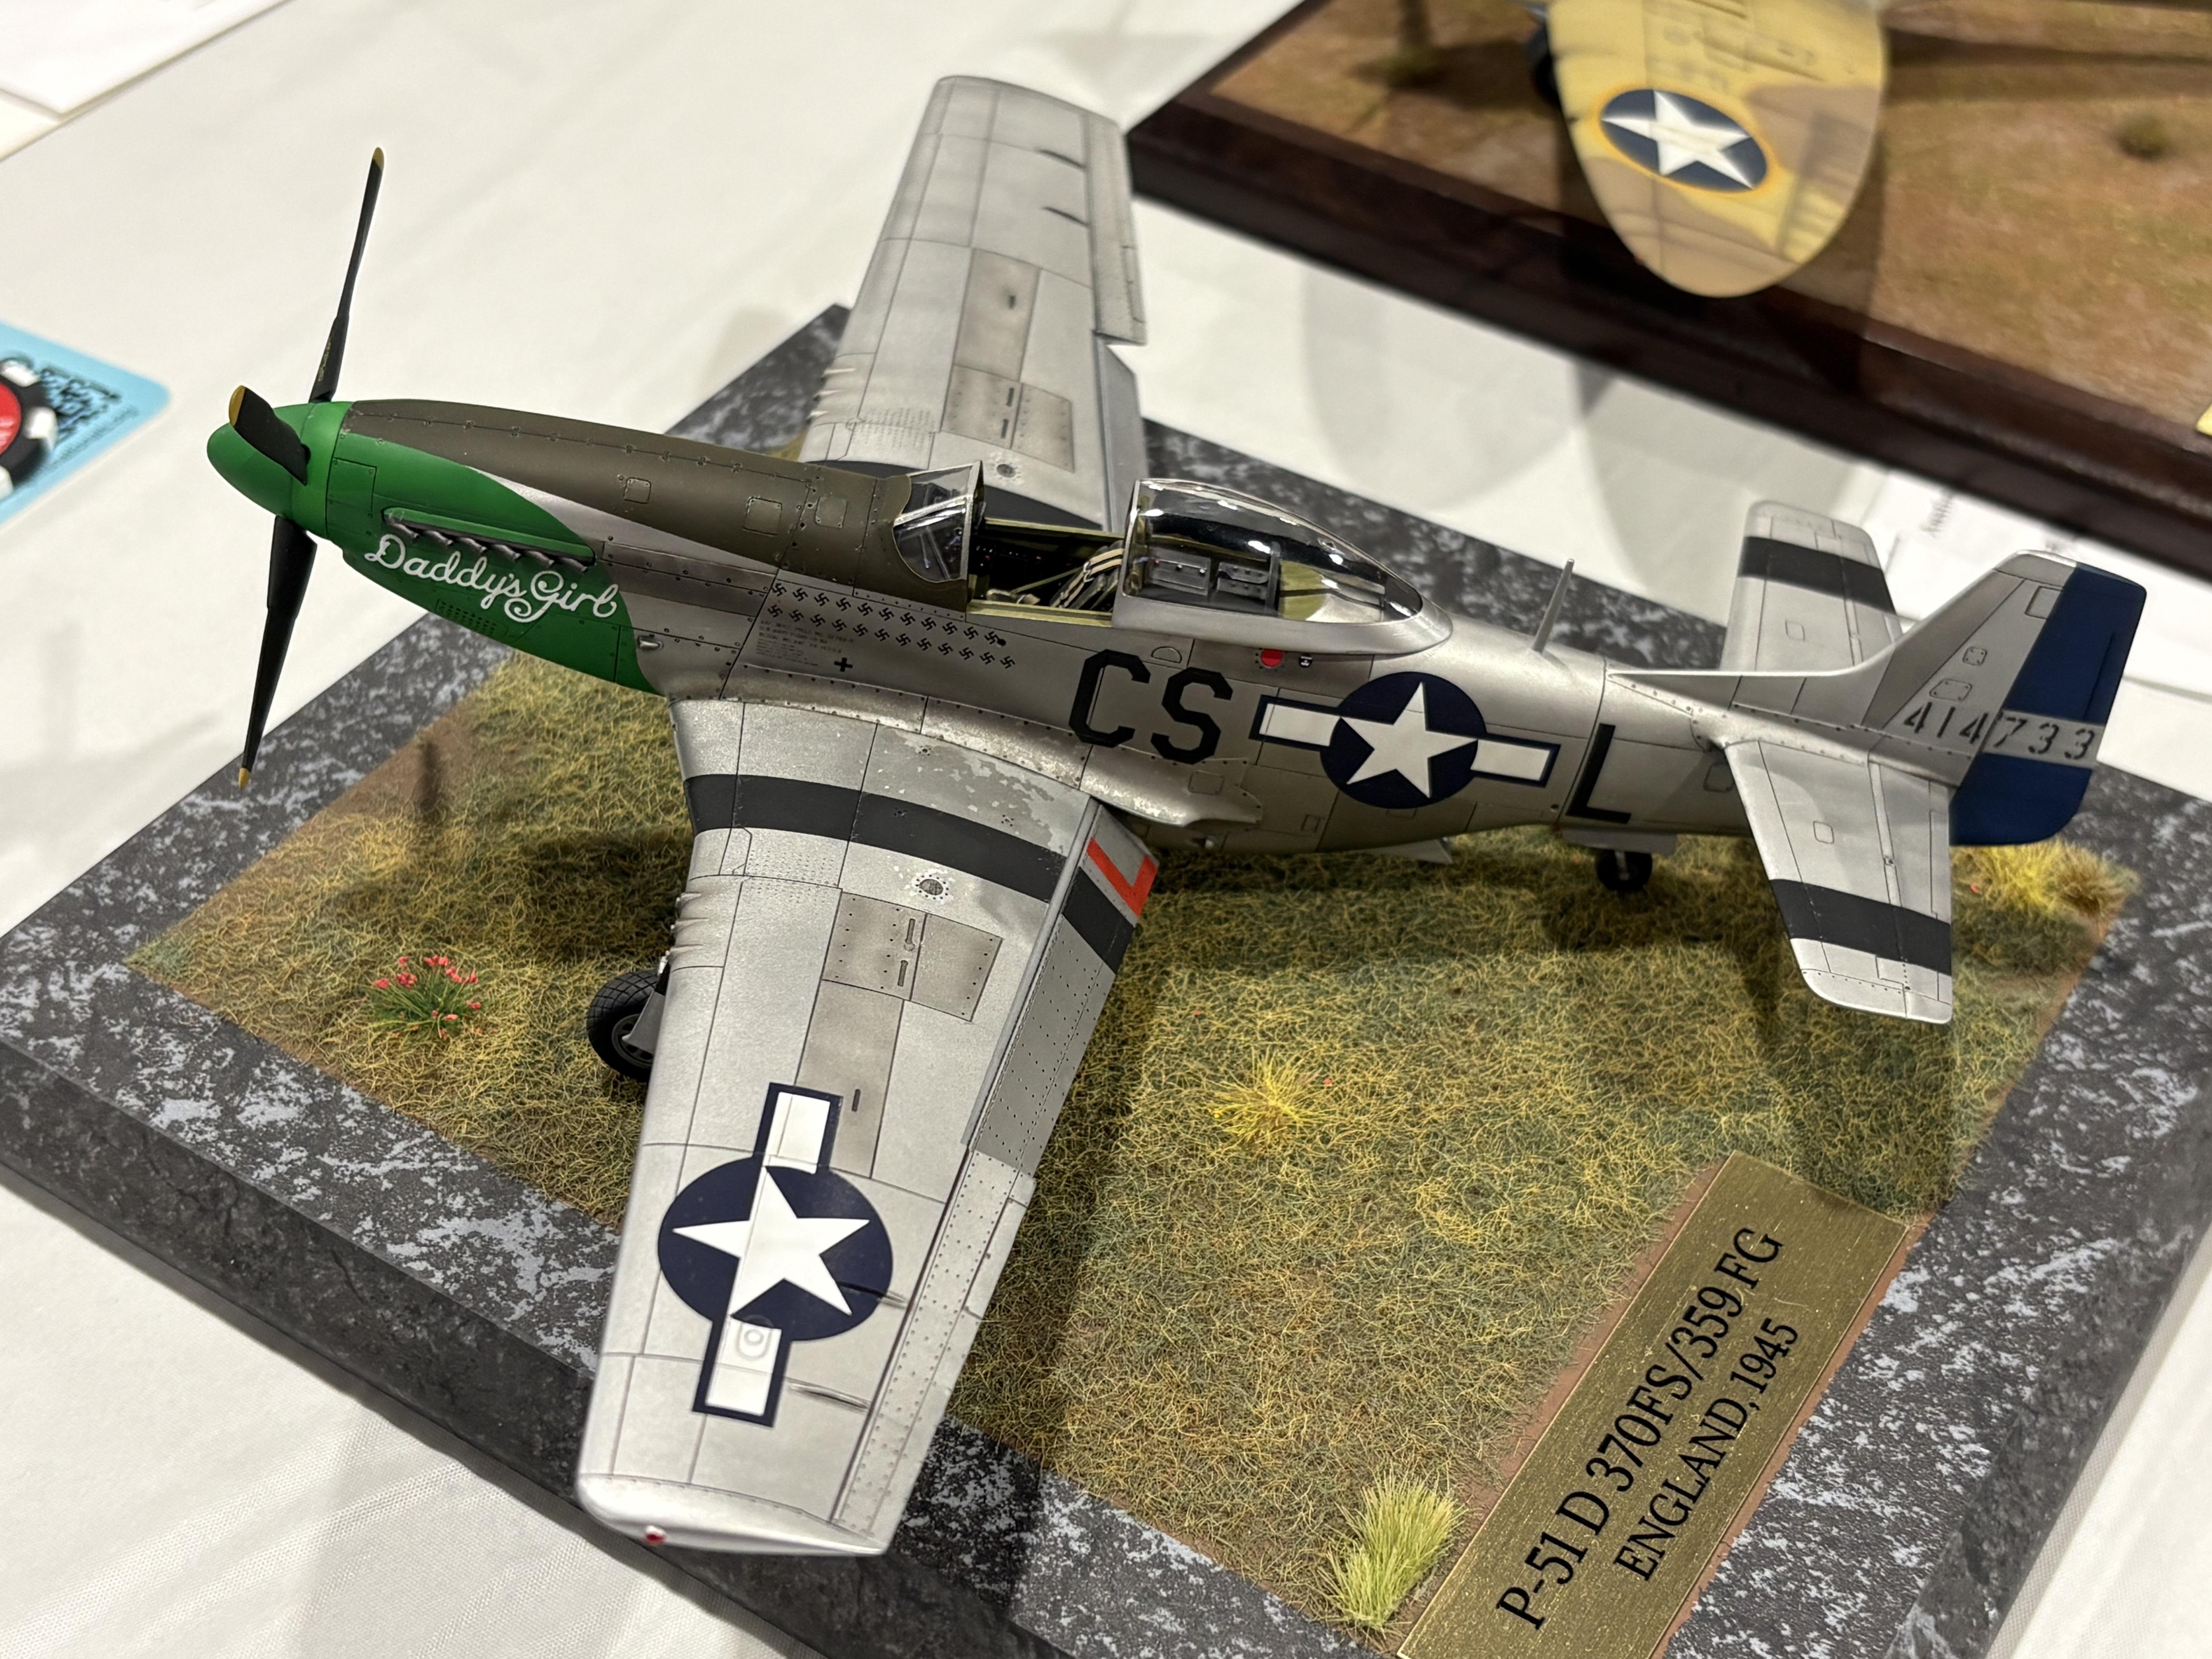
That blue and red plane is a German WWII Heinkel 119, apparently captured and used by a US fighter squadron. I had never seen this before. Interesting, IMHO.
-
Pics from Austin Capitol Classic contest. November 8, 2025
LDO replied to LDO's topic in Contests and Shows
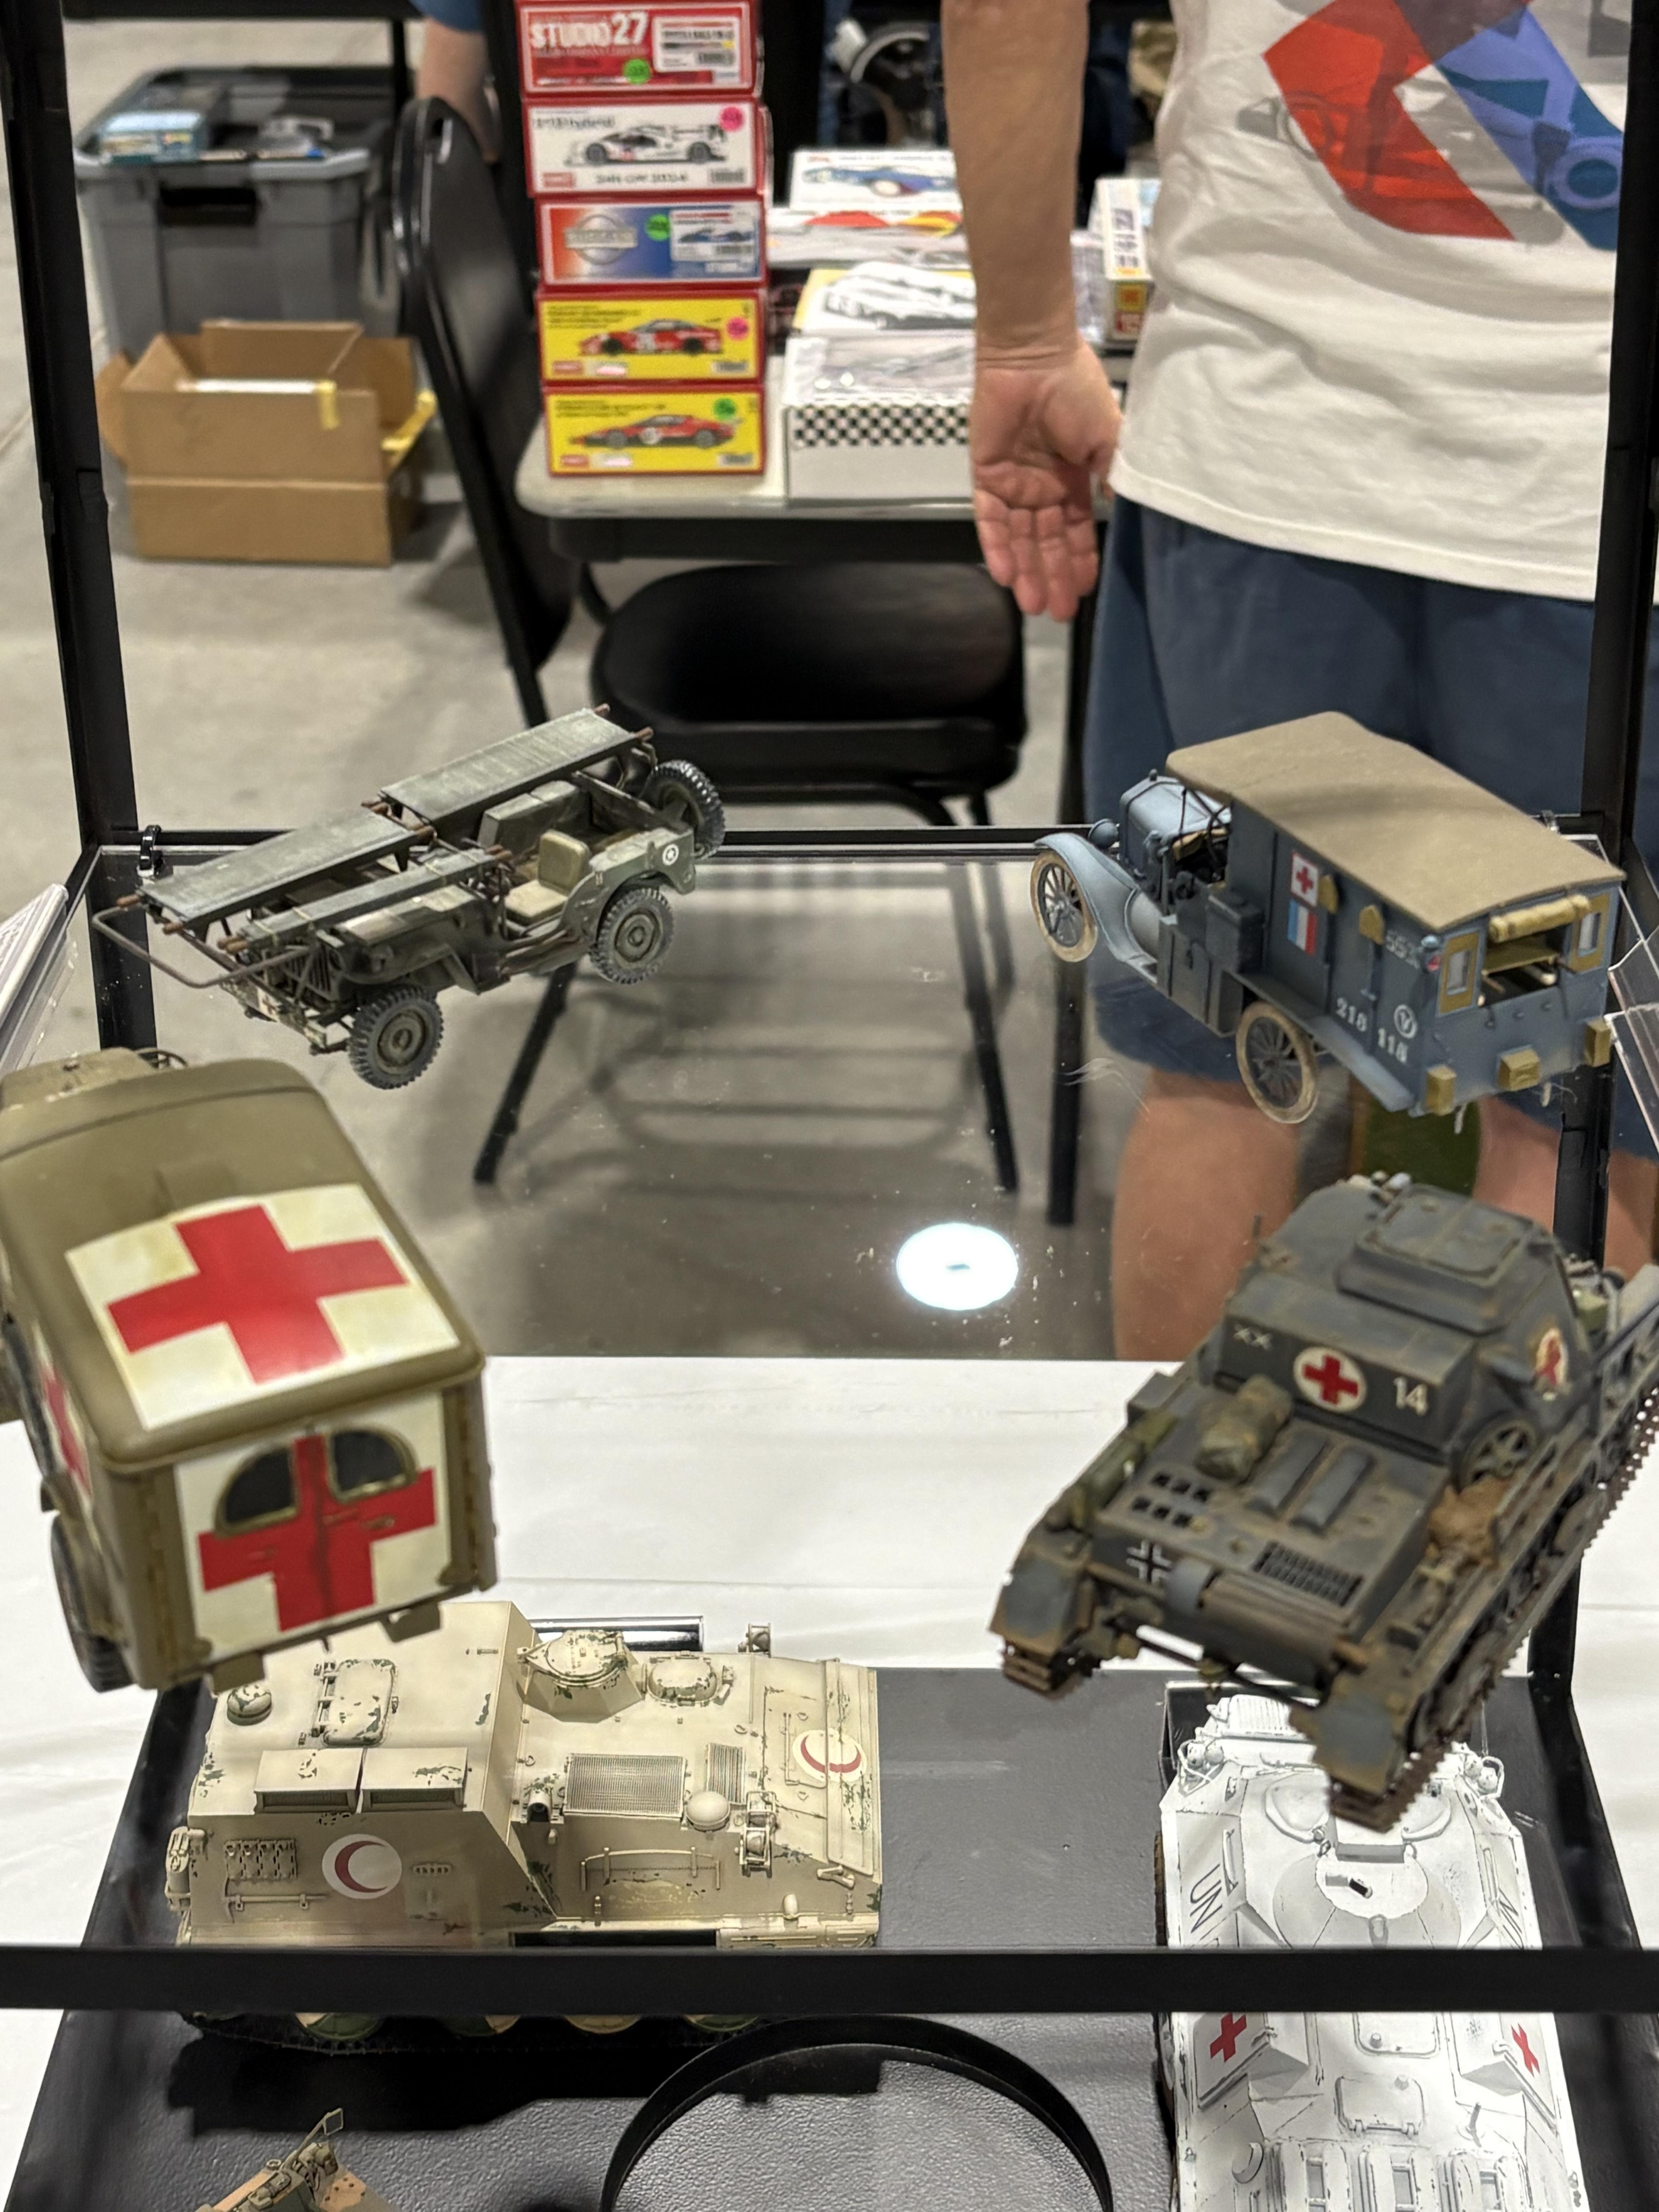
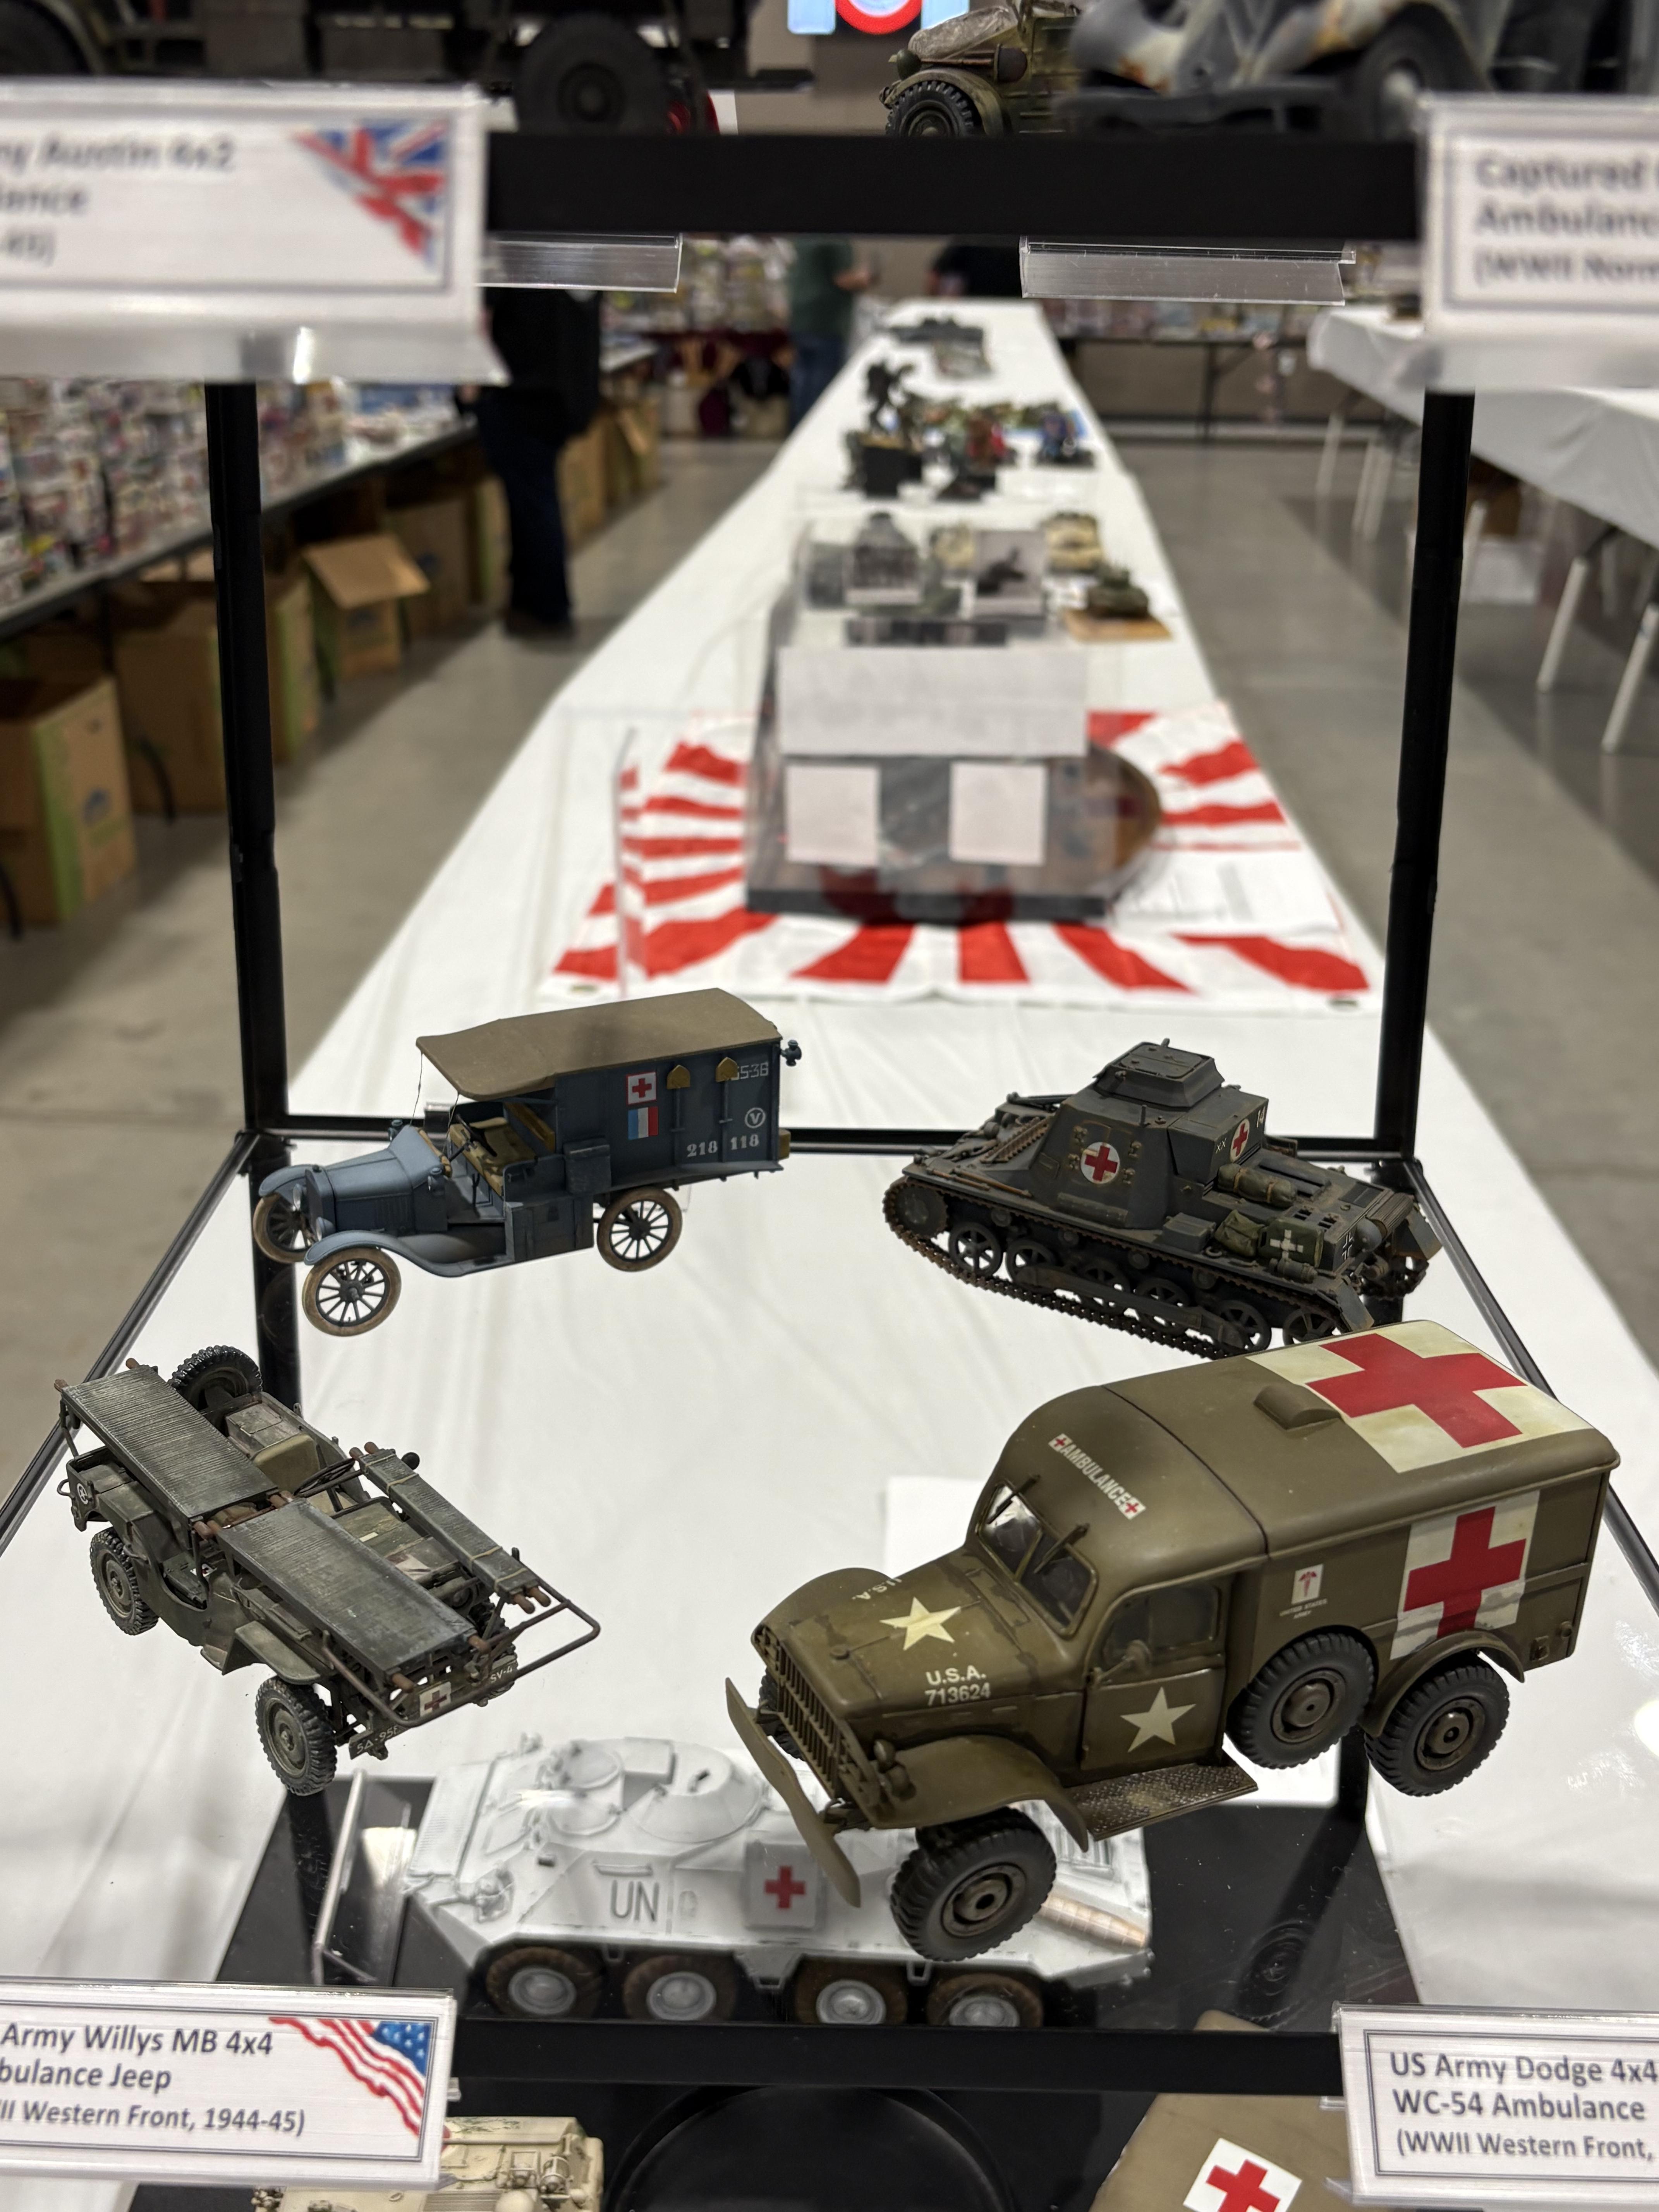
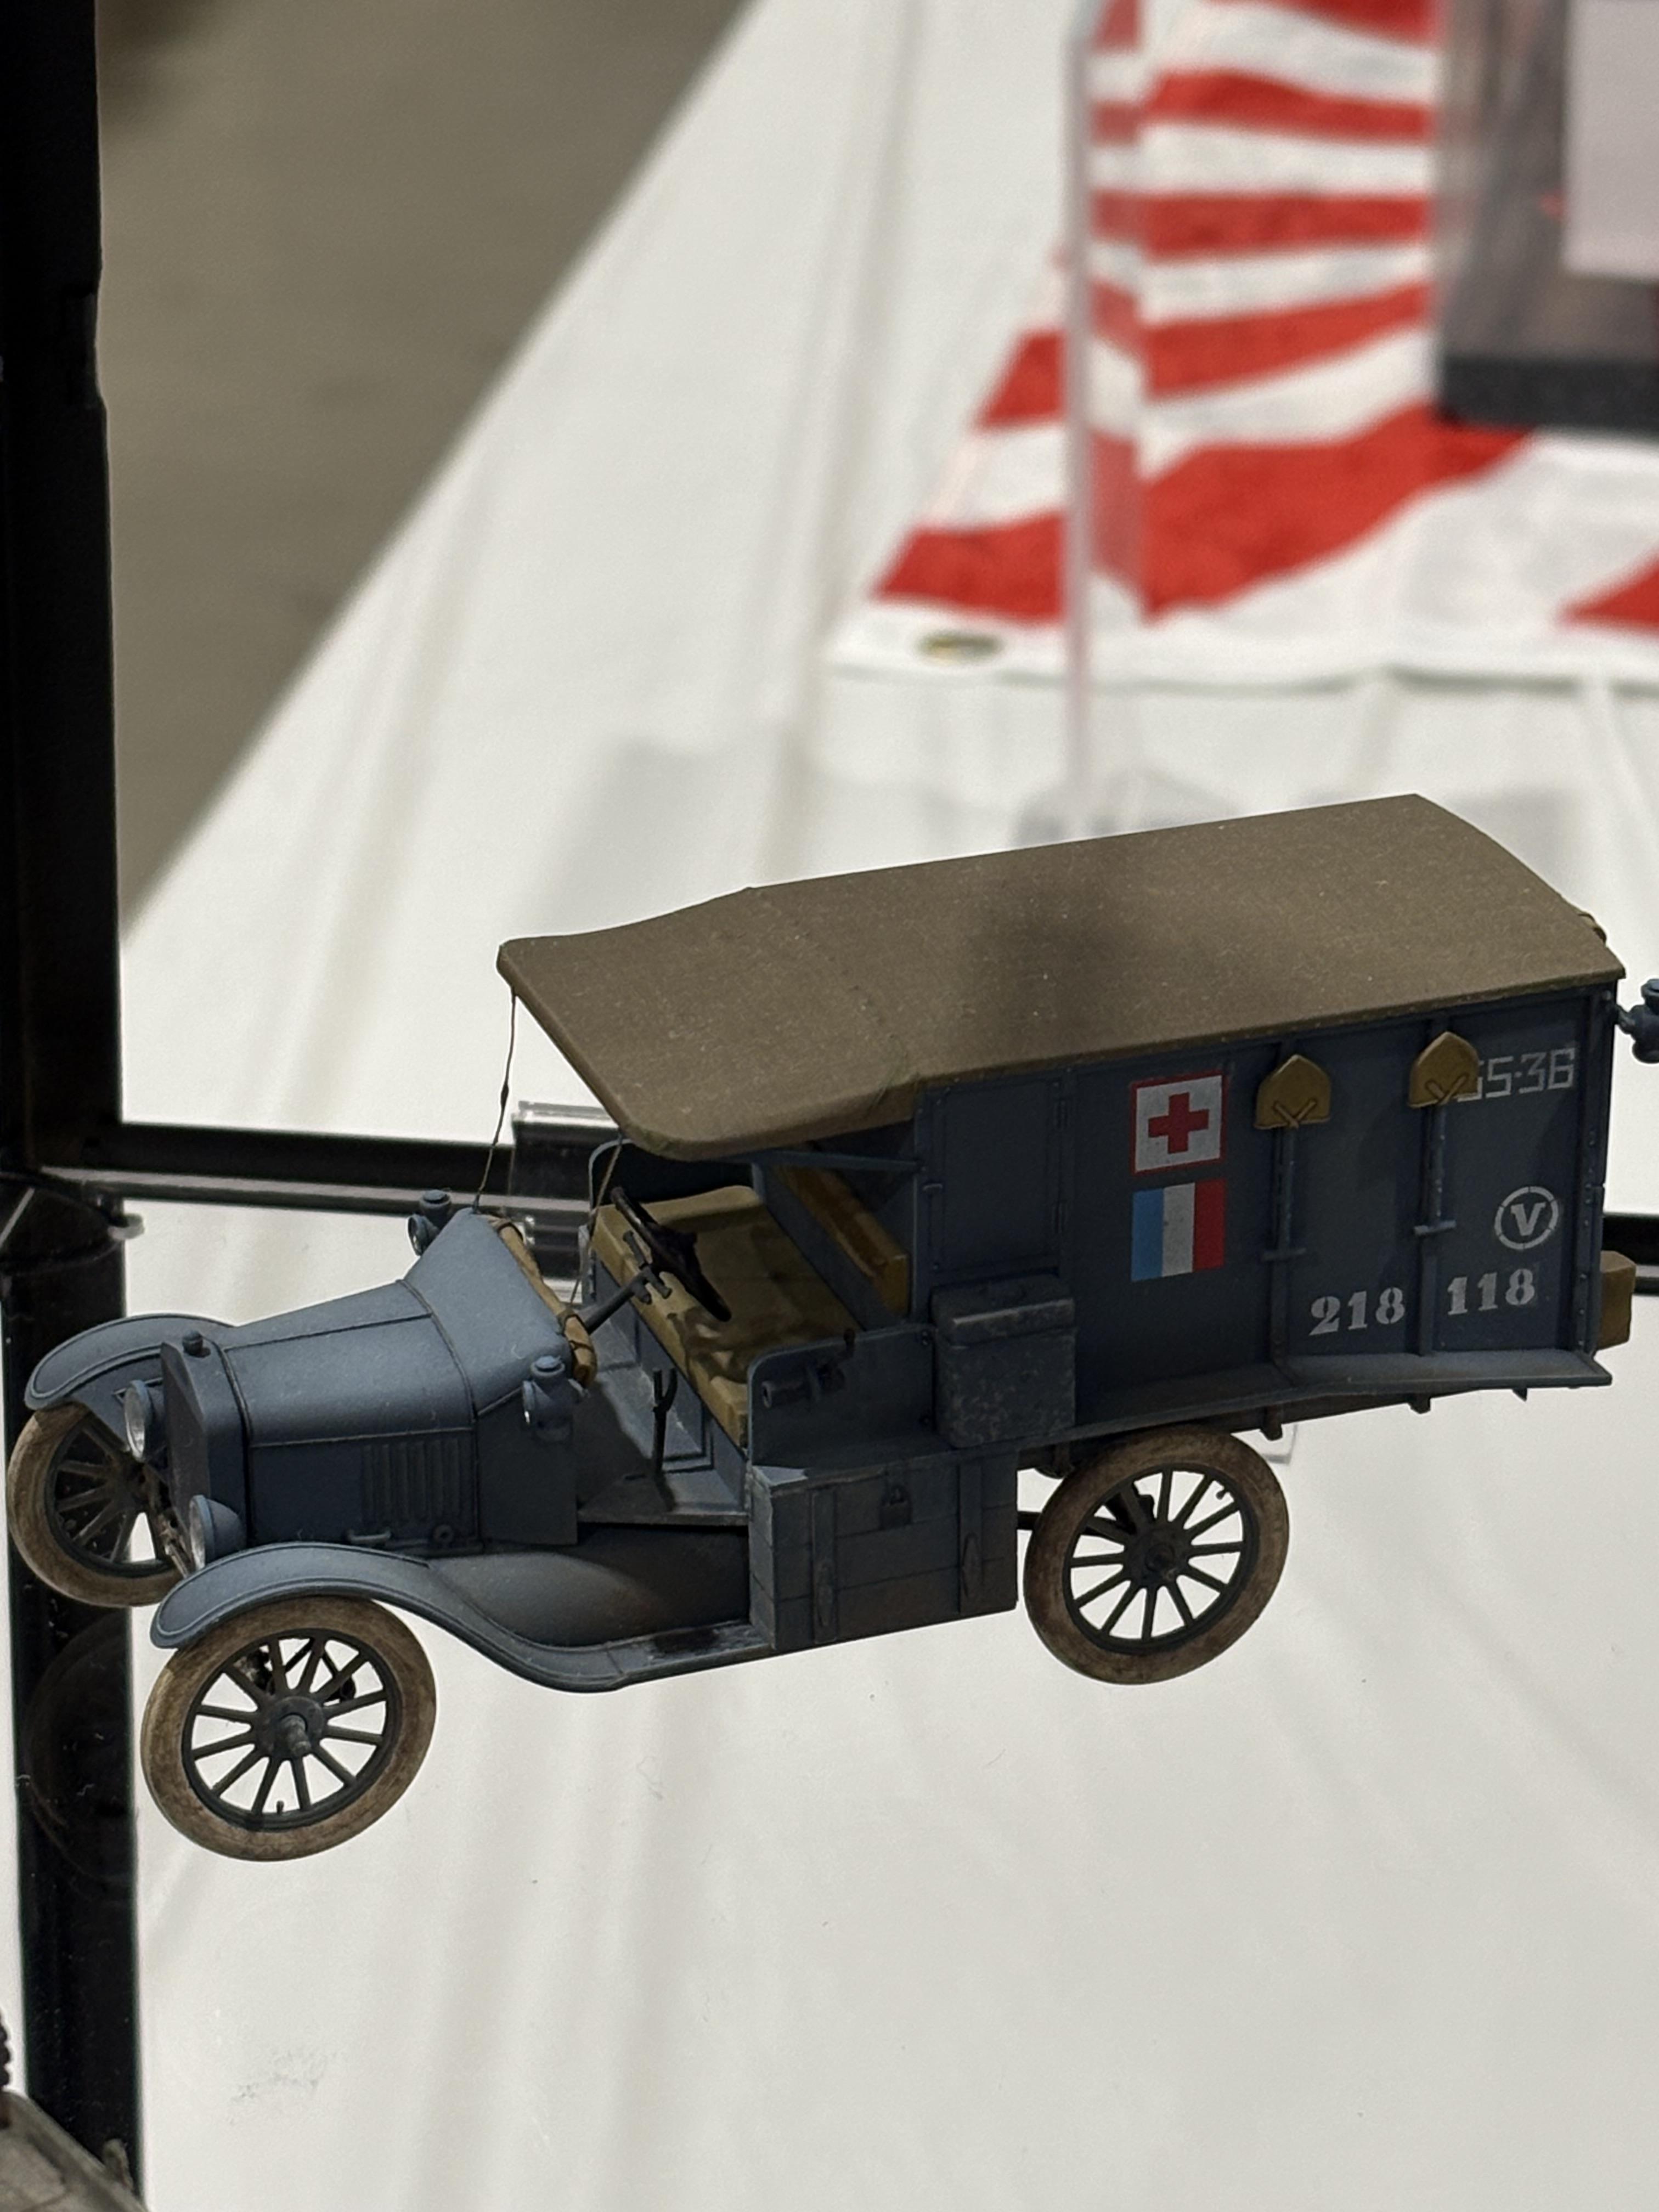
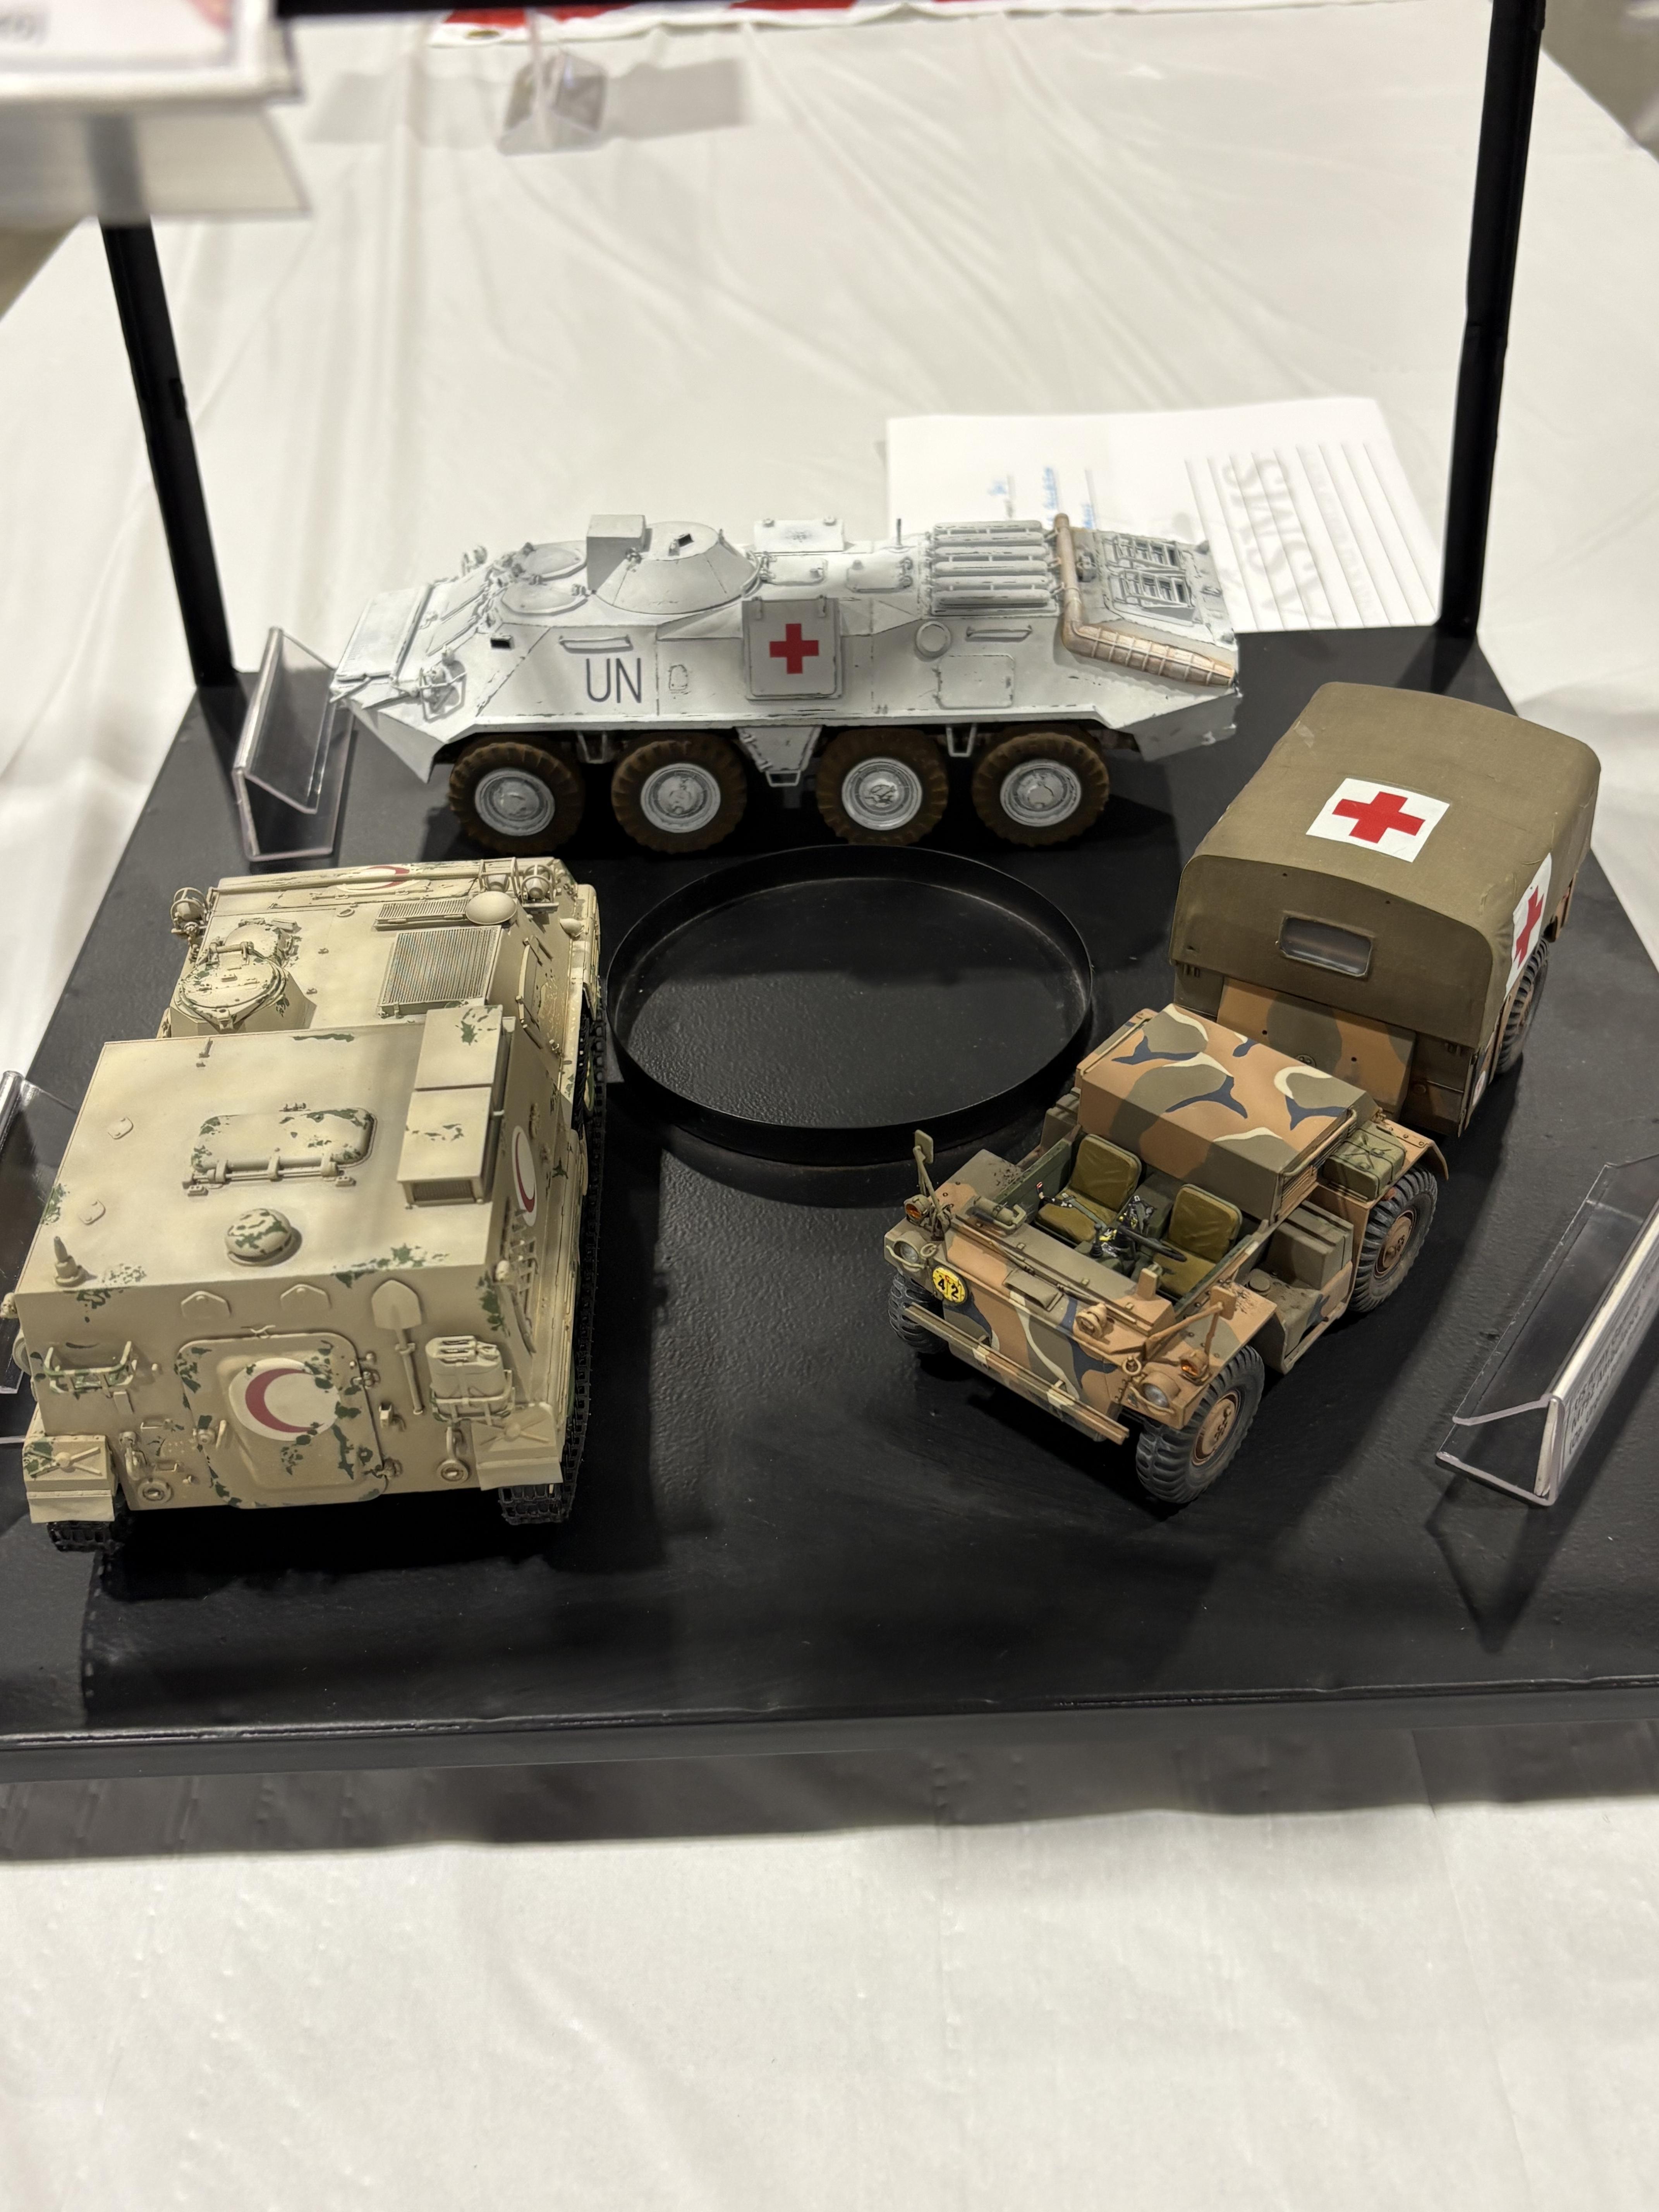
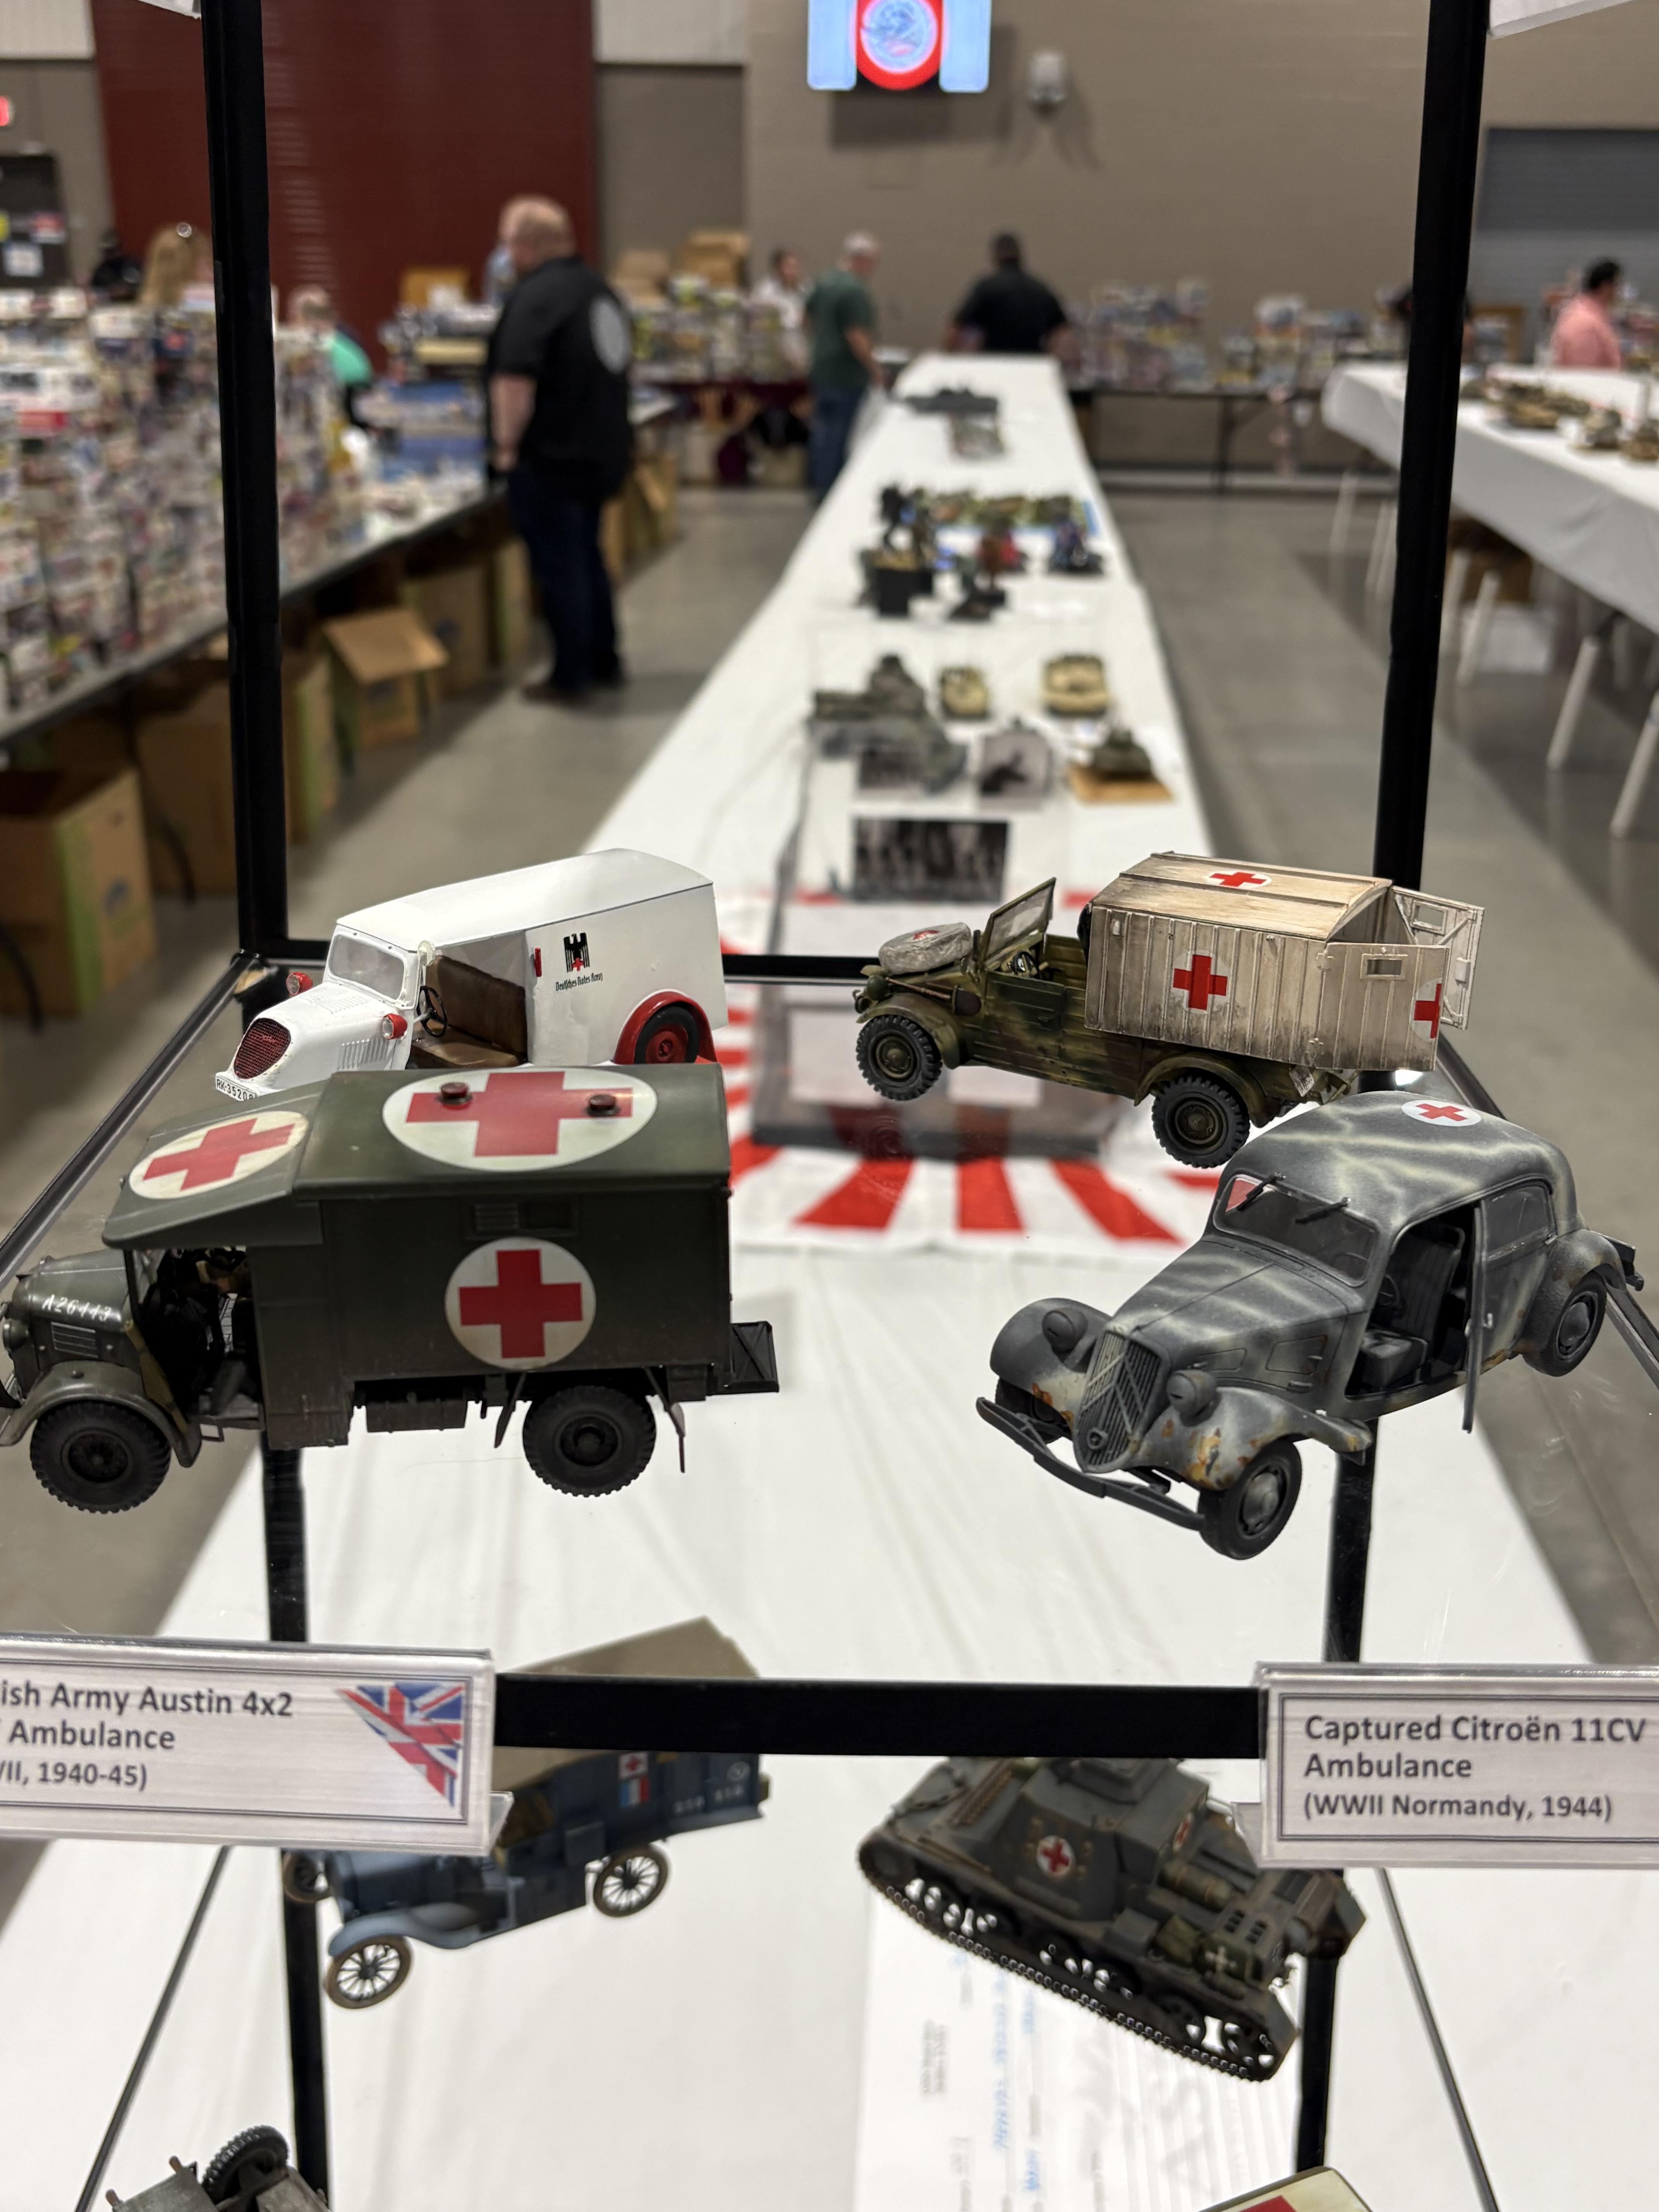
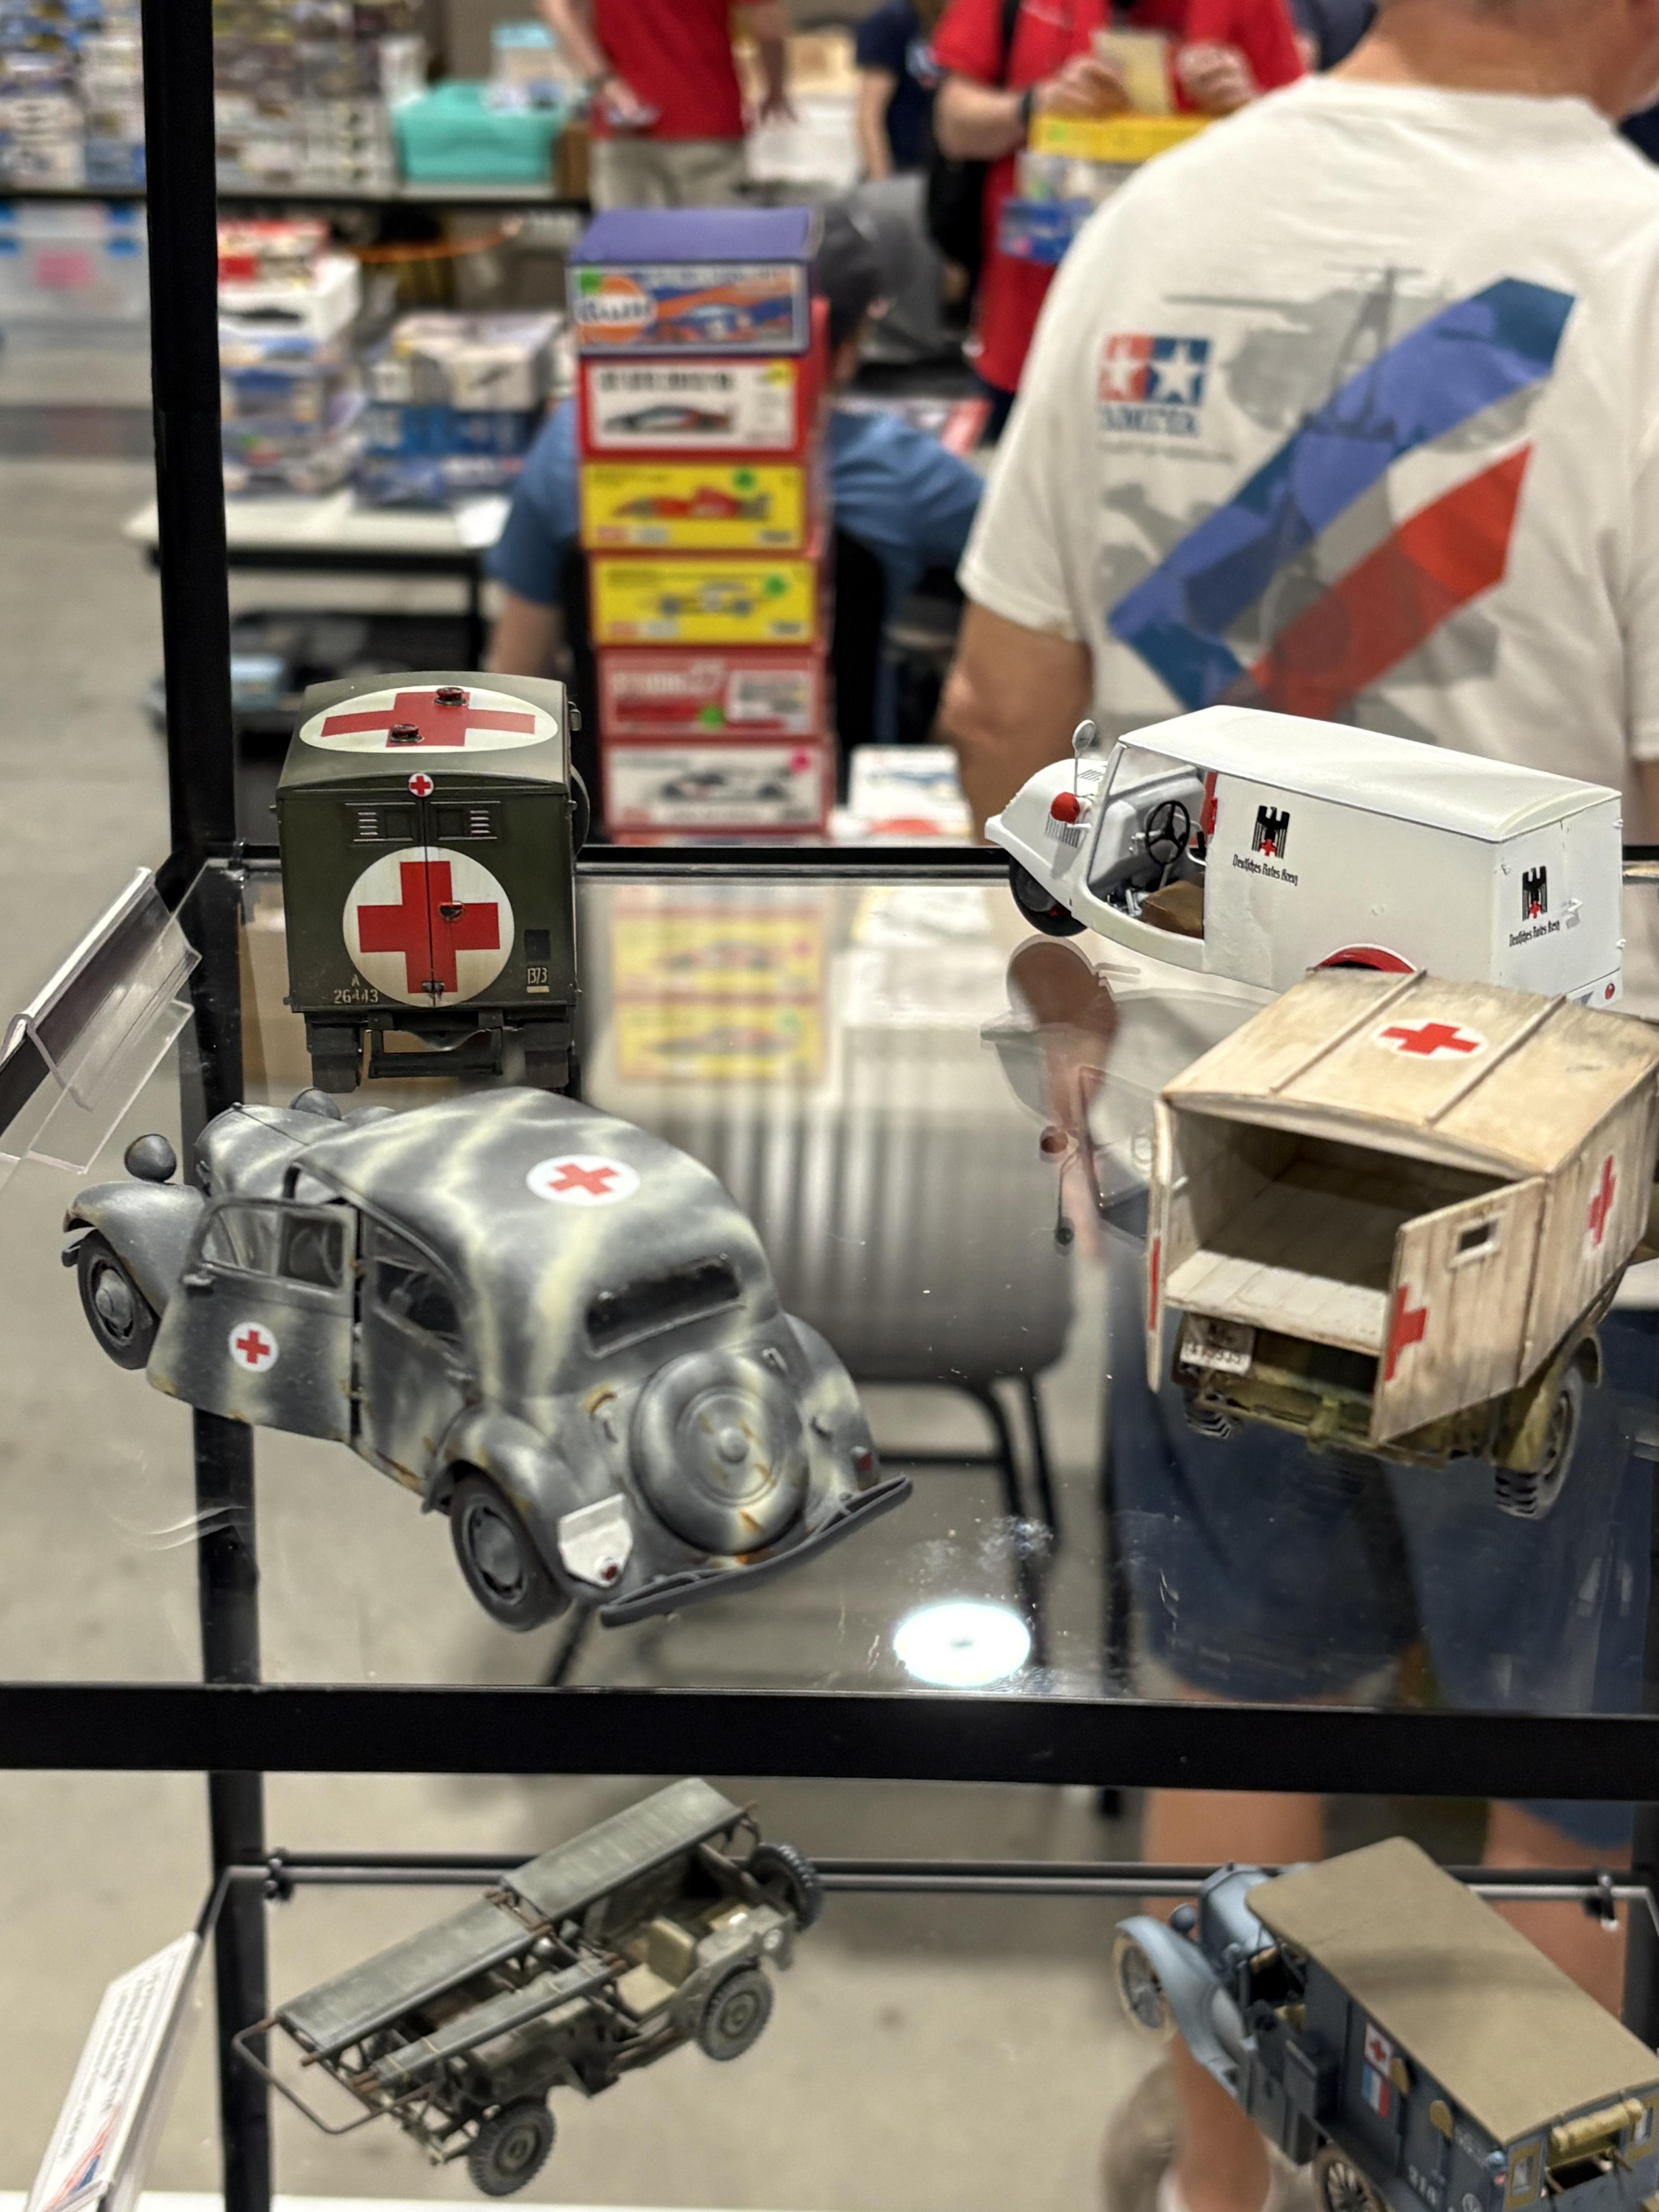
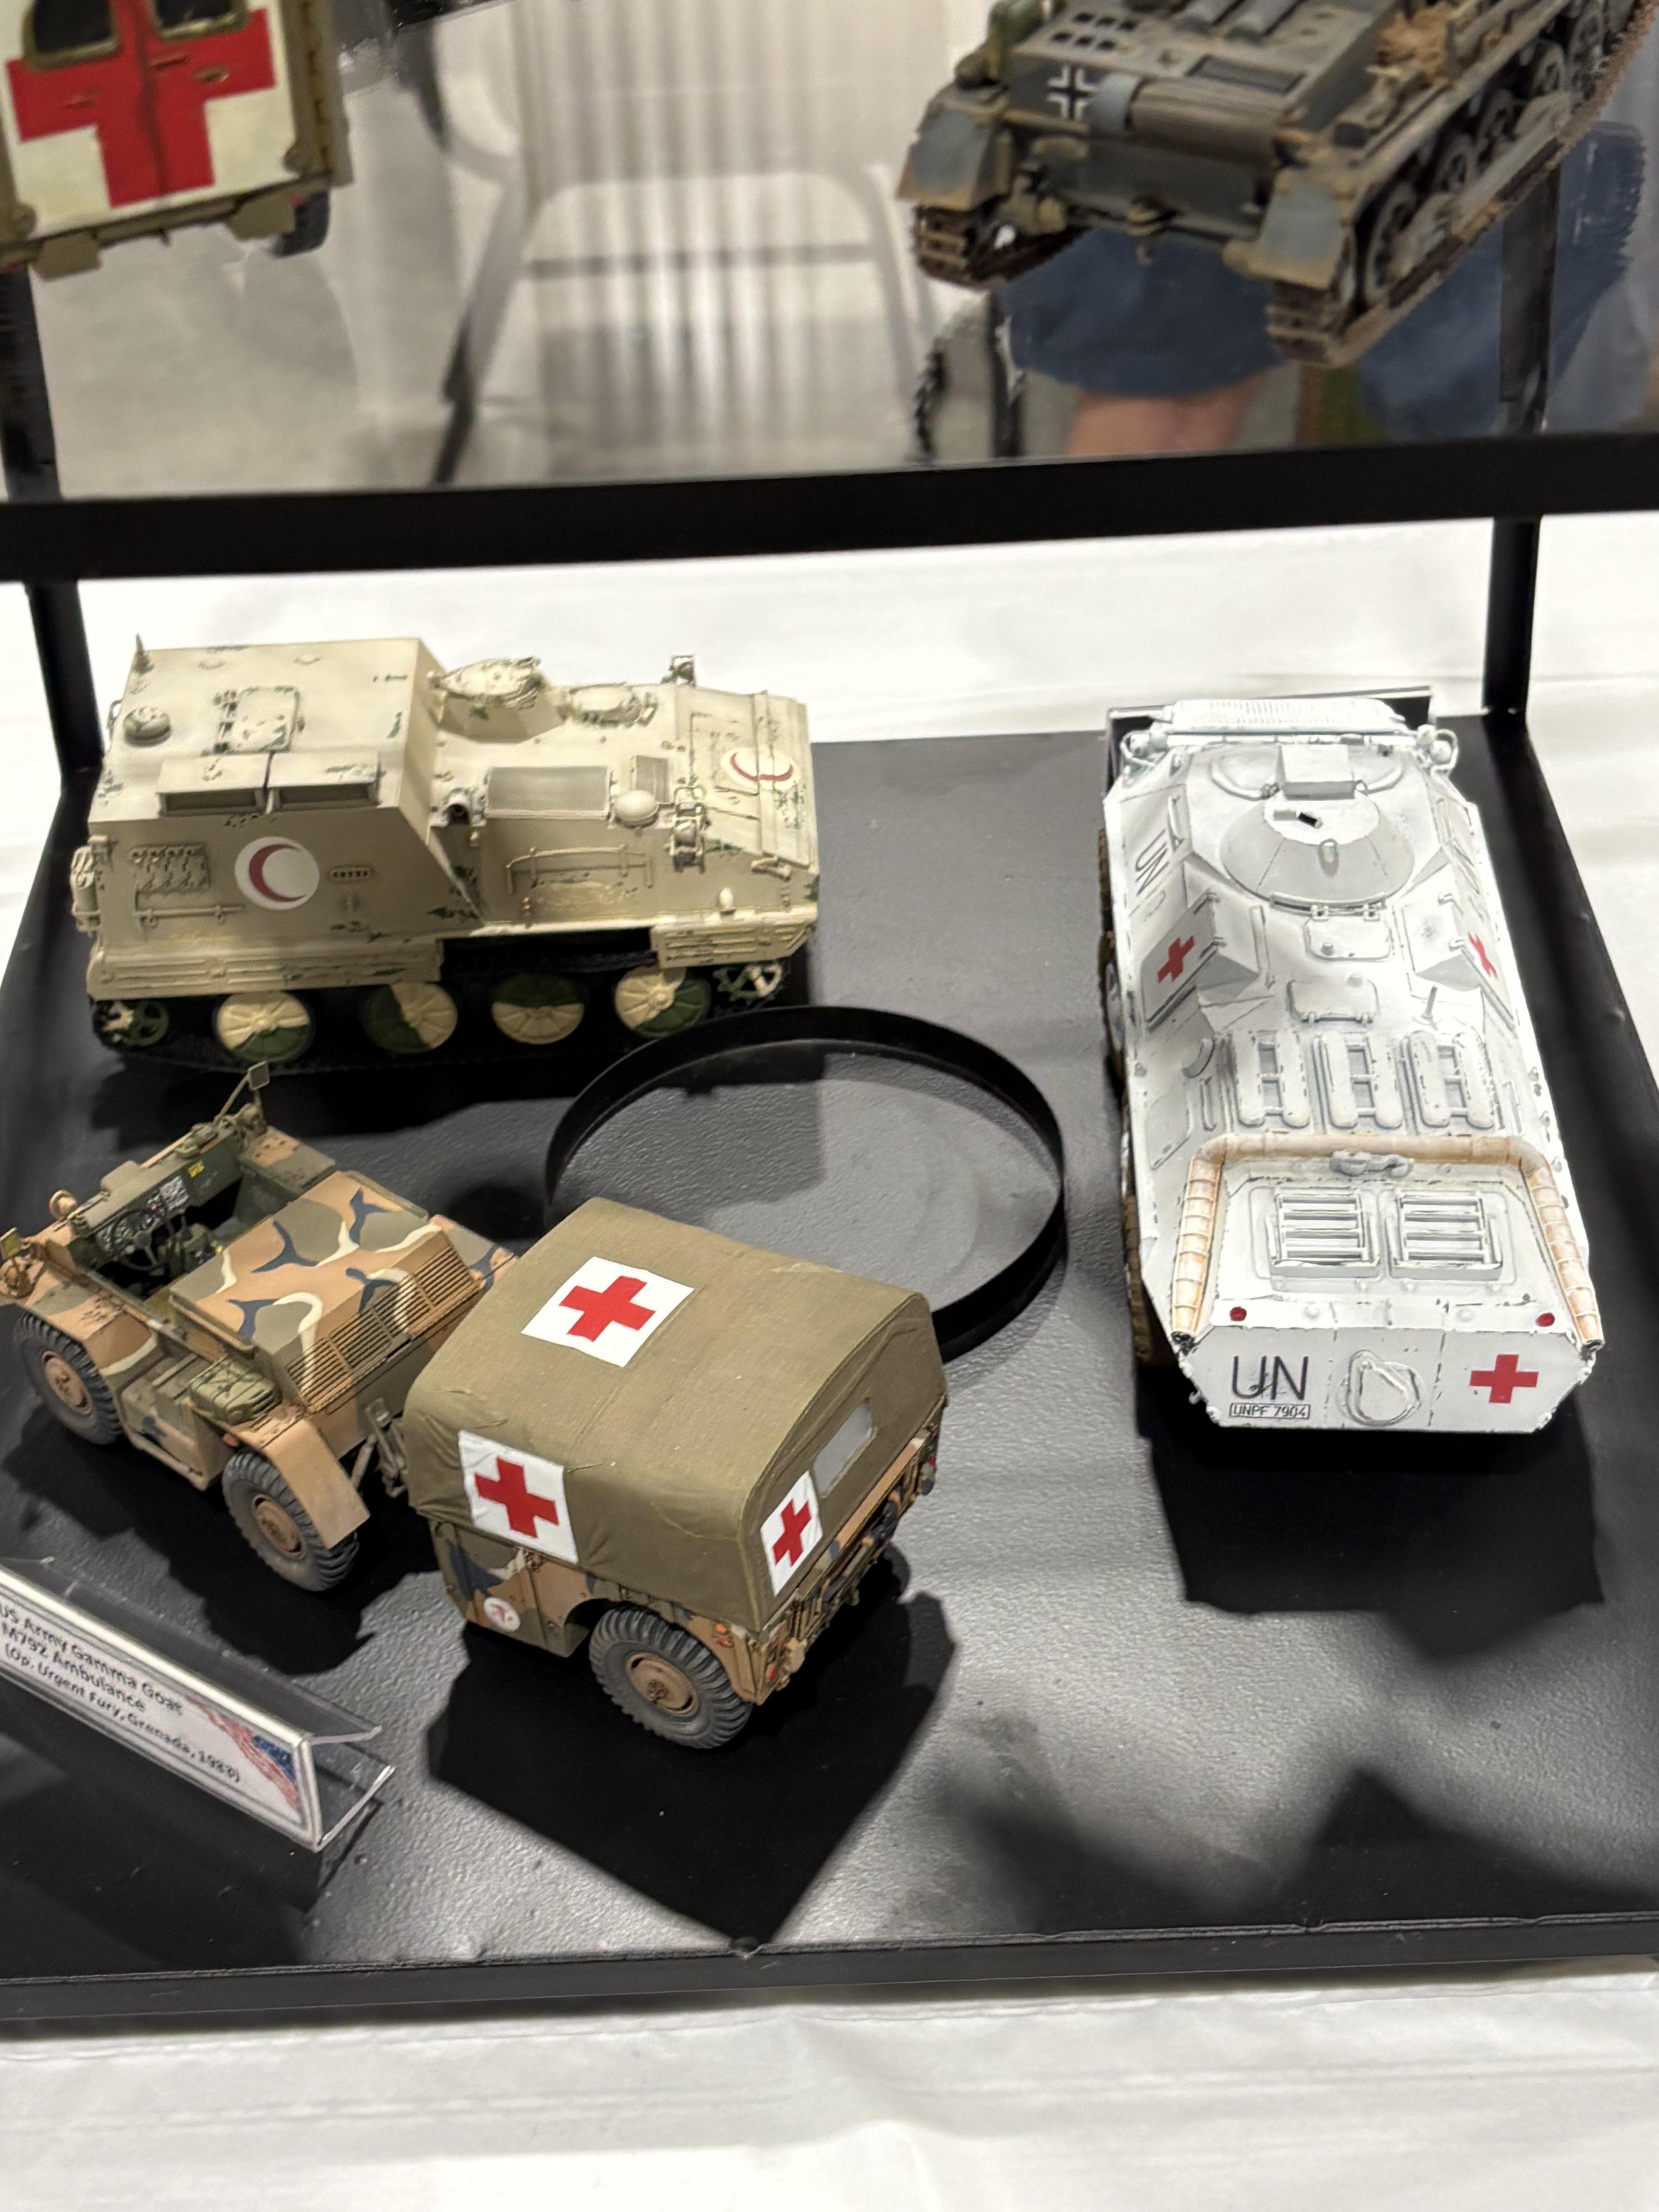
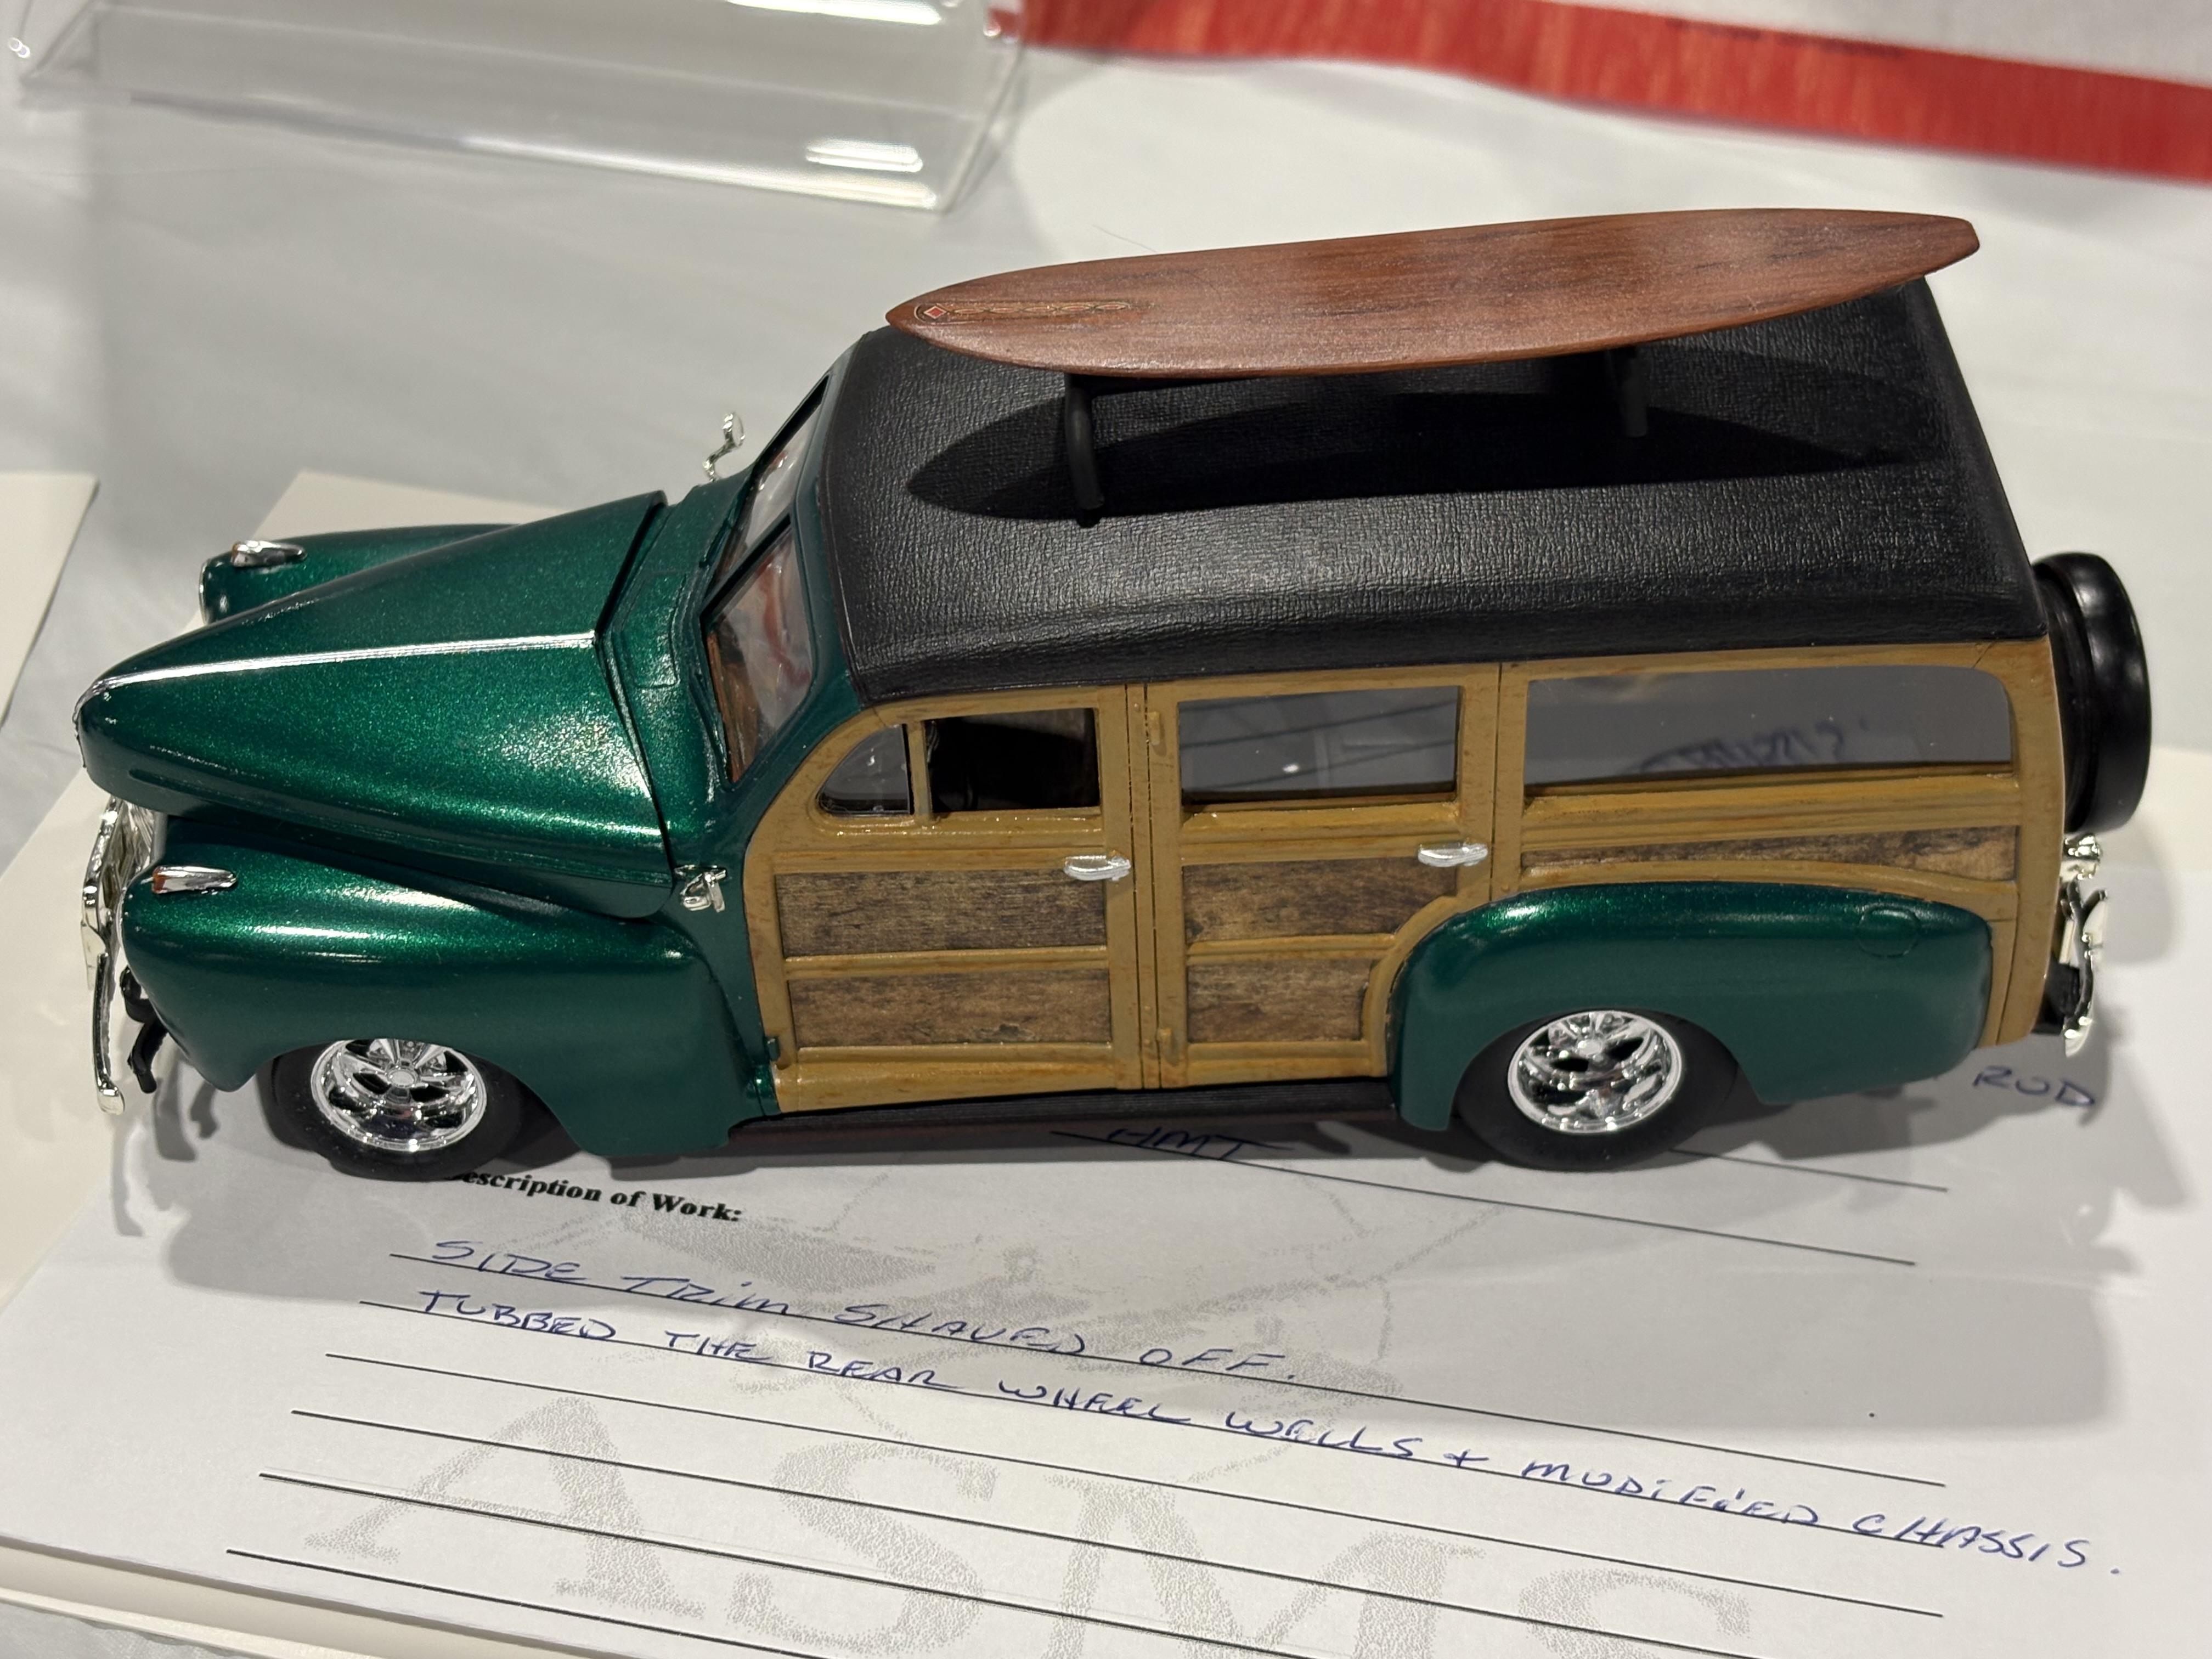
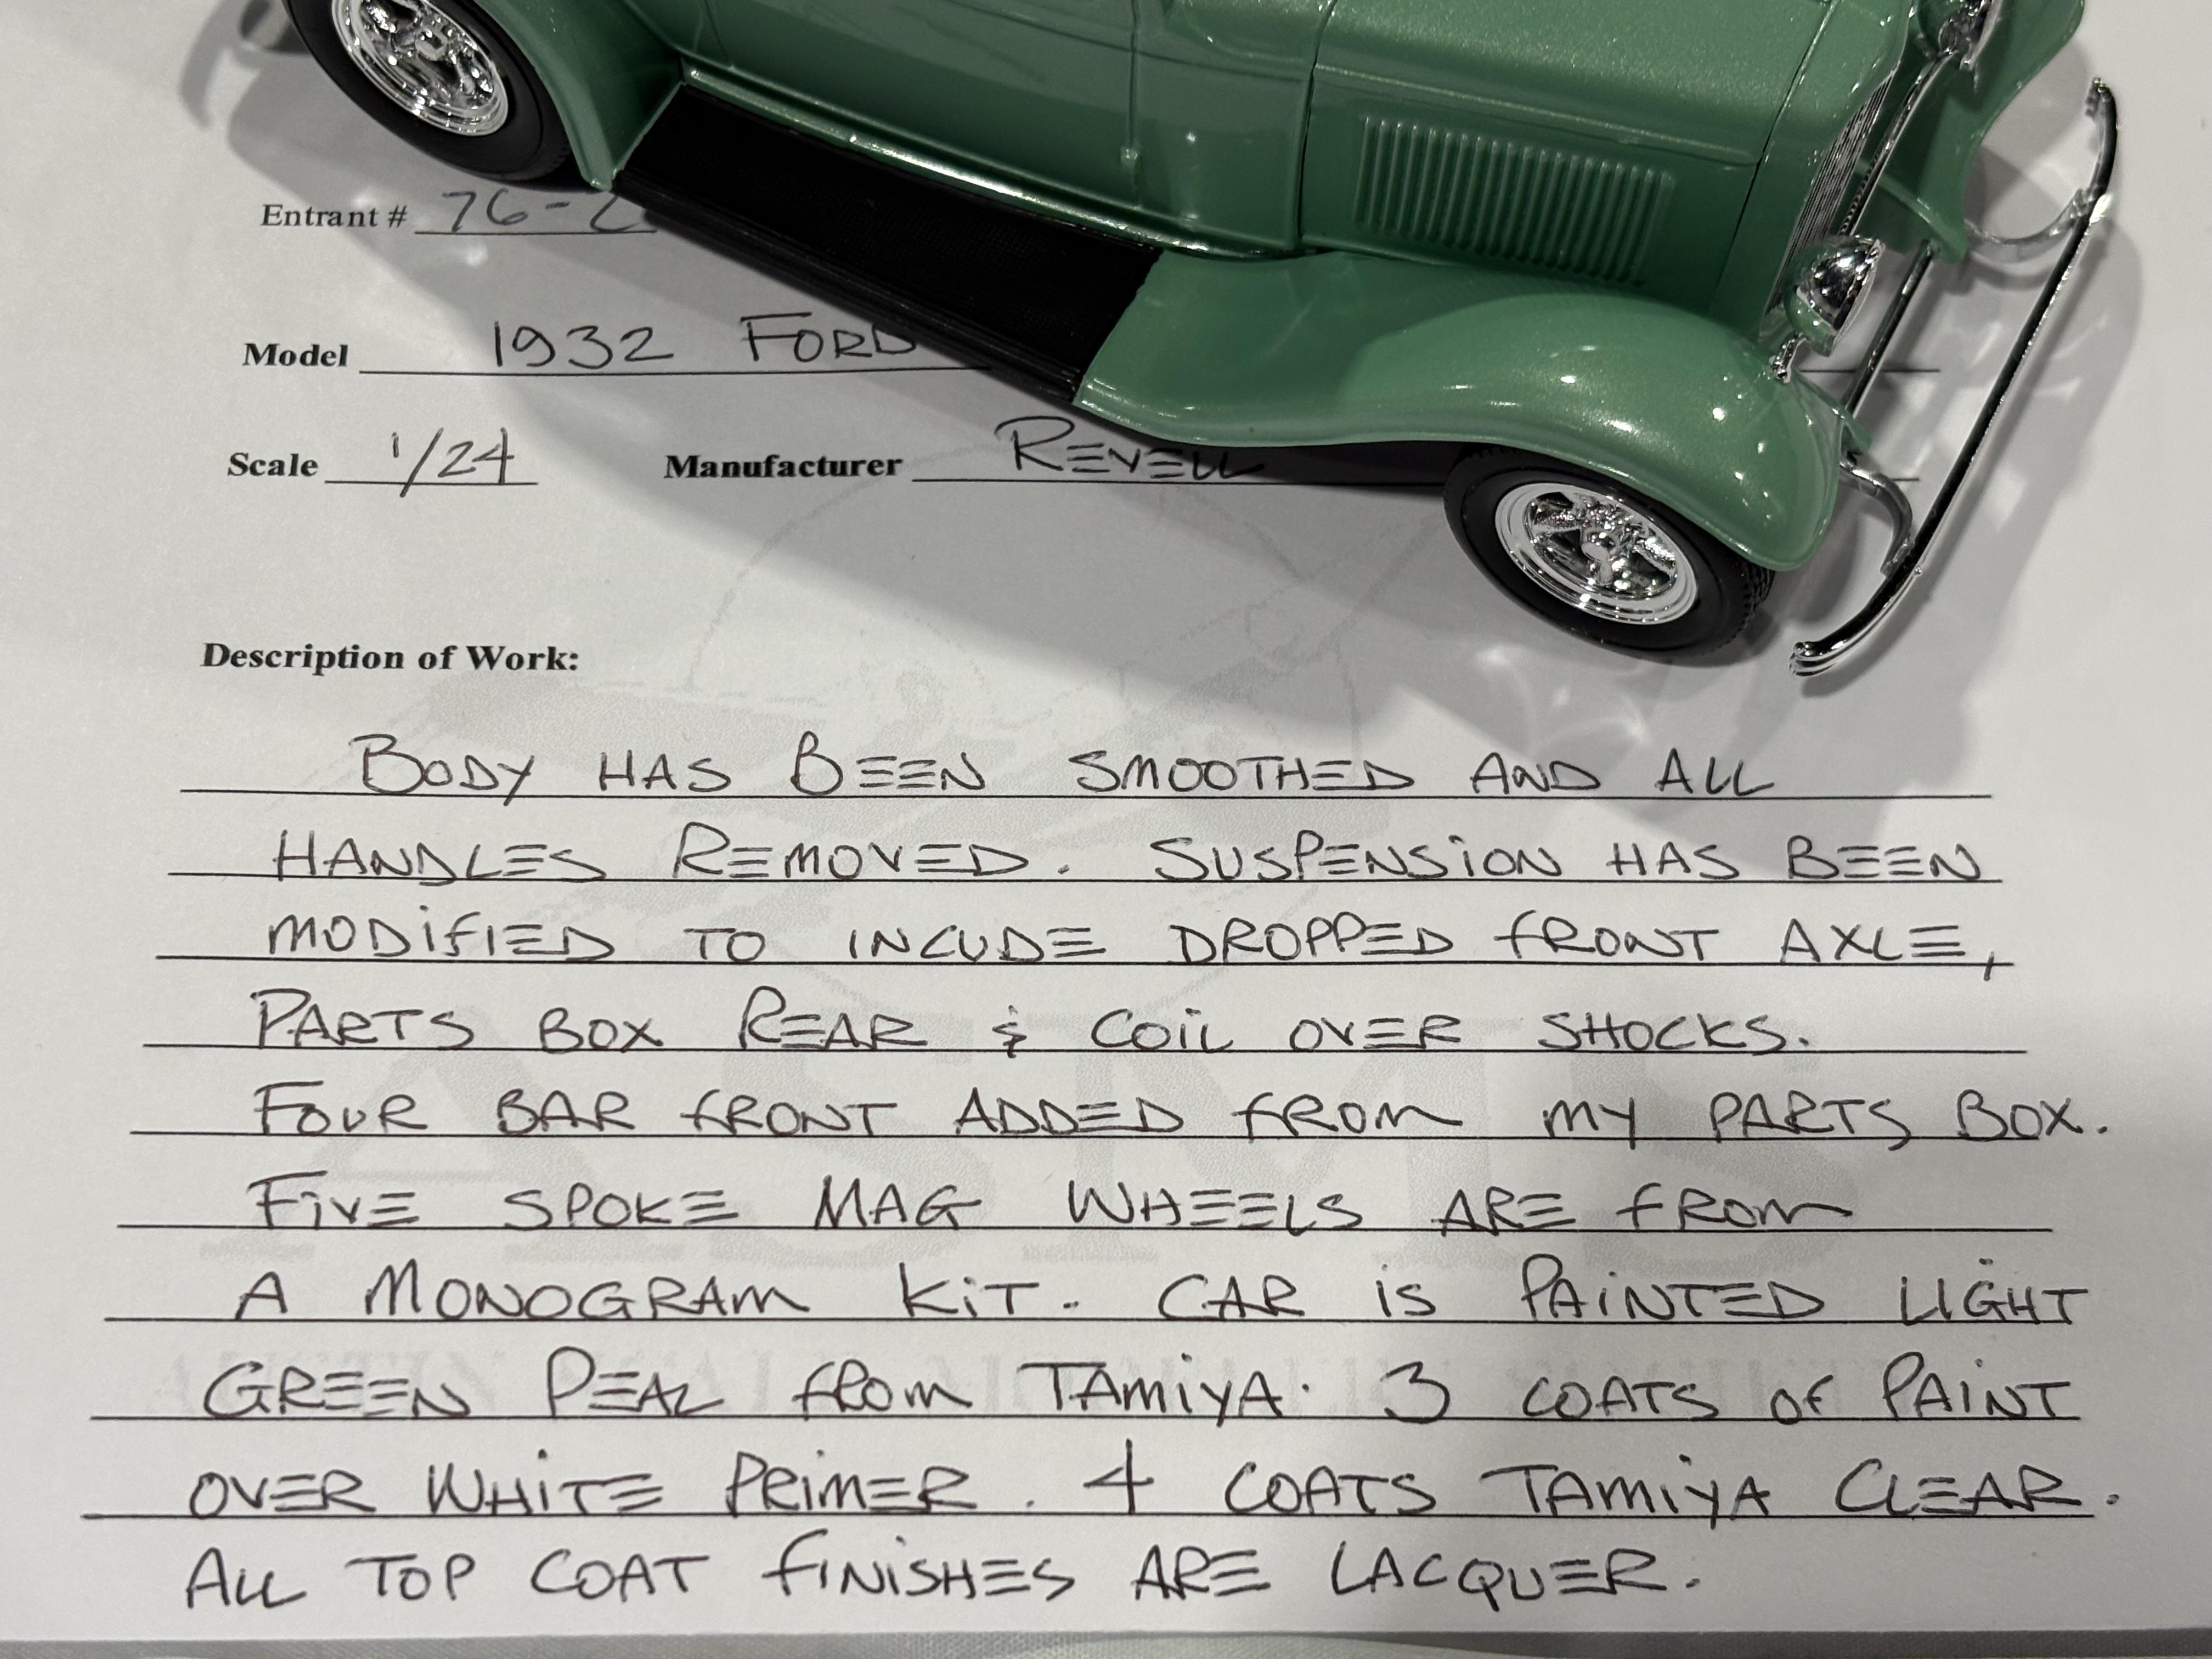
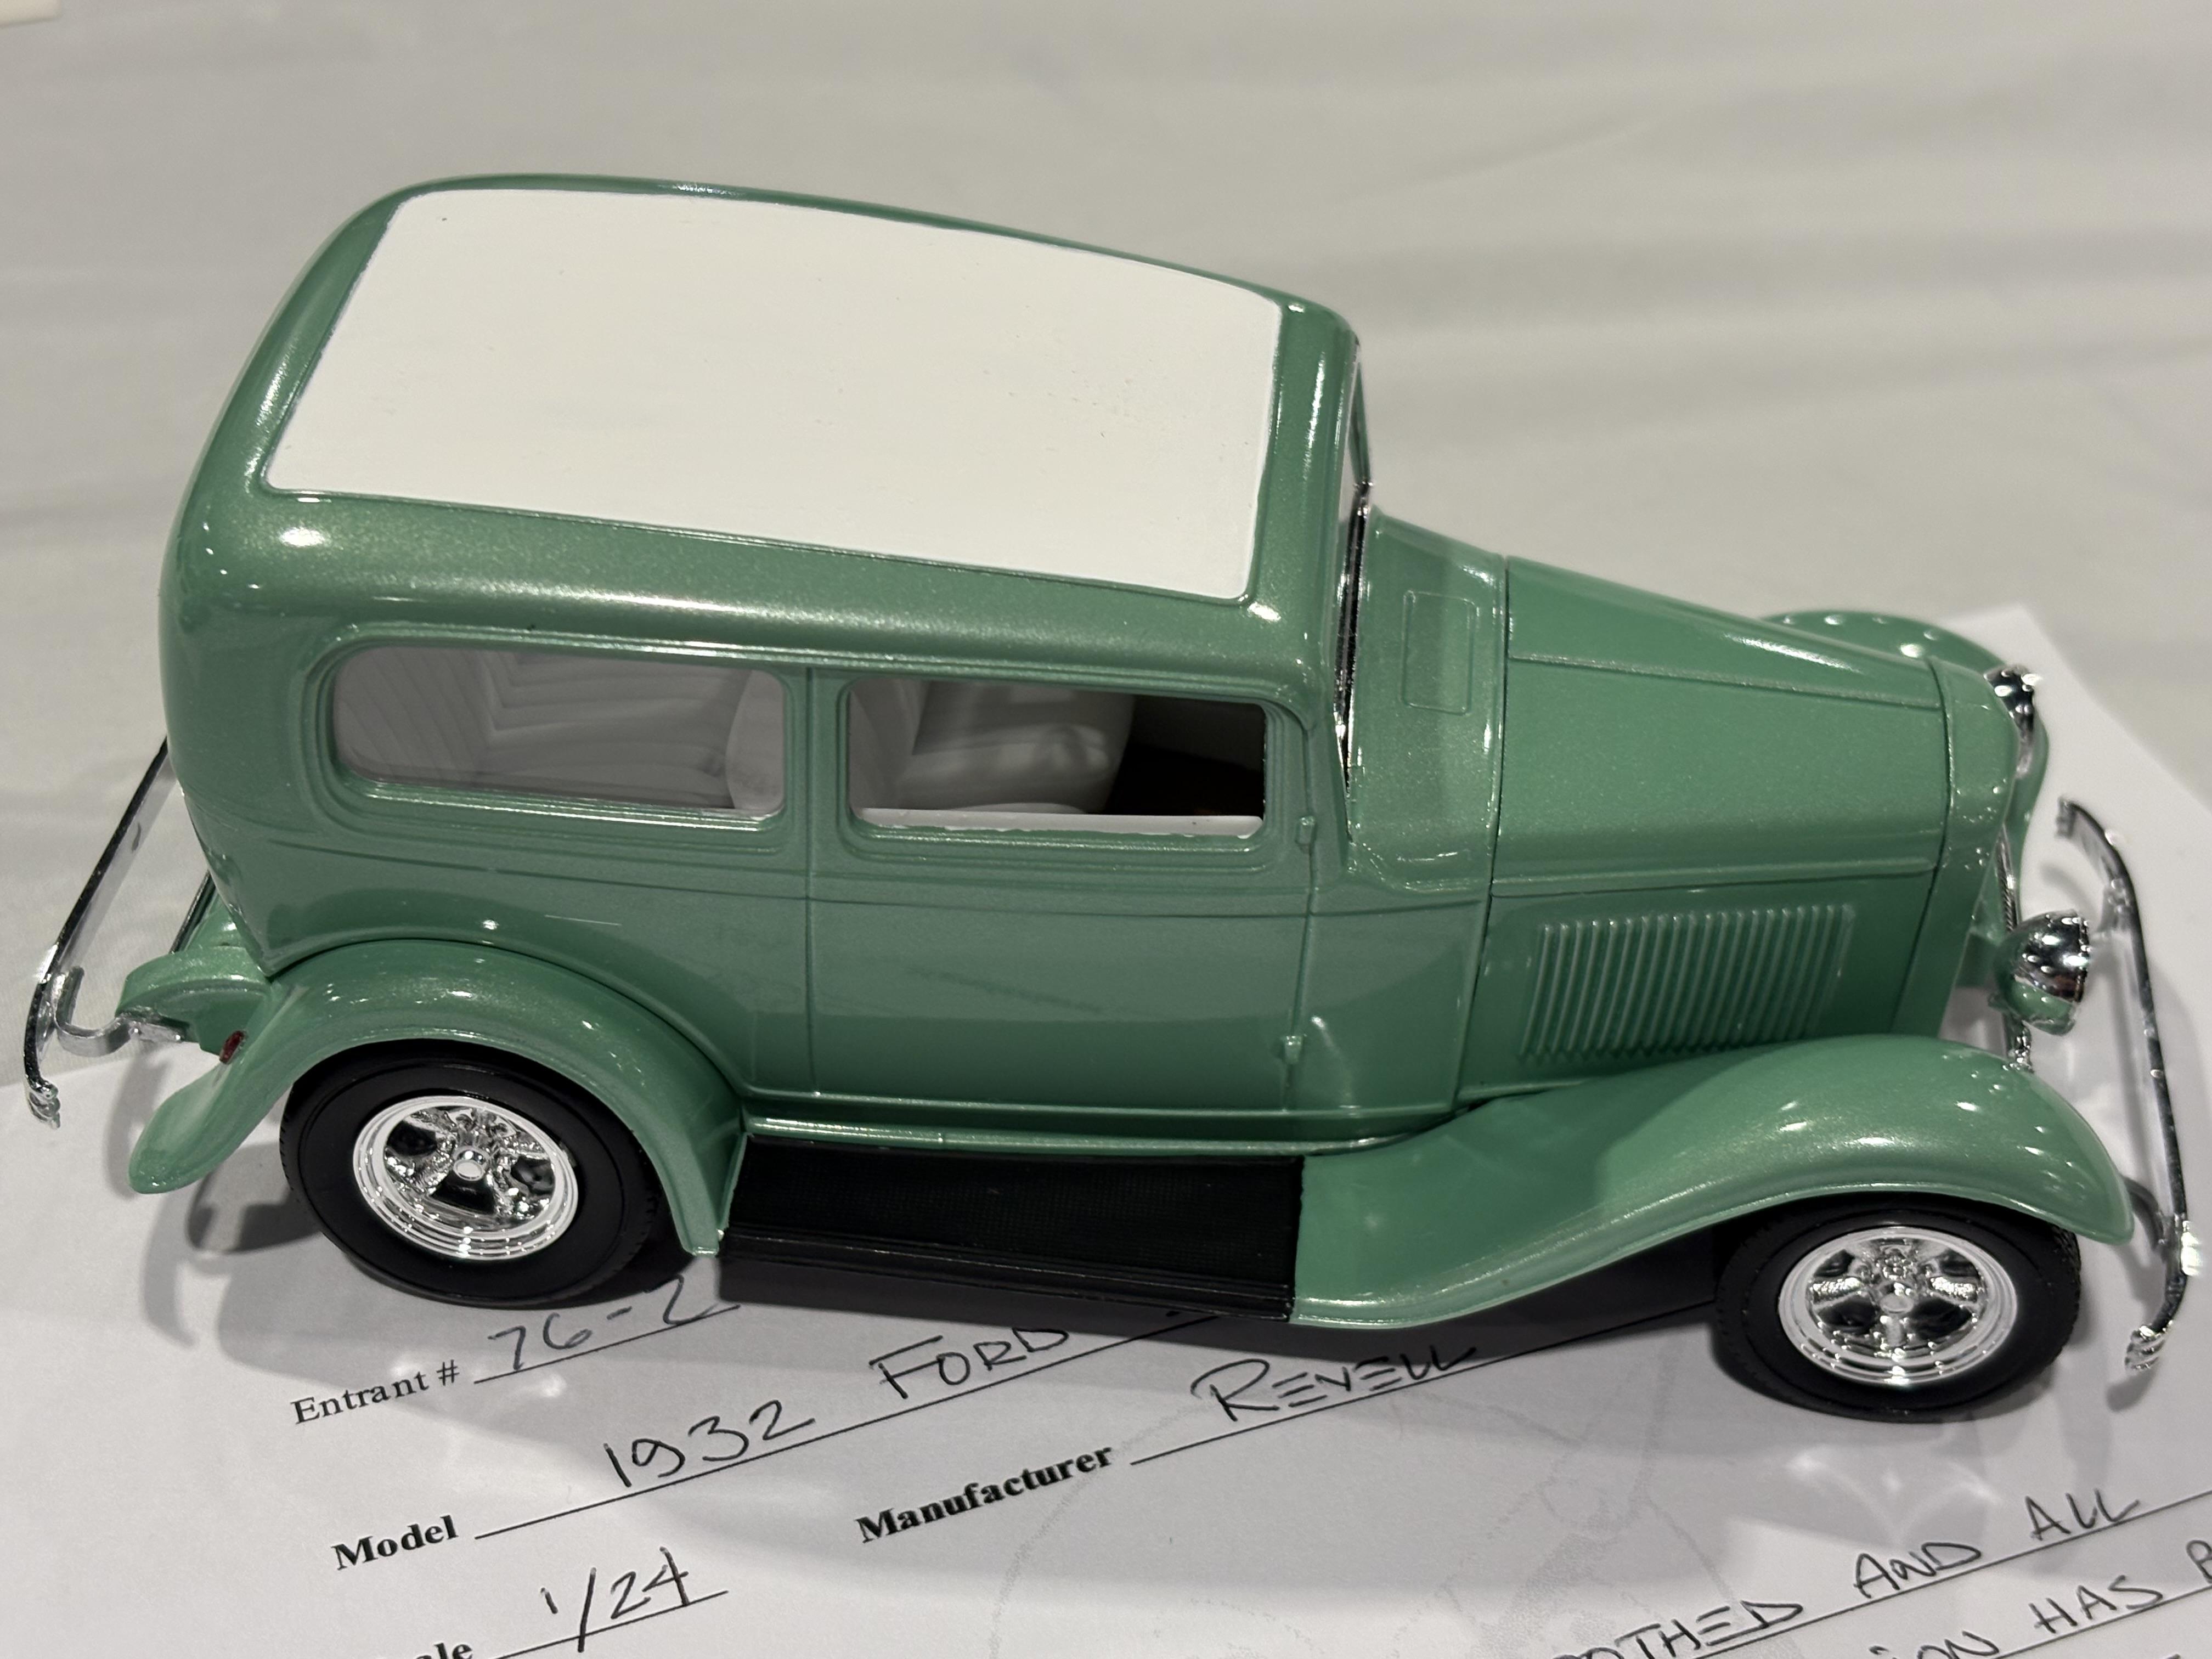
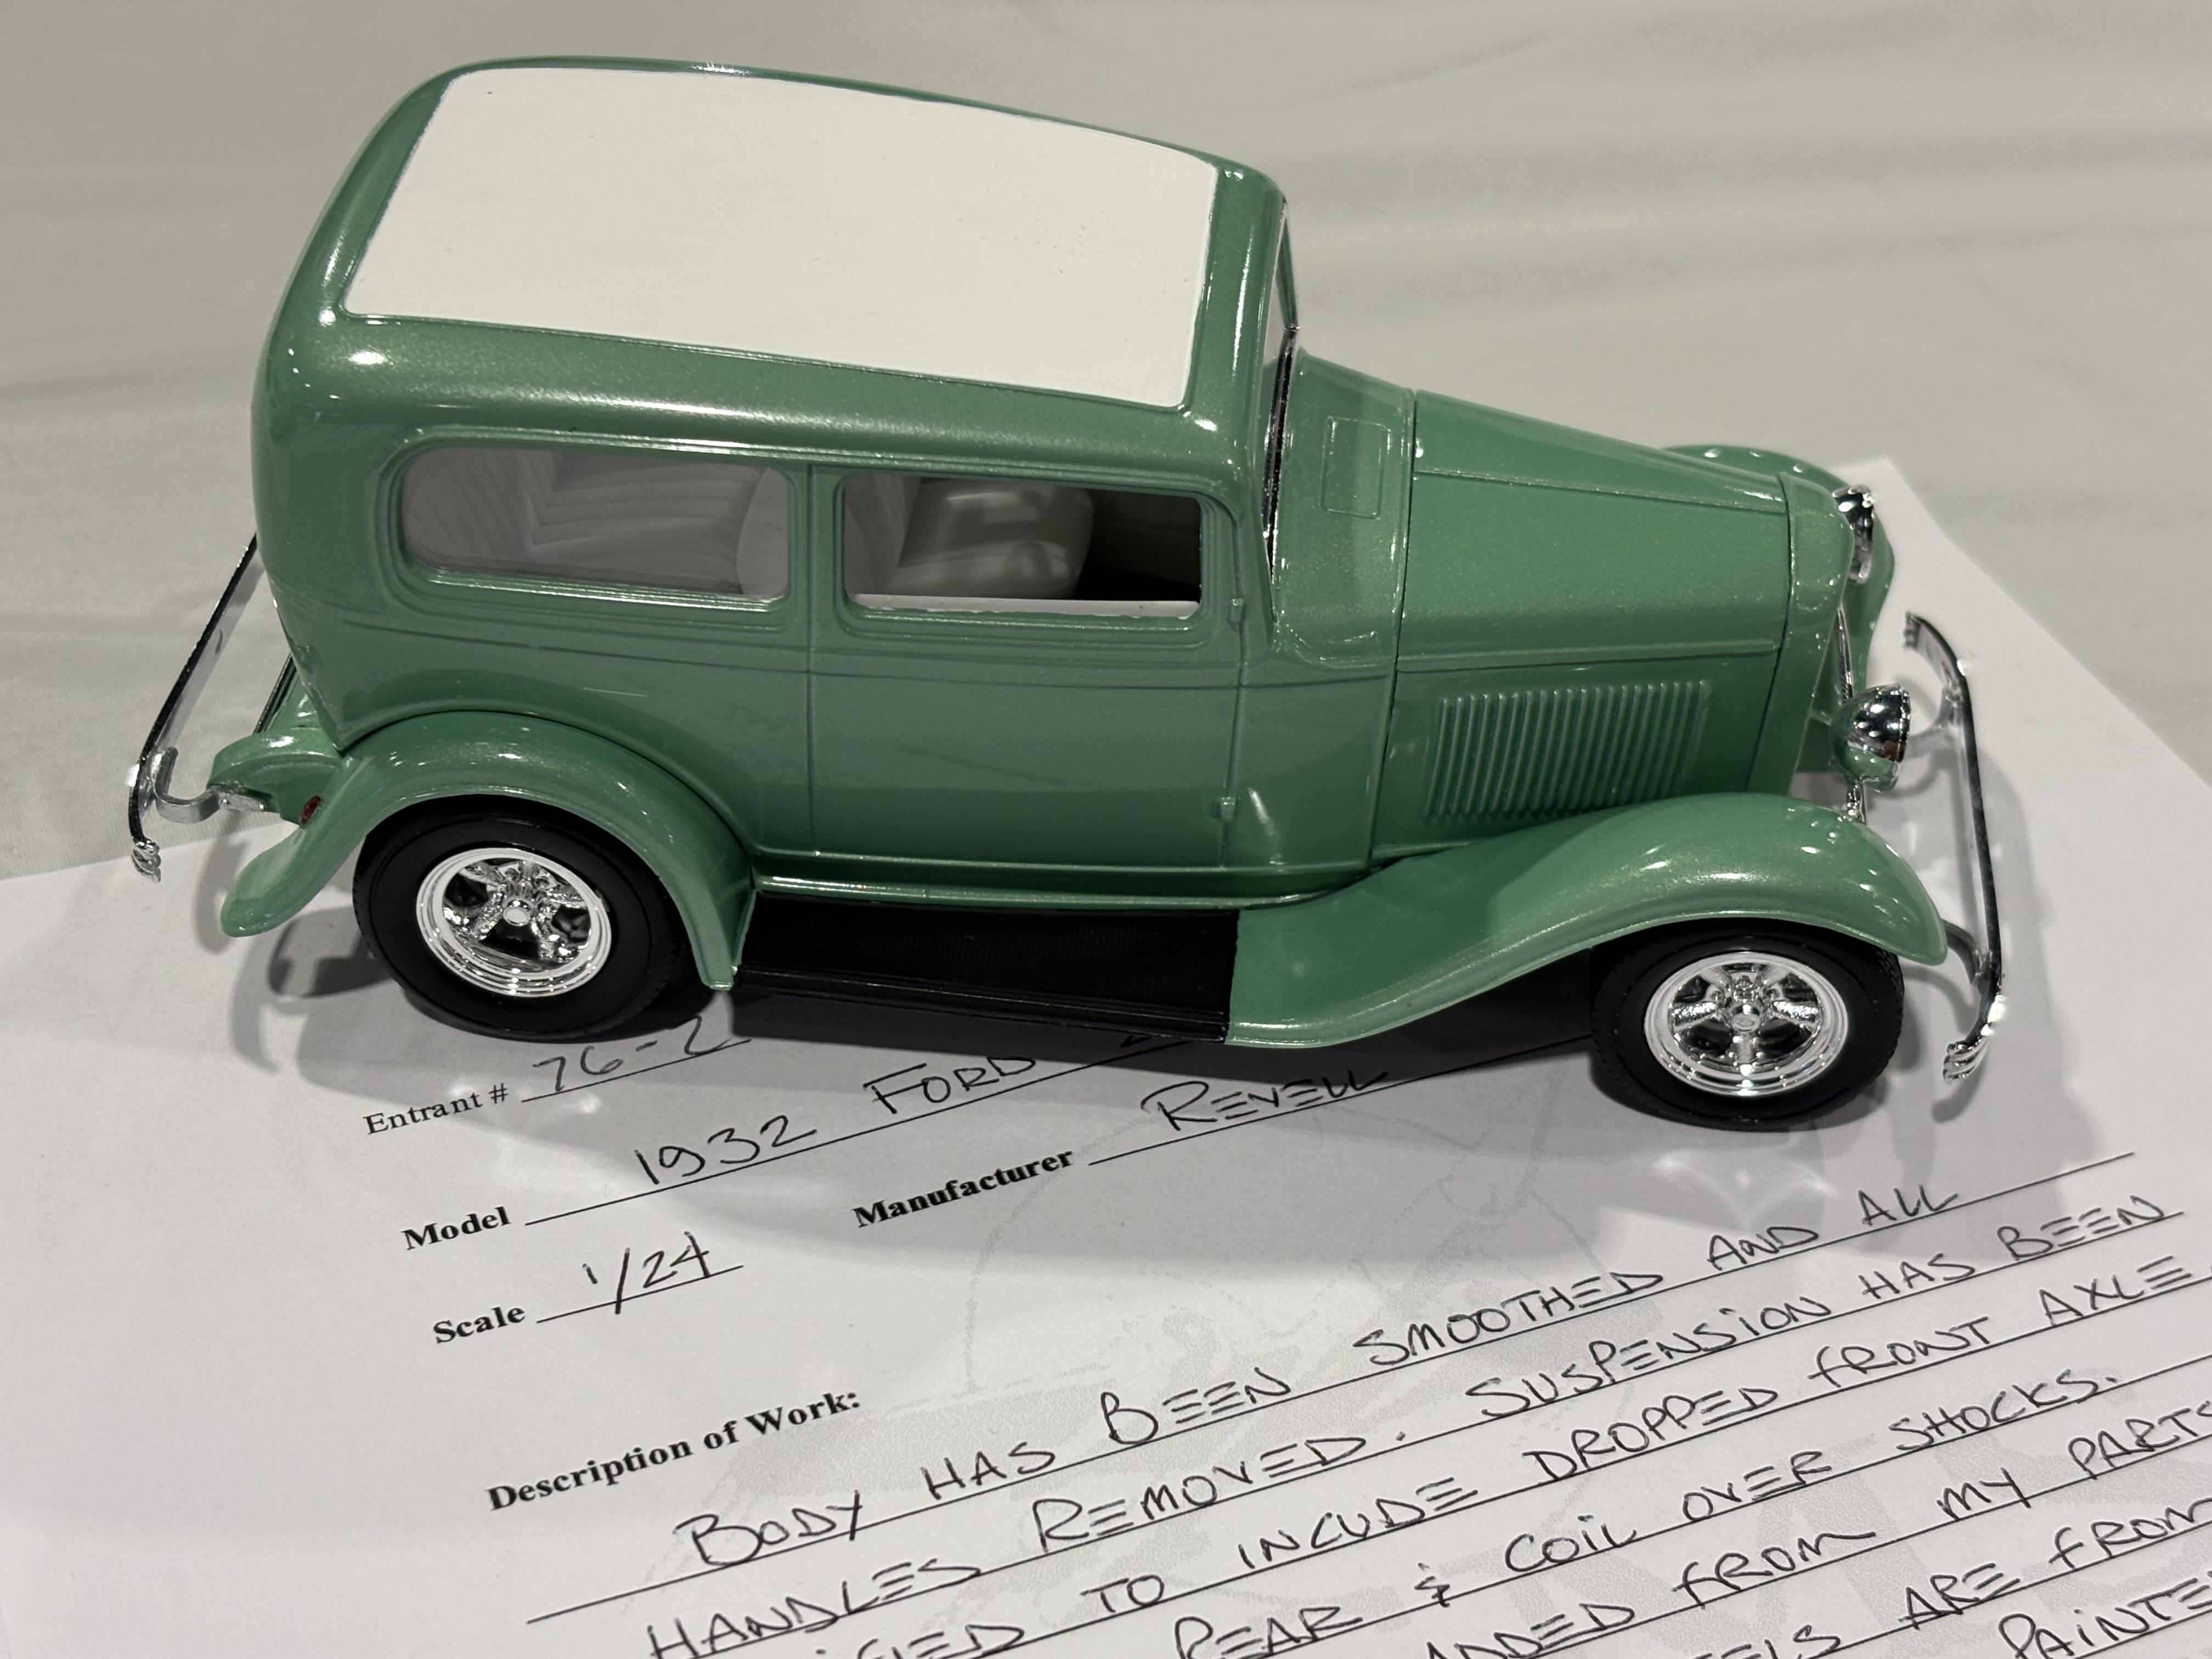
I thought this display of military ambulances was interesting
-
Pics from Austin Capitol Classic contest. November 8, 2025
LDO replied to LDO's topic in Contests and Shows
-
Pics from Austin Capitol Classic contest. November 8, 2025
LDO replied to LDO's topic in Contests and Shows
-
Pics from Austin Capitol Classic contest. November 8, 2025
LDO replied to LDO's topic in Contests and Shows
-
Pics from Austin Capitol Classic contest. November 8, 2025
LDO replied to LDO's topic in Contests and Shows
-
Pics from Austin Capitol Classic contest. November 8, 2025
LDO replied to LDO's topic in Contests and Shows
-
Pics from Austin Capitol Classic contest. November 8, 2025
LDO replied to LDO's topic in Contests and Shows
-
Pics from Austin Capitol Classic contest. November 8, 2025
LDO replied to LDO's topic in Contests and Shows
-
Pics from Austin Capitol Classic contest. November 8, 2025
LDO replied to LDO's topic in Contests and Shows
-
Pics from Austin Capitol Classic contest. November 8, 2025
LDO replied to LDO's topic in Contests and Shows
-
Pics from Austin Capitol Classic contest. November 8, 2025
LDO replied to LDO's topic in Contests and Shows
-
Pics from Austin Capitol Classic contest. November 8, 2025
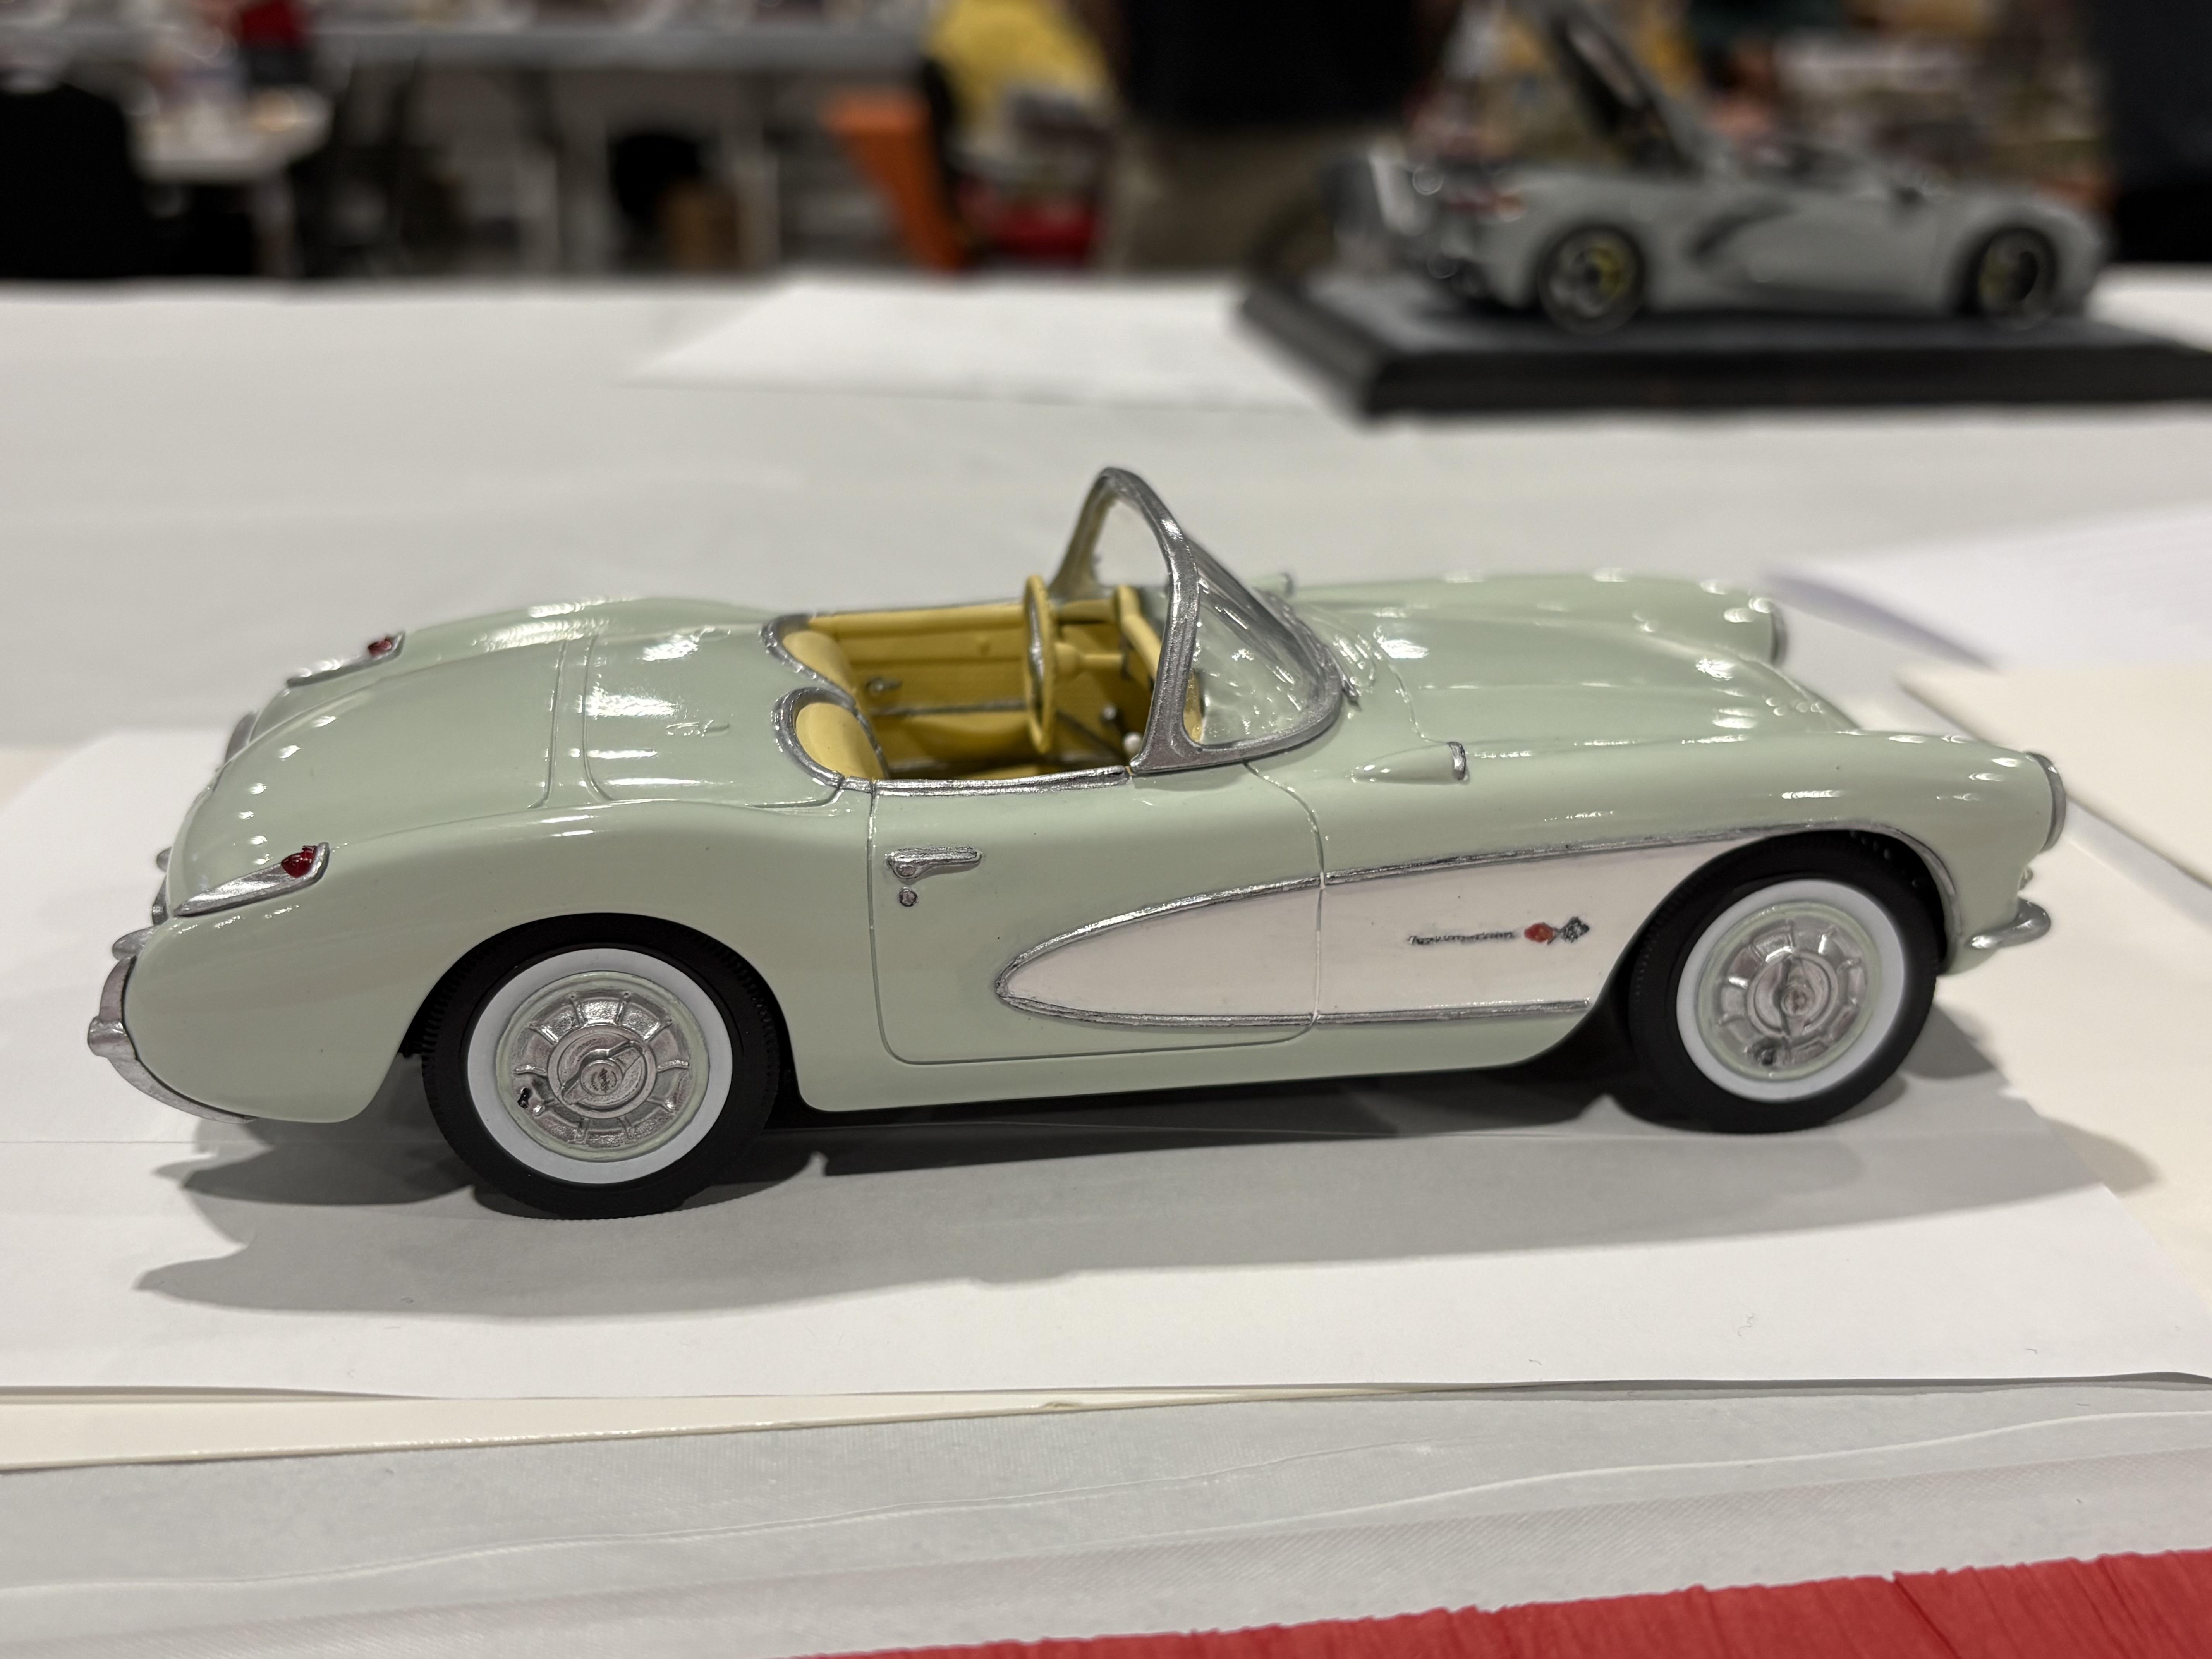
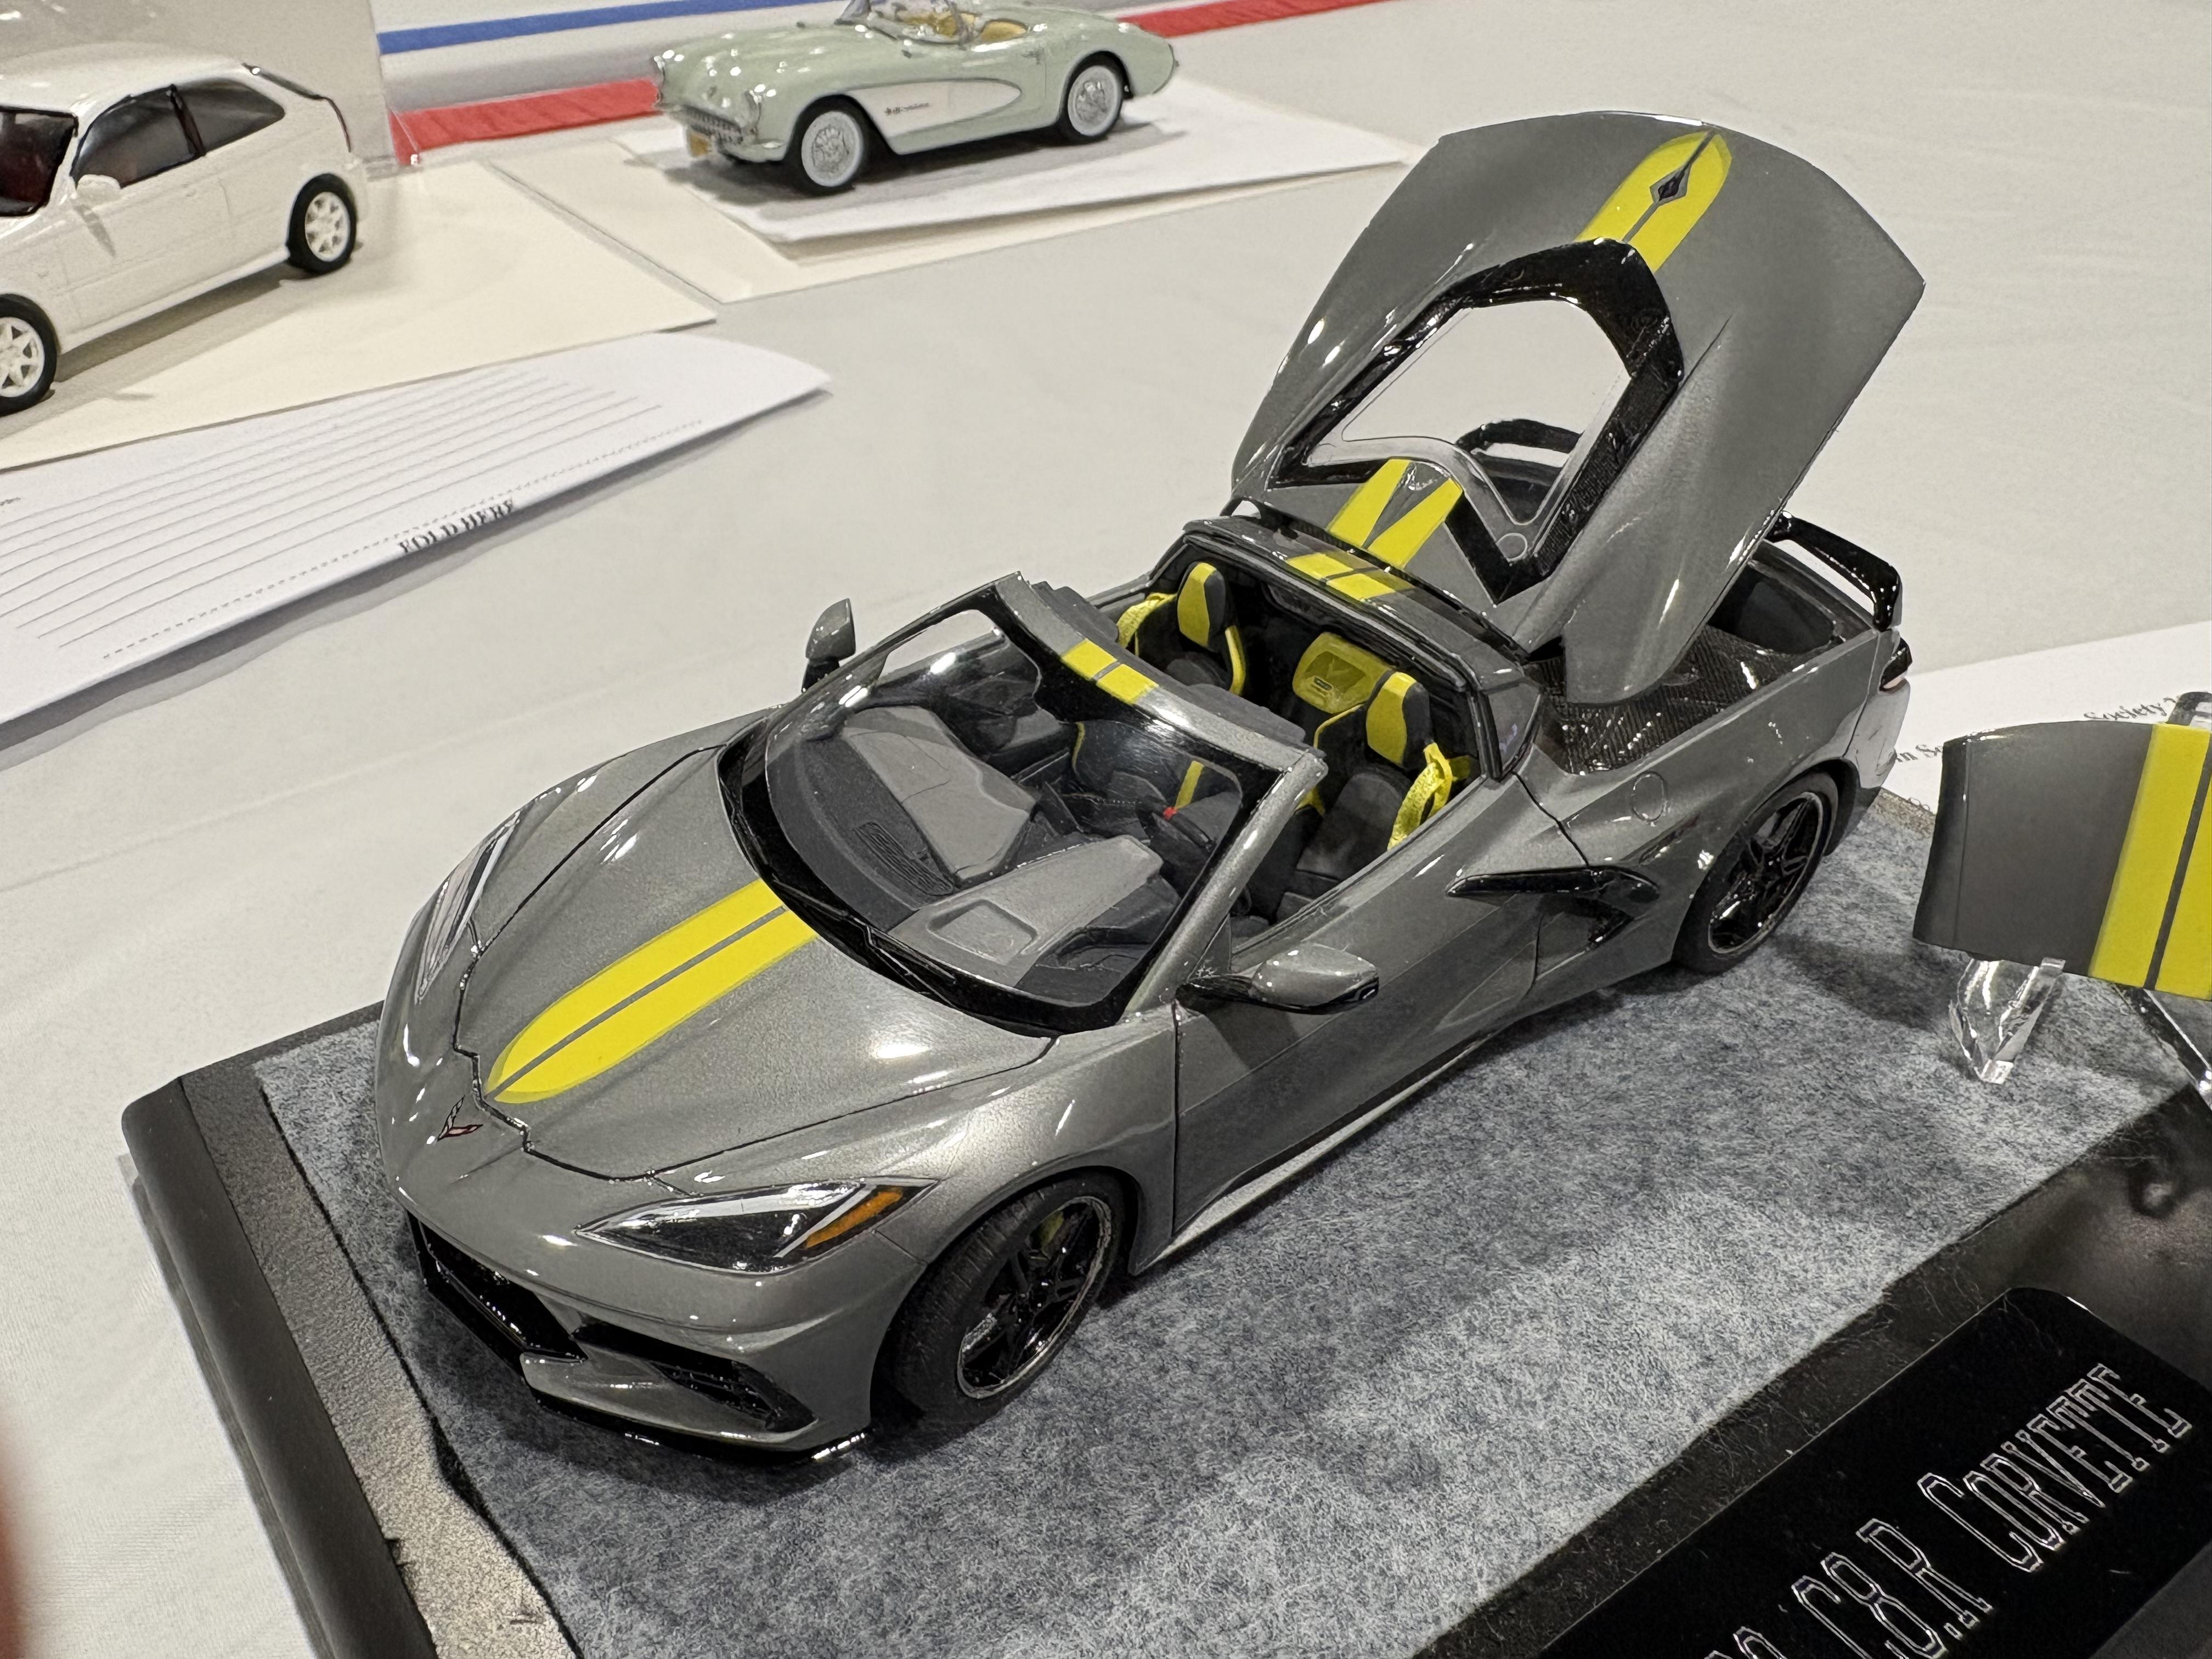
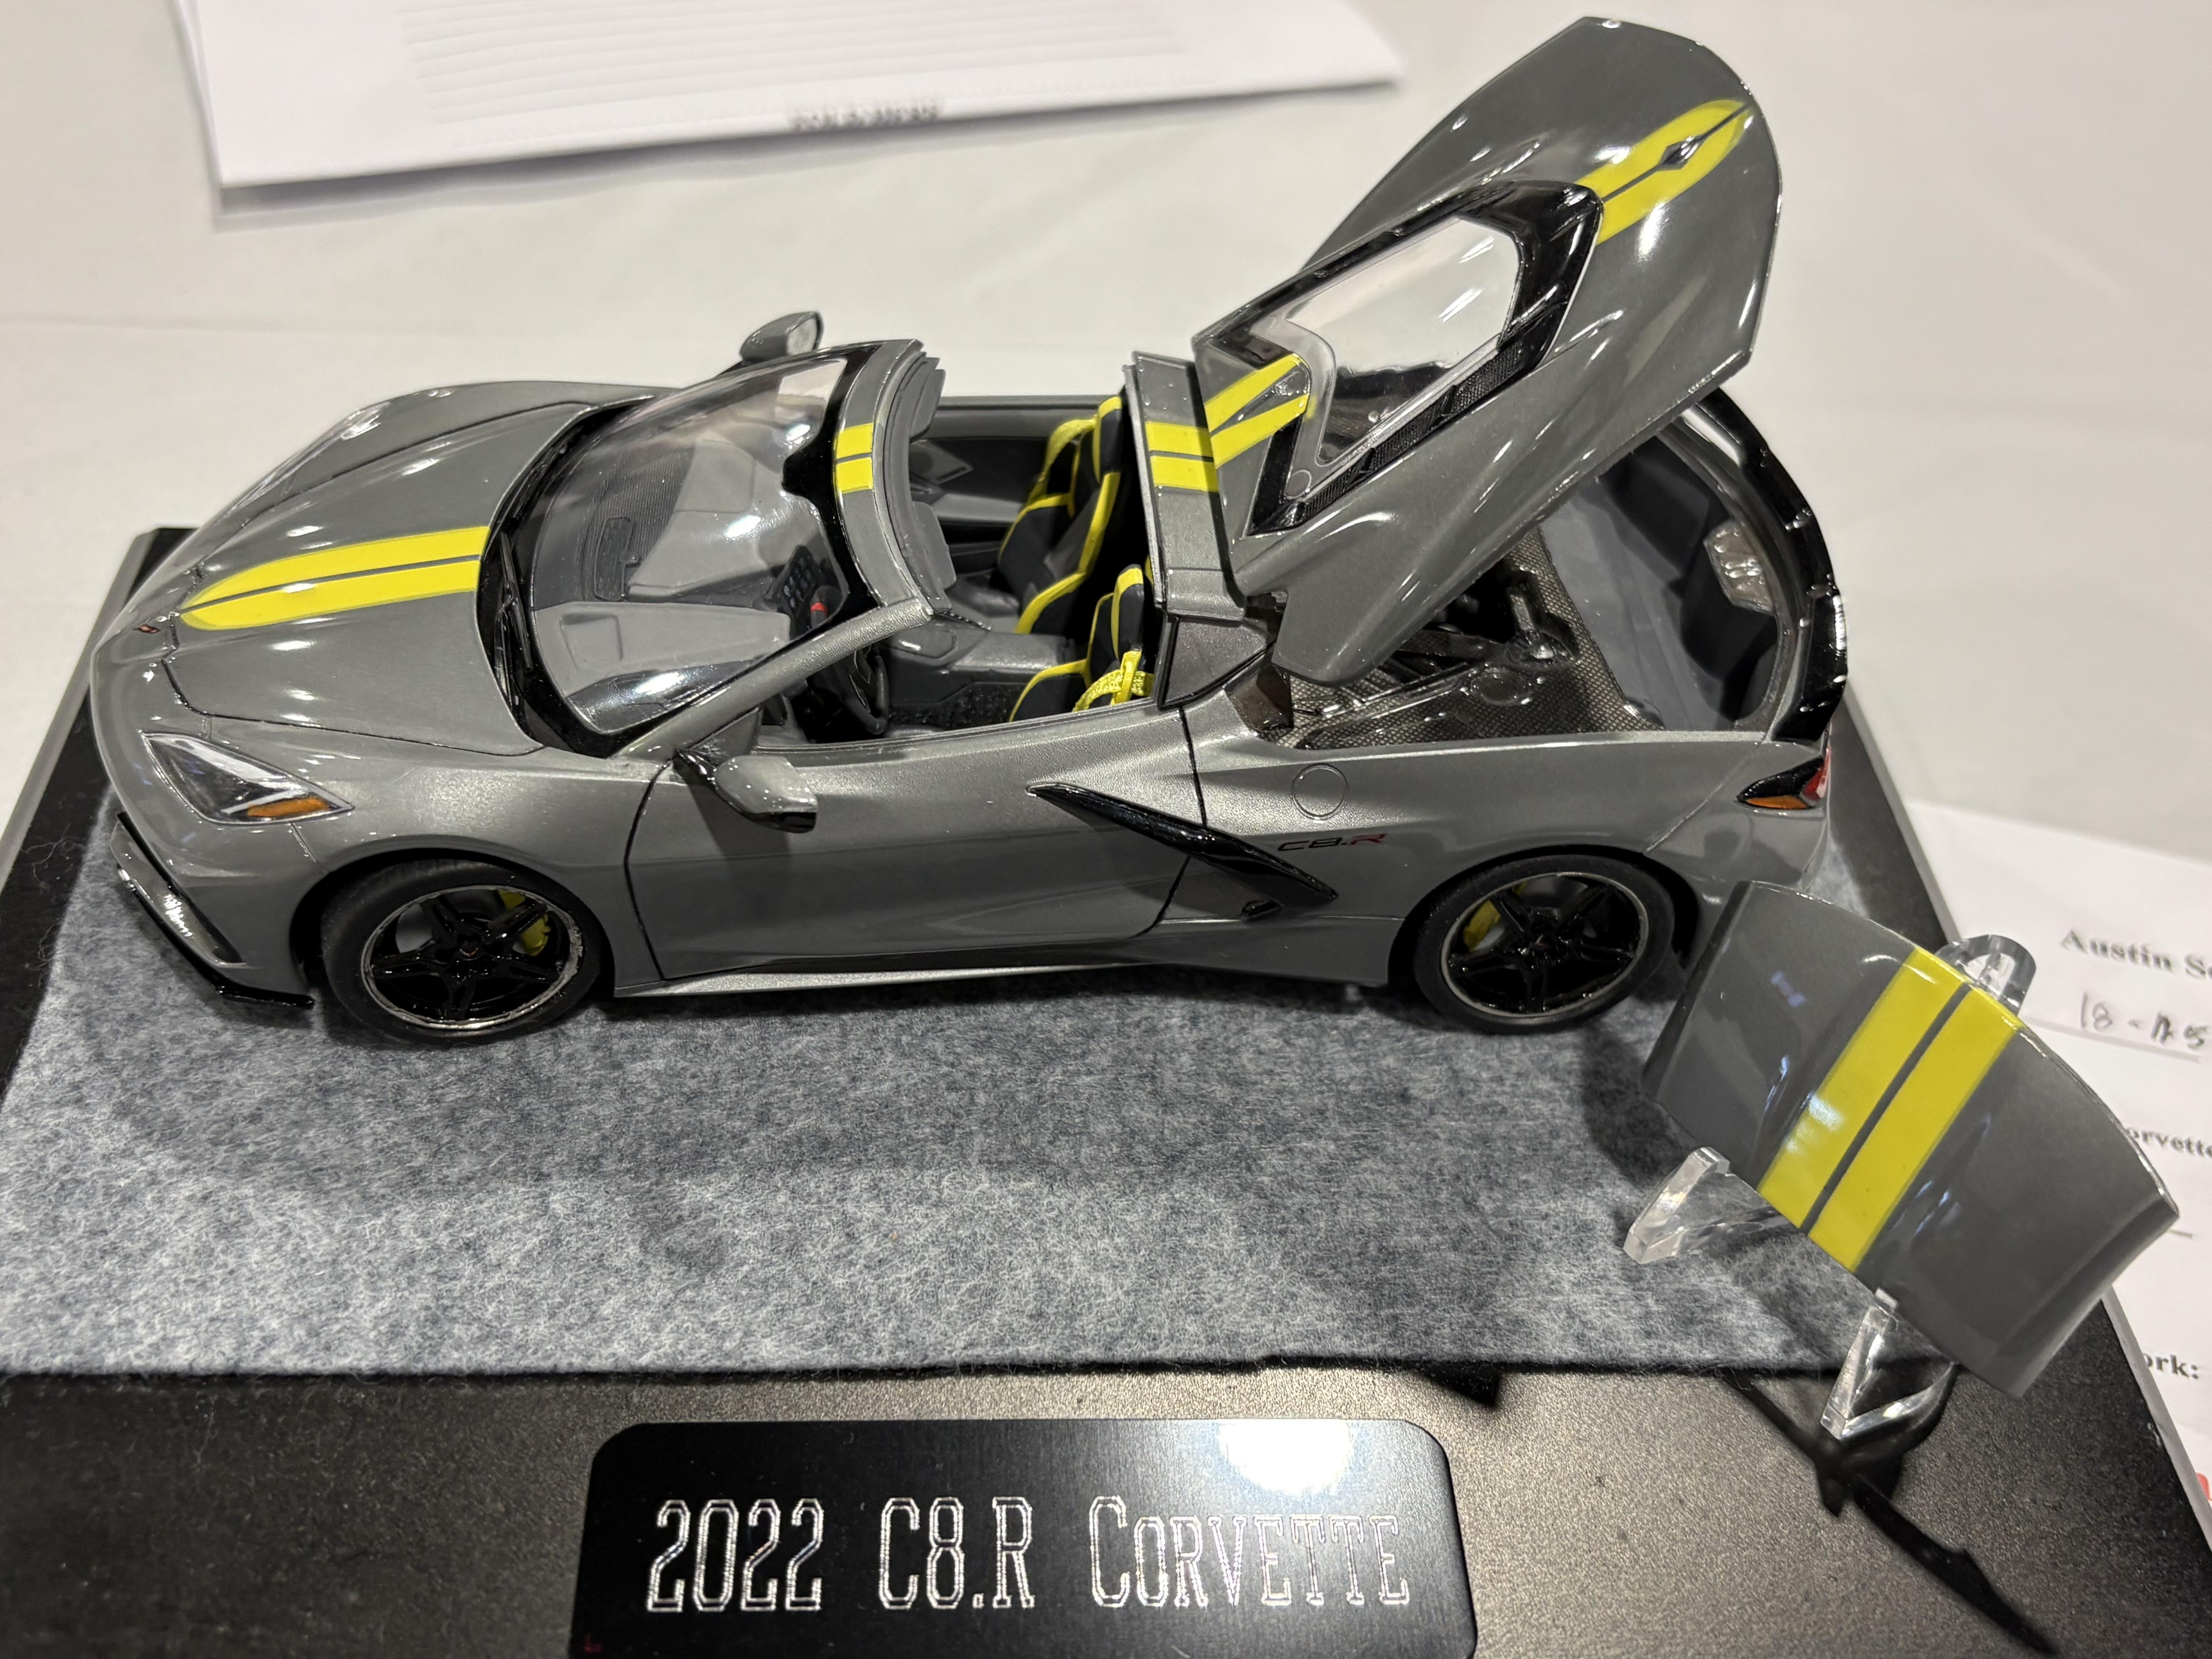
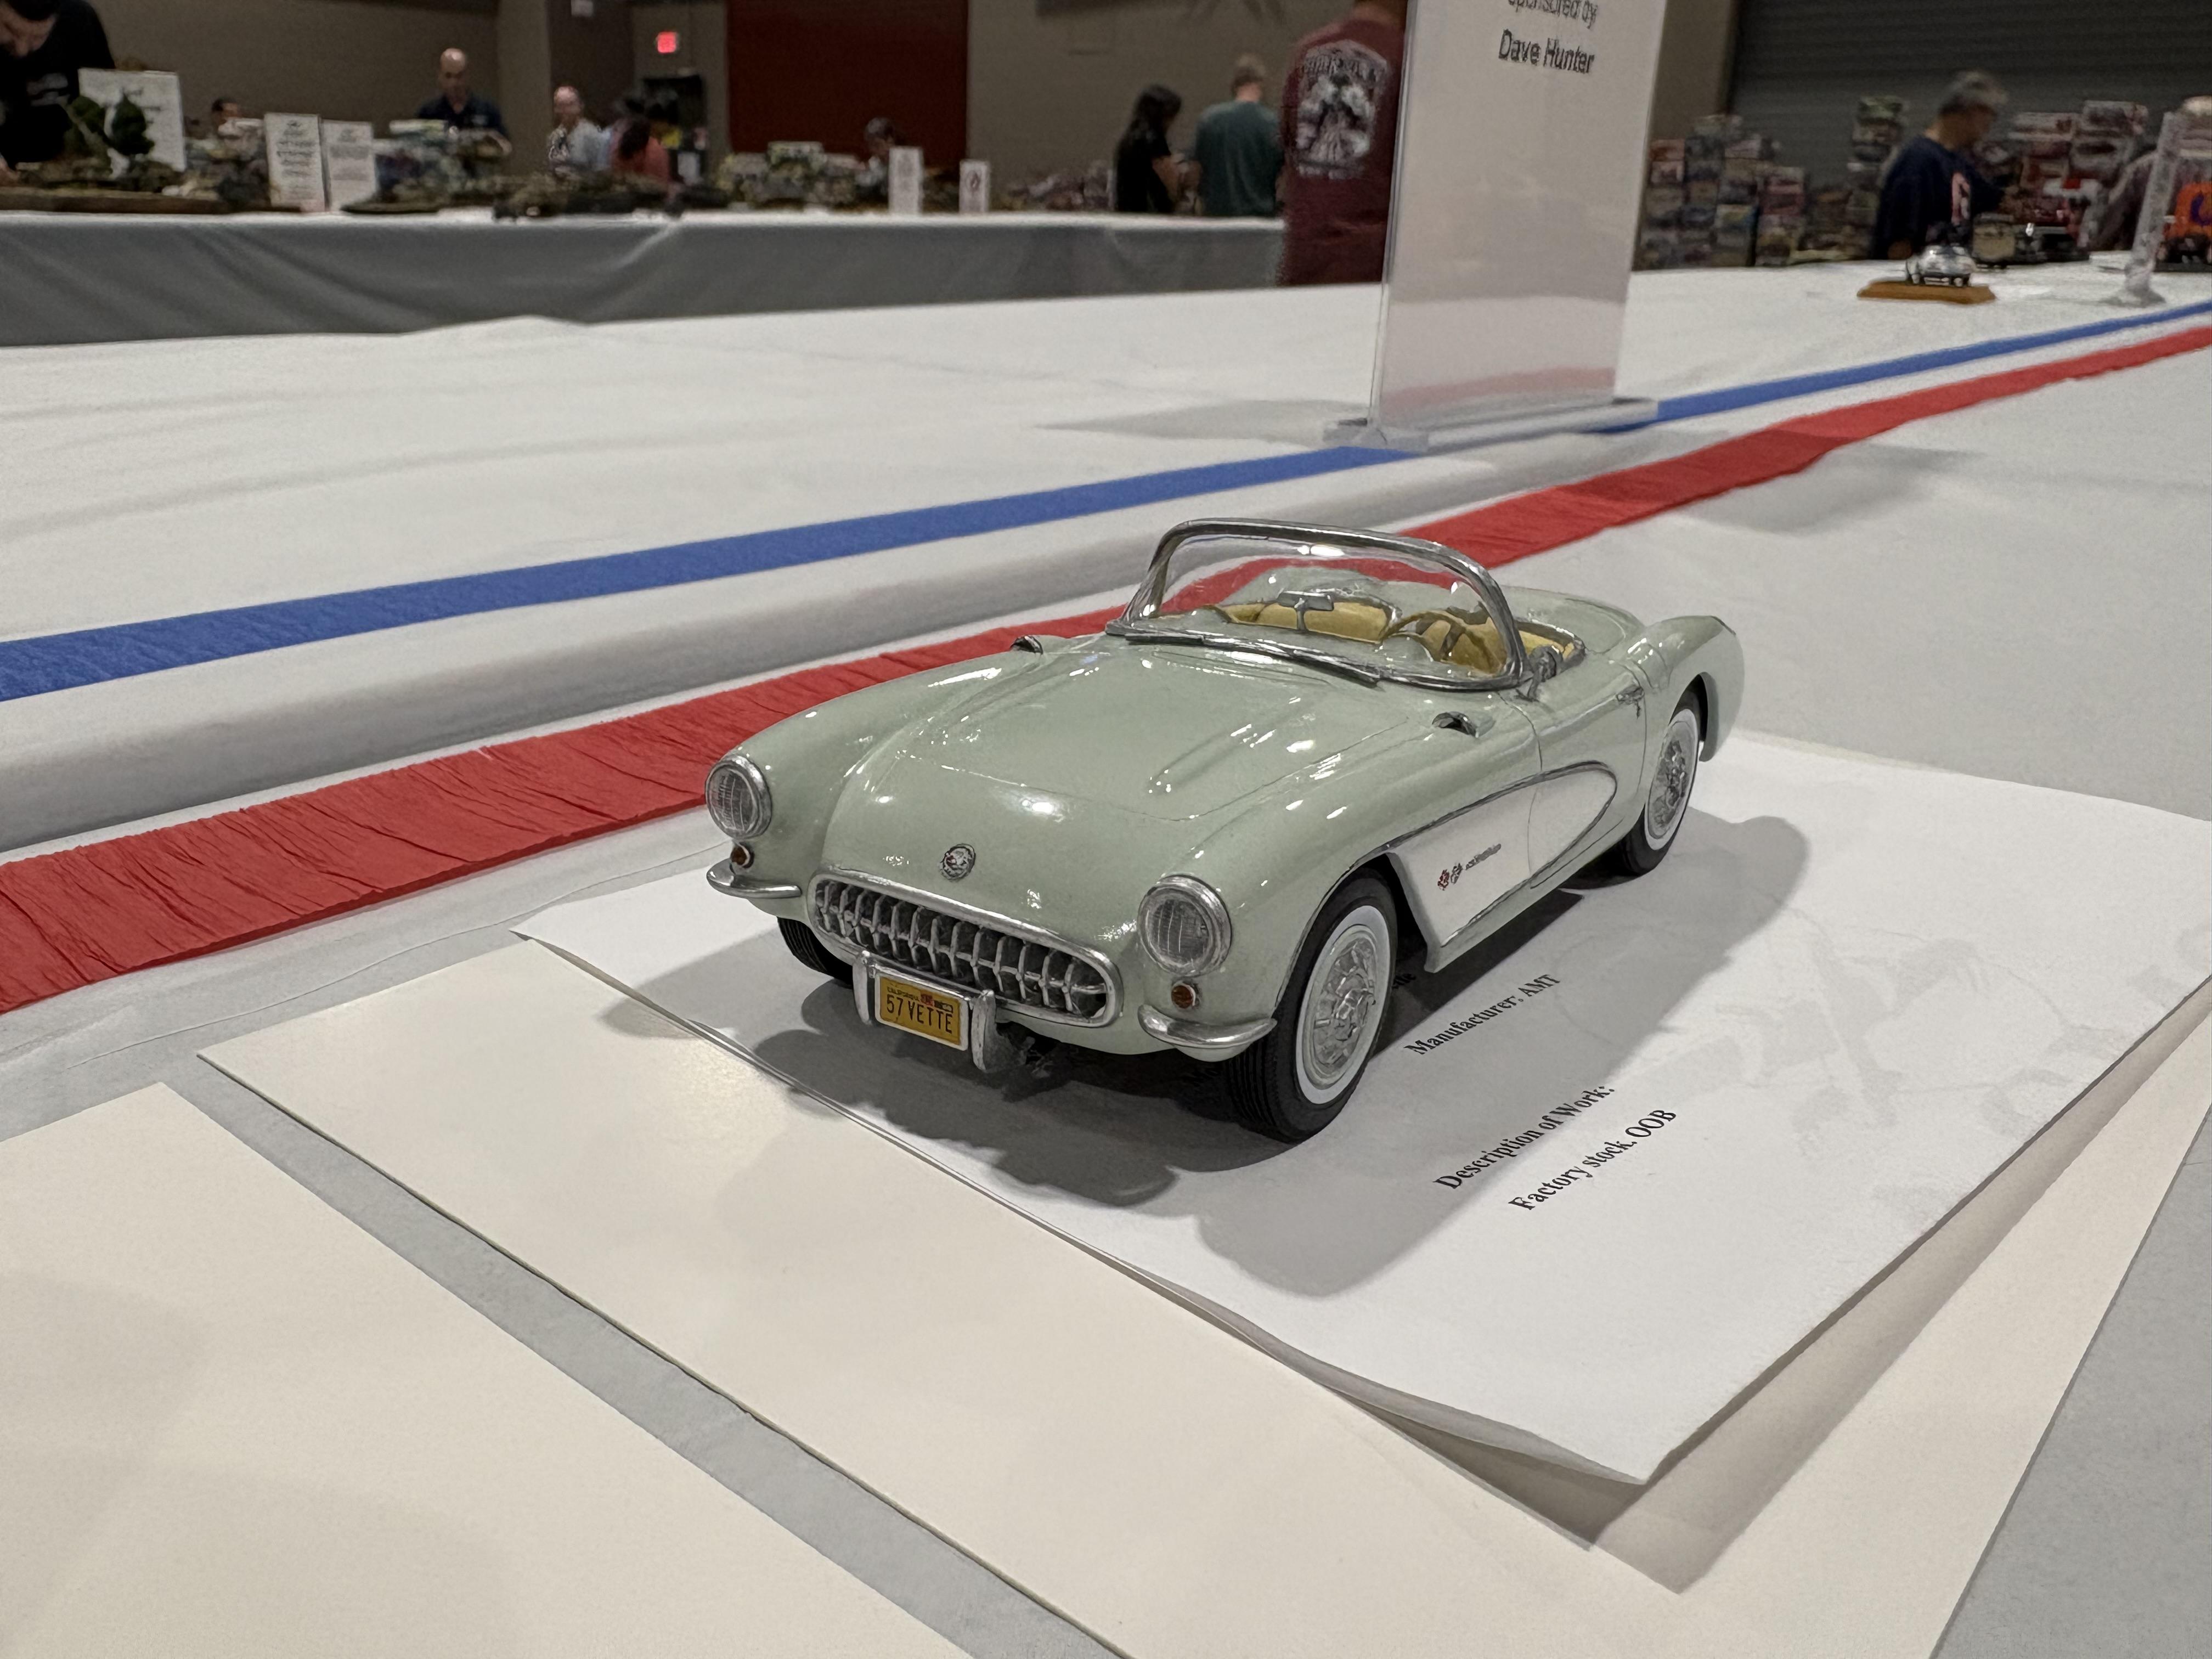
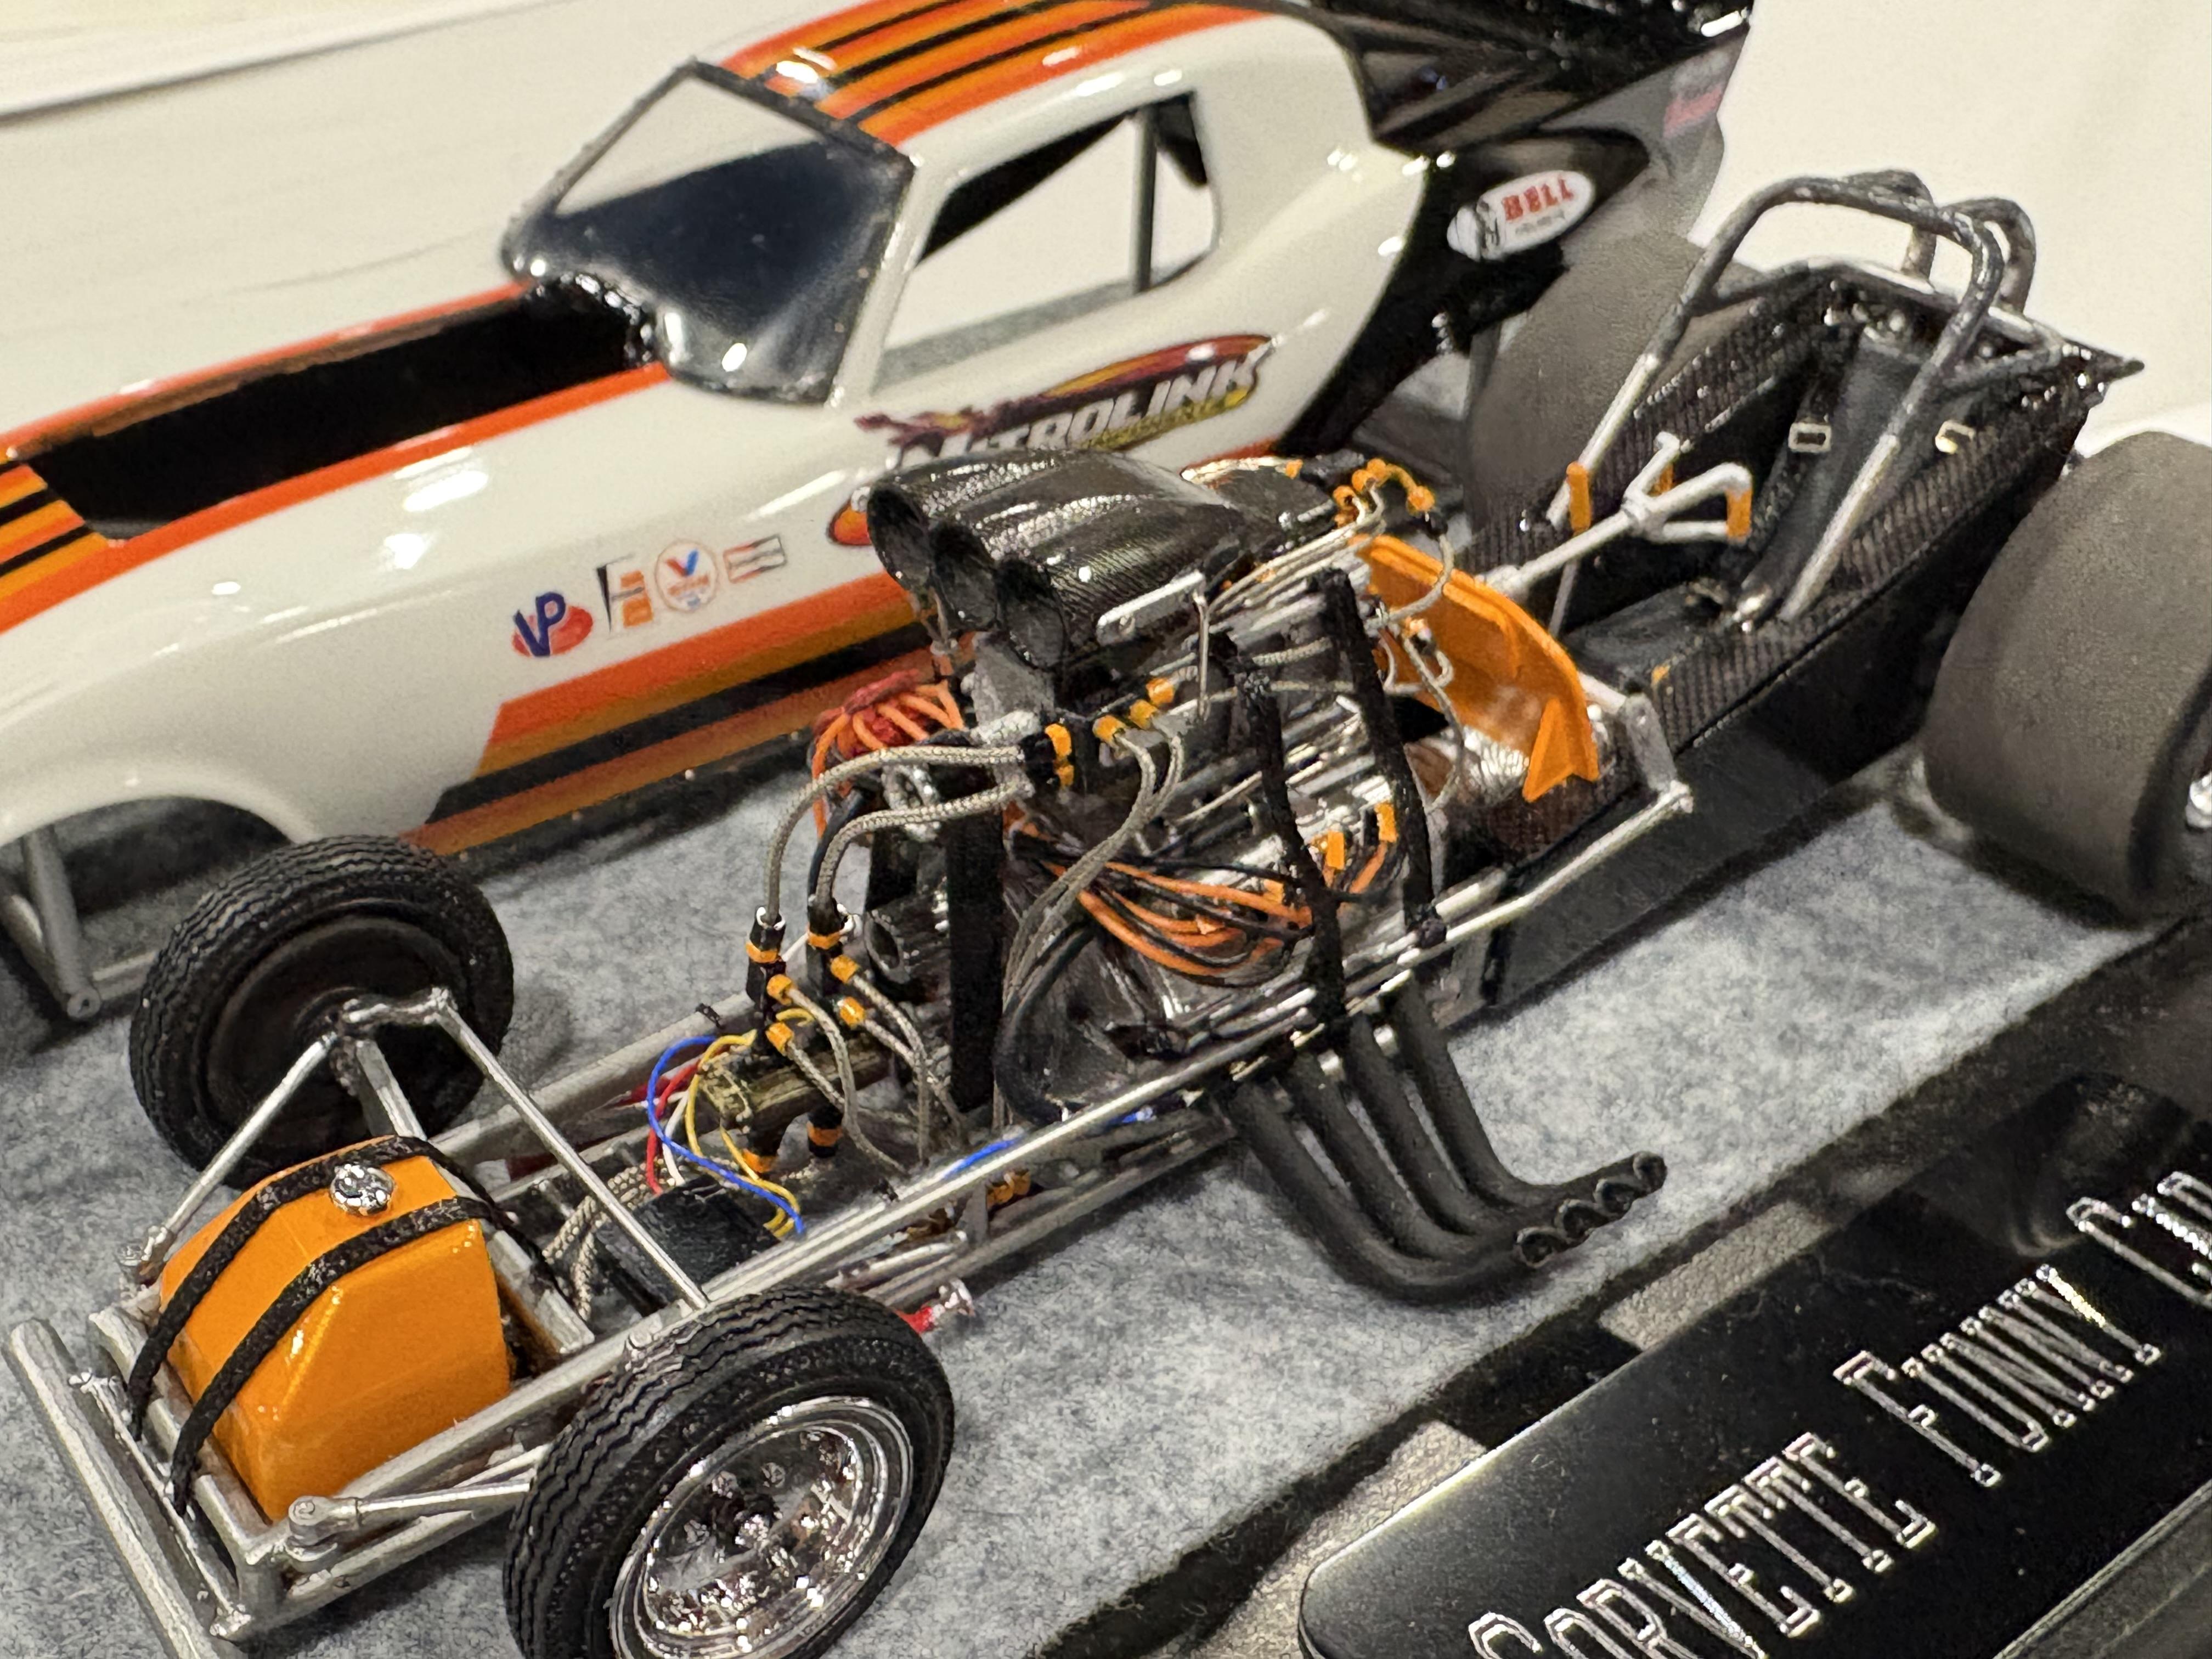
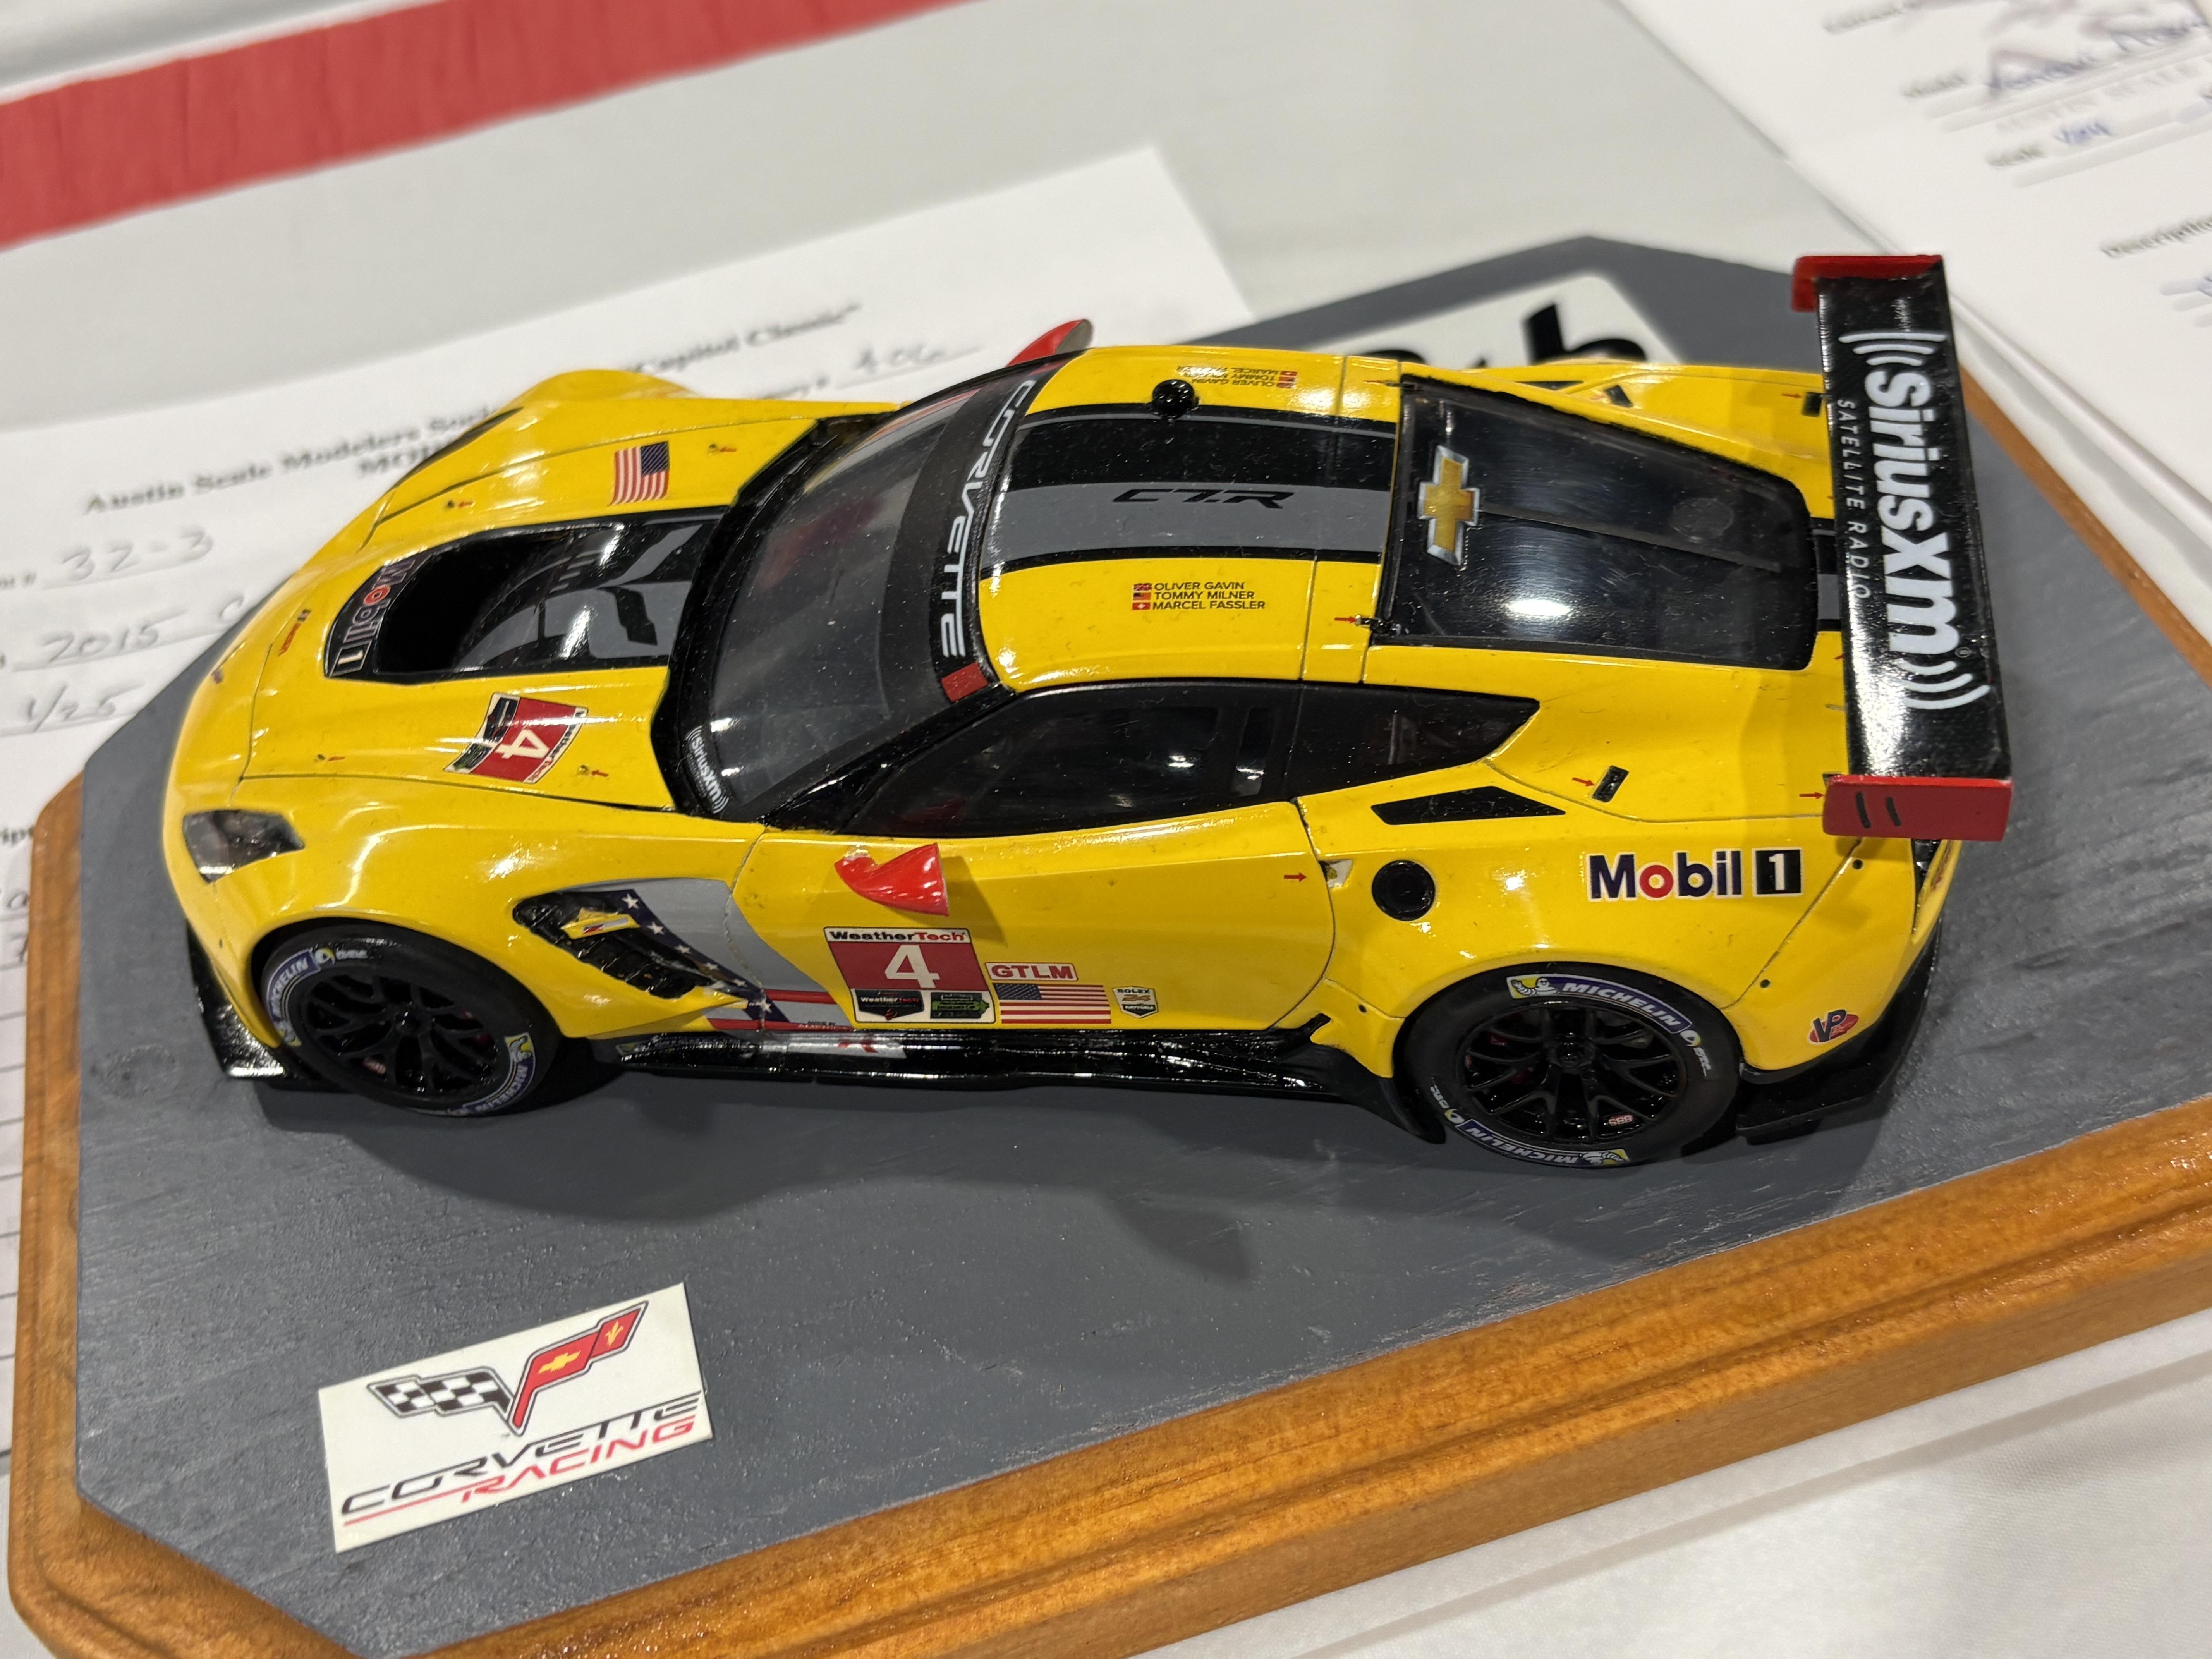
LDO replied to LDO's topic in Contests and Shows
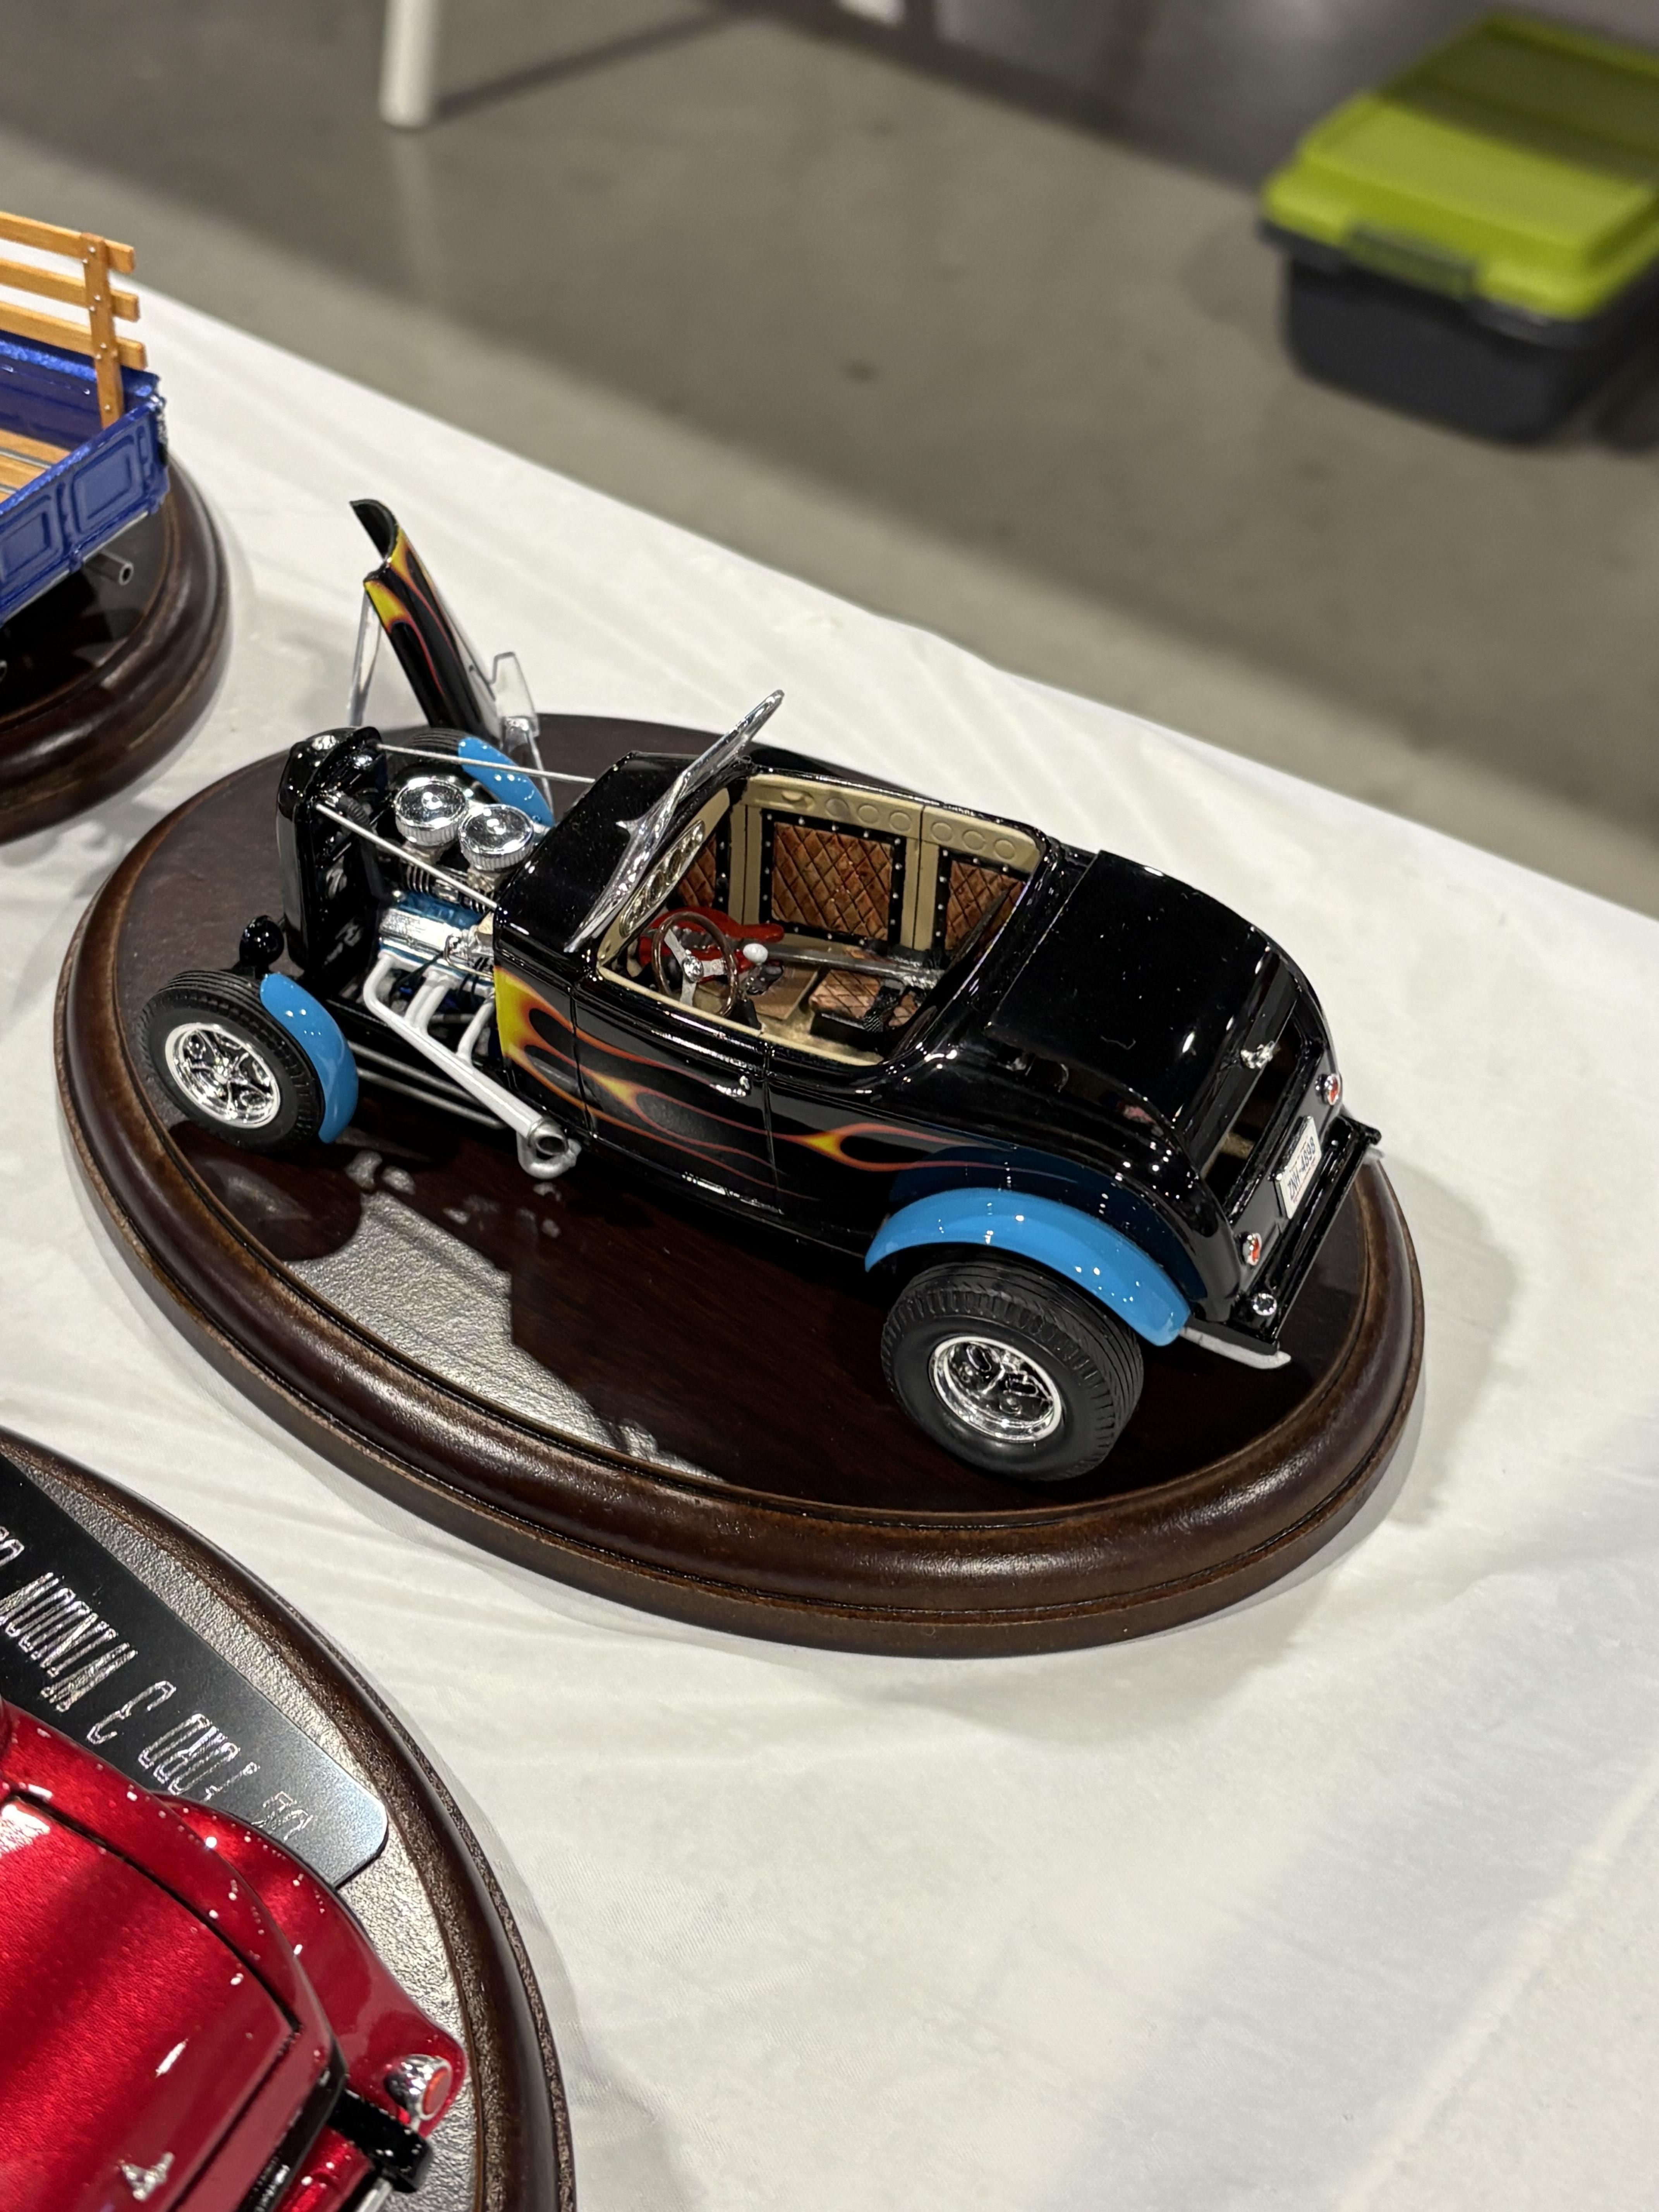
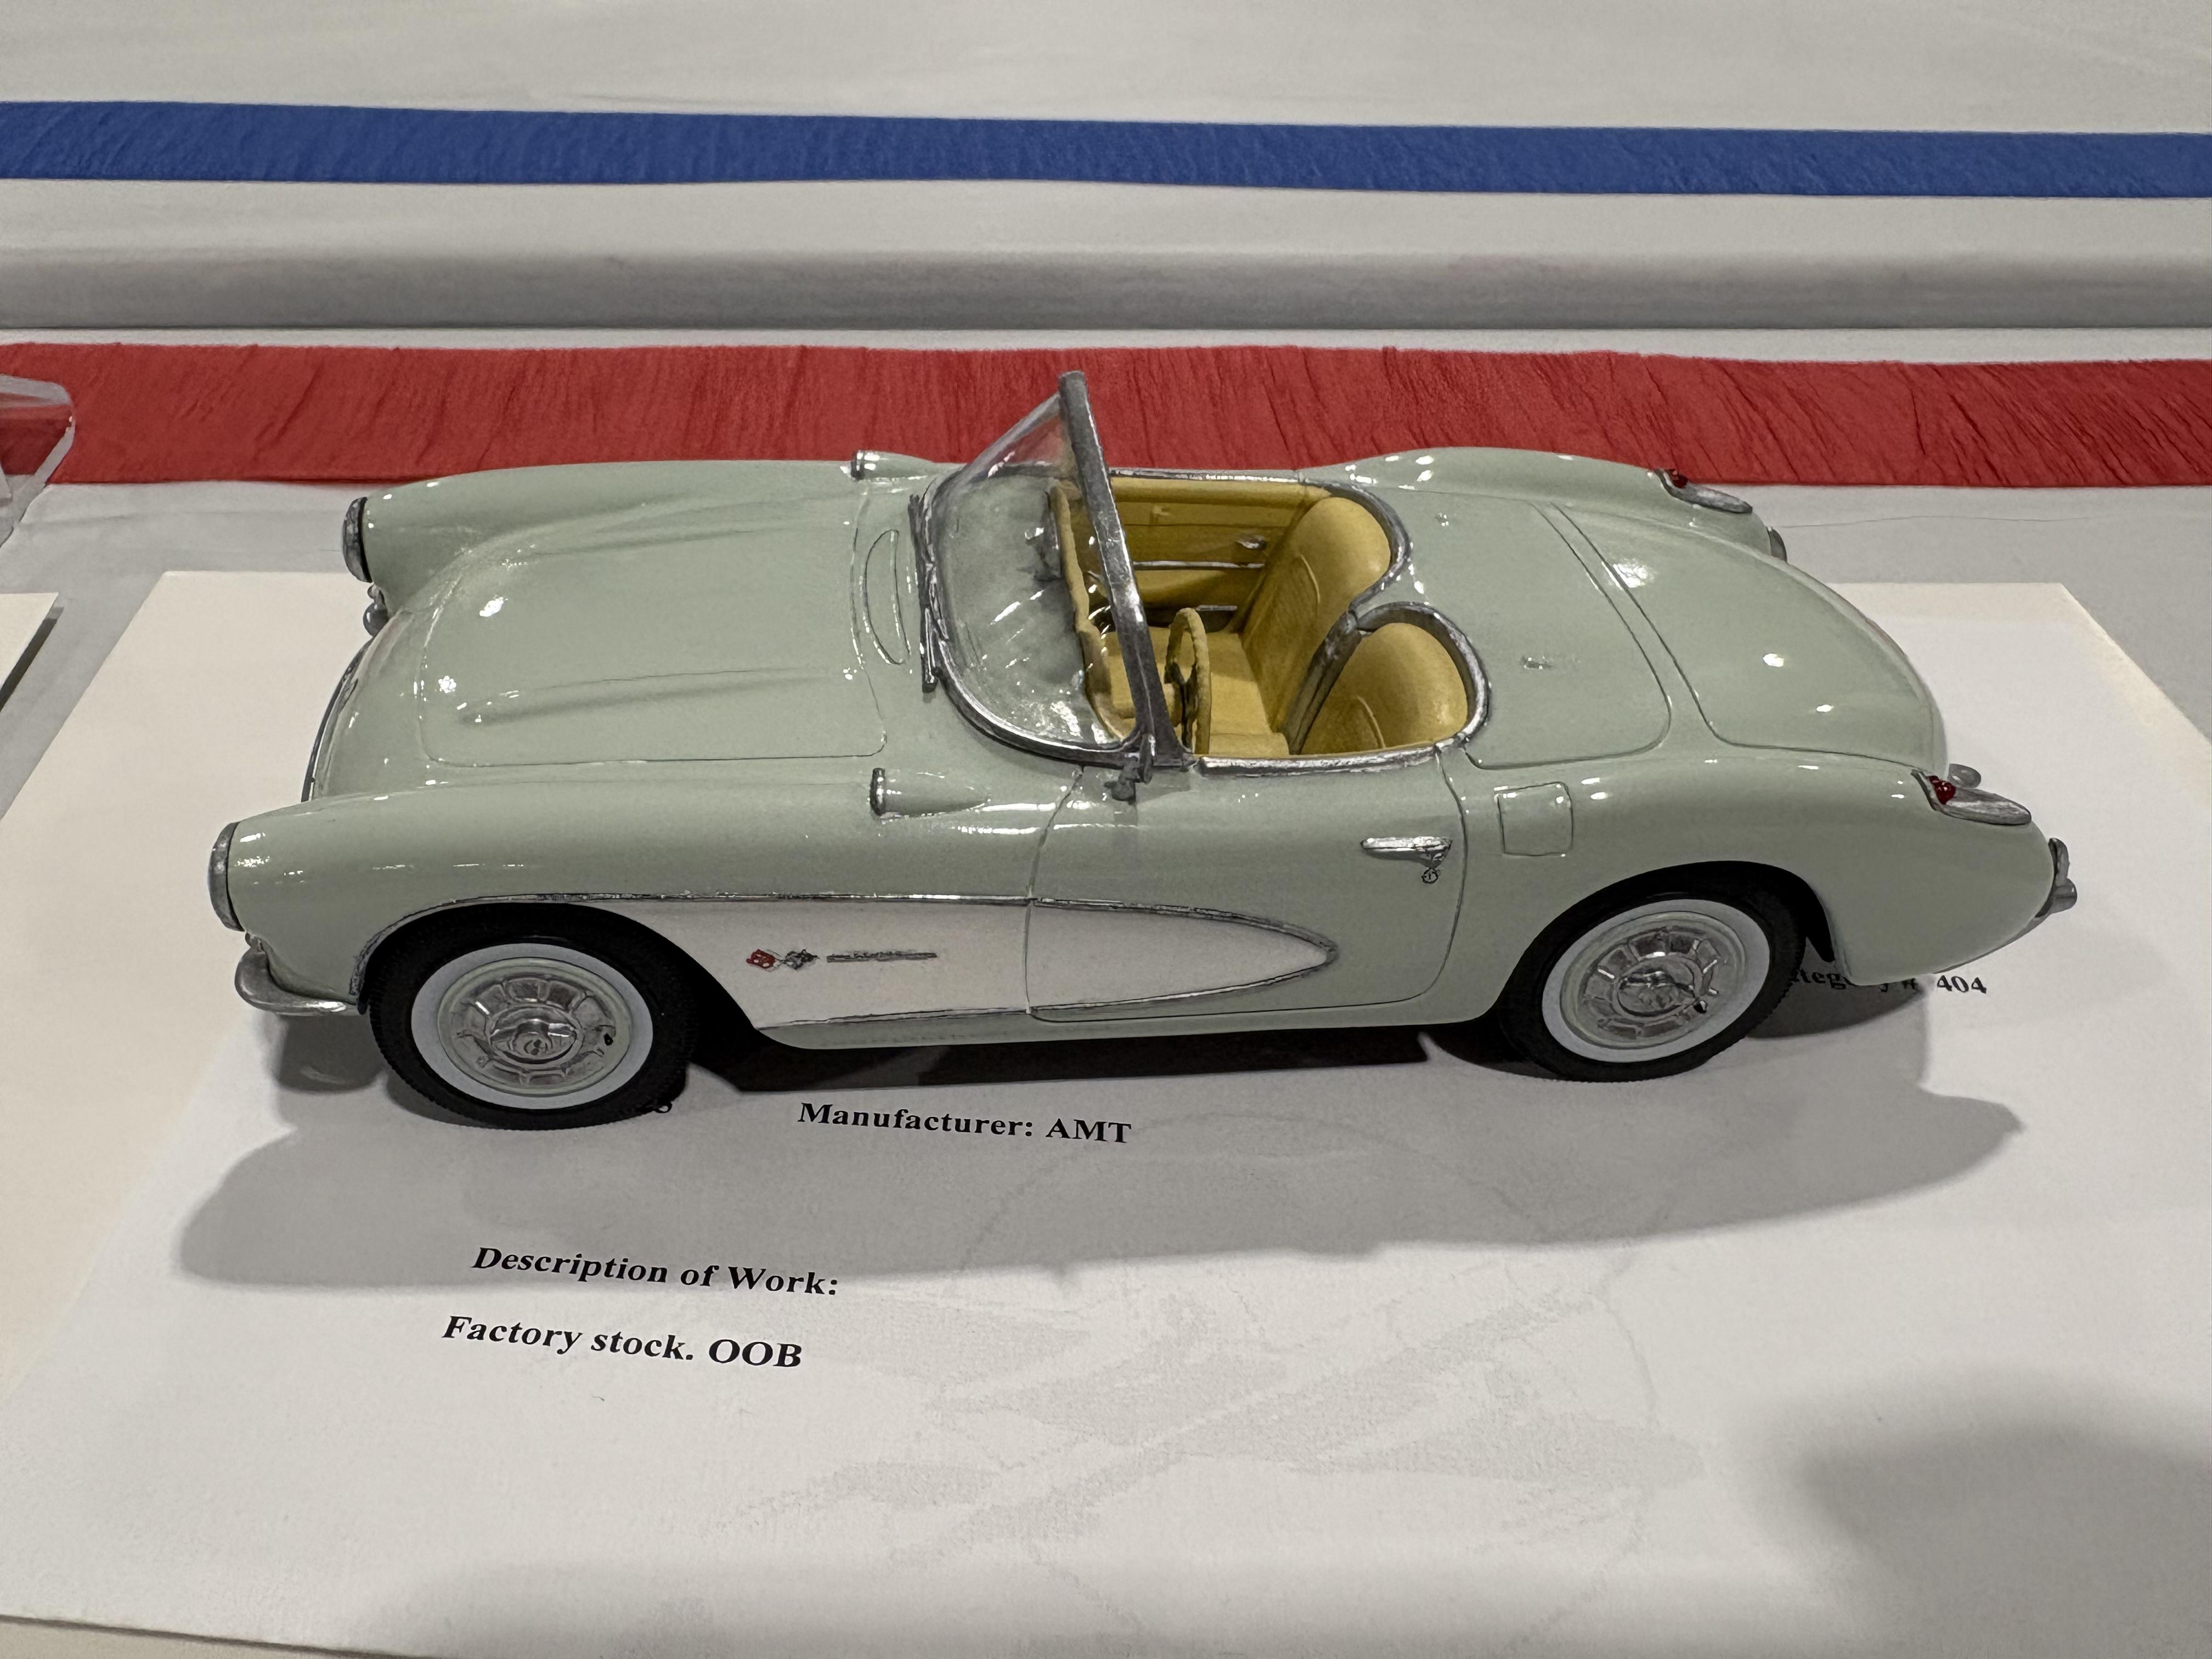
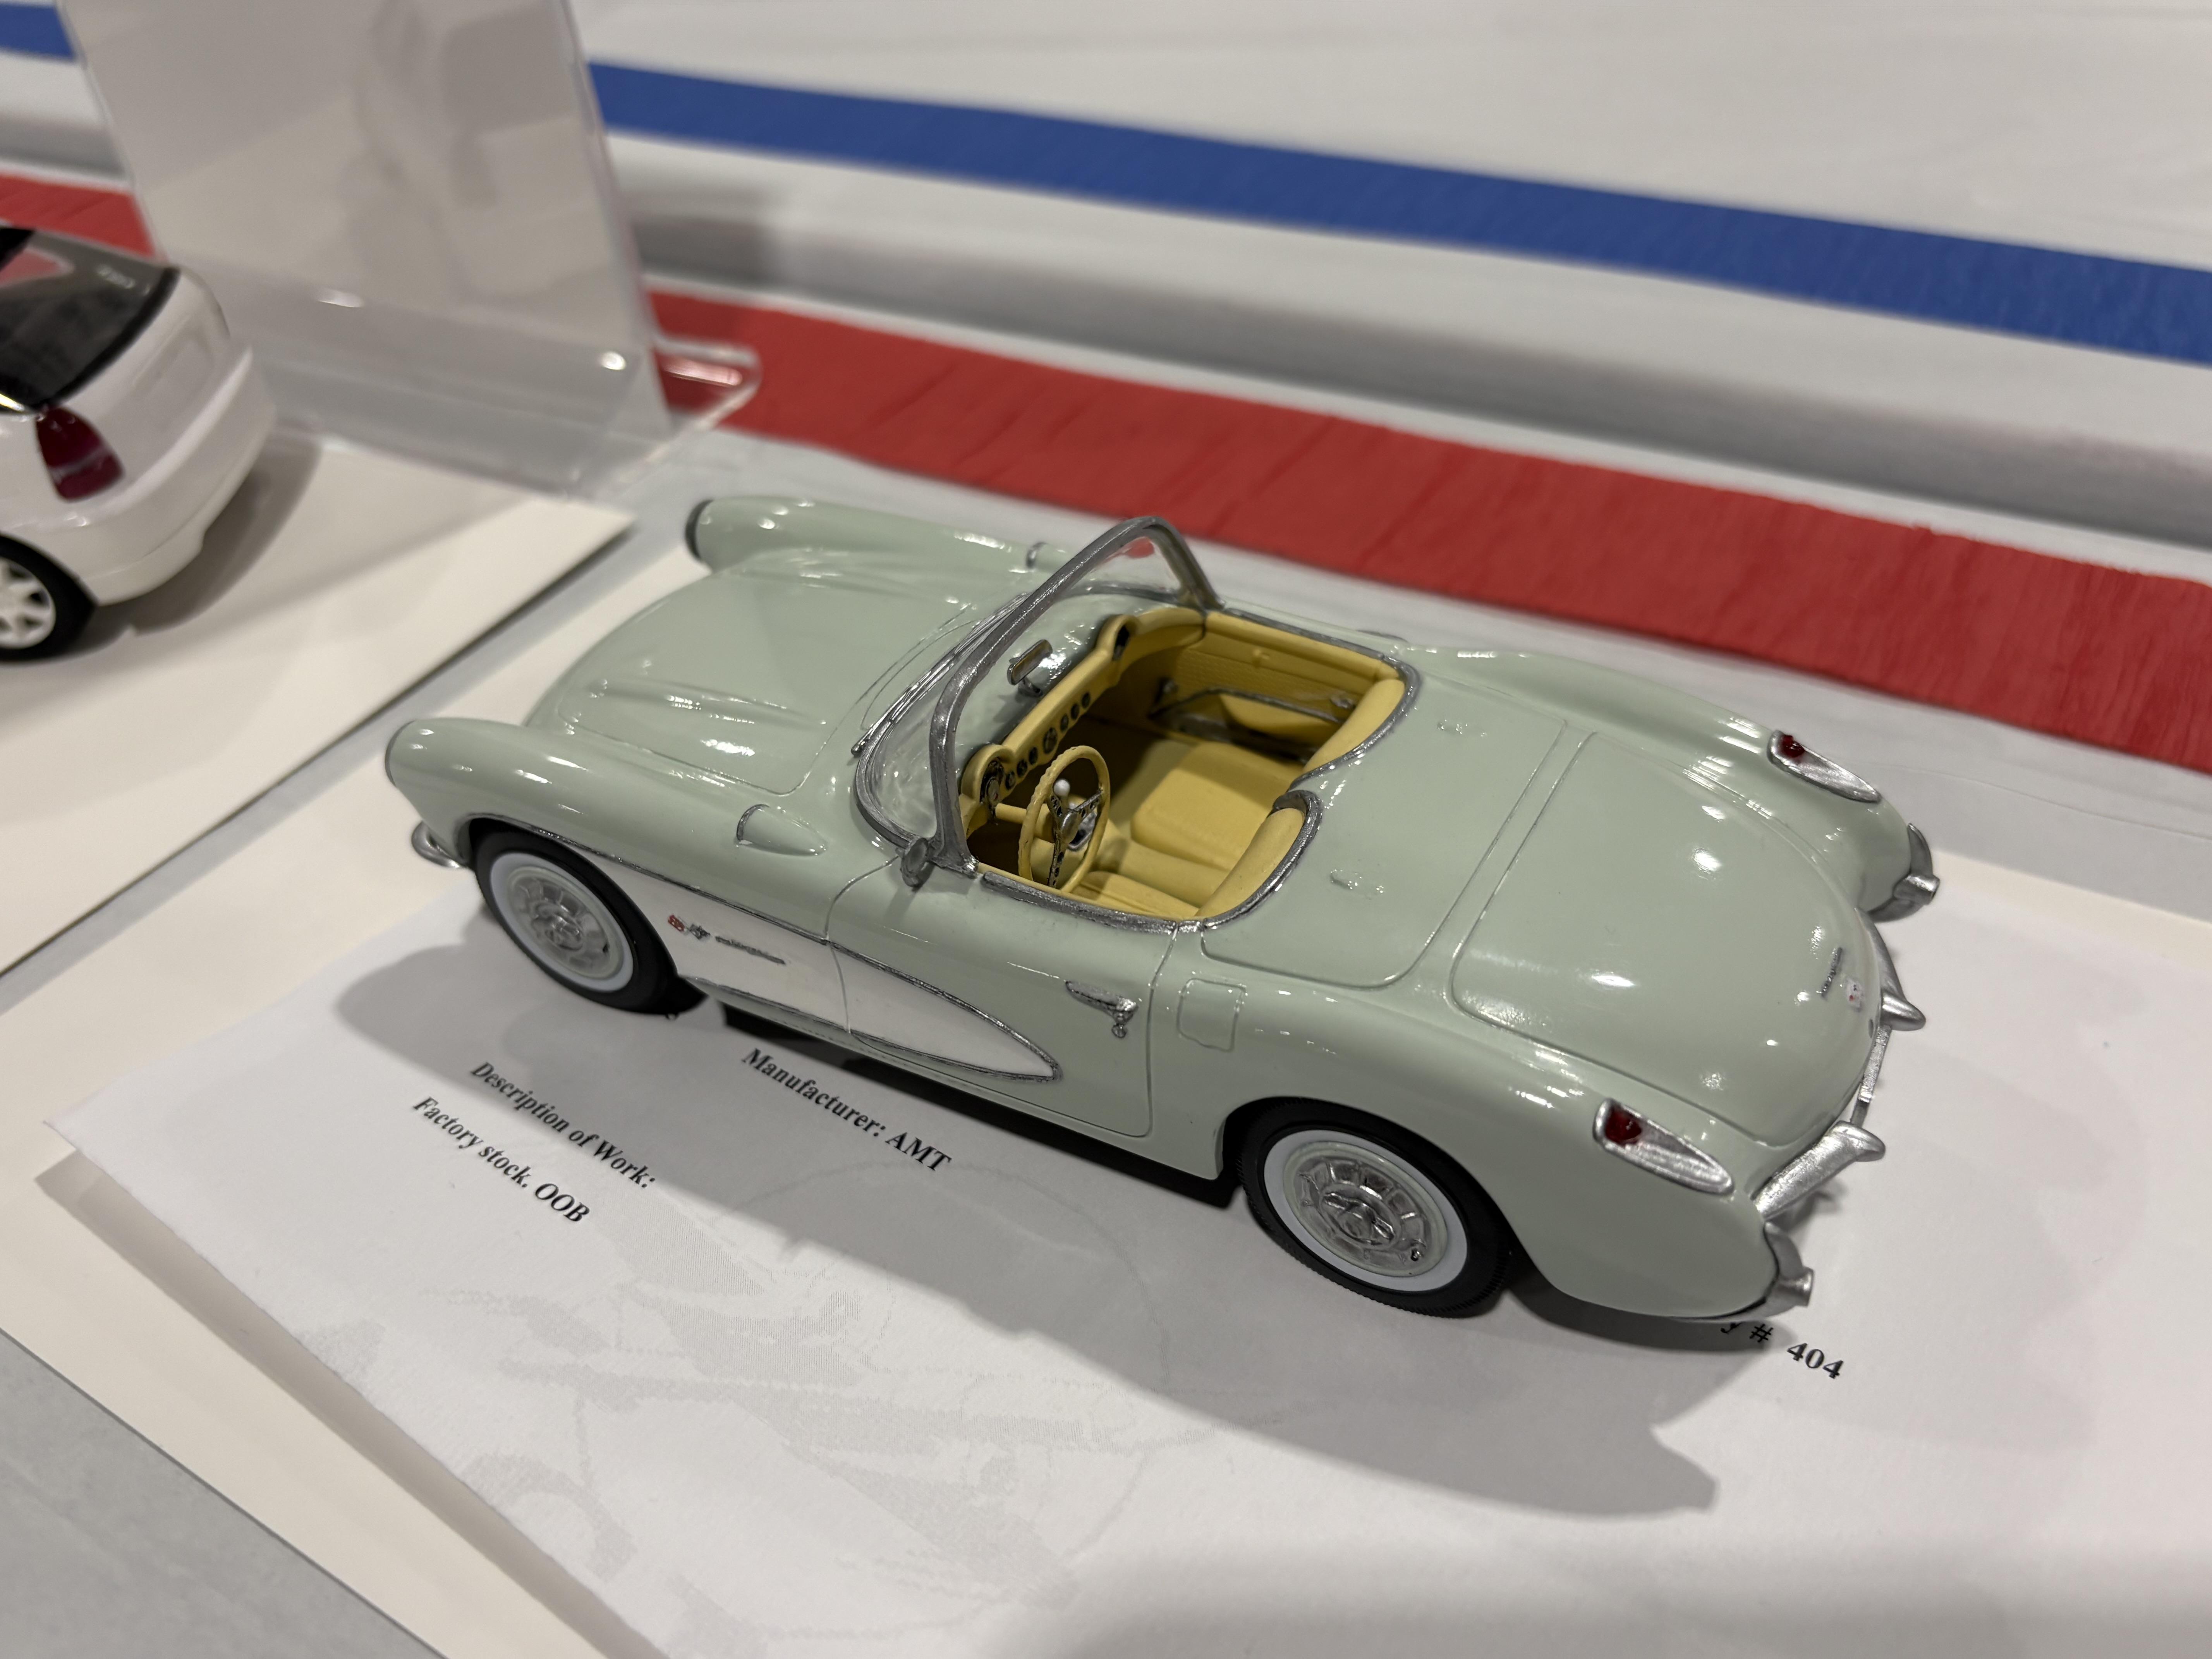
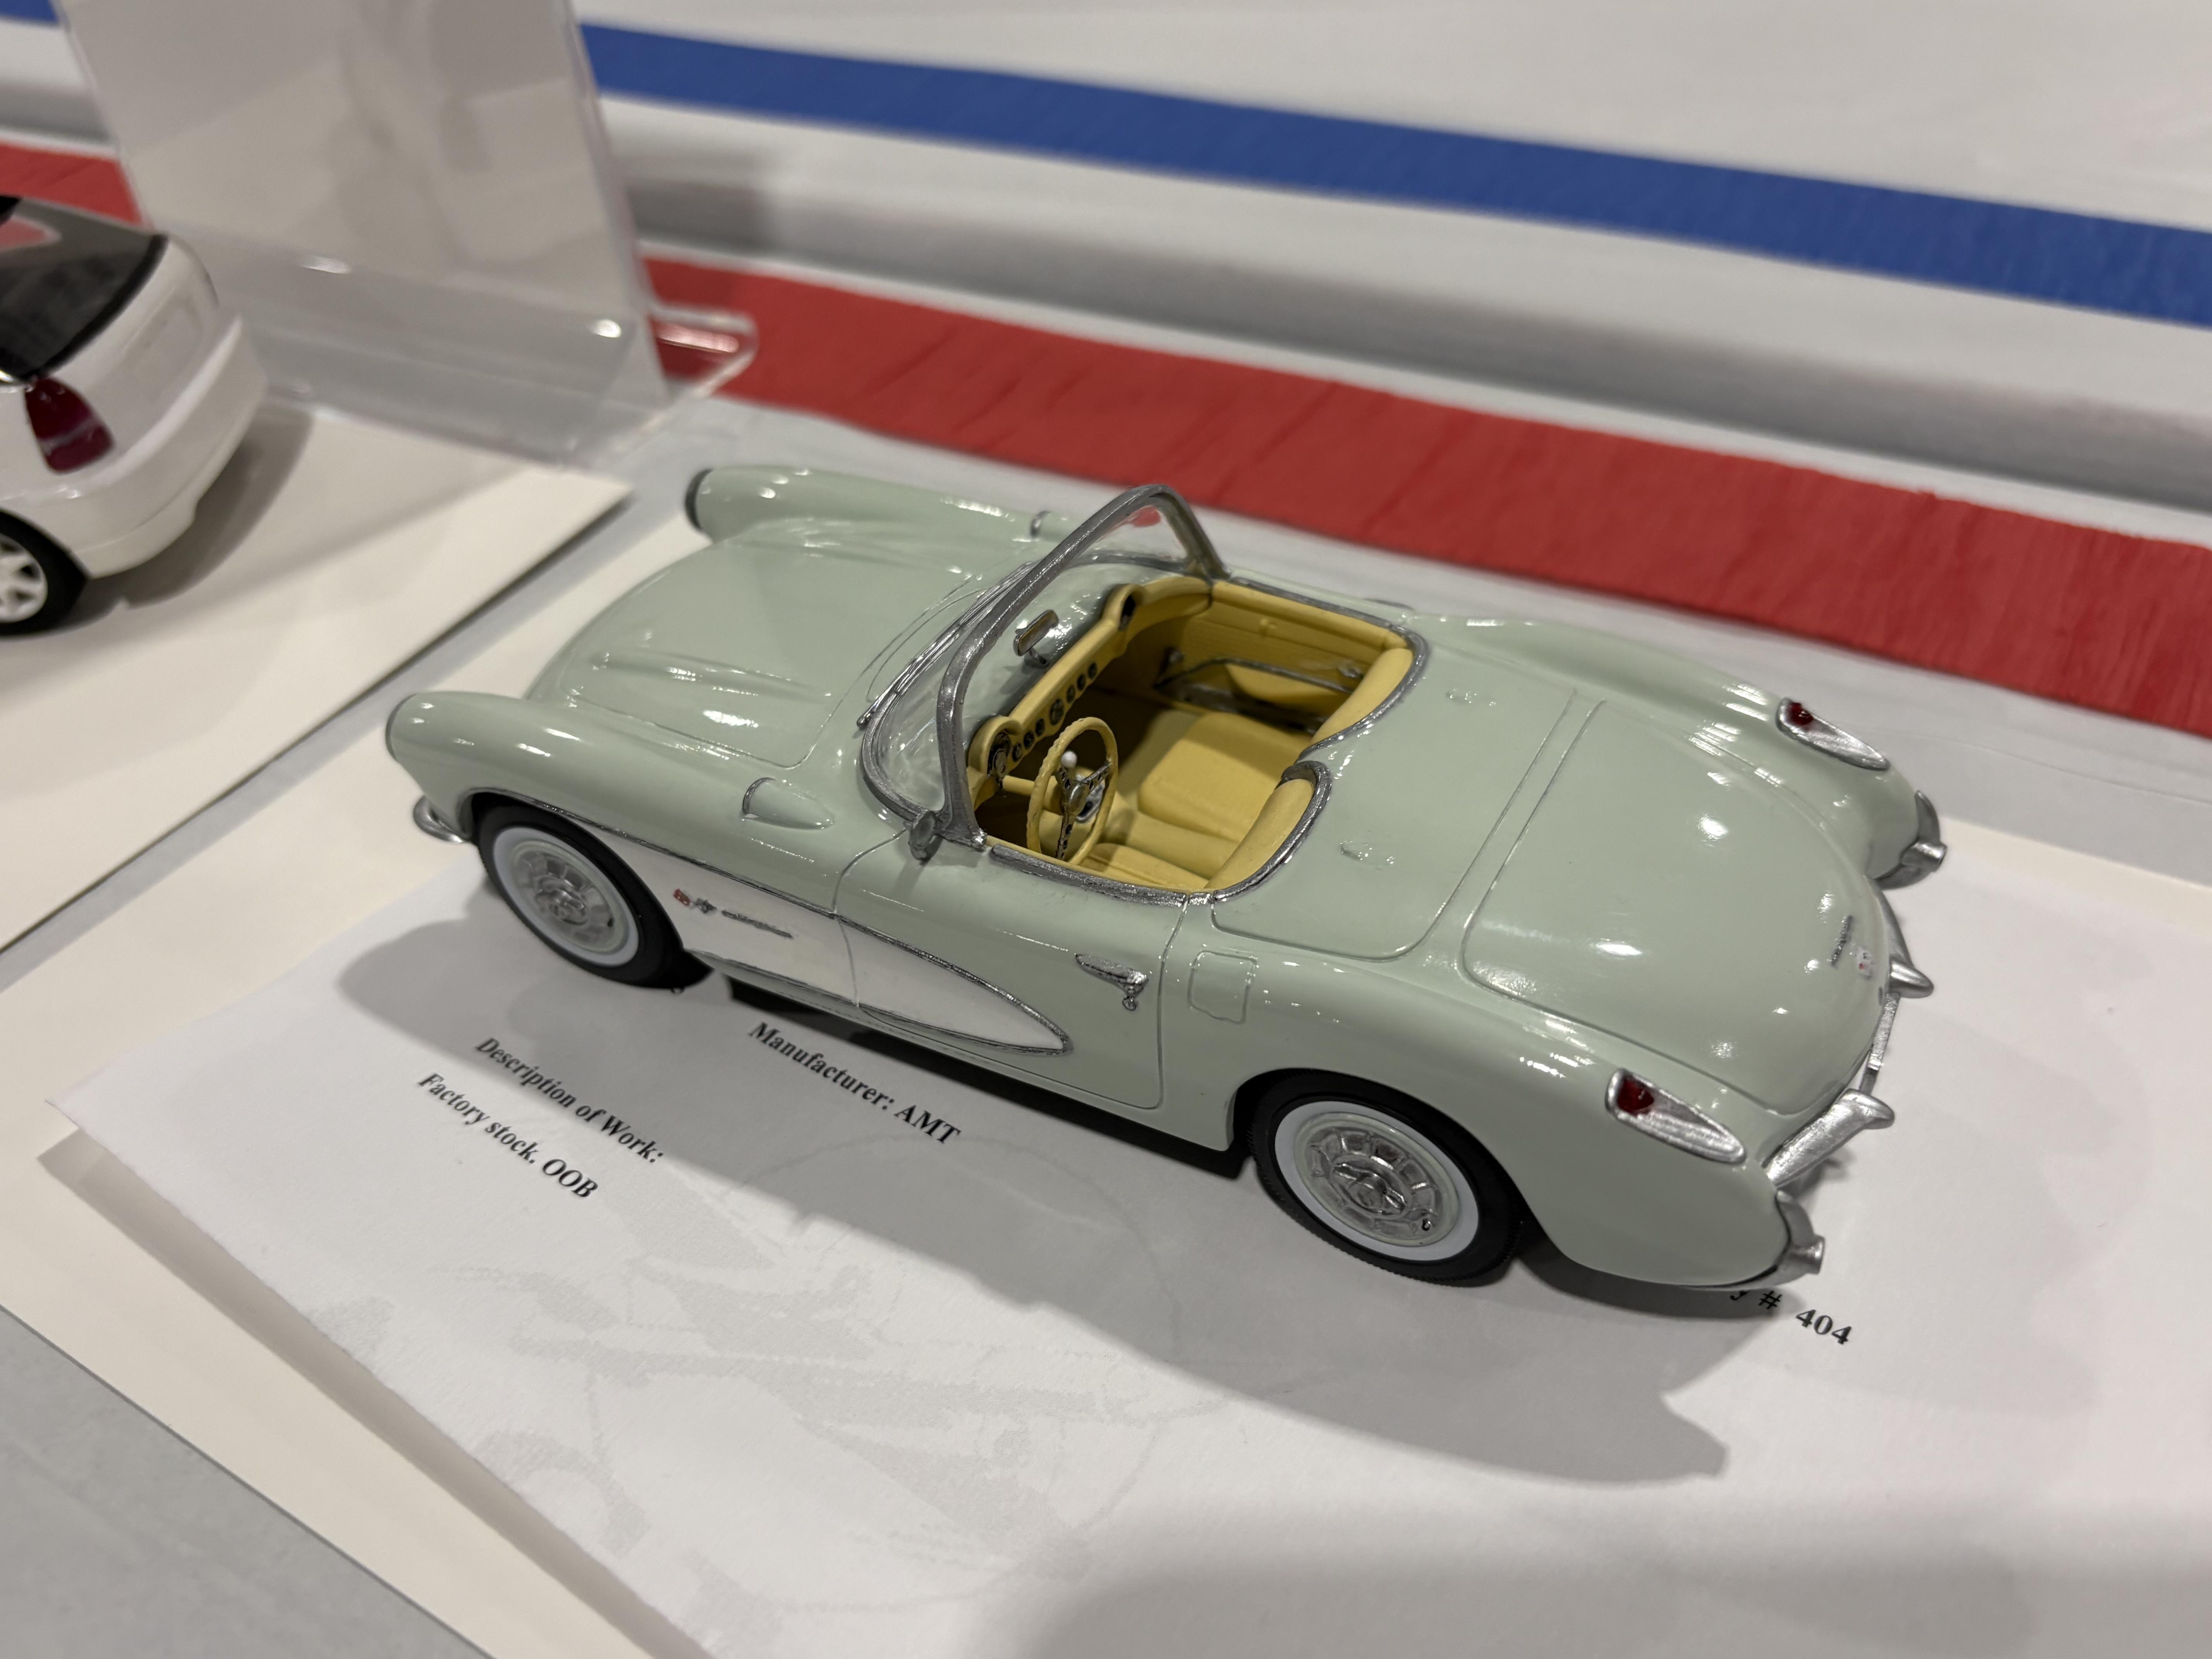
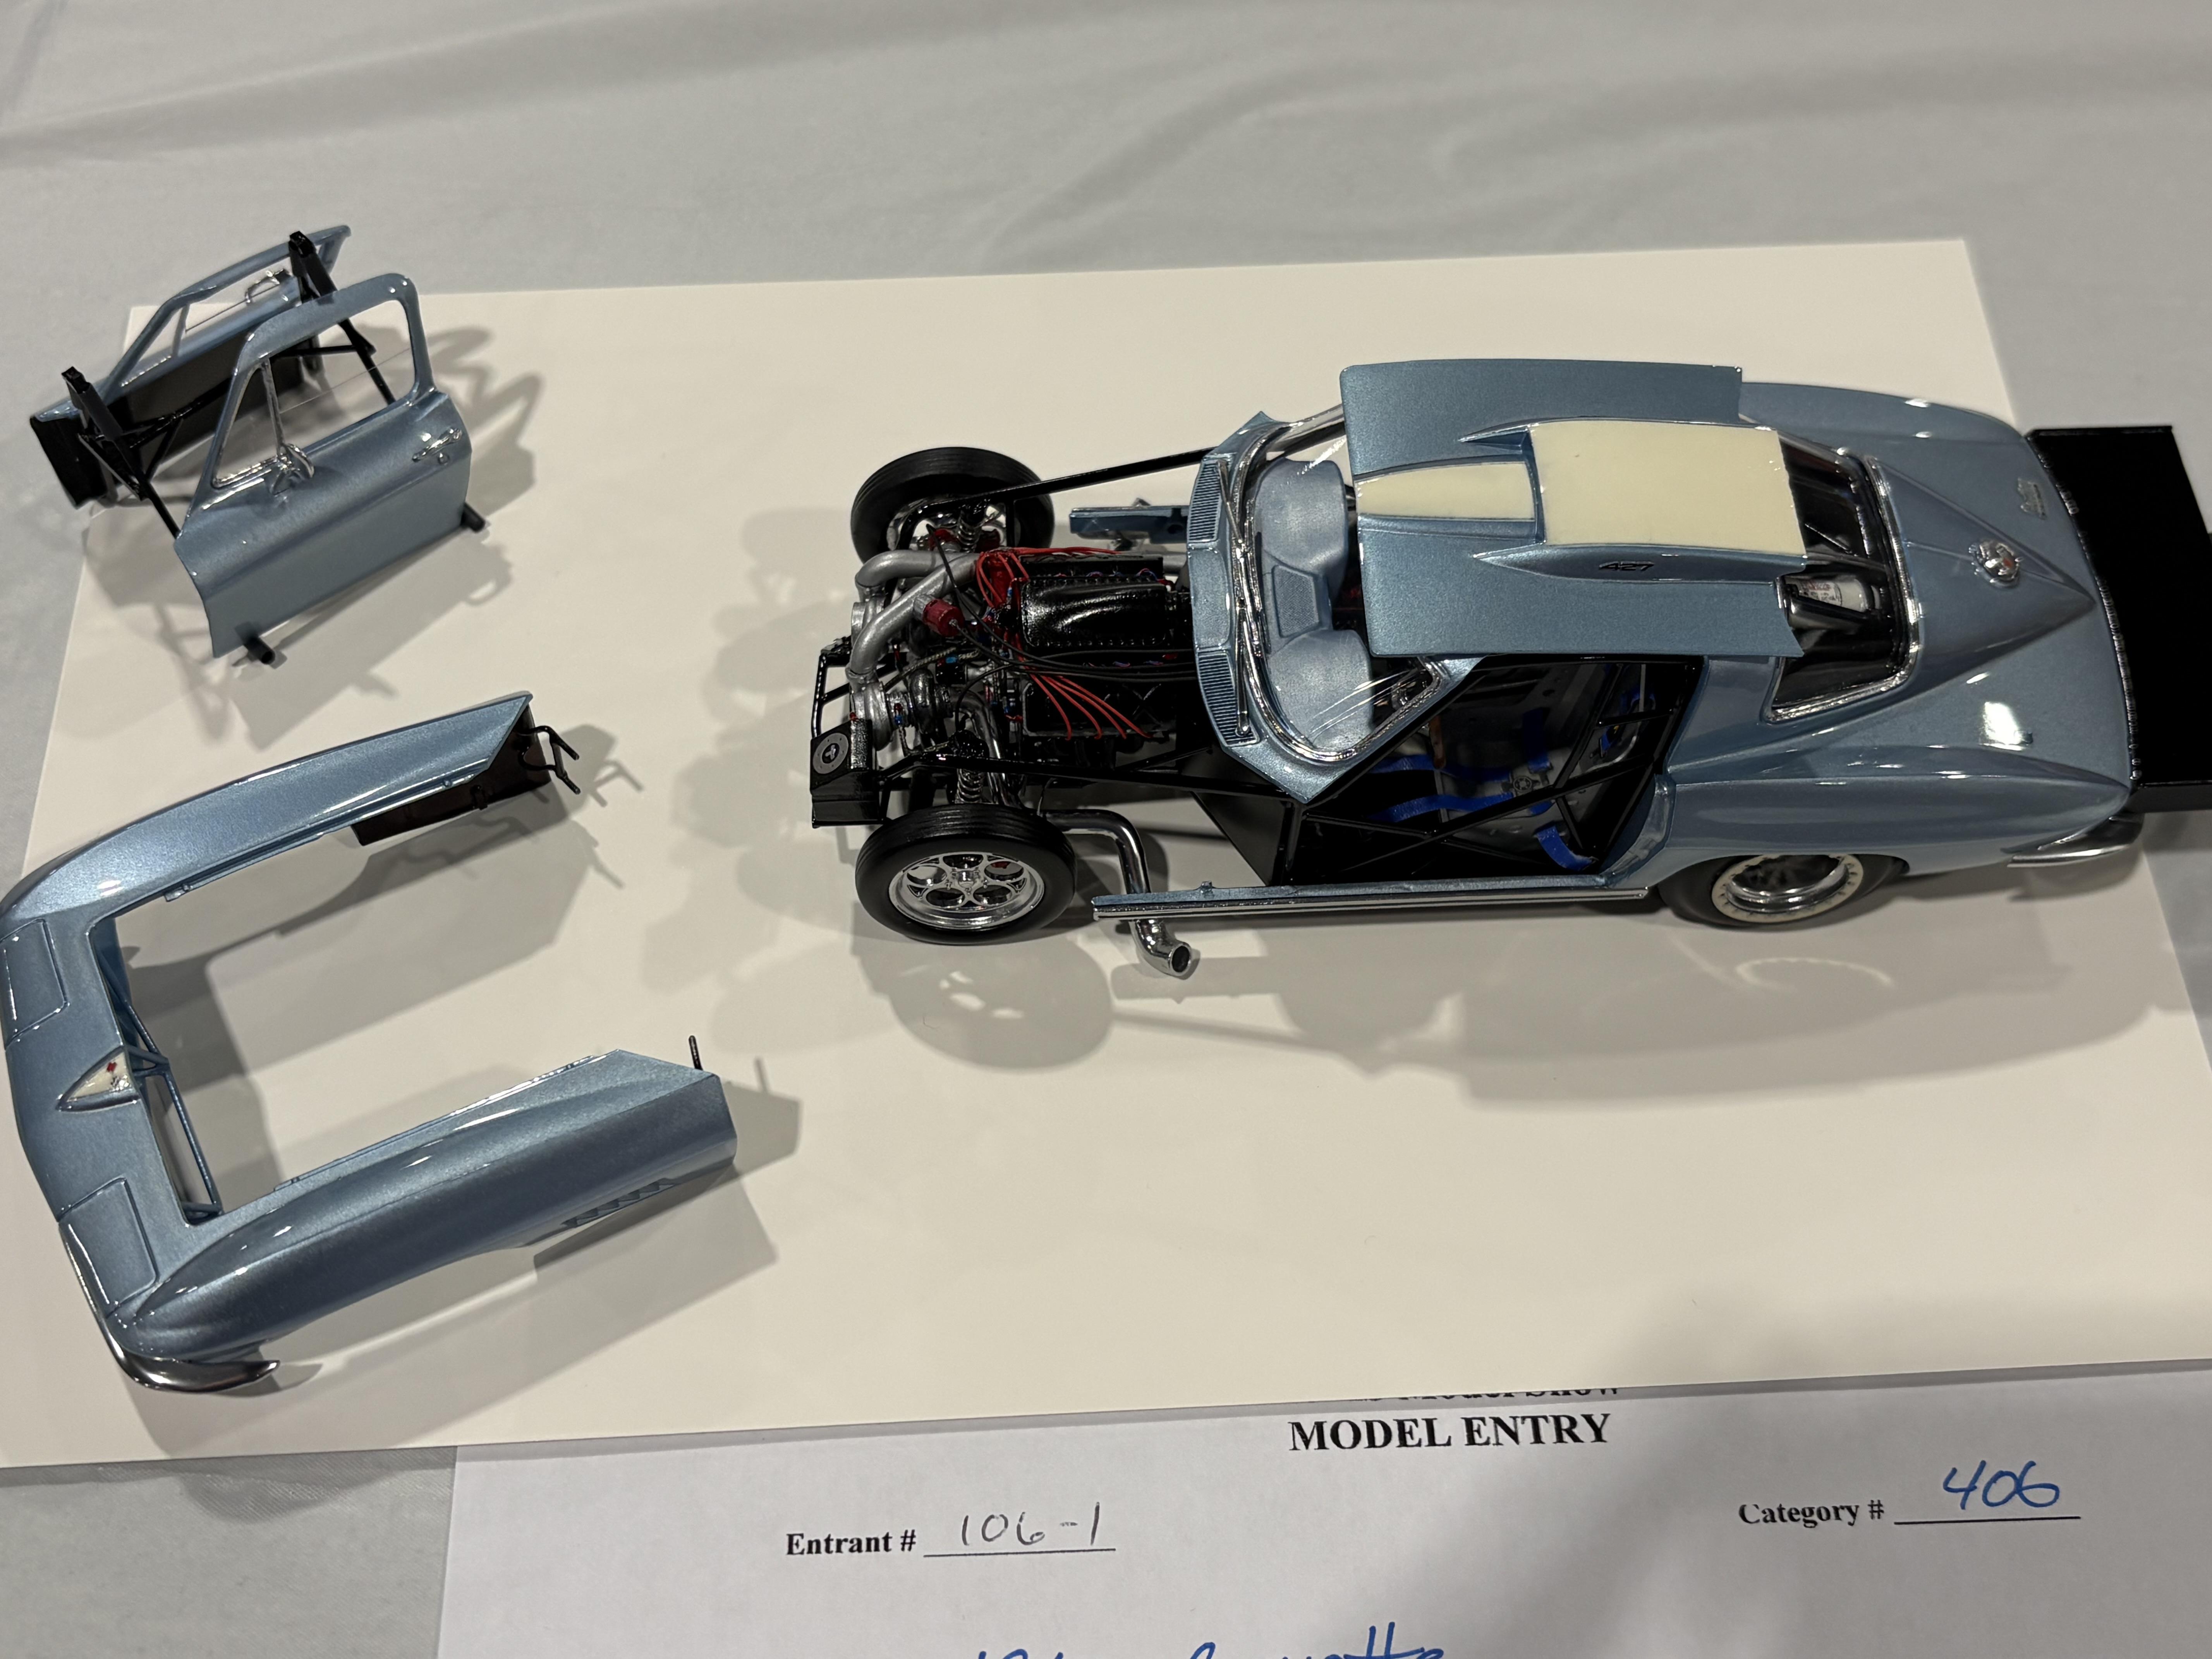
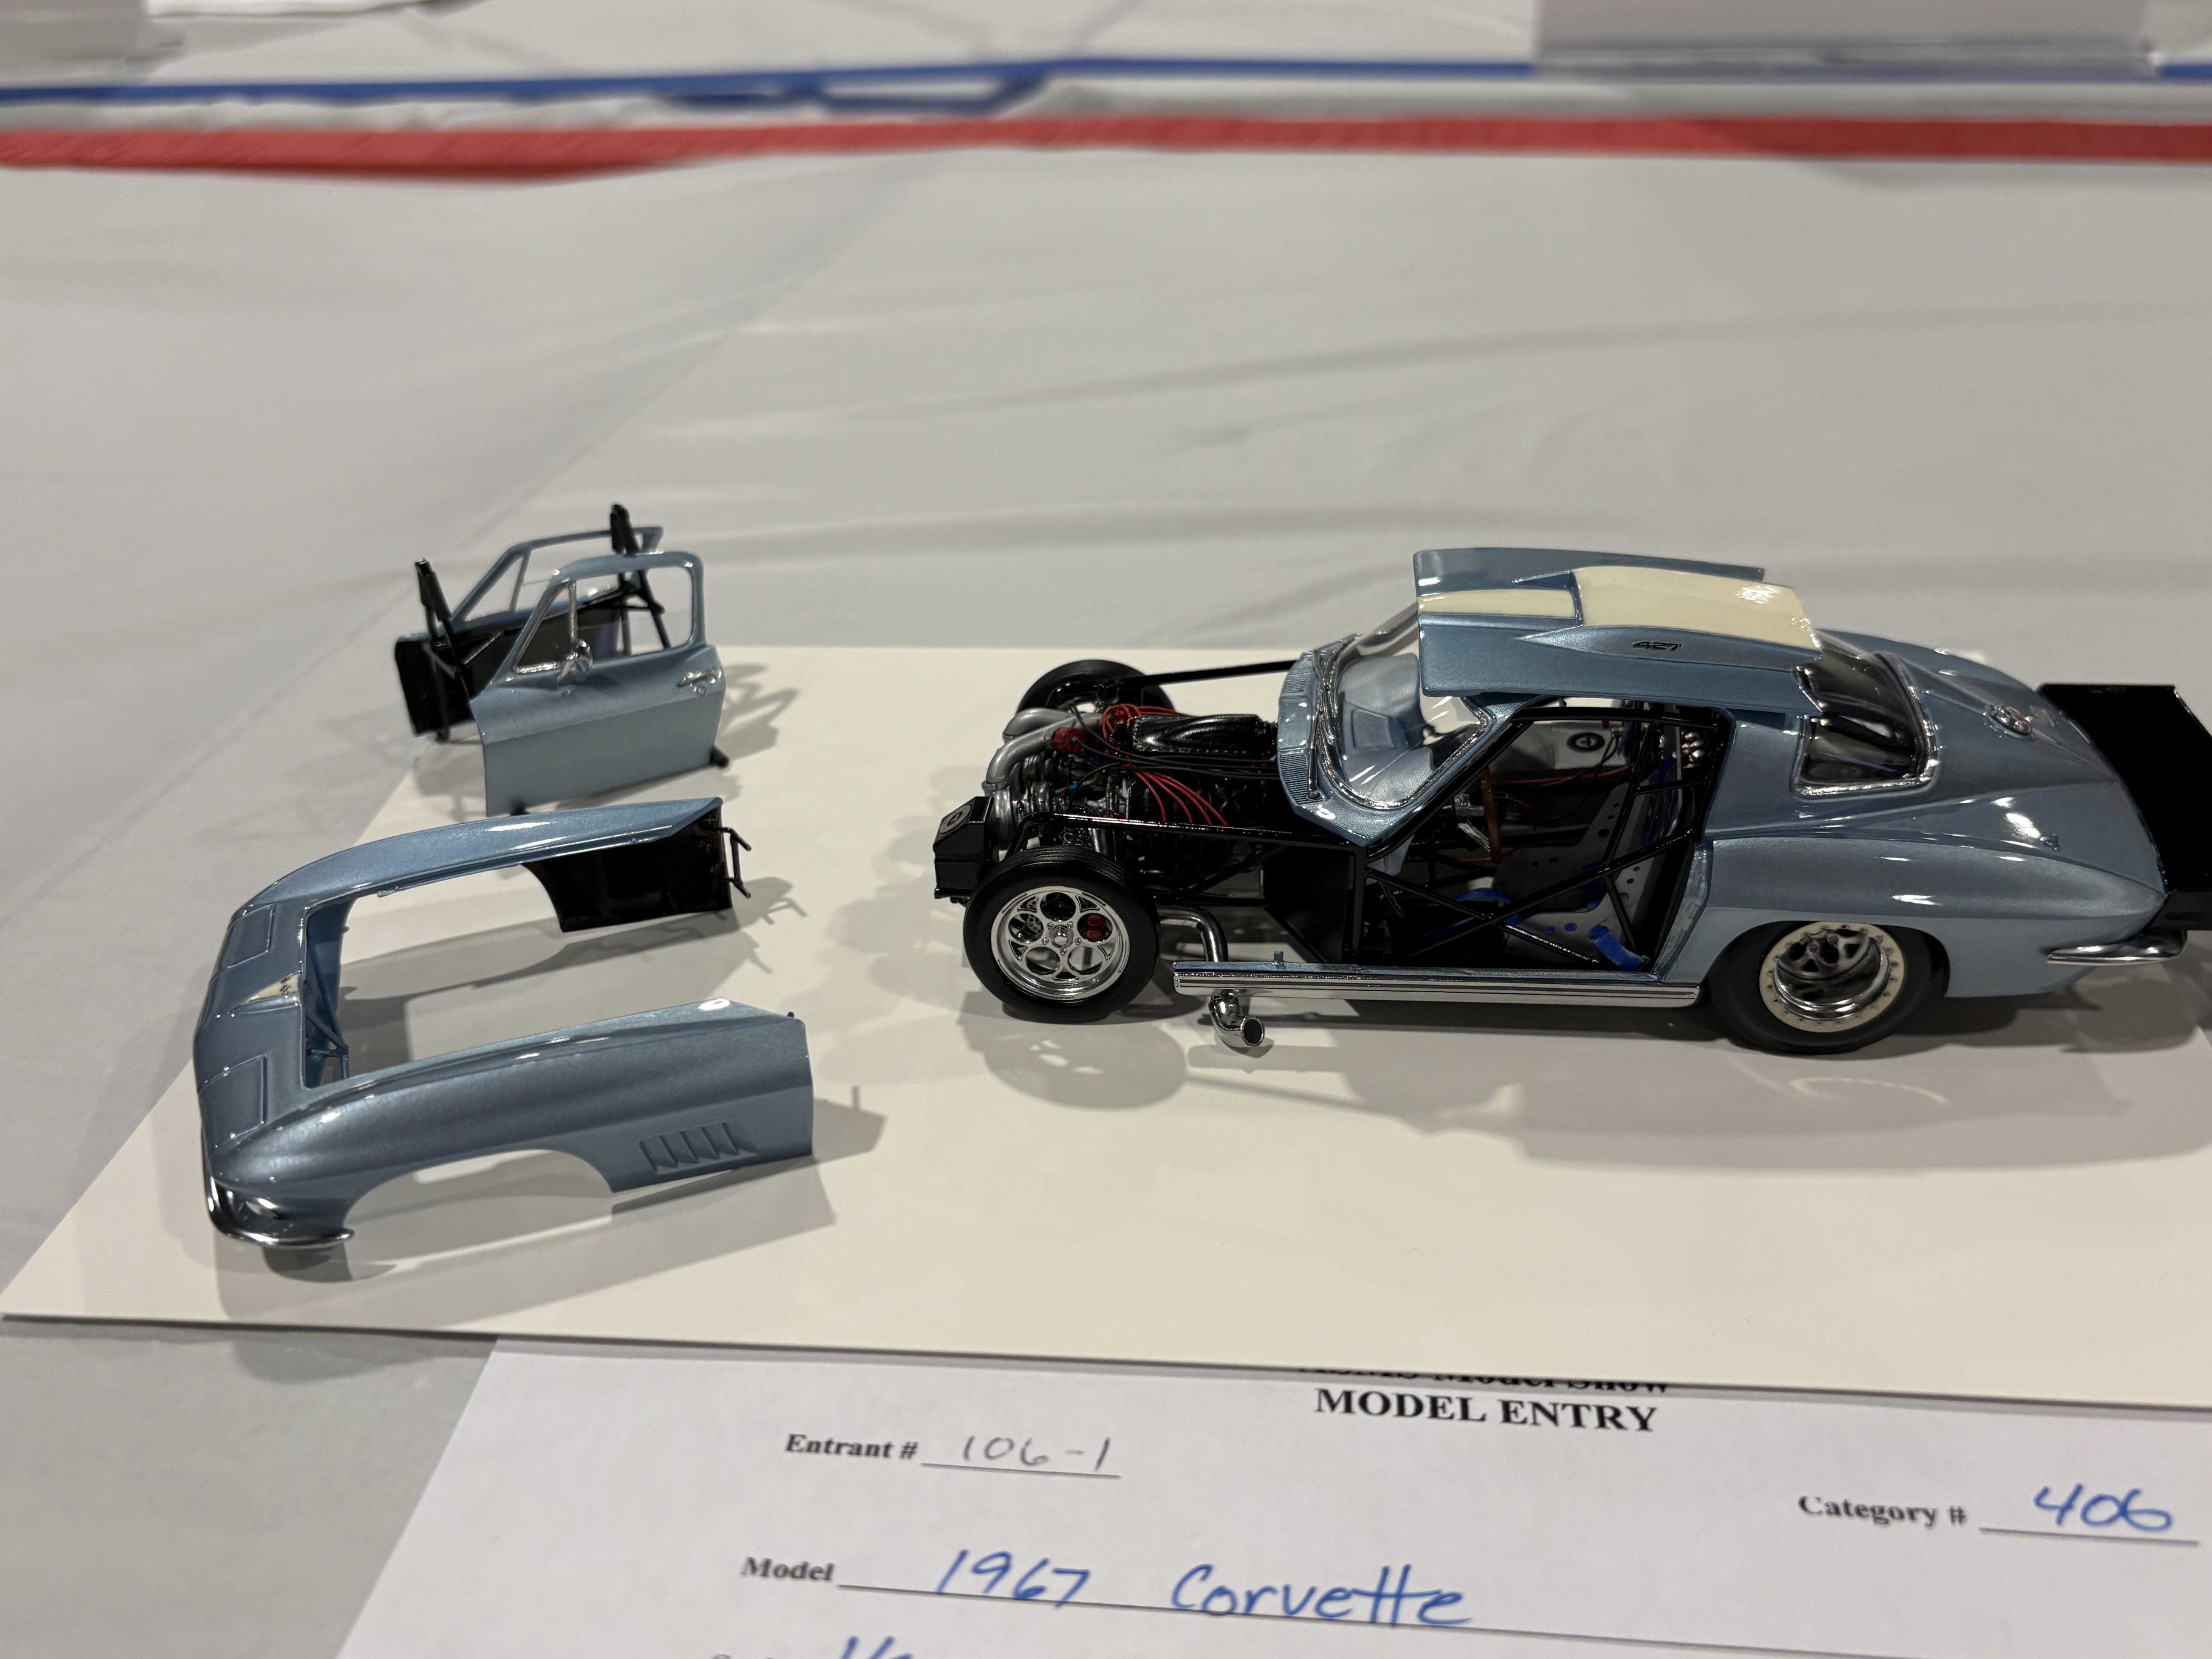
This Corvette was also just beautiful.
-
Pics from Austin Capitol Classic contest. November 8, 2025
LDO replied to LDO's topic in Contests and Shows
-
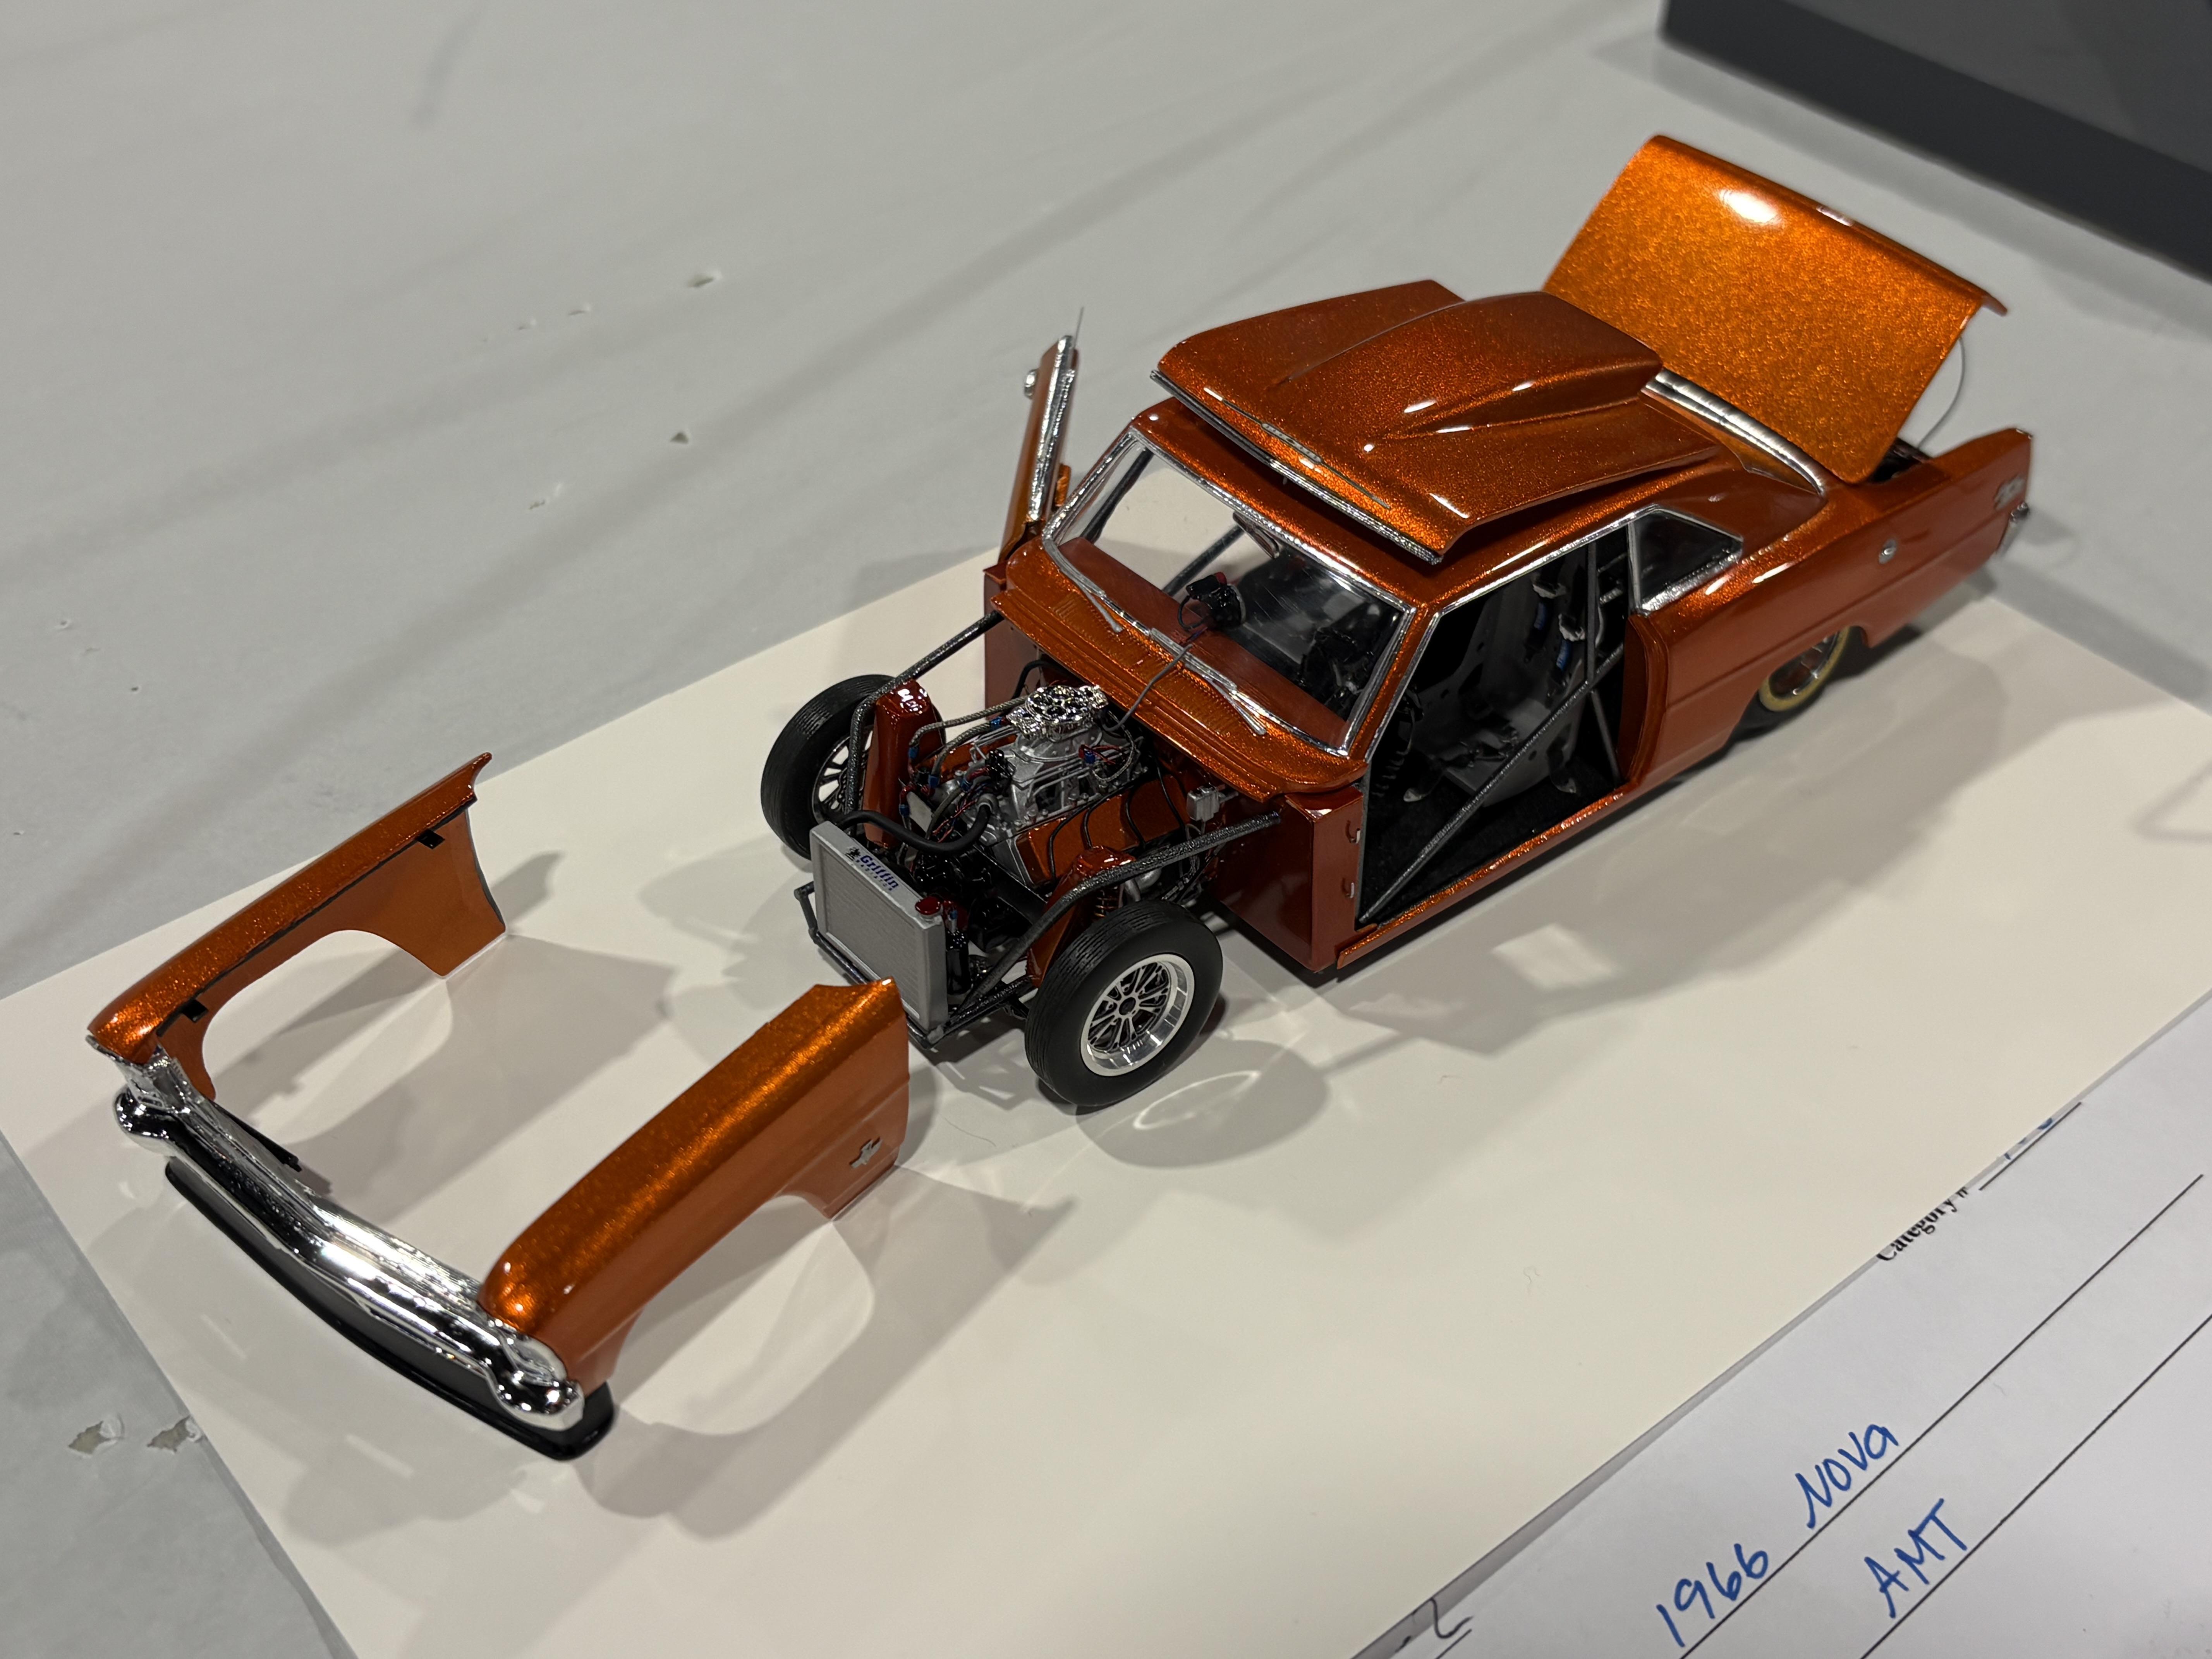
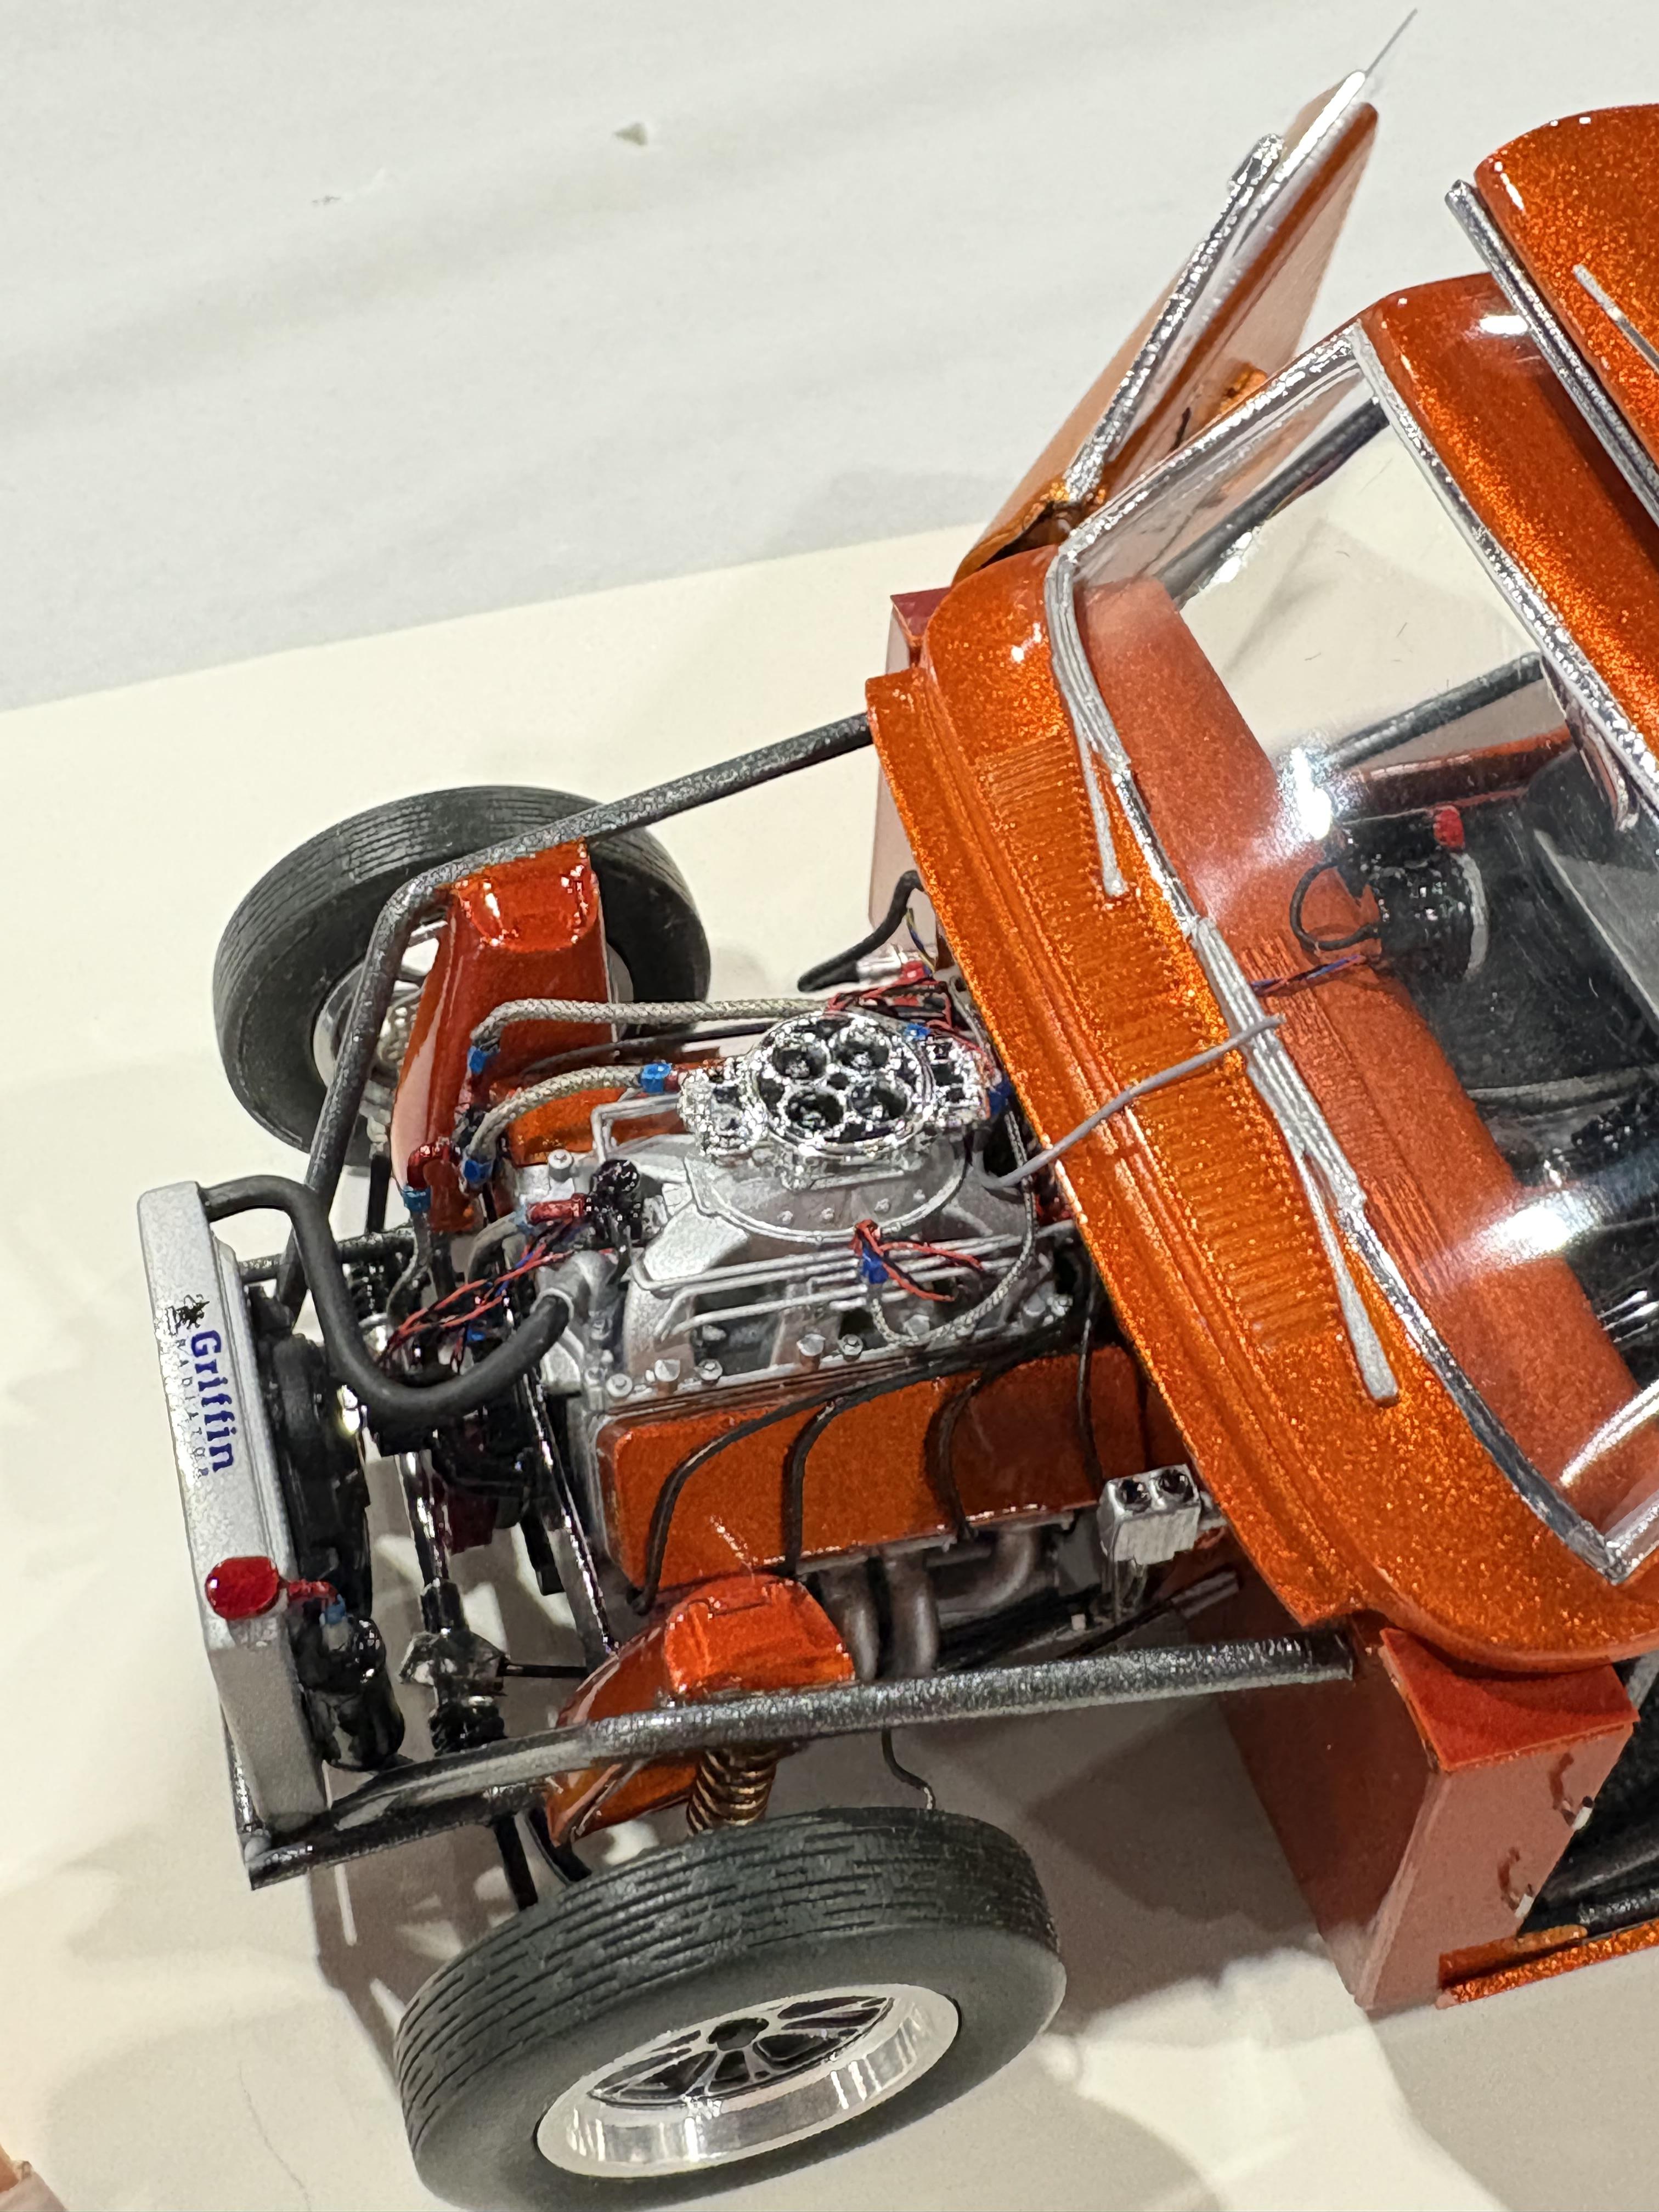
Pics from Austin Capitol Classic contest. November 8, 2025
LDO replied to LDO's topic in Contests and Shows
OH MY GOSH the paint on that Corvette was beautiful!
-
Pics from Austin Capitol Classic contest. November 8, 2025
LDO replied to LDO's topic in Contests and Shows
-
Pics from Austin Capitol Classic contest. November 8, 2025
LDO replied to LDO's topic in Contests and Shows
-
Pics from Austin Capitol Classic contest. November 8, 2025
LDO replied to LDO's topic in Contests and Shows
-
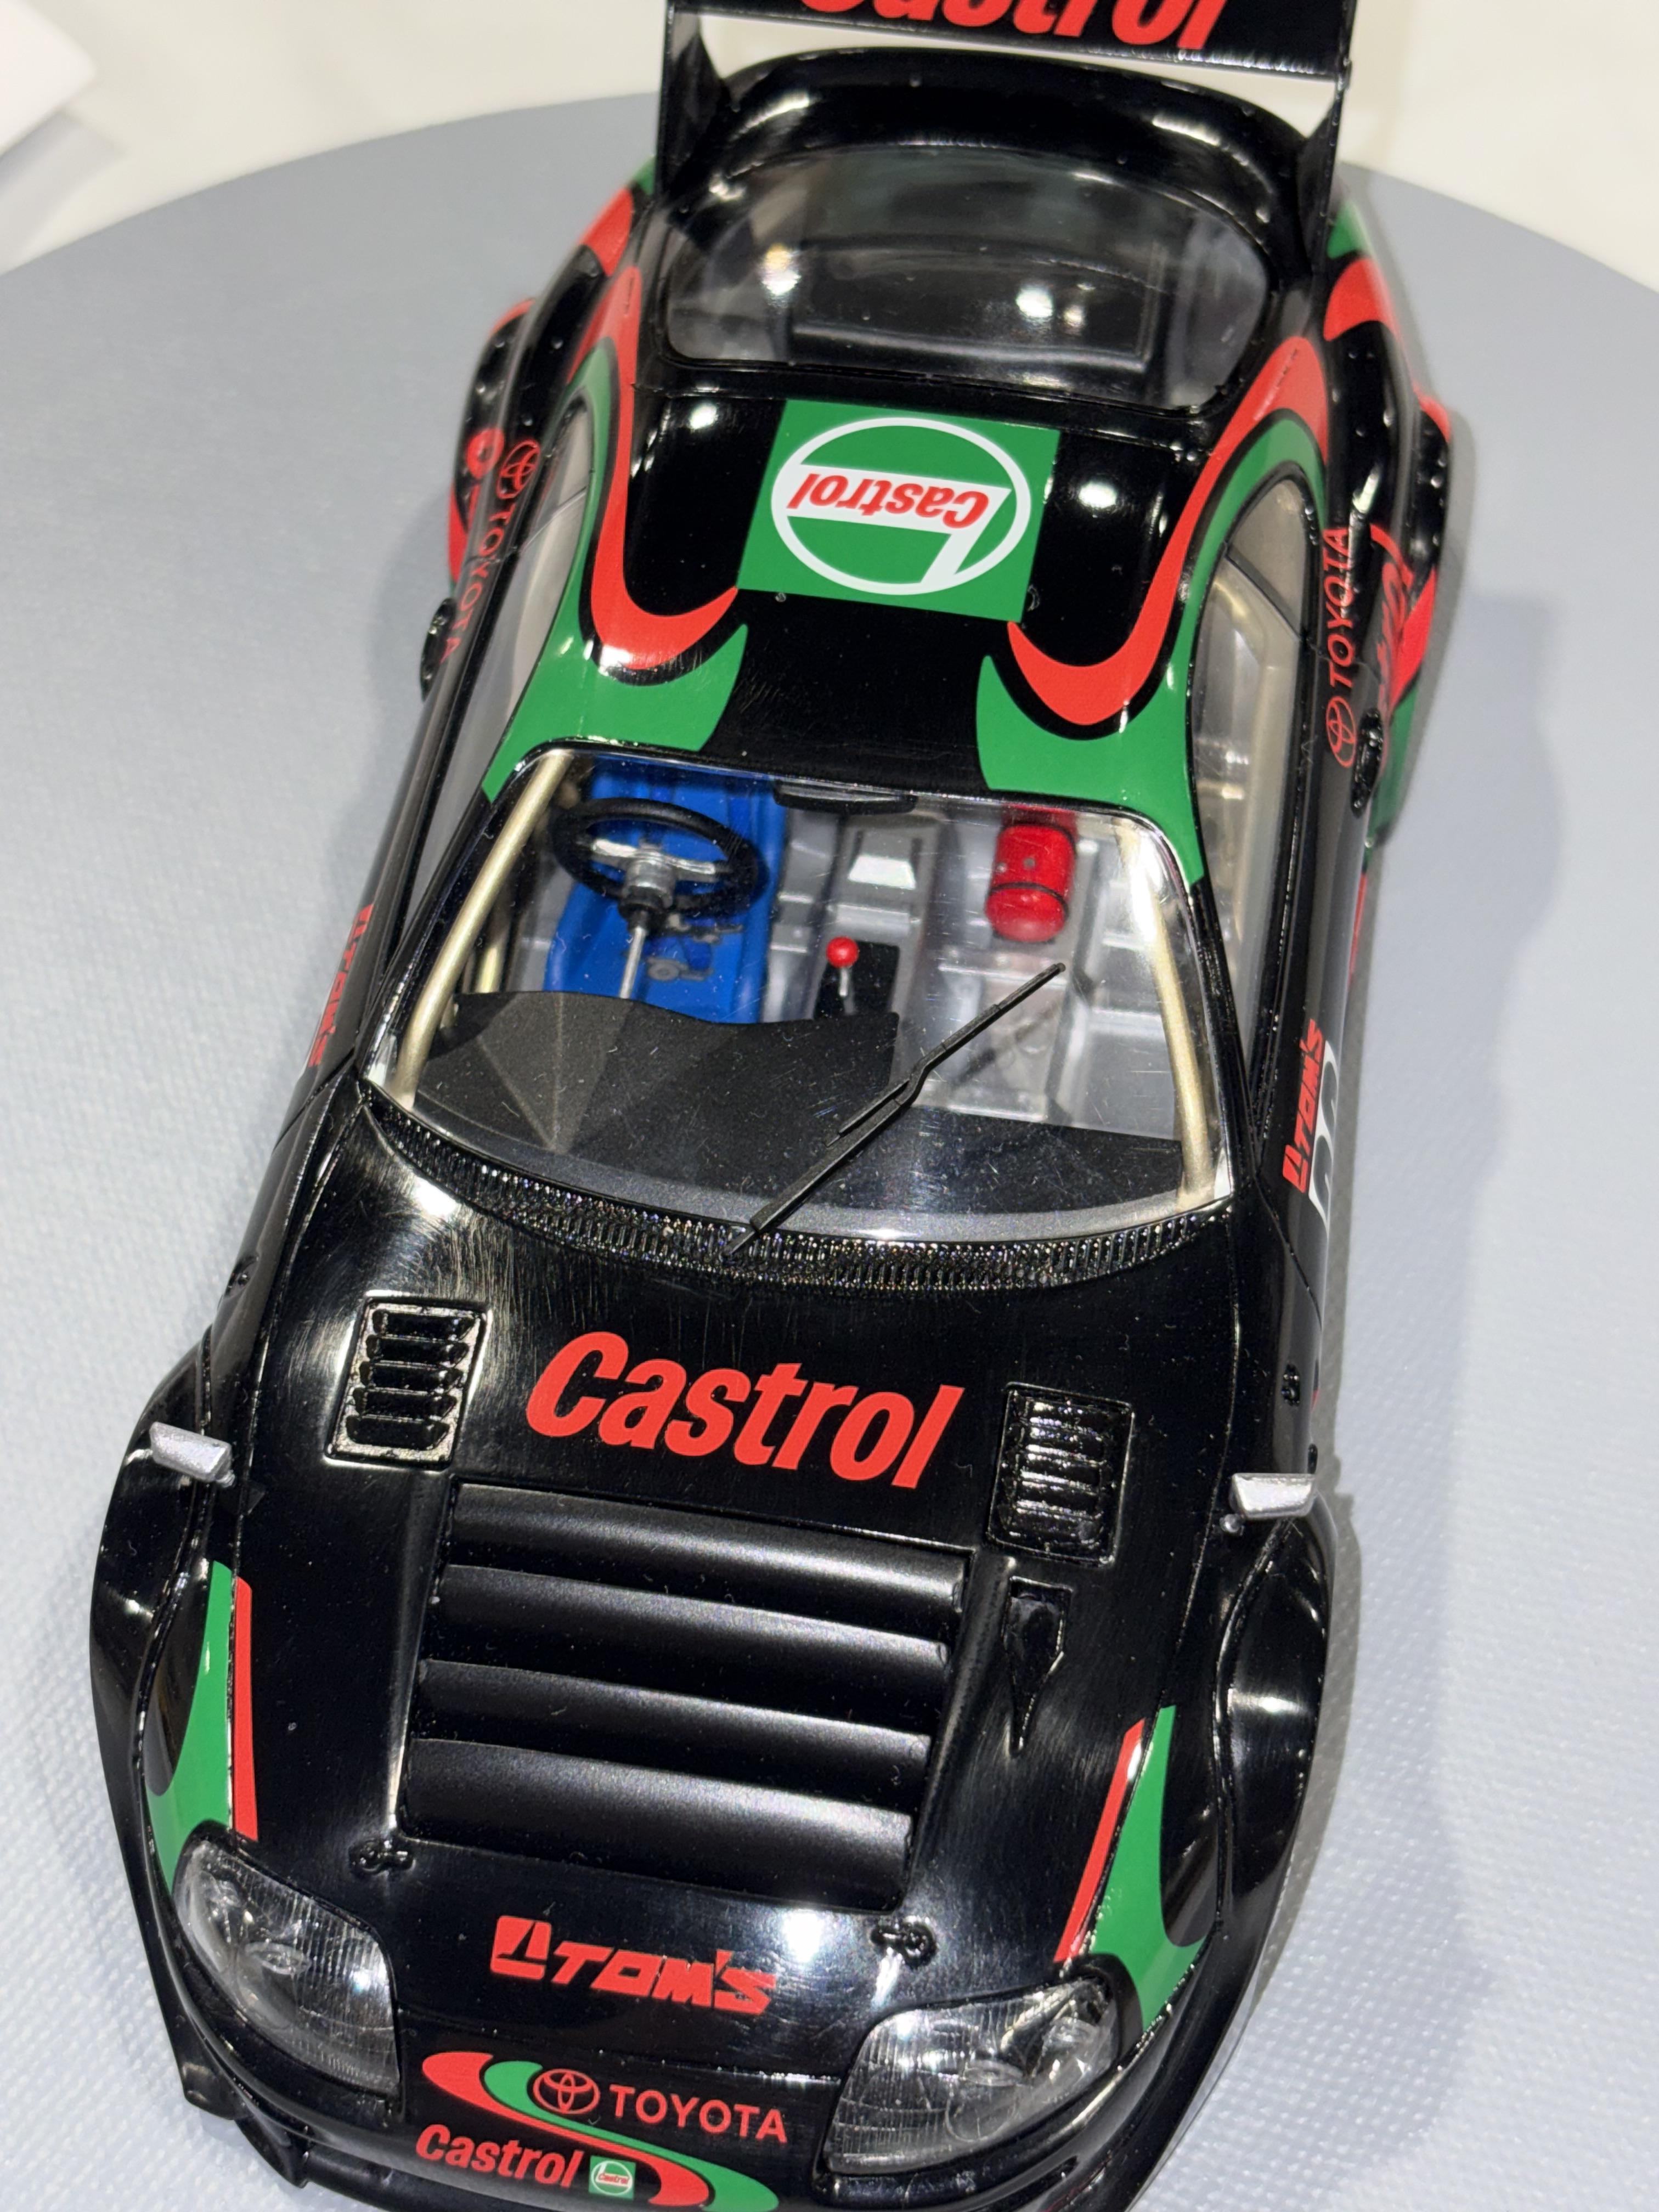
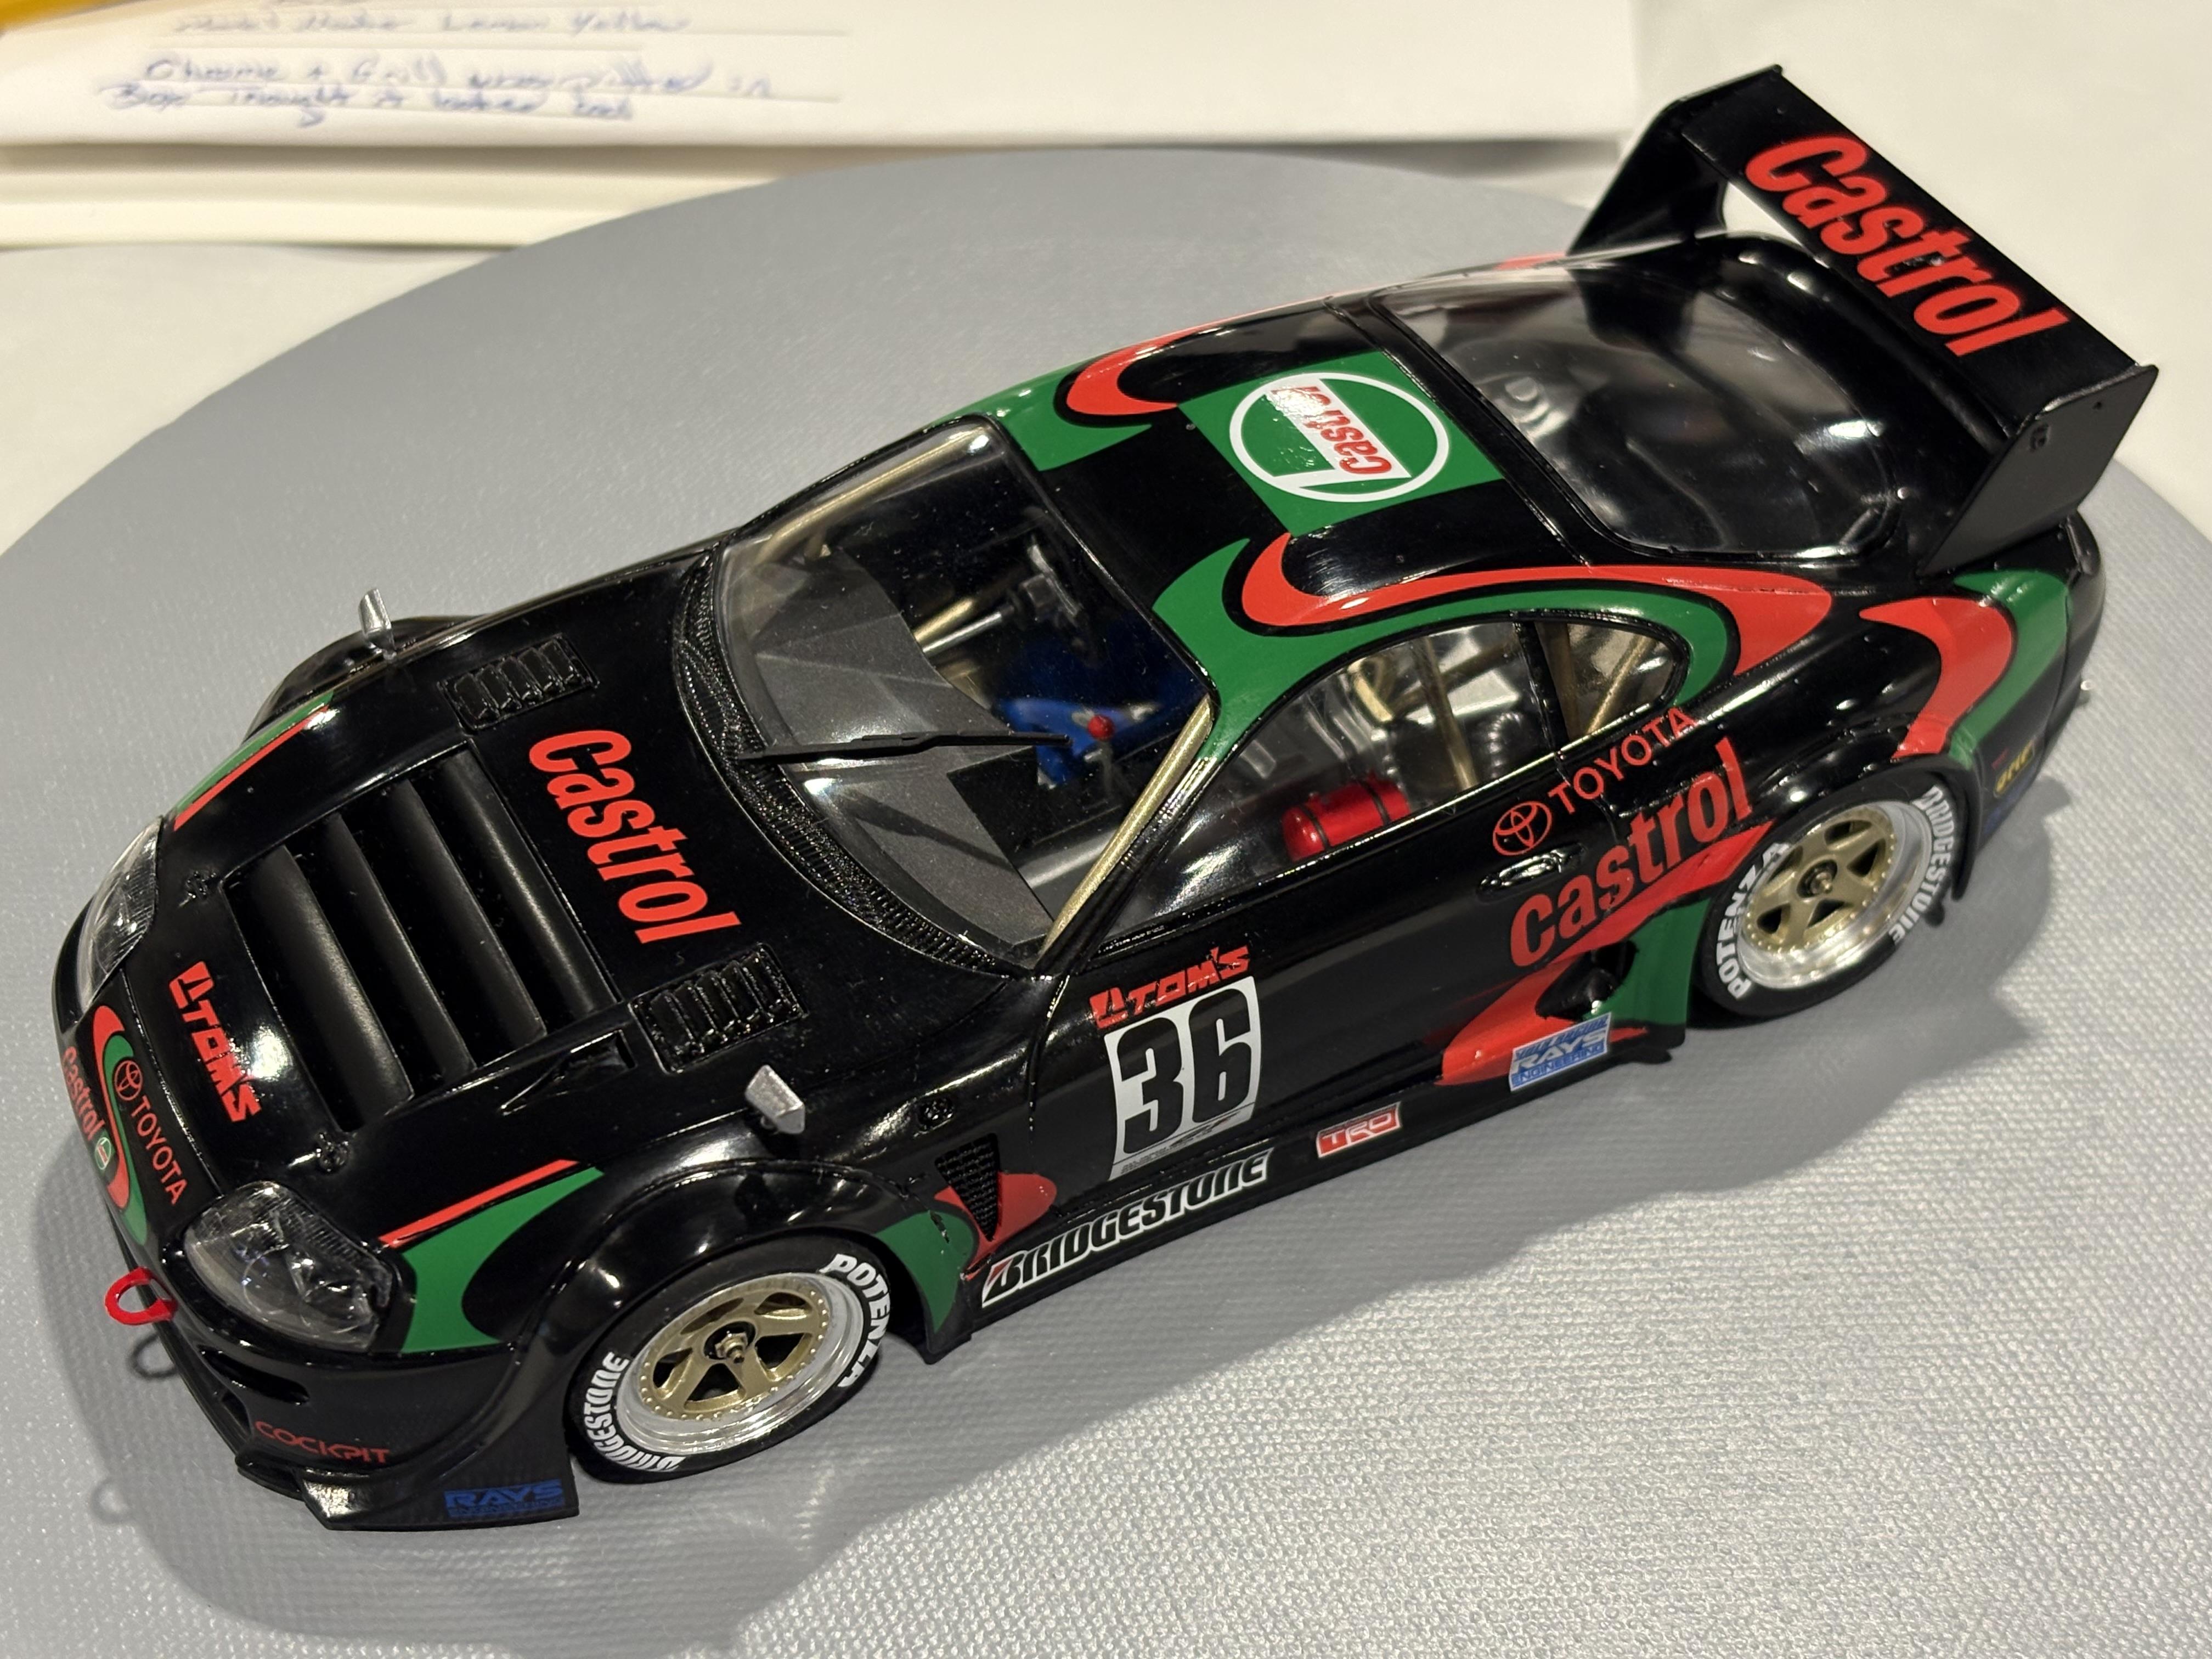
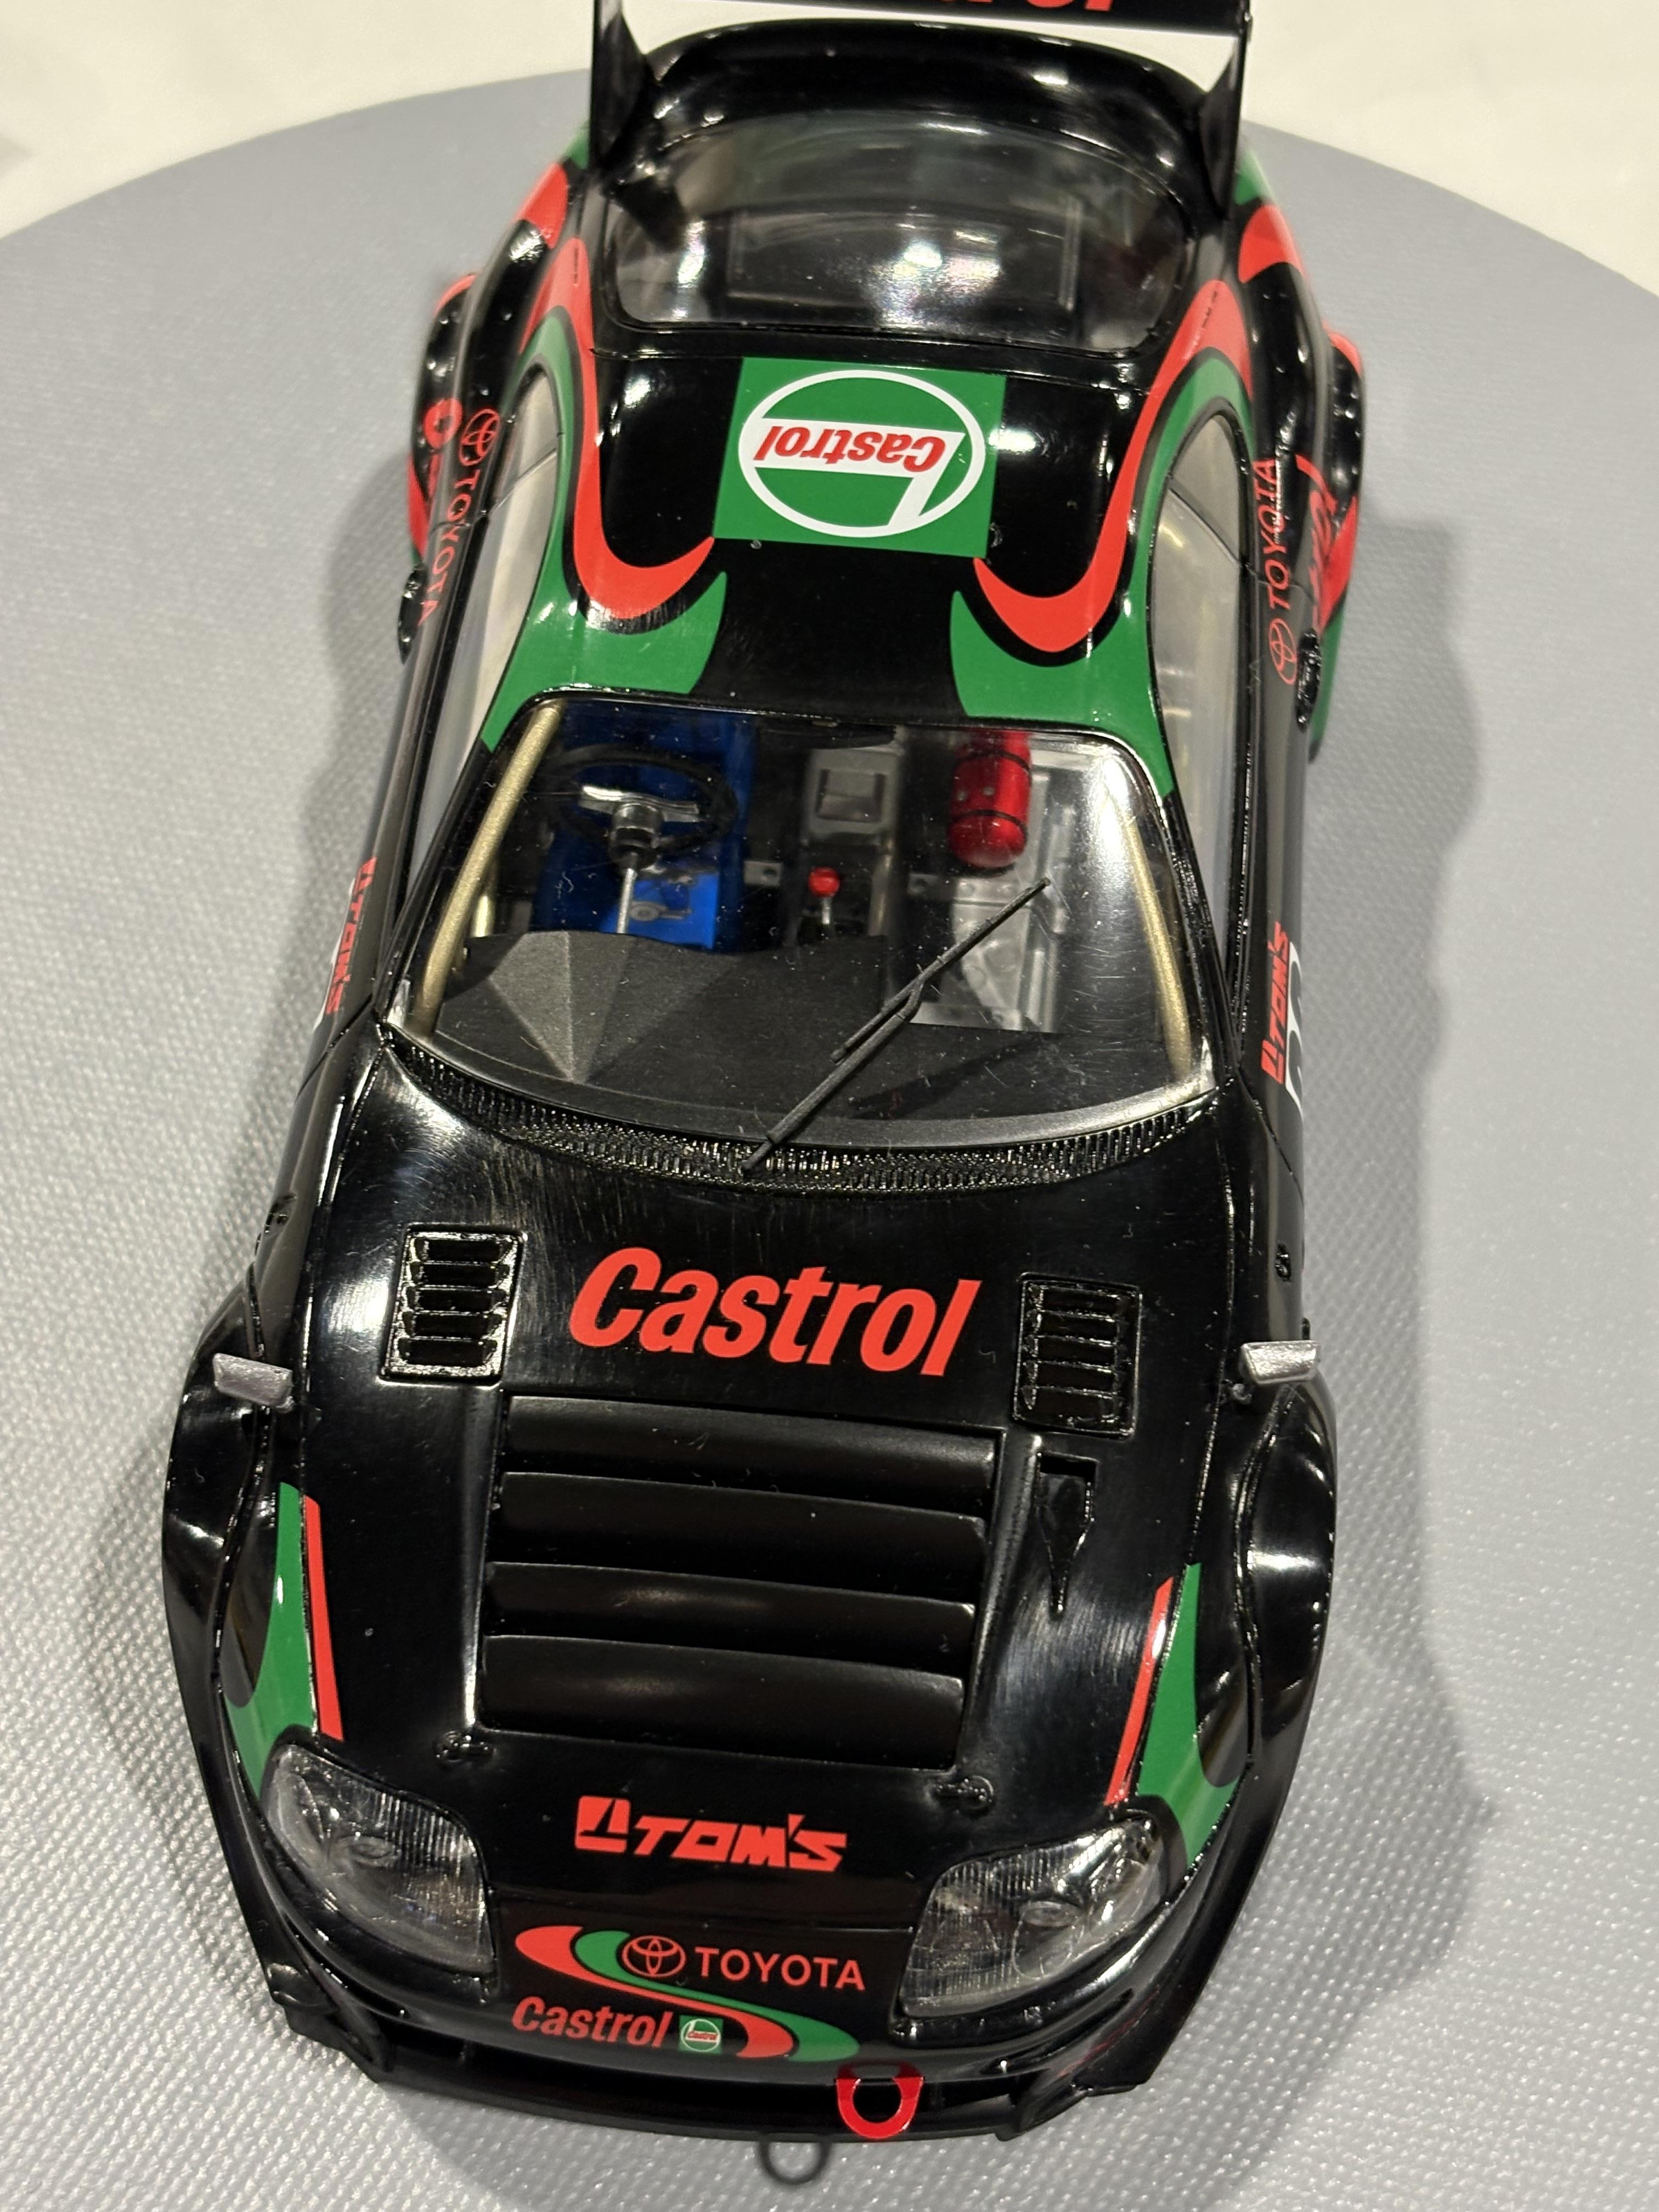
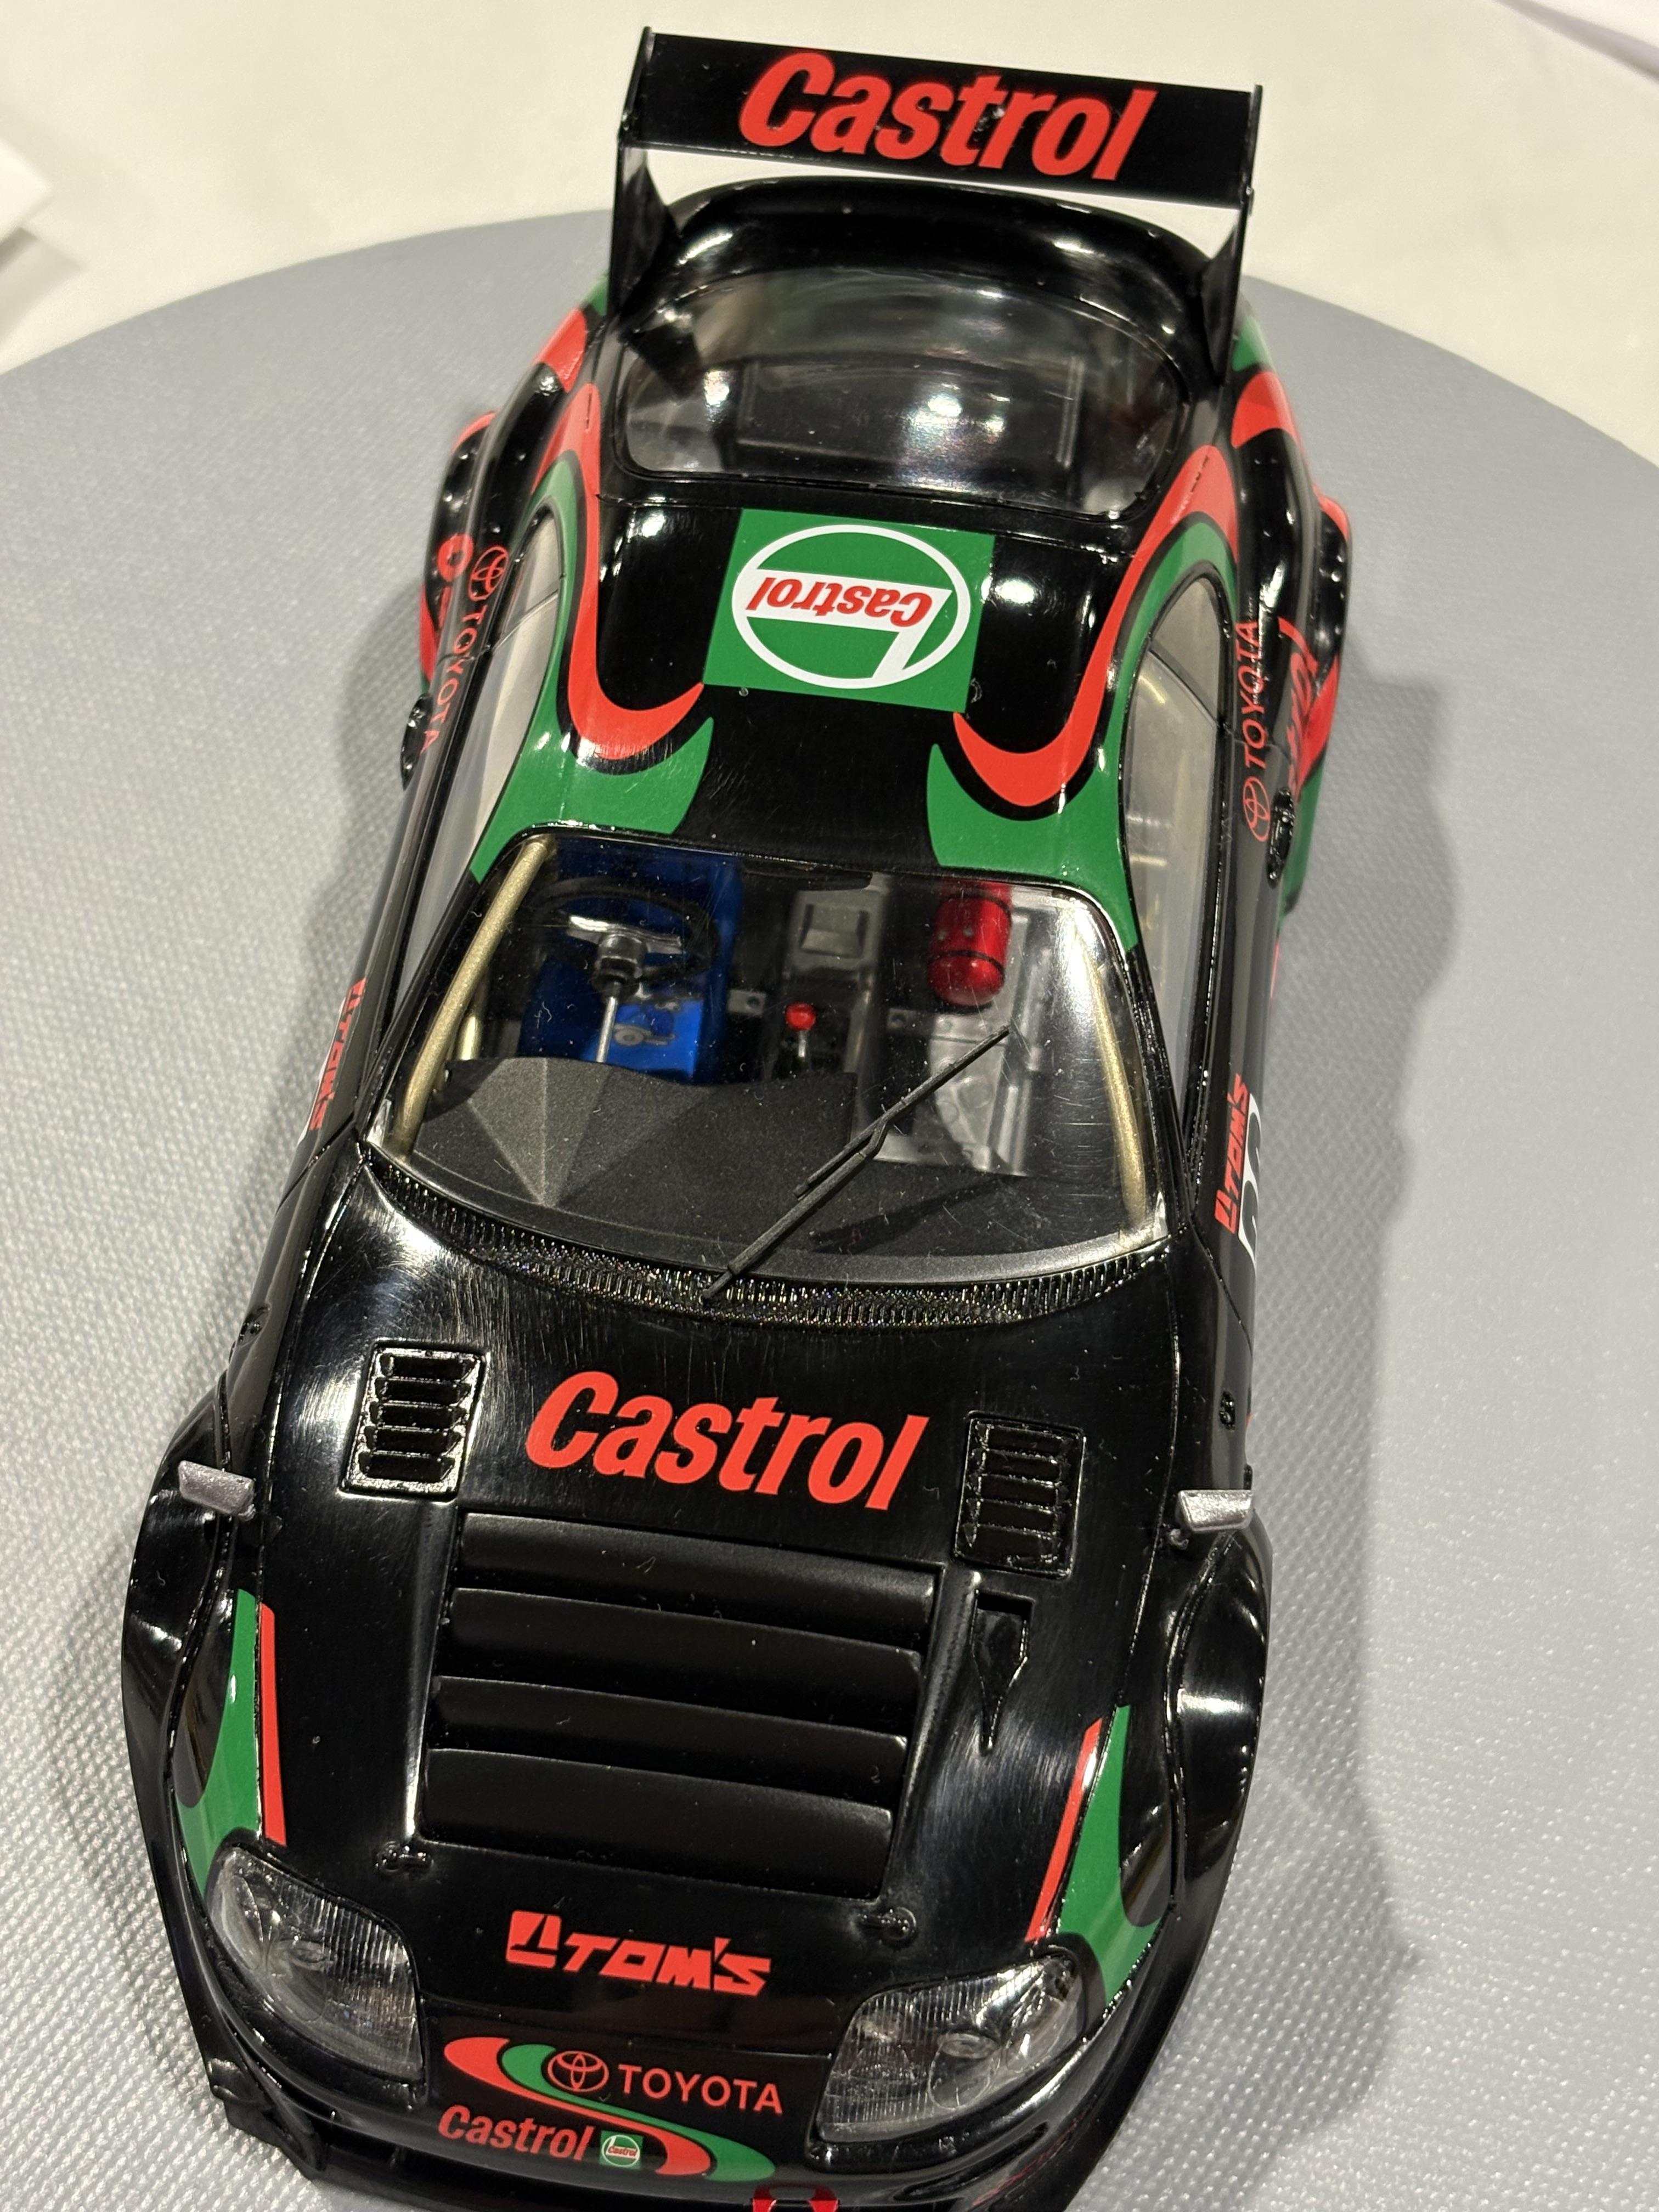
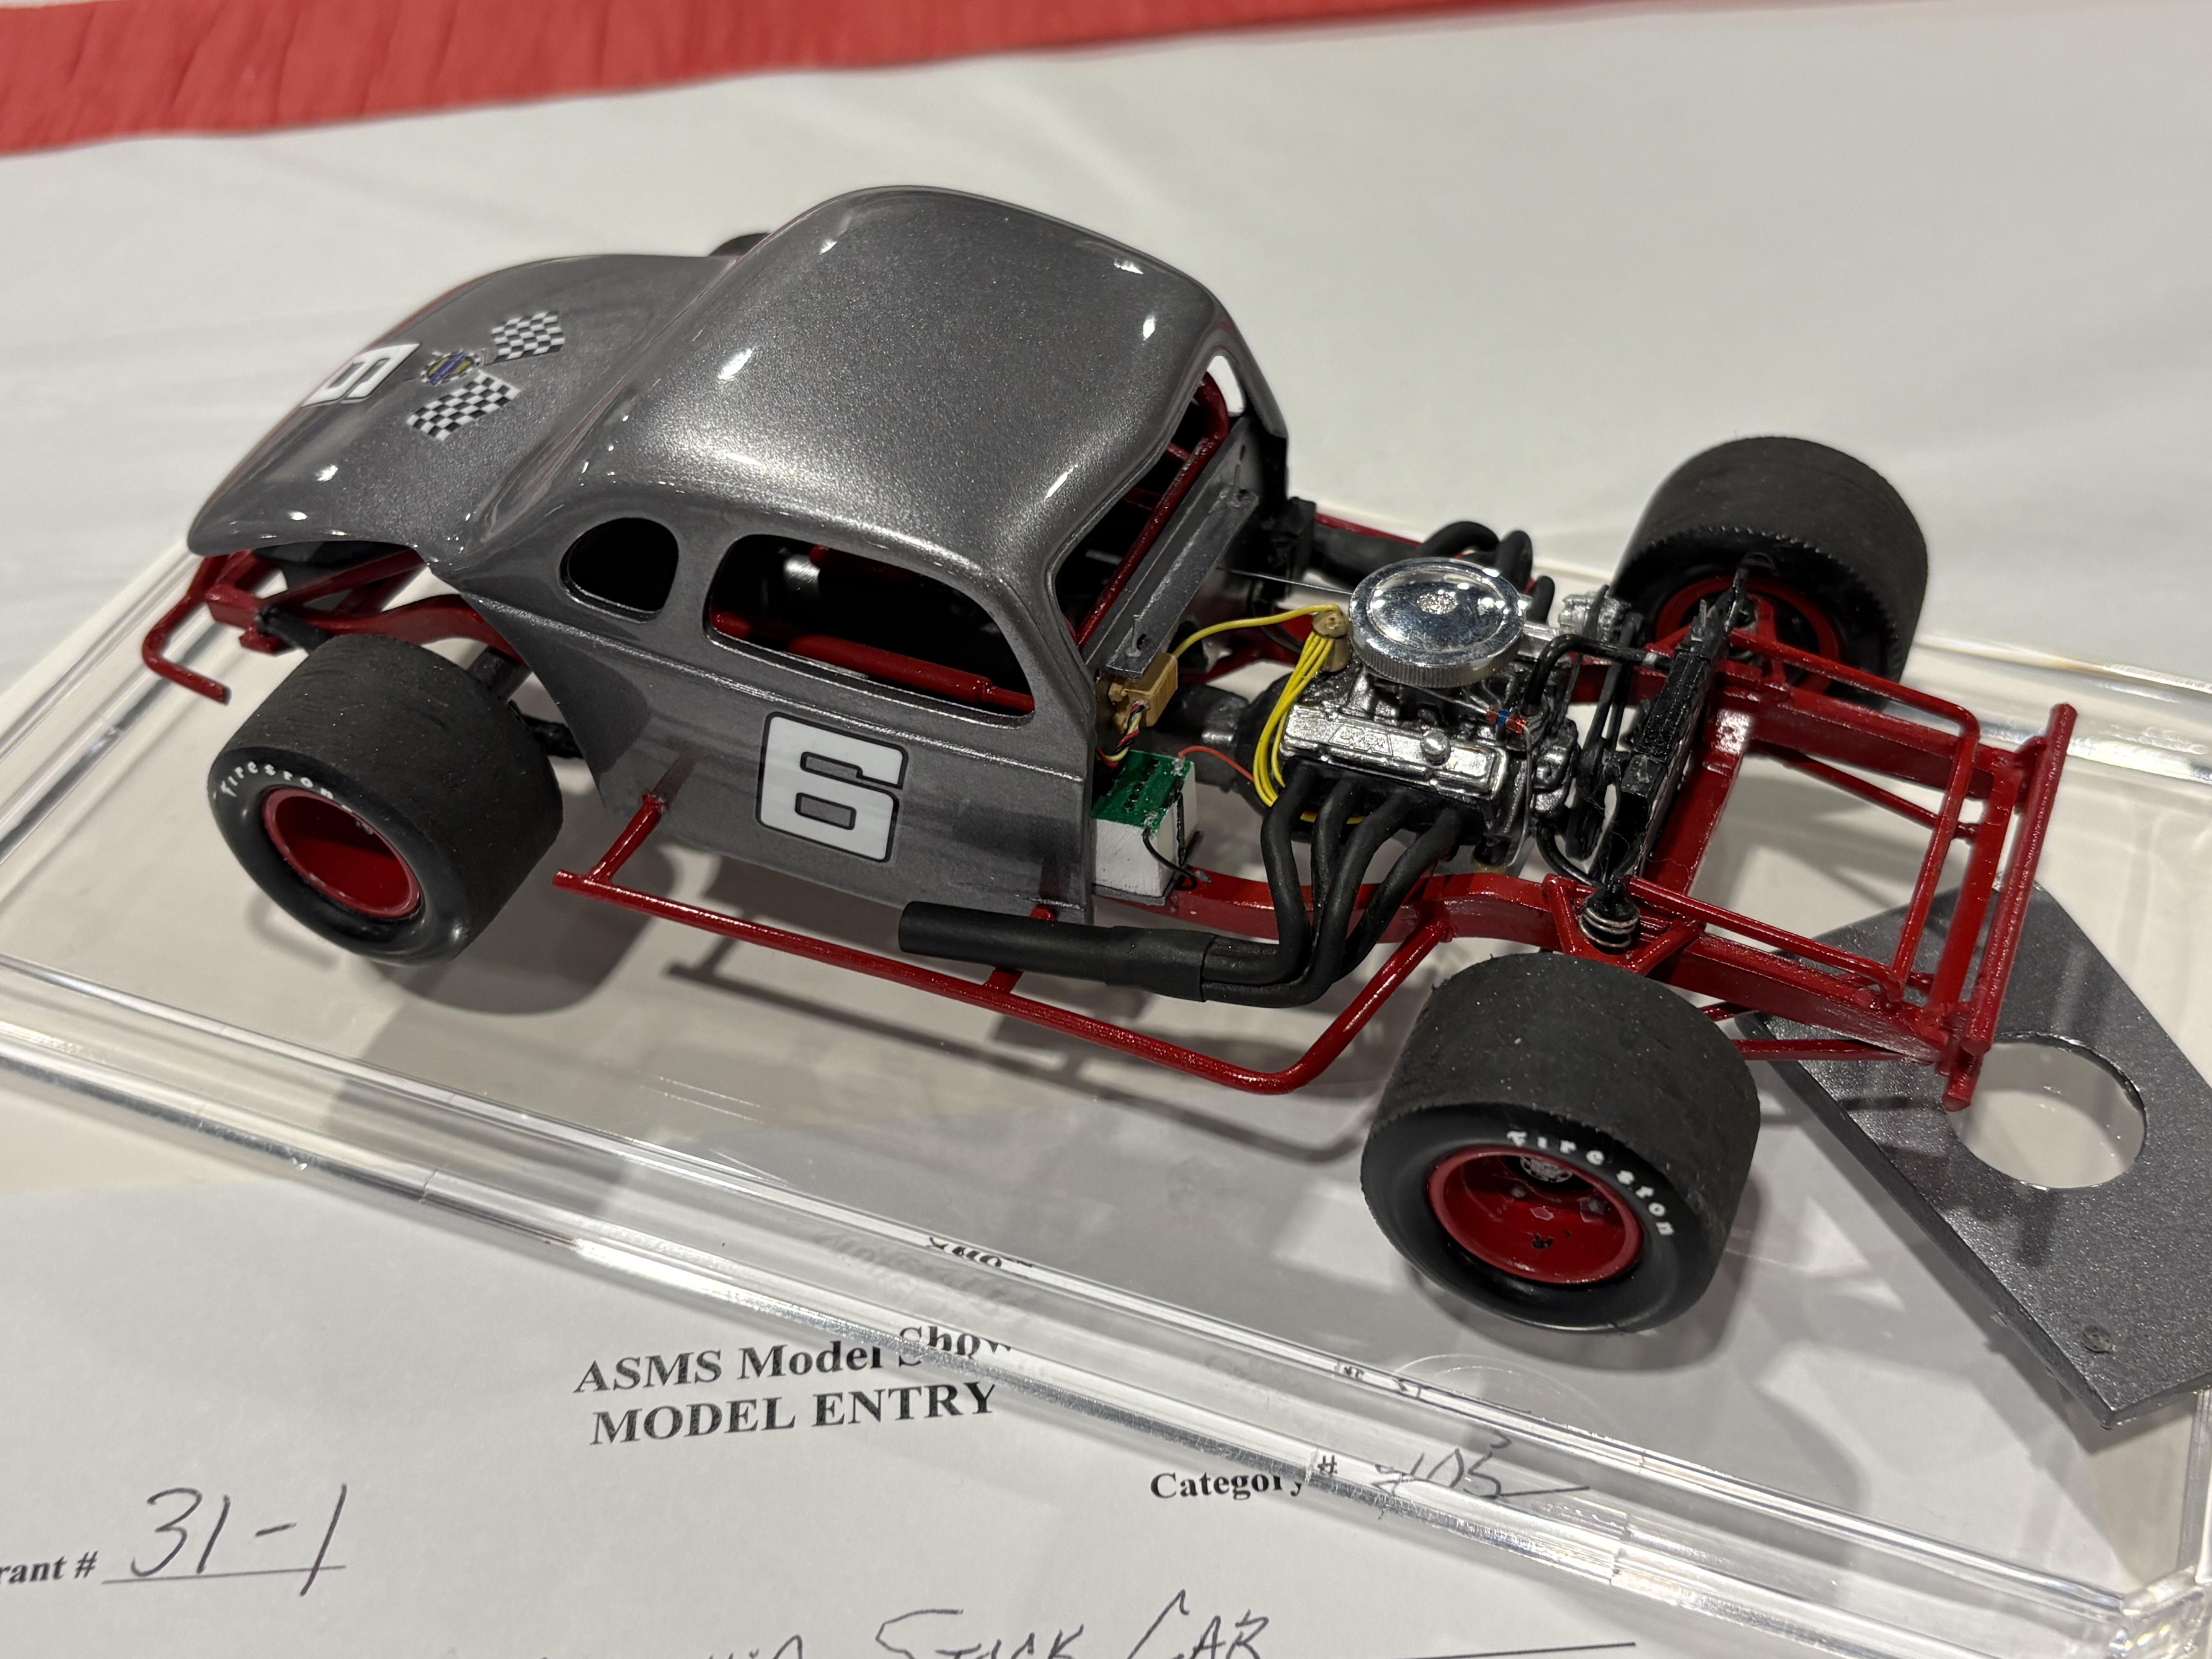
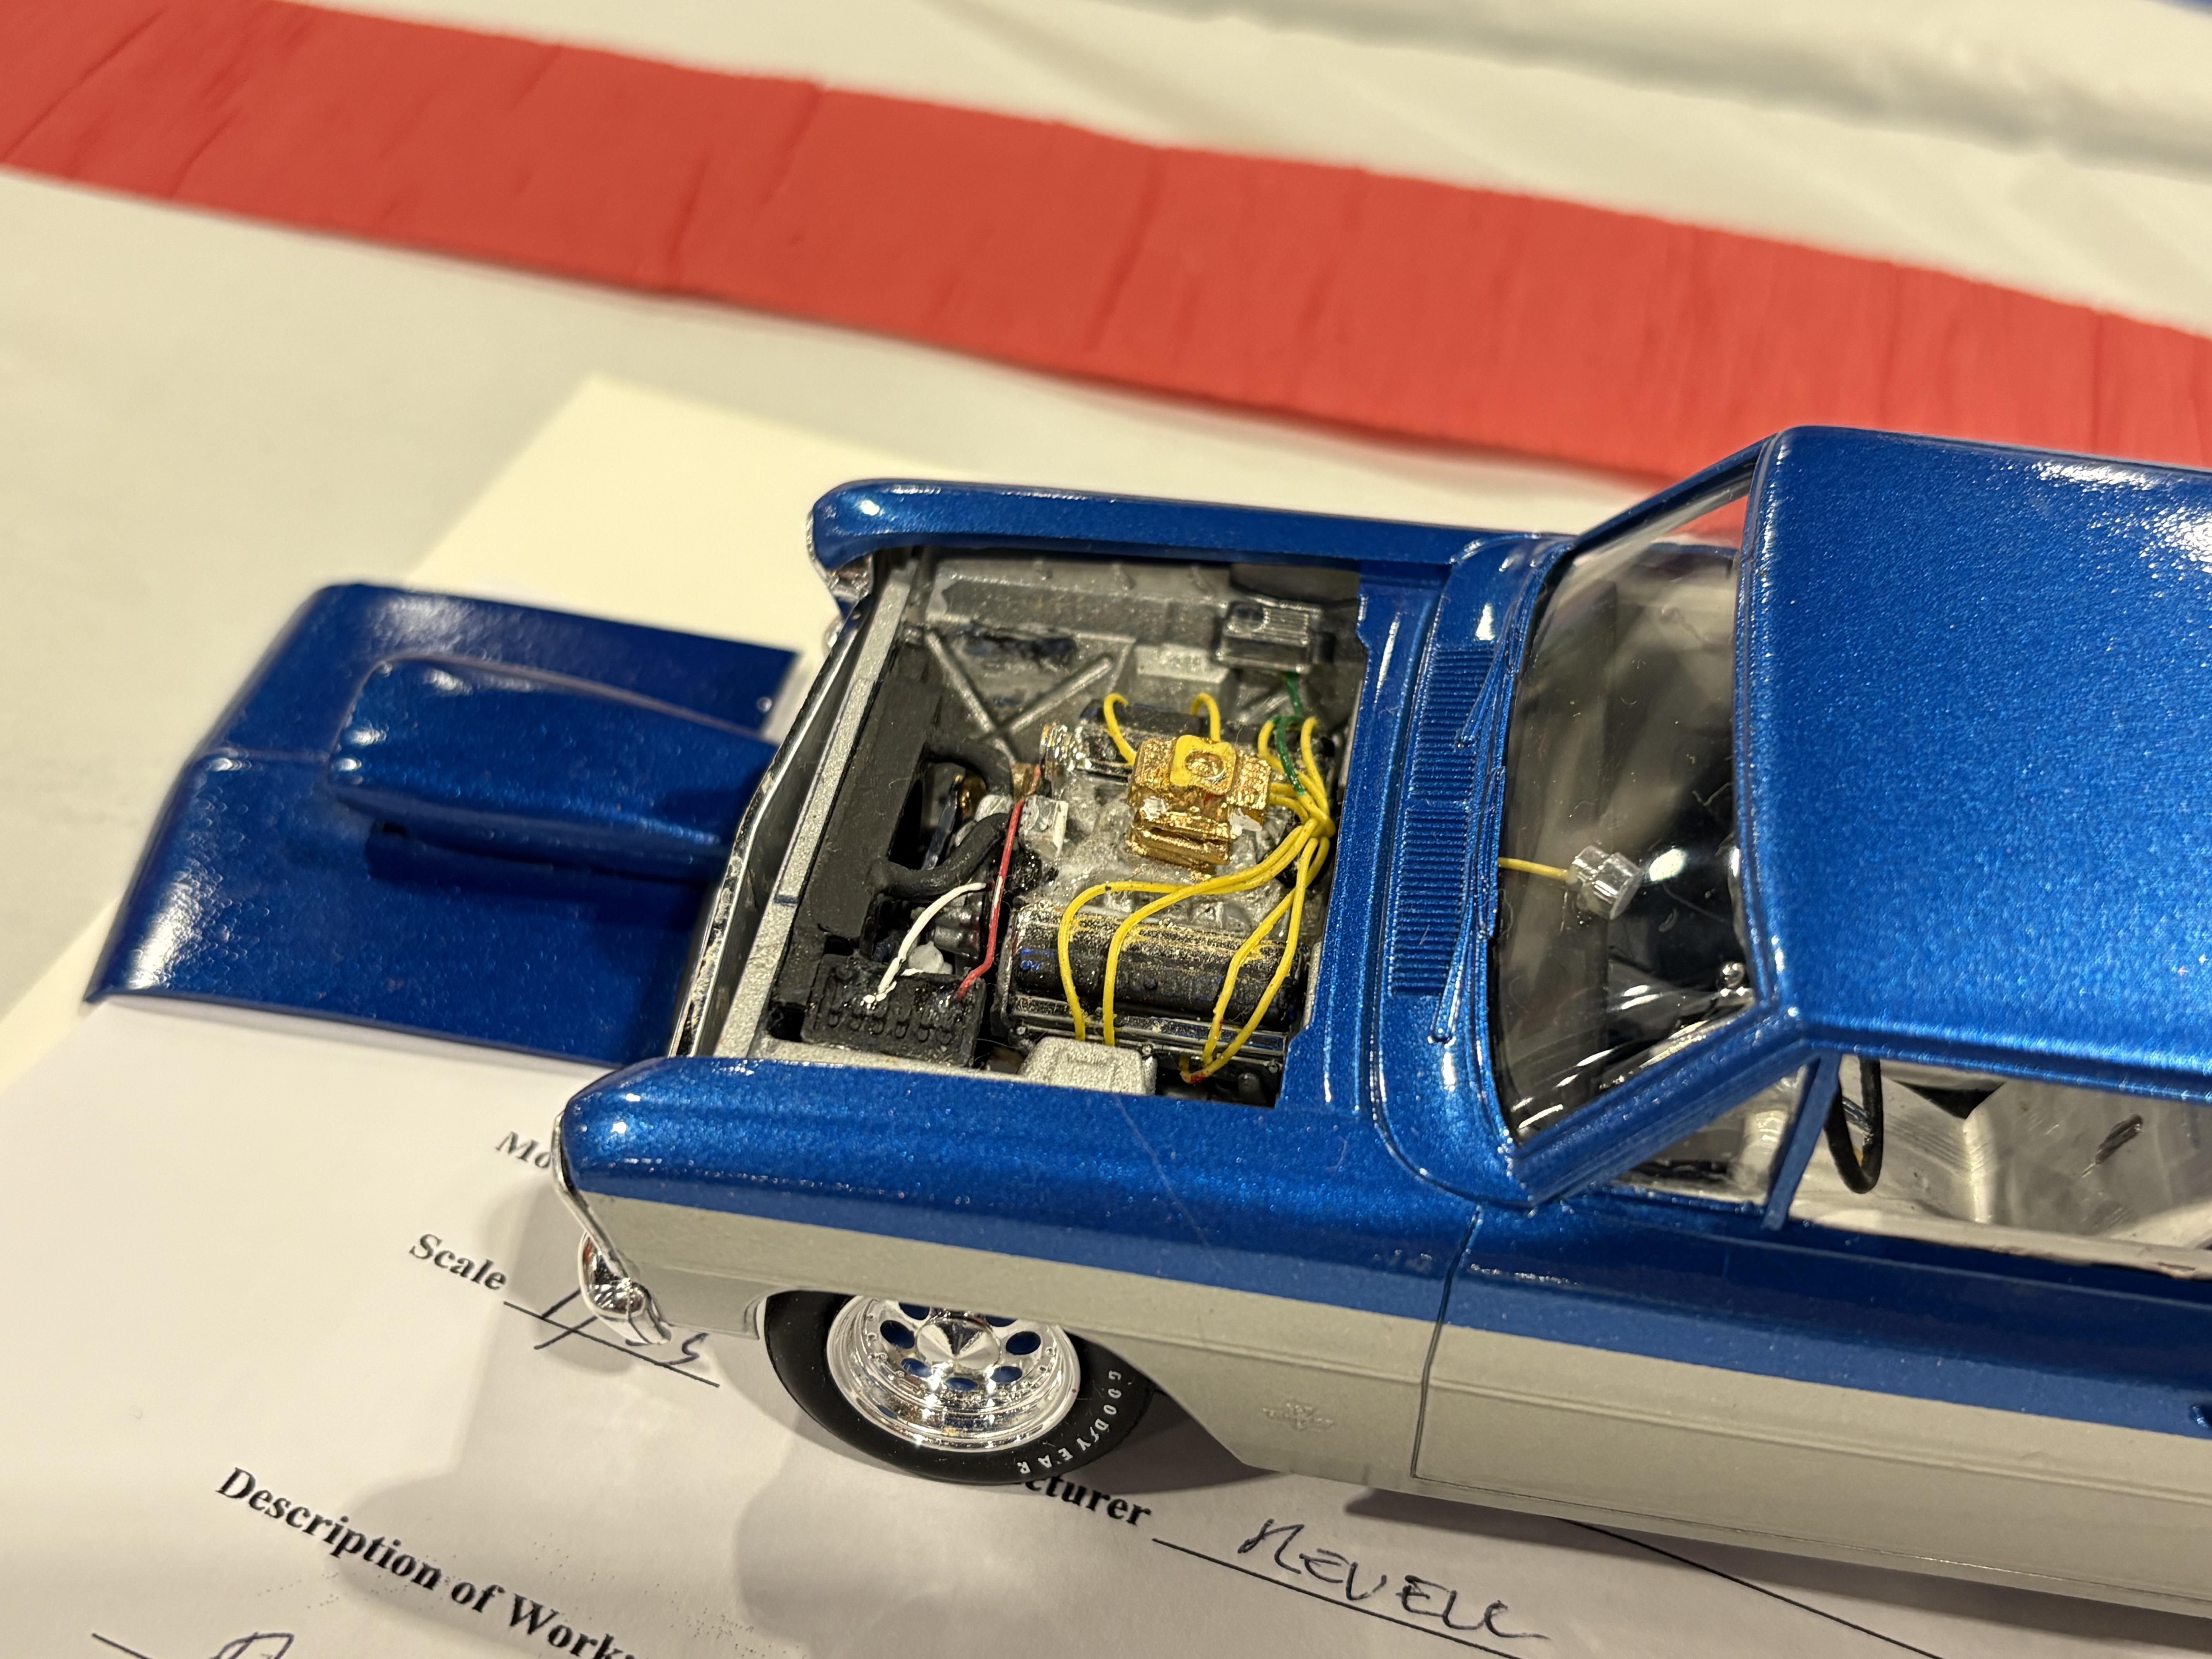
I don’t have any info beyond what is in the photos.
-
A merlin powered sleeper (ish)
LDO replied to stitchdup's topic in General Automotive Talk (Trucks and Cars)
If I win the lottery, I’ll build a hot rod with a Rolls-Royce Griffon. (2240ci). -
Got some free time this weekend. Doing some baking/cooking.
LDO replied to LDO's topic in The Off-Topic Lounge
The bread is so good. Date Prosciutto was a new recipe. Oh my gosh it’s good, but I would say it does not need the cheese. The Date Nut Spice bread will get less spice if I do it again. It was just a bit much. Seafood stew was also good, but it could use a tiny bit more spice. The recipe called for a little crushed red pepper, but l left it out because Mom is sensitive to any amount of spice. Maybe add a little to my bowl when I heat up some leftovers. I do love to cook. That was a lot for one day. -
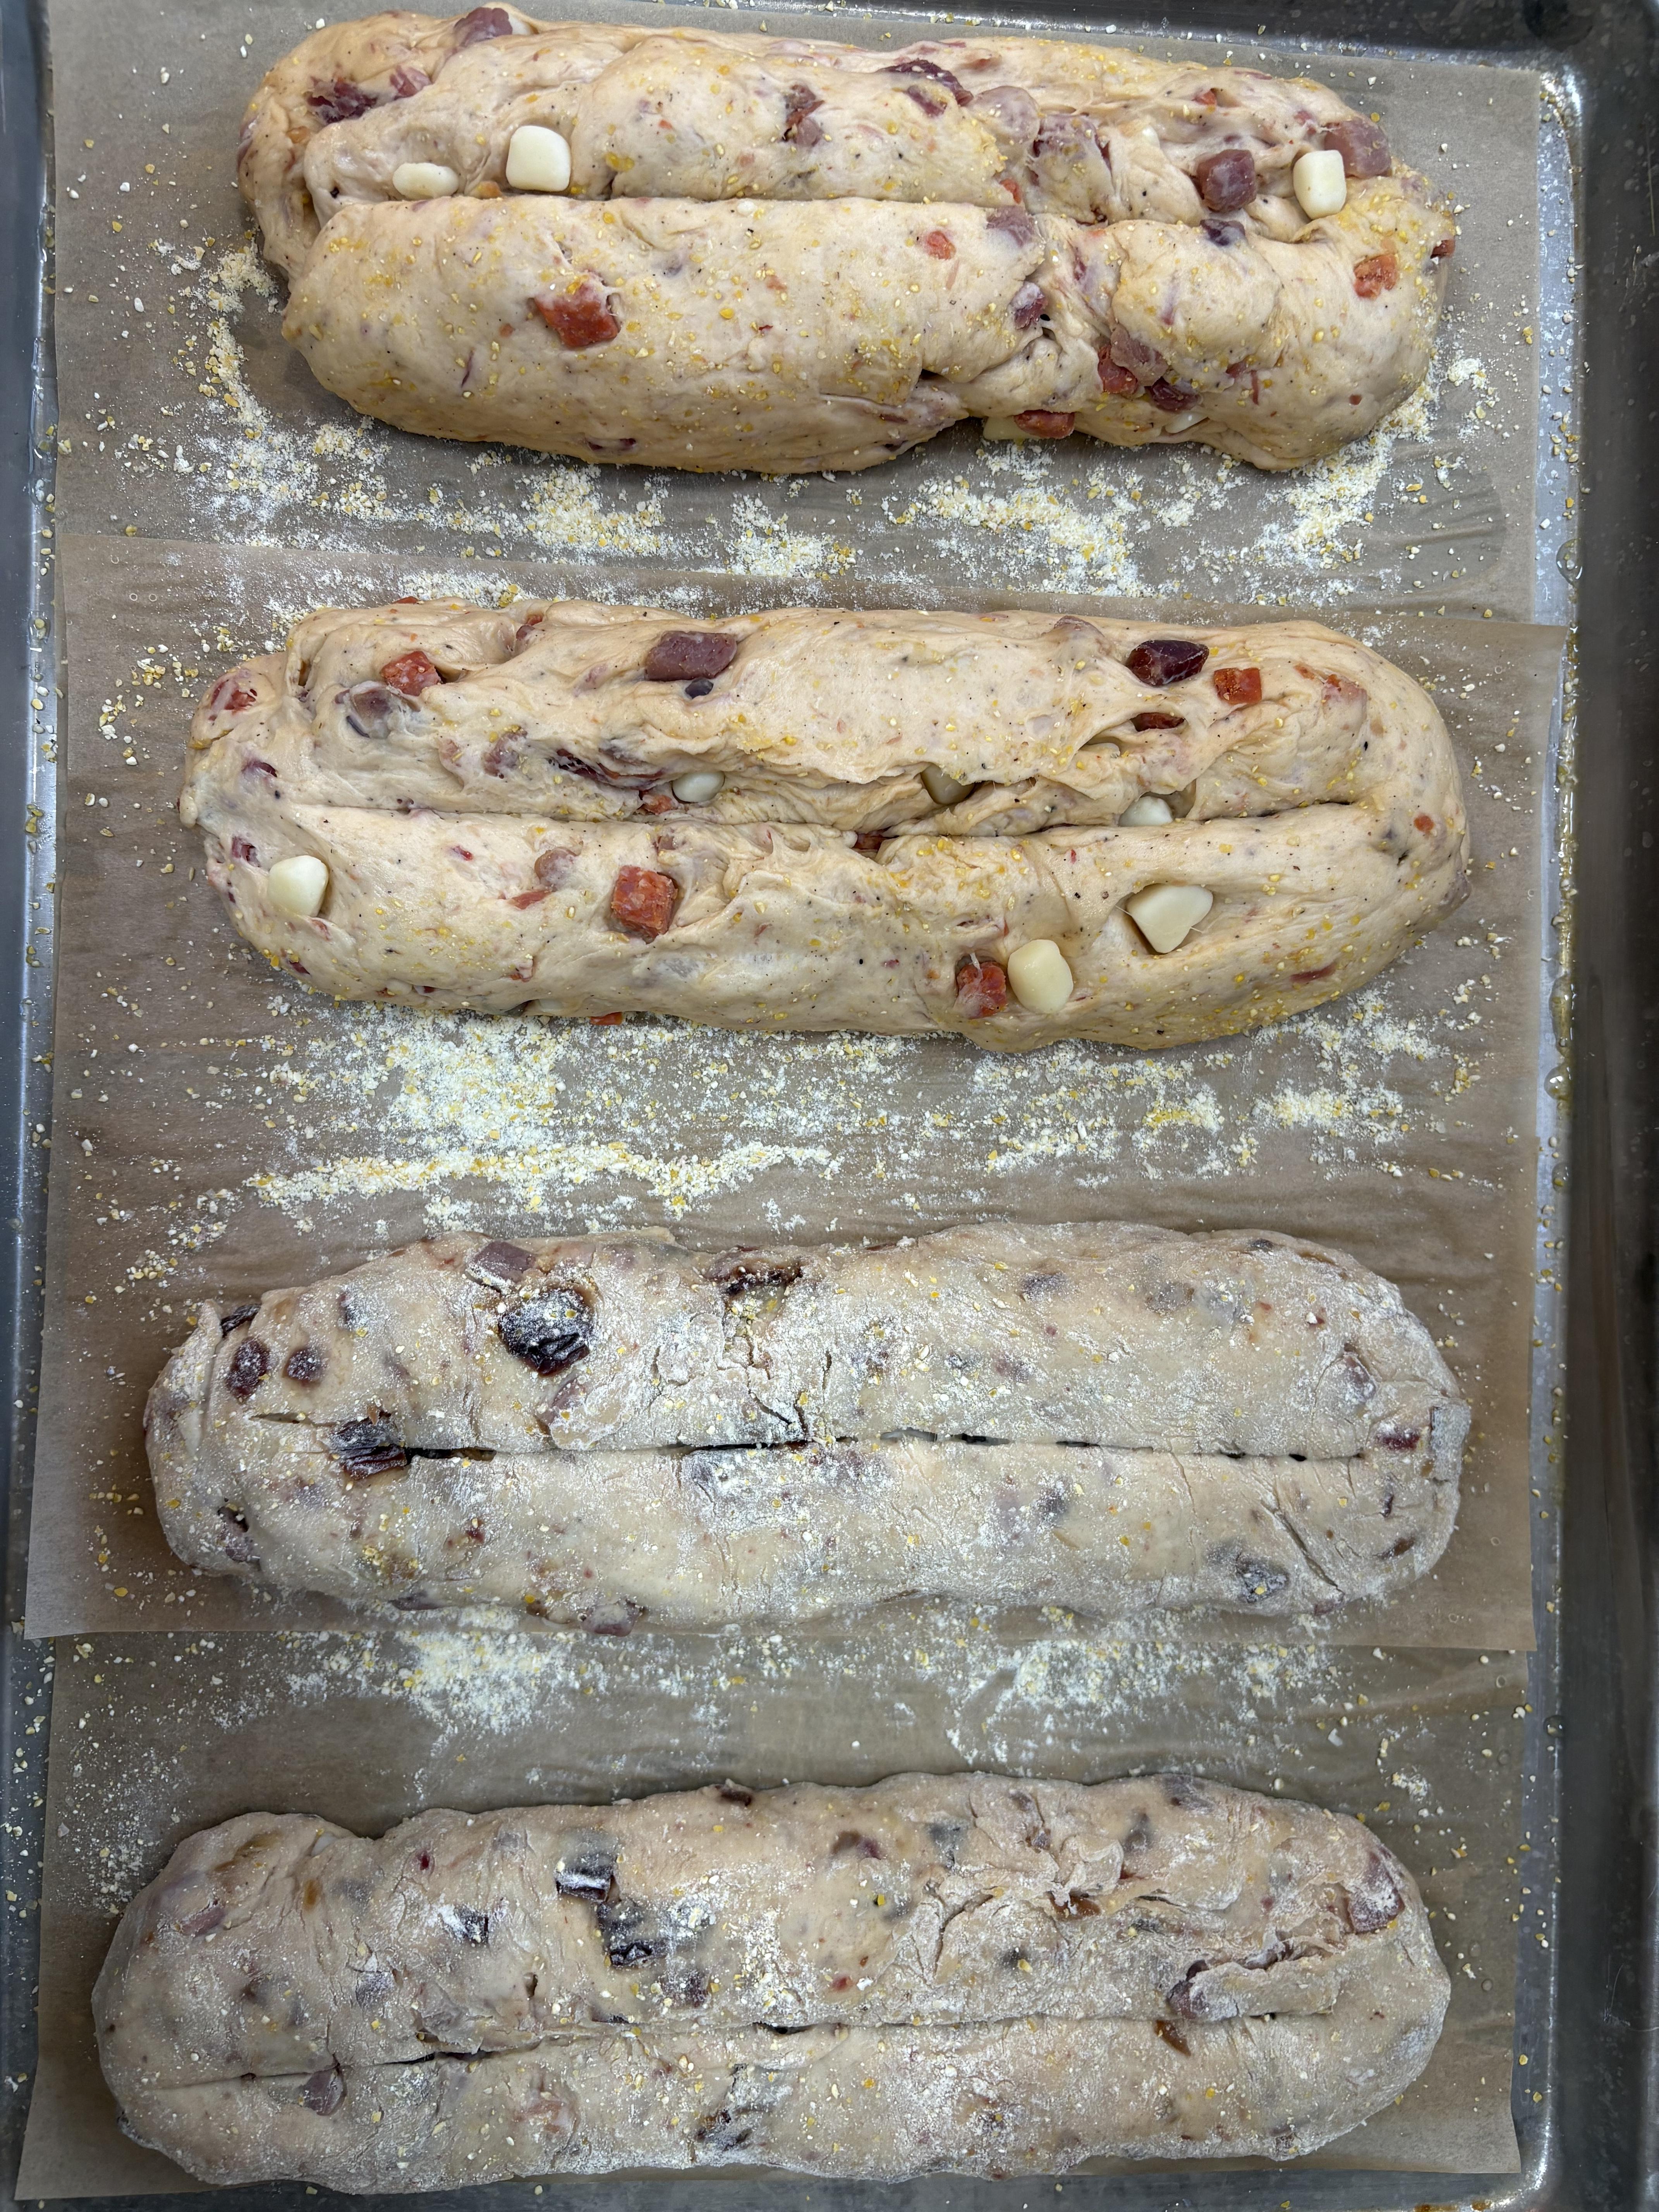
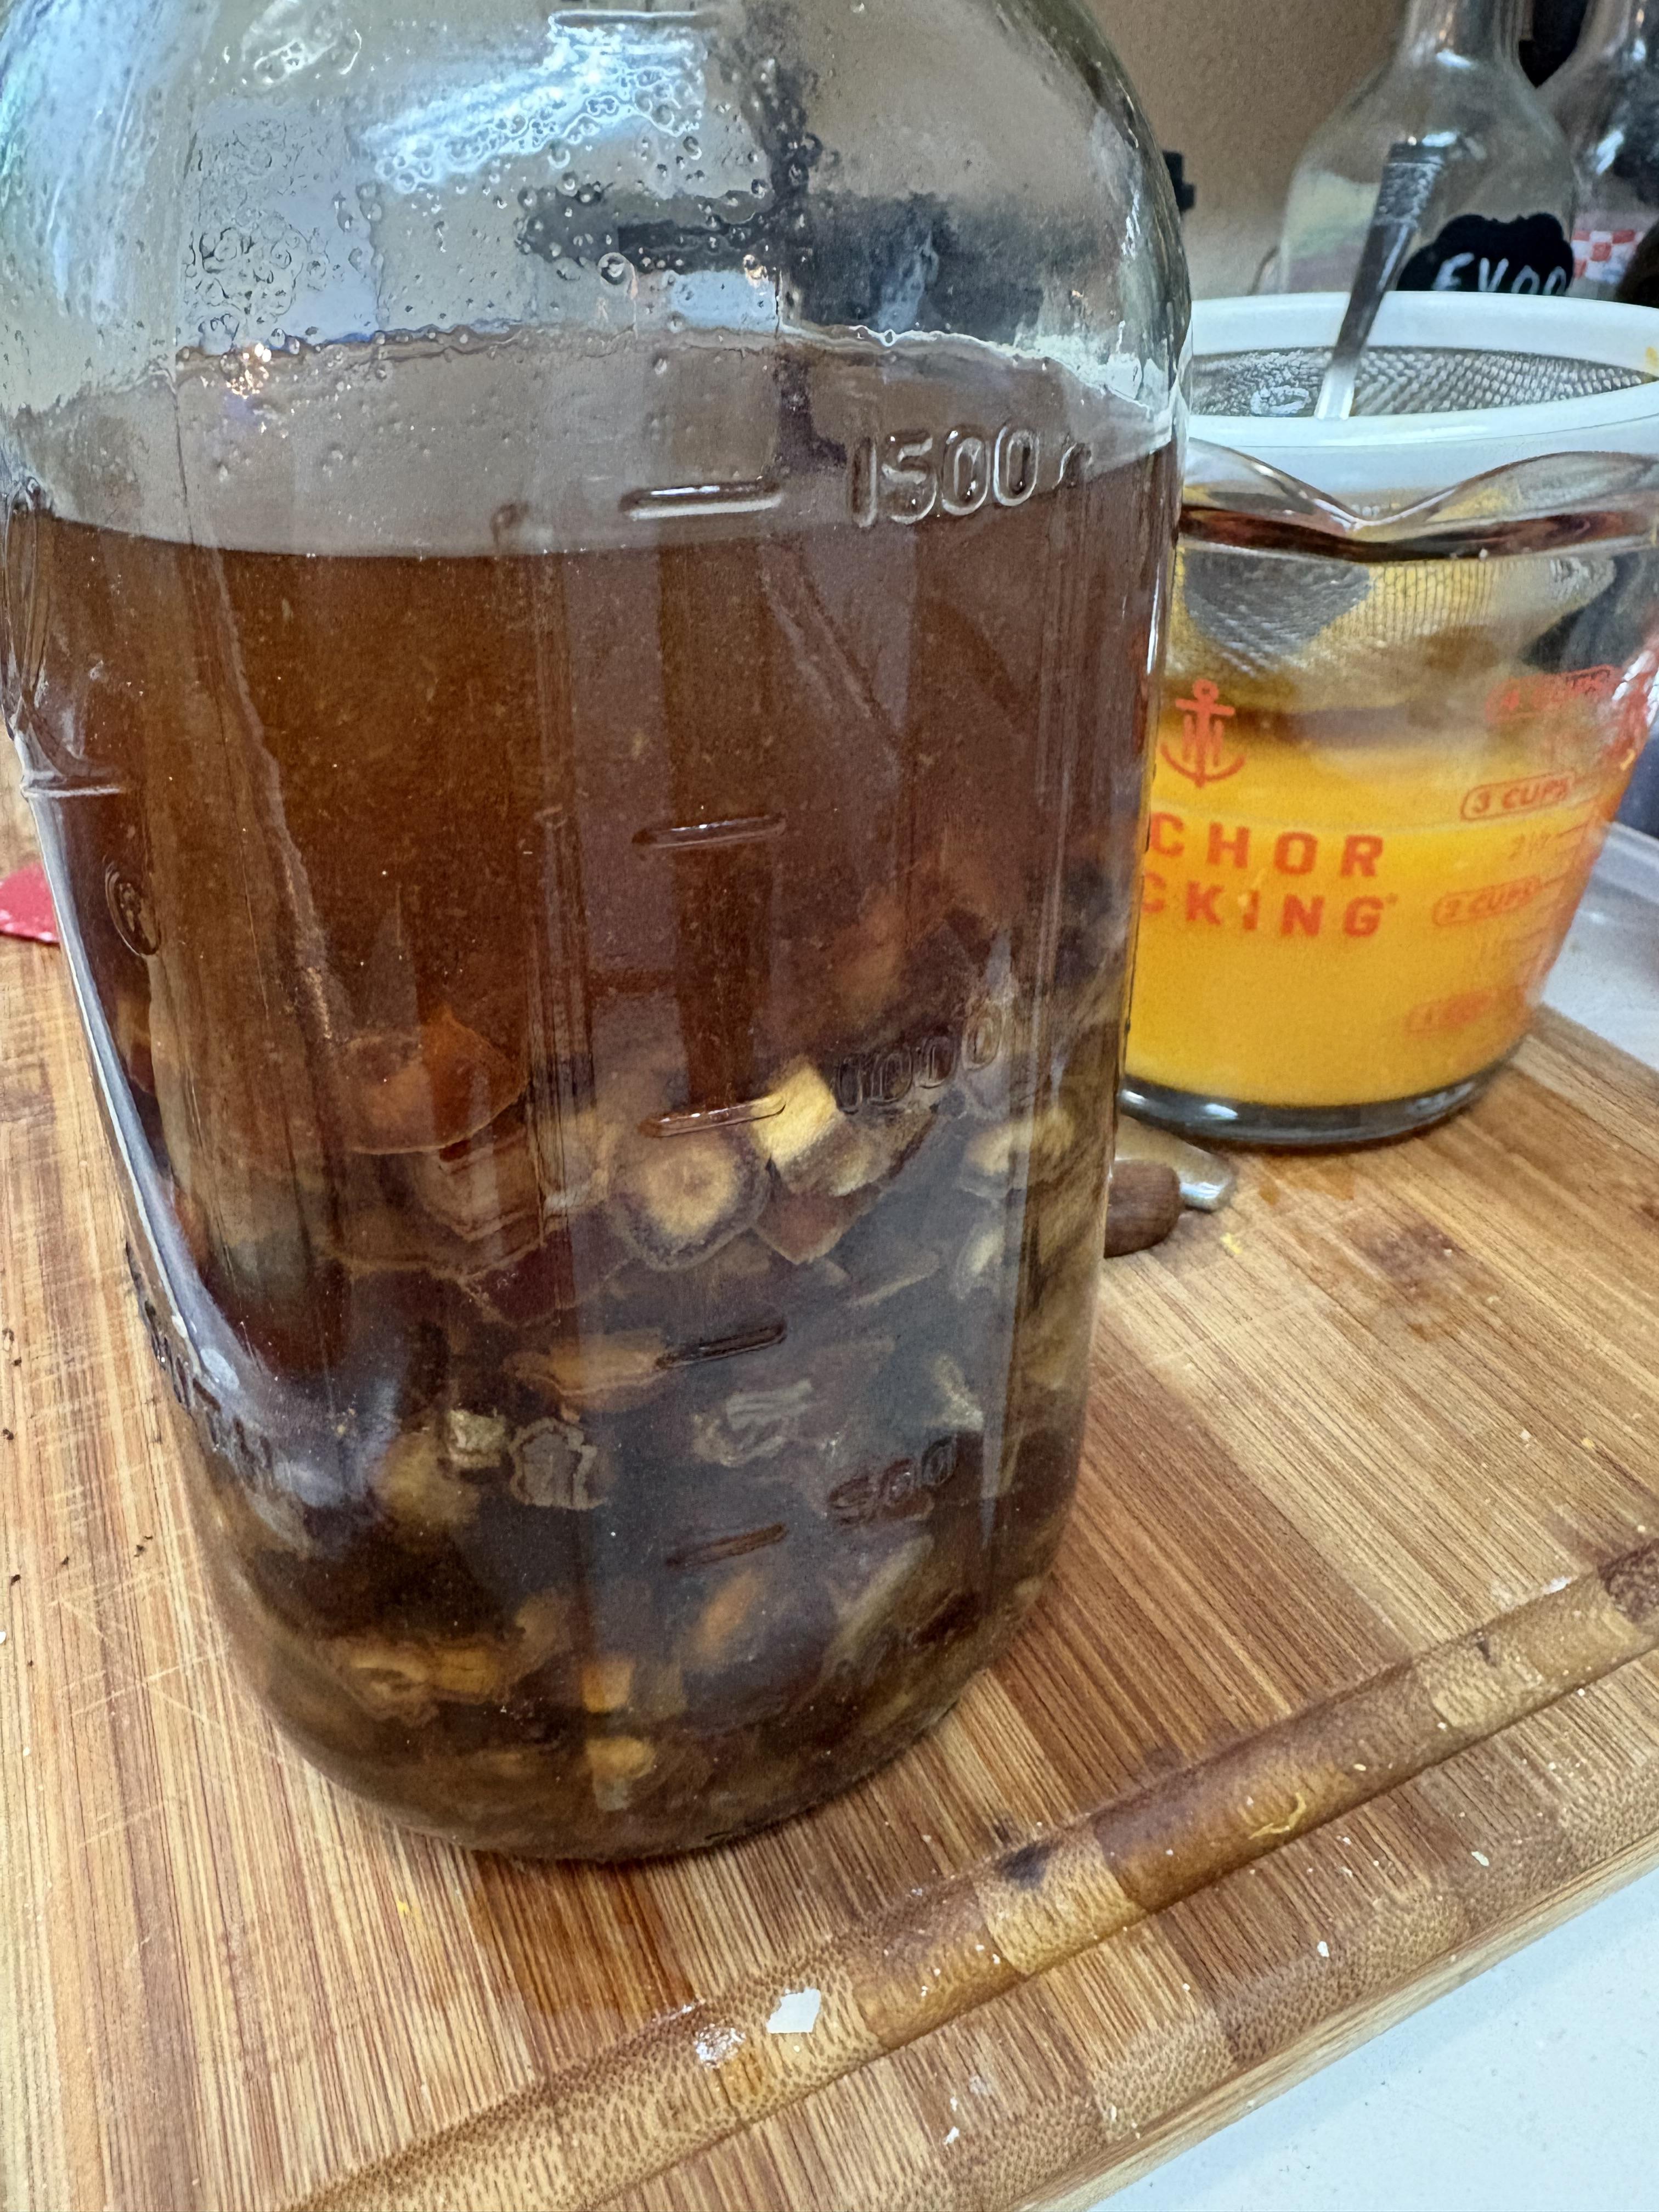
I got up early today and started on two batches of bread. The first is Prosciutto Bread from America’s Test Kitchen. It has Prosciutto, Capicola, Pepperoni, and cheese. They call for Provolone, but I started using Grana Padano. It tastes like Parmesan, but melts better. Up next is a variation on that recipe; Date Prosciutto bread inspired by Alton Brown’s pizza recipe. In addition to Dates and Prosciutto, it has Grana Padano and fresh Mozzarella cheese. This one is a new to me. I sampled a bit of dough and that was good. I have high hopes (of course). Next up is Spiced Date Nut Bread. Also a new recipe for me. I was wondering about infusing dates with some kind of liquor and wondering which would be best. I did a search and survey said…Whisky. I have a 1/2 gallon jar about 3/4 full of chopped dates soaking in 750ml of bourbon. In about a month, I’ll separate the two and use the dates for baking. The bourbon will get filtered and go back in the bottle. I saw some good ideas for the infused whisky, like adding some caramel sweetness to an Old Fashioned. Dinner tonight will be Cioppino, a seafood stew. I went to an H Mart (Asian Market. H is for Hancook, the Korean word for Korea). I got fresh cod, shrimp, scallops, squid, octopus, and frozen mussels. There are many different recipes. It’s something that was made at the end of the day by fishermen, using whatever they had left. There is a little model related activity. I’m setting up model building space downstairs for Mom. Also got her a couple artist’s oil paints for weathering model tanks. She also has access to my supplies. She will be starting a Tamiya 1/35 M4E3E8 (“Easy Eight”) soon. https://www.foodnetwork.com/recipes/alton-brown/grilled-pizza-three-ways-recipe-2118405.amp https://www.foodnetwork.com/recipes/ina-garten/date-nut-spice-bread-recipe-1917475.amp Pics: two loaves each of bread about to go into the oven. Prosciutto on top, Date Prosciutto on the bottom. Dates infusing into bourbon. That’s fresh squeezed orange juice in back, for the date nut bread.
-
My tribute to the Jim Keeler “Dodge Fever” 1968 Coronet
LDO replied to LDO's topic in WIP: Drag Racing Models
I haven’t had any bench time in a while. Construction has slowed down while bills have gone up. I work with a friend who owns a plumbing company if I get off work early. I will have two loans paid off soon. That will help. -
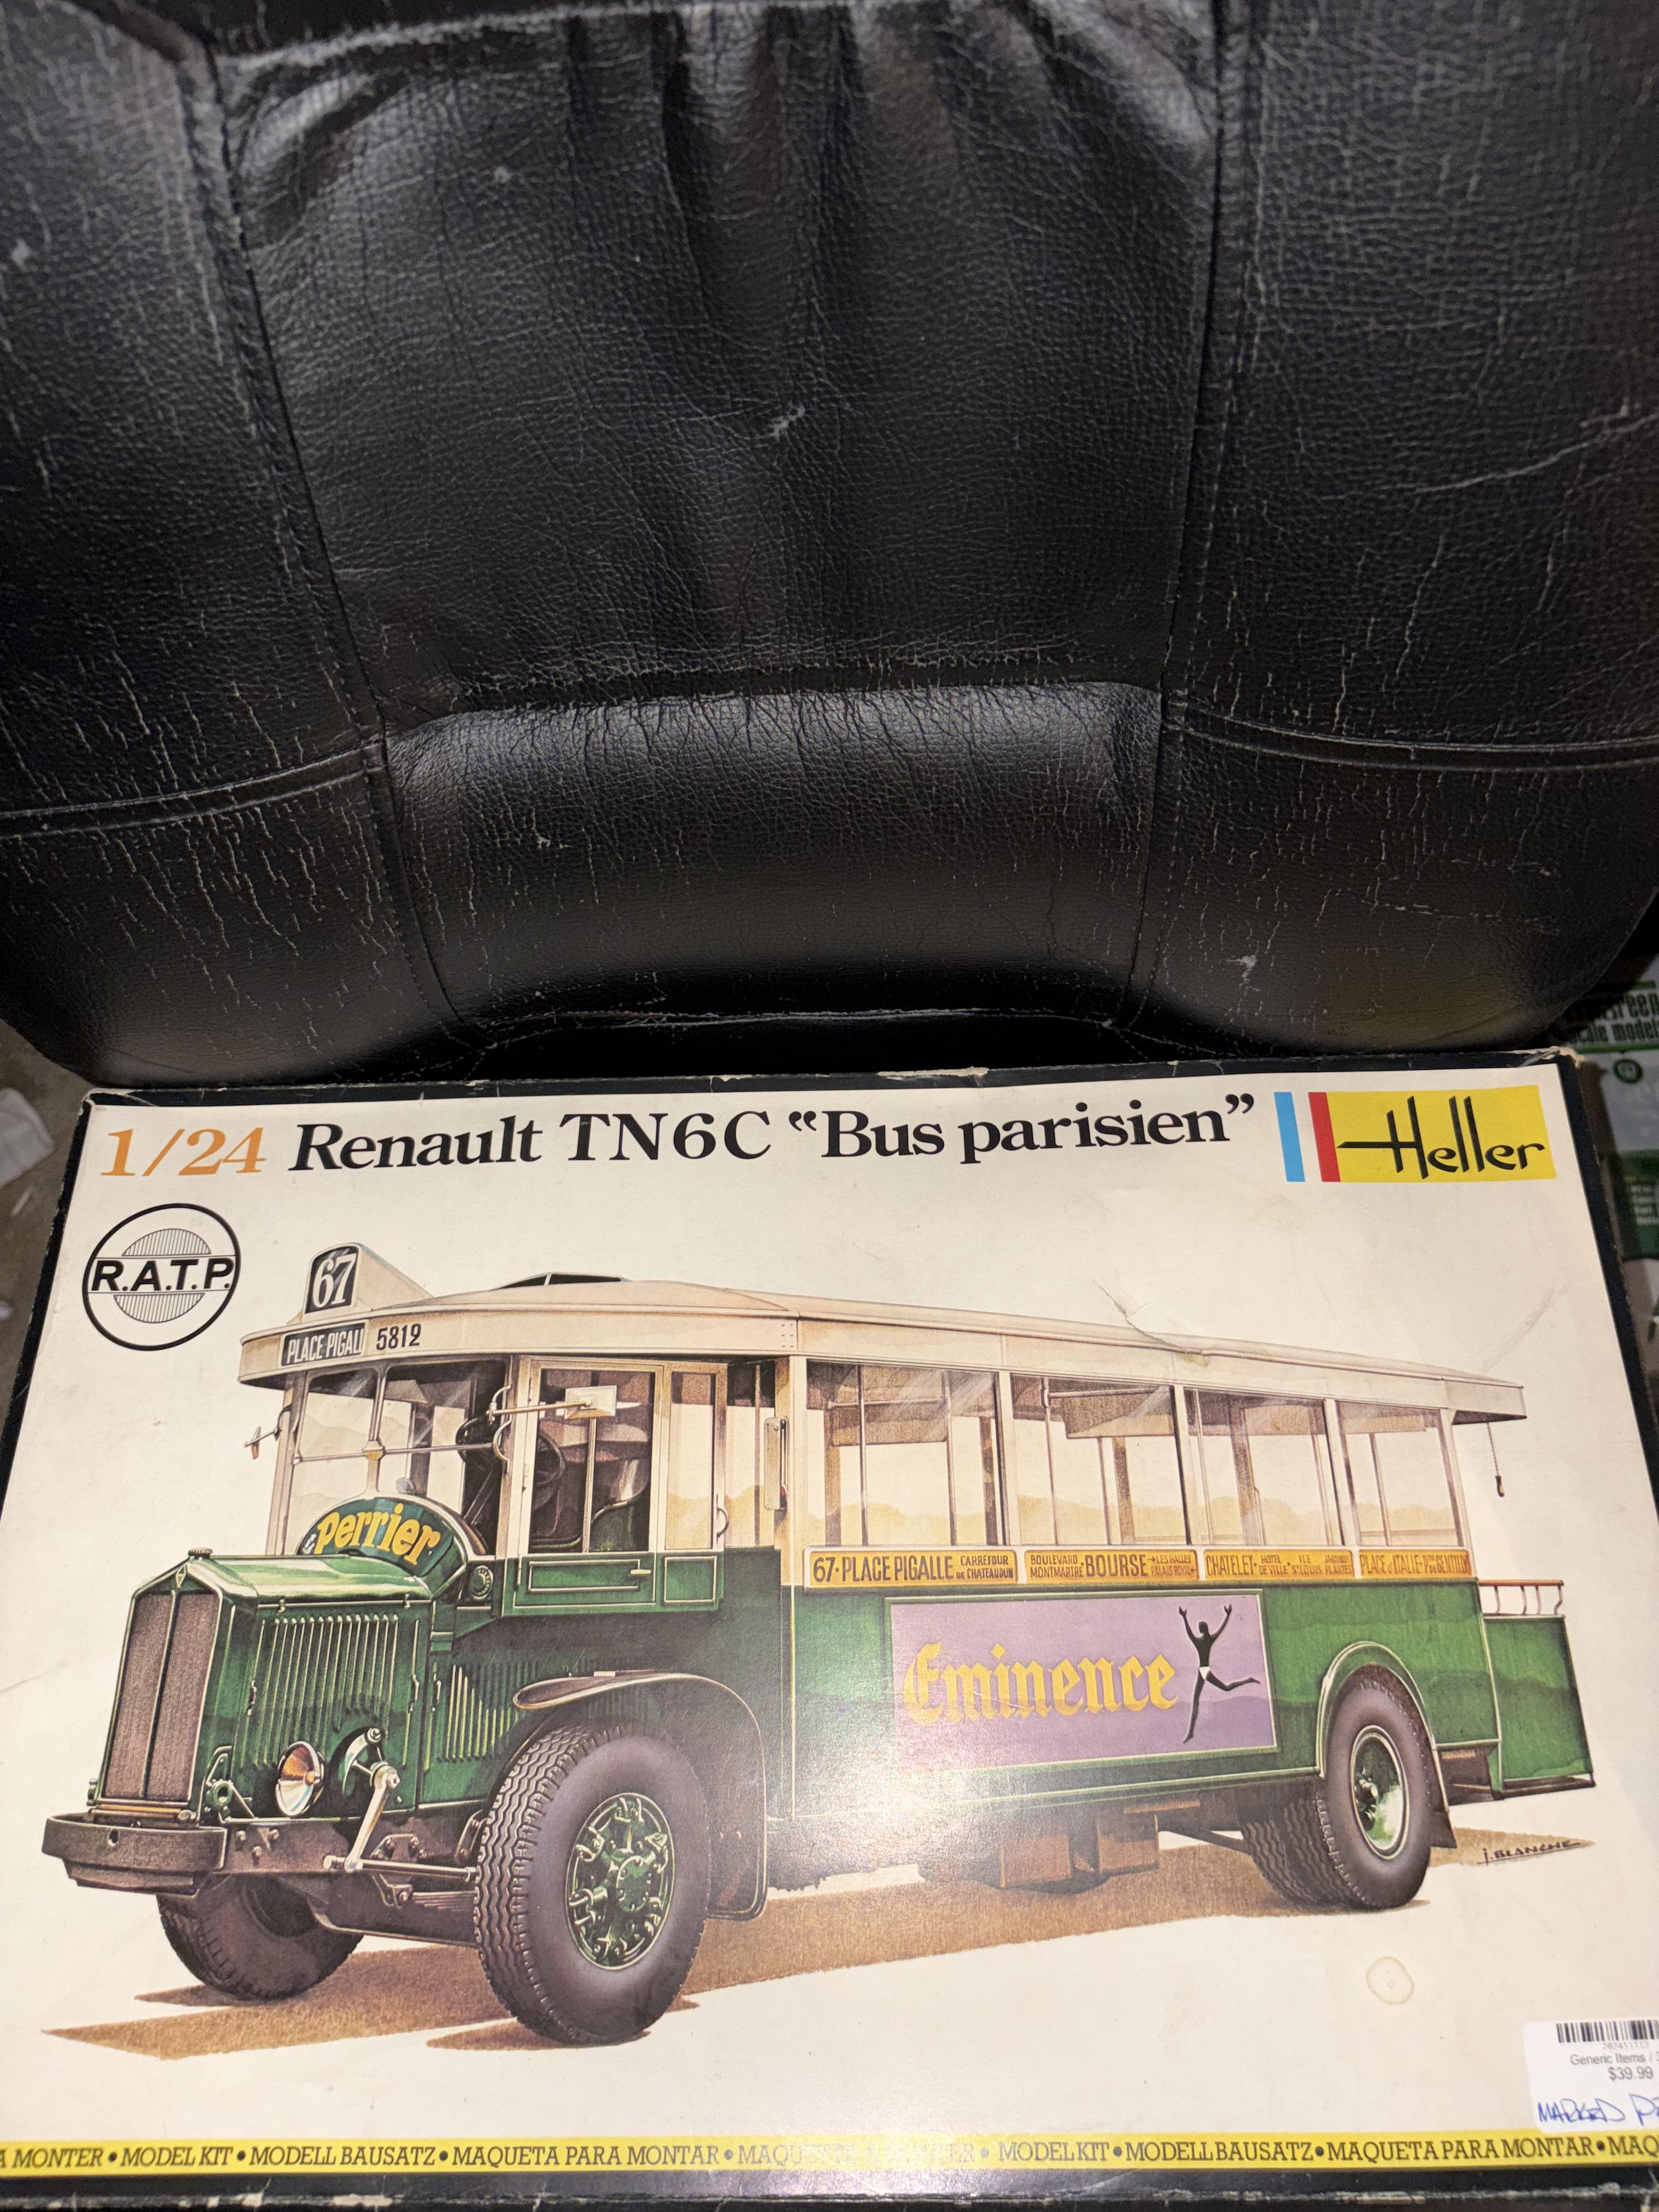
The box has seen better days, but the kit is all there and in good shape. I wonder if it ever had other advertisements/markings, or if any were owned by regular Jeans and made into RVs?
- 39,258 replies
-
- 6
-

-
- johan
- glue bombs
- (and 1 more)