
Hypermung
-
Posts
160 -
Joined
-
Last visited
Content Type
Profiles
Forums
Events
Gallery
Everything posted by Hypermung
-

WORKING Christmas Tree Project Circuit
Hypermung replied to Hypermung's topic in WIP: Drag Racing Models
I'll let you work that one out....lol -
WORKING Christmas Tree Project Circuit
Hypermung replied to Hypermung's topic in WIP: Drag Racing Models
G'day Bart. I will post a component list (when I make one up later). Check back next time. You may have to experiment with the value of the 22k resistor @ IC1 to get it to the speed you want the lights to flash. A larger value will slow the tree down, but as these resistors are only a few cents each, you can get a few larger ones & use which ever one in appropriate to obtain the speed you want. -
Hi Guys. I've been experimenting with some simple electronic circuits lately & thought someone here in the 'Drag' section could find some inspiration to build a 'WORKING' christmas tree out of coloured LED's. Now whilst the circuit may look complicated, it is actually simple to read. If you can read a road map you should be able to follow this. The circuit for the christmas tree comprises two cheap & readily available integrated circuits (ICs): a 555 timer & a 4017 decade counter. The 555 is wired as an pulsing oscillator in the simplest configuration possible, using only 2 additional components. This 'pulse' is fed into the input of IC2, which is called a 'decade' counter' because it counts to 10 (0 to 9) each time it detects a 'pulse' on pin 14. Each time IC2 is pulsed, it switches on the associated transistor (basically a 'switch') & the 3 LED's. For example, when the first output ("0") at pin 3 of IC2 is powered, transistor Q1 is switched on via the 10k base driver resistor. This transistor powers LED's 1,2 & 3 via the 1k current limiting resistor. This process is repeated for each output in turn (ie: 1,2,3,4 etc) each time IC2 is pulsed. ............ You can see that the 3 amber LED's on outputs 0-4 will light up in turn then go out (counting down from the top of the tree, so LED's 1,2 & 3 will occupt the top amber position of the tree, 3,4 &5 the second position etc). When the output on 4 is pulsed the green (GO) LED's come on, but as we want the green to stay on (& not go out), the outputs 5-9 are fed into the same green circuit using diodes (one way valve) to stop any back-feed into IC2. This way, the amber lights count down in turn (outputs 0-3) then the green stays on for 5 counts (outputs 4-9) before IC2 resets itself (via pin 15) & the process repeats itself again & again. I have also added 3 white LED's (LED 16, 17 & 18) that come on (& stay on) as soon as the circuit is switched on to simulate 'Staging' lights. Don't let the look of this circuit frighten you. As I said if you can read a road map you should be able to follow the 'Streets' on this. Think of the transistors as 'traffic lights', diodes as 'One way streets', & resistors as 'Speed humps'. I haven't put together a component list yet, but I'll get one together & post it if anyones interested. I know this is not an 'Electronics' forum, but this is something we all can use to take our dioramas to the next level.... I also have circuits for Fire / Police flashing lights, light 'Chasers' for billboards / diners etc, Knight Rider circuits, all using basically the same circuit with a few mods. Let me know if you think this is appropriate for this forum, & I might start a thread in the 'Tutorials' area
-
DOH.......The XC Falcon Hardtop 'Kit' I remembered seeing is in actual fact a resin money box... Still a cool money box though.
-
The HQ Holden in post #47 (not THAT actual one) is available in resin kit form from The Parts Box, as well as some really cool stuff you guys in the US may never have seen before.......I'll try to post a link to their site. http://www.thepartsbox.com/I also know I've seen a resin kit of the XC Falcon hardtop, but I'll have to search the dark corners of my memory to find that one
-
LOVE those dished, red rimmed white-walls... Yummy.
-
OOPS.... My link to Scale Dreams didn't work, but they are there if you google them...
-
SERIOUSLY though Michelle, seeing how you're painting it Chevy blue, if you had access to a plastic 350 block, the Model Car Garage photo etched dress up kit for the Chev is definately the way to go. The only down-side is that you don't get the machined aluminium parts, but let's face it, they're all available seperately from Scale Dreams anyway. http://stores.scaledreams.com/StoreFront.bok. All the machined stuff you really get with the Scale Repros Plus 350 is the air cleaner (the MCG one is nicer anyway), a few pulleys, alternator, distributor, some wires, & that's about it. I will add here that I am not in any way affiliated with Scale Dreams or the MCG, BUT I will give credit where credit's due. Those M/T valve covers & air cleaner are pure eye candy & worth every cent.....
-
There's one on evilpay @ the moment... http://www.ebay.com/itm/METAL-350-Chevy-Engine-Kit-Scale-Repro-Plus-1-25-/350490897835?pt=LH_DefaultDomain_0&hash=item519ae2adab
-
I have both these in my stash & I can tell you the Scale Repros 350 is nice, but mine has a few casting issues that will easily be rectified with a little bit of bondo. That is as long as you want to paint the engine of course. The air filter is a little tacky, but can be used with some detailing. The milled aluminium parts are nice though. As the 350 is a solid lump of metal, it also has a considerable weight factor (for its size), so the front suspension had better be up to scratch. The PE Chevy dress up kit is nothing short of spectacular & would be my choice. That air cleaner is a 10/10 on its own, & I seriously wished they made the same kit for a Big Block Chrysler as well (I'd buy 10 straight up). It would also be possible to file the top of the SR 350 valve covers flat & use the PE parts on it..... If you're going to paint the engine, why not mate the resin heads to the cast metal block & use both to make one very nice display?
-
Some unreal Ebay prices.
Hypermung replied to Brutalform's topic in General Automotive Talk (Trucks and Cars)
Maybe over there. Ausie ebay says postage is $38.60. Gotta love ebays policies...... (not) -
Some unreal Ebay prices.
Hypermung replied to Brutalform's topic in General Automotive Talk (Trucks and Cars)
My main beef is some sellers (mainly from Thailand it seems, but the USA is also in there) that are gouging on the cost of postage. I recently had an experience with a fellow from the 'fore mentioned Asian country who wouldn't offer a discount on the individual postage cost for 4 kits sent as 1 package. I ended up paying $54 postage & the 'Dealer' spent only $16 to post the package to me, pocketing the rest as a 'Bonus'. After enquiring to him about the discrepancy in the postage cost, he replied 'That's what all the sellers charge. Have a nice day'. Now I have NEVER left anyone negative feedback before, but I made sure that I finished my feedback comment (after the bright red negative symbol) with a "Now have a nice day yourself ".... As I said, the good 'ole USA is no stranger to a similar practice as well. Dealers INSISTING on priority mail prices ('cause I'm in Oz) @ 50% more than usual, then sending it first class & pocketing 'the bonus' -
GET THEM OUT NICK.....This sounds like the start of a 'Forward Look' community build to me... I'd be in that for sure.
-
DOH.... Typing too fast again & not proof reading... YES that is definately Redhead, with a capital Rrrrrr.. By the way, d'yall know what an Ash Blond is?... It's a Redhead with all the fire f(taken) outa her!!. Keep this one cummin Derrick. Mmmmmm... Sedan Deliveries.
-
They have changed the laws over here whereby any car can be kept LHD if it's older than (I think) about 1986?. You can still import anything after that year, but it must be convertad to RHD. But there's NO WAY I'm going to pull that beautiful LHD dash out to put in a plain RHD 58 Dodge dash in it because thats what all the Aussie assembled 59's got. Yeah your'e right... Most just stand there with their mouth agape.... The kids are the funniest though 'LOOK MUM.It's the batmobile'
-
You mean like this?. Yep, I like that too. Then again, I'm a sucker for a Sedan Delivery (& a readhead.... Mmmmm readheads)
-
The kit itself is a 1980's re-issue (Excell, I think?) of the original Johan kit, long out of production, but they do come up on ebay from time to time. But they NEVER go cheaply. You can generally find factory built re-issues all the time though, & then just disassemble it as they're only held together with screws. Co-incidently, if you compare the 80's re-issue next to an original, the Johan is about 1/4" shorter than the re-issue??.. New tooling?.. The re-issues don't have an interior, but Modelhaus make an interior tub. Modelhaus also do a 59 Dodge convertible kit that is very nice. I don't have one of those (YET) lol
-
More work done to the 59 Dodge. I won't clutter this thread with countless pix of every little detail, but if you'd like to see more, I've started a seperate thread on this build in the 'On the workbench' section.
-
I've also recently received some nice stuff from Modelhaus. Nice chromed tail light housings & lenses, correct 59 spinner hubcaps (very nice), dash assembly & steering wheel. But I did stuff up though. I was going to use the interior from the 58 Plymouth, but on closer inspection the door trims & seat covers are all wrong (of course), & some idiot forgot to order the 59 Dodge interior tub from Modelhaus @ the same time..... DOH... I guess I'll just have to wait another 8 or 9 weeks until it's made & sent to me. I suppose that will give me some time to detail the engine & under body. I also got some photo etched parts, some of which may find it's way into the Dodge
-
Yah, I like the drip rail there as well.... BUT, I can really see the 2nd image (the smooth look) with a full black vinyl top down to the belt line.... VERY classy.
-
I love the Sedan Delivery idea. Are you going to keep the drip rail above the rear windows or delete it. Some pix for you to ponder over
-
I'll either paint it black (like my 1:1) or otherwise this 2 tone Aqua & white really grabs my eye.
-
Another update: I've used the fan belts, generator & power steering pump from the 58 Belvy kit on the '383'. Also test fit the radiator, battery & power brake setup. It all appears to fit ok @ this stage. The gaps on the edge of the engine bay will be filled with some sheet styrene to mate it to the body when it finally goes together.Lookong fairly close to the real thing
-
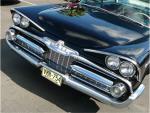
I just thought I'd throw in a few pix of my 1:1 ride
-
Thanks for the encouragement Guys. It's very appreciated. I don't need reference pix thanks as I can always go to the shed to reference my 1:1 I have been collecting 59 Dodges for a number of years now. I still have in my stash 2 unbuilt re-issues (1 with the uncommon green tint 'Solex' glass), & 2 factory assembled re-issues. I also have a number of Johan originals... I guess you could say I love my 59 Dodges