
Mopar - D
-
Posts
6,092 -
Joined
-
Last visited
Content Type
Profiles
Forums
Events
Gallery
Everything posted by Mopar - D
-
Jim thanks for the hoistory on the "Surburban" name that Plymouth used and also GM's. Added some more detail on the engine glued the K frame in and added black to the center hub caps. I also glued in the head liner next will be to add the support bars on it.
-
Thanks Raoul I've got the 383 Super Comando so duel exhaust it is.
-
Thanks for the comments and ideas for my build. I've been checking to see if Plymouth offered duel exhaust with the 383 on the wagon? I've seen pictures of one but it could of been done after market.
-
Here's the 2 nd head liner and this is where I'm going with the rear grill and bumper. My chrome peeled when I masked off the back up lights. Will need to come up with a fix for that.
-
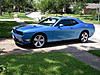
Nice color of blue Mike it fits this year Satellite. What scale is this 1/24 or 1/25?
-
You could also go with that the engine was replaced with a 72
-
Thanks Jim the head liner came out better after it dryied it took like 3 days. Thanks Carl I like the lighter blue interior better. Thanks Tom yea I'm not done with the left side I'm like you I think I'm done until I take the pictures and then I see that I'm not. Yesterday was my grand daughters birthday so I did not get time to fix it before posting.
-
Started some BMF on the side trim molding and trim paint before clear coating.
-
Think Pink: Engine In, Suspension Started
Mopar - D replied to FASTBACK340's topic in WIP: Model Cars
John Heres a 71 to give you some encouragement on your build. Picture is from the Hemi Hideout just out side of Houston. -
Nice builds
-
Looks good nice change out on the roof.
-
Al here are my C-Body MOPAR's to show some more colors. The 300 is Model Master Black, Poloia MCW -Electric Blue and the Fury is Model master Bronze with a white vinyl.
-
Here's try #2 with a napkin I think this will much better with a finer texture.
-
Think Pink: Engine In, Suspension Started
Mopar - D replied to FASTBACK340's topic in WIP: Model Cars
John glad to see you back on the 70 Cuda. I saw your 68 in the magazine congrad's !! -
Looking good.
-
Very interesting project your starting. I'll be following along.
-
Thanks Dennis, Tommy the kit comes with tail lights for the Fury I trim level that only had the lights on the outer ends. Tom your seats look good. I've got Cinninbun napkin drying in place now.
-
Looks good so far. Back in the 60's and 70's we were in station wagons pre mini van era.
-
Looking good keep it up.
-
Thanks Gary I know about the head liner bars you mentioned and was already planning on putting them on. Ran over to our mall with my wife and picked up some napkins that have a smaller texture pateren that I'm going to try.
-
Thanks Tom I was wondering about that too it seamed to big a pattern. Well I did not like the color of the interior as it looked to dark for what I was trying to get so now it's a lighter blue with dark inserts I think it's closer to what it should be now. Also I now have color on the body. I added some black wash on the wheels too.
-
I'm going to try to add some texture for the headliner seeing how it is pretty big. I've seen where others have used a wet paper towel coated with Elmer's glue to create the shell and then paint it. Here is my wet towel with Elmer's glue setting up and the cut out after it dried. Also did a test fit to make sure everything still fits and to see how the wheels look in the body.
-
Looking good man you have a lot of work ahead you to get this done by the 15th.
-
Going to be a cool rebuild Mike. Are you going with a plane Jane sleeper look?
-
Fire Truck Restoration
Mopar - D replied to Sam I Am's topic in WIP: Model Trucks: Big Rigs and Heavy Equipment
Sam great project looks like you will be able to clean it up. I think the site moderators will move your post over to the big rigs section.