Rockford
-
Posts
1,931 -
Joined
-
Last visited
Content Type
Profiles
Forums
Events
Gallery
Everything posted by Rockford
-

Night to day
Rockford replied to Rockford's topic in WIP: Model Trucks: Big Rigs and Heavy Equipment
? -
Night to day
Rockford replied to Rockford's topic in WIP: Model Trucks: Big Rigs and Heavy Equipment
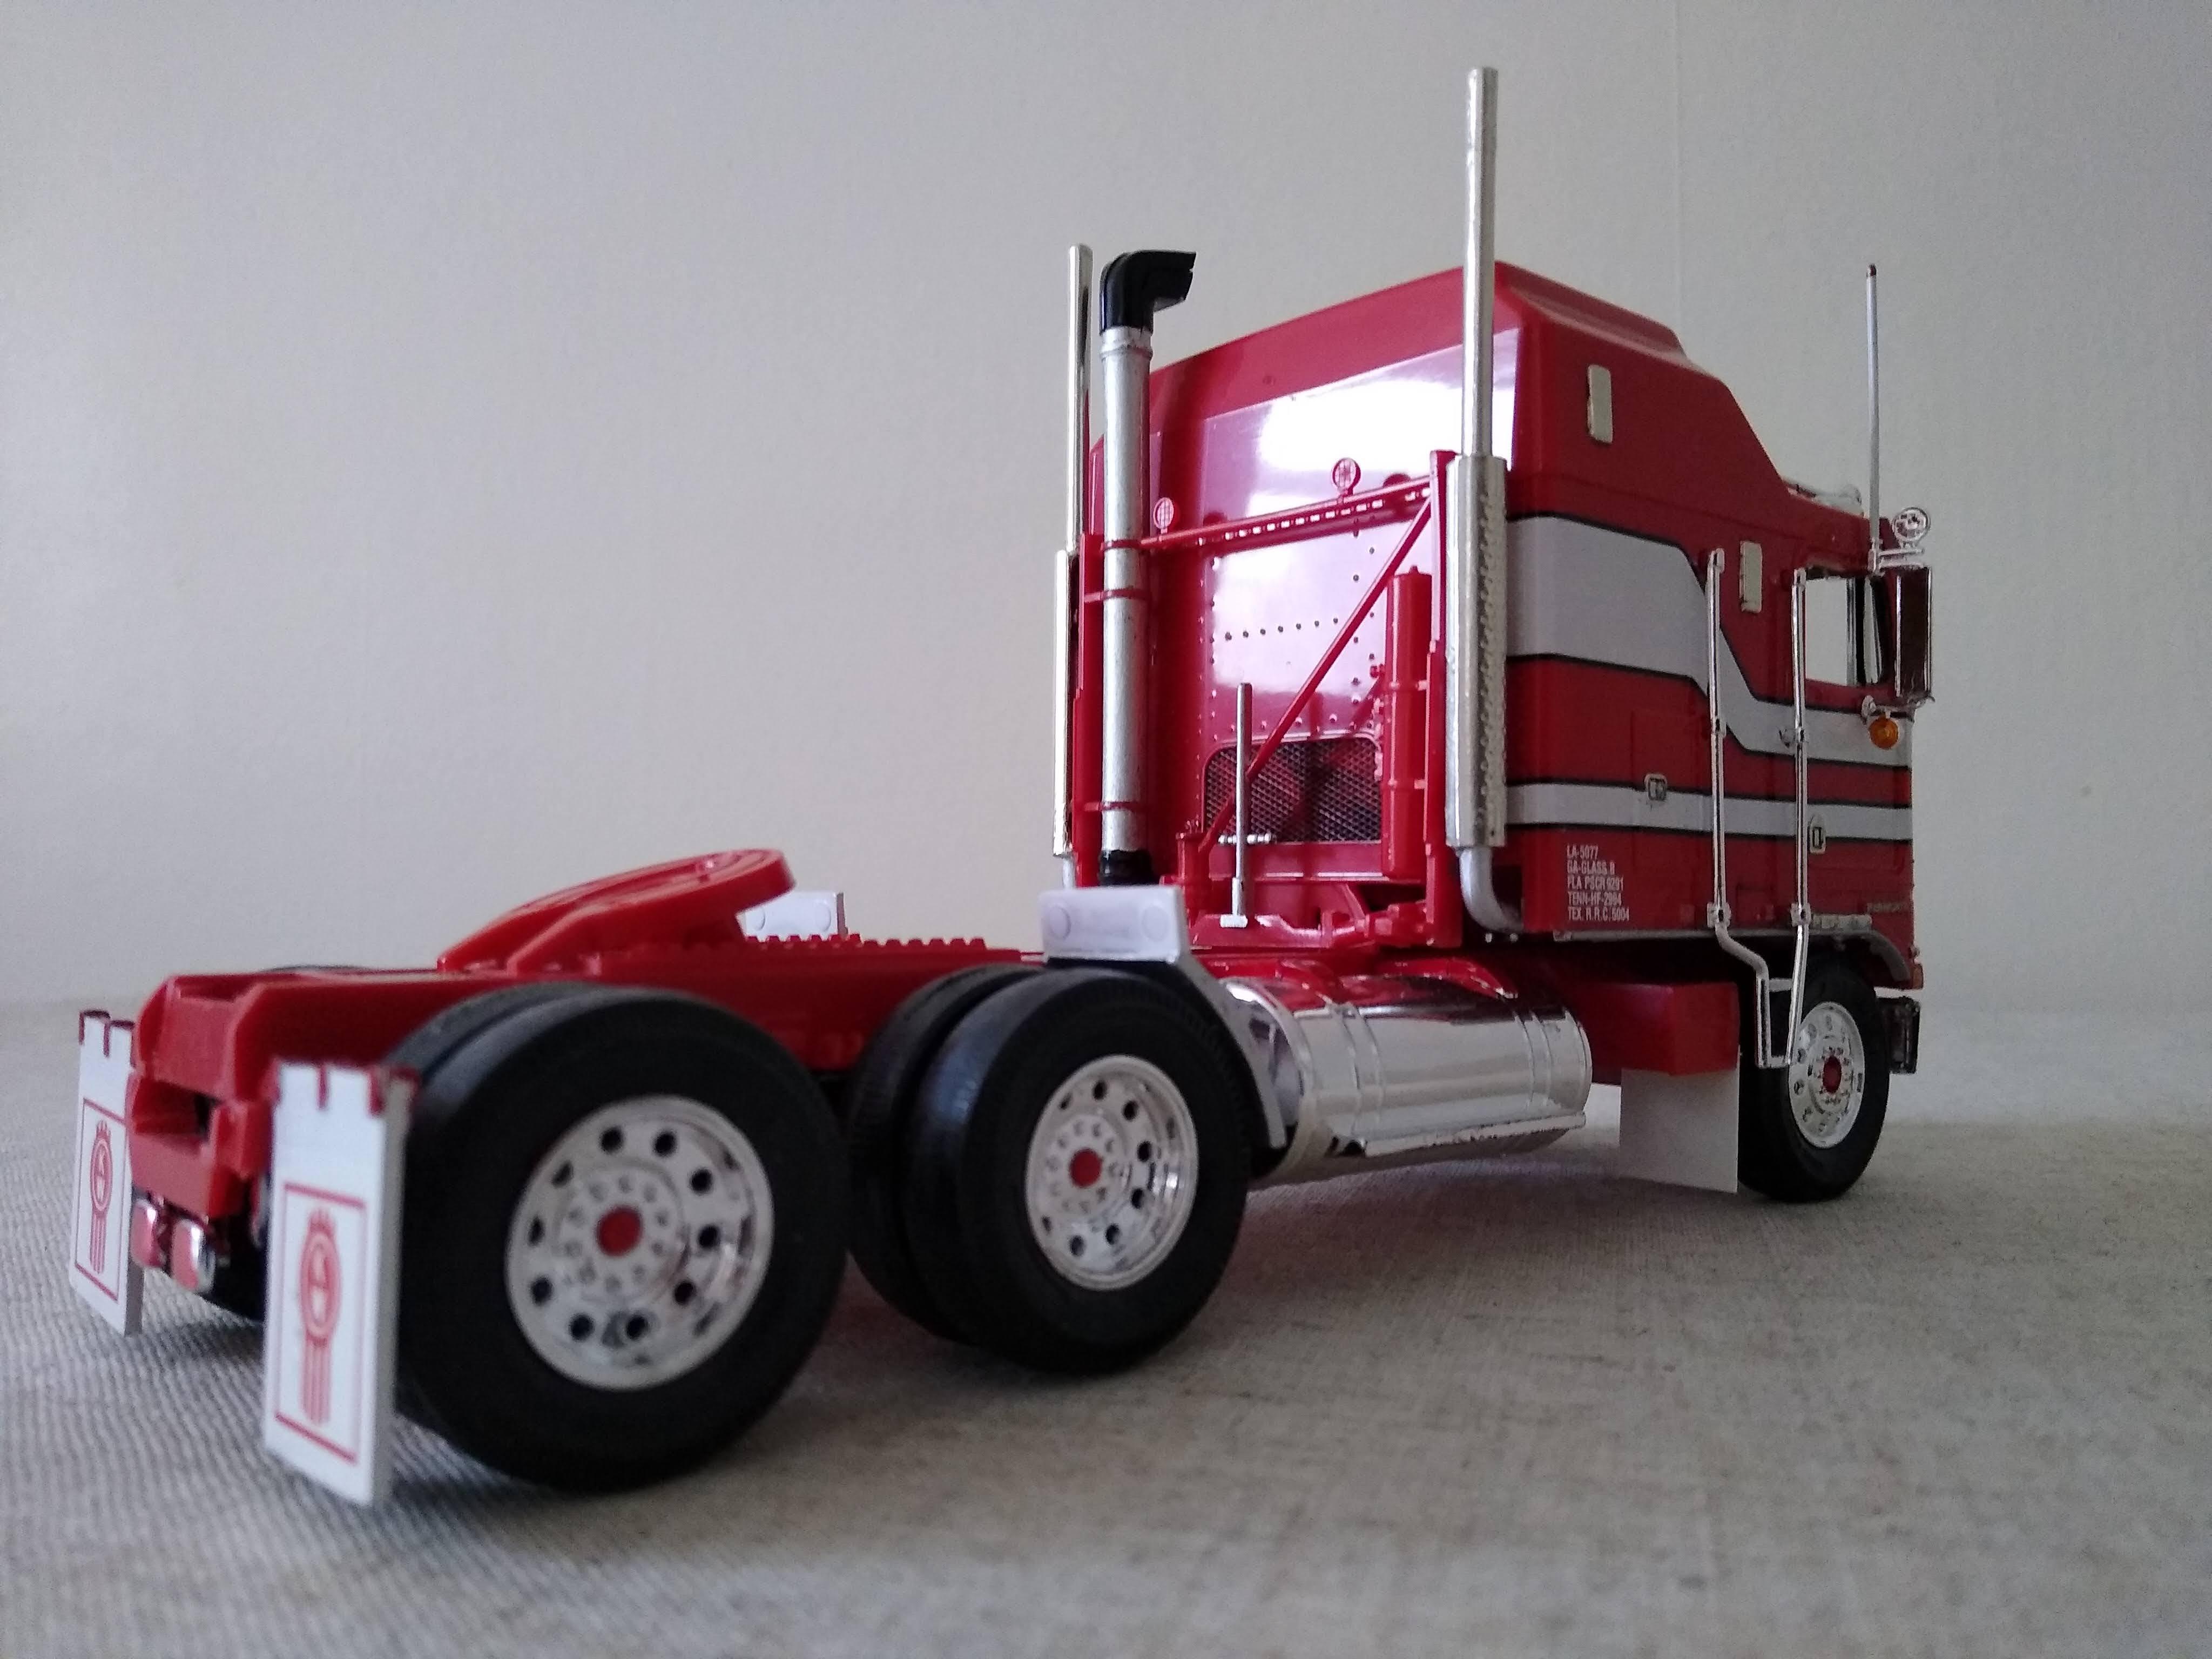
Enrico, it will be black chassis with a white cab and a little stripe along the side, pretty much as the truck in the photo though a little longer chassis. On the fuel tanks and battery boxes, I thought e exactly the same and was going to omit one tank, or shorten one etc... and then I realised there's no battery boxes there on the kit and I could go to all that work for something that will never be seen. So, I'm going to move the tanks and imagine they're shortened because it's a day cab on short runs so it doesn't need two 200 gallon tanks. It's the overall effect I'm going for with this, so that it looks ok on the shelf. -
Night to day
Rockford replied to Rockford's topic in WIP: Model Trucks: Big Rigs and Heavy Equipment
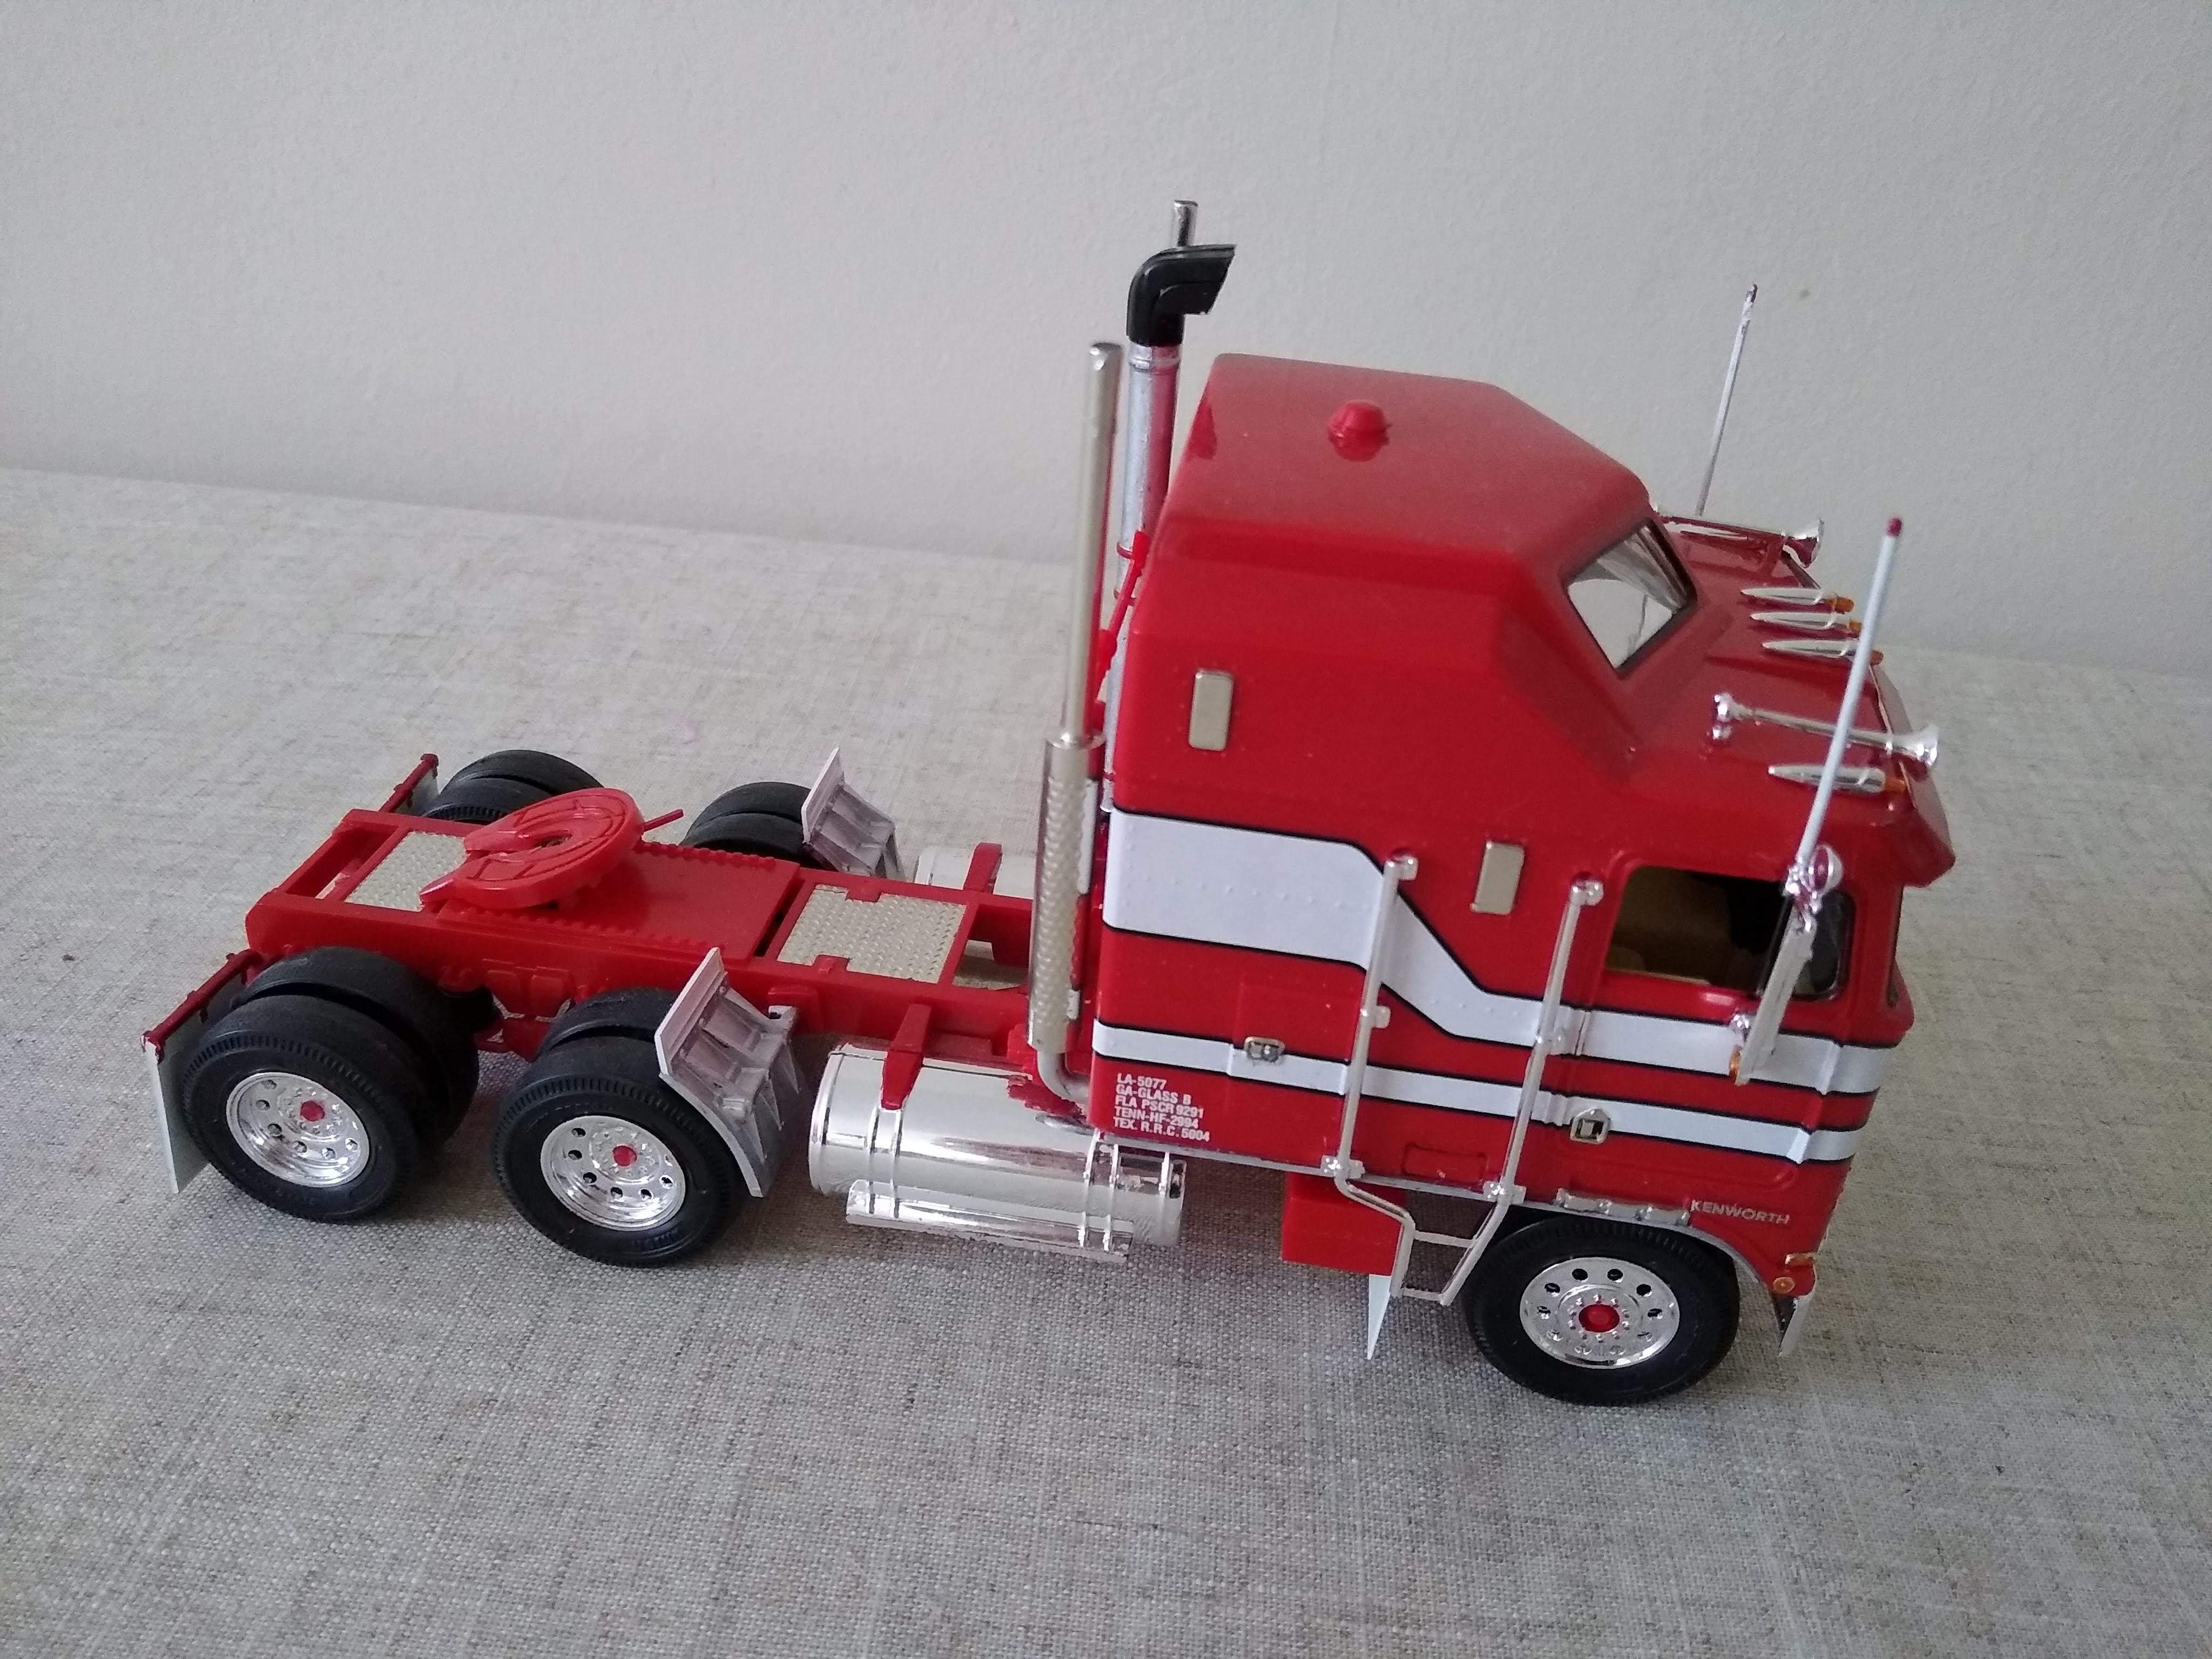
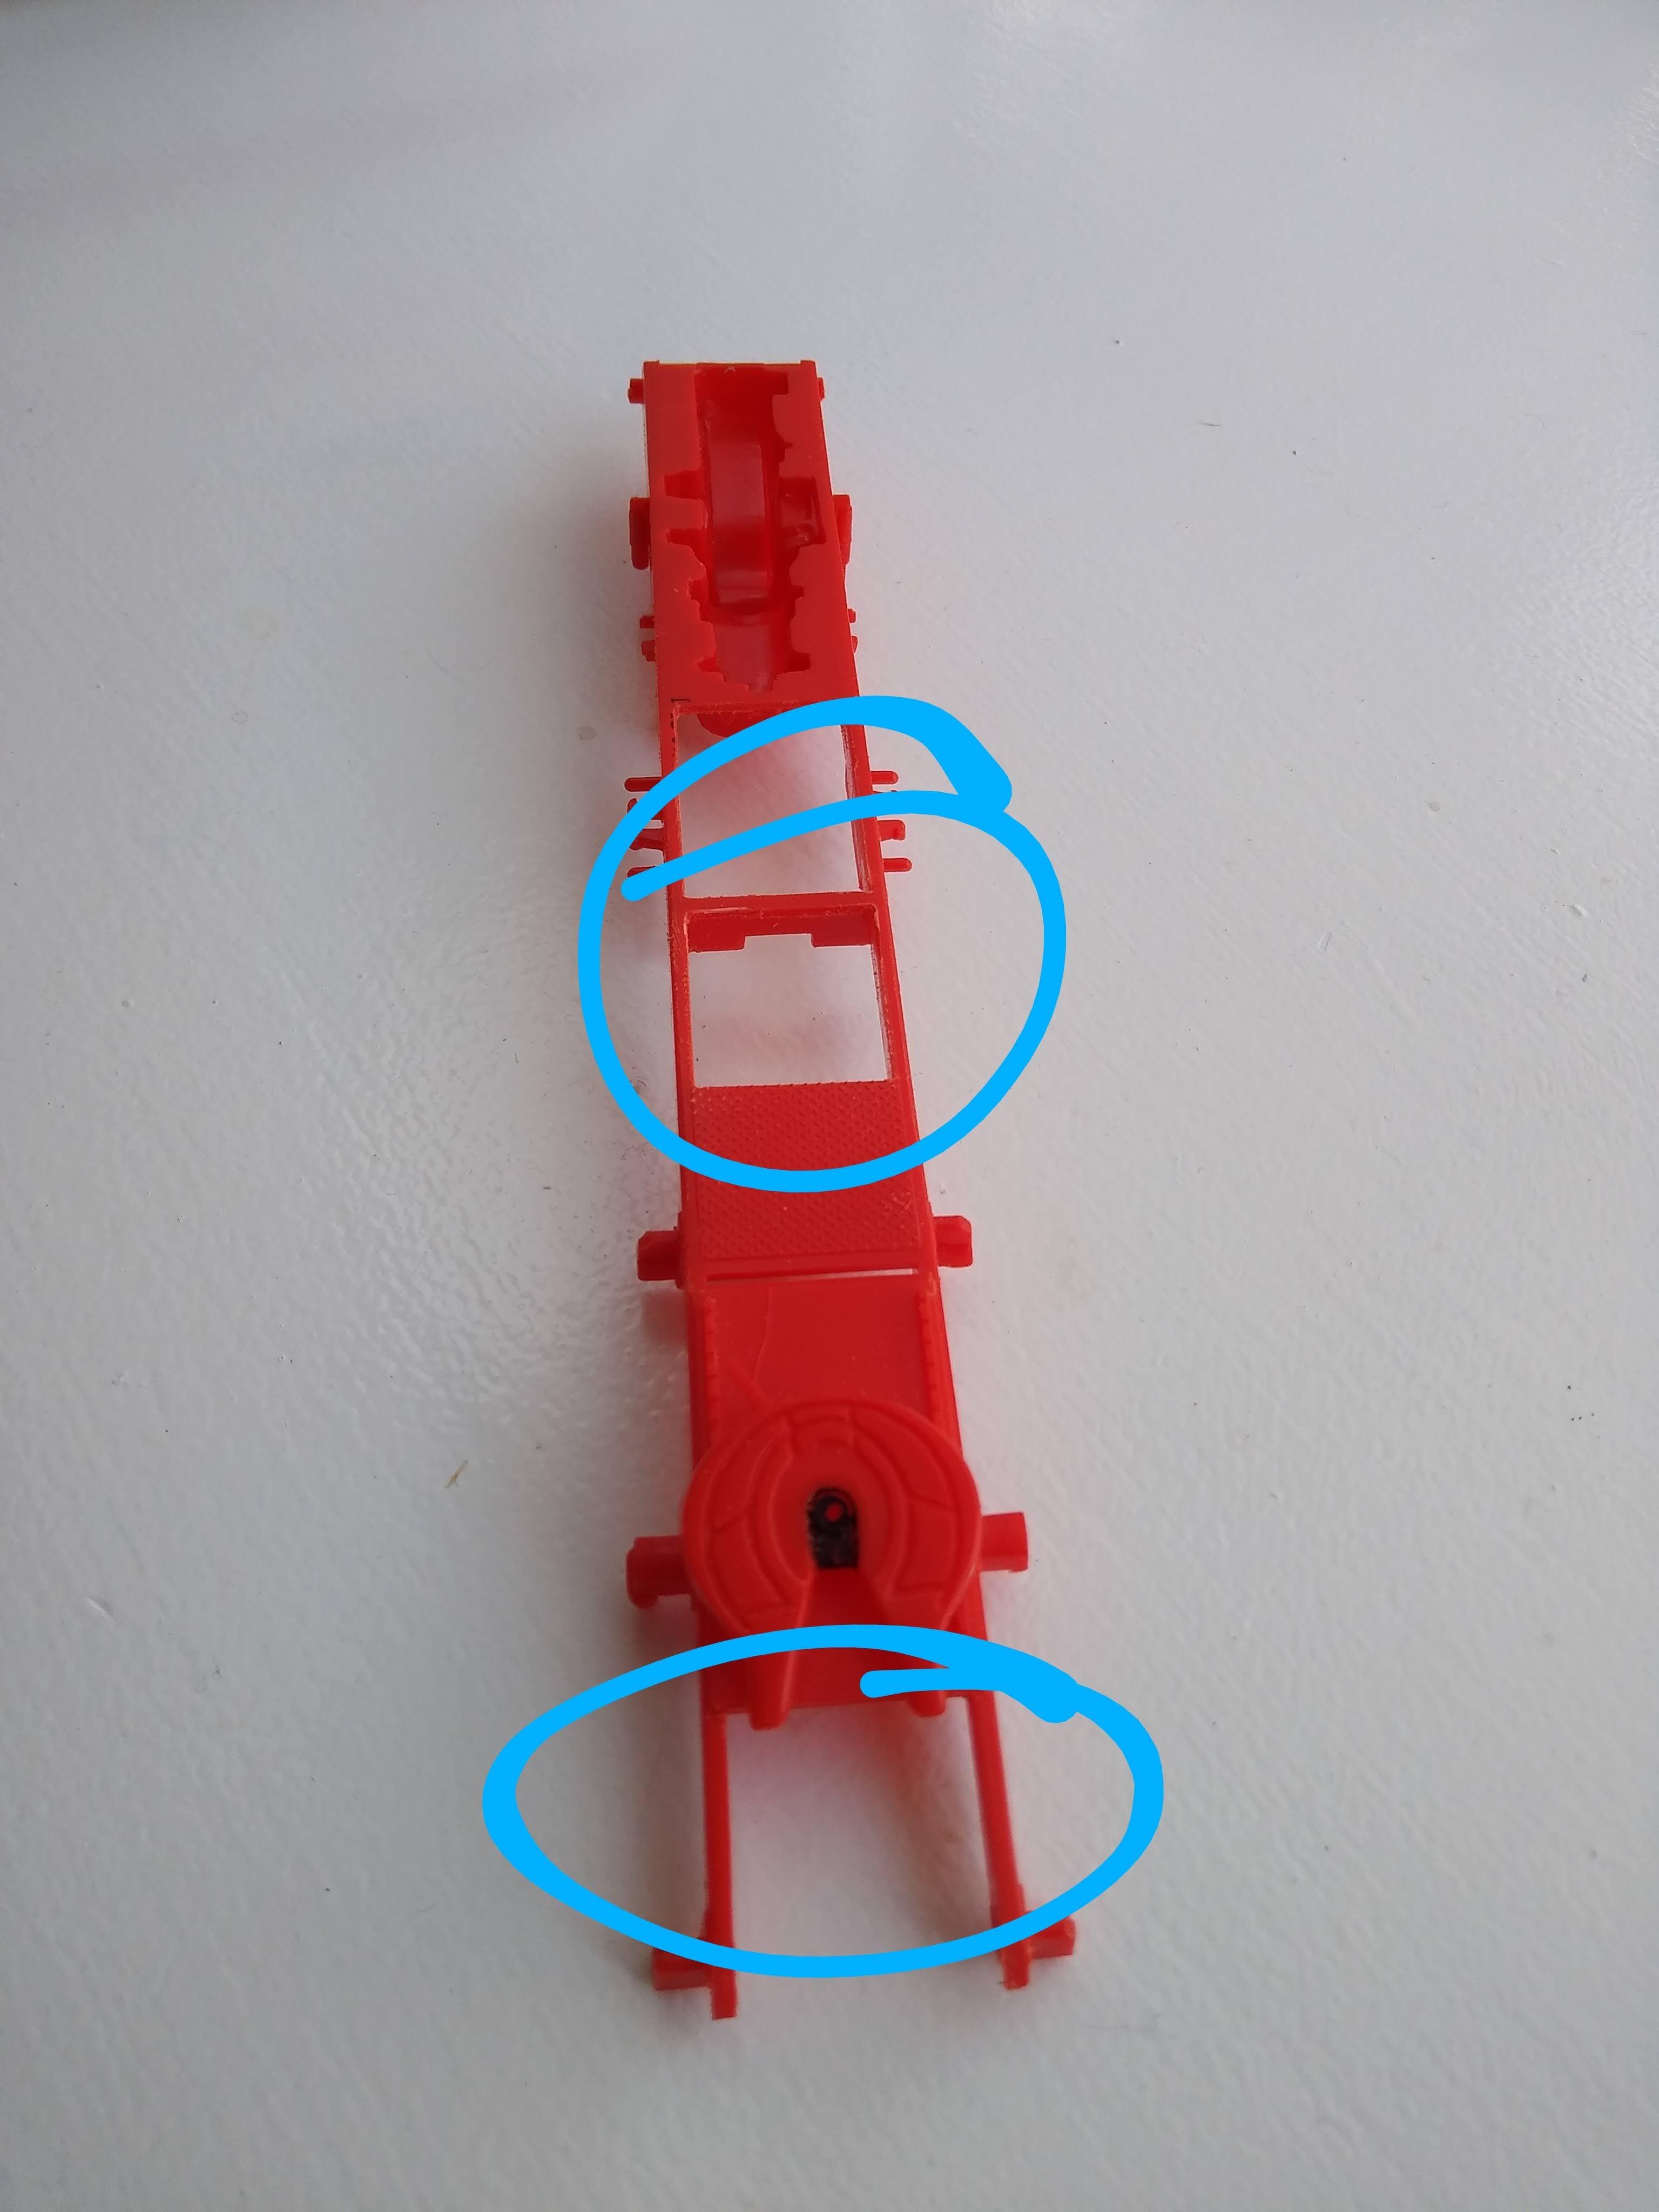
I want to move the fuel tanks forward so that they're pretty much completely under the skirts leaving as much empty chassis rail as possible. It also gave me the opportunity to remove the big locating boss they put on the chassis on these kits so the there is is just one straight rail right through. Also stripped the tanks because they're going to be aluminium like the wheels. In the chassis shot you can see the cab mount crossmember I've built out of square rod. I love seeing bare chassis, you don't see anything over here in Europe because everything is crammed into such a small space on our trucks that there's no space left unused. In the 70s and 80s when trucks were much simpler you'd often see the chassis on a truck but not now. I can't generate any enthusiasm for modern trucks, they're just so ugly and ungainly looking with their mini tag axles, steerable trailer axles and all the aero kit, and don't get me started on the amount of plastic! When we had metal bumpers, if a truck hit something you could pull the bumper out and weld any cracks, now it's got to have a complete front end on it costing thousands, but I did say don't get me started so I'll leave it there. I'm not writing a commentary on modern vehicles I'm doing a WIP on my Kitty Whomper.
-
Night to day
Rockford replied to Rockford's topic in WIP: Model Trucks: Big Rigs and Heavy Equipment
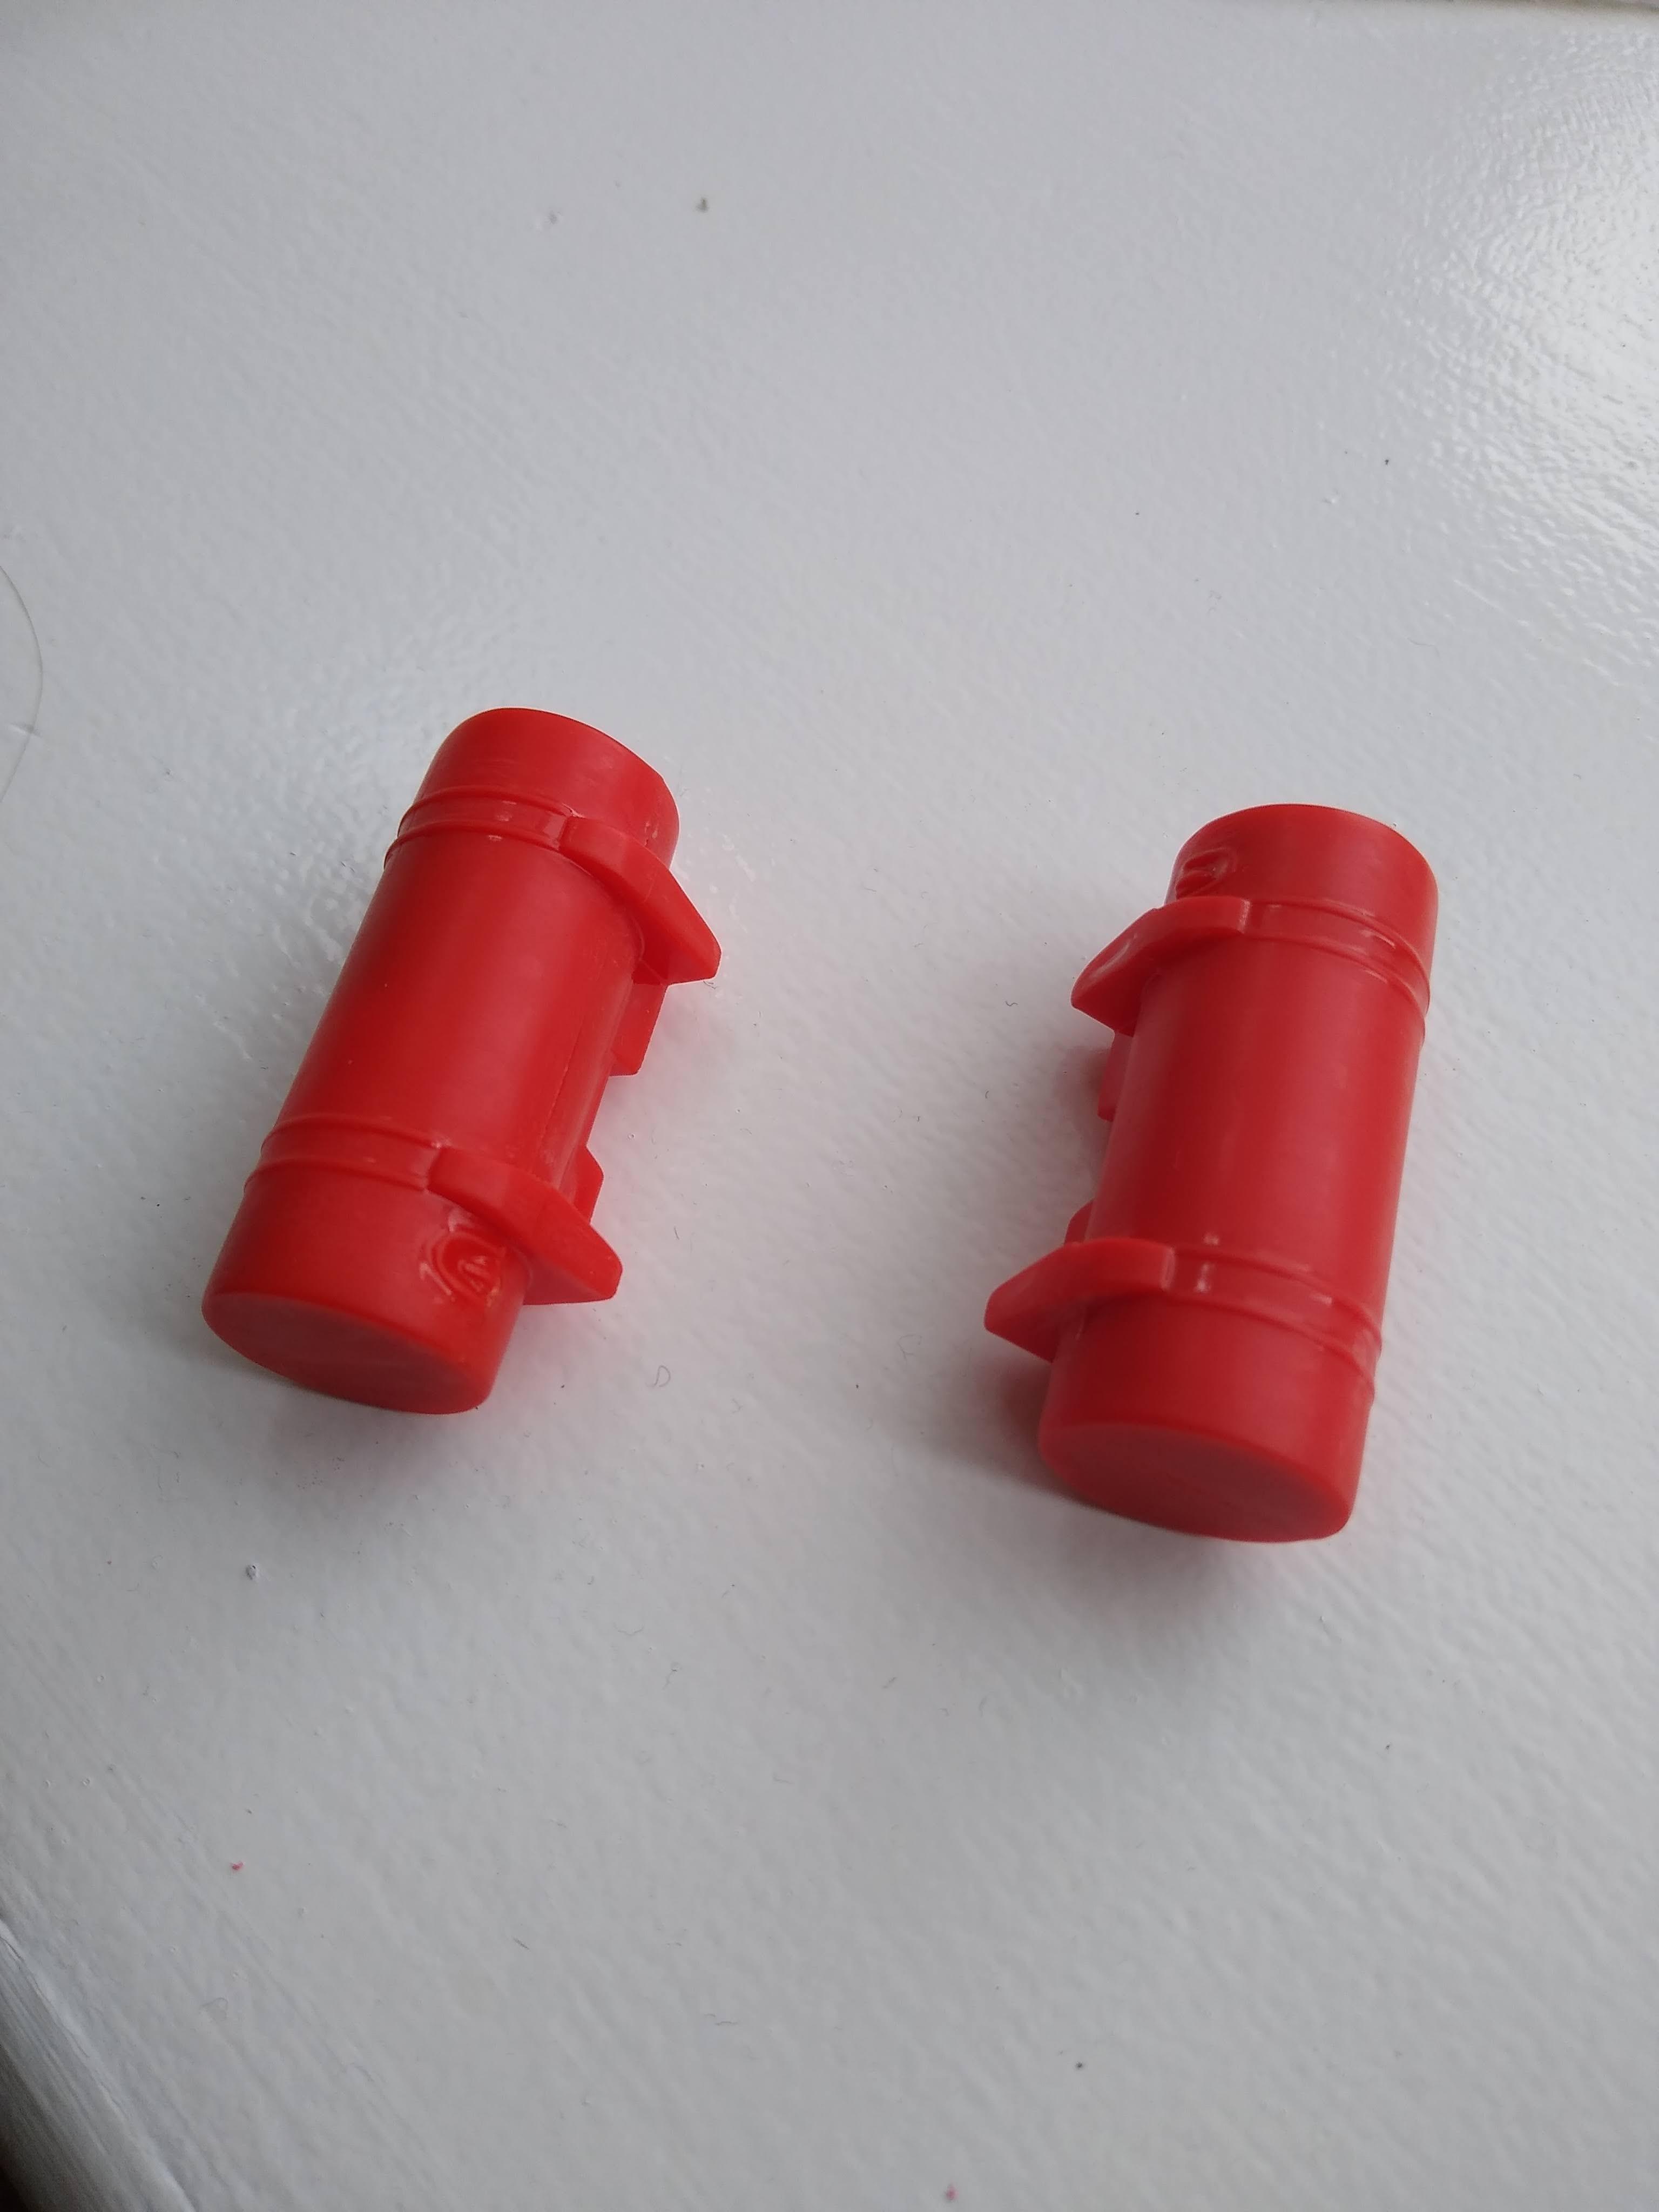
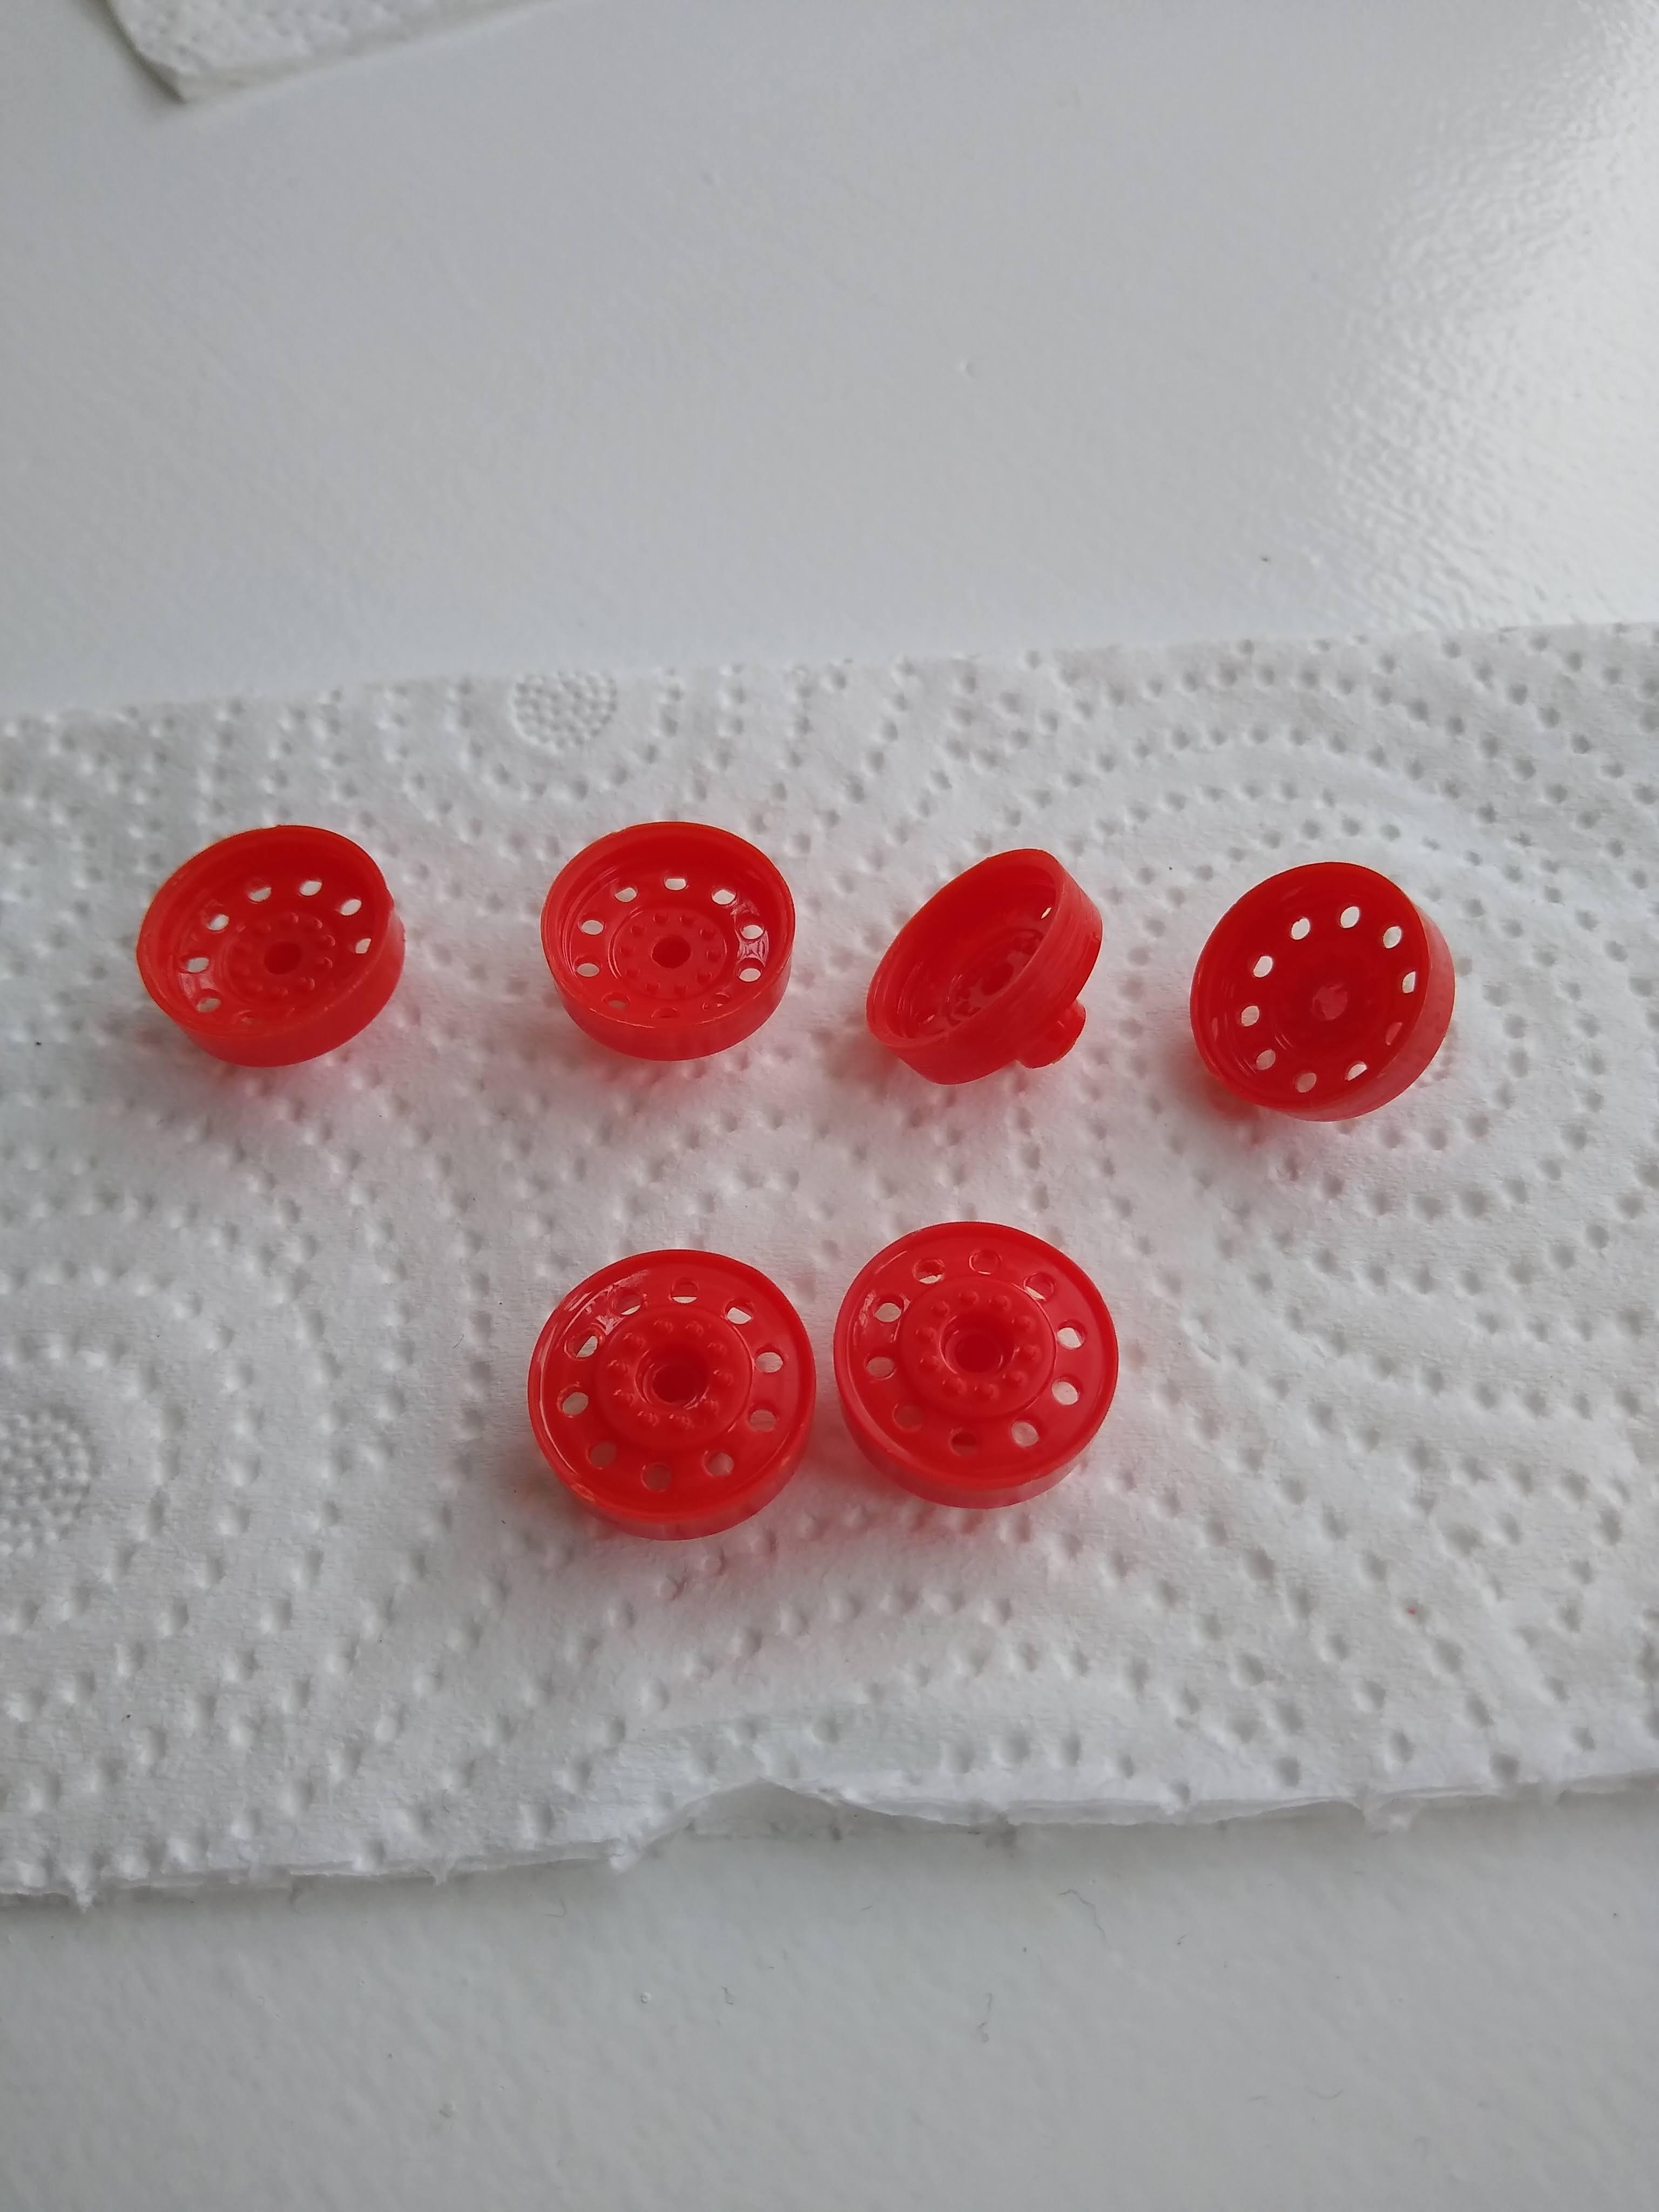
Stripped the chrome off the wheels using bleach because these are going to be unpolished aluminium. I don't know whether I'm using the wrong product but although the chrome disappears it always leaves behind a clear lacquer on the parts so that they still need sanding to get back to actual plastic. Made myself a pogo stick out of some hollow plastic tube and some solid.
-
Night to day
Rockford replied to Rockford's topic in WIP: Model Trucks: Big Rigs and Heavy Equipment
Charles Thanks ever so much for the kind offer but I'm ok with the tyres as they are, they fool the eye enough to look ok. I also think I'd make more of a mess of things than anything. I'm just waiting for the mistake that blights the whole thing, paint soon so could be that! Thank you all for the kind comments too. I look at some of the work being done on this site and I realise that mine is pretty primitive, but it is a real diversion for me, I become absorbed in the task, remembering my days "on the spanners" in the UK. The trucks were pathetic next to the American stuff [ERF, Seddon Atkinson, Foden, DAF etc....] but we had Cummins 14litre engines and Fuller transmissions [which were a bullet proof combination] with Rockwell rear axles so I see some familiar stuff! Takes me back. Strangely, Caterpillar never got into truck engines in UK although I did work on a few in plant like 'dozers. -
Night to day
Rockford replied to Rockford's topic in WIP: Model Trucks: Big Rigs and Heavy Equipment
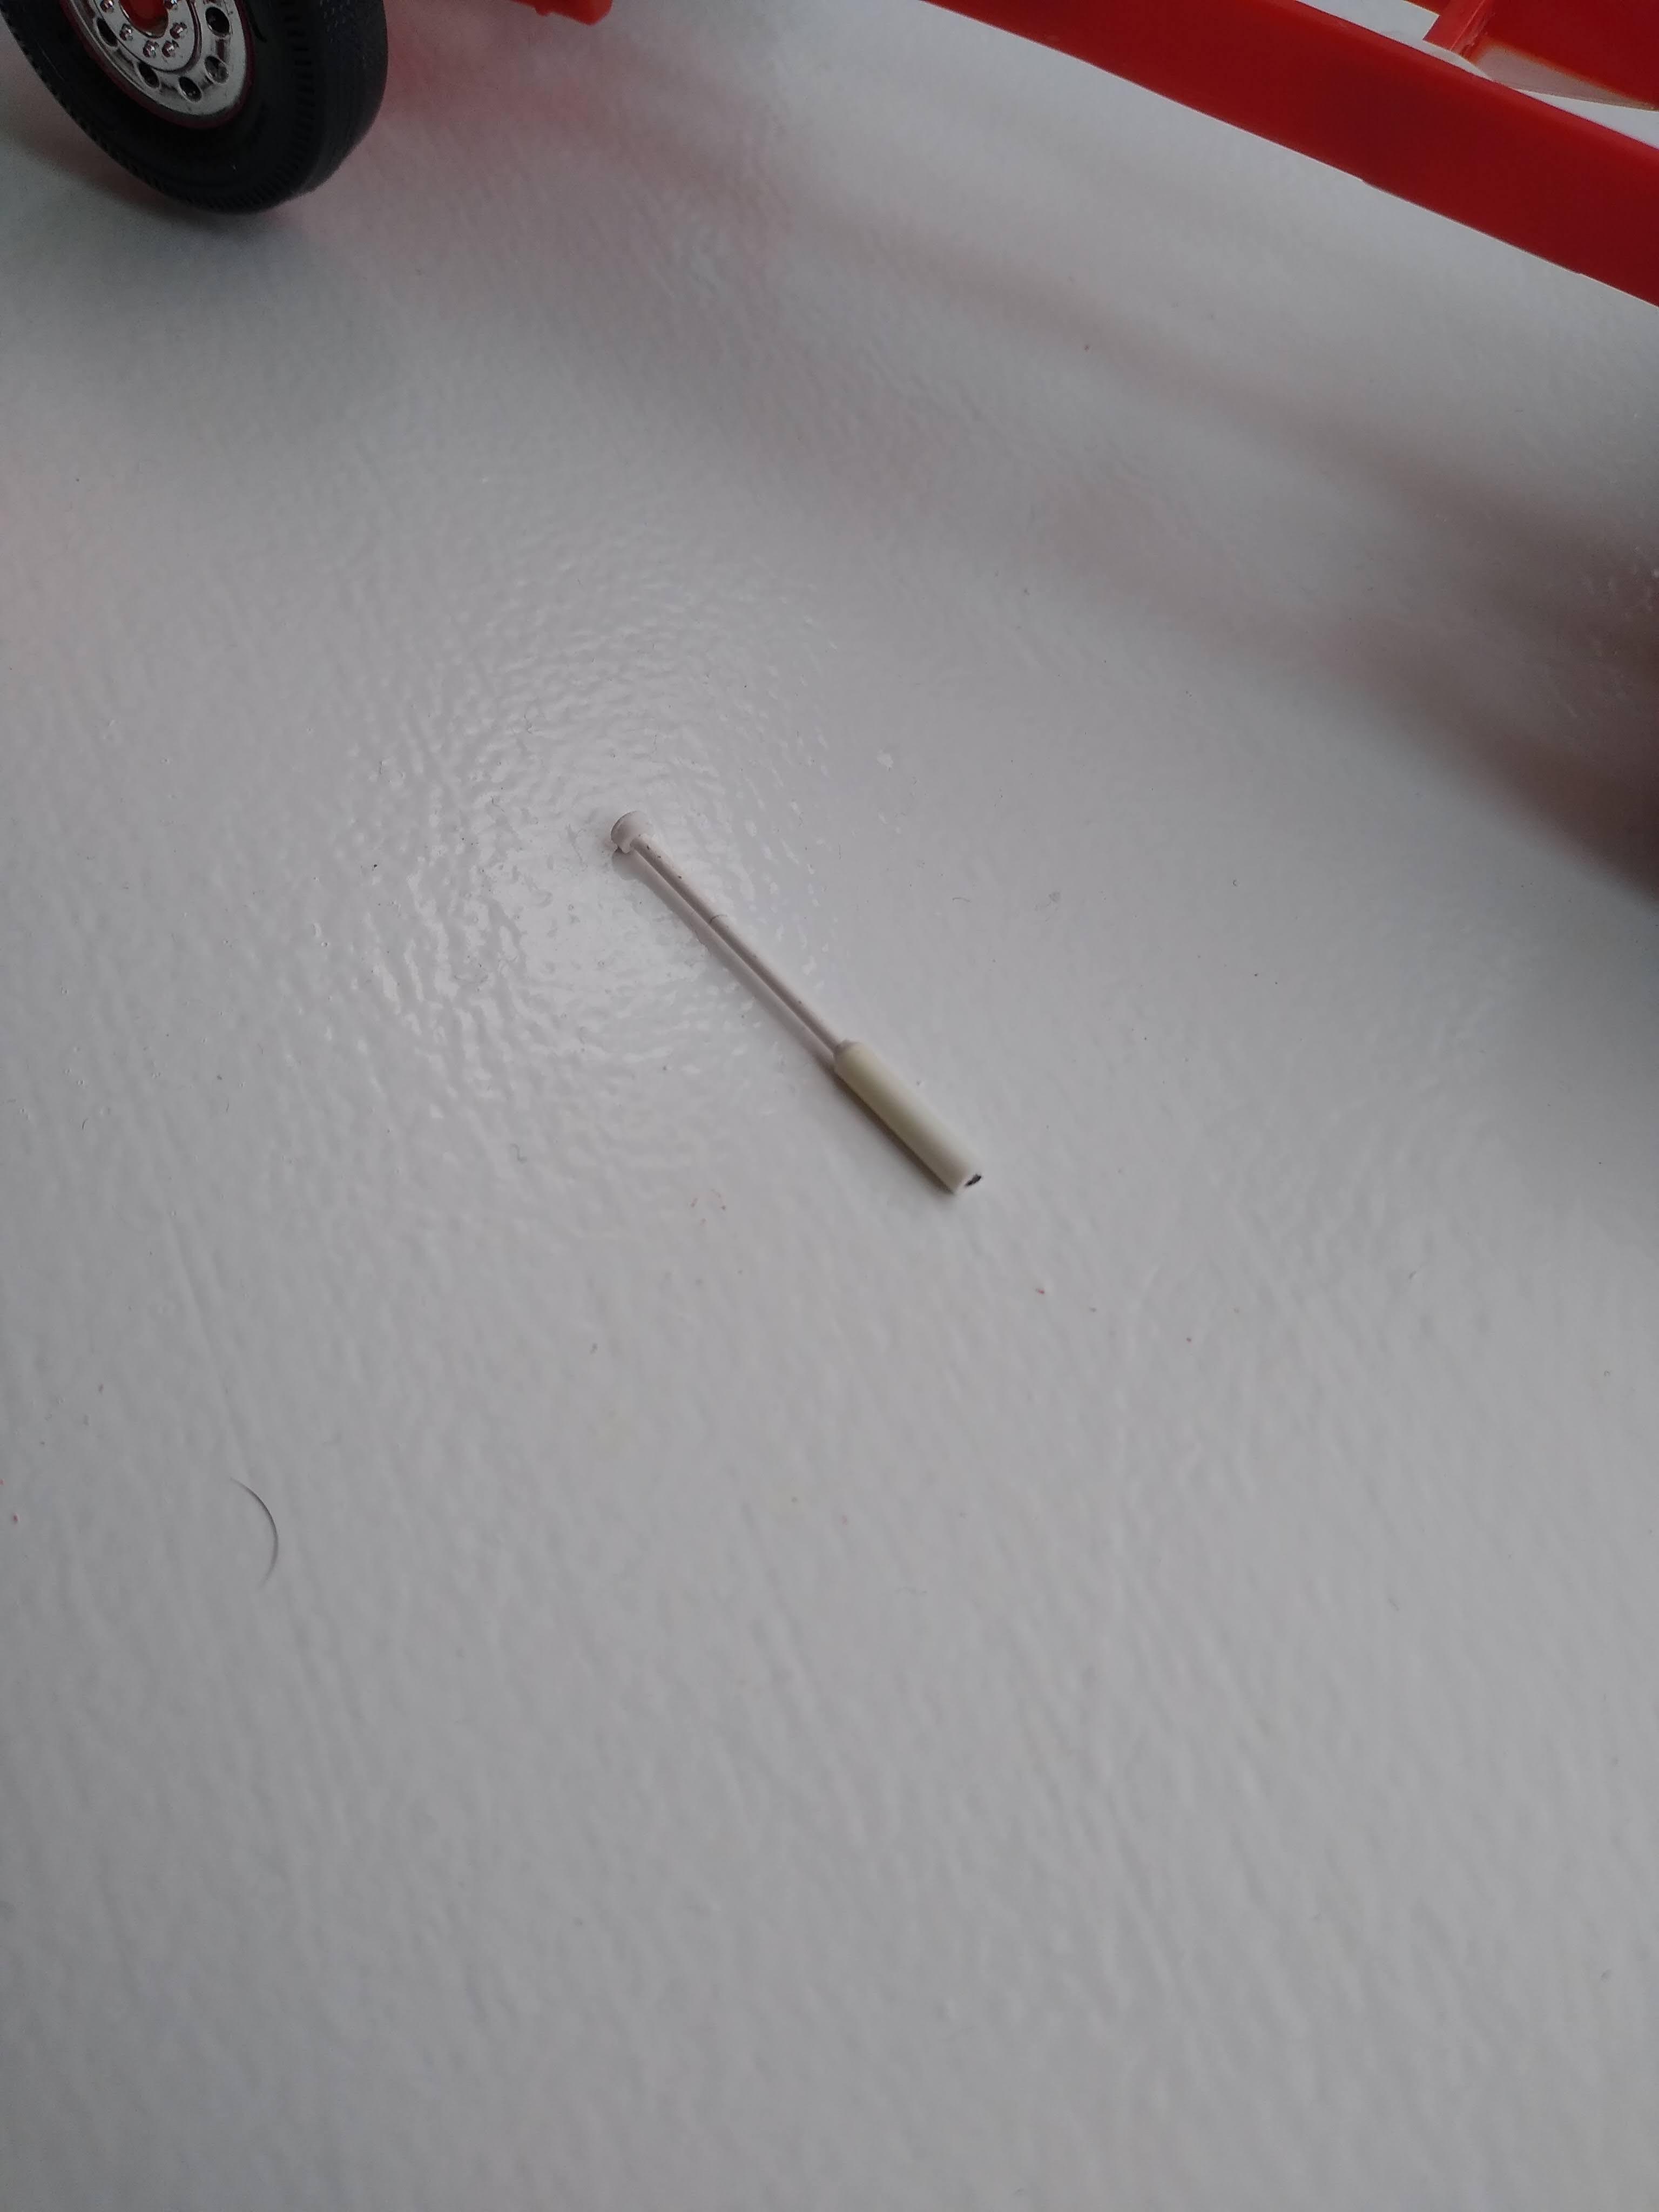
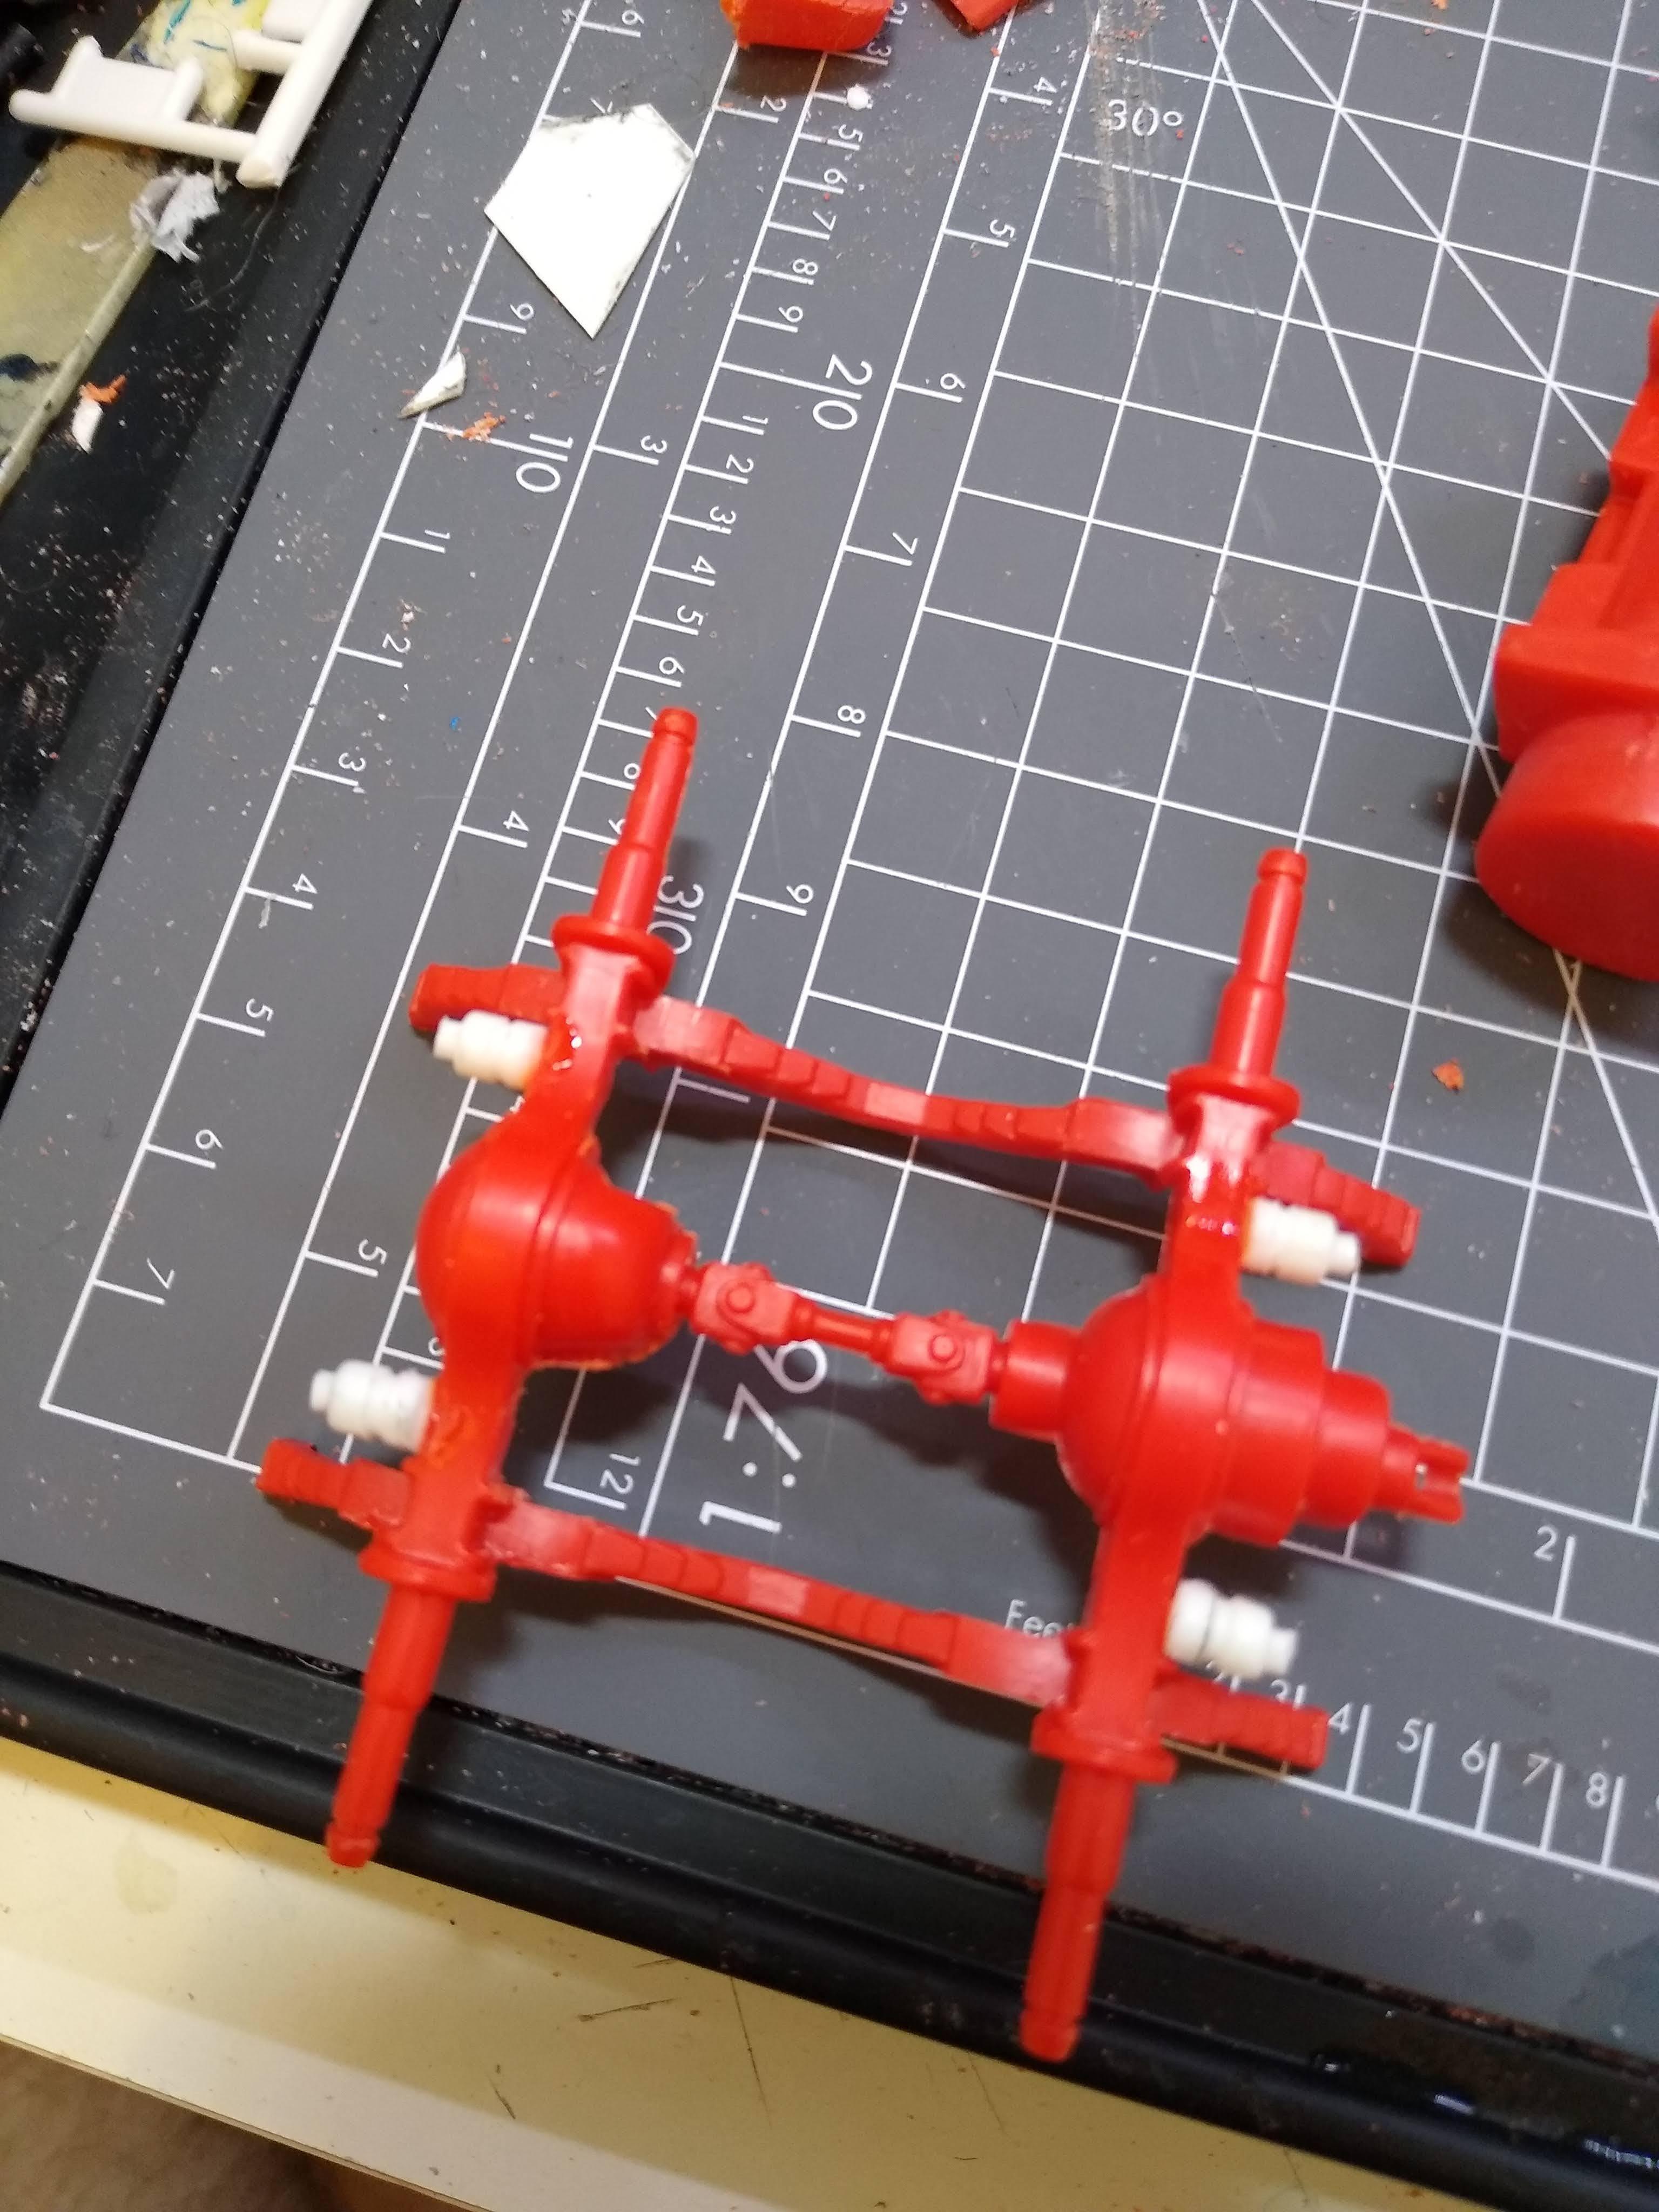
I will install some shock absorbers on the rear axle too. I made them out of plastic tube, using small pieces at each end to form the locating eyes. I can't fit these until the axles are installed.
-
Night to day
Rockford replied to Rockford's topic in WIP: Model Trucks: Big Rigs and Heavy Equipment
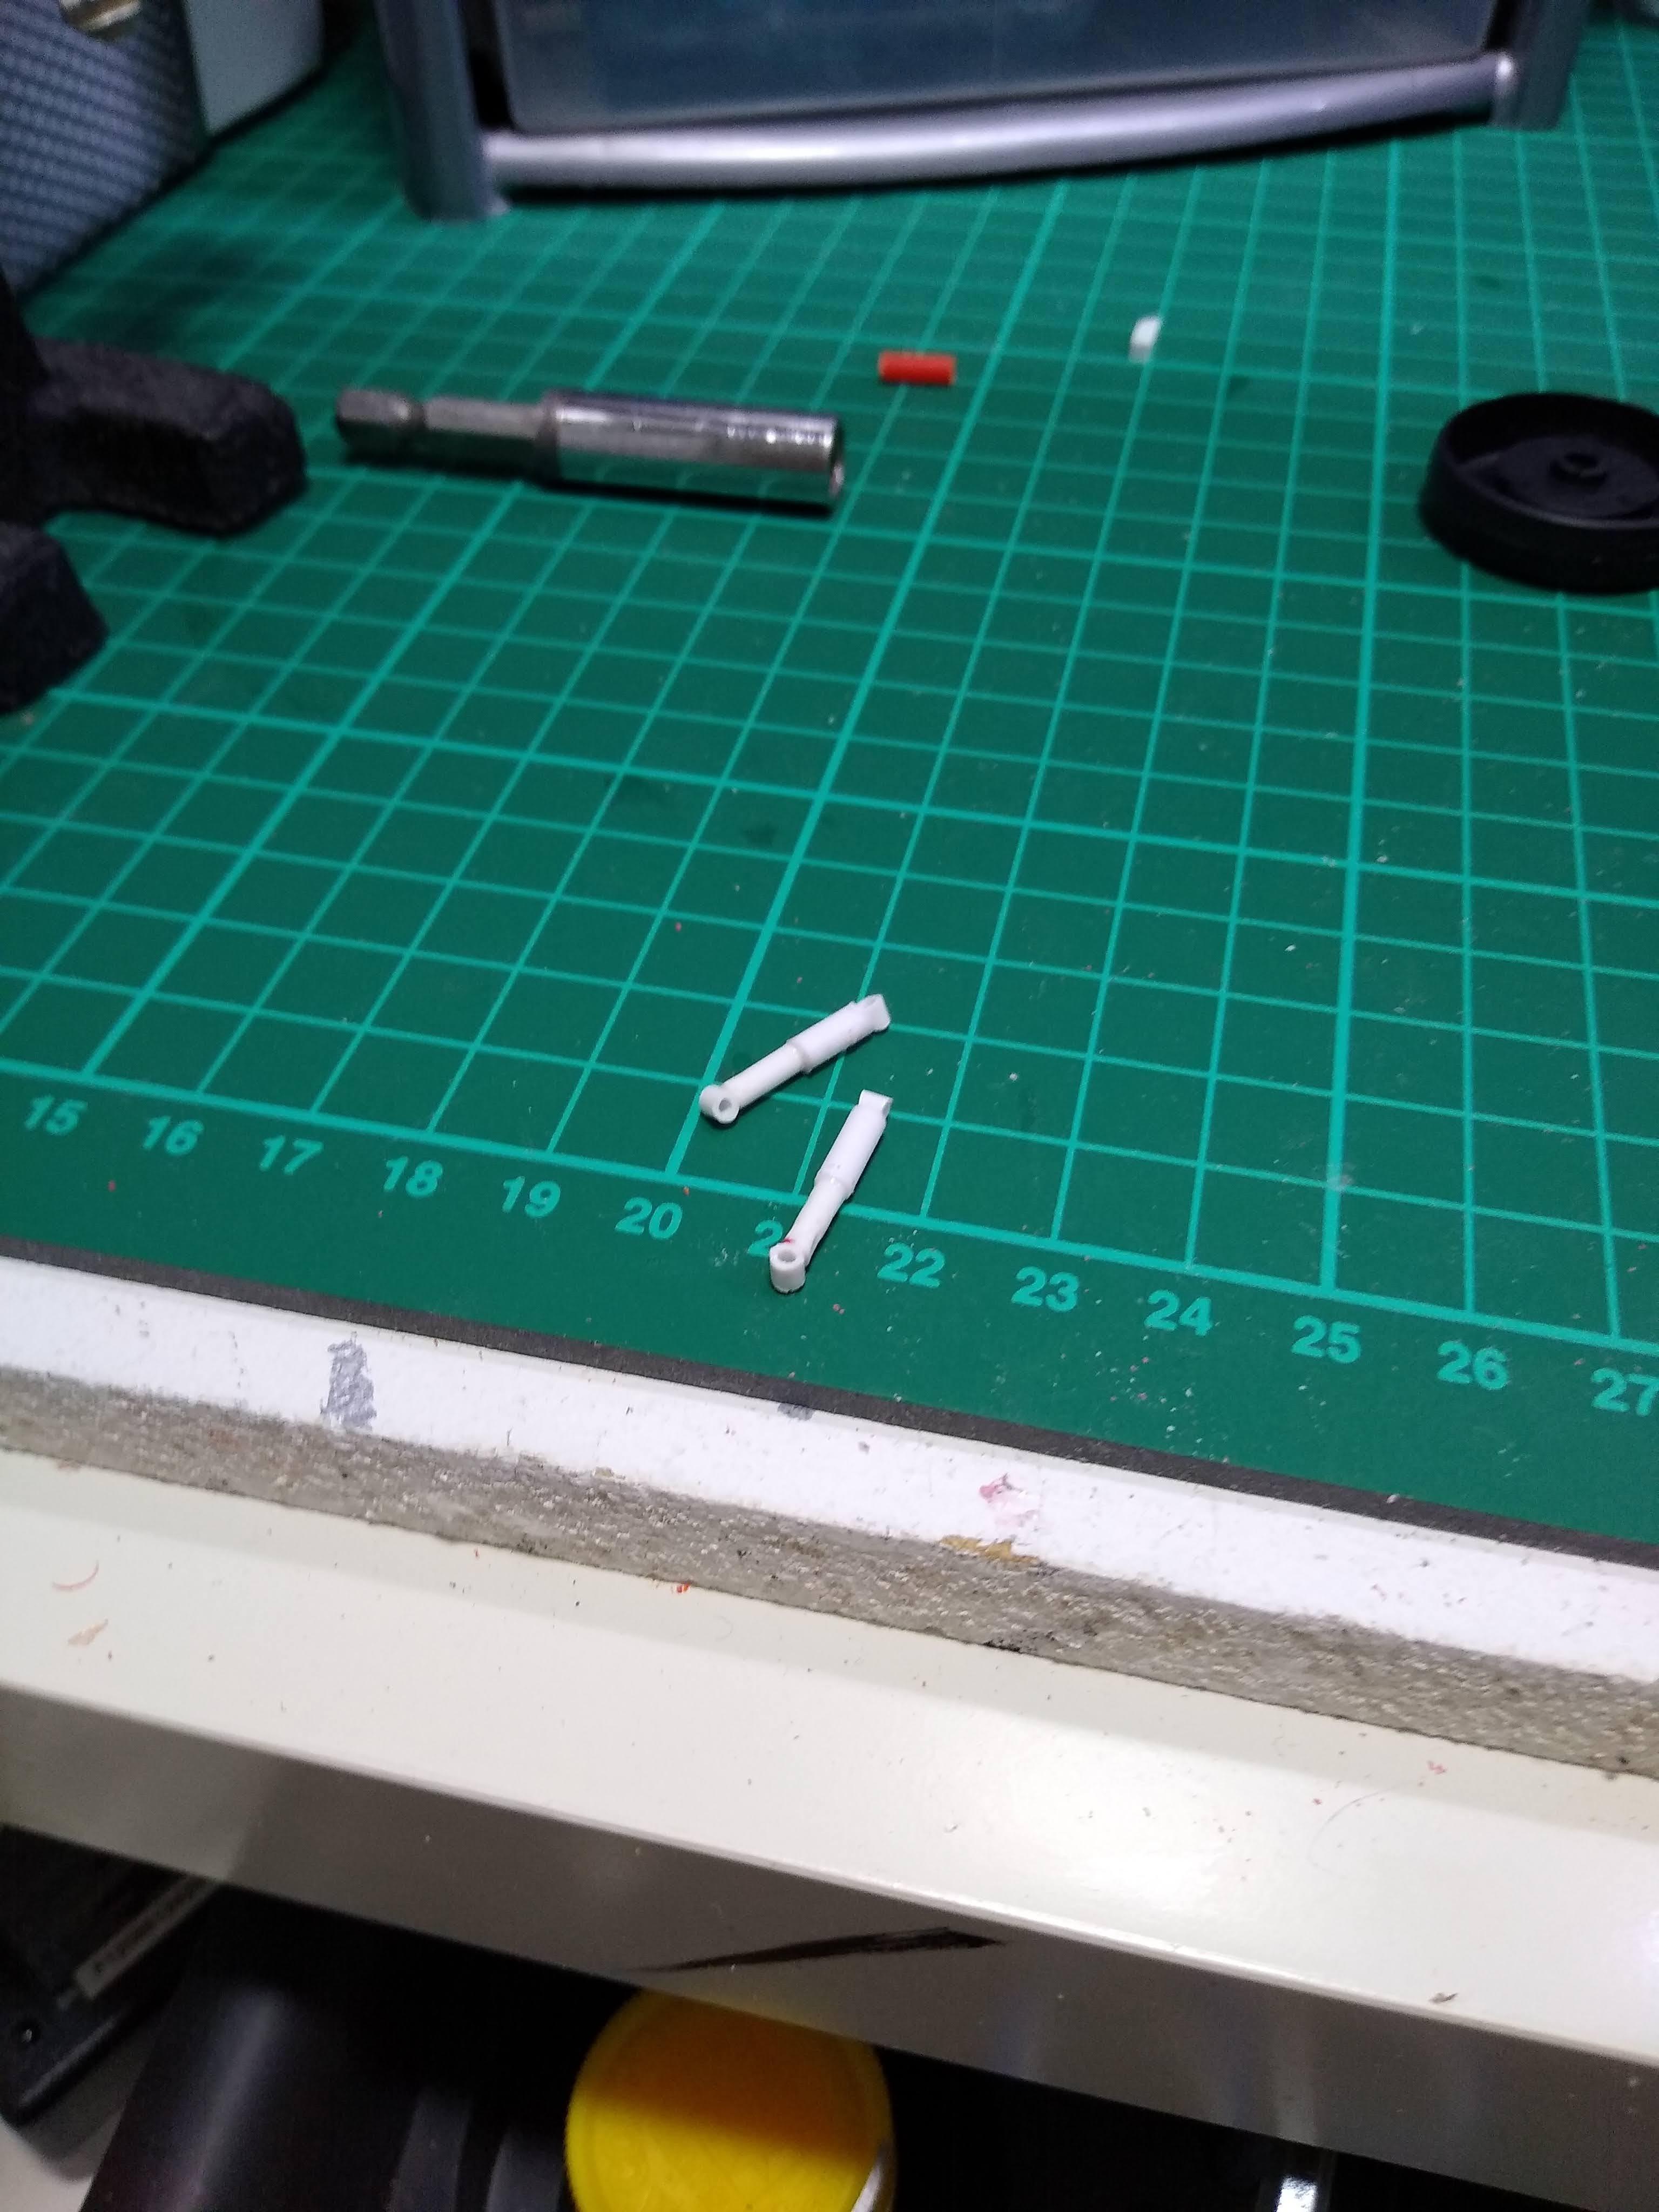
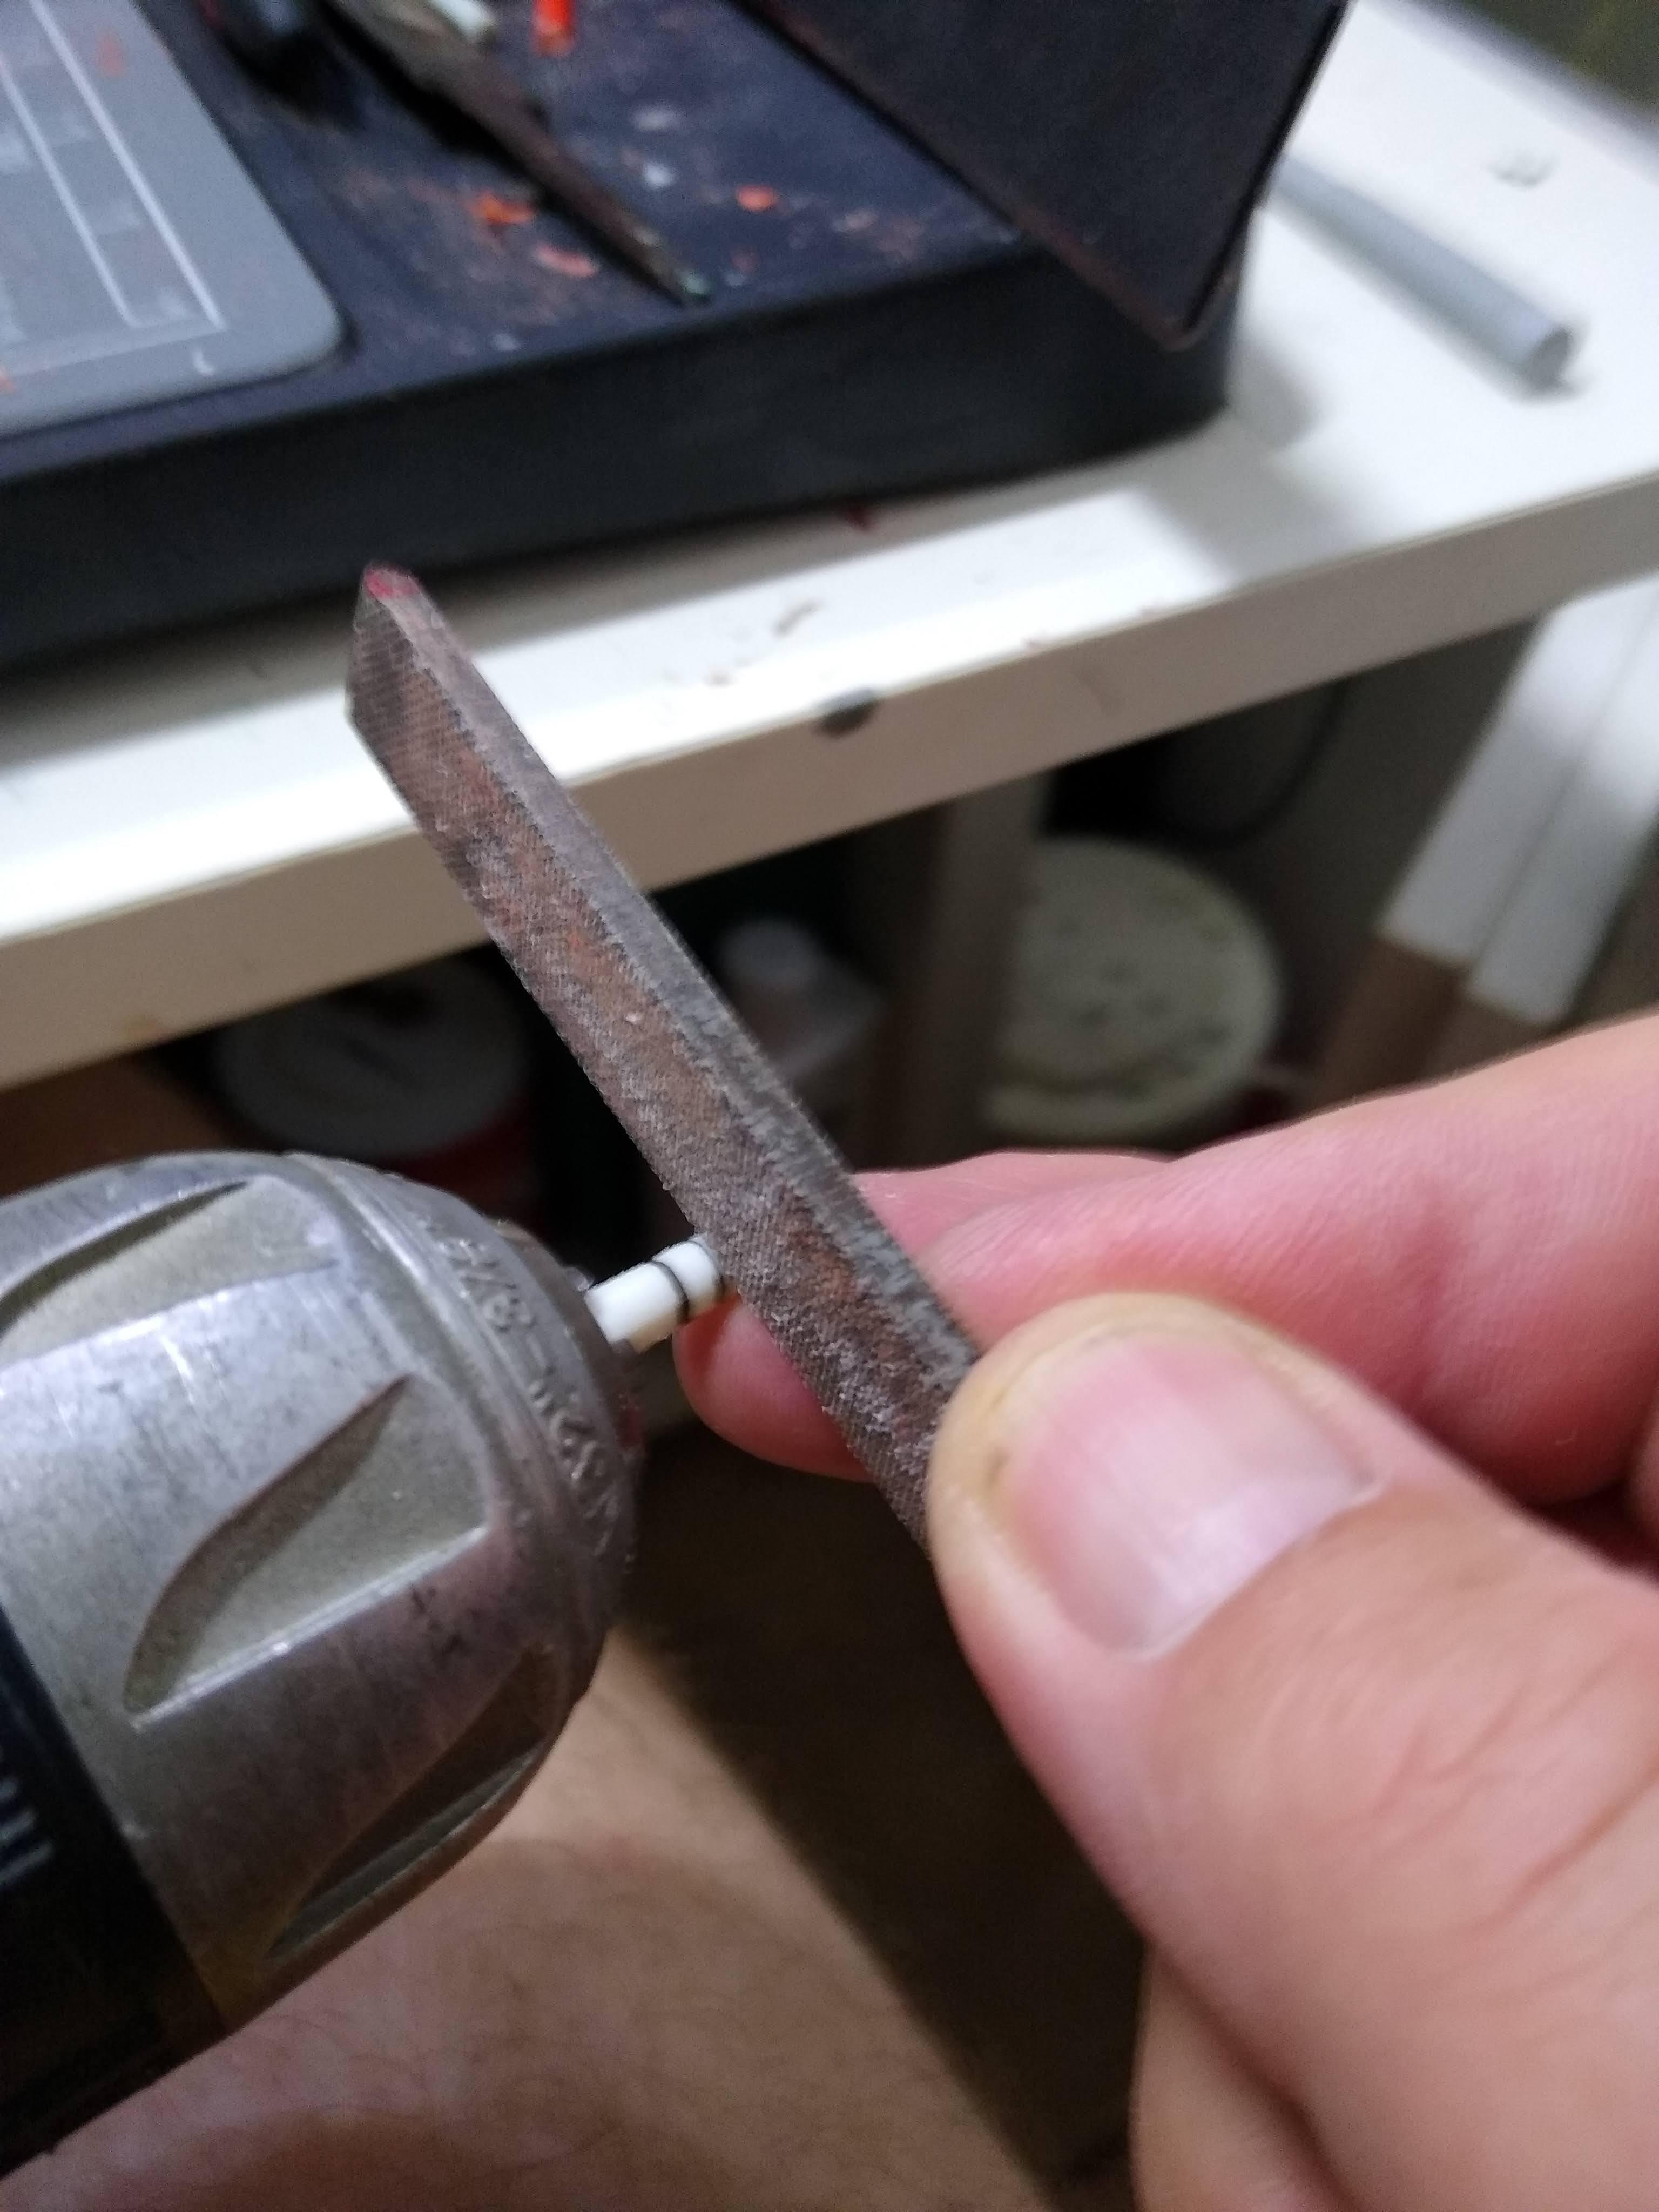
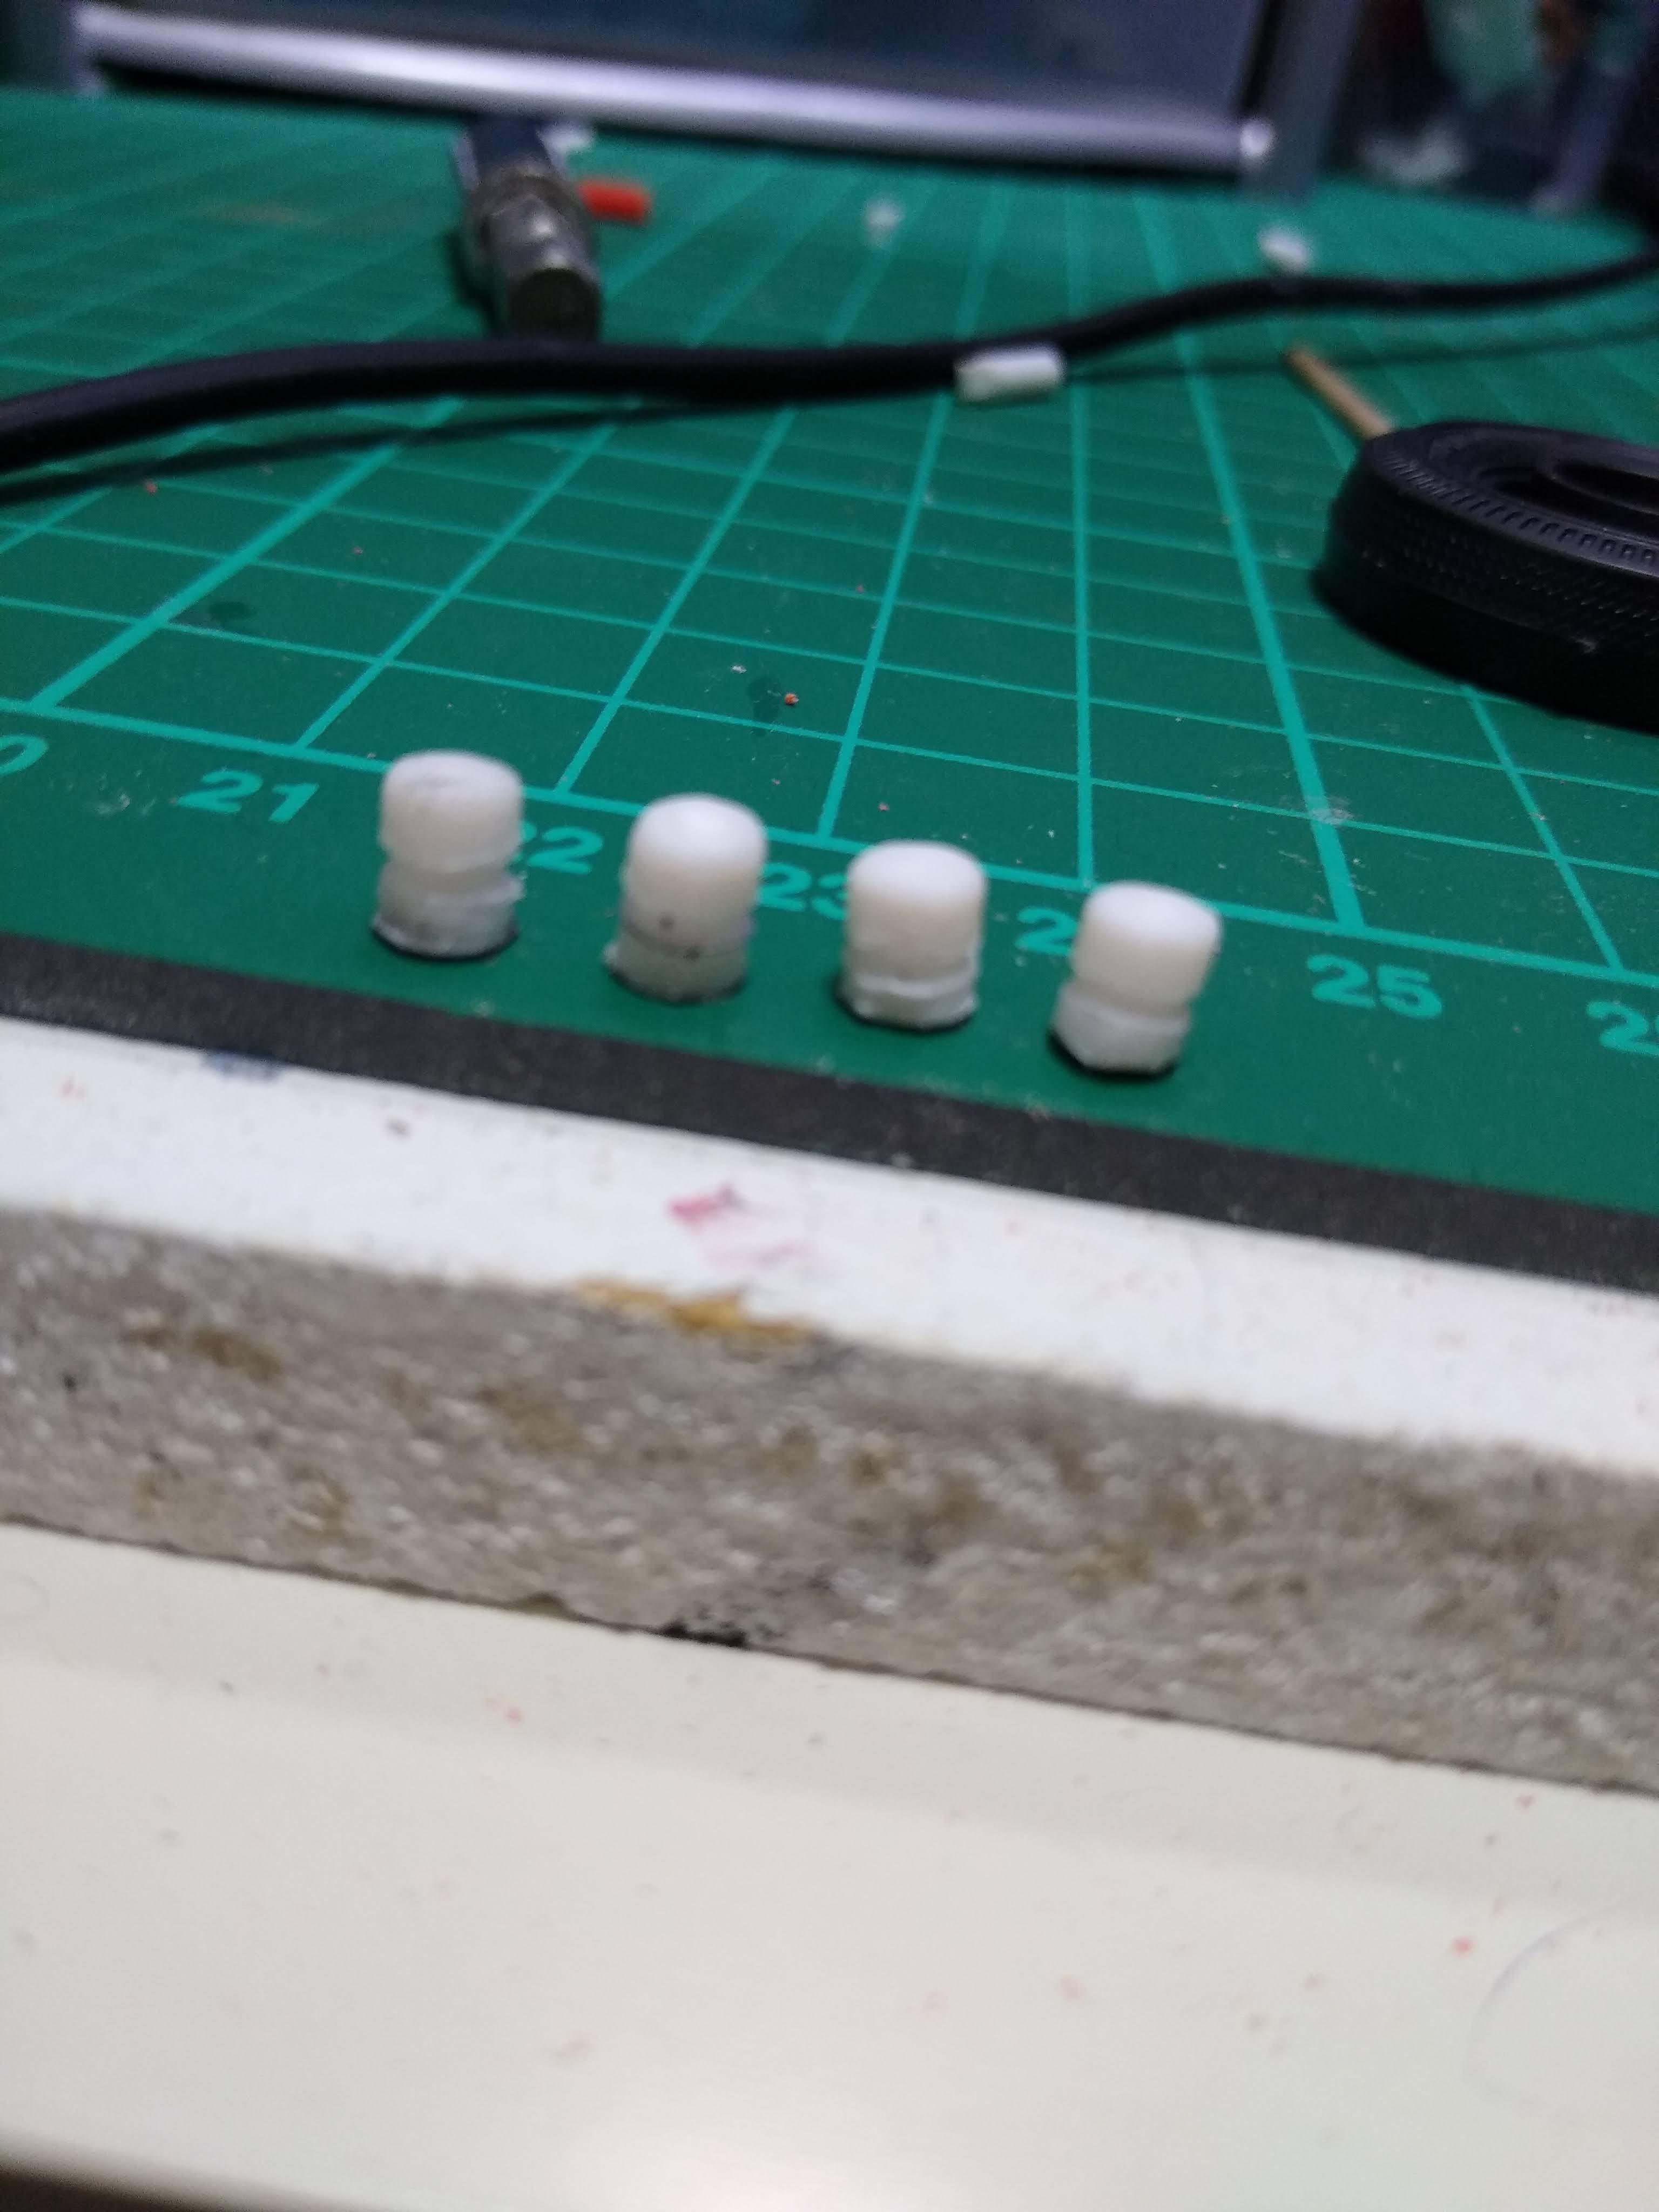
I used my cordless drill as a primitive lathe to turn some brake chambers. [I don't recommend this as a method, I'm just demonstrating how incredibly stupid I can be] I'm going to make spring-brake chambers [as we'd call them in UK] that apply the brakes when there's no air in the system, rather than plain service brake chambers. I considered adding slack adjusters and cams but I think that would be a little bit excessive. I first rounded the end, measured 5mm and 2.5mm on the sprue then slowly turned the chuck holding the pen against it to complete the circle. At the 2.5mm line I will turn a groove using a triangular file to create the two halves of the chamber I'll then cut it off at the 5mm mark. Finally, I used a scrap exhaust pipe from a 1/25 Camaro kit to form the black plastic cap on the end of the chamber where the winding-off bolt is [in America you'd call it caging the brakes]. Glued them to the axles and the look passable.
-
Night to day
Rockford replied to Rockford's topic in WIP: Model Trucks: Big Rigs and Heavy Equipment
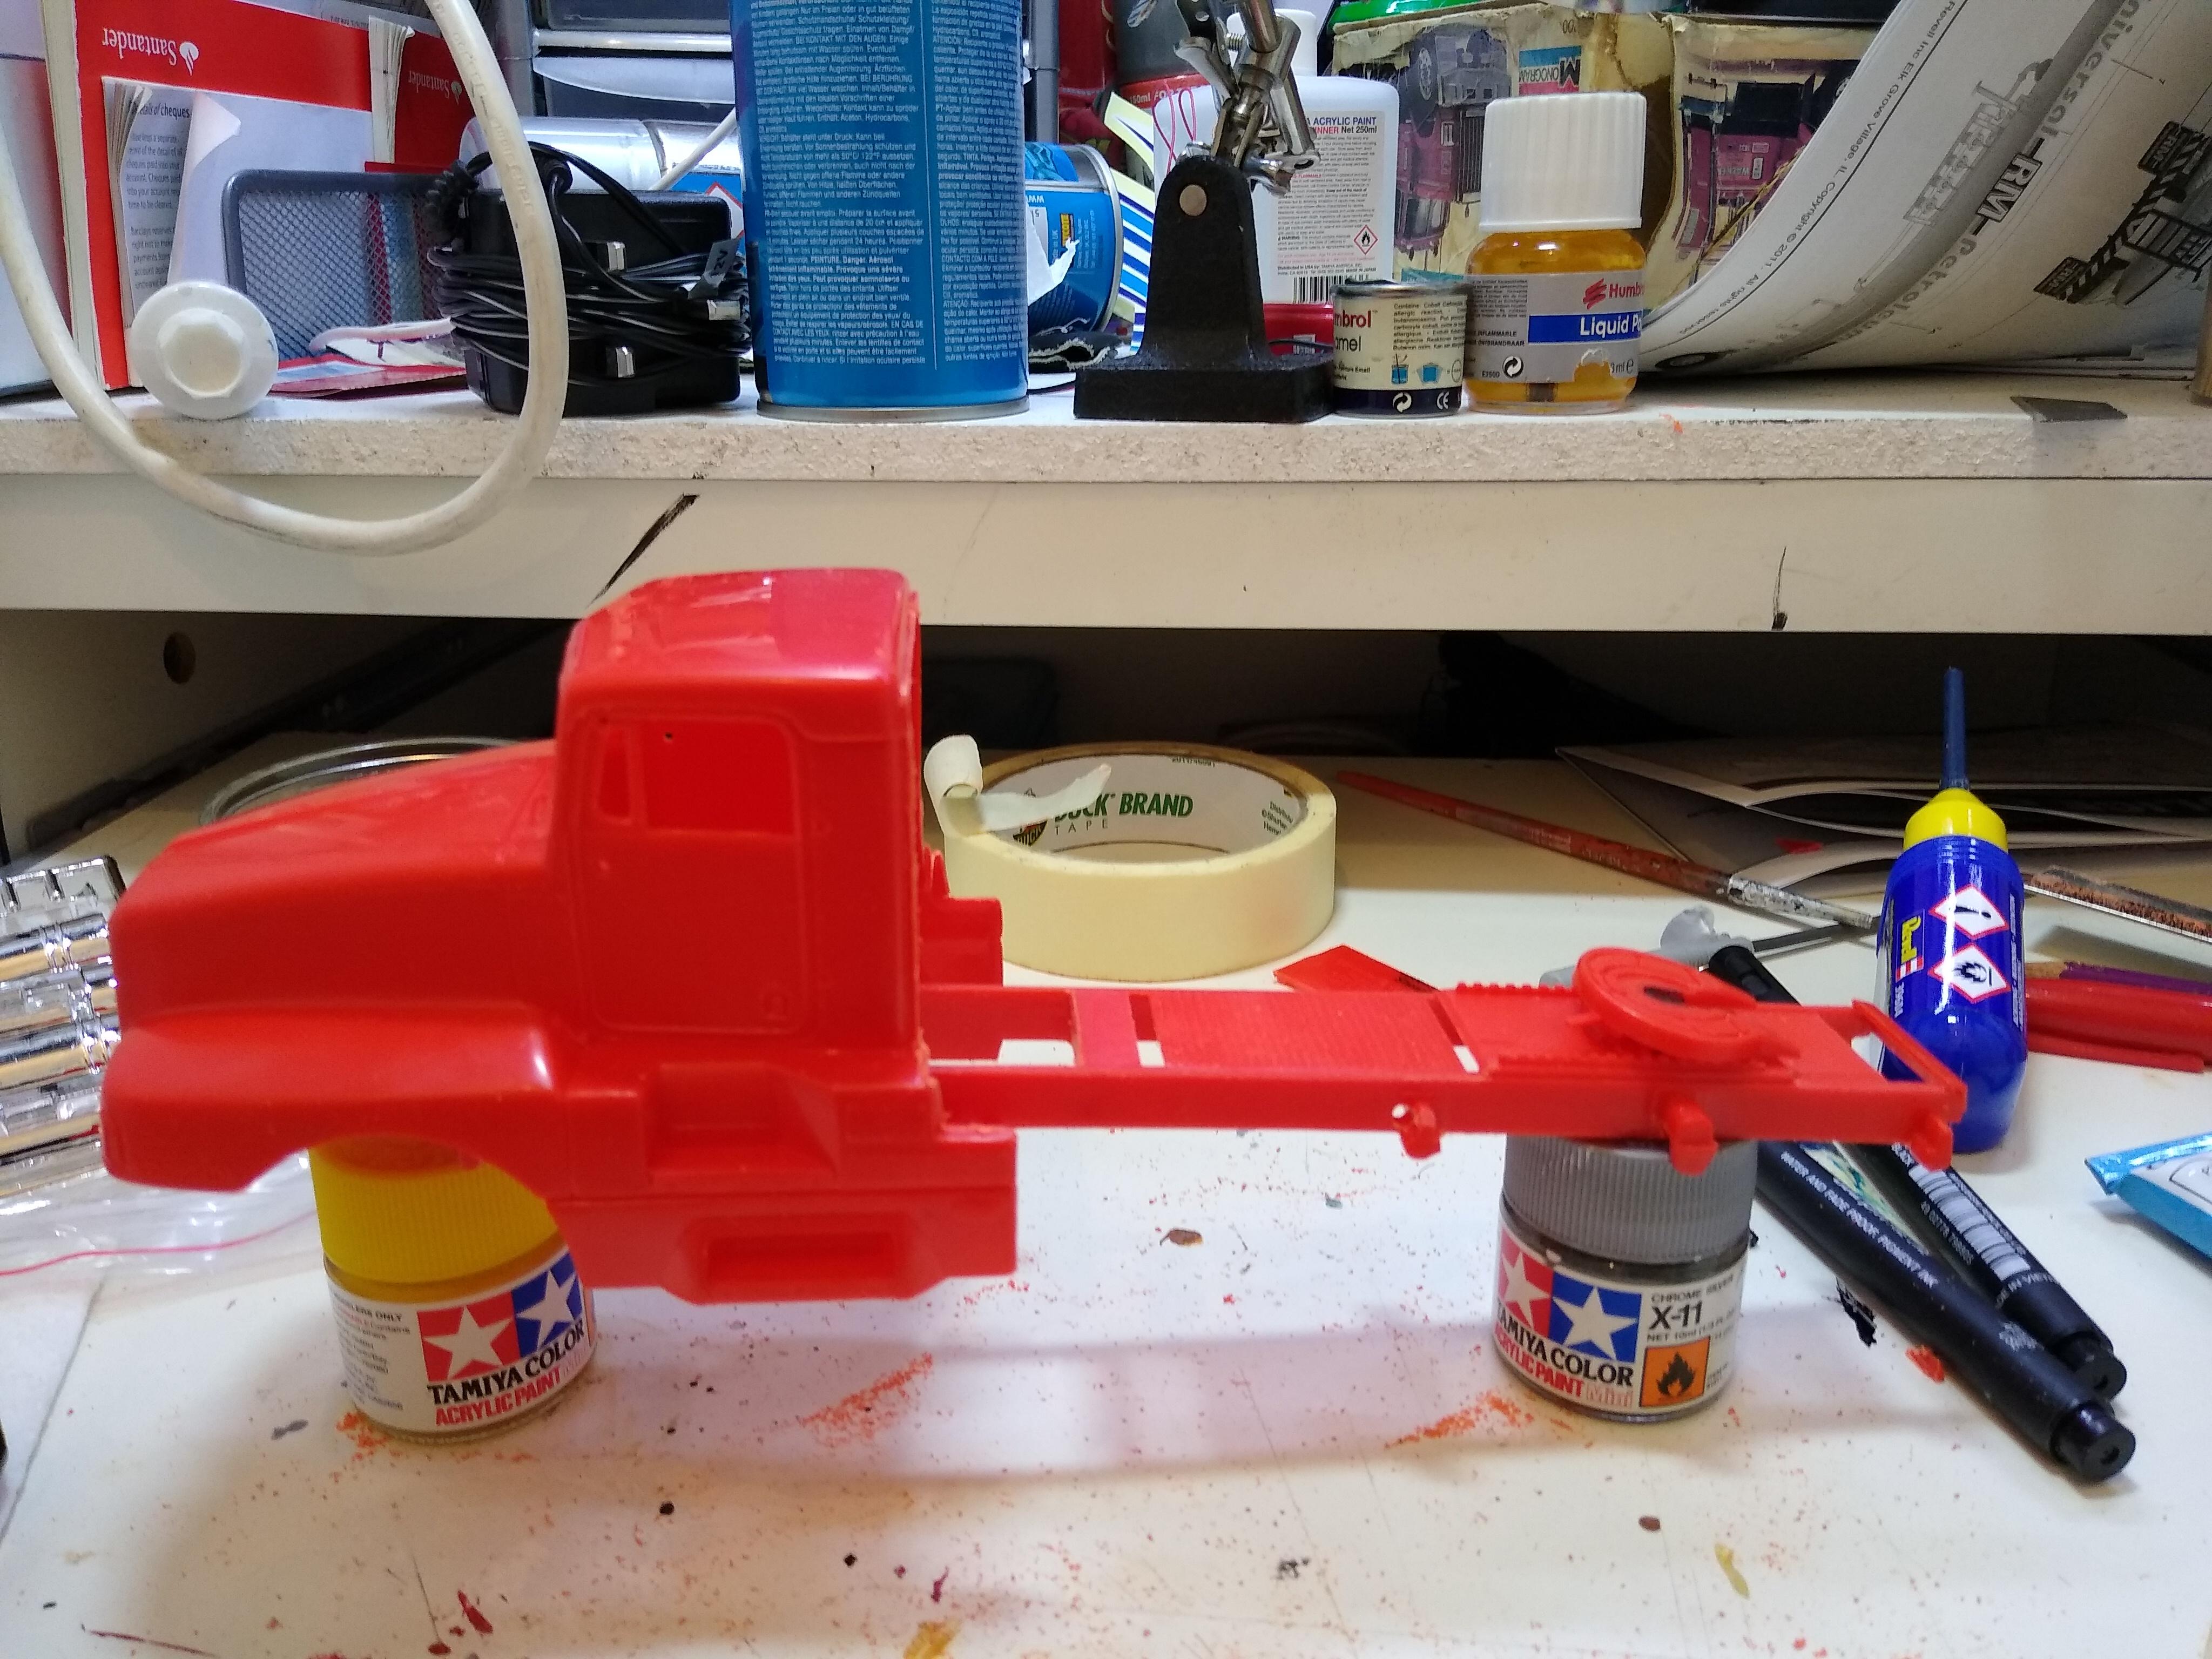
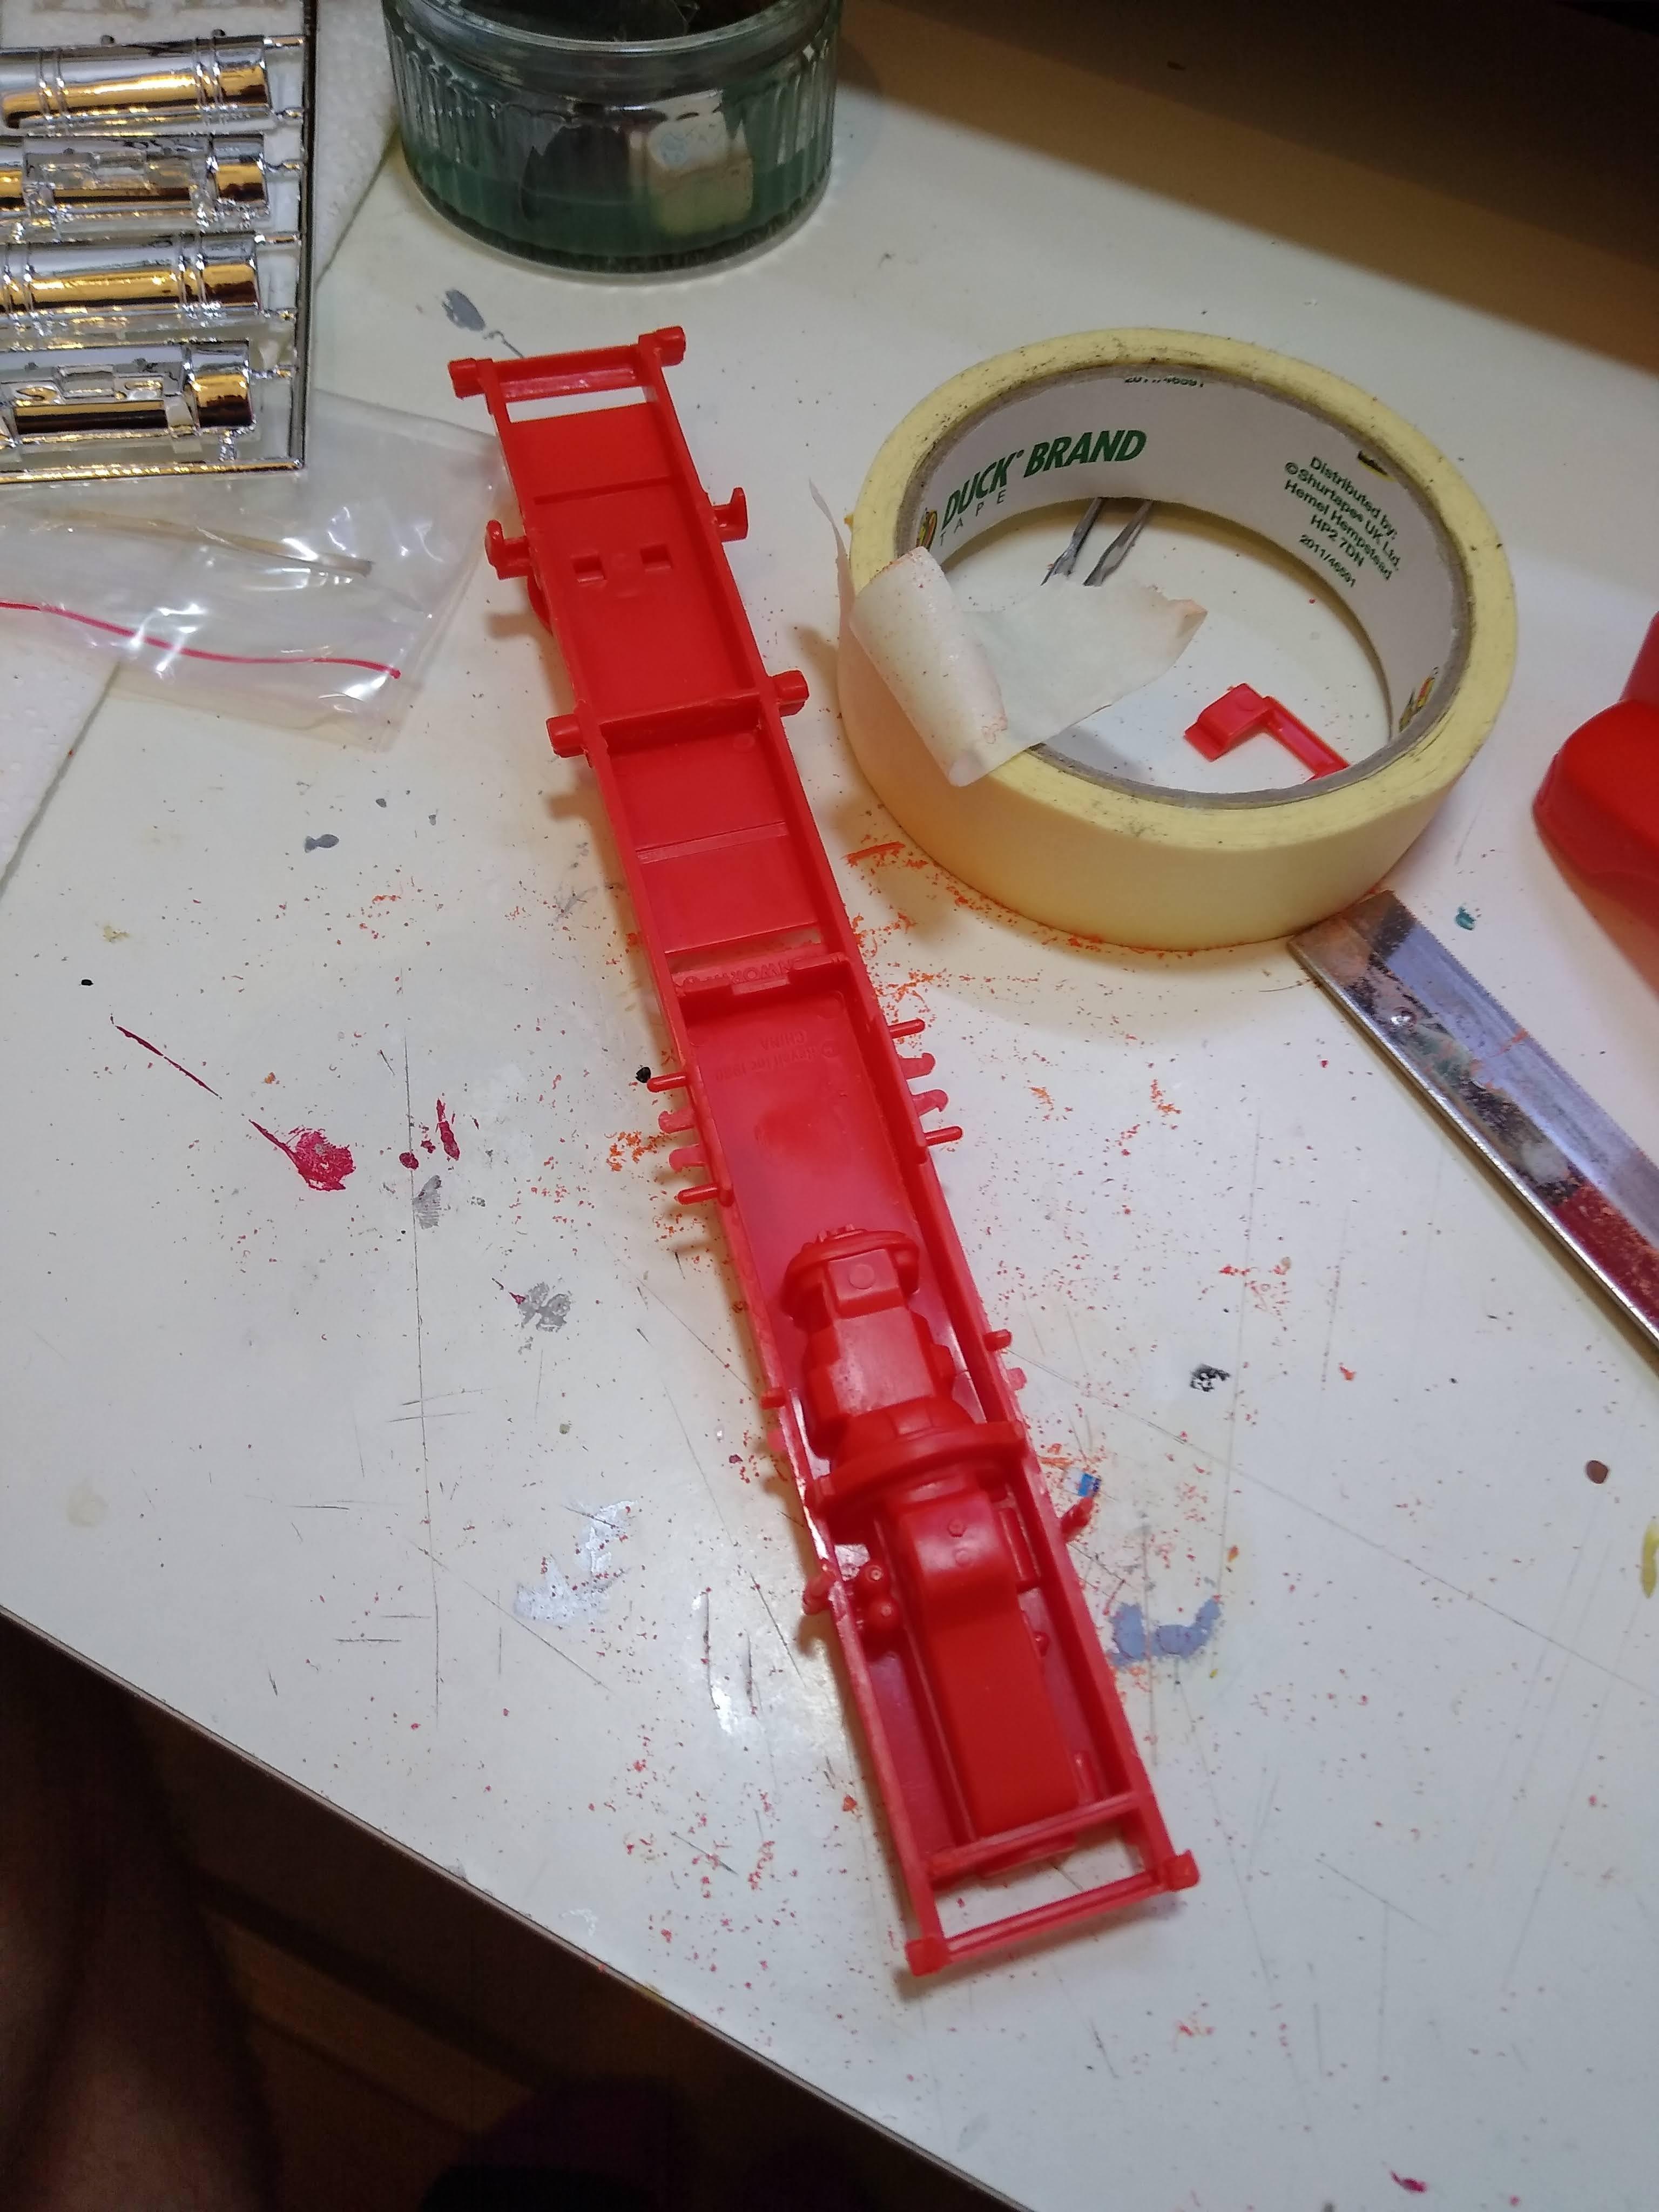
I said I wanted to add some detail to the chassis on this kit, Revell hide the lack of detail with tread plate so that had to come out first. This exposes the top of the rear diff which is hollow so that'll need building up, also you can see there are no brake chambers or shocks or proper crossmember etc...
-
Night to day
Rockford replied to Rockford's topic in WIP: Model Trucks: Big Rigs and Heavy Equipment
Andy, thanks for the tip, i'll look them up in case I need them. Tarheelrick, that's a very innovative car carrier made from the fire truck and the issue with red versus white plastic doesn't detract from it at all. Enrico & Gator, sometimes less is more! -
Night to day
Rockford replied to Rockford's topic in WIP: Model Trucks: Big Rigs and Heavy Equipment
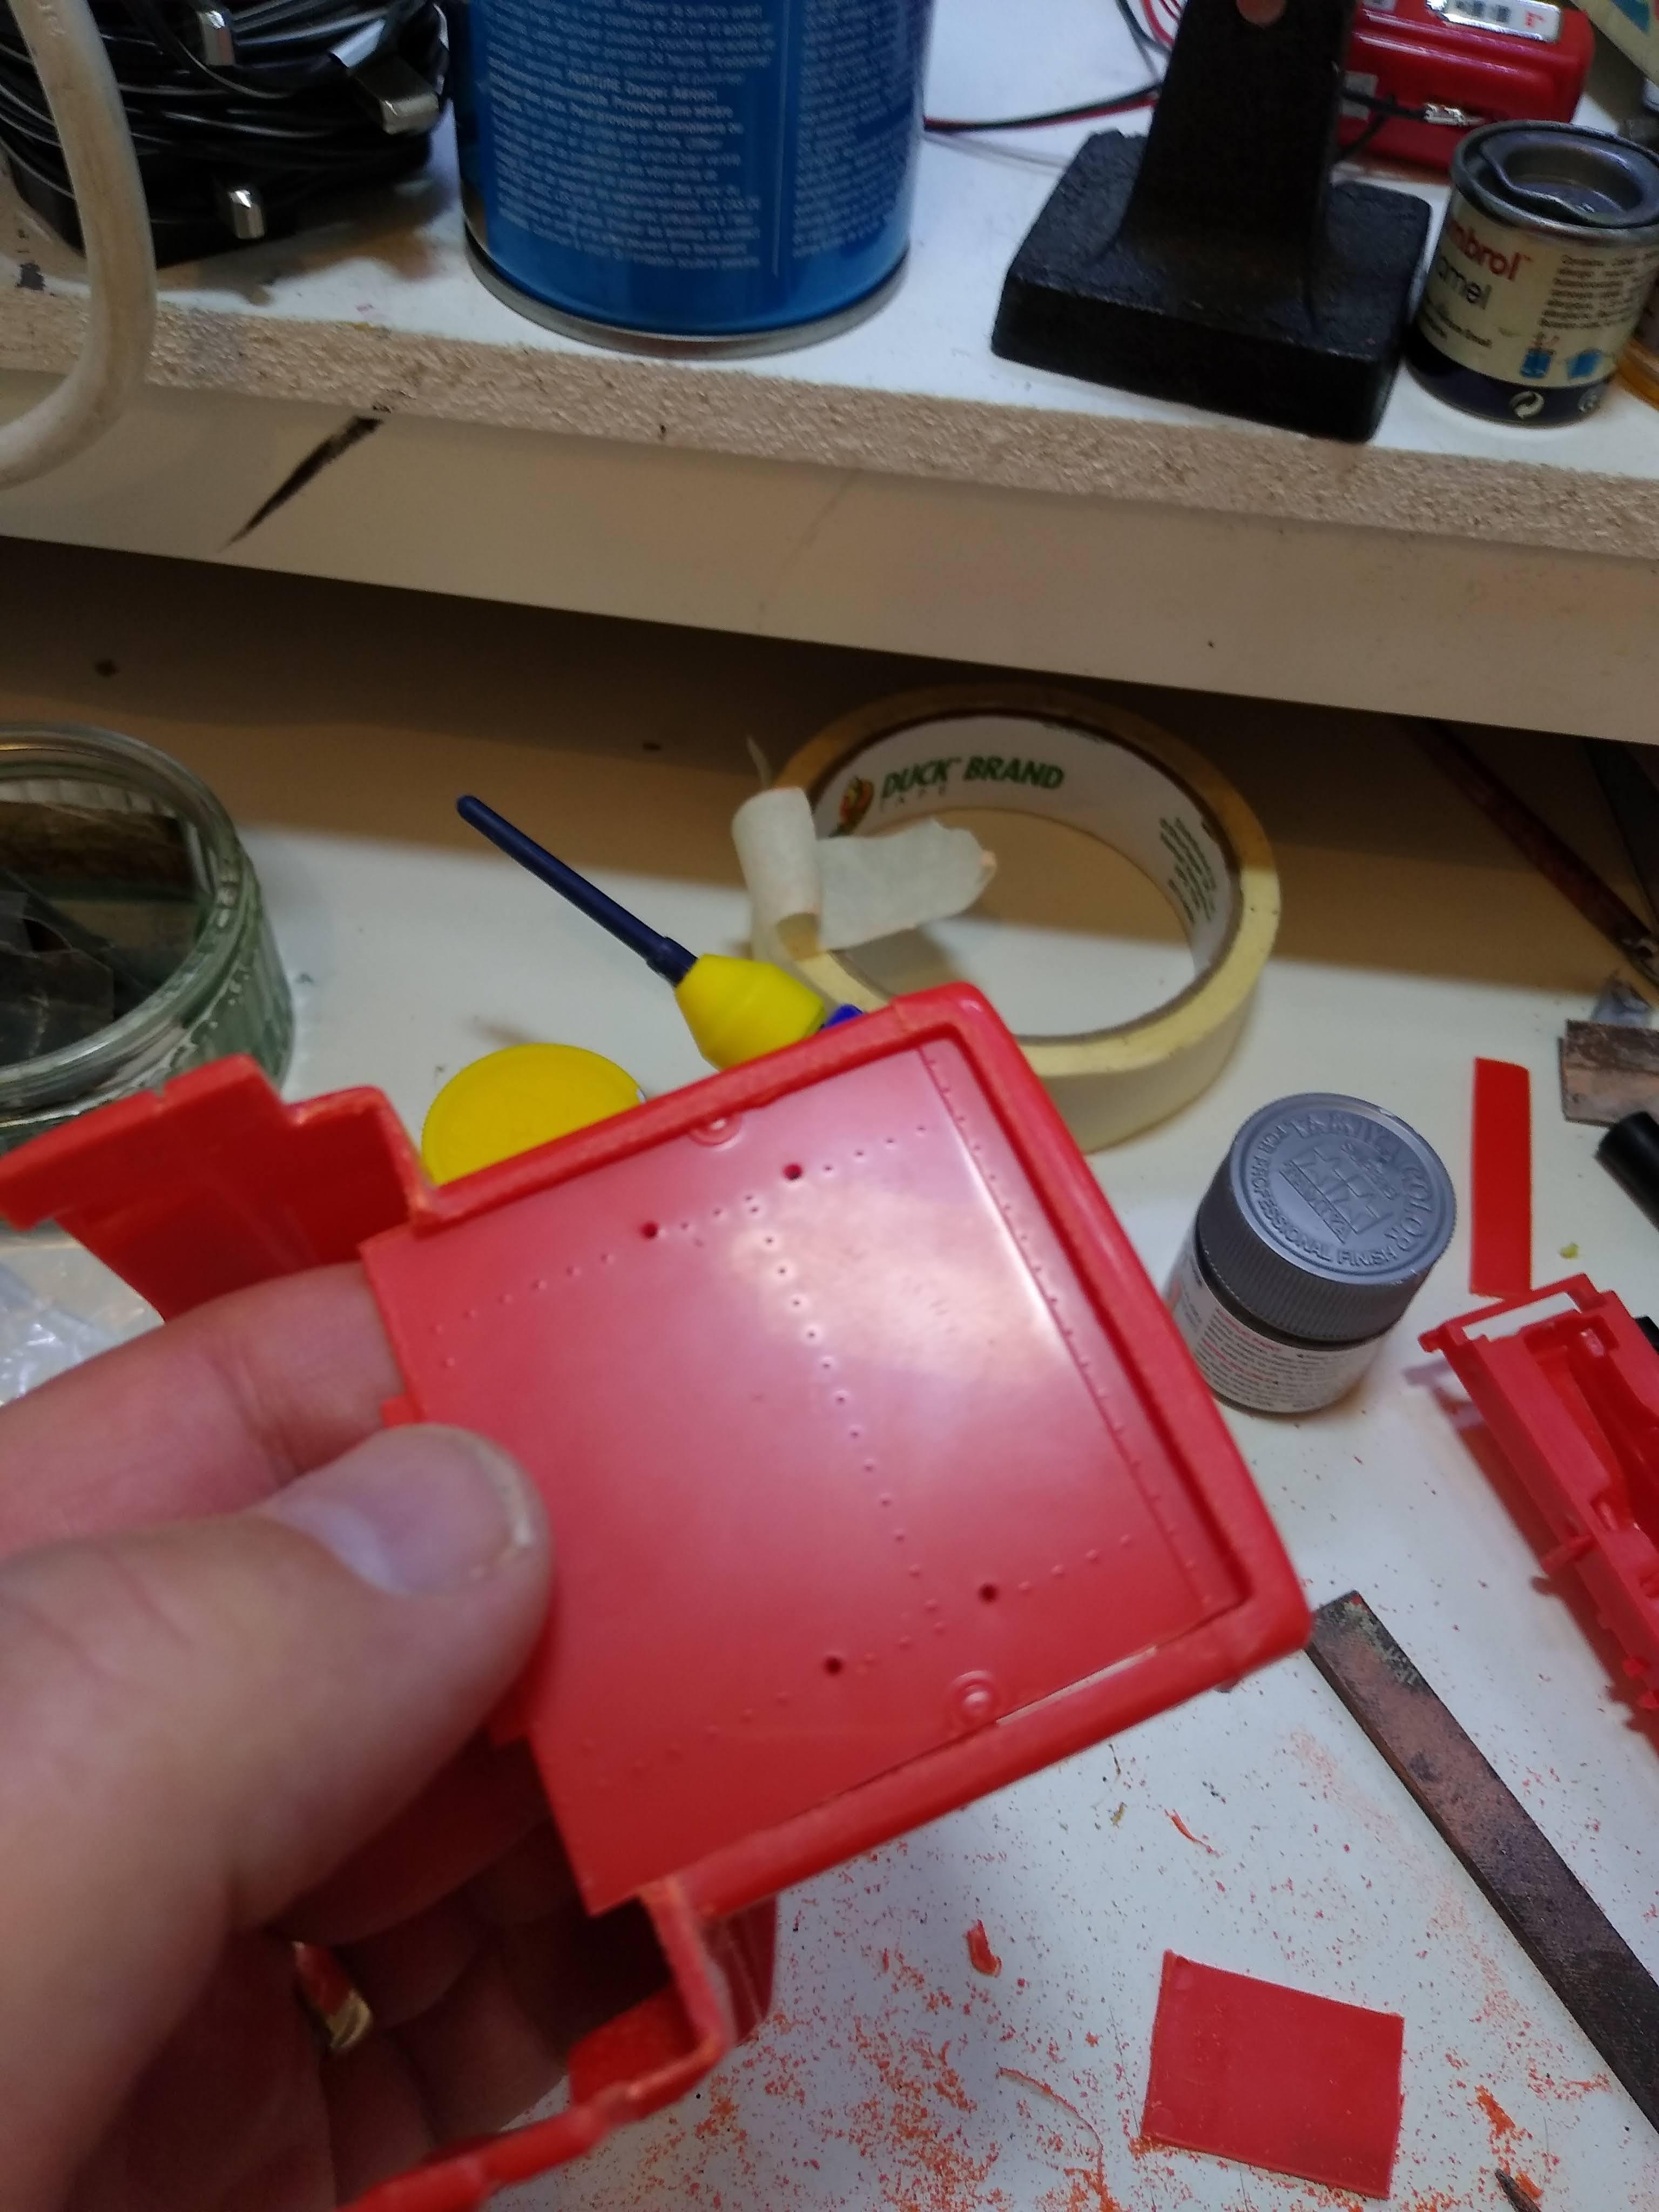
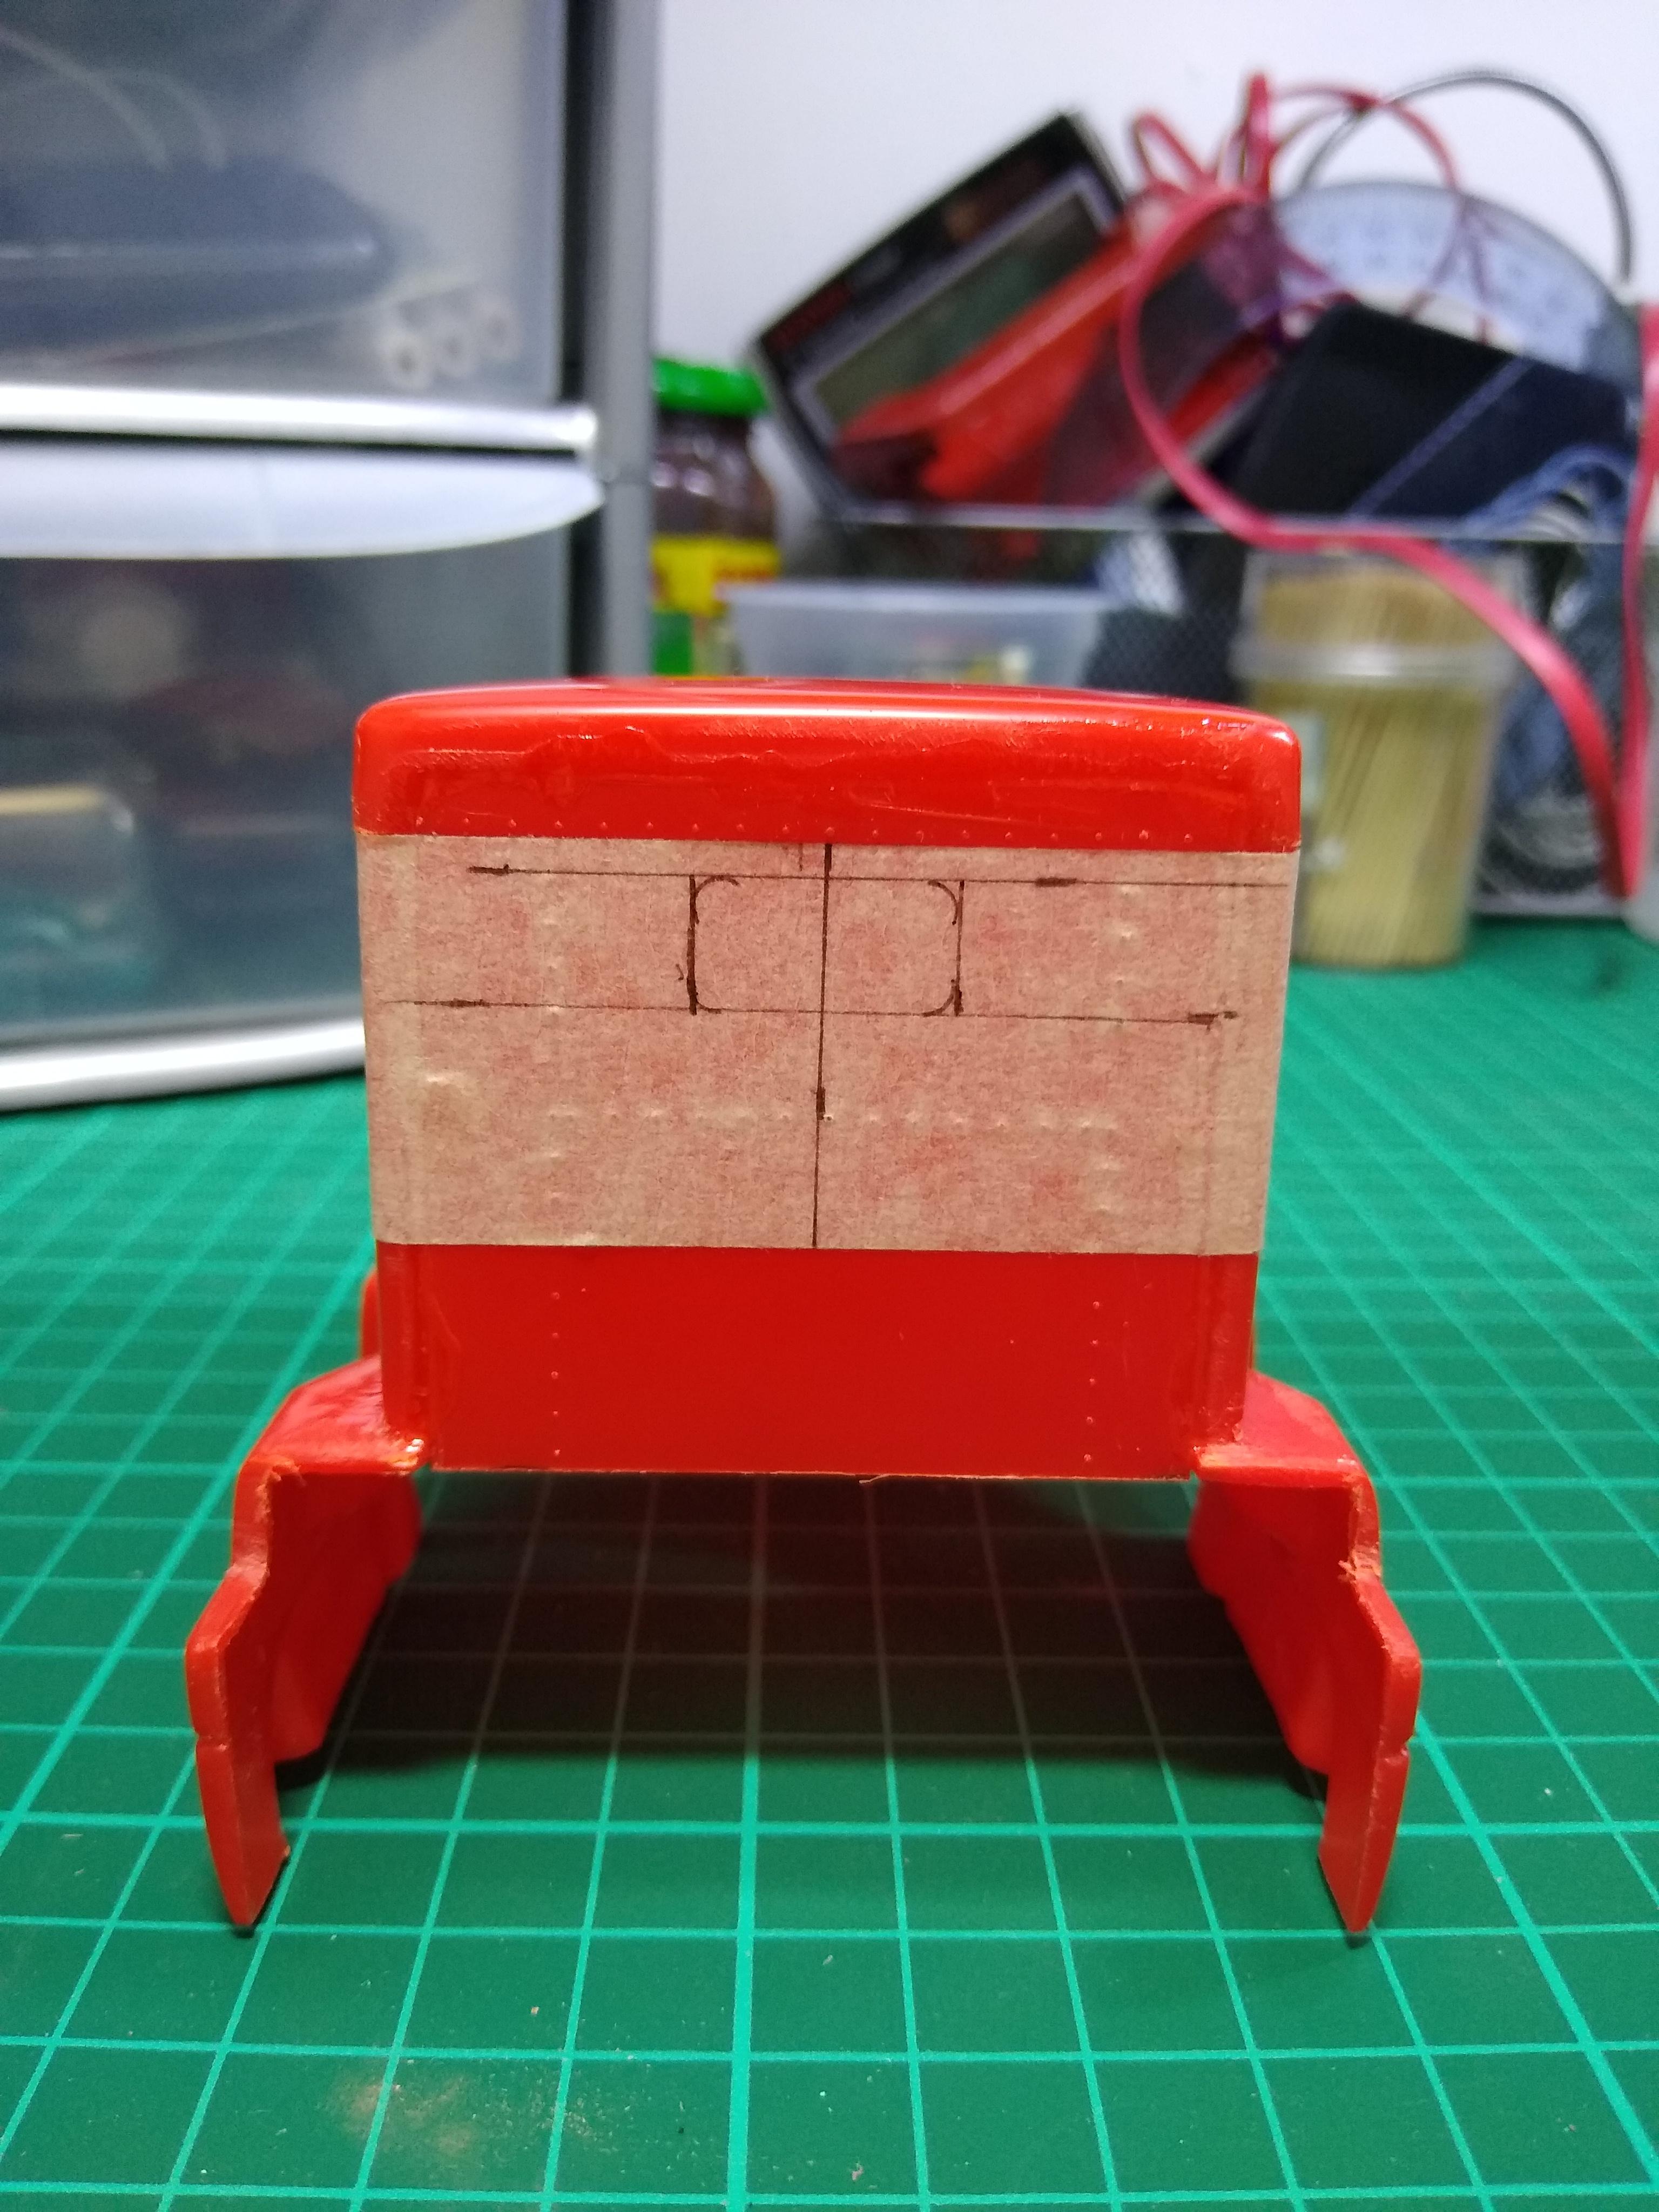
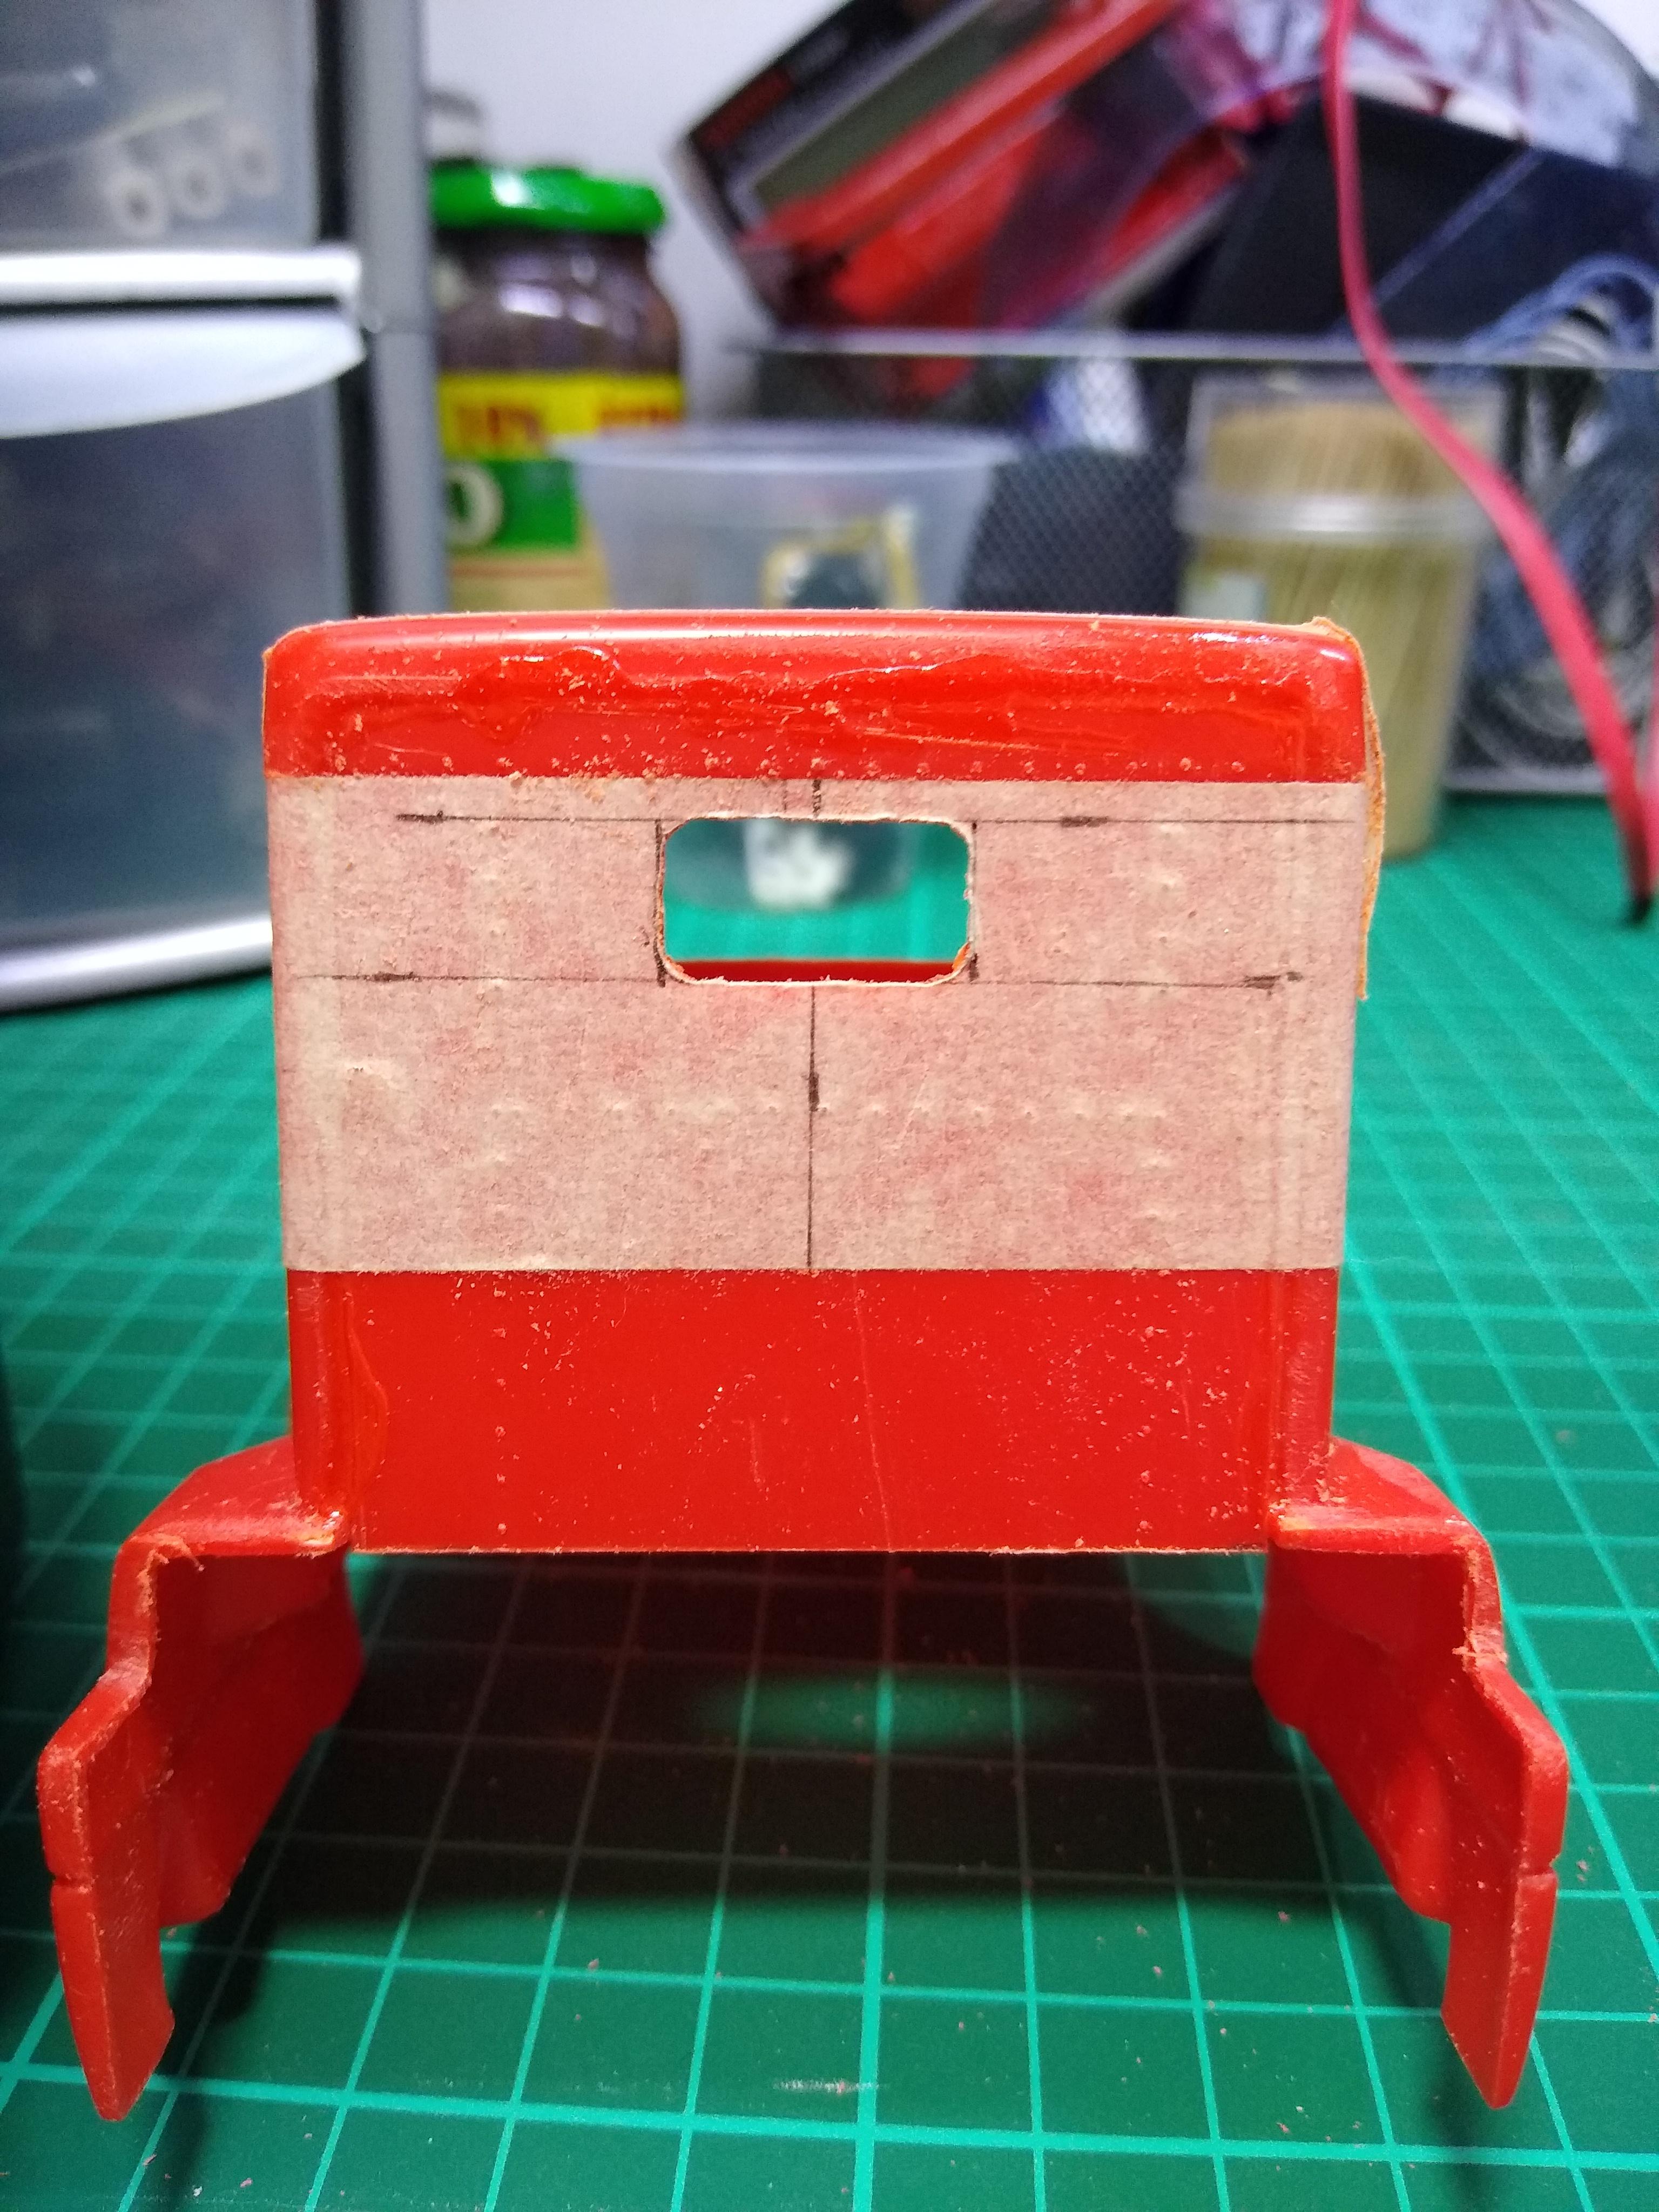
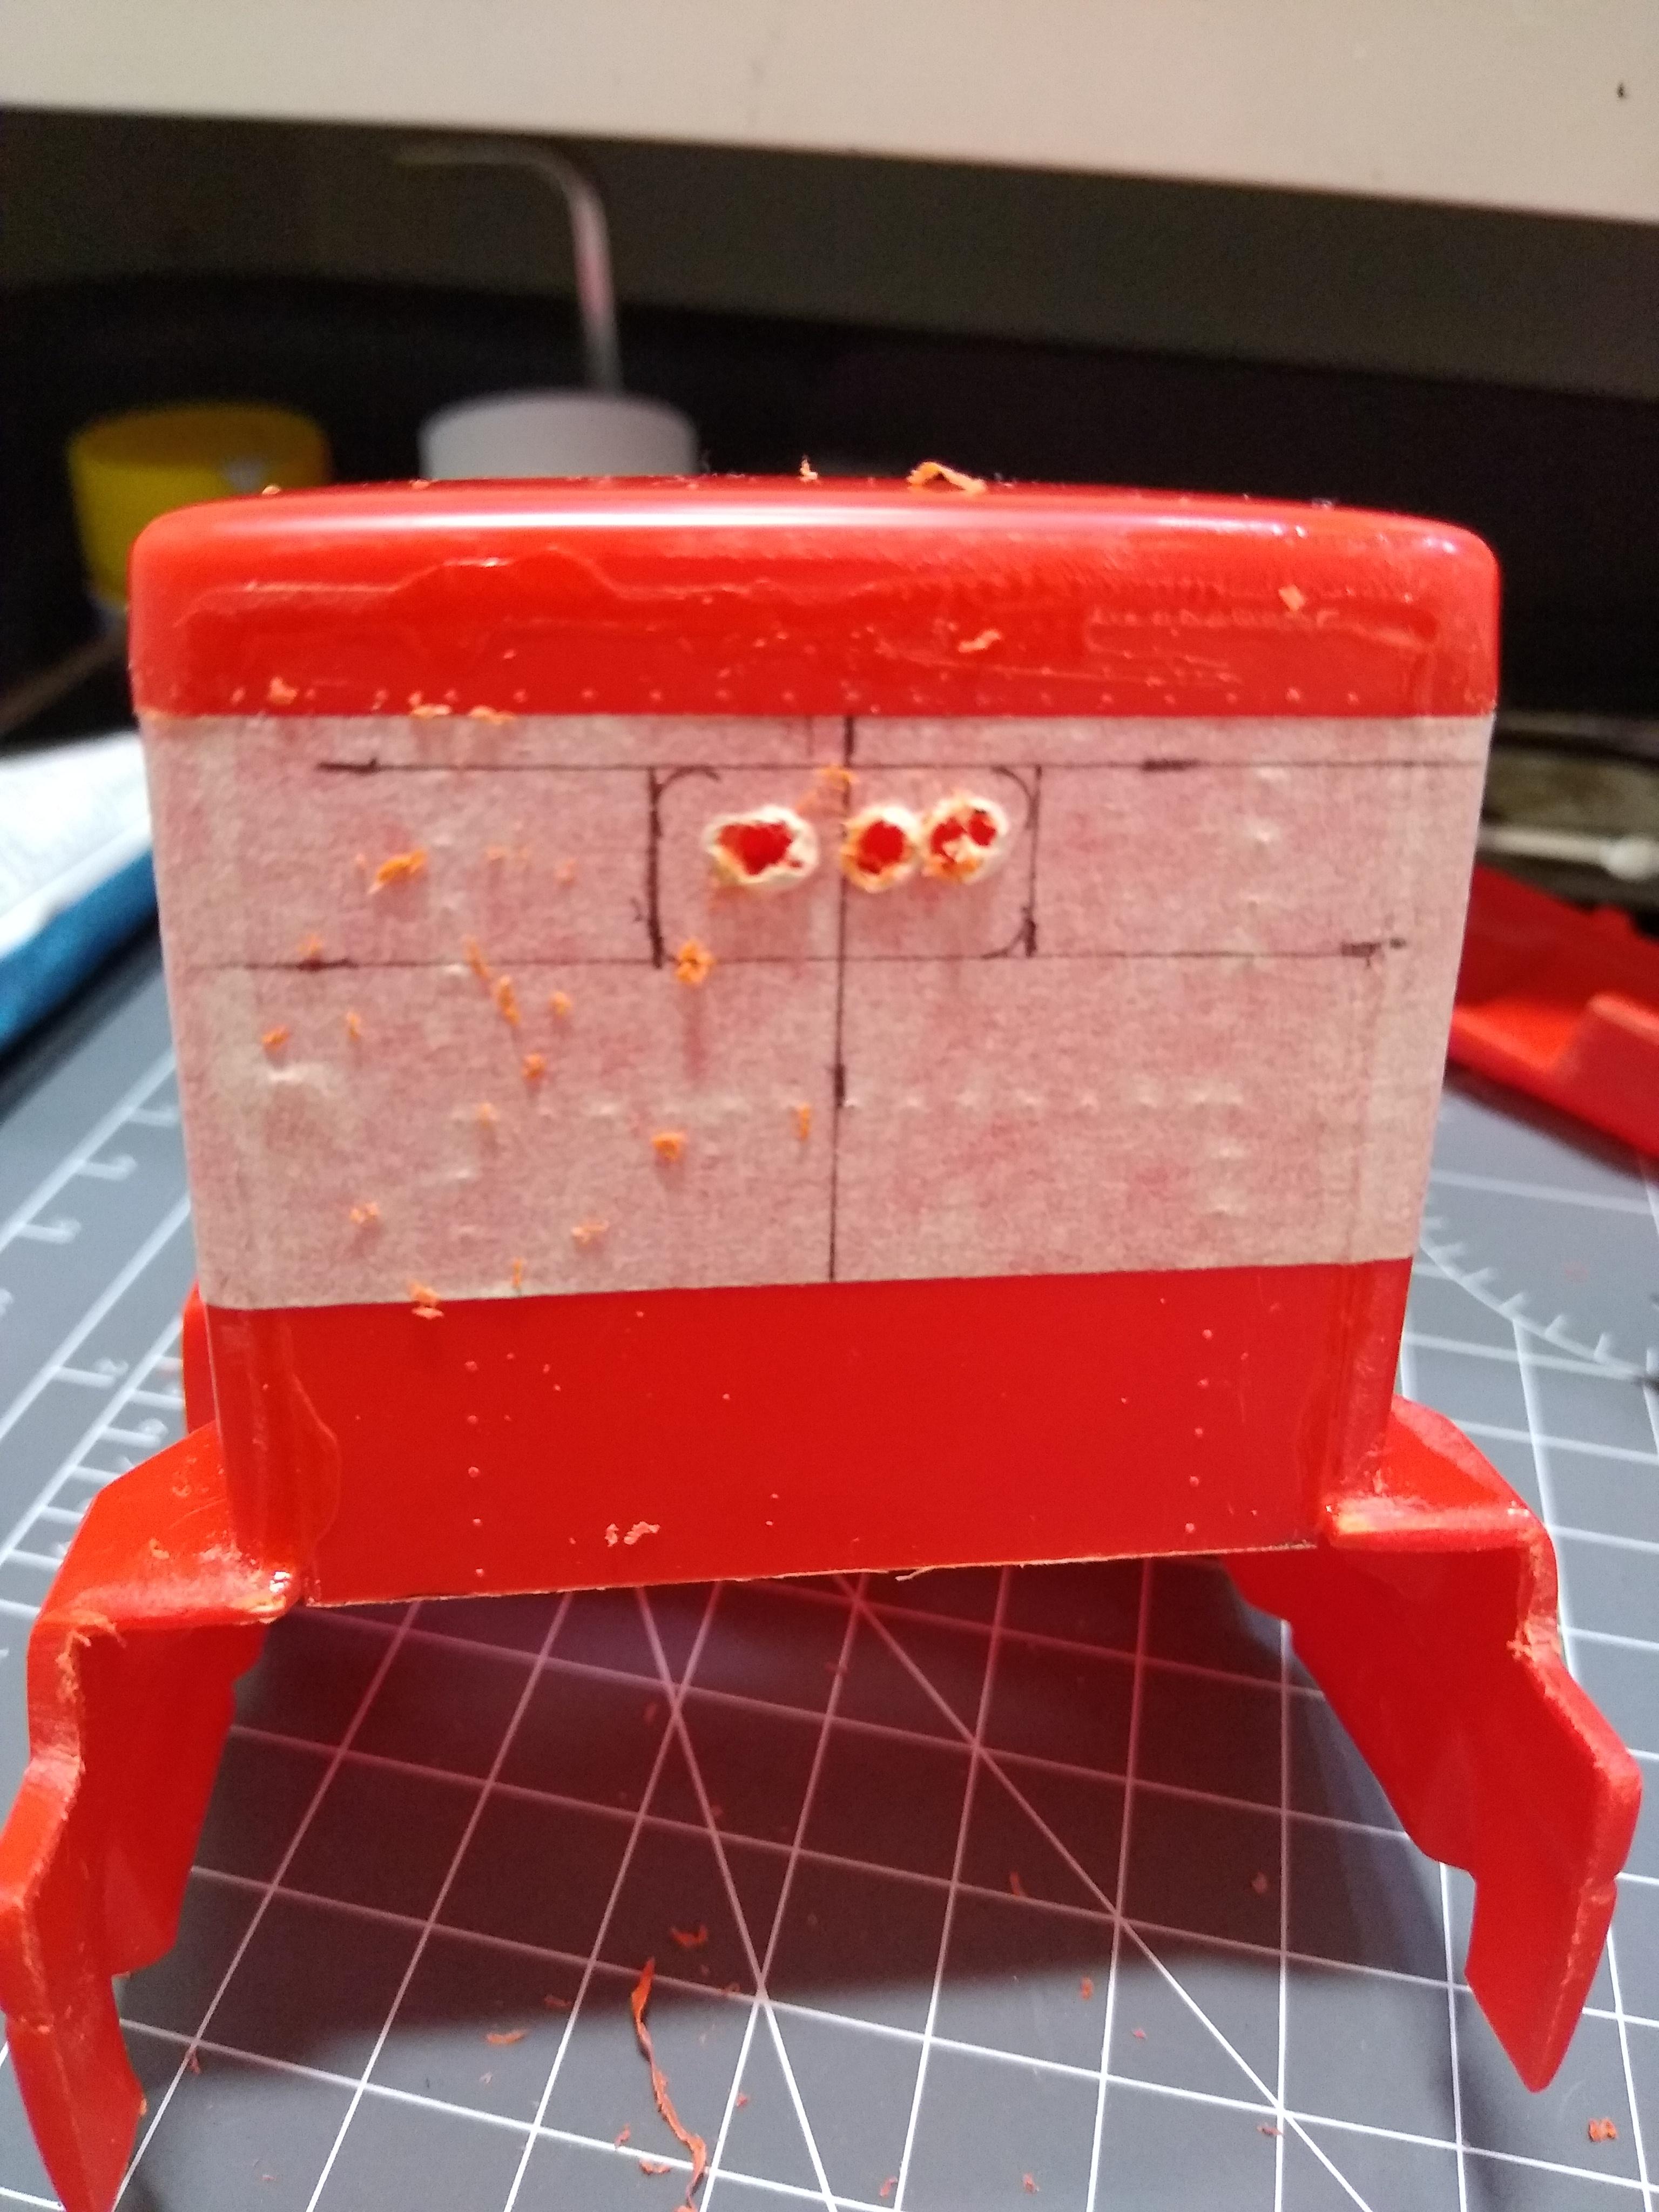
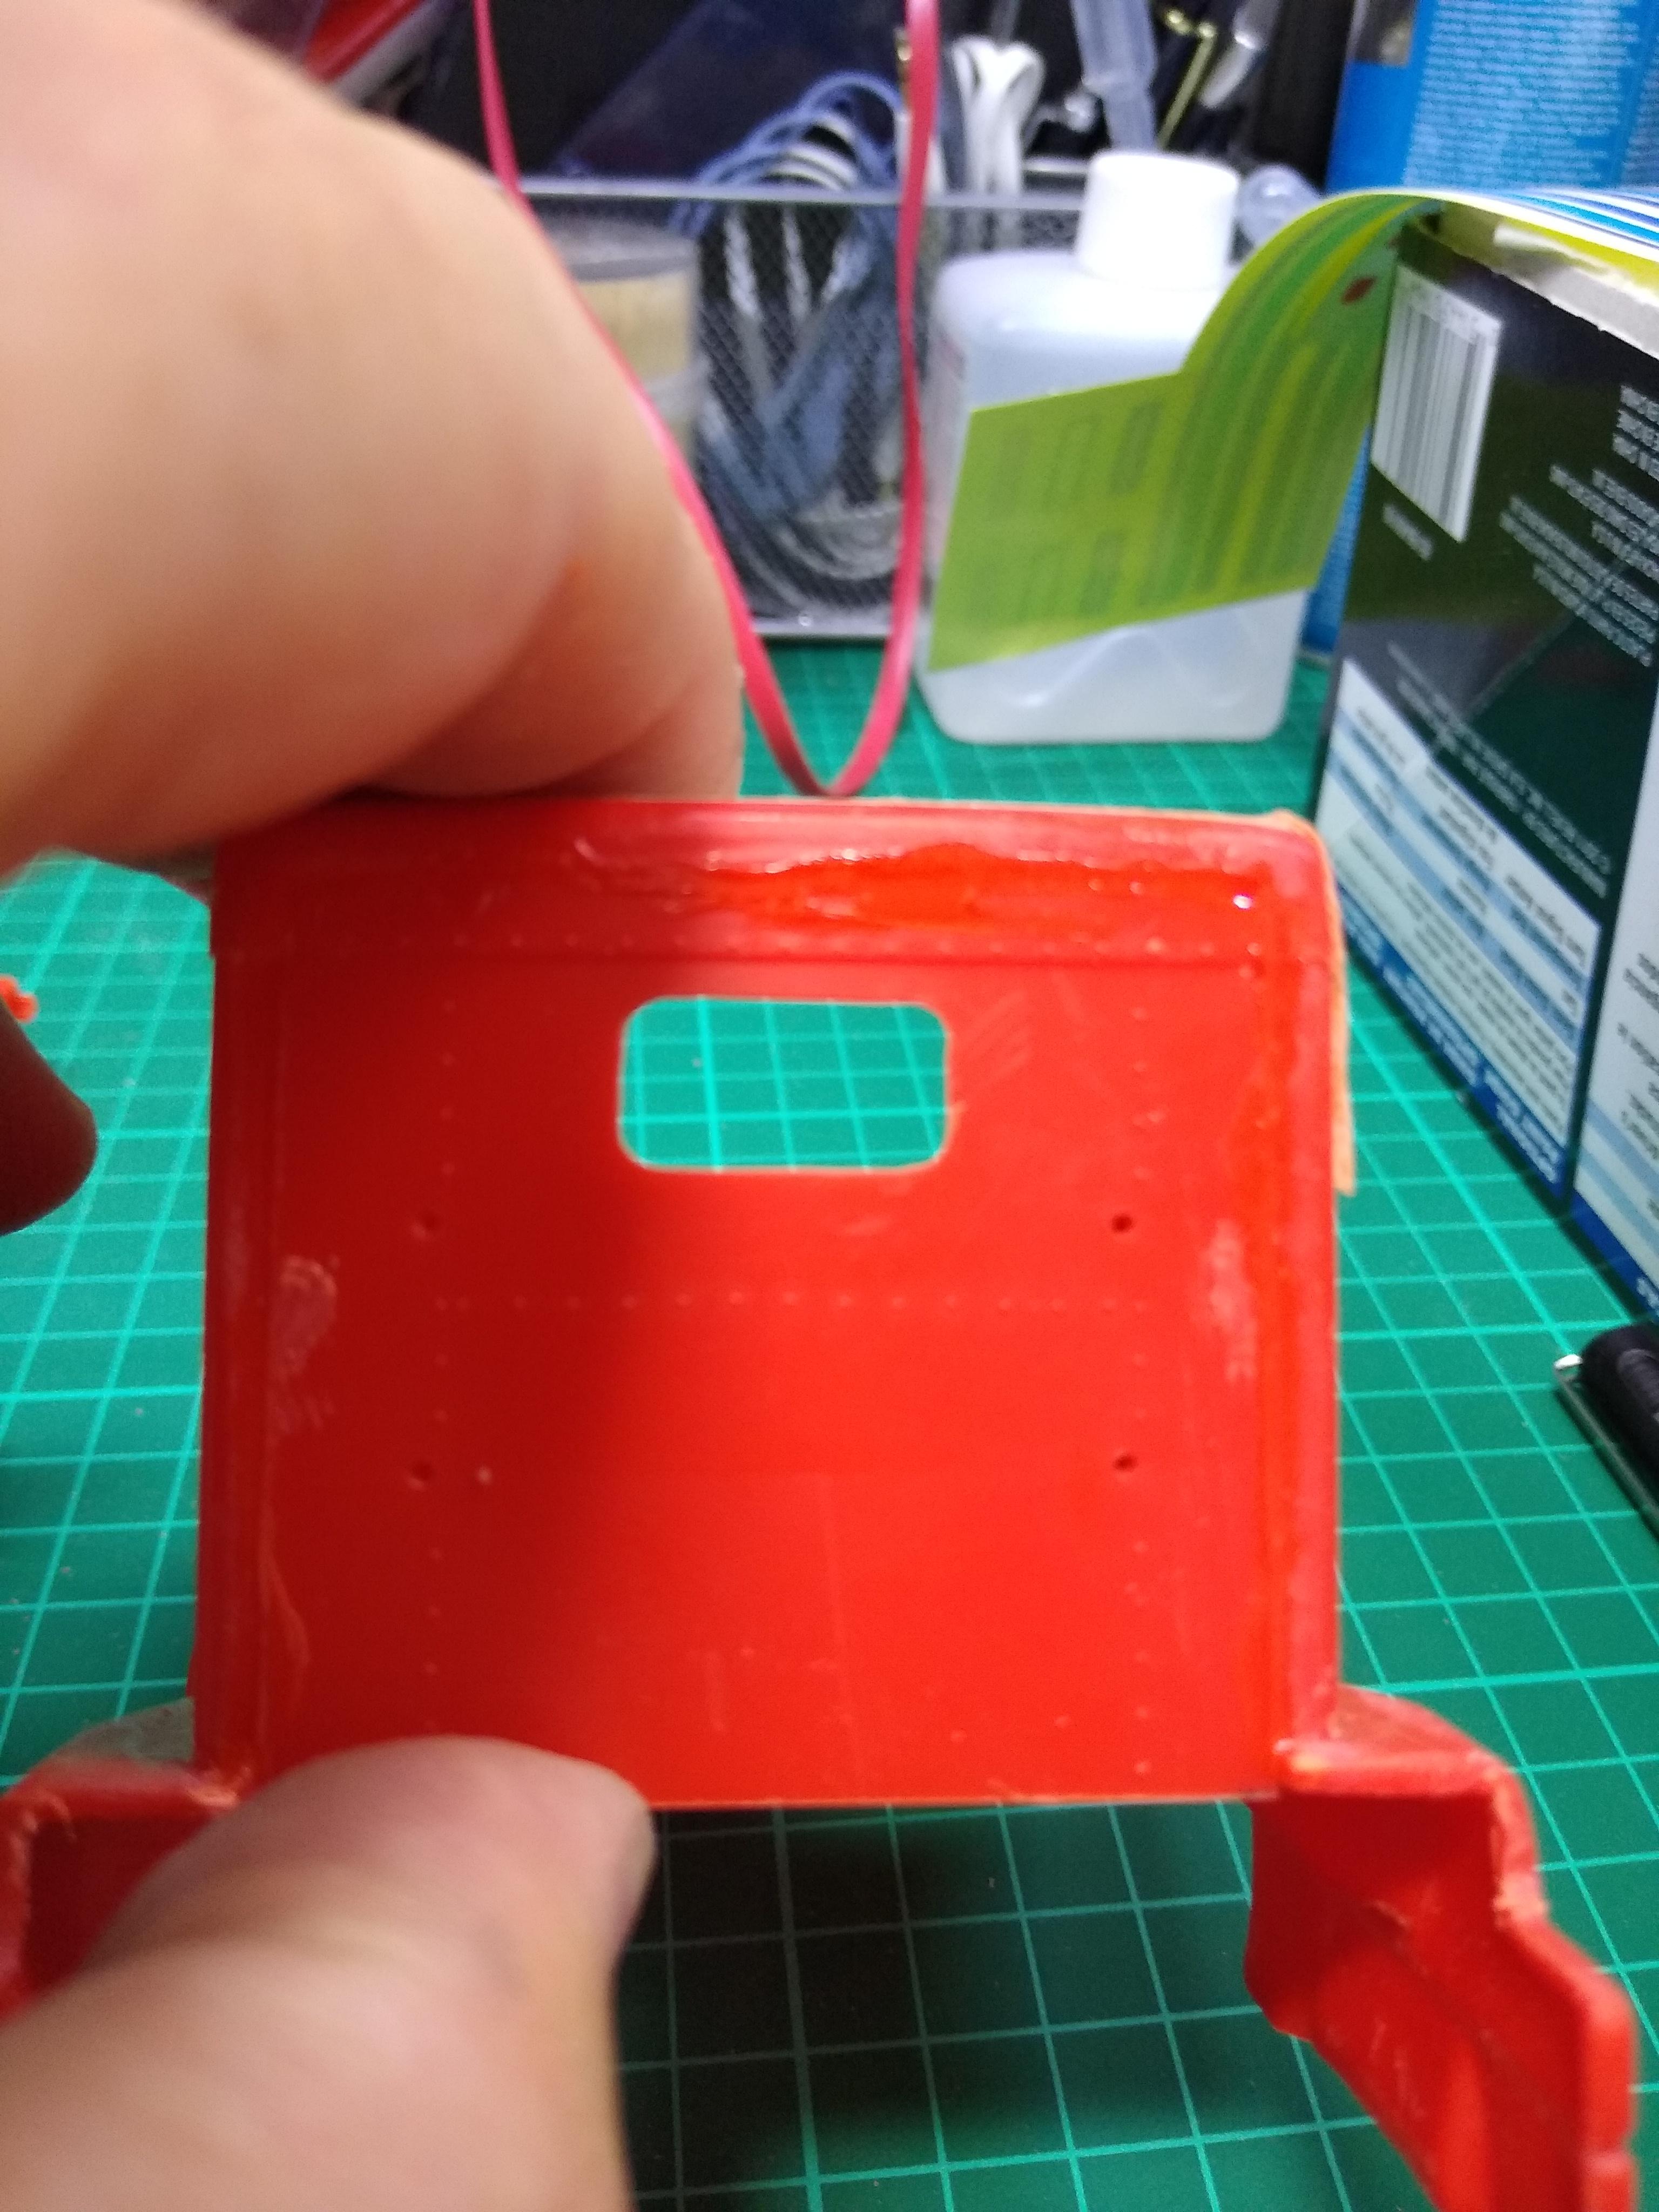
Scary part! Marking up and cutting out the rear window. I laid masking tape across the panel, found my centreline and then drew the box. Using a geometry set circle thingy I drew 3mm radius on each corner. Drilled a row of holes which I then broke together to form a slot and got filing. Used a rat-tail in the corners and finished off with 600 wet and dry. I left the tape on to protect the panel from scratches. Looks ok. Now to rub the joint in the back wall down.
-
Night to day
Rockford replied to Rockford's topic in WIP: Model Trucks: Big Rigs and Heavy Equipment
They look ok sitting on a shelf, they seemed to get the cab profiles spot on and that's the main thing your eye sees. The AMT ones do look good but they appear to be as rare as hen's teeth with prices to match, so no-go for me I'm afraid. Mind you some of the prices for these Revell kits are scandalous now. Which means I can't justify cannibalising other kits to splice tyres together [as suggested by Chariots of Fire], though I appreciate your idea, I'll just have to live with what I've got. Like we did in the 70s with British Leyland! ?? Aerodyne: One of the benefits of the 1/32 kits is the size, I don't have the room for 1/25 kits, they're just too big, though didn't stop me buying one again recently. [Recently in modellers terms is within the last 15 years] Thanks for your comments guys, I'm determined this build will not stall. -
Night to day
Rockford replied to Rockford's topic in WIP: Model Trucks: Big Rigs and Heavy Equipment
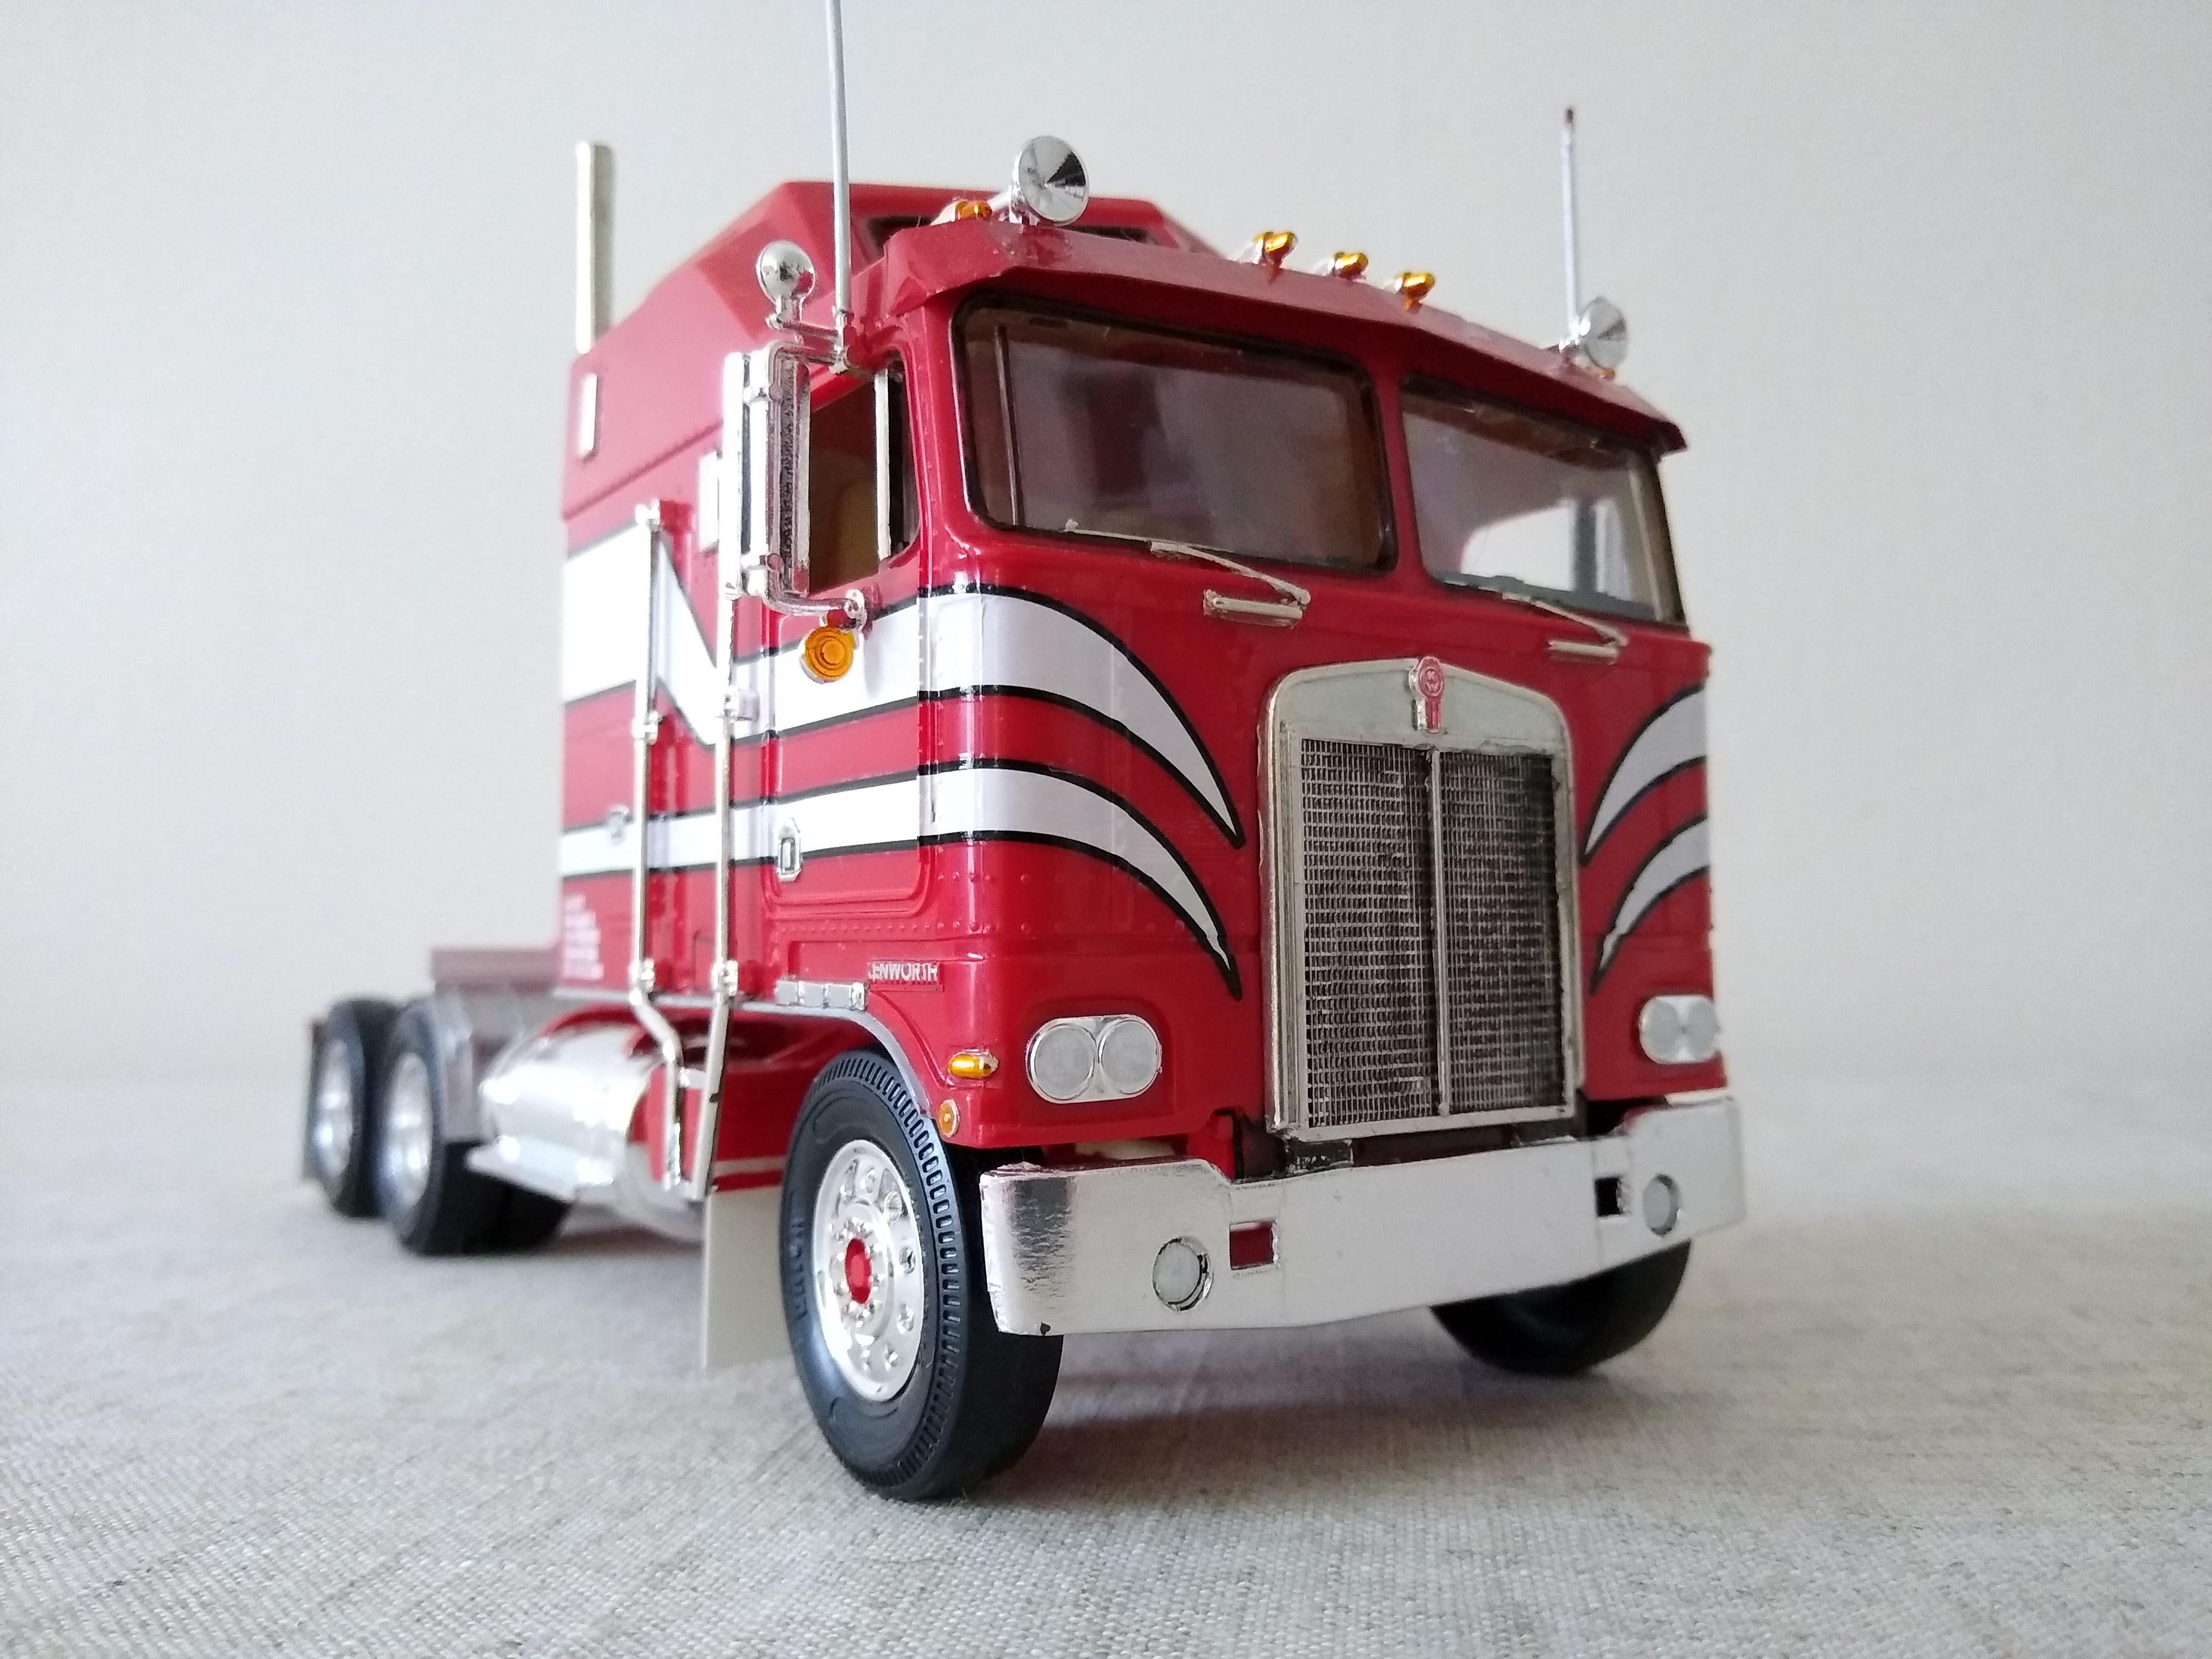
This is the truck I'd like to copy with this build. Tidy little number.
-
Night to day
Rockford replied to Rockford's topic in WIP: Model Trucks: Big Rigs and Heavy Equipment
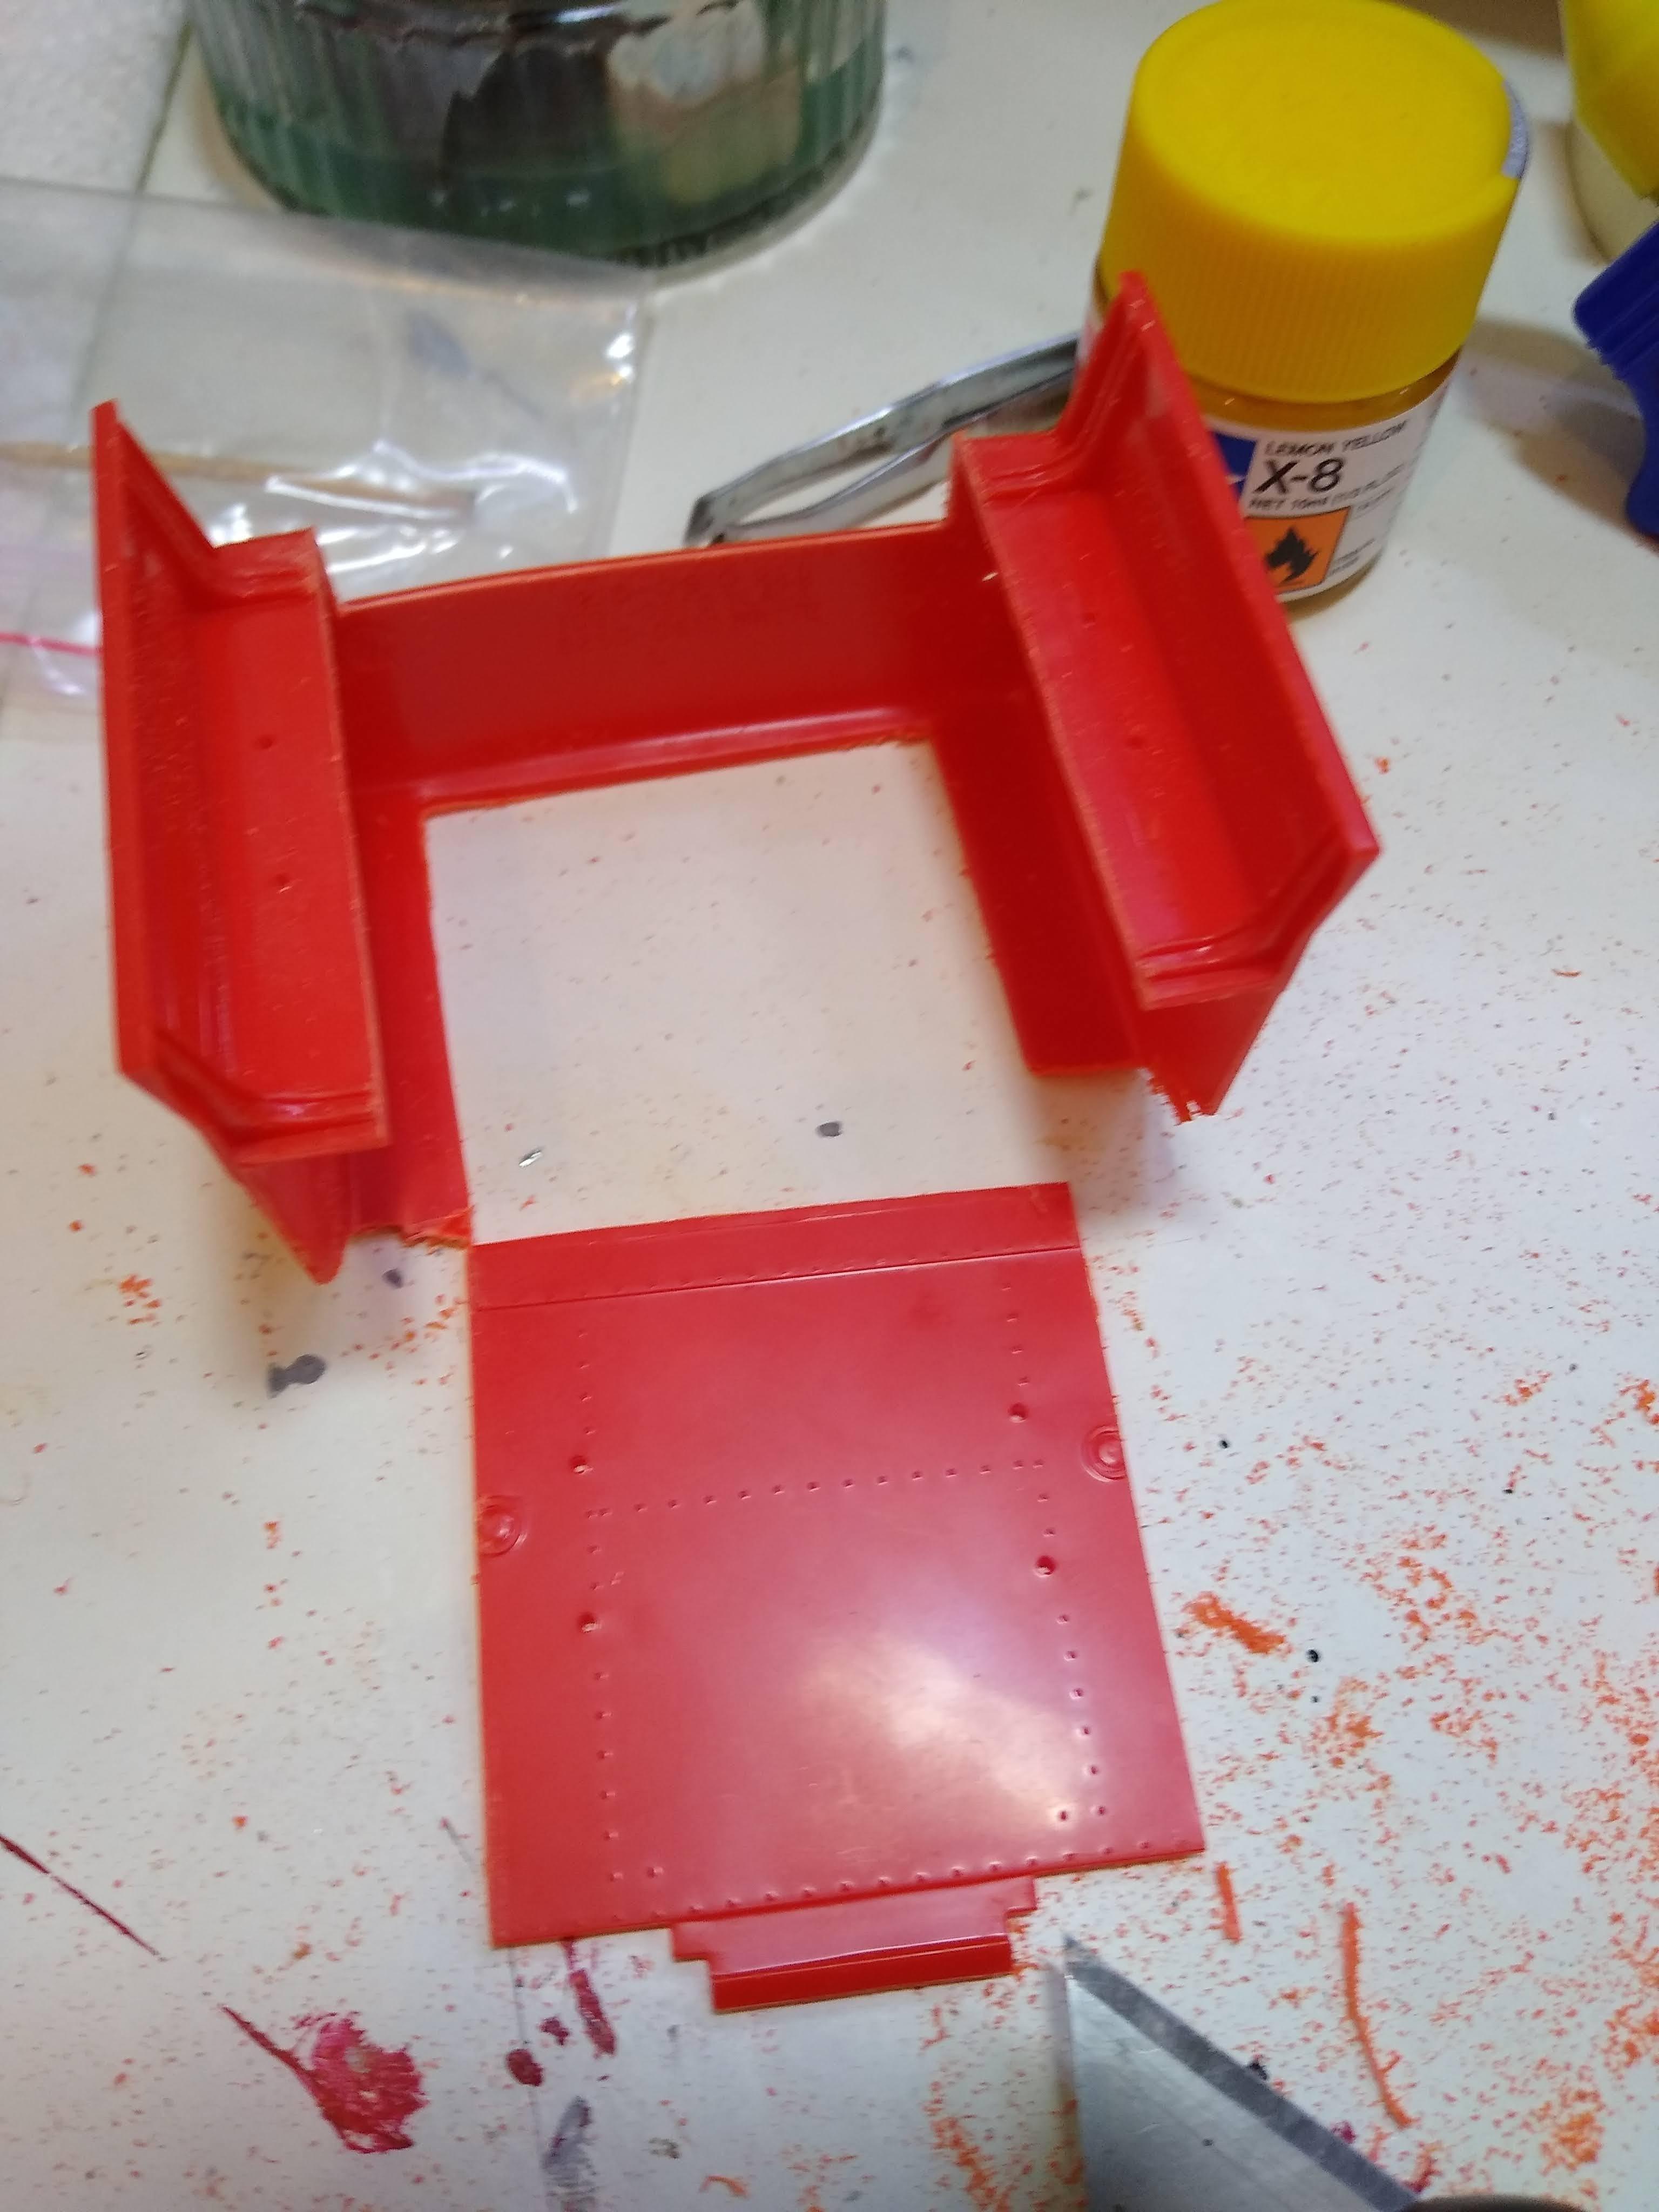
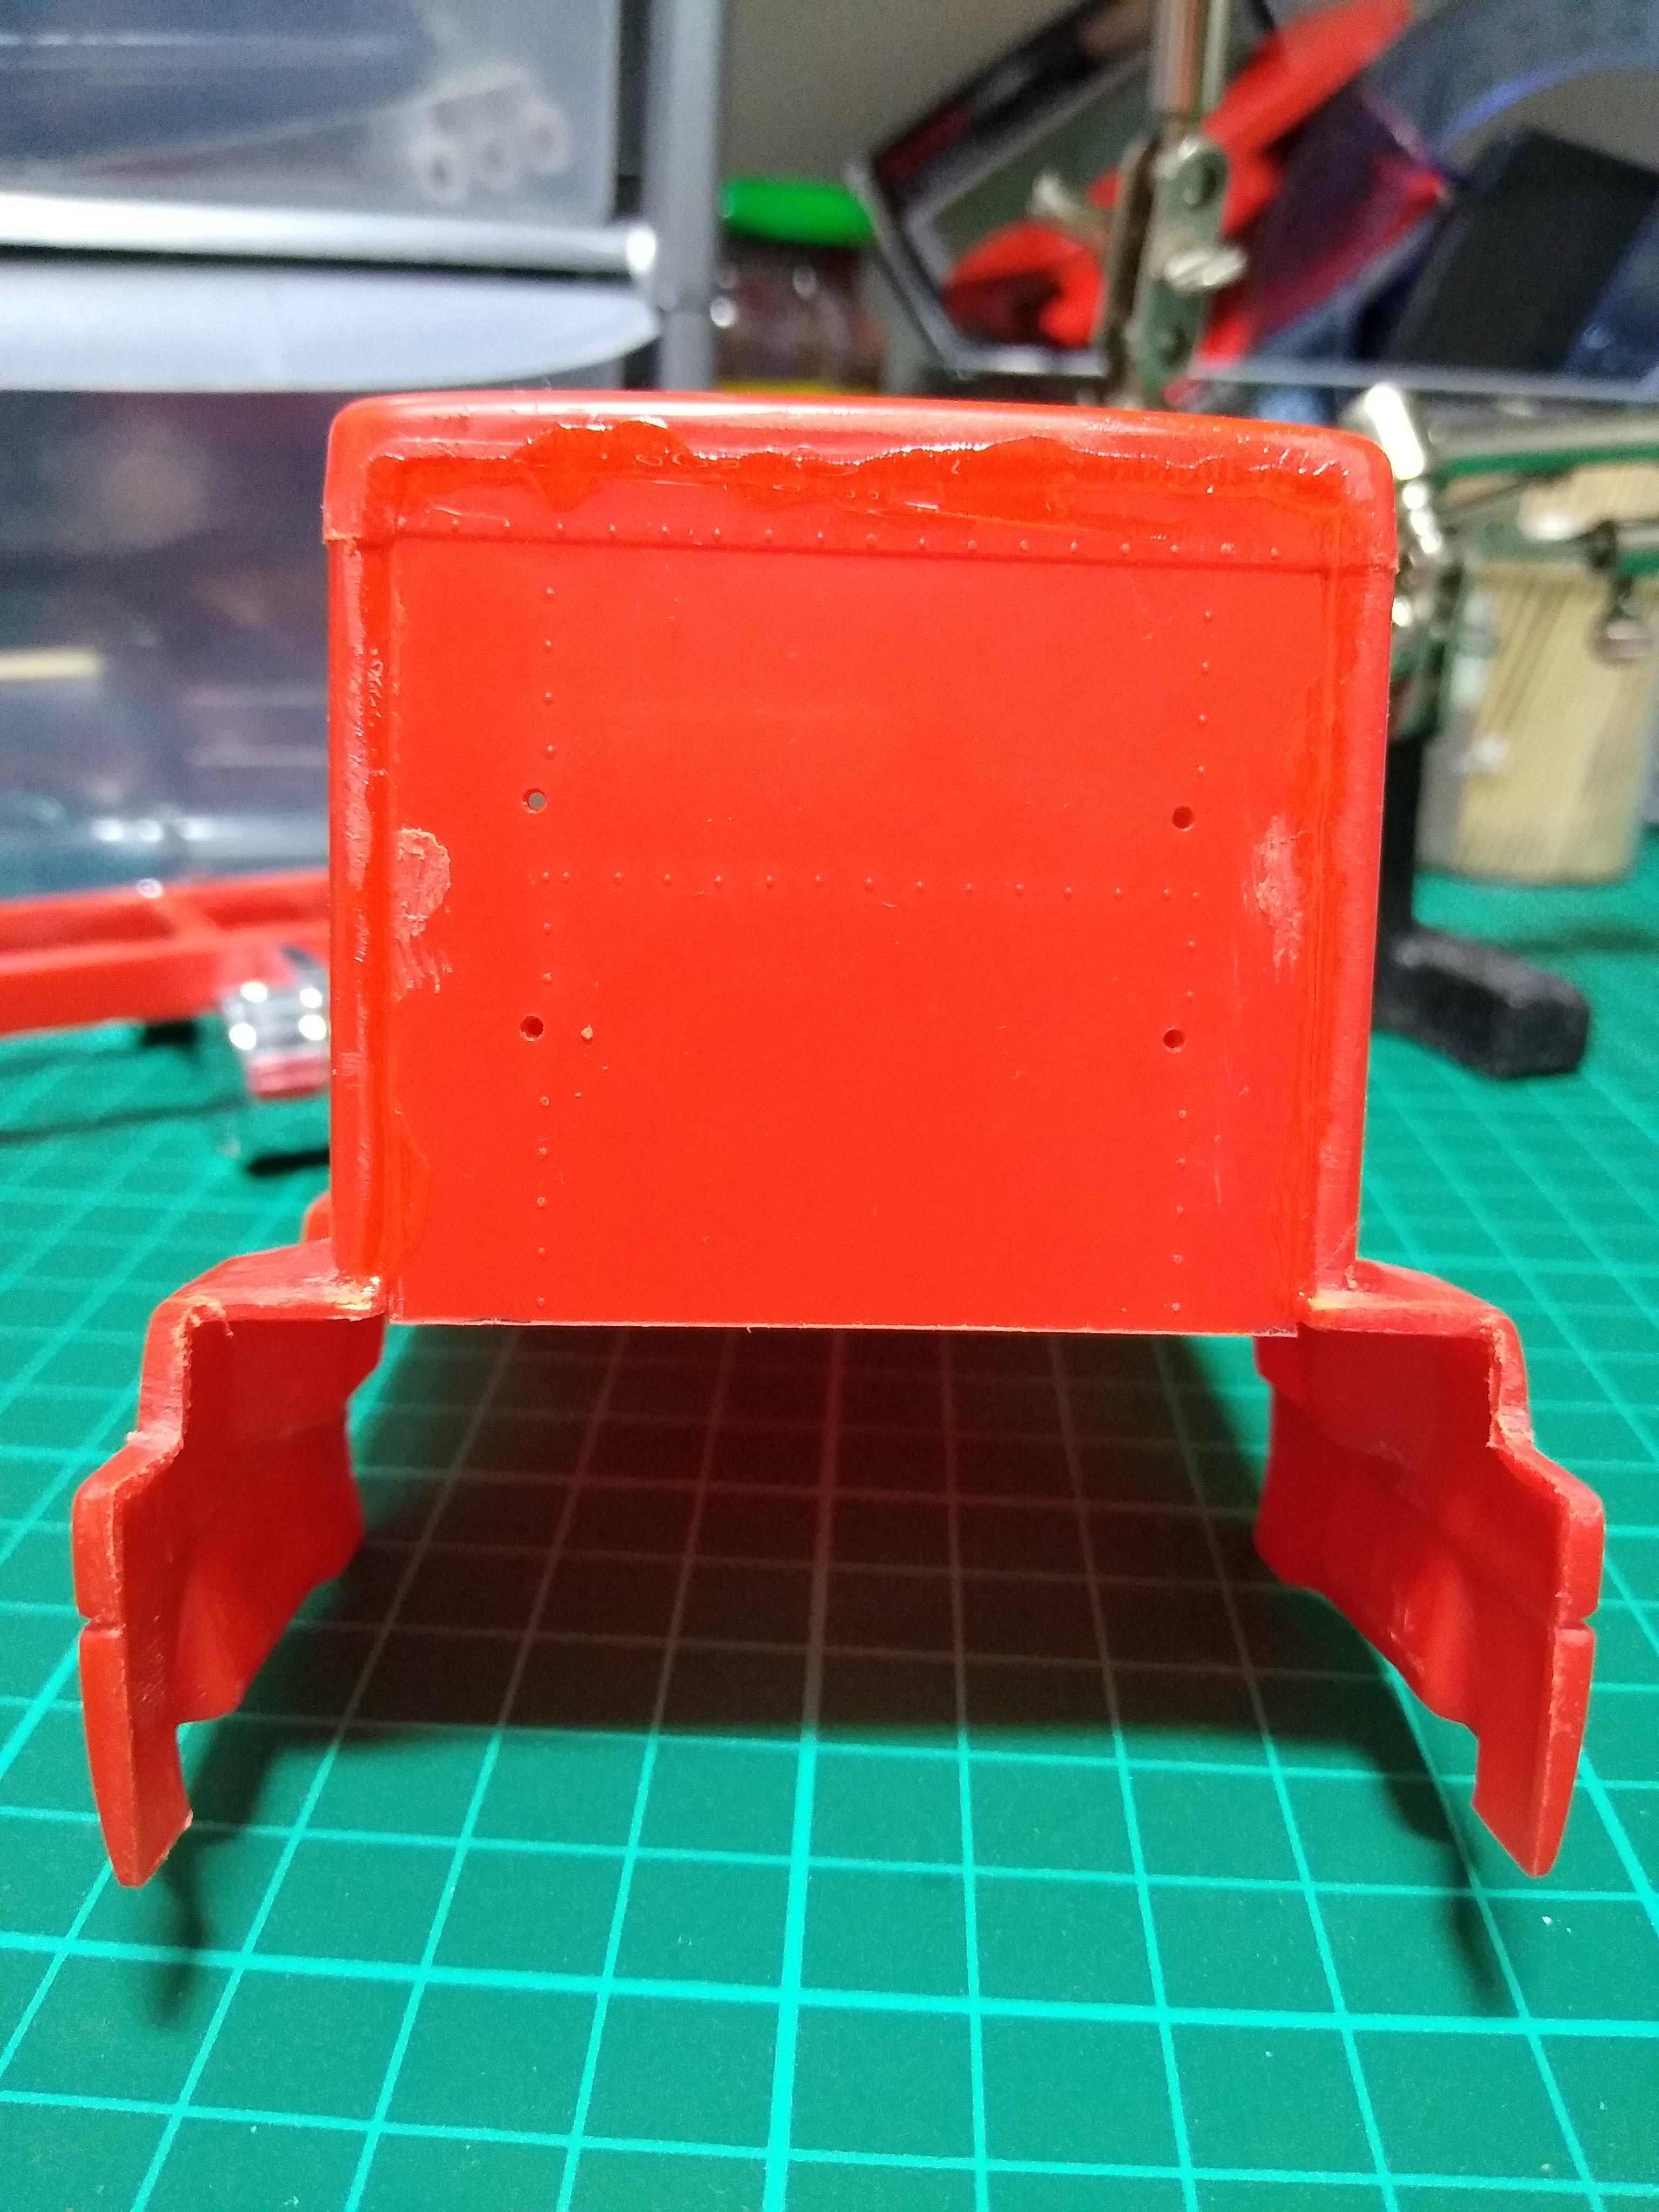
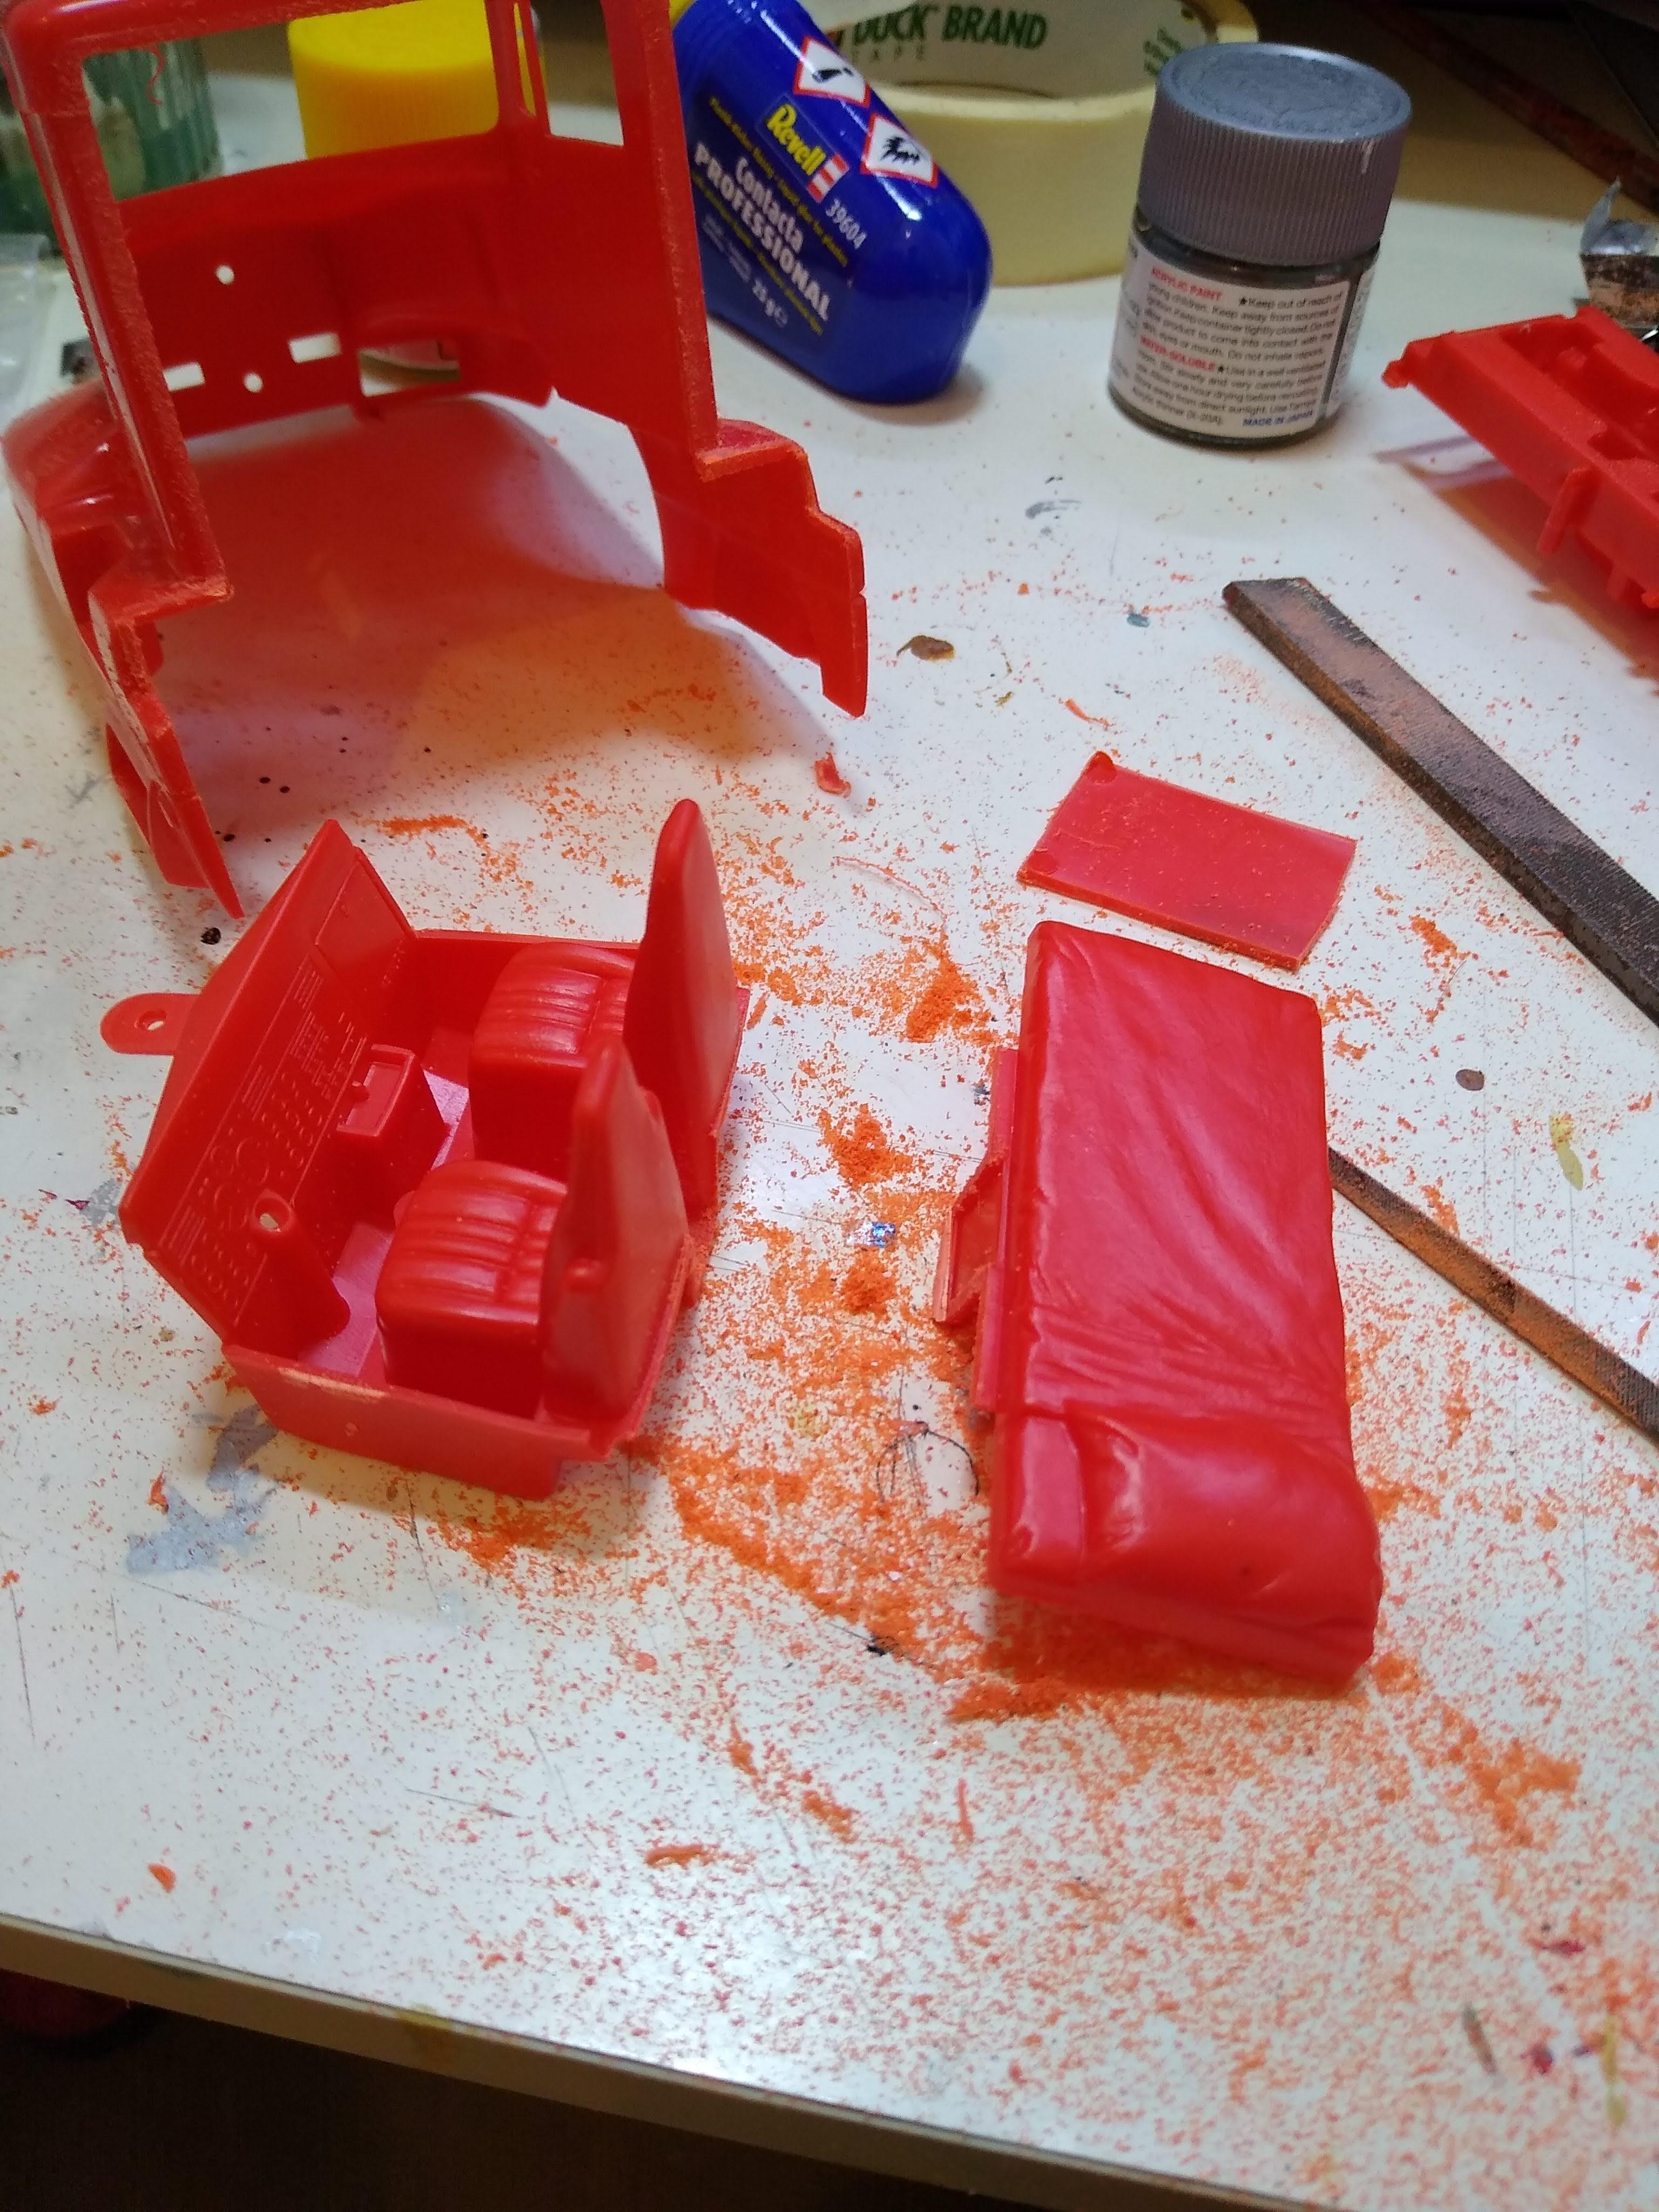
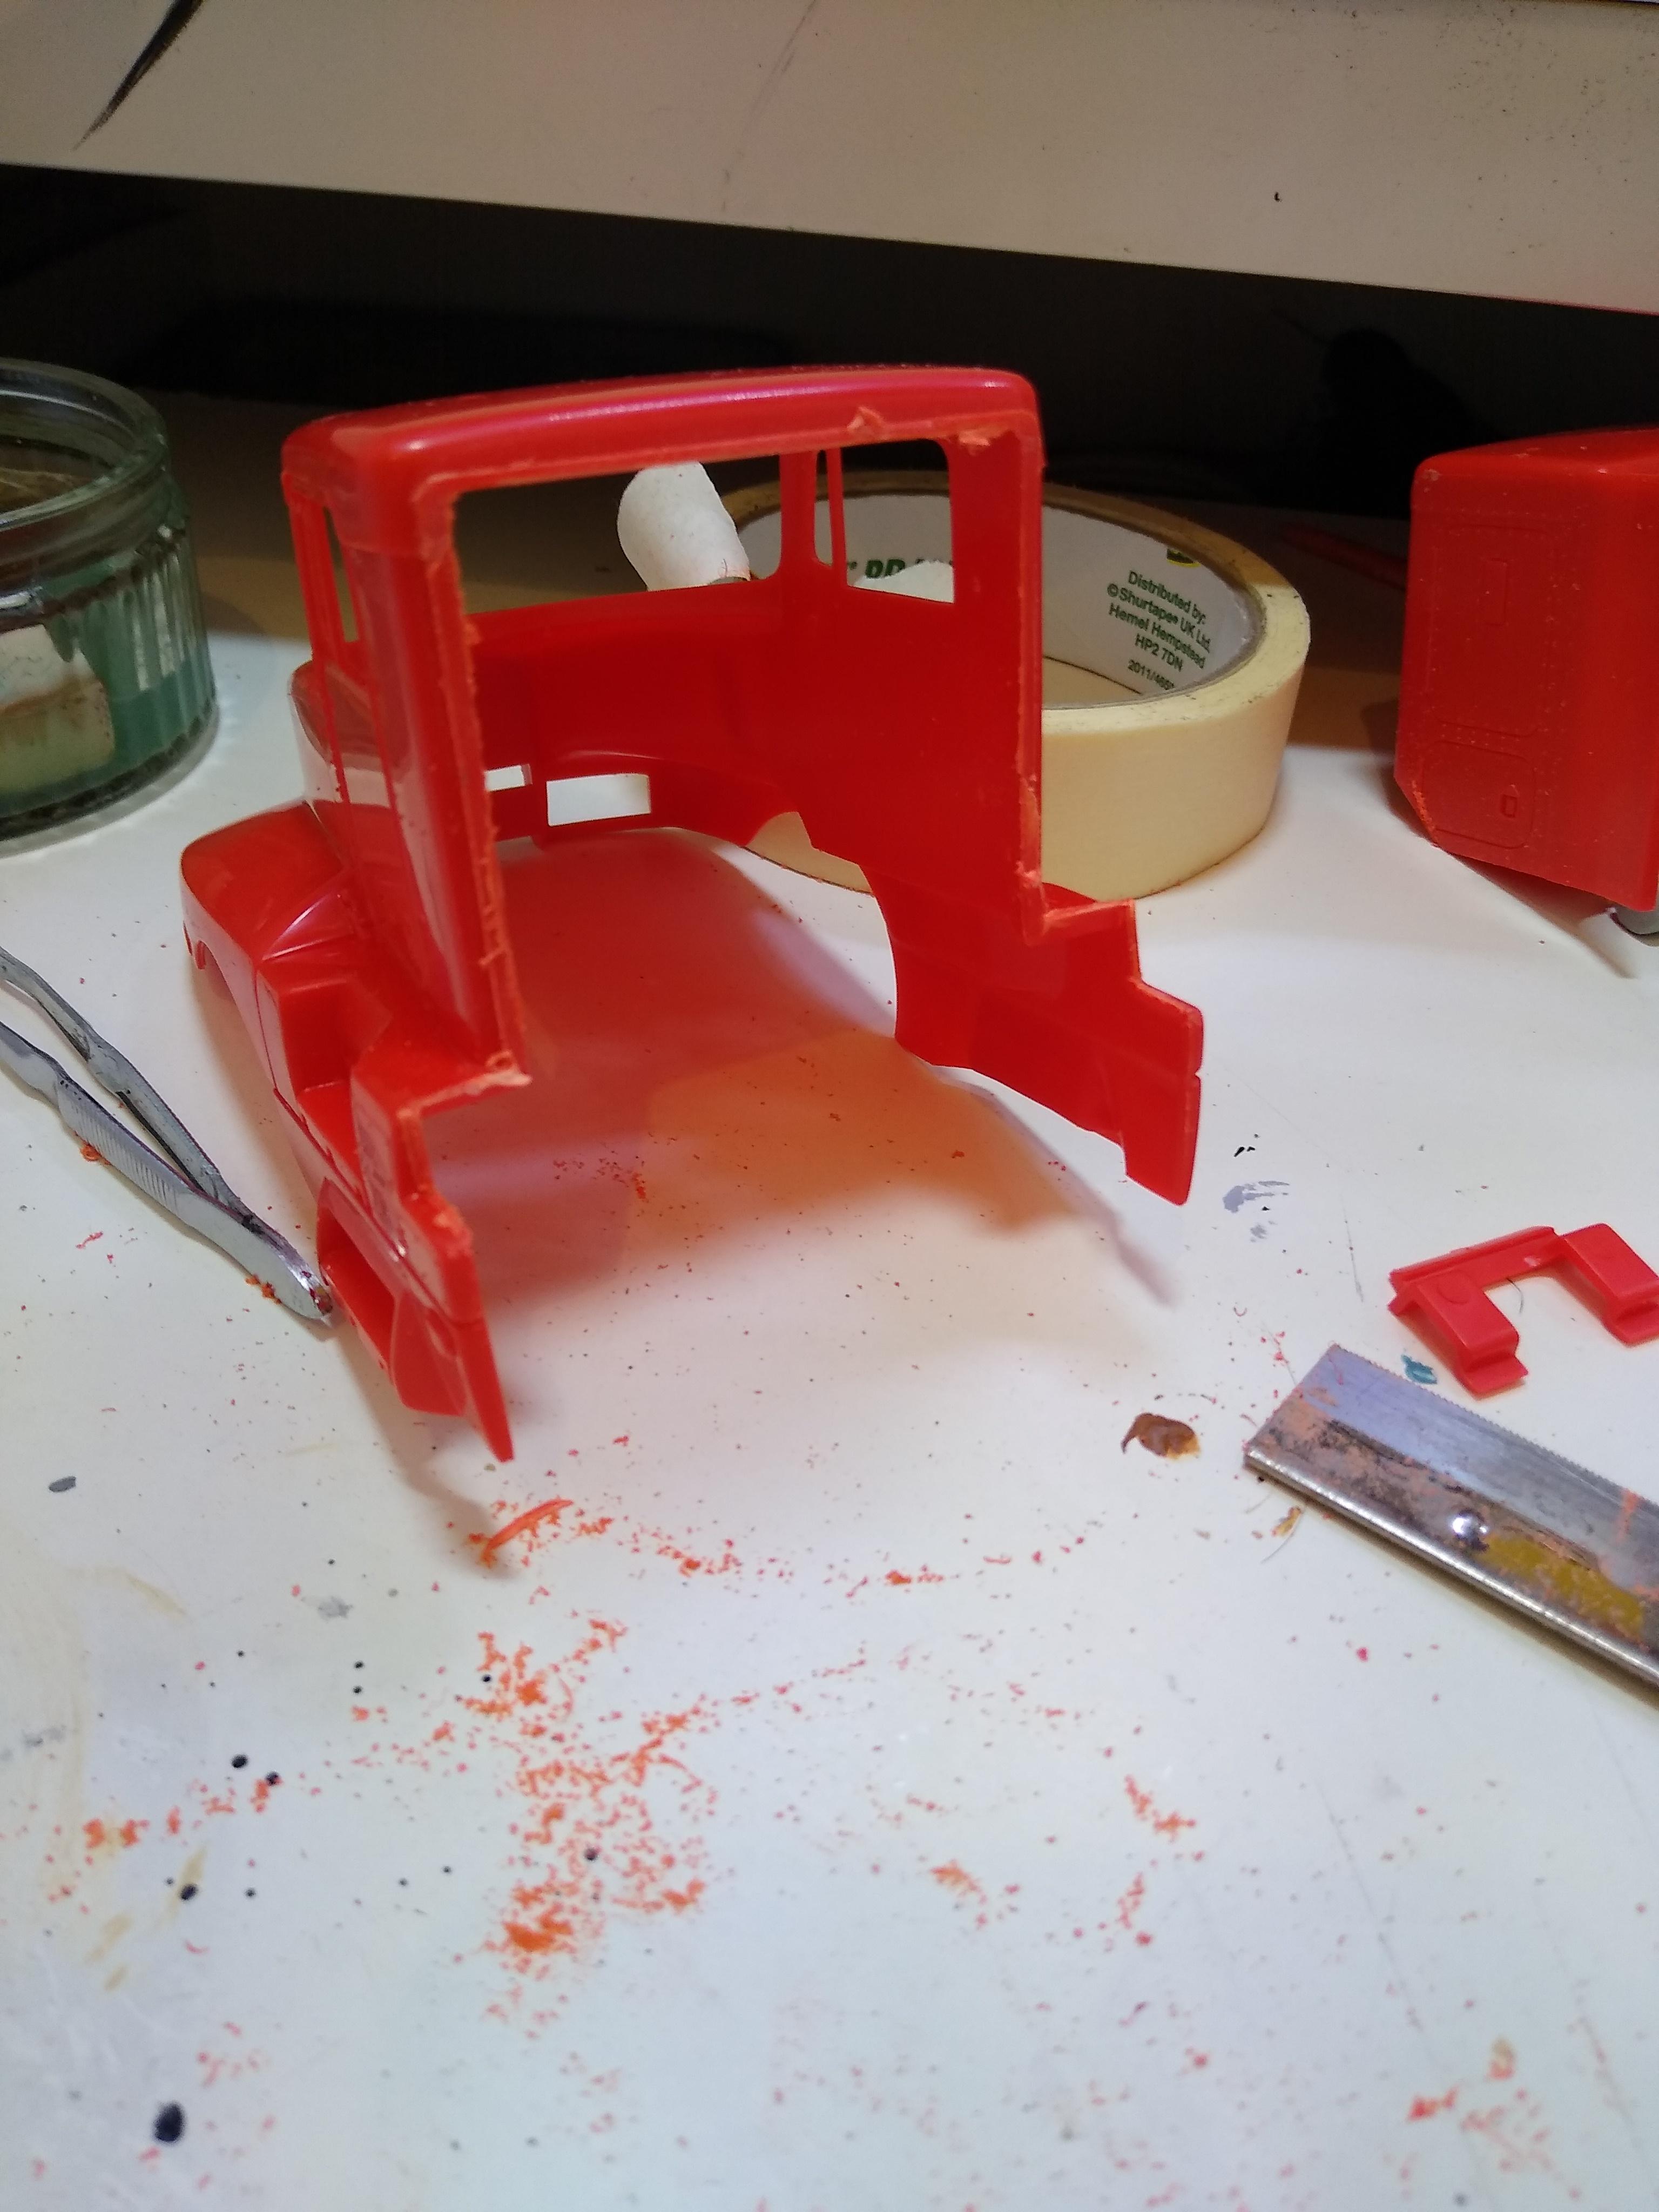
I cut the rear wall out of the sleeper, and extending the cut into the roof cap, this is because I intend to match the cap's edge with that of the cab's roof cap, plus it will look the same when painted. Red plastic is difficult to hide so I'd probably end up with a shade difference in the paint if I used white card. I filed the cut down flush with the cab rear wall and, with a little filing, the panel dropped in nicely. You can see how the line of the roof cap continues across the rear wall. I can even use two grab handles on the rear of the cab because the holes transferred across! Before I was overcome with my own cleverness I pondered whether I should have cut out the rear window aperture before I glued the panel in? Probably, one step forward..... never mind. Hacked the interior in two and it drops in nicely. Does anyone want a bed for the night?
-
KENWORTH X 2 K123 & K100 Aerodyne
Rockford replied to CRUSADER2's topic in WIP: Model Trucks: Big Rigs and Heavy Equipment
I chuckled when I read your comment "it'll have to do" about THAT engine. It's fantastic! Brilliant job mate, not just here but through the whole job, the chassis the wiring and plumbing etc... -
Big Scale "BigCam" Pete 359
Rockford replied to ReduitRetro's topic in WIP: Model Trucks: Big Rigs and Heavy Equipment
That Cummins is impressive. I love the old Cummins engines, went like the wind and seemingly lasted forever. -
Another parts box build
Rockford replied to Vettegasser's topic in WIP: Model Trucks: Big Rigs and Heavy Equipment
Now that I've found out what a "tiller truck" is I'm going to watch this. Looking good. -
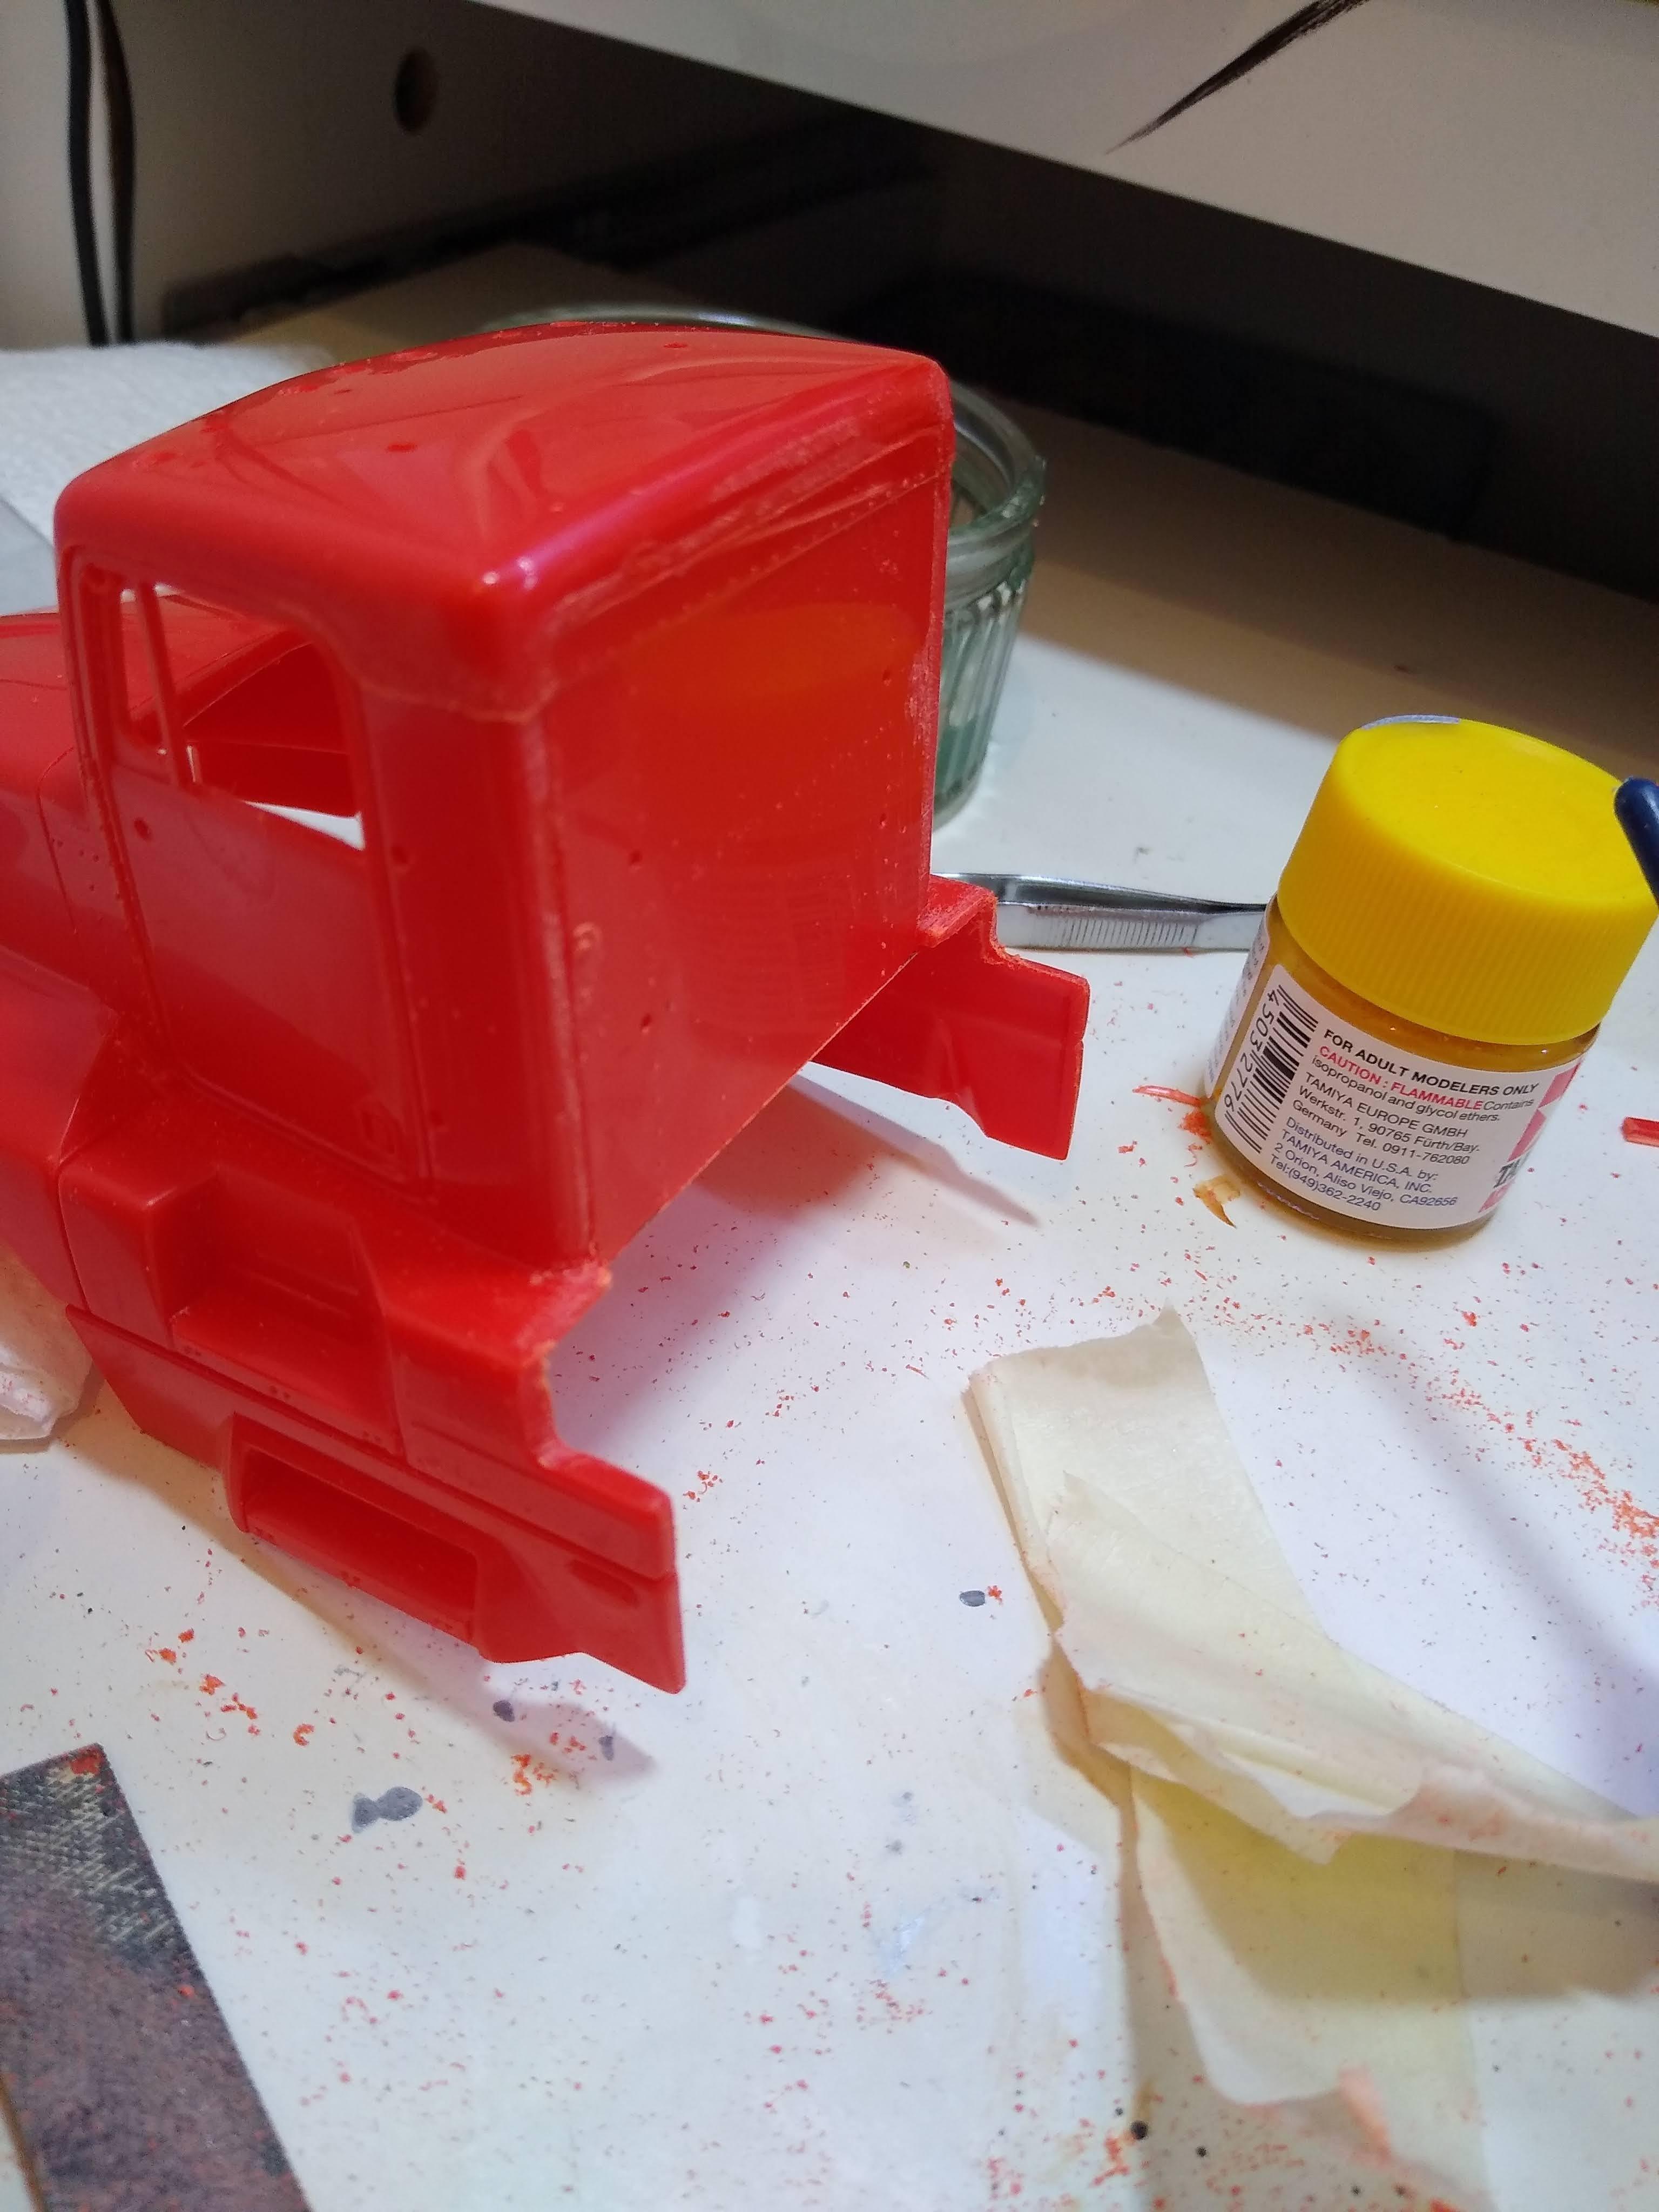
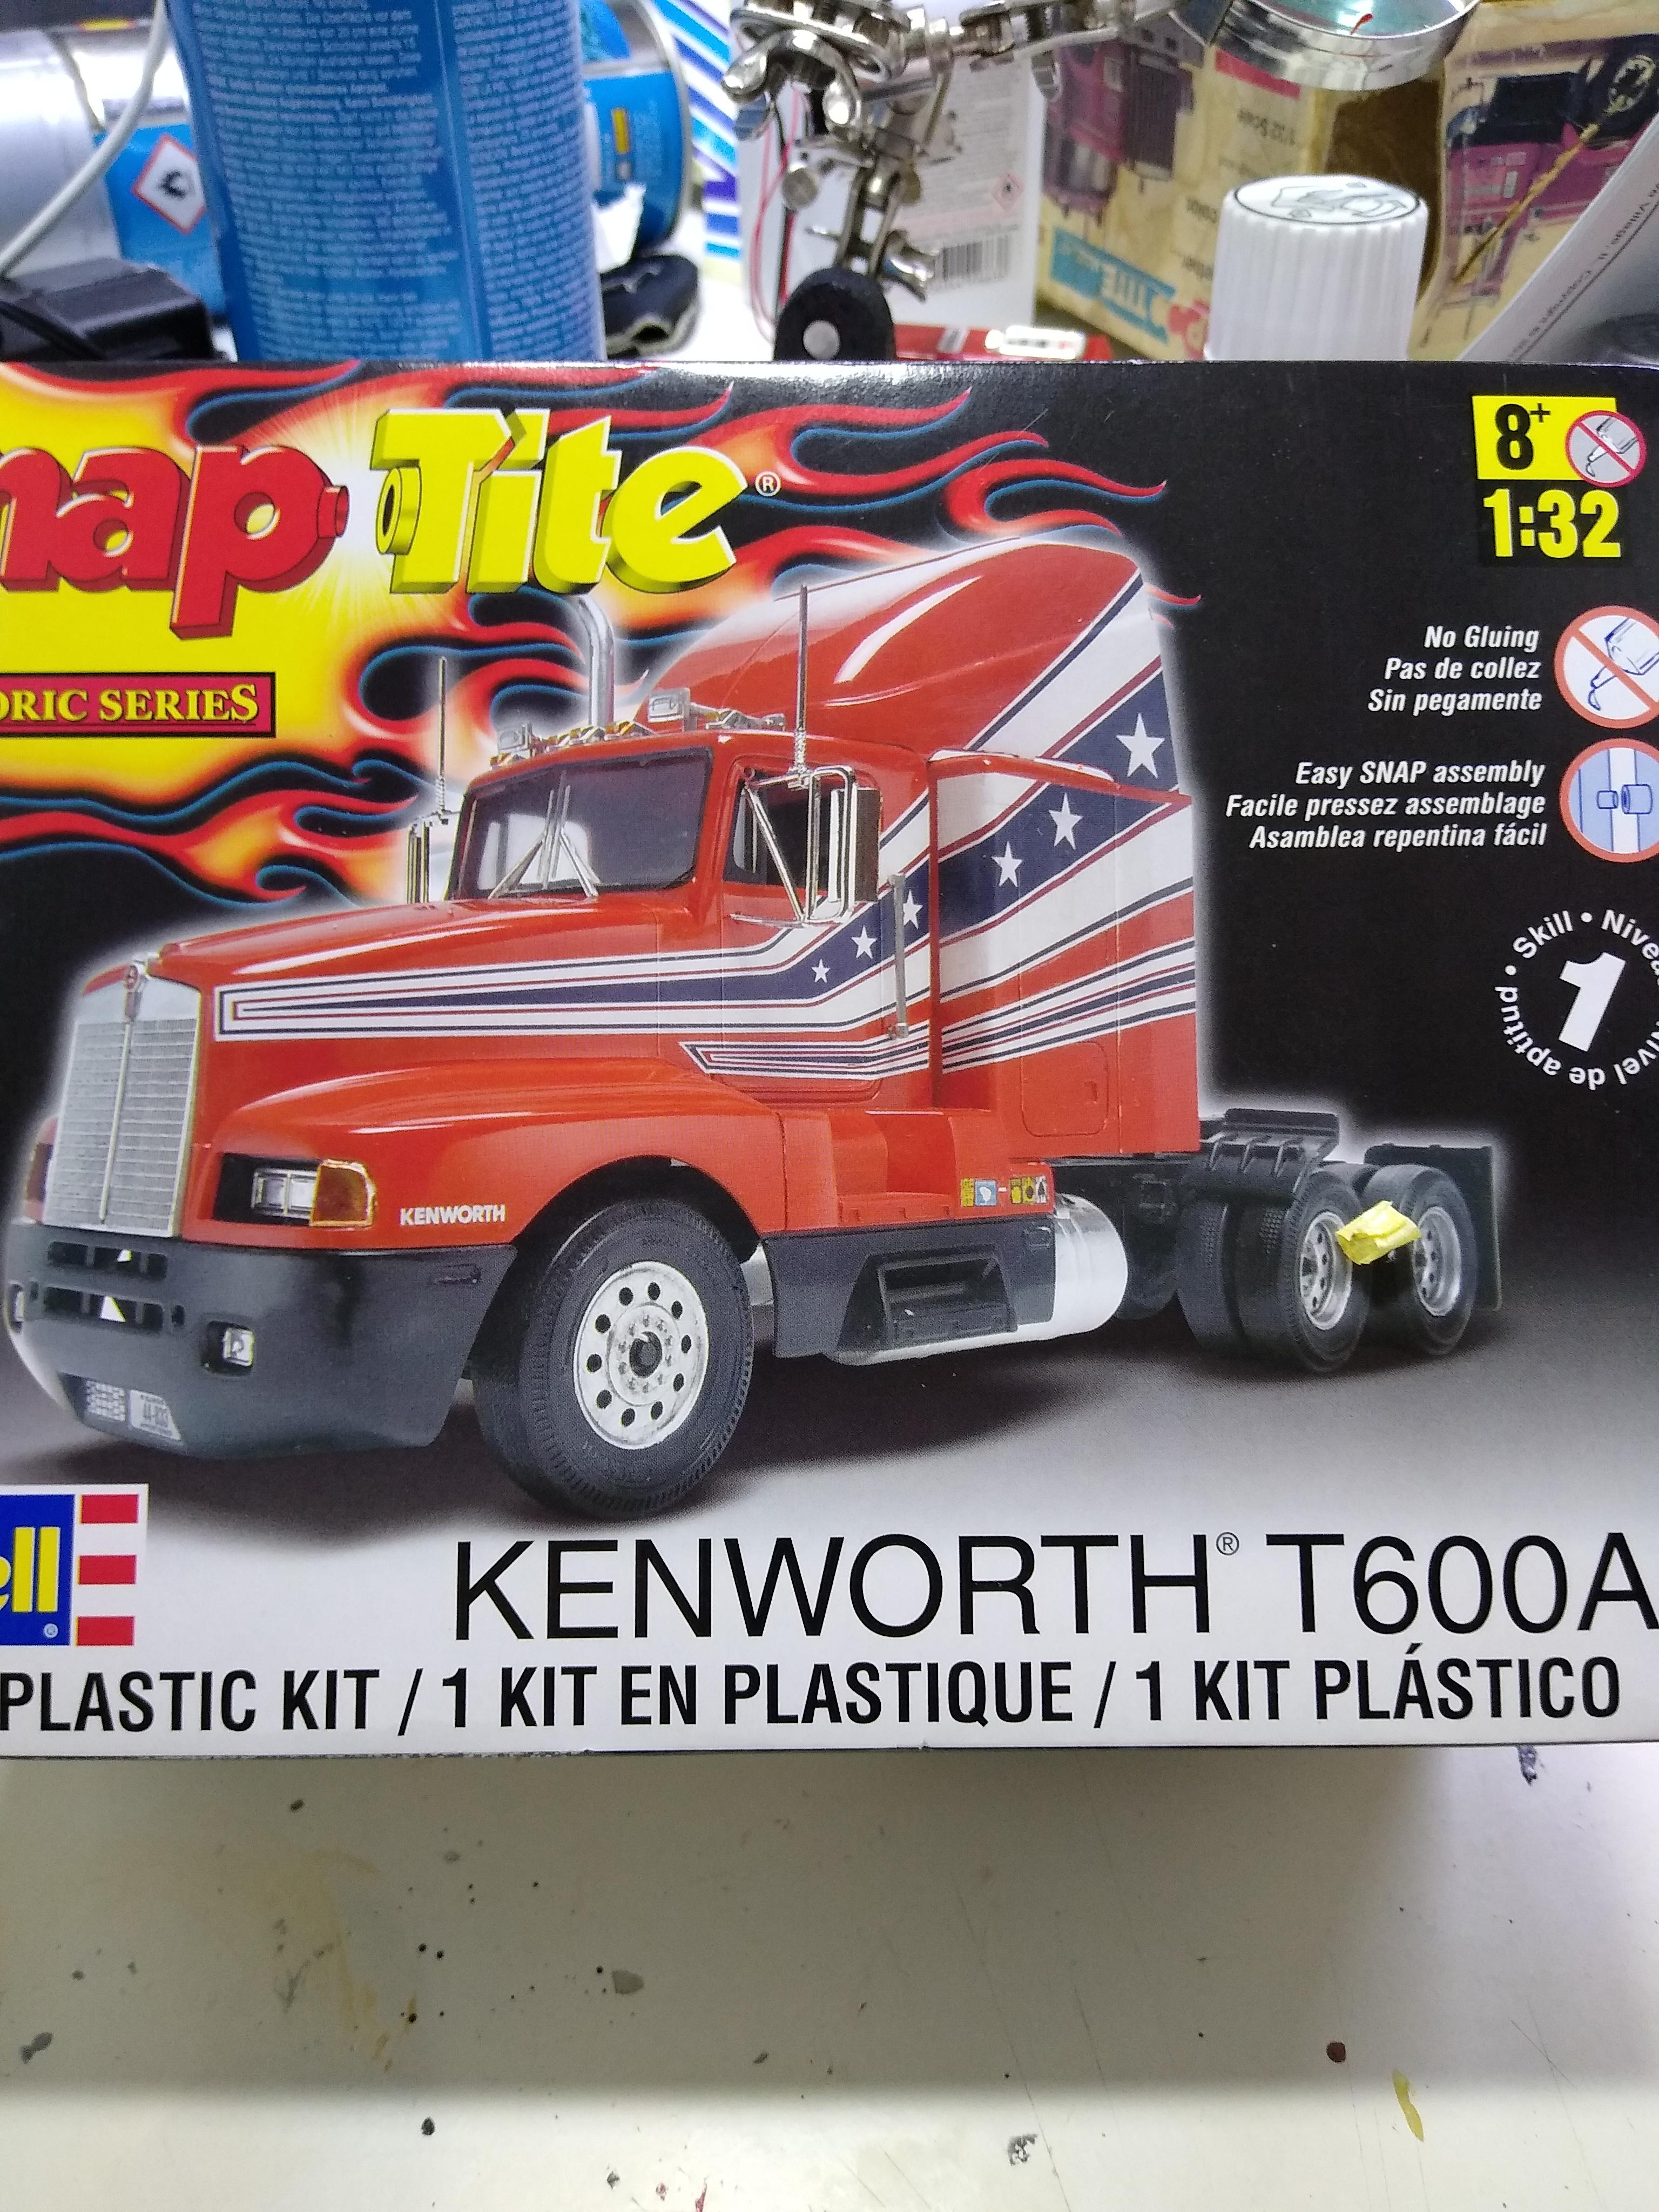
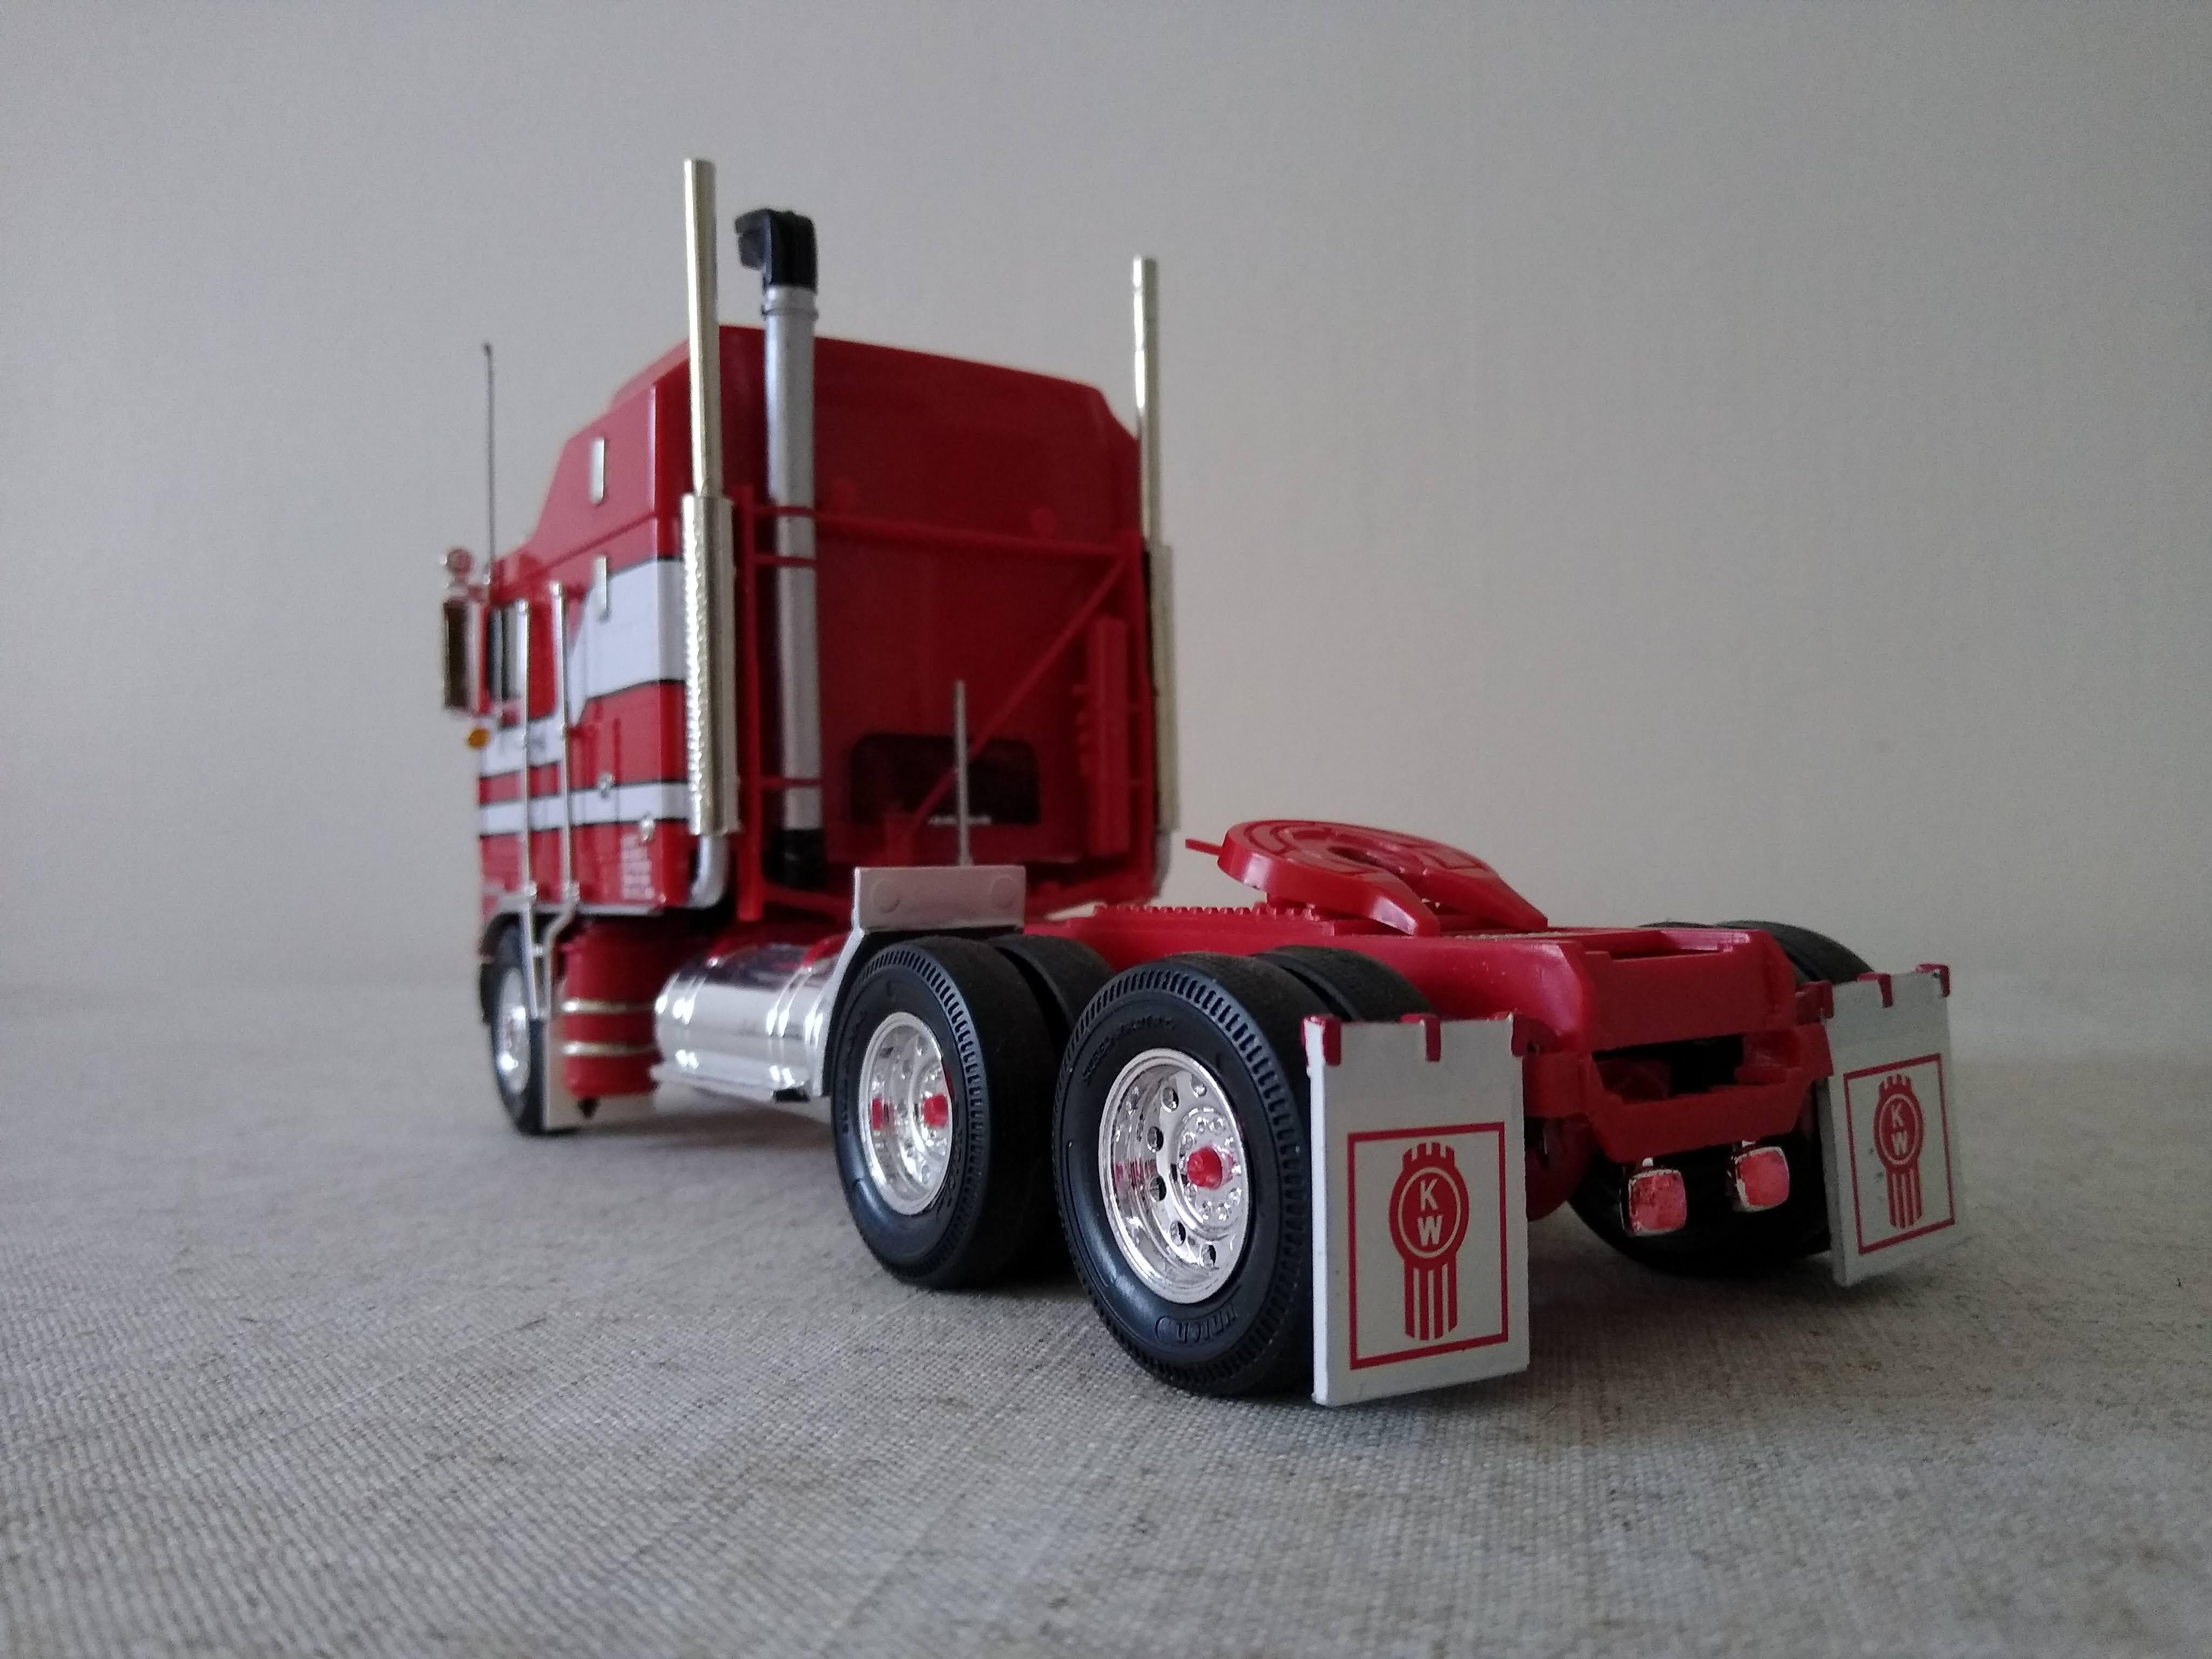
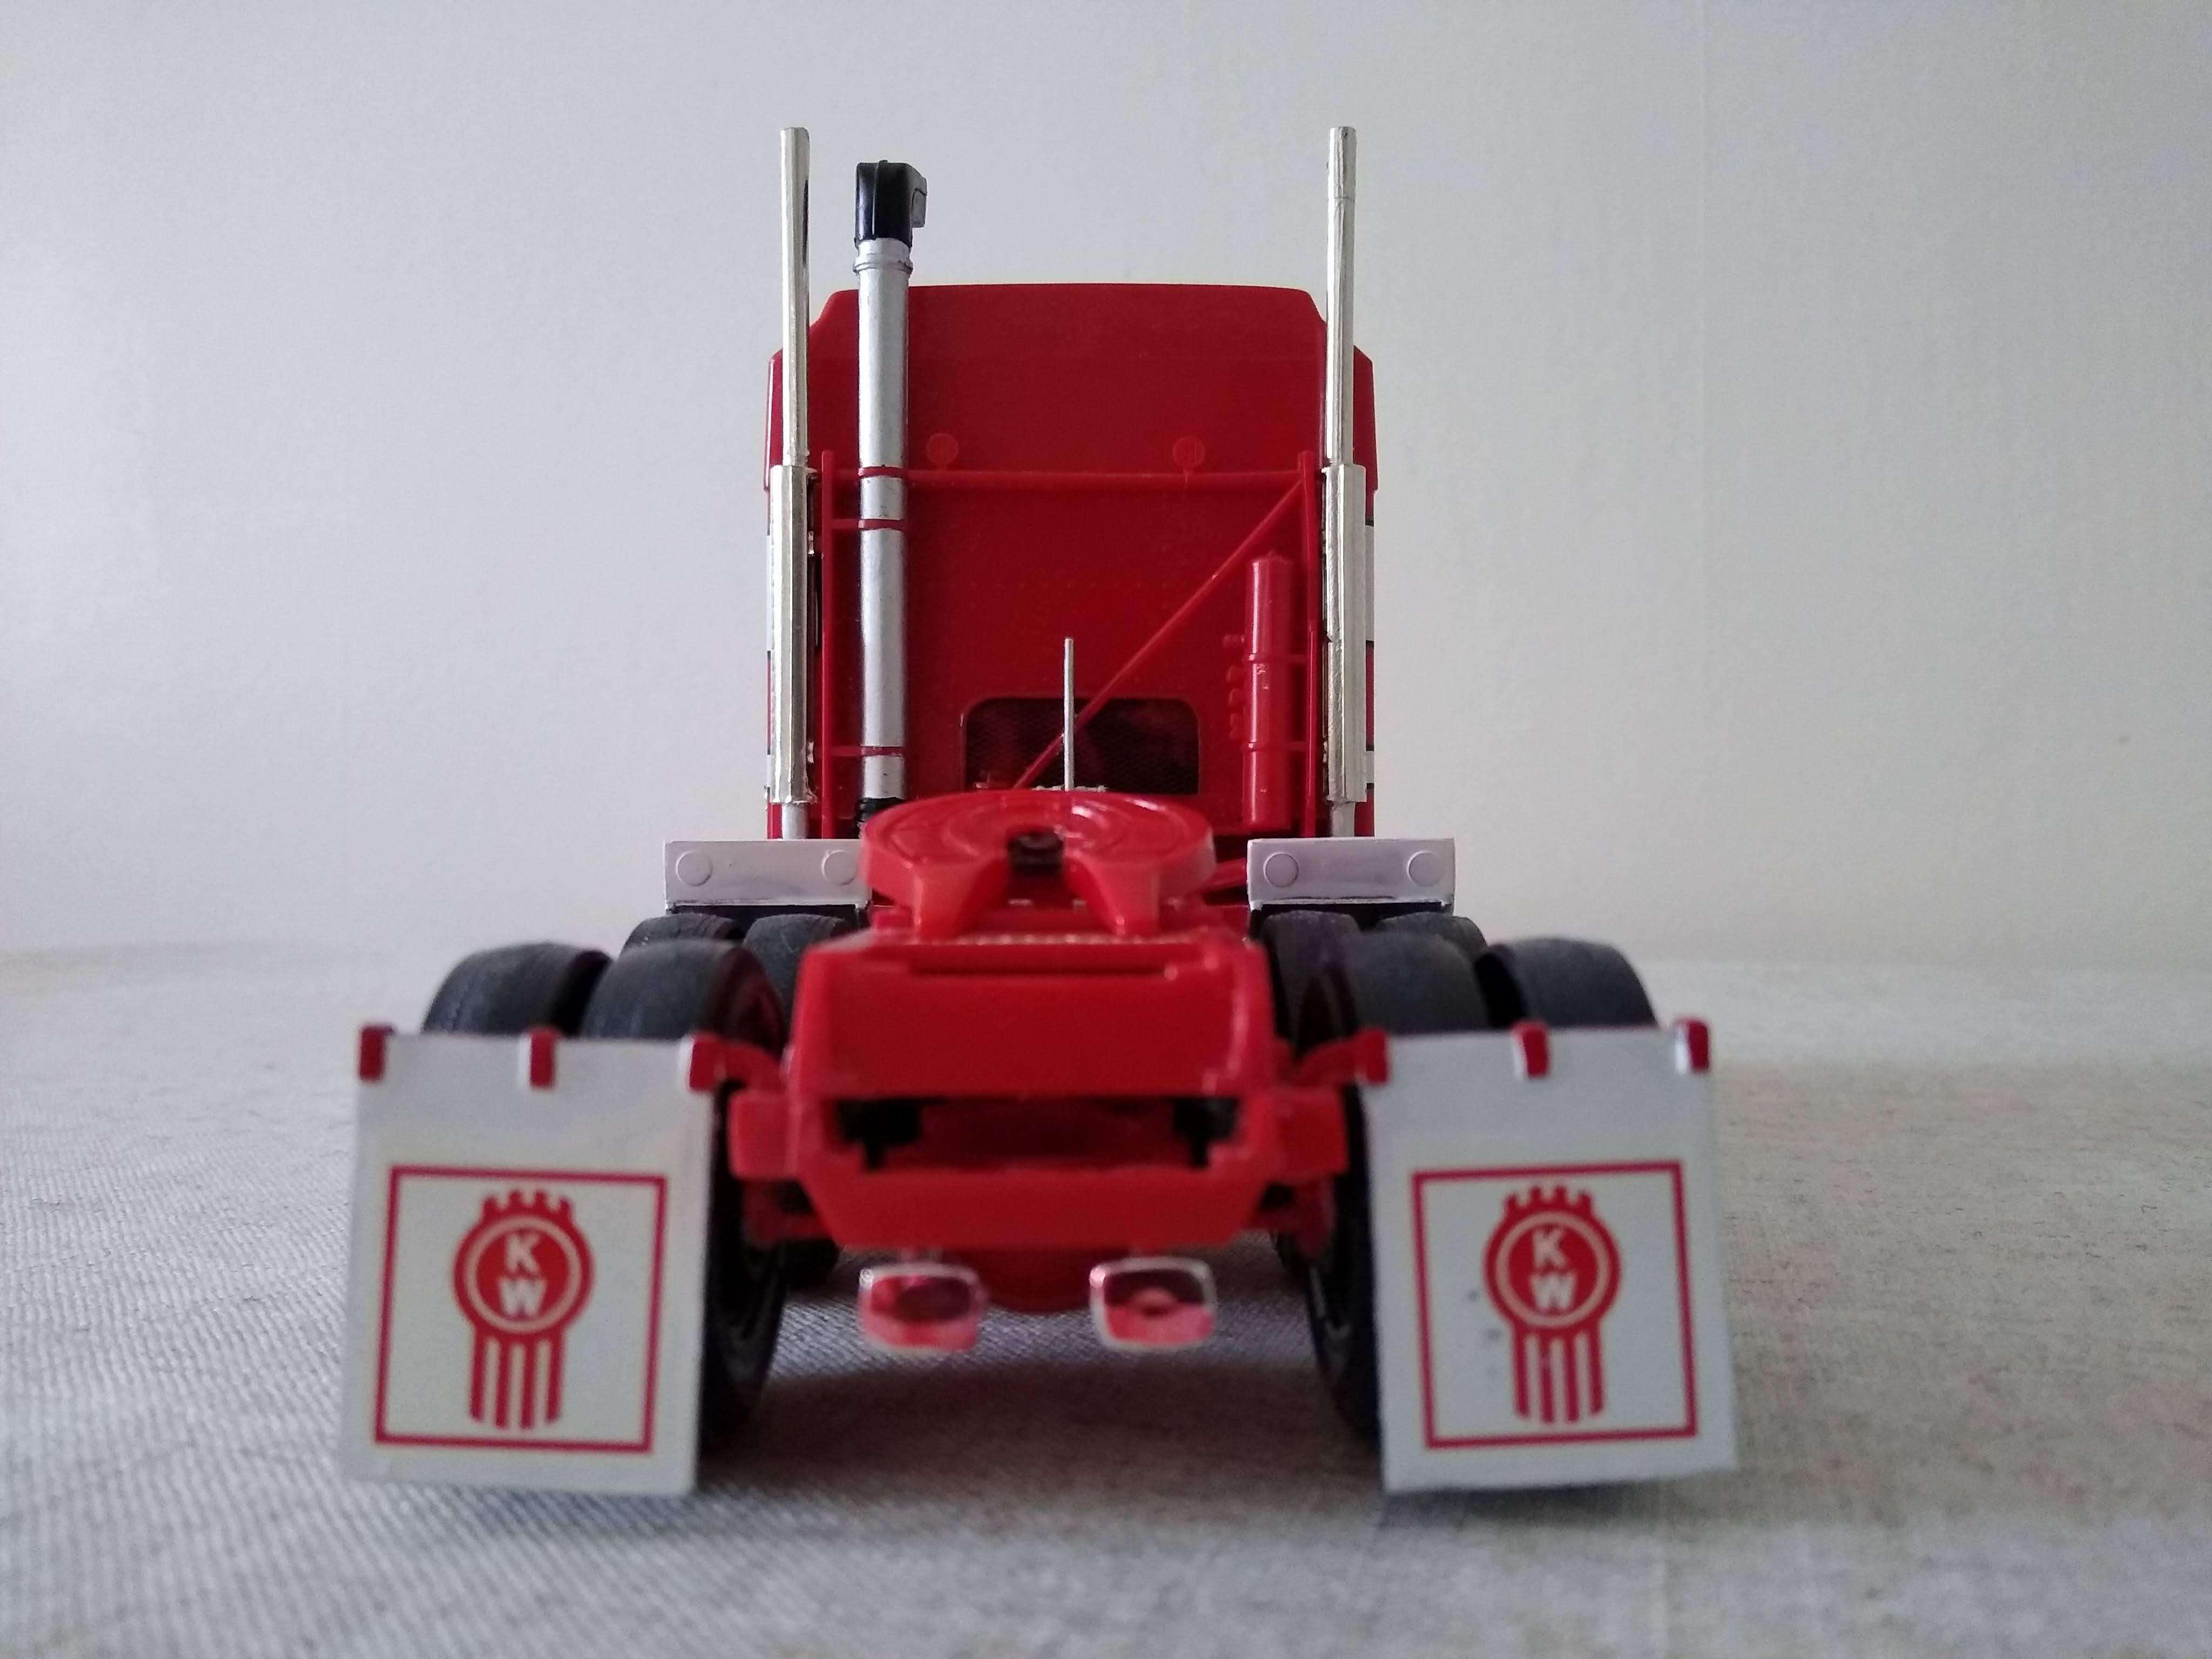
Yet another snap kit. The Kenworth T600 with full aero kit. I don't know about you but these always remind me of Sam the American eagle from the Muppets. Anyway, I decided to convert this to a day cab, leaving only the skirts in place. I'll use the rear wall of the sleeper to create the rear wall of the cab as it has rivet detail on it. Out came the saw! I also intend to remove some of the deck plating they put on the chassis to hide the lack of detail on the duals etc... This will require inserting some detail to make it look better. Haven't done anything like this for a while. Quite scared.
-
Needlenose Pete
Rockford replied to BlackDragon's topic in Model Trucks: Big Rigs and Heavy Equipment
Fantastic build, a proper workhorse. So well done. -
Freightliner conventional
Rockford replied to Rockford's topic in Model Trucks: Big Rigs and Heavy Equipment
Thanks everyone for your kind comments. I would love to have the cabover Freightliner and the conventional KW Aerodyne they did. These kits used to be pennies but they're so expensive now. -
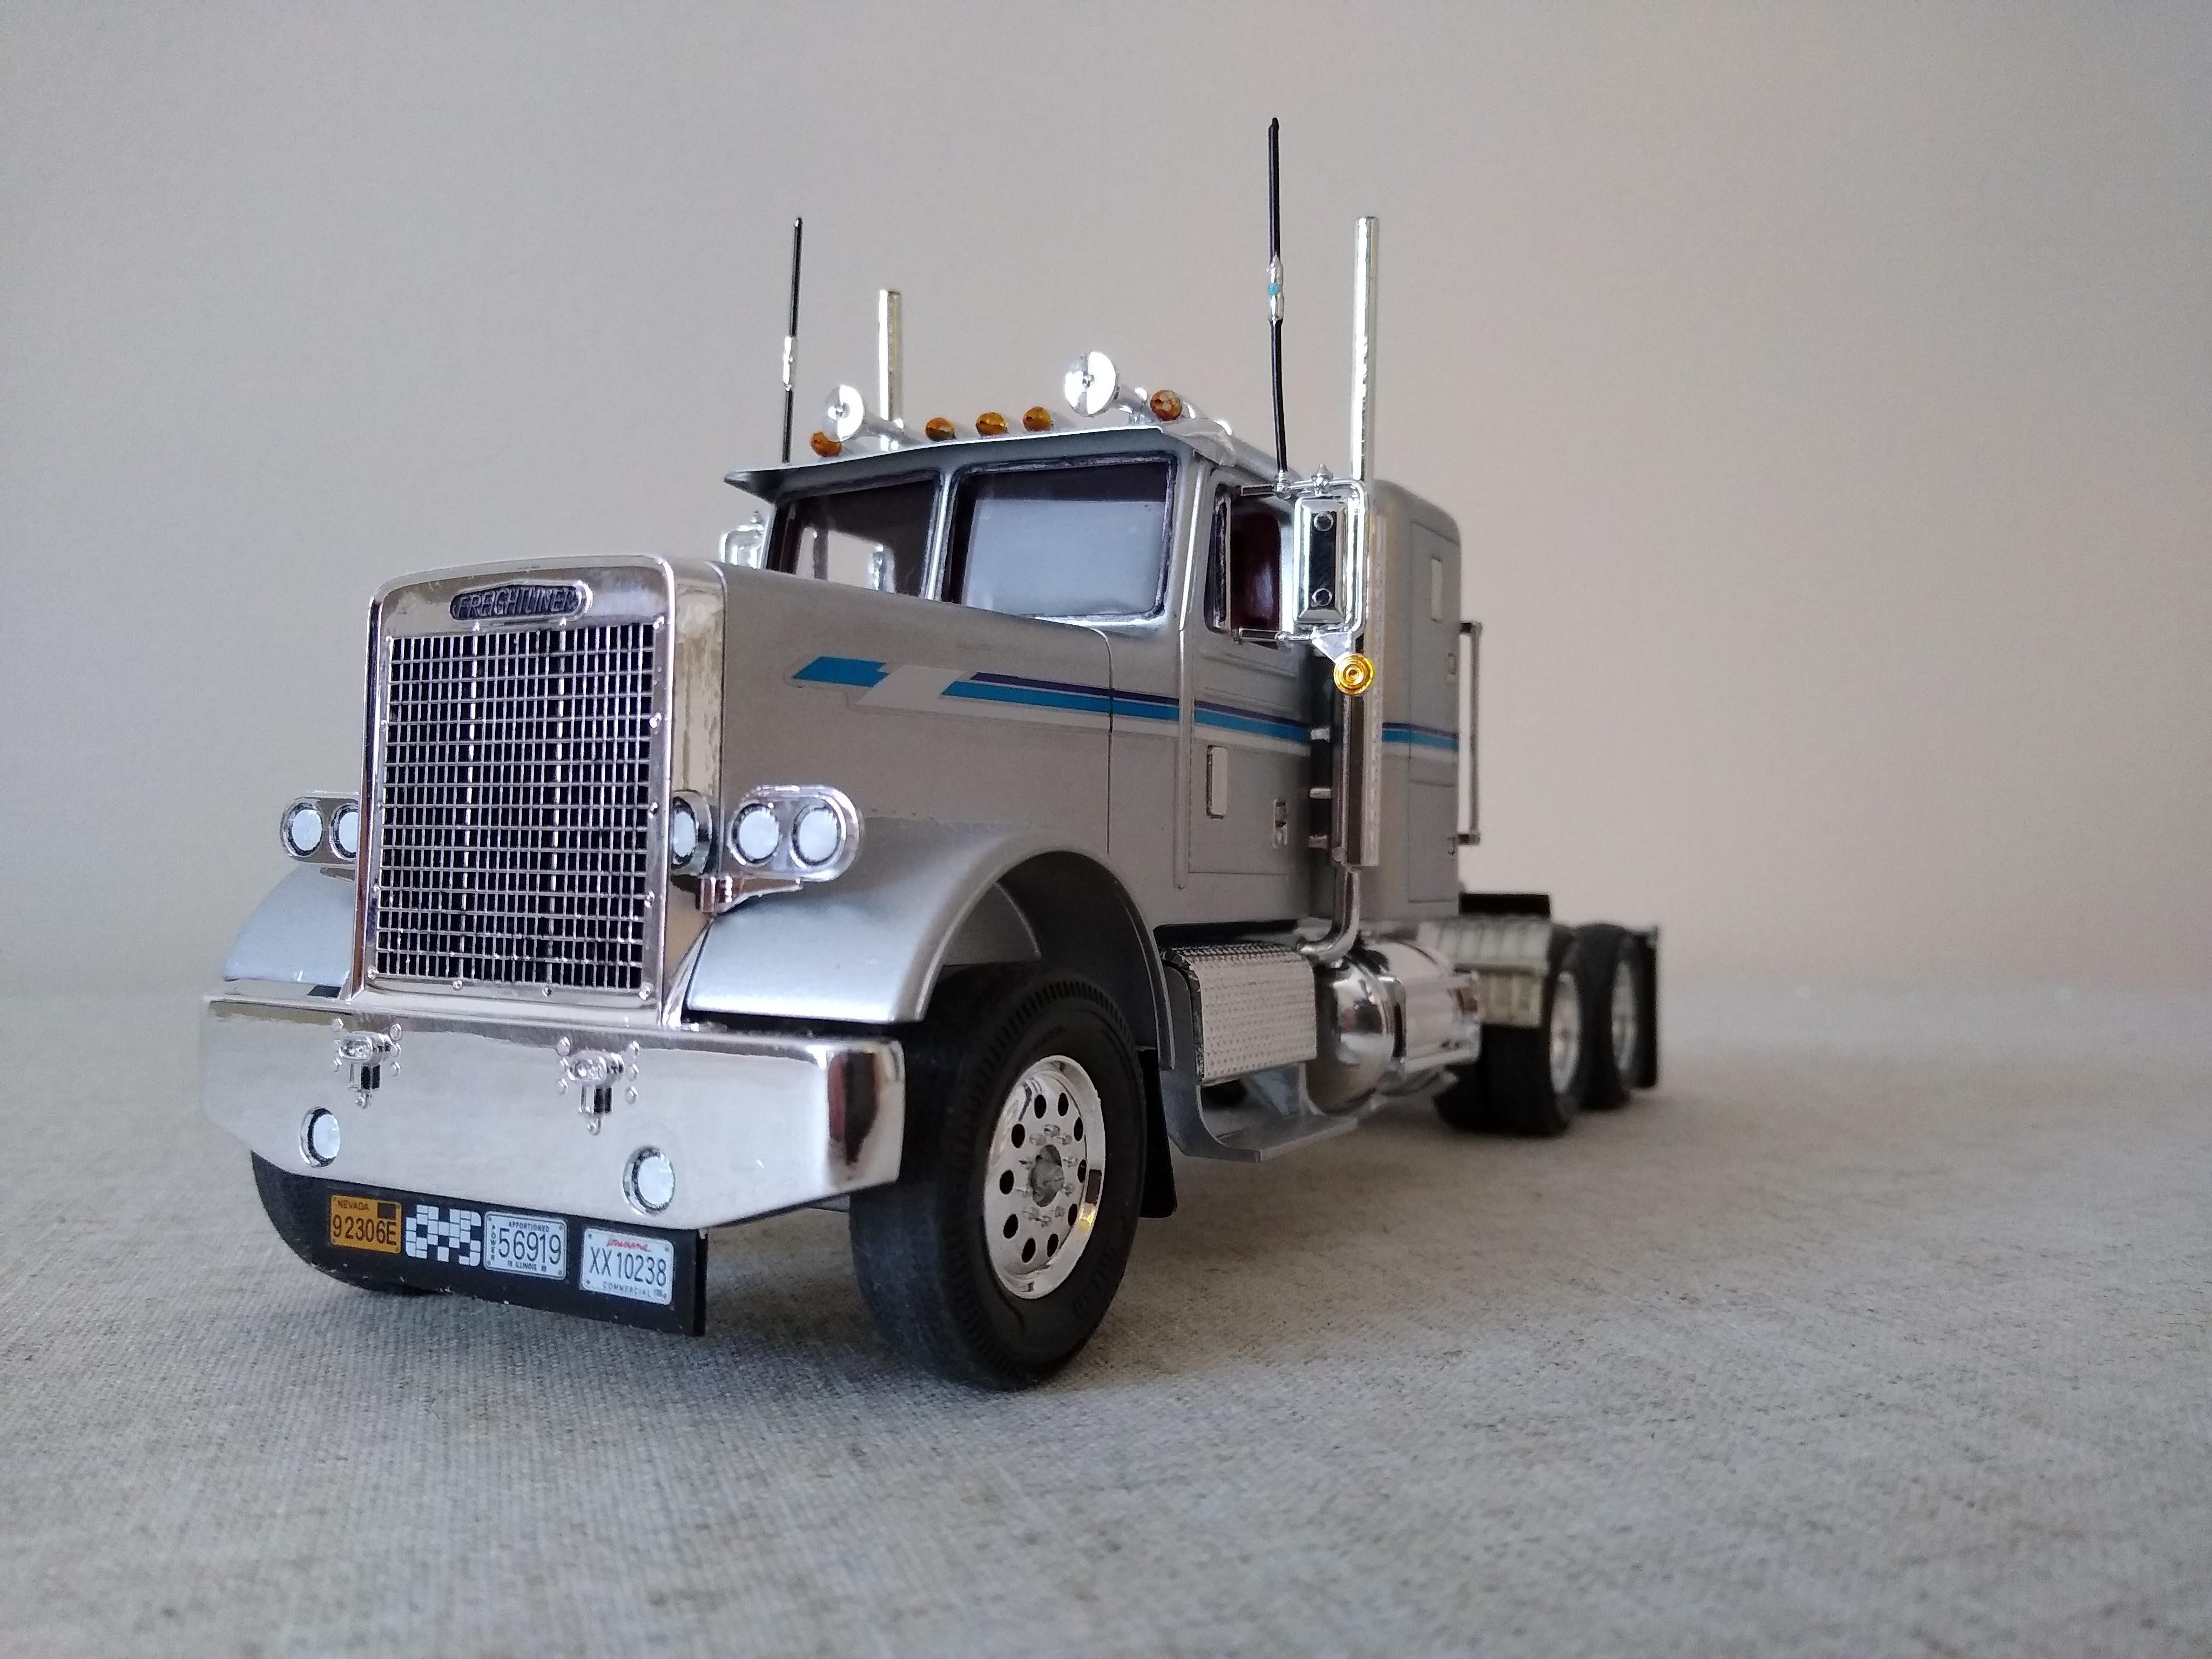
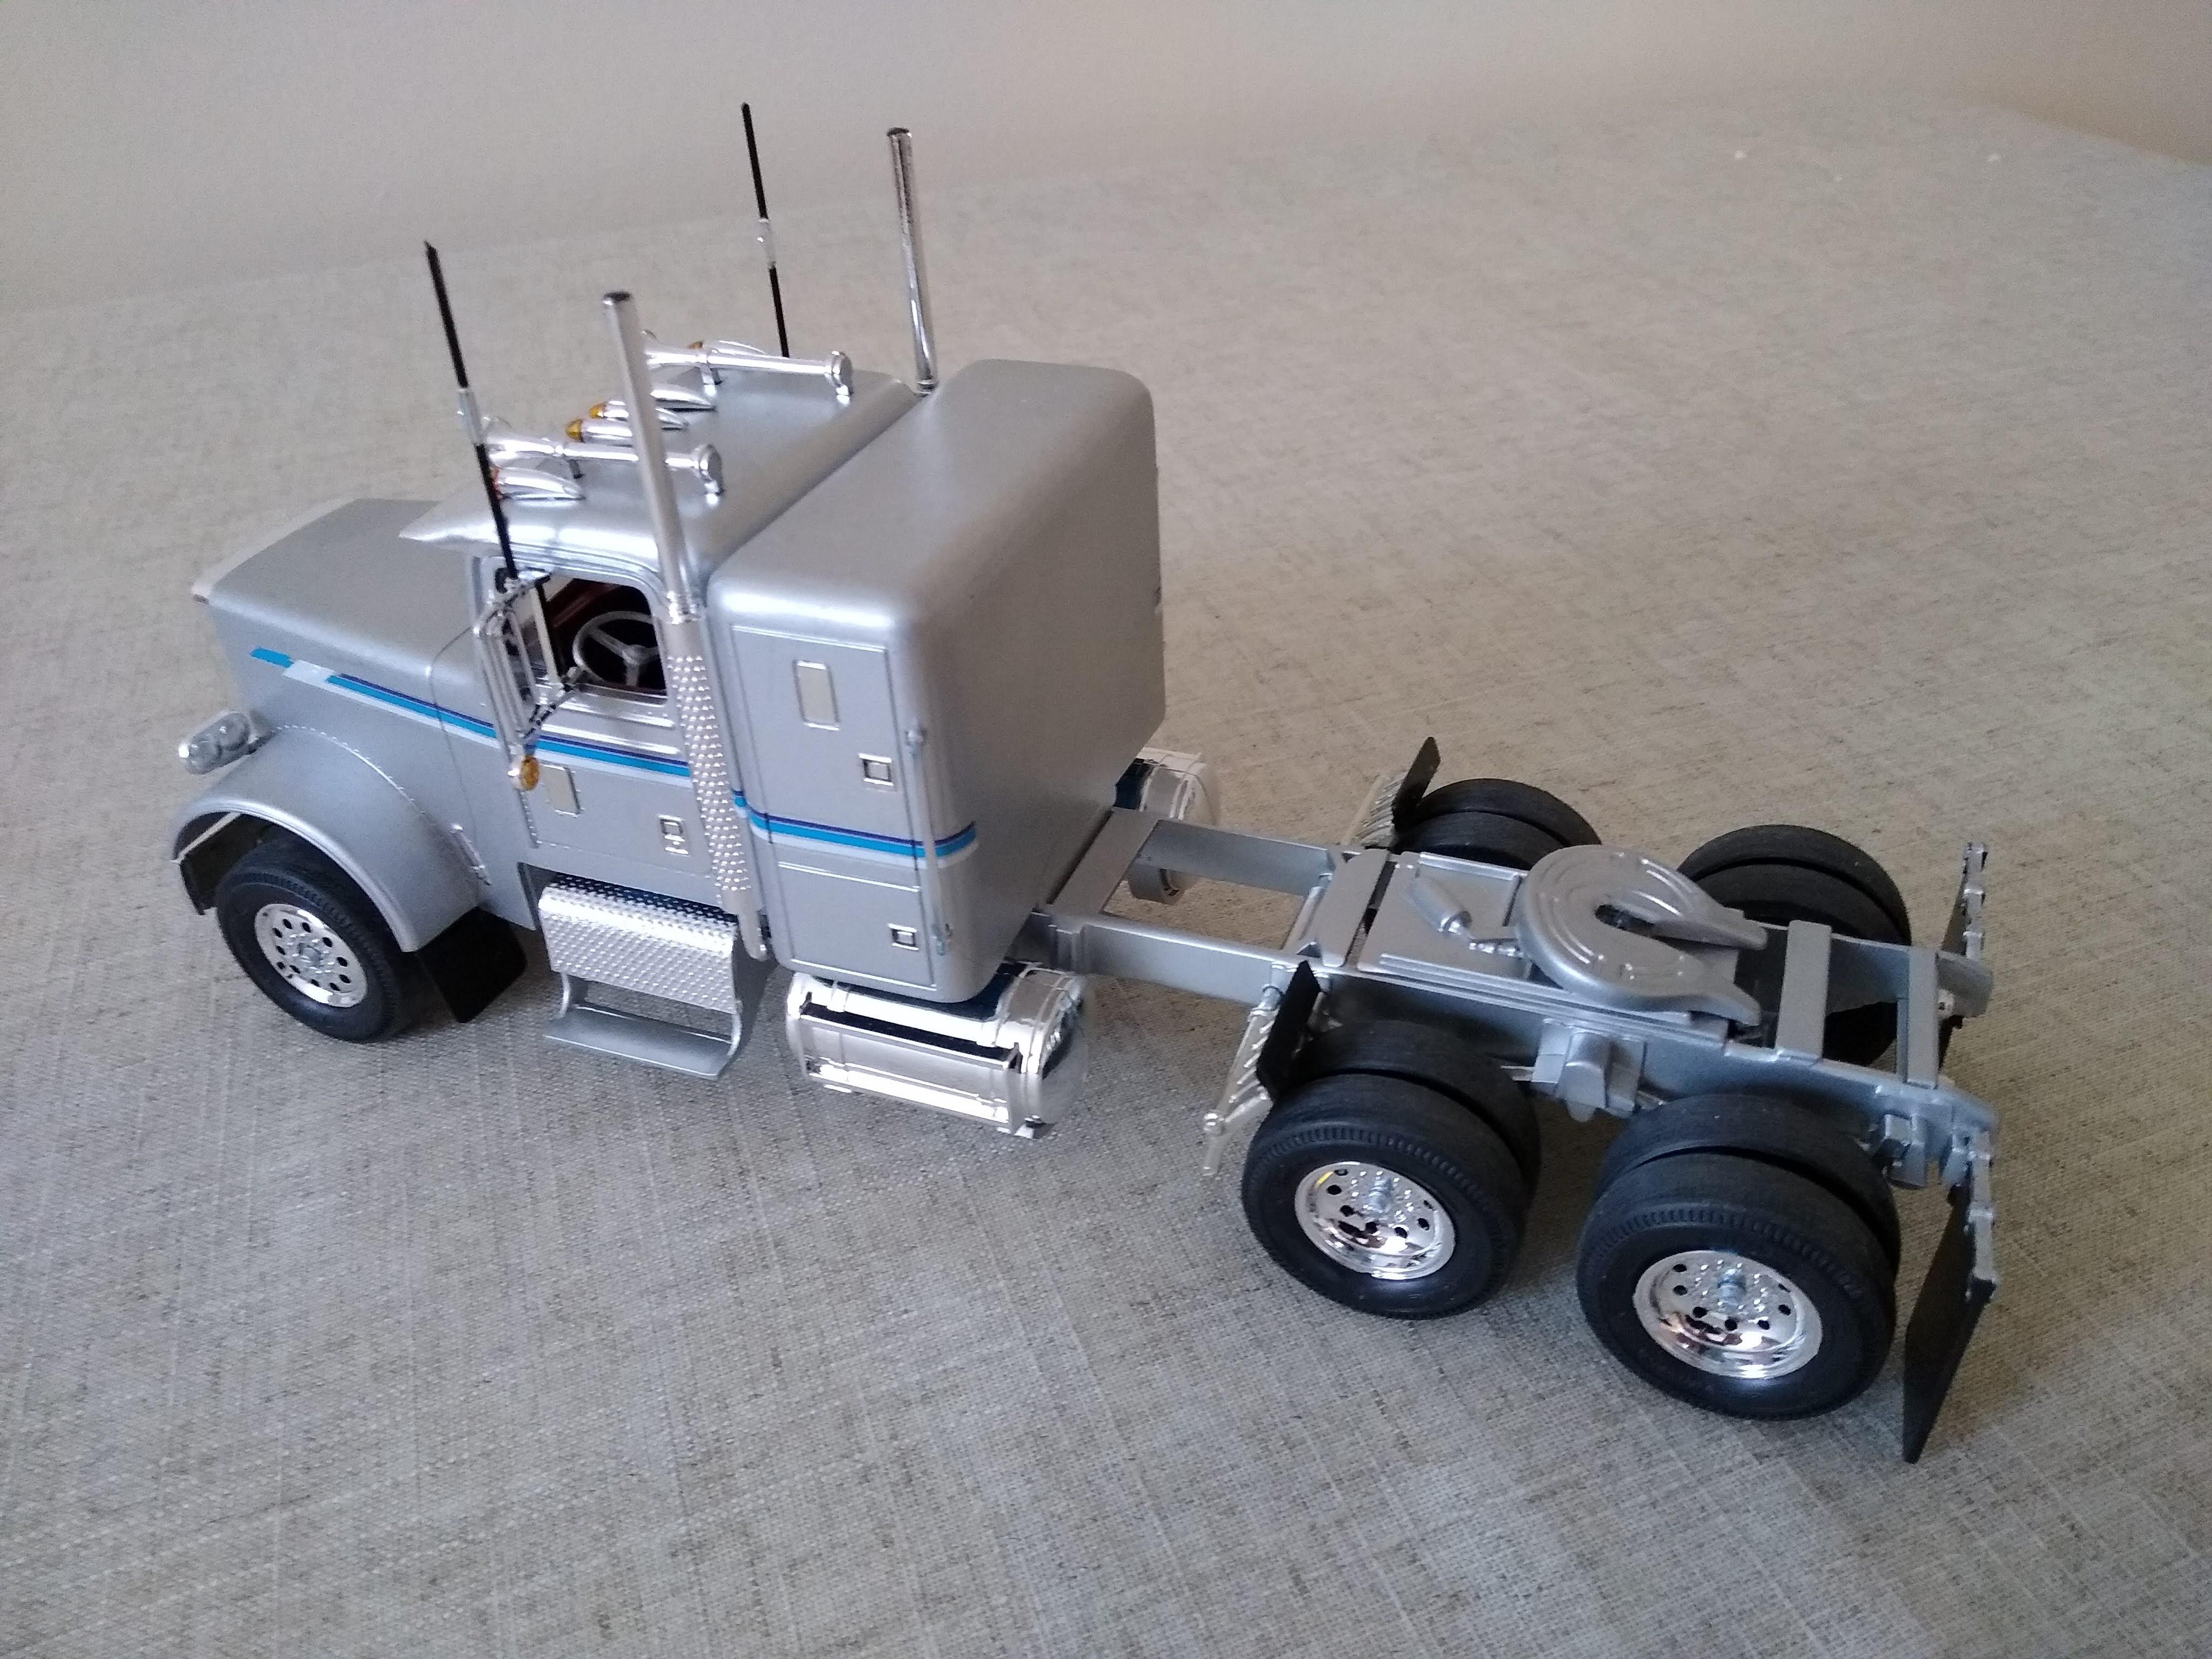
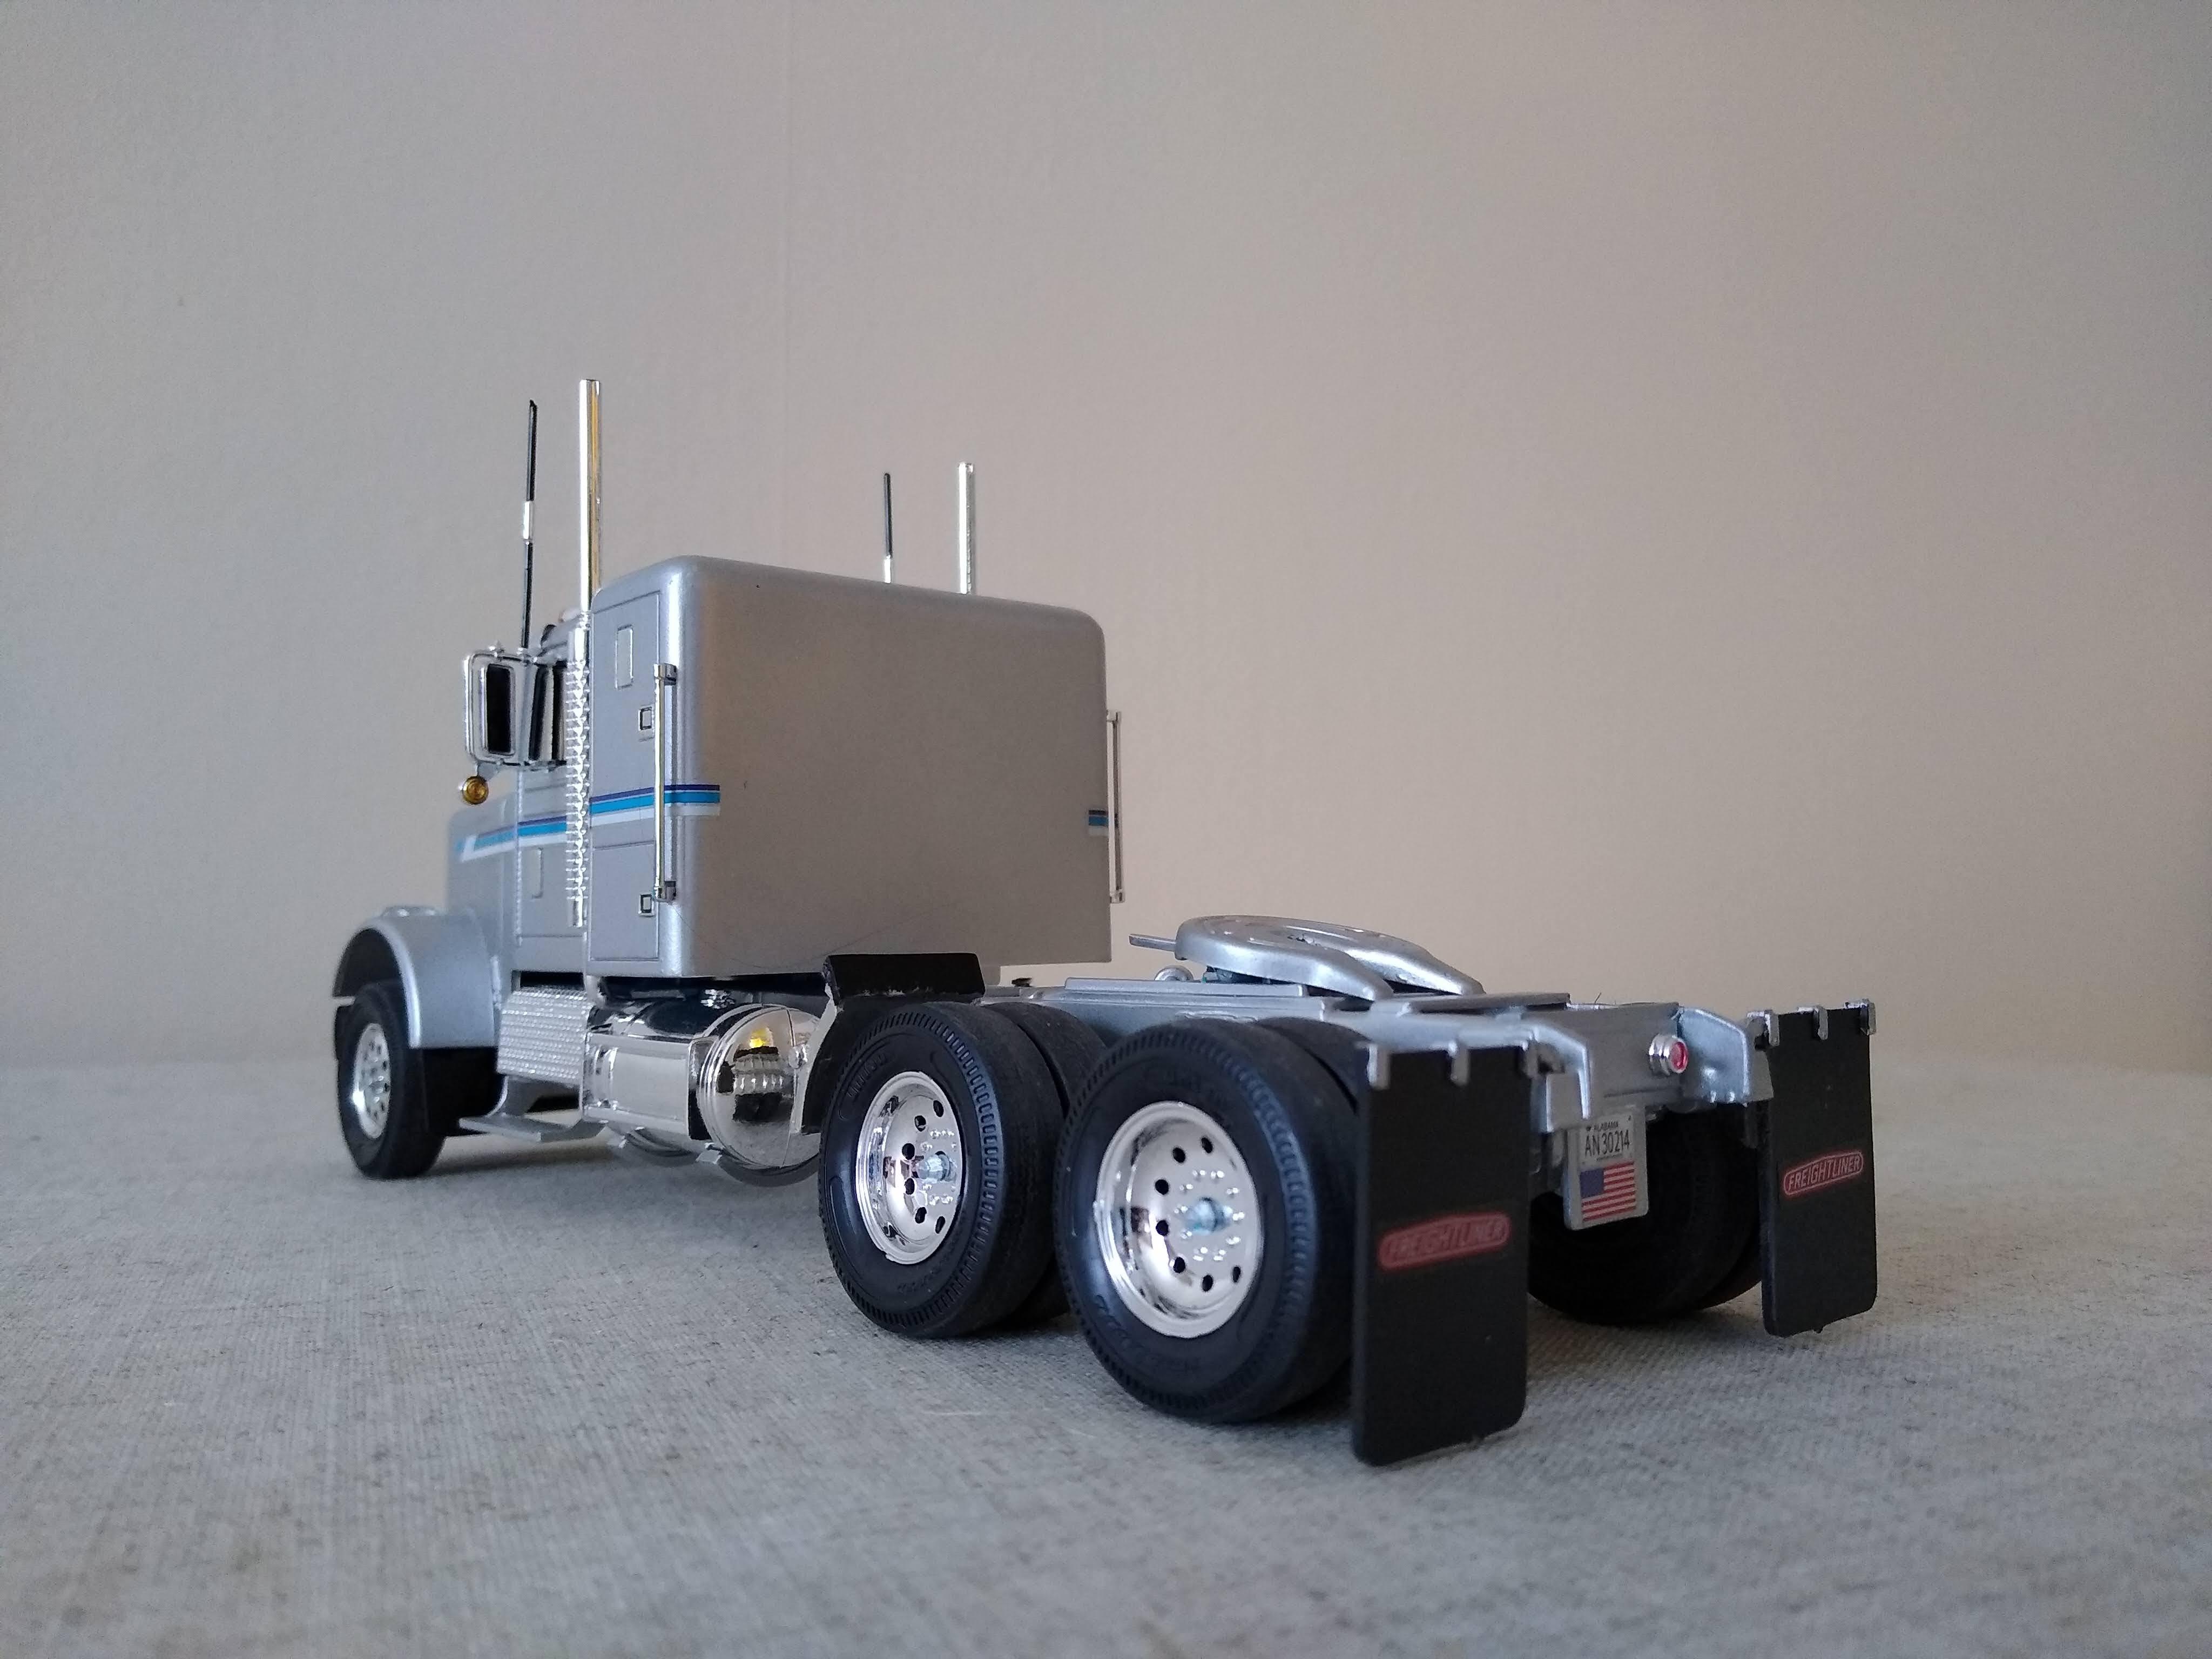
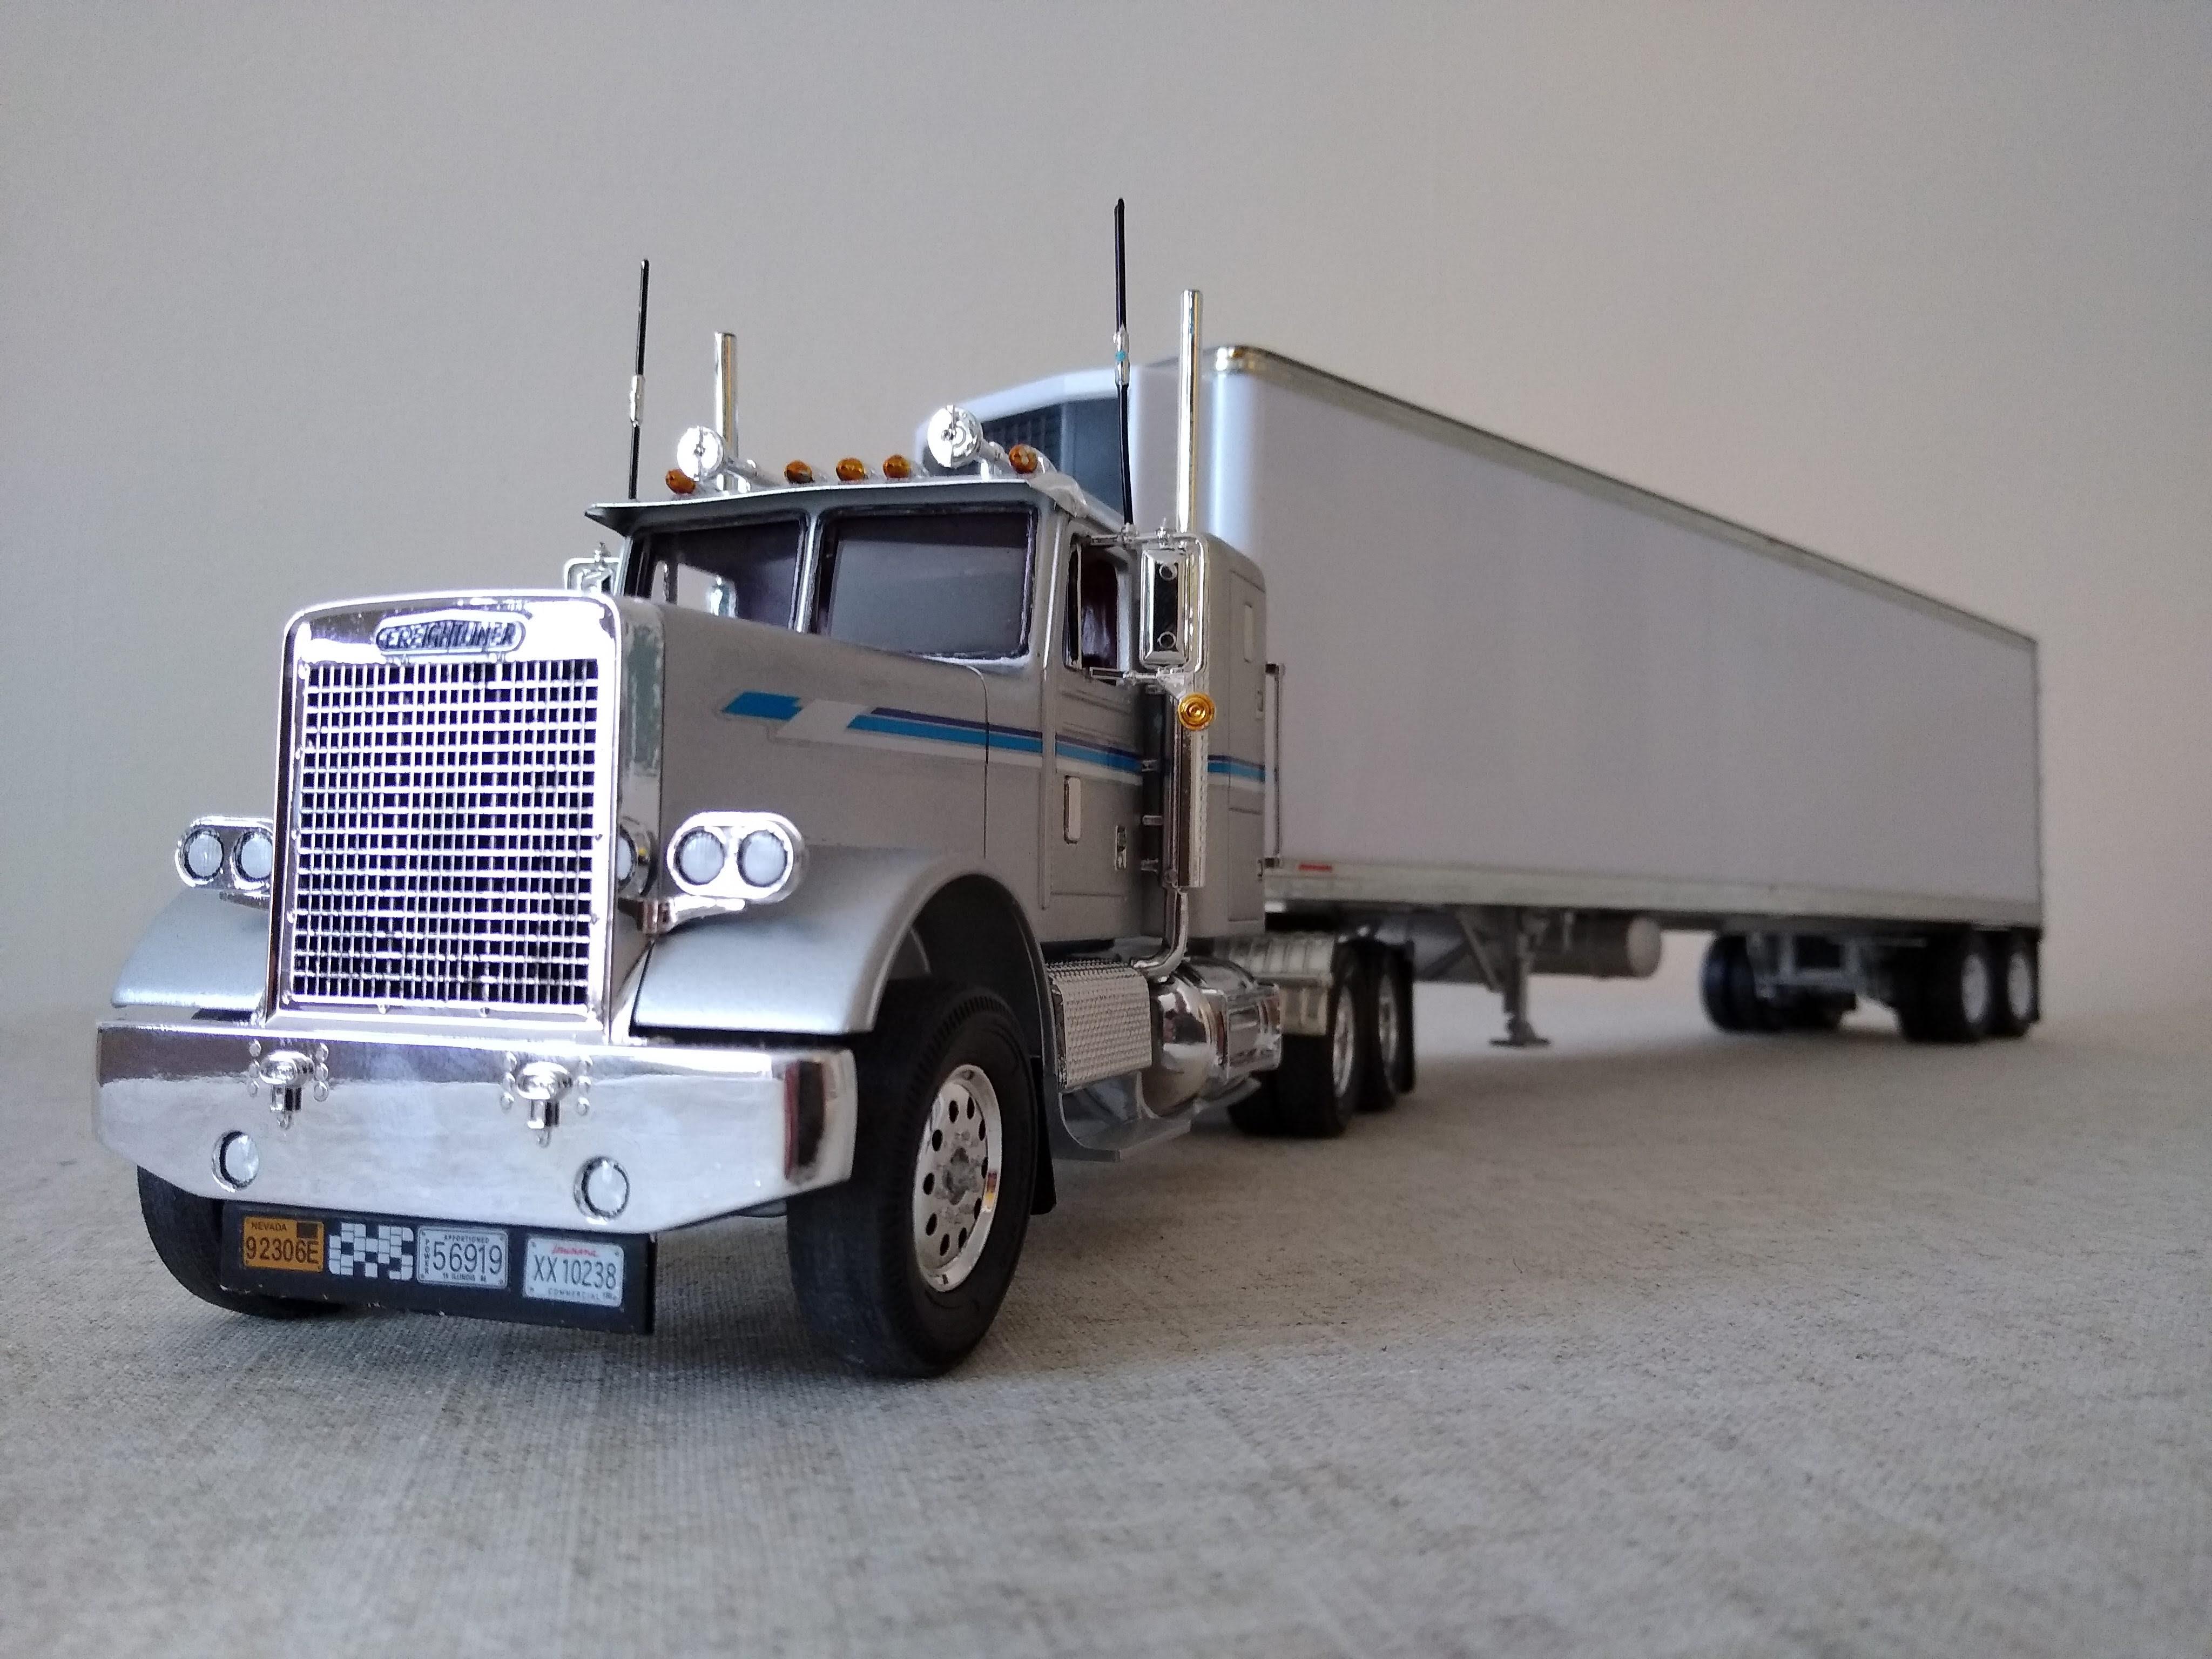
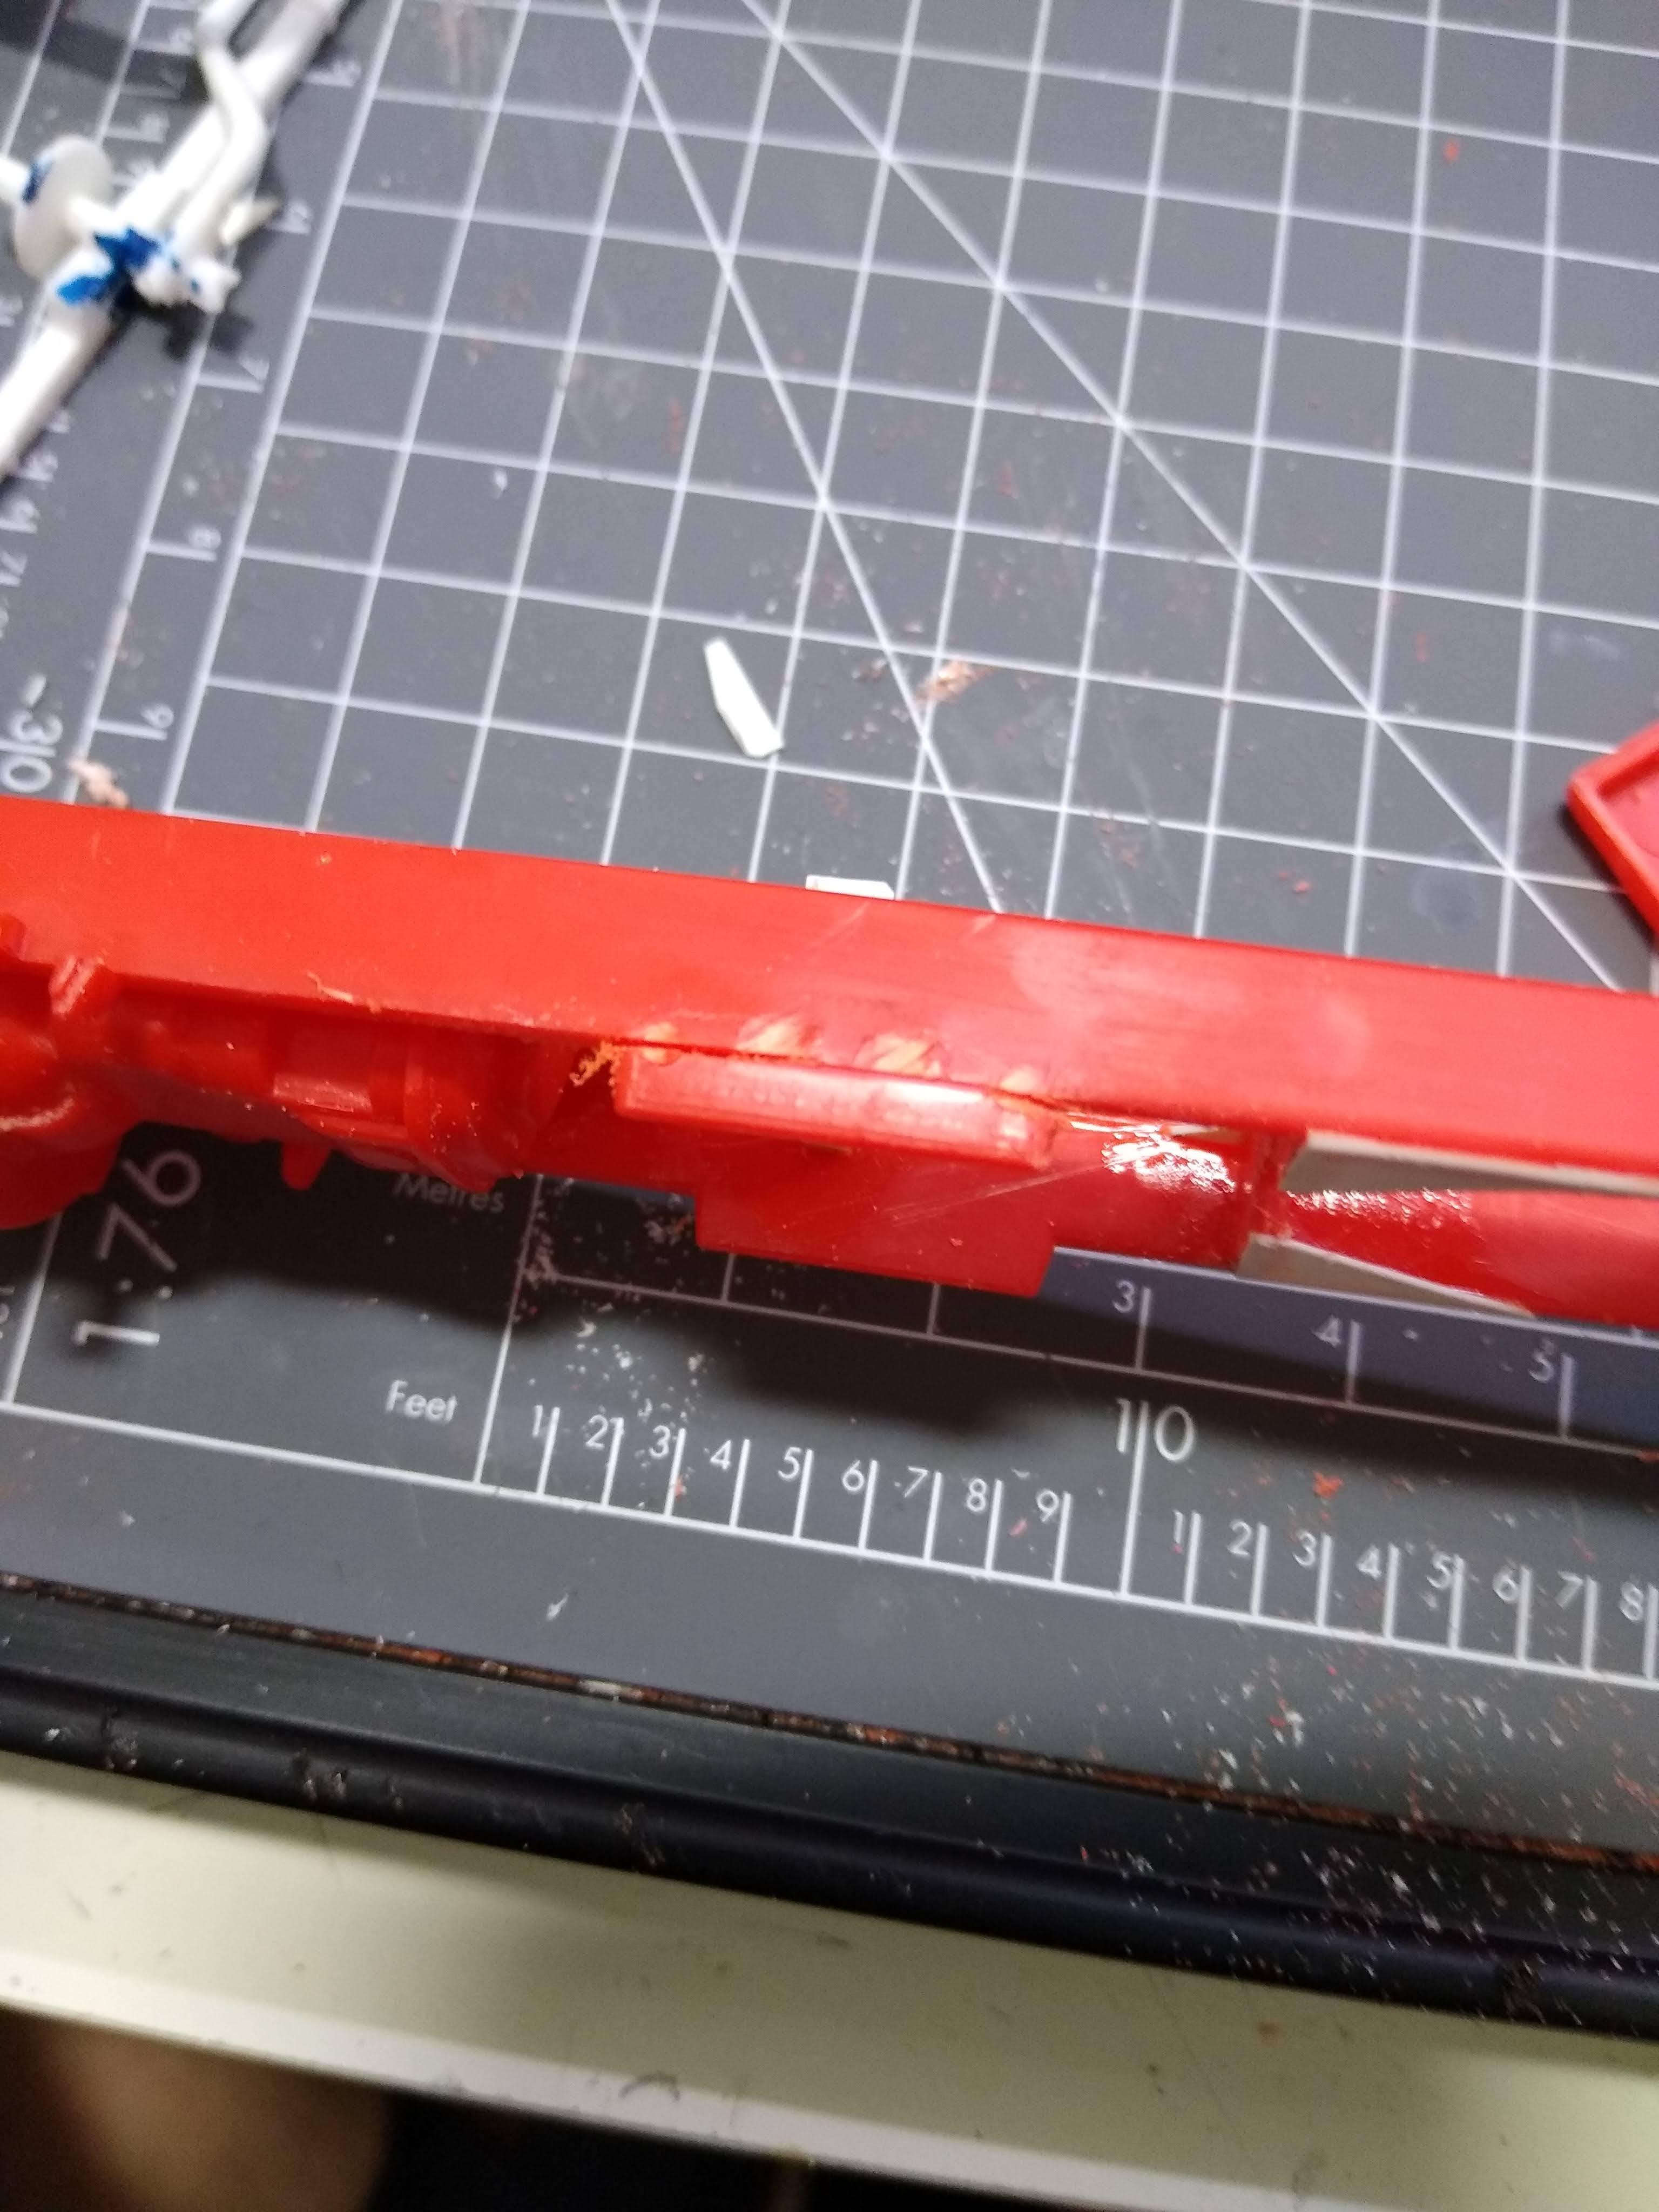
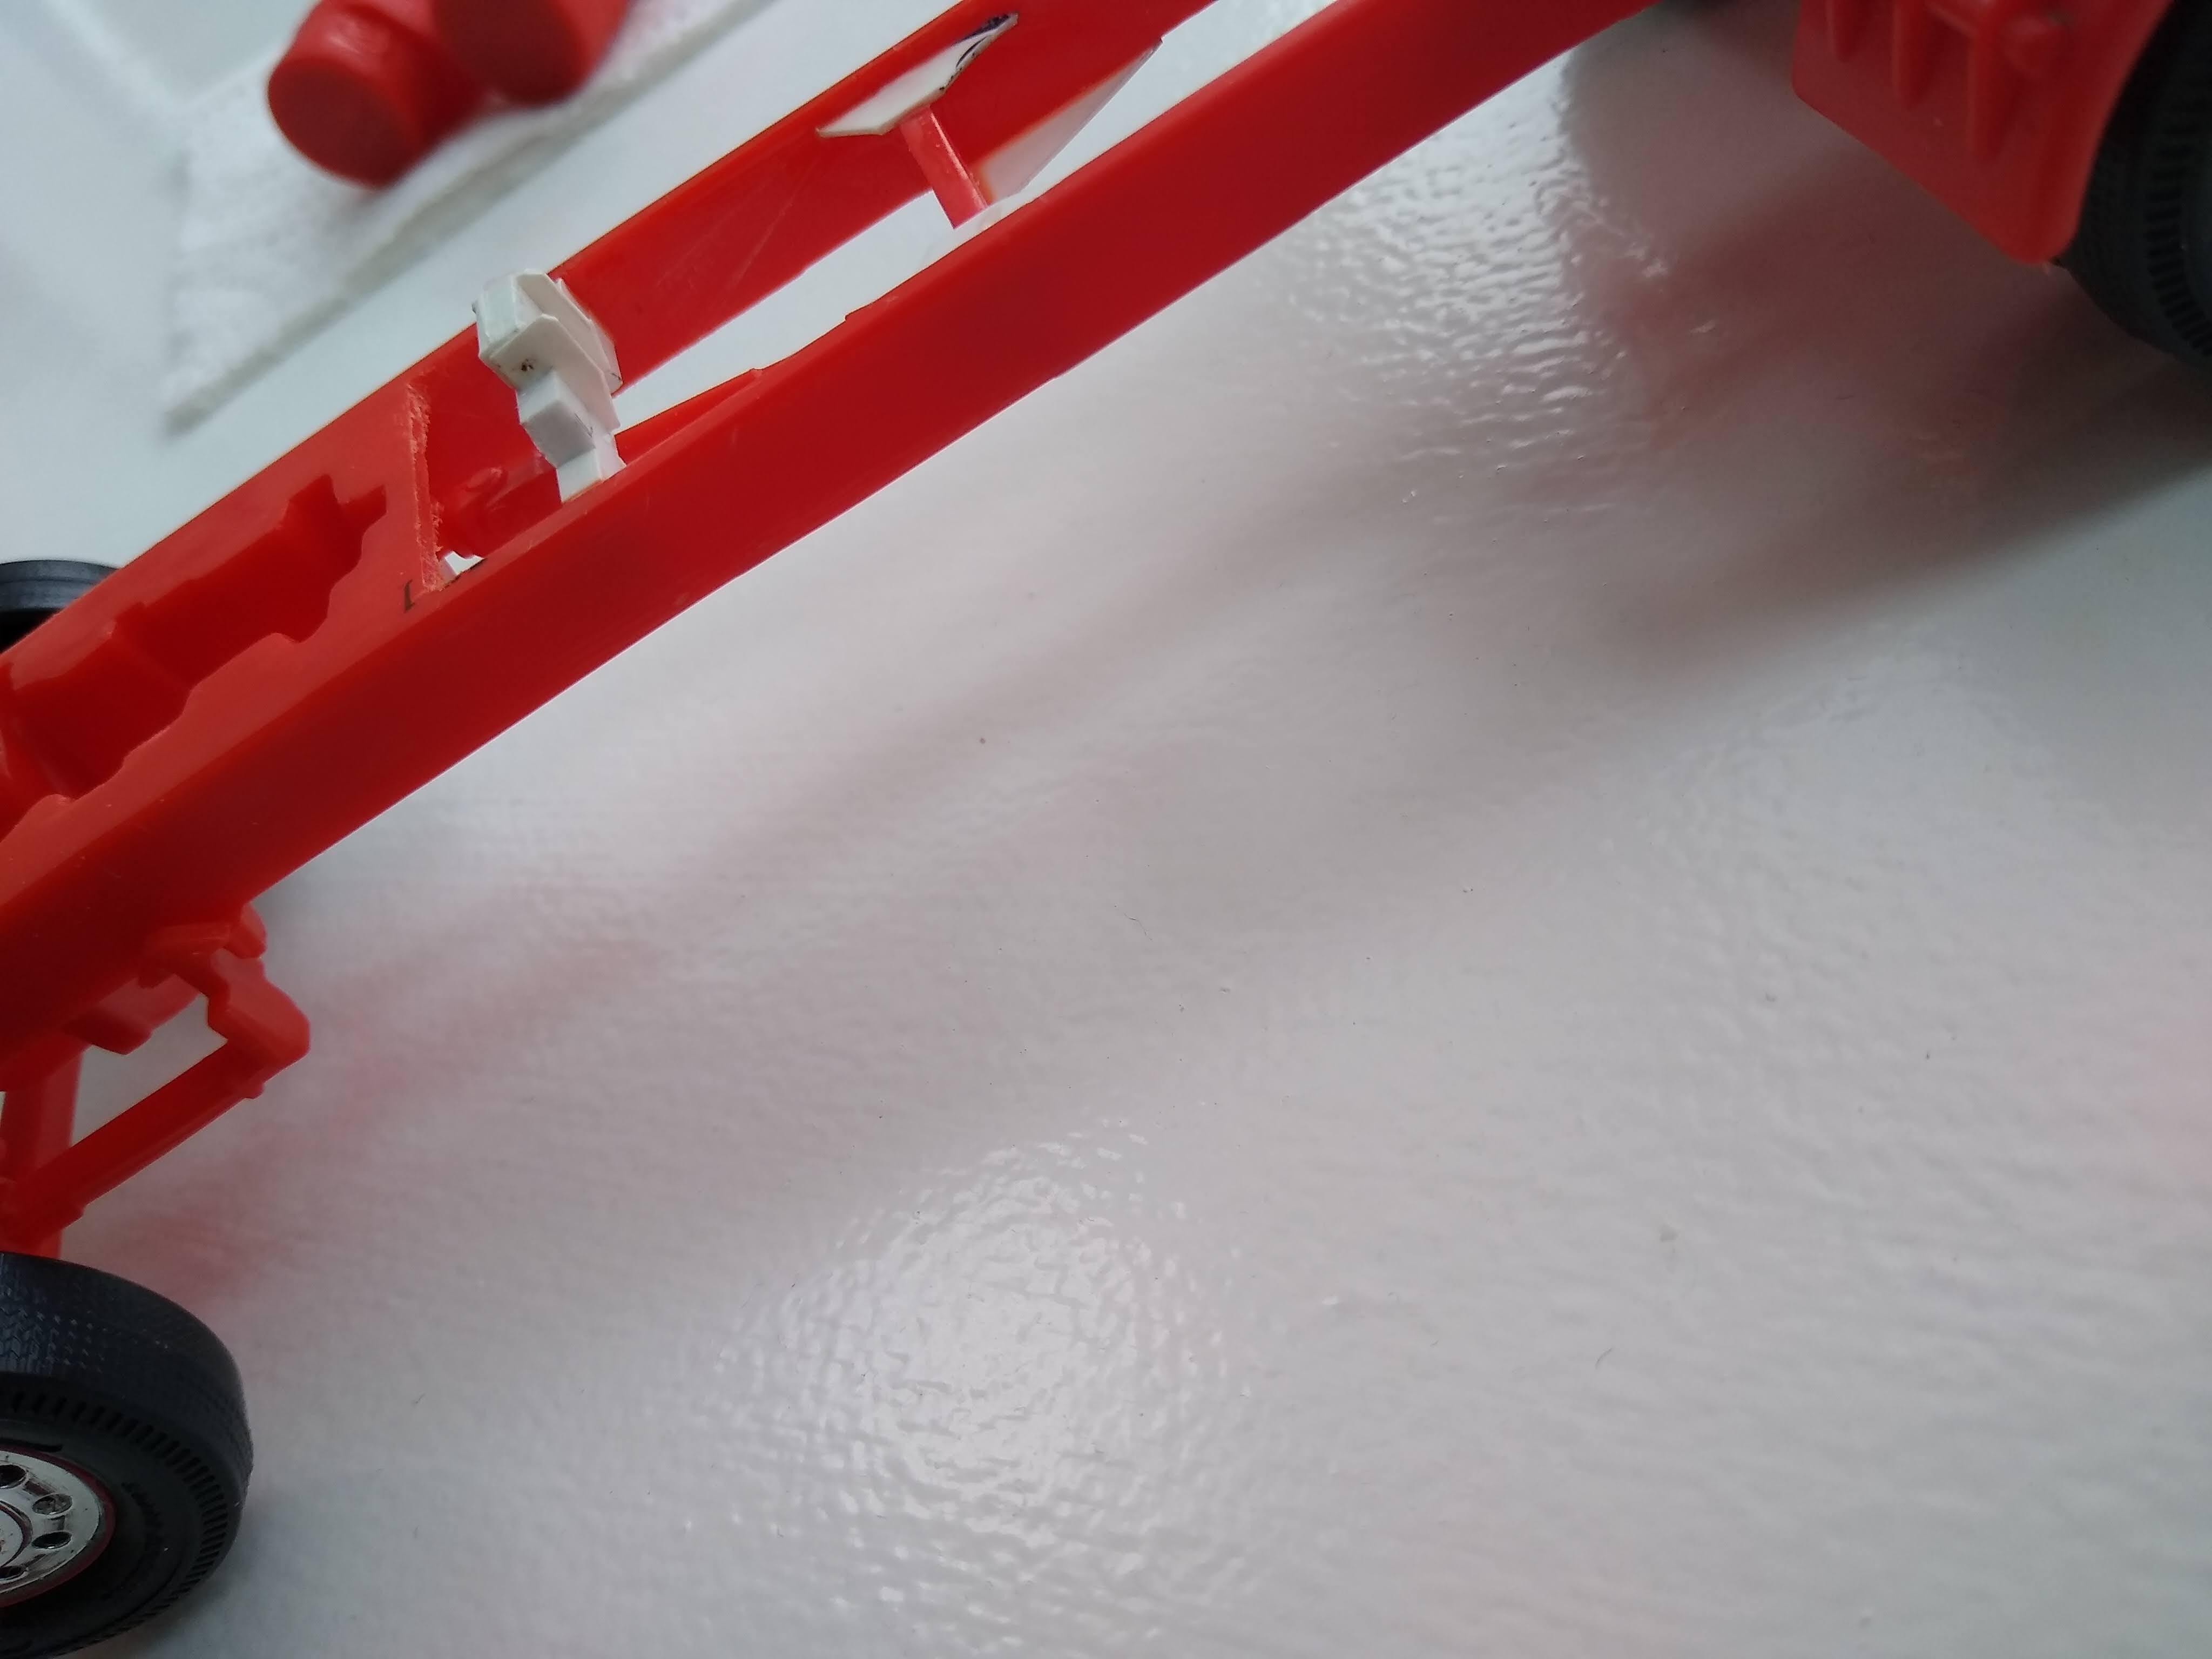
This is a kit built in the 80s under the original release with the big stripe decals. I think it was White with an orange chassis. The current version is in blue with sticker stripes. I rounded the chassis rail corners, opened up the steps under the battery boxes, repositioned the quarter fenders and mudflaps, altered the trailer hitch to lose the silly spigot from the middle, bit of BMF here and there, then painted it metallic silver with a rattle can. Looks ok and even better hitched to the van trailer.
-
Freighliner Cabover Tractor
Rockford replied to mr46ford's topic in Model Trucks: Big Rigs and Heavy Equipment
Everything is spot on about his truck, outstanding quality. -
AMT White Freightliner COE Single Drive
Rockford replied to Leonidas's topic in Model Trucks: Big Rigs and Heavy Equipment
Very nice indeed. Quite a chunky little beast! -
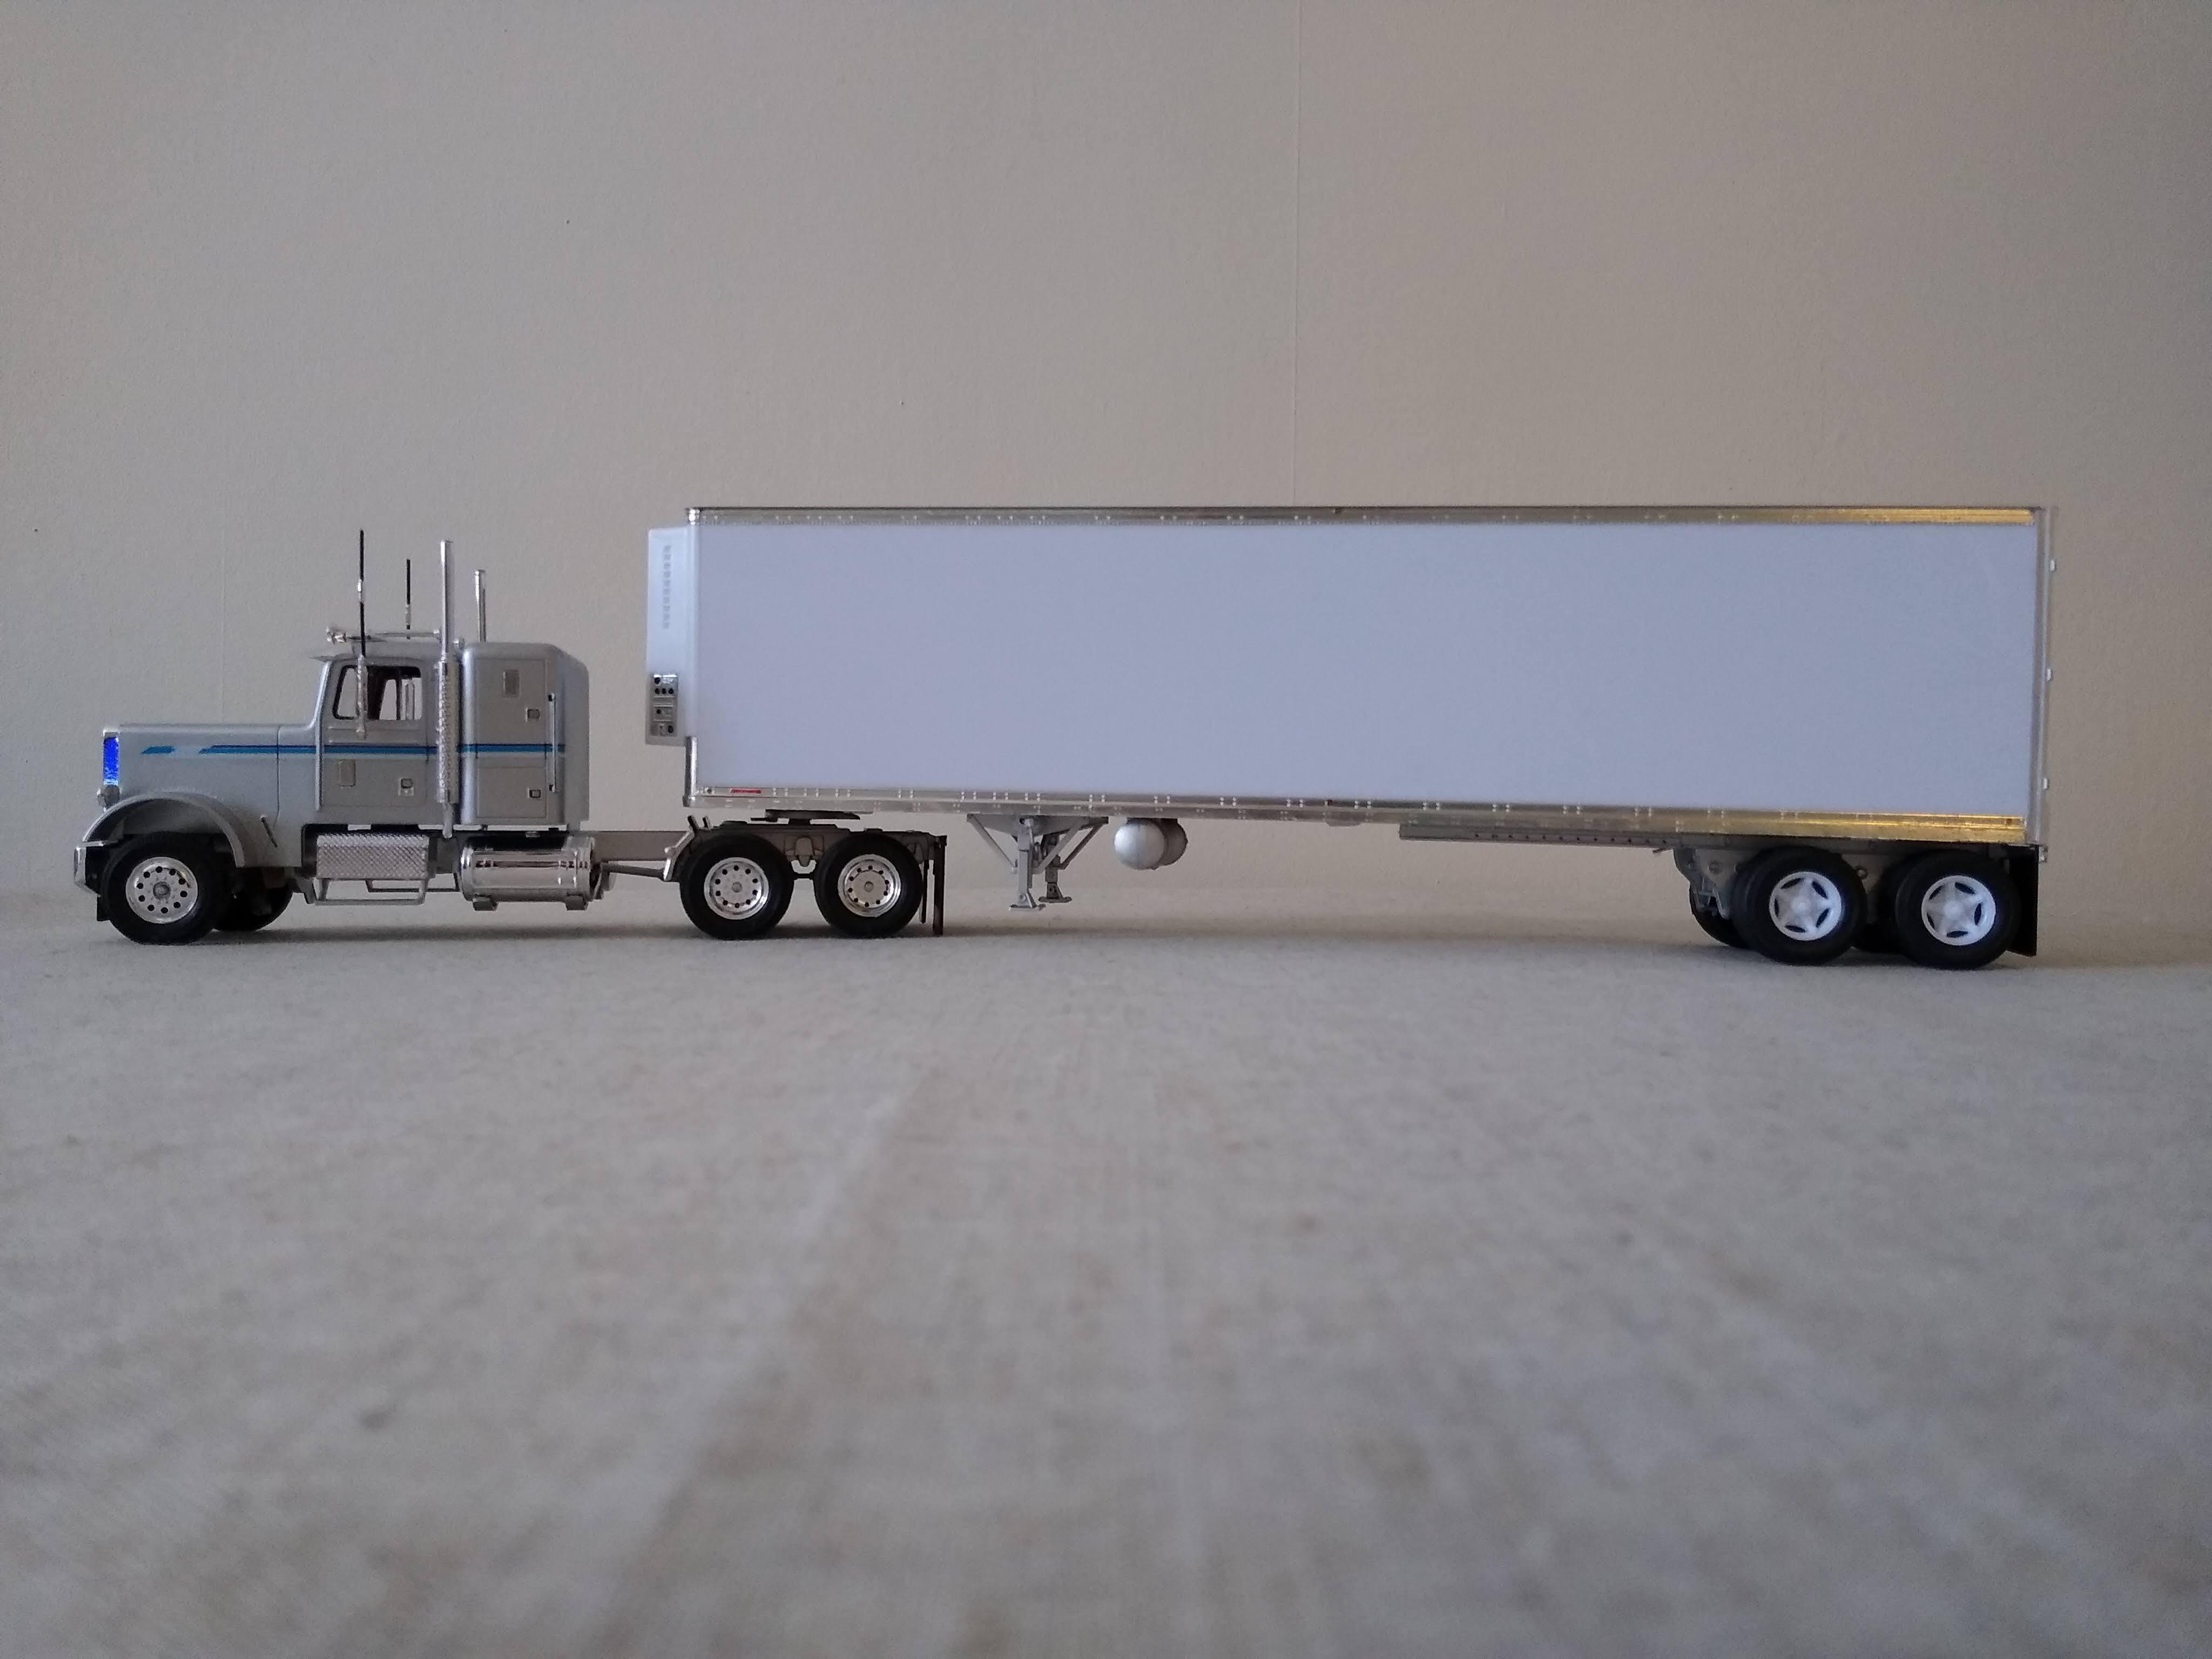
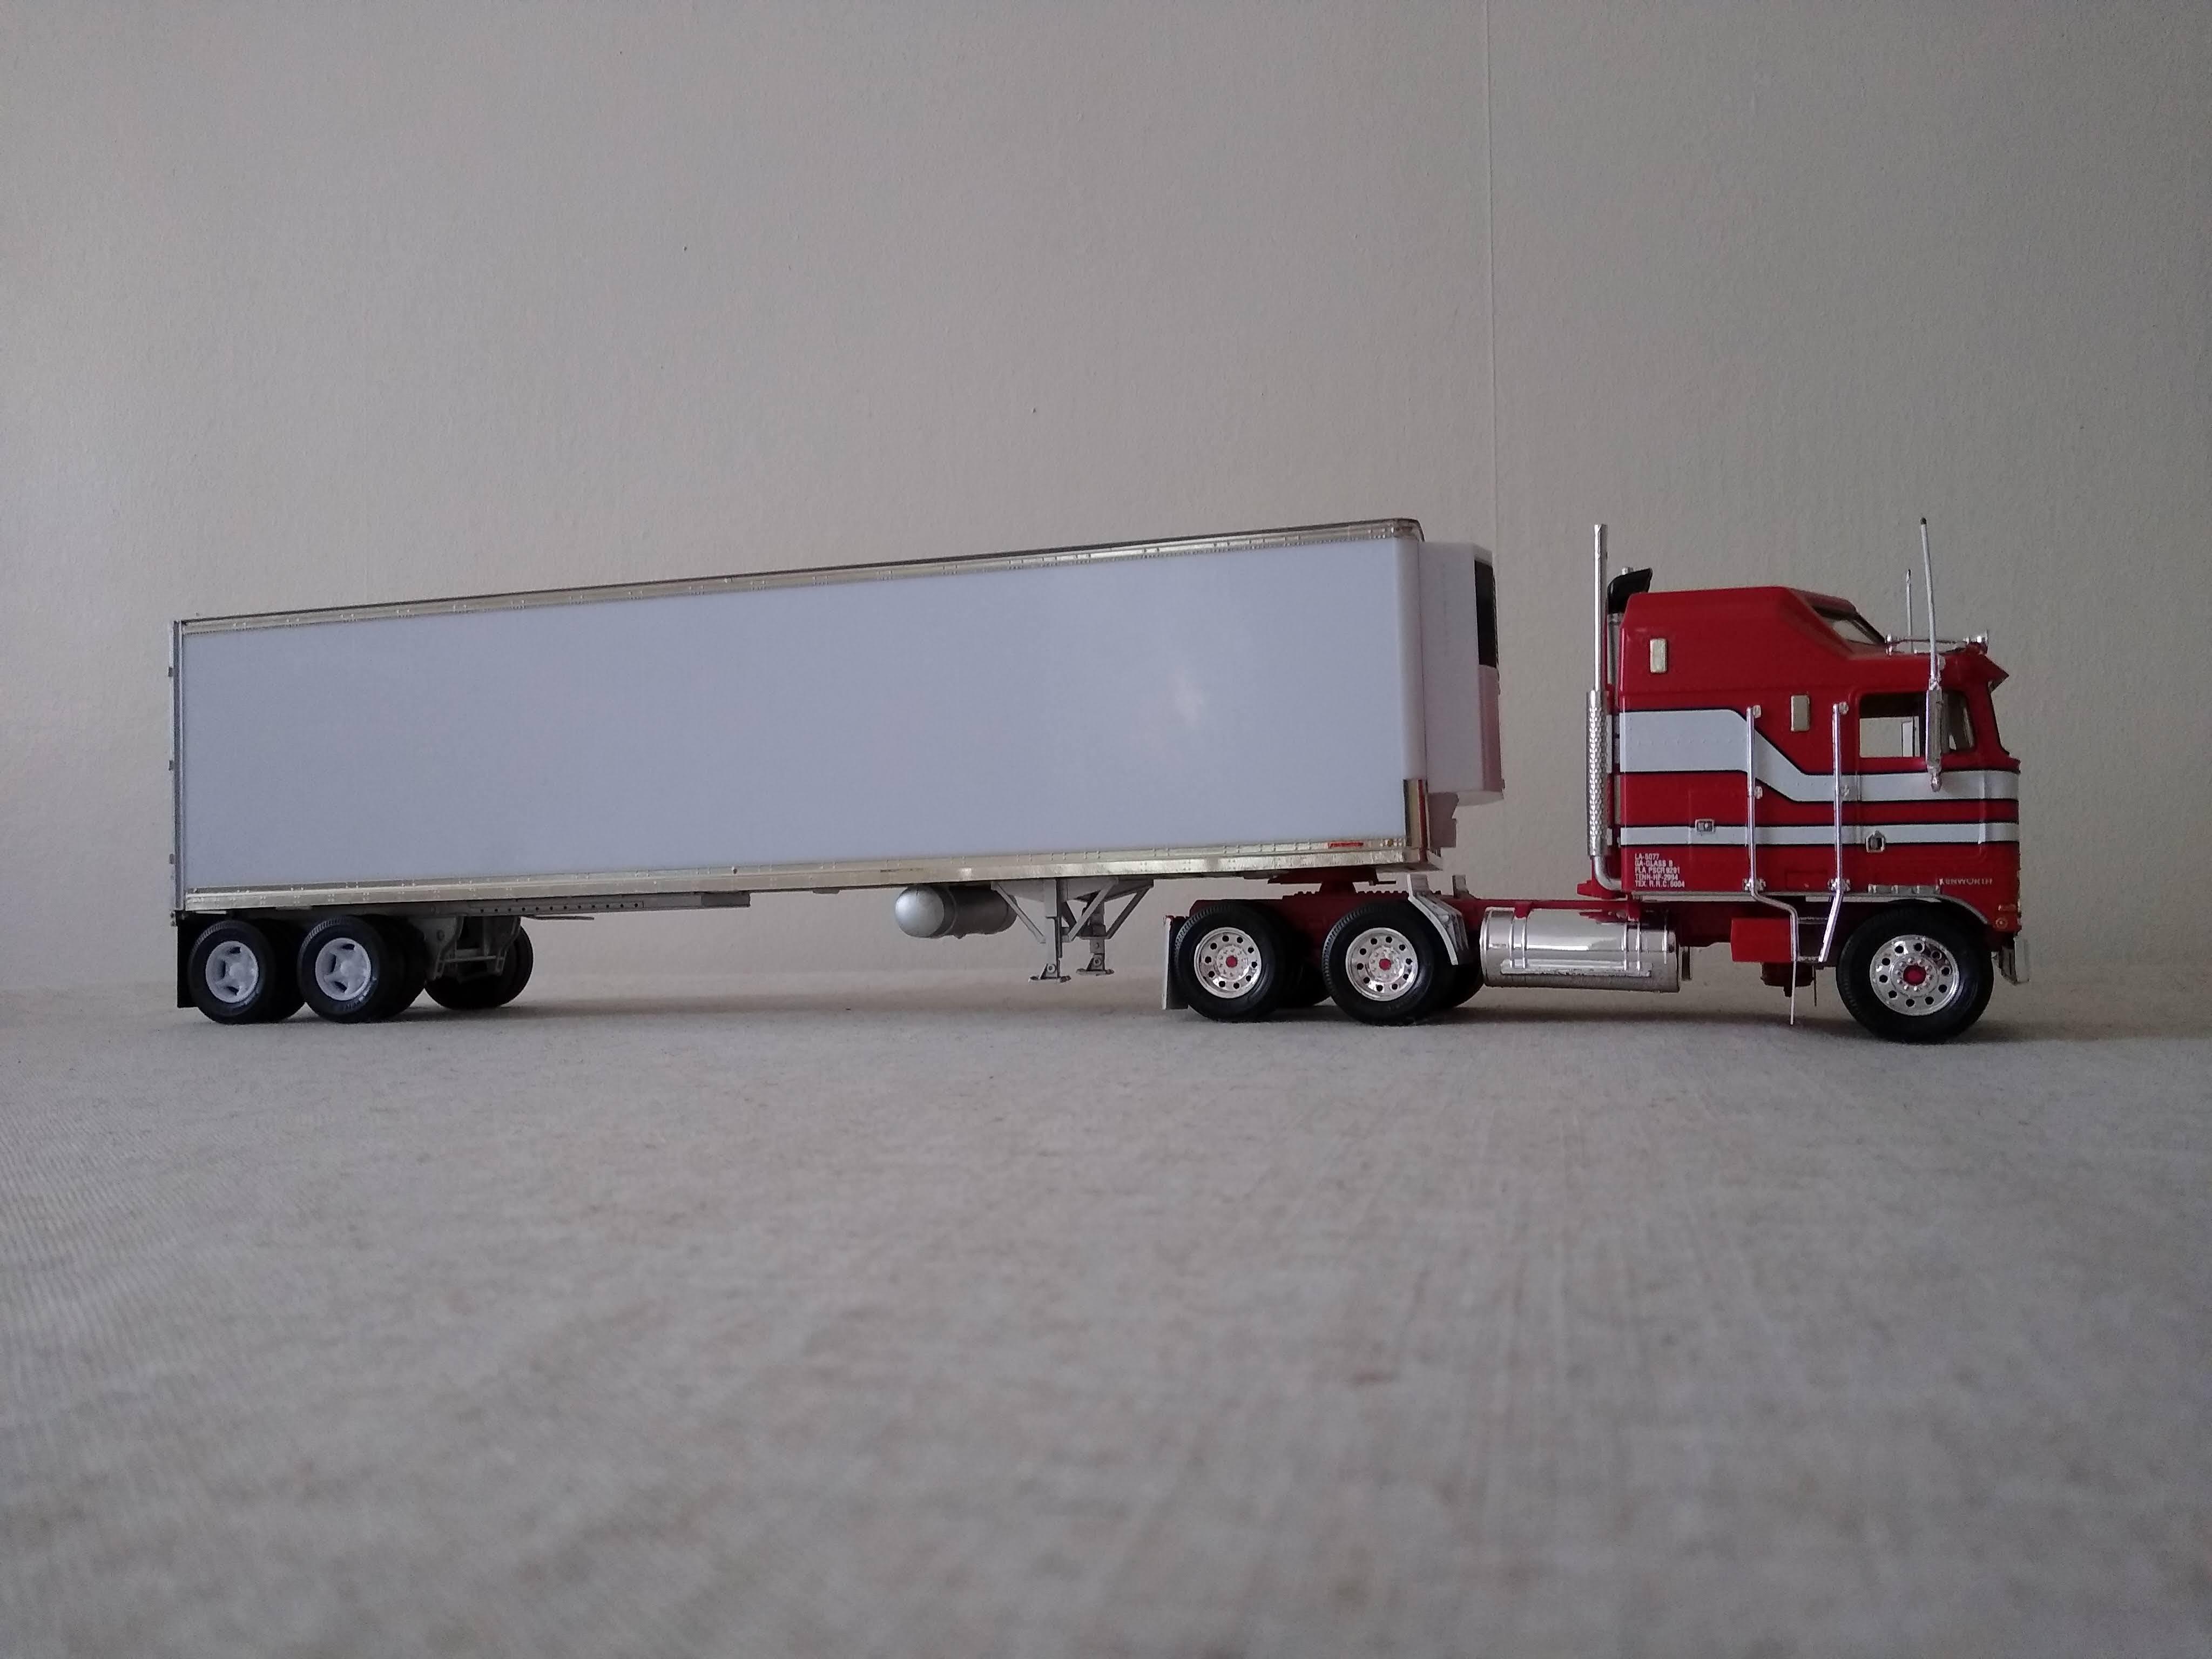
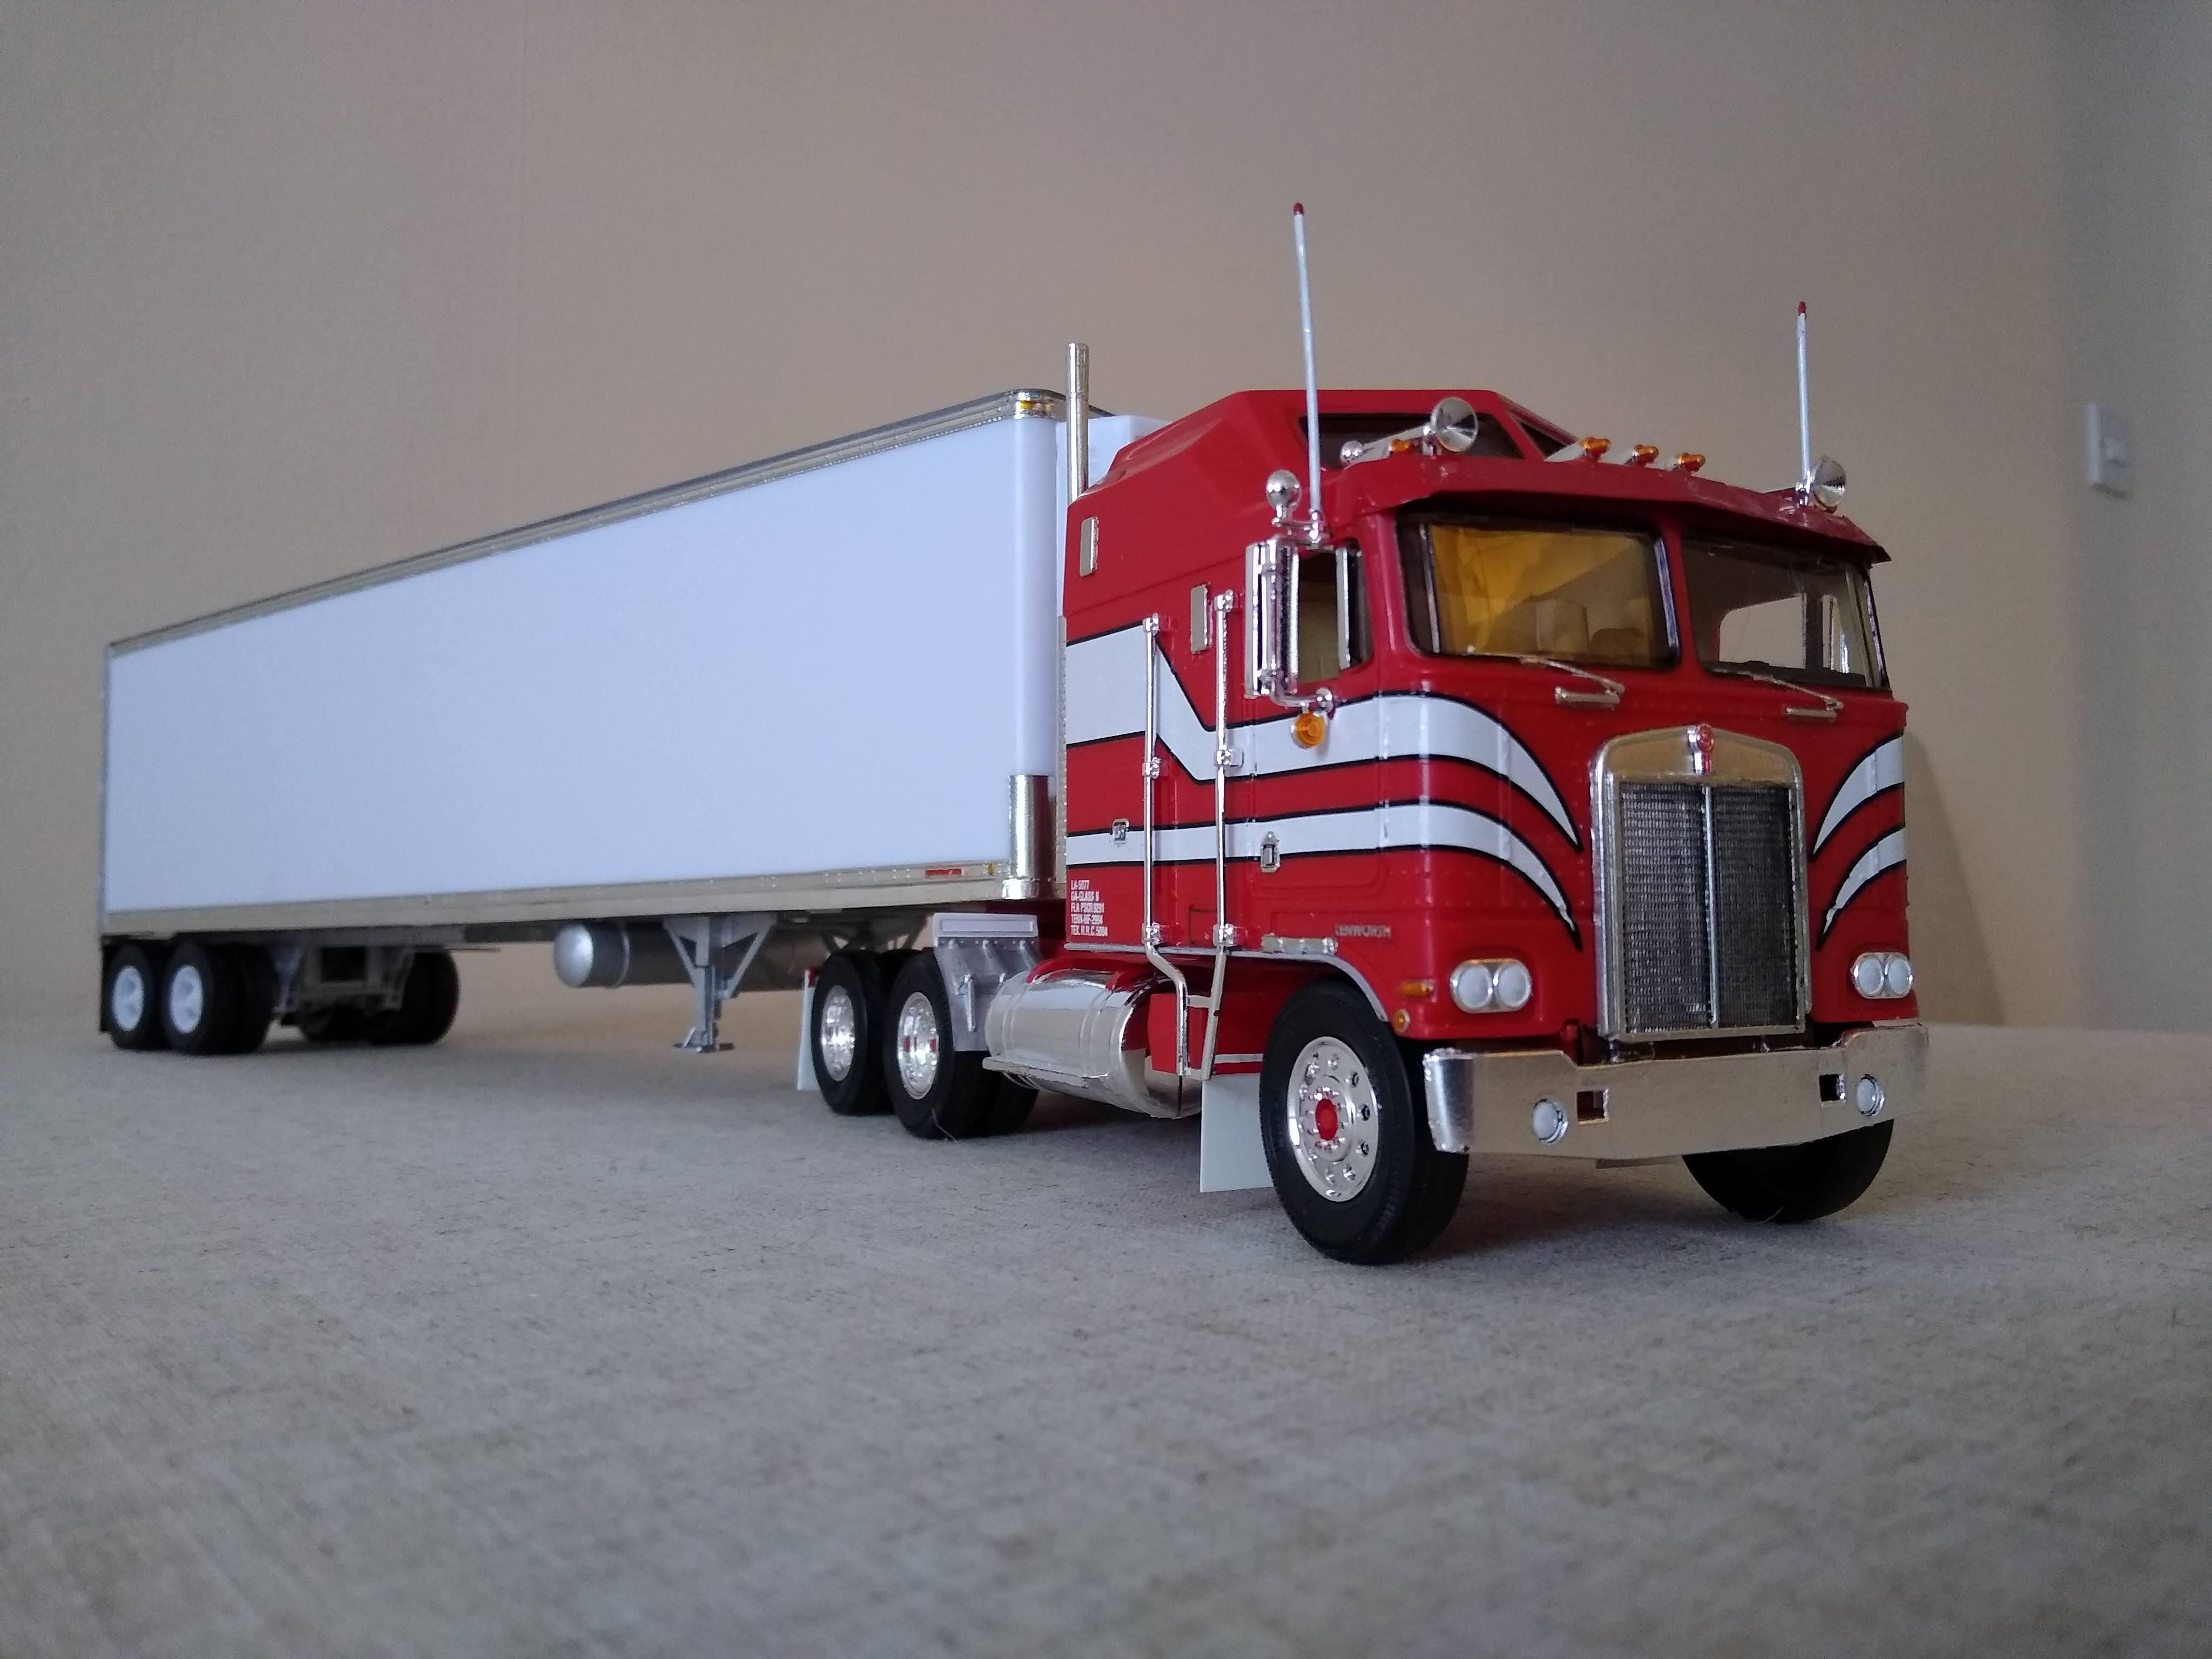
I've had this kit for about 5 years and finally got around to it now. I love K100s and especially Aerodynes, what a great idea they were, what a wise use of space combined with aerodynamic efficiency. This release is from Revell Germany and so it still came with decals rather than stickers, which settled down beautifully with setting solution. I'd loved to have a Salem paint scheme because I think it's a masterpiece in any colour combination but never mind. I did my usual adjustment to the mudflaps and moved the quarter fenders further into the duals ro make them look more involved with the job of catching debris from the wheels, they seemed to just hang in the middle of nowhere before. The notch left in the chassis was filled with sprue. I had to foil the grille and bumper on this kit as well as the exhaust stacks because as soon as my fingers touched the chrome it came off on my skin. This was during full lockdown so I had to improvise at times. I wanted to make a visor but my plastic card stock was too brittle, I bought a pack of 4 aluminium serving trays from a supermarket [the only shops open at the time ] and used the flat base of one for raw aluminium sheet. The final result looks quite ok. Can't have a K100 without a visor. Can't have a K100 without mudflaps on the air cleaner and battery box either, so they got added in card stock. I cut the silly spigot that juts from the 5th wheel on these kits and drilled small hole [0.8mm] through what remained. This allows the hitch to pivot and receives a small metal pin I've employed on the trailer as a kingpin and looks so much more realistic. As you'll see it uses my ubiquitous box van [love a plain white van] which will soon have the tanker as company. I also scored the old Harley Davidson 40ft dry van kit on Ebay for only £17 so that will coming soon, I've seen it going for £50 on the same site. I cant believe the prices these kits command now! I know there's no hubs for the drive axles, no brake chambers or chassis detail to speak of, but they look ok. Next job is to rig up the airlines between the tractor and trailer and some draped over the pogostick. Just trying to come up with 1/32 gladhand couplings. Thanks for stopping by.
-
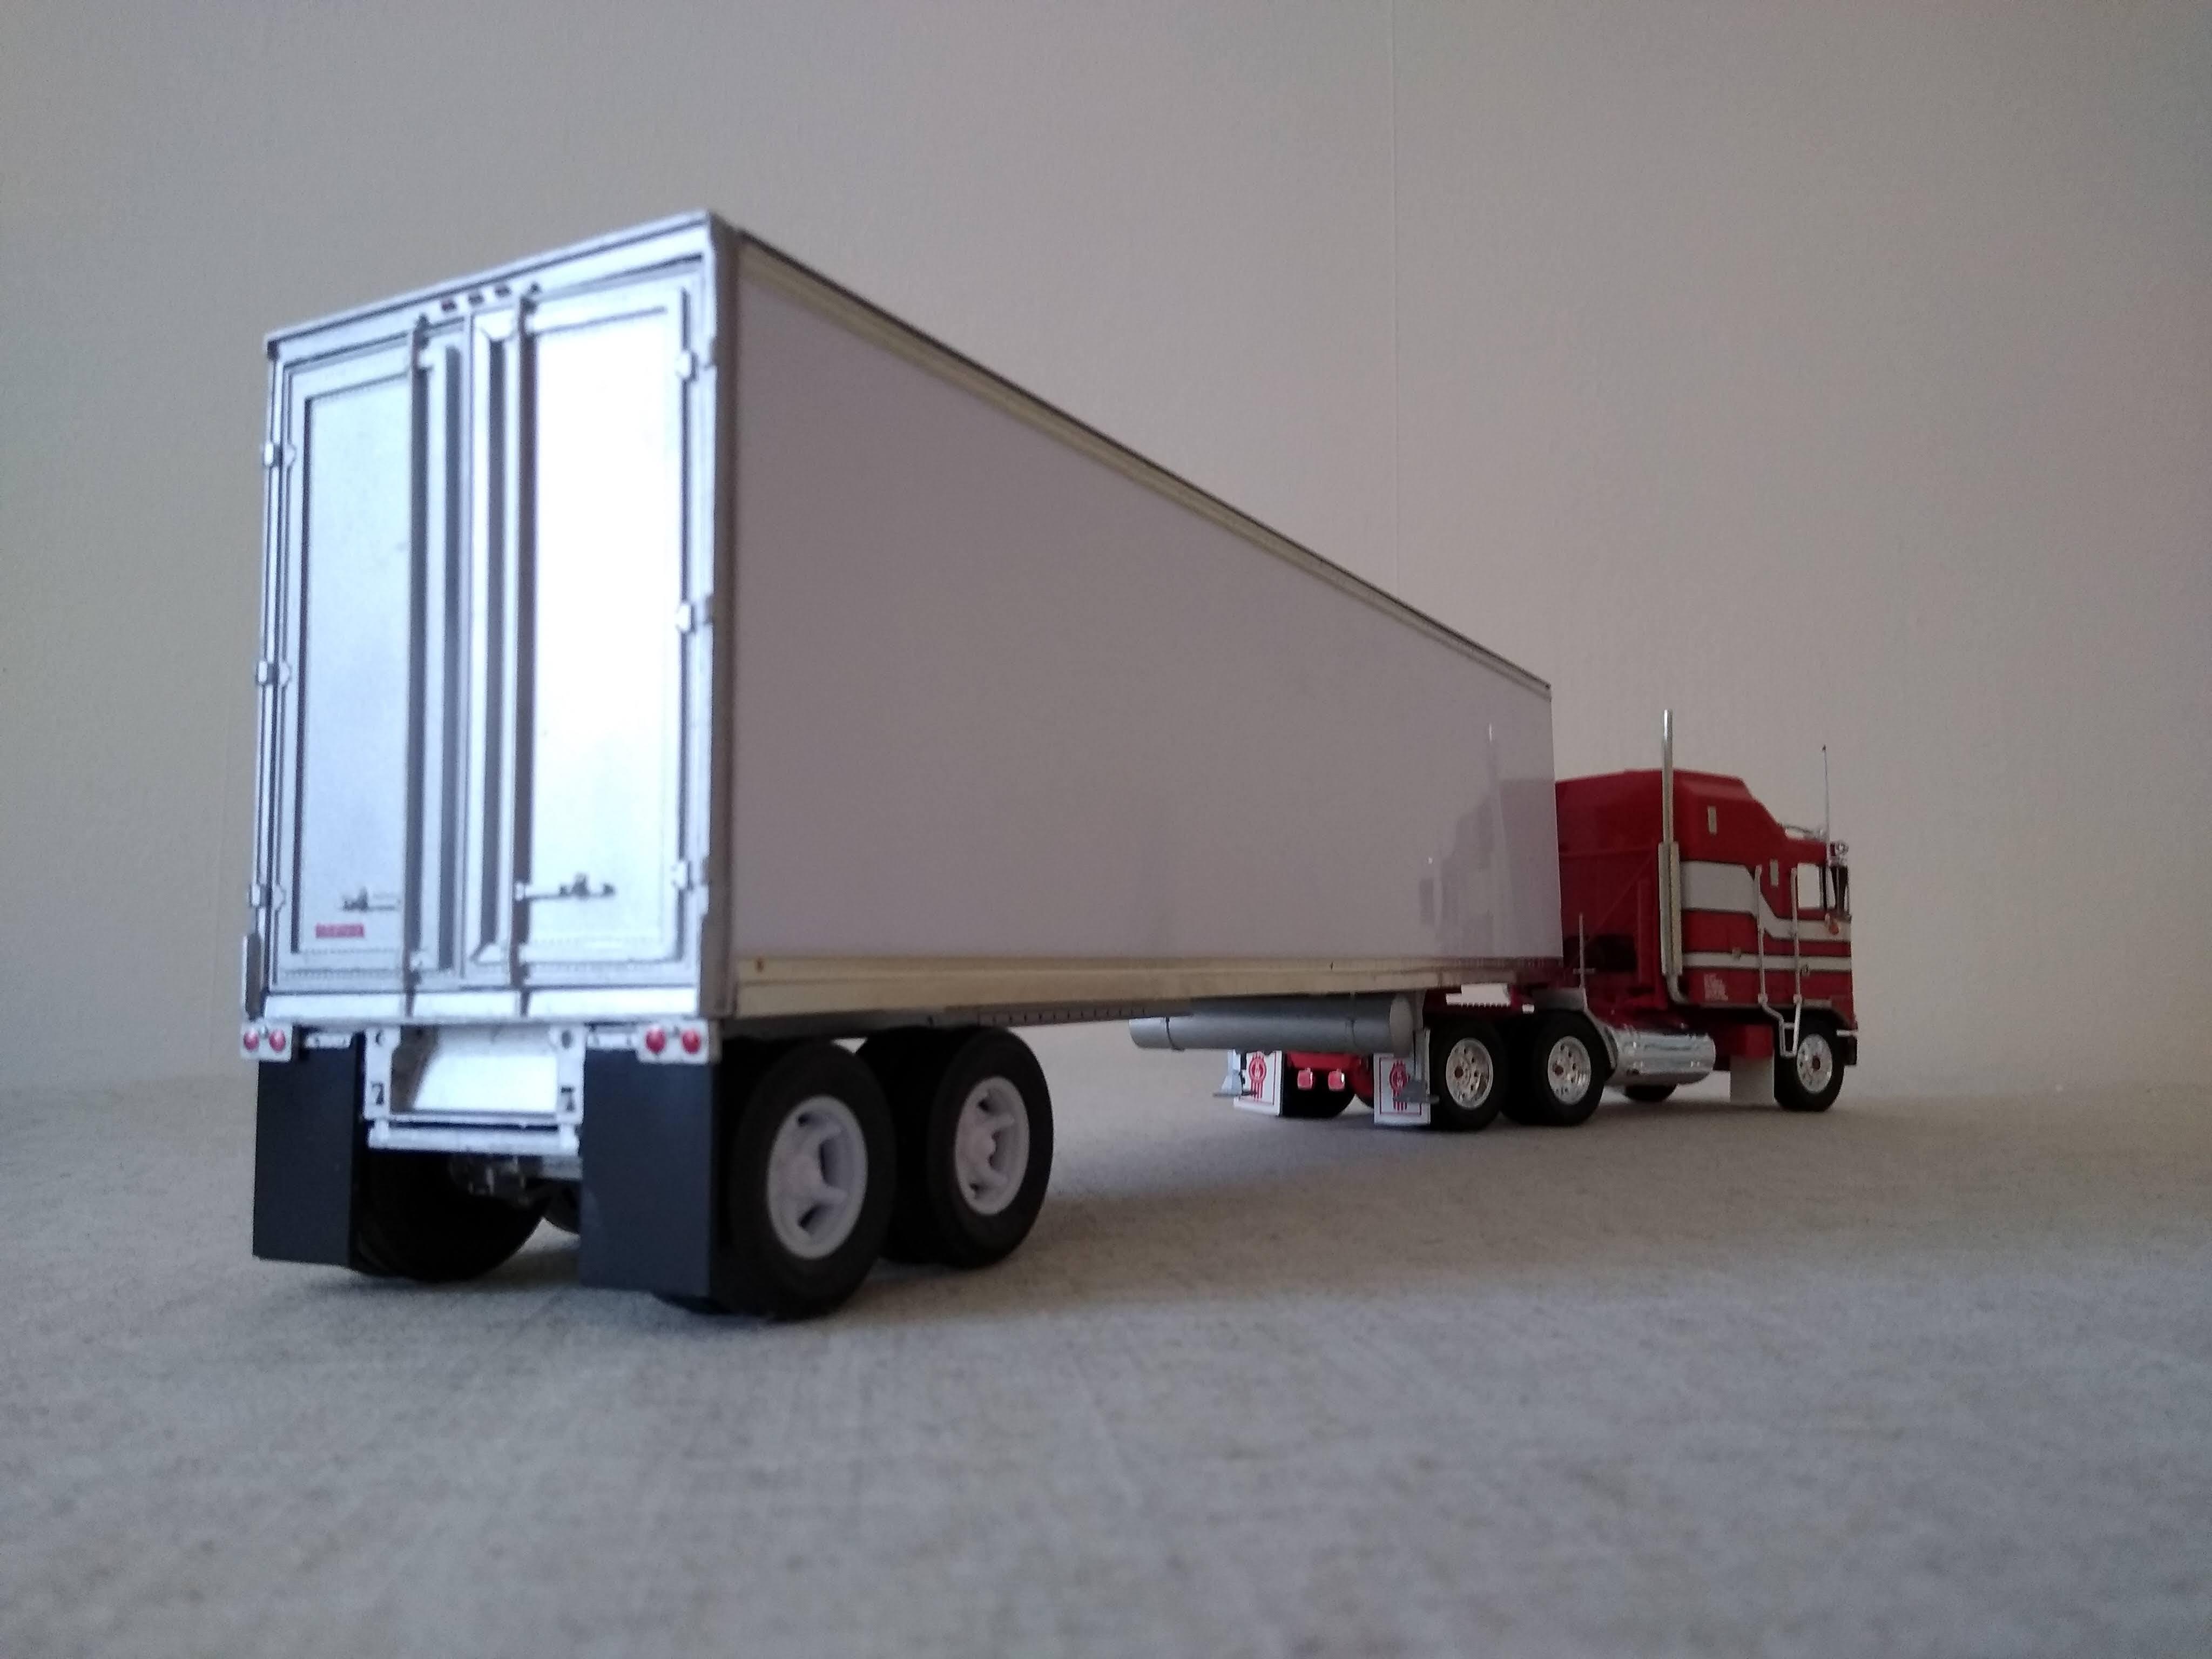
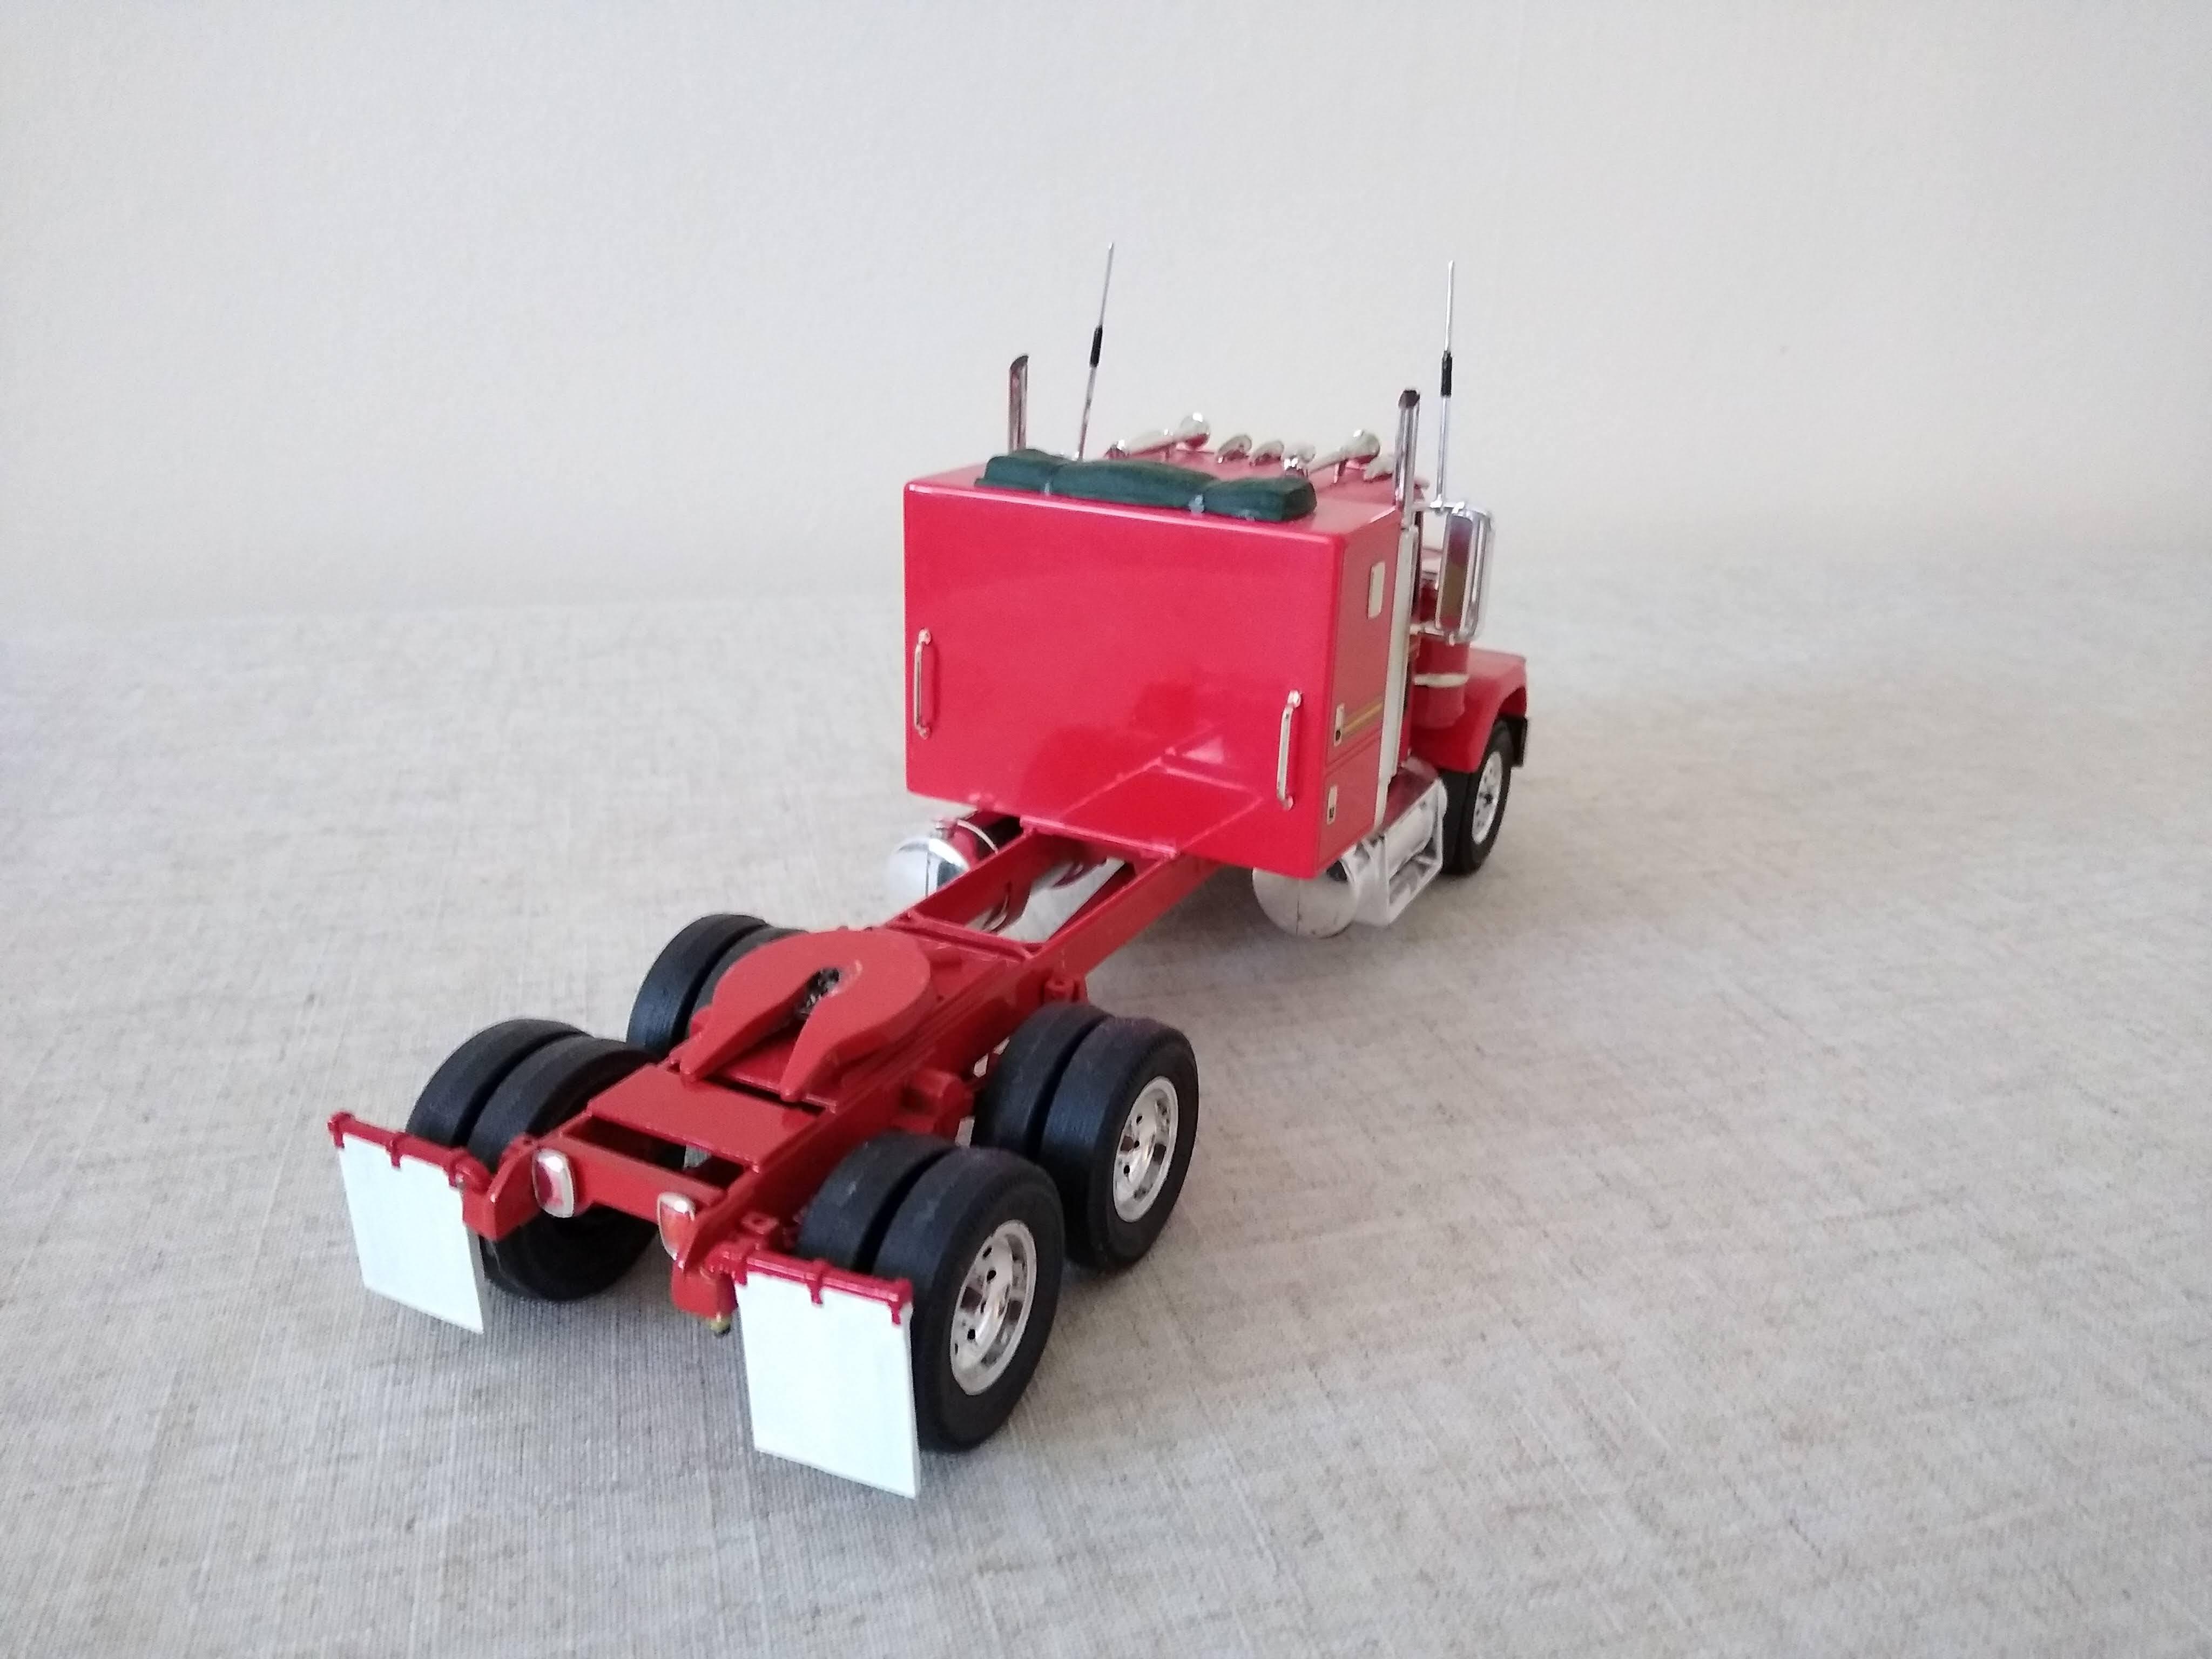
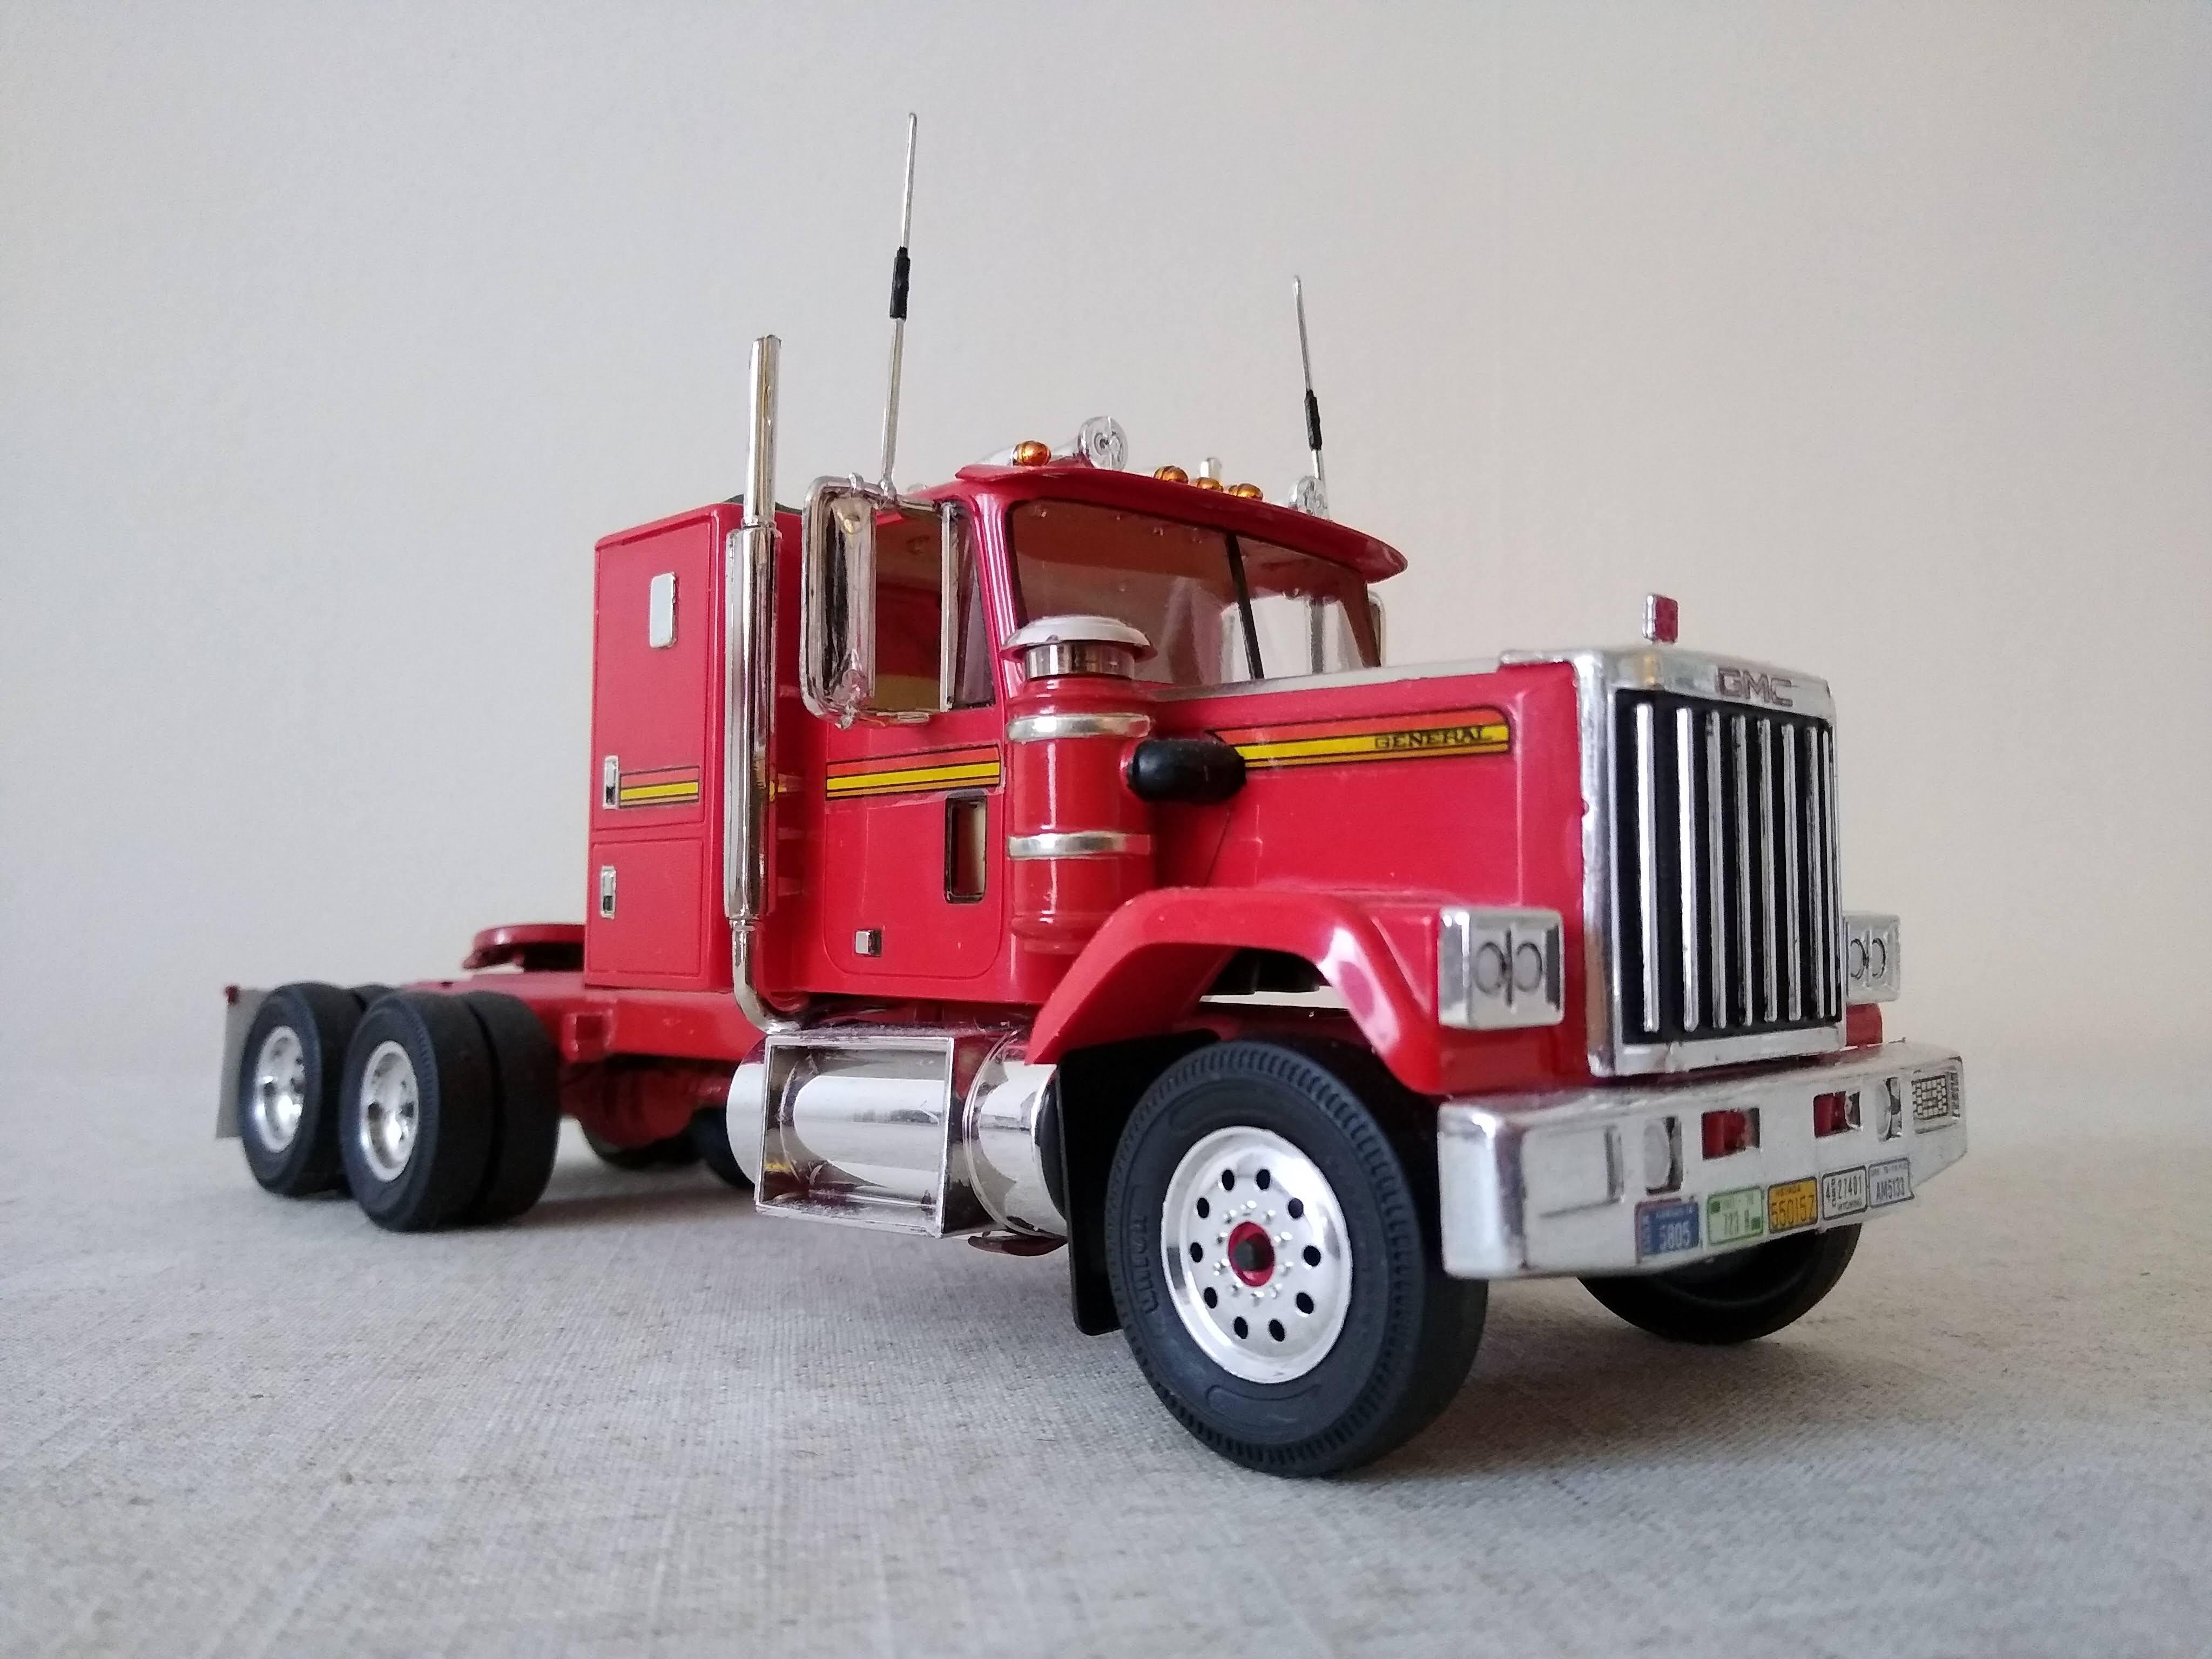
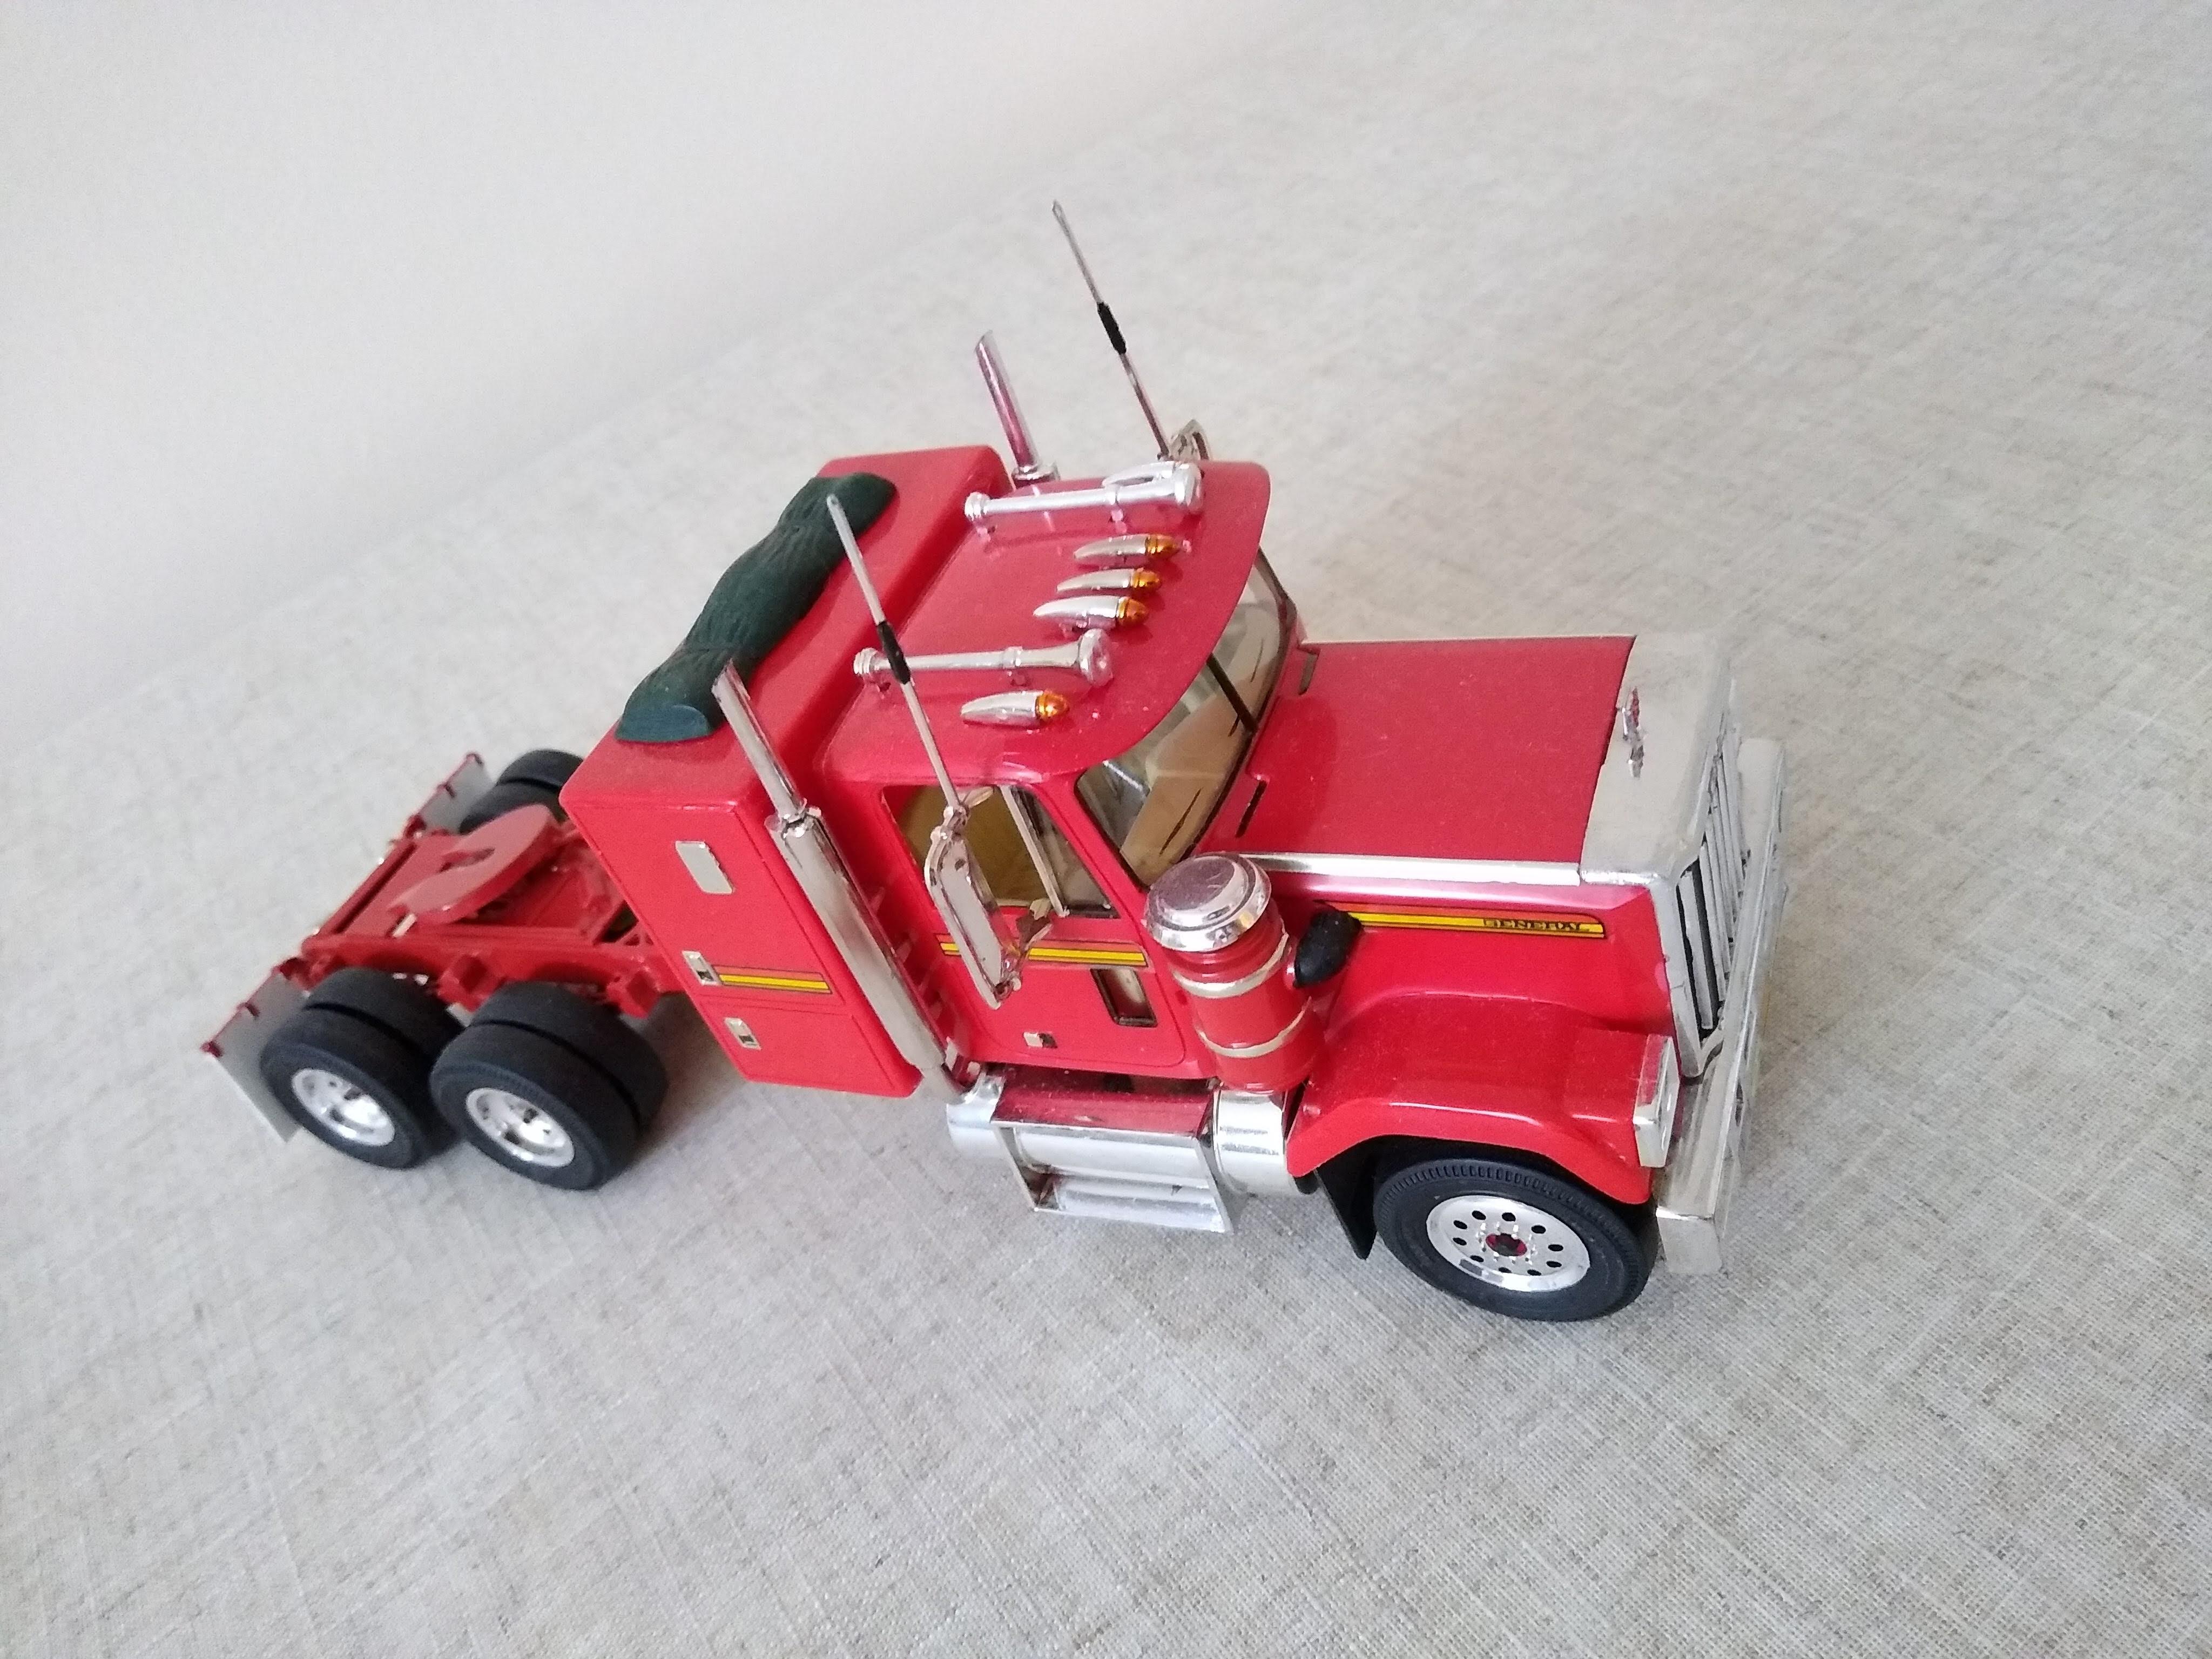
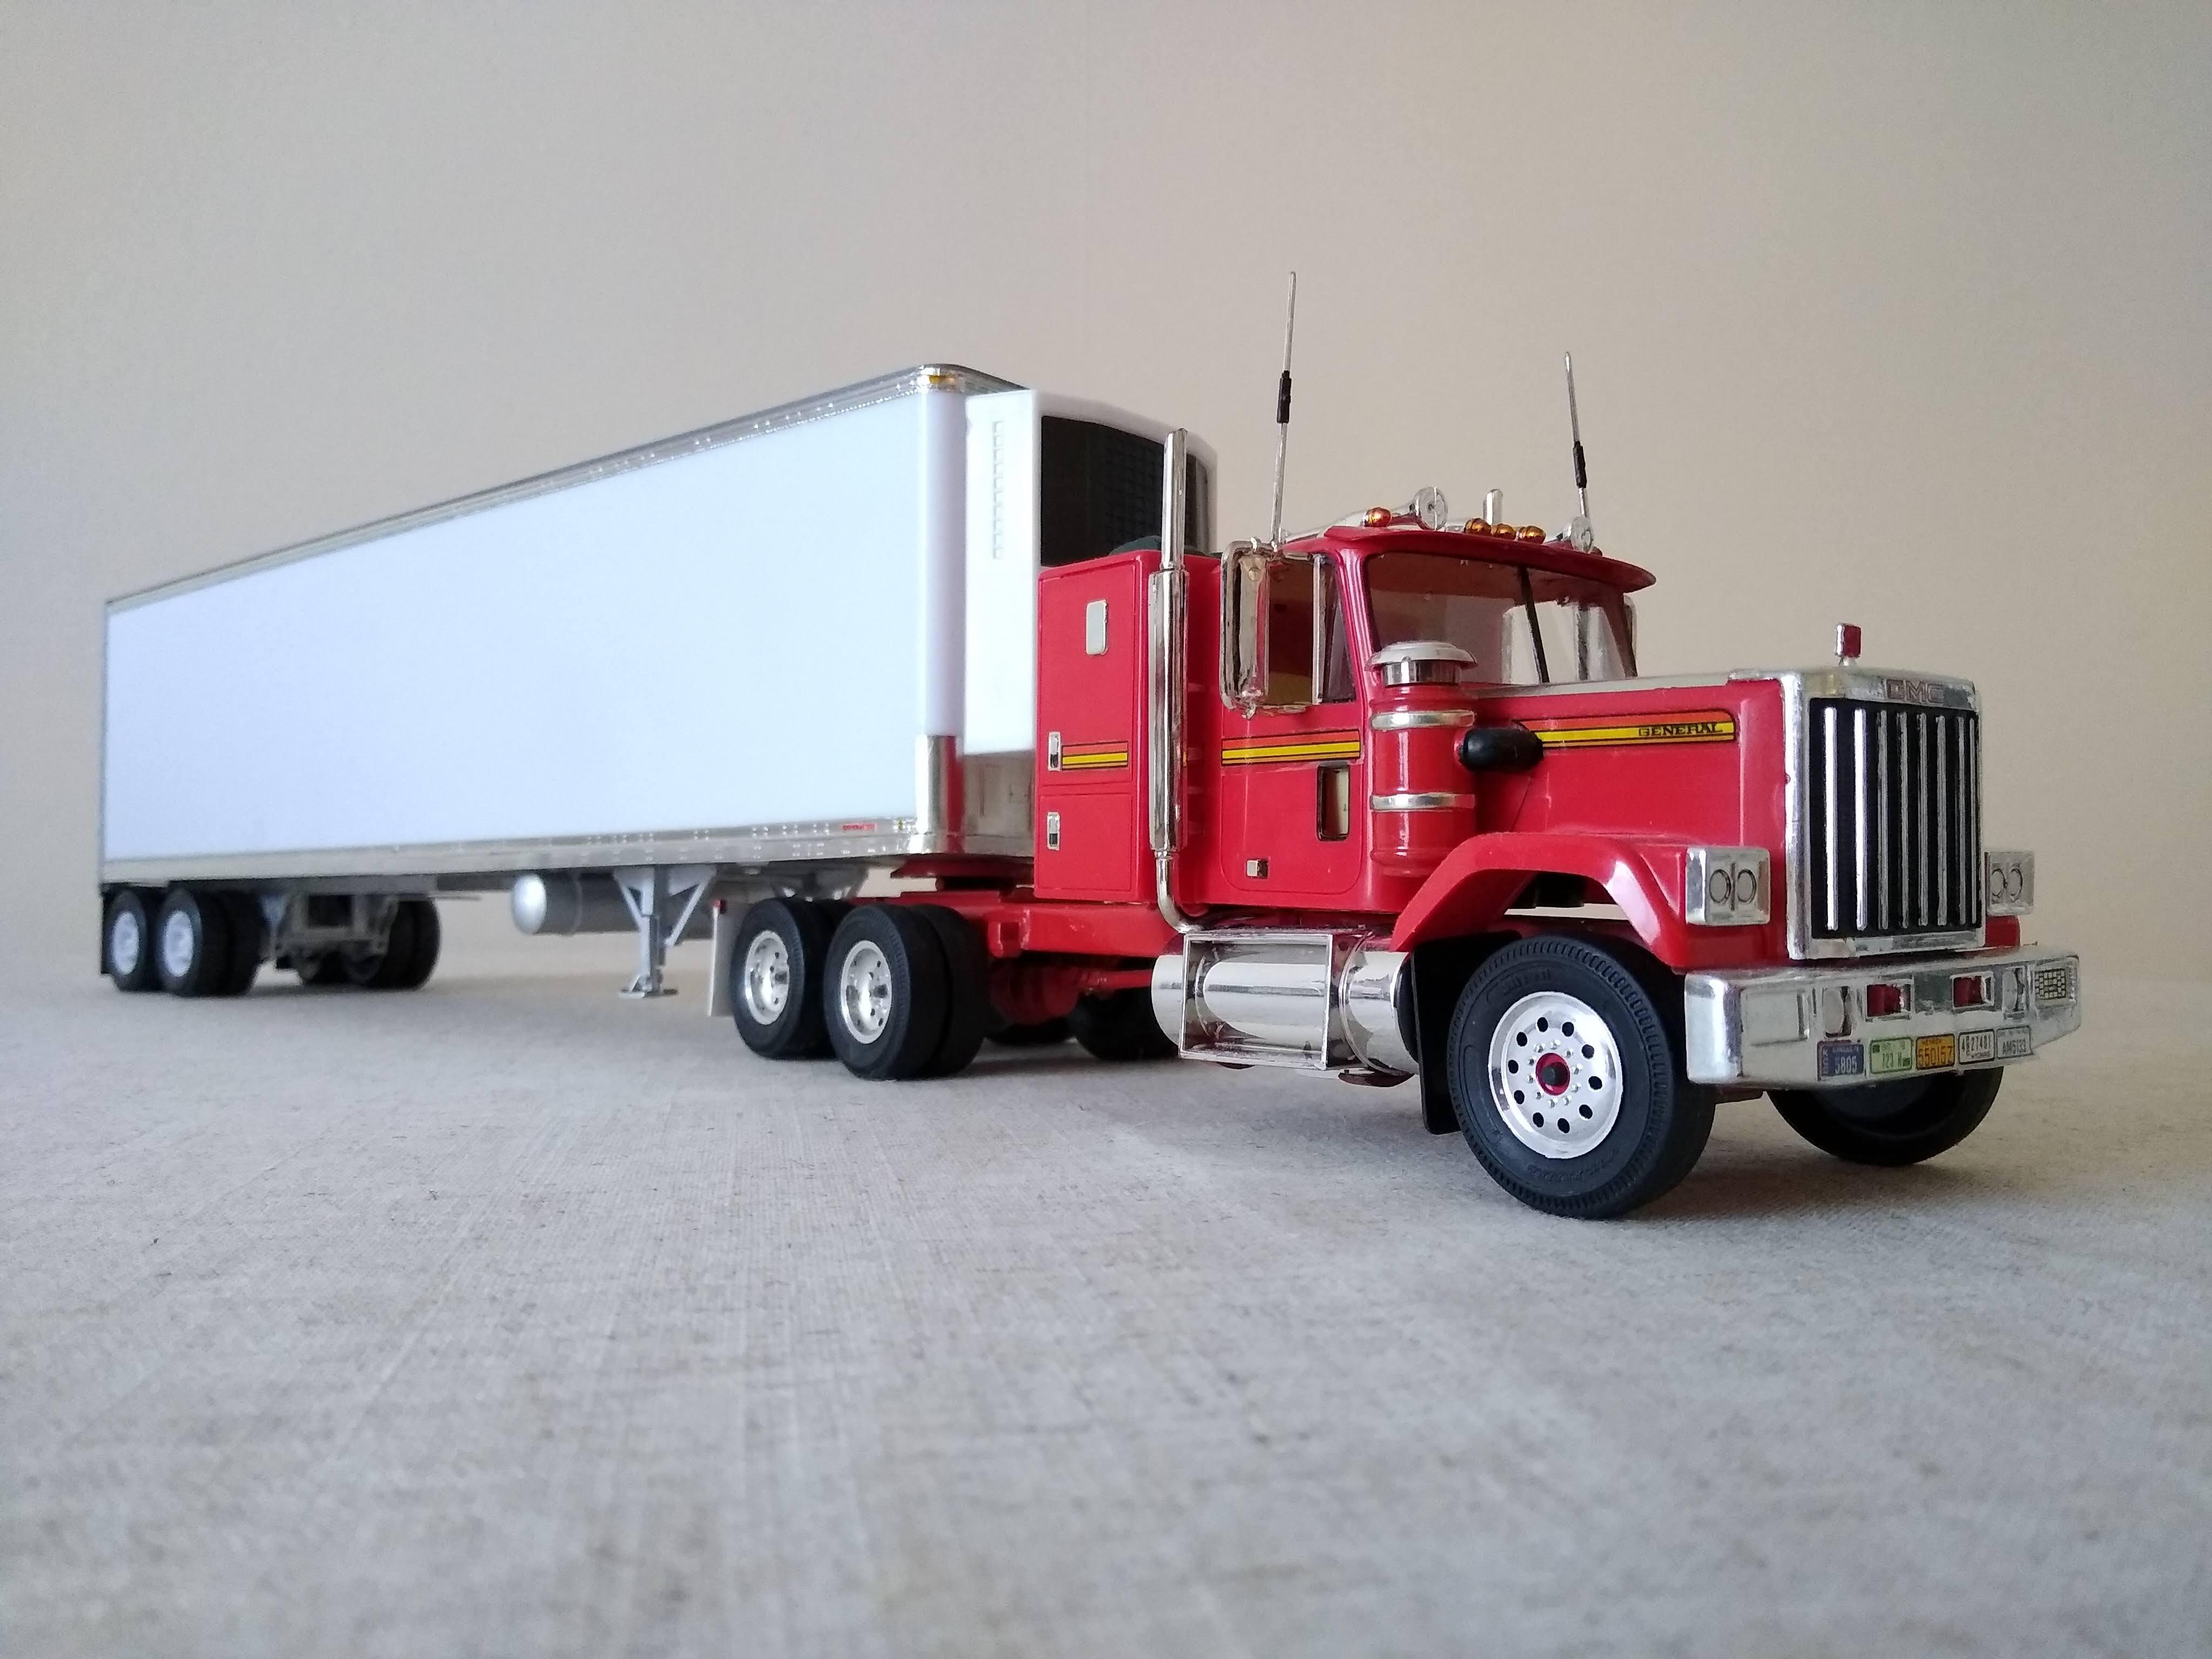
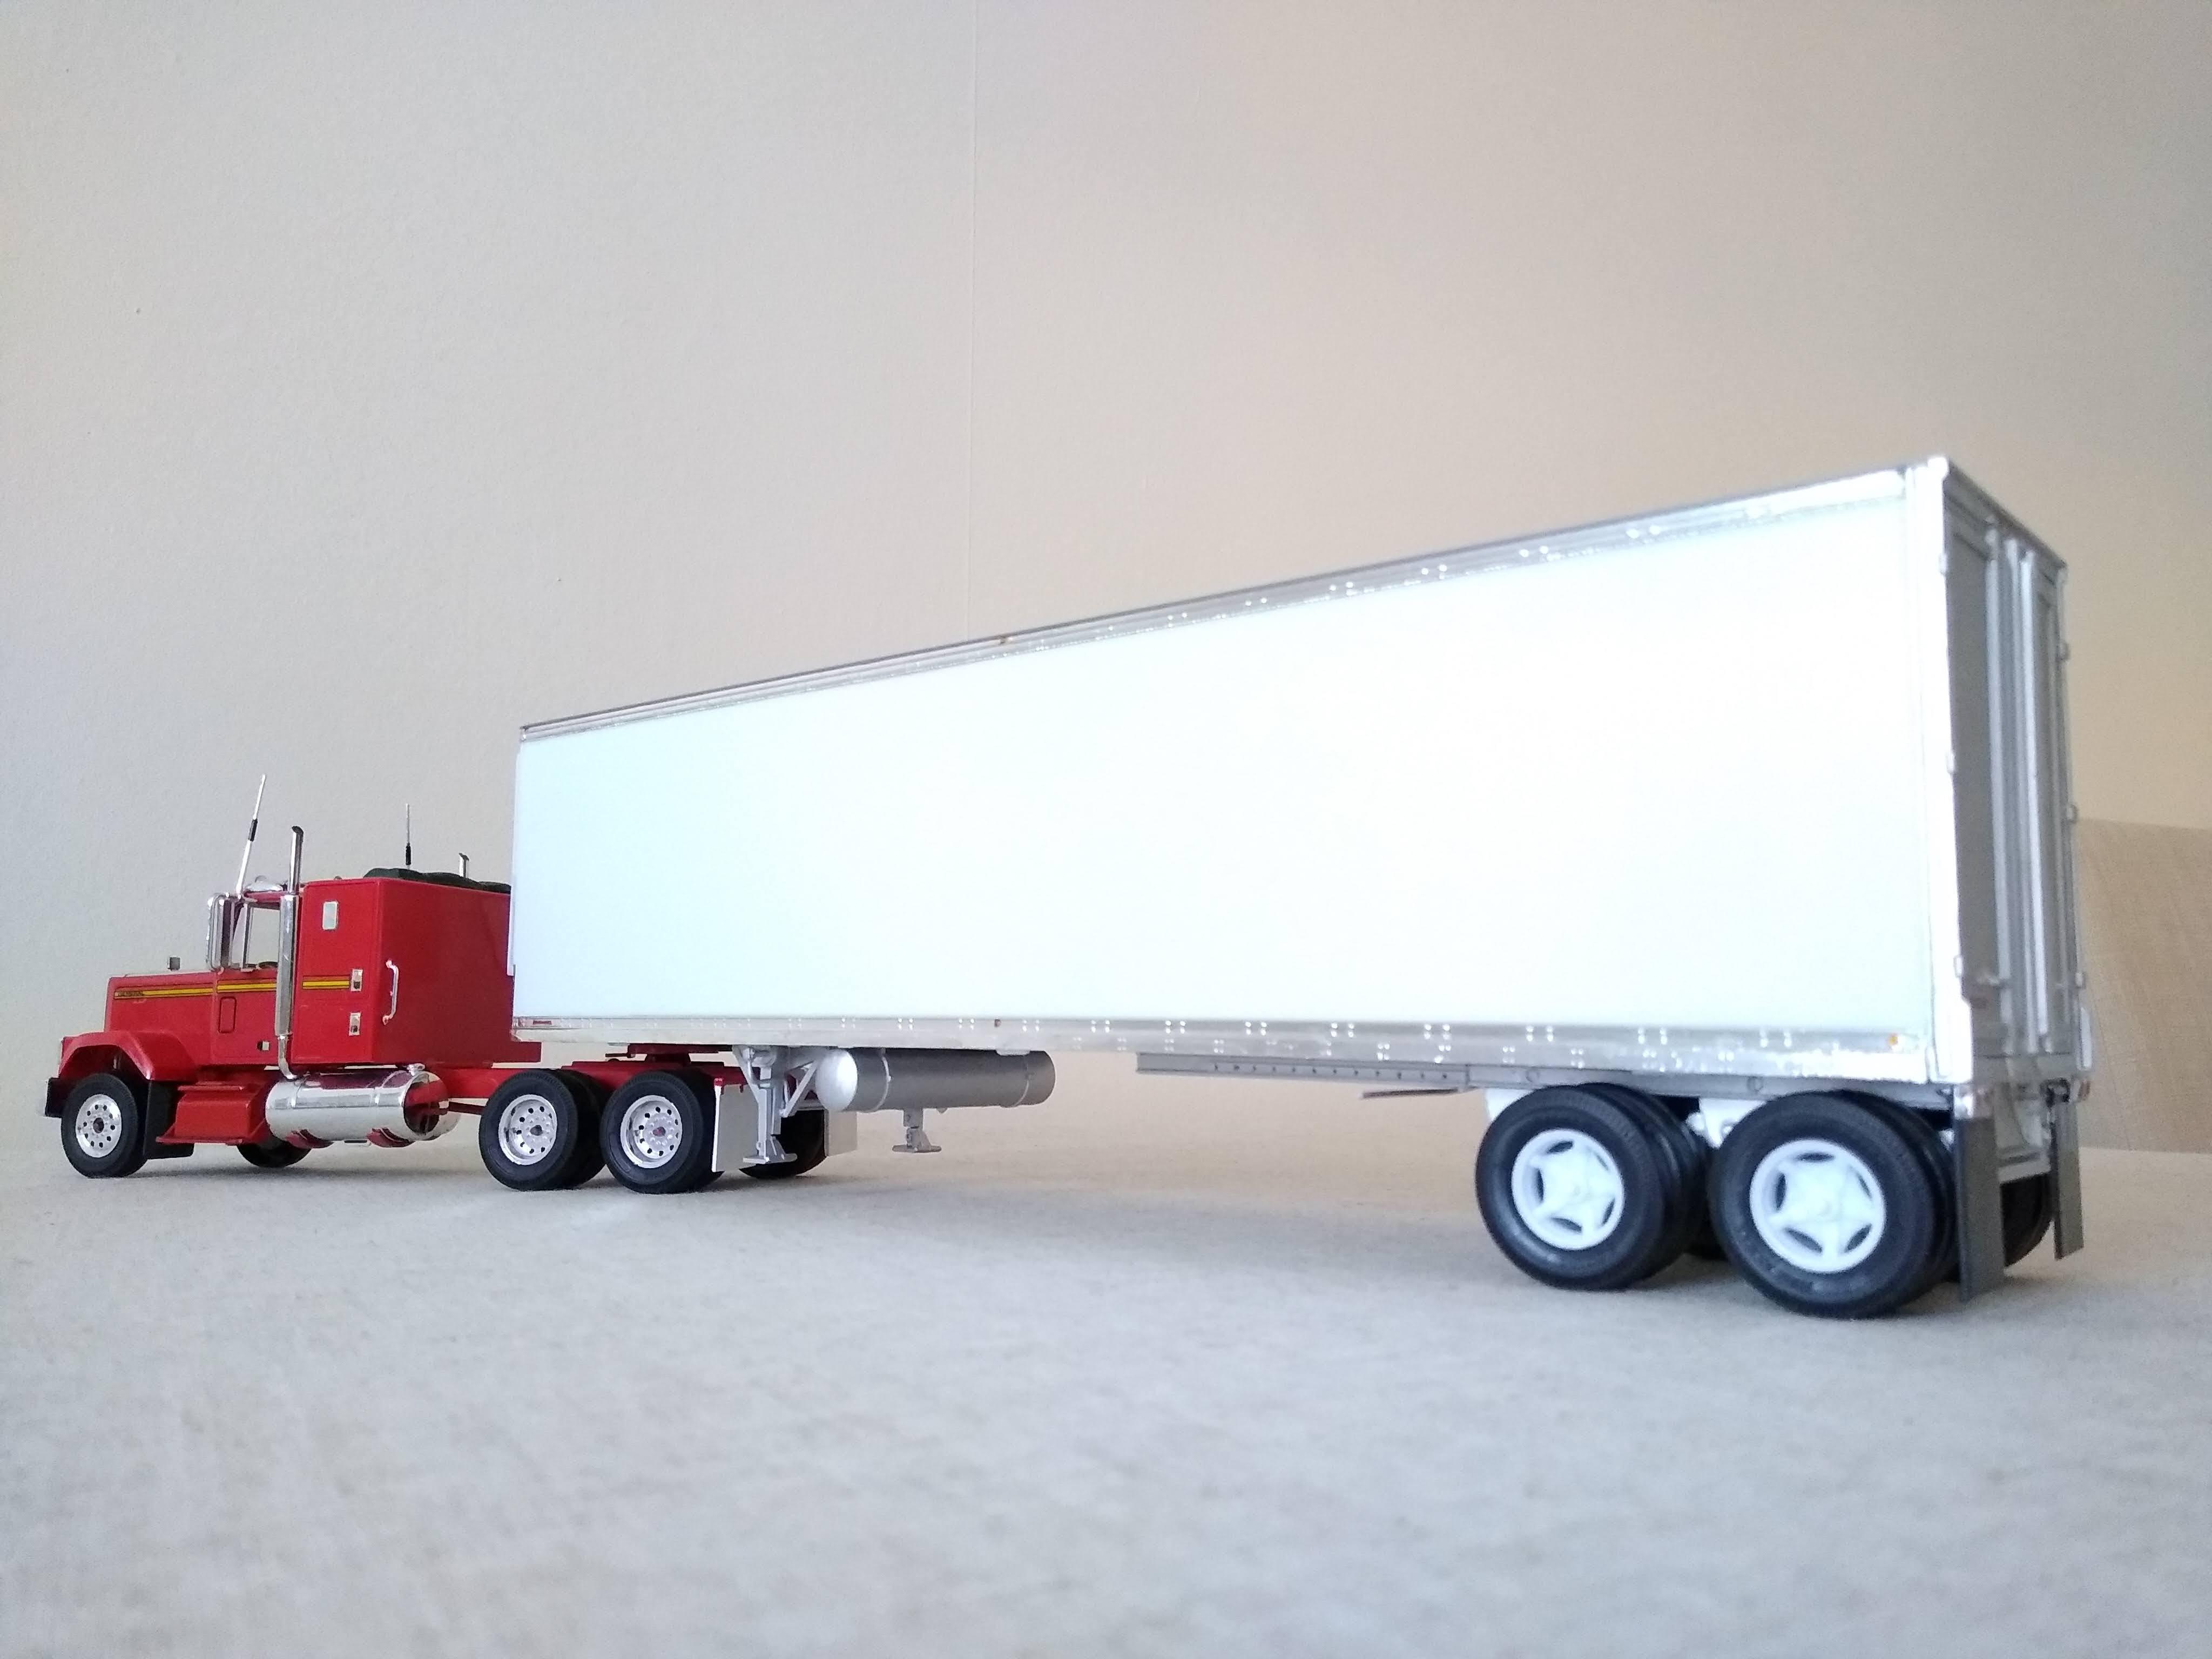
I have a soft spot for the Monogram 1/32 Snap Tite trucks. I had a few in the 80s when I was a kid and snapped a few up when I saw them I a store in UK about 4 years ago. Sadly the great decals that used to come with them have been replaced by stickers blending a toyish feel but a little work can give a good overall appearance. I find you're best going for an overall look with these rather than a detailed true to life appearance. This General is an original kit I scored off Ebay with no glass and the cab half painted, but still the original decals. I painted the chassis red, reduced the size of the mudflaps and lowered them so that they don't look like sails and rounded the edges of the chassis rails off so they look more like rolled steel beams. The trailer is the standard Fruehauf unit form the kit combined with the Freightliner conventional. Being a very recent issue it had a terrible warp in it which I pretty much dealt with by gluing and strapping everything together until set. I foiled the aluminium parts of the trailer and had to cut the slider rail away so that the running gear attached directly to the frame of the trailer, otherwise it sat far too high. The overall combination looks great to me, as long as you don't start examining all the little details. These kits have kept me sane over last few months. Thanks for looking.
-
Racing, Hot Rod, truck and aircraft engines by FTB
Rockford replied to landman's topic in Model Cars
Just found the diorama thread - intoxicating!

.jpeg.478d12c5fa748f568e9aec40965ca927.jpeg)