Rockford
-
Posts
1,944 -
Joined
-
Last visited
Content Type
Profiles
Forums
Events
Gallery
Everything posted by Rockford
-

Night to day
Rockford replied to Rockford's topic in WIP: Model Trucks: Big Rigs and Heavy Equipment
Would you believe today turned out to be beautiful, dry and warm so I bit the bullet and shot the primer on the tank! Came out ok, can't see the glue damage so I'm really relieved. Wednesday will be even better I believe so I'm going to give it a quick run with a scotchbrite pad and make it silver on Wednesday!!!!
-
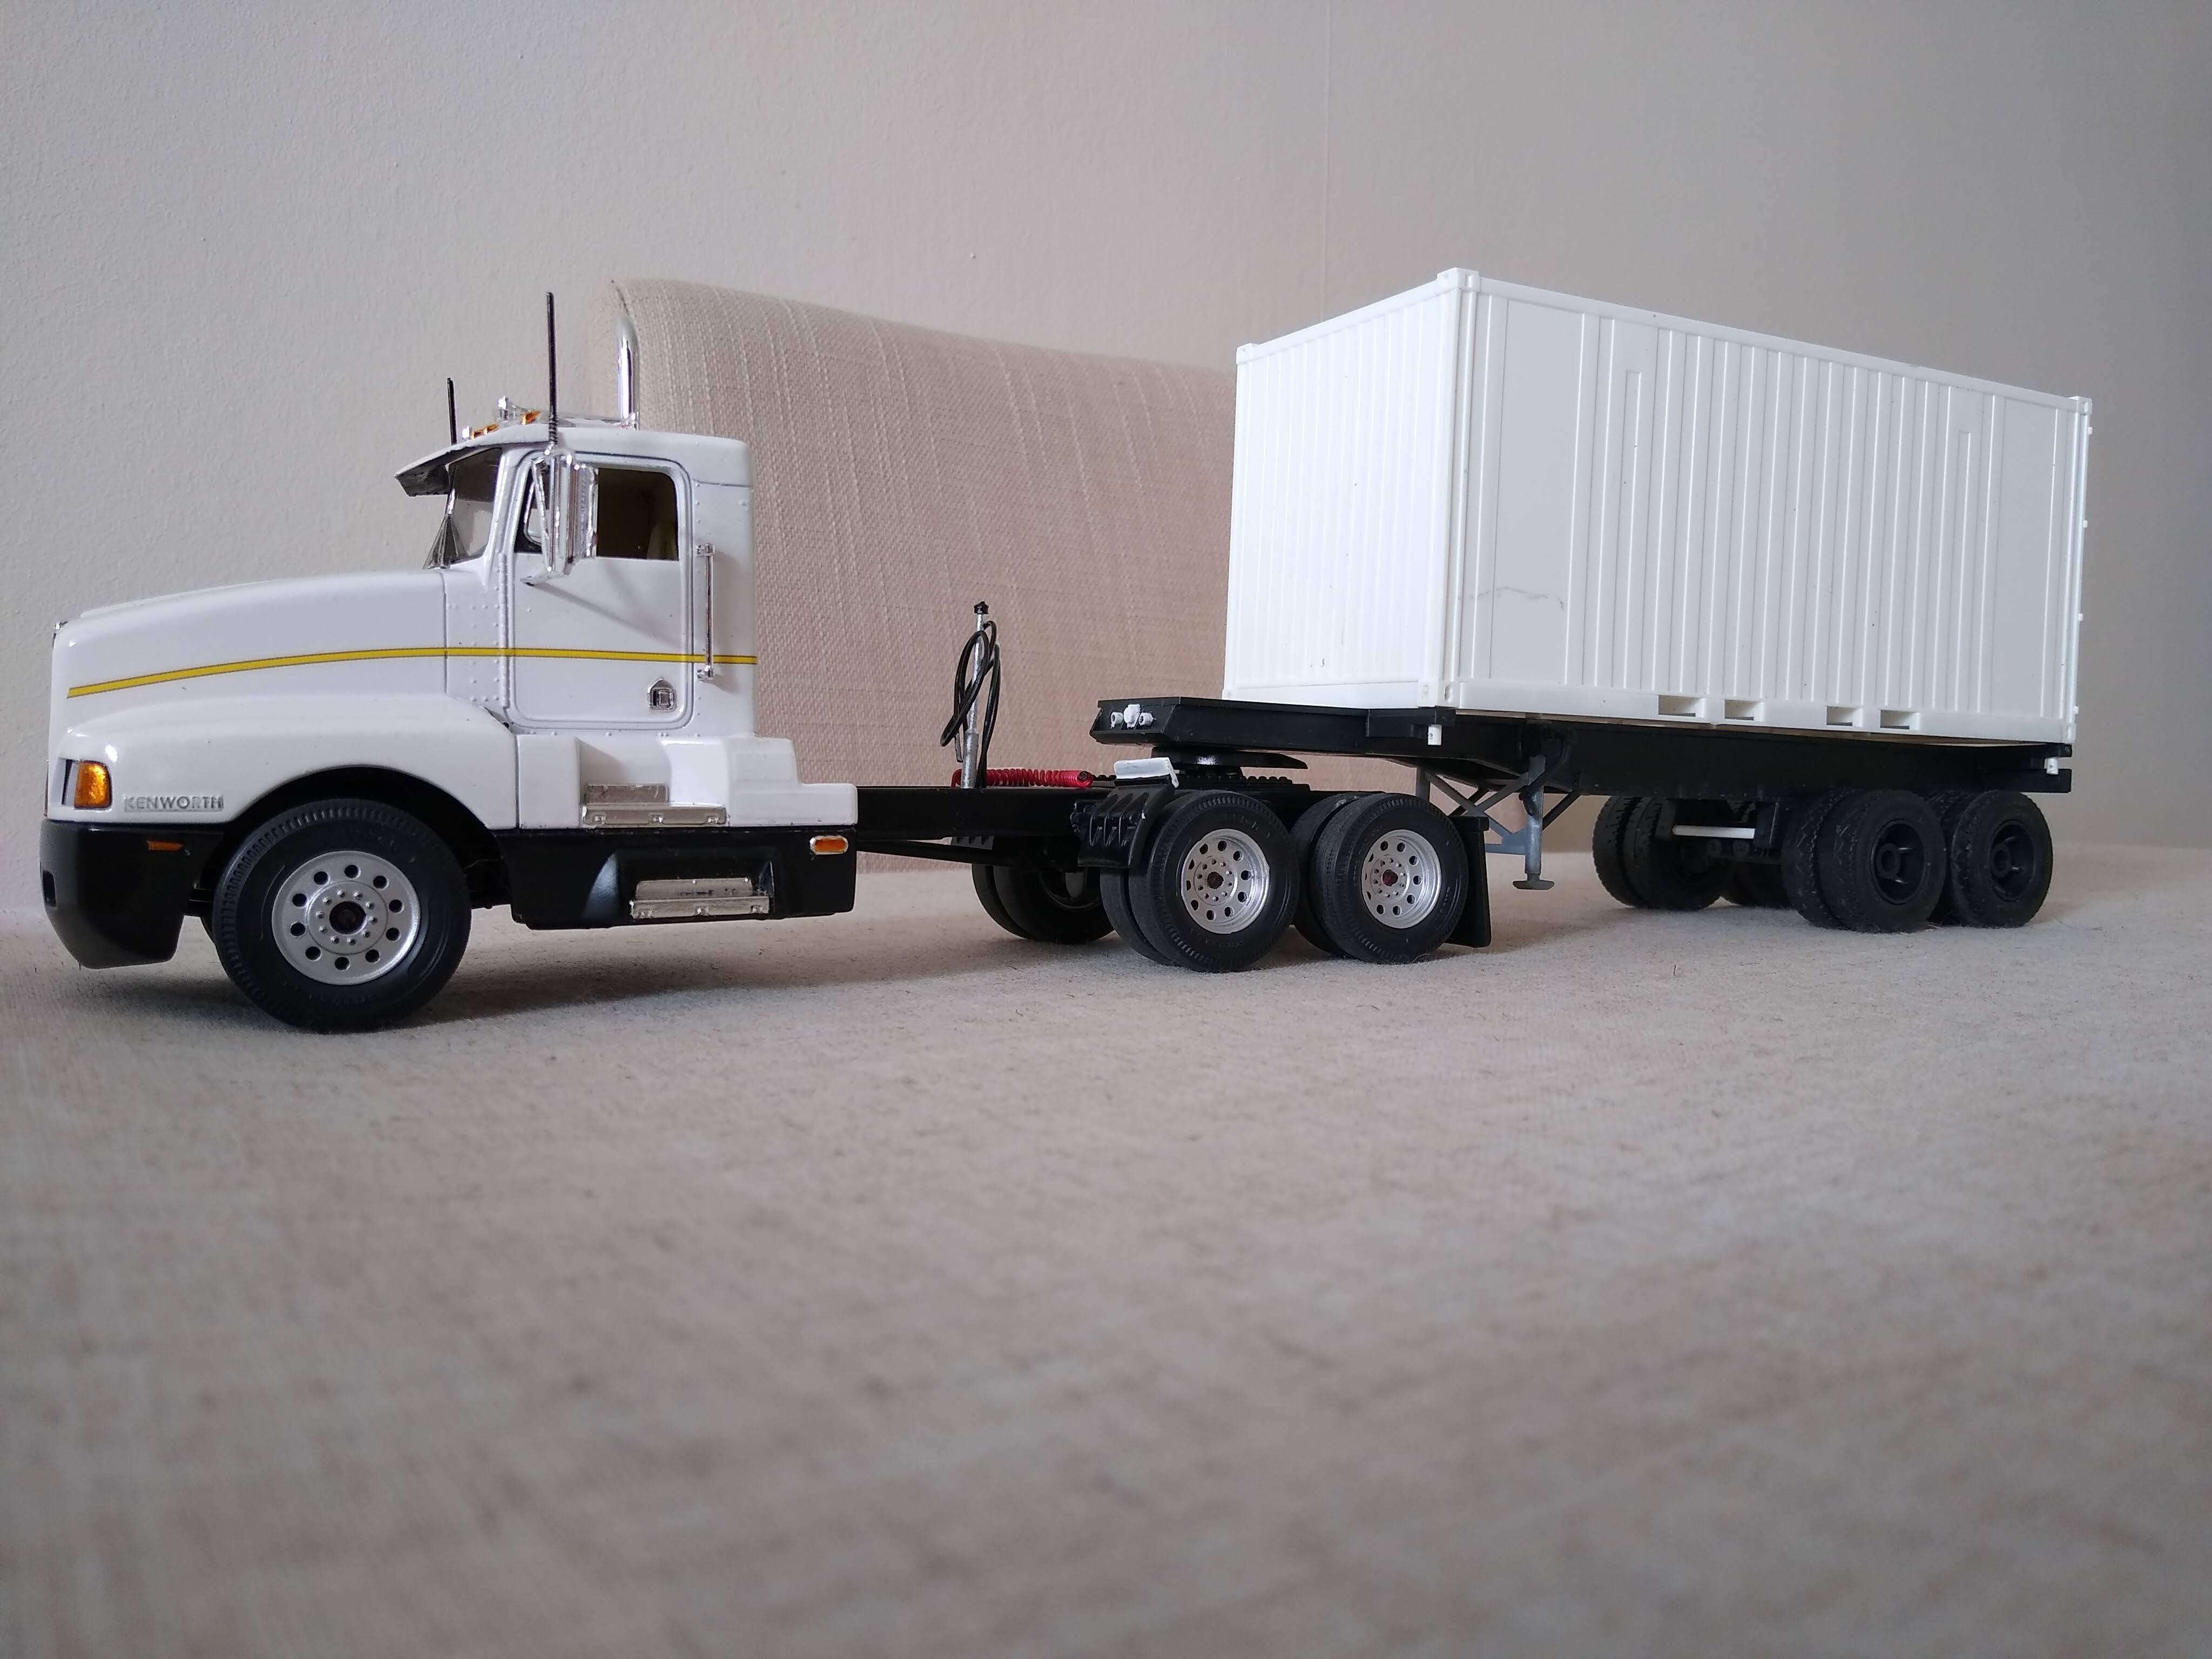
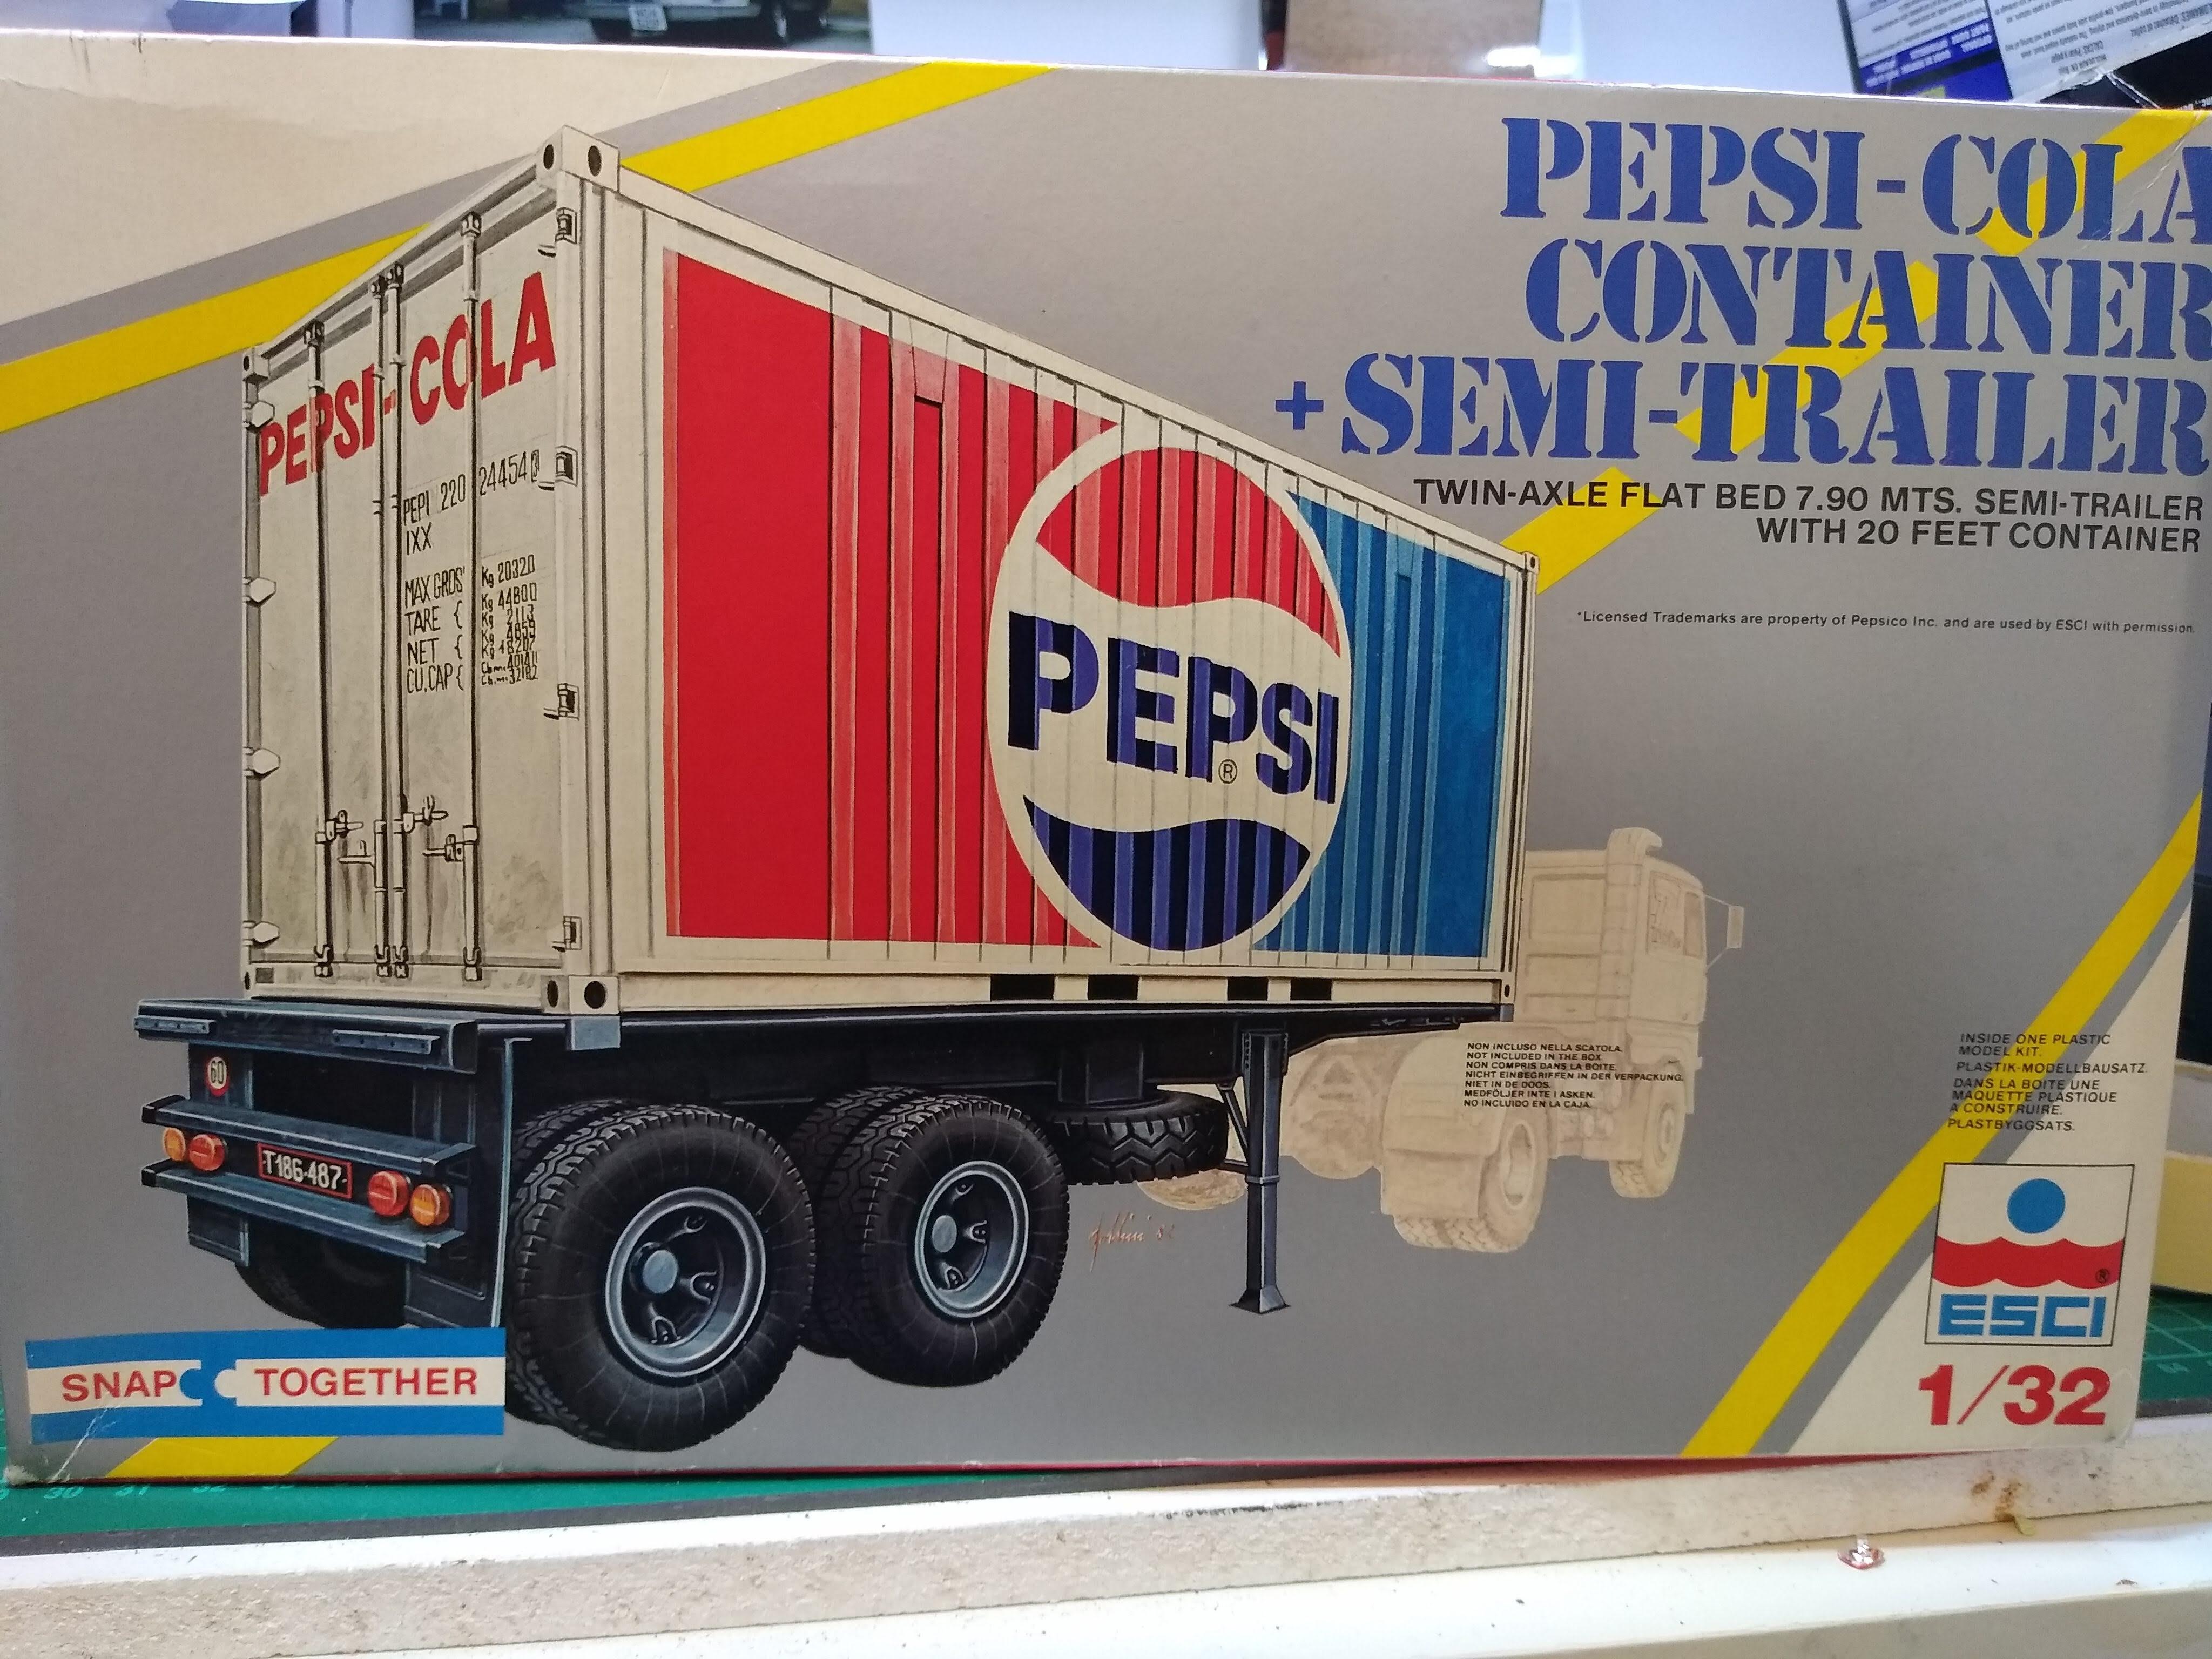
ESCI 20ft Container trailer
Rockford replied to Rockford's topic in WIP: Model Trucks: Big Rigs and Heavy Equipment
Thanks Dutzie. I've been rooting through my odds and ends box for something like a brake relay valve and I found this. A 1/25 carburettor, looks like a Thermoquad that became the Edelbrock carb. The body can form the diaphragm housing and the four corners of the flange can be the four outlets to the chambers.
-
ESCI 20ft Container trailer
Rockford replied to Rockford's topic in WIP: Model Trucks: Big Rigs and Heavy Equipment
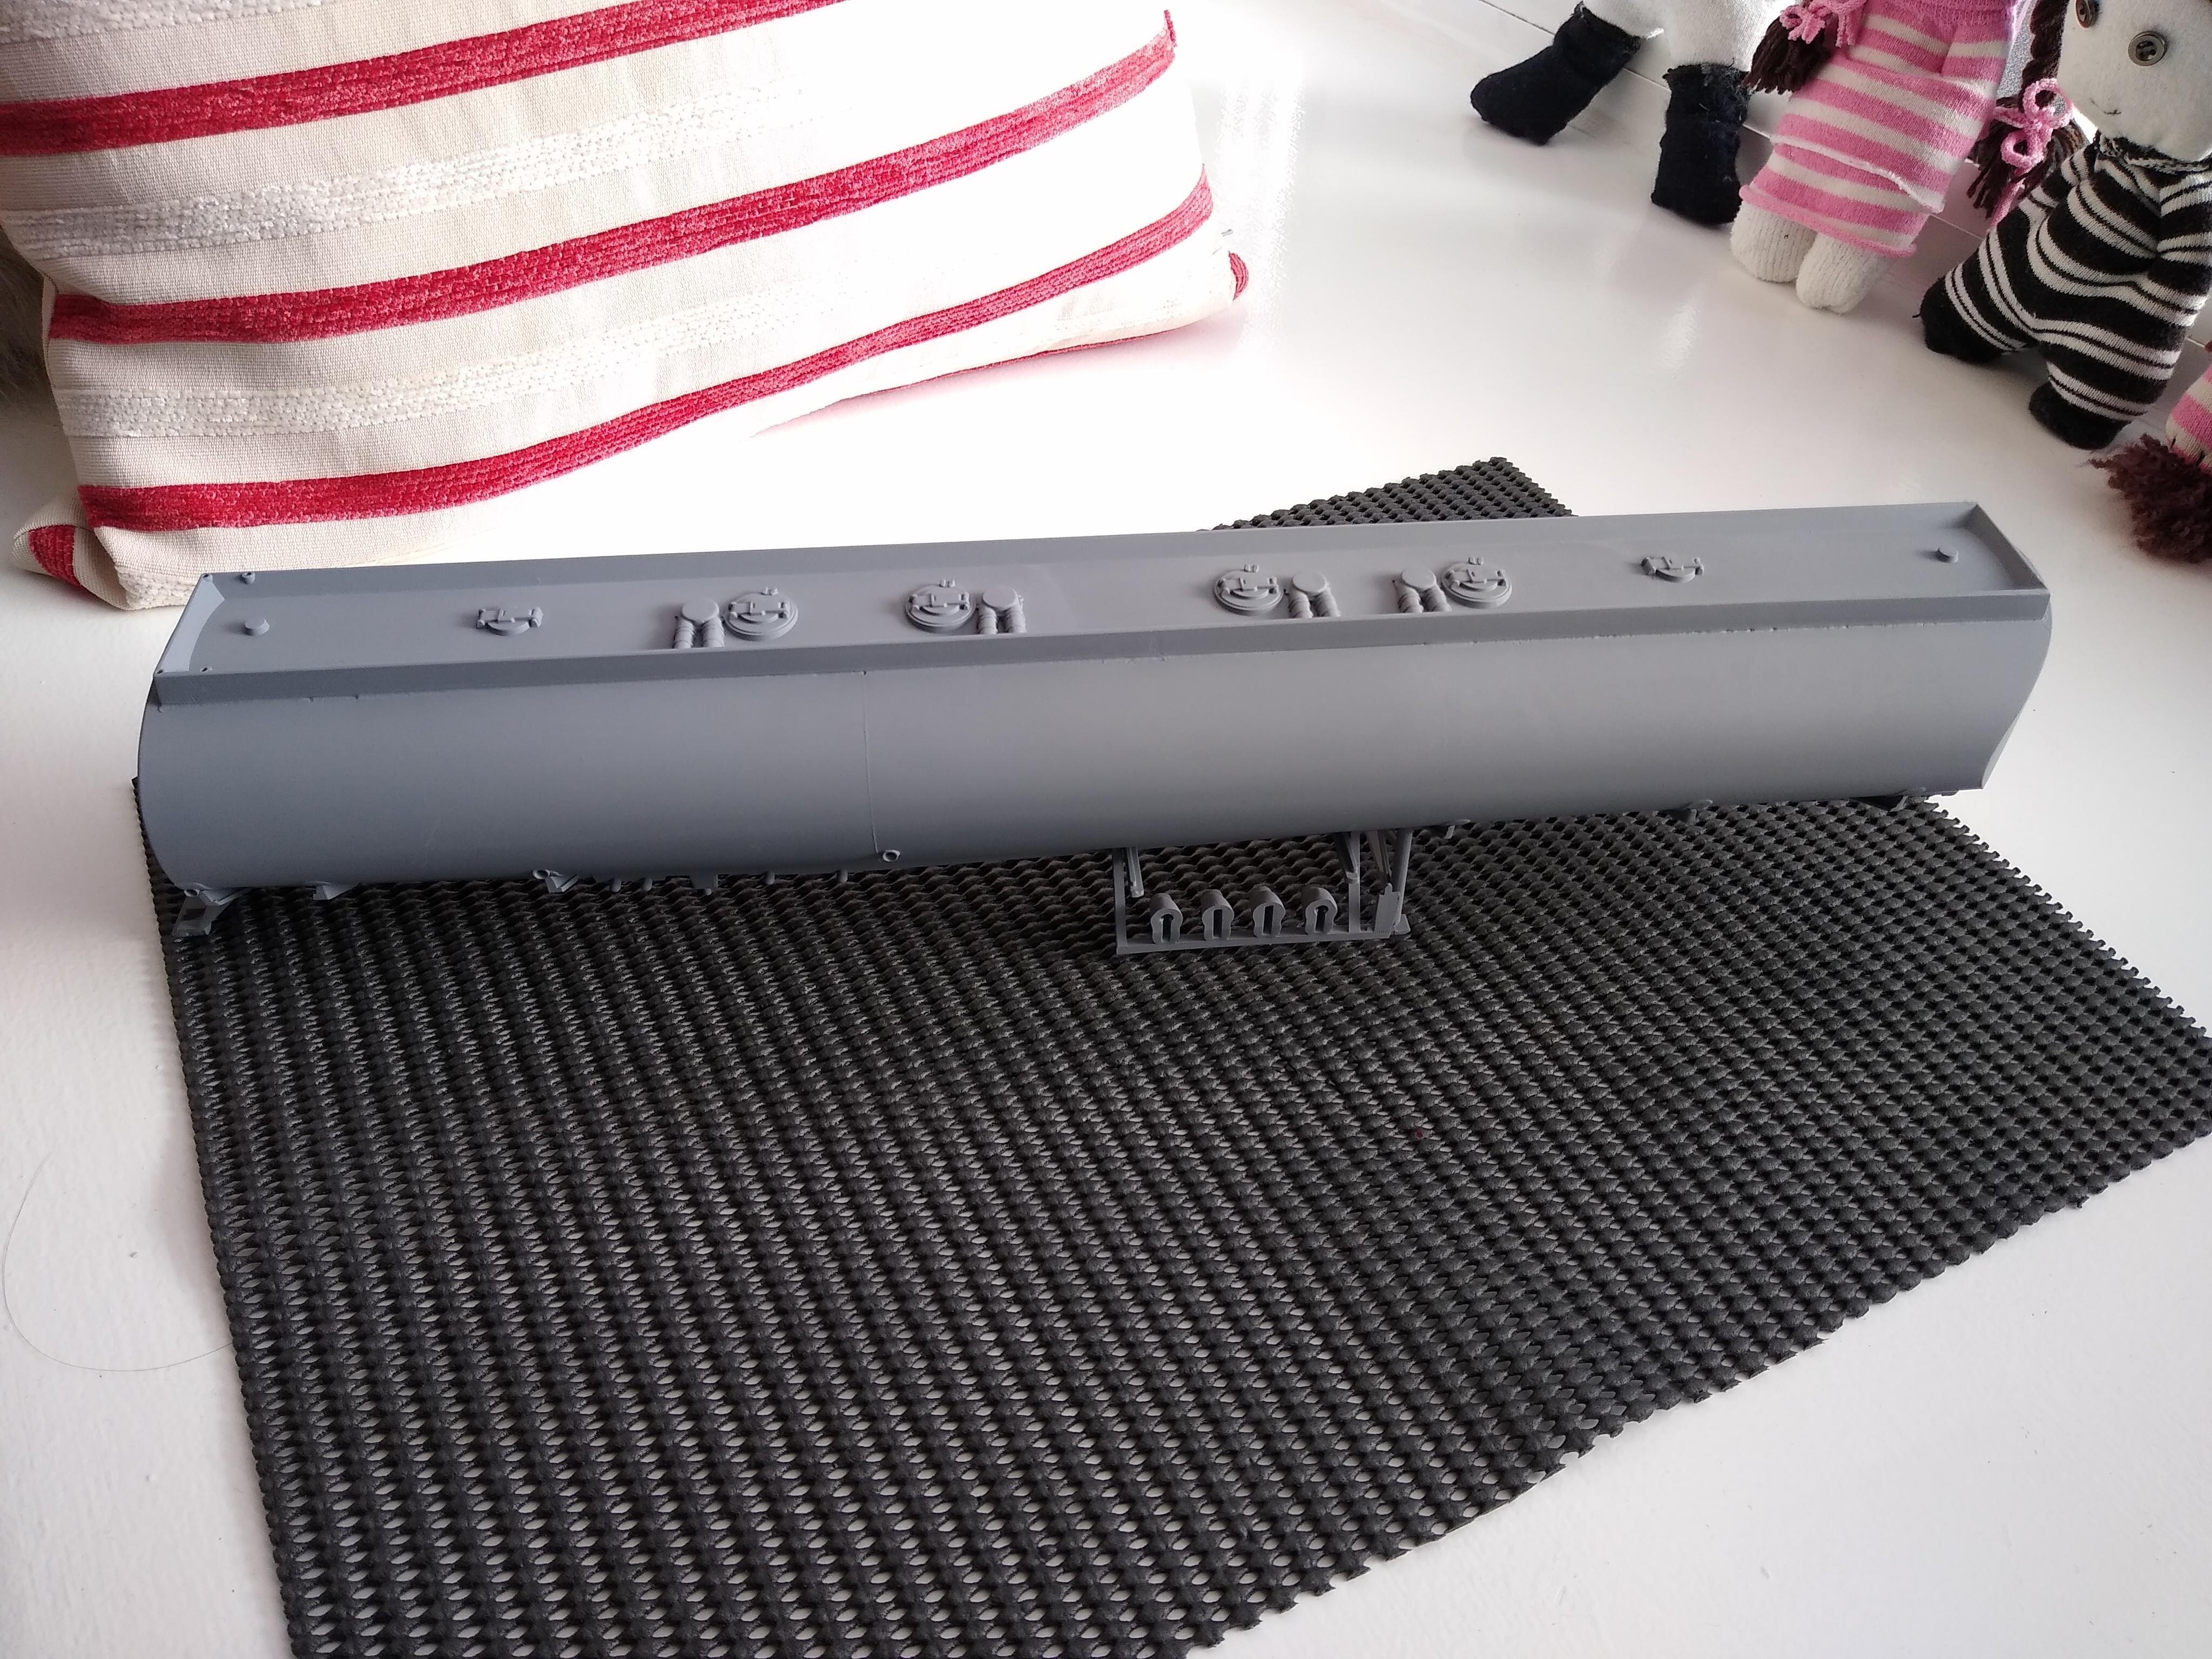
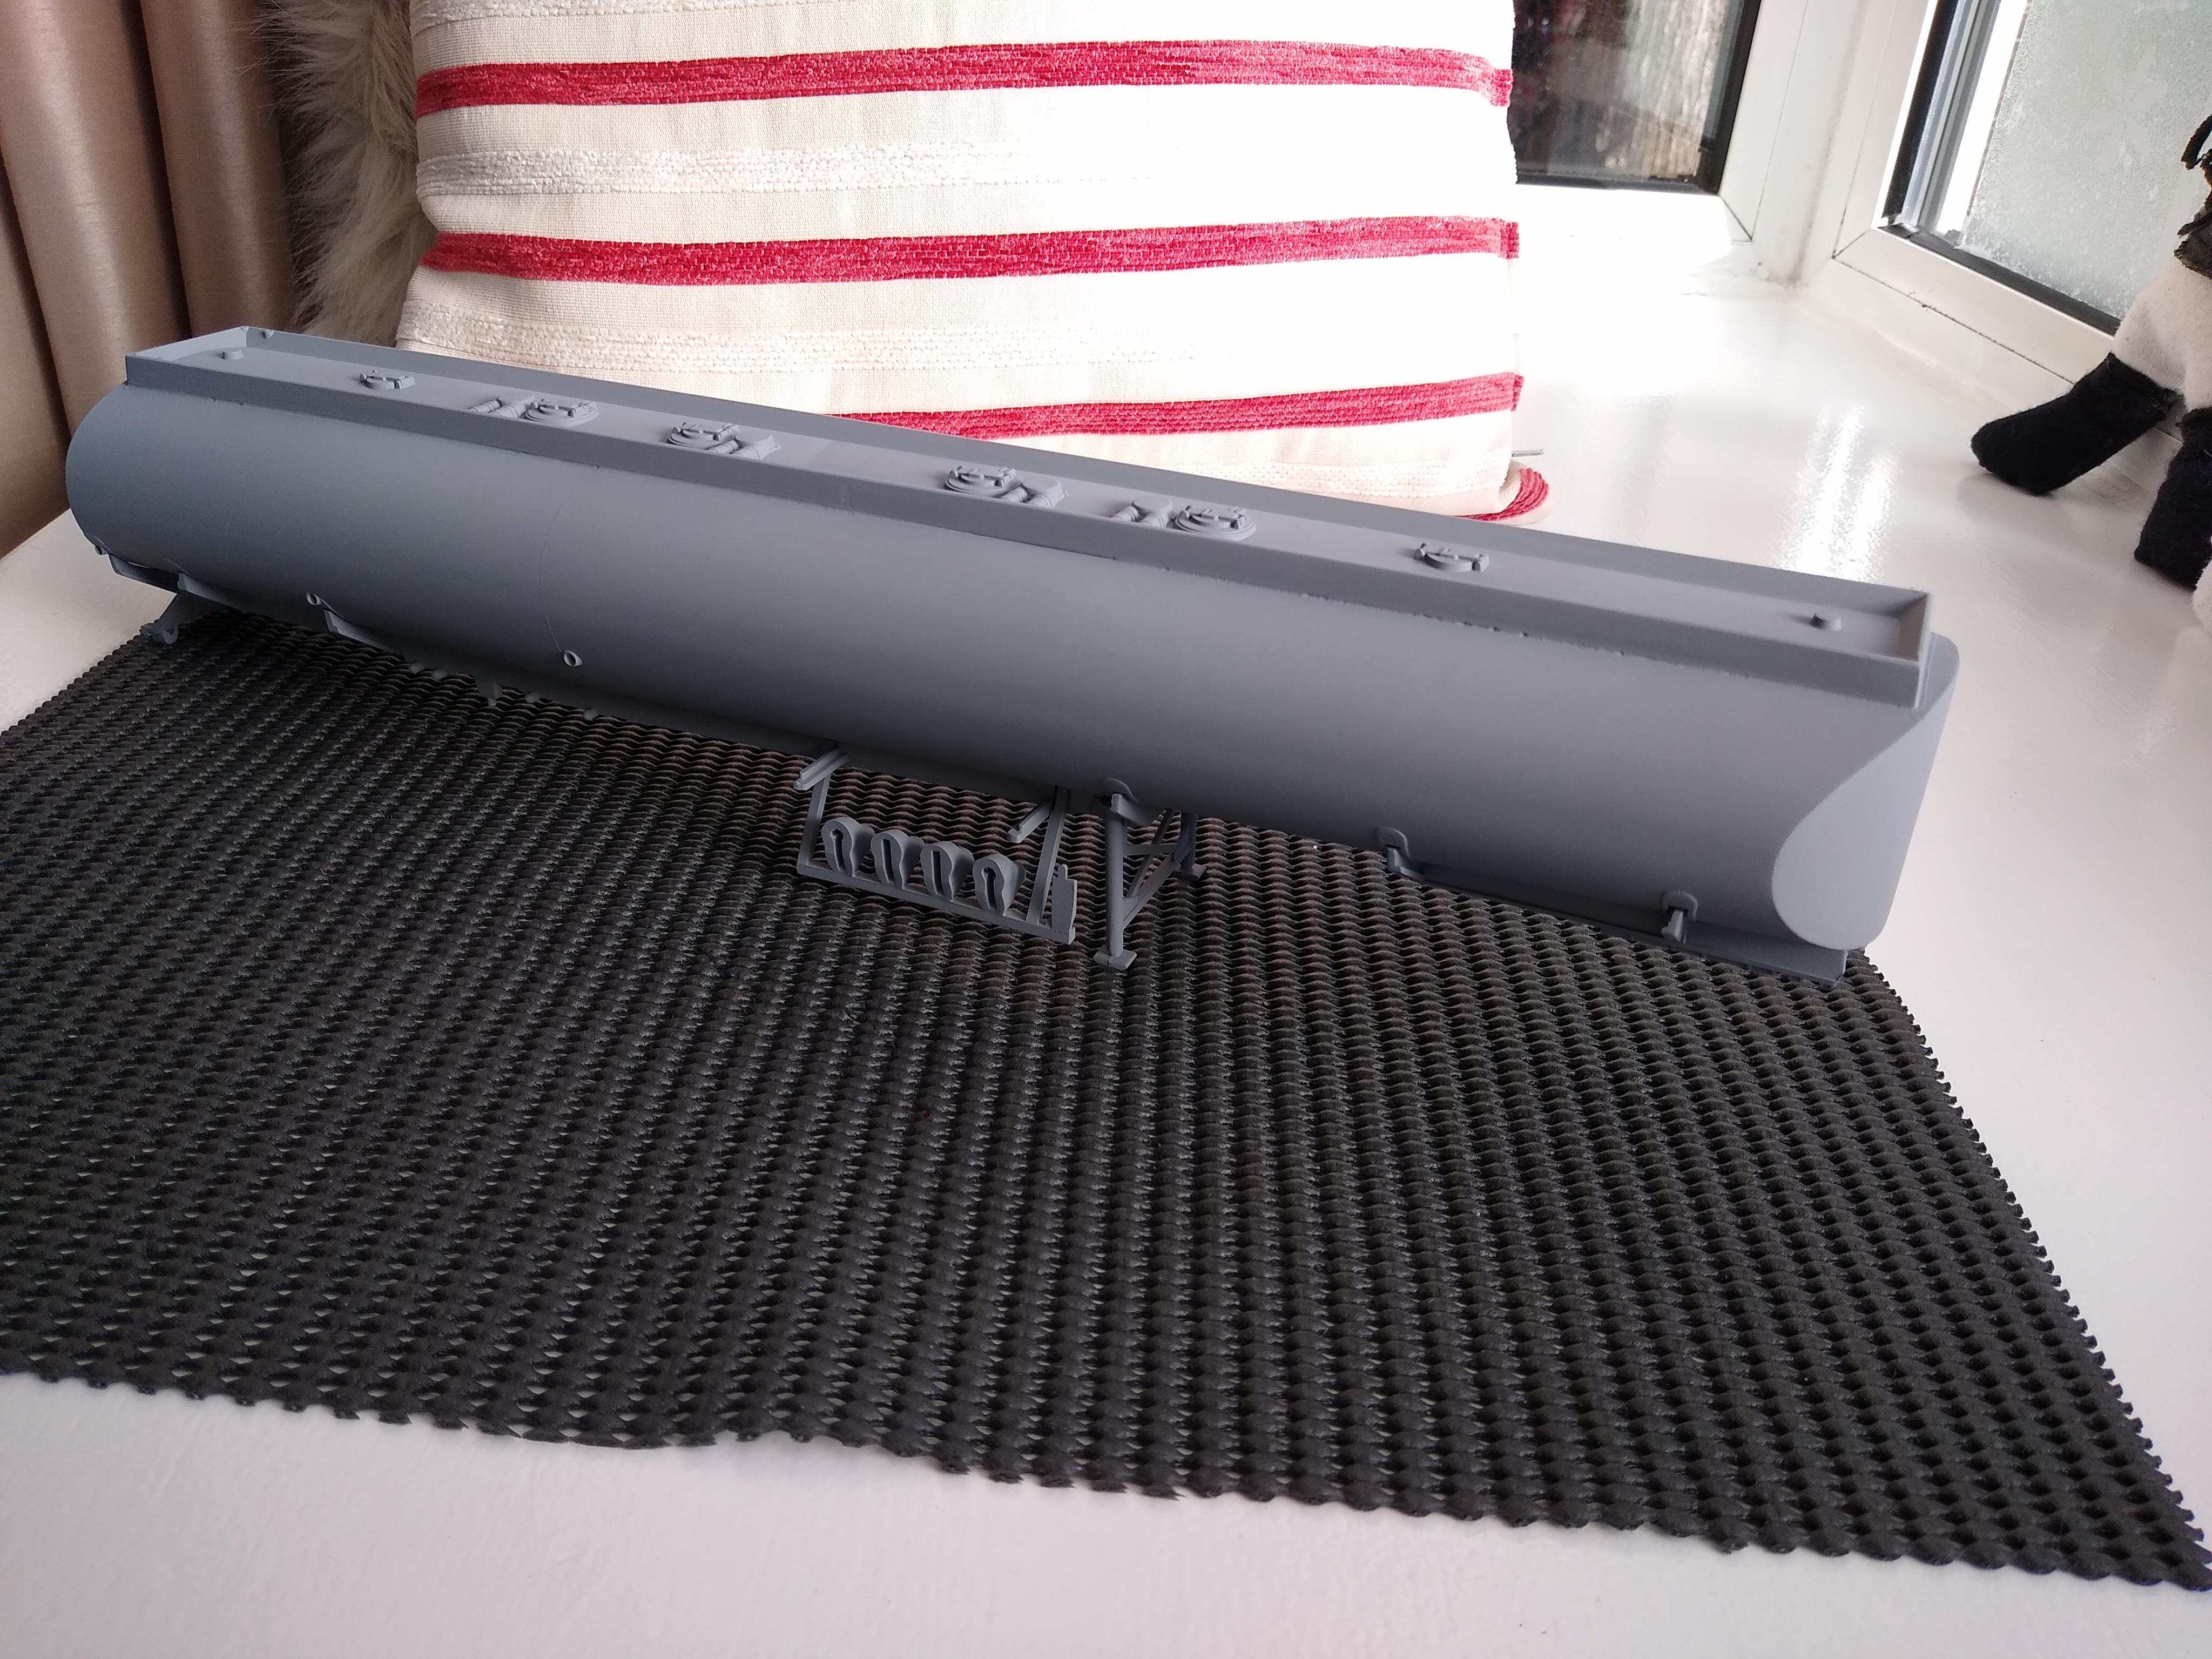
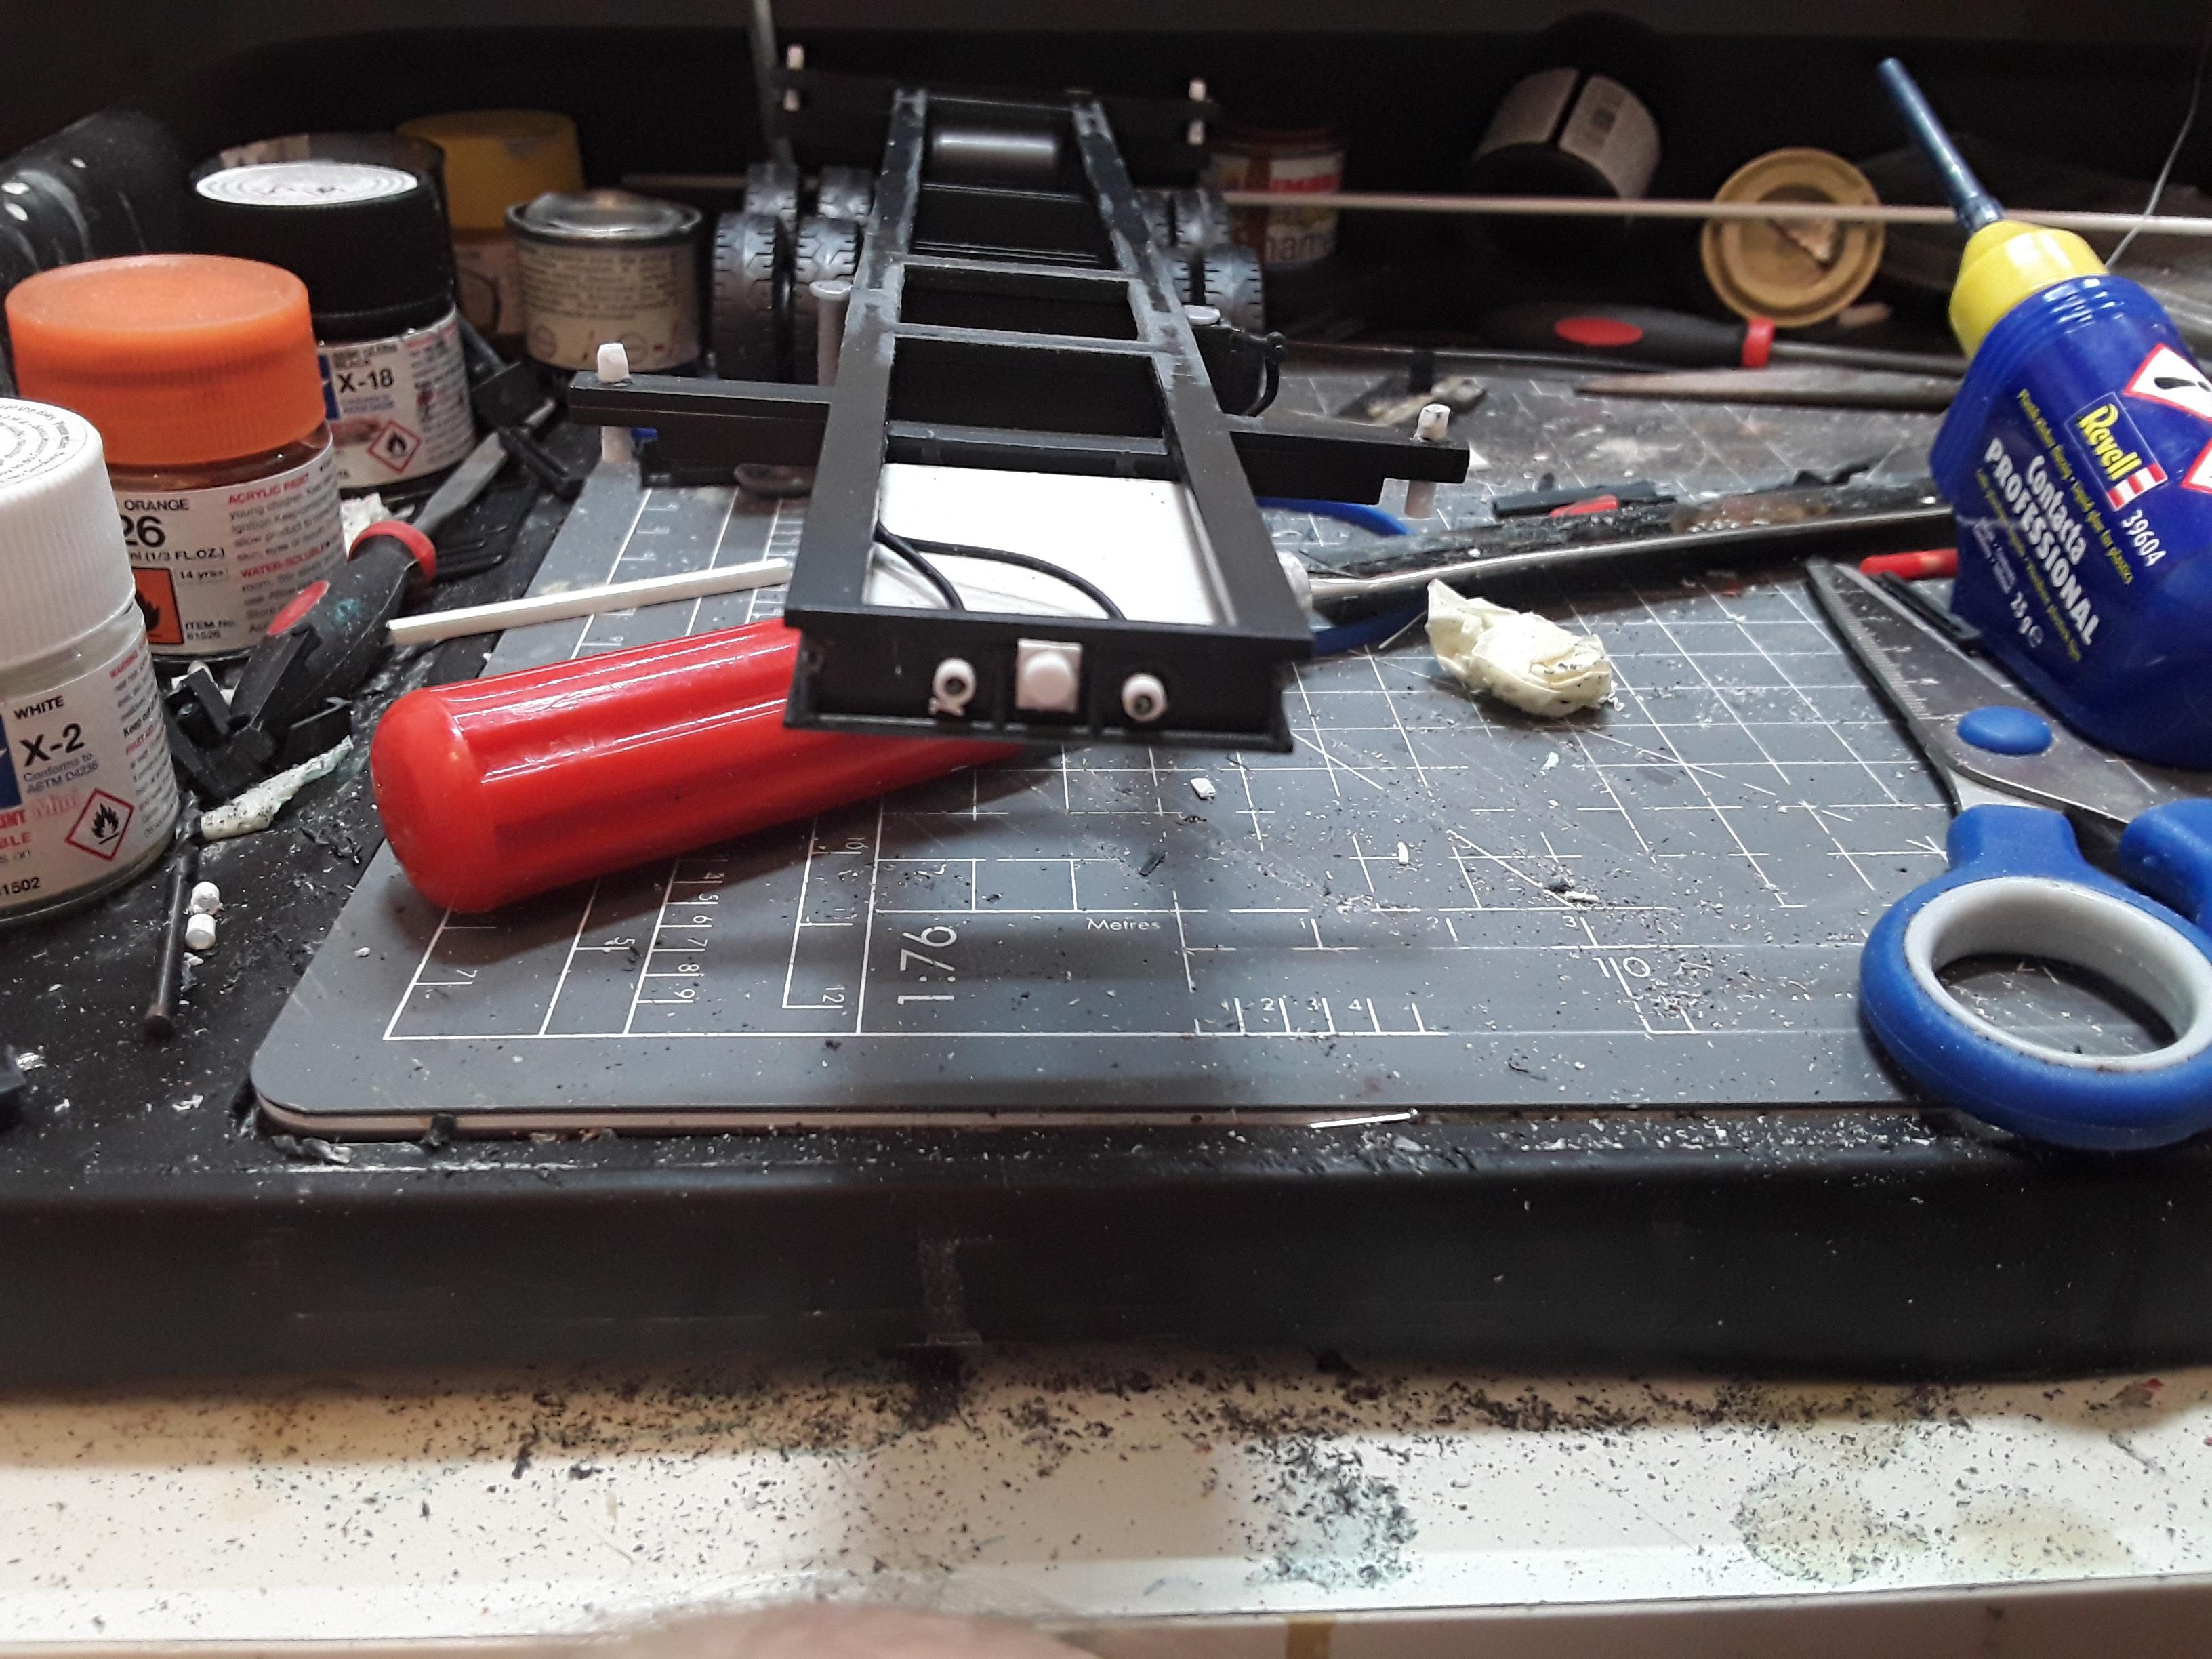
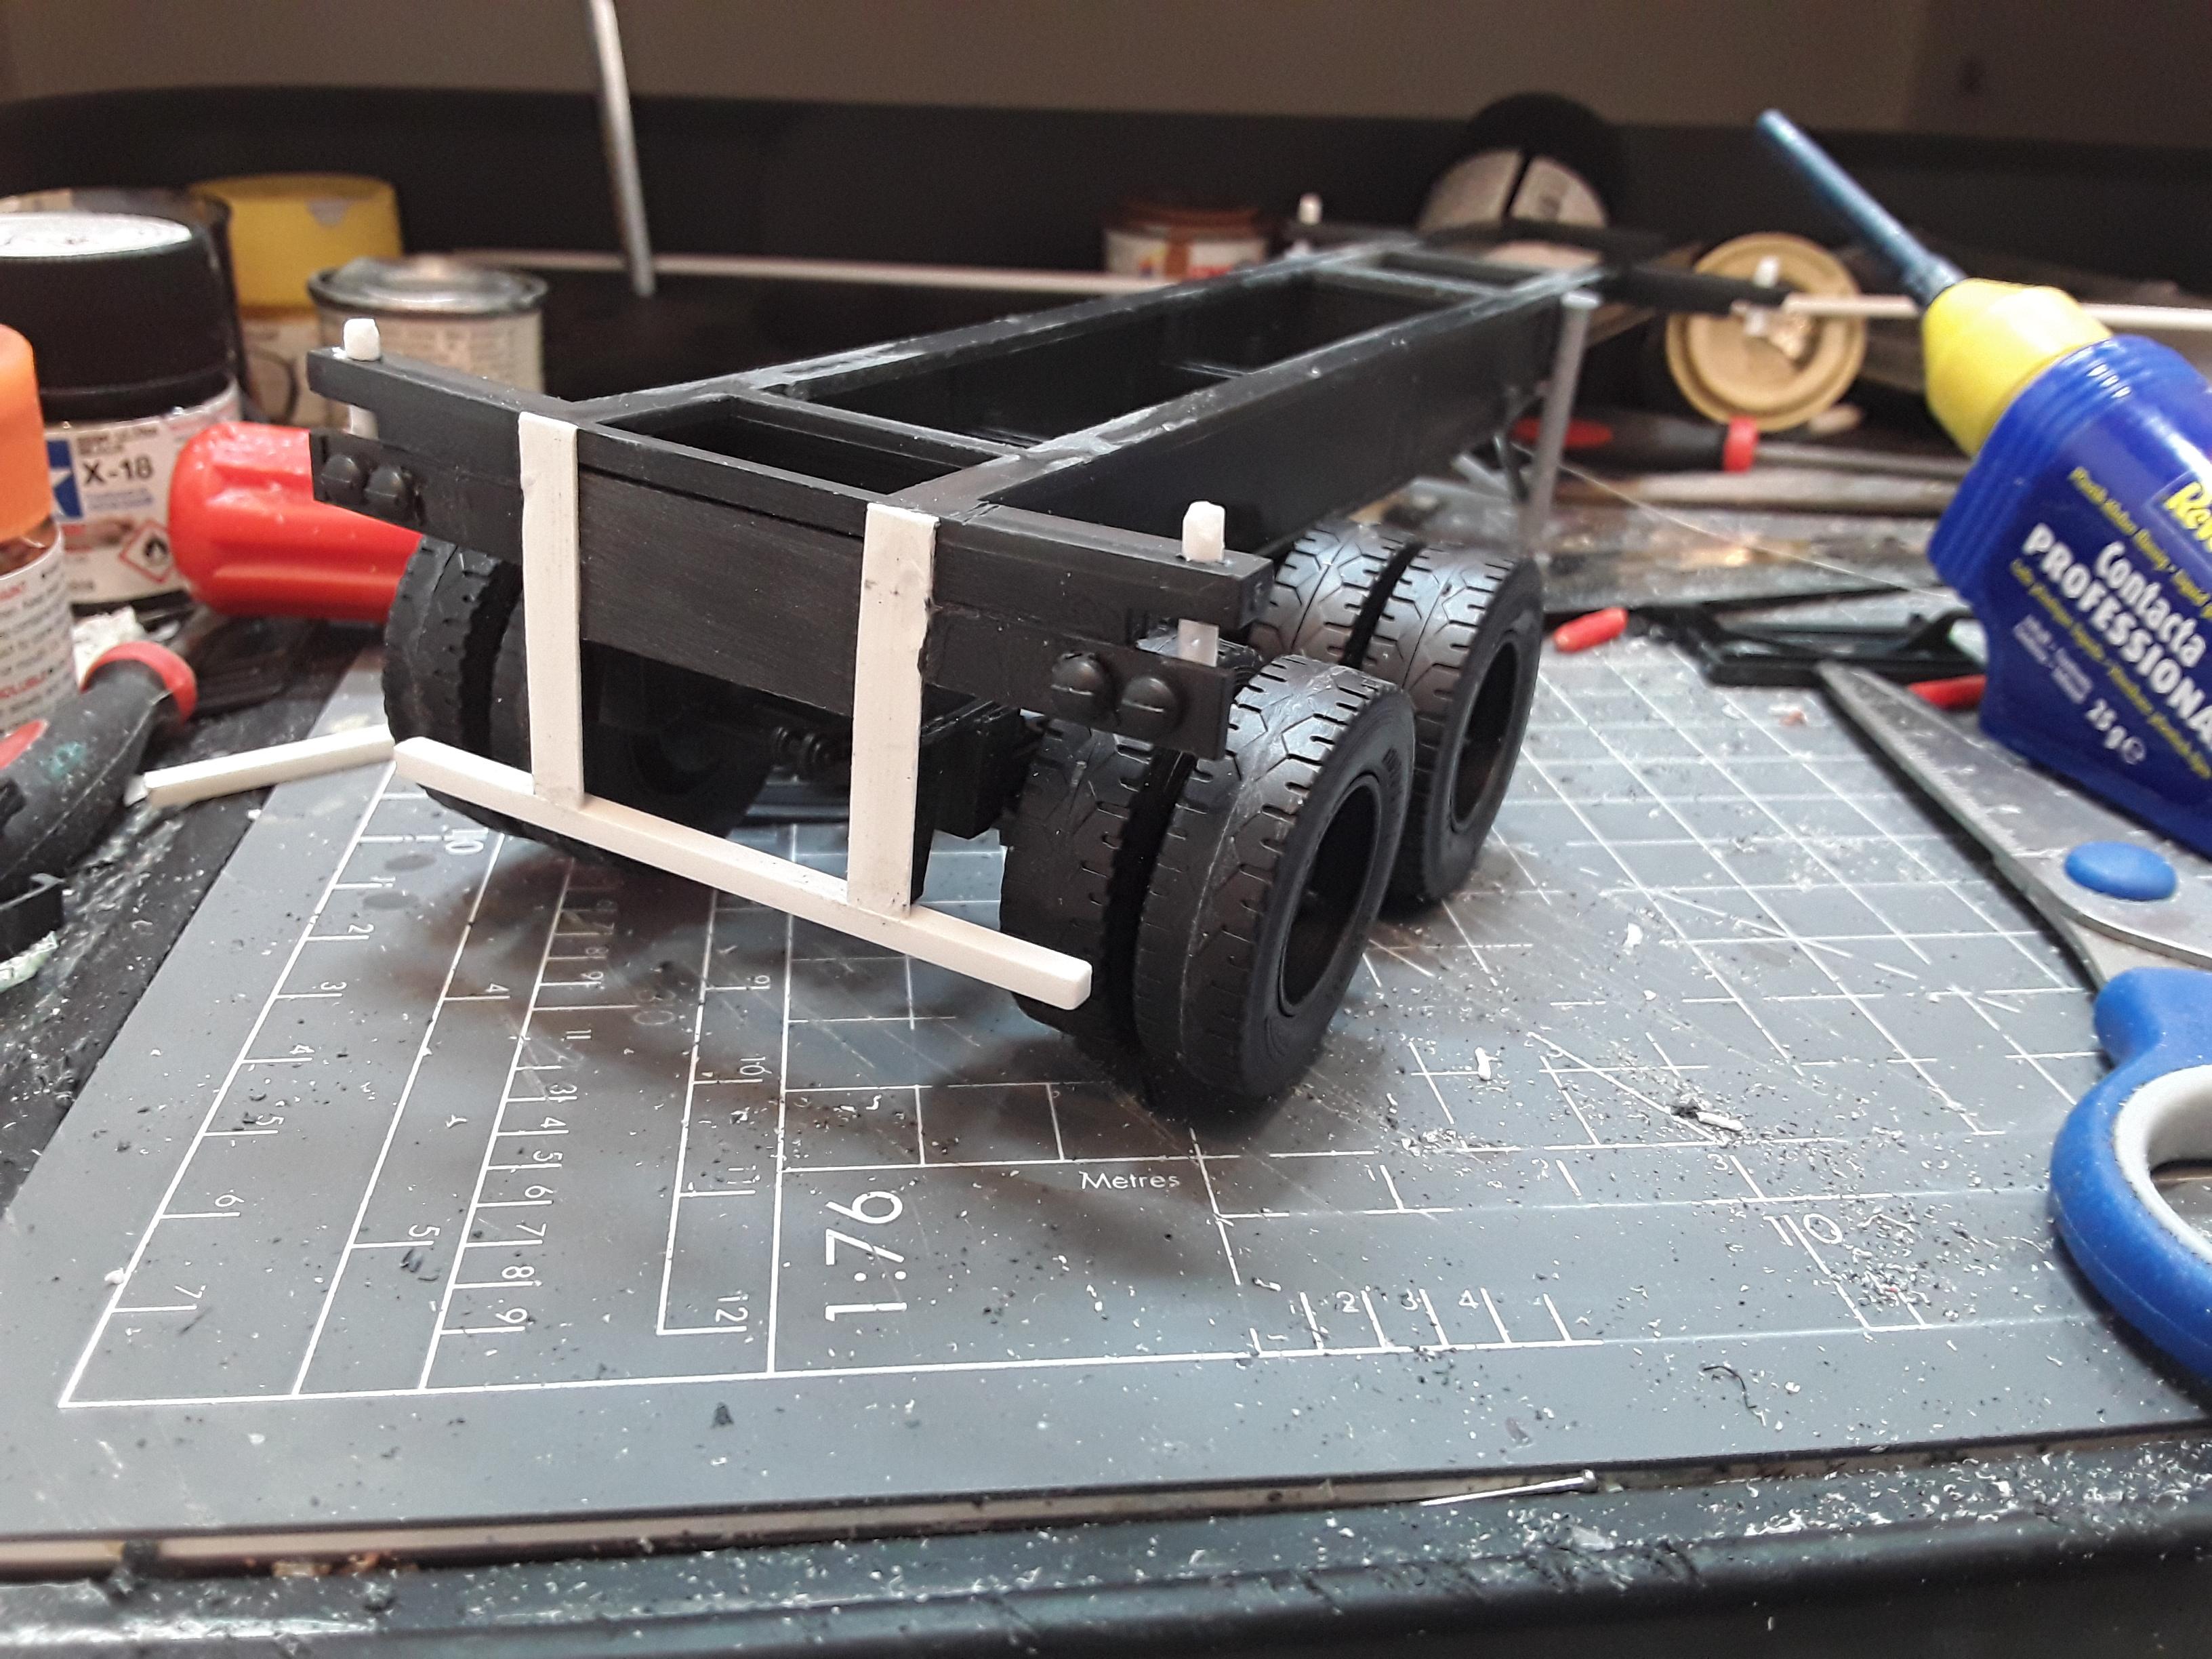
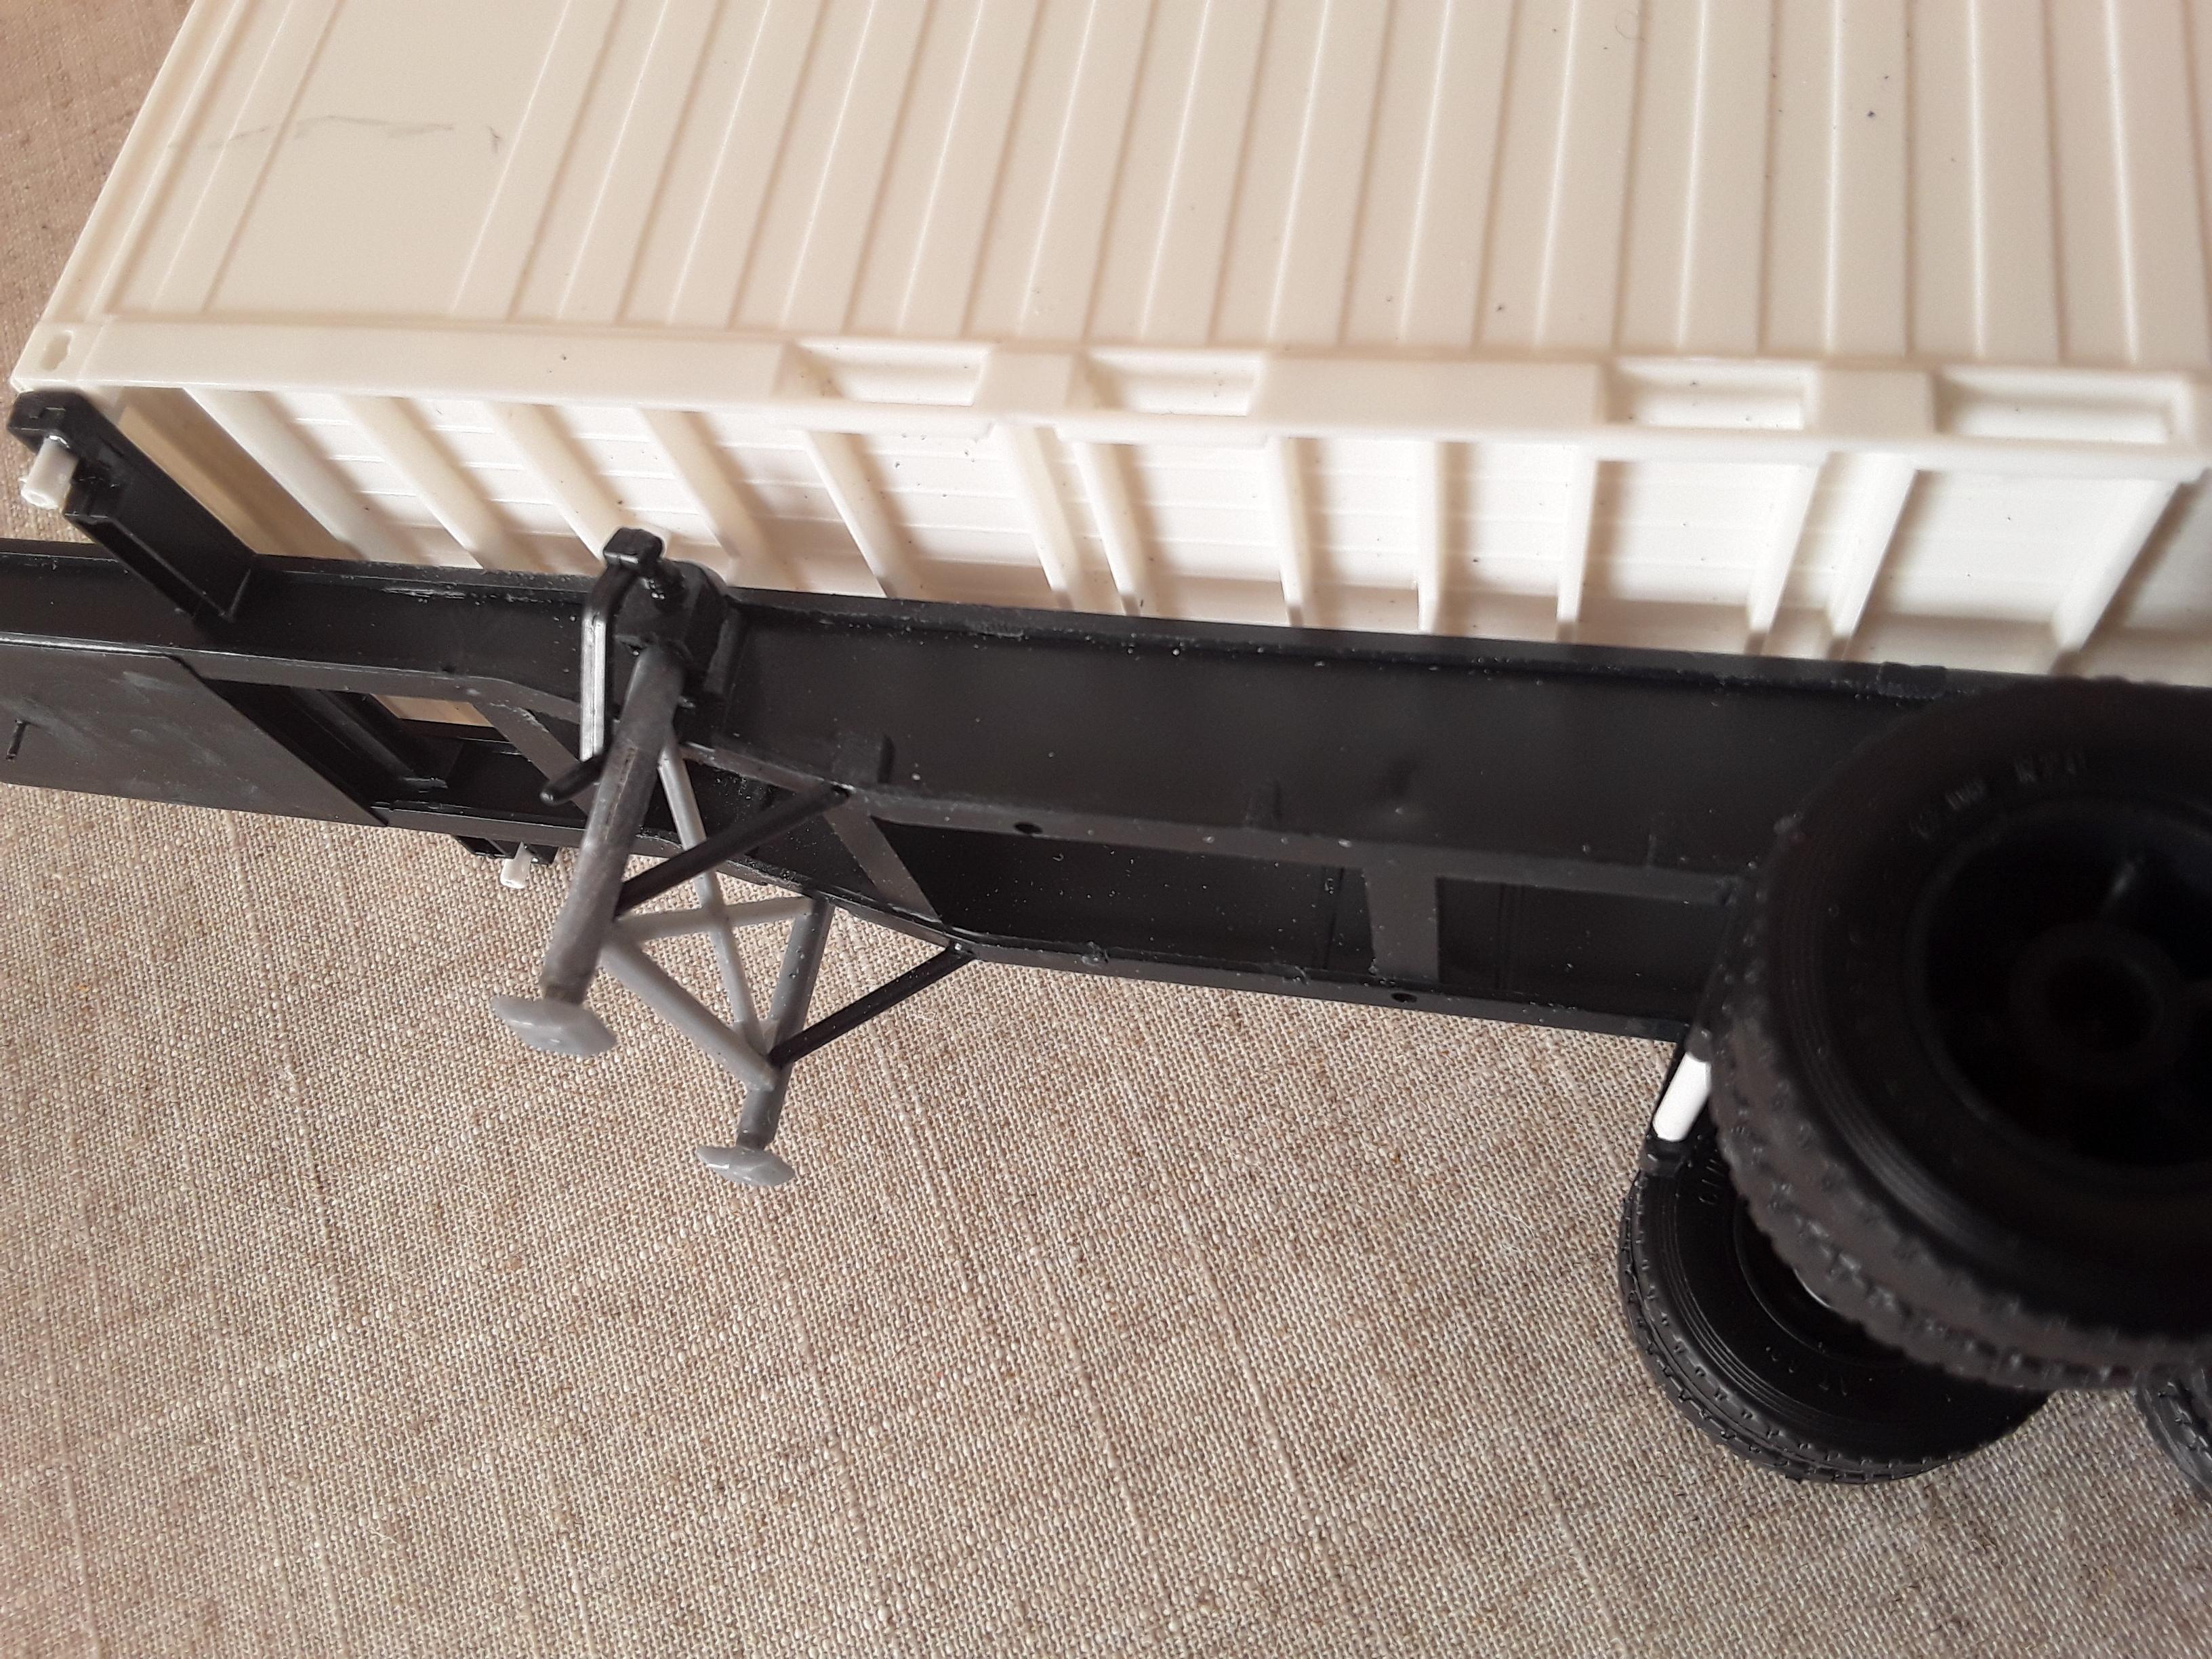
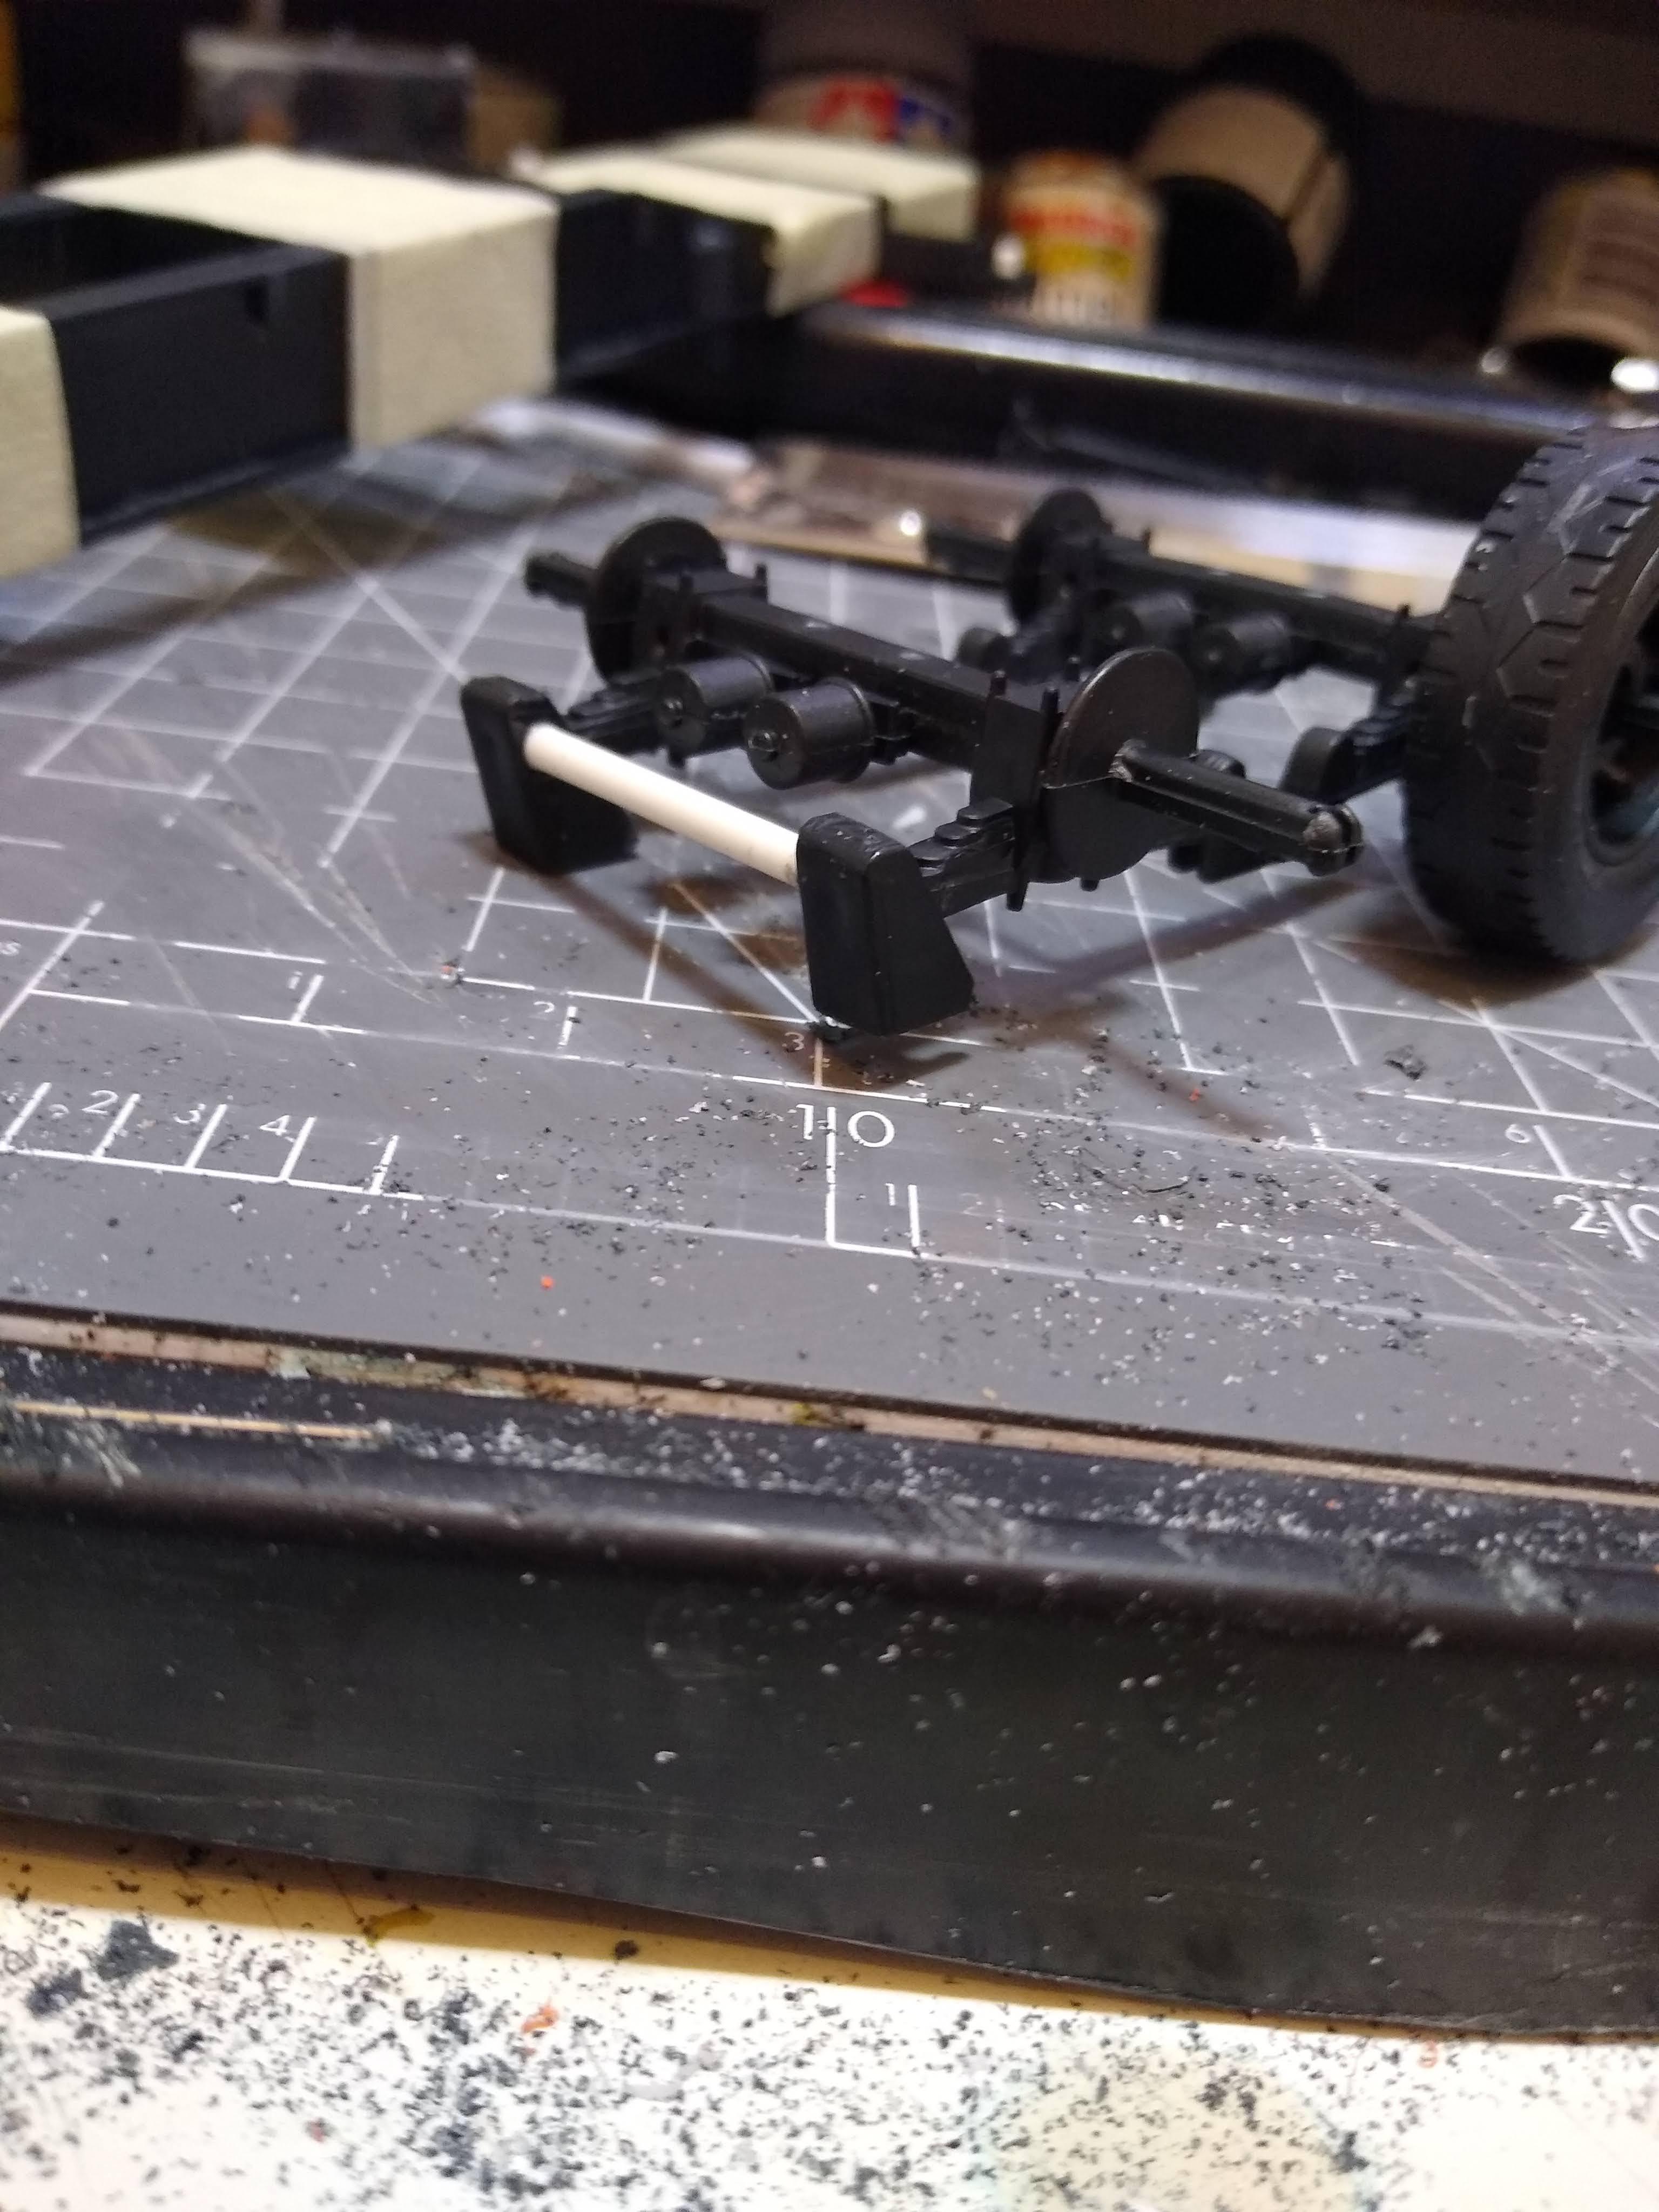
You can also see the twistlocks I built by drilling through the outrigger and into the container, then I used plastic rod to form a twistlock. I'll put wire through the bottom se tion to make the handle. Now that the ride height is more realistic the chassis angles upward when coupled to the point that the front axle is off the floor, I'll have to adjust the suspension a little so that it accommodates the angle. I also want to fabricate a relay valve at the air reservoir with the hoses going to the brake chambers as it is all so visible when the container is not there. So, it's coming up to paint. Now, these trailers were never very well painted so I'm not too worried about the finish. The only thing is I'm not at all certain about a colour. I'm thinking of a mid blue, but the wheels are important too, do I do the hub chassis colour with full silver rims, or paint them all chassis colour with just the very outer edge of the rim painted white.
-
ESCI 20ft Container trailer
Rockford replied to Rockford's topic in WIP: Model Trucks: Big Rigs and Heavy Equipment
The kingpin was too far back and didn't look right at all, but would also cause the landing legs to foul the tractor frame if left. I moved it forward, then covered the work with a piece of plastic card. I also added couplings for air and electrics at the front of the frame and added a couple of airlines snaking off from the couplings and knto the frame. The rear bumper is a European looking thing so I fabricated a new one. Using plastic card, the triangular mounts for the original bumper and some square rod. I cut the rear lights out of the bumper assembly and put them below the outrigger for the container.
-
ESCI 20ft Container trailer
Rockford replied to Rockford's topic in WIP: Model Trucks: Big Rigs and Heavy Equipment
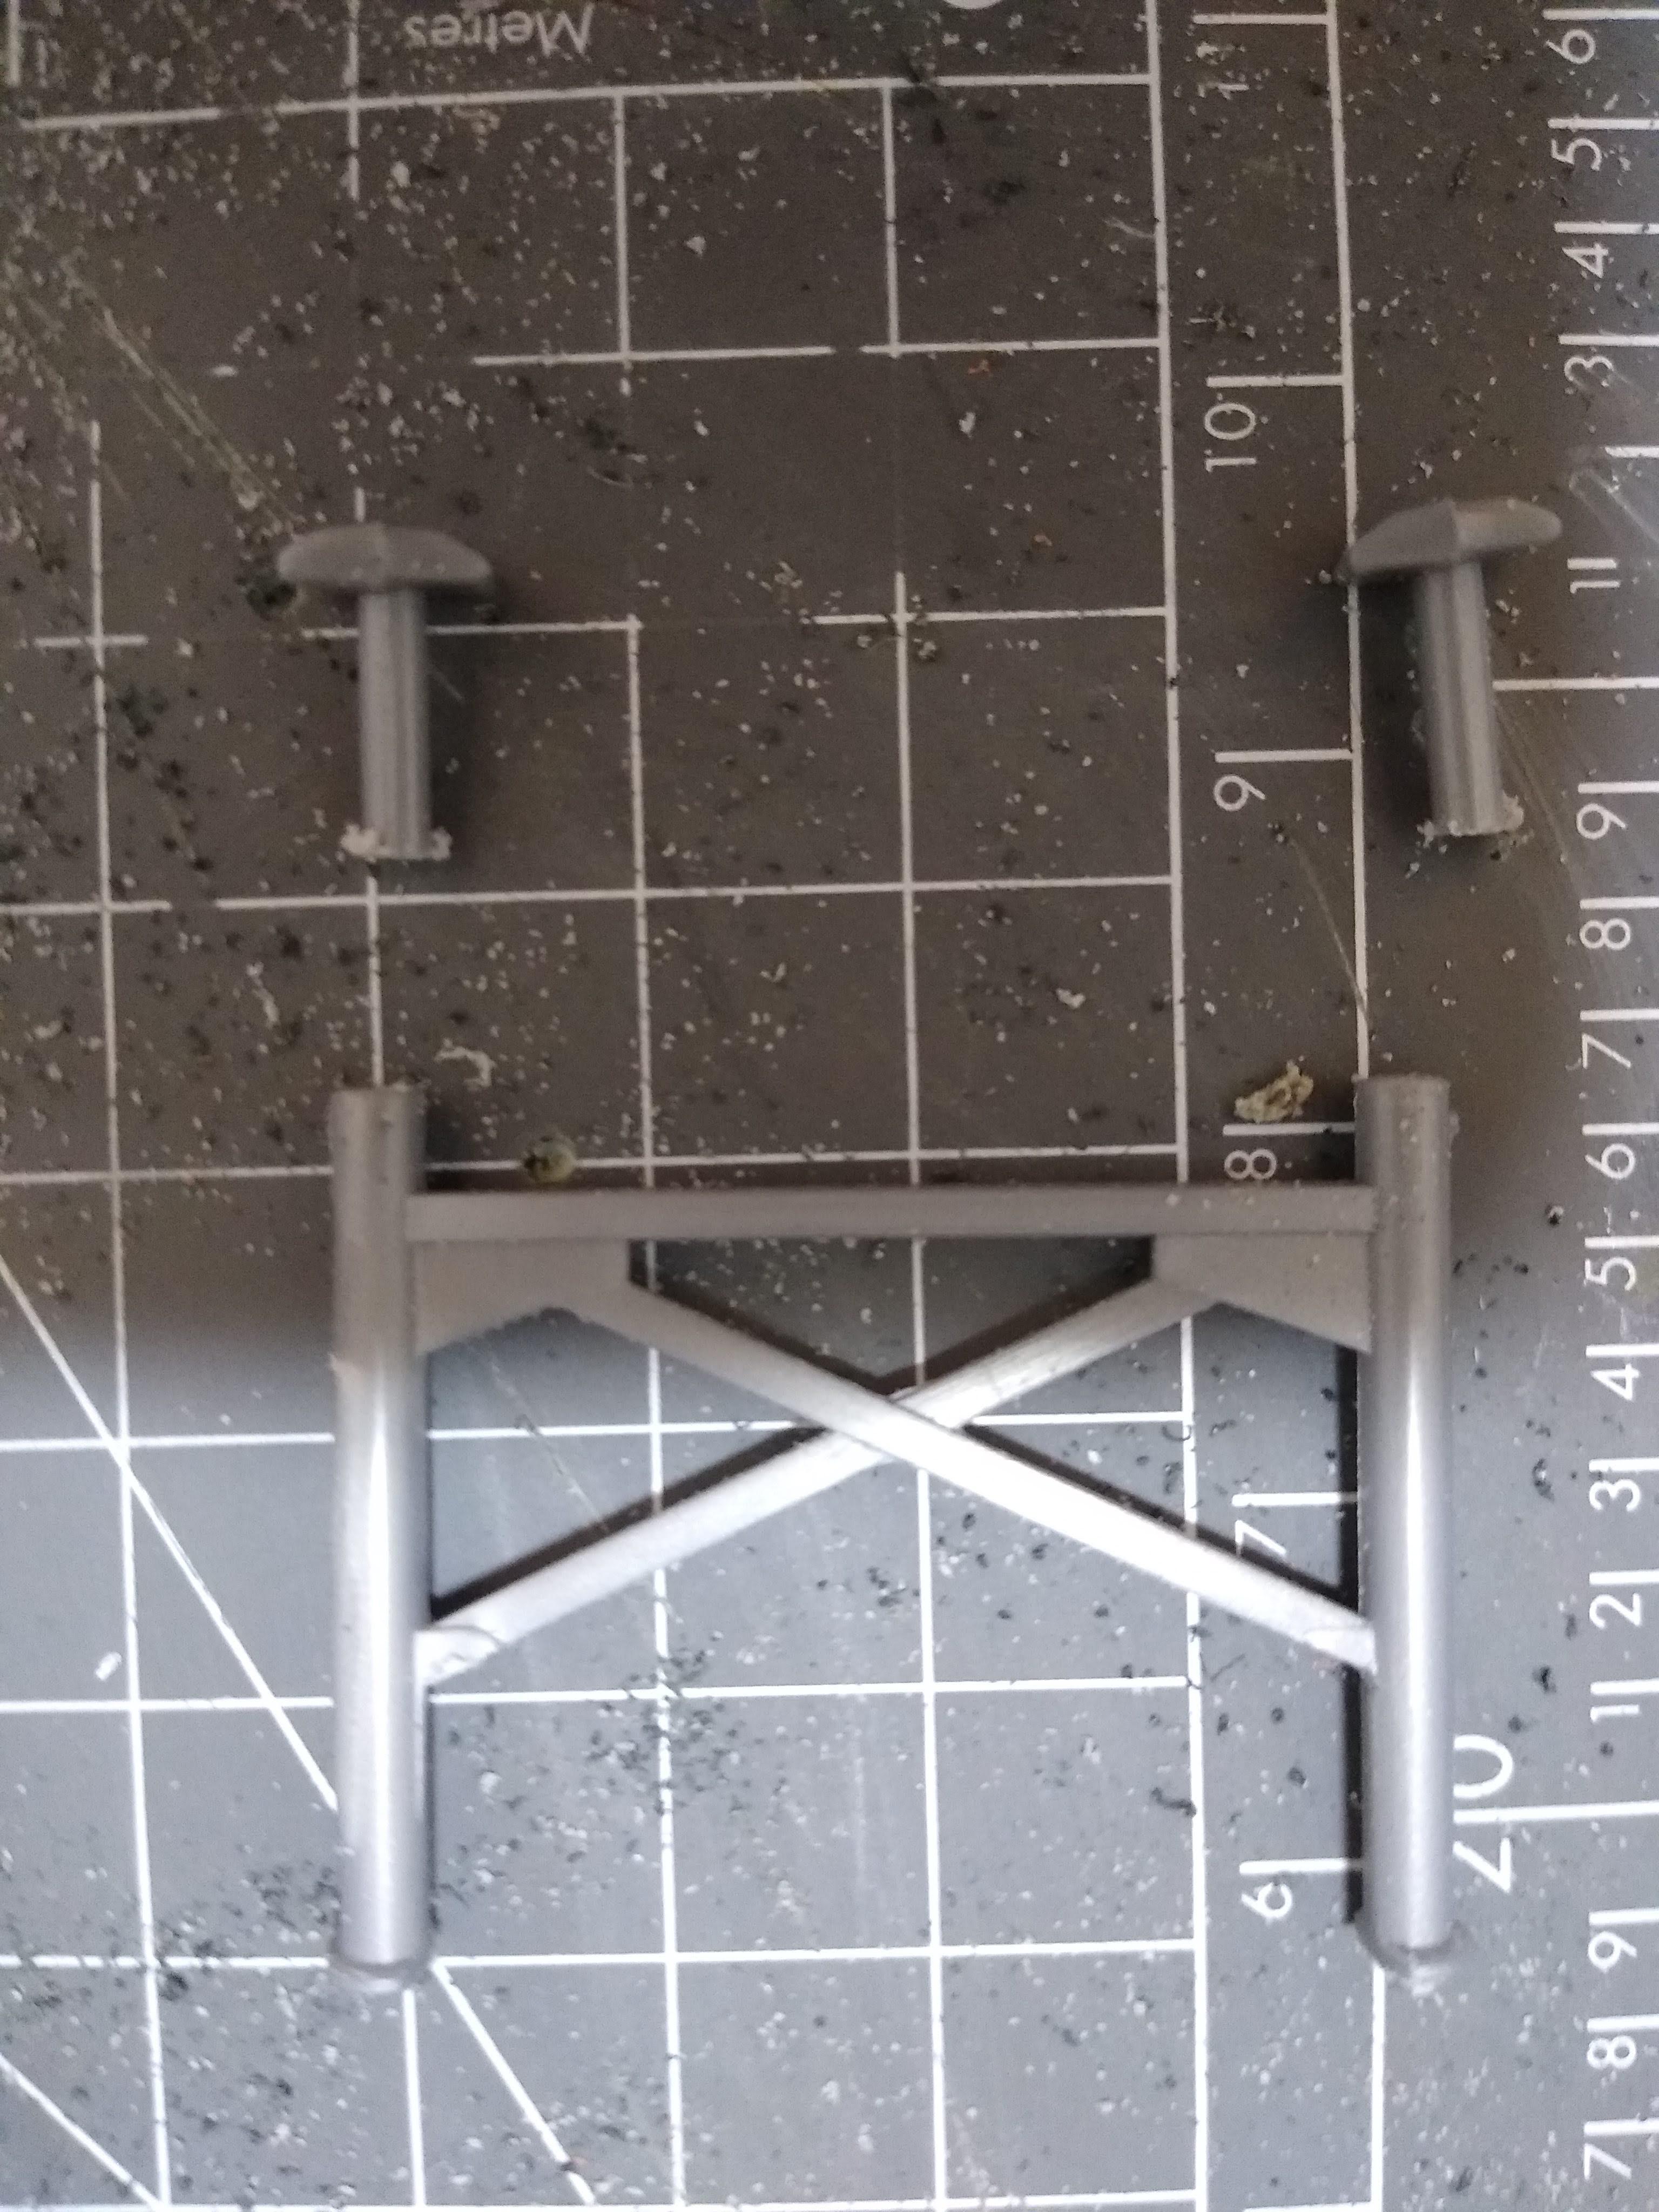
The landing gear was too heavy, like something off a bridge structure! I ditched it in favour of the legs off the Revell Snap Tite tanker [the spare ones that are in the extended position] which I cut down and added diagonal braces. Fabbed up a gearbox and used the winding handle fro the kit. Looks a lot better.
-
ESCI 20ft Container trailer
Rockford replied to Rockford's topic in WIP: Model Trucks: Big Rigs and Heavy Equipment
Mocking things up I found the ride height was that of a crop sprayer, probably because of the snap fit design. I removed about 6mm by cutting off a needless top crossmember from the suspension subframe. I added the usual tubular crossmember between the front suspension mounts.
-
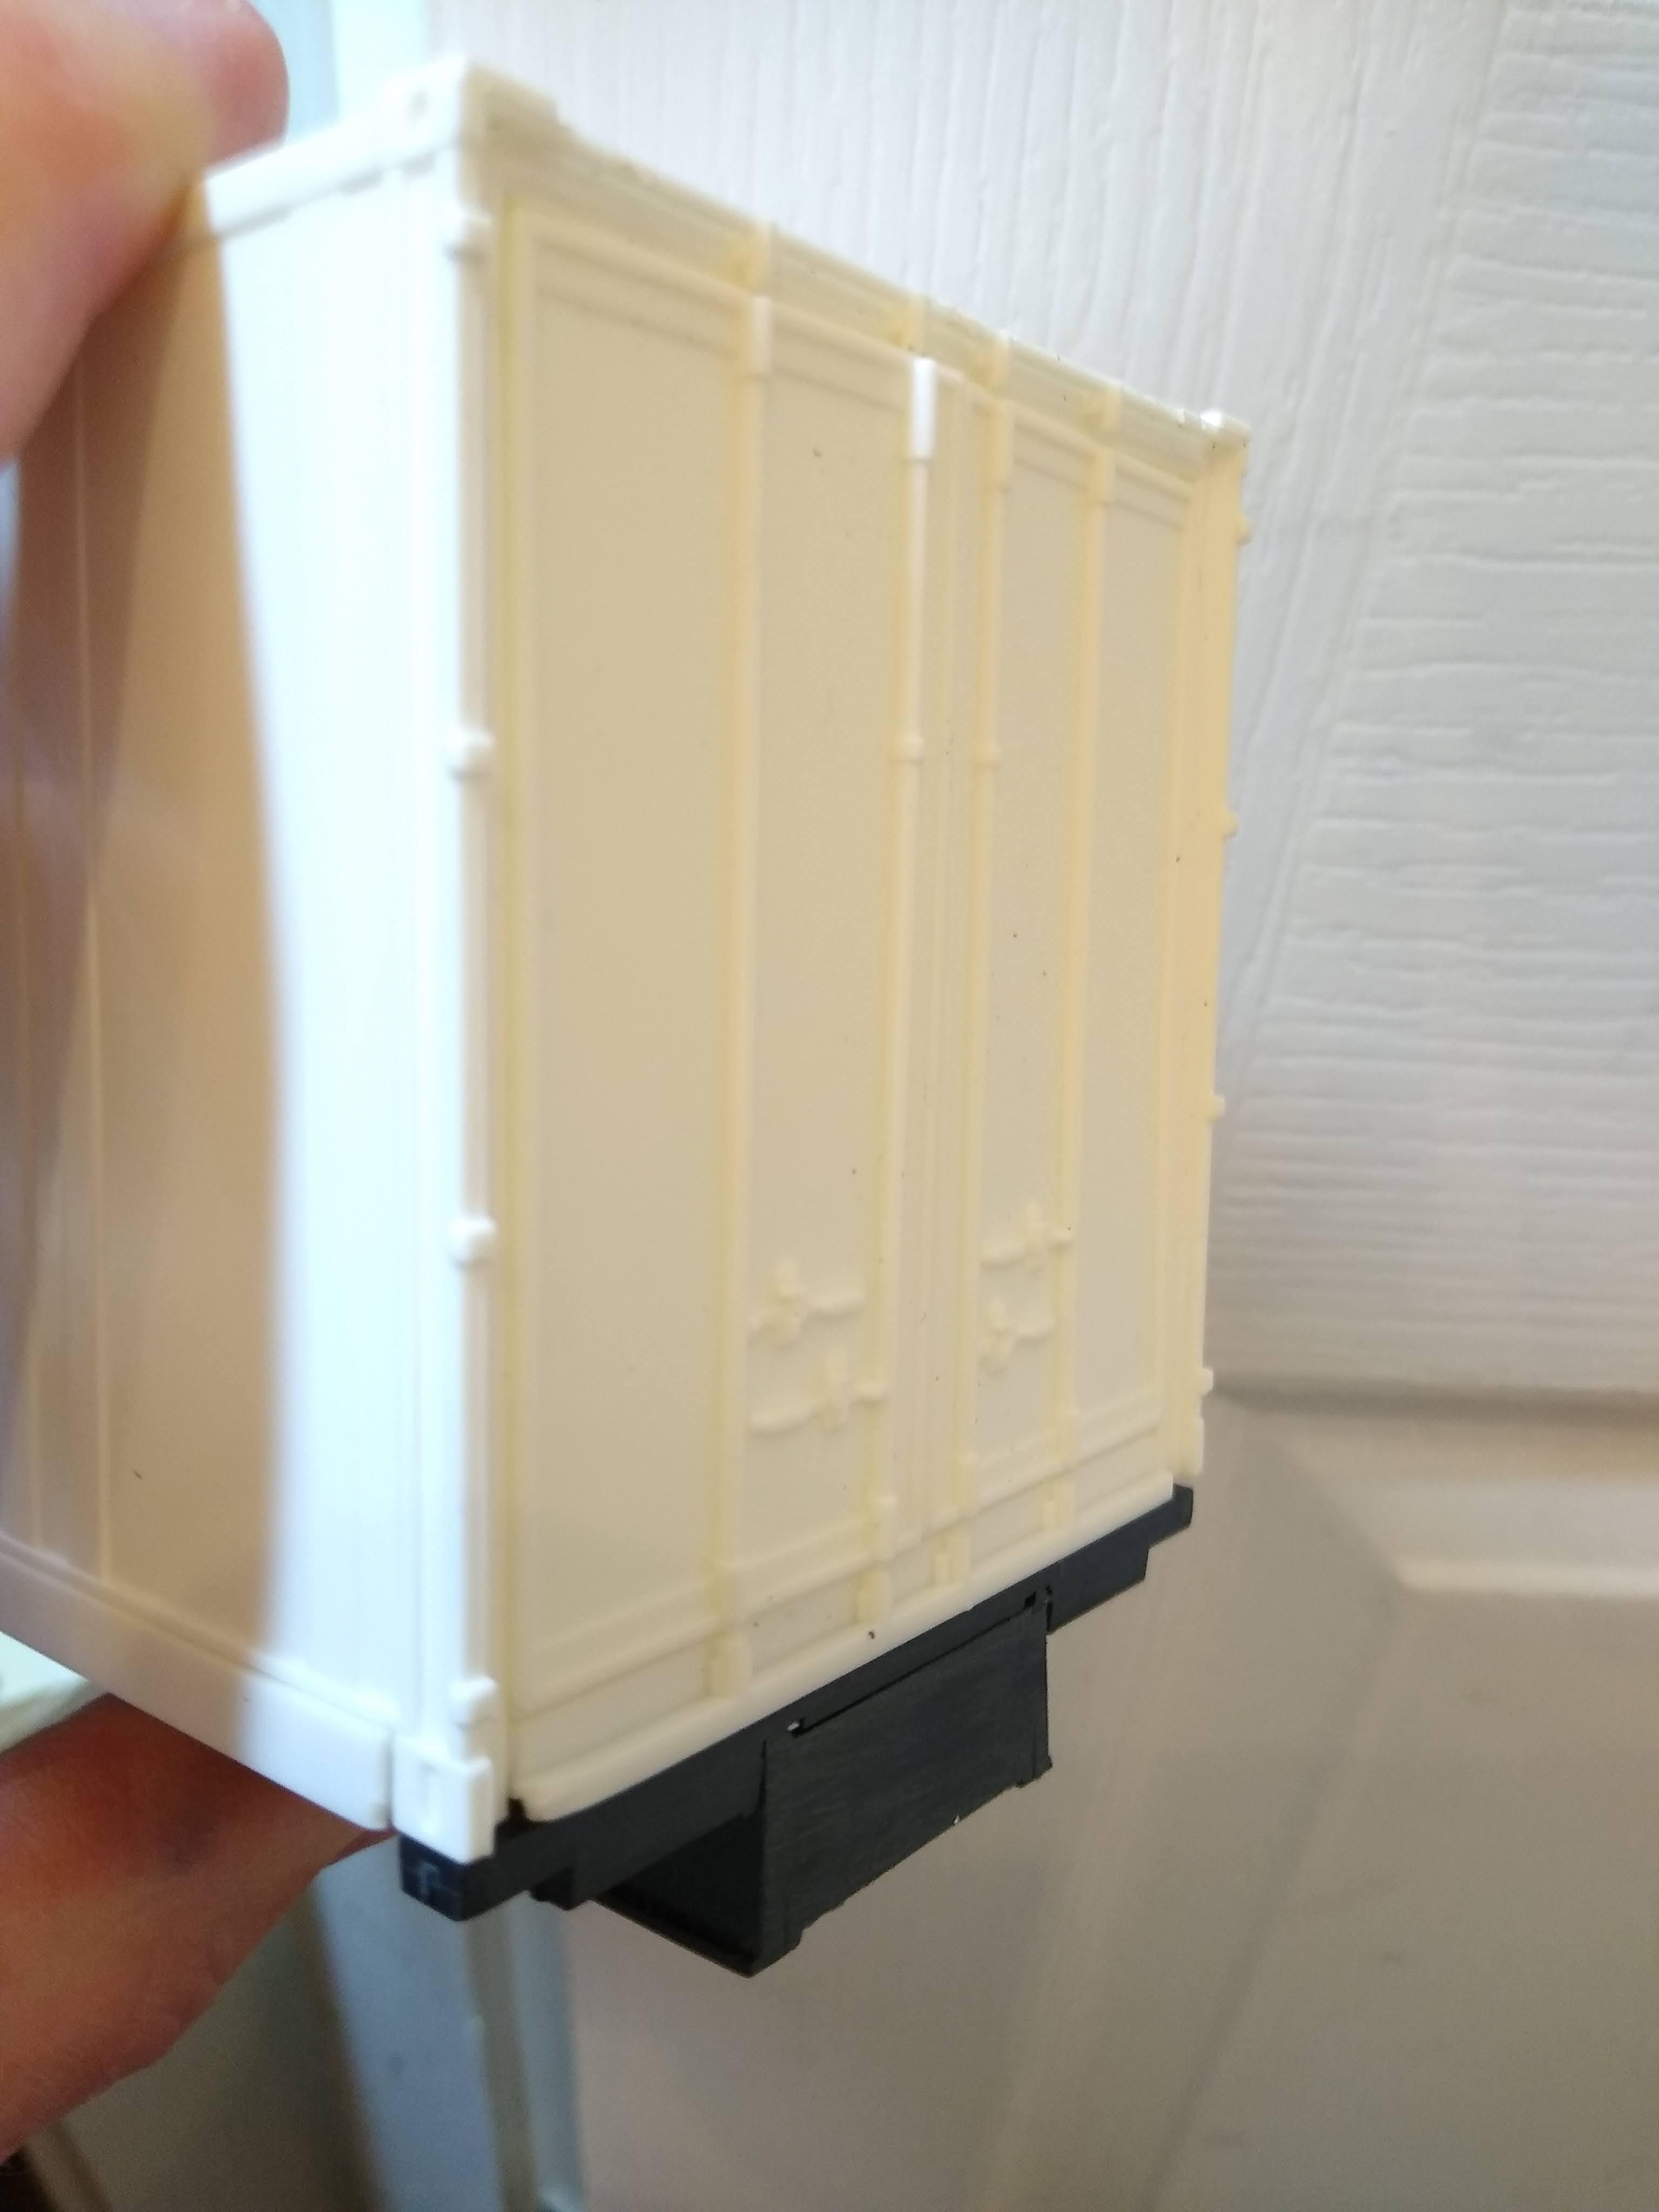
Never heard of ESCI until I saw this in Ebay. There used to be thousands of these trailer about in Liverpool because of the container terminal om the docks. They used to clatter and bang because of their short frame. They've all gone now, replaced with the more versatile [and more stable] extendable frames. This kit is very well made, no flash whatsoever and straight as a die, but has issues. From the box art you can see there's a ledge at the back which had to go, also a guardrail along the top between the twistlocks. I decided to cut the frame rather than move the container mounts backwards as the frame co es in two pieces, the top flange of the frame carries the crossmembers for the twistlocks and drops on to the chassis rails. I cut the frame down at a convenient crossmember.
-
Night to day
Rockford replied to Rockford's topic in WIP: Model Trucks: Big Rigs and Heavy Equipment
Well work has stopped on the trailer because of the weather. The repair work I had to do on the glue deluge meant that I missed the last spell of warm weather for a while, so no spraying possible in my unheated, brick built garage. However, I do have another trailer to do, the ESCI 20ft container trailer so I'm going to start another thread witb that. This will keep me busy for a little while. However, should we get an "Indian summer" as they call it, I may be brave and get the paint out. -
Gareth, this looks really classy, very Lincolnesque! The stance is great. Colour choices are spot on. These cars really benefit from vinyl roofs. I suppose what the promo type kits lack in detail they make up for in accuracy of body lines. ? Very well done sir!
-
Eric, hello from Liverpool UK, looking forward to seeing some of your builds.
-
I don't know what to say ? ! Speechless! It's brilliant. I never thought that kit could turn out that right! You've done a grand job on that mate and you've got my juices flowing about mine now. Just spot on mate. The thing is, now you've finished it, what are we all going to talk about? We went all around the houses on this build! (And may I say, you were very gracious about it all) Love it.
-
1976 Kenworth VIT 200 Bicentennial (W900)
Rockford replied to steve1970's topic in Model Trucks: Big Rigs and Heavy Equipment
That's a very clean build indeed! My love for American trucks began with a Kenworth conventional - no need to guess where, it was green. -
Mission Impossible - American Graffiti cop car from a wreck
Rockford replied to Alan Barton's topic in WIP: Model Cars
If you only managed to make something that even resembled a Galaxie from what you started with it would be a feat but what you've done is staggering! Fantastic work, well done. -
I suppose beauty is in the eye of the beholder! Quite an awkward front end with a very bland rear end. From the side it's very 69-70 Cougar. Interesting subject and I'm sure you'll do your usual excellent job of it. Looking forward to seeing it come on.
-
'55 Chevy Two Lane Blacktop replica(ish)
Rockford replied to Spottedlaurel's topic in WIP: Model Cars
Wow 30 years! That's some hiatus. Gonna be a great looking car. I remember seeing the film when I was kid and not fully understanding it all, pink slips etc... but I just remember how great the cars looked, the 55 with the howling Muncie and the super smooth GTO. I'm fairly sure the 55 went into American Graffiti as Bob Falfa's car. -
Very difficult, my uncontrollable love for 57 Chevies would say a good 57 Chevy kit, but then I'd want a kit of my own car so the MPC 79 Chevy Nova kit, but then again, what about the perfect truck of all time the Kenworth W925, I'd have to have the AMT "Watkins" version. You just cant do this to a person ?
-
Excellent build! Looks very clean and sharp. Nice day2 upgrades too.
-
Reading the comments here I realise that the Nova was one of those run of the mill cars that everyone had or rode in through family and friends, but was so common it never achieved enough status to warrant preservation. They all quietly wandered off to the scrapyard until all too late we realised theyd disappeared from the streets. You can sense the degree of fondness people feel for them just from this thread! You've rekindled an old love in many people Doors! Well done on the kit, appears to sit nicely, not like an off roader like some kits though I noticed you altered the front wheels a little so that might account for this. You have made the best of the basic interior tub too. I've had my kits out a few times this week fiddling about with them. You've got me going again!
-
Night to day
Rockford replied to Rockford's topic in WIP: Model Trucks: Big Rigs and Heavy Equipment
I did the method of foiling the emblem before topcoating. I rubbed the topcoat off and it shows up great in some angles but not in others. I want to wait until I get my eye done and rub it down again. -
Night to day
Rockford replied to Rockford's topic in WIP: Model Trucks: Big Rigs and Heavy Equipment
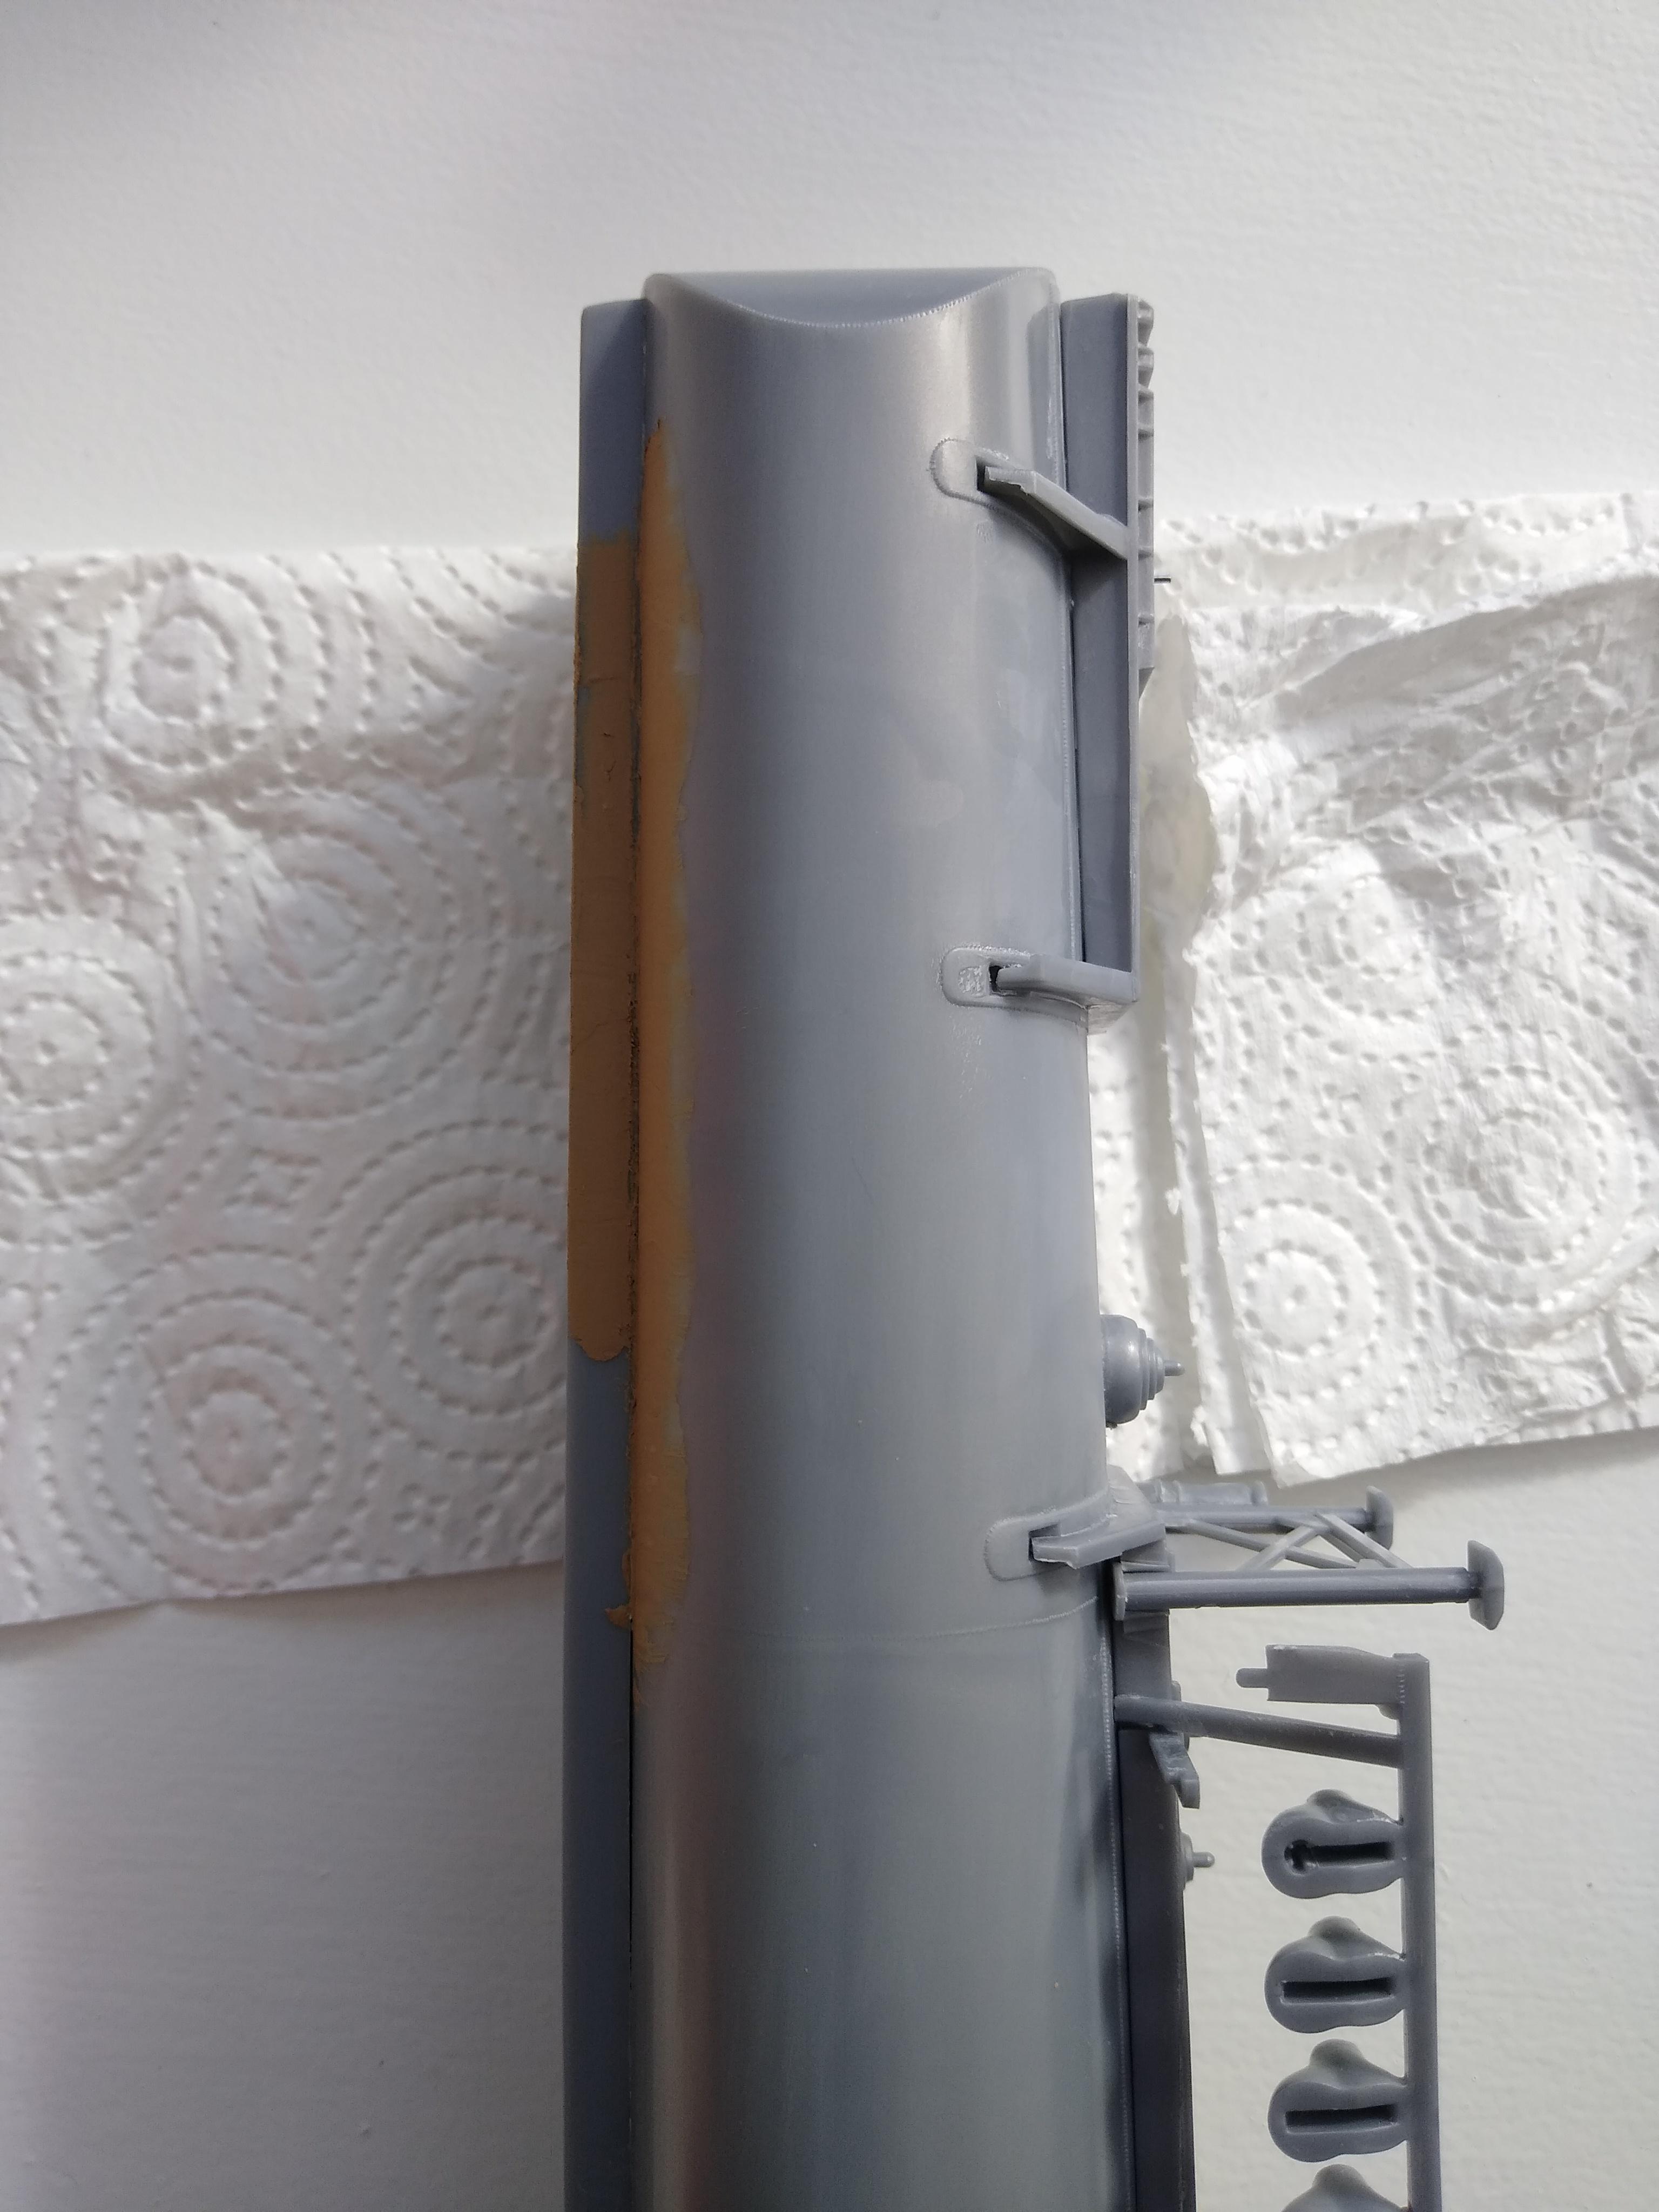
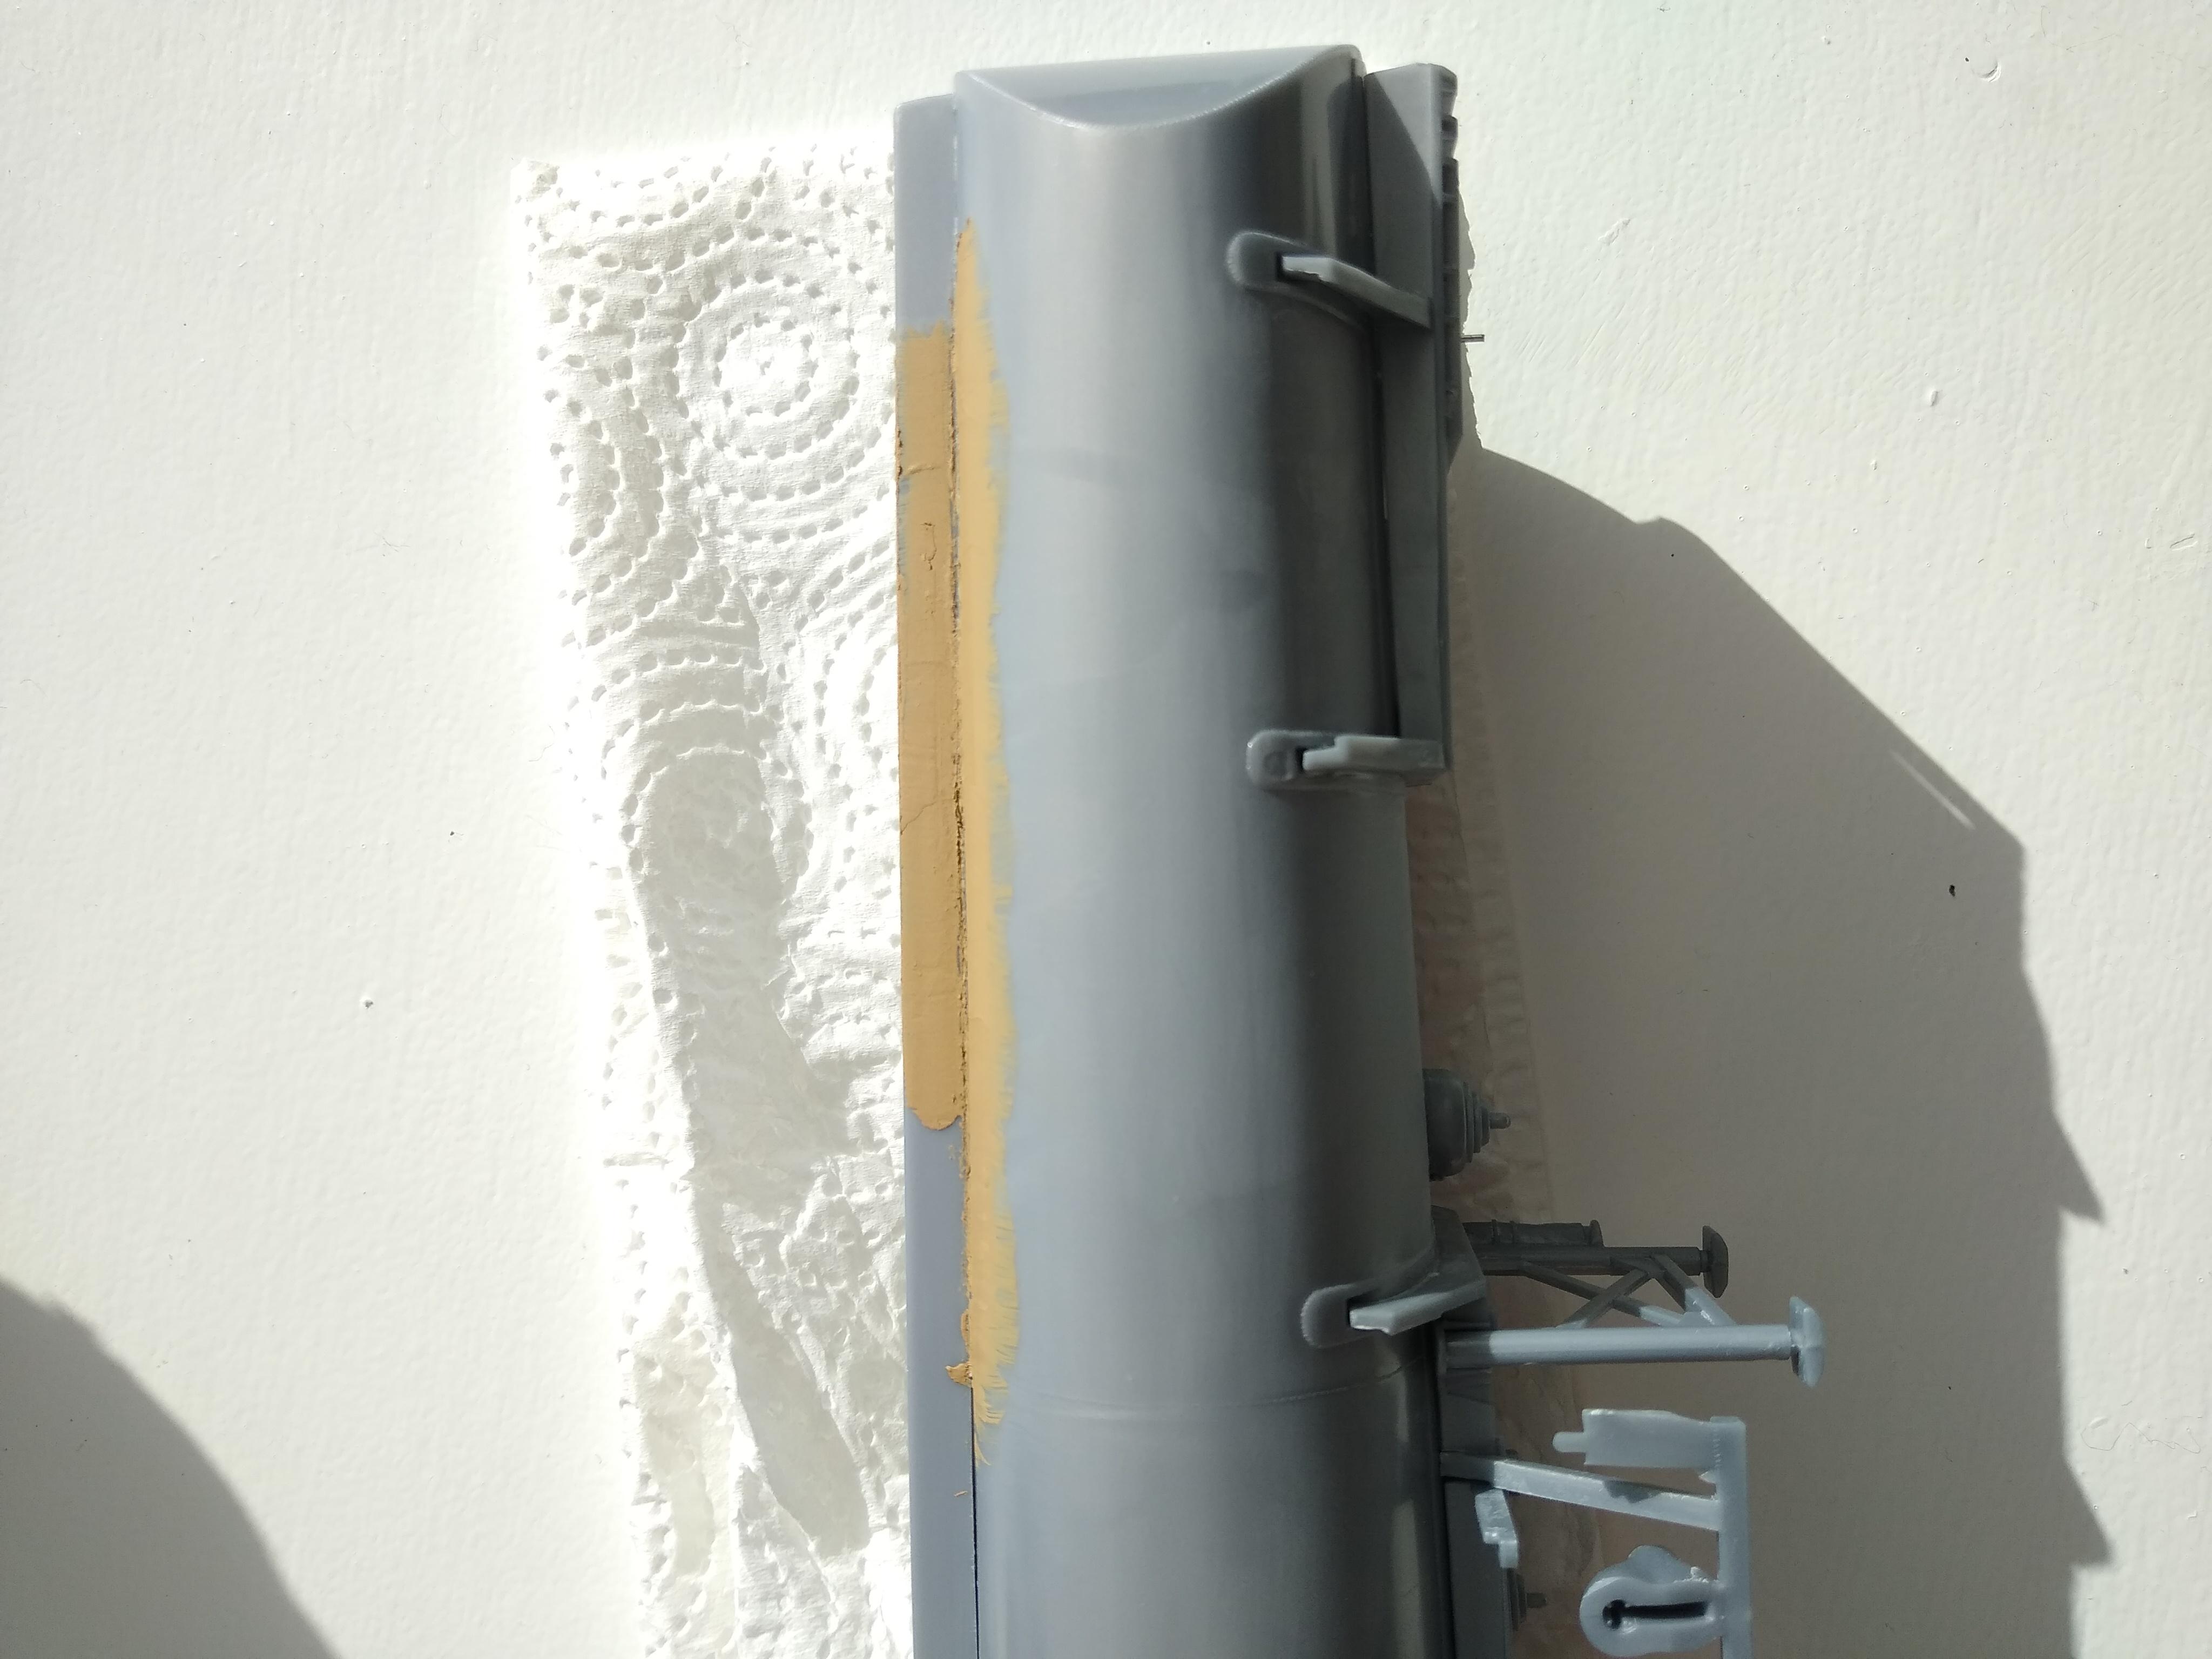
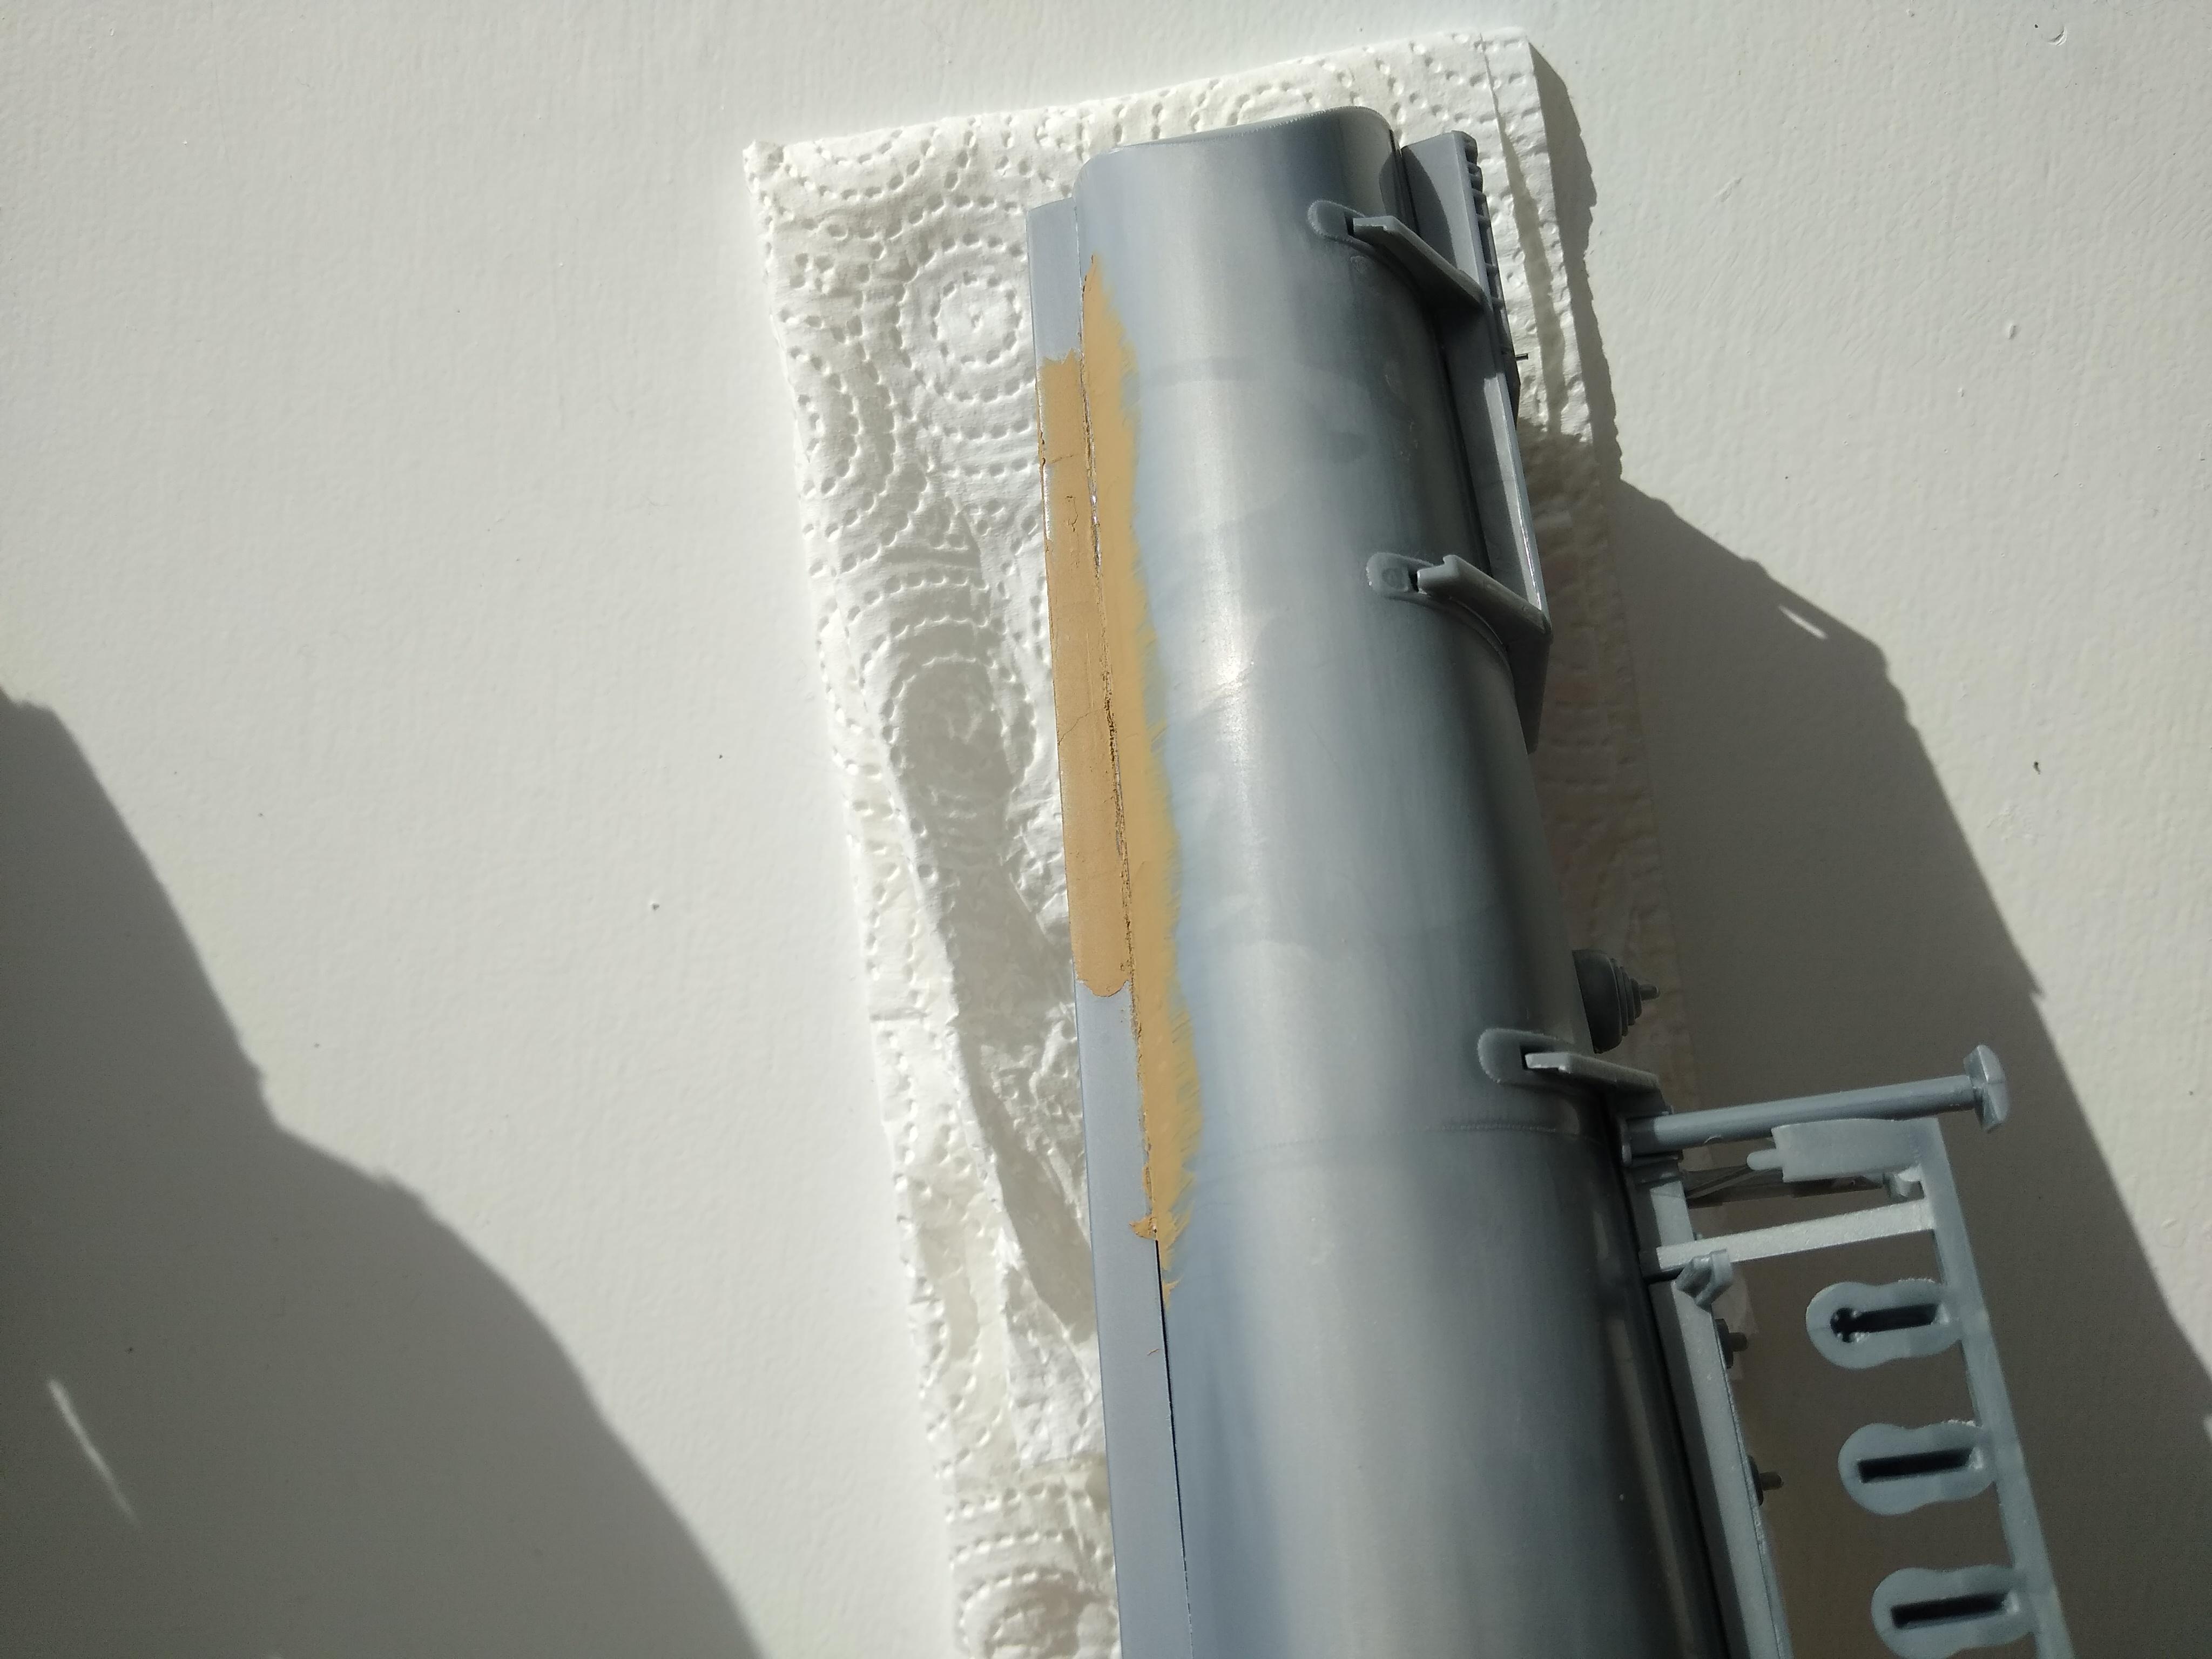
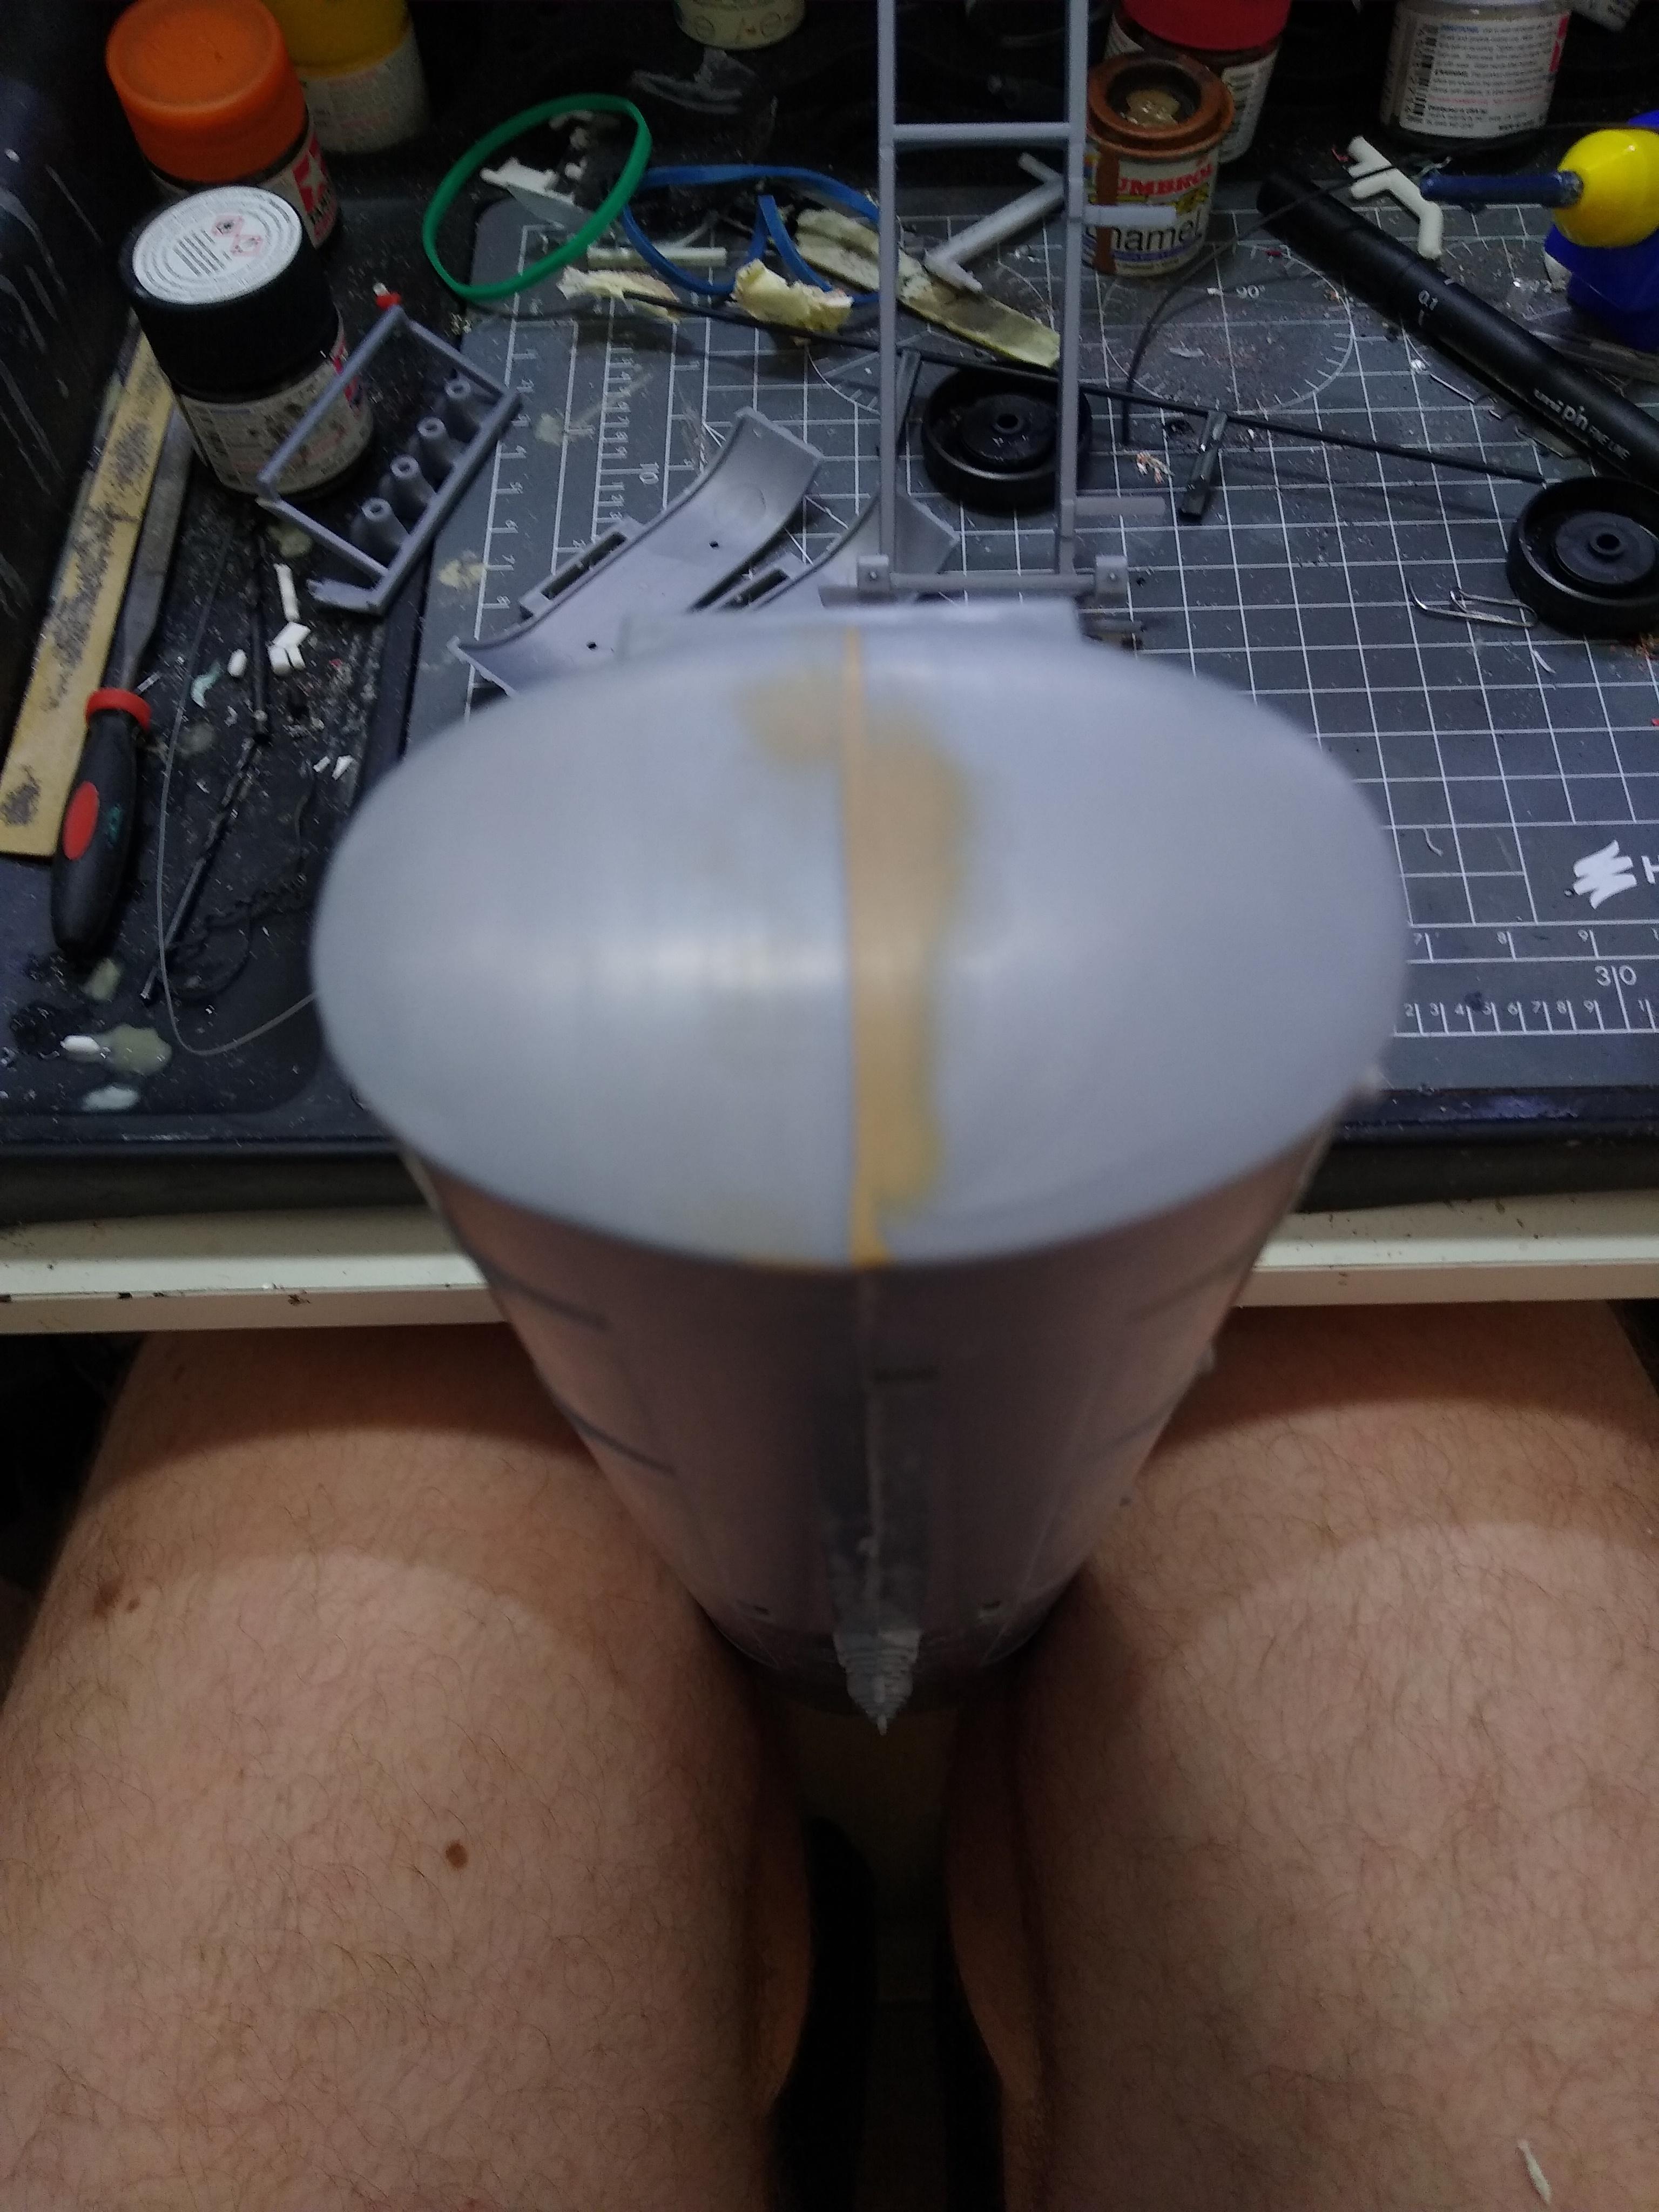
Do you ever feel like packing in ? I was using a bottle of liquid cement to flow into the chassis joints with the tank when I dropped the bottle. A huge splurge landed on the LHF of the tank. It makes the plastic swell where it dries quickly but has burnt holes where it pooled. I've rubbed the main part down with P800 and used stopper on the pitting but while the stopper dries I'm having to fight the urge to just throw this in the bin. The only thing that stops me is thinking of the money it cost and how it would cost three times that to replace it. I'm definitely living up to my name Cyclops Kit Cobbler. Any advice on how to repair the mess is most welcome, including "take up knitting"!
-
Night to day
Rockford replied to Rockford's topic in WIP: Model Trucks: Big Rigs and Heavy Equipment
Sadly, cataract surgery cancelled due to COVID surge in Liverpool and all nursing staff called off wards and into ICU. So I continue as the Cyclops Kit Cobbler. The SnapTite 1/32 is no stranger to anyone here and falls together. It is superbly engineered when you consider it, falls together so well. The main issue is the joints down the end panels of the tank itself. So, I chamfered the edges and, after glueing everything together I used some stopper to fill the gap then smoothed out with P800 wet & dry.
-
You're right, it does have the chrome trim on the front of the hood, just looked at my kit and it's there with a little tiny Chevrolet script on the right hand side. I can't get a photo of it though it's so faint. I never knew it was a 79 it was depicting because the box for mine just says Nova Street Machine. Must be honest I'd never seen a square headlight car until this thread, until now I'd thought they'd got the grille so wrong in the kit but now I see it's fairly accurate. GM were obviously squaring the car up to get people ready for the Malibu et al with their square designs.
-
Wasn't the chrome trim across the front of the hood only on the Nova Concourse? The trim levels under that didn't have the chrome.
-
https://www.bbc.co.uk/sounds/play/m000lz6n This is the link to the BBC radio programme on BL.
-
BTW there was a programme on Radio4 recently in the series "The Reunion". It was a group of ex BL employees. I couldn't believe some of the stories they had to tell, how badly the company was managed. When I was a kid in the 70s the media made the shopfloor workers the villains of the piece. It's really worth a listen.