Rockford
-
Posts
1,889 -
Joined
-
Last visited
Content Type
Profiles
Forums
Events
Gallery
Everything posted by Rockford
-

Italeri Volvo VN670 in CNTL livery
Rockford replied to hct728(Bob)'s topic in Model Trucks: Big Rigs and Heavy Equipment
Nice looking rig. No engine? No great problem, you shouldn't see it very often anyway! -
AMT Kenworth W925
Rockford replied to Doug 1061's topic in Model Trucks: Big Rigs and Heavy Equipment
You must be so proud of that build. It's impeccable. Fantastic choice of colours and the KW paint scheme looks spot on. The AMT W925 is one of my all time favourite kits, it was my first proper truck kit and was quite exotic over in England in the 70s. You have to remember there was no internet then, so I didn't really know what it was, I just knew it was a beautiful truck. The daycab is a great choice too. I smiled when I opened this thread! -
Nice colours you've chosen, interior looks especially tidy! Good stance too. Very nicely done.
-
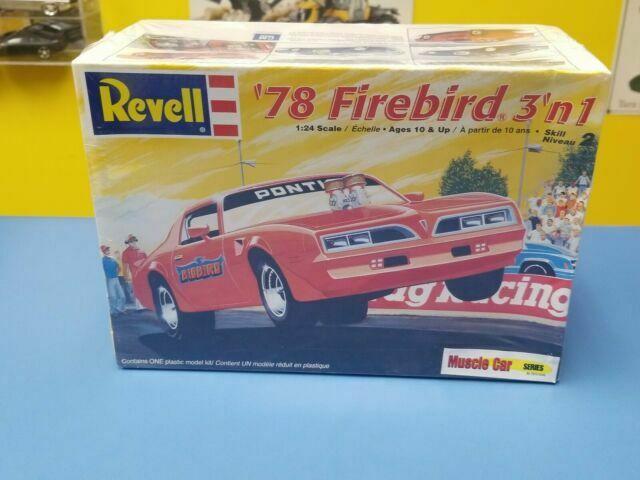
Great looking build, don't envy you those decals but should finish it well. I see this is a Revell kit but it's very different to the Revell Firebird kit I'm familiar with. They obviously have different origins. This is the only Revell one I know:-

-
Interior looks great in that colour, the dash looks really clean, and the underfloor looks so tidy! Great kit.
-
This is going to be some build, that engine looks fantastic. One of the most exciting parts of a build for me is the engine. I found a pack of diodes from Radio Shack serve well as in line fuel filters, they even come with the fuel line attached!
-
I know how you feel, what I used to do freehand without glasses I now have to use two pair of glasses, a magnifying glass, and jam my hand against the bench to keep it still. It is so frustrating! Your builds look fantastic though. Tamiya do make a good product don't they?
-
It's a beautiful big red slab of steel! Very nicely done. I've never seen that trim on the front fender with the Bonneville script before.
-
Well you're doing something right mate because your paint jobs are excellent. Unfortunately I live in a flat so I can't employ the "kitchen door" method. I have to say Halfords paint is excellent stuff to work with, very forgiving and a durable finish, though lately I've been buying Hycote from The Range because it's where we go for our exercise. I believe they're the same product inside. I've had some good finishes from the too.
-
AMT 1955 Chevrolet Bel Air 2-door Sedan - India Ivory & Harvest Gold
Rockford replied to RandyB.'s topic in Model Cars
Very tidy! Do love a Tri-Chevy and that's a nice job. -
Looks brilliant, interior is excellent! Well done. You must have built about 30 cars in the last few months.
-
I love these 60s behemoths, especially Ponchos. That's a beautiful car and you're making your usual great job of it! Vinyl roof looks great and suits the car so well. I'm just wondering where you're painting because here in Liverpool it's too cold and damp to do anything. I tried painting something in the garage the other week and the condensation on it was unbelievable! Your paint jobs are stil coming out great.
-
ESCI 20ft Container trailer
Rockford replied to Rockford's topic in WIP: Model Trucks: Big Rigs and Heavy Equipment
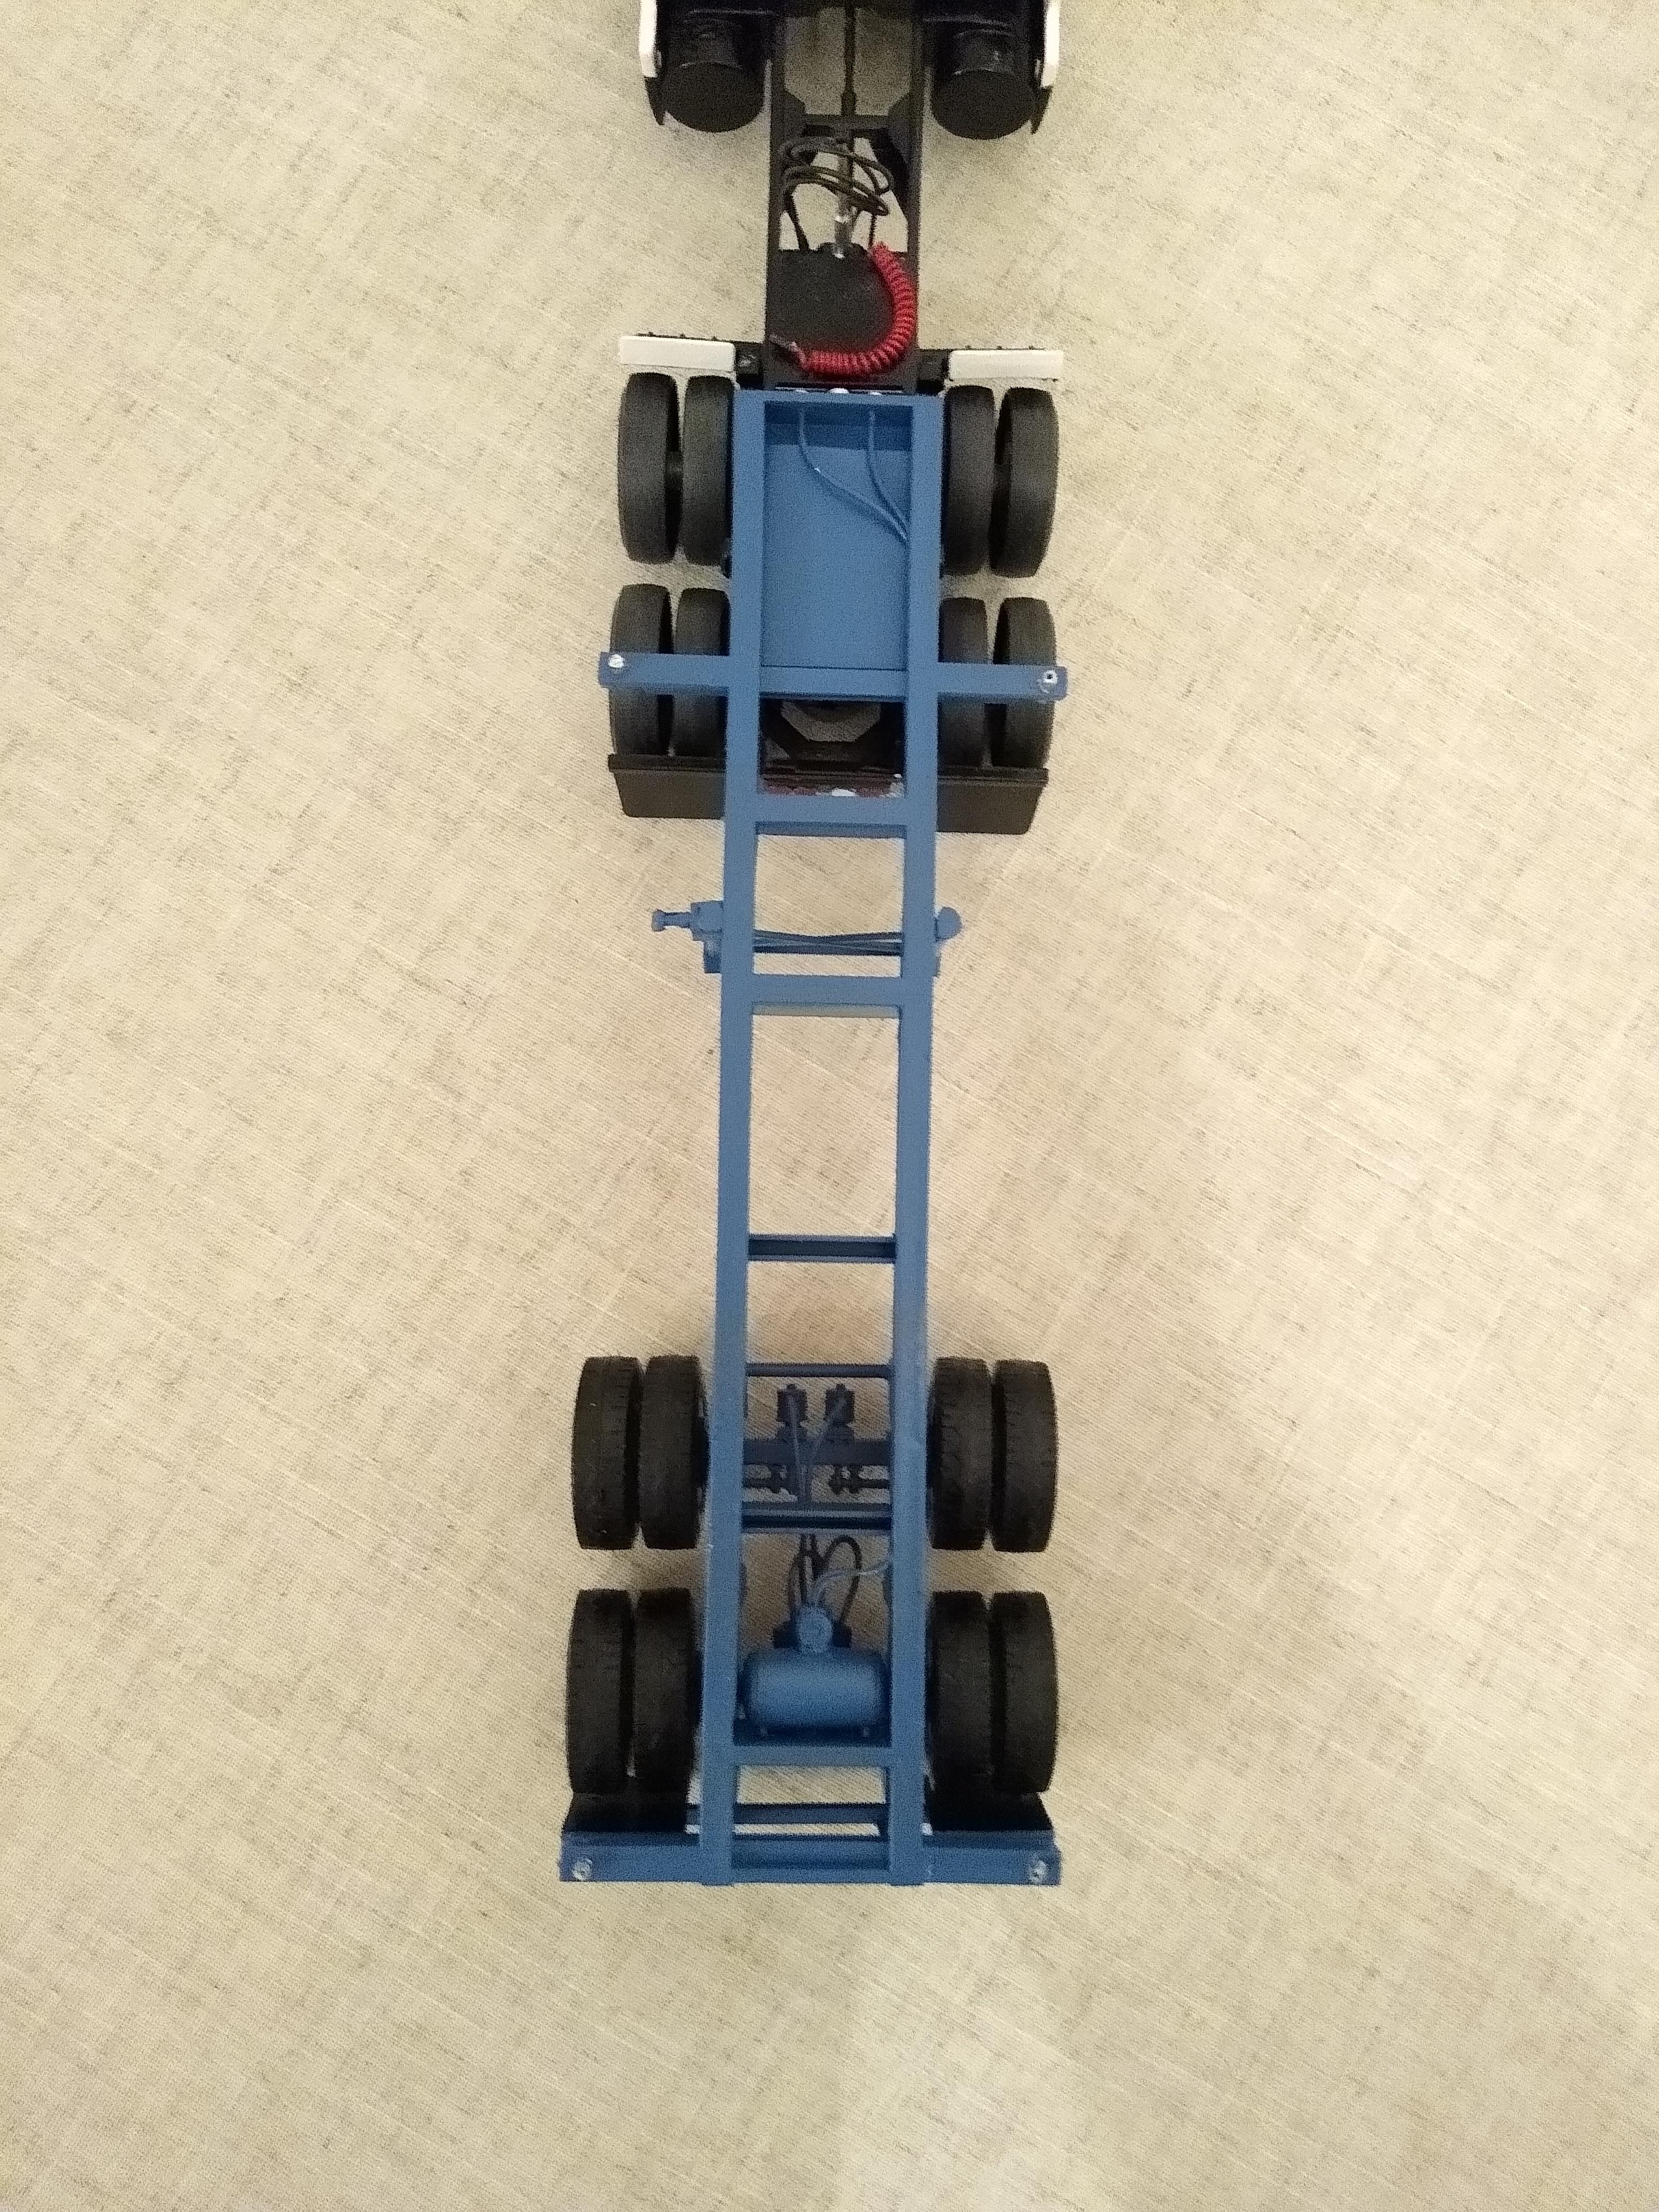
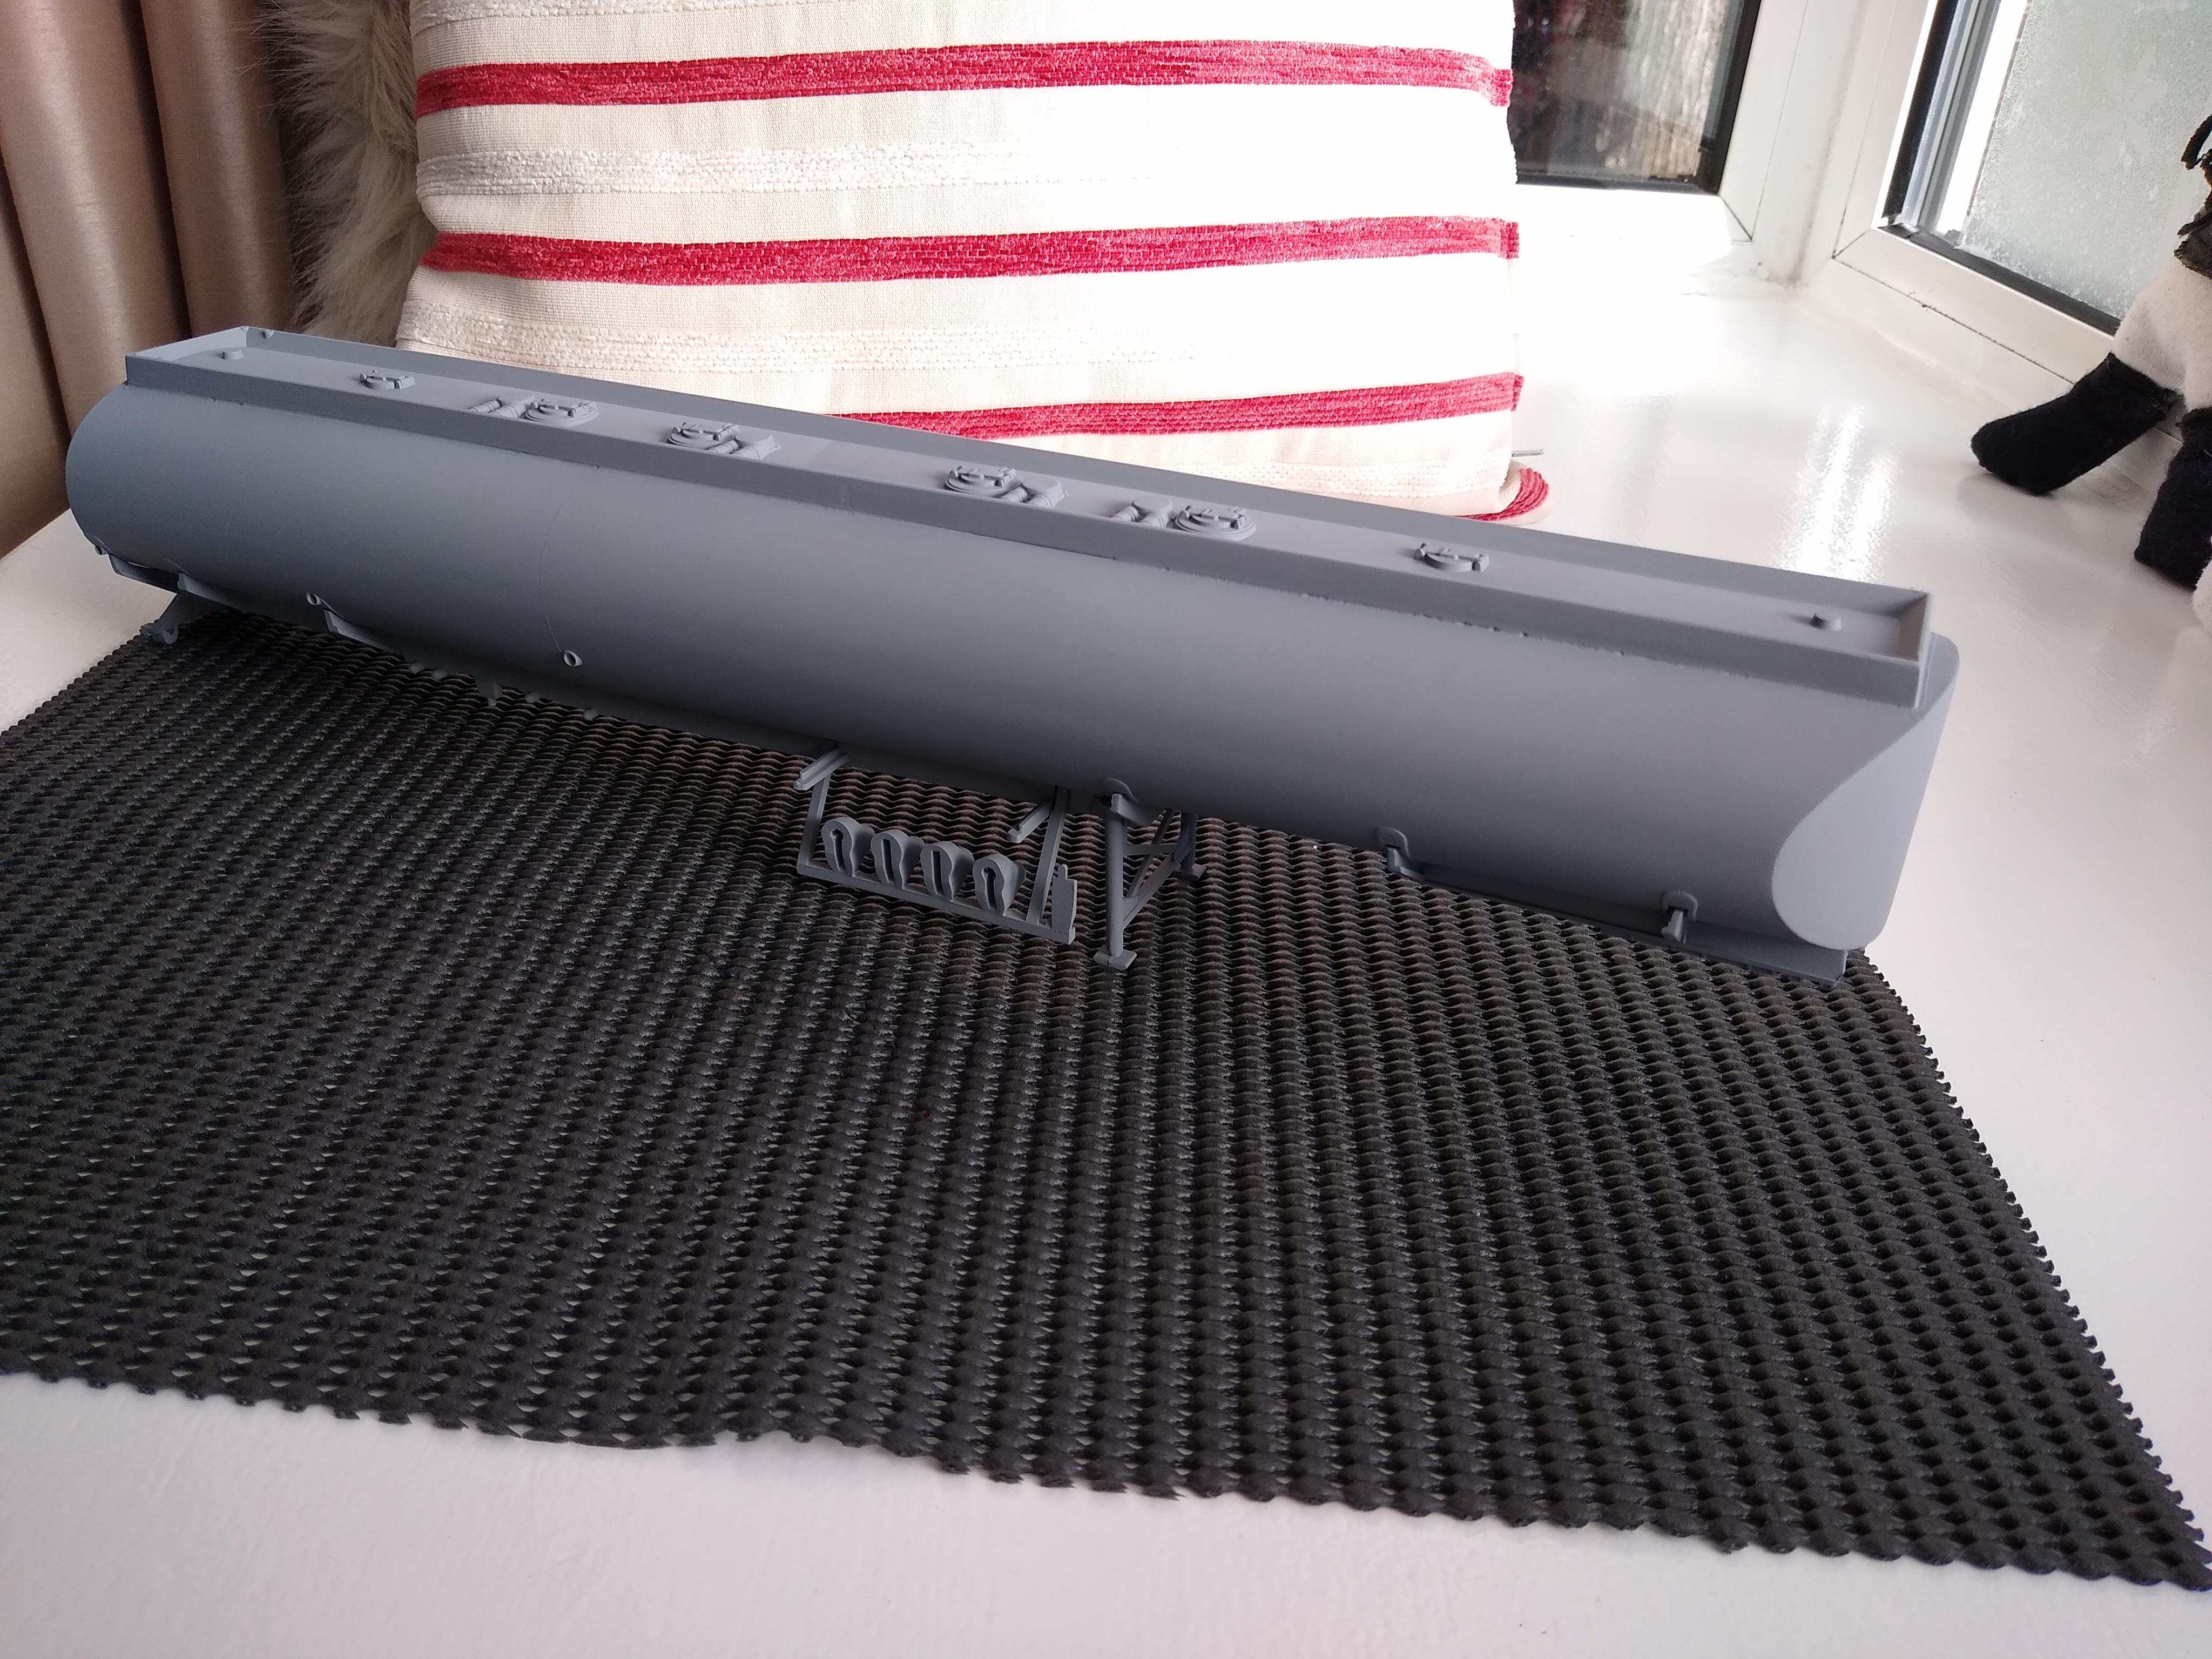
Did some work on the trailer today. Built the wheels up. Decided to just add the white line on the edge of the wheel rims. Painted the mudflaps too. Need to accommodate the rake in the chassis from the fifth wheel. Do I lower the front axle or raise the back axle? I'll have a think. I'm aware of the irony that the trailer has bigger hubs than the drive axles of the tractor!!! Such is SnapTite life.
-
ESCI 20ft Container trailer
Rockford replied to Rockford's topic in WIP: Model Trucks: Big Rigs and Heavy Equipment
Great minds think alike! It looks just right really. Worked out well. -
ESCI 20ft Container trailer
Rockford replied to Rockford's topic in WIP: Model Trucks: Big Rigs and Heavy Equipment
I'd be interested to see a picture of that -
ESCI 20ft Container trailer
Rockford replied to Rockford's topic in WIP: Model Trucks: Big Rigs and Heavy Equipment
Thanks for the nice comments everyone. I managed to get paint on it yesterday, I shot the primer and I couldn't believe that when I went to pick it up it was soaking wet with condensation! As the solvents evaporated the surface temperature drops and the moisture in the air condensed onto it. I thought it was warm and fairly dry, but obviously not. I dried it off and later got the colour on. It's not the best finish but as I said earlier in the thread these units never got the best of finishes, as long as they were all one colour they were doing well. I'm leaning toward white rims for the wheels, leaving the hubs and spokes blue, but I wonder what just white on the very edge of the rim would look like. I think it's obvious that I should try the minimum first. Painted the box in red oxide primer. Looking at making some ACL decals for it.
-
ESCI 20ft Container trailer
Rockford replied to Rockford's topic in WIP: Model Trucks: Big Rigs and Heavy Equipment
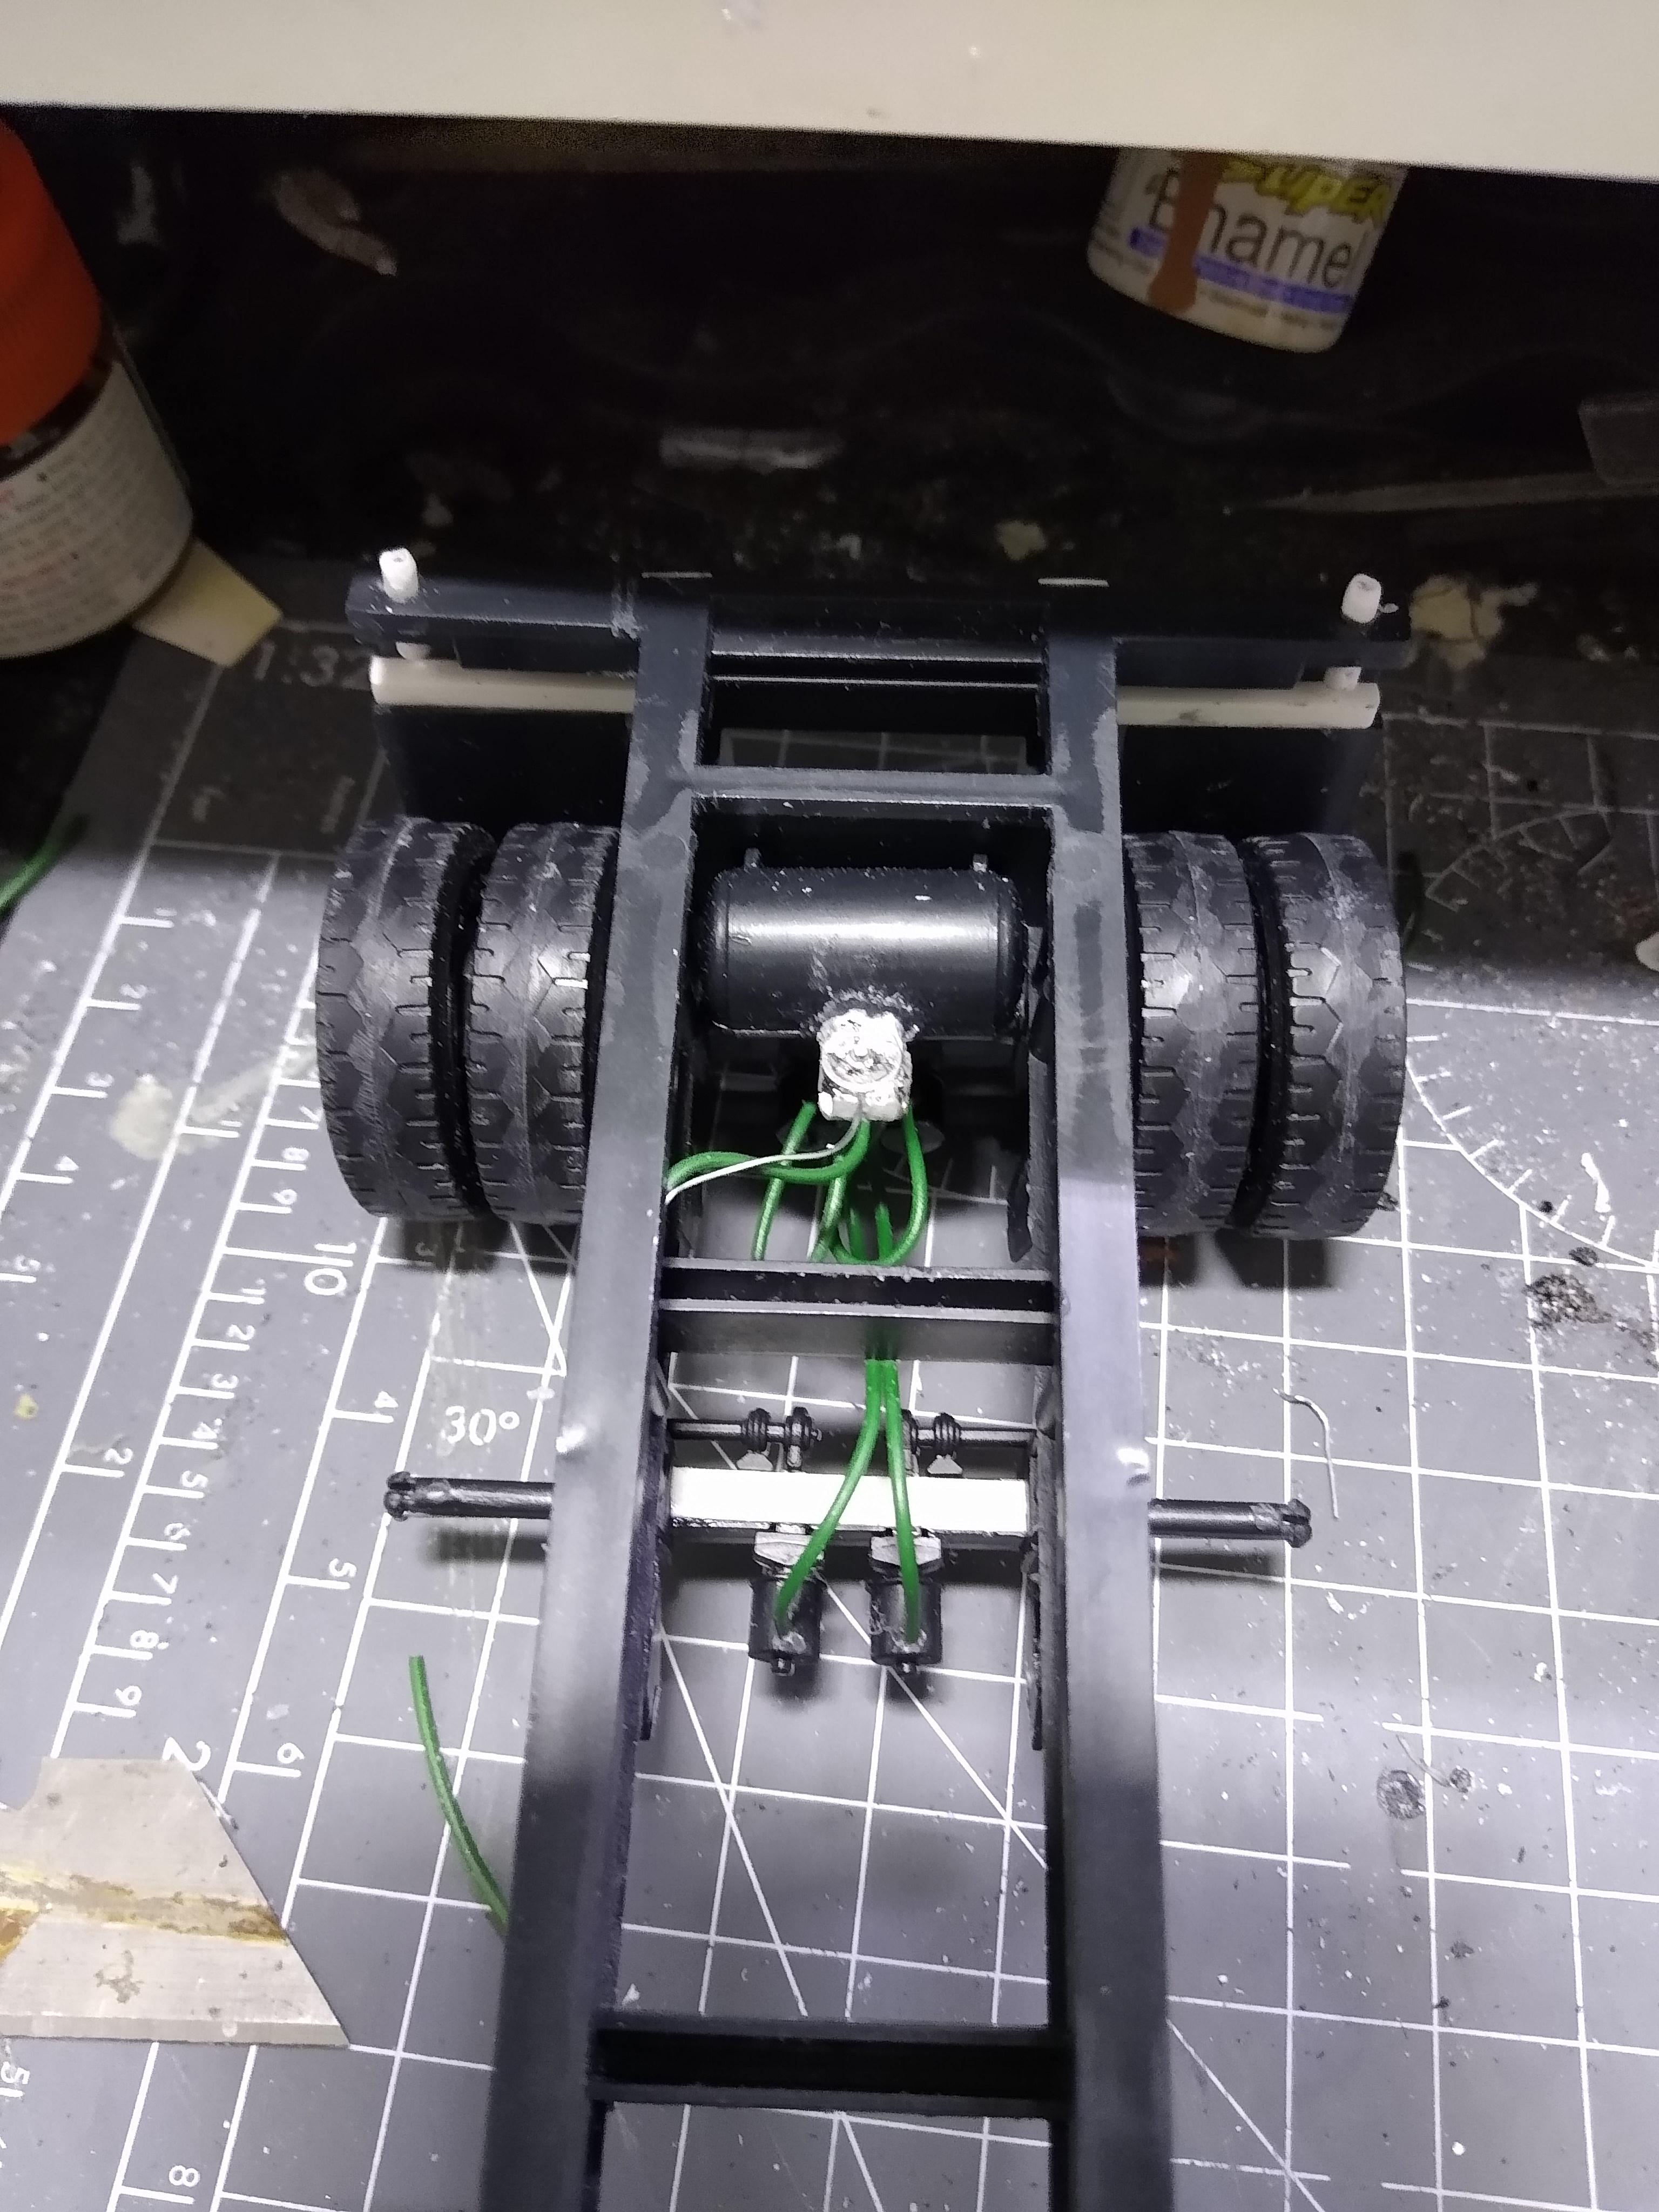
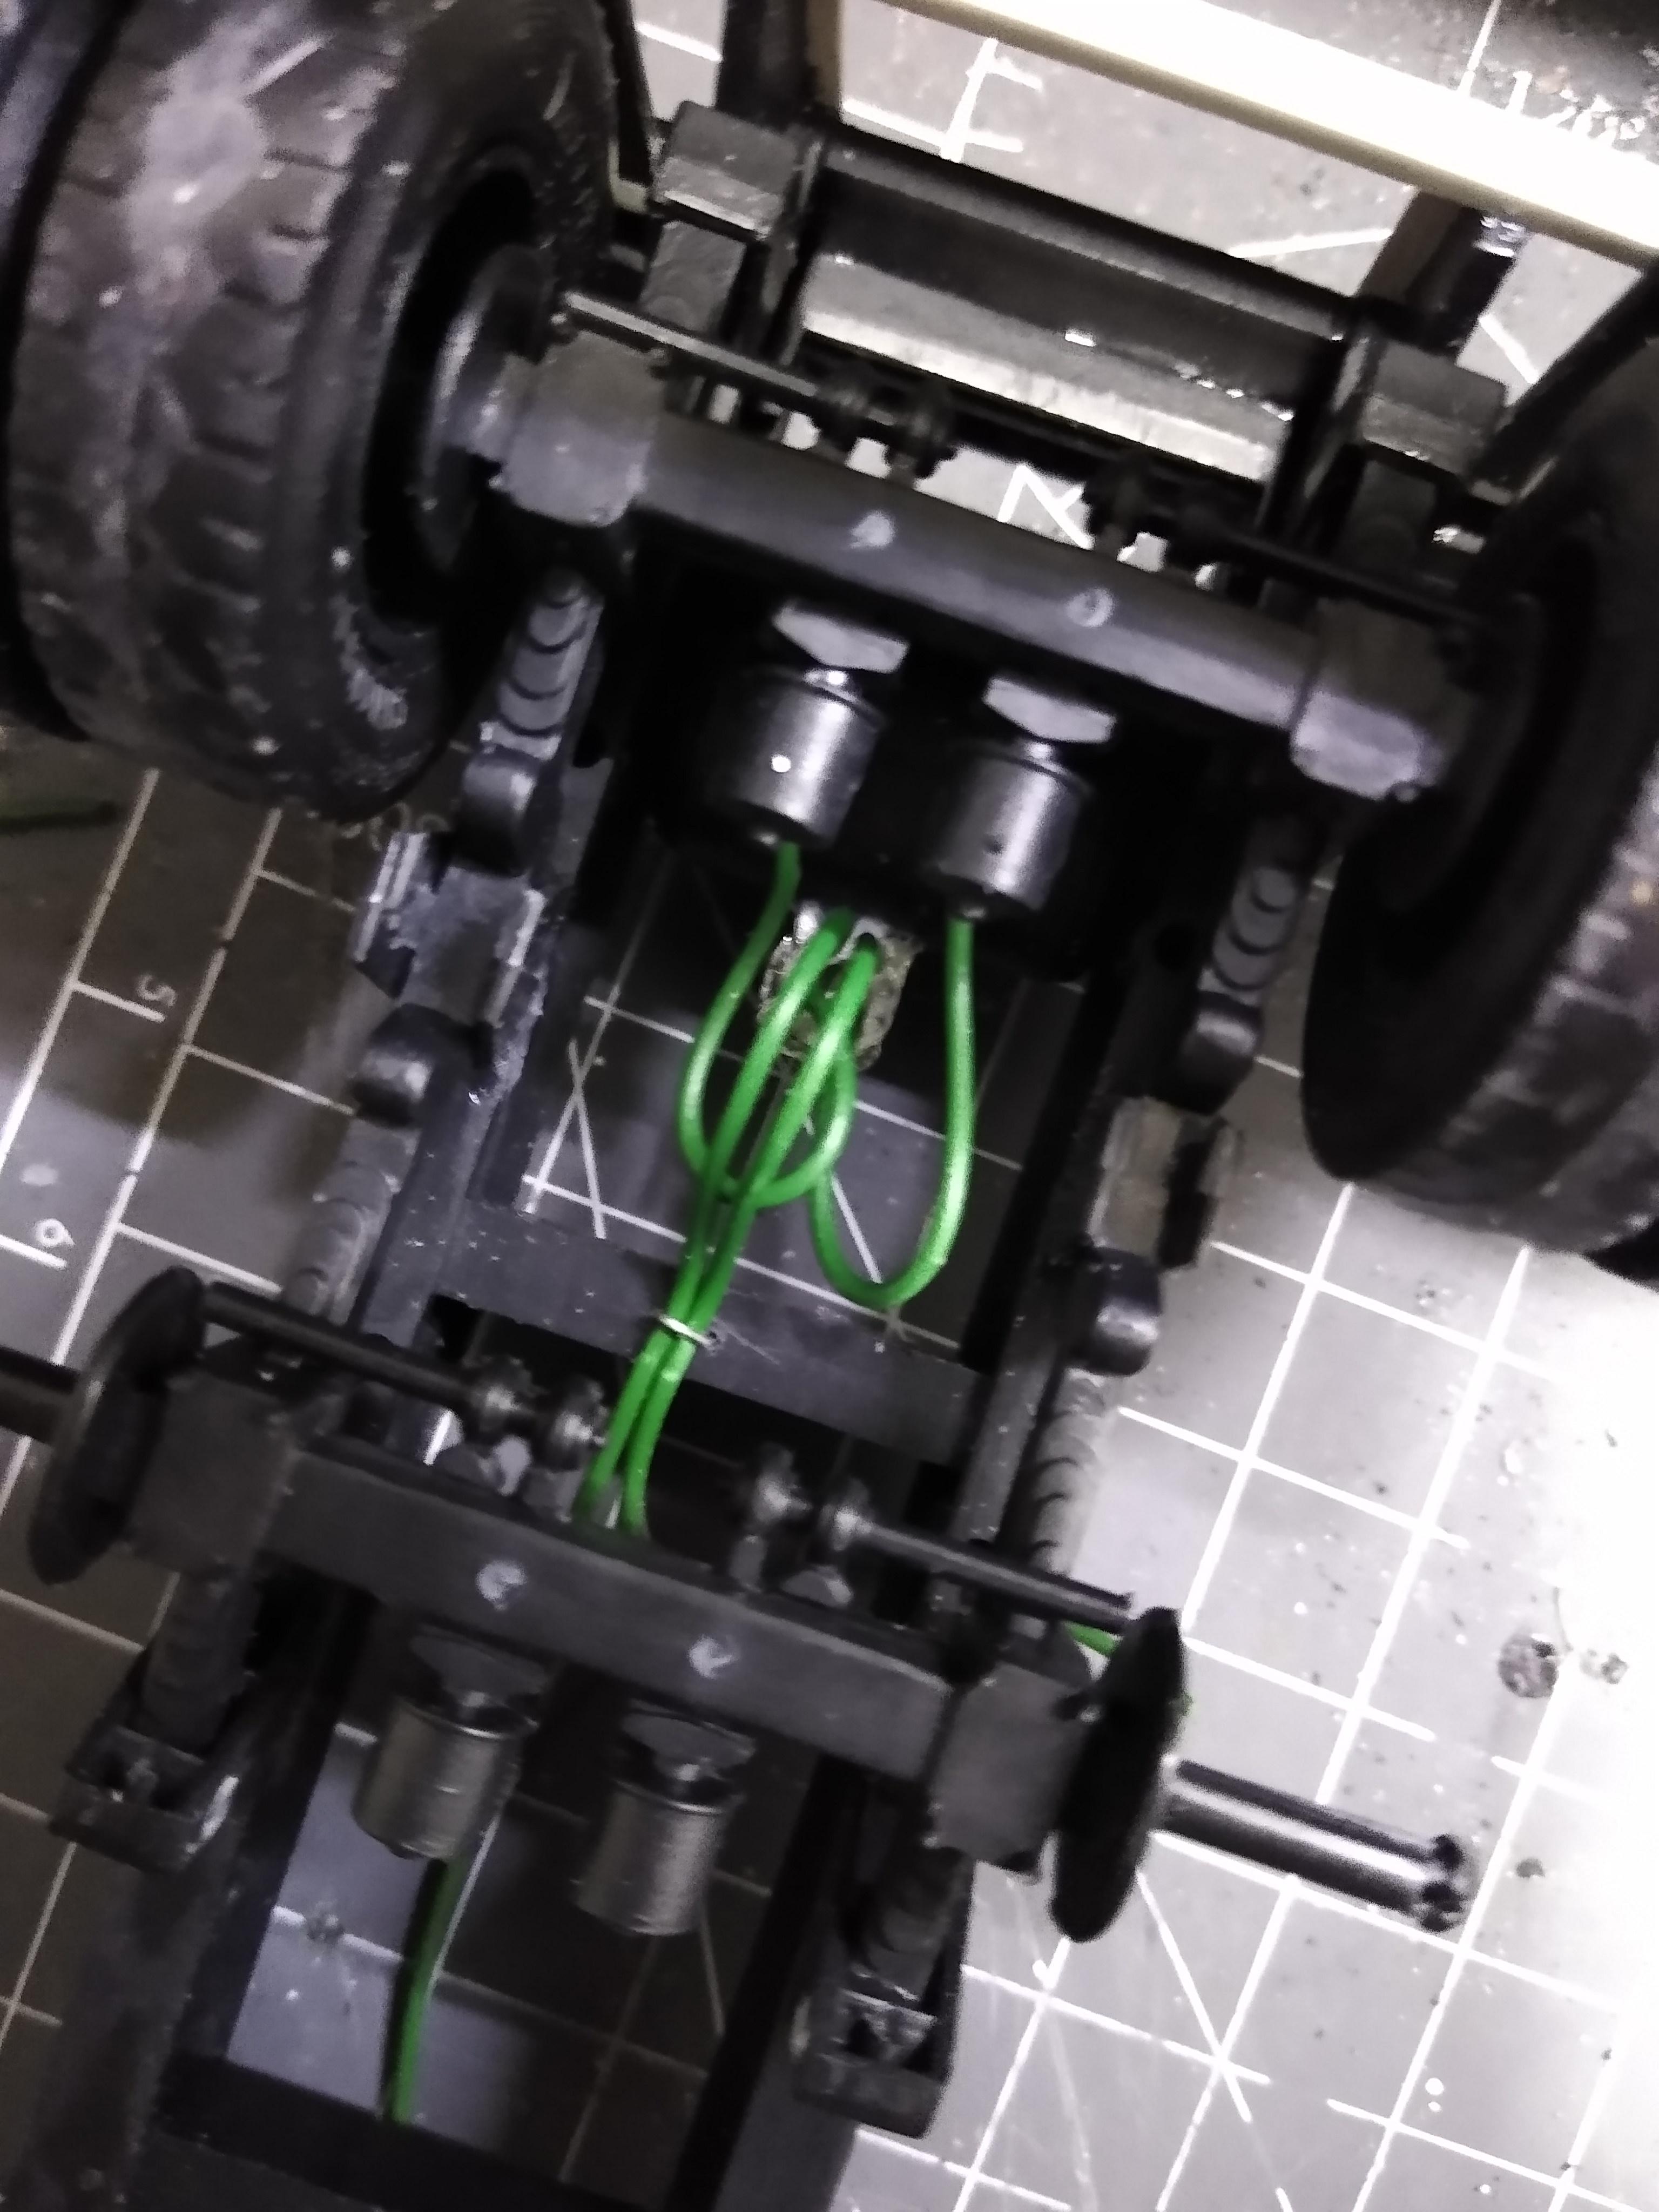
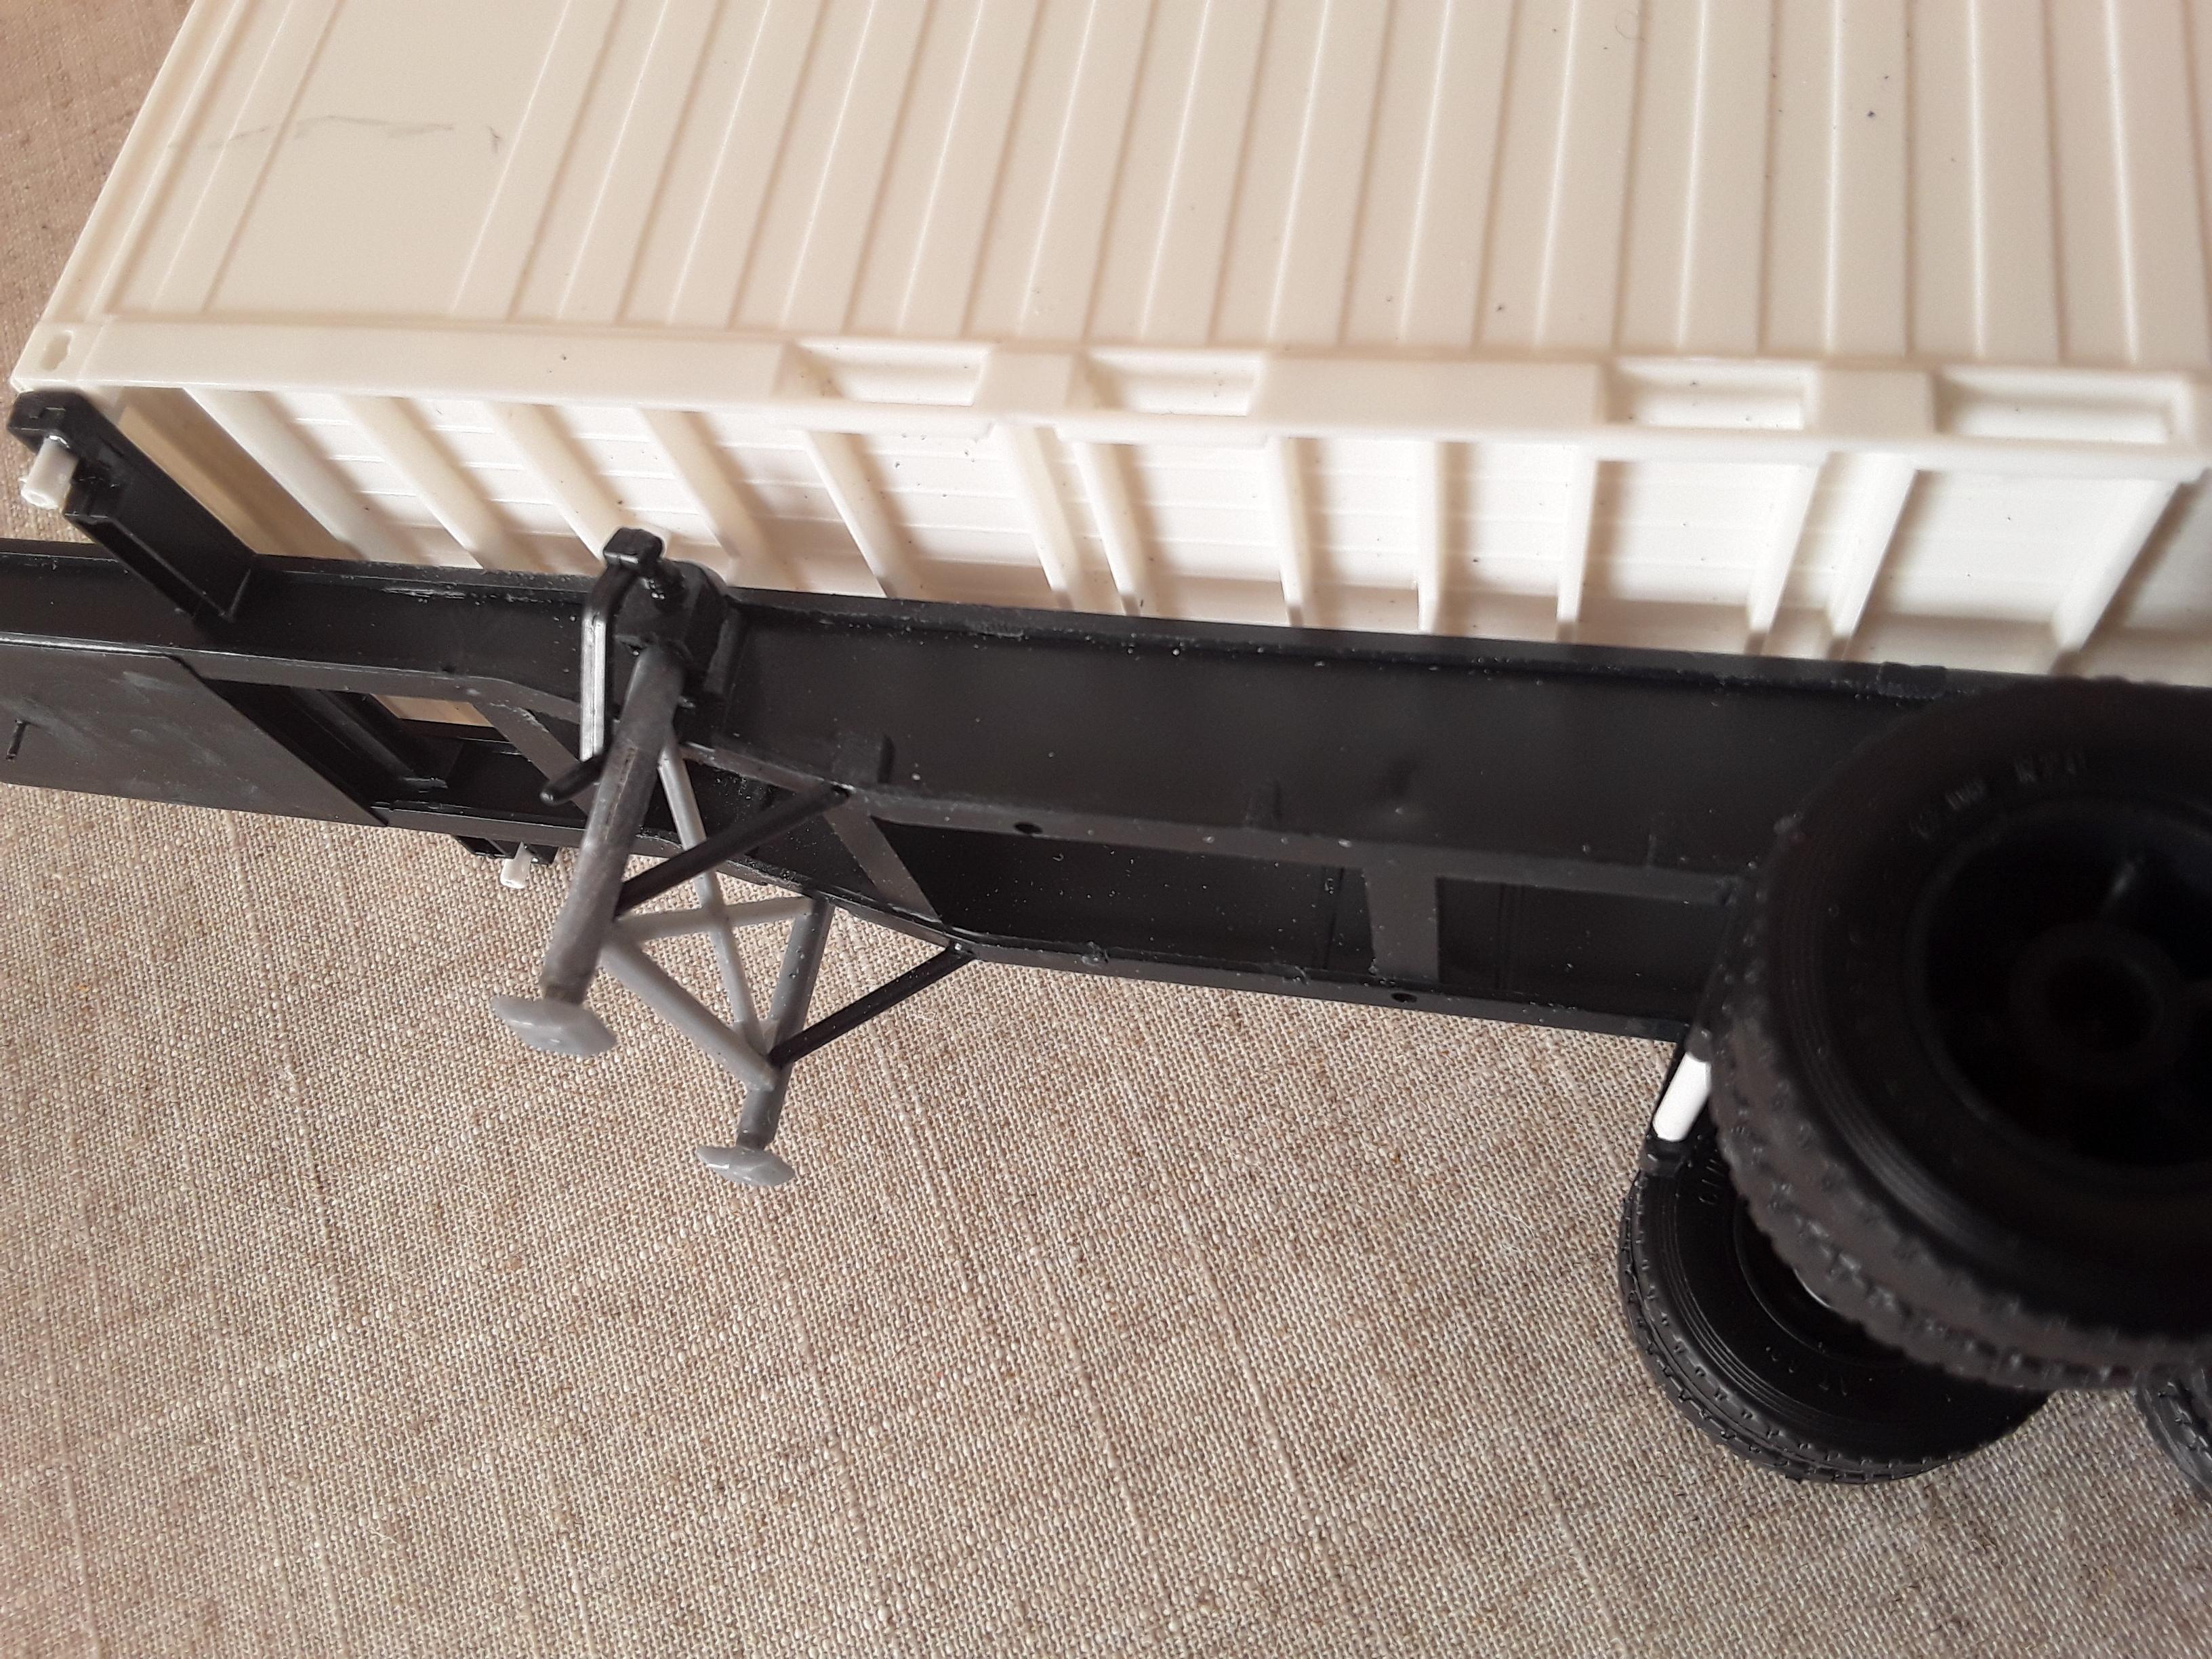
Did a bit more on the trailer before it goes for paint. Shaped a trailer relay valve from the old carburettor I found. Drilled holes to fit pigtails in the brake chambers and the valve. Also did the same for the signal and emergency lines to the valve. I know it will all end up painted chassis colour but that's what happened with our trailers, we didn't mask the pipework it all got blasted with colour! I also realized the top of the axles are hollow so I fitted some plastic strip over the hole, that's the white piece in the photos.
-
Night to day
Rockford replied to Rockford's topic in WIP: Model Trucks: Big Rigs and Heavy Equipment
Thanks Geoff, looking at the work you do a 1/25 truck could keep you busy fir a while and would turn out quite impressive! -
Night to day
Rockford replied to Rockford's topic in WIP: Model Trucks: Big Rigs and Heavy Equipment
. -
Night to day
Rockford replied to Rockford's topic in WIP: Model Trucks: Big Rigs and Heavy Equipment
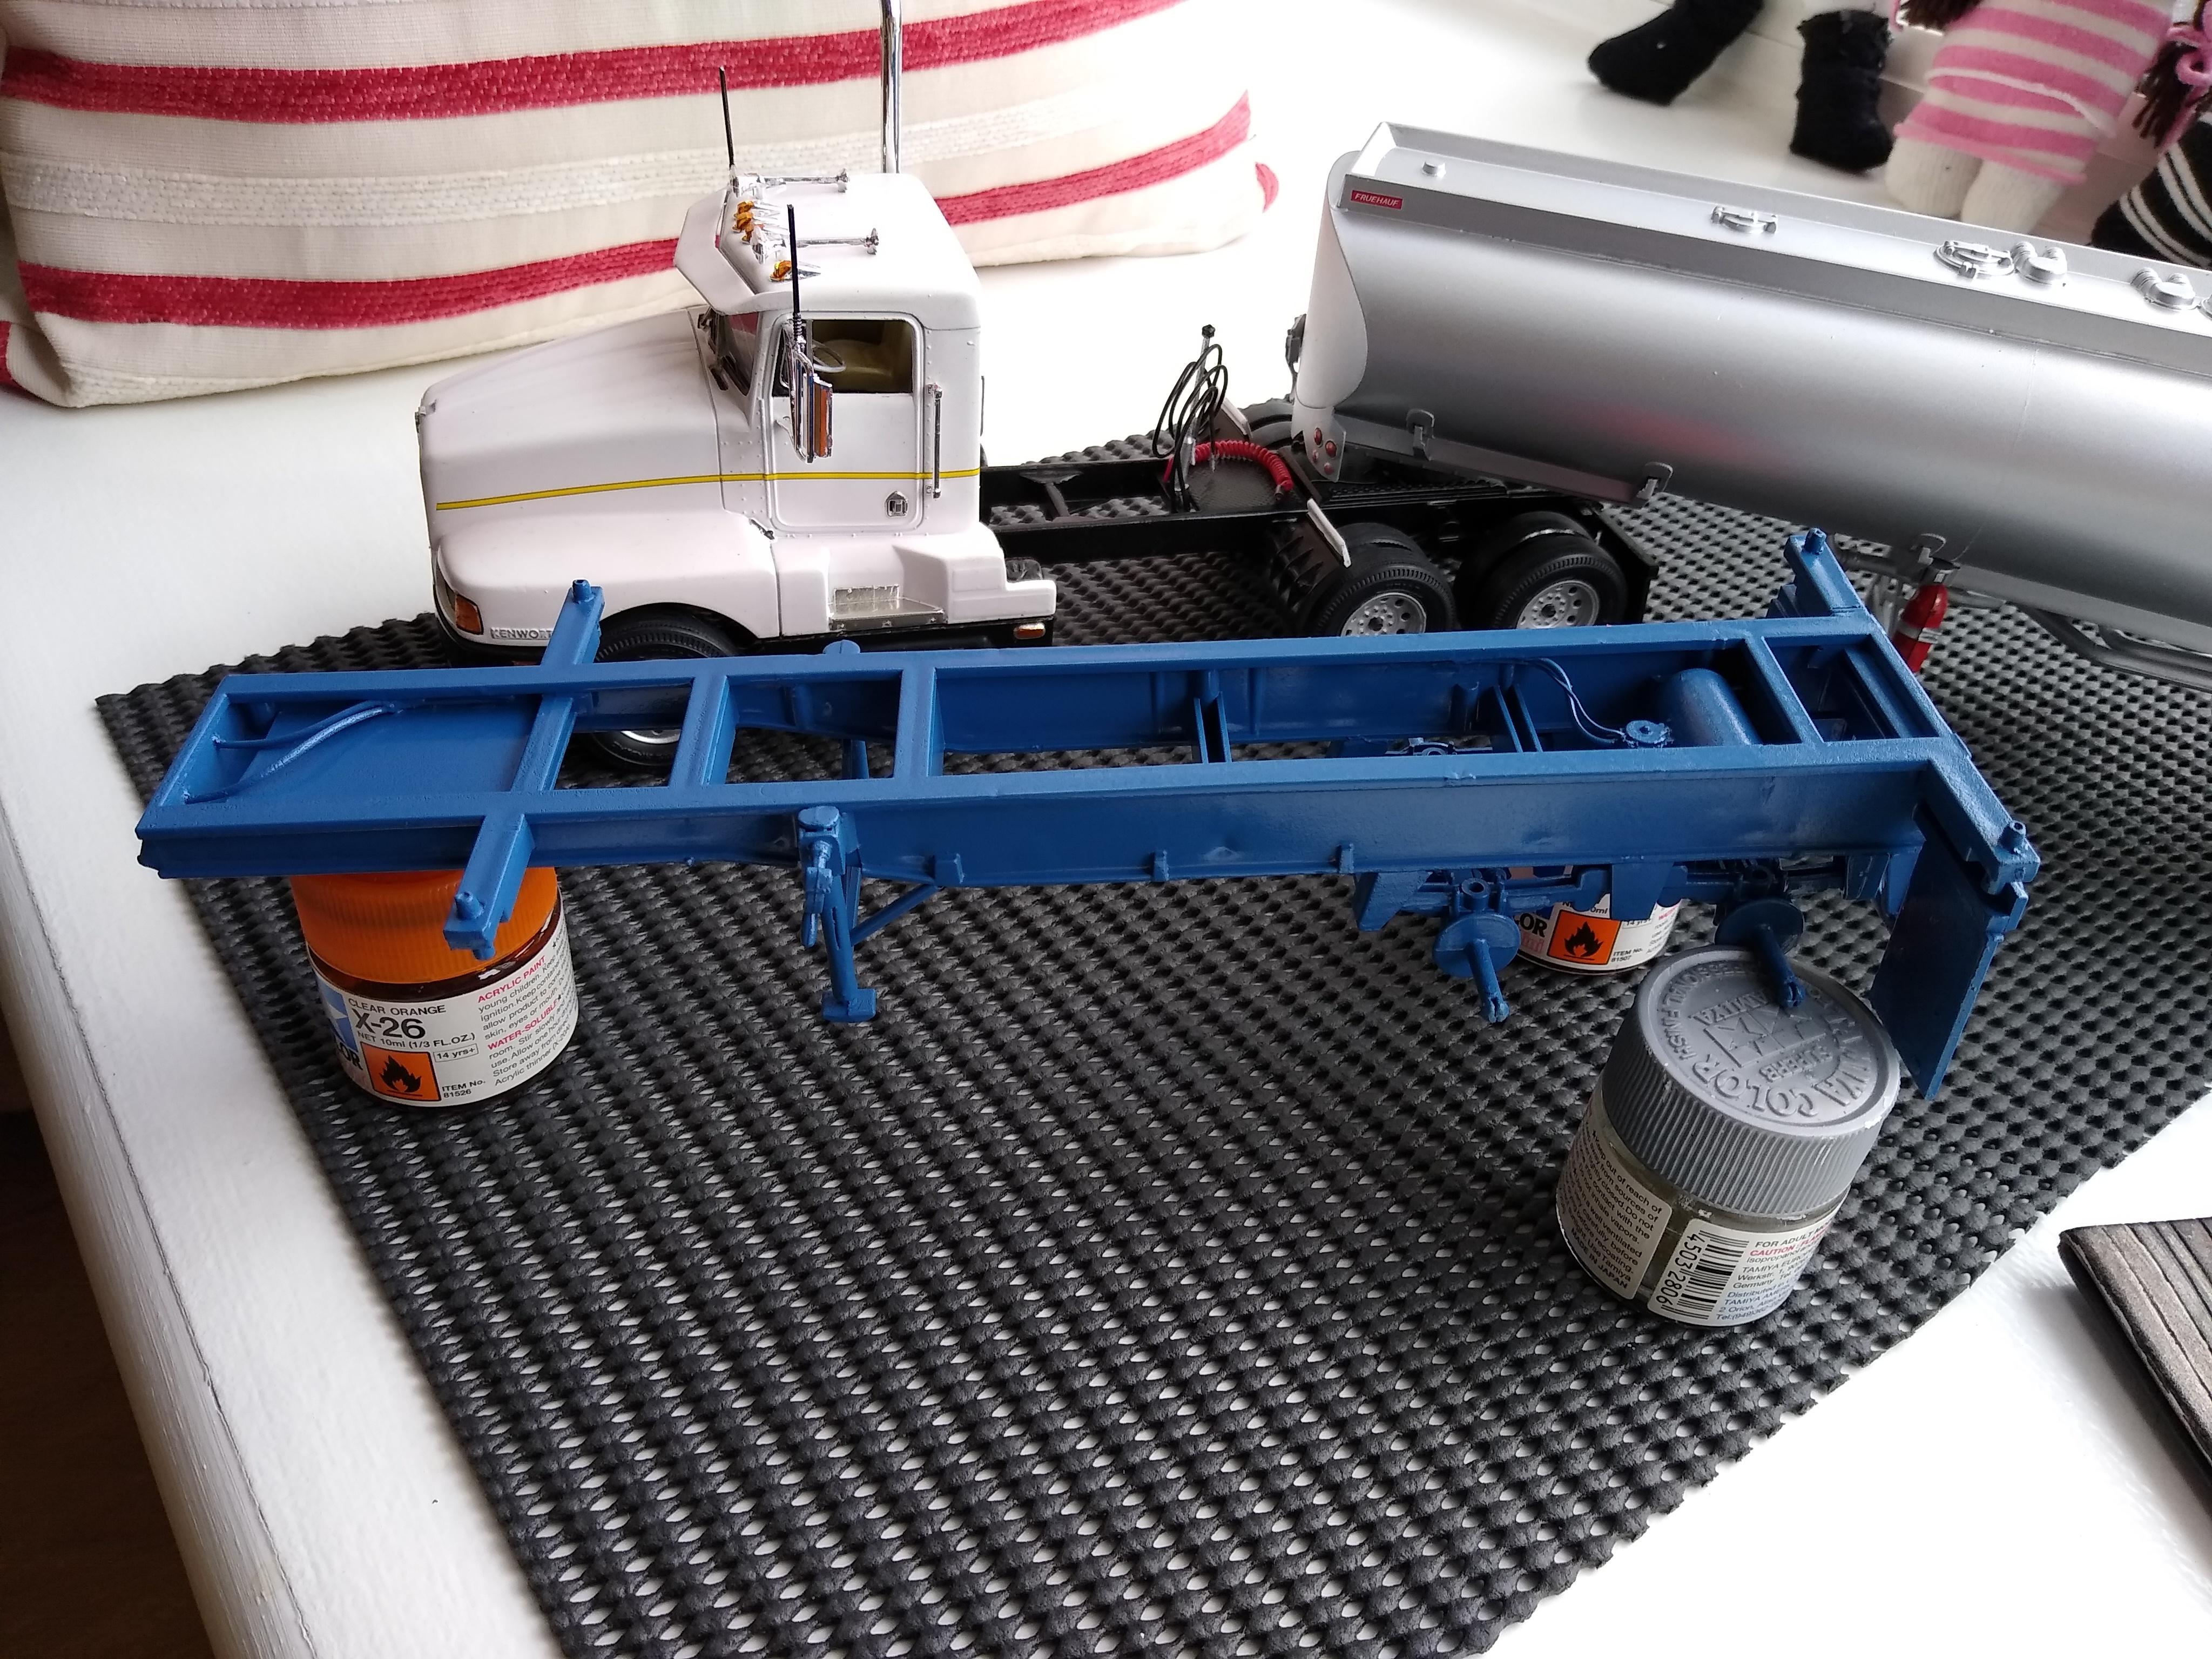
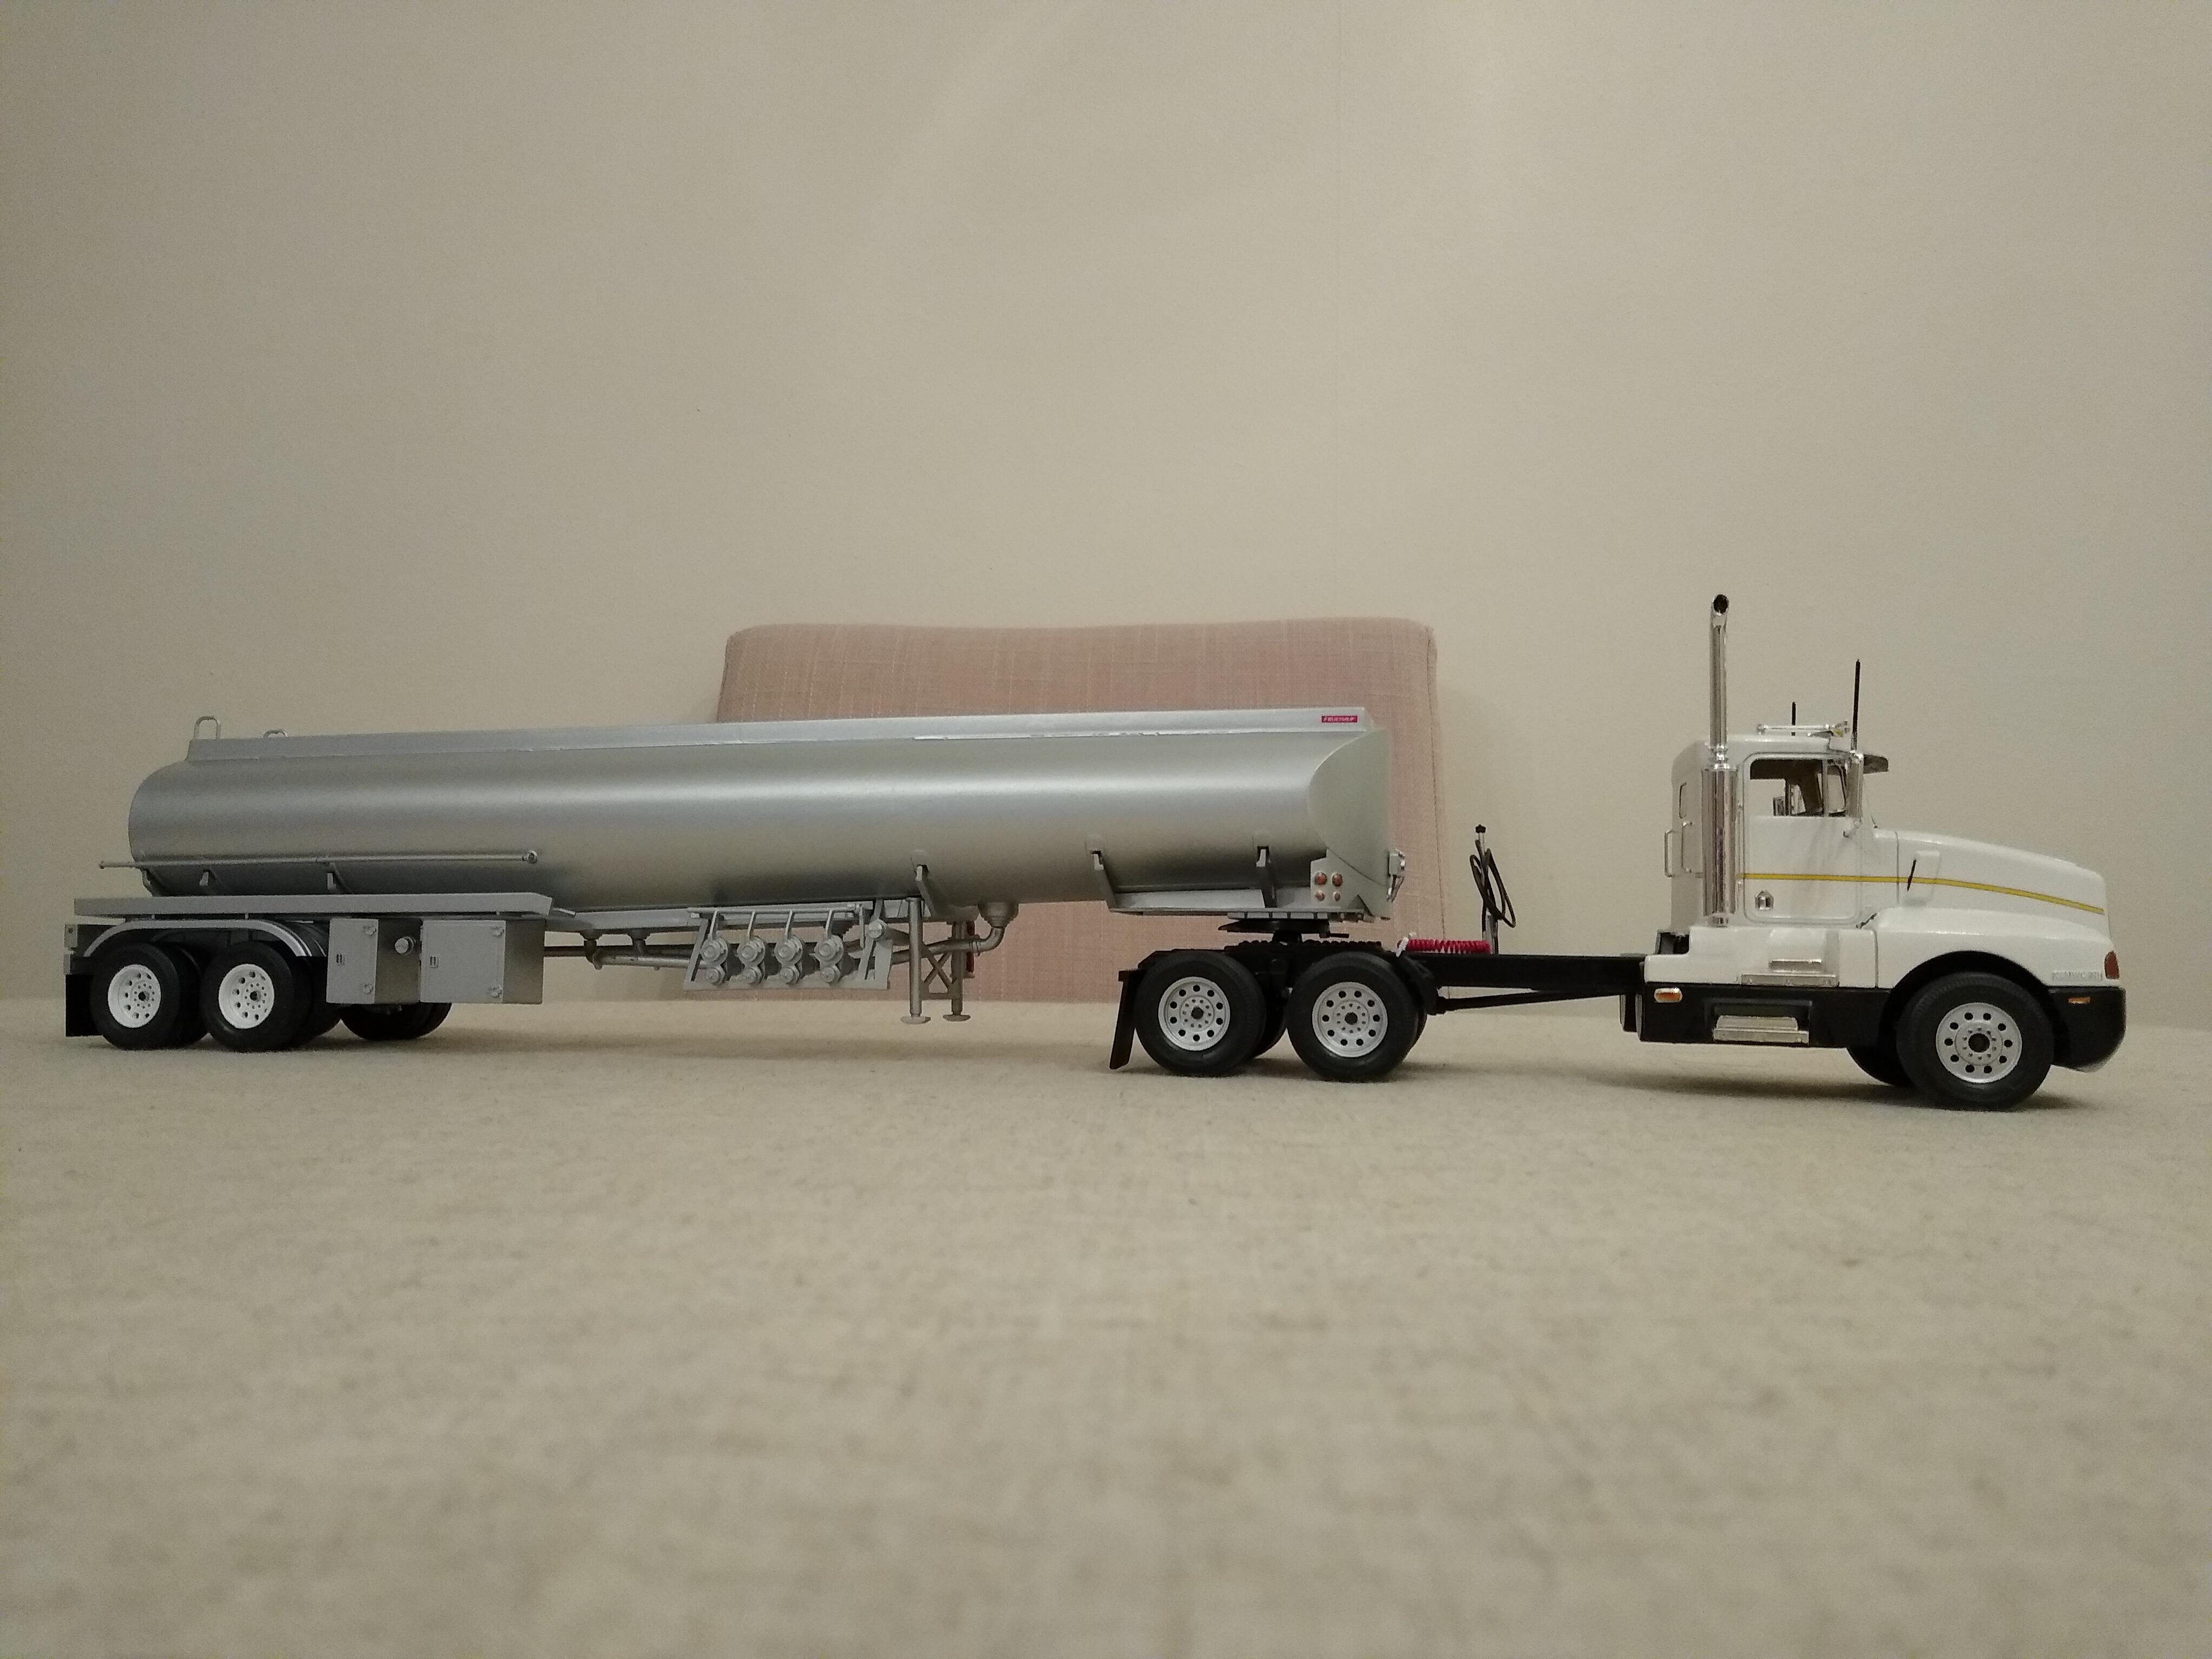
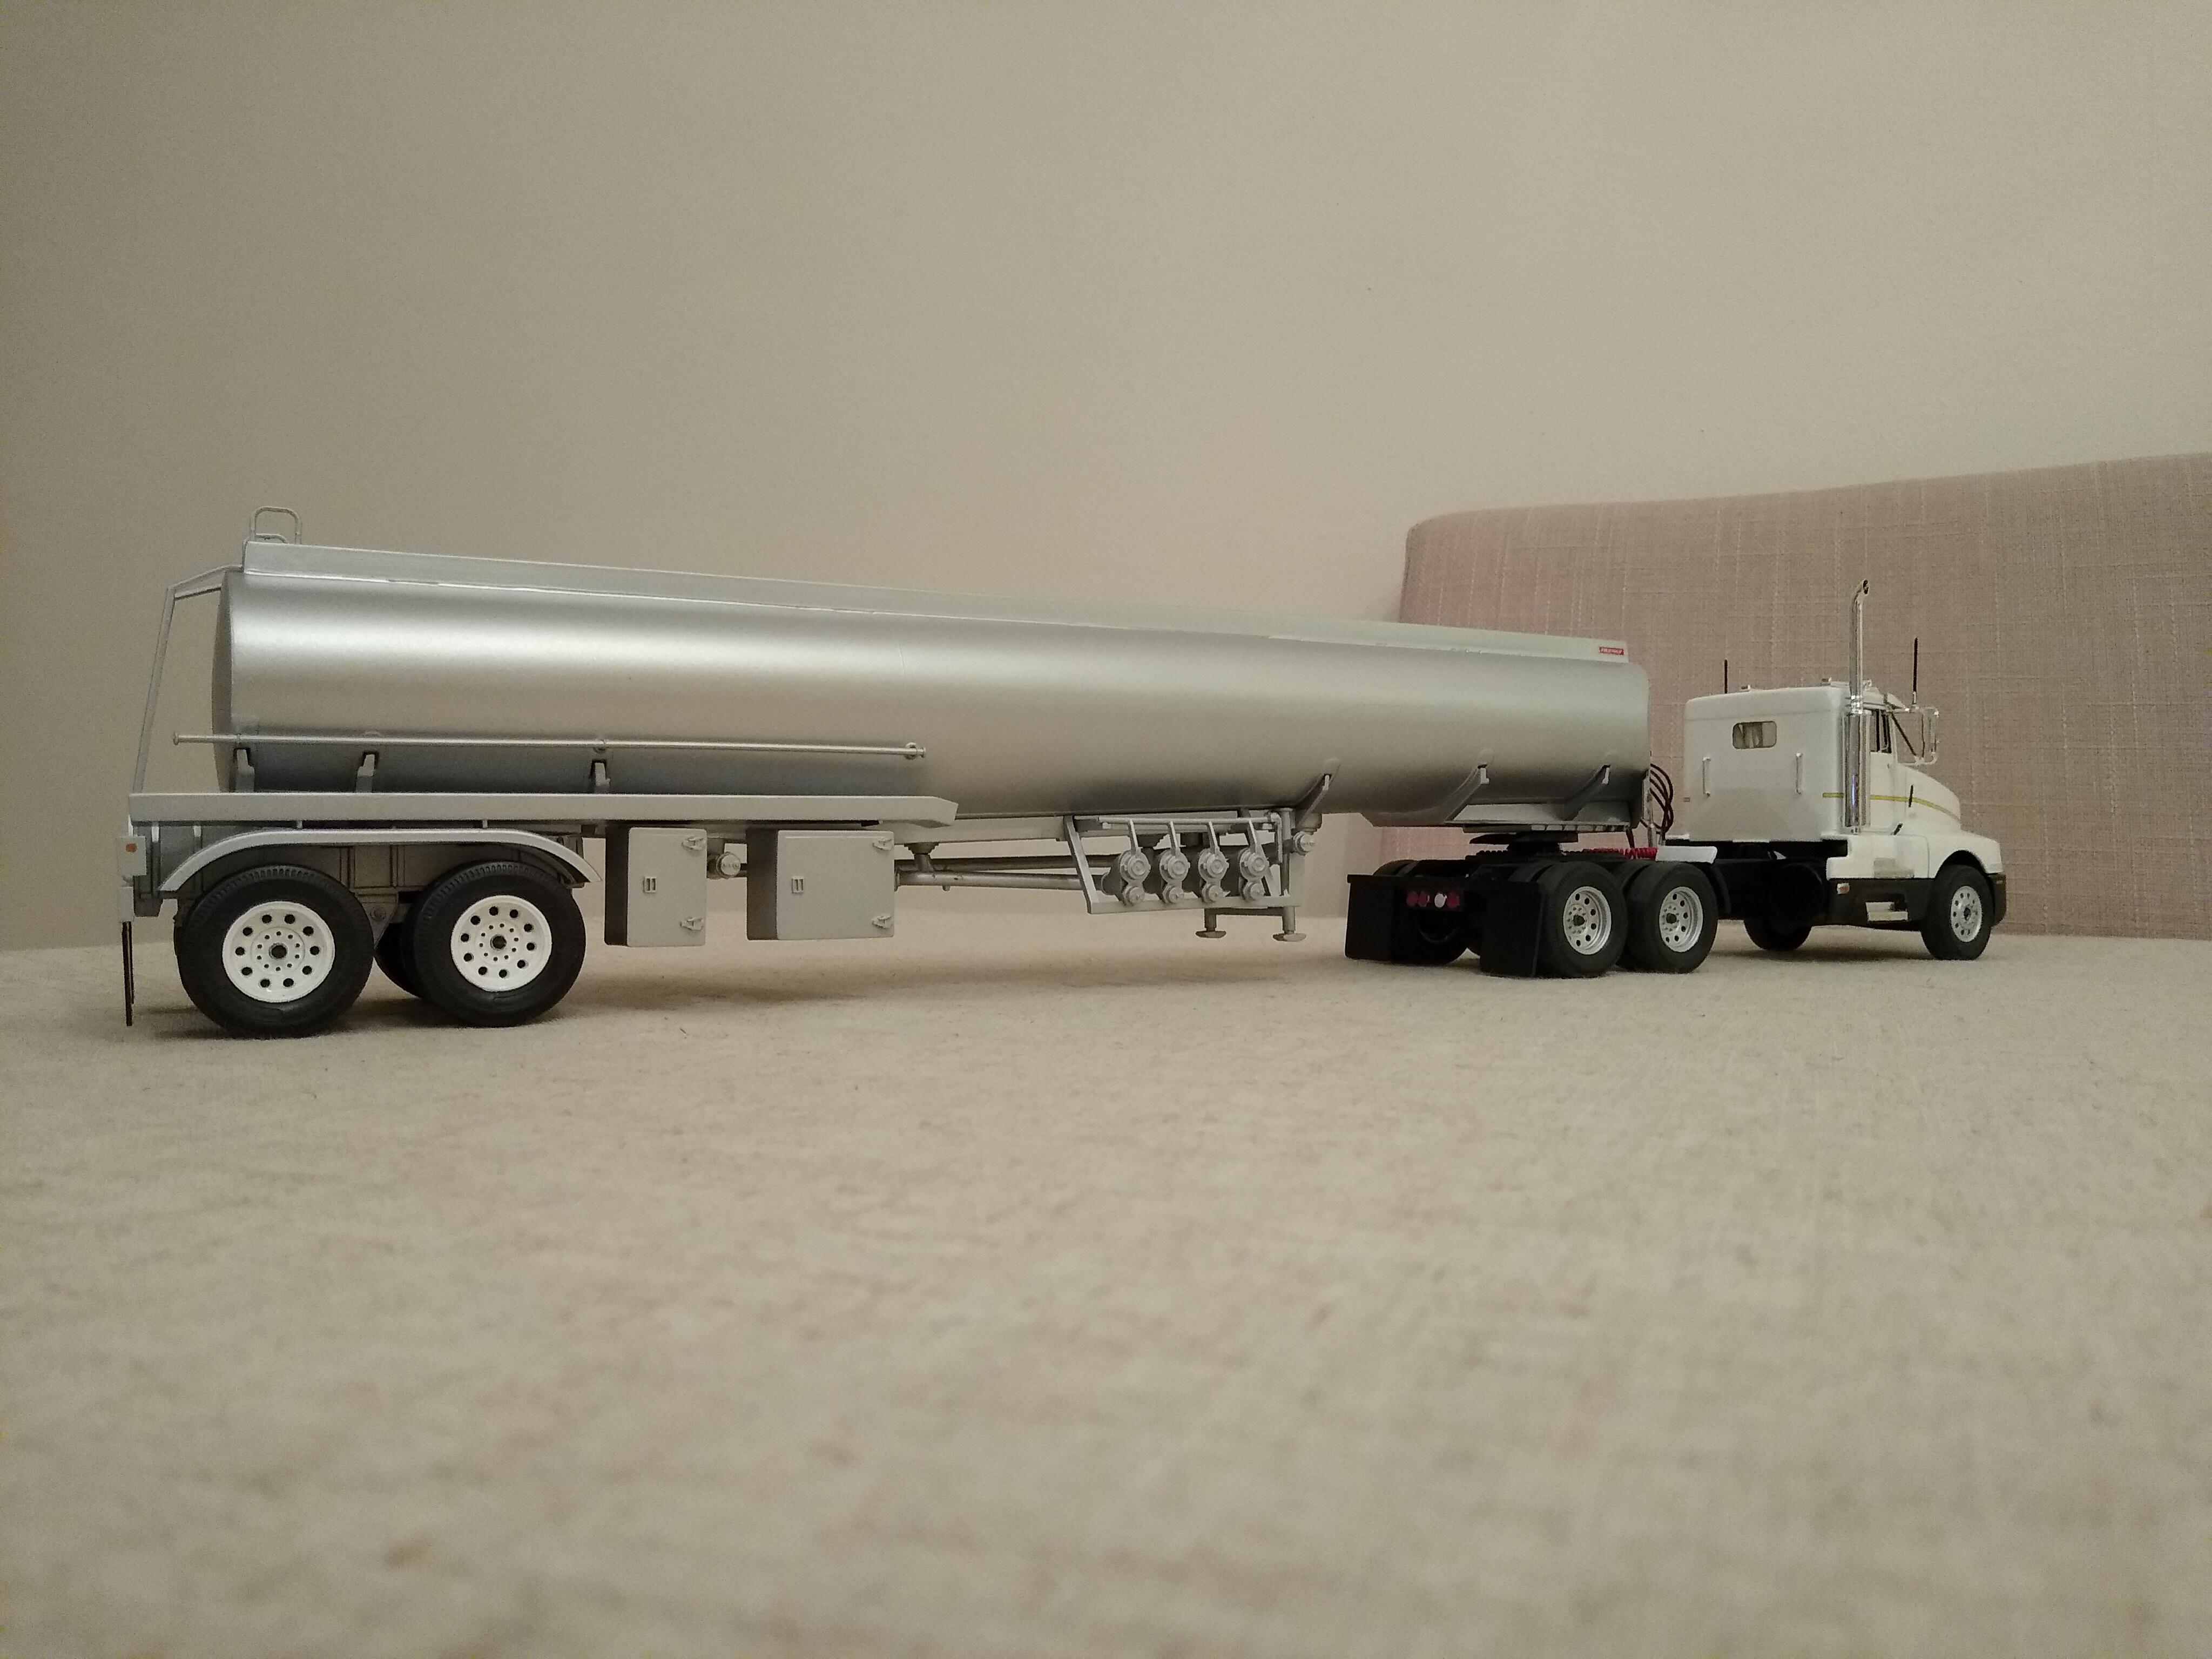
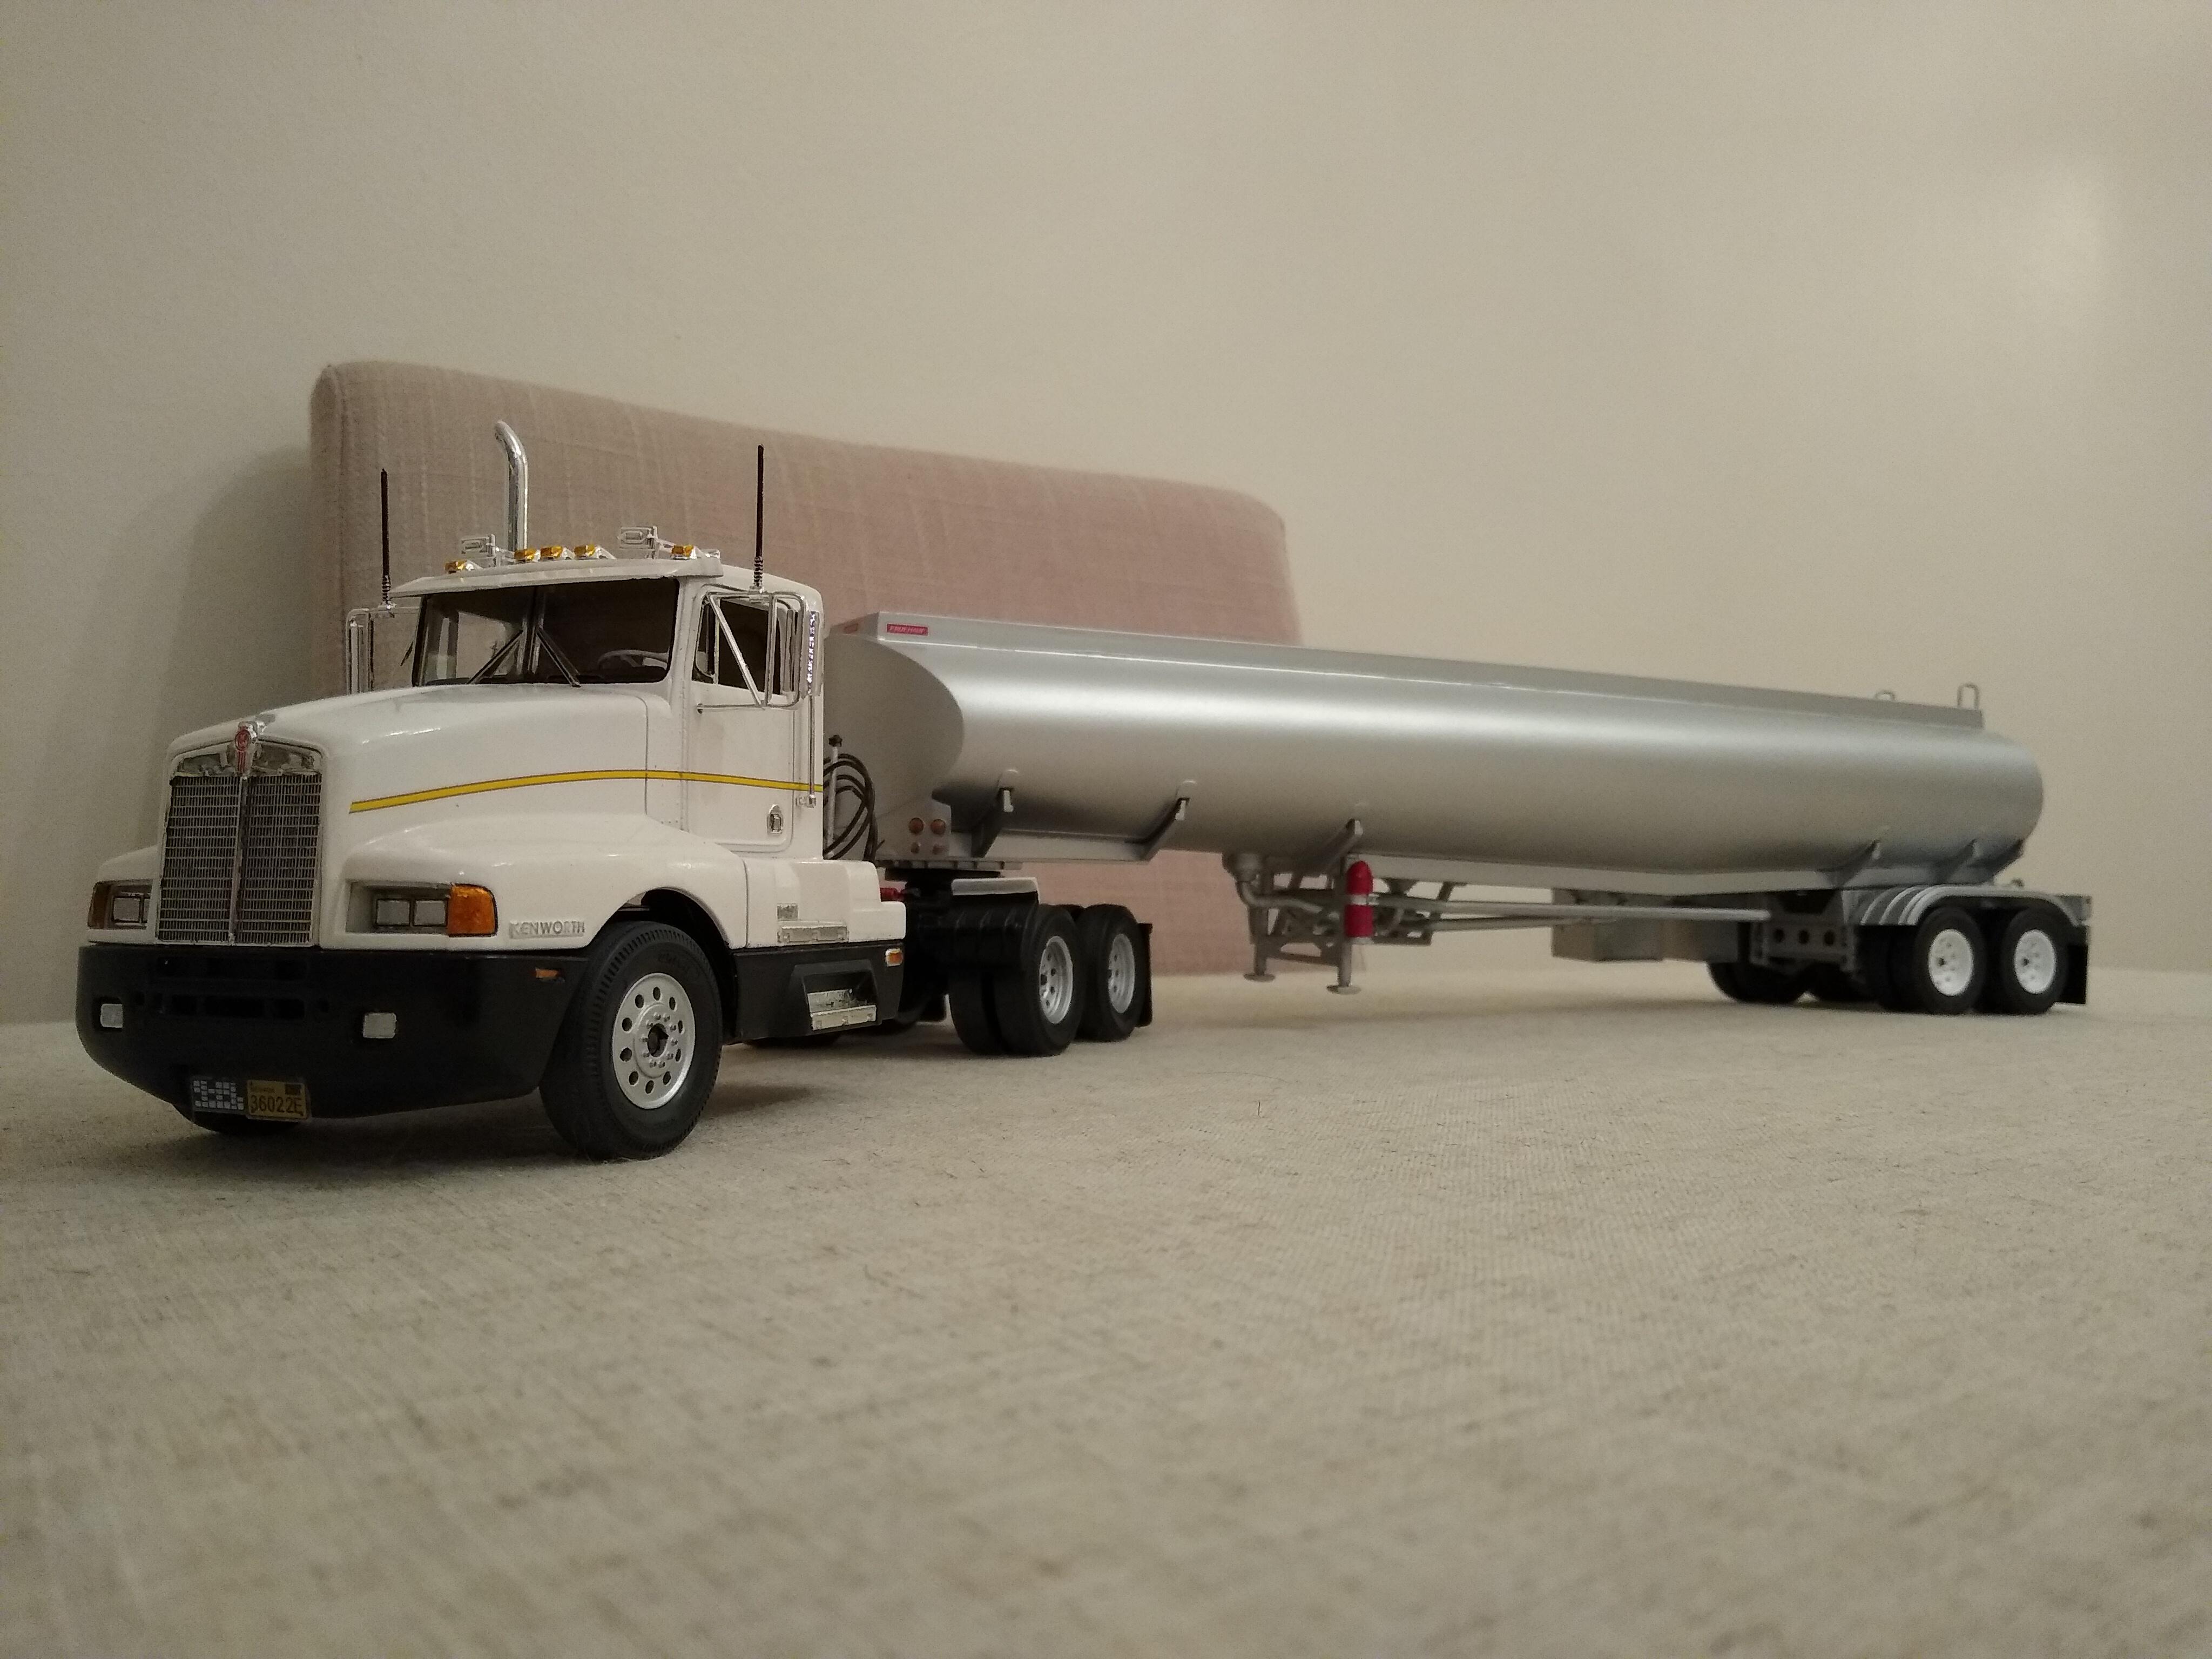
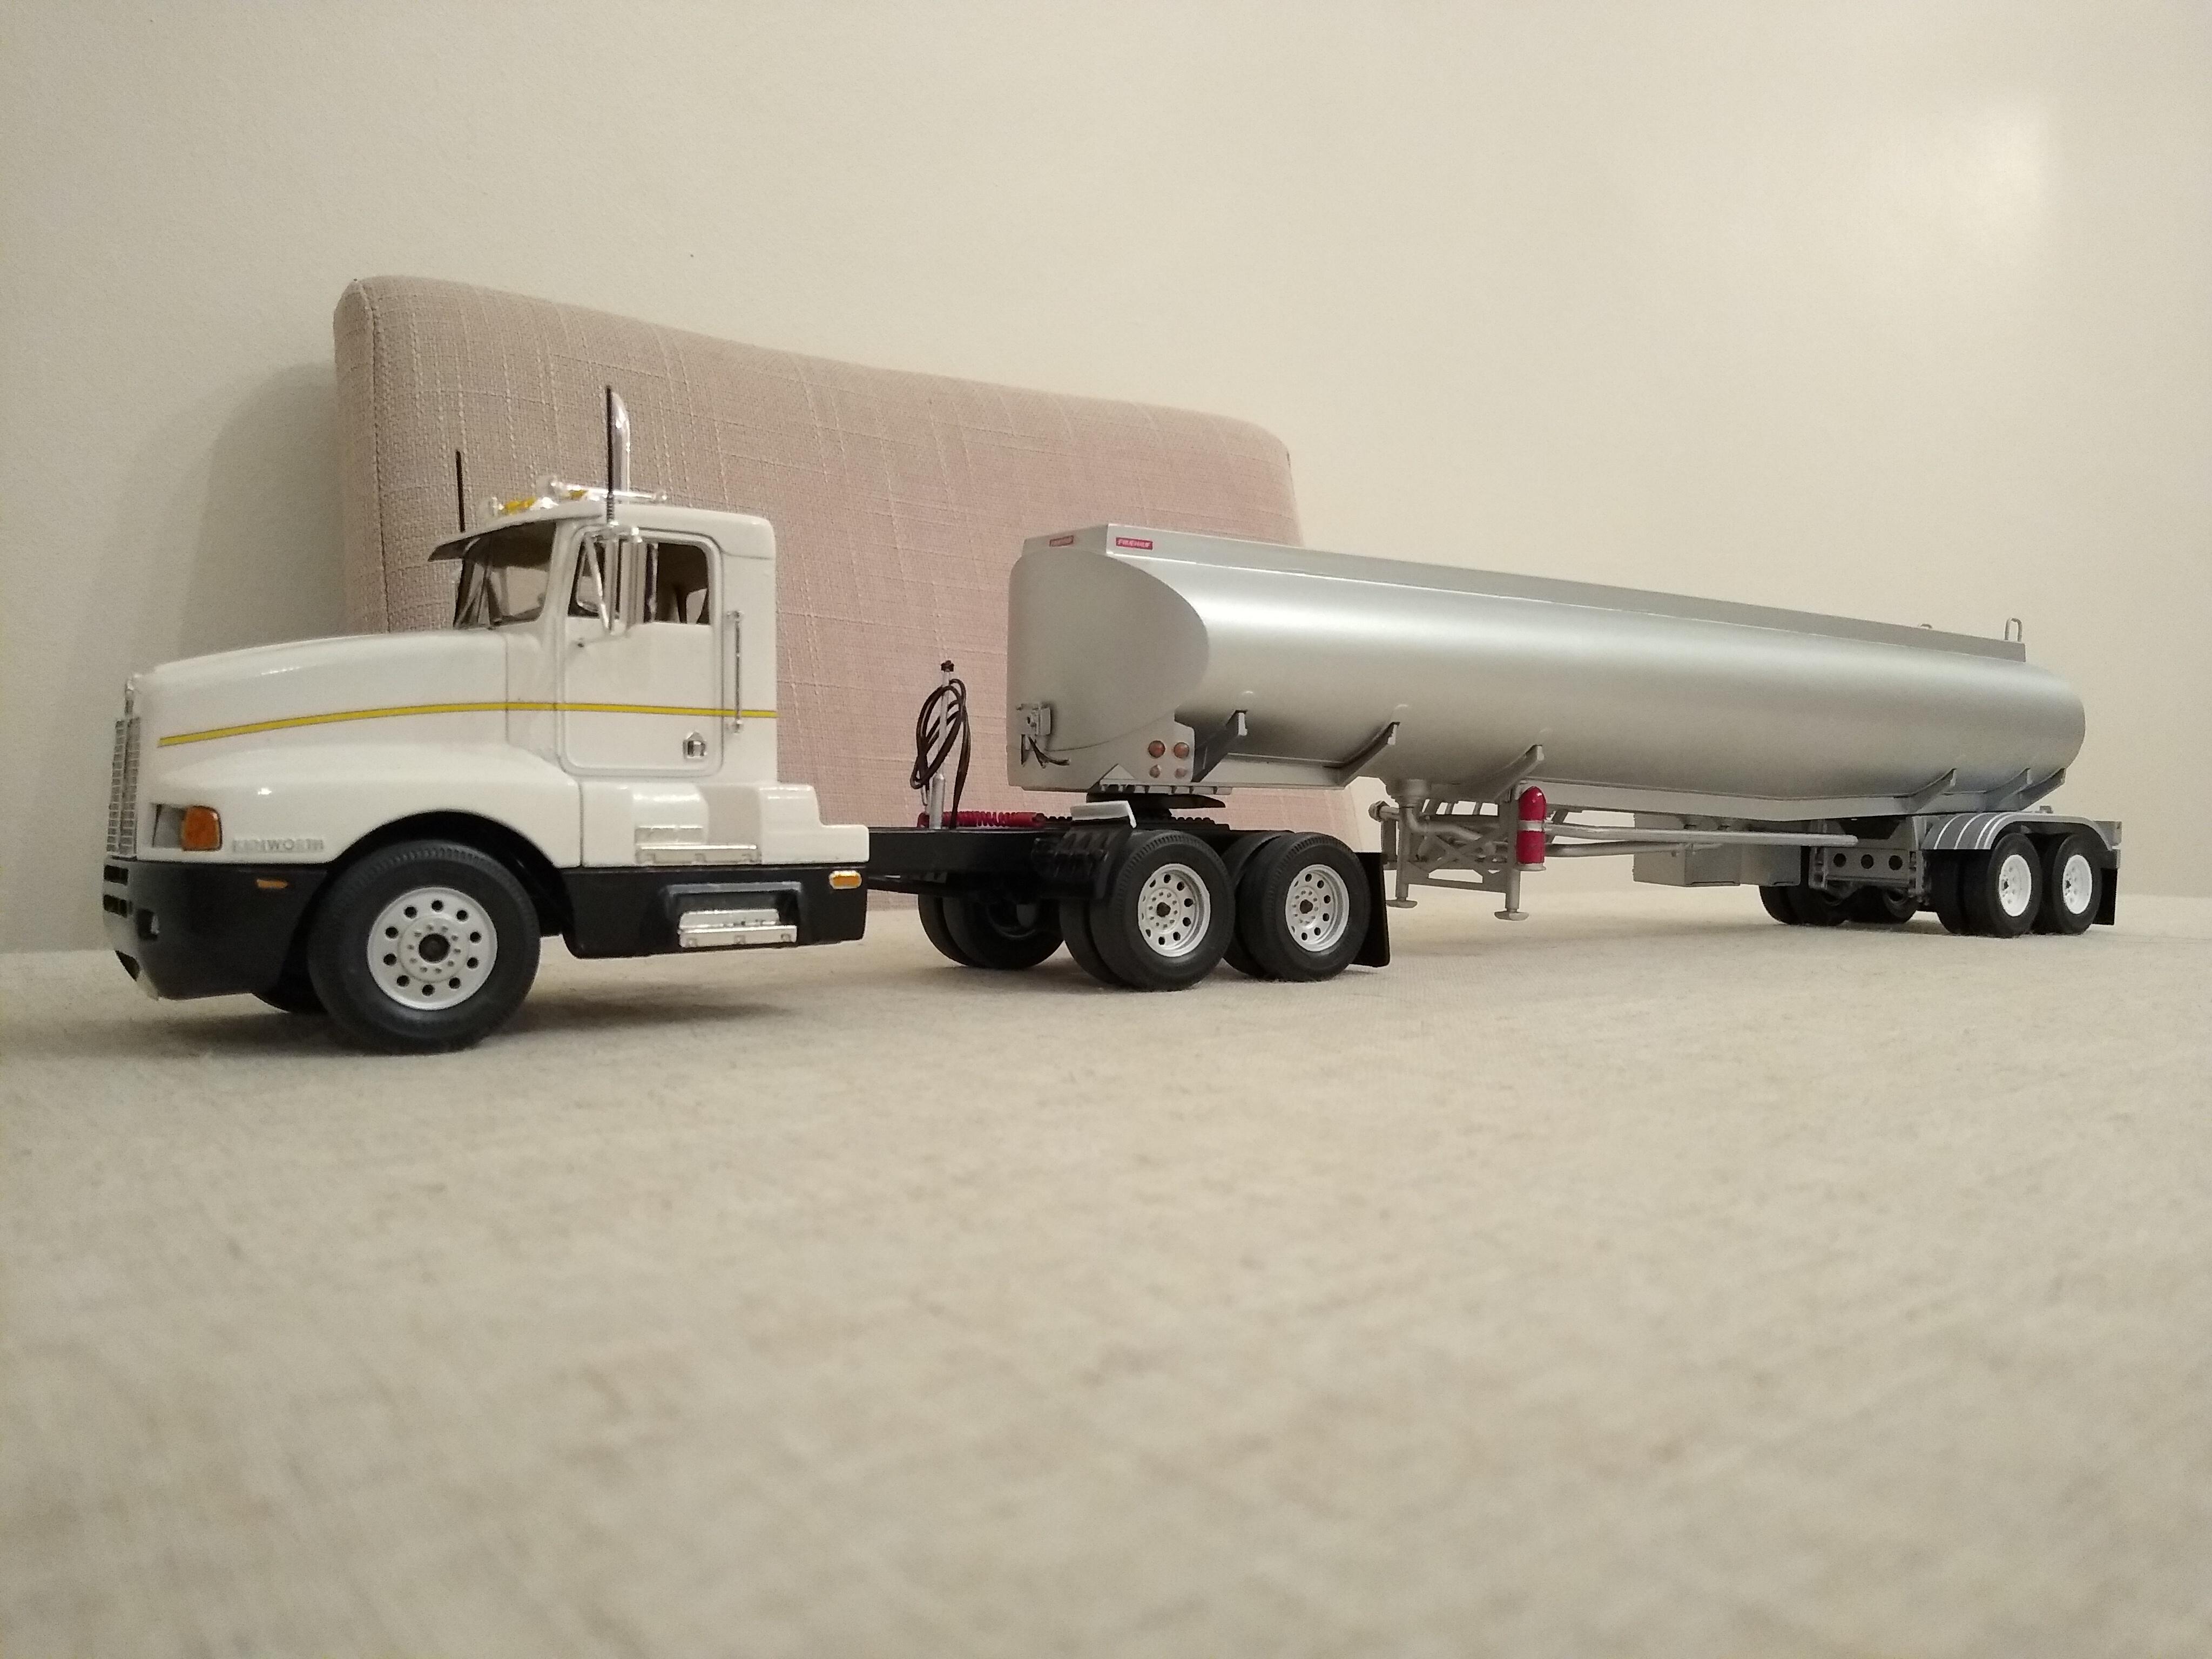
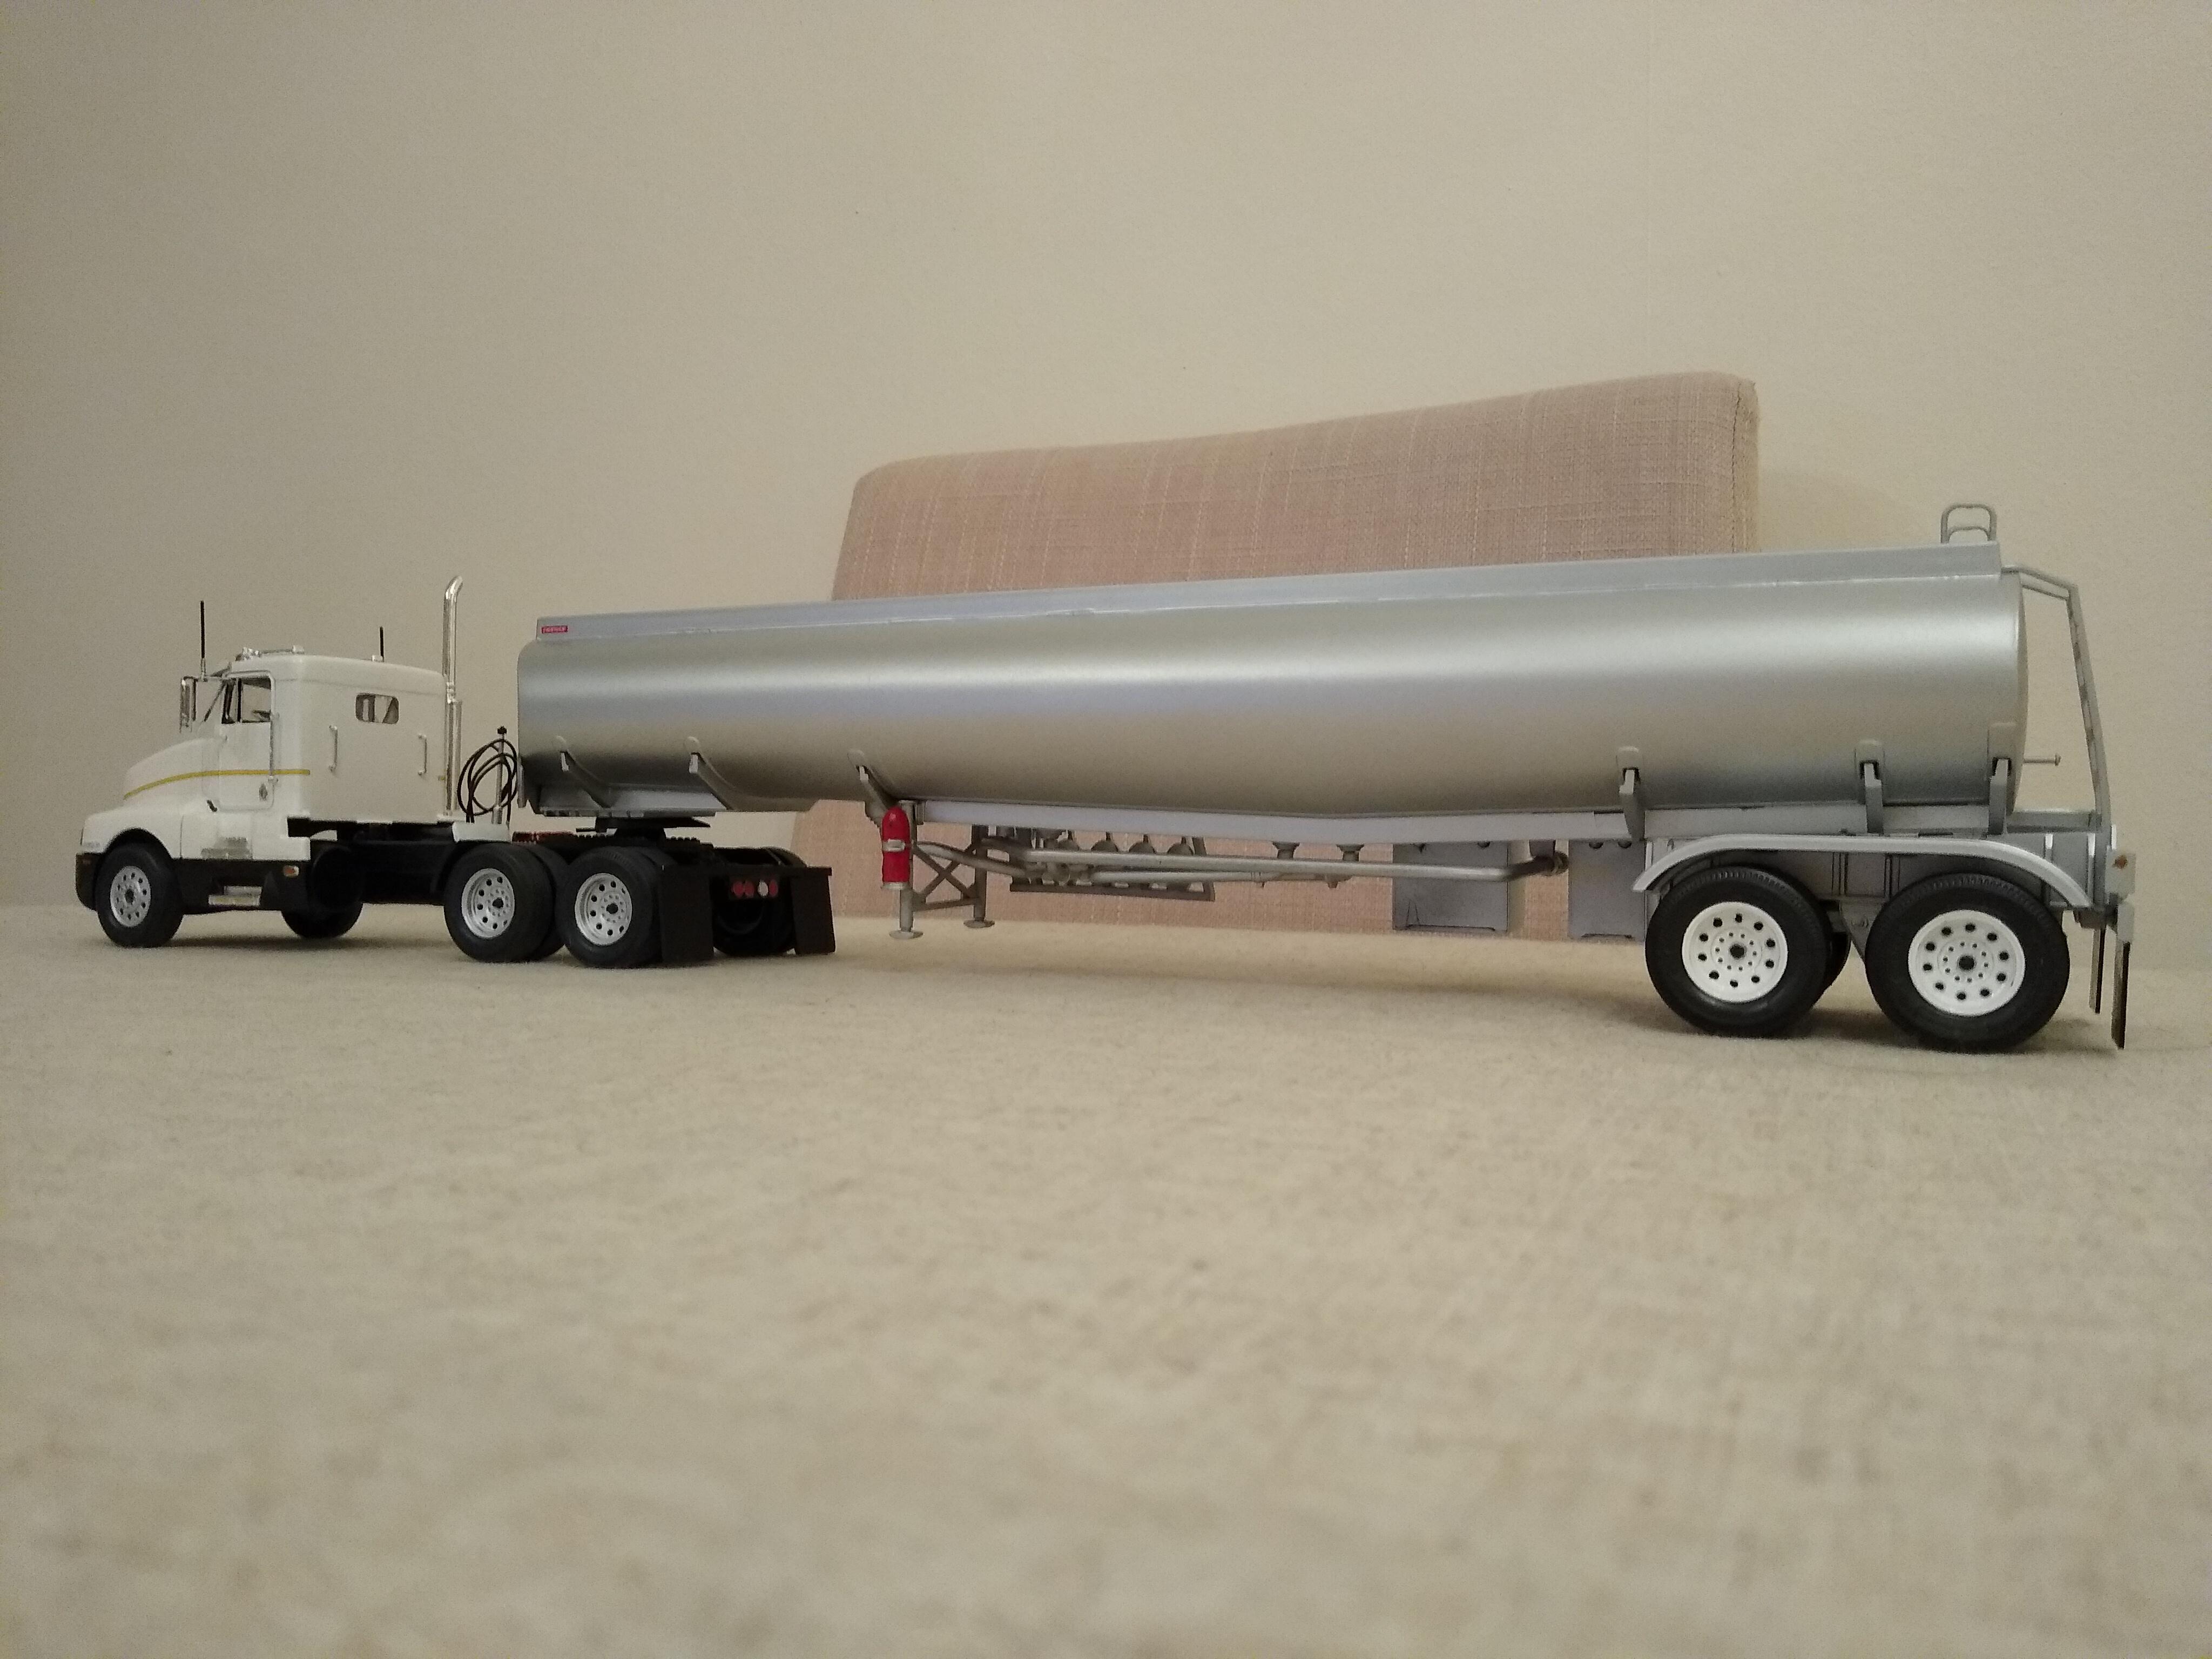
Finally finished my tanker and put it behind the T600. Looks great! Tried it behind my other tractors and it looks great even though it's a snap kit. I'm happy with it considering I almost binned it. I need to find an easy way of hooking up the airlines and electrical cable. That's being pondered as we speak.
-
Night to day
Rockford replied to Rockford's topic in WIP: Model Trucks: Big Rigs and Heavy Equipment
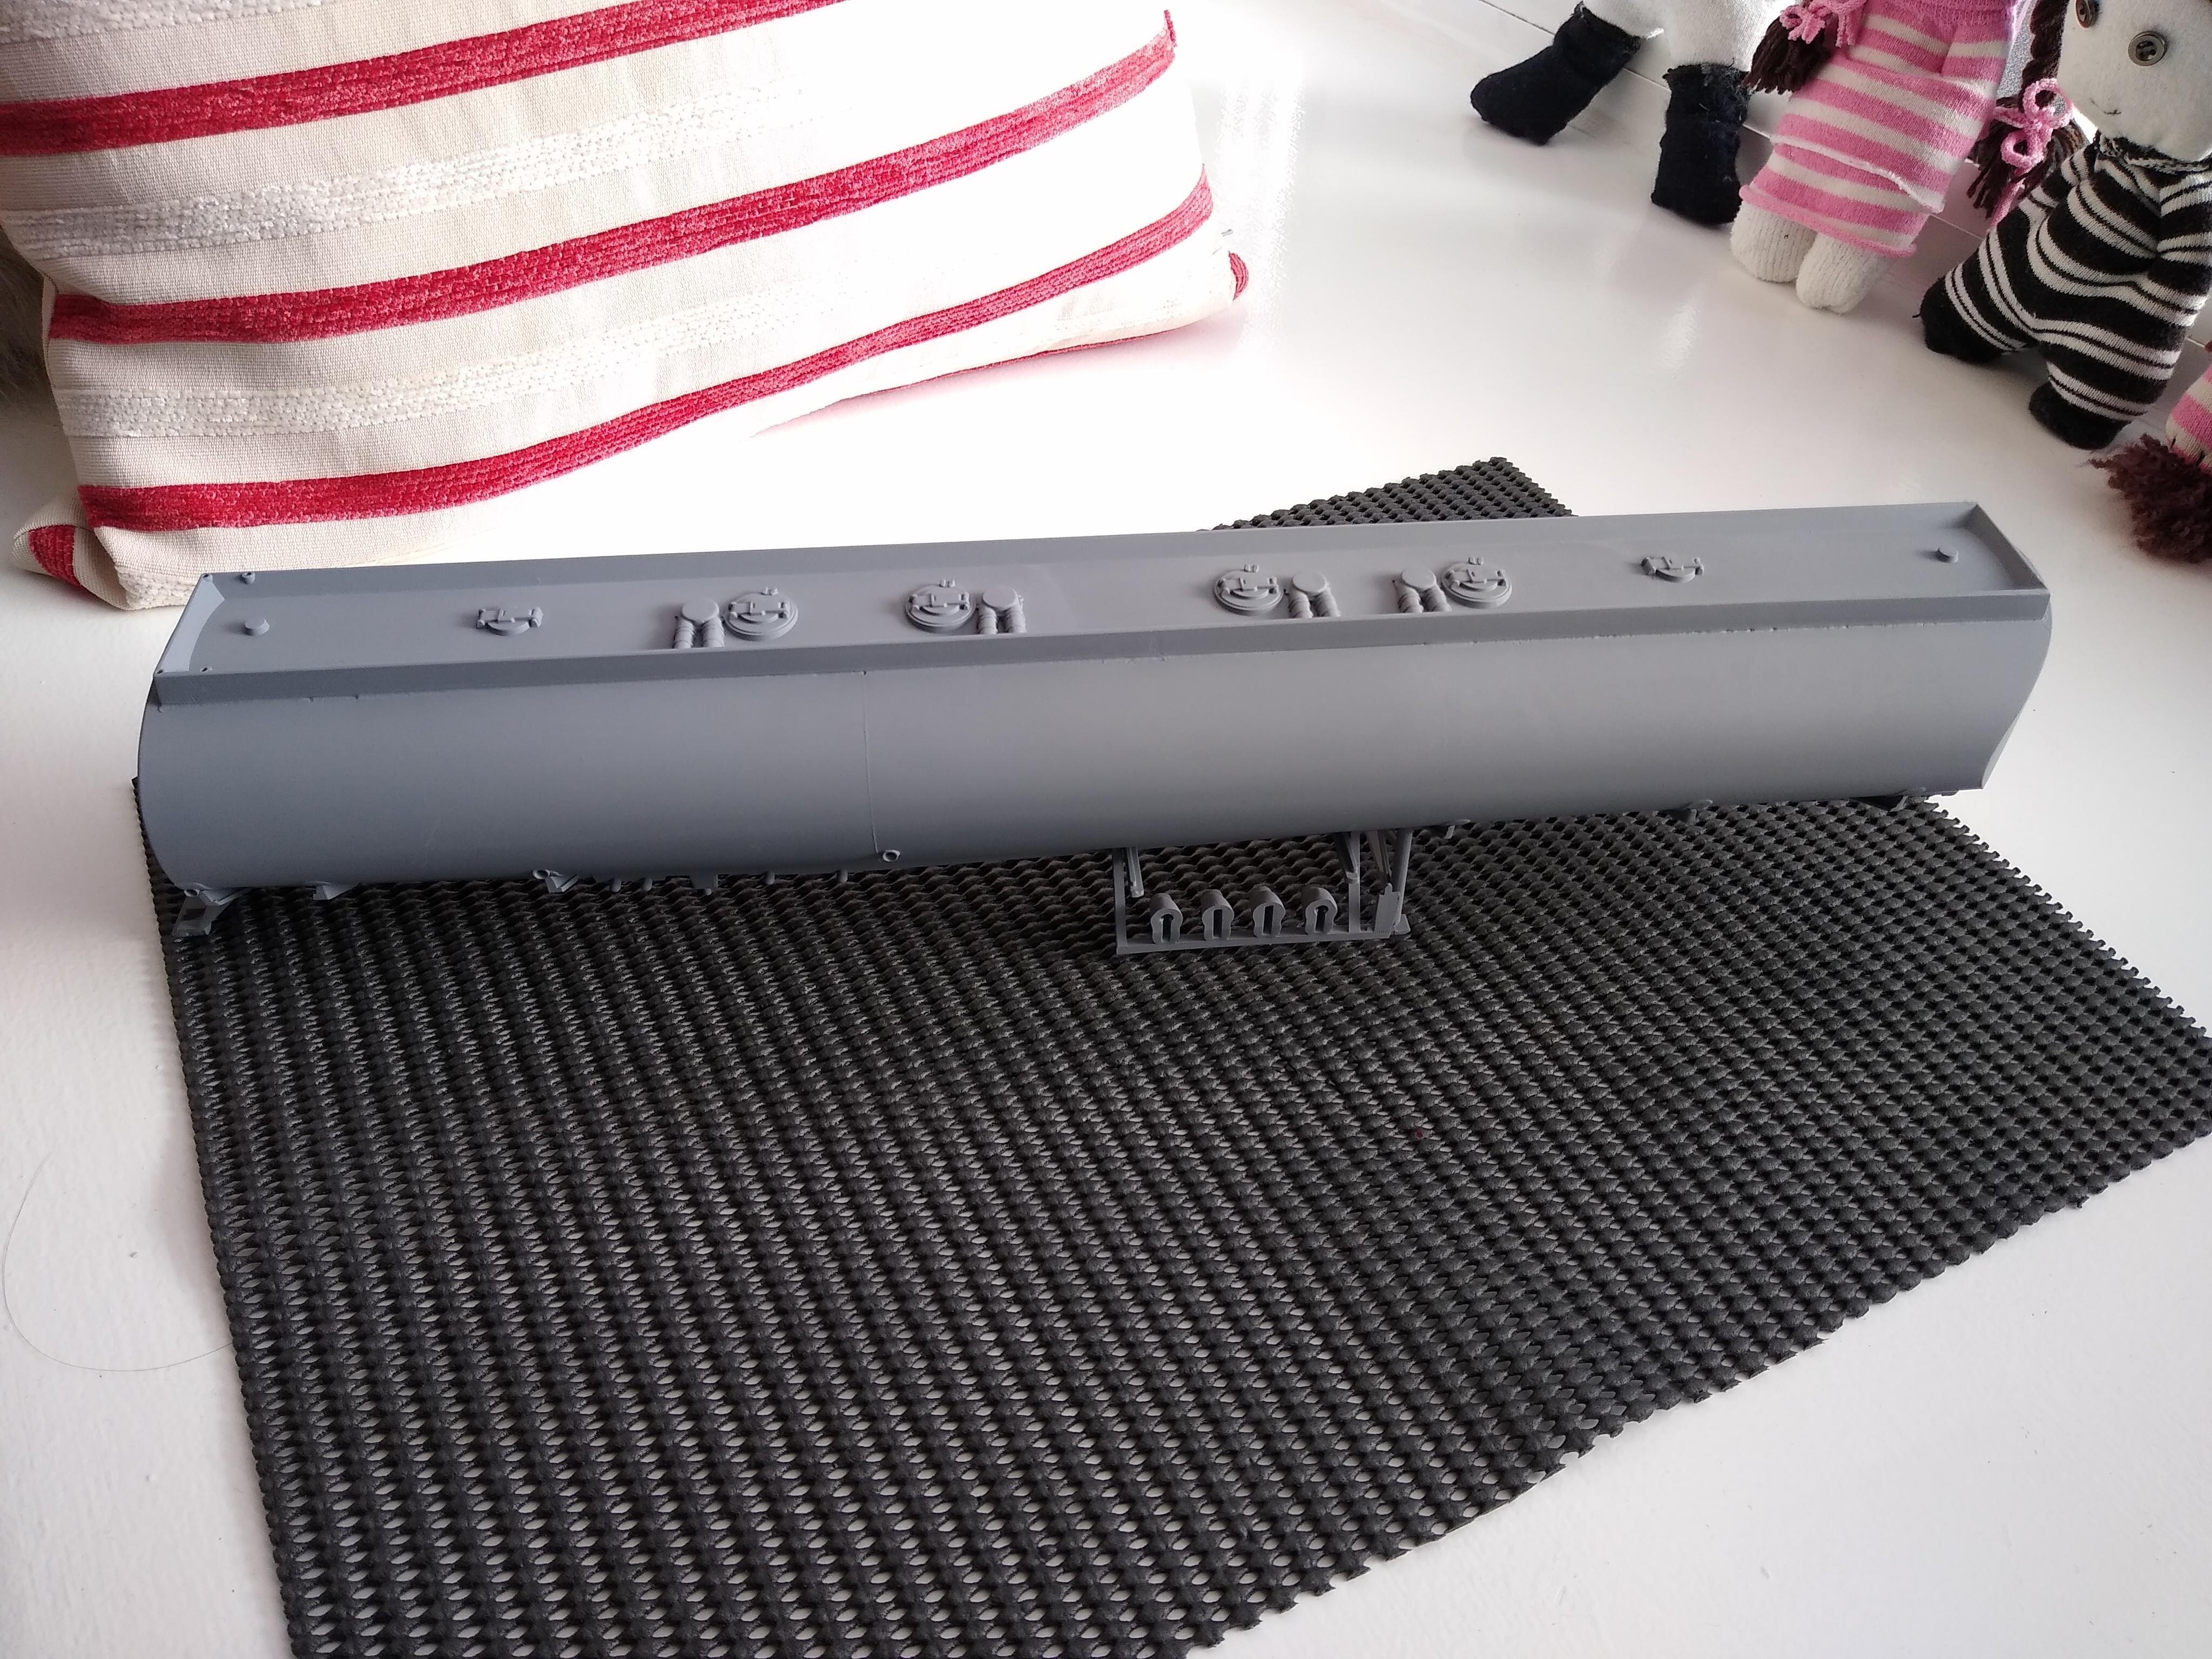
Would you believe today turned out to be beautiful, dry and warm so I bit the bullet and shot the primer on the tank! Came out ok, can't see the glue damage so I'm really relieved. Wednesday will be even better I believe so I'm going to give it a quick run with a scotchbrite pad and make it silver on Wednesday!!!!
-
ESCI 20ft Container trailer
Rockford replied to Rockford's topic in WIP: Model Trucks: Big Rigs and Heavy Equipment
Thanks Dutzie. I've been rooting through my odds and ends box for something like a brake relay valve and I found this. A 1/25 carburettor, looks like a Thermoquad that became the Edelbrock carb. The body can form the diaphragm housing and the four corners of the flange can be the four outlets to the chambers.
-
ESCI 20ft Container trailer
Rockford replied to Rockford's topic in WIP: Model Trucks: Big Rigs and Heavy Equipment
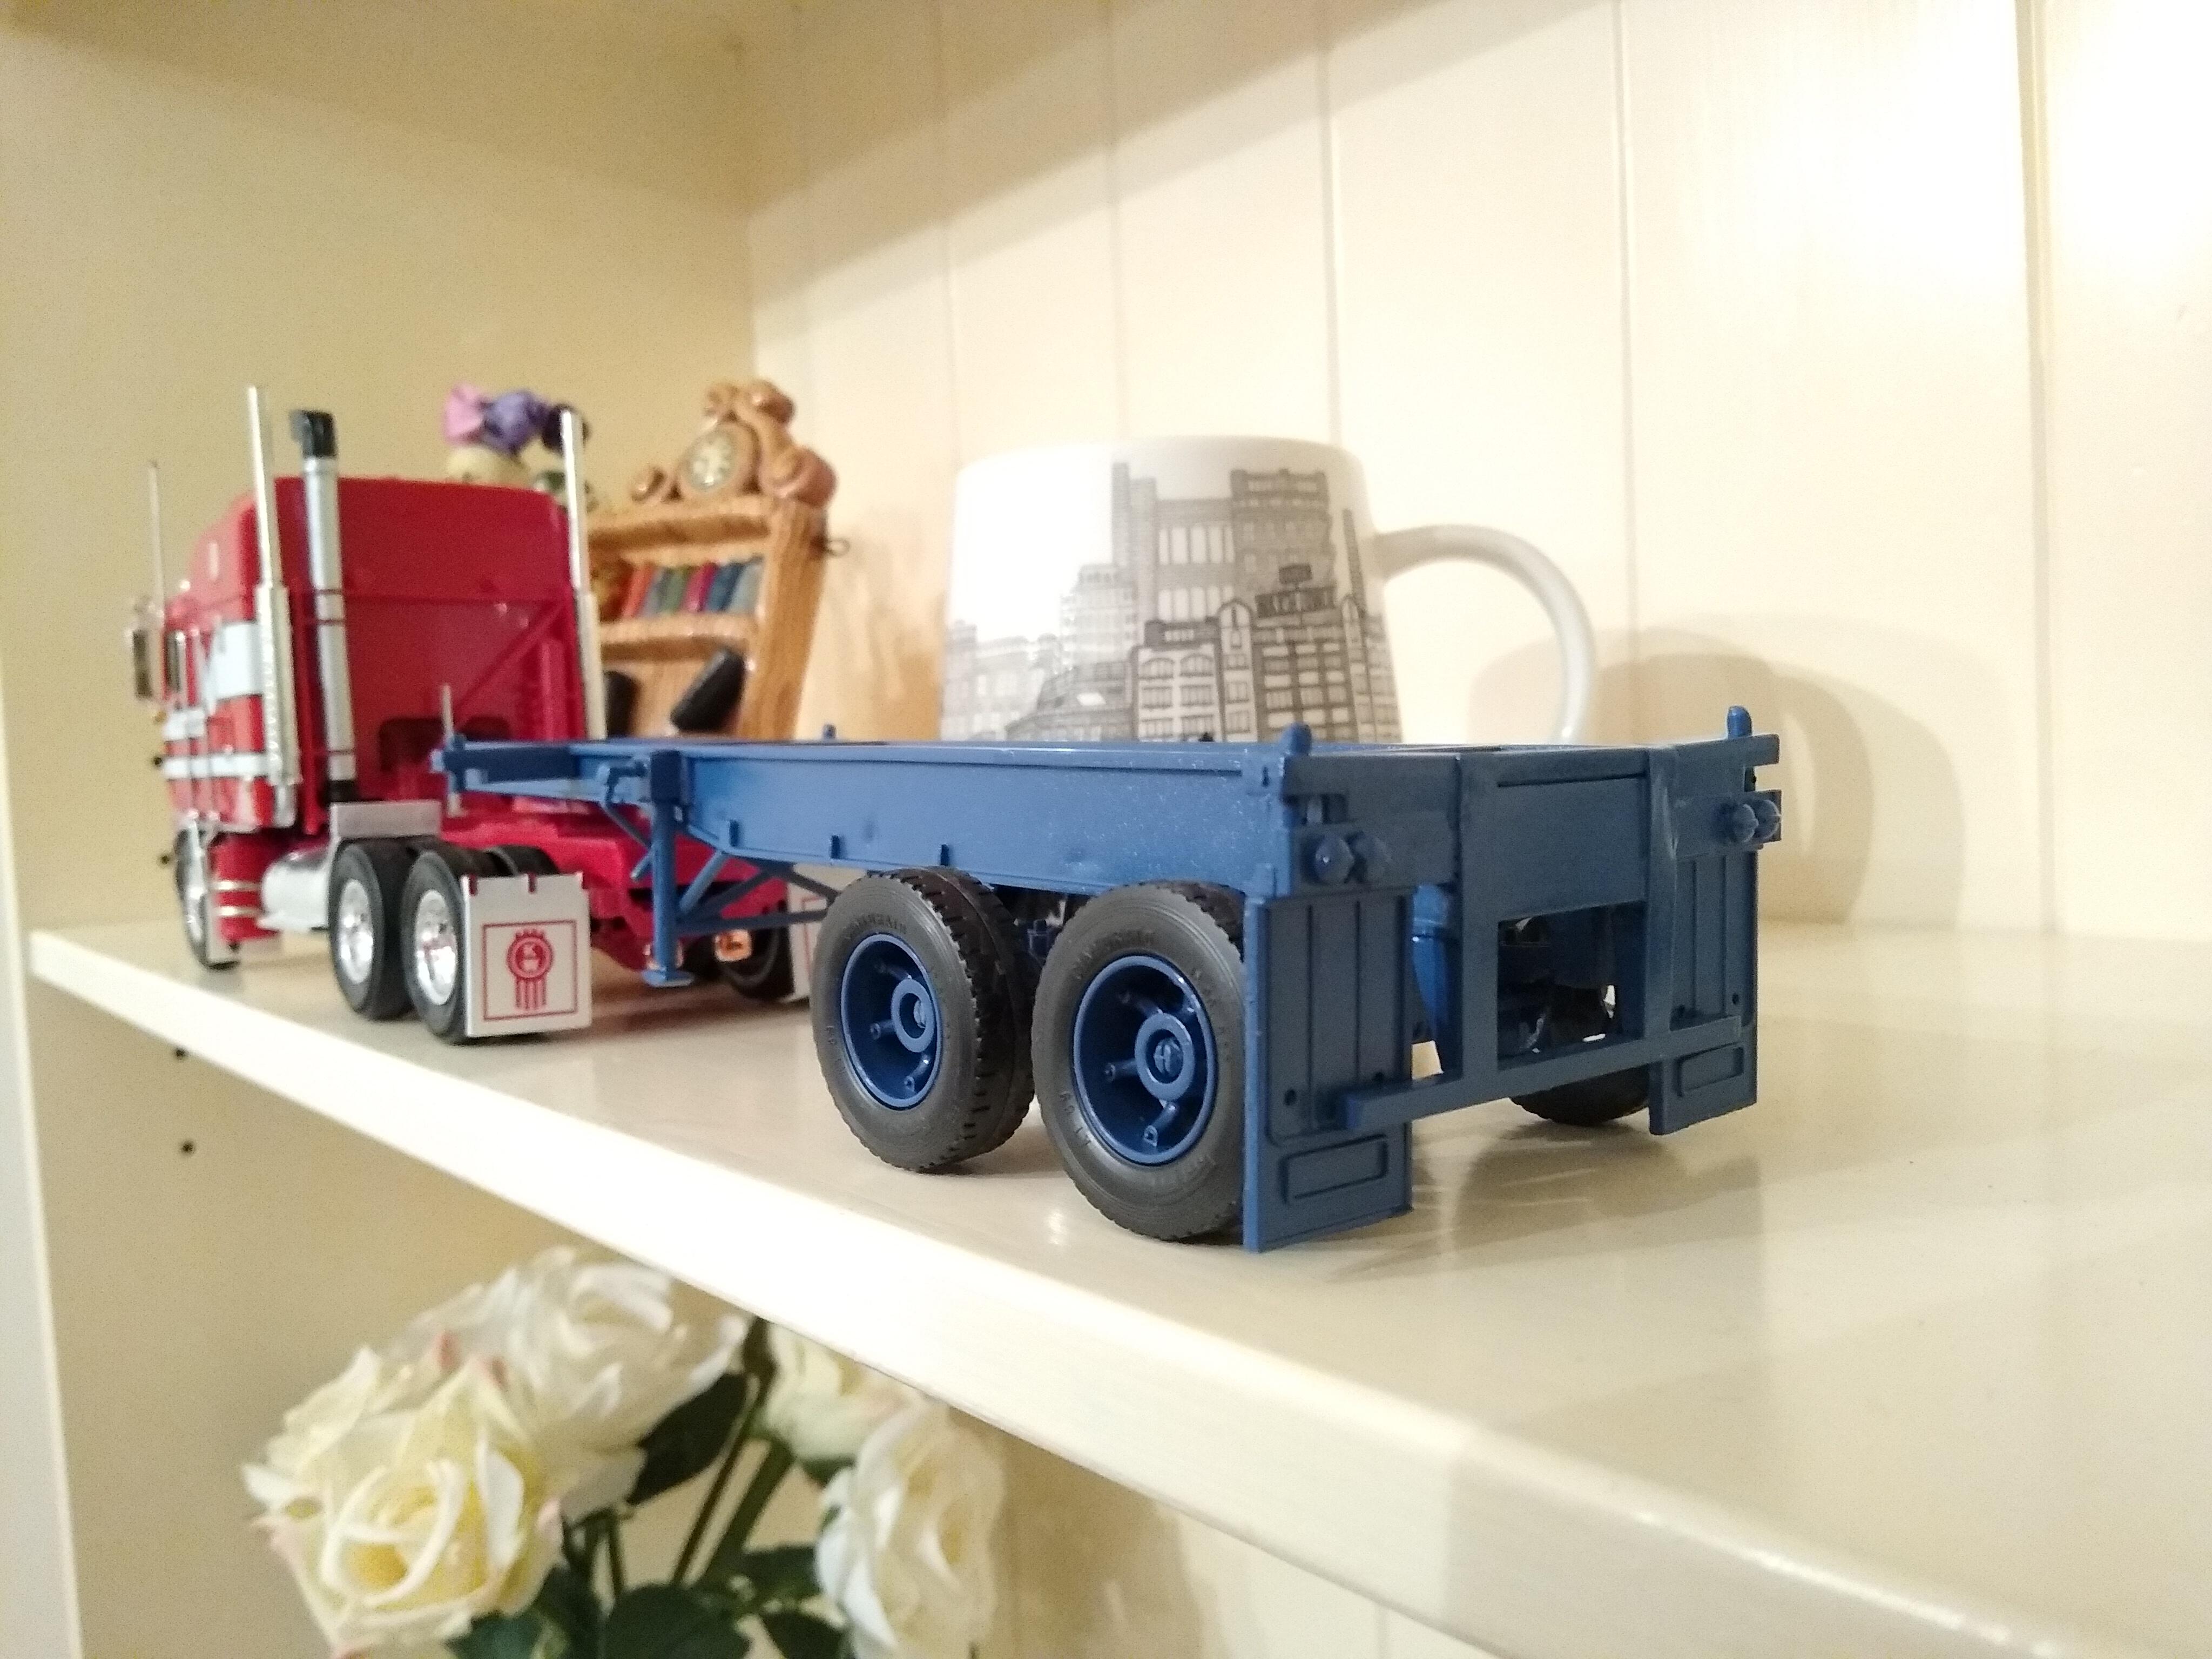
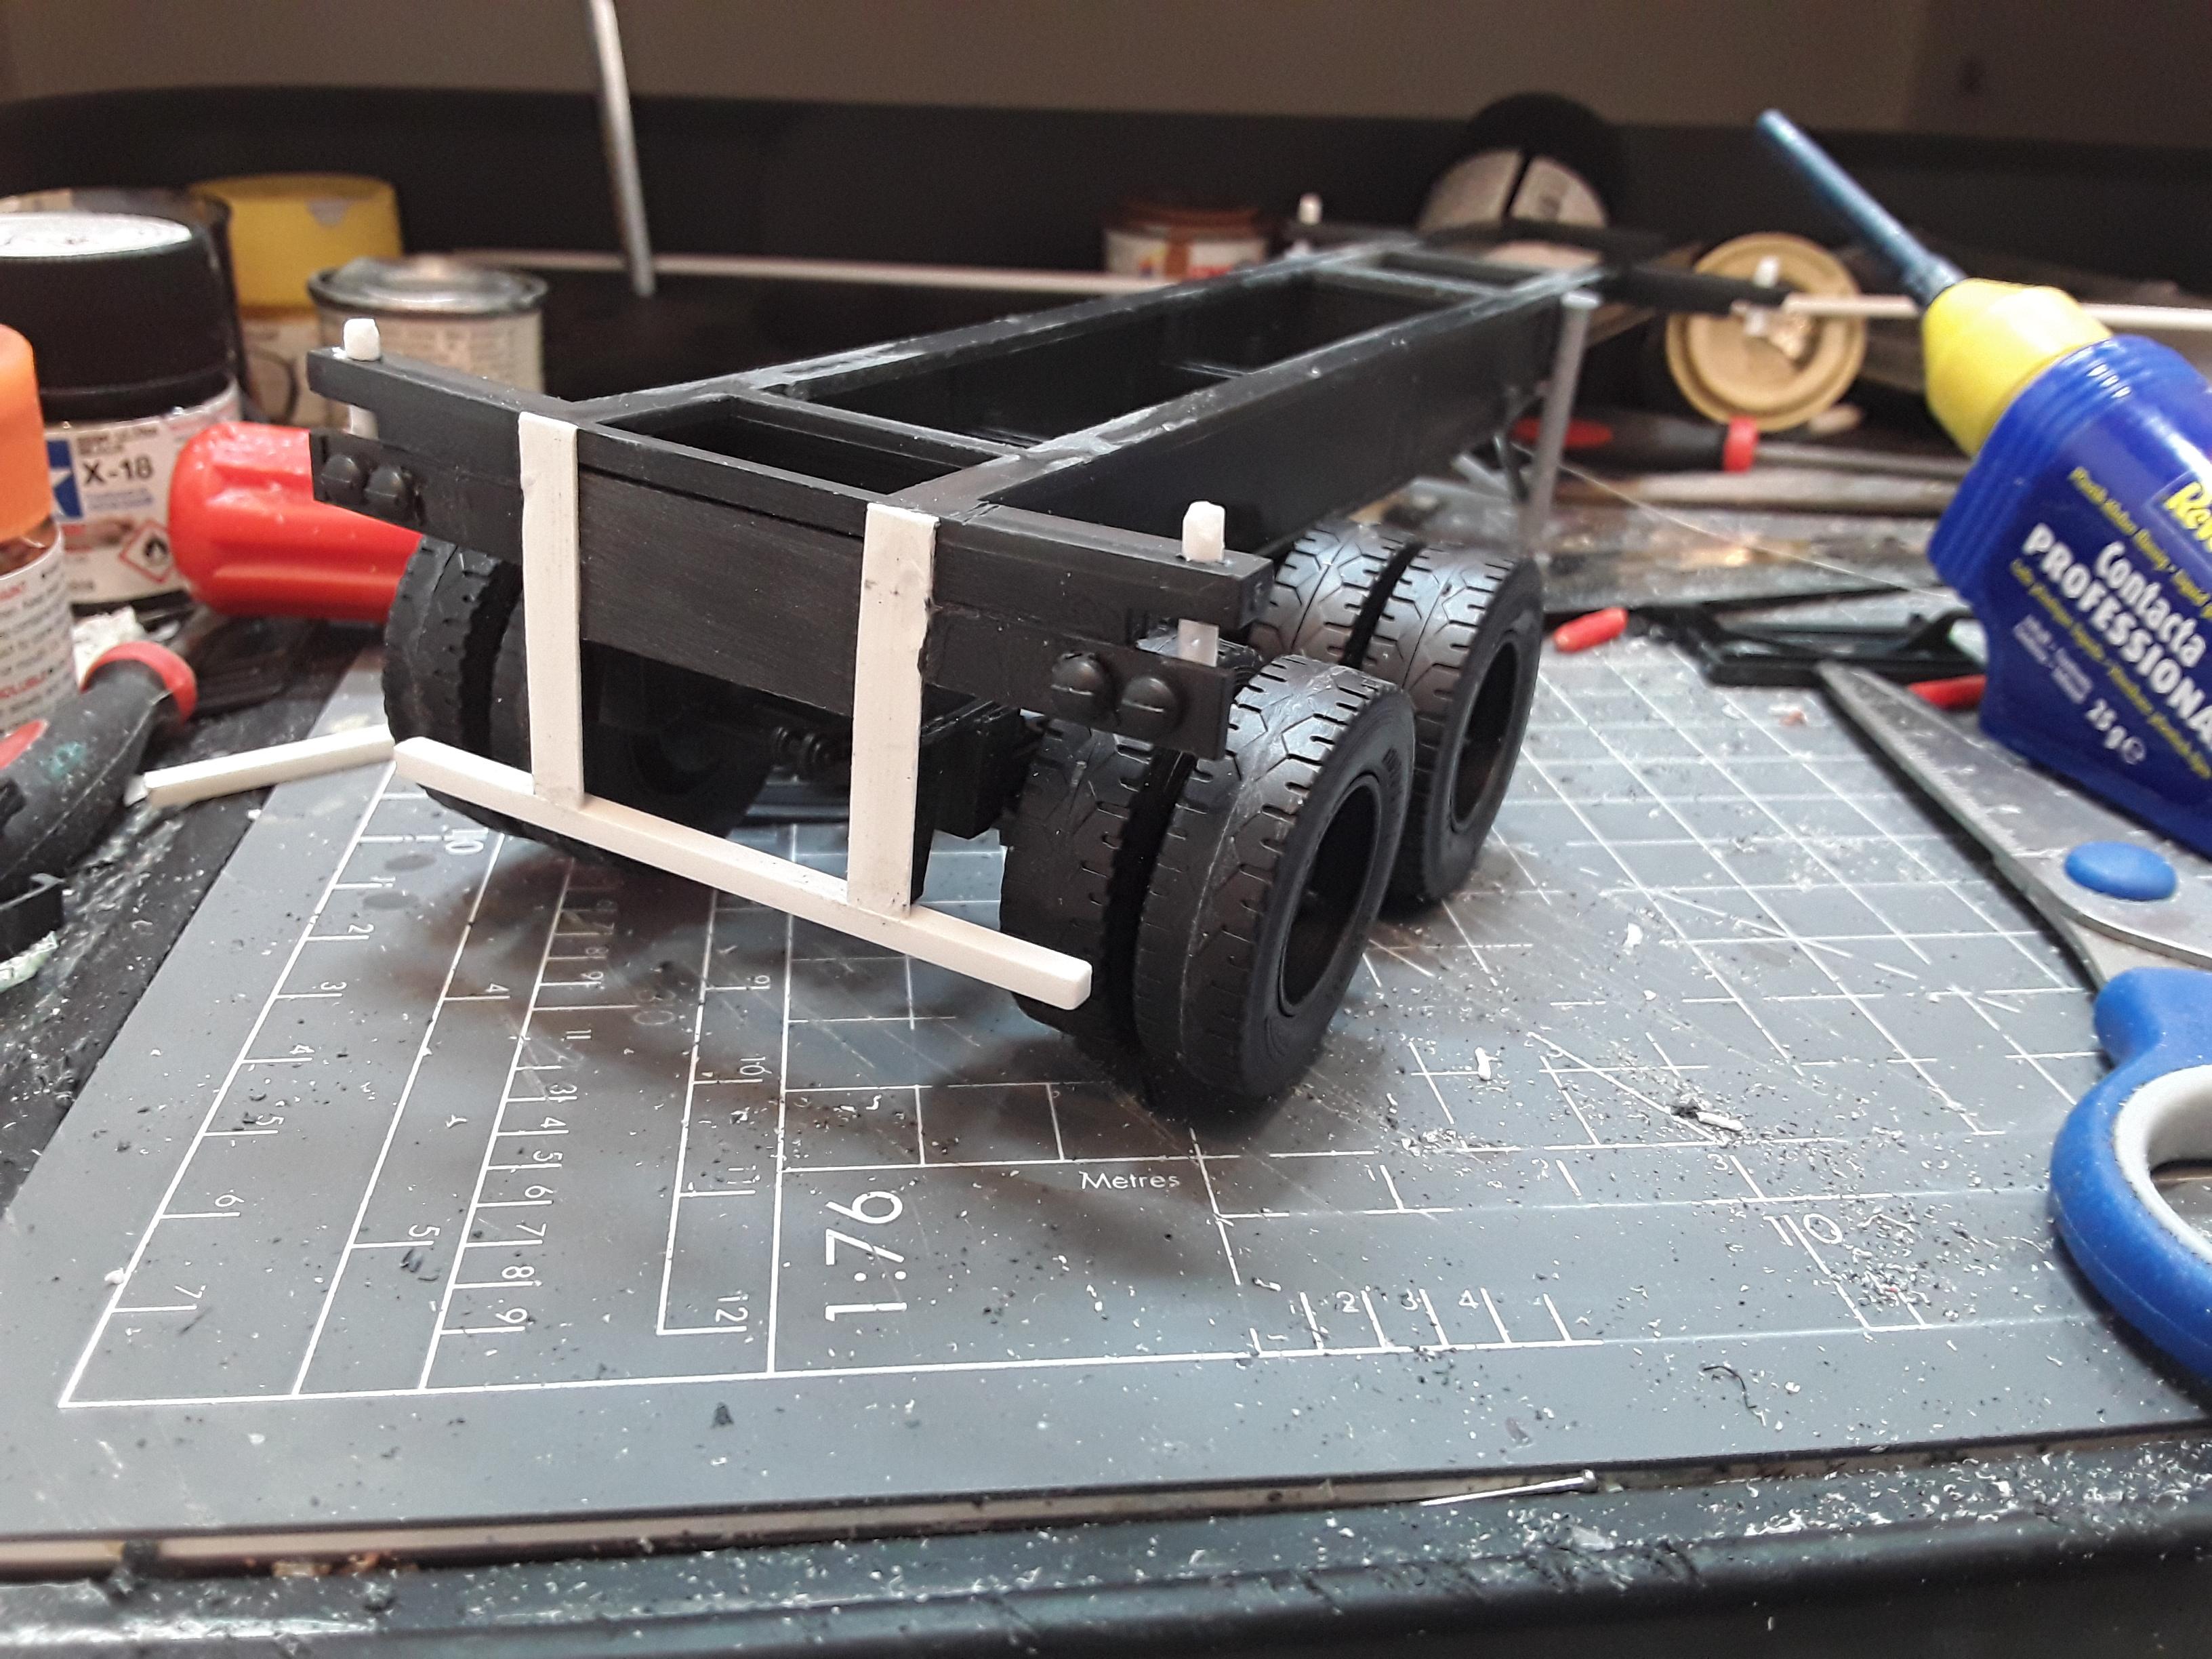
You can also see the twistlocks I built by drilling through the outrigger and into the container, then I used plastic rod to form a twistlock. I'll put wire through the bottom se tion to make the handle. Now that the ride height is more realistic the chassis angles upward when coupled to the point that the front axle is off the floor, I'll have to adjust the suspension a little so that it accommodates the angle. I also want to fabricate a relay valve at the air reservoir with the hoses going to the brake chambers as it is all so visible when the container is not there. So, it's coming up to paint. Now, these trailers were never very well painted so I'm not too worried about the finish. The only thing is I'm not at all certain about a colour. I'm thinking of a mid blue, but the wheels are important too, do I do the hub chassis colour with full silver rims, or paint them all chassis colour with just the very outer edge of the rim painted white.
-
ESCI 20ft Container trailer
Rockford replied to Rockford's topic in WIP: Model Trucks: Big Rigs and Heavy Equipment
The kingpin was too far back and didn't look right at all, but would also cause the landing legs to foul the tractor frame if left. I moved it forward, then covered the work with a piece of plastic card. I also added couplings for air and electrics at the front of the frame and added a couple of airlines snaking off from the couplings and knto the frame. The rear bumper is a European looking thing so I fabricated a new one. Using plastic card, the triangular mounts for the original bumper and some square rod. I cut the rear lights out of the bumper assembly and put them below the outrigger for the container.
-
ESCI 20ft Container trailer
Rockford replied to Rockford's topic in WIP: Model Trucks: Big Rigs and Heavy Equipment
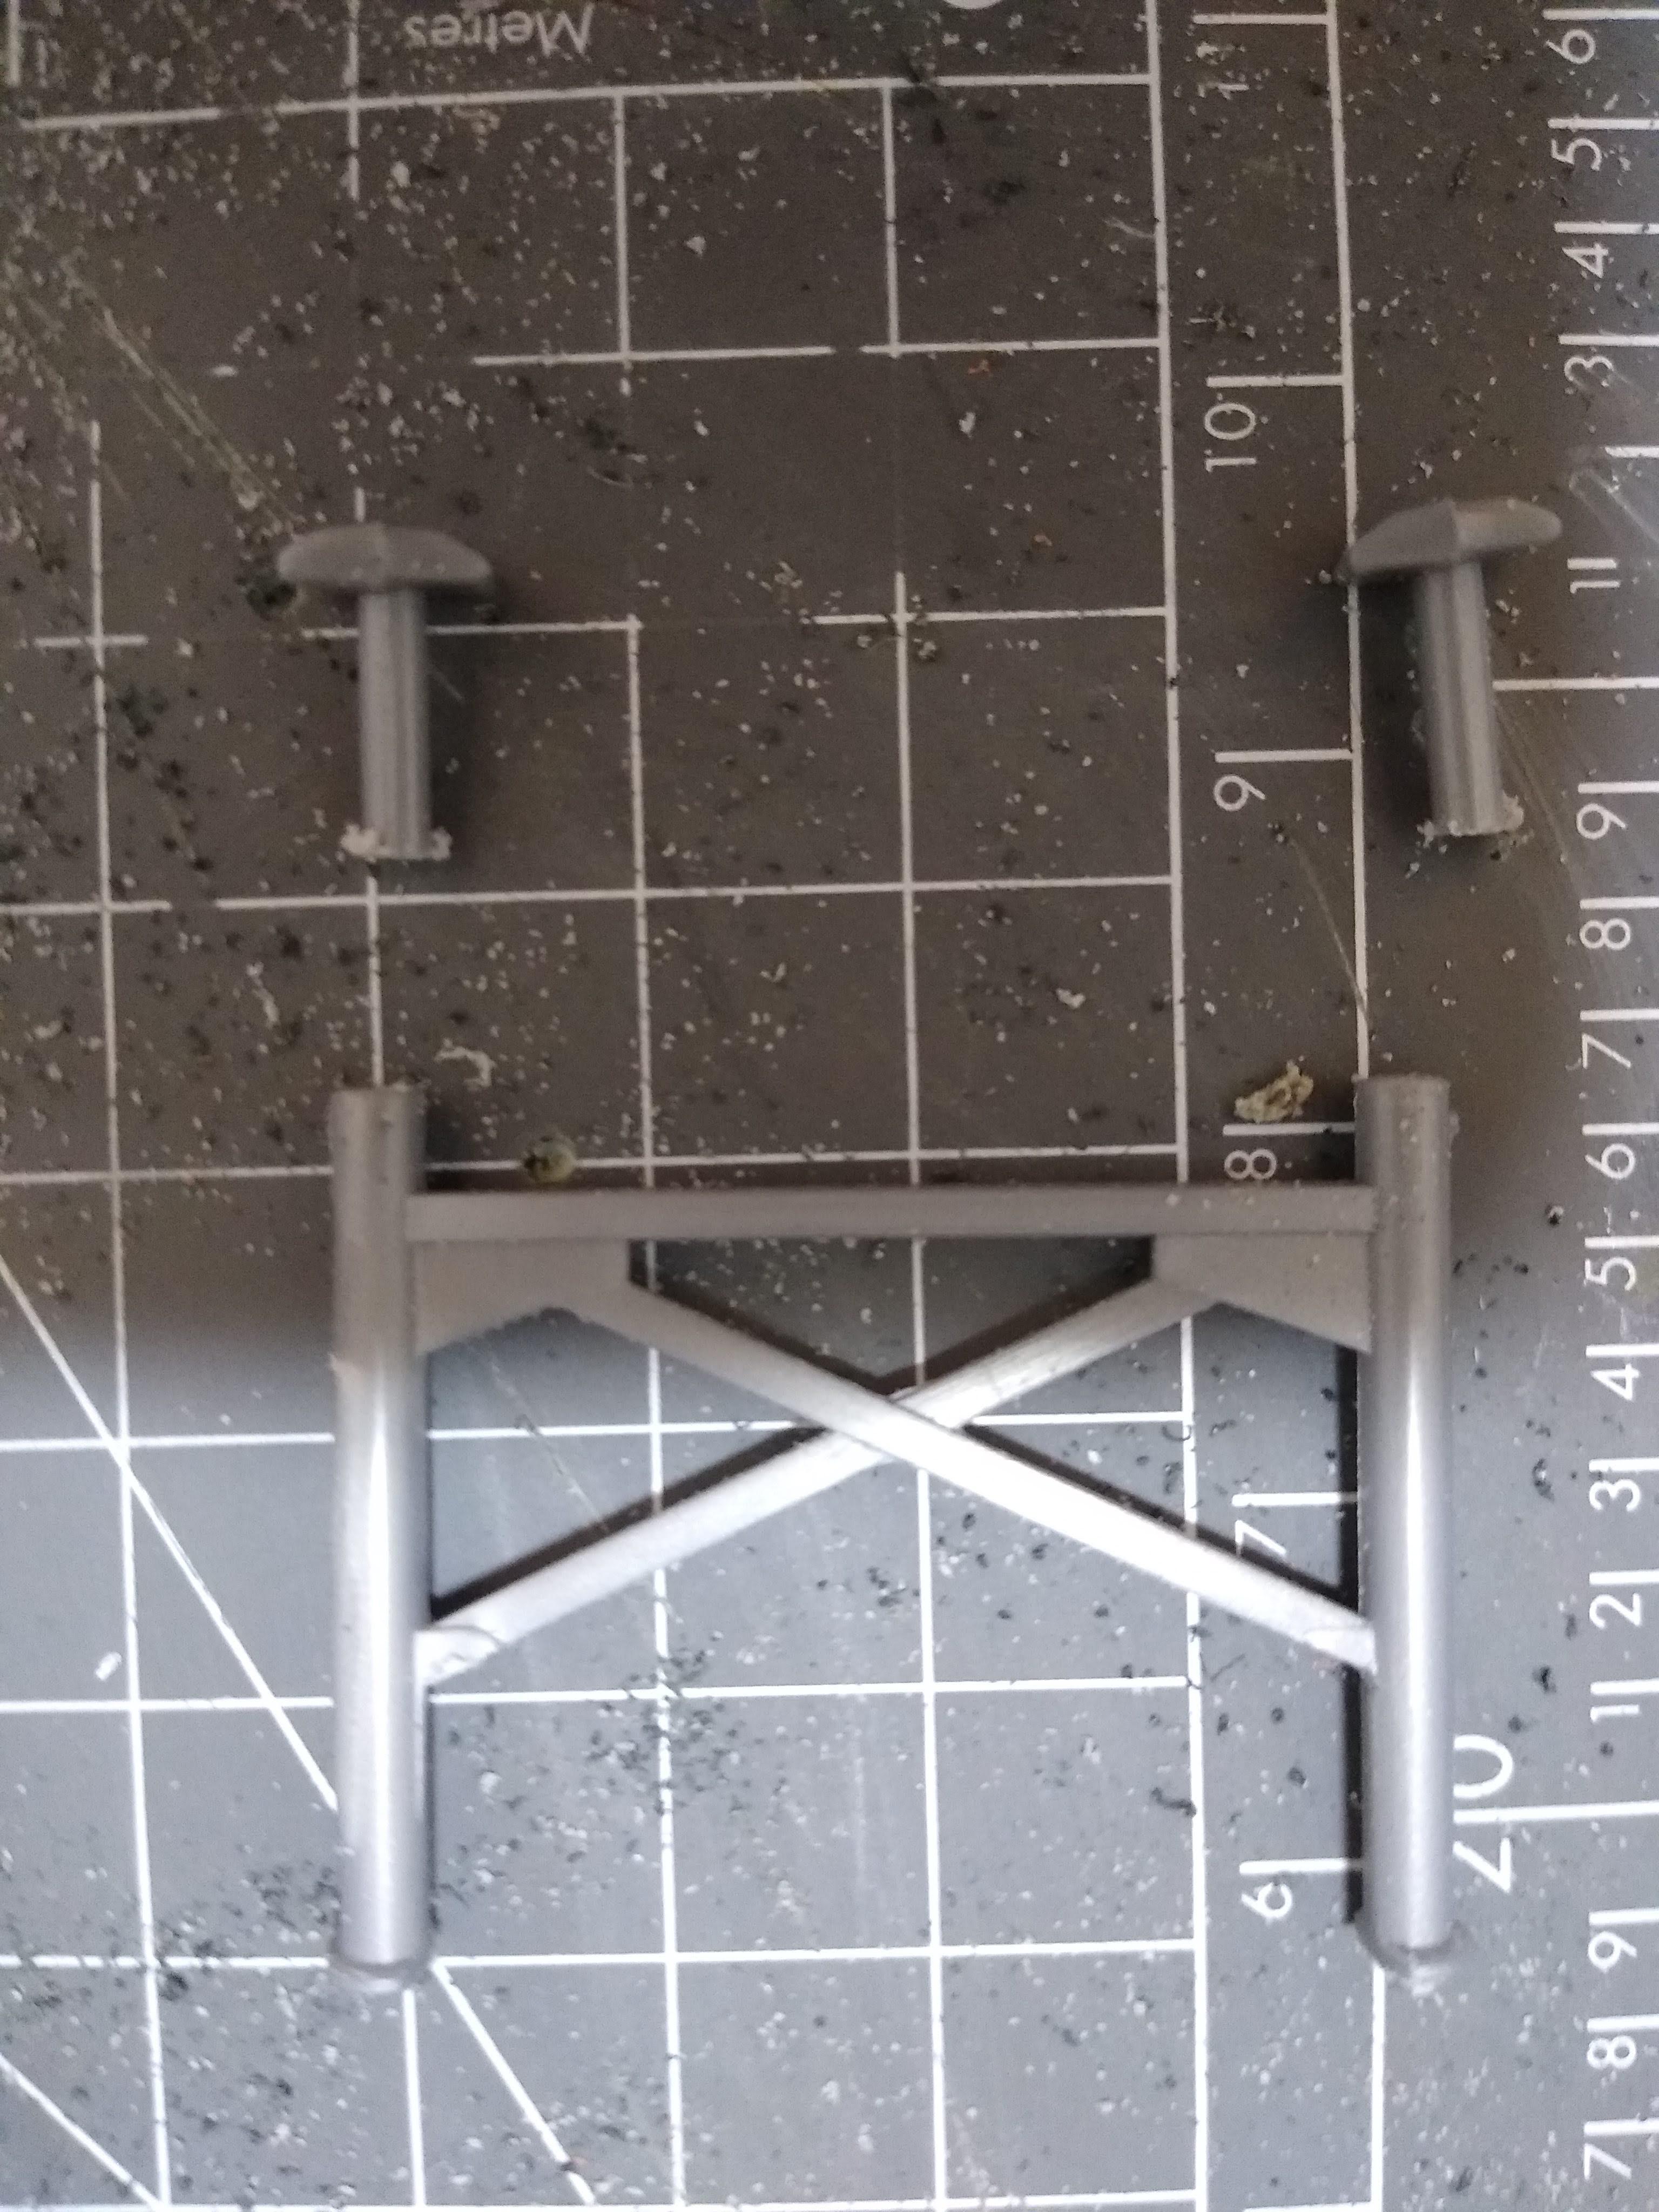
The landing gear was too heavy, like something off a bridge structure! I ditched it in favour of the legs off the Revell Snap Tite tanker [the spare ones that are in the extended position] which I cut down and added diagonal braces. Fabbed up a gearbox and used the winding handle fro the kit. Looks a lot better.