

Bren
-
Posts
126 -
Joined
-
Last visited
Content Type
Profiles
Forums
Events
Gallery
Everything posted by Bren
-
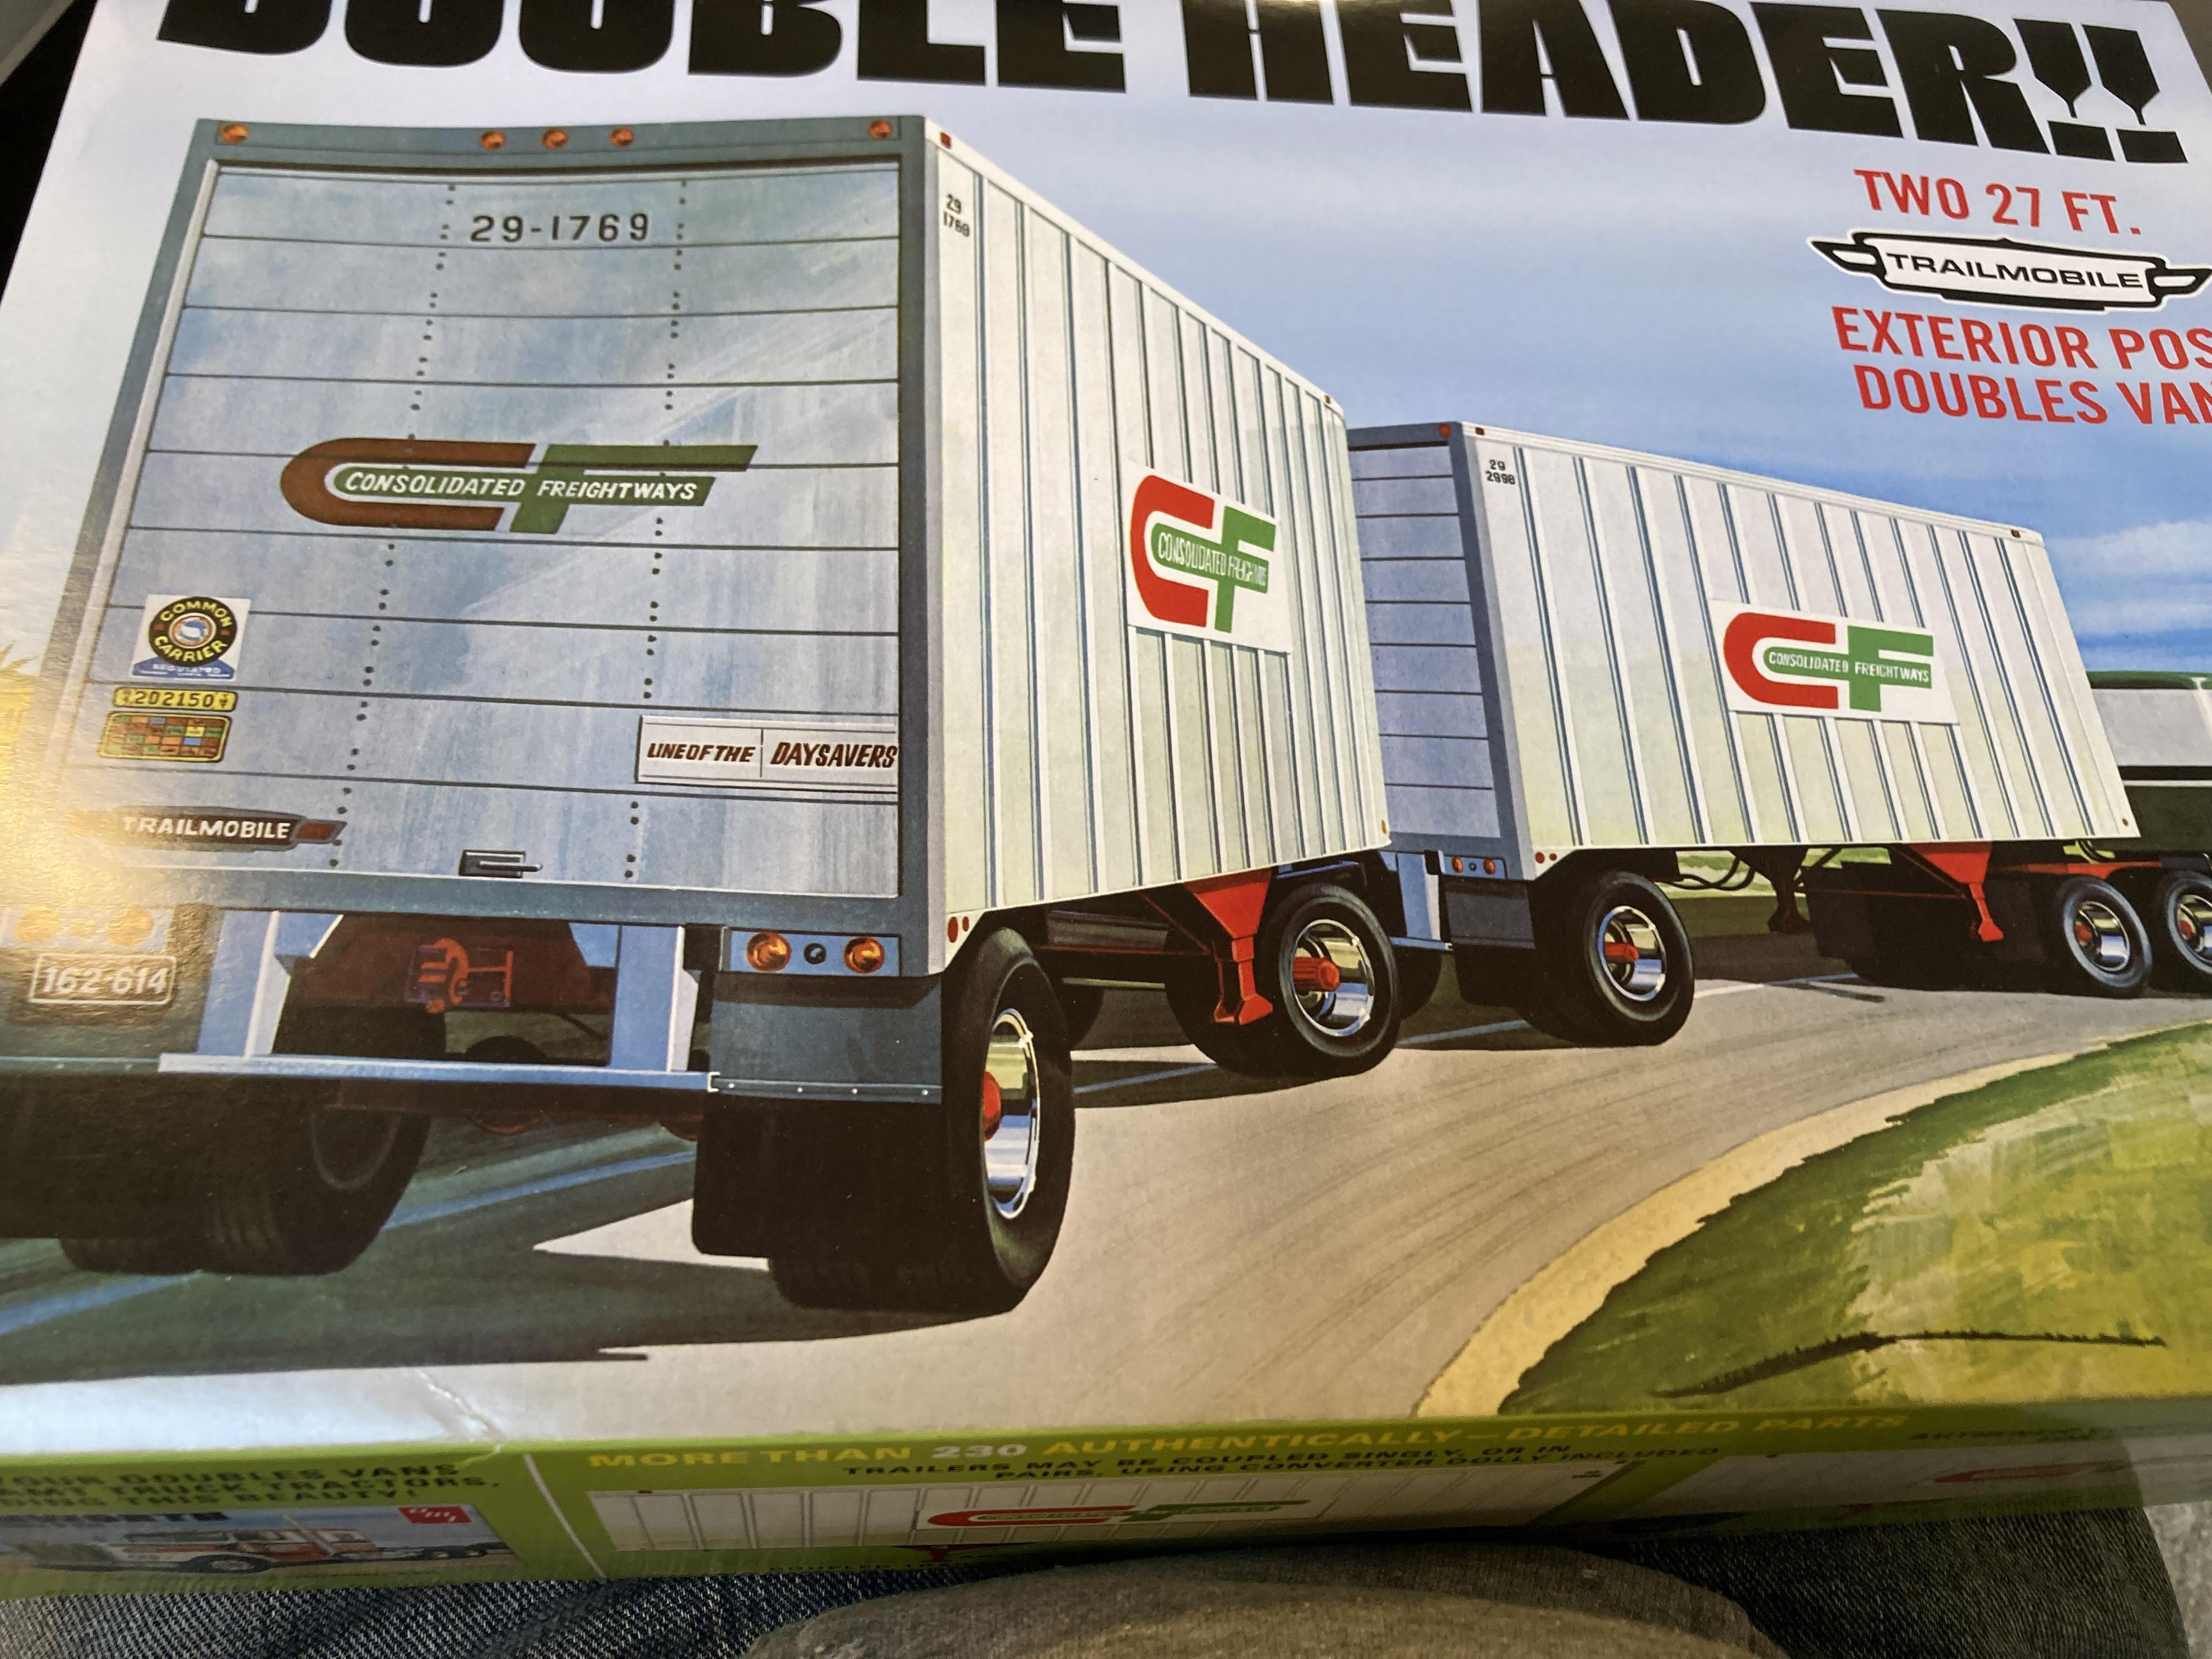
AMT Exterior Post Doubles Vans
Bren replied to Bren's topic in WIP: Model Trucks: Big Rigs and Heavy Equipment
As promised - these are the products I used to get the effect using the method I described above. And yes....just ordinary Robin Hood pastry flour!
-
AMT Exterior Post Doubles Vans
Bren replied to Bren's topic in WIP: Model Trucks: Big Rigs and Heavy Equipment
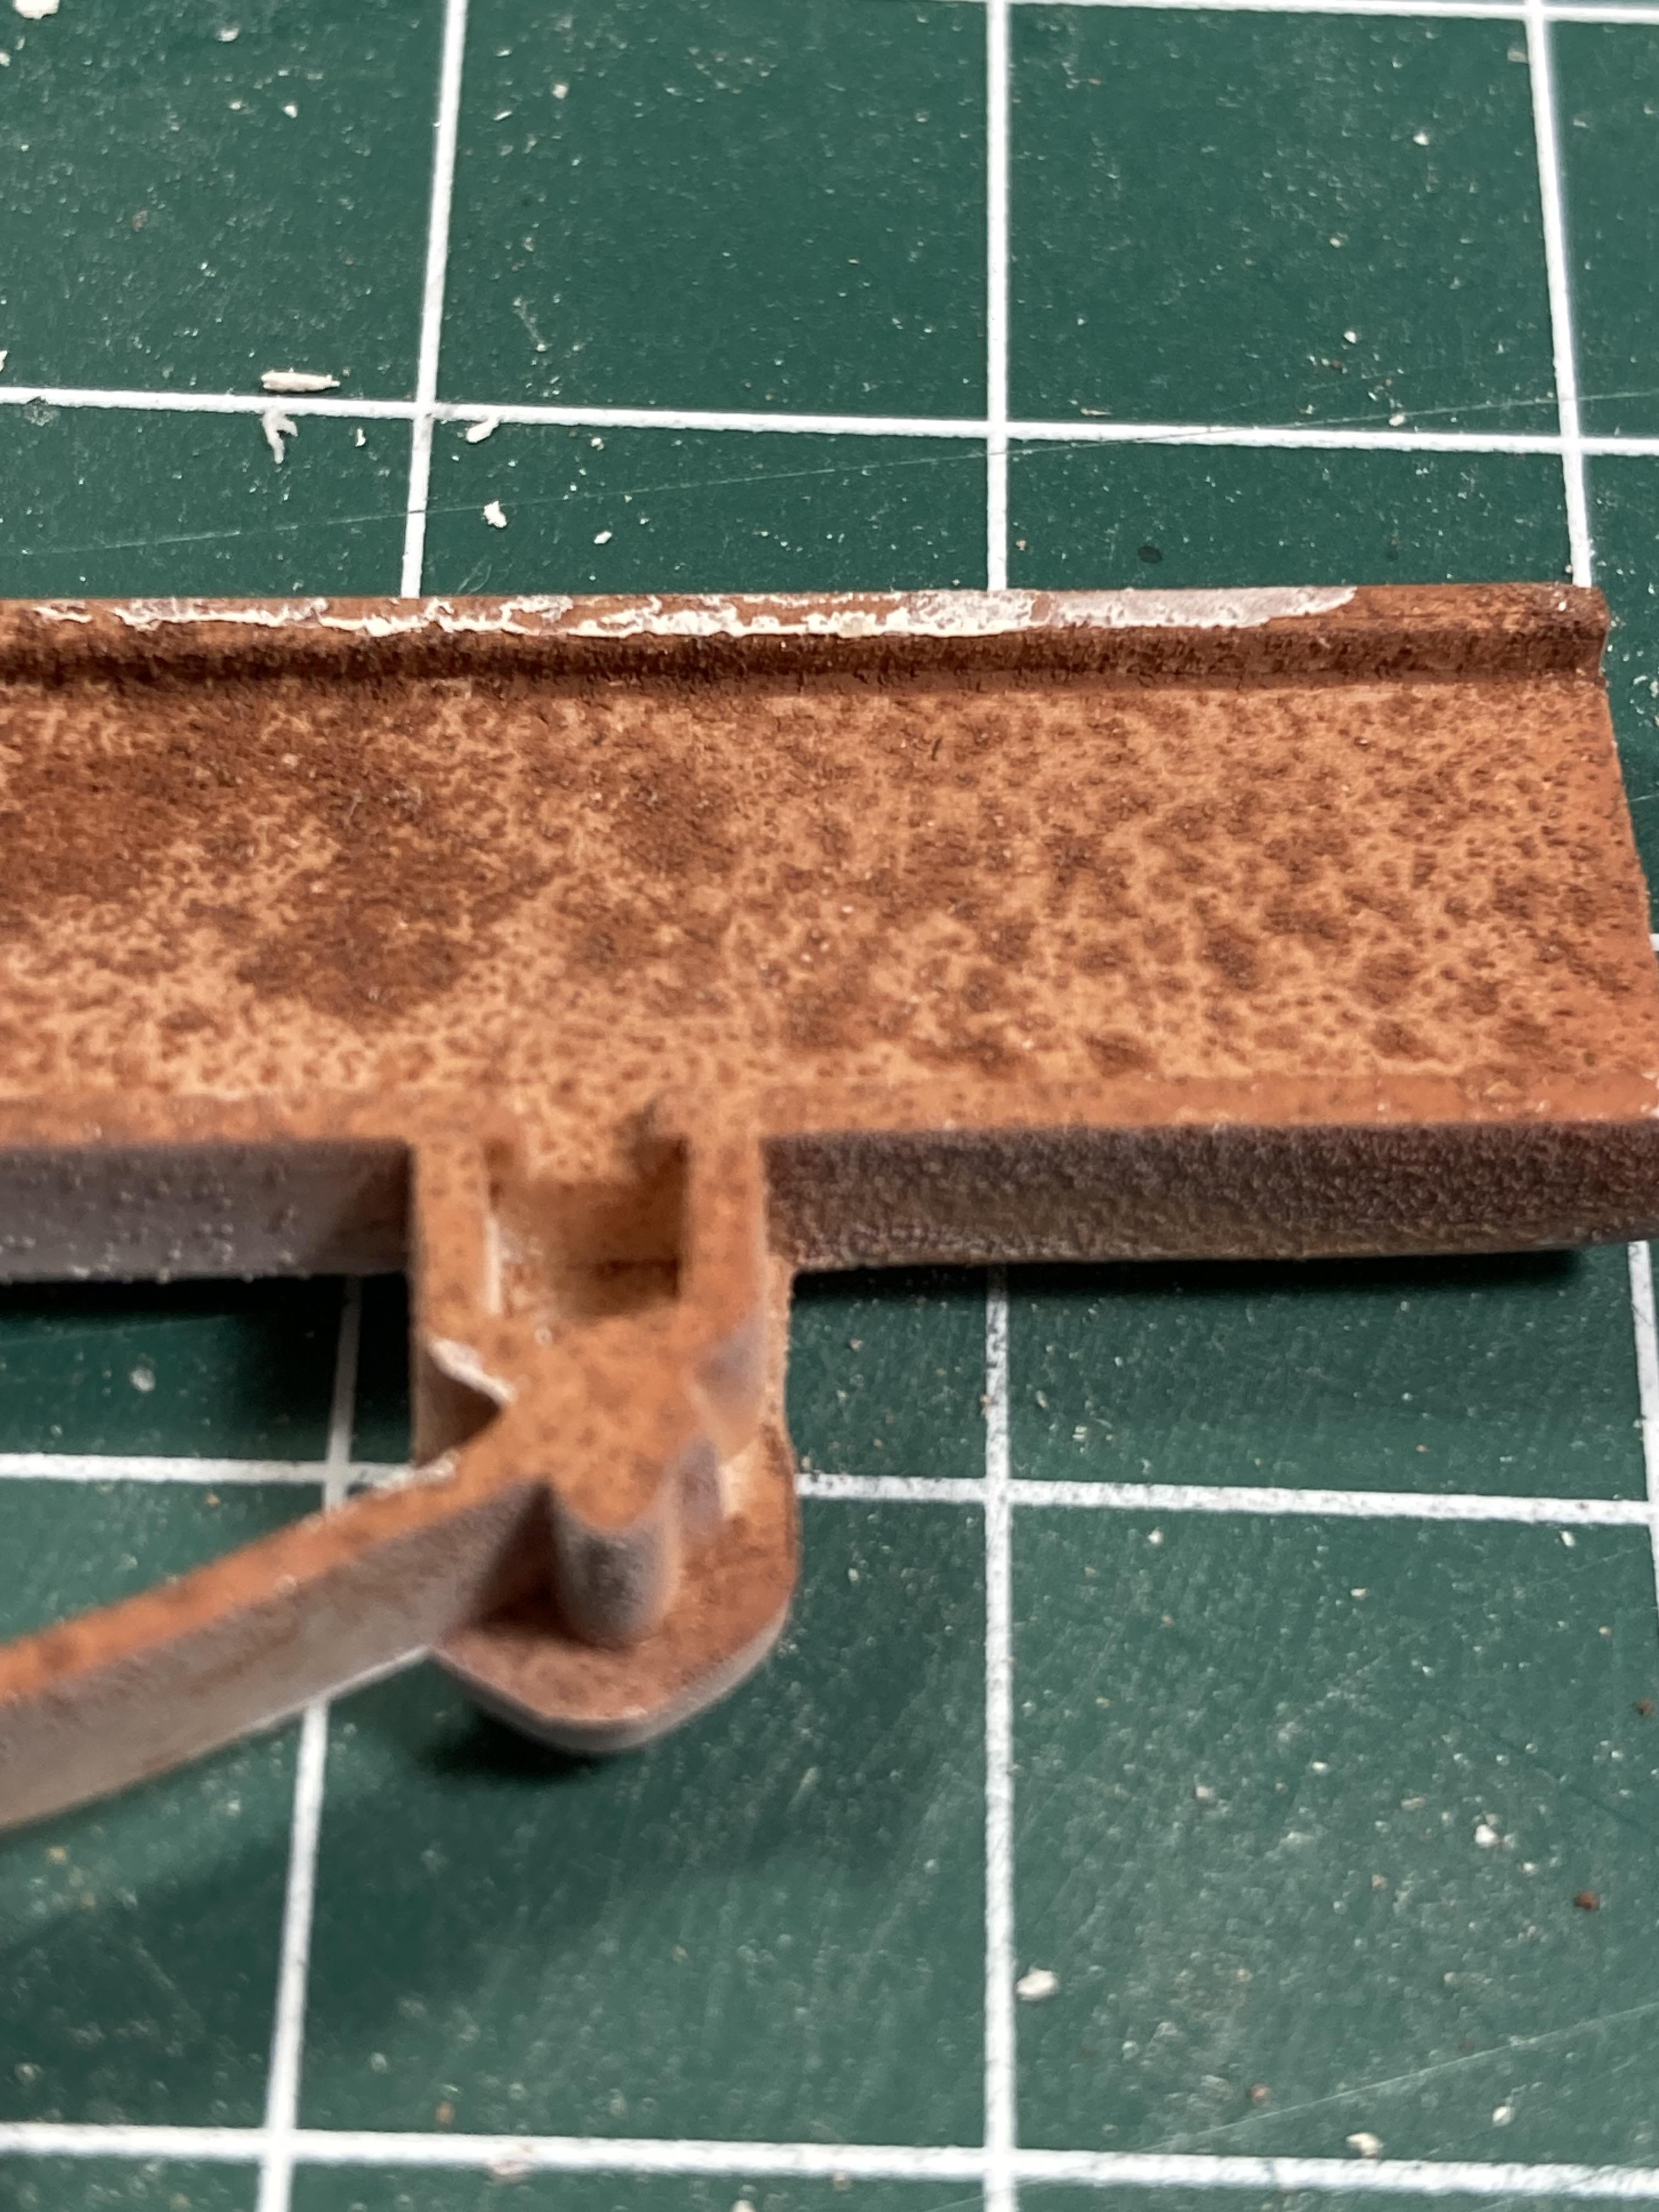
Thanks for all the kind comments guys. This forum is so encouraging! This effect was achieved with Vallejo rust (I’ll get the actual numbers for you) over Tamiya primer with alternate flour sprinkled between wet airbrush coats. Gives a nice gritty finish. The chipping is Vallejo chipping medium over rust, with Tamiya acrylic flat white - which is then reactivated with water and chipped. Won’t work with the flour technique though - I just found that out 😳 - but that’s what I did with the wheels. . Then a flat black pin wash to blend everything, followed by a bit of bright rust dry-brushing. The tires are weathered with Tamiya chalk - Scott is right - it is very useful - and forgiving. -
Nothing too special going on here boys - but I think it's always fun to see what's on each other's benches (speaking of which - here's my little corner of the world). I'm building a kit that made me drool as a kid - could never afford it - but oh - those wonderful doubles! Just basically stock with 3D printed 2 hole buds/Goodyear tires and a few detail parts like a new dolly drop-wheel, glad hands, electrical junction box and security chain hooks. I decided to do it as a weathered old work-horse. I'm playing with some various rust/weathering techniques. I always like to do up a reference binder to gather all my source photos in one place. Merry Christmas and Happy Holidays everyone!
-
American LaFrance Eagle
Bren replied to Engine 51's topic in Model Trucks: Big Rigs and Heavy Equipment
What a terrific model. You put a lot of work into that and it paid off. Very clean build. Congratulations! If you cared to share any of your tips or tricks I’m sure we’d all love to hear more. Resin parts? Any tricks you learned scratch building? Anything you would do different if you had to do it again? -
Western Star 4900 FA plow truck
Bren replied to BK9300's topic in WIP: Model Trucks: Big Rigs and Heavy Equipment
Wow! I (and everyone else it seems) am running out of superlatives to describe this build Brian. Those tanks/straps are AMAZING! It is an overused cliche - but you could scale this thing up and drive it off the lot. I’ve never seen such a stunning replica. All I can say is keep it up! We’re watching in amazement. -
The Same but a “little “ different….
Bren replied to Biggu's topic in Model Trucks: Big Rigs and Heavy Equipment
Well blush away Jeff 😳- well deserved. Our little corner of the scale model hobby exists at an interesting intersection between scale cars - with all their flash and chrome - and military subjects - with the accent on weathering skills. Just so no one misinterprets what I’m saying - there is absolutely nothing wrong with a shiny new Abrams tank fresh from the factory say, nor a shiny new truck as the manufacturer built it. But it takes a whole new skill-set to subtly bring the subject to life with worn metal highlights, paint chipping, shading to sun-wear paint and the like. It’s not just hucking glops of mud at a vehicle - and this is a skill I see evolving beautifully in our truck models on the forum here. So keep turning out those shiny new chromed up Petes- but there’s a special place in my heart for the road warrior workhorses with their battle scars as testament to their hard work! -
The Same but a “little “ different….
Bren replied to Biggu's topic in Model Trucks: Big Rigs and Heavy Equipment
I’ll just add my congrats to the general conversation Jeff. This is terrific! Subtle weathering is an art form - and you nailed it. Too many model trucks look either shiny off the show-room floor - which is cool if that’s what you’re going for, or like they just competed in a mud-bog competition! Nothing shouts realism like mild weathering - the odd paint chip or dusty windshield, greasy engine, dusty tires - you pulled it all together - and has been said - your use of aftermarket parts was tasteful and beautifully incorporated. Kudos my friend! -
My 1st Big Rig "Blue Collar"
Bren replied to James2's topic in WIP: Model Trucks: Big Rigs and Heavy Equipment
I killed myself laughing over this quote!! I need to put that in a plaque over my bench “It’s modelling - not defusing explosives!” Love it? -
Western Star 4900 FA plow truck
Bren replied to BK9300's topic in WIP: Model Trucks: Big Rigs and Heavy Equipment
I totally agree Jeff. I have learned so much from the members here - and can always ask a question. Don’t know about ‘banging’ out though ? -
Western Star 4900 FA plow truck
Bren replied to BK9300's topic in WIP: Model Trucks: Big Rigs and Heavy Equipment
Well that’s a surprise! We’re in the same neck of the woods - I had no idea you were a BC’r. If you want me to take a stab at printing your file(s) just let me know….. -
Smokey and The Bandit, my way!
Bren replied to TruckerAL's topic in Model Trucks: Big Rigs and Heavy Equipment
And a well deserved award it is too! Terrific build. I know I’m late to the party commenting - but I think I speak for others when I say ‘don’t spare us the details!’ I’m fascinated to know what you did and how you did it. That’s how we all get better here. Where did you source some of the after market parts - and what were they? Did you have any headaches to overcome? What were your fixes? I notice very nice chrome trim detailing - just a steady hand - or did you use a particular technique? Thanks! -
Sorry for deluging you with pictures?! But I just love your work and think this could be a helpful addition to your palette. You bet - these were all printed on an Elegoo Saturn 3 Ultra at .02 layer height using water washable resin - pretty standard these days - nothing fancy.
-
And a few other things printed for the Pete.... So my main point is - you don't need to print massive whole truck bodies - I find it a great tool for..."now where would I find something that looks like that...." And uber-scratch builders like you could definitely take advantage of this fountain of new parts for your builds.
-
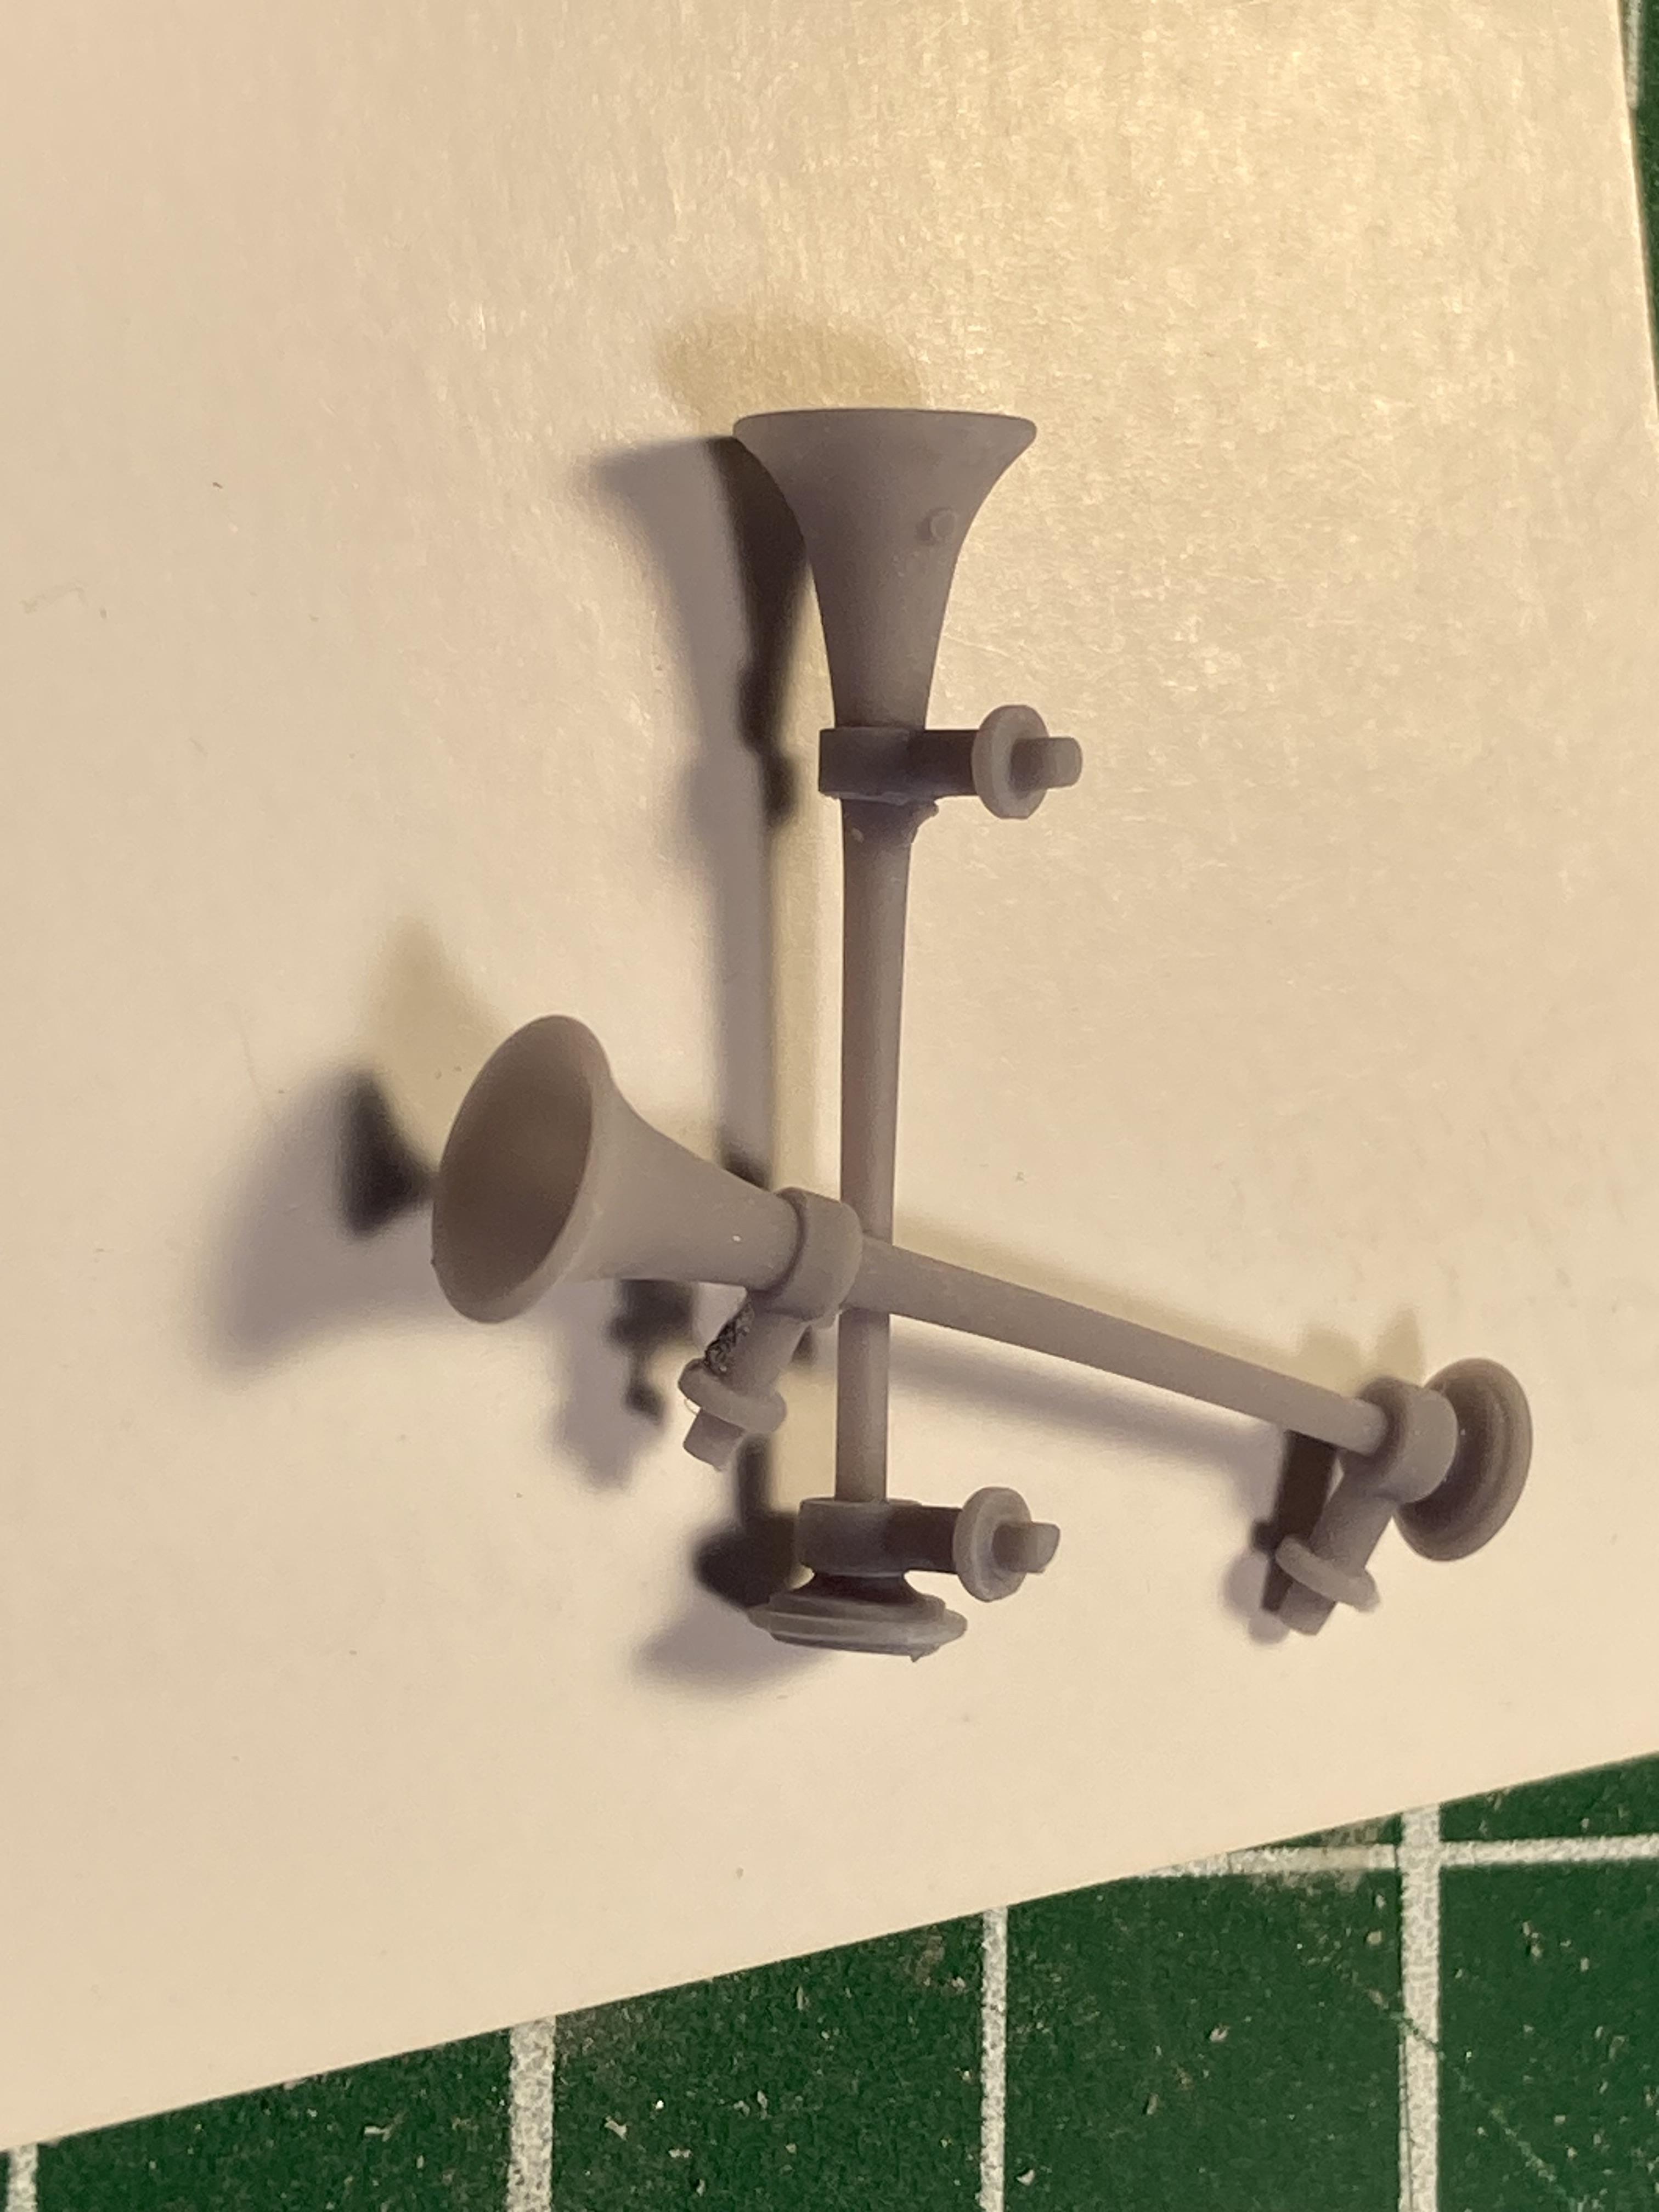
I needed an electrical junction box as well. And the electrical trailer connector. I know you like your parts small - so I showed you my gorgeous finger for scale!
-
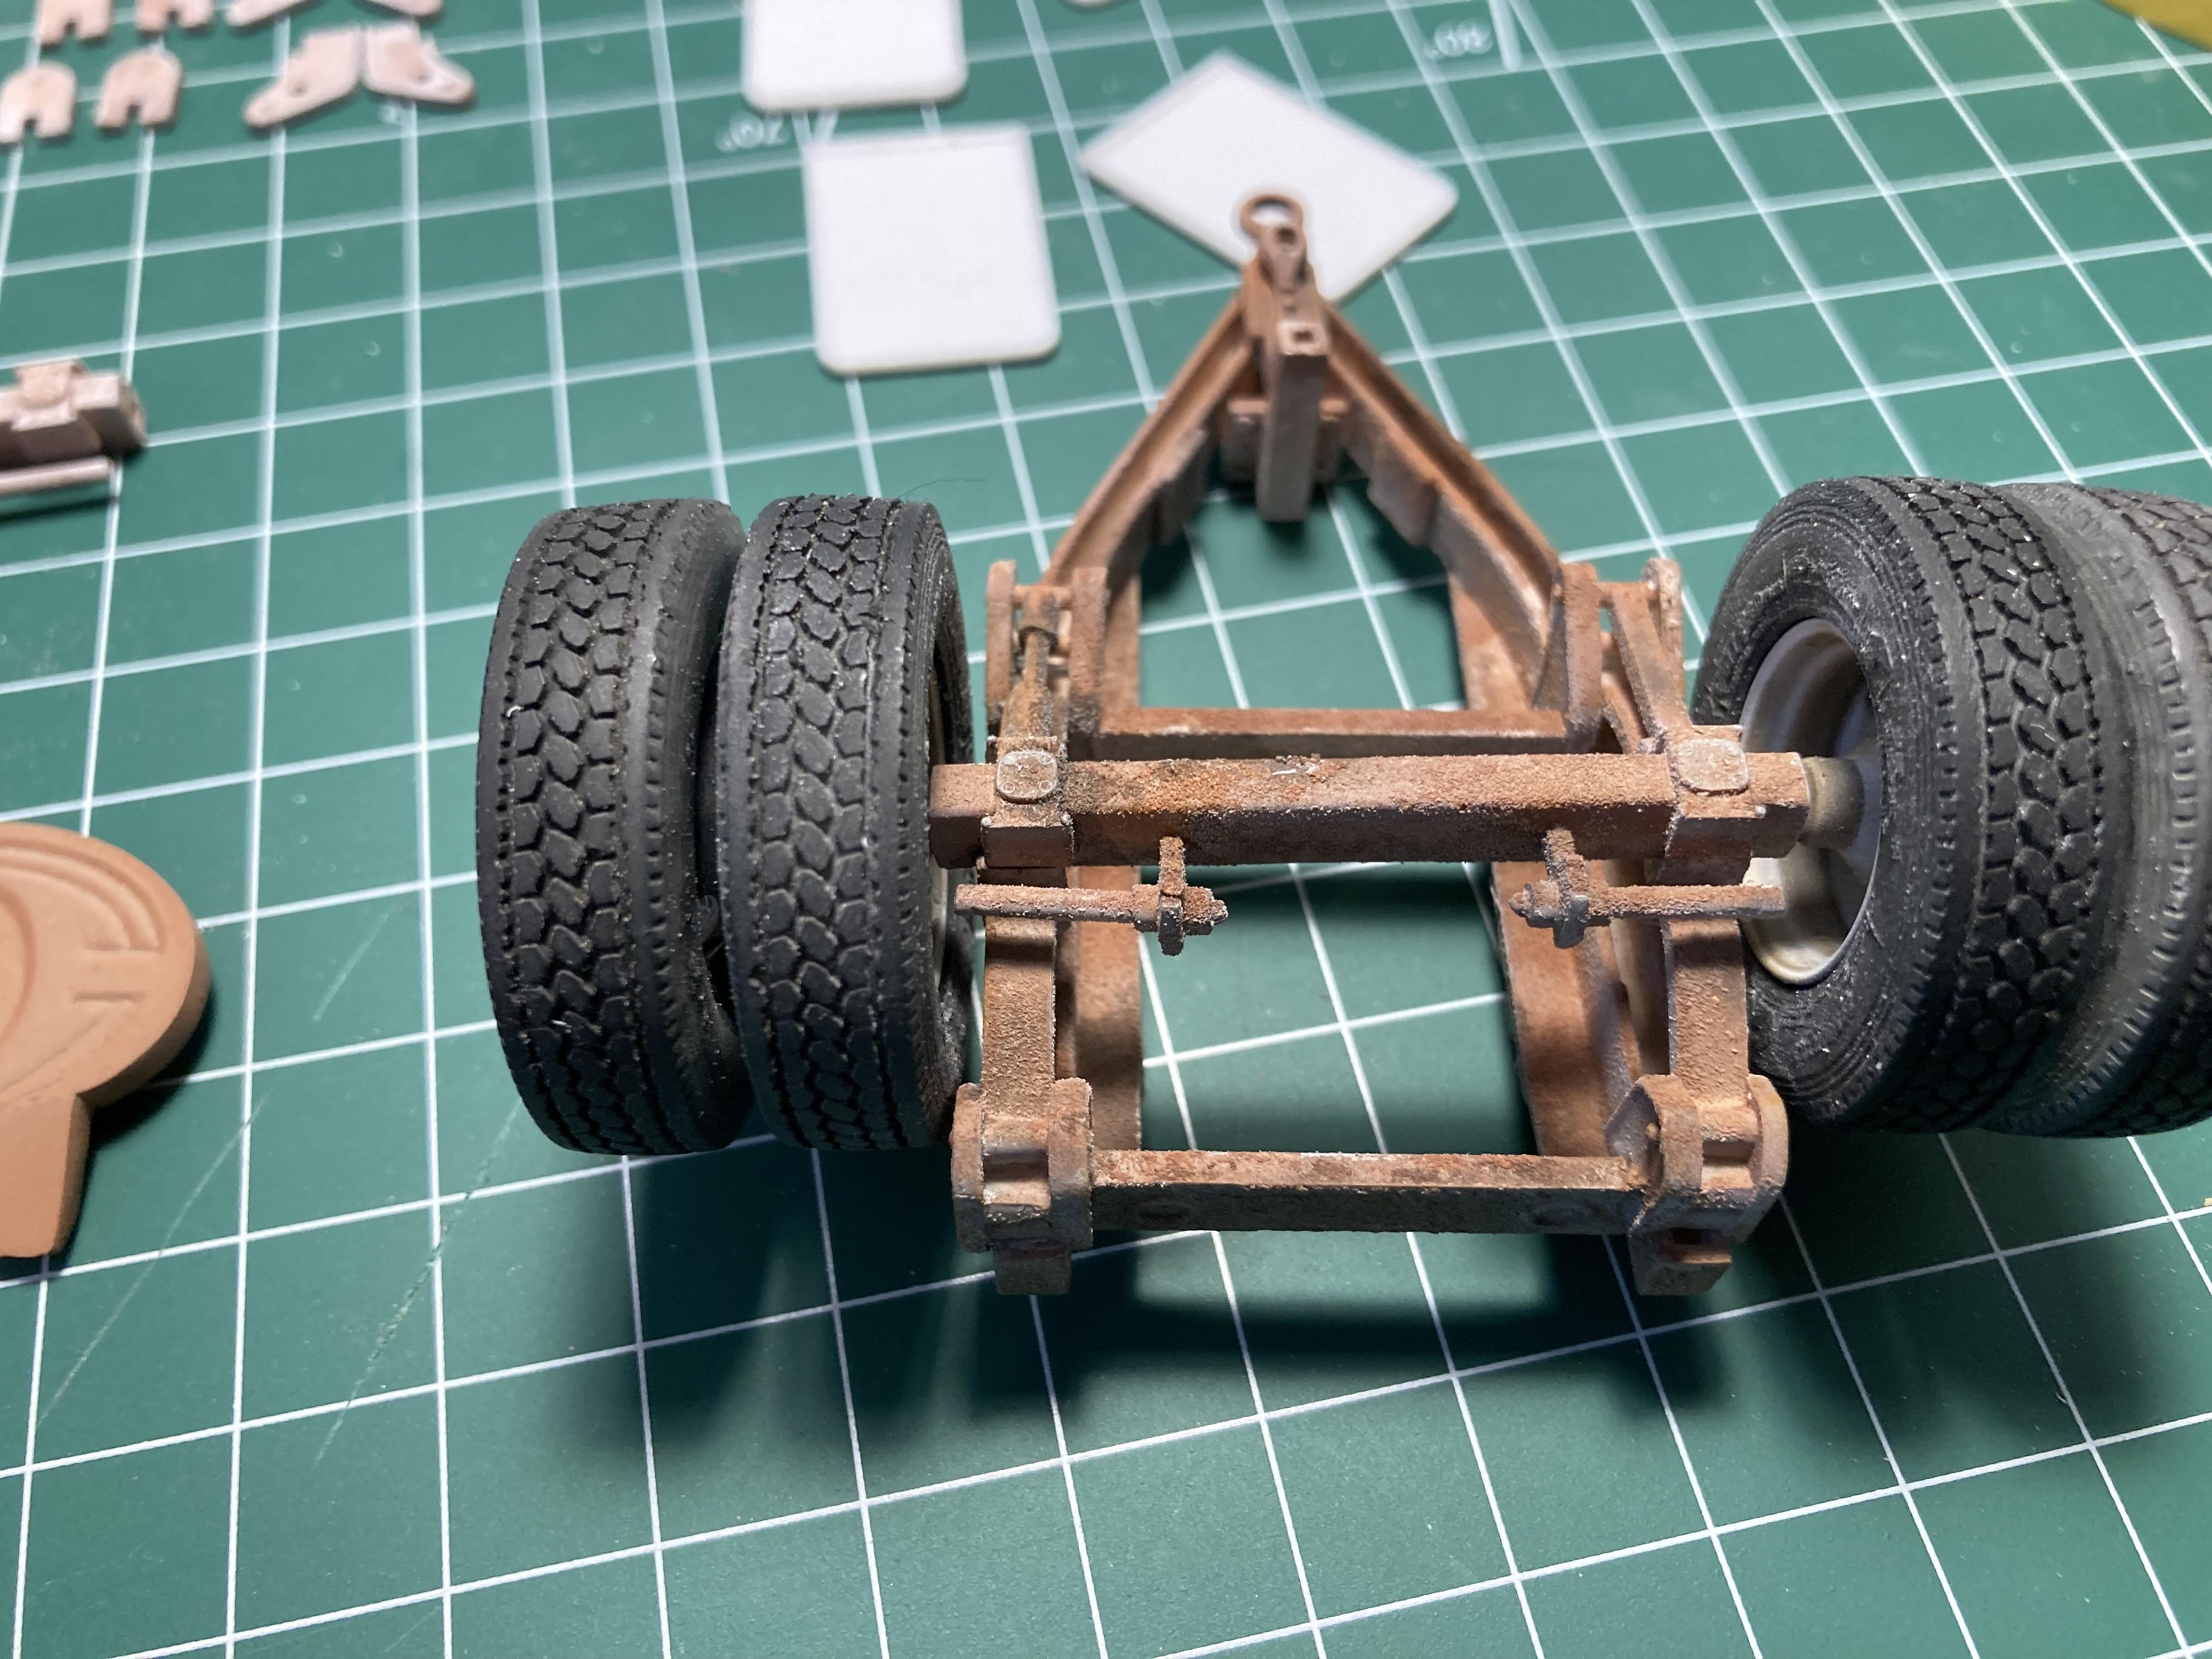
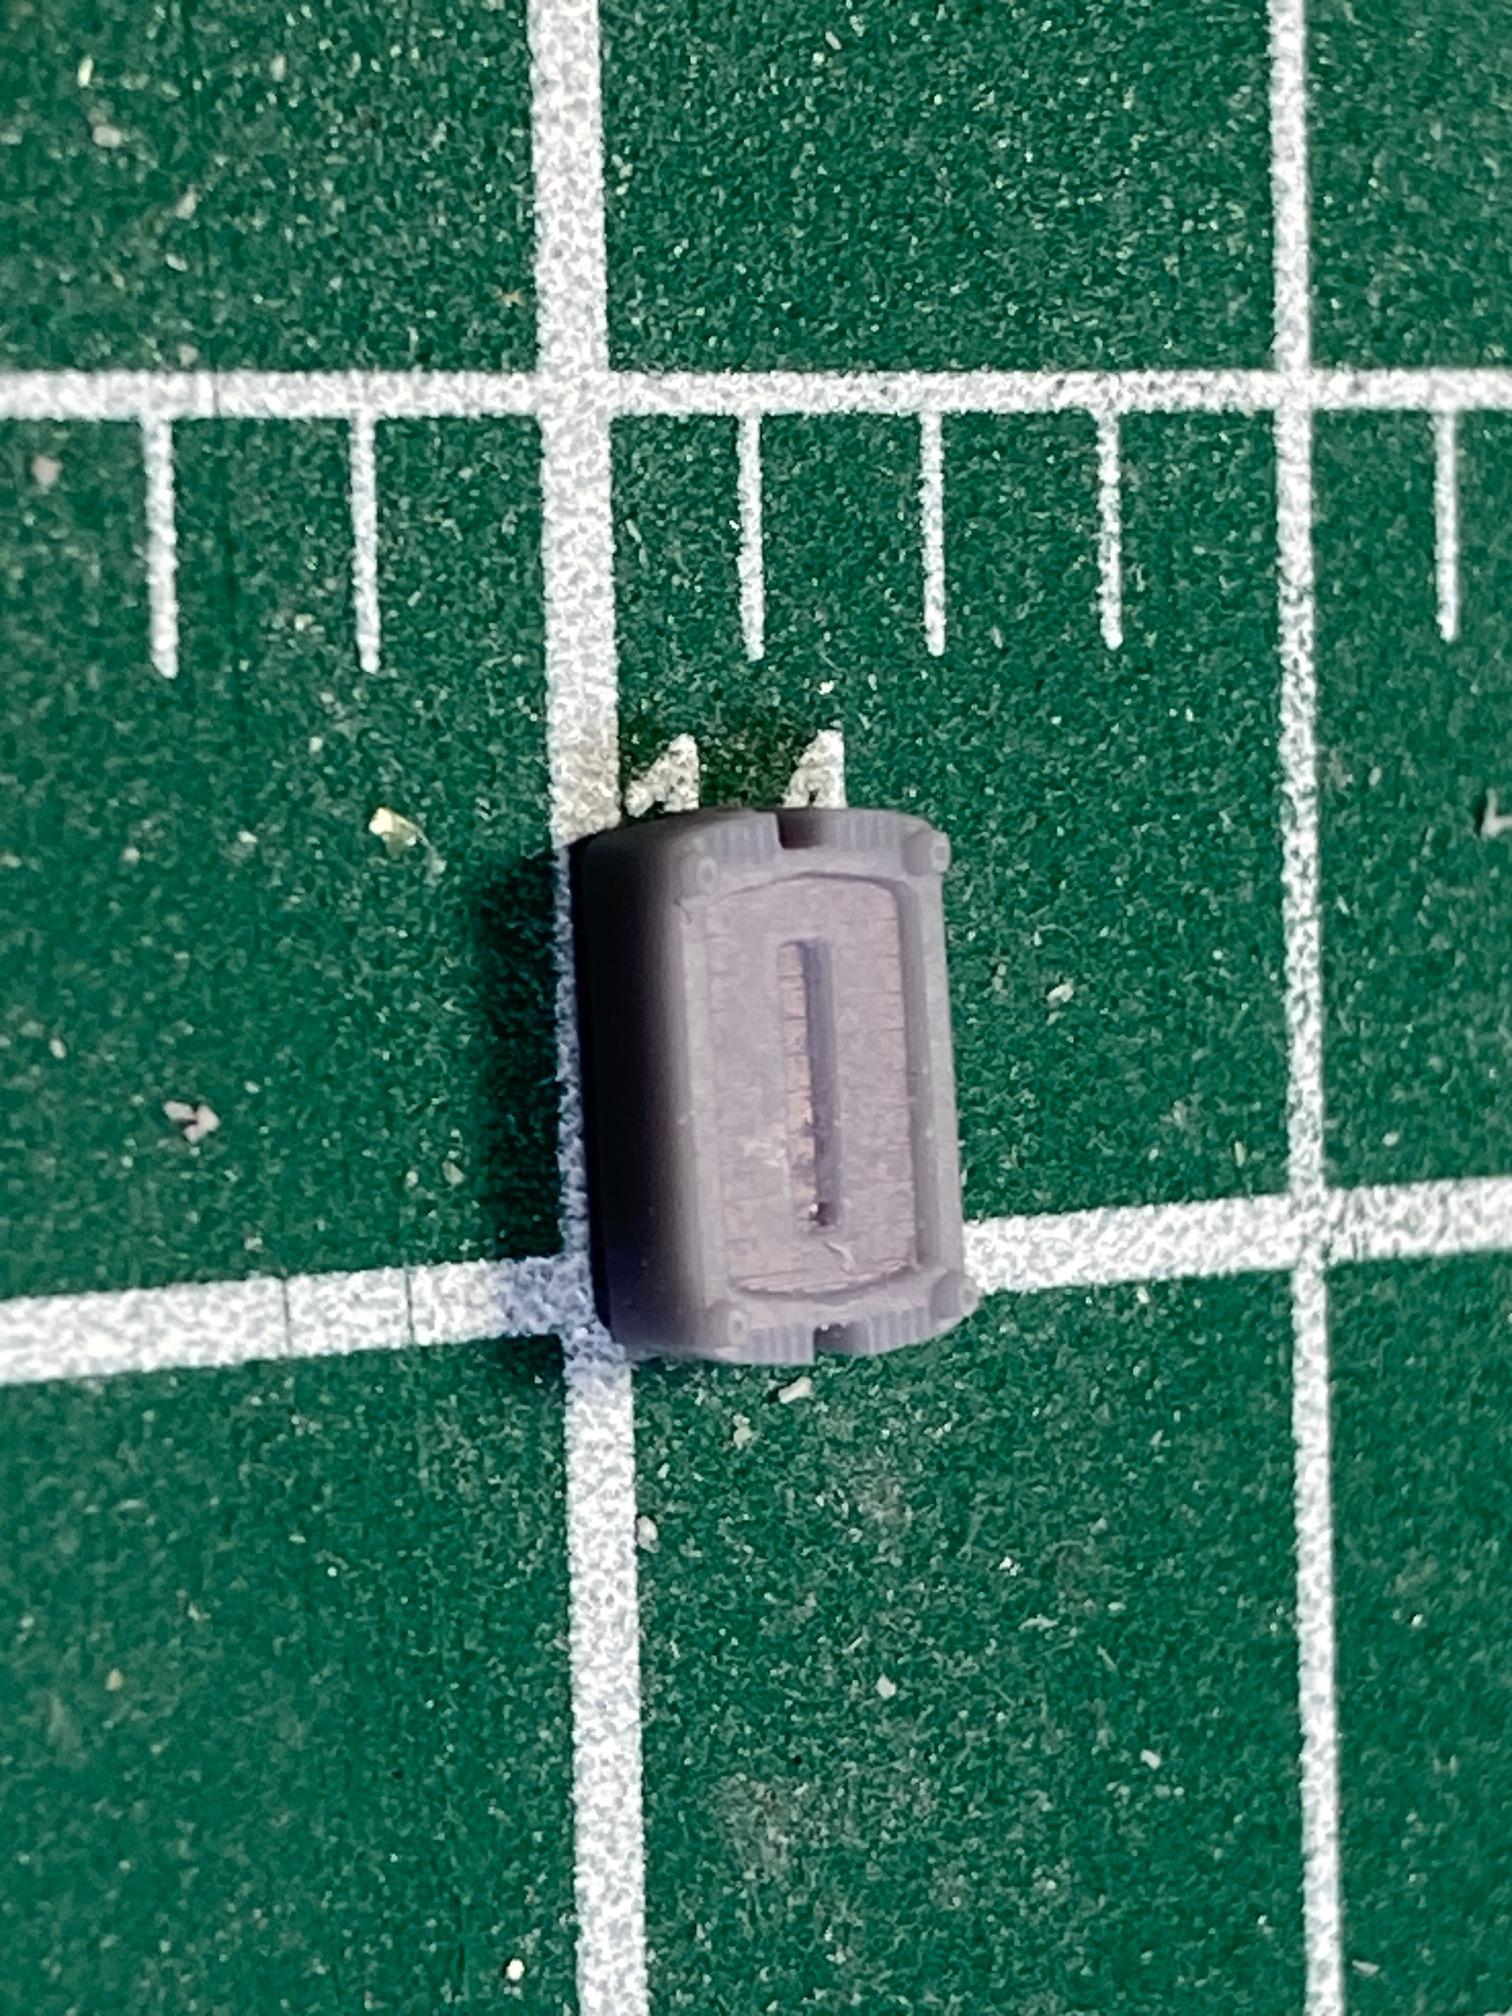
Next, I needed some parts for the Trailmobile dolly - specifically the chain hooks - not included in the kit, electrical trailer connection, and some handles. I also needed a better representation of the dolly support wheel. The kit part appears much larger than any reference pic I was able to find. I searched Cults for an appropriate file - and as an example of resizing something never intended for that purpose - I found a free .stl file of a child's toy train wheel, shrunk it down to 7 mm and presto - it looks exactly like what I wanted. I'll post the reference pictures and the prints I selected as suitable, below. (Kit dolly wheel shown beside the printed one).
-
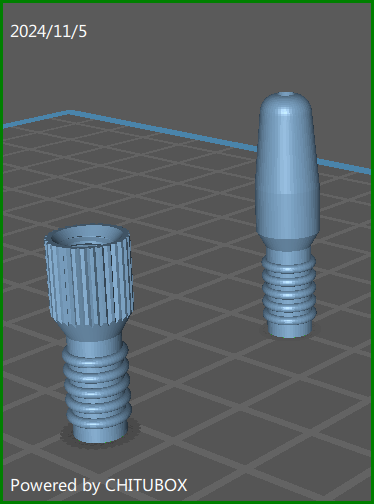
So I thought I'd show you EXACTLY what I'm doing as an illustrative example of what I'm talking about. I'm currently working on finishing "the bane of my existence" Pete 353 and The Trailmobile dual trailers. The Pete needed the fresh air intake to the turbo - and the crude kit parts look awful - and in any event - won't fit. So I printed two different elbow files, joined them and used CTM hose clamps to detail (pictures below). I'll post a few more examples after this....
-
New 2024 Peterbilt 579 Hi-roof sleeper
Bren replied to RoninUtah's topic in Model Trucks: Big Rigs and Heavy Equipment
Terrific build Ron. I know you had to climb a steep learning curve to get this one out - but you did it and hopefully will inspire others to dip their toes in the water! Well done my friend! -
At risk of waxing too eloquent (at which point my wife rolls her eyes and mutters....again?) I think you have hit on a key point with respect to 3-D printing. The large truck body prints are impressive, and obviously encompass subject matter which will never be kitted by the manufacturers, but I think the real strength is in small parts. I have been following your sander truck build with fascination and you have next level scratch building skills. It truly is a tour de force. 3-D printing cannot approach the stuff you are doing. Nonetheless, where I find it most useful in my building is in printing connectors, rubber hose elbows, glad hands and the like. These are often not offered in the aftermarket, and they do not appear in any kits. I cannot scratch build a glad hand in 1/25 scale to save my life, and yet my printer can chuck out thousands of them. I have lost track but, presently, I have well over 2000 .stl files, almost all of them small truck components rather than large bodies such as pictured above. I think the true place of 3-D printing will find its way into most of our workshops just like our other specialty tools, for specific small jobs that we either cannot, or do not want to model. I looked at your sketch up diagram of the passenger side control module for your sander, and I think, with caution, one of the newer printers that have resolution down to .01 should be able to do justice to a lot of the detail. One of the most influential philosophies on my modelling was that expressed by the brilliant diorama designer, the late Shep Payne, who coined the expression 'creative gizzmology' in his book 'How to Build Dioramas'. This concept is that the eye cannot see detail below a certain level (remember he worked largely in 1/35 and 1/43) and it could be represented by odd spare parts that merely resembled the object we were modeling, without every nut and bolt being (almost invisibly) present. Perhaps pretentiously, I honestly believe that what we do on this site is art - constrained art to be sure, but art none-the-less. And the way we represent things that are very small is a mark of artistry, just as much as it is technical skill. (Pontification over...sorry? )
-
The bane of my existence! Pete 353
Bren replied to Bren's topic in WIP: Model Trucks: Big Rigs and Heavy Equipment
Sorry - I got so wrapped up in answering the rust question that I missed the 5th wheel one. This is a technique from Hunter at Showtime Studios on YouTube. I do it exactly like he shows here. The trick is not to overdo it - I suspect Hunter would argue I already did, but I think it looks okay. It’s oil paint, with the secret being to use a twitch of red. . -
Yes Brian - it is definitely one of the challenges of 3D printing. I'm told one can fool with print settings to eliminate straight lines being a bit curved (sometimes) but it still seems to happen to me every so often. Print orientation is a big deal - here are the side skirts I just printed for the above. Look at the forward piece (yellow arrow) - the first one came out with a warped upper border. I re-oriented it and it printed straight. It's not the curing but the actual print that is warped. But yes, thin parts generally need to be clamped or weighted (I use 123 blocks) so they stay flat after UV curing. I find 24 - 48 hours does it - they don't warp after that. I'm having a blast with 3D - but it's definitely a labour of love - the parts need quite a bit of reworking (they call it "post-print processing") to look right. The more I do, the better I get. And resins are improving all the time - so I think we'll find it gets less of a problem with newer printers and resins.
-
The bane of my existence! Pete 353
Bren replied to Bren's topic in WIP: Model Trucks: Big Rigs and Heavy Equipment
Thanks Gary. All you have to do is wait about another 10 years and I'll be all over it!? -
The bane of my existence! Pete 353
Bren replied to Bren's topic in WIP: Model Trucks: Big Rigs and Heavy Equipment
You bet. I find it's the texture that sells it - colour is secondary. I used Streaking Rust Effects by Ammo Mig (A.Mig-1204), and while it was still wet, ground some Tamiya weathering master - combination of Orange Rust from Item87085 - set C, and Rust from Item87080 set B. I try to make it rough texture without overdoing it. Then a dilute flat black wash to blend everything. I didn't do it here, but I've also sprinkled flour into wet rusty paint - looks pretty good too.
-
The bane of my existence! Pete 353
Bren replied to Bren's topic in WIP: Model Trucks: Big Rigs and Heavy Equipment
Thanks so much Jeff. Now I gotta do it!! ? -
I hear you - these files are not cheap - but you can print as many copies as you like - so defraying the costs among 3 or 4 guys makes it much more manageable. The print above took about 1/2 a bottle of resin - so about $15 US - so not too expensive. Add in the file cost among 4 people and each could have this for about thirty bucks.
-
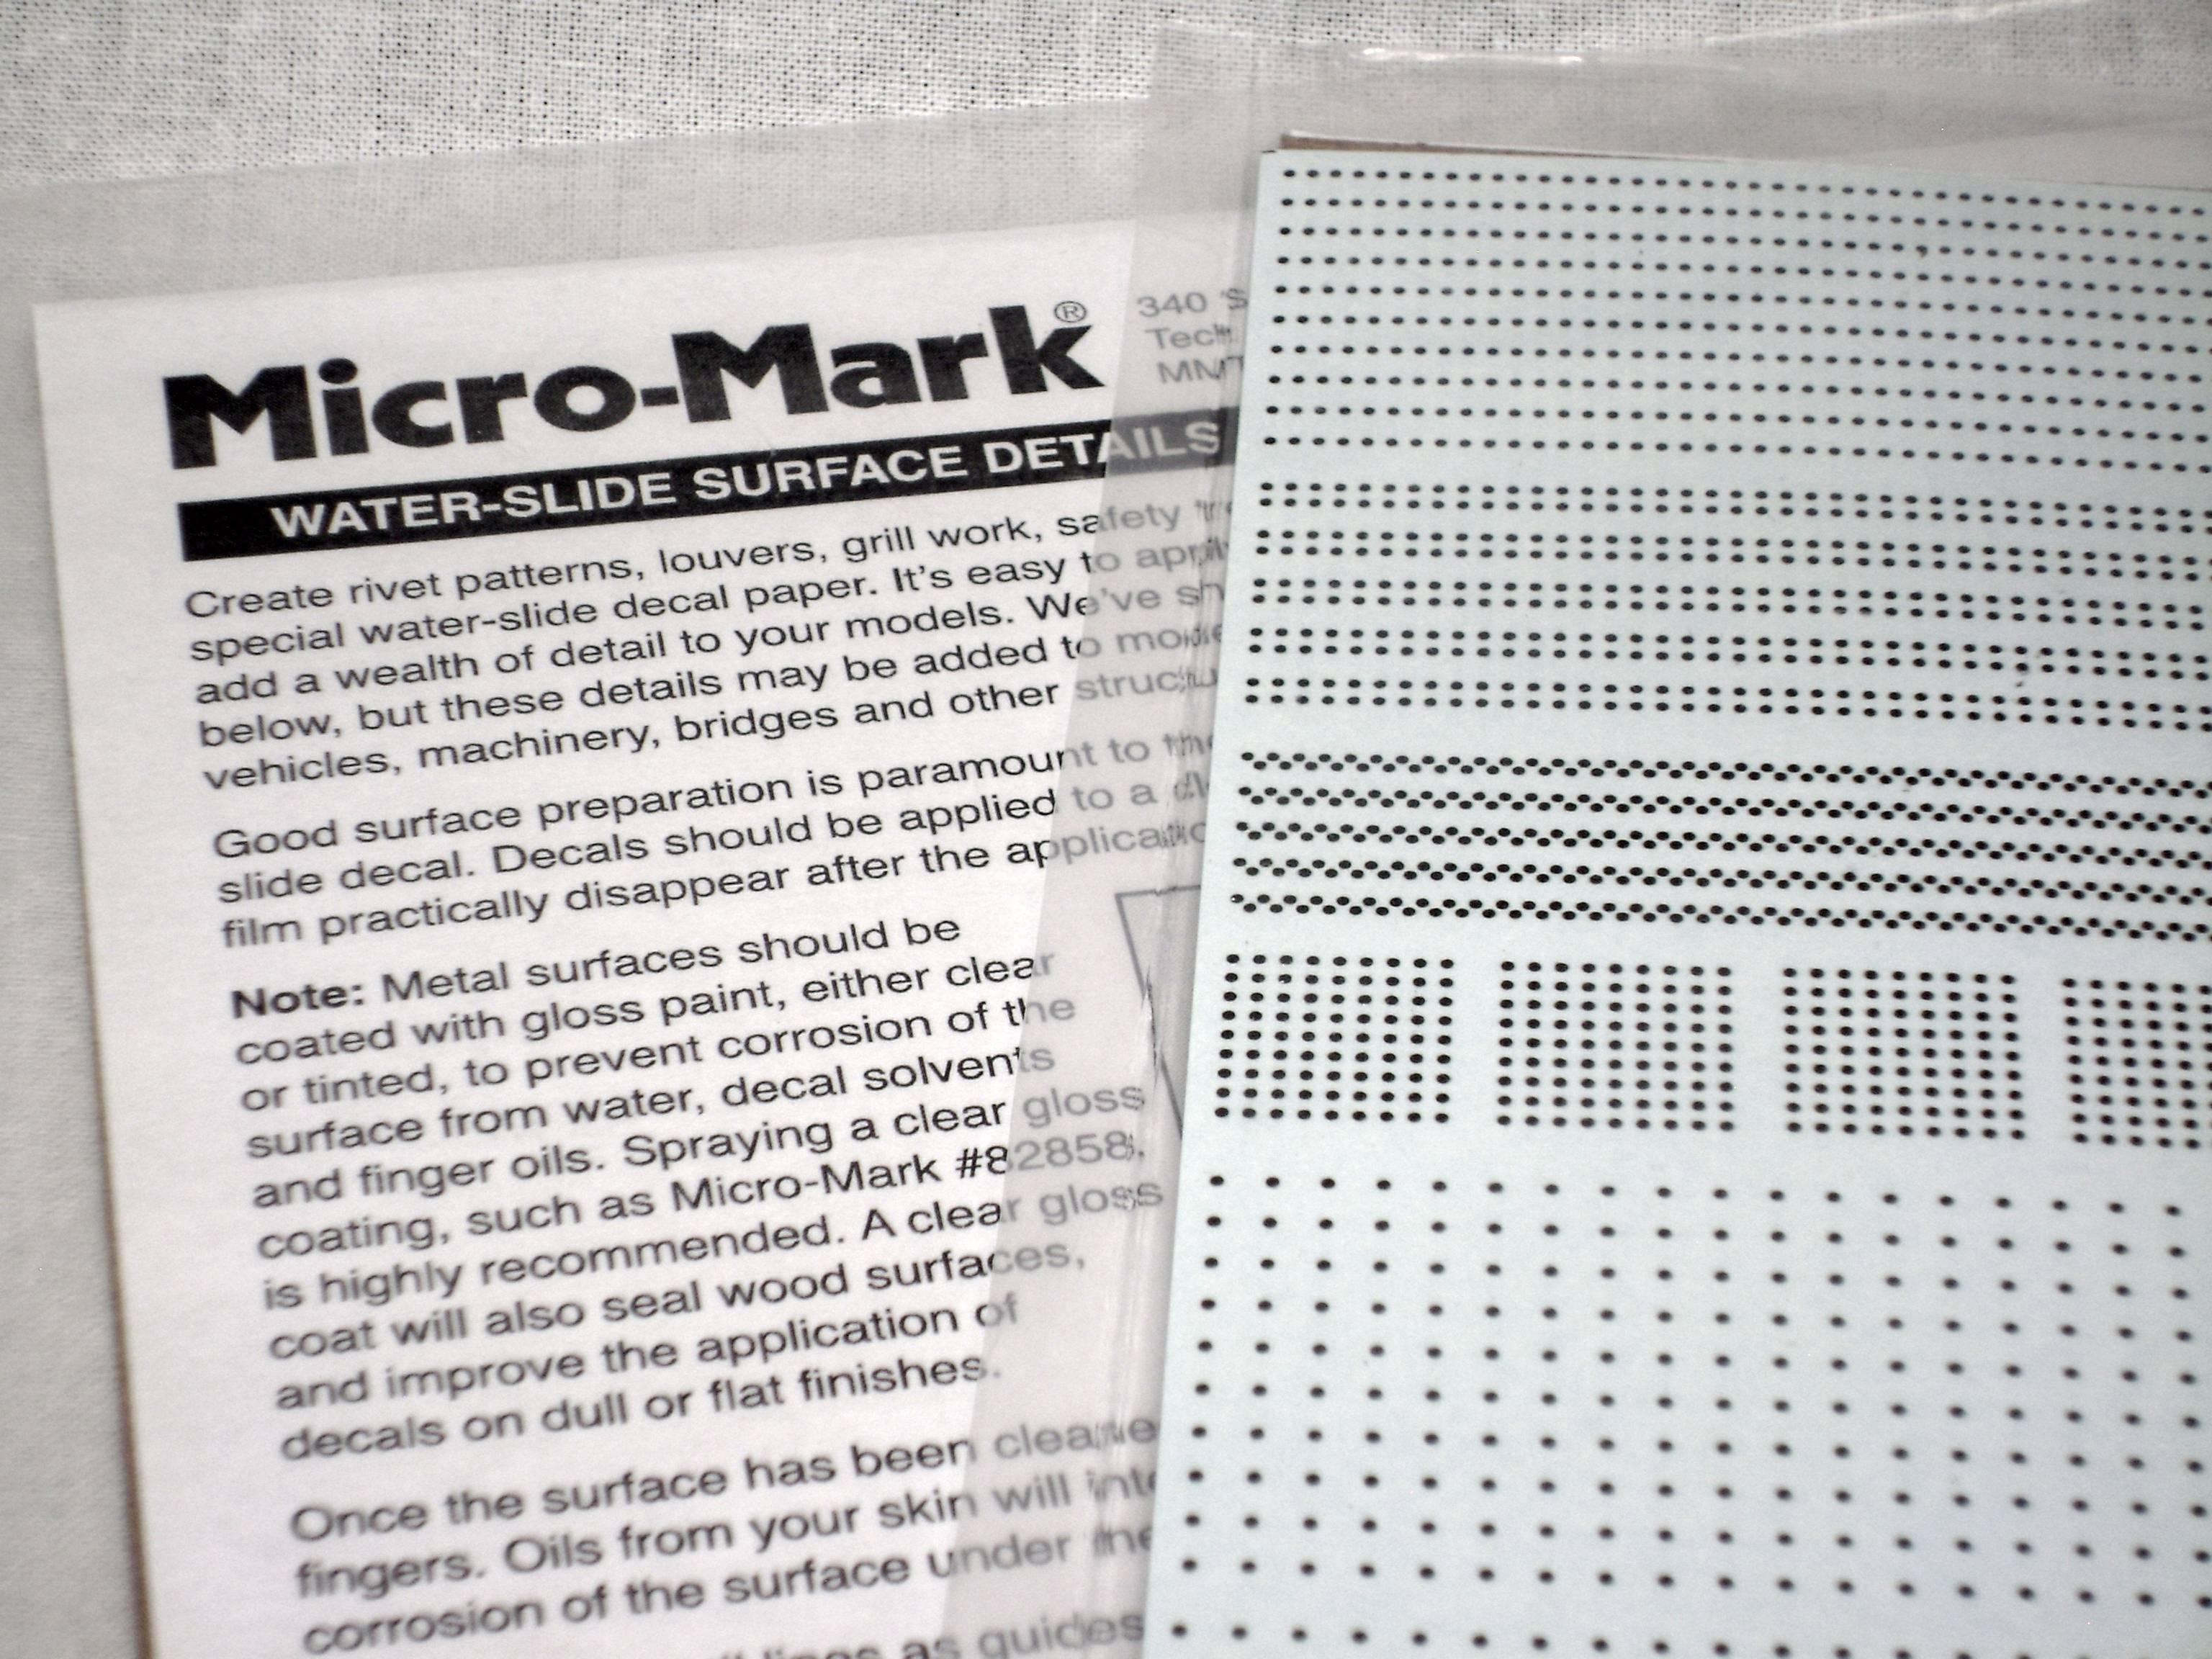
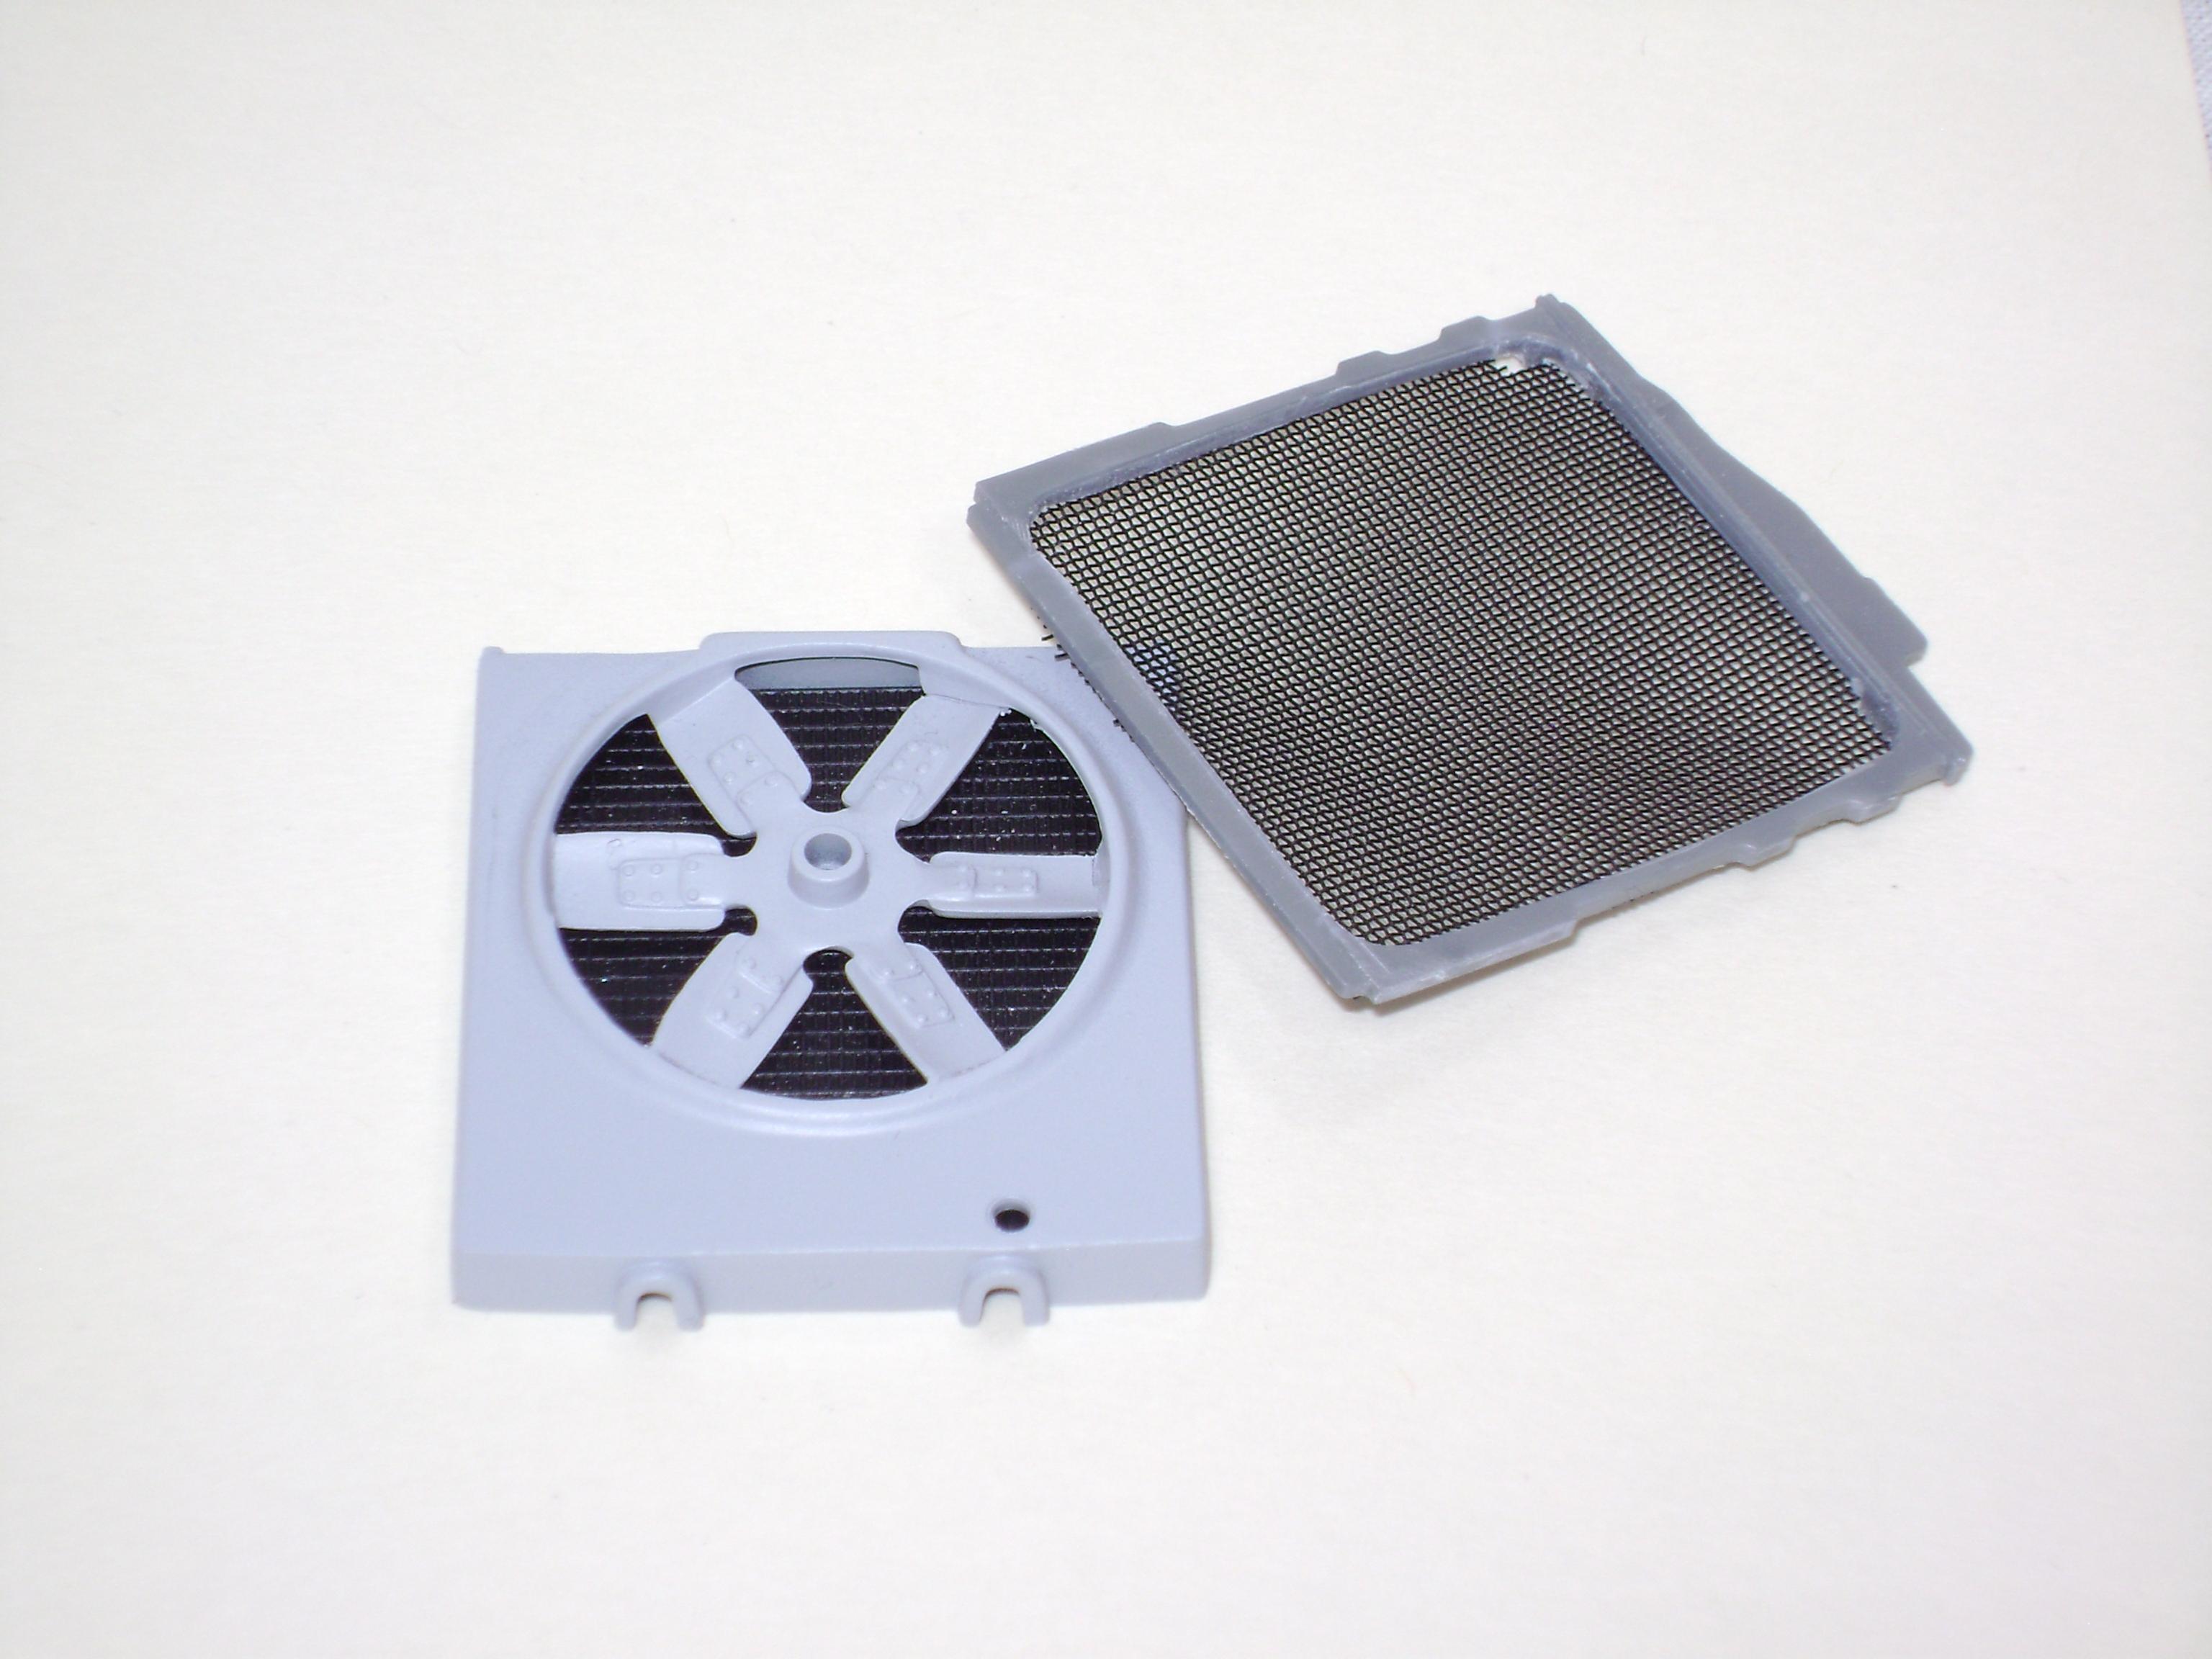
We've all got one - the model that refuses to get finished - just sitting there on the bench glowering reproachfully at us. Well...I do anyway - this one's mine. And, as confession is good for the soul, I'm coming clean and posting it here - maybe it'll shame me into finishing it. This is the Revell kit 07464 Western Life Peterbilt 353. I bought it 10 years ago for a "fun quick box-stock build" - and promptly hit a brick wall and bounced off. Those of you who know the kit remember it is NOT a realistic 353 - the pit style fenders are molded to a tilt style hood. So I separated them and fabricated a proper frame attachment, and a more realistic front bumper. I scratch built a rear cab wall to turn it into a day cab, using Micromark rivet decals to replace the missing detail. Once I fixed all that, the perfectionism bug bit - and I started detailing or correcting everything. I used photo etch for the grill, radiator and stack heat guards. Replaced the too-modern style headlights with more period correct. Stole the Dayton style wheels off the AMT Astro - I thought they were more realistic for a 353. Made my own decals on a colour laser printer. Then plumbed and wired until my eyes crossed. Then I hit that darn butterfly hood and got stuck. So here it sits. Some day......


.jpg.a40a9ec8ec392c2d71e6973004fb6eb2.jpg)
.jpg.9607408c4ff5e15adcb9787c97cee8c9.jpg)
.jpg.7fcbe48f177ad3d689078344f33af79c.jpg)

.jpg.721ed92e24714c944114ce67243fc783.jpg)


.jpg.6454c25283dae2ed9fd7ac5195be83d4.jpg)
.jpg.2daecf9a0af73da790e090166c6b40c6.jpg)
.jpg.e8226128c890cf1fa2f106b9aedeead1.jpg)
.jpg.dca8300636d40c1f88267f048295b6ee.jpg)
.jpg.011686c5aa5d230b6b48402aa5b69940.jpg)
.jpg.2c1a9950048766d1df3d5872ccd674f3.jpg)
.jpg.0c1bf844bbf5867465eb9eab5e648280.jpg)
.jpg.9cc2a733b282fe36bcbc479b6071e8d2.jpg)