

SpreadAxle
-
Posts
2,198 -
Joined
-
Last visited
Content Type
Profiles
Forums
Events
Gallery
Everything posted by SpreadAxle
-
 Dave, my main progress since my last post has been all small details. I will have pix up again, soon. I haven't done anything major, though it isn't too far from being complete.
 -
Good point. I had a bad habit of doing it by eye. I'm going to try the straightedge next time, along with some other cool ideas I read.
-
Note that sometimes this is the hard part. Check measurements often as looks are decieving. I've had to redo frames that looked perfect until I went to mount items like the front and rear suspensions.
-
What Douglas is showing in his pix is pretty much how I do it. You will note the plastic pieces at the joints in the frame section for strength. What I usually like to do is use a crossmember right at the joints to add strength. This is where I always start. Also, another thing I do for strength is if it's possible, mount things like fuel tanks, toolboxes, or whatever on the outside of the frame rail at the joint. If you straddle a fuel tank(for instance) across the joint, it is glued to both sections of the rail, and covers up the joint if you can't get it to look right. Even a deck plate right there helps. All that is just my long winded way of saying never rely solely on just glueing the ends of the frame rails together. It's my understanding that when real trucks have their frames stretched, we'll use the example of a conventional with a sleeper, the cut in the frame is usually made under the sleeper. Doing this, allows you to mount the fuel tanks as I mentioned, and, will hide flaws. Or if it's a straight truck, which usually has a longer frame, make your cuts where the truck body will be sitting over the top of the splices. The body will be glued to both sections, giving the rail sections the added strength of being glued to a large item. Also, from watching Mackinac359's recent work, if you get the right size Evergreen/Plastruct channel, cut to desired length, you can use your existing frame rails as a template for detailing the new rails, including shaping the front and rear ends of the frame rails. You will then have a one piece, stronger frame rail, then you can use the kits crossmembers to tie your rails together. It's something I will be trying on a future project.
-
Peterbilt 378 Heavy Transport Inc.
SpreadAxle replied to Twist67's topic in WIP: Model Trucks: Big Rigs and Heavy Equipment
It's looking better and better. -
http://riversedgeresins.com/truck_parts If you're looking for resin sleepers, fenders, and cab panels 4 the Italeri Peterbilts, click on this link.
-
1965 Autocar logging truck FINISHED
SpreadAxle replied to bitner's topic in WIP: Model Trucks: Big Rigs and Heavy Equipment
I love the paint job. It's very nice. -
1965 Autocar logging truck FINISHED
SpreadAxle replied to bitner's topic in WIP: Model Trucks: Big Rigs and Heavy Equipment
I love the blue one you have for comparison. This is going to be nice. -
I learned a few things reading this post. I didn't know this truck was that rare, but then again, I've only seen it in the Truck Paper for sale(many years ago), or in online pix, usually brochures. Never in person. Same with the Aero Astro. I never saw one of those in person either. It is an interesting looking truck. I also didn't know Chevy got out of the HD market so soon. I know they made a Titan with the big grille of the '80s, I just didn't know they quit making the big iron that soon.
-
Going Green and Aero
SpreadAxle replied to mackinac359's topic in WIP: Model Trucks: Big Rigs and Heavy Equipment
Tim, this is looking really nice. One question on the paint from Tower Paints. Is this a laquer or enamel paint? This is color is close to a color I'm looking for on a future paintjob. -
NO, no. Don't get in trouble , but another shot or 2 of the air lines at the rear of the frame frame another angle would be cool. Could you get some of the KW as well? Thanks for offering, and taking the pix you have taken thus far. I learned something, too. I never knew they had orginially been from Council Bluffs, IA.
-
Peterbilt 359
SpreadAxle replied to bjscustommodels's topic in WIP: Model Trucks: Big Rigs and Heavy Equipment
This will be a nice truck when finished. -
Really big trucks
SpreadAxle replied to SpreadAxle's topic in WIP: Model Trucks: Big Rigs and Heavy Equipment
That makes sense. Sounds like it would have been a pretty interesting task. -
Ford CLT9000
SpreadAxle replied to phoneguy's topic in WIP: Model Trucks: Big Rigs and Heavy Equipment
It looks good Jerry -
Thanks for sharing these. I am working on the same kit as a side project, so thanks for the shot of the frame, it helps as far as running the air lines.
-
Werner 359
SpreadAxle replied to Murphy's Law's topic in WIP: Model Trucks: Big Rigs and Heavy Equipment
It looks good so far. -
New Resin Truck Stuff
SpreadAxle replied to cargostar's topic in WIP: Model Trucks: Big Rigs and Heavy Equipment
VERY NICE!!!!!! -
lowboy trailer modification
SpreadAxle replied to modeltrucker's topic in WIP: Model Trucks: Big Rigs and Heavy Equipment
If you're talking about the old articles in Car Modeler, click on the link below. Scroll towards the bottom and you should find the article you need. http://public.fotki.com/modeltrucks25thsca...s/car_modeller/ -
Really big trucks
SpreadAxle replied to SpreadAxle's topic in WIP: Model Trucks: Big Rigs and Heavy Equipment
Glad you liked them -
I did a little more on the trailer tonight. The frame is painted, as well as the tank. I used Model Master Aluminum Plate buffing laquer. Here it is b4 buffing: ...and after.... I still need to buff it some more, but it has a nice shine to it.
-
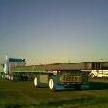
I thought I would share some photos from my recent trip west. This is the load I delivered Tuesday in Miami, Arizona to a copper mine. It's one of the most interesting loads I ever had. How would you like to have to change these tires?? These tires are 11'9" wide, or should I say tall since they're laying down. The whole load weighs 47,000#, which makes each of the 6 tires weigh in at roughly 7,834# a piece. The tread area measures more than 3 1/2 feet across. Here are the big beasts that will use these. They are Komatsu 830E-AC dump trucks. This one was being worked on by the mine's truck garage, which is where I unloaded. AS the guys from Cummins Rocky Mountain worked on it, I got to hear(and feel) the massive engine roar. I wonder how much money is parked right there. Here are some "action shots" as I drove the muddy road through the mine. I hope you enjoyed them.
-
international F-2674 logging truck
SpreadAxle replied to bitner's topic in WIP: Model Trucks: Big Rigs and Heavy Equipment
Awesome! -
Since I'm carrying an oversize load, and not allowed to drive across New Mexico on Sunday, I spent today working on the trailer. This meant chasing a lot of parts from the spare parts box, and a lot of sanding, but here is a mock up of the trailer on the truck. On the original, I made front fenders from Evergreen corrugated sheet. I constructed front fenders for this trailer using spare fenders that are from other AMT Fruehauf tanker kits. I still have to make the upper supports for these fenders. They are supported from below with stretched sprue supports like I did the first time. They go across the frame to both fenders. Here is a front shot. I still have some touch up and final detail painting to do to the cab. 8-) As to the trailer, the tank needs some sanding, and another coat, as well as a coat of paint on the frame. This was an ebay trailer, assembled with no paint, just far too much glue, resulting in broken parts during the tear-down. The suspension from the original trailer is under this frame now. Thanks for looking.
-
The trailer really sets this tractor off. Nice job.
-
Here are 3 for the Ford CL 9000. The wavy stripes are available from JBOT.