traditional
-
Posts
469 -
Joined
-
Last visited
(1).thumb.jpg.e371d4579f83ee021ff22f9ad4b79bbc.jpg)
.thumb.png.e64ca4fead948adbdf6a111229b6cf2f.png)


.thumb.jpg.4bca3333e1da4027c381d8d56a564ec1.jpg)


traditional's Achievements
MCM Avid Poster (5/6)
-
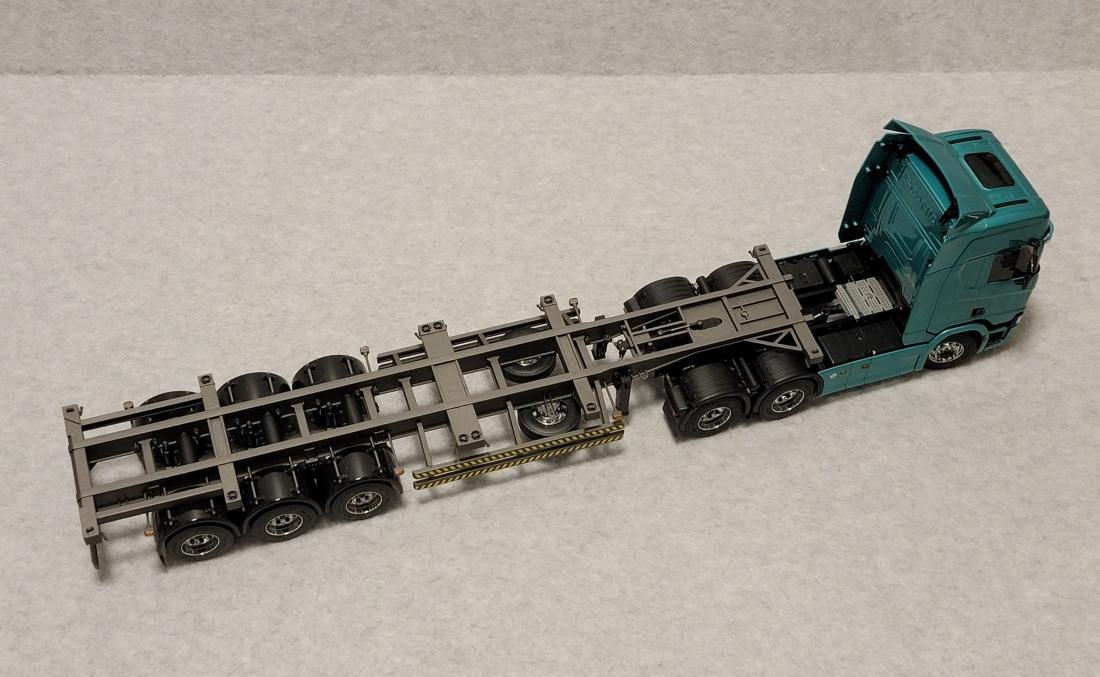
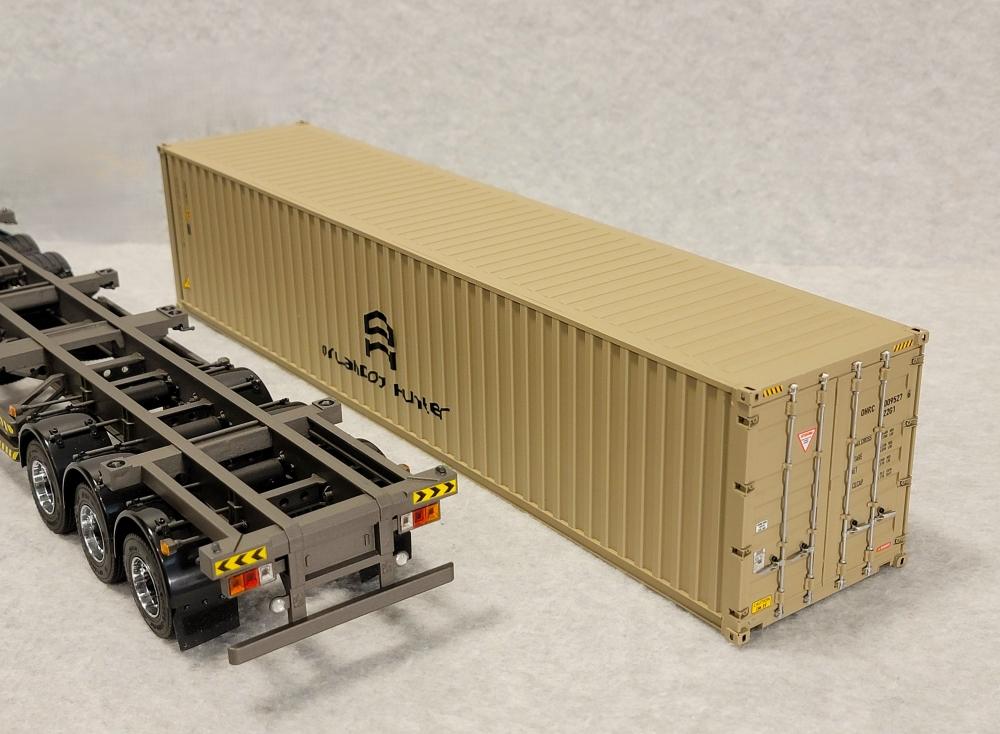
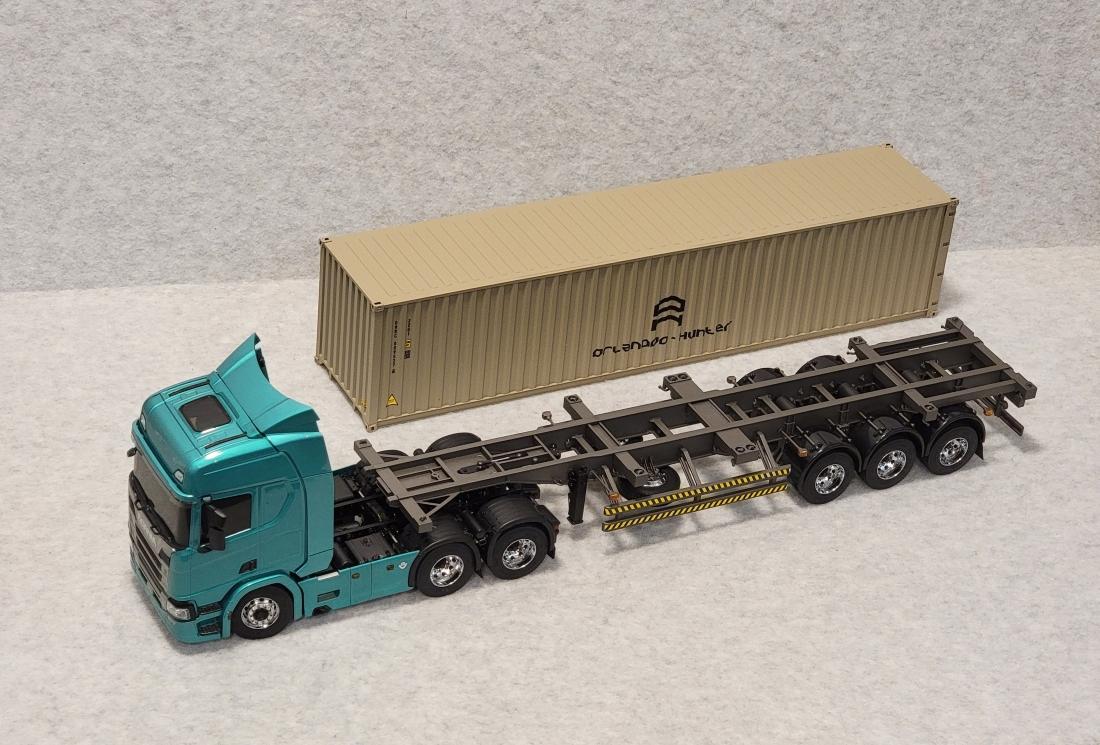
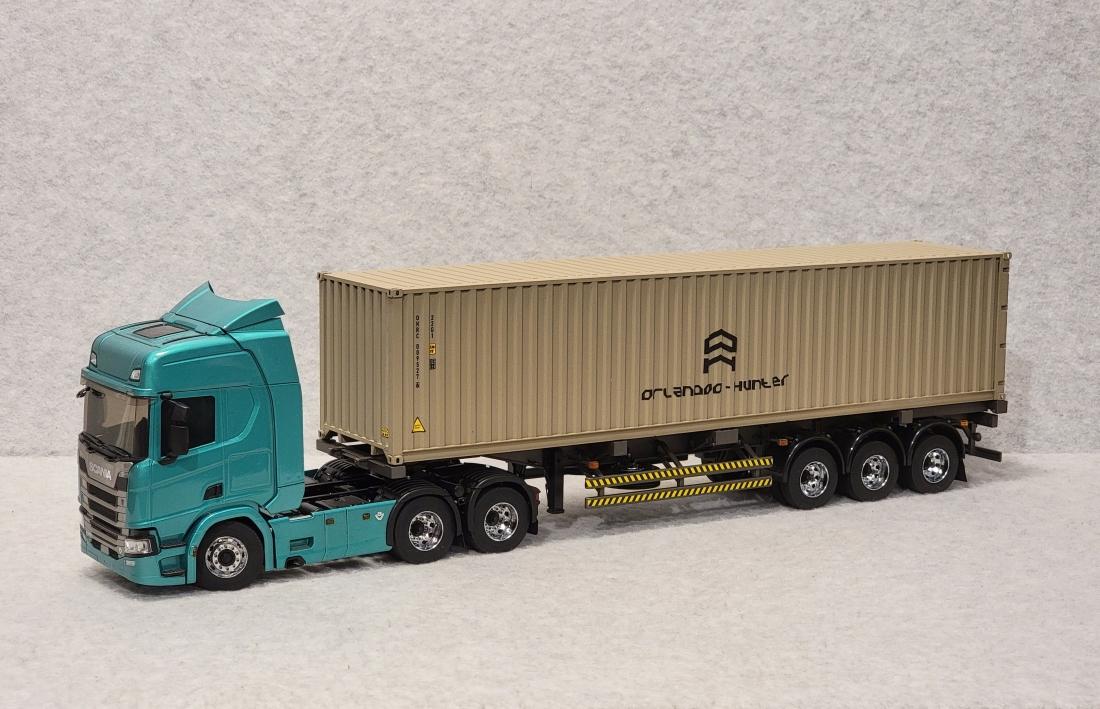
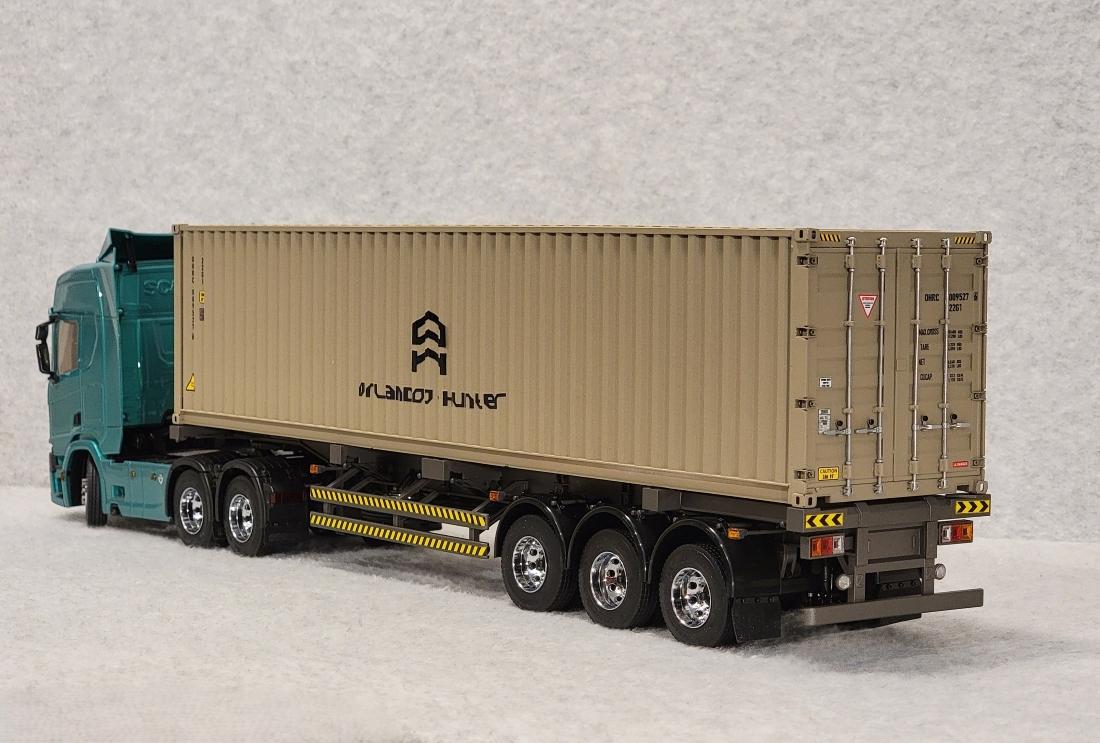
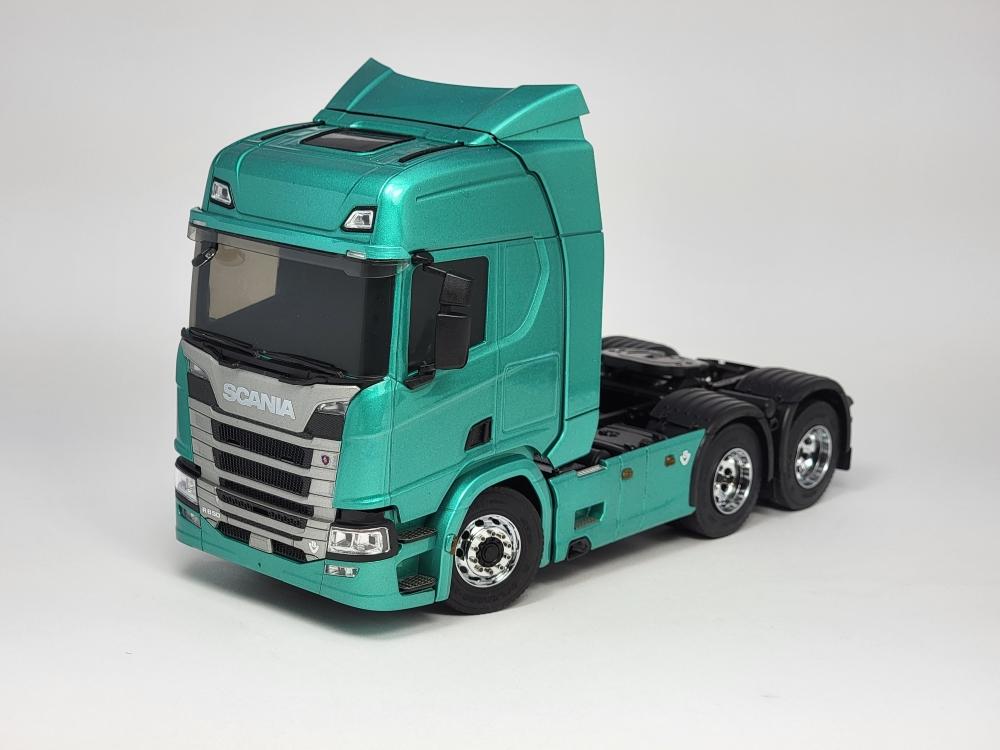
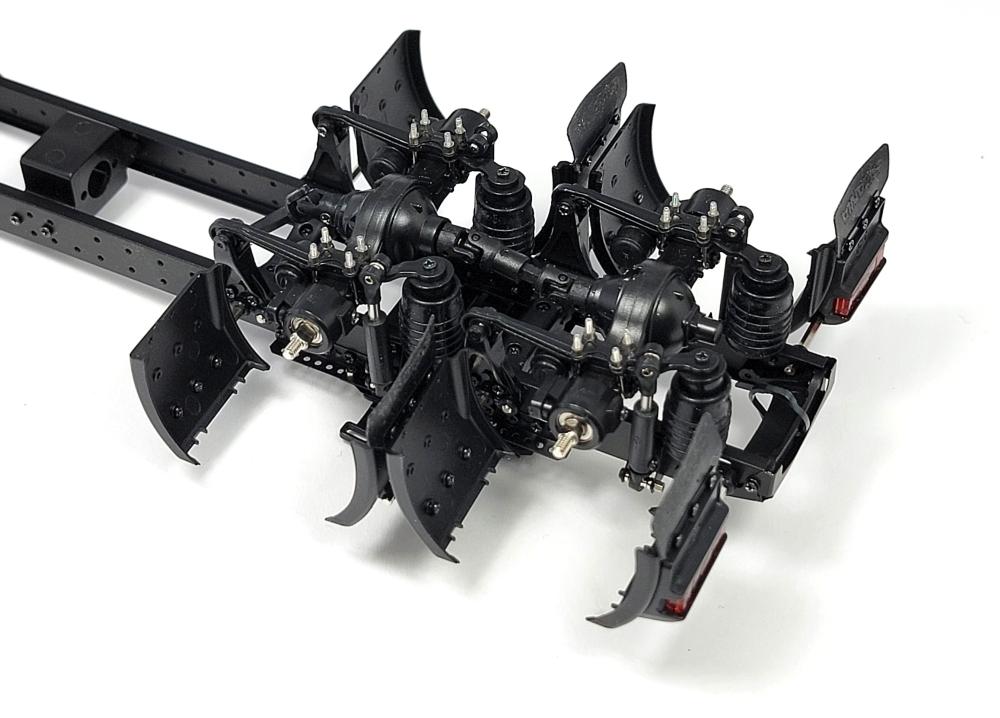
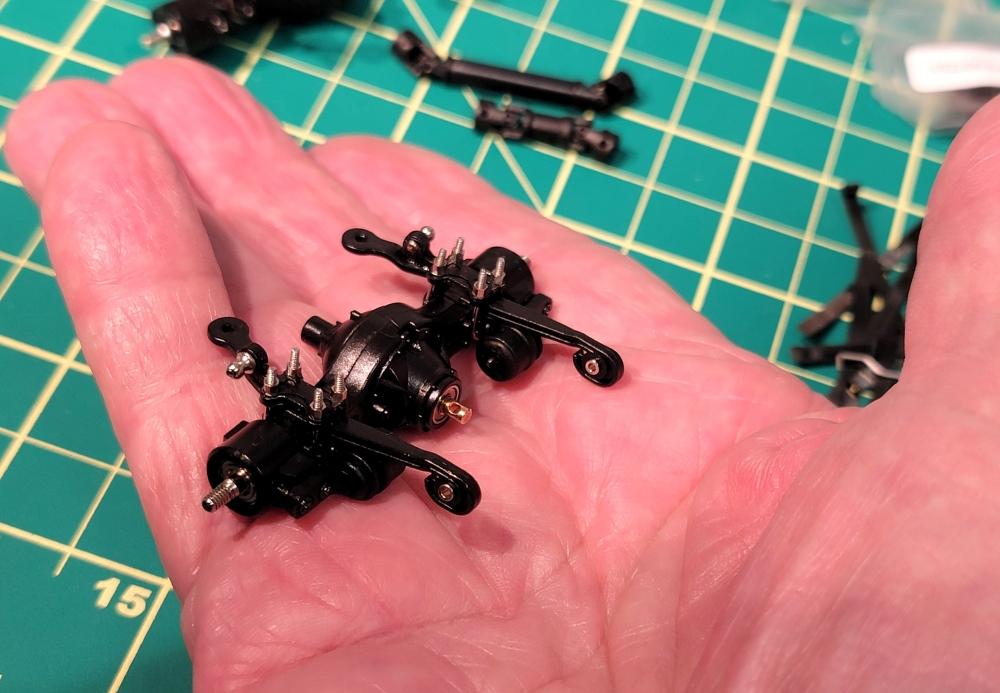
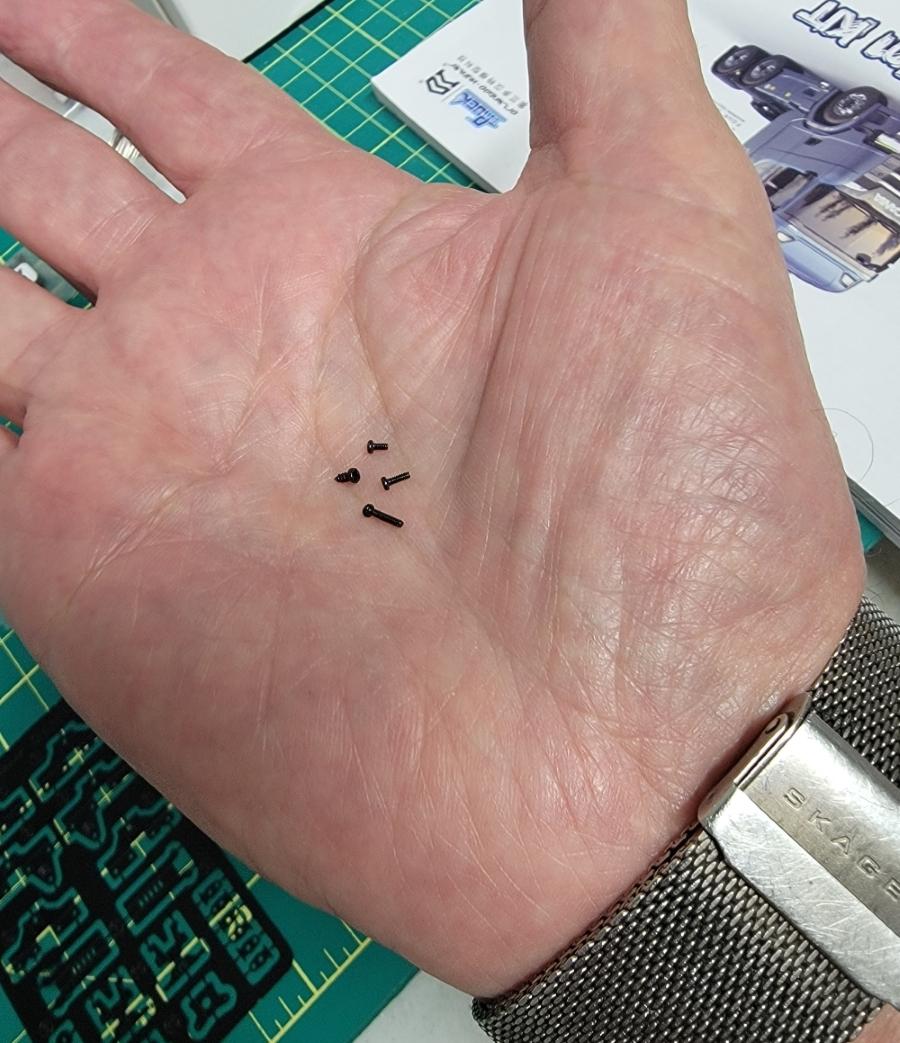
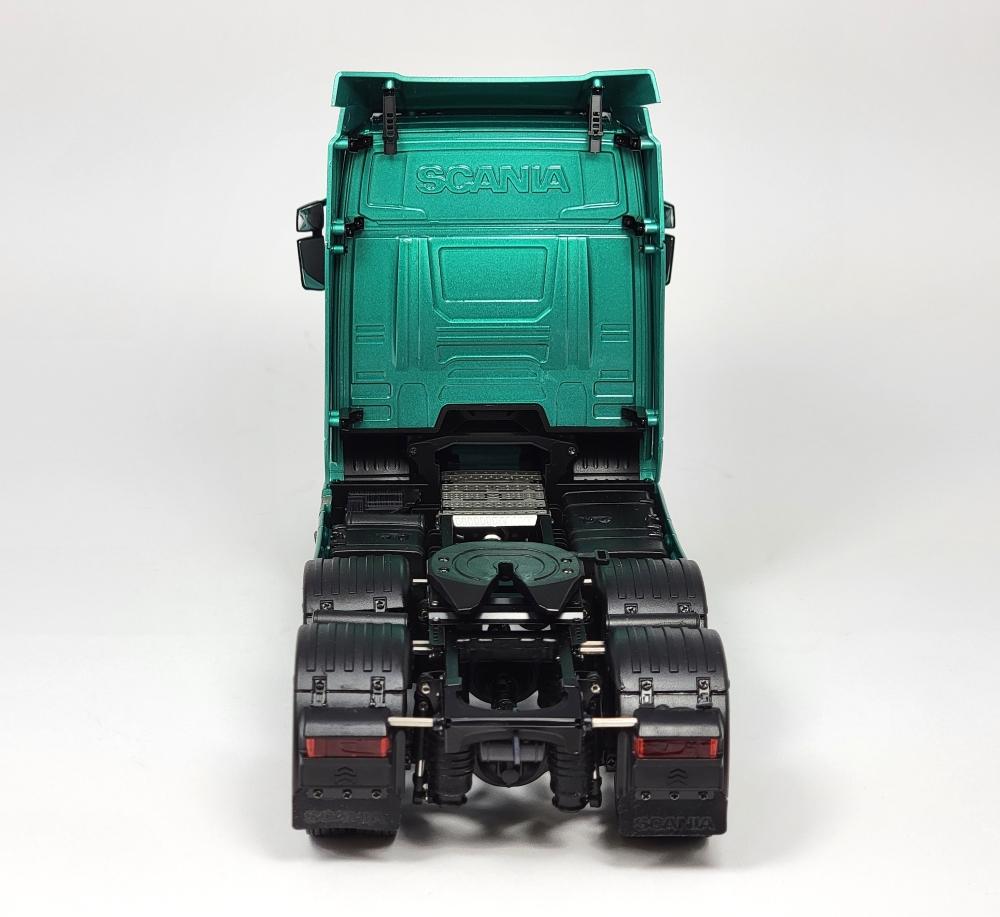
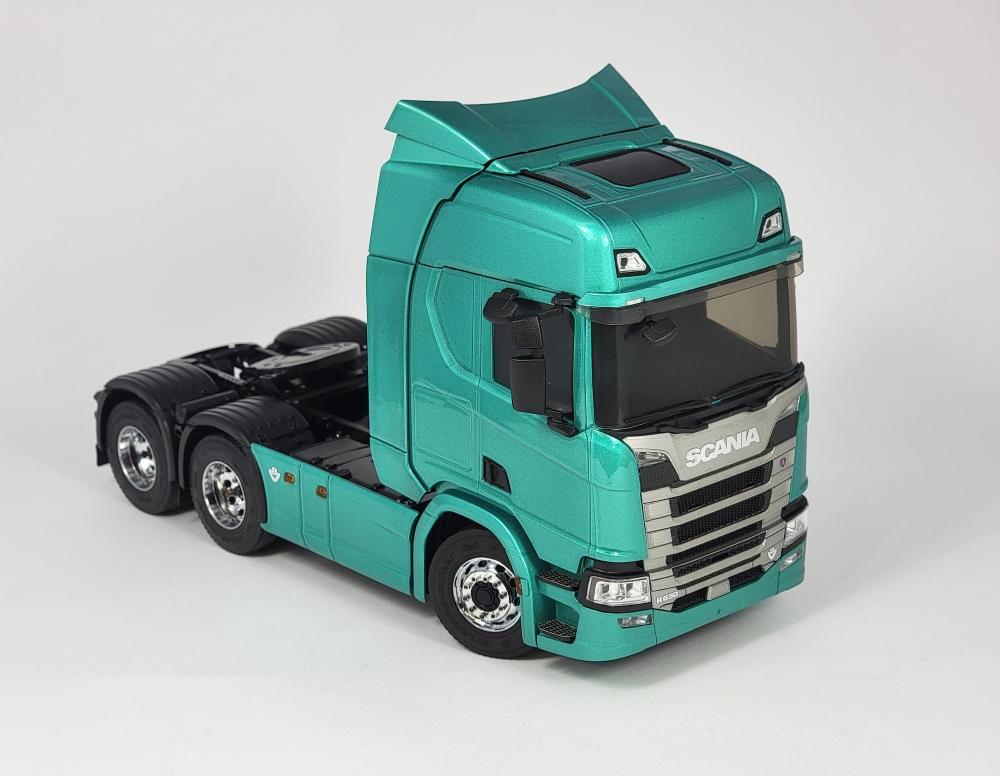
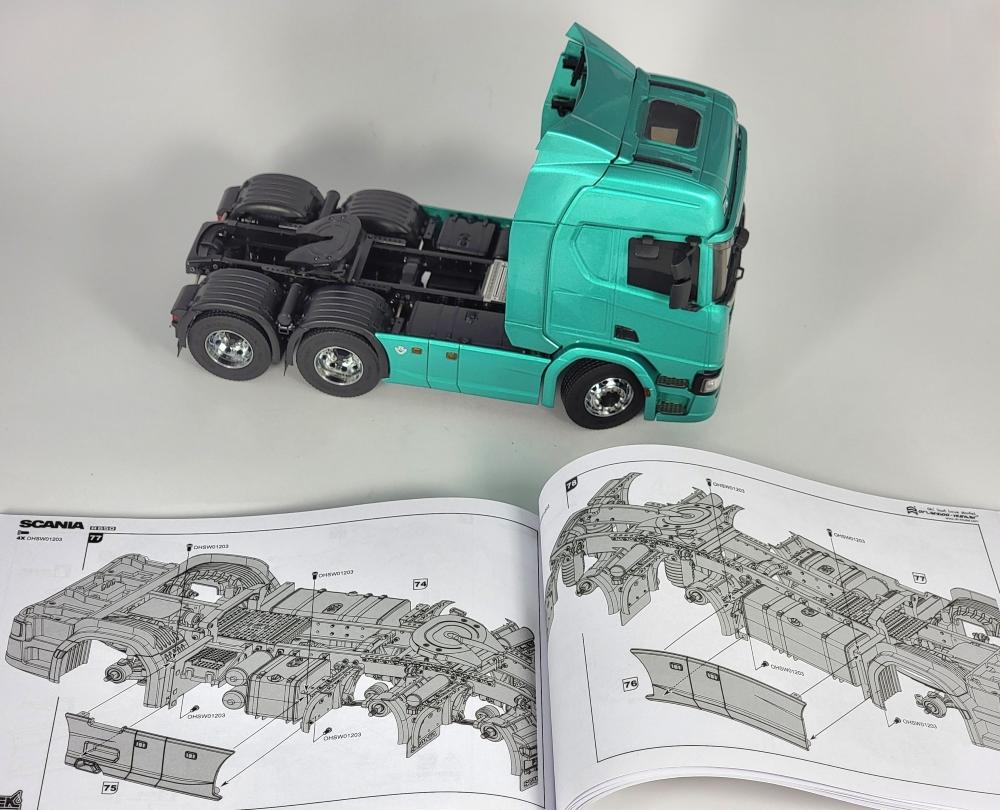
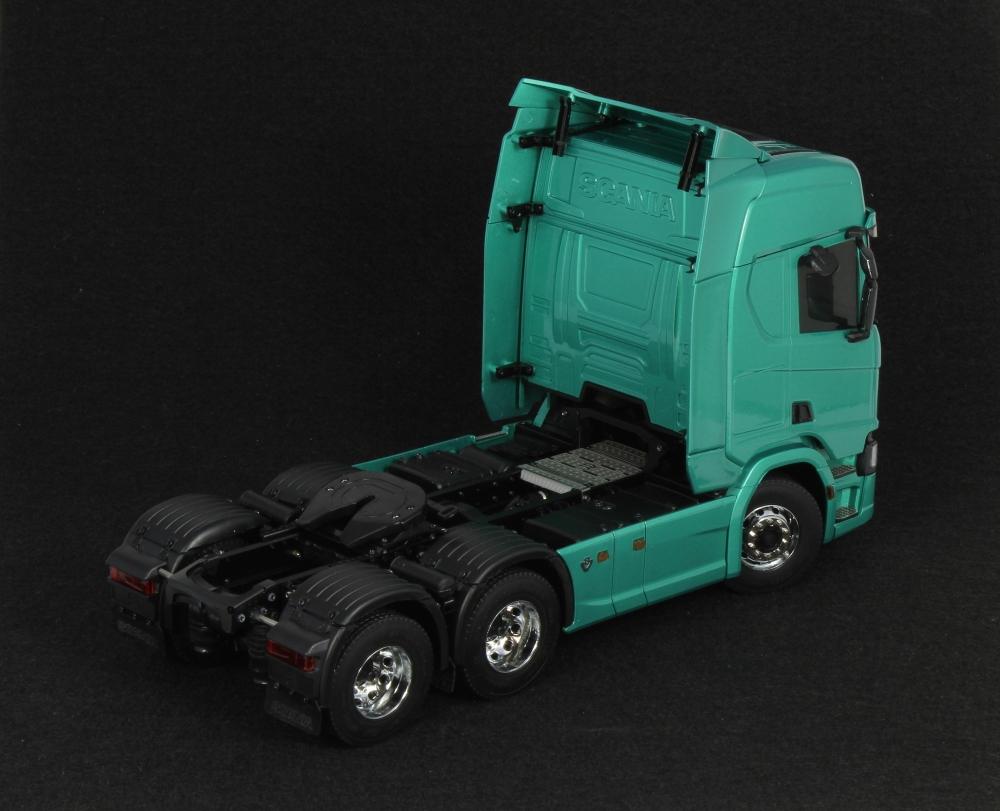
The complete ensemble is from Orlandoo-Hunter 1/32 kits which are absolutely amazing in detail and both challenging as well as satisfying......many hundreds of parts and super tiny fasteners, etc.

-
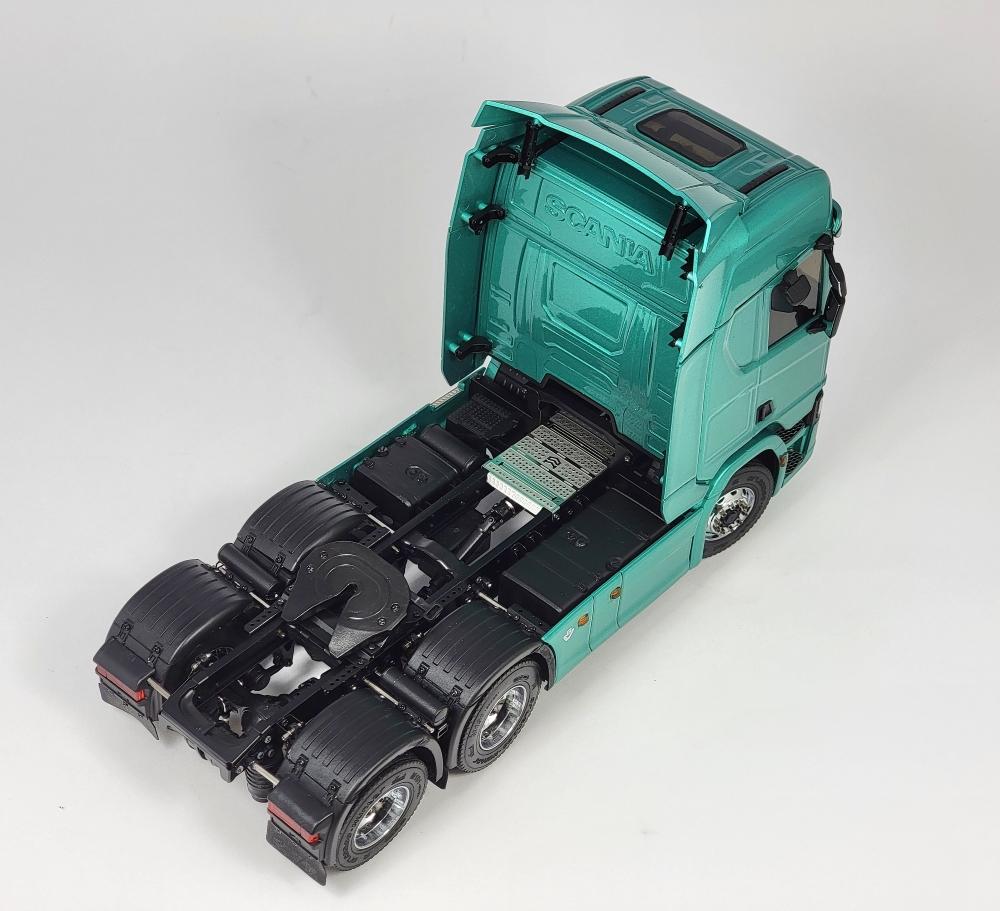
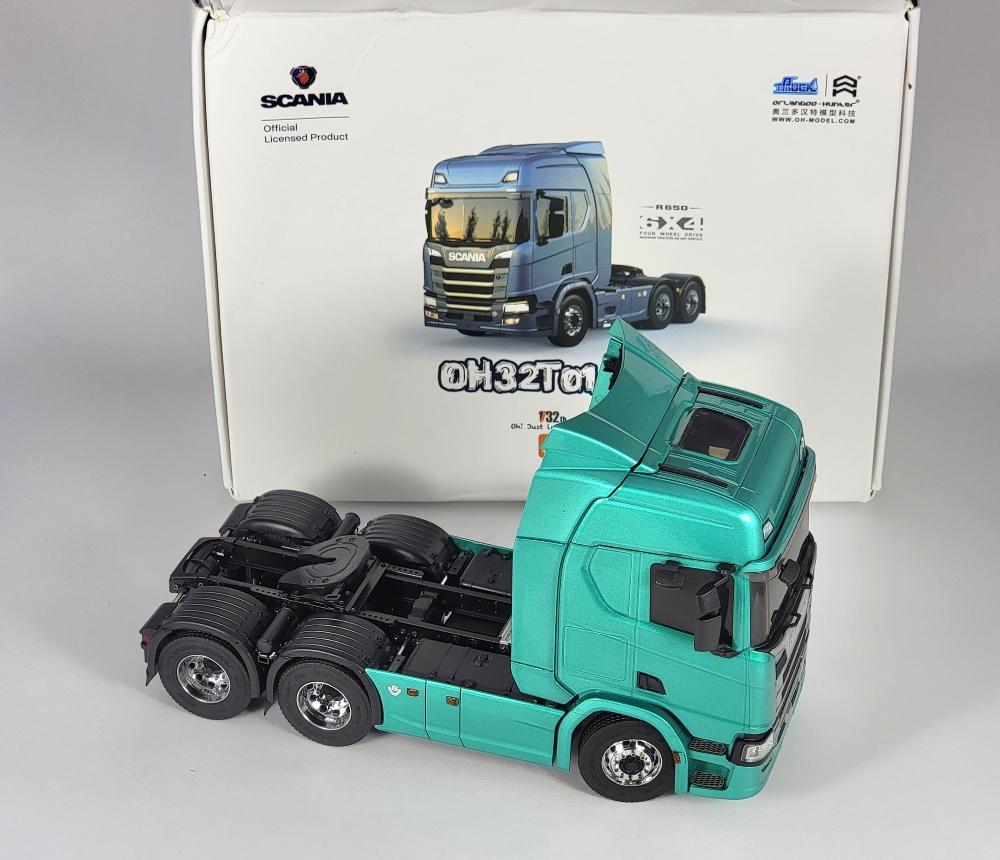
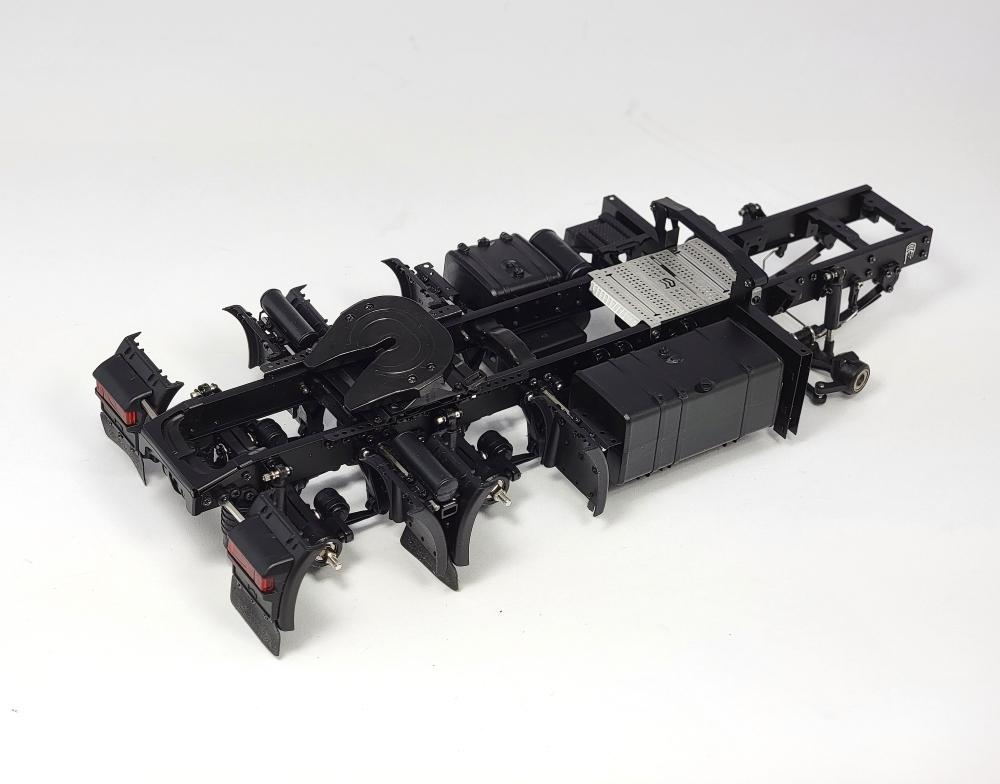
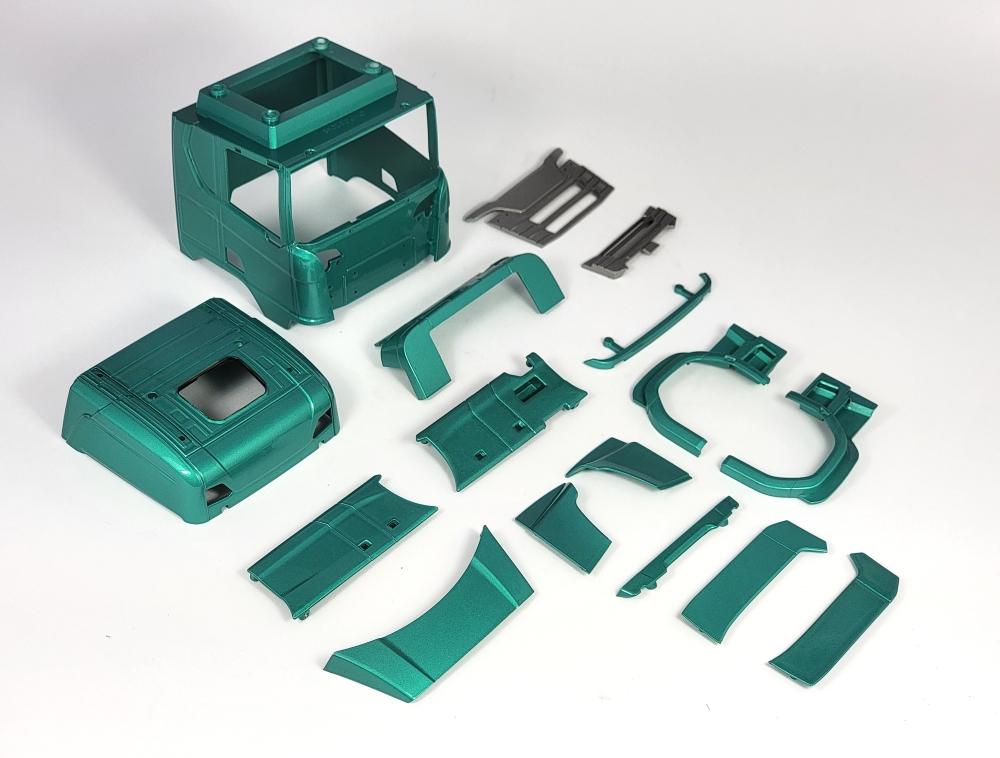
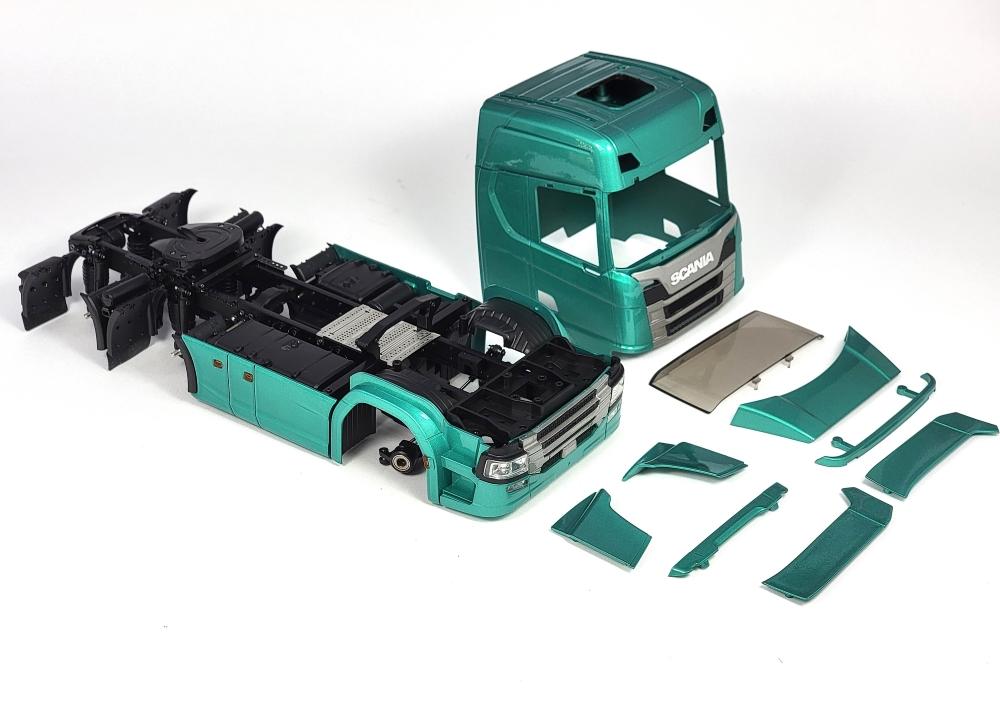
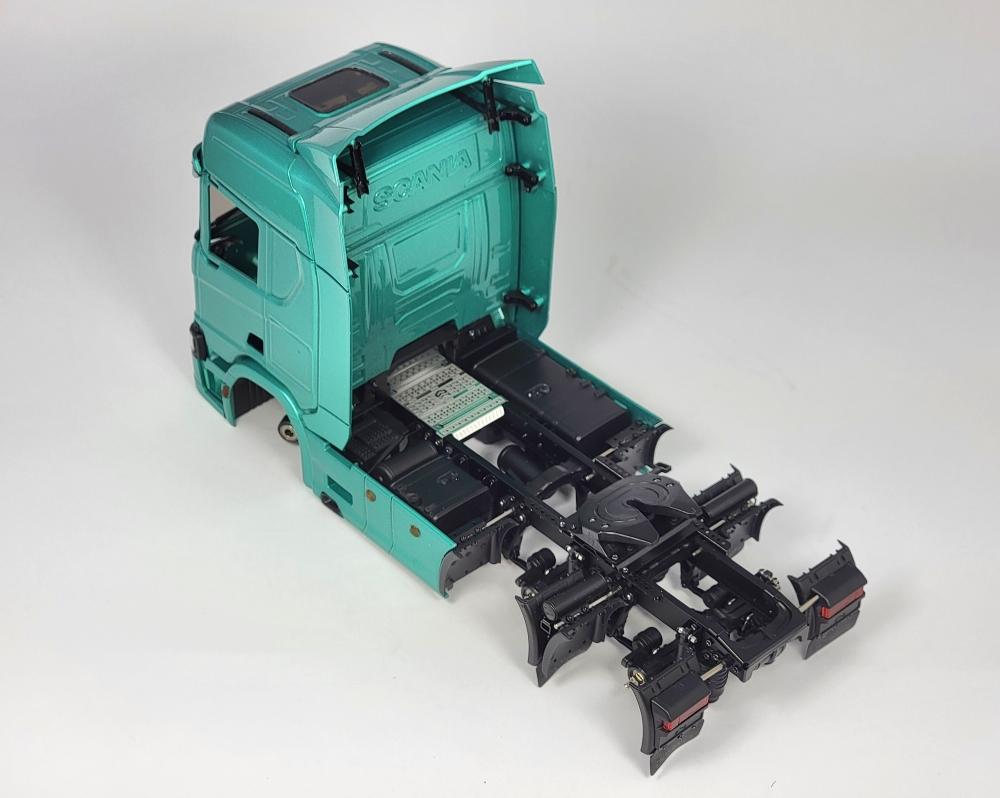
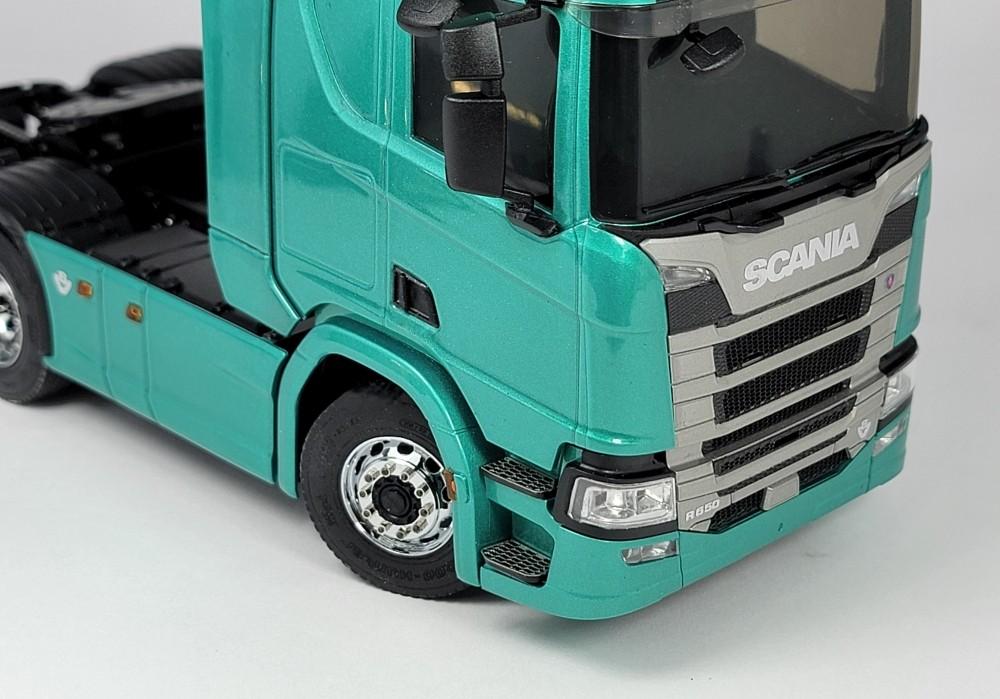
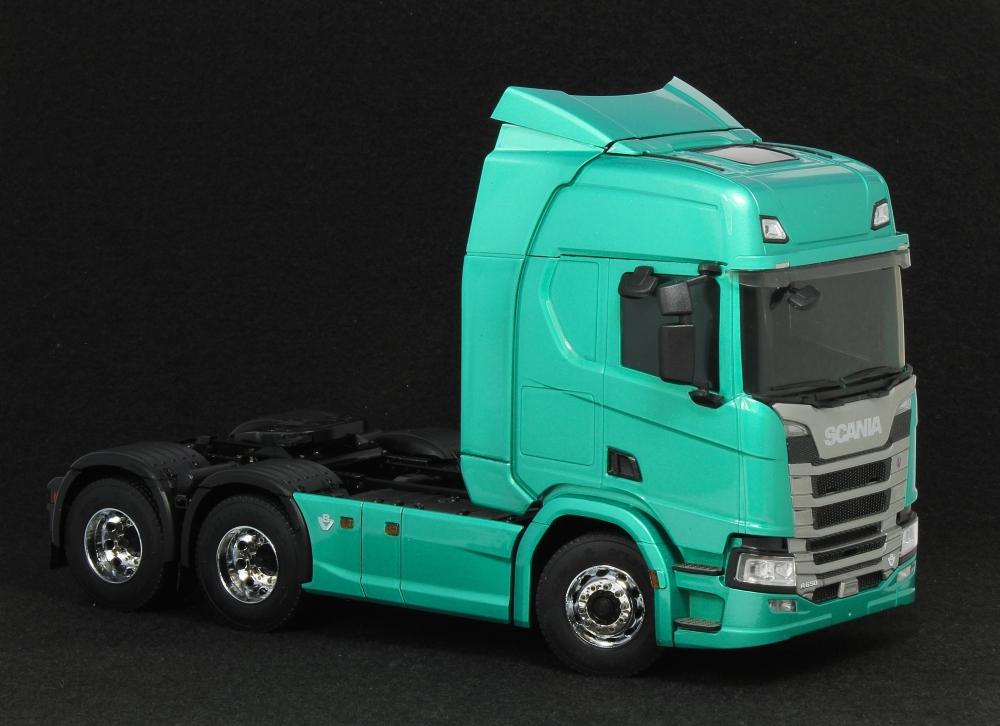
Built box stock, but probably the most detailed, amazing, intimidating and challenging kit I' ve ever attempted. This 1/32 scale Scania 650R tractor kit is made by Orlandoo Hunter in China and intended to be fitted with a radio control system (not included in the kit). I don't have any interest in RC stuff, but I was certainly interested in building the Scania as a static model. The kit consists of many hundreds of parts, including copious sizes of super tiny screws and nuts, resulting in operating shock absorbers, airbag rear suspension, and front leaf springs. There are also lots of machined parts, including wheel spindles and tiny bearings for the operating rear axles. Many tiny brackets must be bent and formed fron photo-etch style metal sheets, and the correctly operating fifth wheel alone is comprised of 41 individual parts (including the various fasteners, etc.) The fasteners are so tiny that my only addition to the provided assembly tools was a magnetized tiny screwdriver. I simply couldn't start the ultra tiny fasteners using my fingers. The model took a long time of fairly dedicated assembly....culminating with the installation of the wheels/tires using ten tiny nuts to fasten each wheel. The kit's body is supplied in white plastic which I decided to paint in custom mixed green basecoat/clearcoat. I'm really pleased with the final result, and now I intend to build Orlandoo Hunter's trailer and 40' container to finish the project.
-
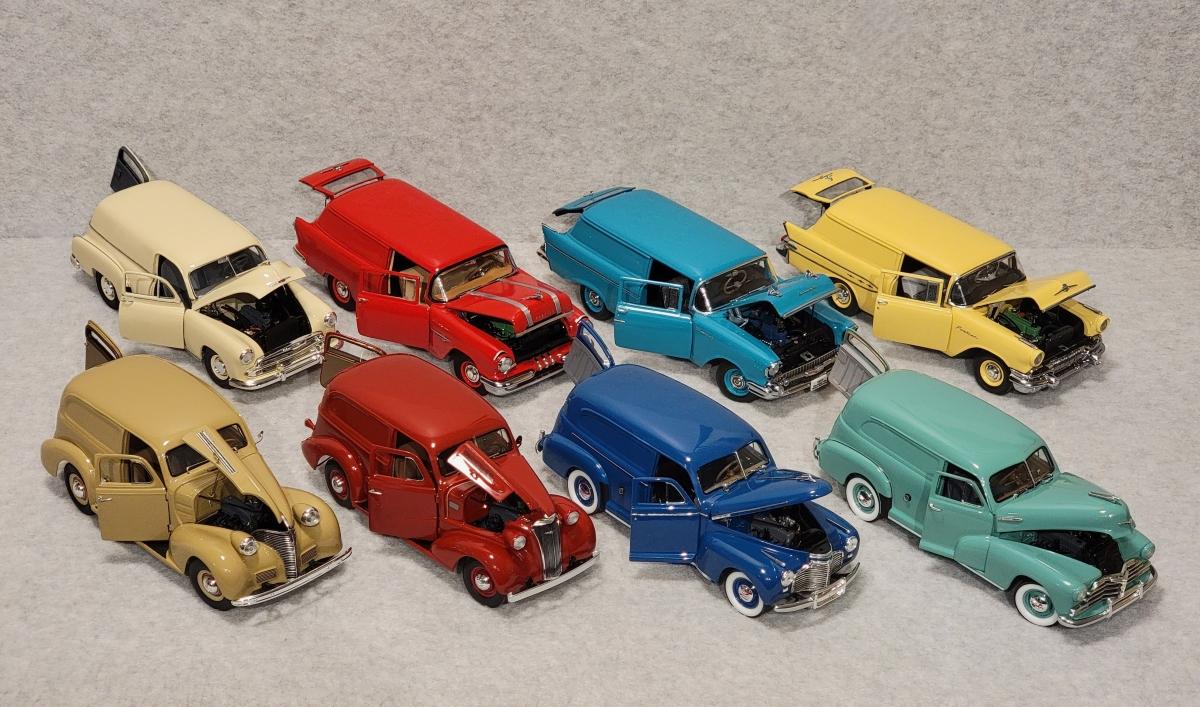
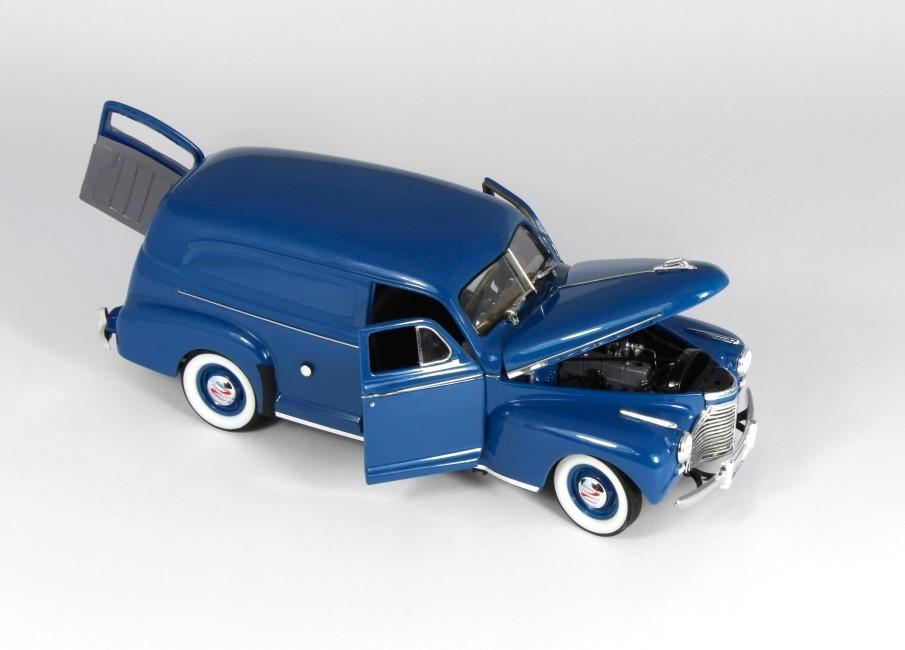
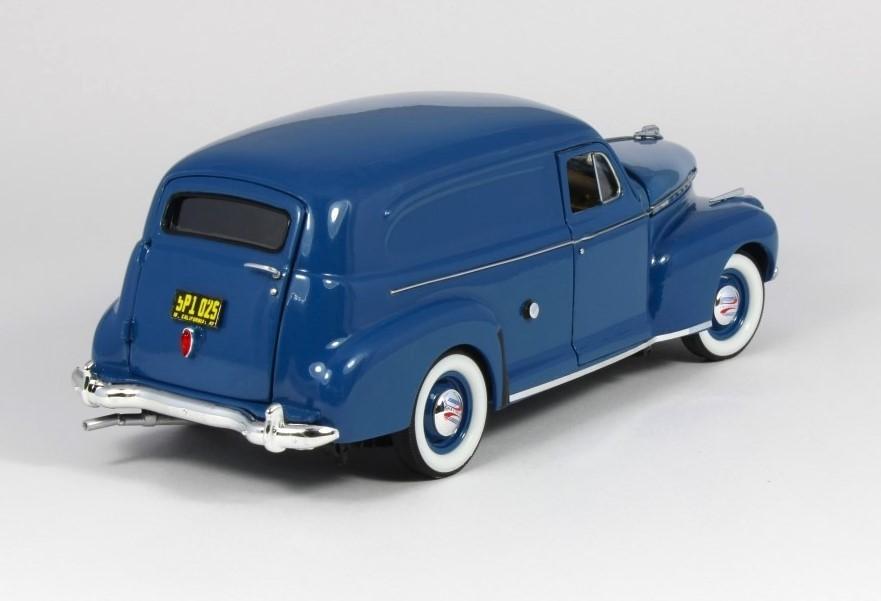
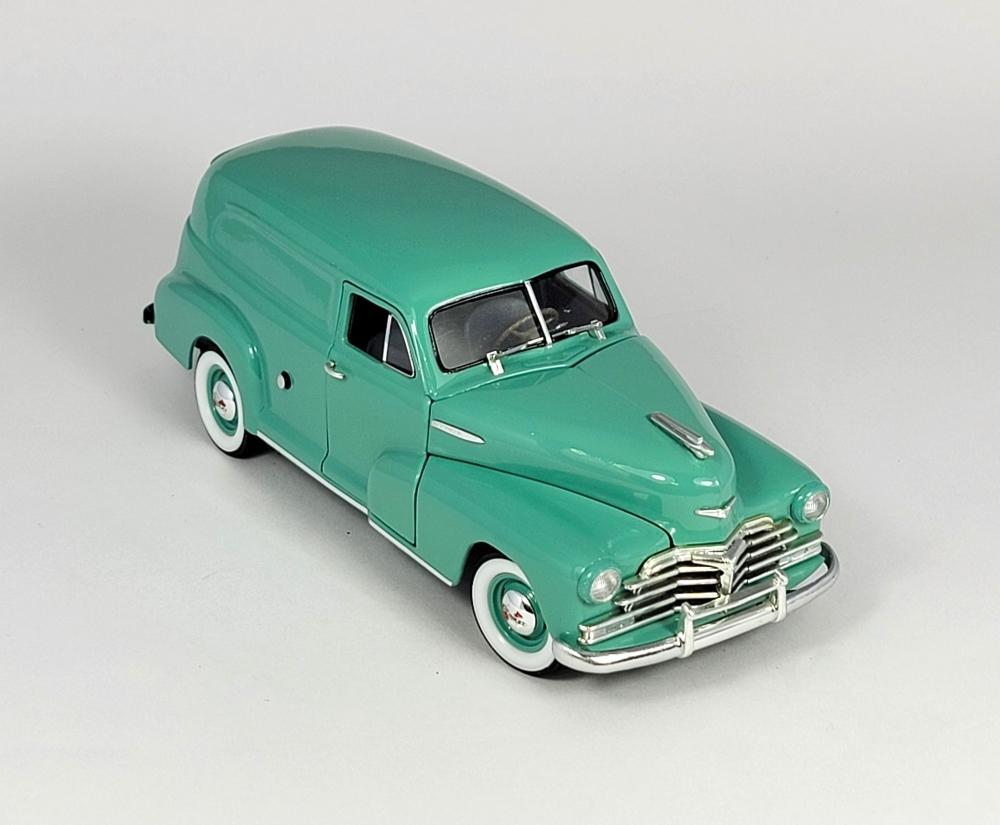
Yes, I did build a '51 Chevy a few years ago. Here's a pic I just took of all my GM sedan deliveries....all stock six cylinder versions ('37, '39, '41, '48, '51, '55 Canadian Pontiac, '57, '57 Canadian Pontiac)
-
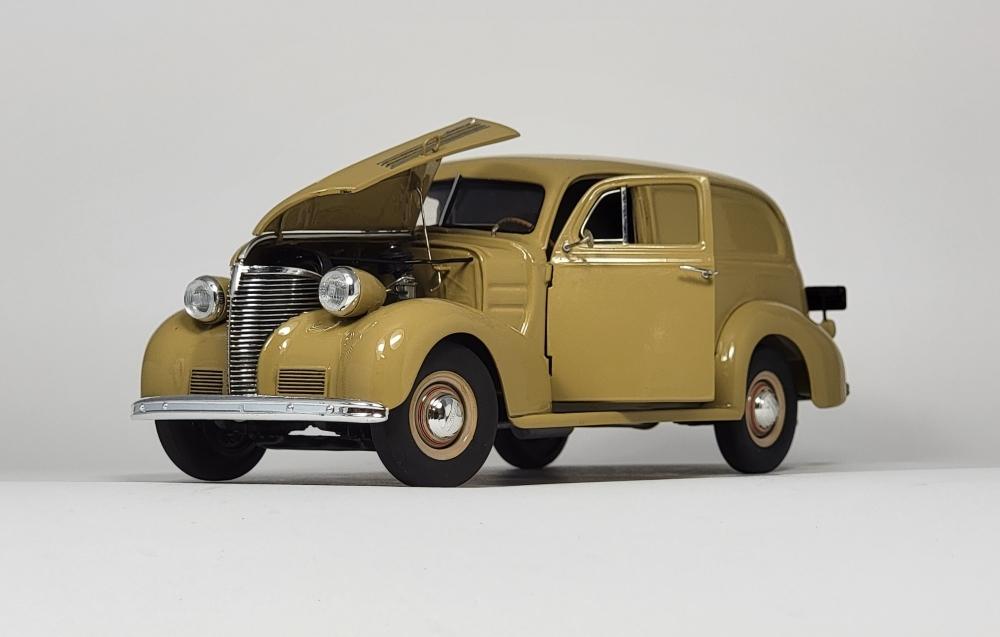
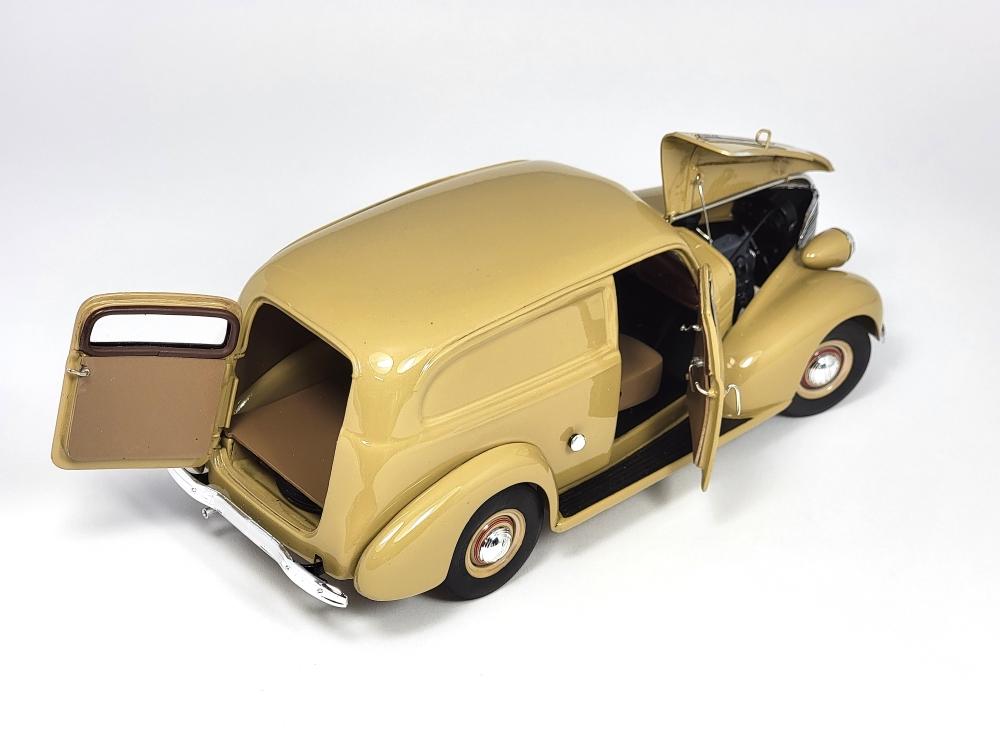
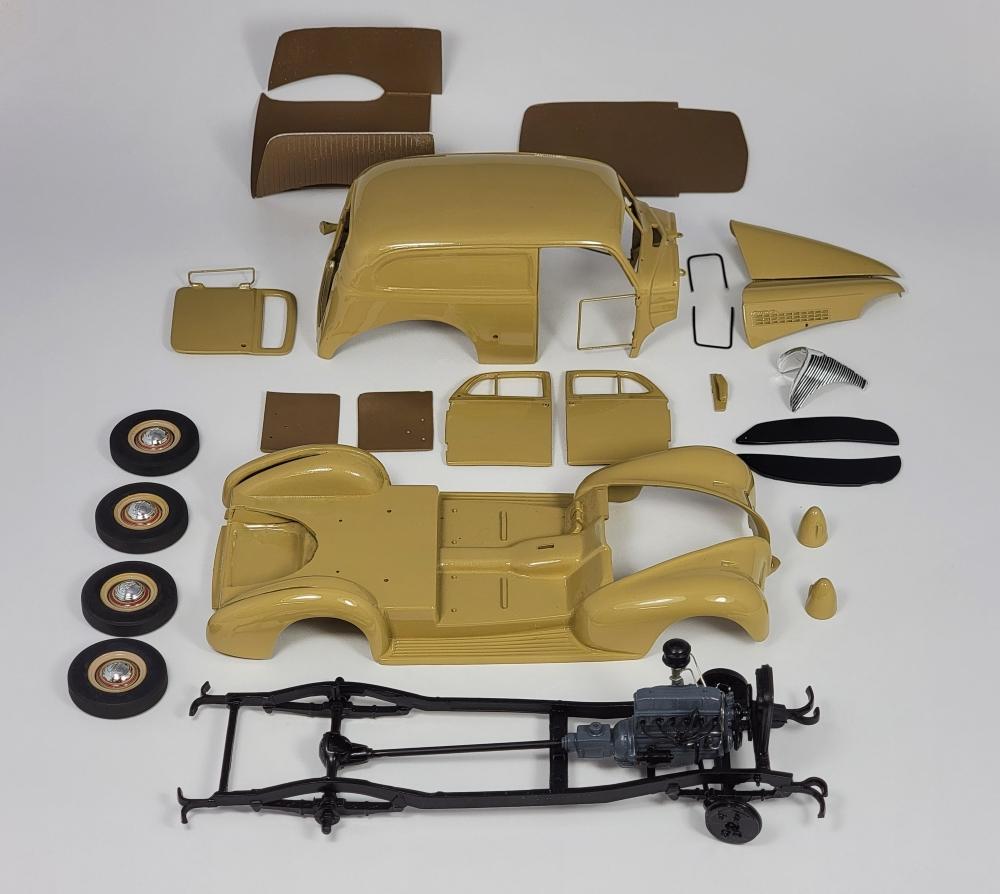
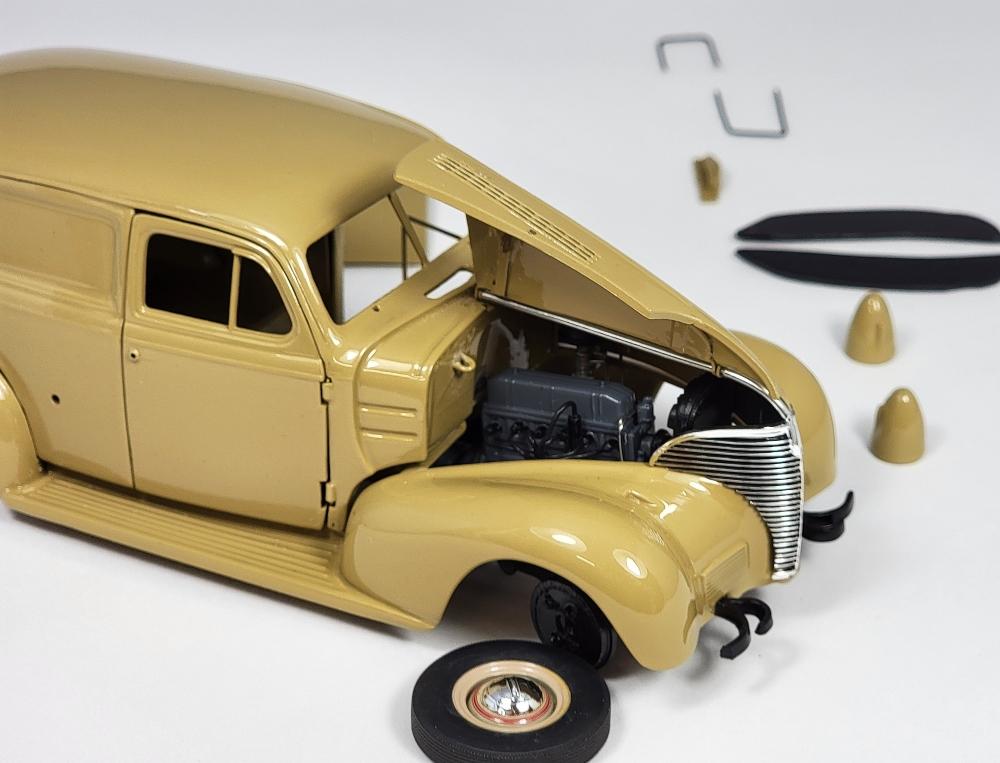
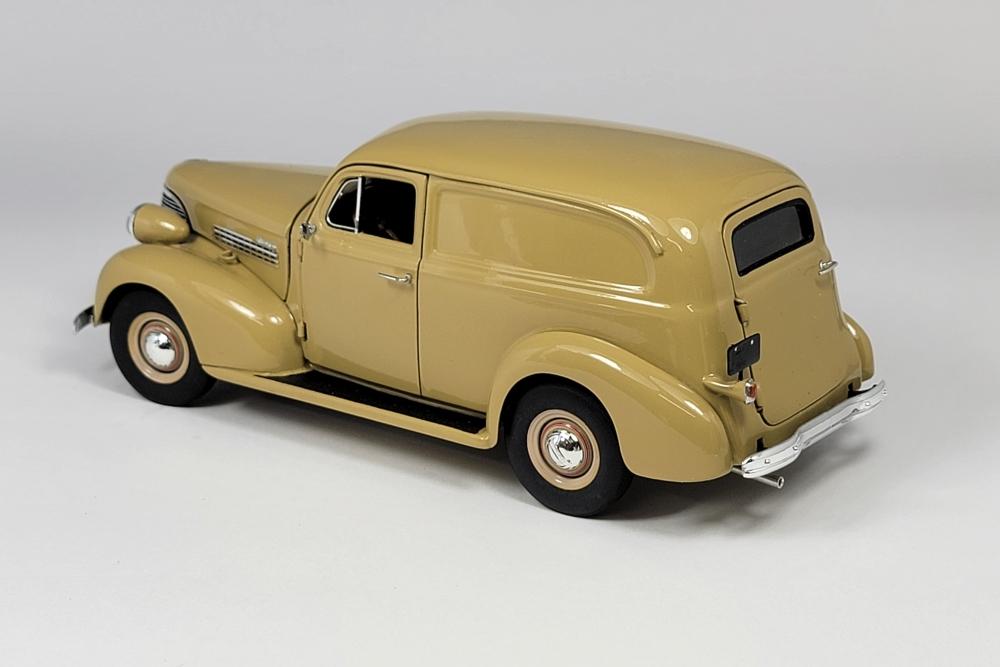
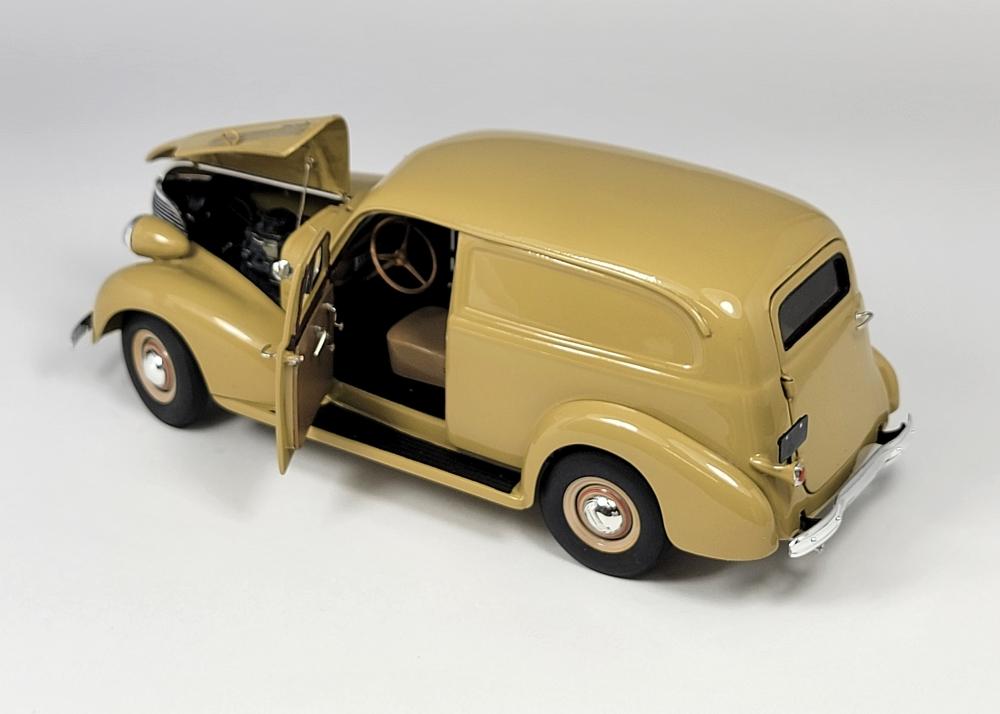
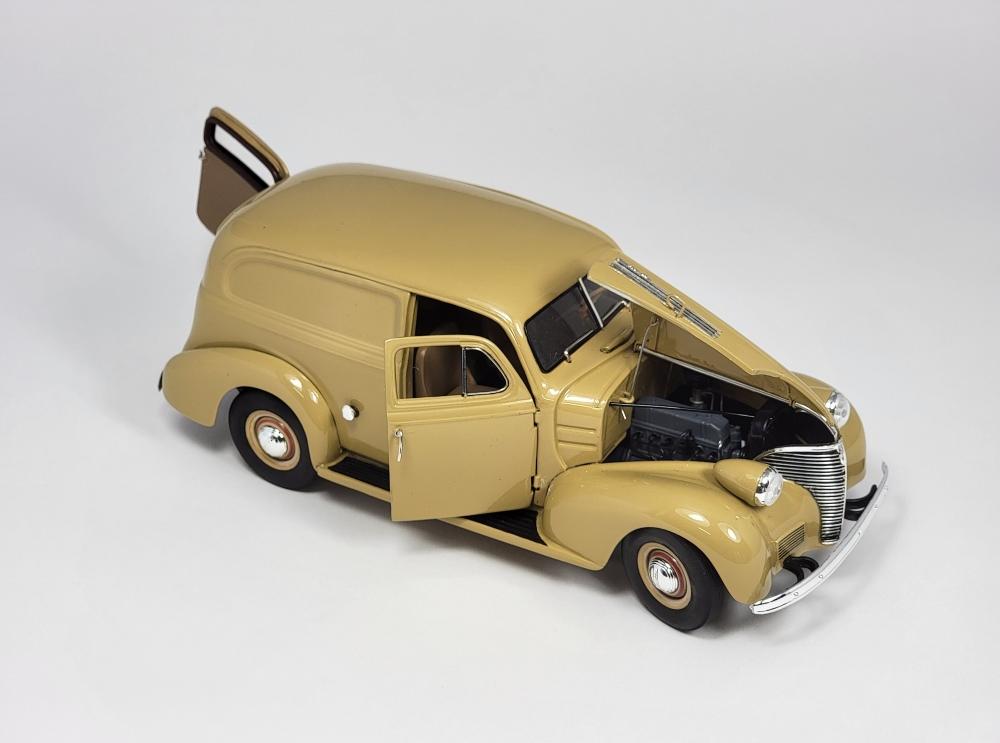
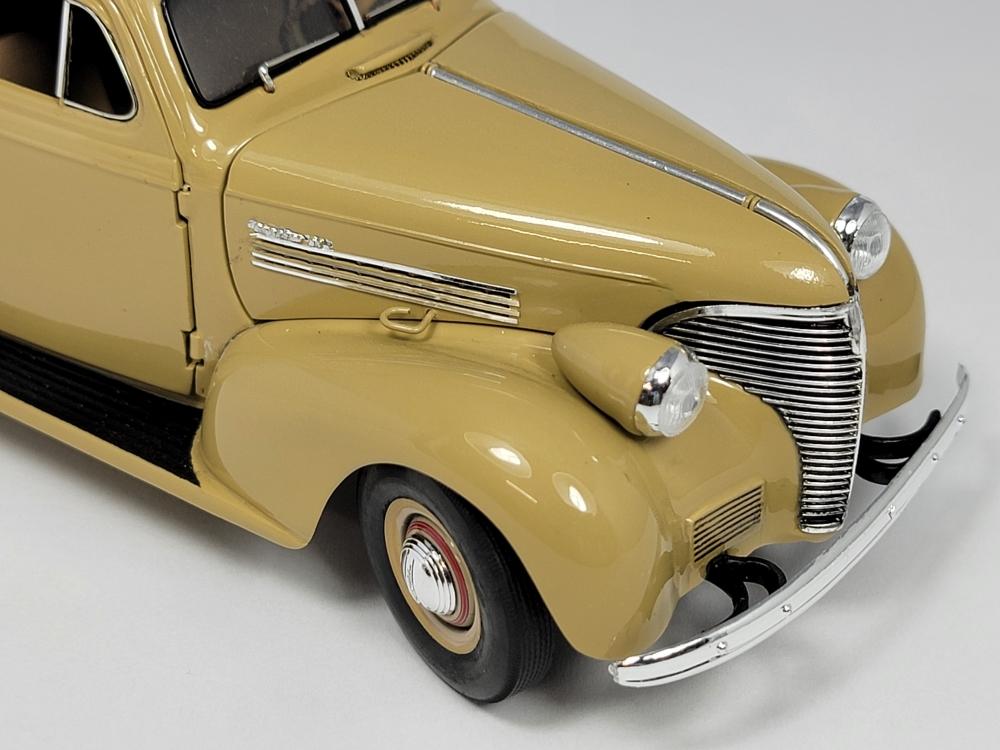
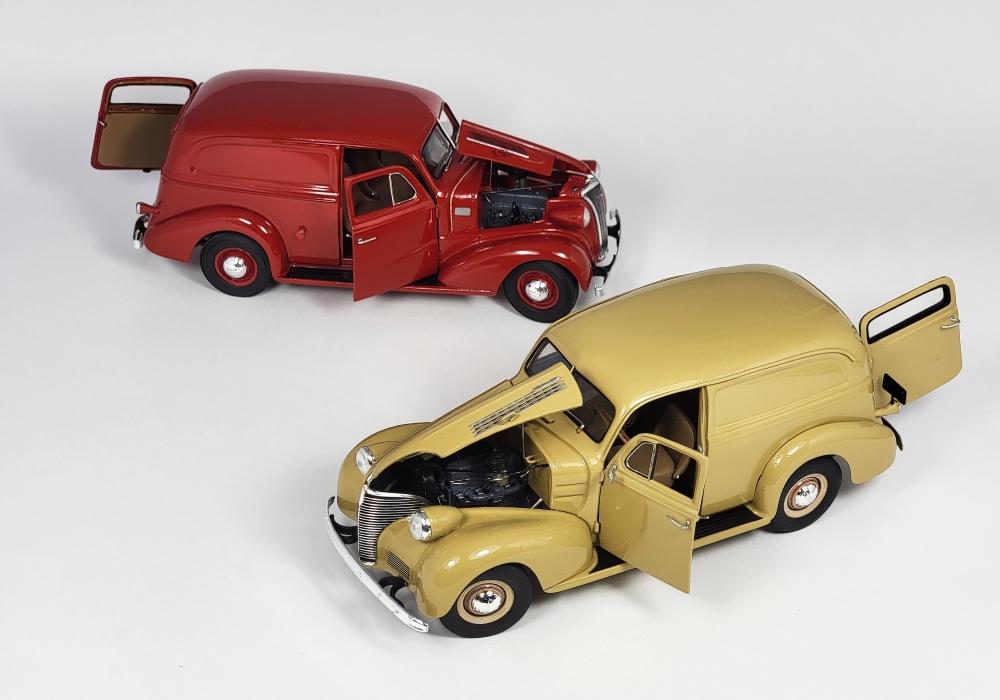
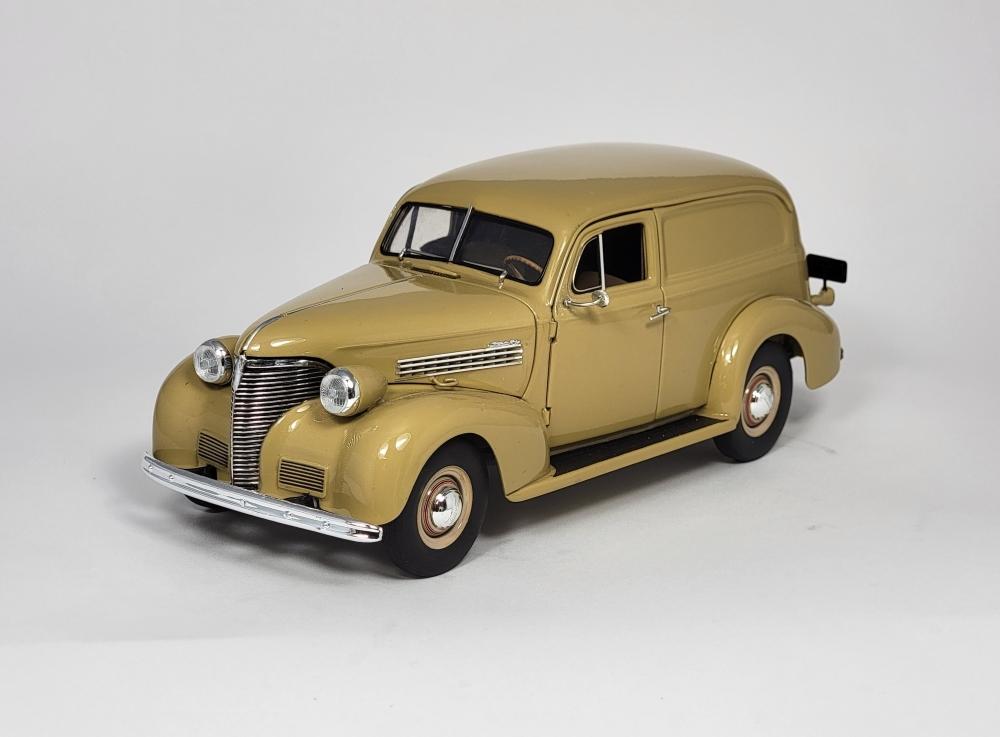
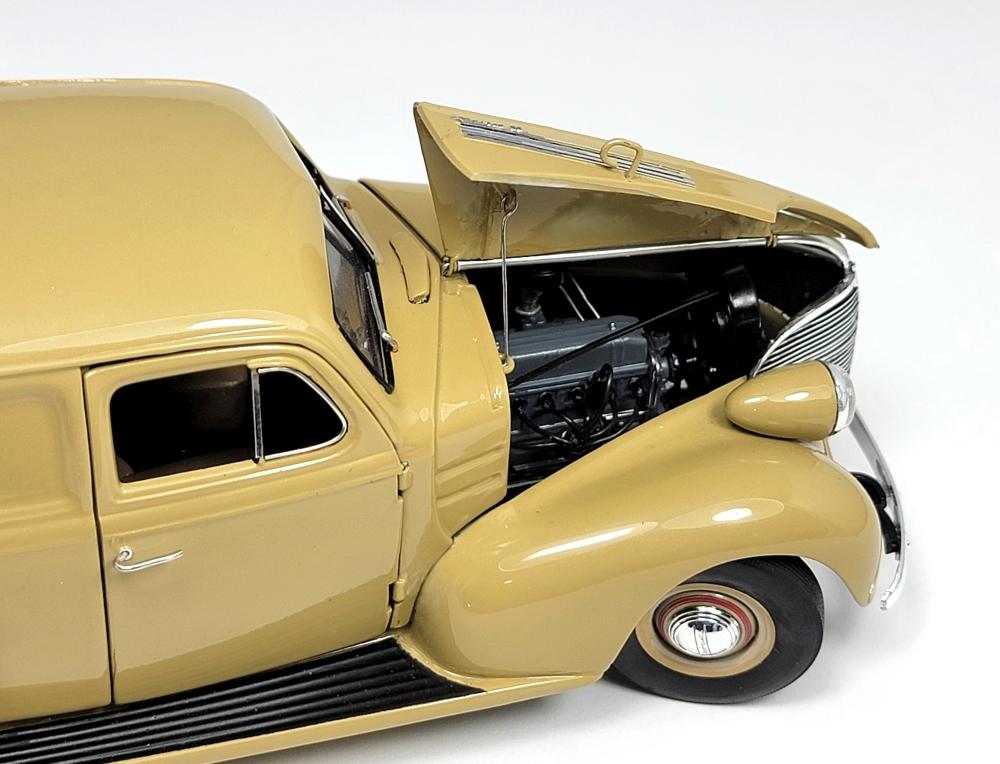
I've just completed this factory stock '39 Chev sedan delivery using the Revell/Monogram hot rod SD as starting material. The disproportionately low windshield was opened up, the doors opened and hinged, the stock open cowl vent added, fabricated butterfly-style hood detail including struts, and the stock underside floor (sheet-metal) was fabricated (the R/M's hot rod version uses the cargo floor as the underside). Brass was used to make a steering front axle, and the rear fender was modified for accuracy..... since the '39 SDs used the relatively unchanged '37 style SD body, the 1/1 stock '39 larger rear fender required an adapter panel to mate the '39 fender to the '37's smaller teardrop fastener shape .Since the doors now open, the complete interior was formed in styrene including inner door panels, cargo area side panels, open access to the spare tire, and headliner. The 216" six cylinder motor is from the 'AMT '37 kit, and the wheels/tires are modified parts bin units. Window gaskets are done in jewelry wire, as are all the latching door handles and window cranks, etc.
- 33 replies
-
- 26
-

-
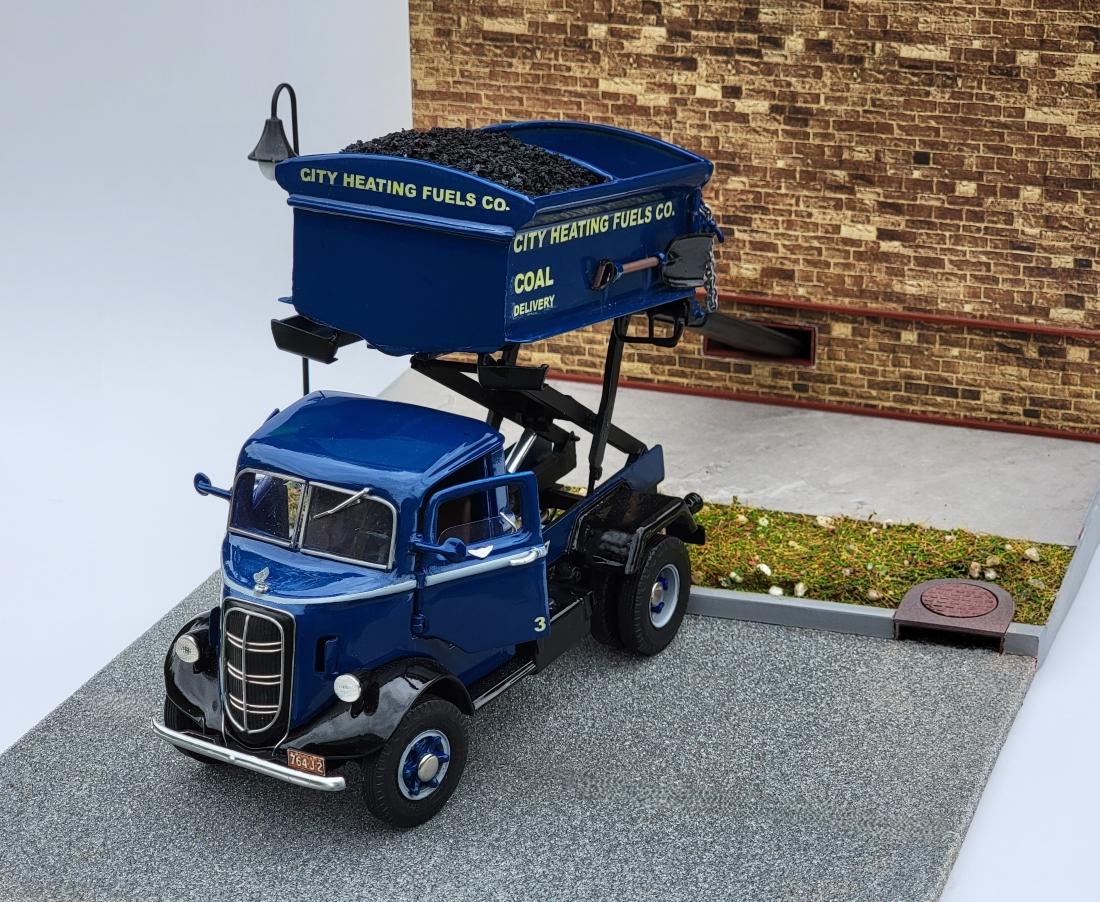
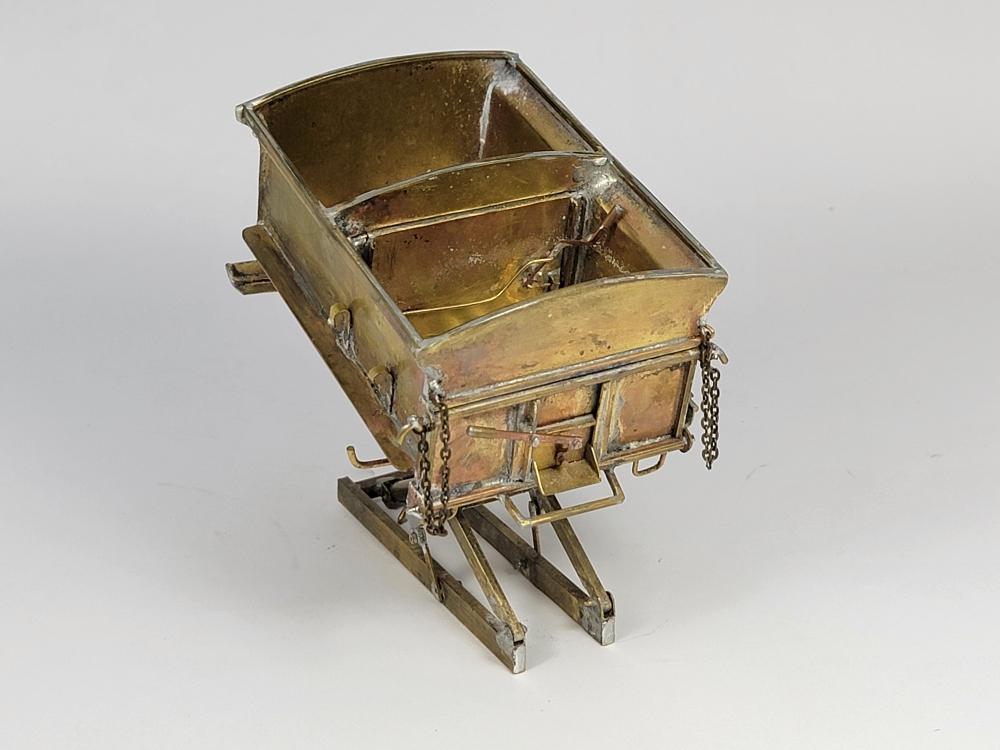
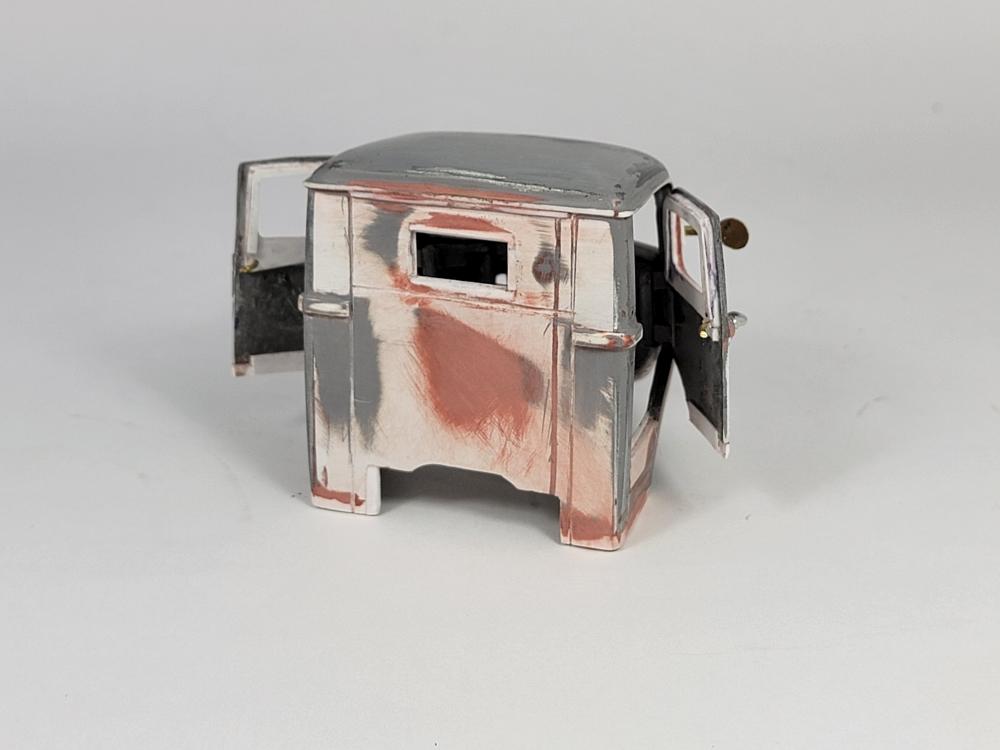
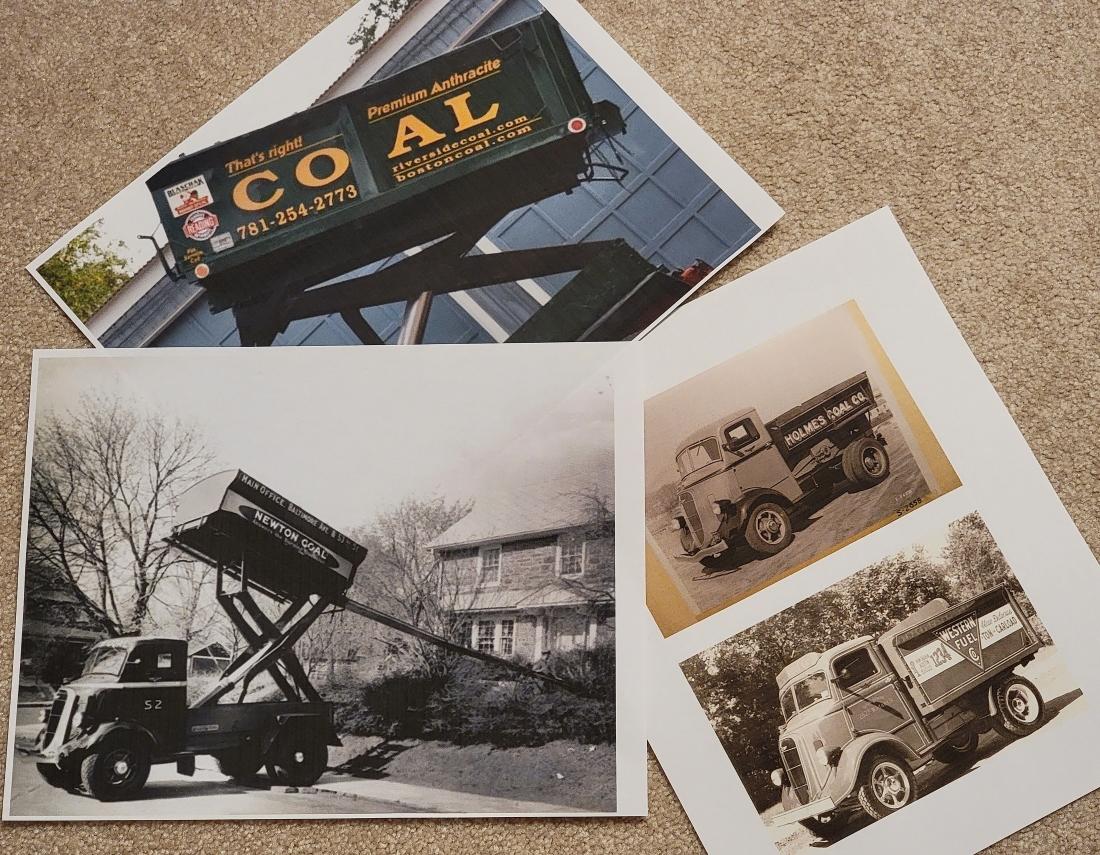
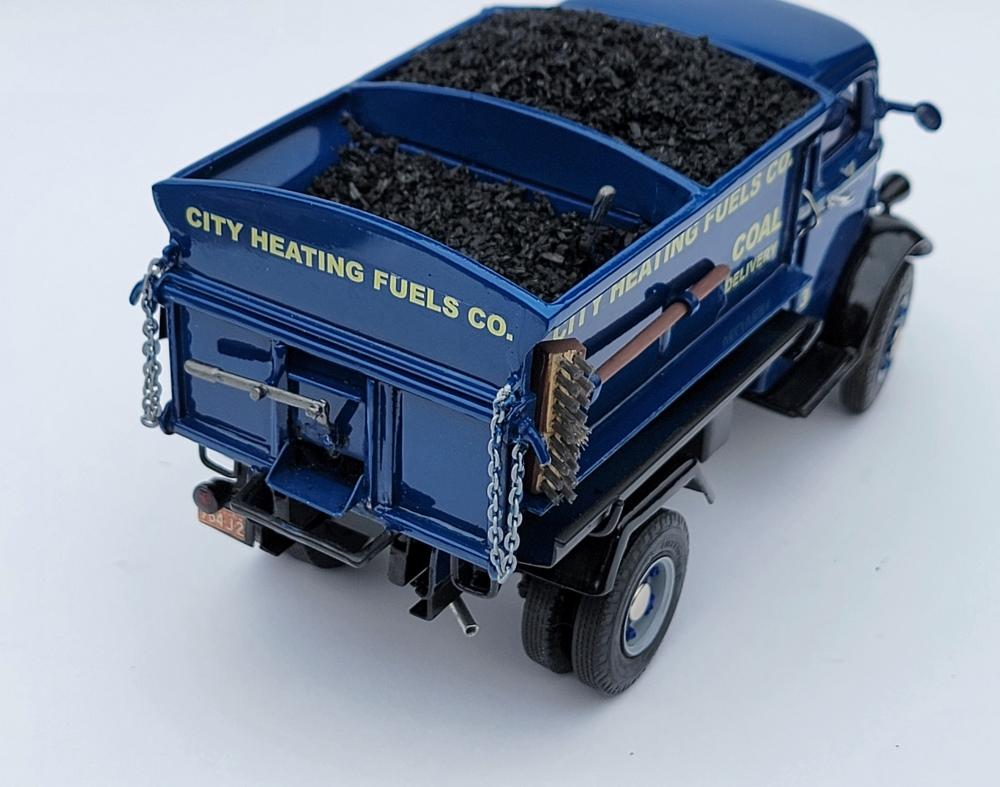
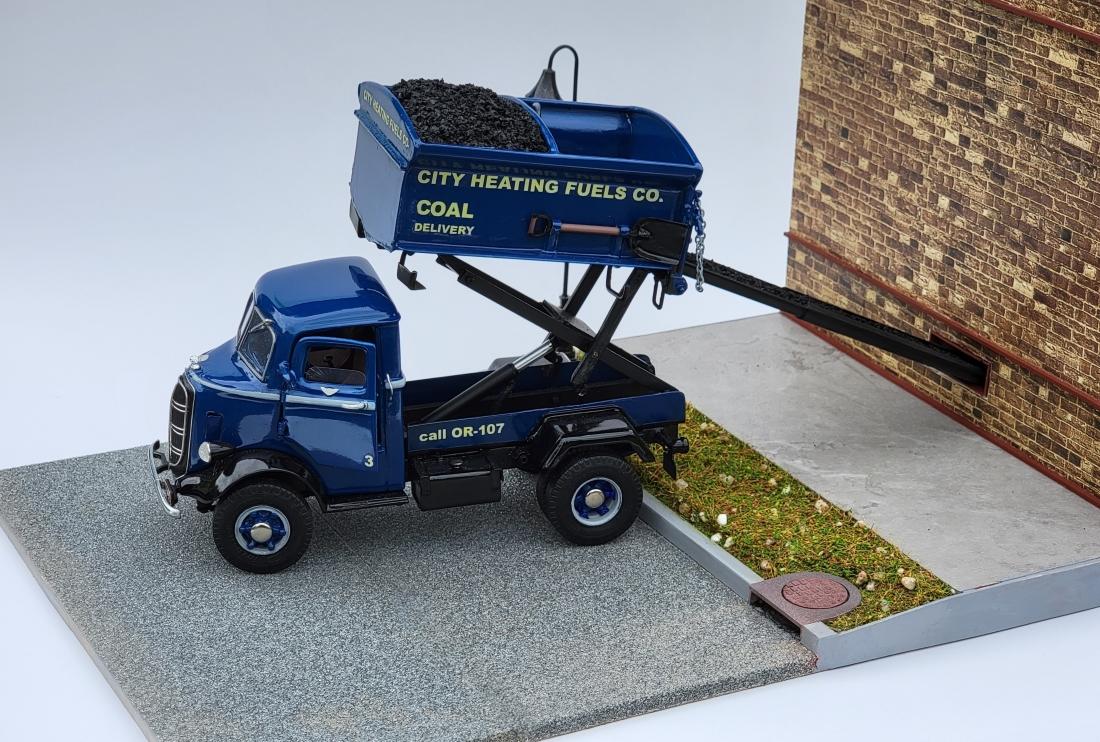
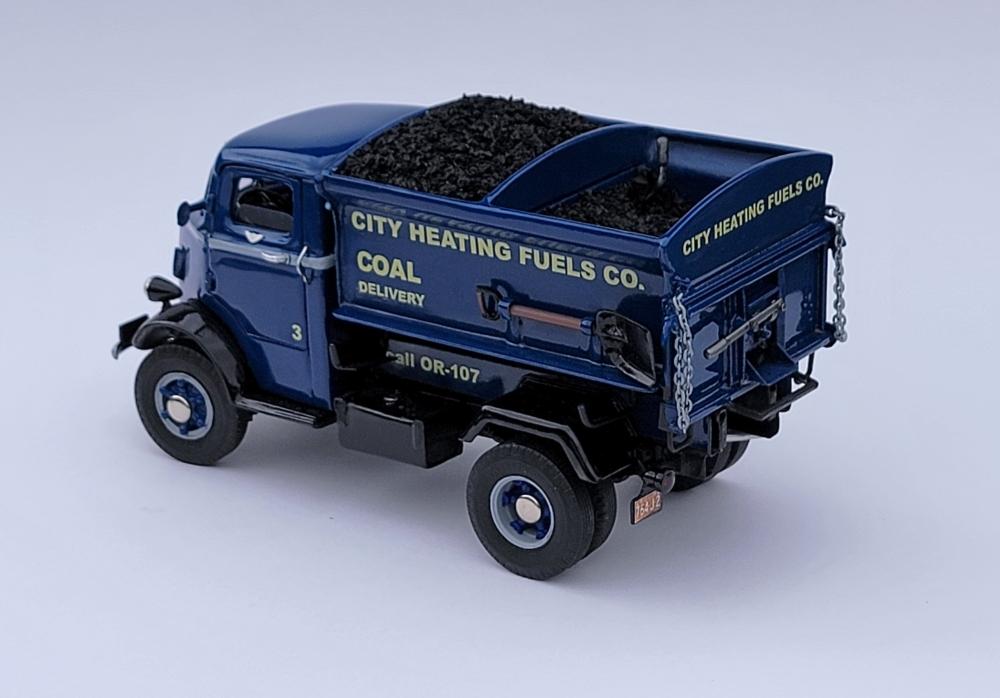
My brother, Larry, enjoys building non-mainstream models of vehicles not available as kits, often fabricating many complex components using soldered brass. Using lots of accumulated reference, Larry has spent considerable time during the last couple of months fabricating this 1937 Studebaker J20M coal dump truck....a short wheelbase, cab-over-engine truck as typically used for urban delivery since they could usually deliver without blocking the entire road. The dump bodies usually were divided into two separate compartments with an opening bulkhead between them. This unusual model is mostly scratchbuilt in brass with lots of articulating and opening parts, etc. To complete his demonstration of the completed model and its features, he also built a small street-scene of how these coal delivery vehicles typically operated.
- 25 replies
-
- 22
-
-

-
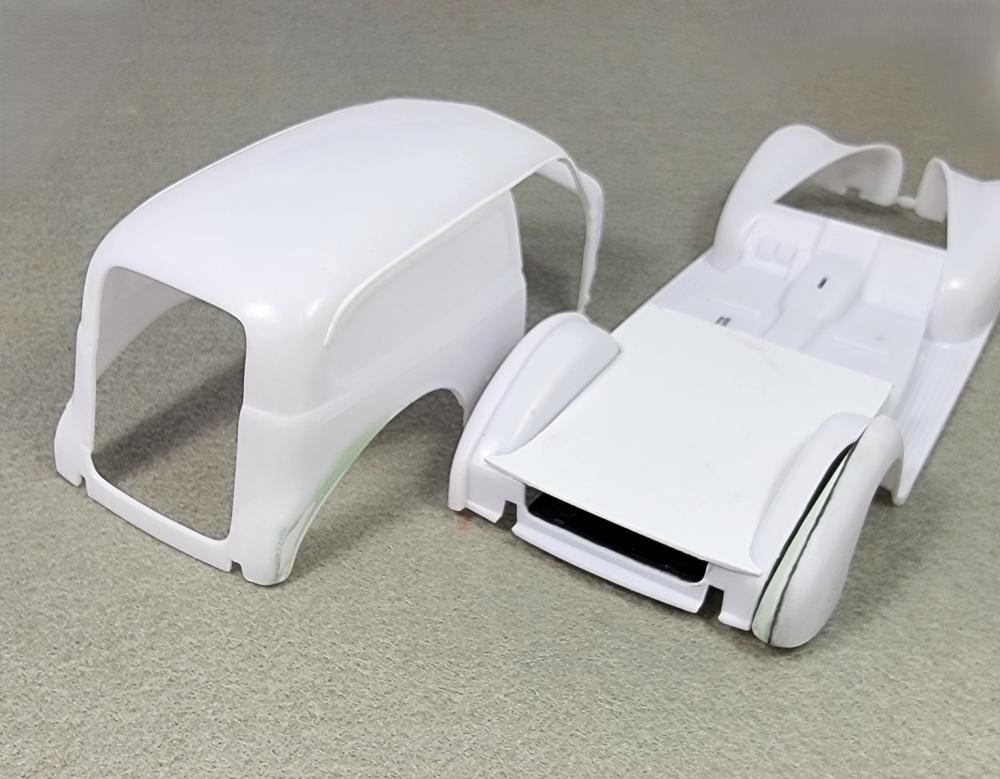
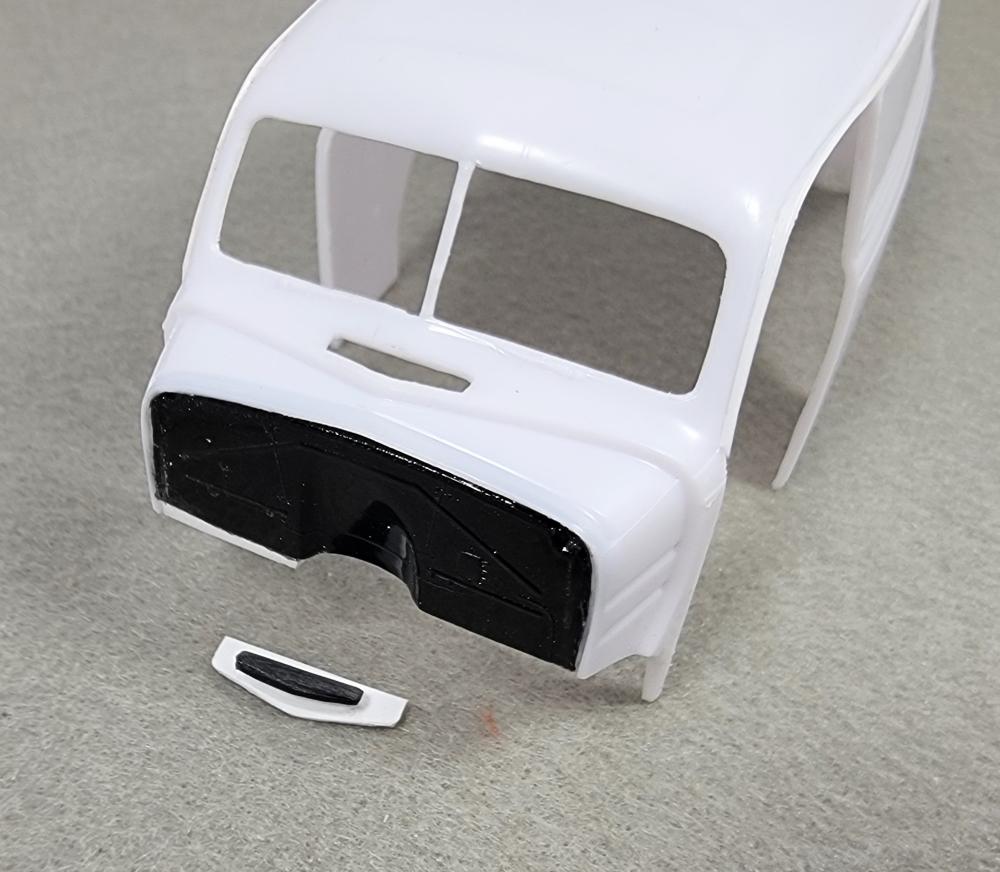
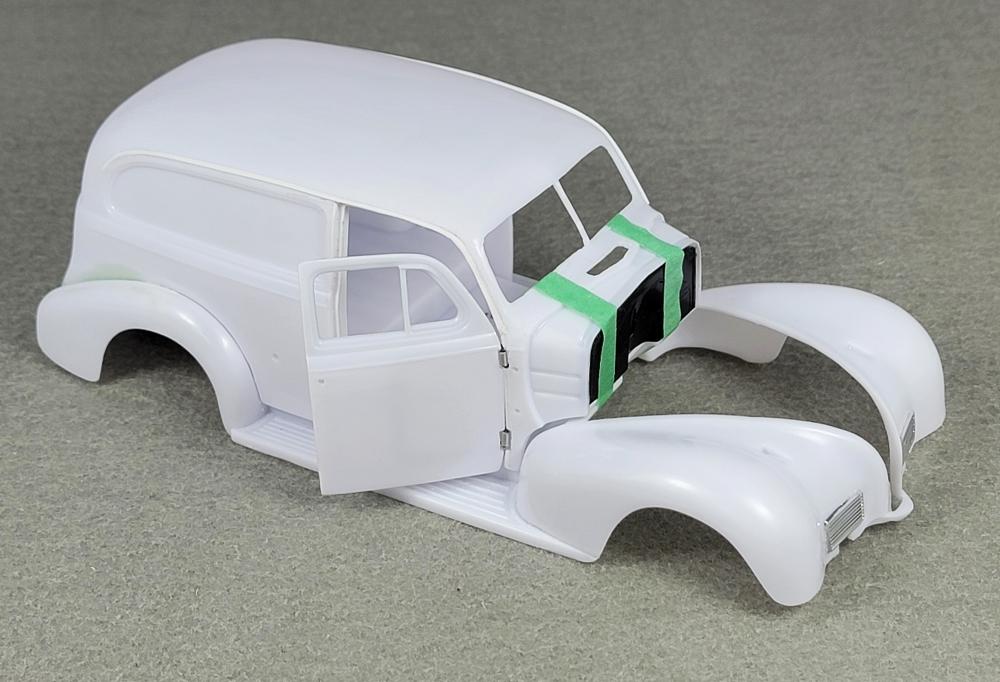
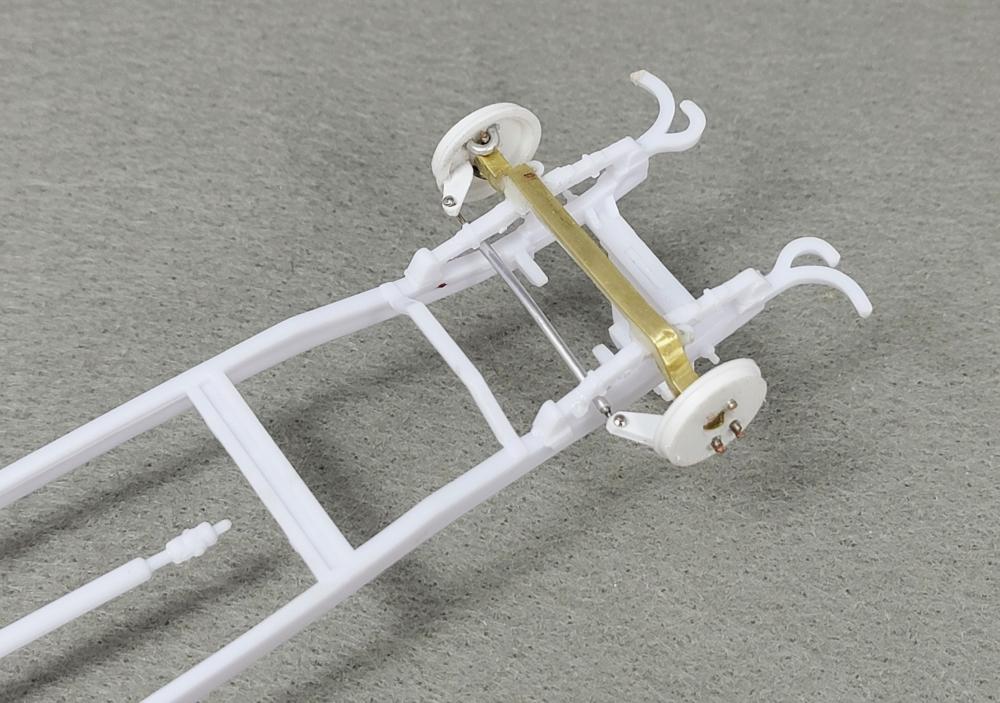
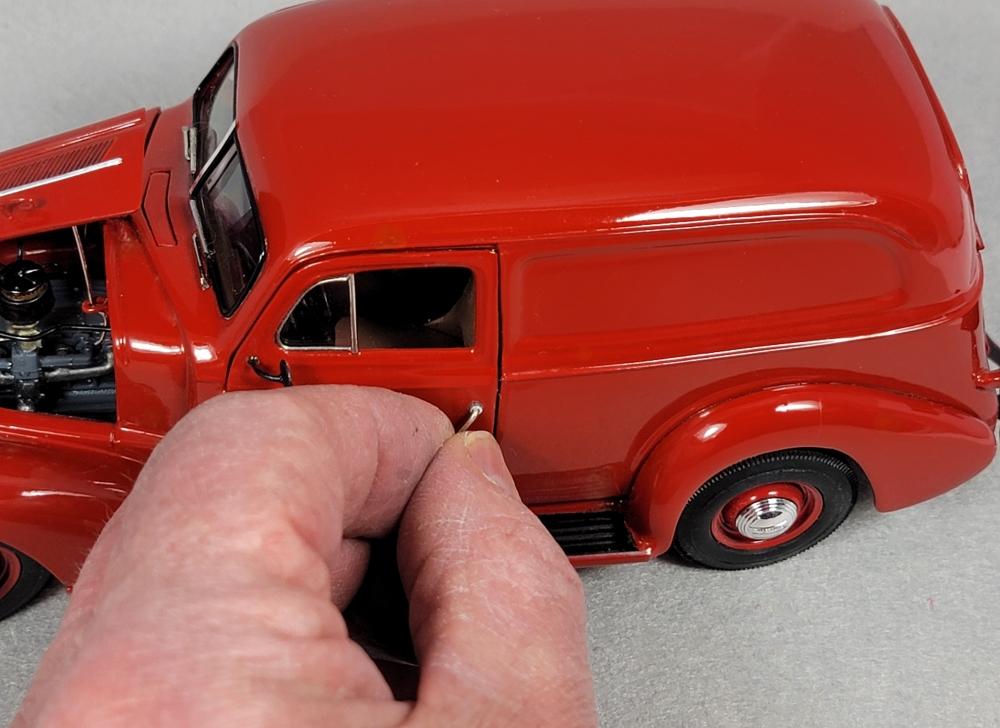
I've just completed this '37 Chevy Sedan Delivery, combining an AMT '37 Chev roadster, a Revell '39 Chev sedan delivery, copious scratchbuilding and detailing to make it as accurate (stock) as possible. The '37, 38, and 39 Chevies used basically the same sedan delivery body, chassis and drivetrain with different front clips, so the project seemed like a possibility. The Revell '39 (originally Monogram) is strictly a street rod so Monogram took lots of liberty with simplifying and modifying to suit their needs. The underbody detail as well as interior required lots of scratchbuilding to be accurate for a stock sedan delivery. I also wanted to open all the doors as well as make the engine hoods hinge open separately as on stock 37 Chevrolet car bodies The windshield gasket and door vent window trim is done in fine wire, and I've even cut open and hinged the cowl vent. The main paint is automotive basecoat clearcoat to approximate the available '37 Chevrolet Regatta Red, with details picked out using Humbrol and Tamiya as well as a bit of Molotow Chrome. The project has taken a month of fairly busy modelling time
- 20 replies
-
- 17
-
-
-
When can we expect to see issue 226
traditional replied to bobthehobbyguy's topic in Model Cars Magazine News and Discussions
Actually, on the subscription page, the 'one year subscription' is listed as 6 issues. so I can understand some of the current confusion. Delightfully, we all have a lot of emotional attachment to this magazine and to my mind, any impatience about the magazine's arrival should be seen as wonderful enthusiasm rather than any upset. This whole current confrontation could easily be quelled by 'someone in the know' simply giving a rough, non-binding estimate (with perhaps some explanation) of when issue 226 might be sent to the printer. -
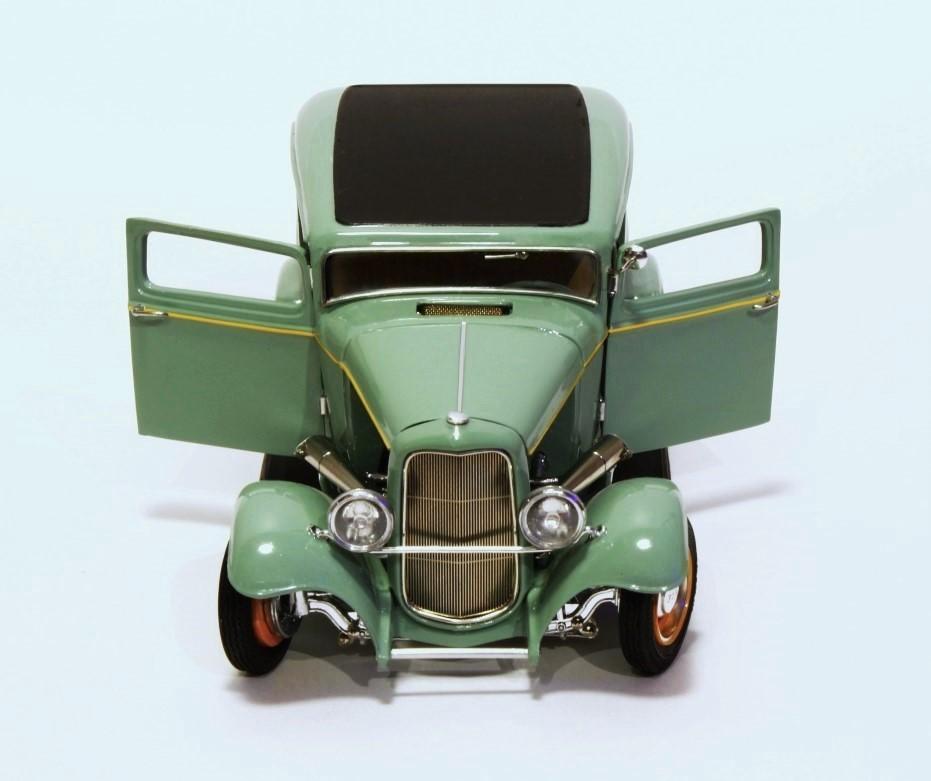
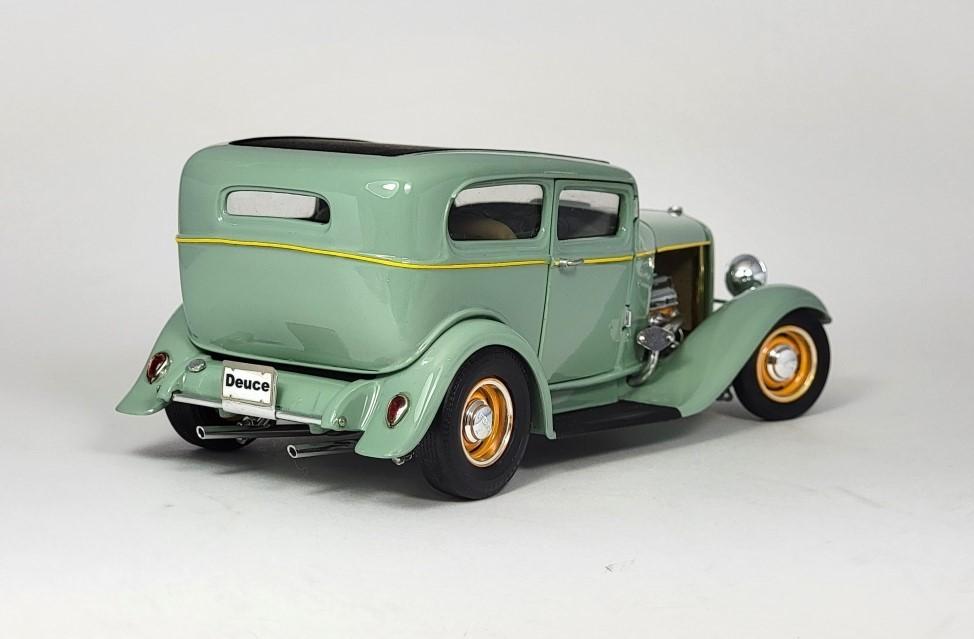
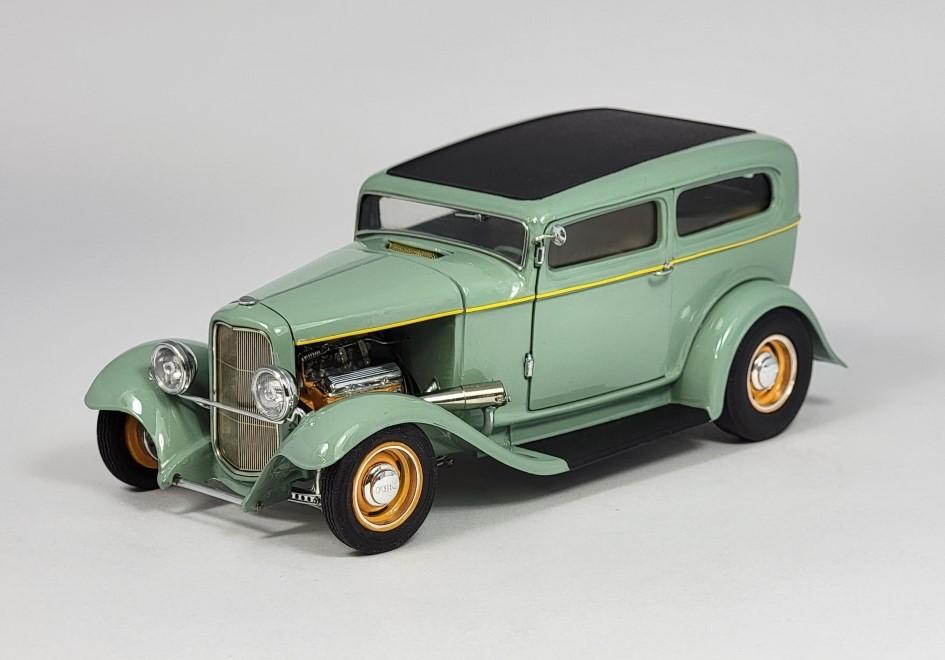
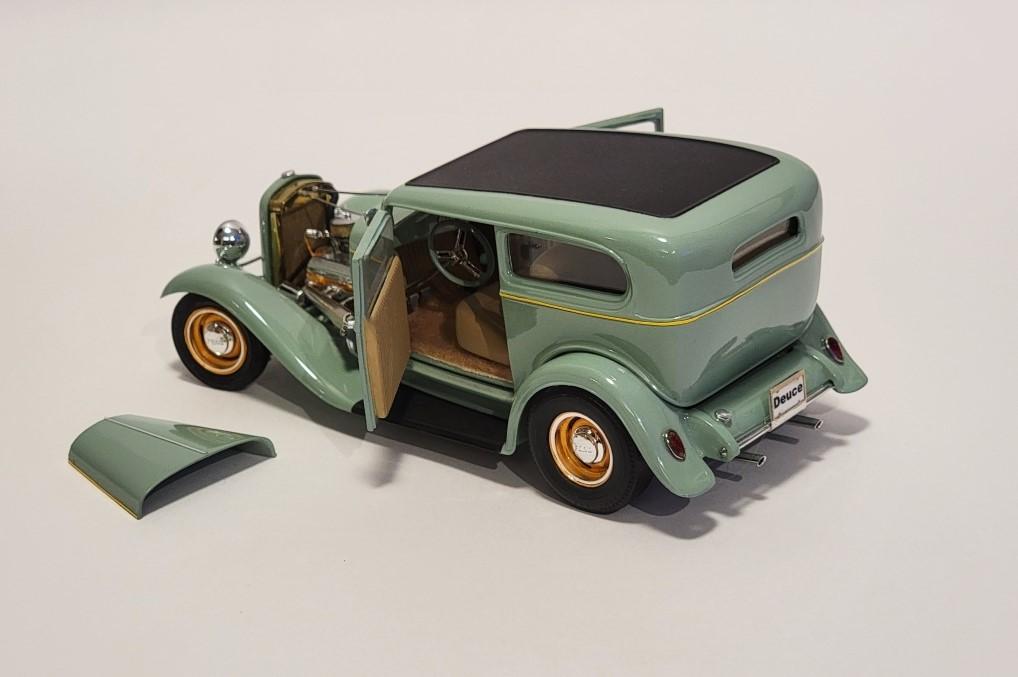
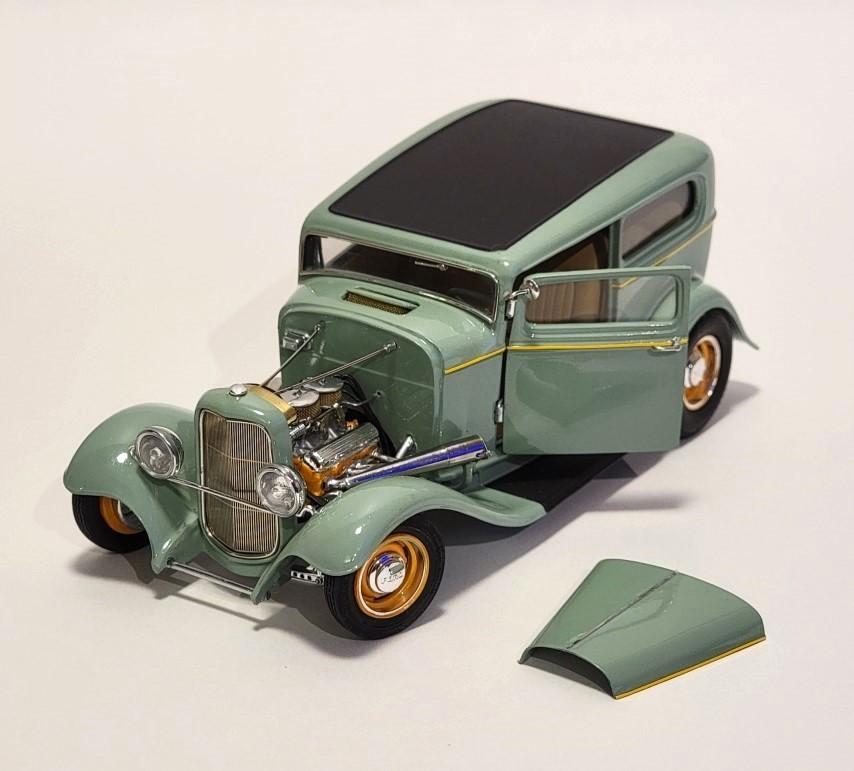
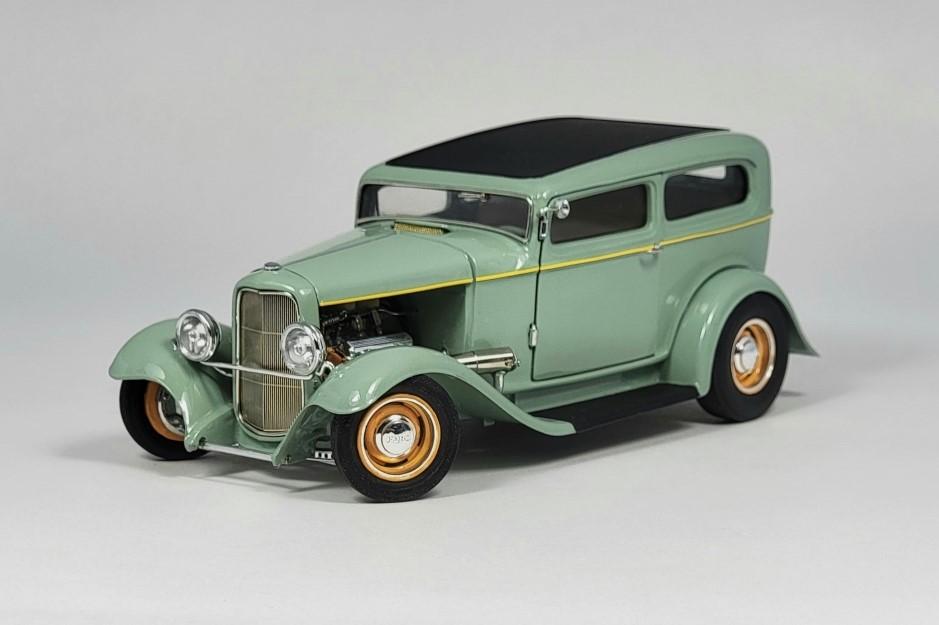
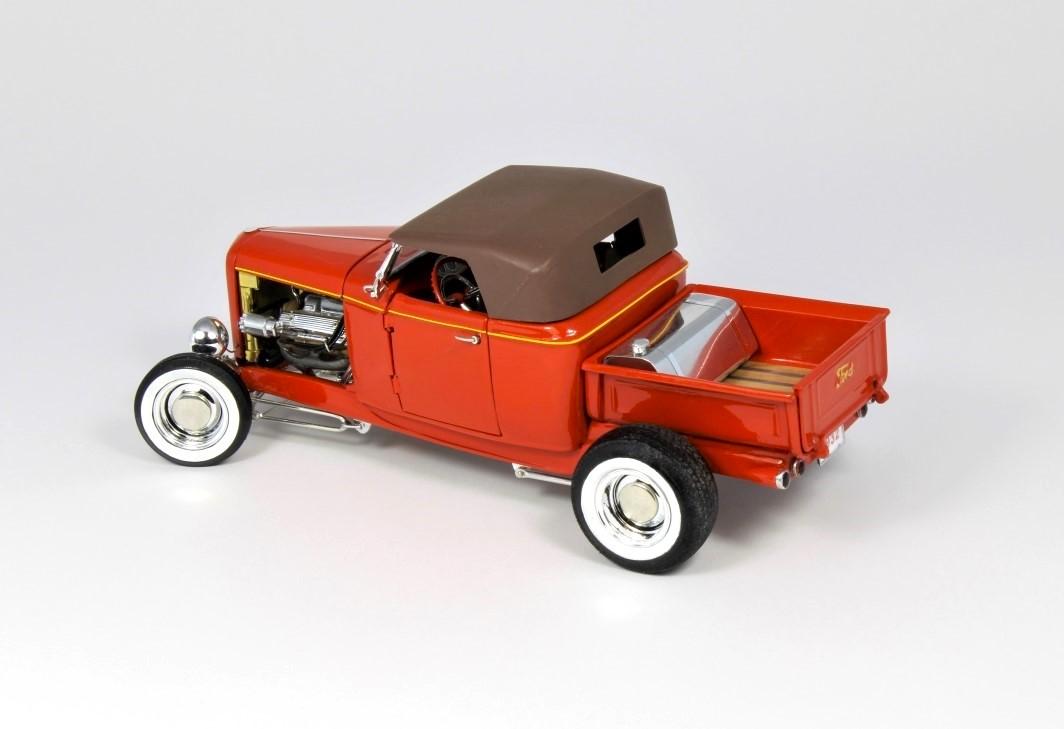
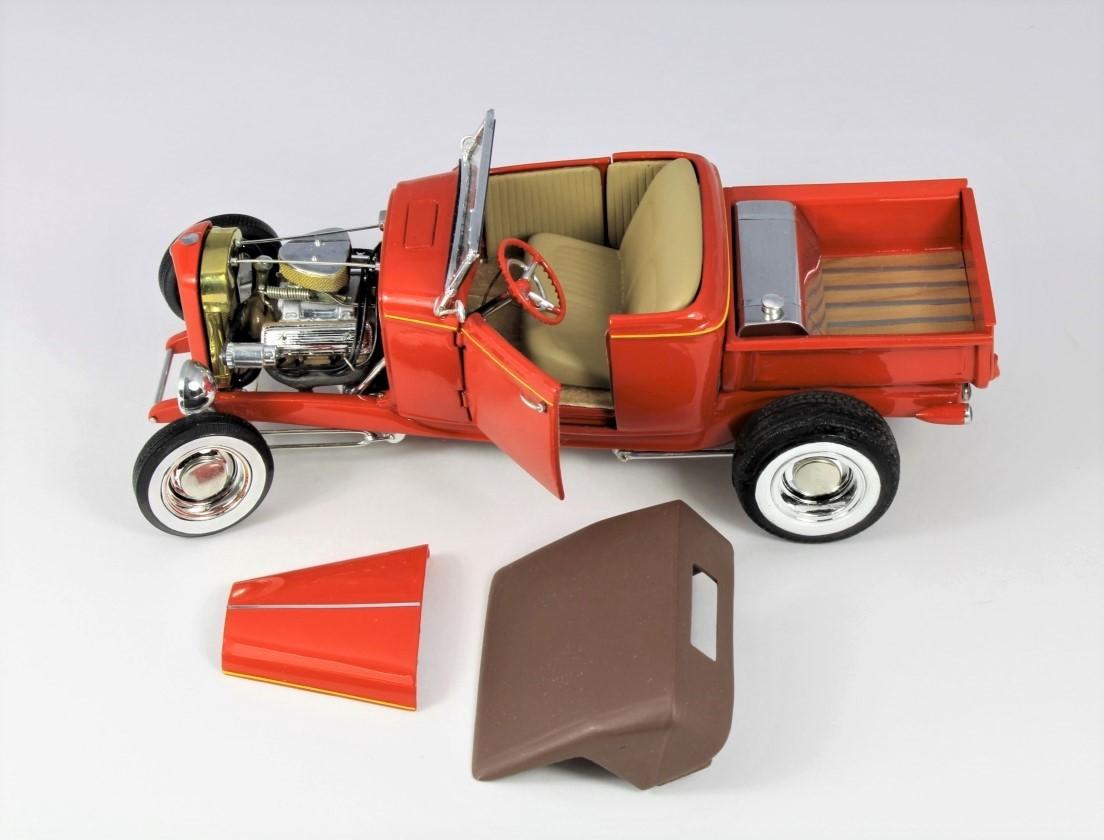
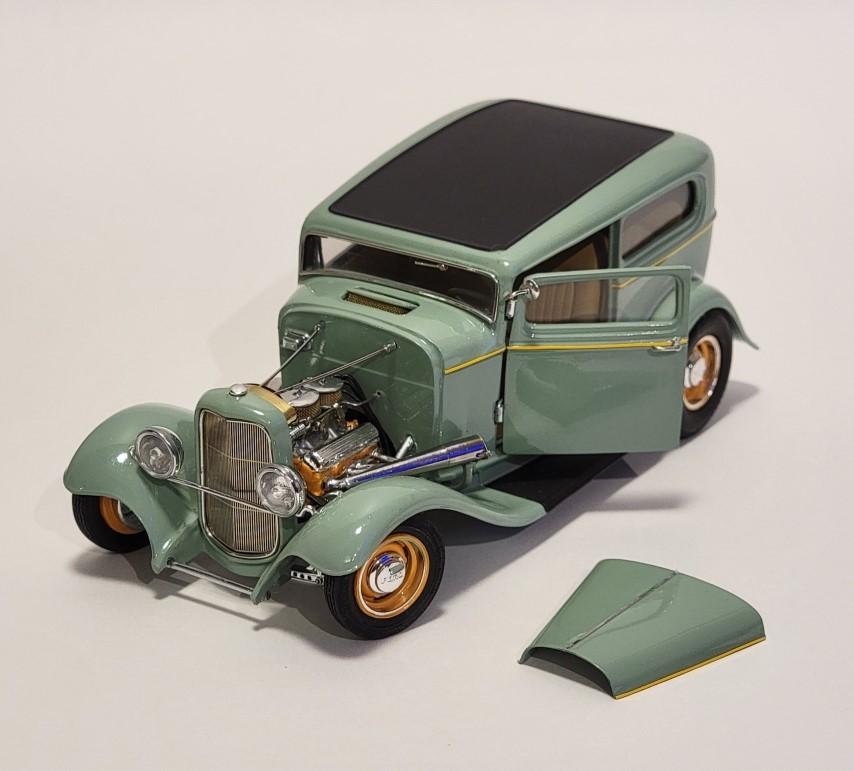
The main starting material was the body from a Revell Orange Crate as well as the fenders from a revell Deuce roadster
- 25 replies
-
- 12
-
-
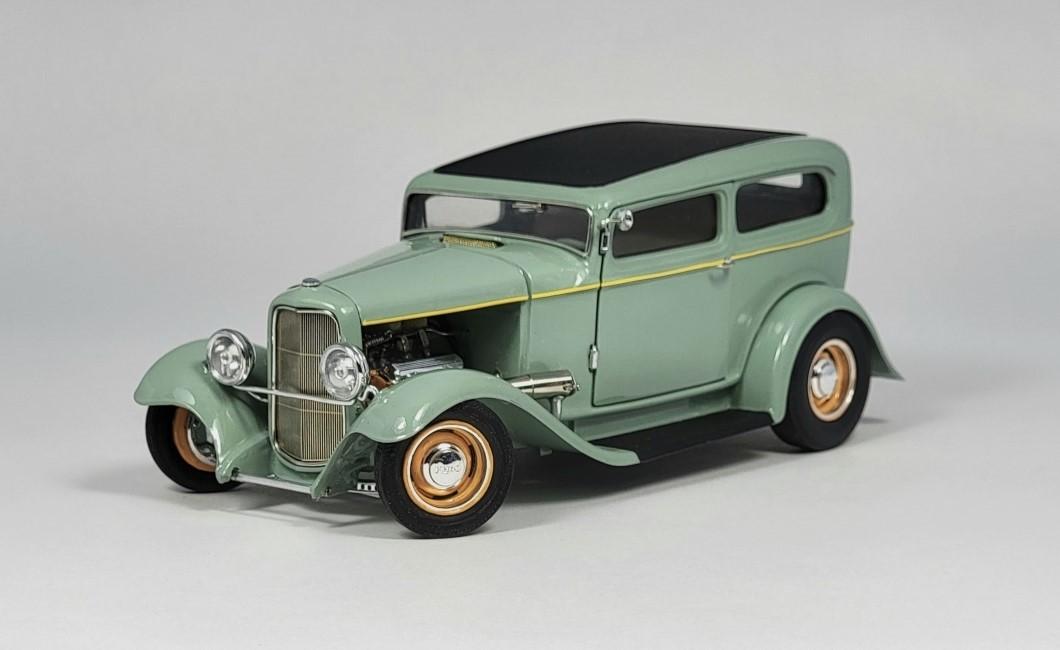
Chopped deuce sedan ....modified and detailed from the Revell Orange Crate kit
-
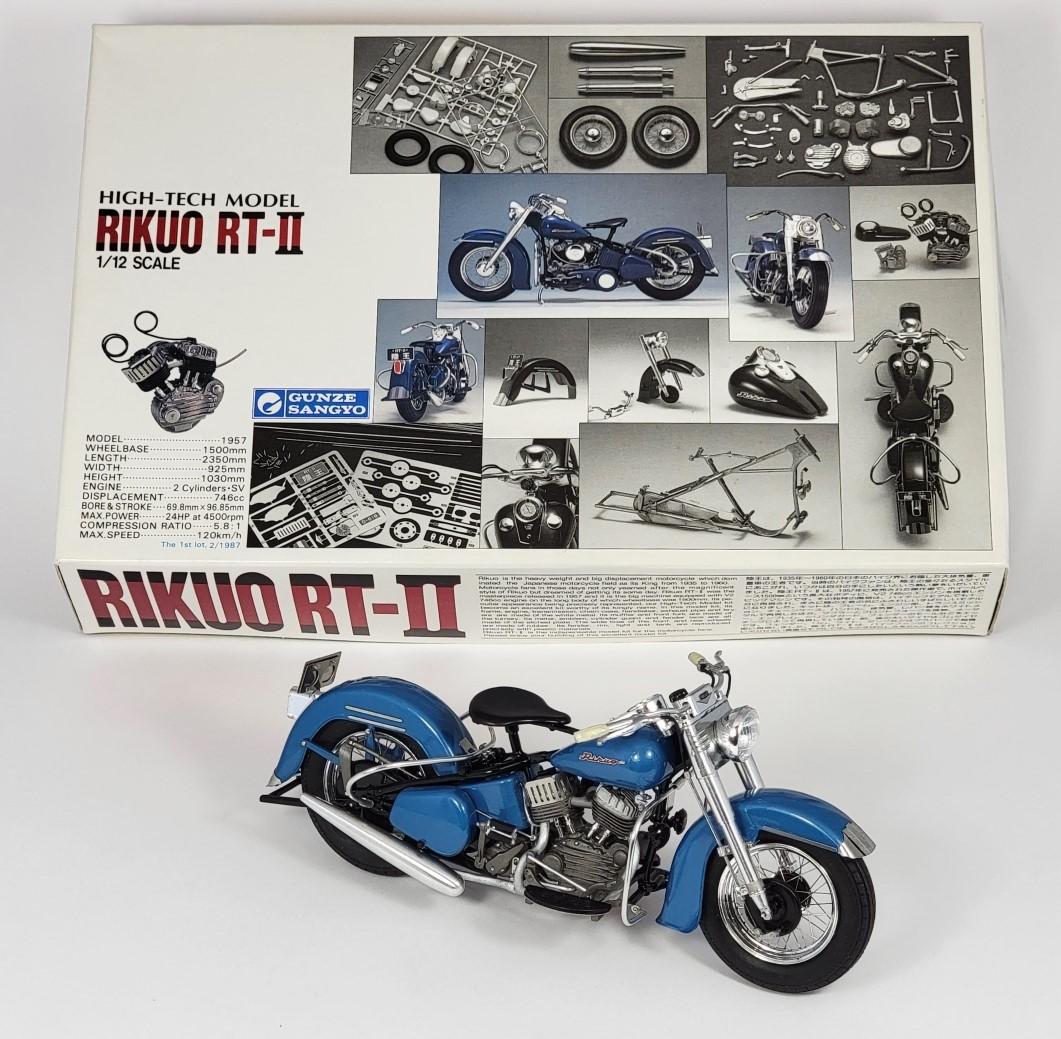
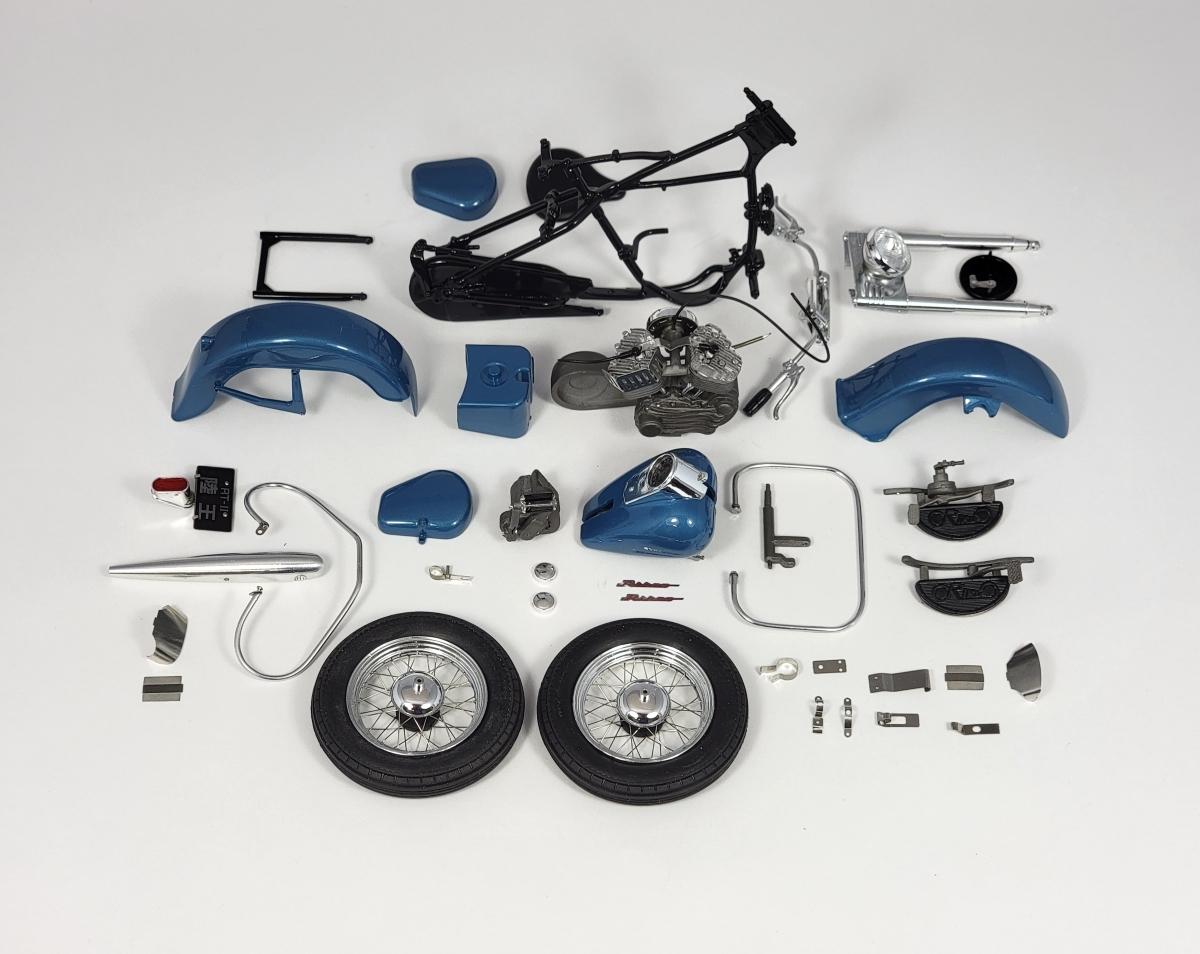
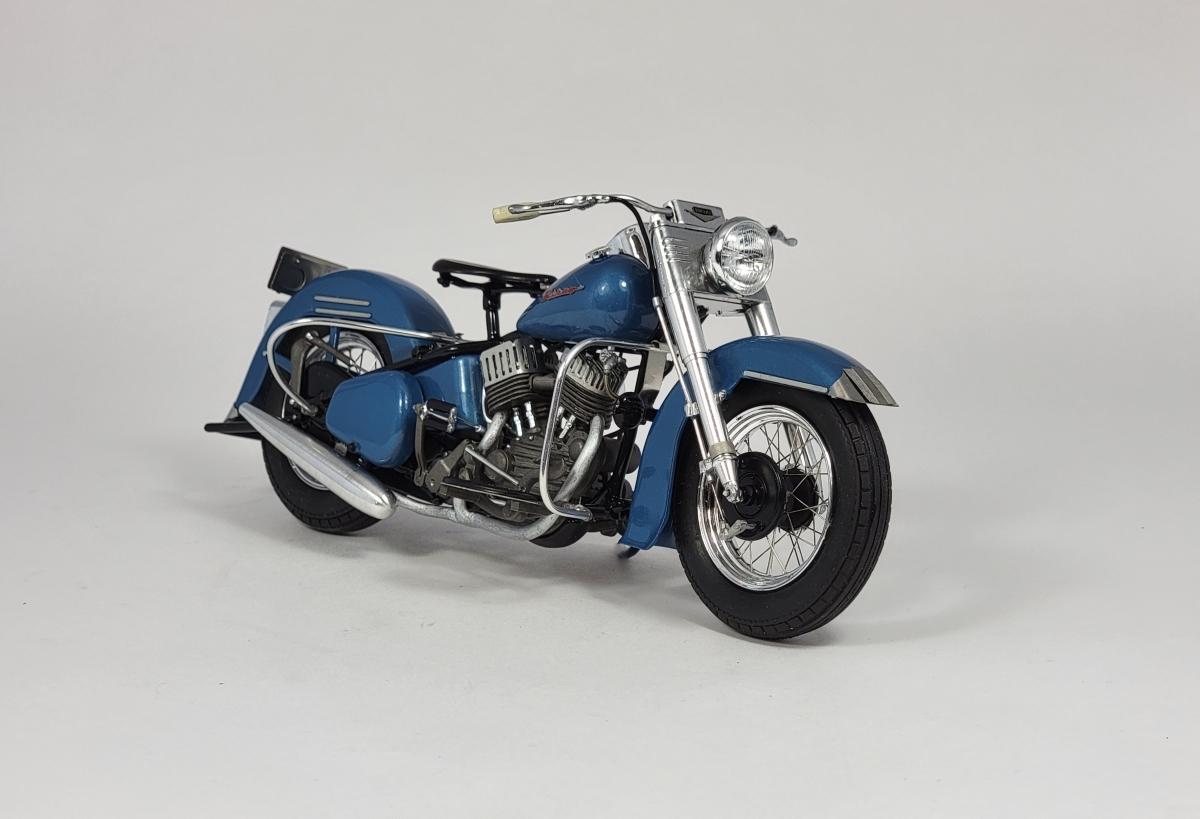
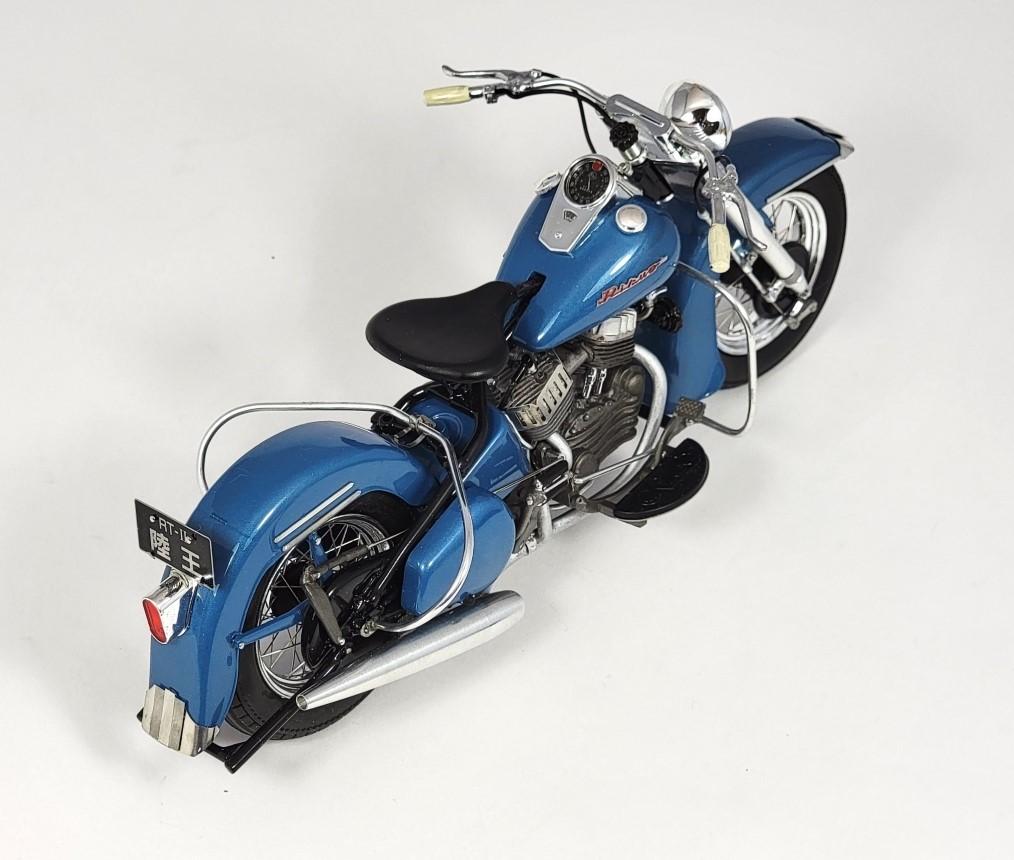
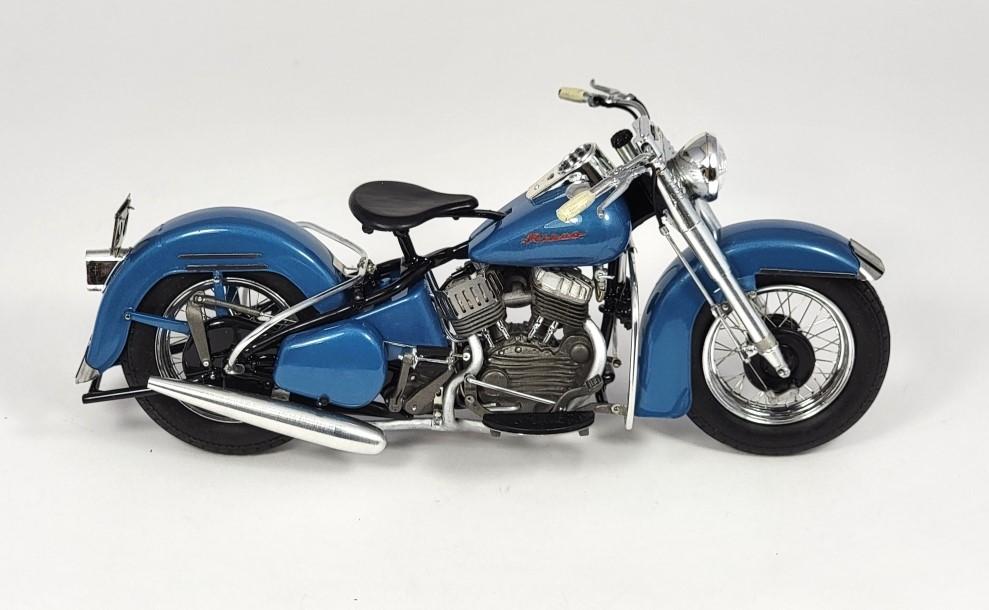
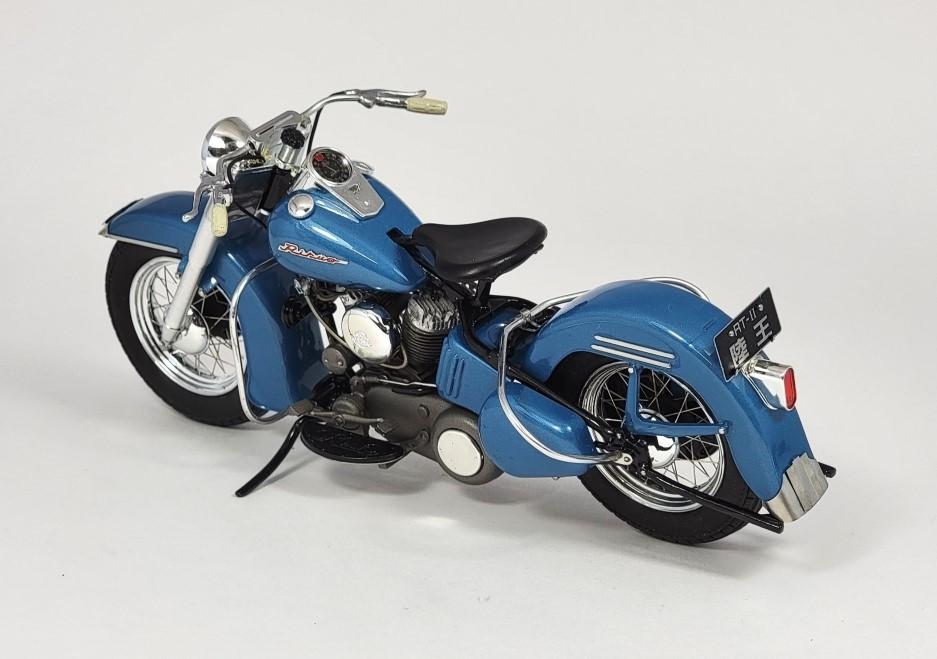
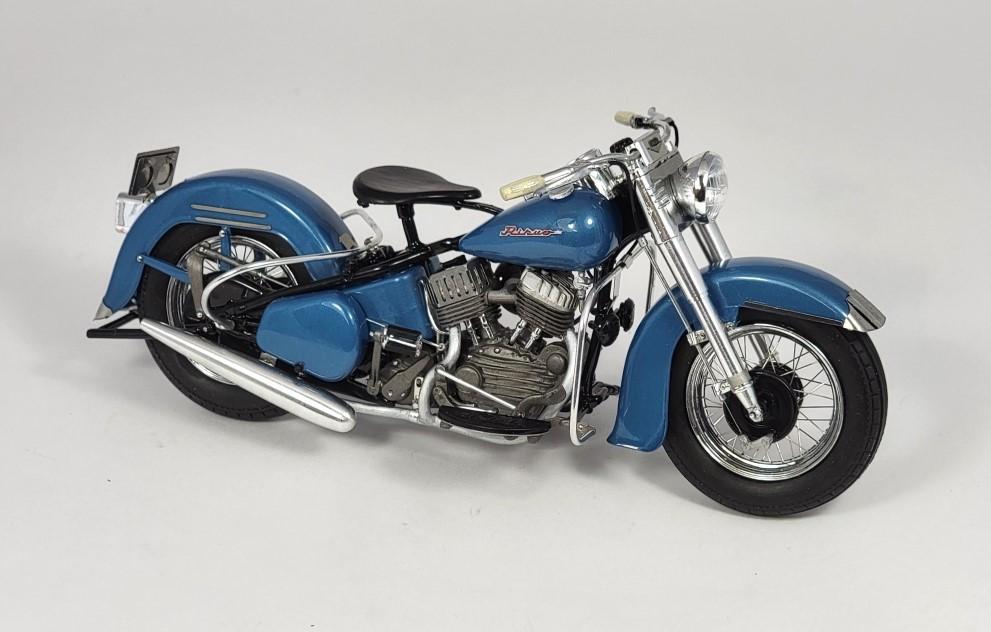
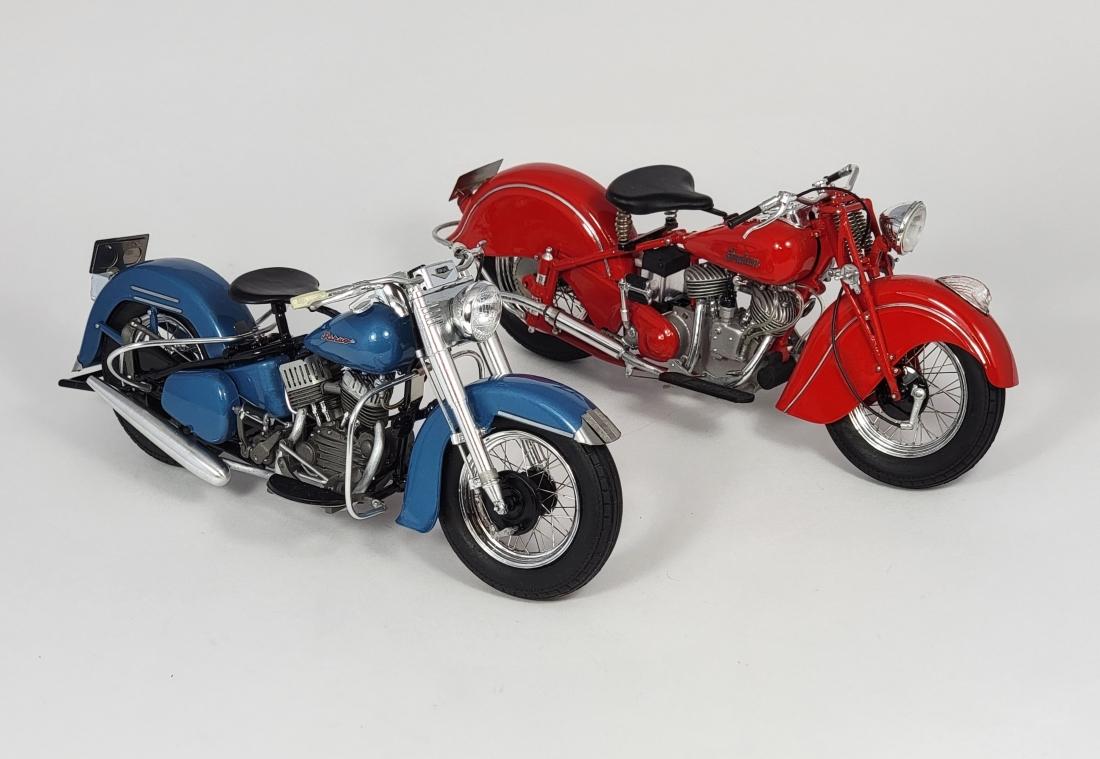
I bought this Gunze Sangyo Rikuo motorcycle 'High-Tech Model' kit as well as their similarly produced Indian motorcycle kit in the late '80s when a local camera/hobby store was going out of business. It had originally been a fairly expensive highly detailed multimedia kit, but it and the Indian kit were being cleared for around $10 each. Although they were both intimidating kits, I had built the Indian kit a long time ago and it's taken me until now to build the Rikuo motorcycle. Rikuo was a Japanese manufacturer who until the early '60s was building Harley Davidson cruising motorcycles under licence. This particular Rikuo RT II depicts a 1957 version, and internet searching indicates that most of them were probably done in metallic blue. This Gunze Sangyo kit is, quite frankly, a somewhat confusing and a very difficult build....the instructions are often ambiguous and out of sequence and they expect you to be able to drill into the ends of 1 millimeter diameter rods and other very fine metal parts. The drivetrain is mostly cast in relatively heavy soft metal, while the body parts are generally styrene. Anyhow, after many days of assembling, painting, and lots of head-scratching the model is finally completed and I'm really pleased with the results. A couple of the pics show the Rikuo alongside my previously built Indian Motorcycle.
-
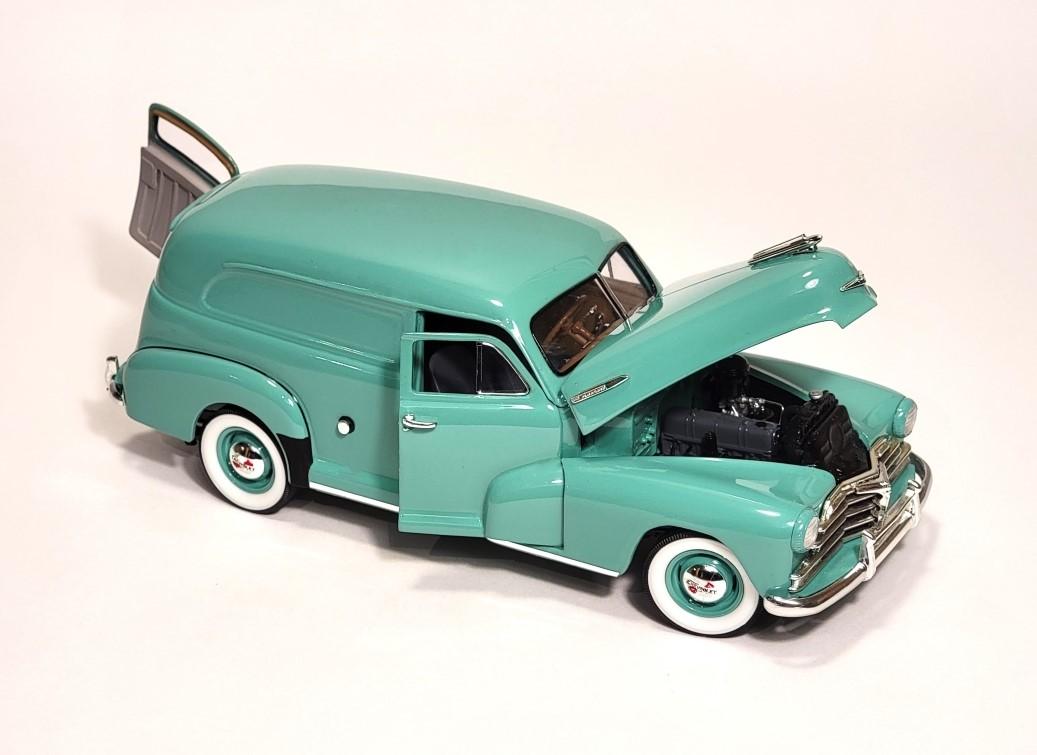
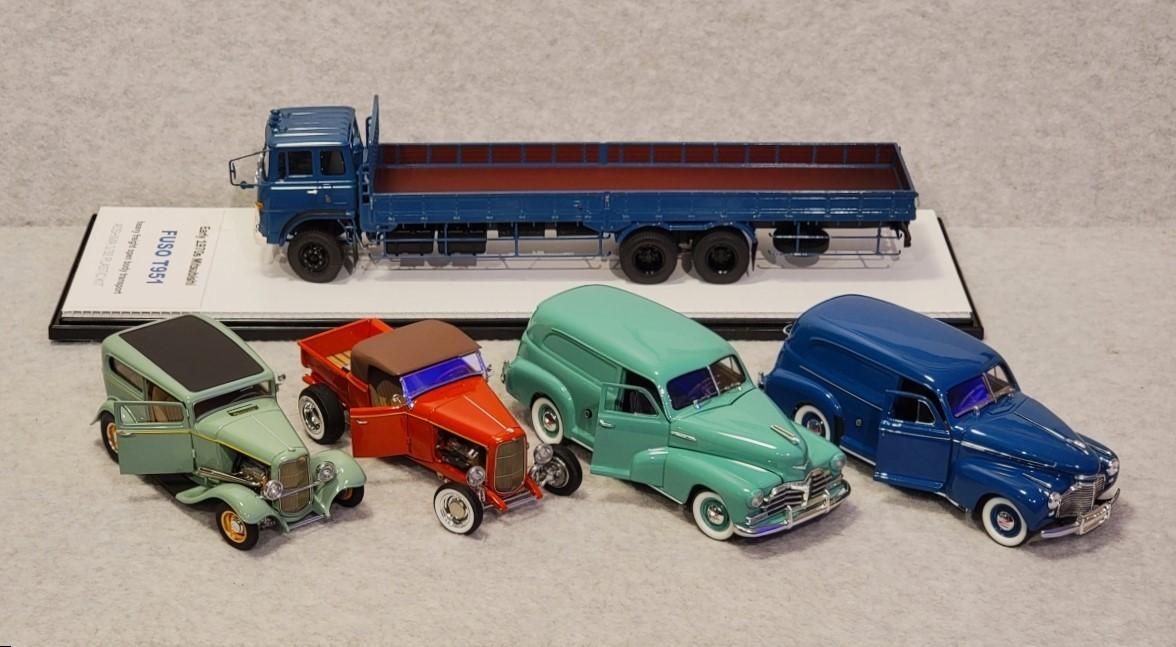
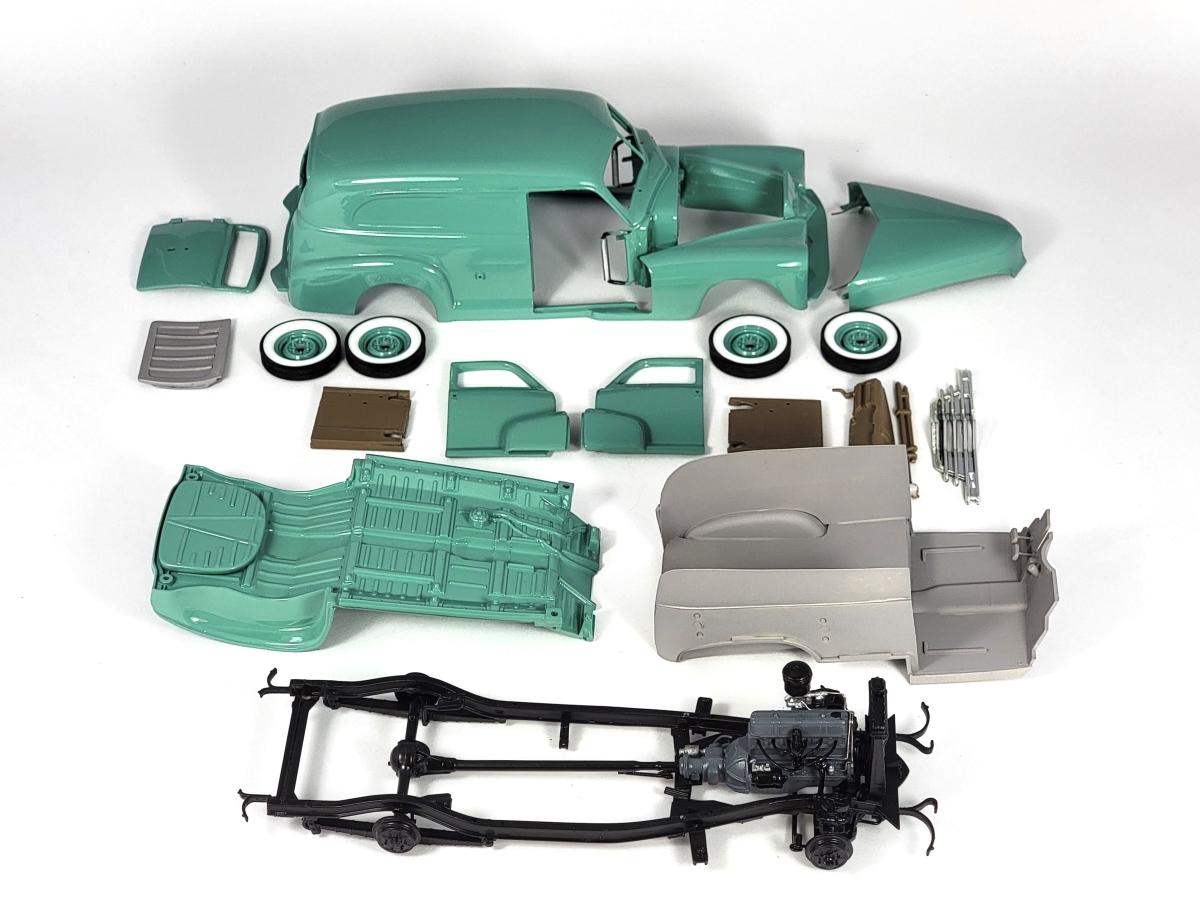
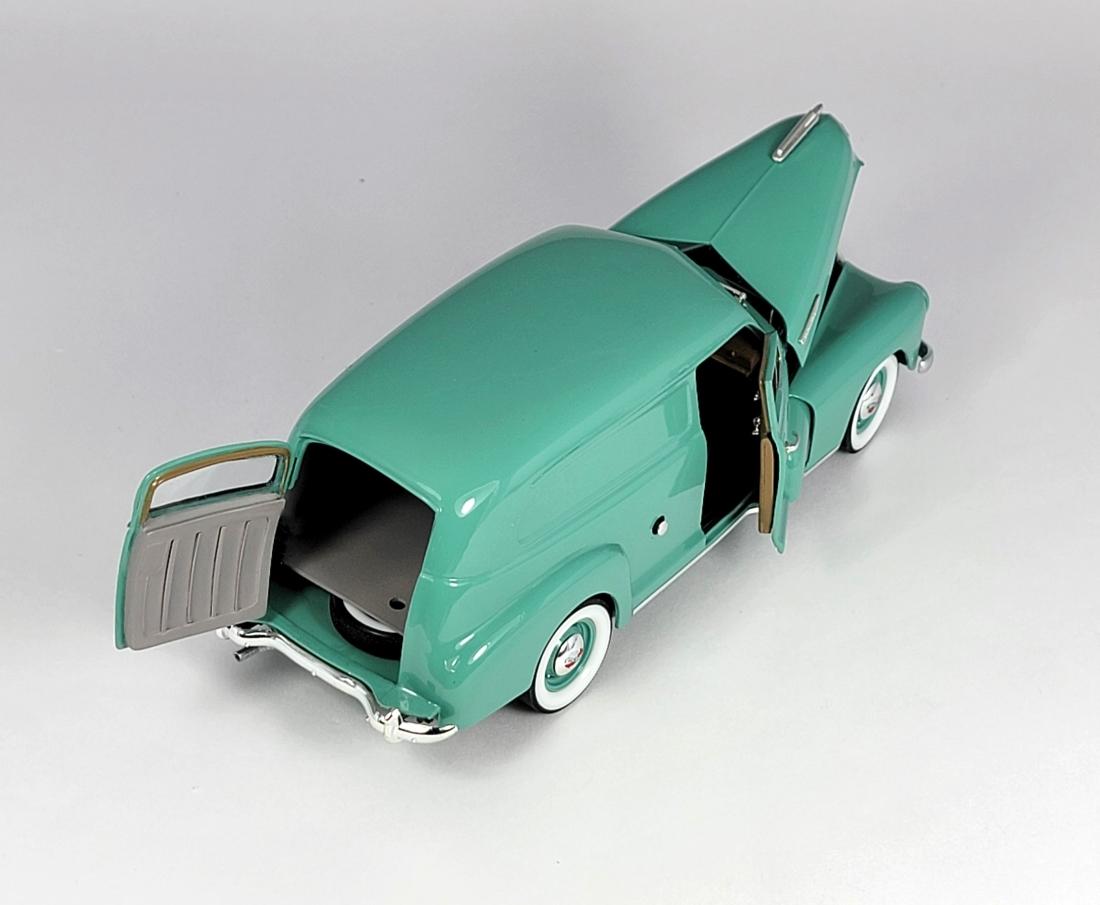
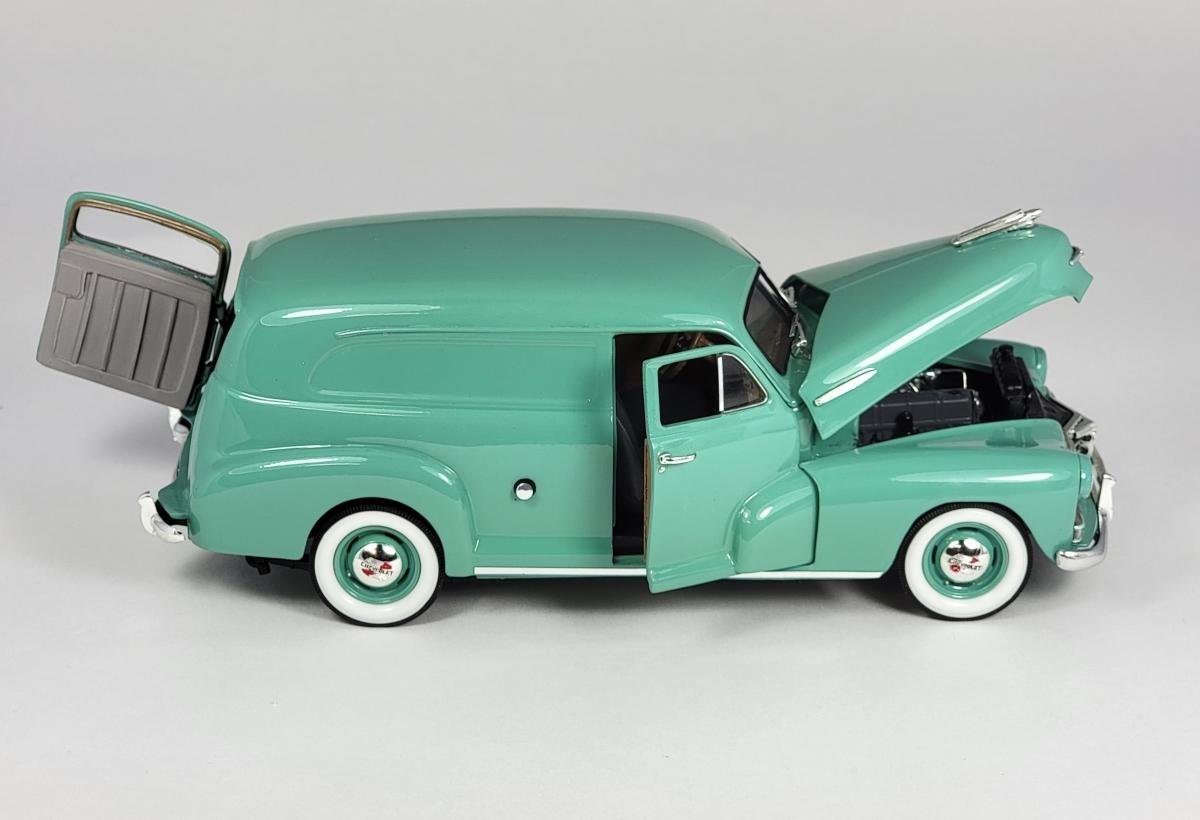
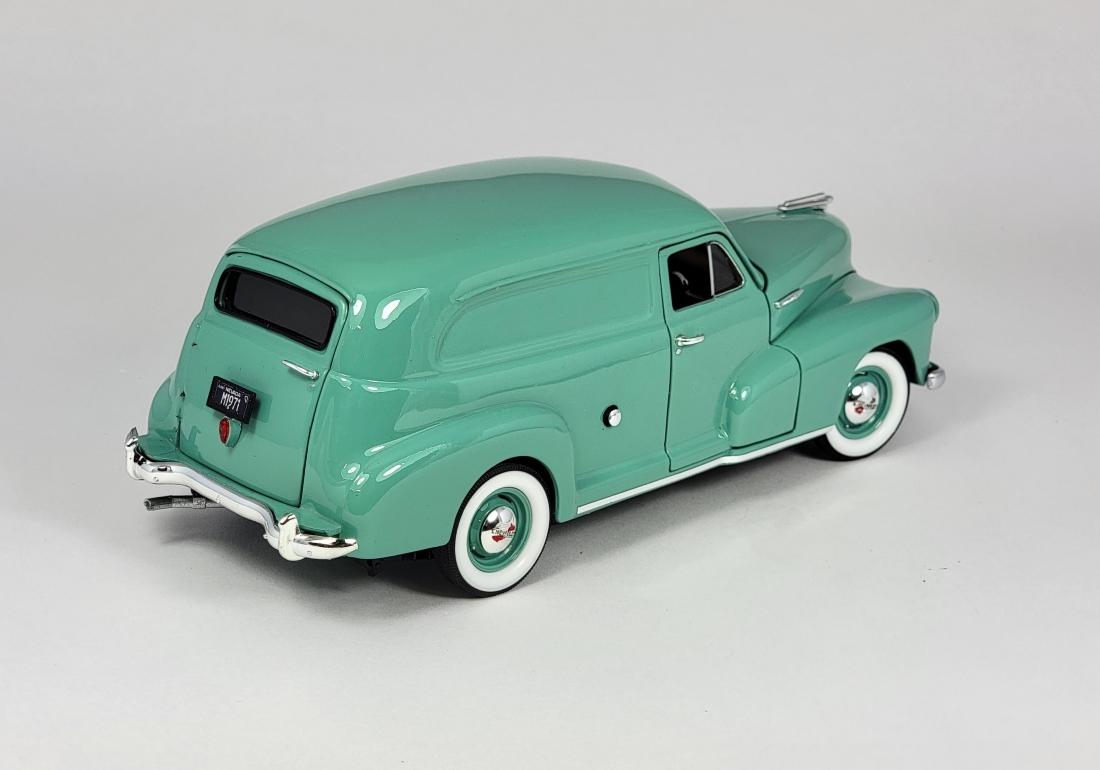
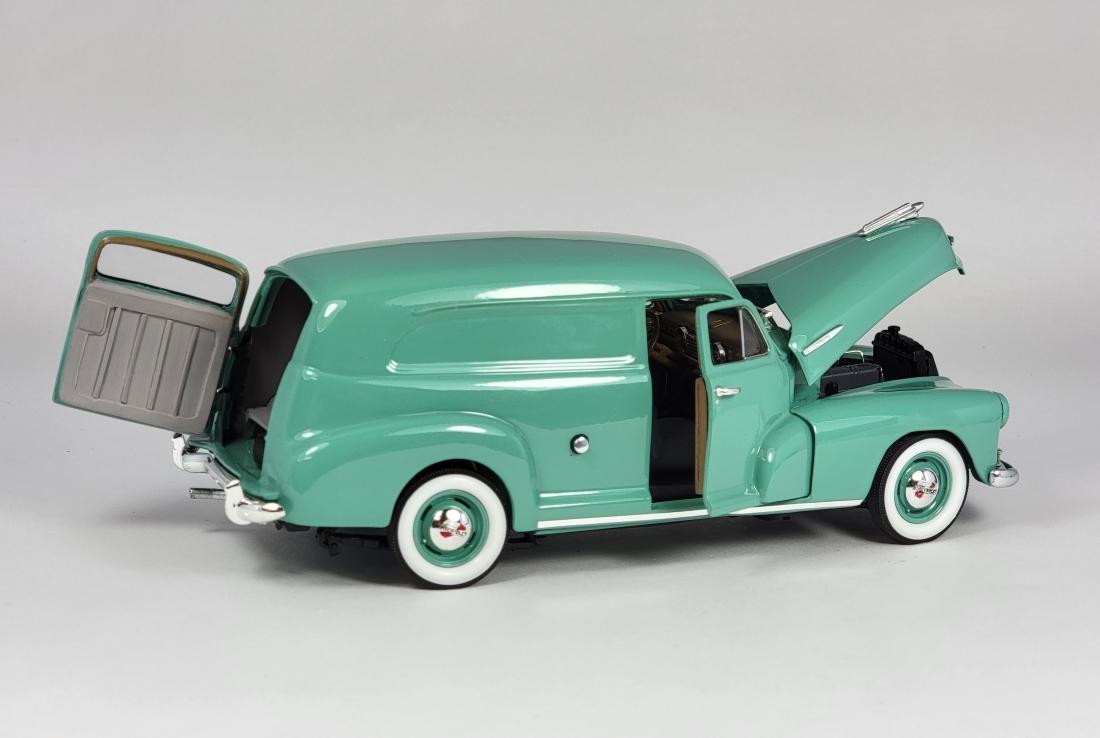
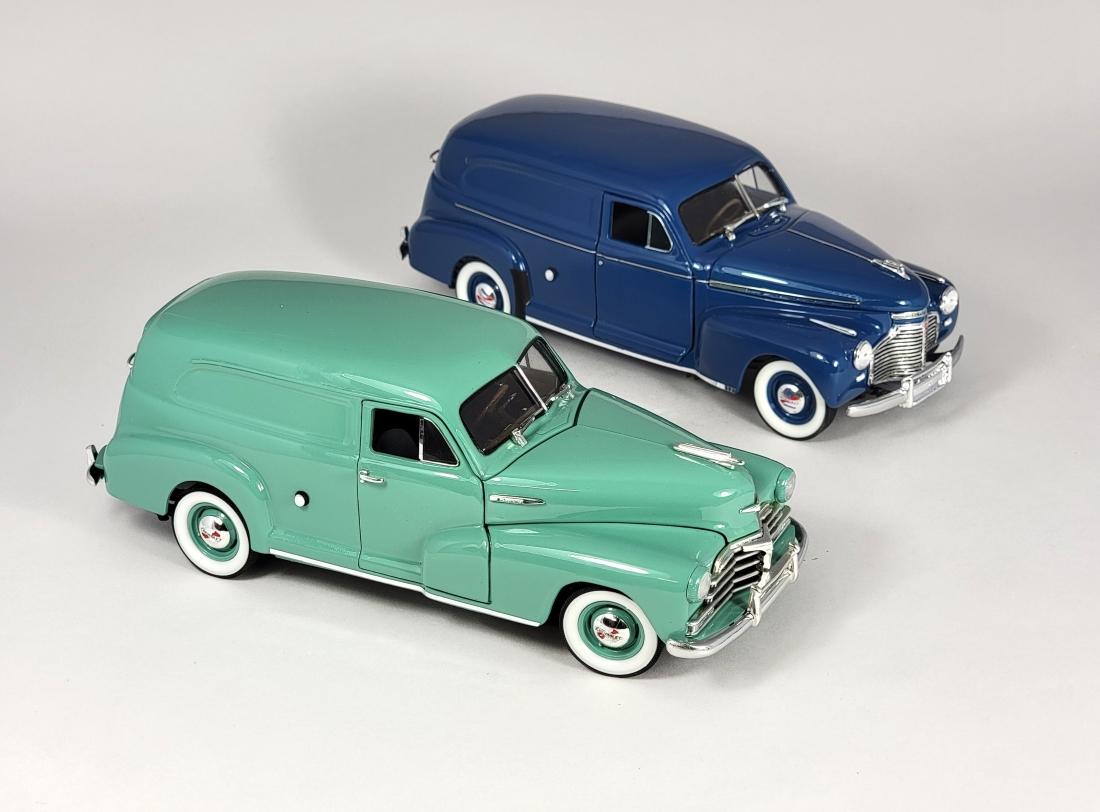
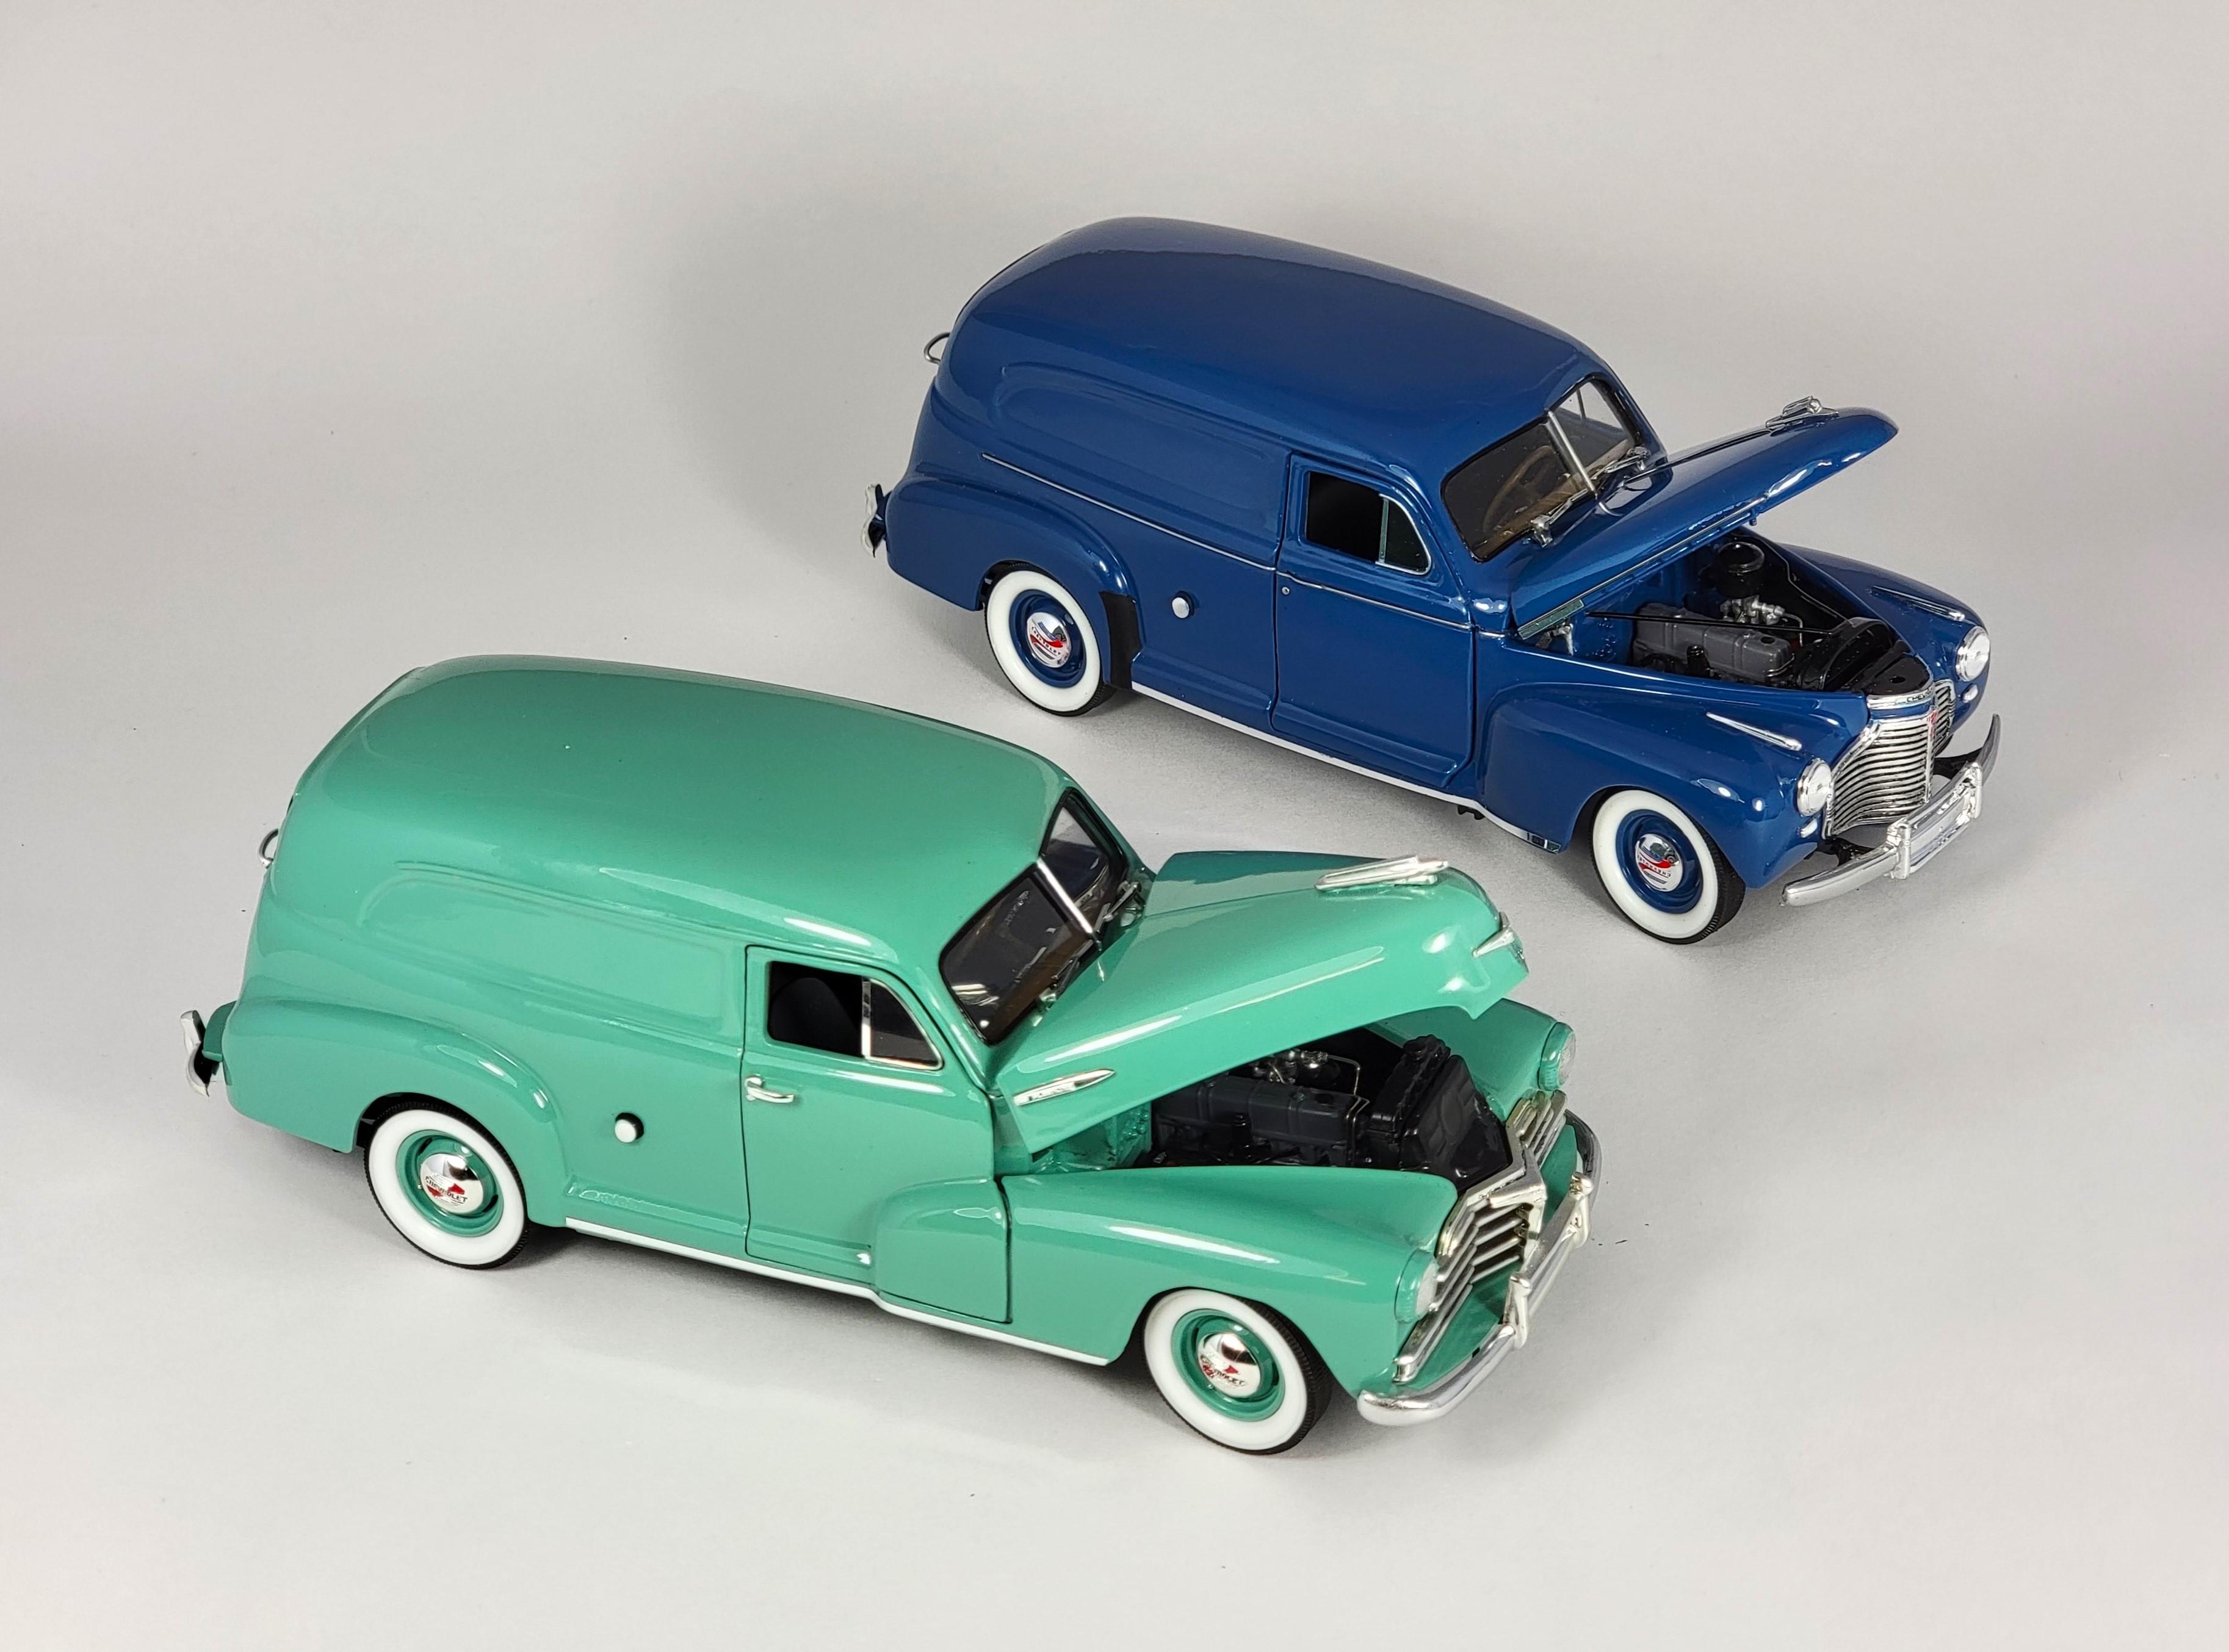
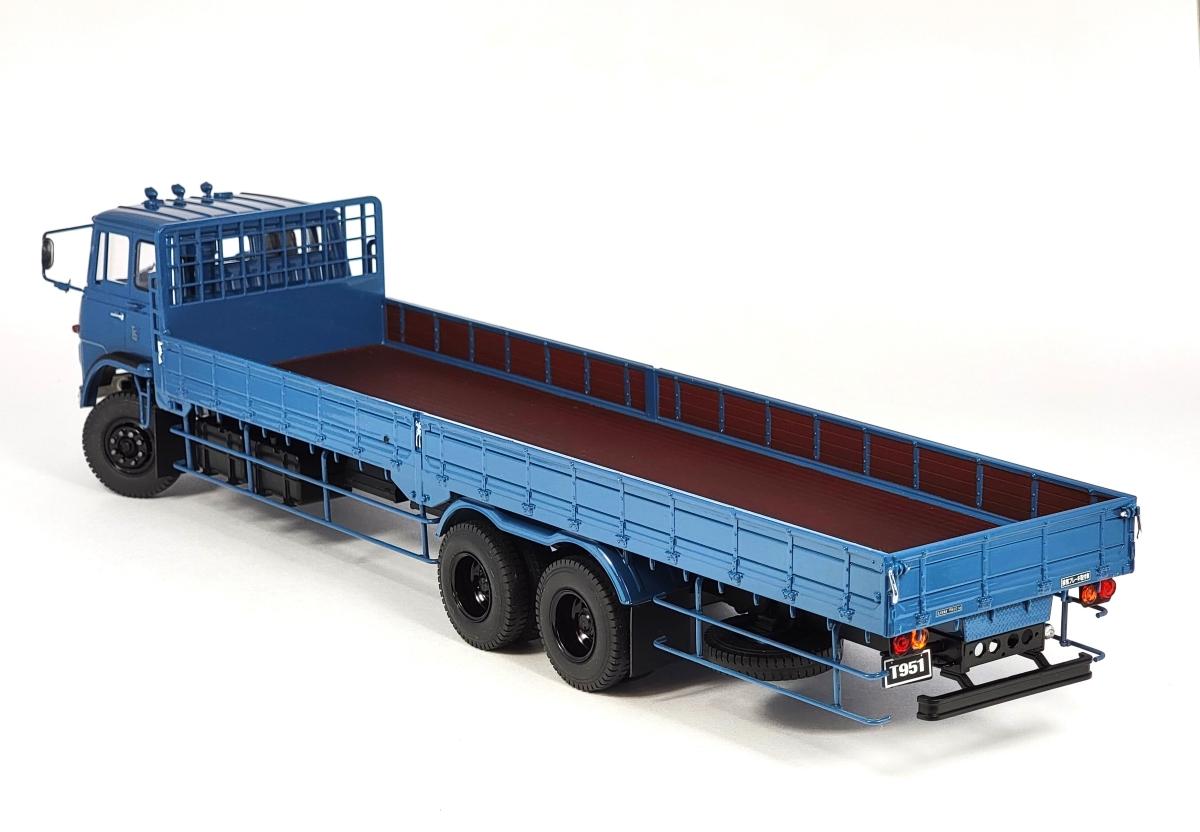
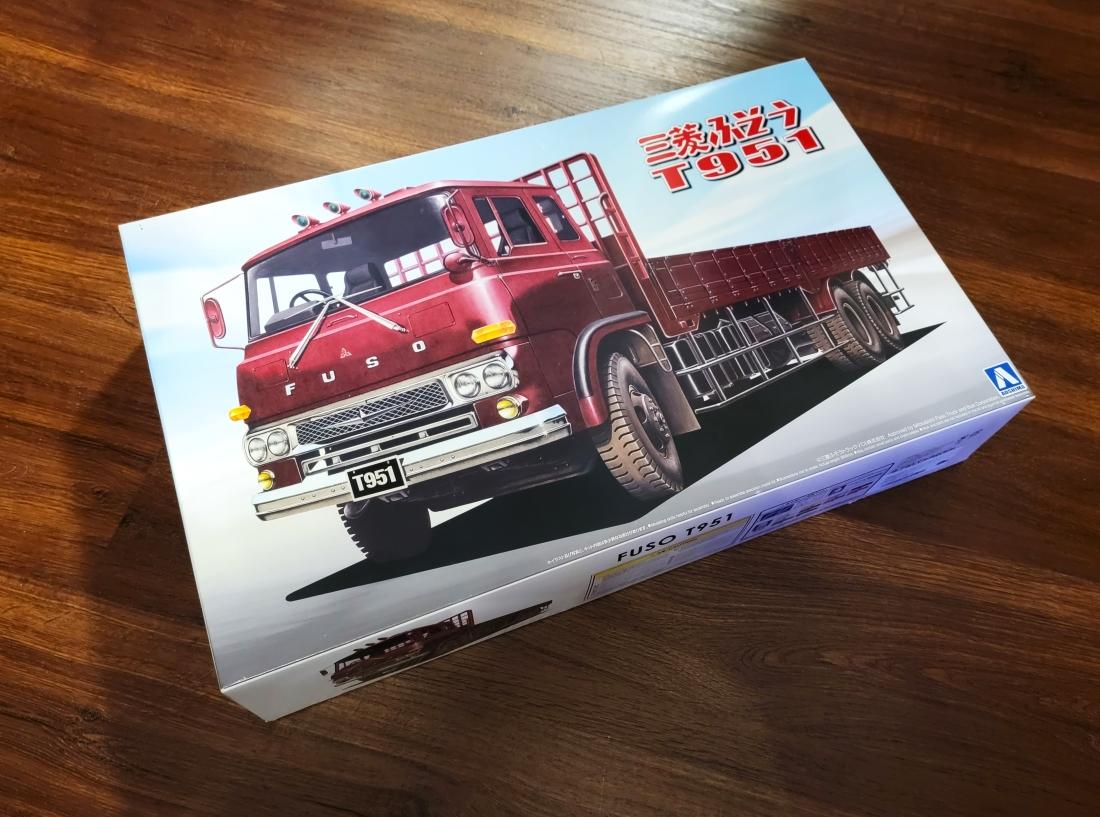
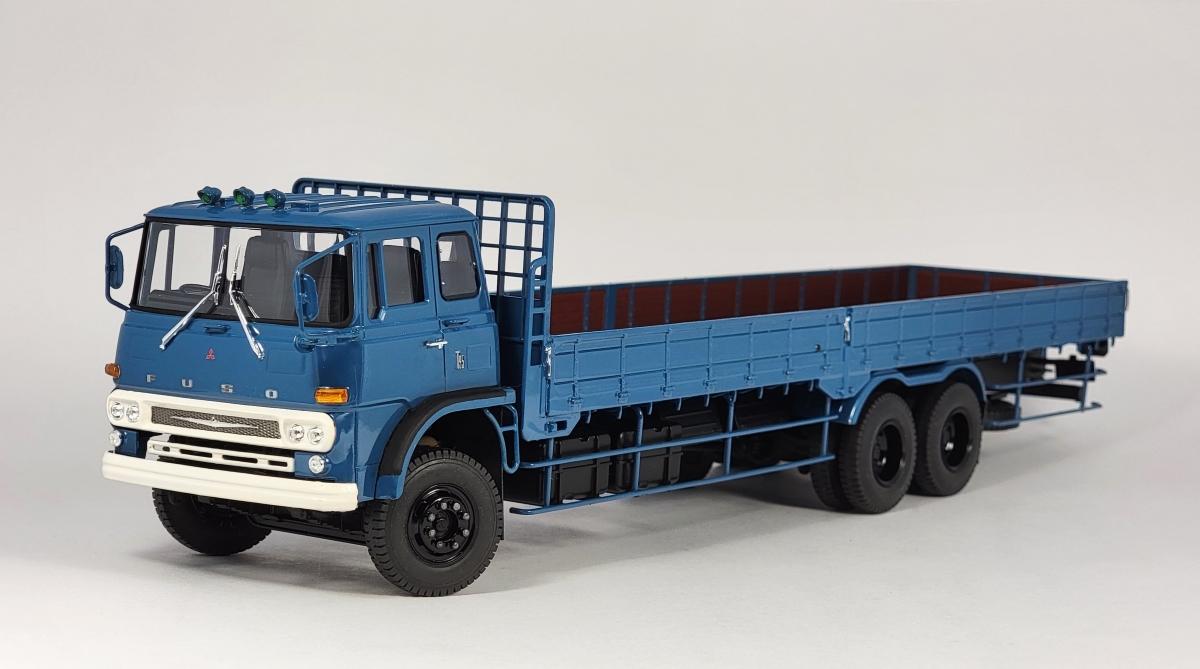
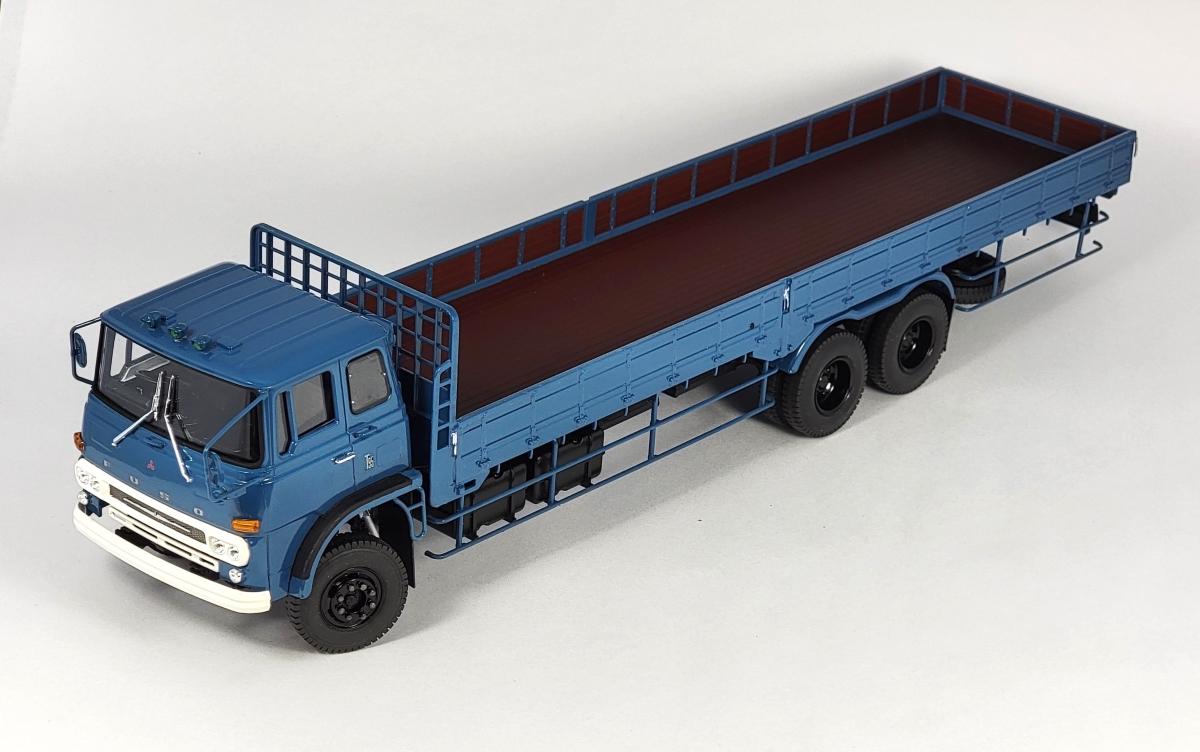
2023 was an enjoyable year, and my model building included a bit of most of my favorite things.........traditional hot rods, sedan deliveries, and trucks. Chopped deuce sedan....modified from the Revell Orange Crate sedan body Deuce roadster pickup hiboy....modified from the Revell/Monogram deuce roadster Mostly box stock from an Aoshima FUSO T951 kit (1/32 scale) Stock'41 Chevy sedan delivery ....heavily modified and detailed from the Galaxie postwar chevy kit Stock '48 Chevy sedan delivery..... reproportioned and modified from the Galaxie kit
- 31 replies
-
- 10
-
-
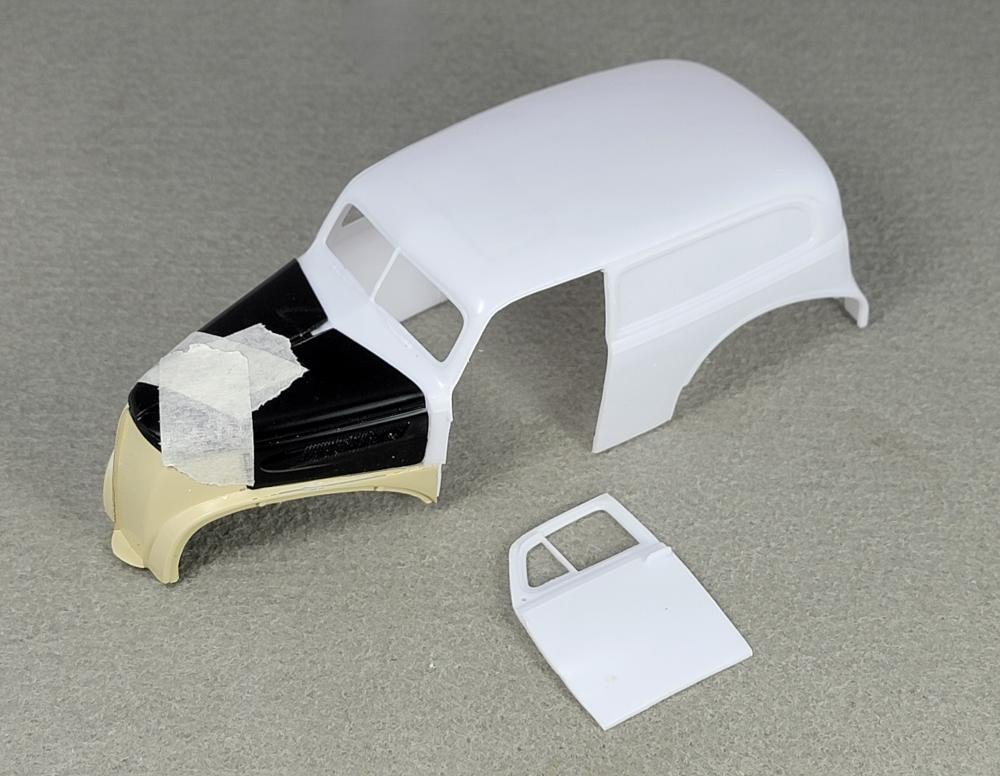
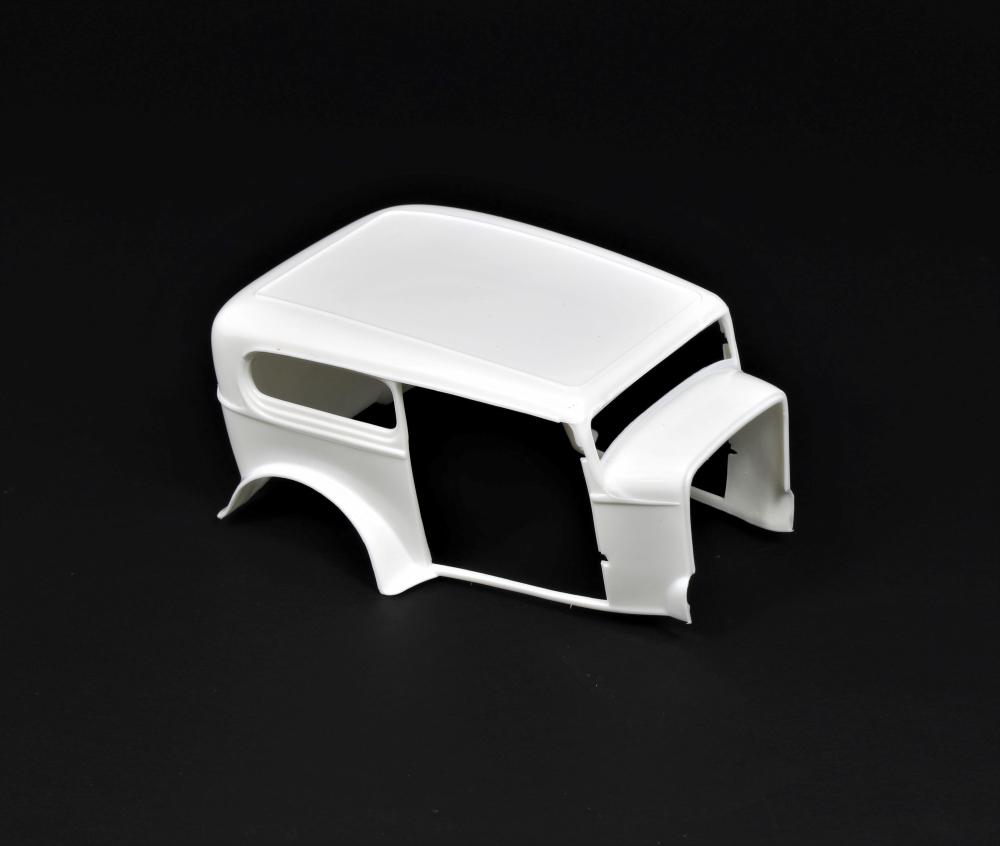
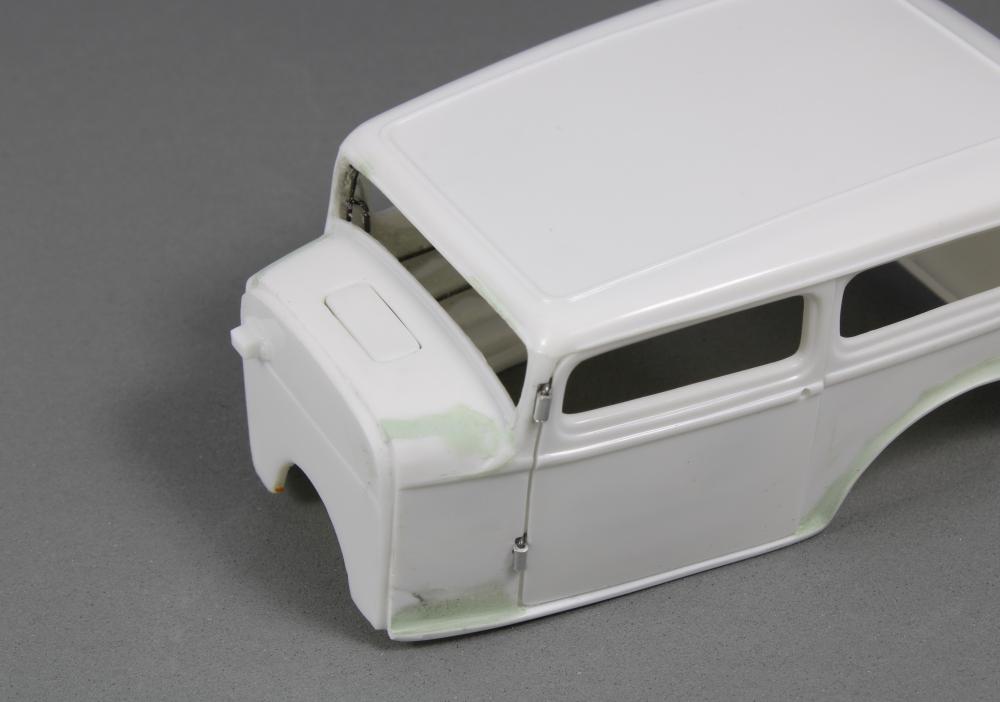
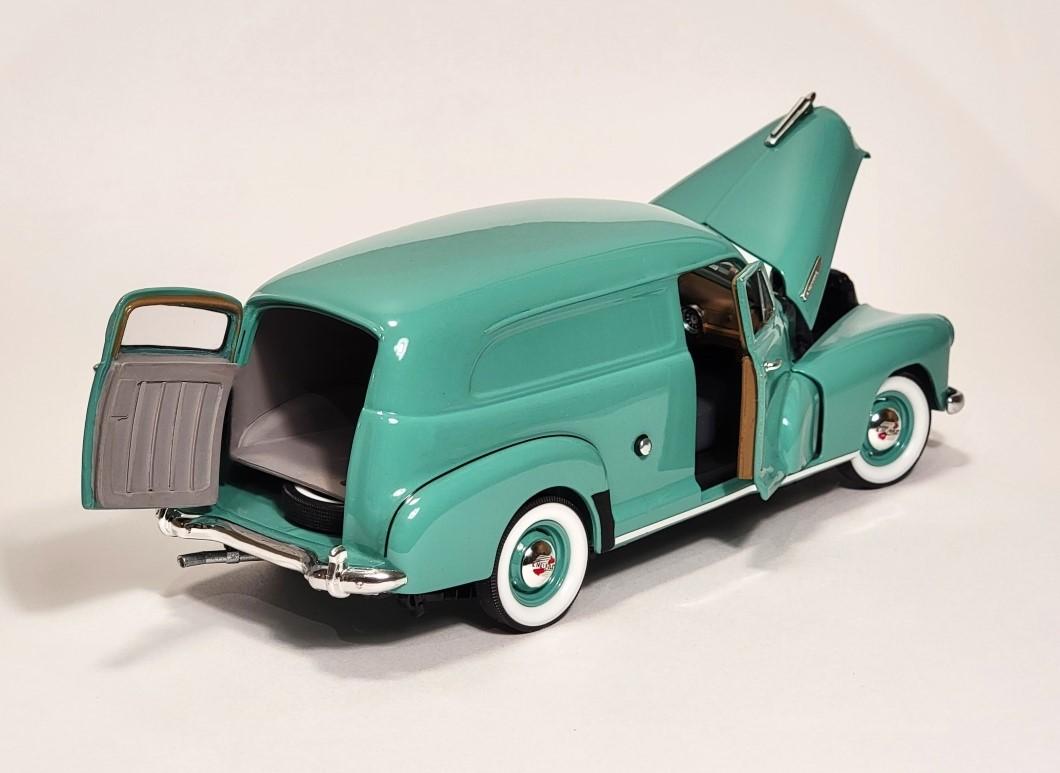
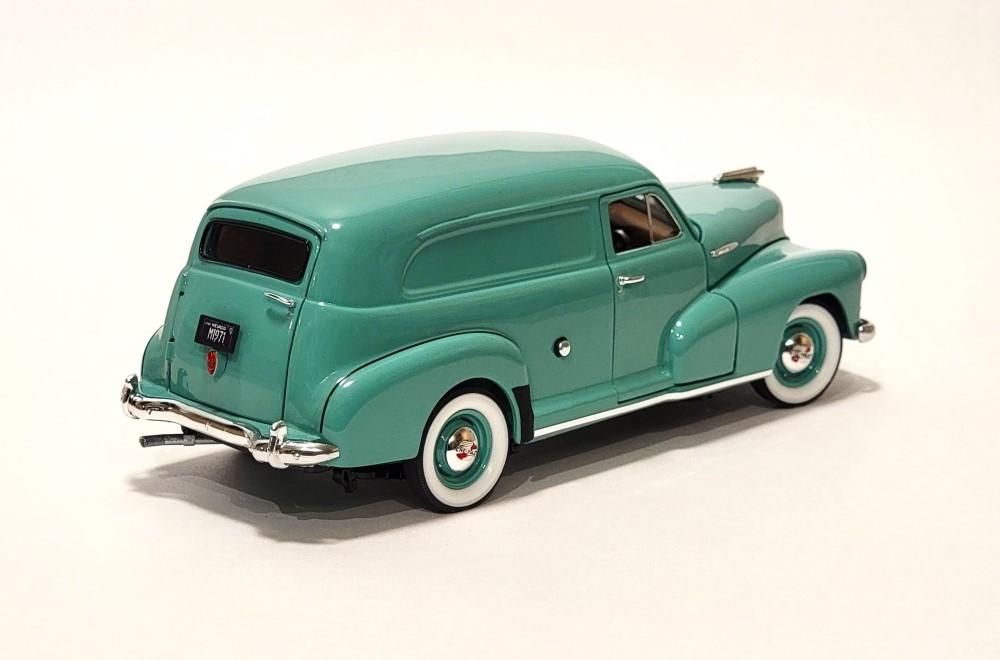
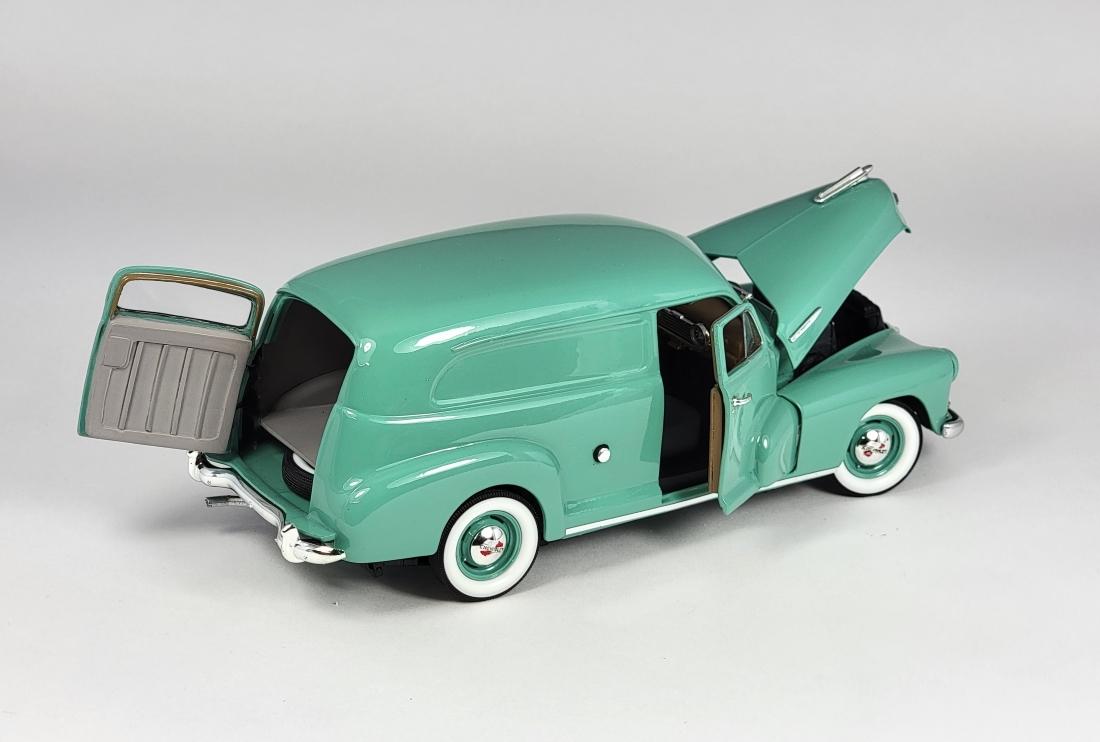
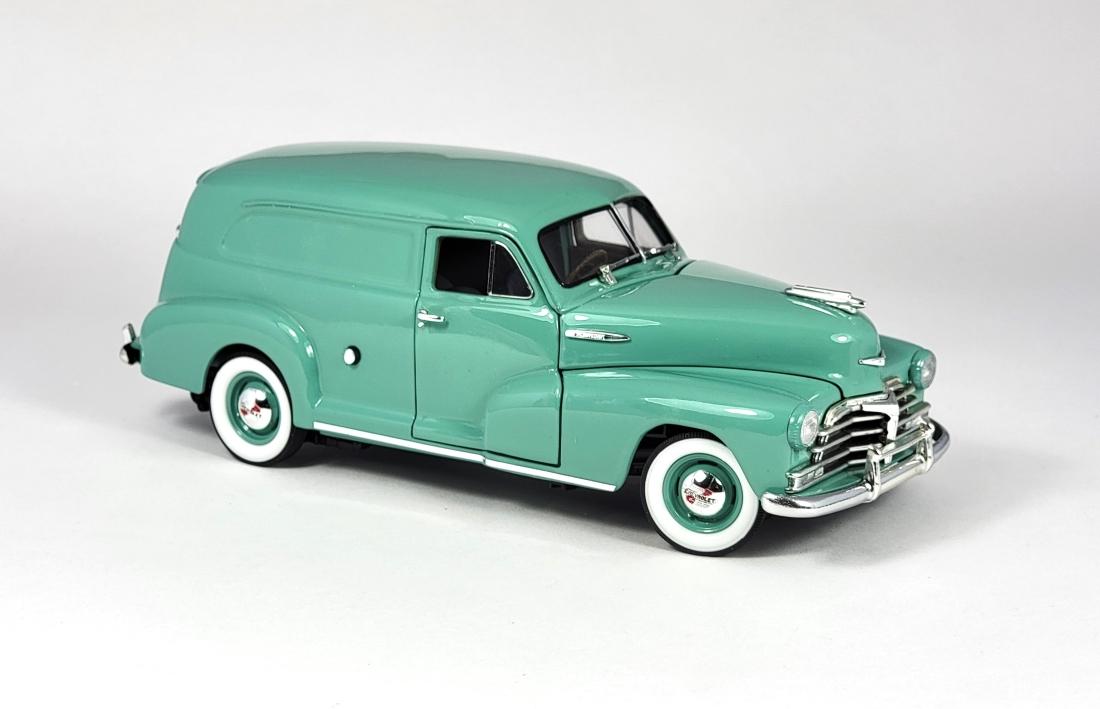
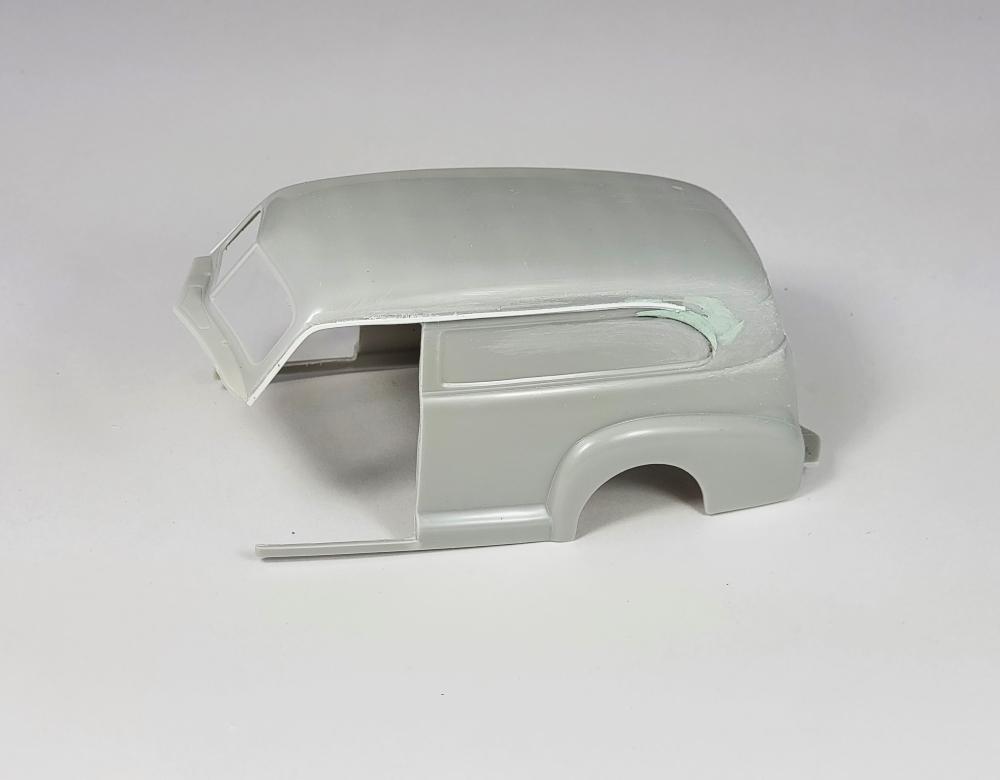
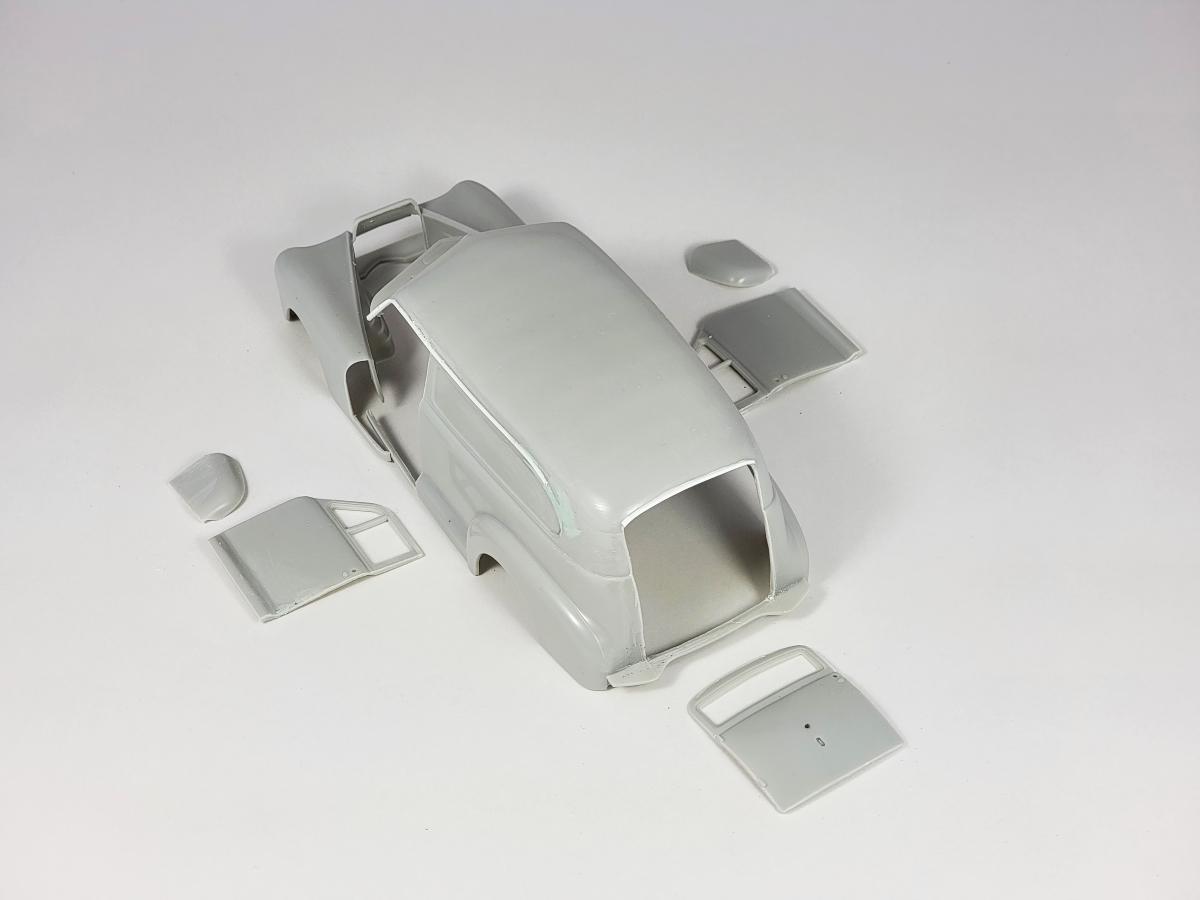
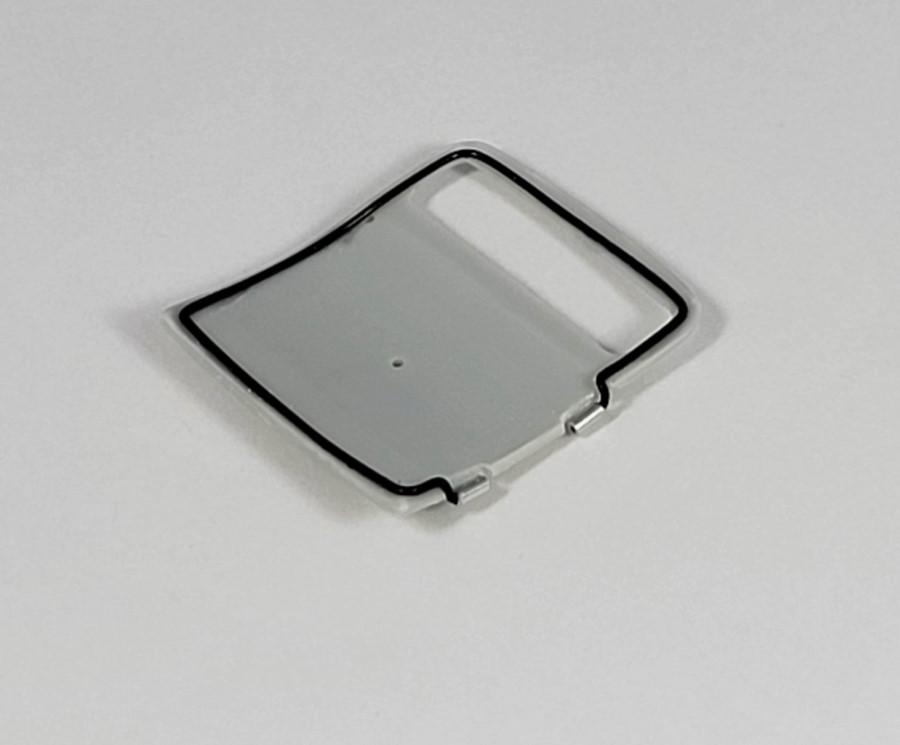
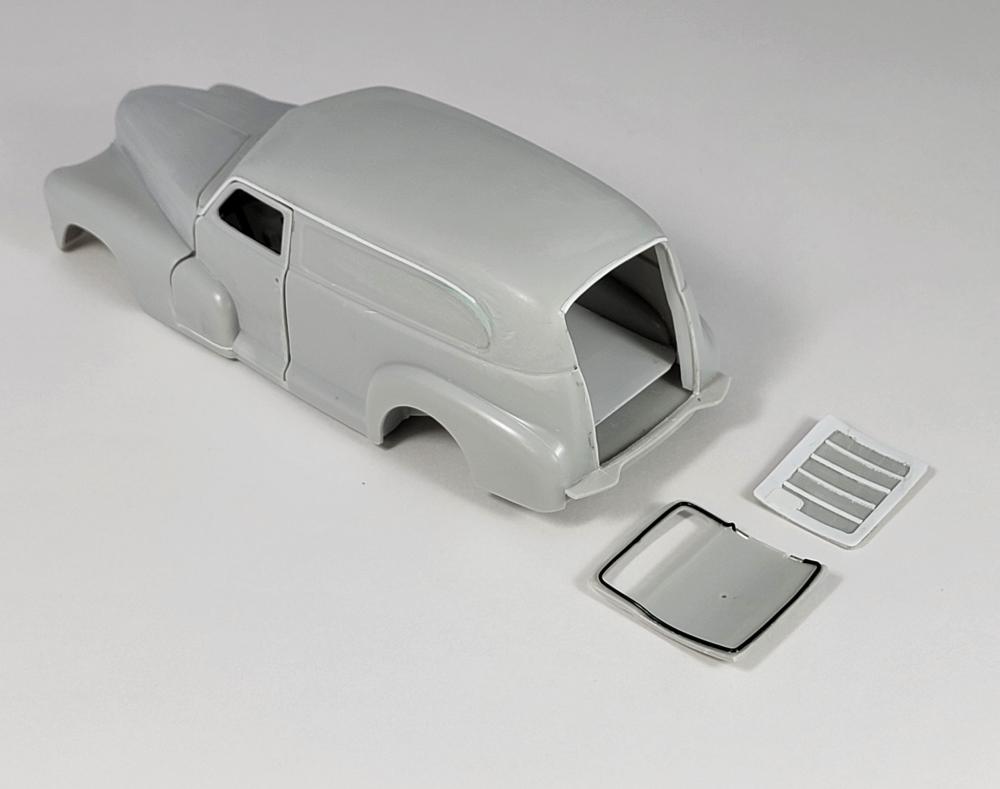
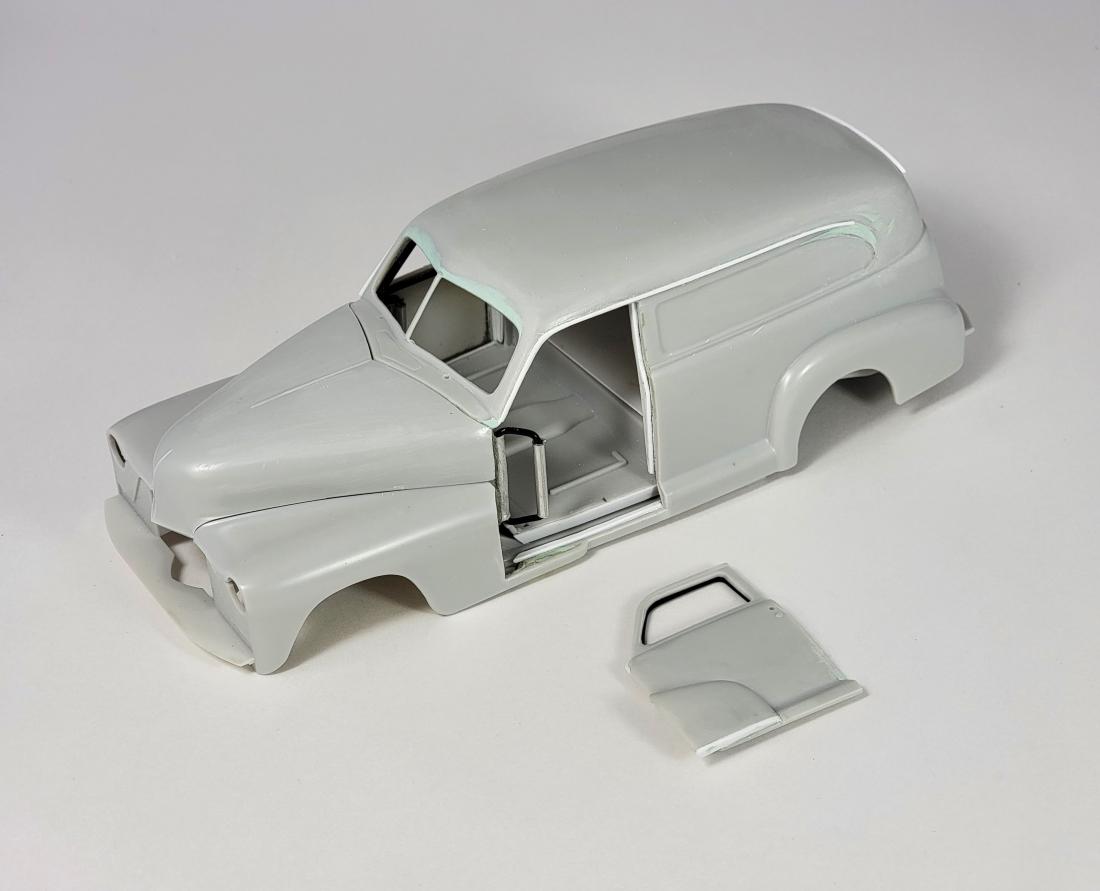
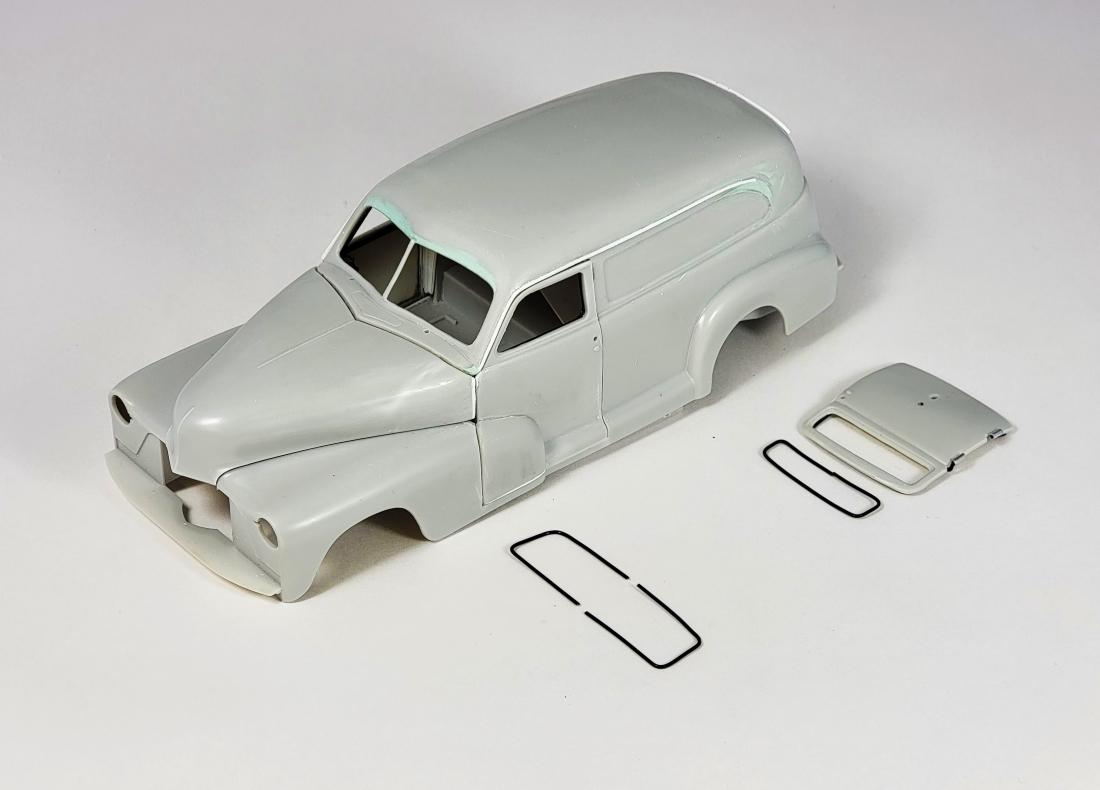
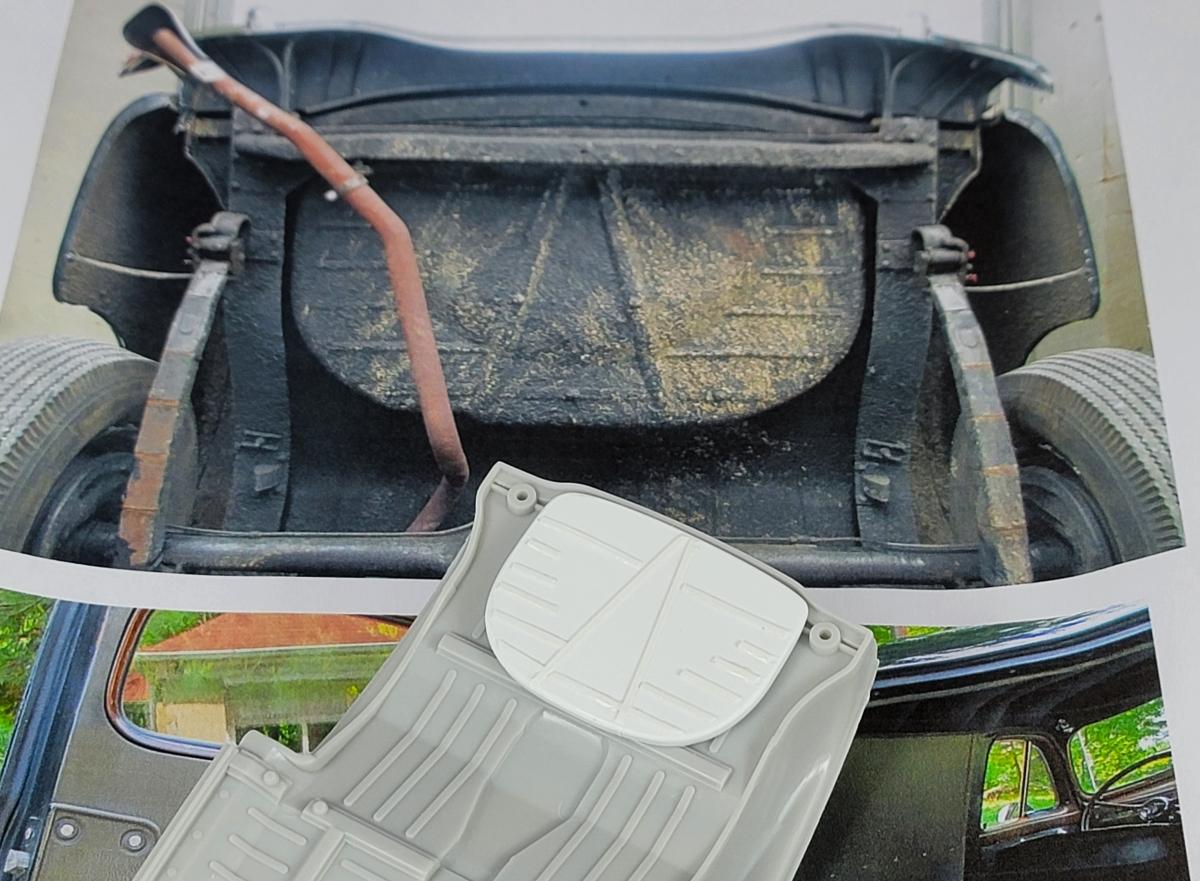
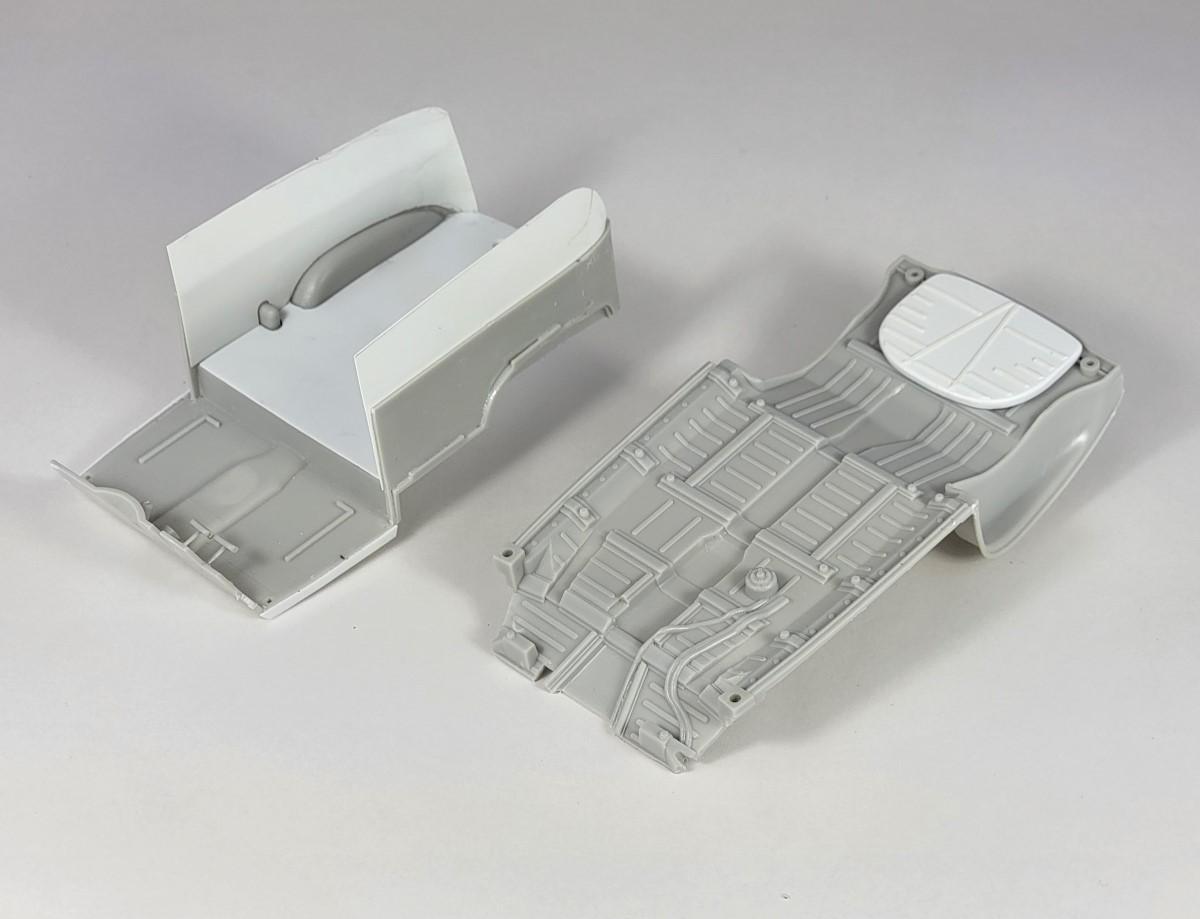
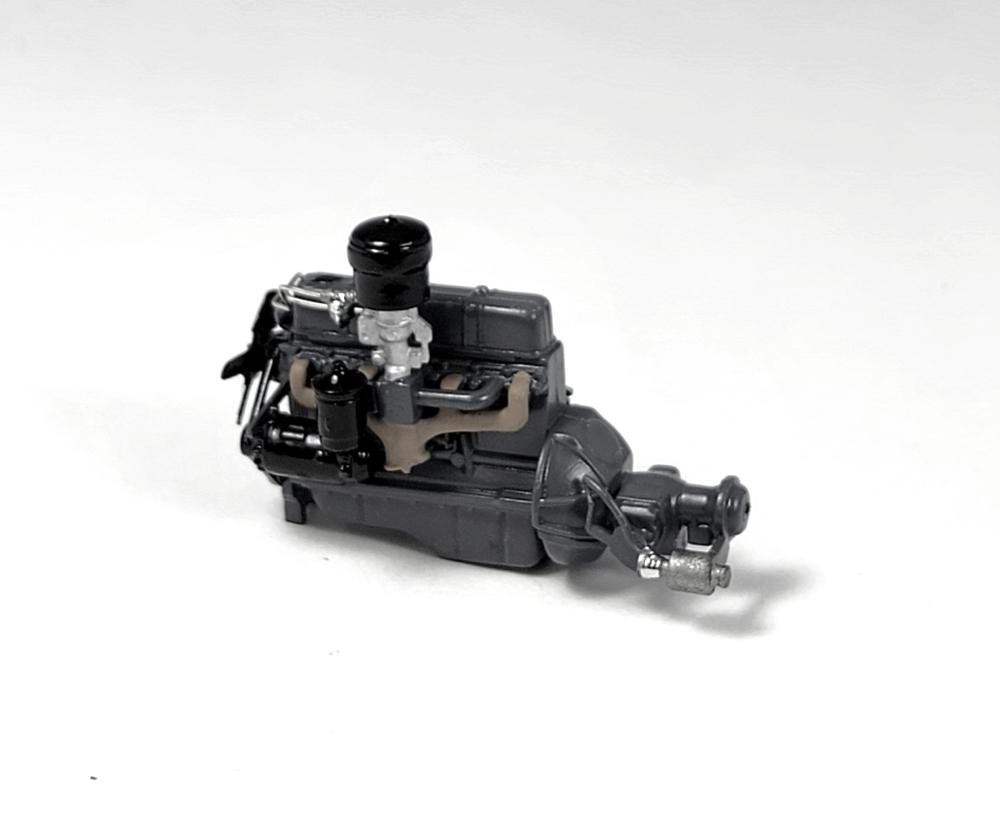
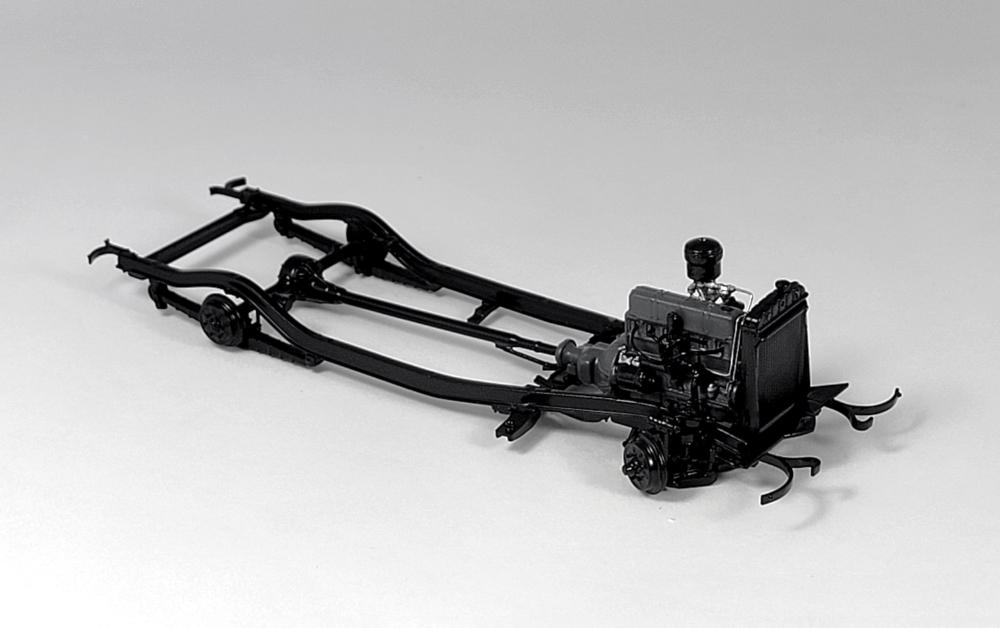
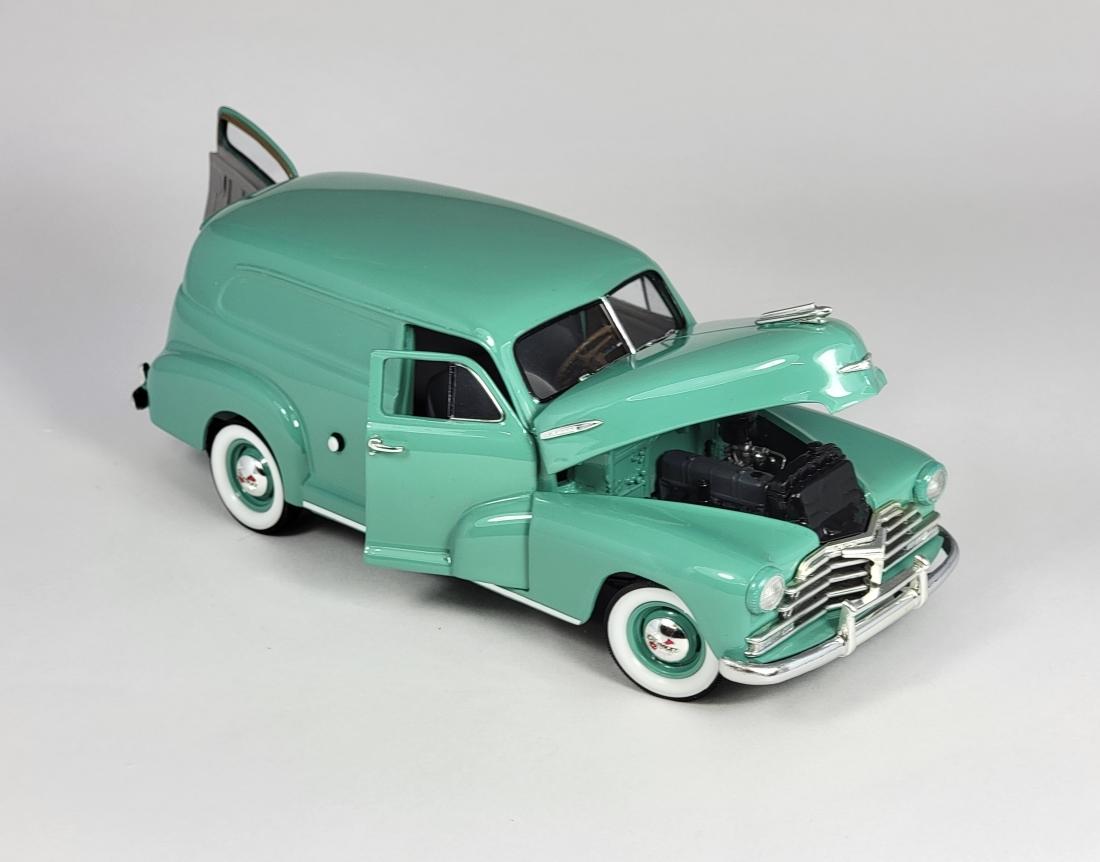
I'm just finishing this one as a stock detailed '48 Chevy sedan delivery after previously making a pre-war version a few weeks ago from the same Galaxie post-war kit. Poseable steering has been added and all the window proportions are now adjusted as well as the SD side indent and front fender wheel openings. The three doors have been cut open and hinged, including making the fade-away panels on the doors swing inward as they should . The front and rear window gaskets have been formed in black wire and the vent windows formed in plated wire. The cargo interior is modified to include the spare wheel access and the Standard sedan delivery seats have been formed from Renshape. I chose the only '48 Chevy non metallic paint colour...done in my usual basecoat/clearcoat. Galaxie made a nicely done chassis and the 'stovebolt' six motor has now been detailed with plug wires as well as fuel and vacuum lines. The under-floor now includes the sedan delivery spare wheel well shape instead of the kit's supplied sedan floor which used a fuel tank in the same spot. The front bumper has been shorn of all the added accessory bling and replated with Molotow. Finished '48 (postwar version) displayed alongside my previous '41 (prewar version) detailed and kitbashed from the same Galaxie kit
- 29 replies
-
- 11
-
-
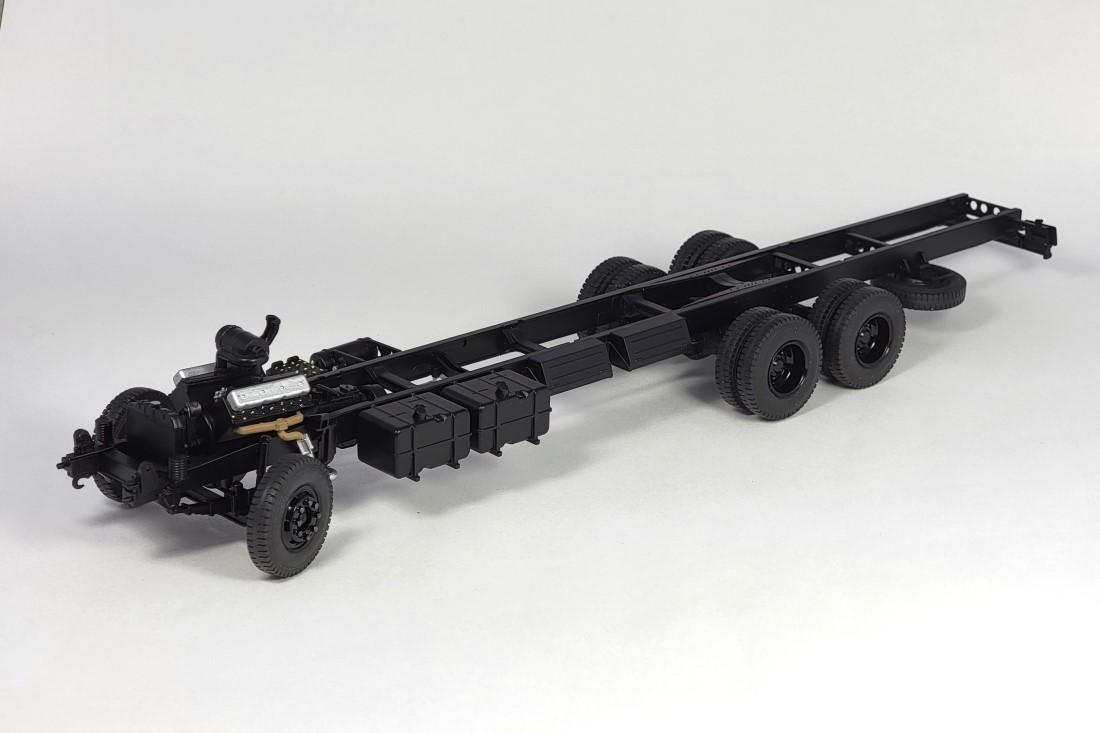
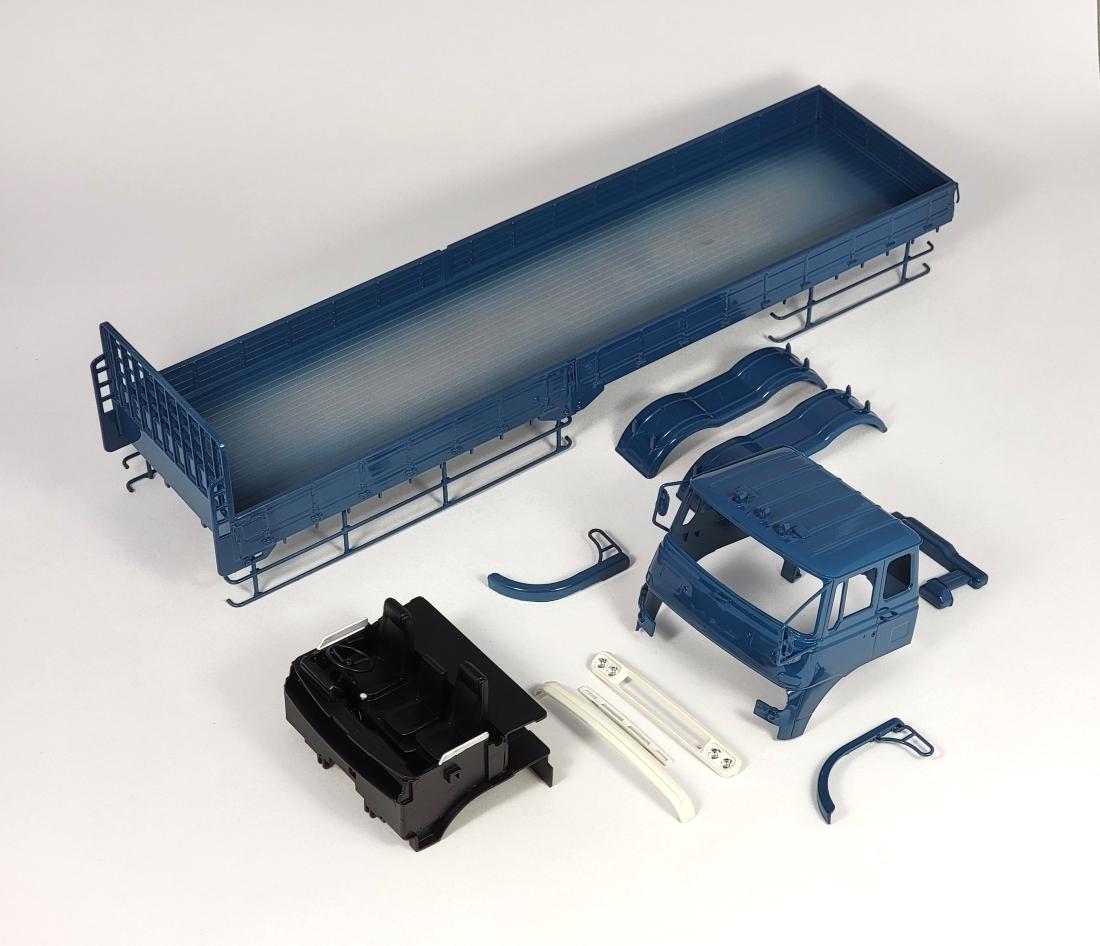
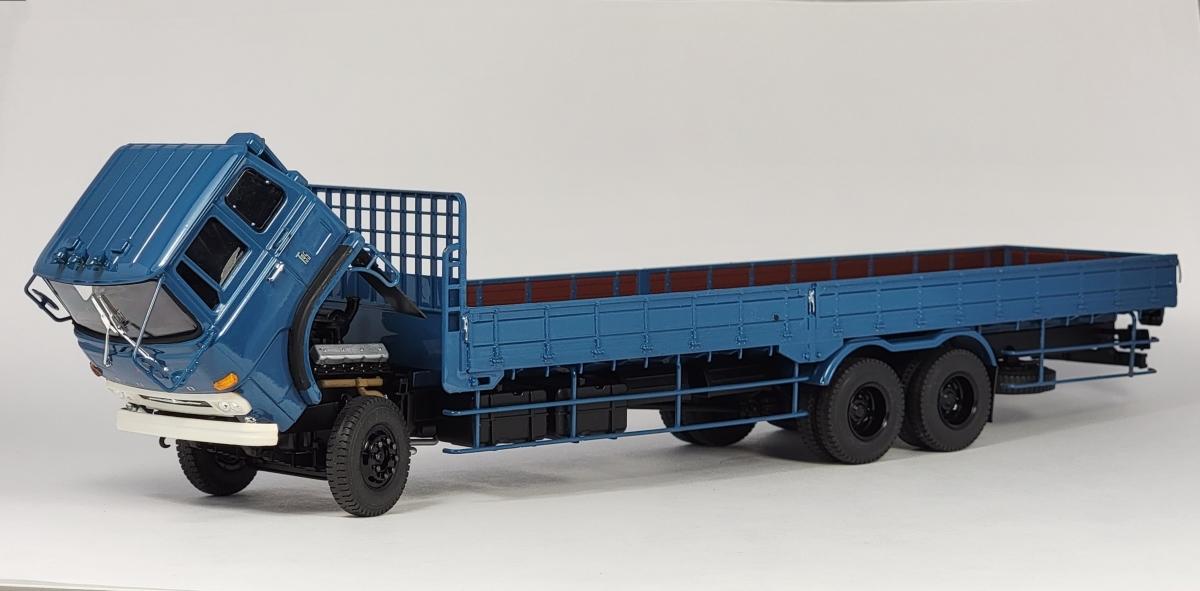
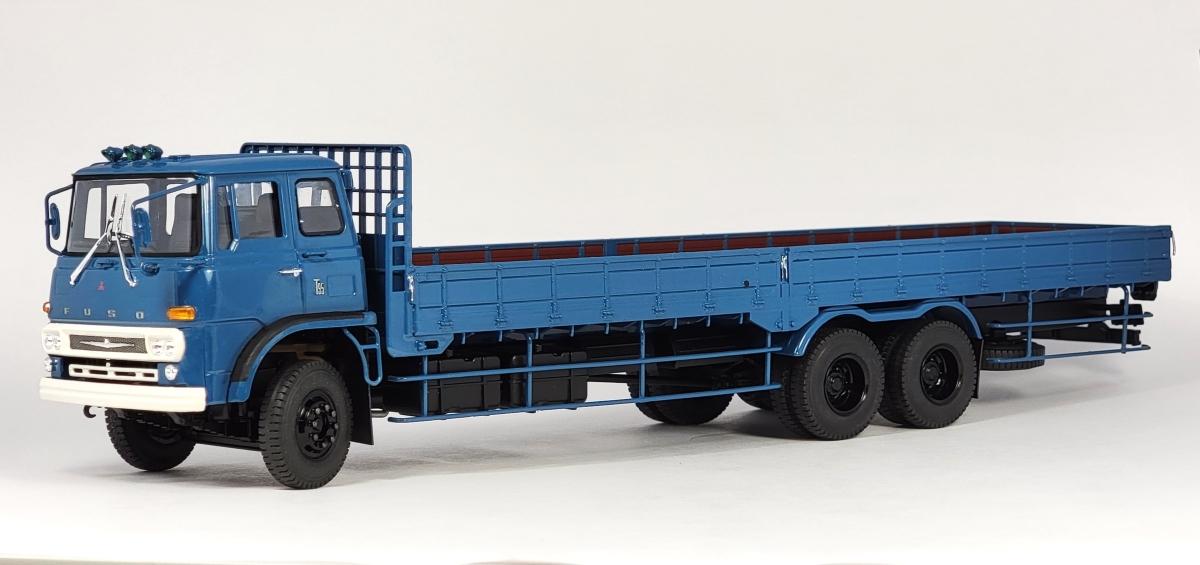
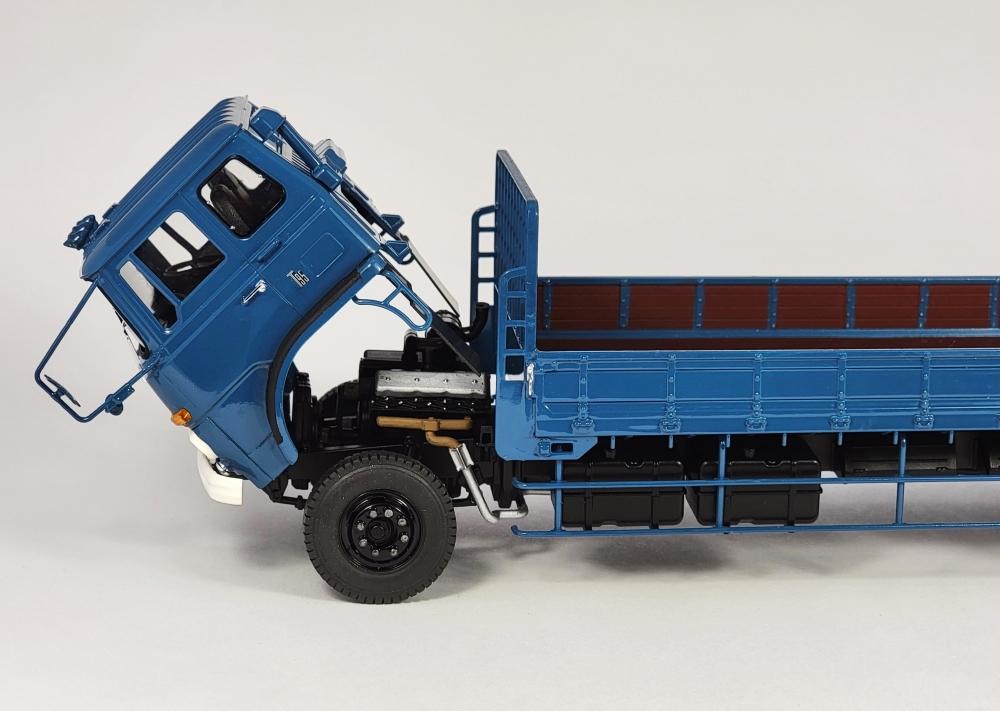
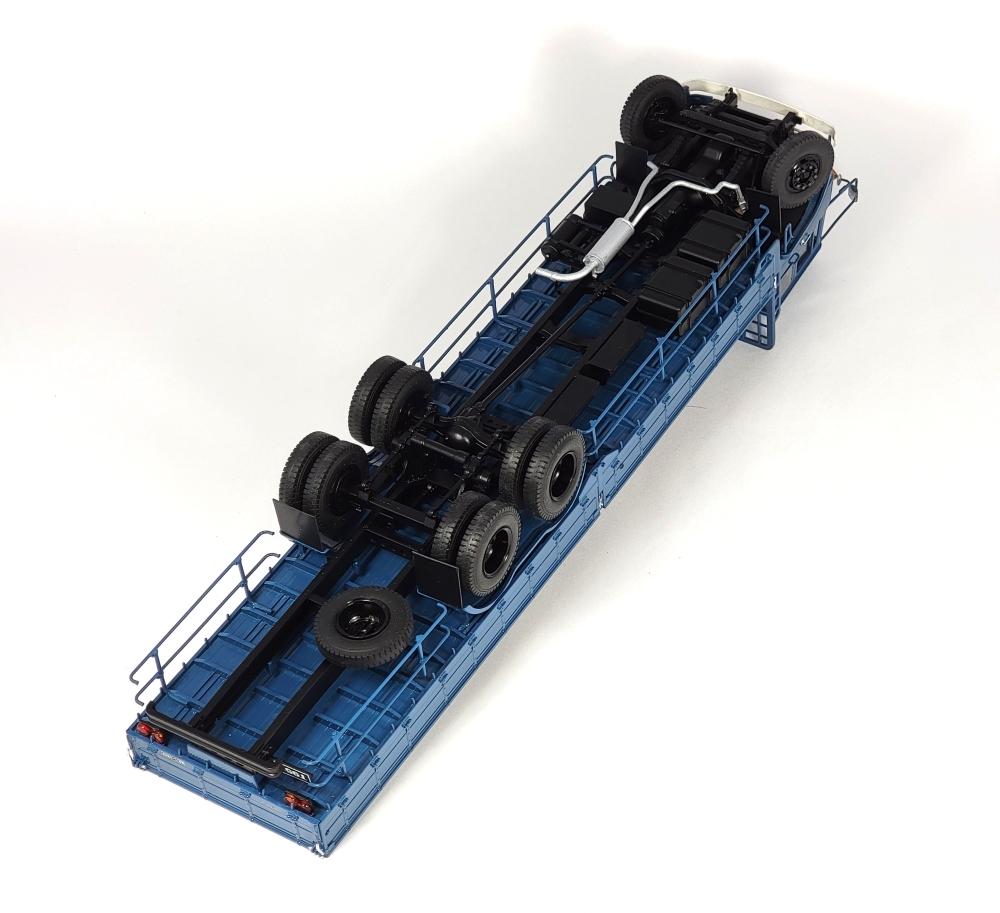
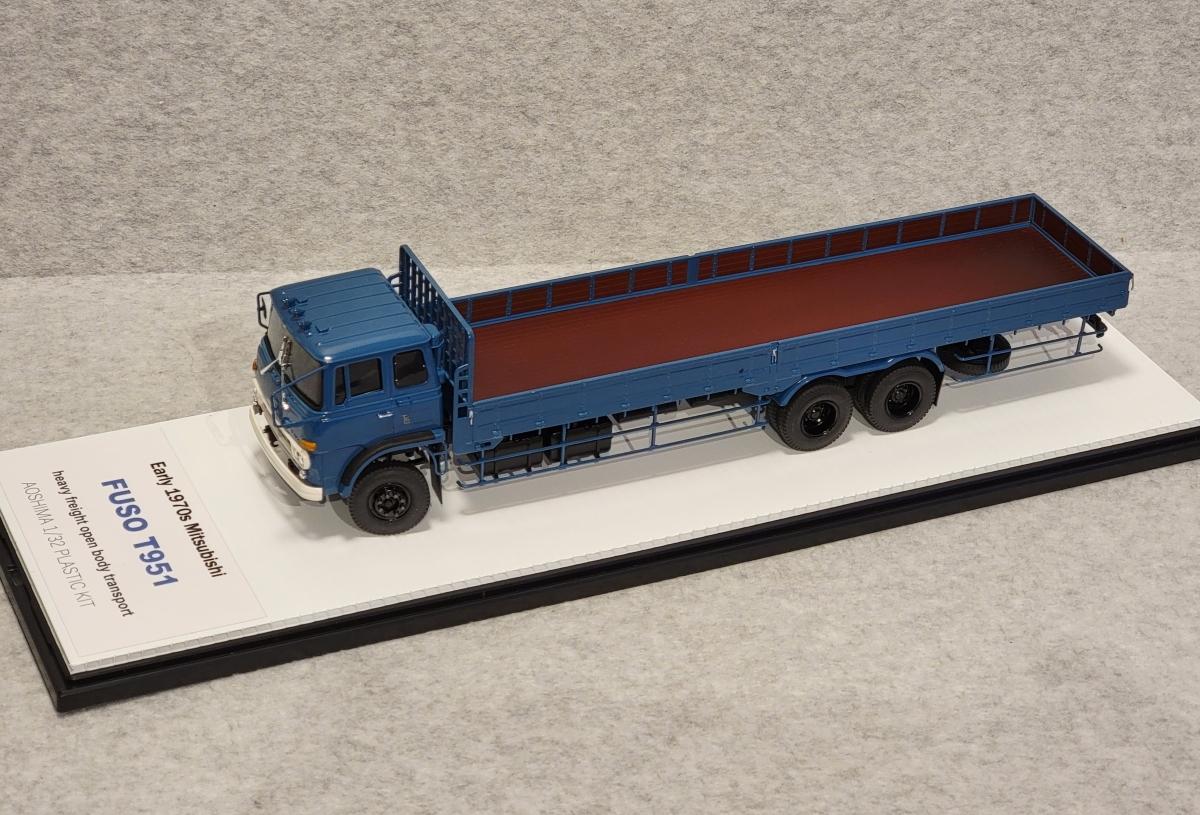
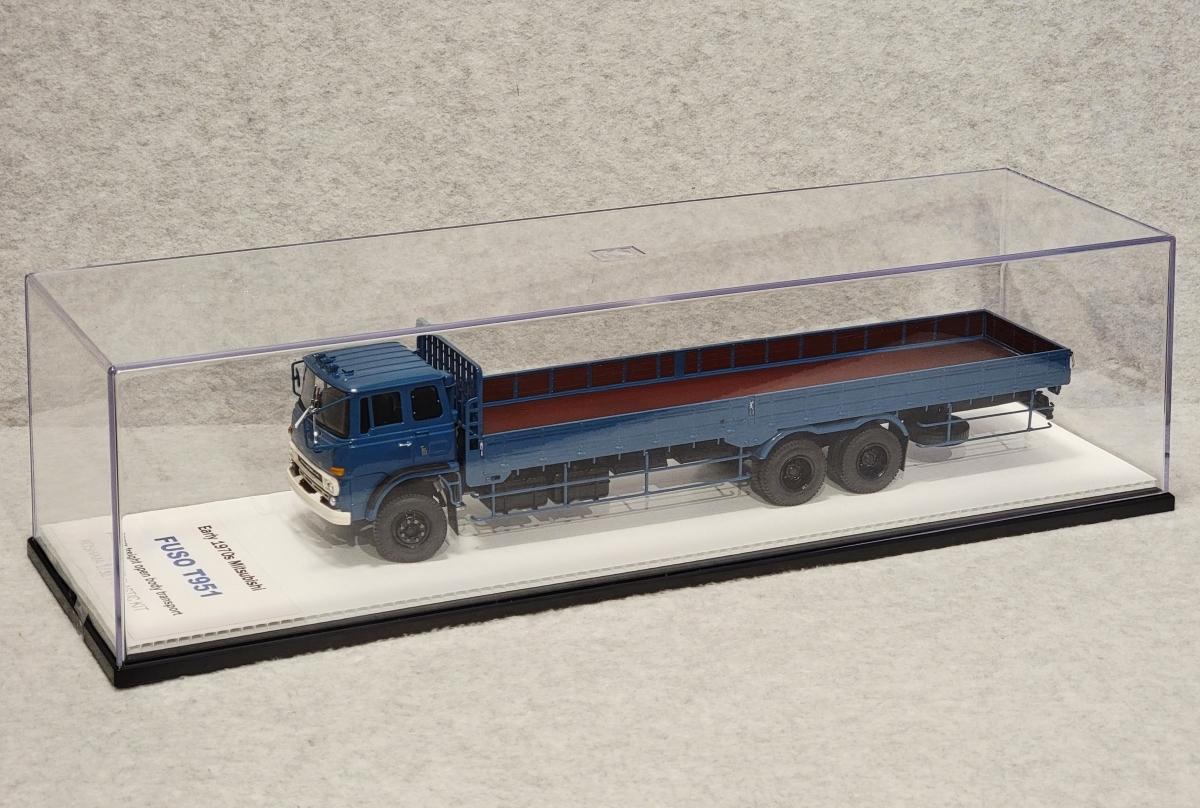
Many Asian countries employ exceptionally long straight trucks for strictly 'city to city' highway transport. They'd have a difficult time manoeuvring within an urban area. I've just completed this long, early '70s Mitsubishi Fuso T951 straight truck from a nicely manufactured Aoshima 1/32 scale kit. Other than paint and one added detail, it was built almost totally box-stock. Aoshima truck kits, while quite finicky with tiny details and a plethora of parts, are beautifully planned and finished....everything fits as it should and the parts are all beautifully molded. Not typical on Aoshima truck kits, this kit included a nicely done motor and under floor detail but, for some reason, didn't include the ability to tilt the cab. My only modification to the kit was to remedy that omission and create the front tilt hinge detail.
-
There are just under 1000 parts...all nicely molded and finished. The body, engine block, hinges, suspension, and wheels are all diecast as are many of the smaller details. This model kit seems expensive at almost US$1000, but quite honestly, when you factor in the sheer number of well finished parts and the probable limited sales quantity, I don't know how they manage it. Almost everything fastens together with a myriad of tiny screws and the complete assembly took me around 5 full days time.The horn, lights, and engine sound all work, although I learned long ago, it's best to never leave batteries in any toys too long.
- 1 reply
-
- 4
-
-
Hi Pete, the basecoat is a darkish orange.....bright orange mixed with a bit of dark brown tint. It isn't from a paint chart, I just mixed it by eye.