buildnething
-
Posts
106 -
Joined
-
Last visited
Content Type
Profiles
Forums
Events
Gallery
Everything posted by buildnething
-
Accurate Minatures Corvette Grandsport
buildnething replied to buildnething's topic in WIP: Model Cars
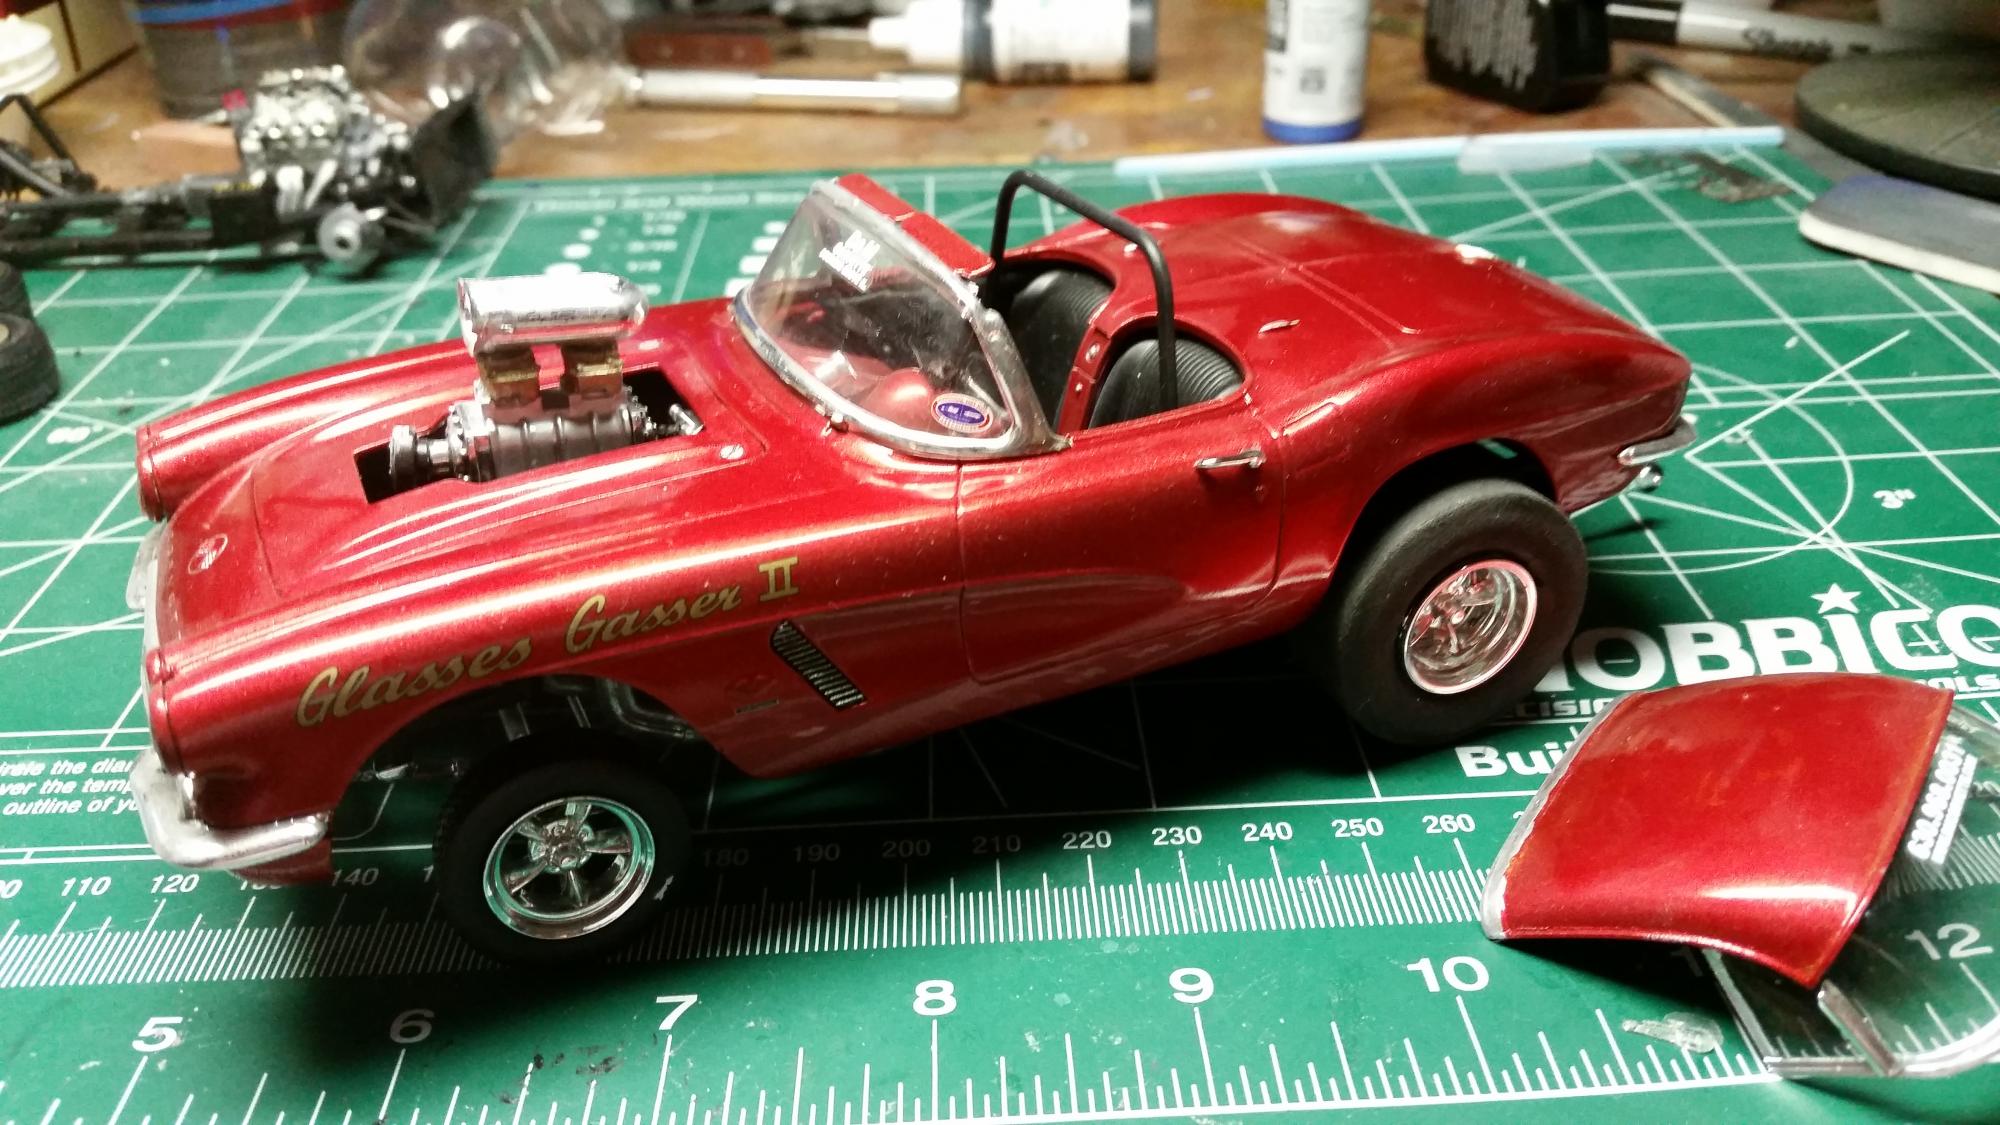
Yes I have, only one coat of Tamiya Dark blue, but I had some issues and had to spot sand. Will do another wet coat and see where its at! This variant has the hammerhead like front stripe with the stripe going down the center in between the vents. I hope at least!?!?! -
Airbrushing
buildnething replied to buildnething's topic in General Automotive Talk (Trucks and Cars)
Question: Do you have to use teflon tape on the air hose as well? -
Airbrushing
buildnething replied to buildnething's topic in General Automotive Talk (Trucks and Cars)
Thanks Larry for the info. Unfortunately I think the compressor purchase was more than 90 days, but it was also purchased with a universal gift card. Not sure how that would work out. I can get the Talon for $99 off amazon. About thirty dollar cheaper than directly. I gave the the HF AB a good thorough cleaning and practiced thinning the Vallejo paints in a separate bowl. This helped, but still not quite satisfied with the functionality. -
Airbrushing
buildnething replied to buildnething's topic in General Automotive Talk (Trucks and Cars)
Yea I was mixing in the bowl, like I have seen done in countless vids on Youtube, but I was just thinking that i probably should mix them outside to really see whats the consistency is. Thanks. -
Airbrushing
buildnething replied to buildnething's topic in General Automotive Talk (Trucks and Cars)
Thanks everyone for the insight. Like I wish I could post a video of what the compressor is doing, because its cycling every two seconds and gets really hot, I mean scary hot. I am in an apartment and its annoying and I dont want to disturb my neighbors. So from what I have gathered I will be purchasing a compressor with a tank, that way its not constantly cycling and getting overheated. I will also be getting the Talon TG-3F set. I build more than just cars, I also do sci-fi (star wars) armor, and Air planes, so I think it will be the best route for that. But I also was using Vallejo model colors and like mentioned, it is pretty thick.. I couldnt get it to consistency of milk without over filling the bowl. Syphon is just too messy for me. I need a cap. So whats a good medium to thin Vallejo Model Colors? The ones in the white bottles.
-
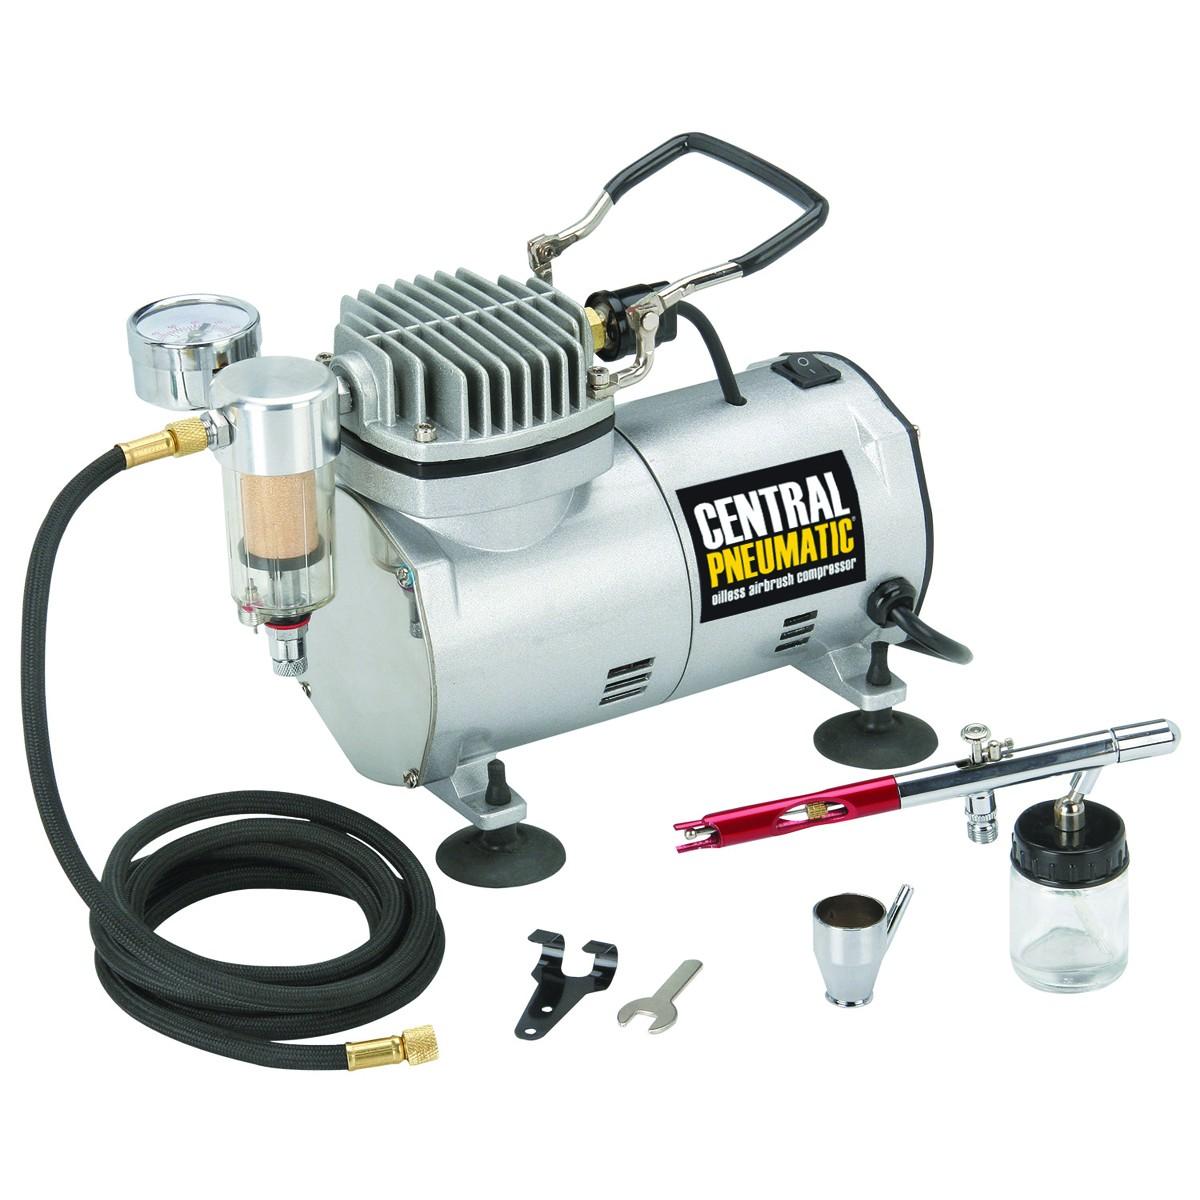
I am new to airbrushing completely! So heres the skinny, I bought a harbor freight air brush compressor and airbrush kit. (God, why did I do this?) I have watched COUNTLESS youtube vids on this subject.. but its not working properly. I had to buy a regulator, because this one didnt come with one. I installed it but its not perpendicular to the compressor like it should be, it wont tighten any further and I am afraid it will strip. So the regulator is off to an angle, not straight up and down. Then on top of that the thing cycles like every two seconds on then off, even when in use. I set the reg at 25-30 PSI which is normal and recommended for thinned down paints. But that leads me to my next question... the double action syphon feed airbrush provided with the compressor looks the part but I think it SUCKS! It doesnt seem to wanna spray continuously. It spits. Plus I cant seem to thin down vallejo accrylic..I used Testors Aztec Multi use acrylic thinner and it doesnt seem to work..I NEED HELP BADLY! I bought the compressor a while back and so I cant return it..I dont want to be at a lost, but I will buy something better if I can get some proper recommendations. I also am thinking of purchasing a gravity fed Paasche Talon. IT seems everyone is using Gravity feeds. Any help would be DEEPLY appreciated. Thank you. Happy Modeling! P.S. Here is what I bought
-
My grandma had one new too, I was about the same age as you were when she had it too. I thought it was awesome and called her my black grandma, because she had one exactly like this build. HAHA funny story!
-
Am I correct to assume this engine would work in the BRE or is that something different? I have no clue about these cars. Its a ways out before I will get to it anyways, I was just curious.
-
This is awesome. Giving me some ideas for my Revell BRE 240Z i just got. Will any of this work for my future build?
-
Accurate Minatures Corvette Grandsport
buildnething replied to buildnething's topic in WIP: Model Cars
Thanks for the info! I think I am going to source after market decals, not sure though. We will see. And yes the slots are a pain, and I should have went back and filled in more, I rushed. But I am okay with that, its not a show/contest car. I just build the best shelf model I can to put into my display case and I am happy with that. Maybe one day I will enter. Im still young. LOL -
After all the reviews and builds I have seen of this kit, it confirms, this kit is a must have! It looks simply inspiring! I dont even care for Mercedes but I want to build this kit. Just like yours.
-
Accurate Minatures Corvette Grandsport
buildnething replied to buildnething's topic in WIP: Model Cars
Thanks Dann. I am now working on the dreaded painting of the body. I have already had to do some spot sanding on the color. Had some blemeshes in the paint. UGH! I have to use rattle cans, until I get more comfortable with my airbrush set up. but I do use Tamiya, at least. I am using Tamiya dark blue. Hopefully after this second wet coat it will be good. -
Accurate Minatures Corvette Grandsport
buildnething replied to buildnething's topic in WIP: Model Cars
I was looking for that kit instead hoping it would be cheaper, it was harder to find, so I decided to just get this one off ebay. Im not a collector so box quality didnt matter. This one was damaged but all the parts were still sealed! I think I got it for about $35 shipped. I would love to get the Revell one too and build that version as well. -
Accurate Minatures Corvette Grandsport
buildnething replied to buildnething's topic in WIP: Model Cars
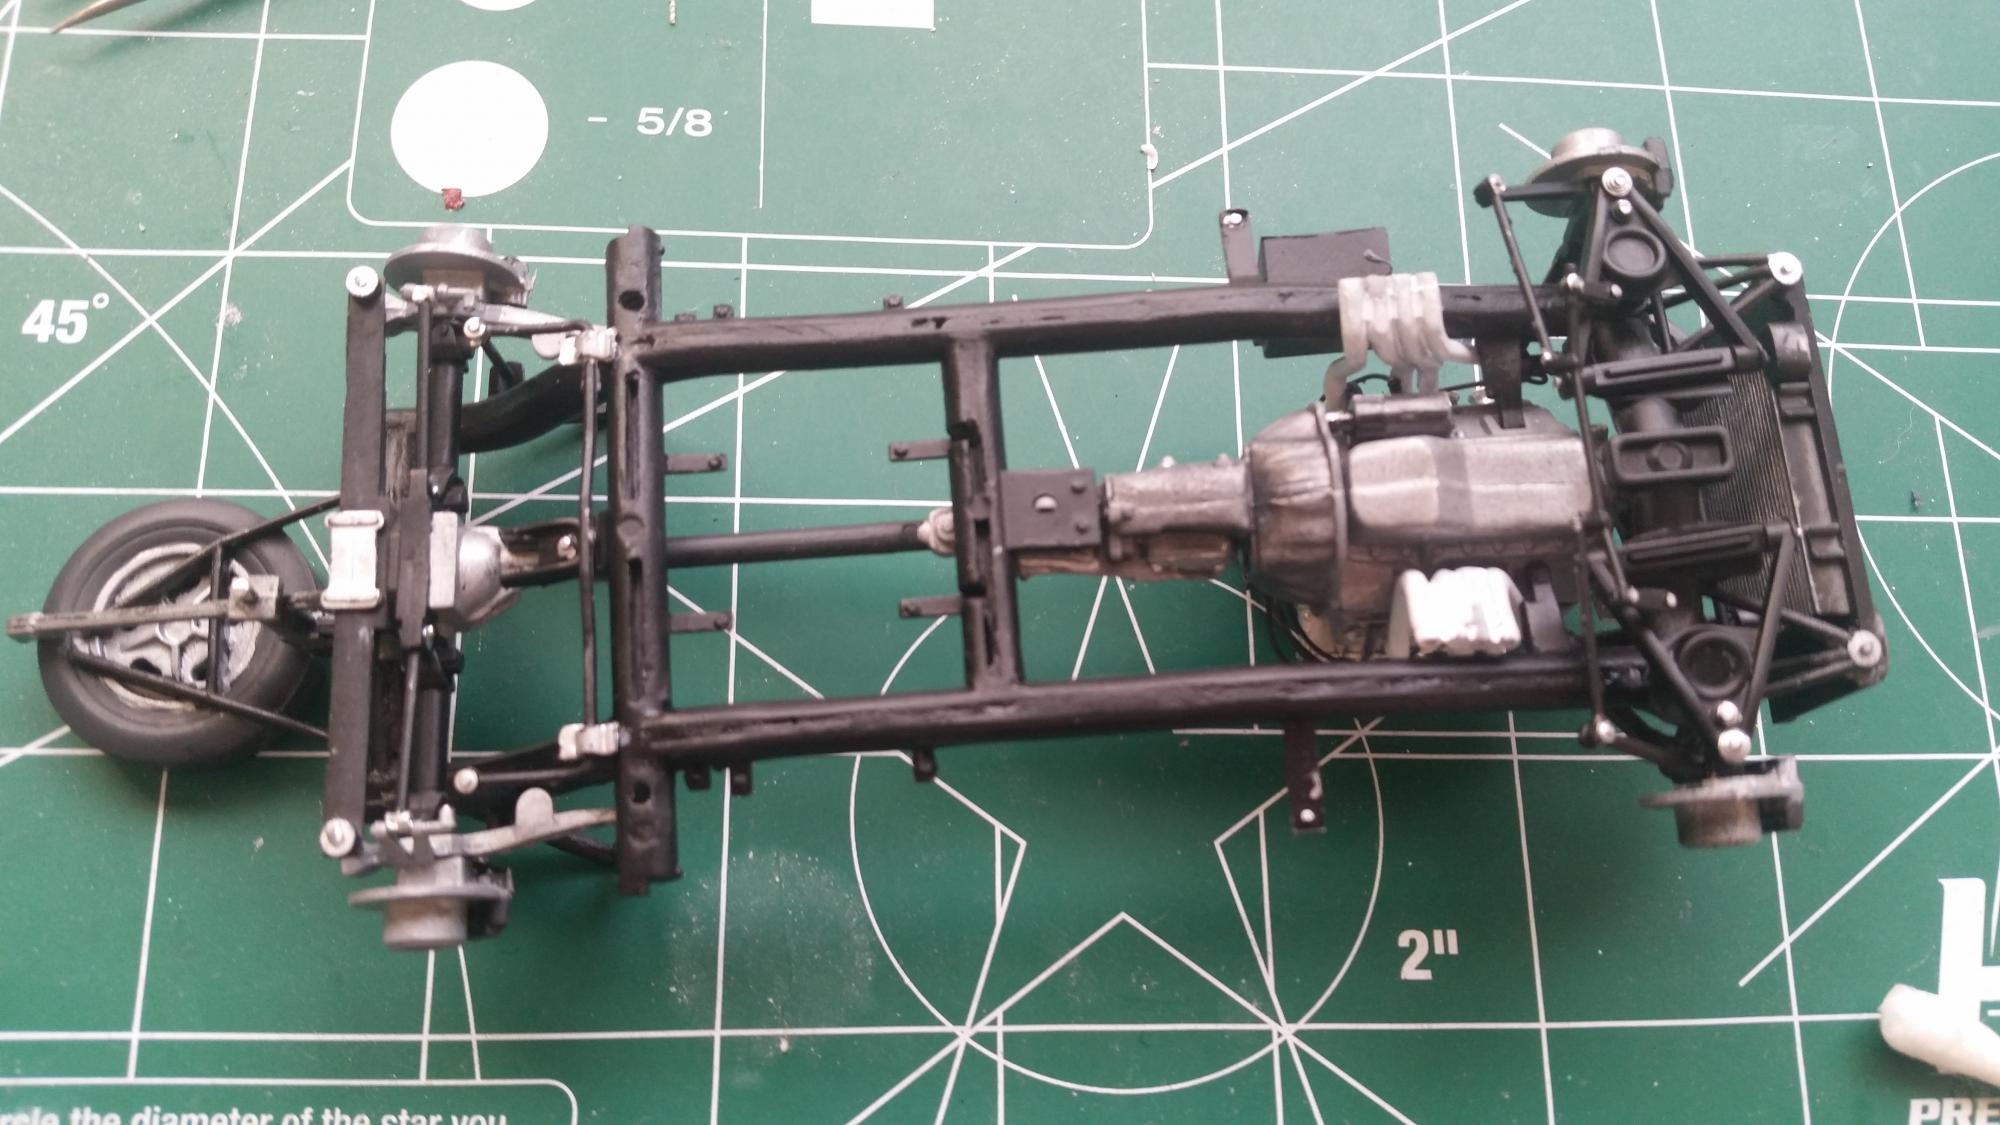
Chassis
-
Accurate Minatures Corvette Grandsport
buildnething replied to buildnething's topic in WIP: Model Cars
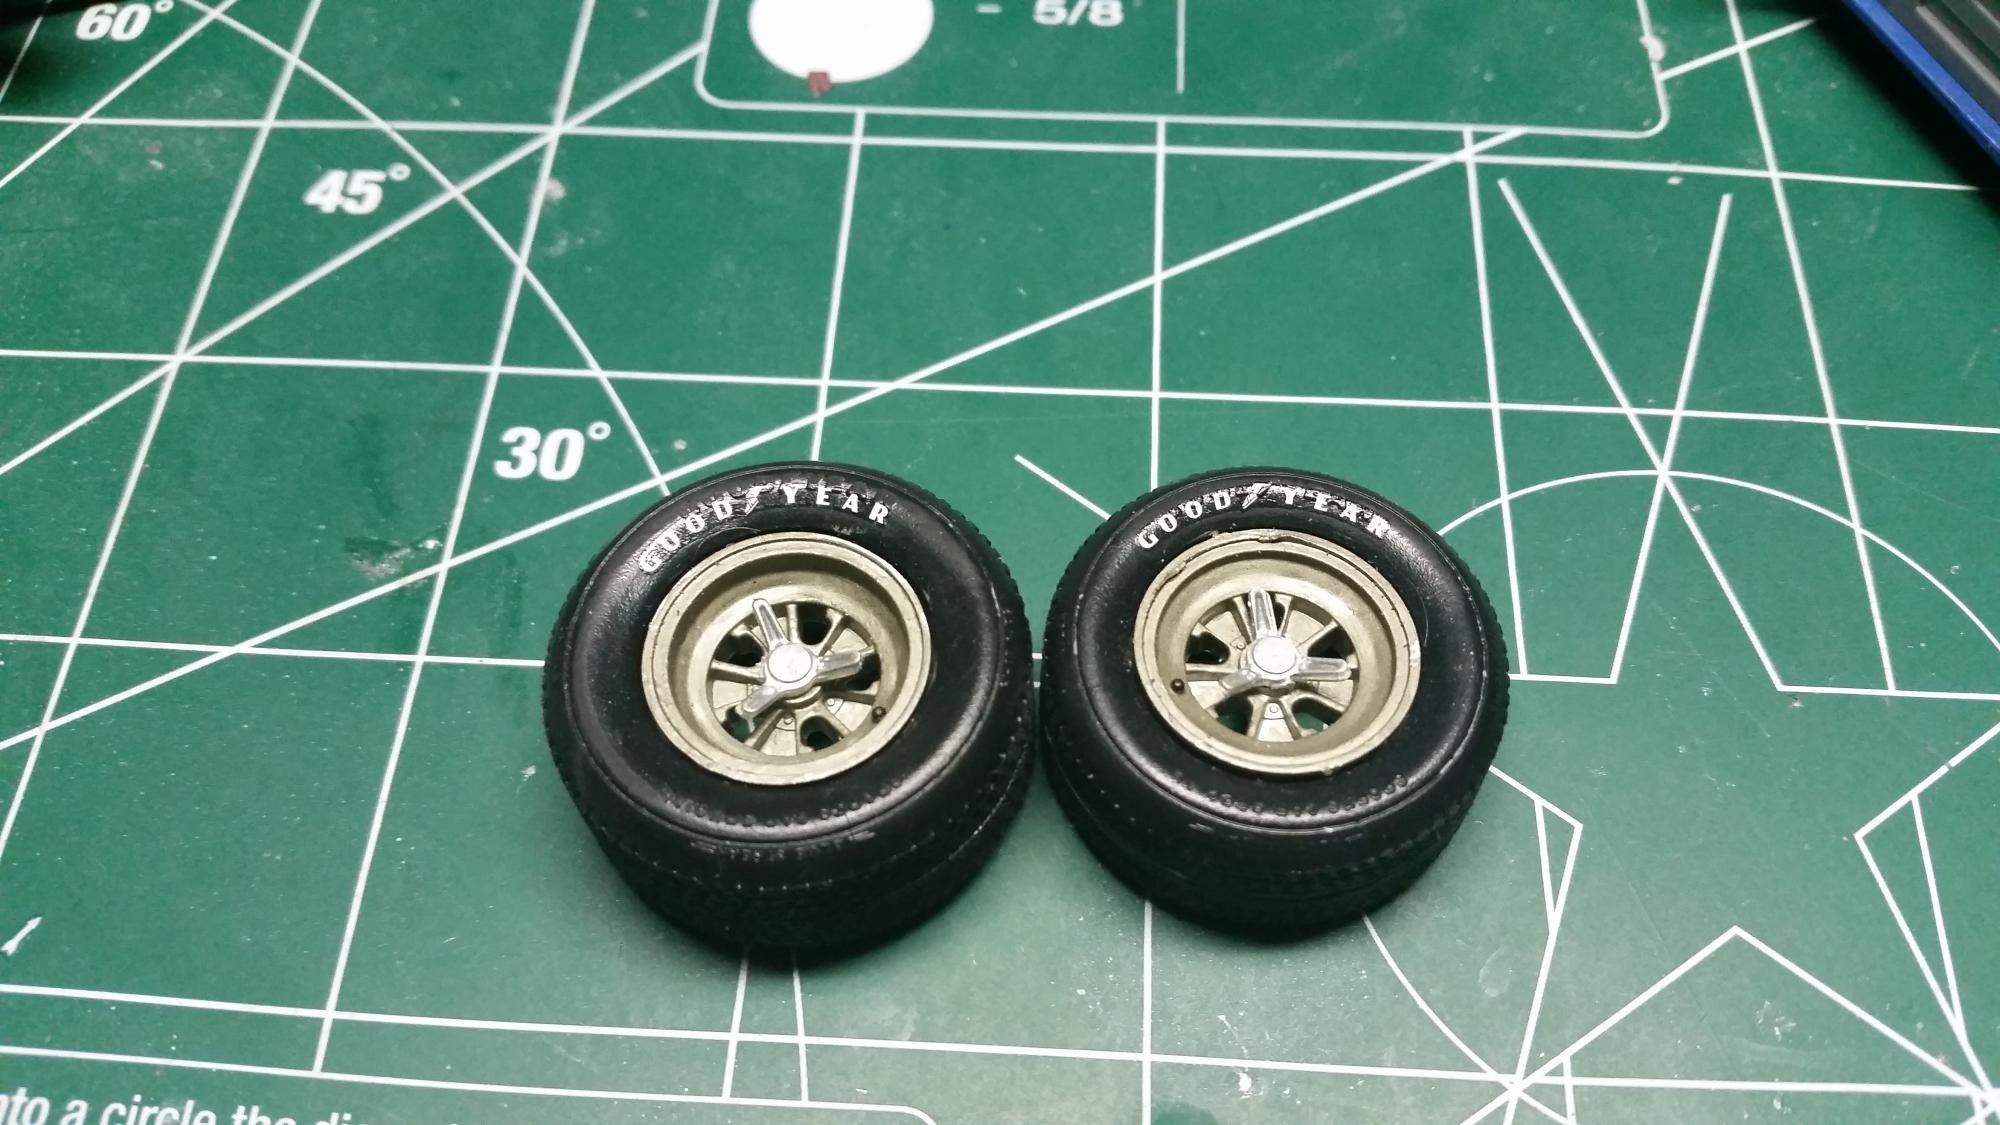
Thank Belugawrx! I like the name. My "youmg" uncle has a fully built 2004 WRX STi pushing about 500 with an E85 Tune. The thing is insane. With tire decals, I ended up sanding the raised detail off on the Goodyear part and then laid them down. They look better in person, not so much up close with the camera. -
Accurate Minatures Corvette Grandsport
buildnething replied to buildnething's topic in WIP: Model Cars
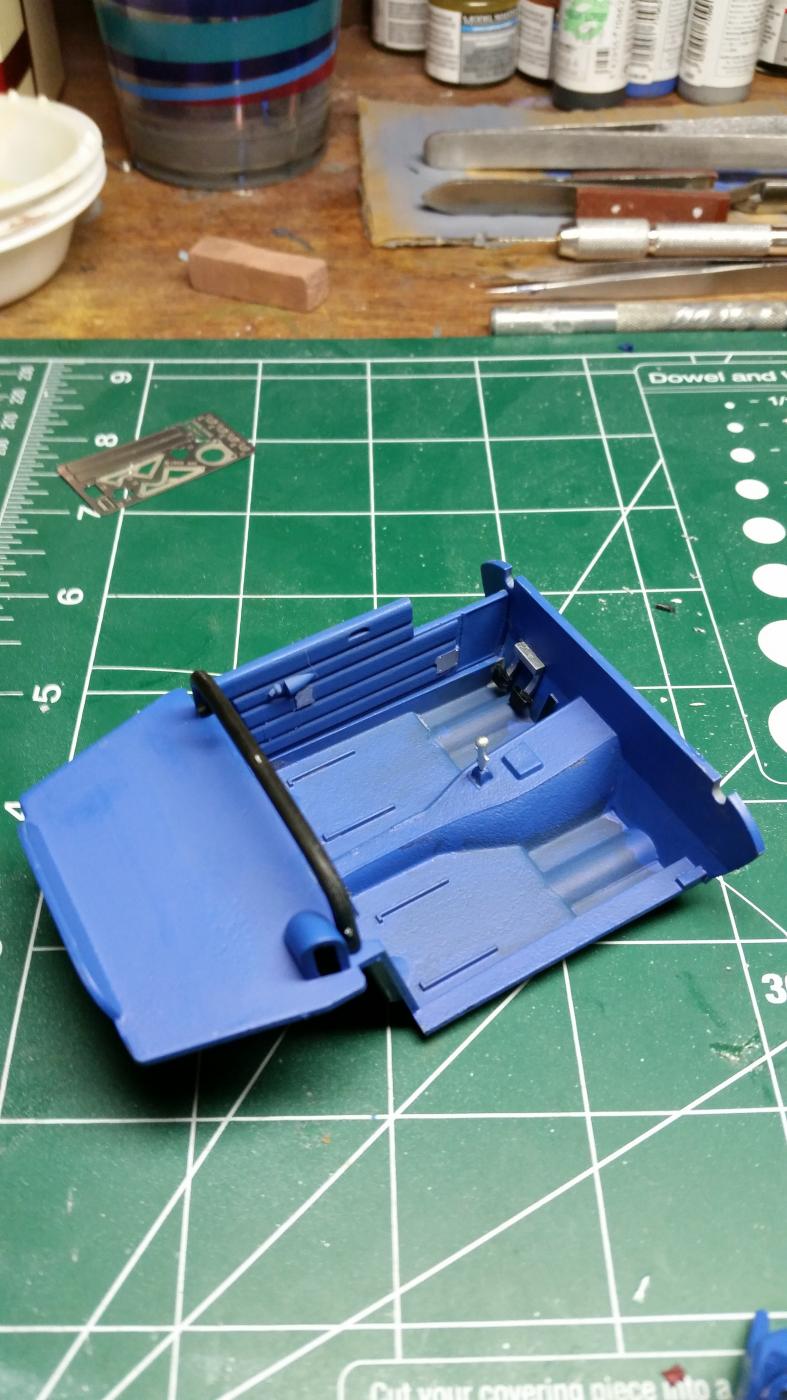
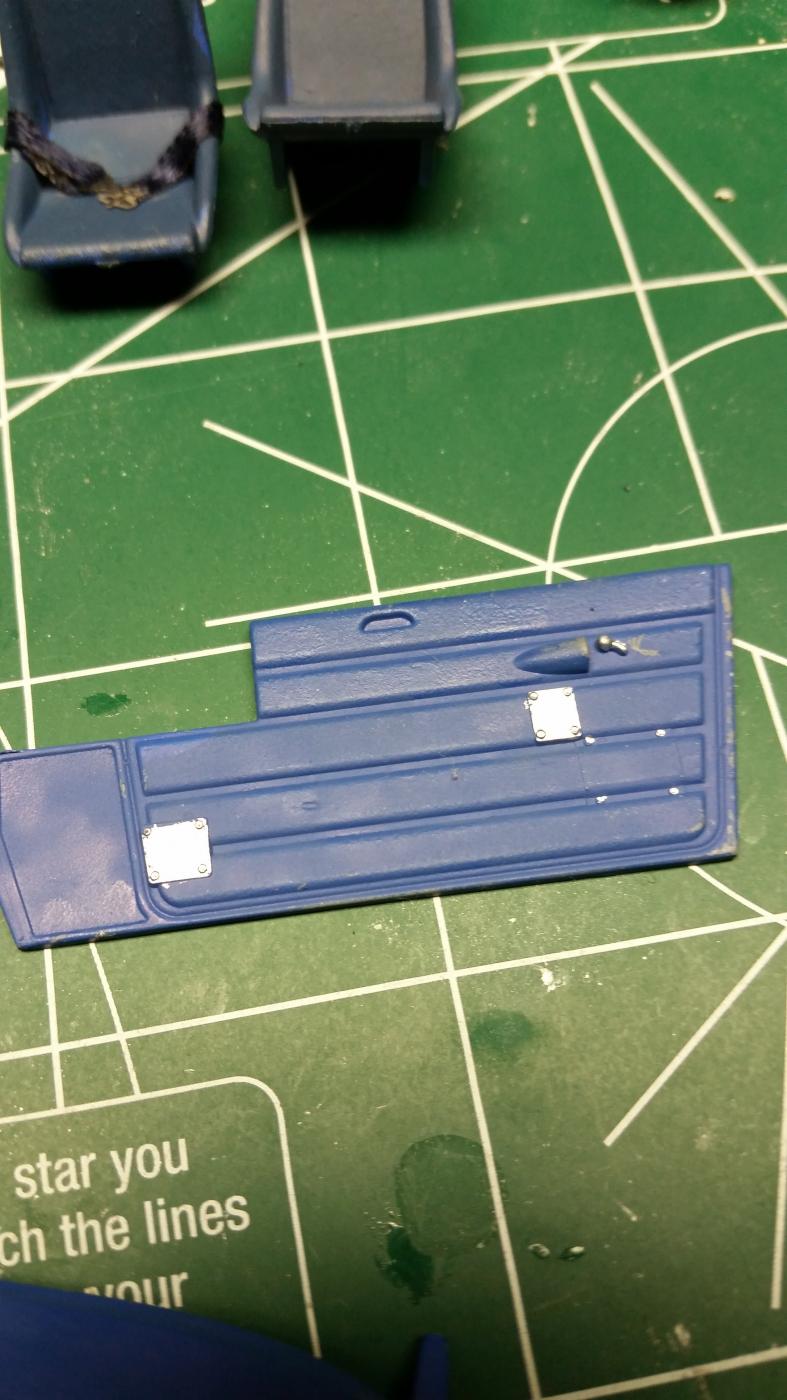
Thanks everyone for the compliments. I just love this hobby! Here is another update on where I am at atm. Take notice of the red dot on the left side of the roll bar, know what that is? That is actually a third brake light these race cars had installed. The more you know! The brake booster with photo-etch bracing in primer. Not detail painted yet White Letter Decals from fireball. Not the exact lettering but it will suffice. Finished interior tub, with seat belt detail and other details picked out.
-
Thanks! Its slowly growing. Thanks for commenting!
-
Accurate Minatures Corvette Grandsport
buildnething replied to buildnething's topic in WIP: Model Cars
Yes I did. Well to at least the best of my ability. There were spots that didnt fill completely. But its good enough for me. I will post more pics soon. -
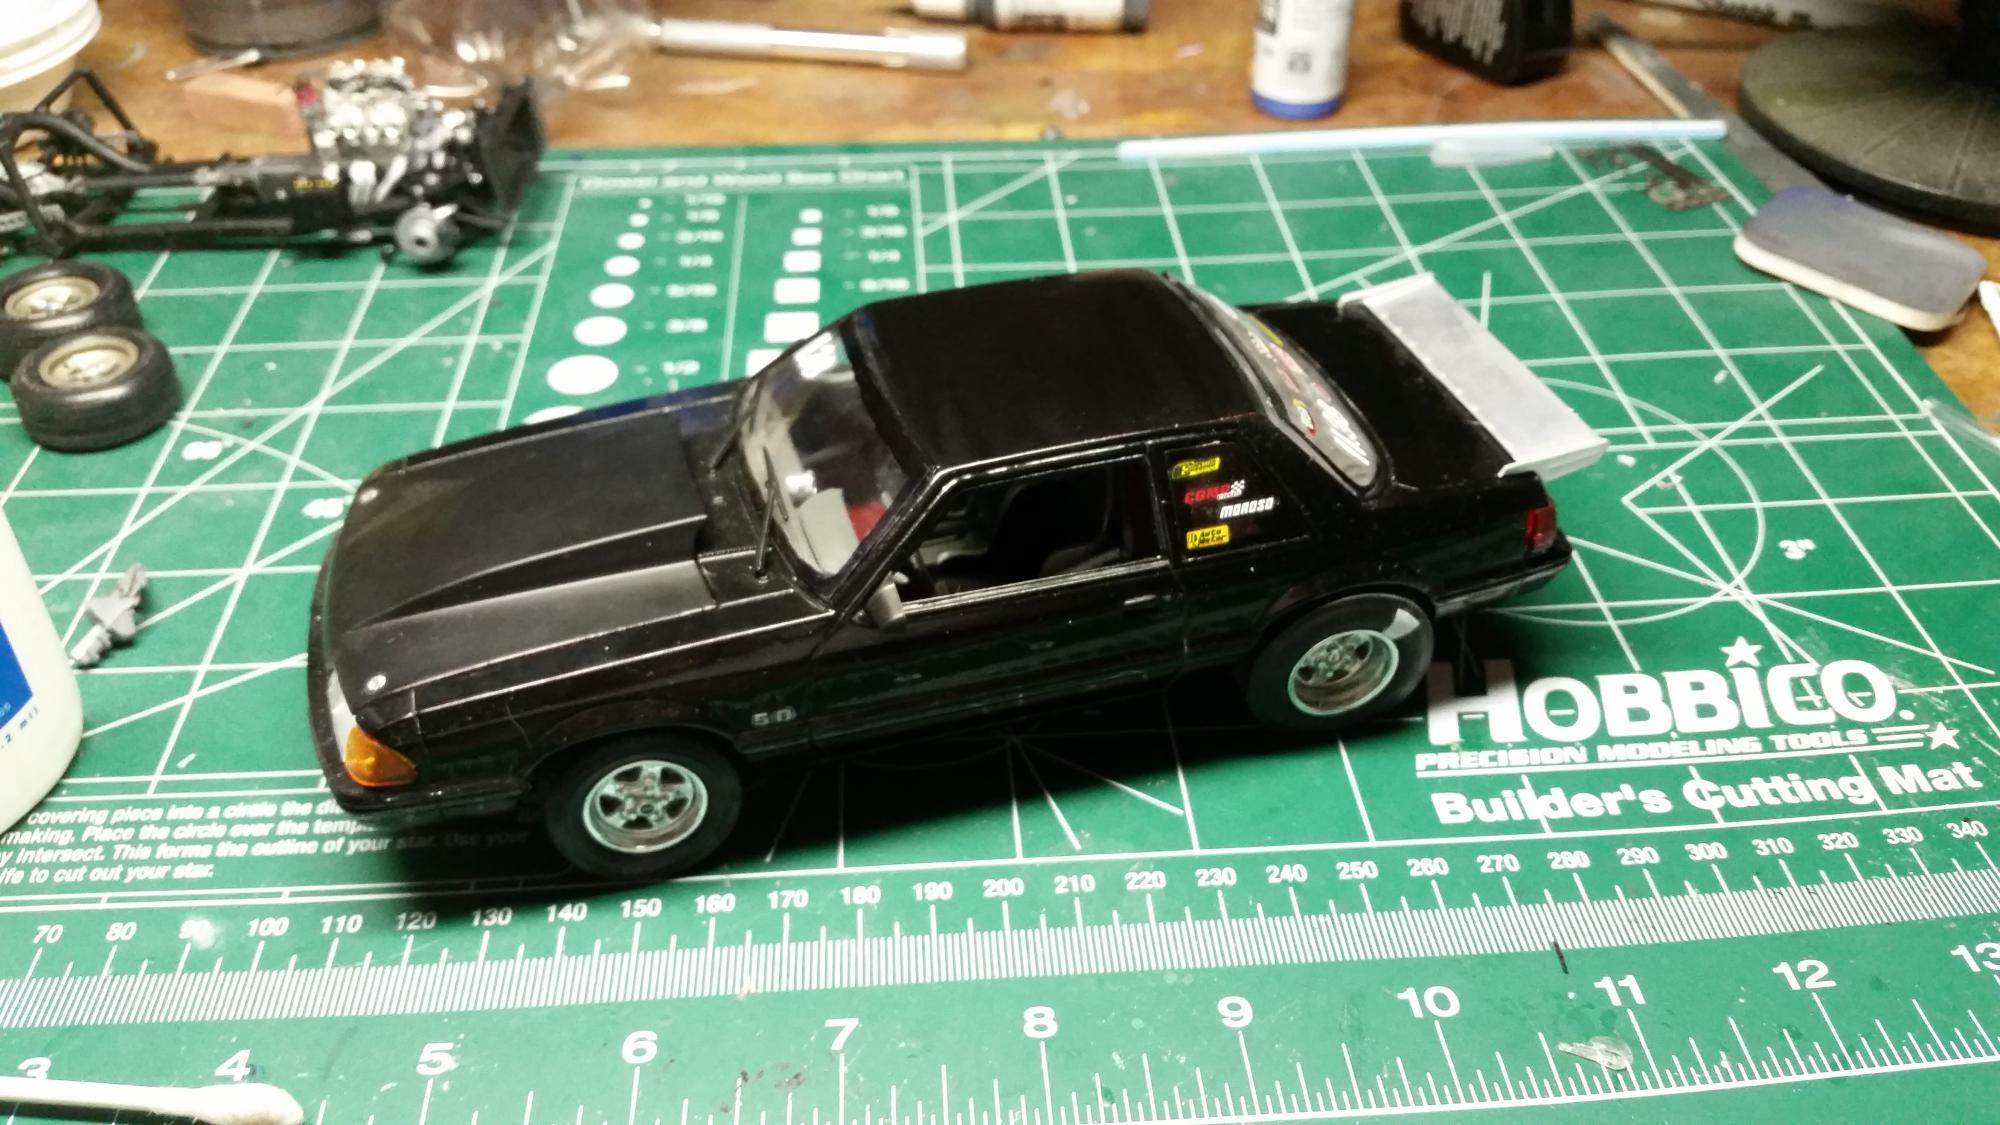
I am almost finished with this one. Just wanted to share the progress so far of this amazing kit. Yes, the instructions suck, but if you read carefully and follow them, you wont go wrong. The detail out of the box is some of the best I have seen in an automotive model kit. Everything looks right to my inexperienced eyes. Highly recommend this kit. The engine out of box is just beautiful, with its side draft carbs and linkages. The photo etch fret really adds another level and keeps things looking in scale. But, I could go on and on but lets get to it. What you say? Interior: Brush painted, yes brush painted, with Vallejo flat blue...stuff lays flat without any strokes. The dash assembled and detailed. .
-
I saw this collection on facebook. I was the one who commented, saying I would like to do the same with all the generations of Mustang kits! Small world! Great Work again Randy!
-
72 Cutlass 442 Convertible - the newest release
buildnething replied to Kmb0319's topic in Model Cars
I got this kit for christmas. Since I live in Indy and I am a huge open wheel fan, I will be building the Pace Car version. Thanks for showing how this kit goes together and how you added extra details. This will help my build. -
Thanks! A bit dusty but thanks. Would you believe I have only been building for 5 years?
-
Better late than never...I wanted to share my complete builds for 2015. Also wanted to introduce myself again. I havent posted much but I have visited and viewed frequently. Hope you like them. Mostly built box stock. See a theme? LOL!
-
Show us your Engines - Post Dedicated to the Engine
buildnething replied to TheCat's topic in Model Cars
Man some very awesome looking engines here. That super7 is just ridiculous! I wonder how long that took to build. -
1/16 Scale Army Vega Funny Car - Finished 10/14/2018
buildnething replied to Mooneyzs's topic in WIP: Drag Racing Models
Wow I am way behind on this. I love building drag cars. The detail is endless. I aspire to this type of building but for now since Im new, Im concentrating on the fundamentals. Thanks for sharing.