64Comet404
-
Posts
991 -
Joined
-
Last visited
Content Type
Profiles
Forums
Events
Gallery
Everything posted by 64Comet404
-
untilModel Car Contest and Flea Market NEW LOCATION: Calvin Christian Reformed Church, 1475 Merivale Road, Ottawa, Ontario This Year's Themes: Gassers, Cars in Song, "Branded" Vehicles For More Information: www.ottawascaleautocontest.com
-
untilModel Car Contest and Flea Market Location: Centre Communautaire Pere Arthur Guertin (Father Arthur Guretin Community Centre) 16 Rue Beriault, Gatineau (Hull), Quebec (across the river from Ottawa, Ontario) This Year's Theme: George Barris Tribute Several Classes for Cars, Trucks, Aircraft, Military, SF, and Figures. Additional Info: www.facebook.com/AMROmodelclub
-
 I teach in a school which is mainly rural, but I have also implemented a similar program at an urban school. The club is open to all, but I have found that the majority of students who participate regularly are girls. There are boys who like to build, but they also like to get outside at recess. I don't chase after them to attend, though; they come when they feel like it. I agree with you on the content of SAMI. I have been buying the magazine for many years, and have enjoyed the variety of aircraft they cover. Since I enjoy building older kits, I enjoy reading Classic Plastic and Clark's Field (I also like Mike Grant's work, but it almost falls under the category of re-engineering). I just hope it doesn't fade out like SAM has over the past couple of years. I was buying it when Jay Laverty was editor, because it catered to a wide variety of subjects (the Canada Day issues were great), but I find that the content is no longer worth the price of admission. I do hope SAMI doesn't fall into that trap.
 -
Yes it is. I run a program in the school where I teach, for students from Grades 4 to 8. The students start with a group build of a 1:24 car, and move on to building other models (usually 1:72 aircraft, depending on donations). I have been taking the group builds to contests, with a number of awards over the past few years, with a picture in the Model Cars annual being the biggest. There are a few teachers out there who build with their students; I was inspired by the model building which Bill Eh! did with his students, so I hope other like-minded teachers will encourage their classes. I liked the article on the Ta-152. I always liked the Classic Plastic section in SAMI, and hope that they continue to run articles which are different from the other model aircraft magazines. With the cost of magazines these days, it's depressing to encounter the same basic article in both SAMI and SAM.
-
I have always liked the Matchbox kits for their subject matter and ease of building. I know that some builders and reviewers have complained about too-deep panel lines and some lack of detail, but the kits fit together!!! After building many Airfix, Revell, FROG, and other manufacturers' airplanes, it is nice to have a kit which falls together without paying Tamiya prices. When I buy models for my model building program, I try and avoid biplanes, but my students have a fighting chance of finishing a Matchbox version. Right now, I have one of their SAAB J-29's on my workbench, ready for final assembly, and have enjoyed it thoroughly. BTW, your name is familiar, Adam. Have you written for a British model aircraft magazine, by chance?
-
I recently won the latest issue of the GTX at the silent auction at Kingston. On opening the kit, I found the GTX chrome tree, but with a set of Cragar S/S mags instead of Keystones. I know the Cragars were found in the Drag On Lady Coronet, but has anyone else noticed this issue?

-
One of the weirdest Die Casts Ever, I'd say, just in time for 4-20...
64Comet404 replied to Faust's topic in Diecast Corner
This is what happens when the Department in charge of Children's Programming smokes a few, and queues up a double feature of Magical Mystery Tour and Yellow Submarine. -
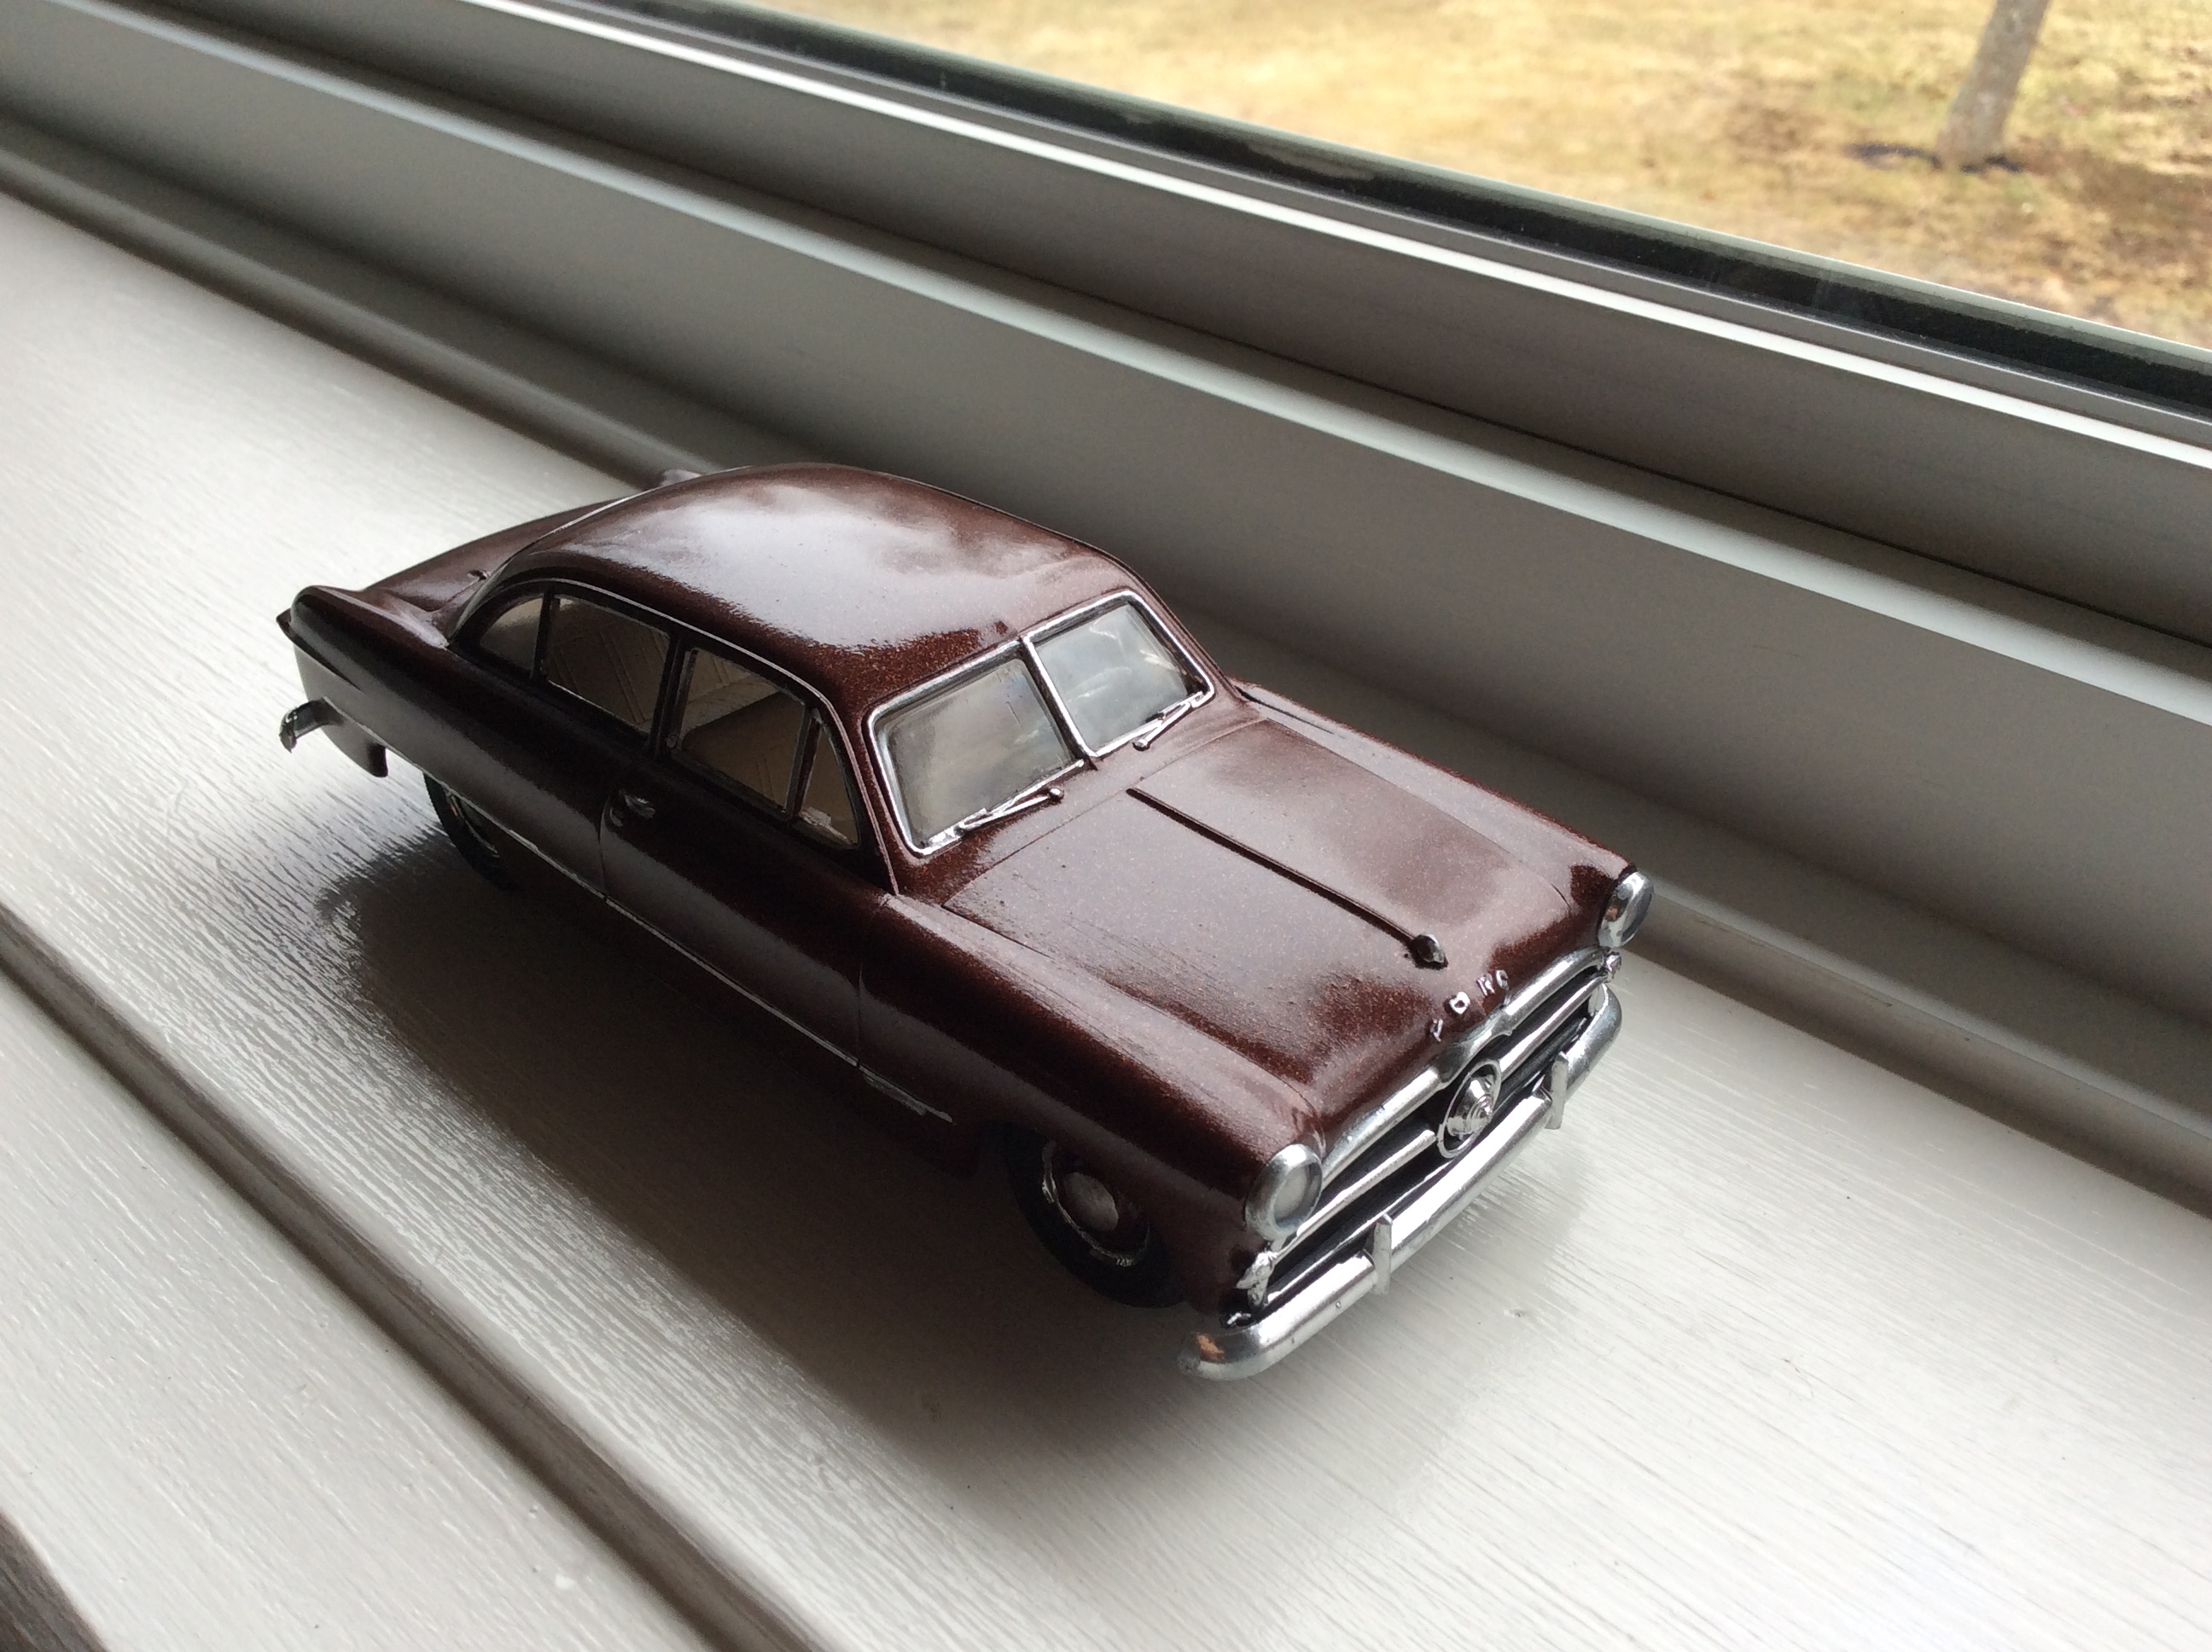
A picture of the Ford's visit to the Model Building Club.
-
I only had a few students building yesterday, but the one who was building the car was impressed. I will see what the other students think today. I still have two groups who need to finish their cars for NNL East, so that will be the priority for the next few days.
-
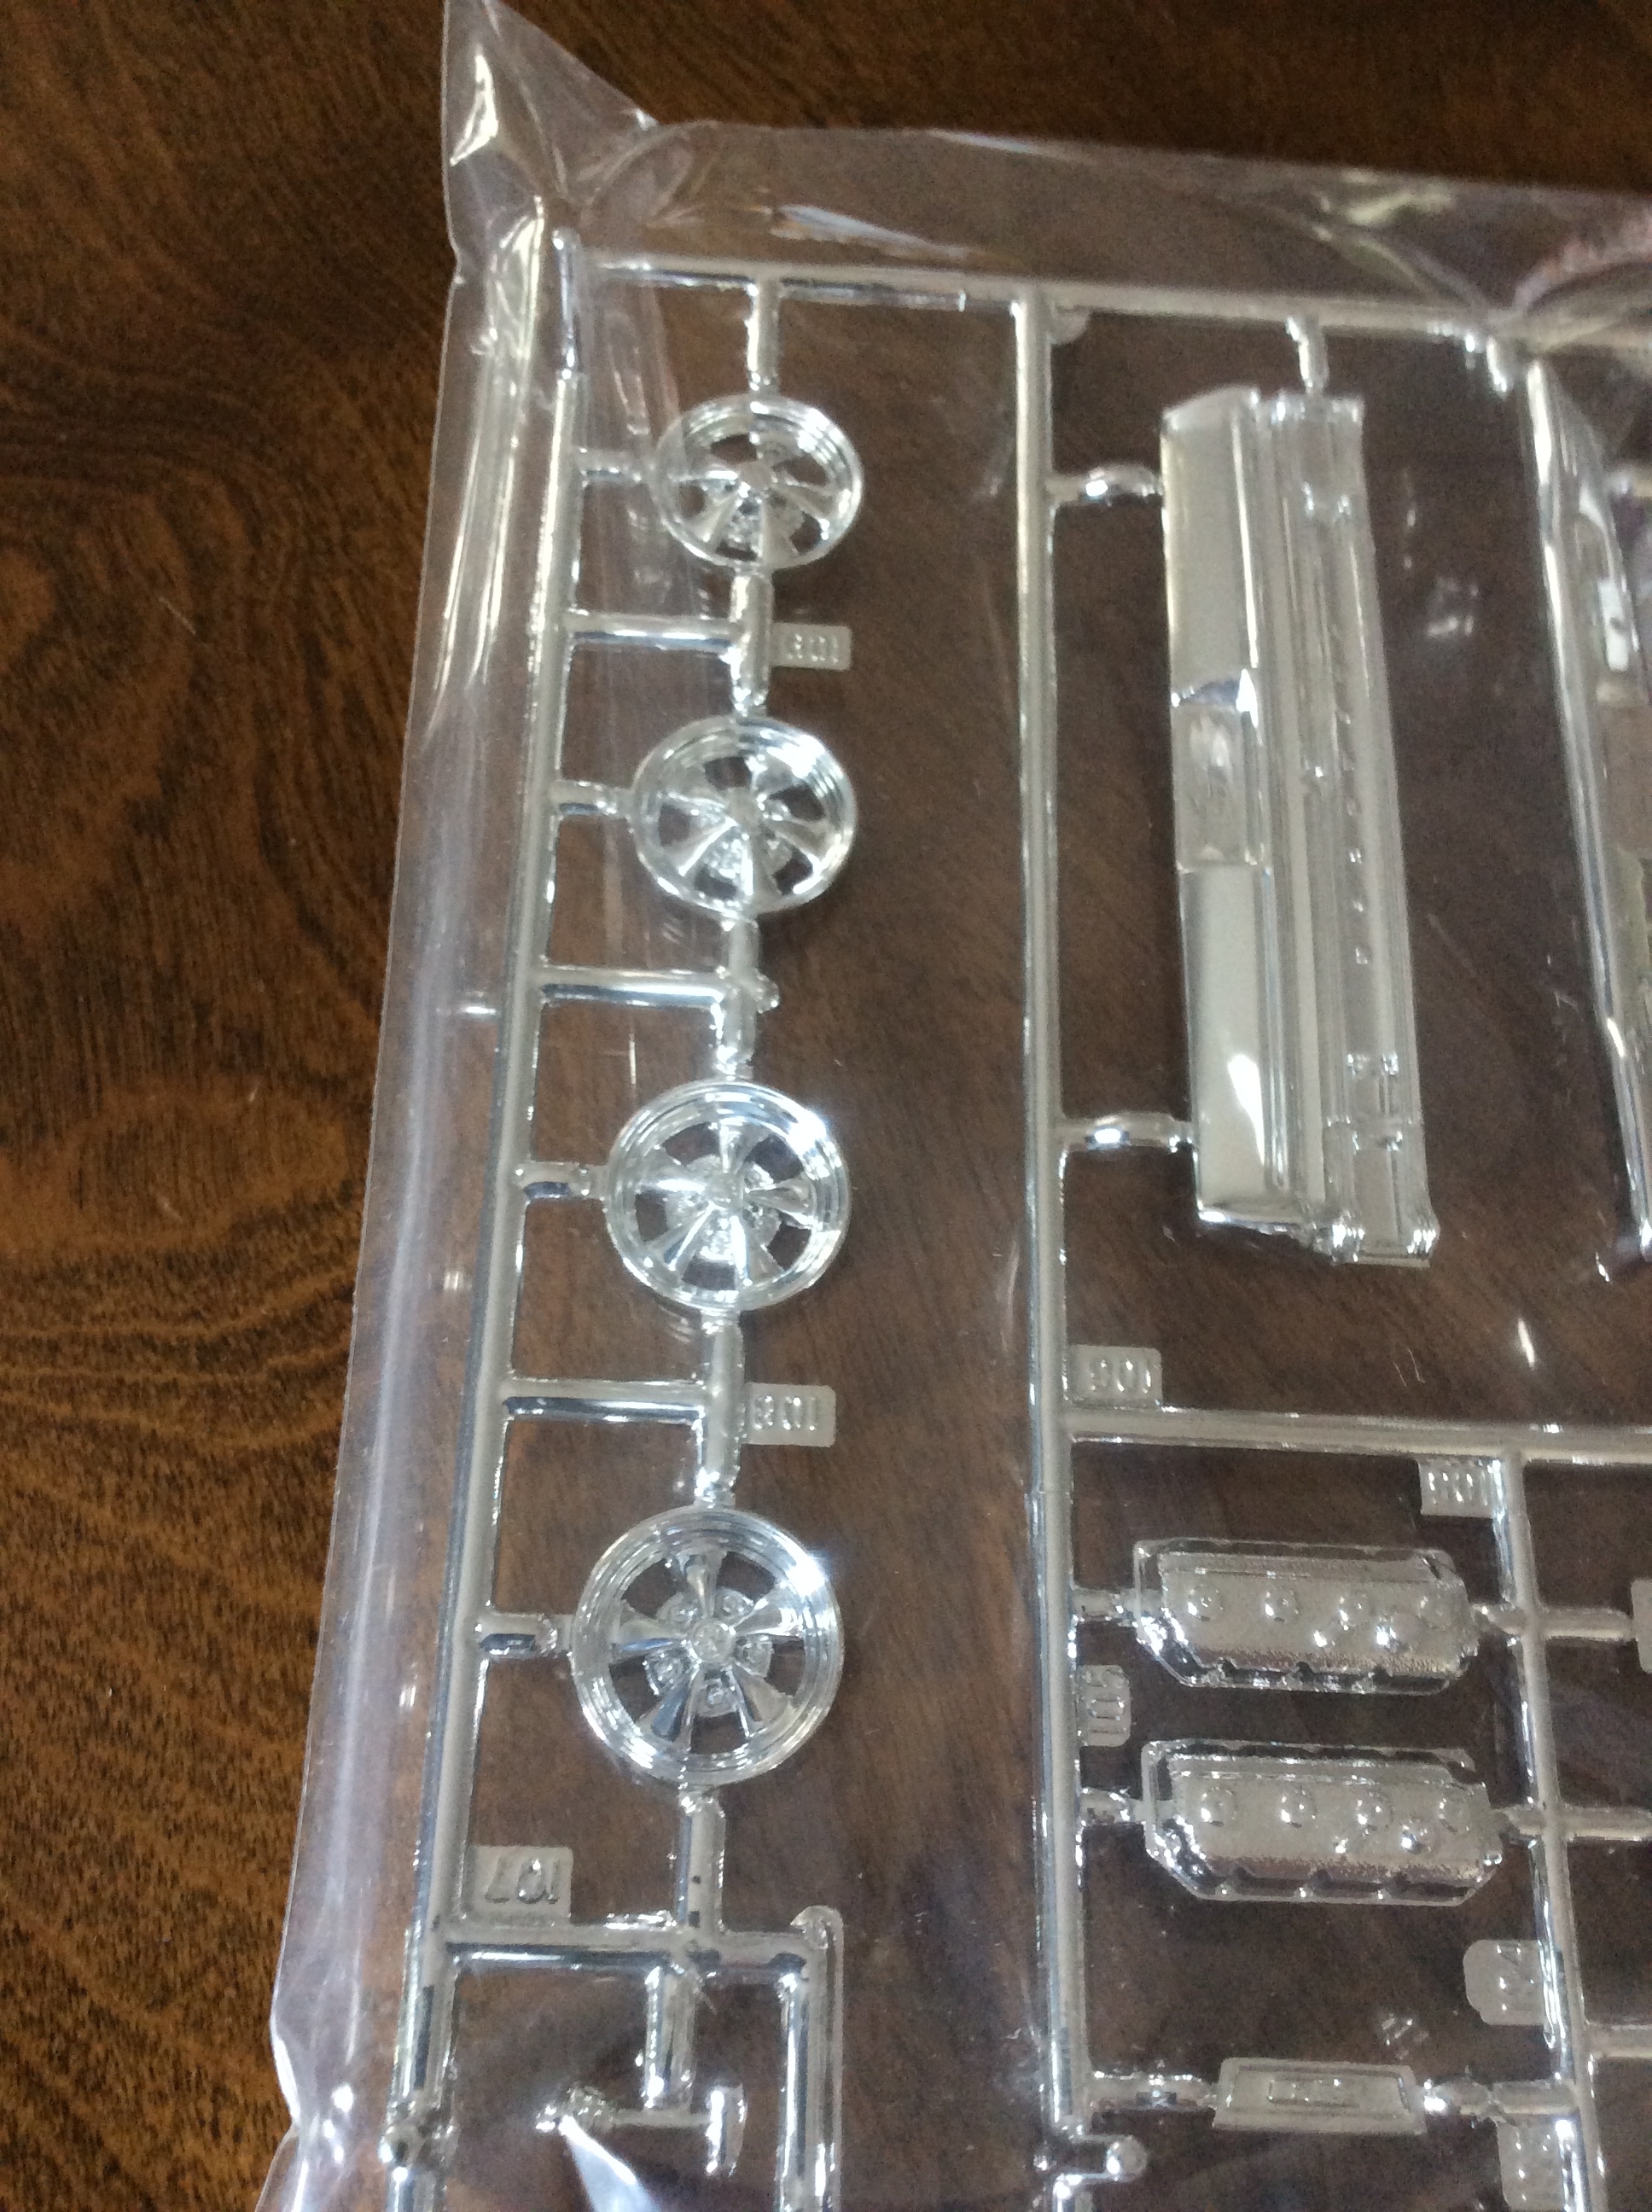
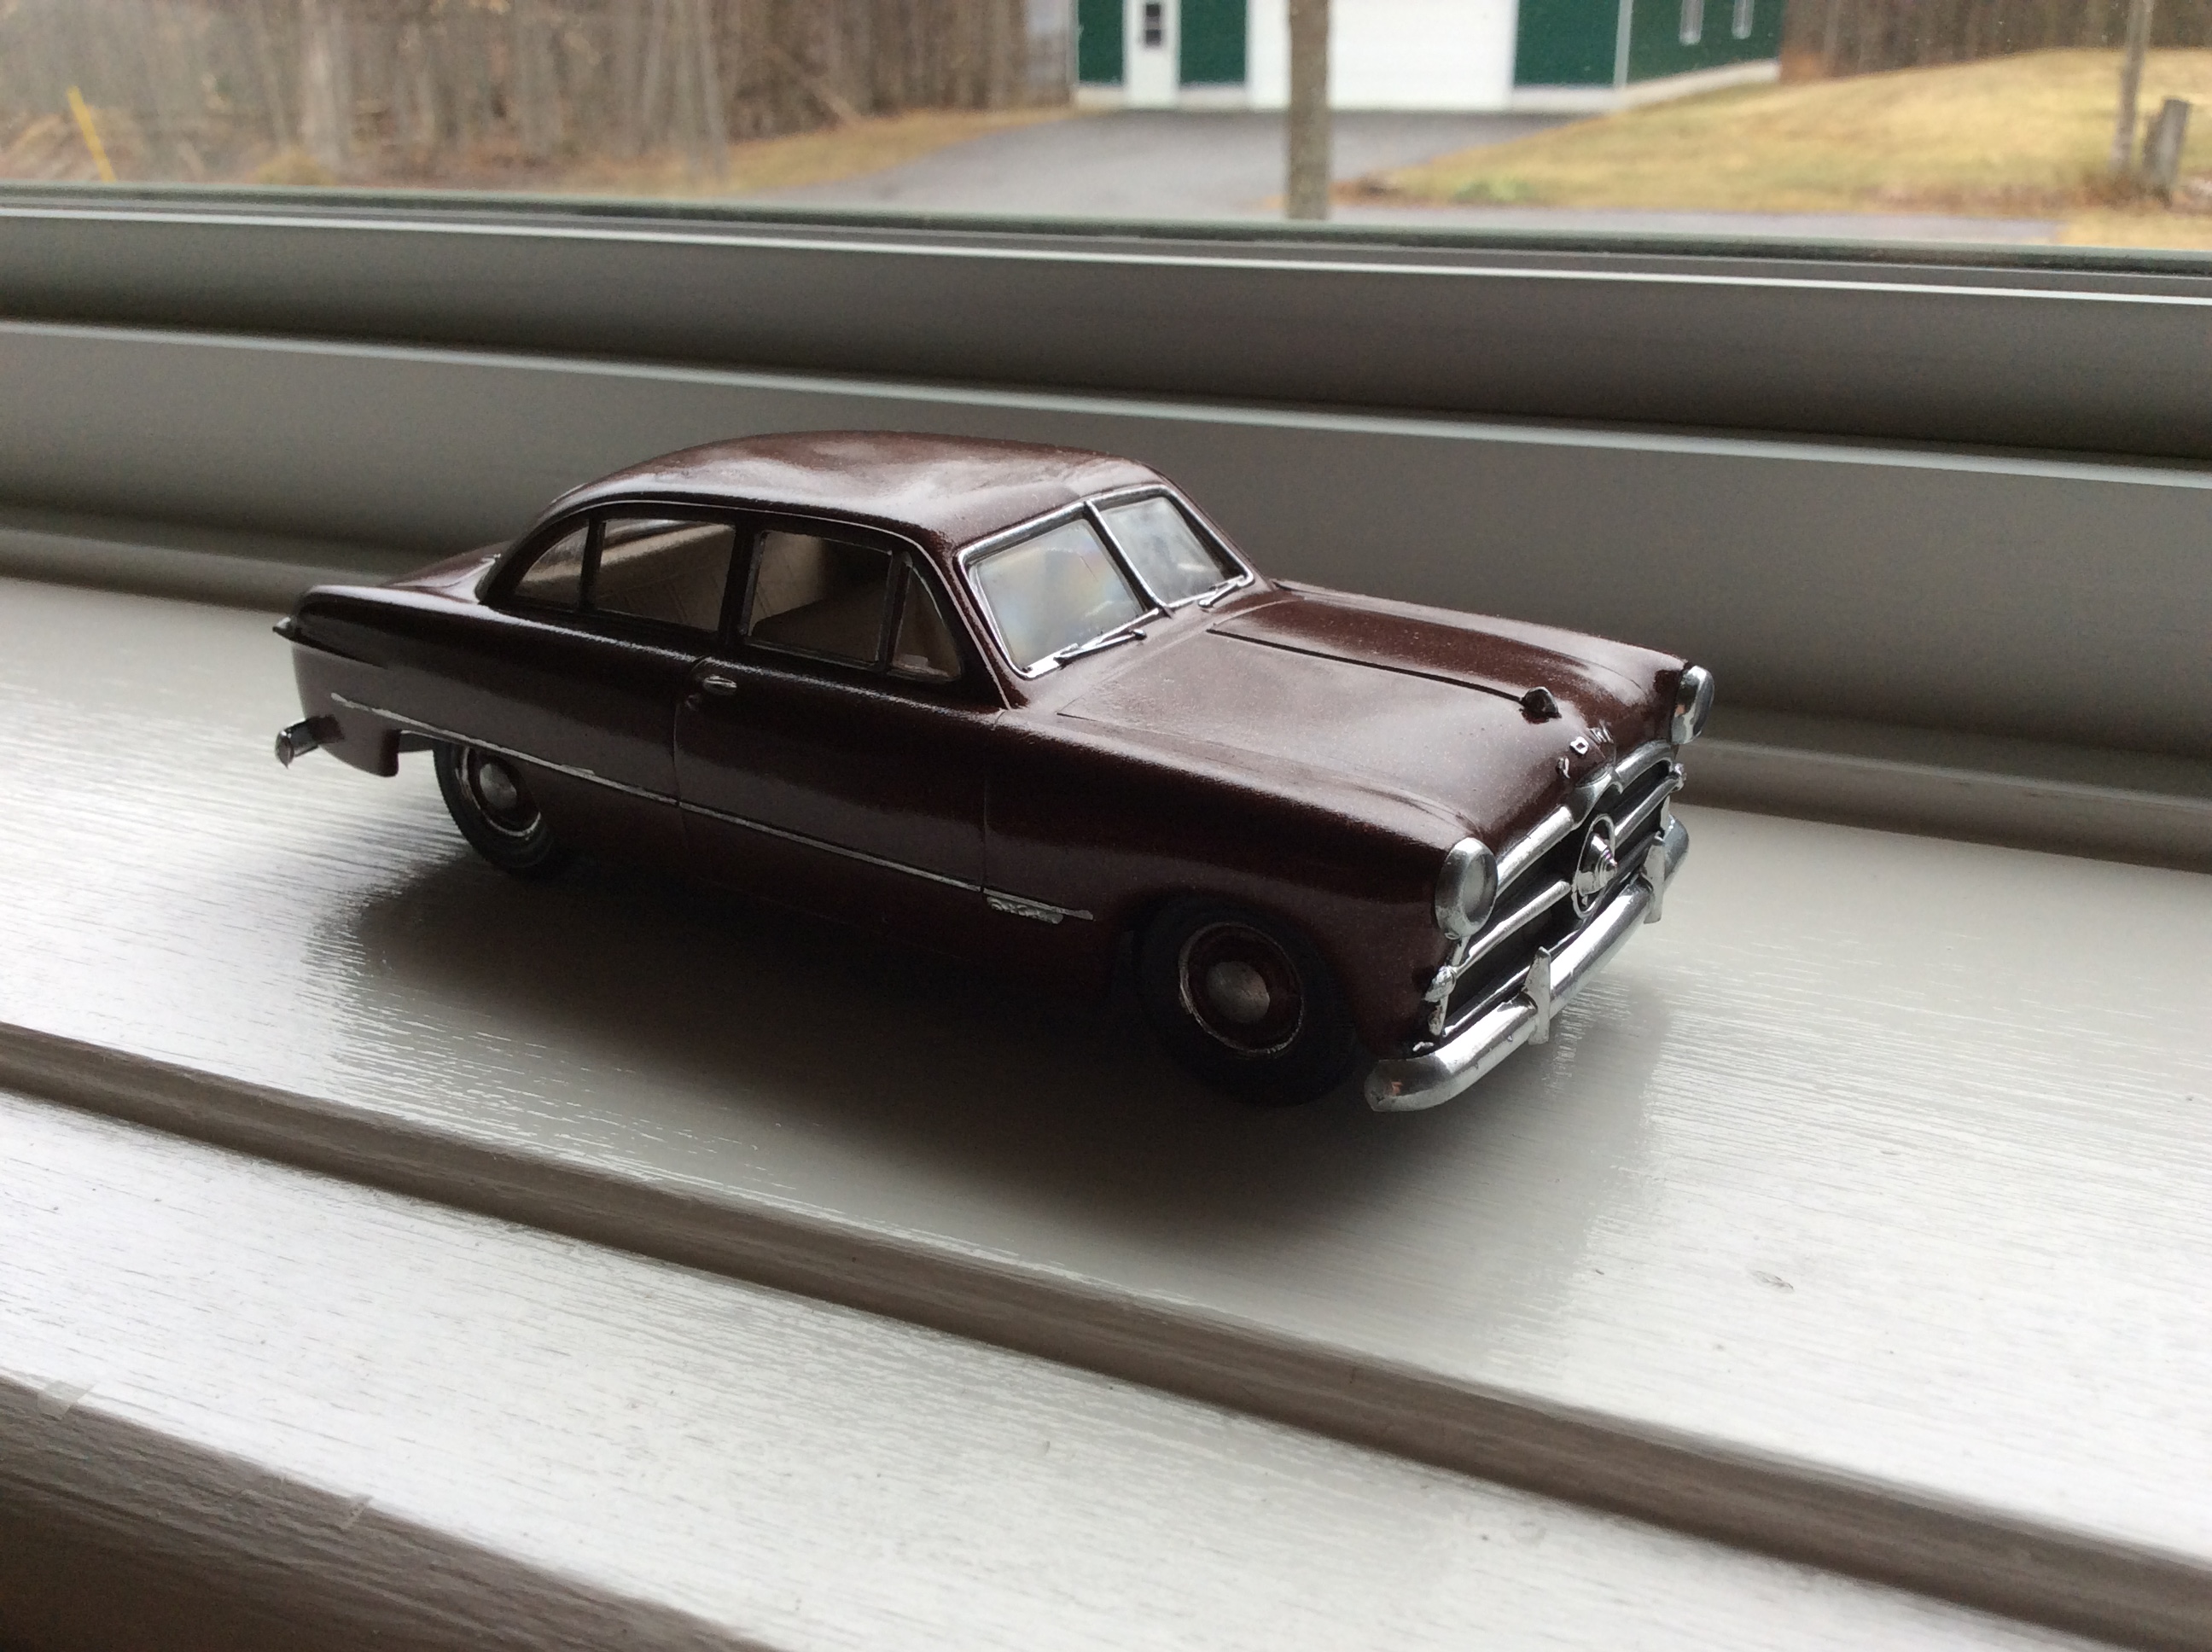
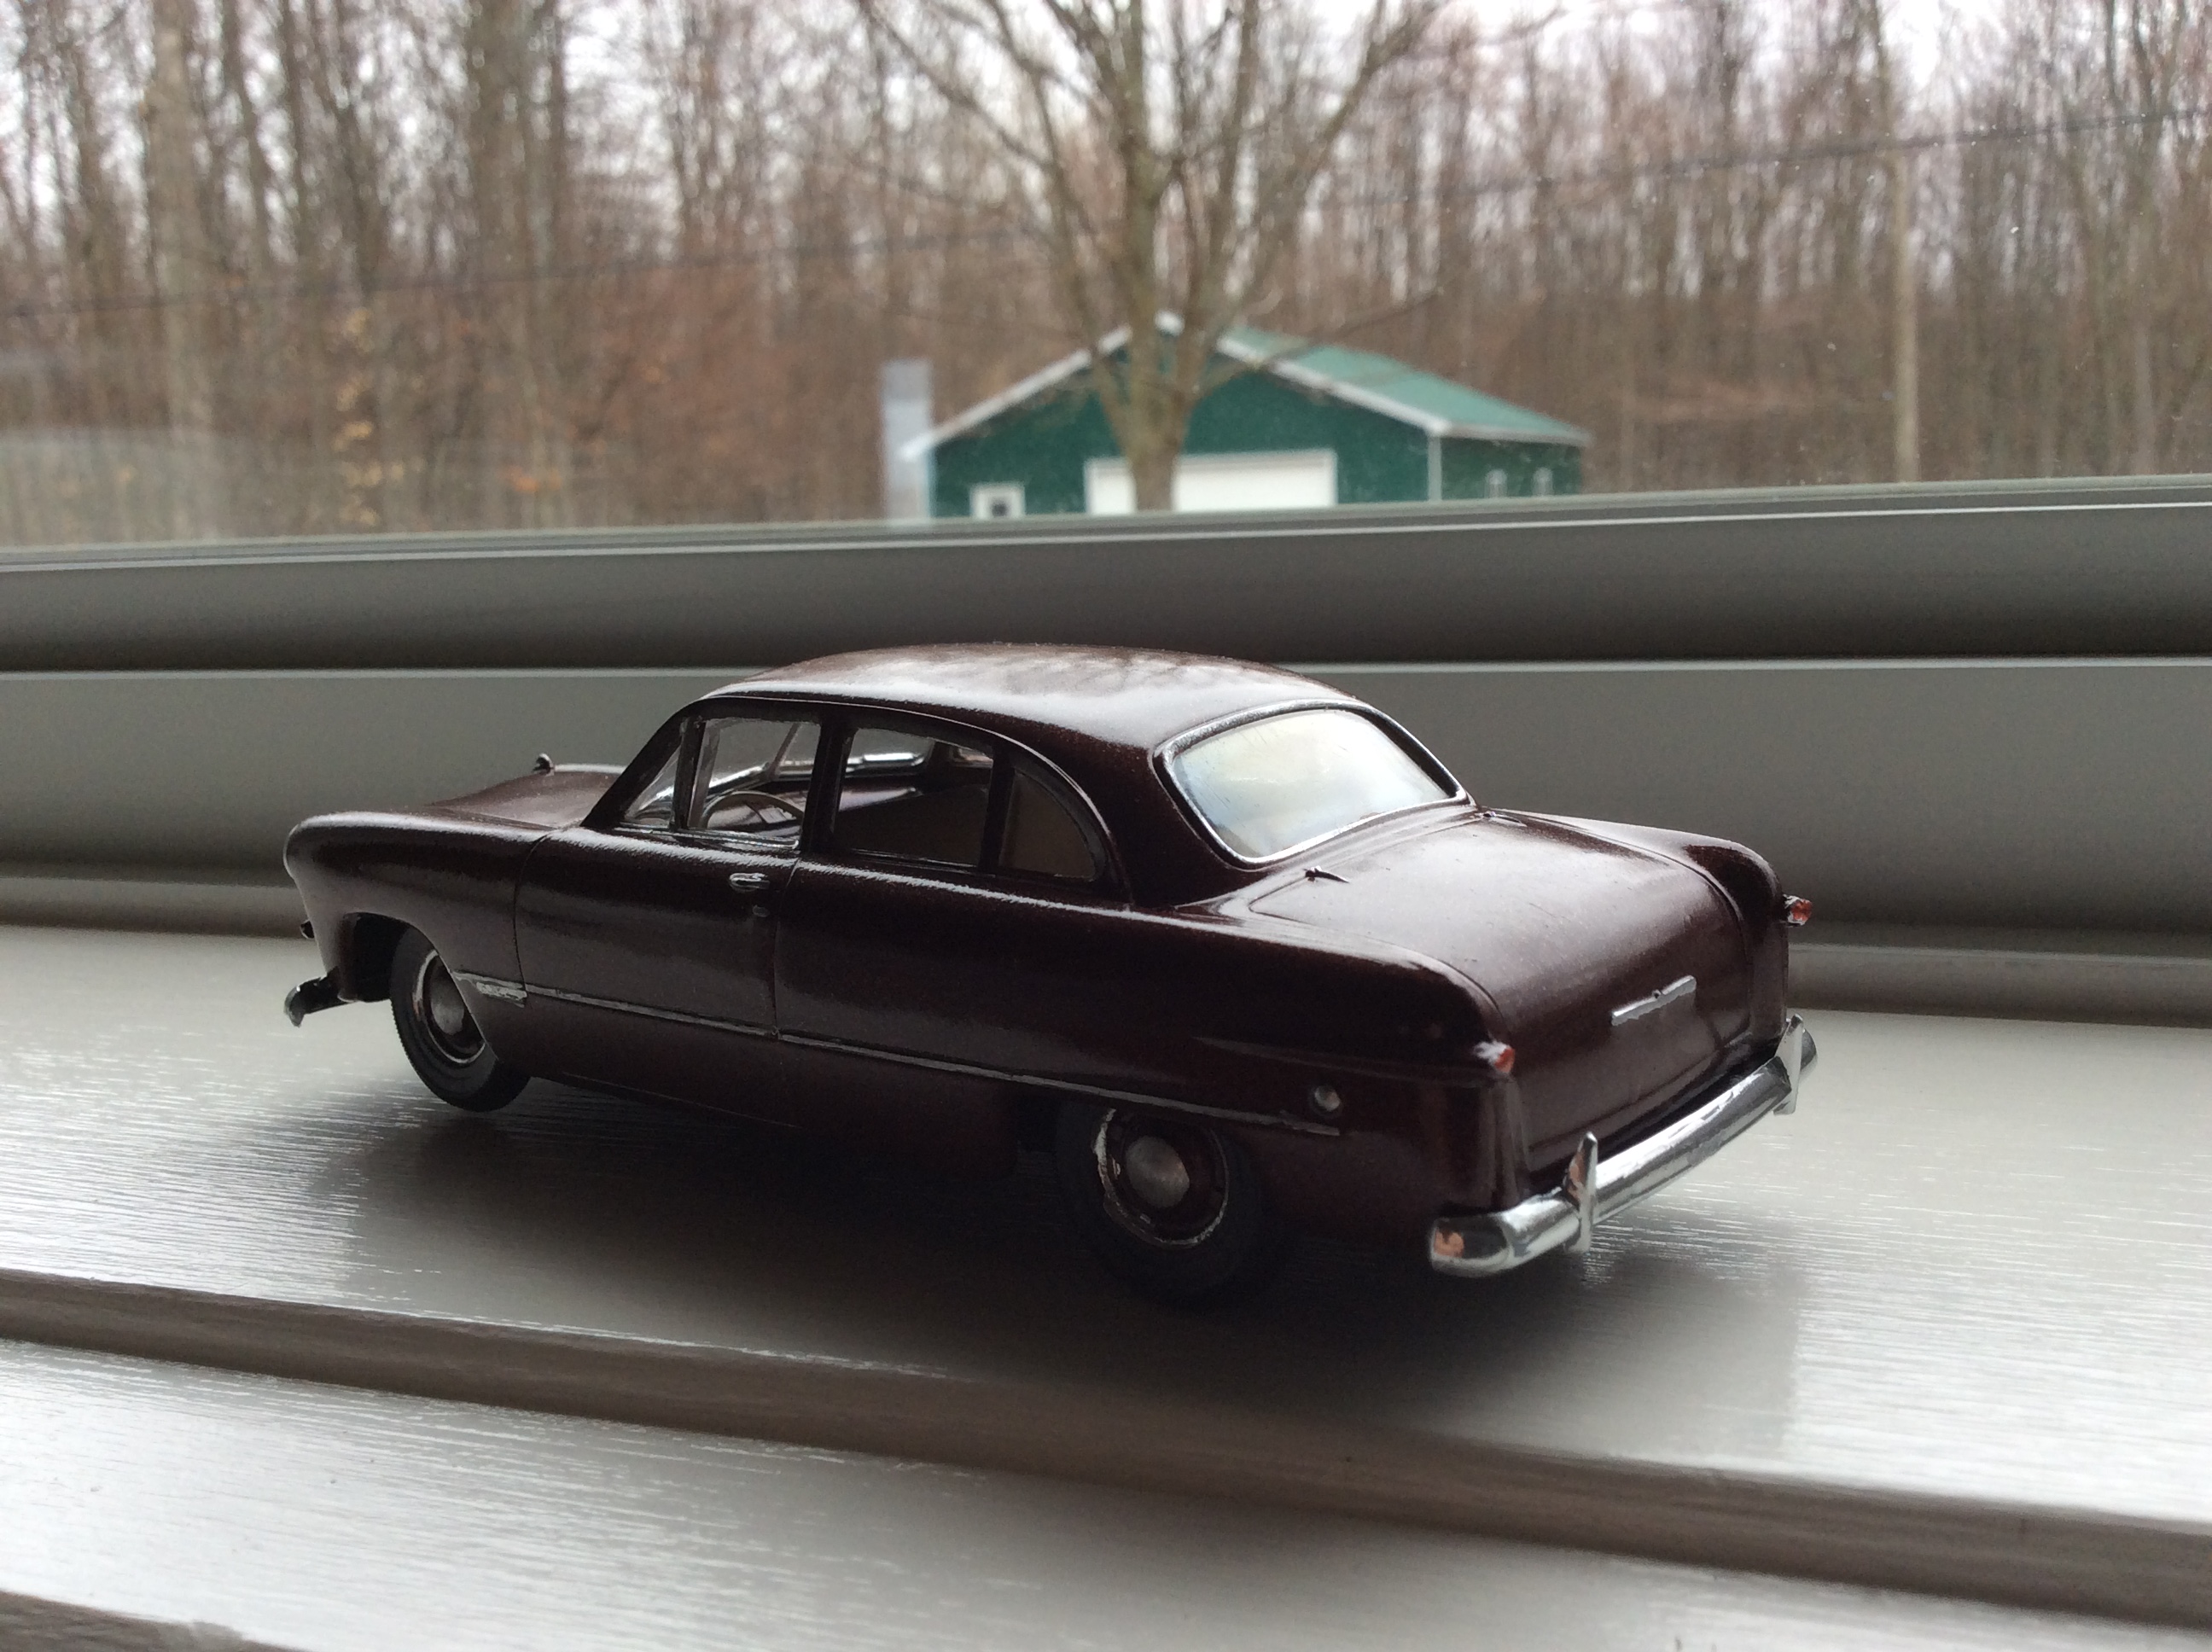
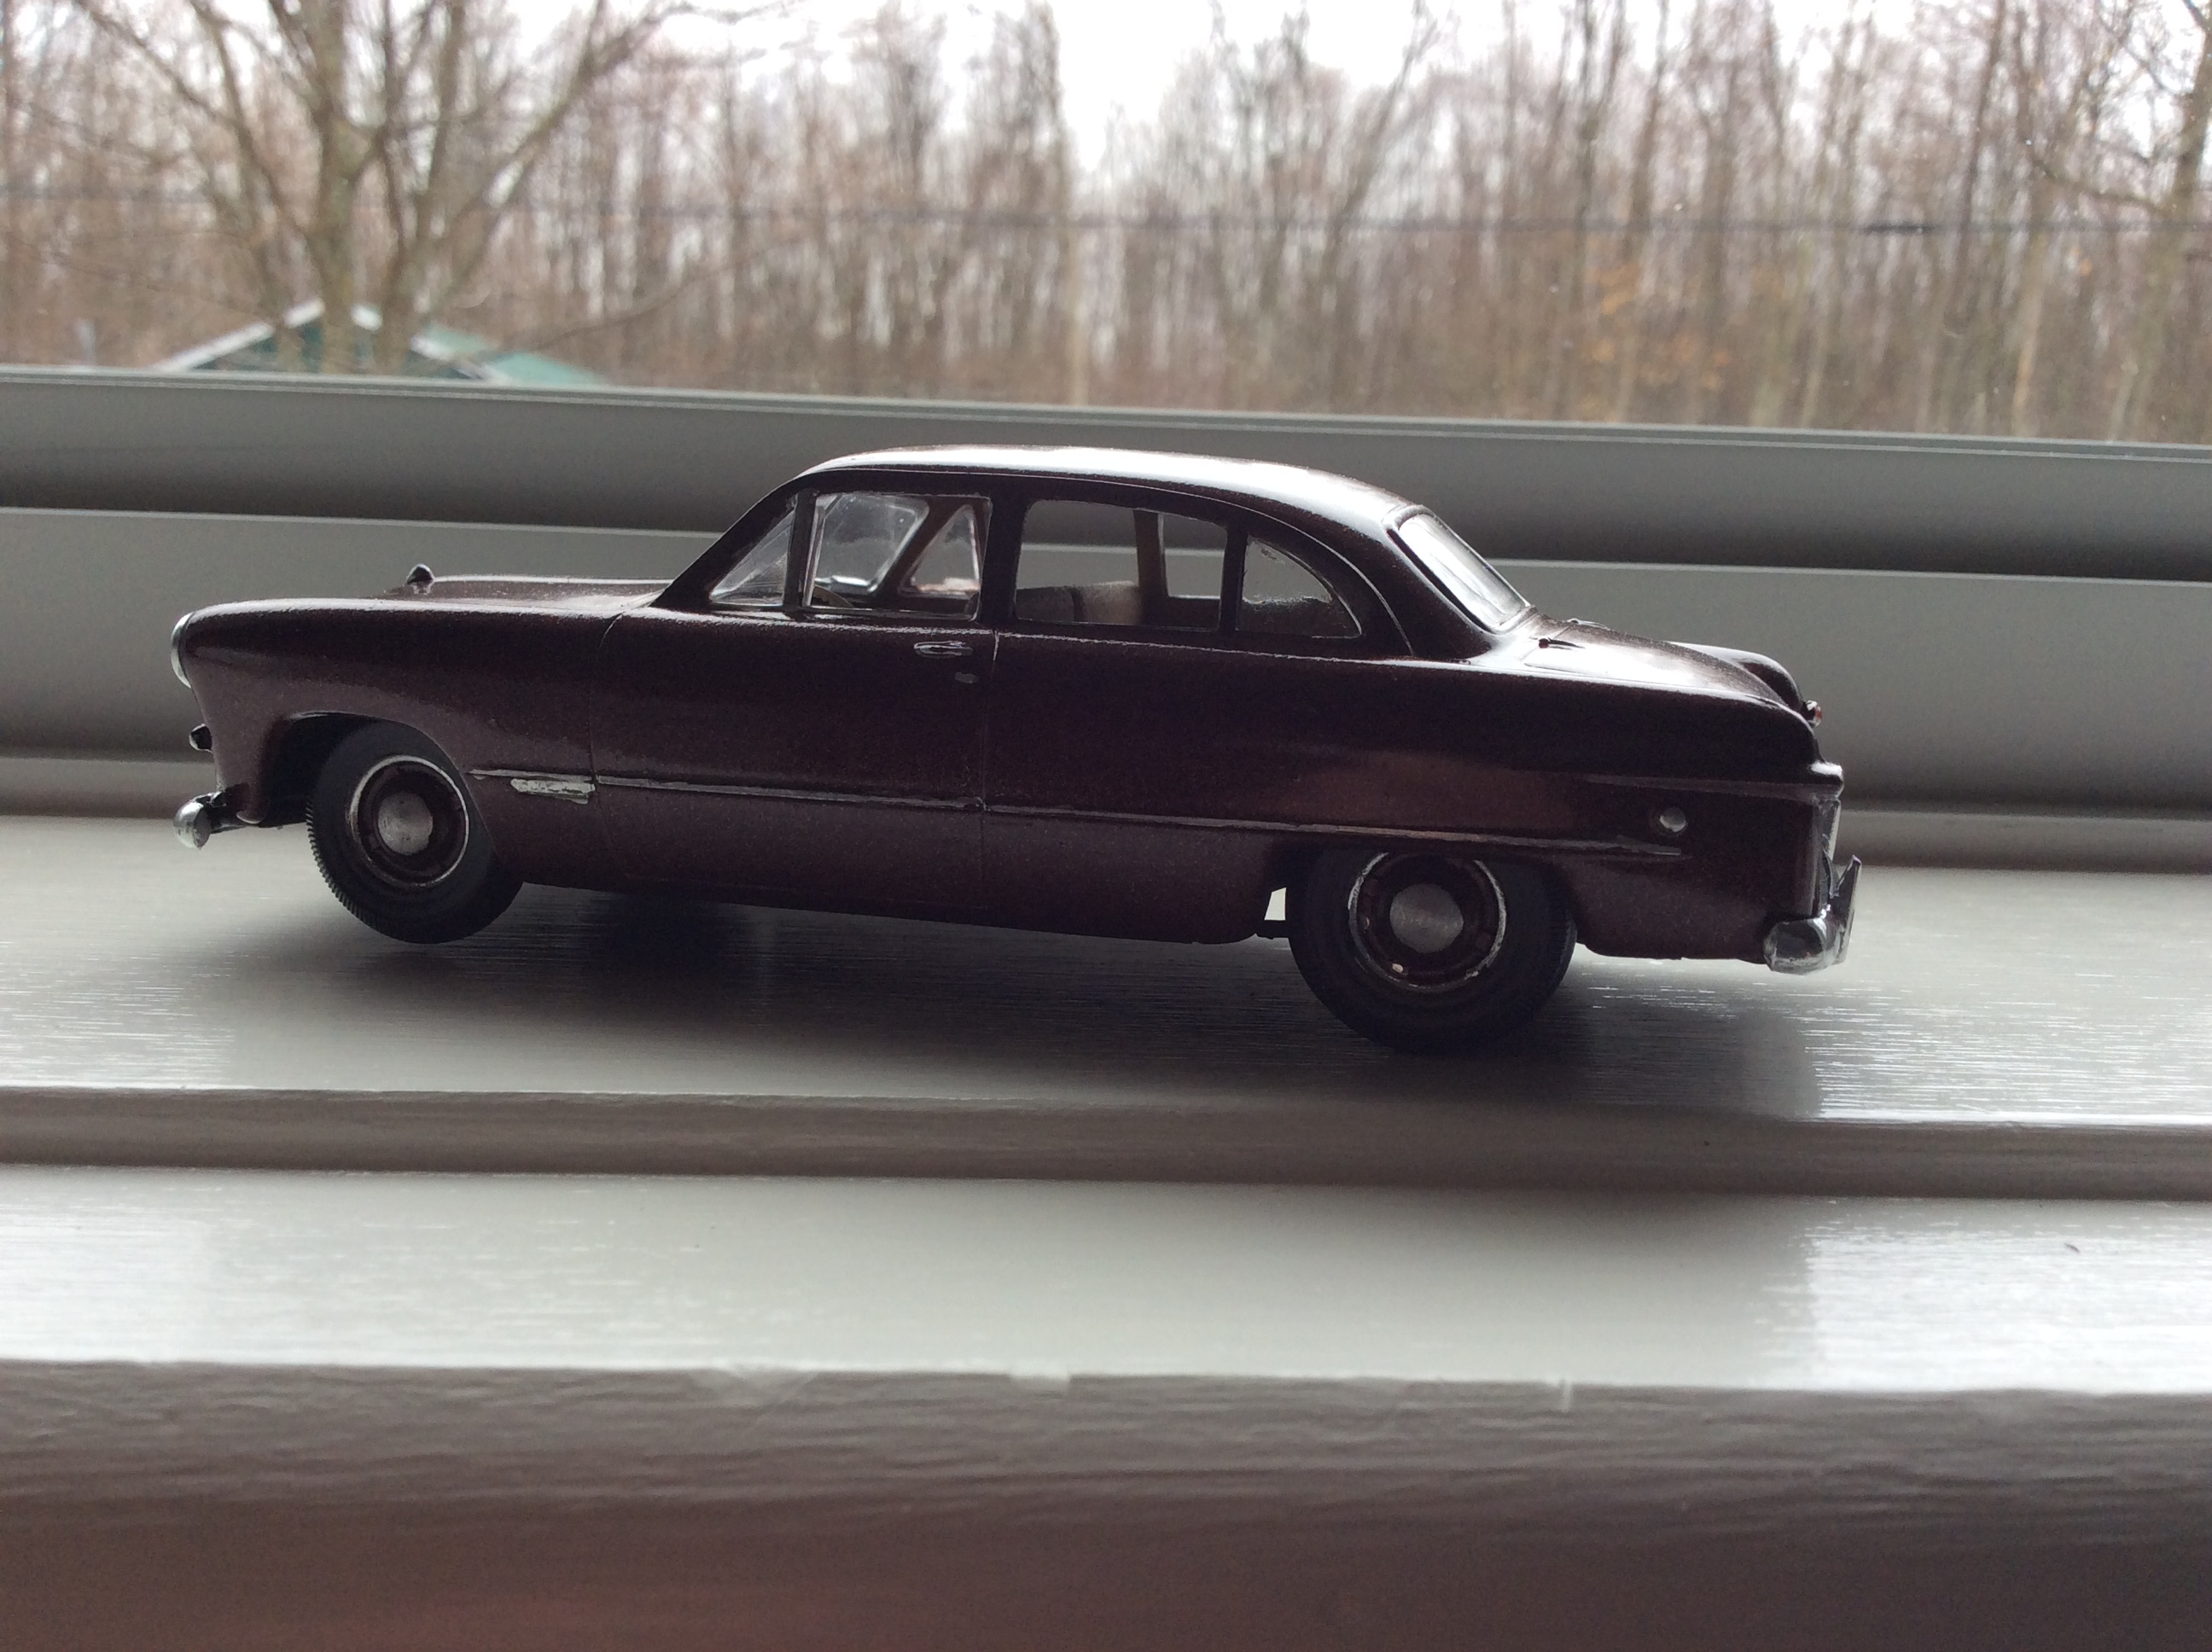
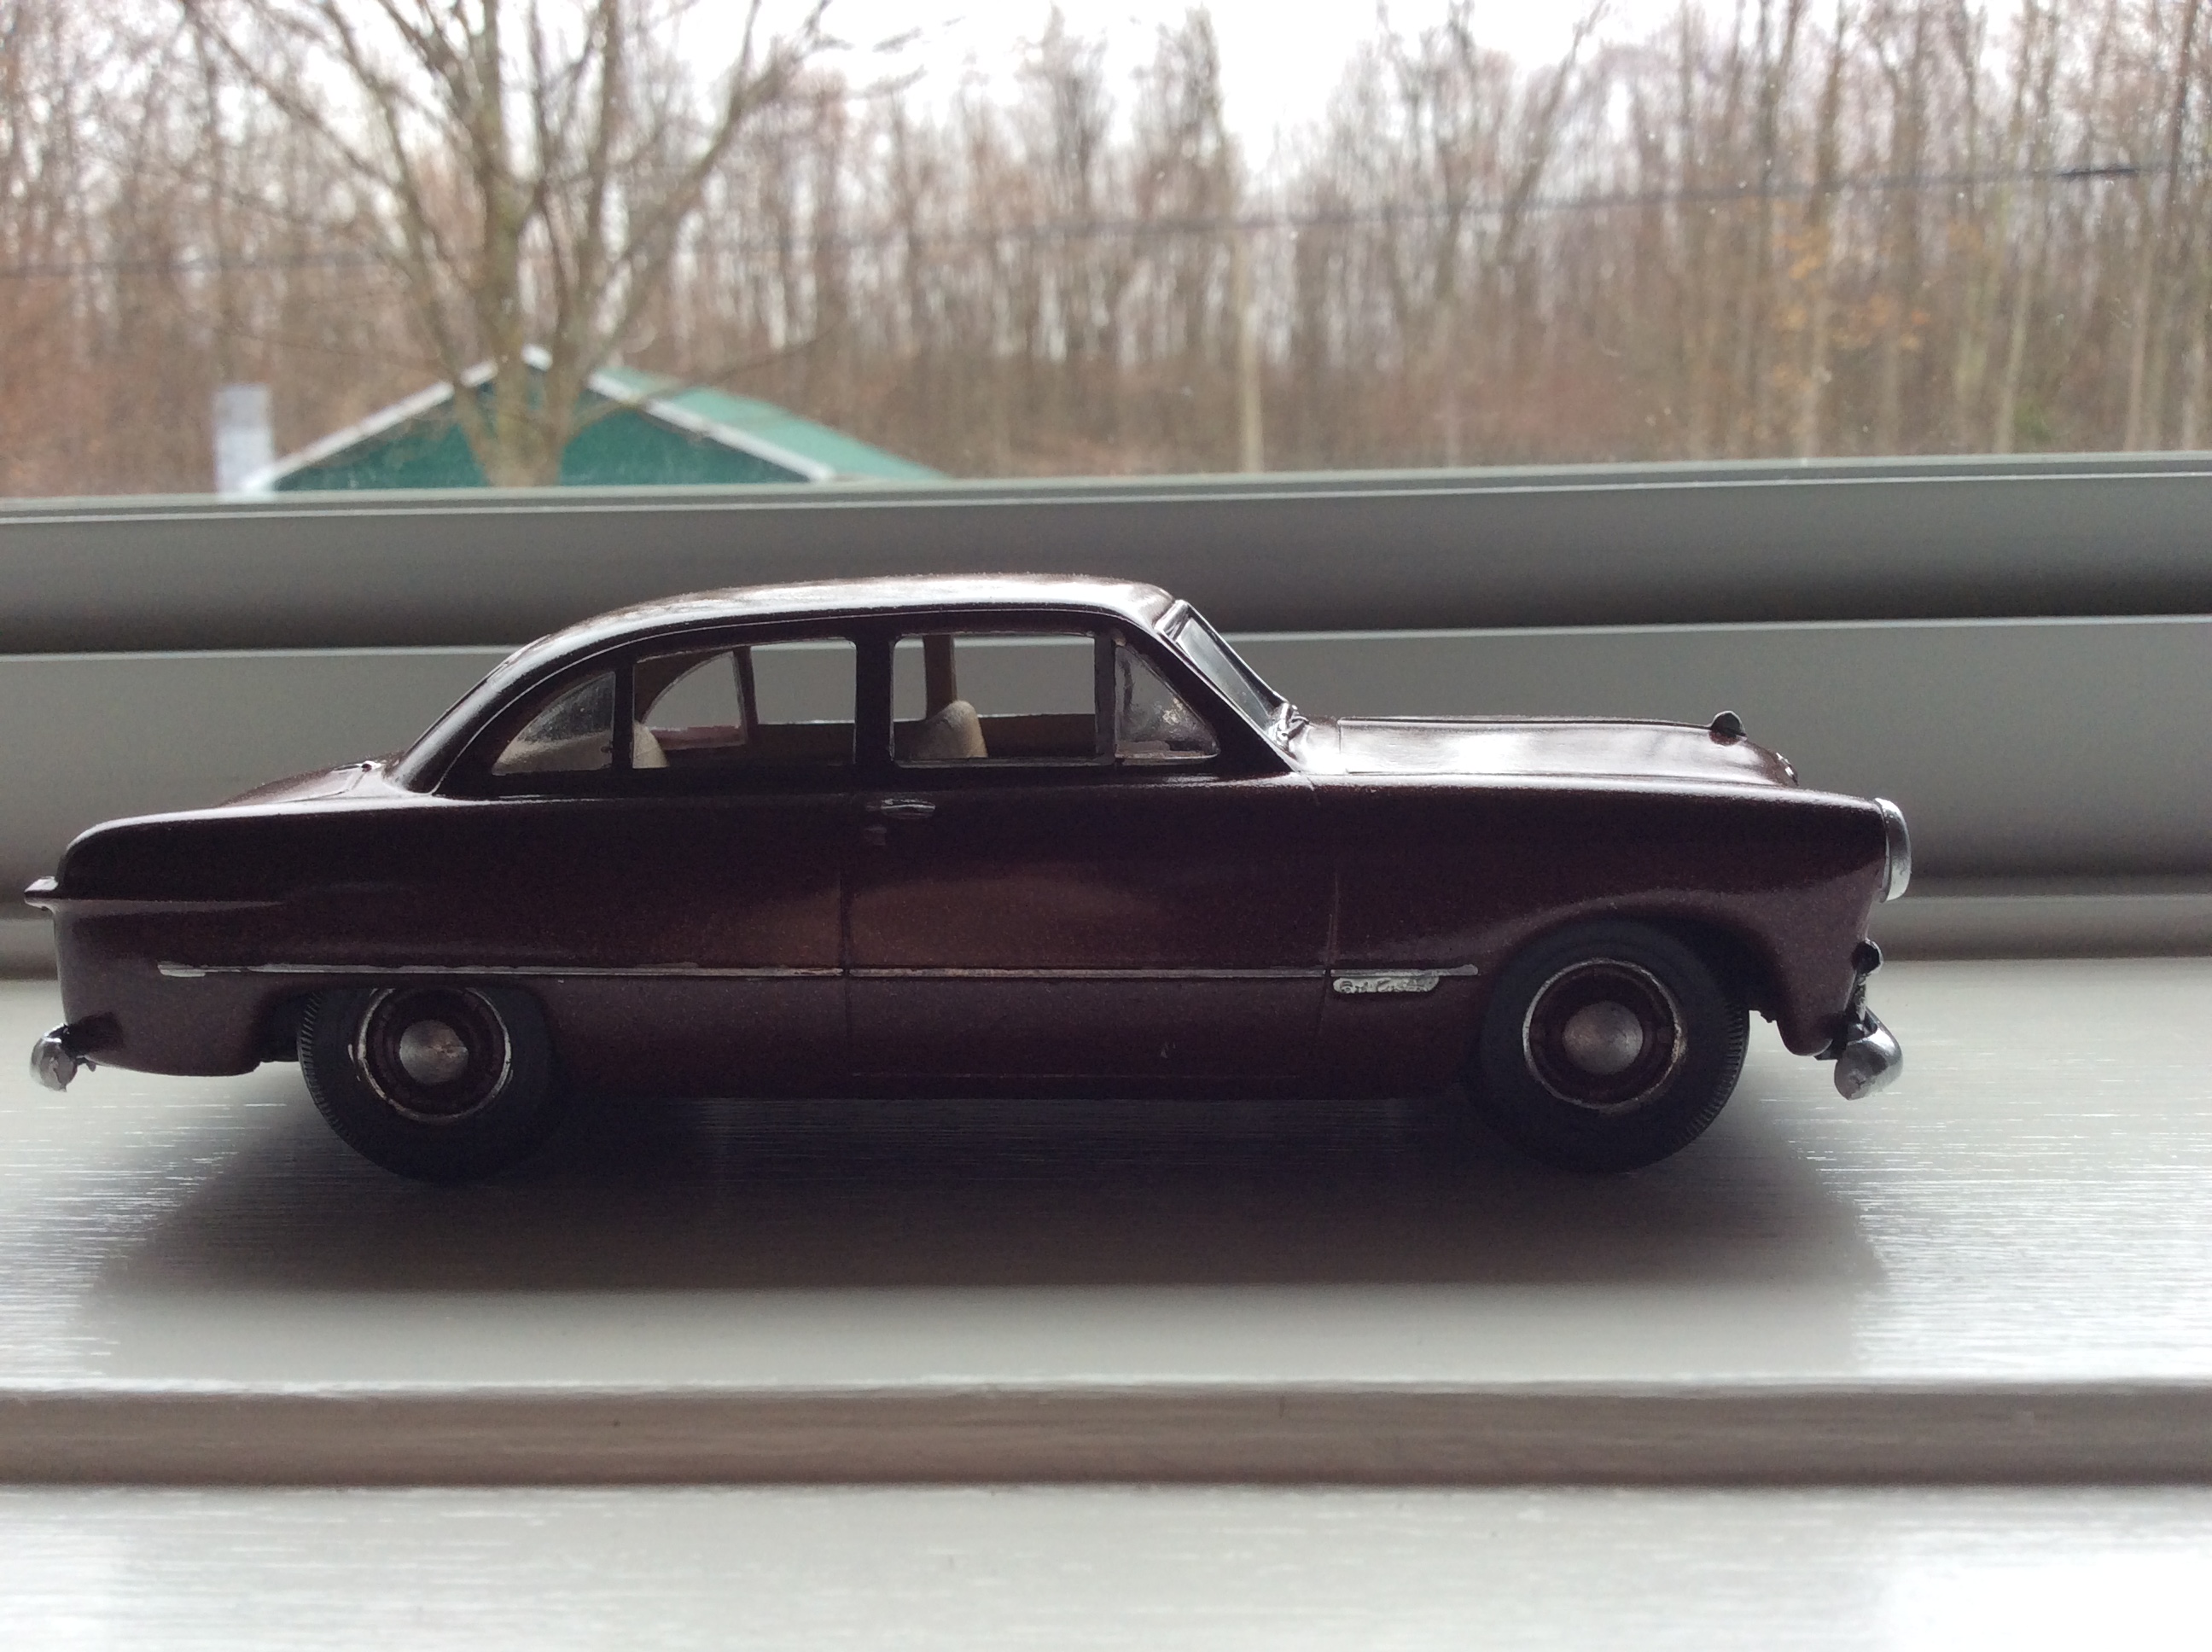
One of my local hobby shops donated a box of bagged 1/32 Lindberg kits to the model building program I run at my school. There were a few mangled kits, but we ended up with enough car models (mainly '49 Fords) for students who wanted to build something other than airplane kits. Since my students were asking about some of the techniques I use in building, I decided to build up one of the incomplete kits (fortunately, I had the missing glass tree in my parts bin). I started the build on Saturday, and have about 4-5 hours into it. Paint is Testors One Coat Root Beer, with no primer; a mistake, considering that I had heavy sanding on the transition between the top and sides of the body. A brush coat of Future gives it a bit more shine. Chrome is Molotow paint markers, and the interior is Testors Fabric Tan, and some Tamiya tan paint. I wonder what my students will think when they see it tomorrow...
-
Personally, I am not really interested in a CSL, since they have been kitted before (not well in 1:24, but still). Pop out a 2.8 or 3.0 coupe without flares or spoilers, and I will definitely be interested. Bring on the 2002's!!!
-
I seem to recall that the Modelhaus kit was used for pics when AMT/Ertl introduced the 1962 Chevrolet Bel Air.
-
Lipstick on a pig! Mercury LN7 Out of Box review
64Comet404 replied to Faust's topic in Car Kit News & Reviews
I remember those kits when they first came out back in the 1980s, and didn't think the 1:1 were that bad (at least in comparison to the competition). For some obscure reason, R-M put out a run of bagged kits back in the mid '90s, and I grabbed another one. It's not for everyone, but at least it's more adventurous than the Cavalier/Omni/Horizon hatchbacks that were modeled at the same time. -
Matty Winspur's "The Fabulous Hudson Hornet".
64Comet404 replied to Dave Metzner's topic in Car Kit News & Reviews
Apologies to Brett on misspelling his name. -
Matty Winspur's "The Fabulous Hudson Hornet".
64Comet404 replied to Dave Metzner's topic in Car Kit News & Reviews
I picked up the kit a couple of days ago. Although it does look good, I wish Moebius had tooled up the standard bumpers (without guards) for these versions. My Modelhaus bumpers are packed away, so I can't check on how close they are to stock. I agree with Brent on the paint; to my eyes, it looks like the 1:1 was painted with Ford Guardsman Blue, or something very similar. -
Model Car and Truck Contest/Flea Market, 9:00-4:00 Location: Royal Canadian Legion #560, 734 Montreal Street, Kingston, Ontario (3.2 km South of Hwy 401) More information at www.kingstonmodelcar.blogspot.ca
-
BSA C15
64Comet404 replied to Cpt Tuttle's topic in WIP: All The Rest: Motorcycles, Aviation, Military, Sci-Fi, Figures
Nice save! I wish Airfix would bring that series of bikes back into production, collectors prices for the BSA and BMW are more than I want to pay for a kit to build. -
It is a great little kit, and your build is really cleanly done. When I built mine, I tried for that same 'before the race' look. Unfortunately, a small little (unseen) seep of CA, followed by a quick dusting, left a mark that could only be hidden with weathering. In some respects, I wish it was easier to locate more of these less common kits here in North America, but I have enough kits as it is.
-
NGD (New Guitar Day)
64Comet404 replied to KWT's topic in WIP: All The Rest: Motorcycles, Aviation, Military, Sci-Fi, Figures
It all depends how far you want to go with the rebuilding. eBay can be a good source, but you really have to watch out for shipping. Allparts is good for a lot of little bits and pieces, and the Stratosphere is good (if a bit pricey) for locating OEM parts. -
From what I recall, 1/24 was a scale which was easy to convert (1inch=2feet), and fit in well with the other common scales like 1/48 and 1/72. It wasn't really a metric scale. 1/25 scale came about because of factory engineering drawings, which were scaled to 1:10. Reducing the drawings by two and a half times gave a scale of 1/25. Companies such as AMT, MPC and Jo-Han, with the contracts to create promotional models, were more likely to stick with 1/25.
-
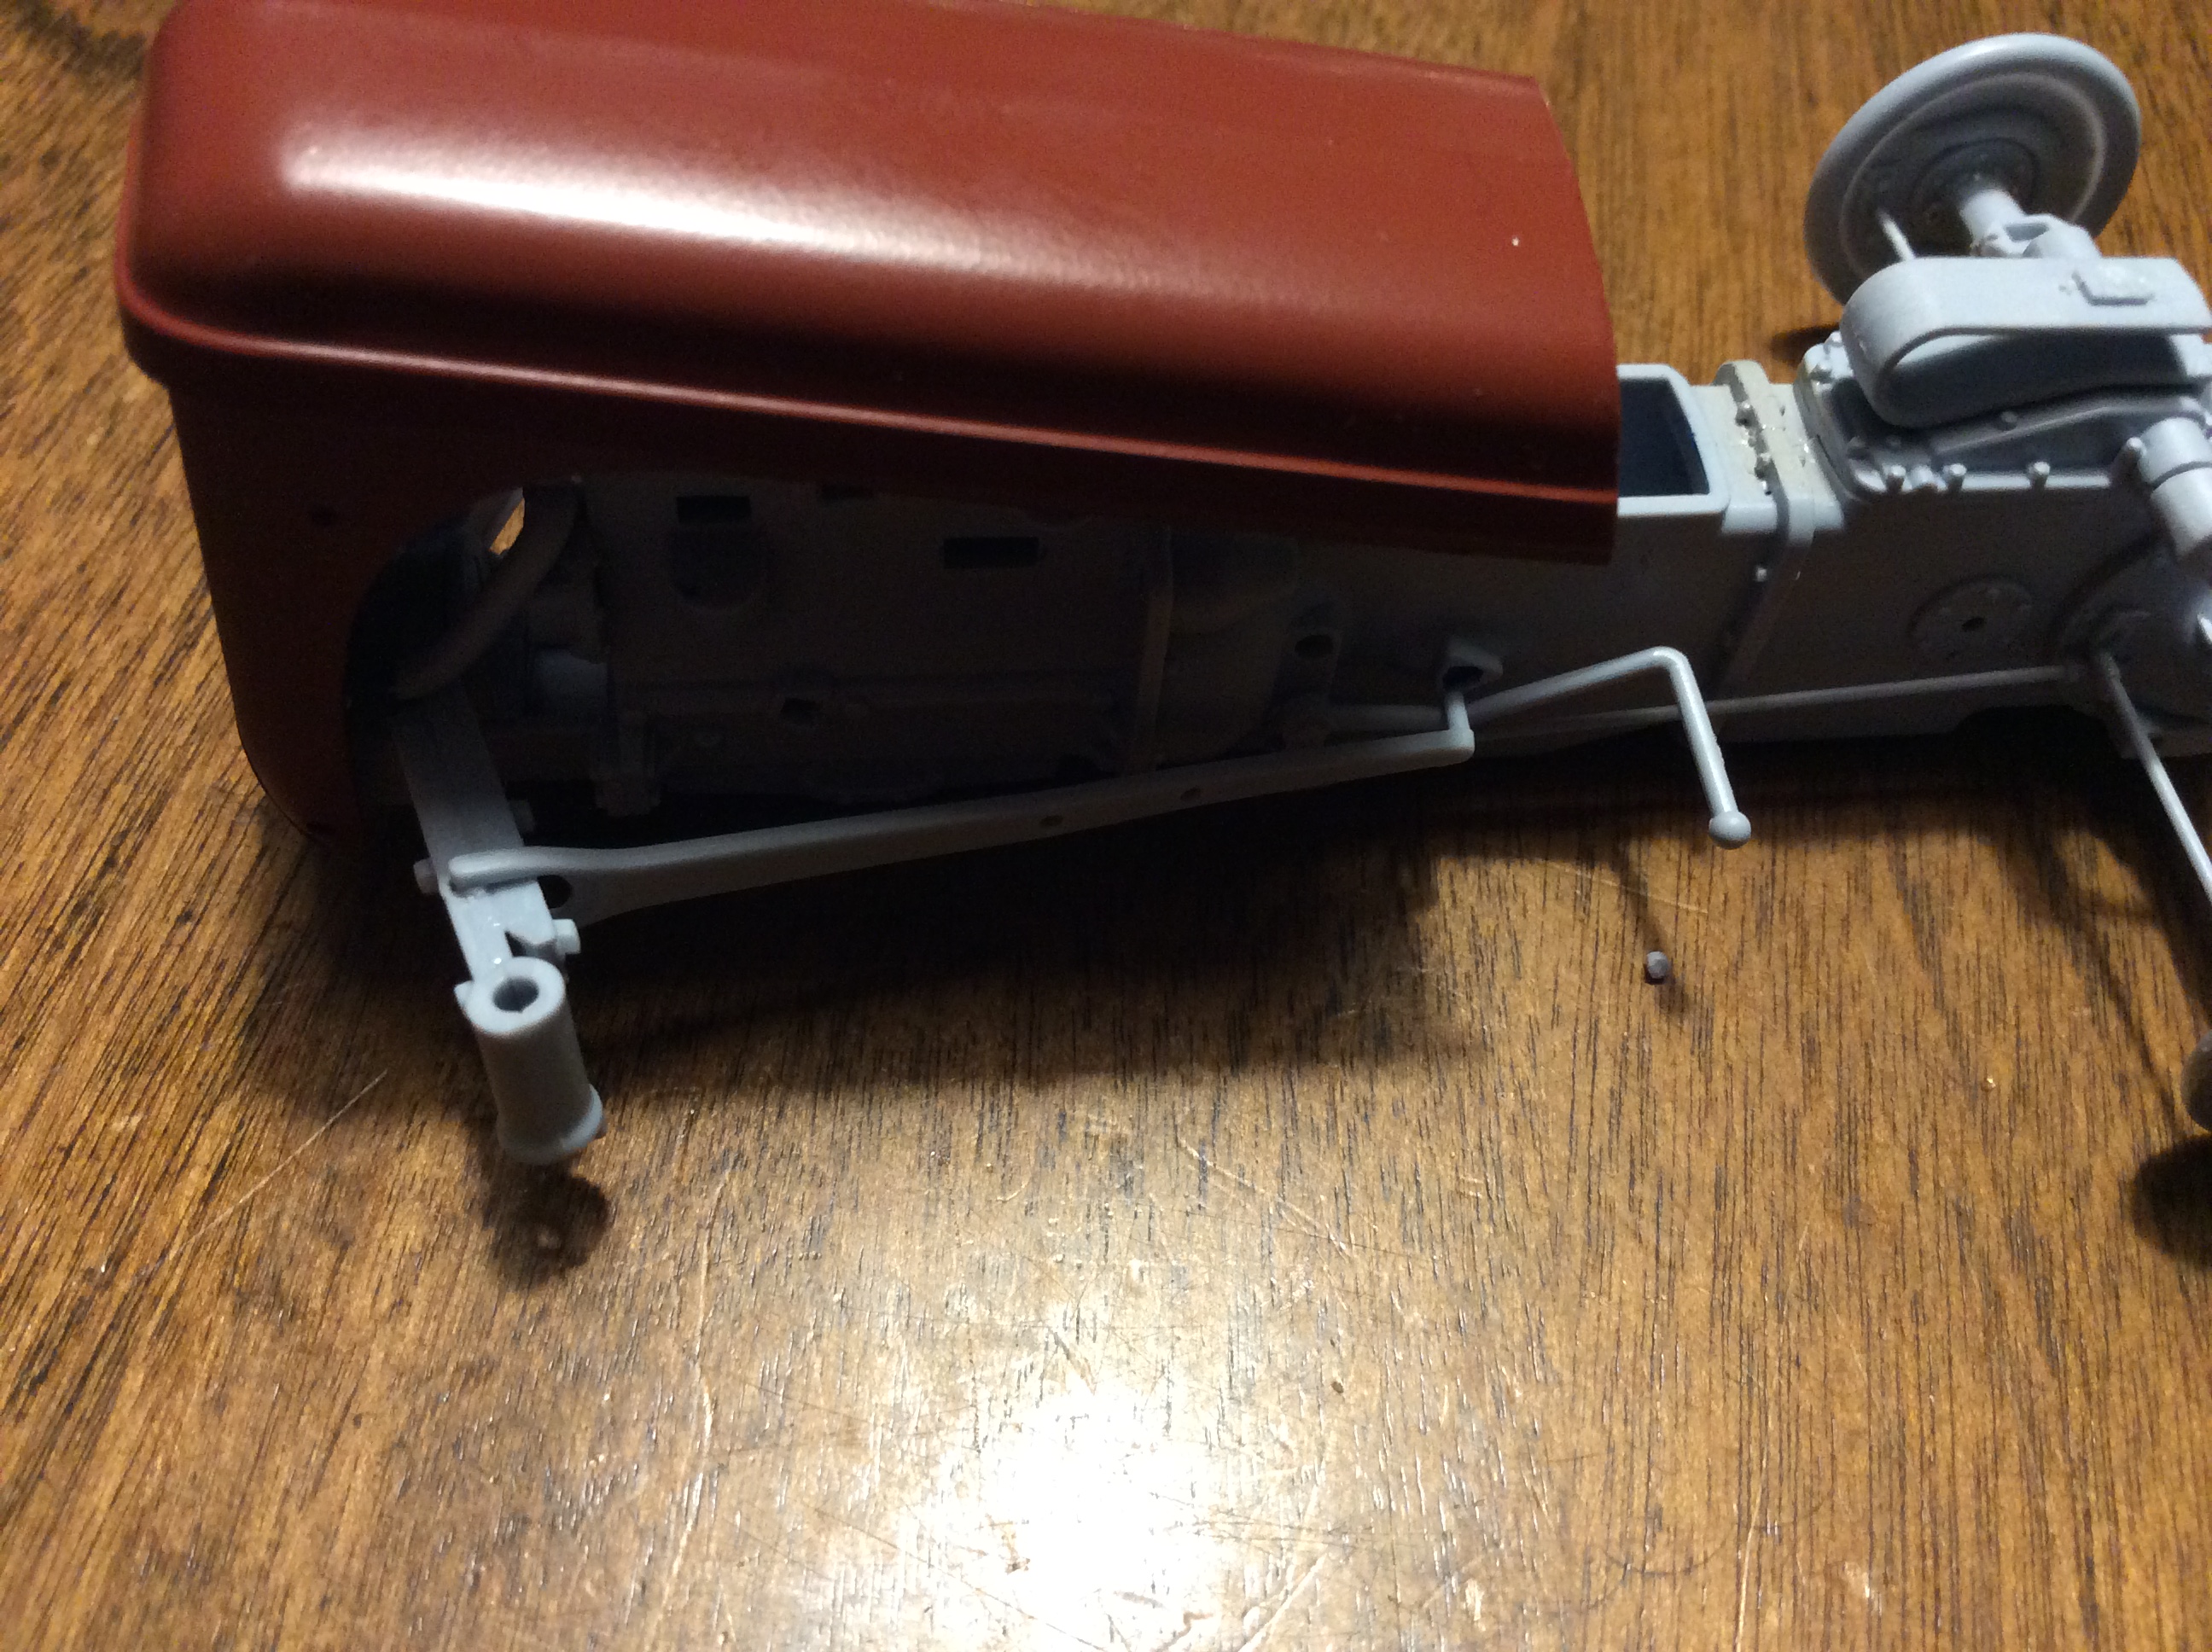
I didn't bother to modify the other wheels, because I am going to a club meeting this week and want to show off the before and after look. I did add a few more bits to the chassis, such as the front and rear axles. The instructions are a bit mixed up on left and right sides, so rely on the pictures more than the part numbers. IMPORTANT NOTE: on Steps 23 and 24, the instructions show the brake rods (B22/B23) locating in holes underneath the axle locators. THIS IS WRONG!!! (sorry for the shouting, but if you try to build it as per the instructions, it won't look right). The location for the brake rods are in front of the axle mounts. In addition, the front axle halves (Steps 33 and 35) are a bit long, so if you trim them down, the axles will be an easier fit. Another solution may be to glue the two halves to the center piece (D7), which is fitted in Step 4!!! I also primed and test-fitted the engine cover. Two points: if the hinge/radiator mount (B26) is not square when the glue dries, it may mess up fit down the line, and the hinge pins are too long to fit without filing. I ended up cutting off the pins, and drilling holes for new hinge pins. For the front end, there are two holes in the left hand radius rod (D19). I couldn't figure out initially what these were for, but it turns out that this is an alternate location for the tool box (Steps 50/51). I think this is more appropriate for an FF-30, so I stretched some sprue to fill the holes.
-
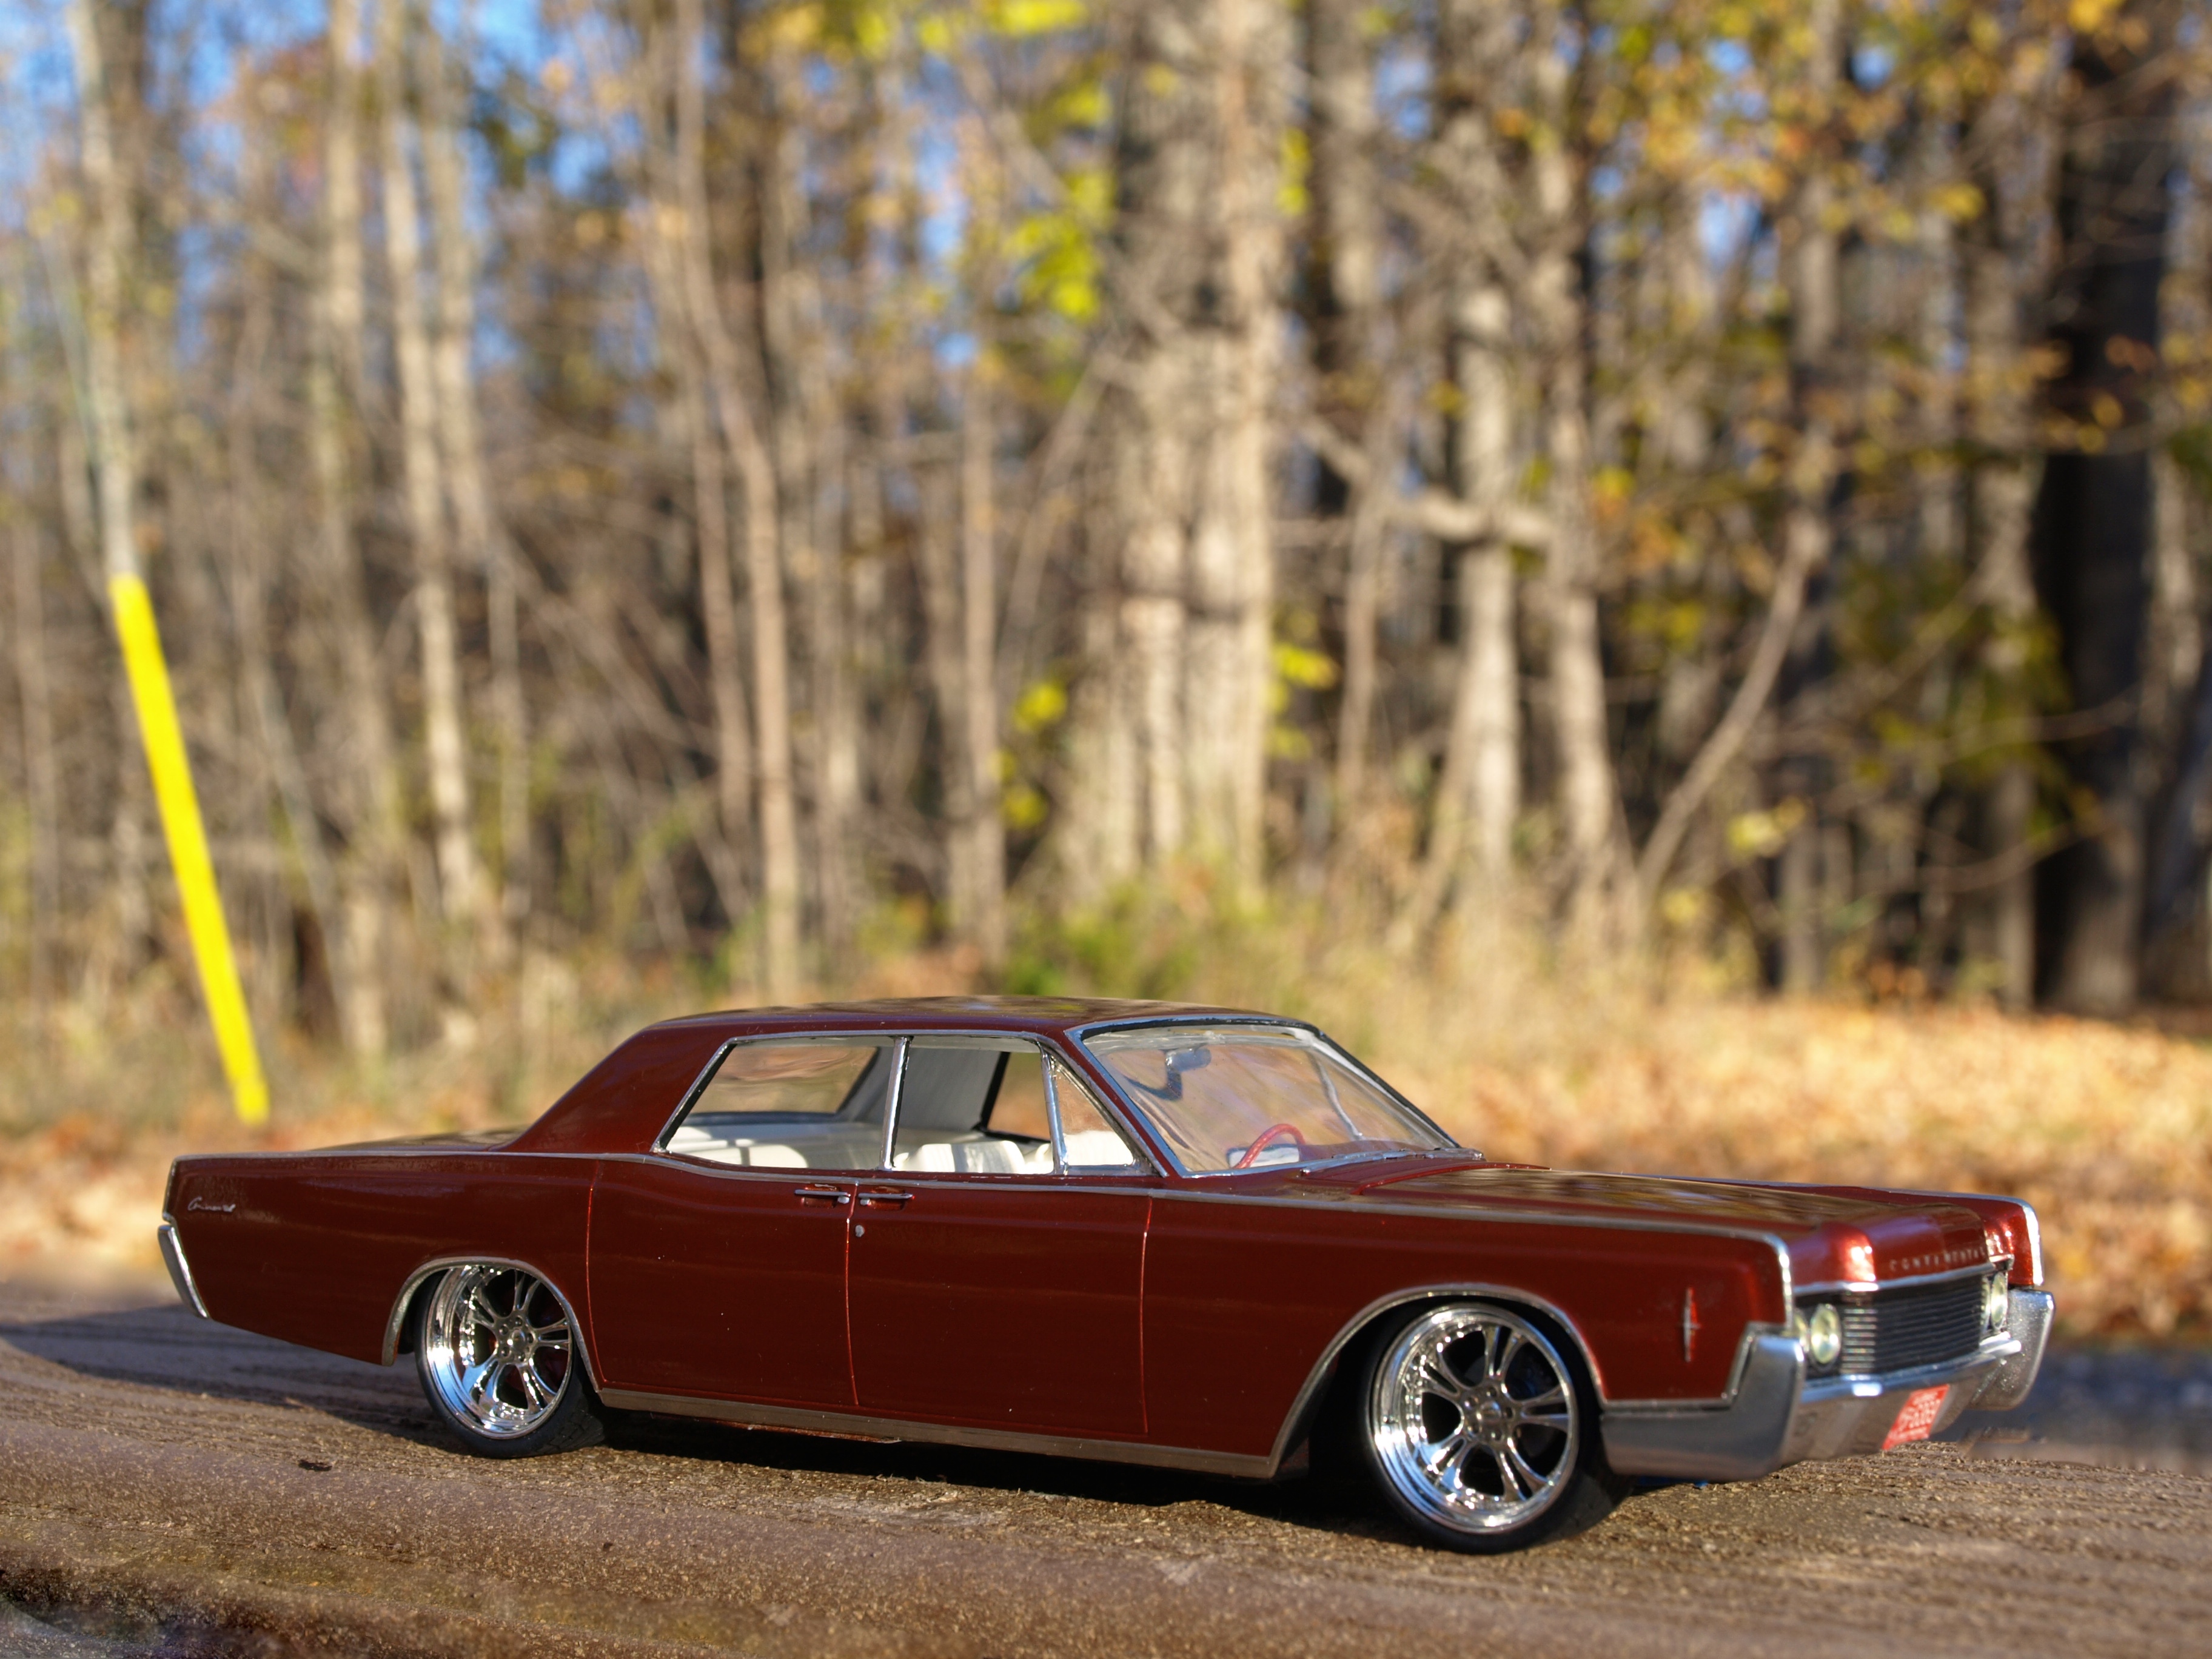
This is one of the best paint jobs I have laid down. AMT 1966 Lincoln Continental with a HoK Kopper Pearl paint job.
-
A really nice build, Cliff. Are those colours based on a real car? I vaguely recall a Packard cabriolet running around Ottawa a few decades back, but I can't remember the paint job.
-
I tried resizing the picture in iPhoto (the Mac's version of Paint), but I still can't get it to work.
-
I have been having this issue as well. I try to re-size photos on my Mac, and I still can't get them small enough. Any suggestions?