DR JAY
-
Posts
288 -
Joined
-
Last visited
Content Type
Profiles
Forums
Events
Gallery
Everything posted by DR JAY
-
I agree that they were homely cars! The 360 degree ugly combined with the Max Wedge just does something for me. Don't get me started on the available colours for 62 Darts...painting a dog turd Dusty Pink or Motel Carpet Burgundy doesn't make it prettier! Thanks for the comment
-
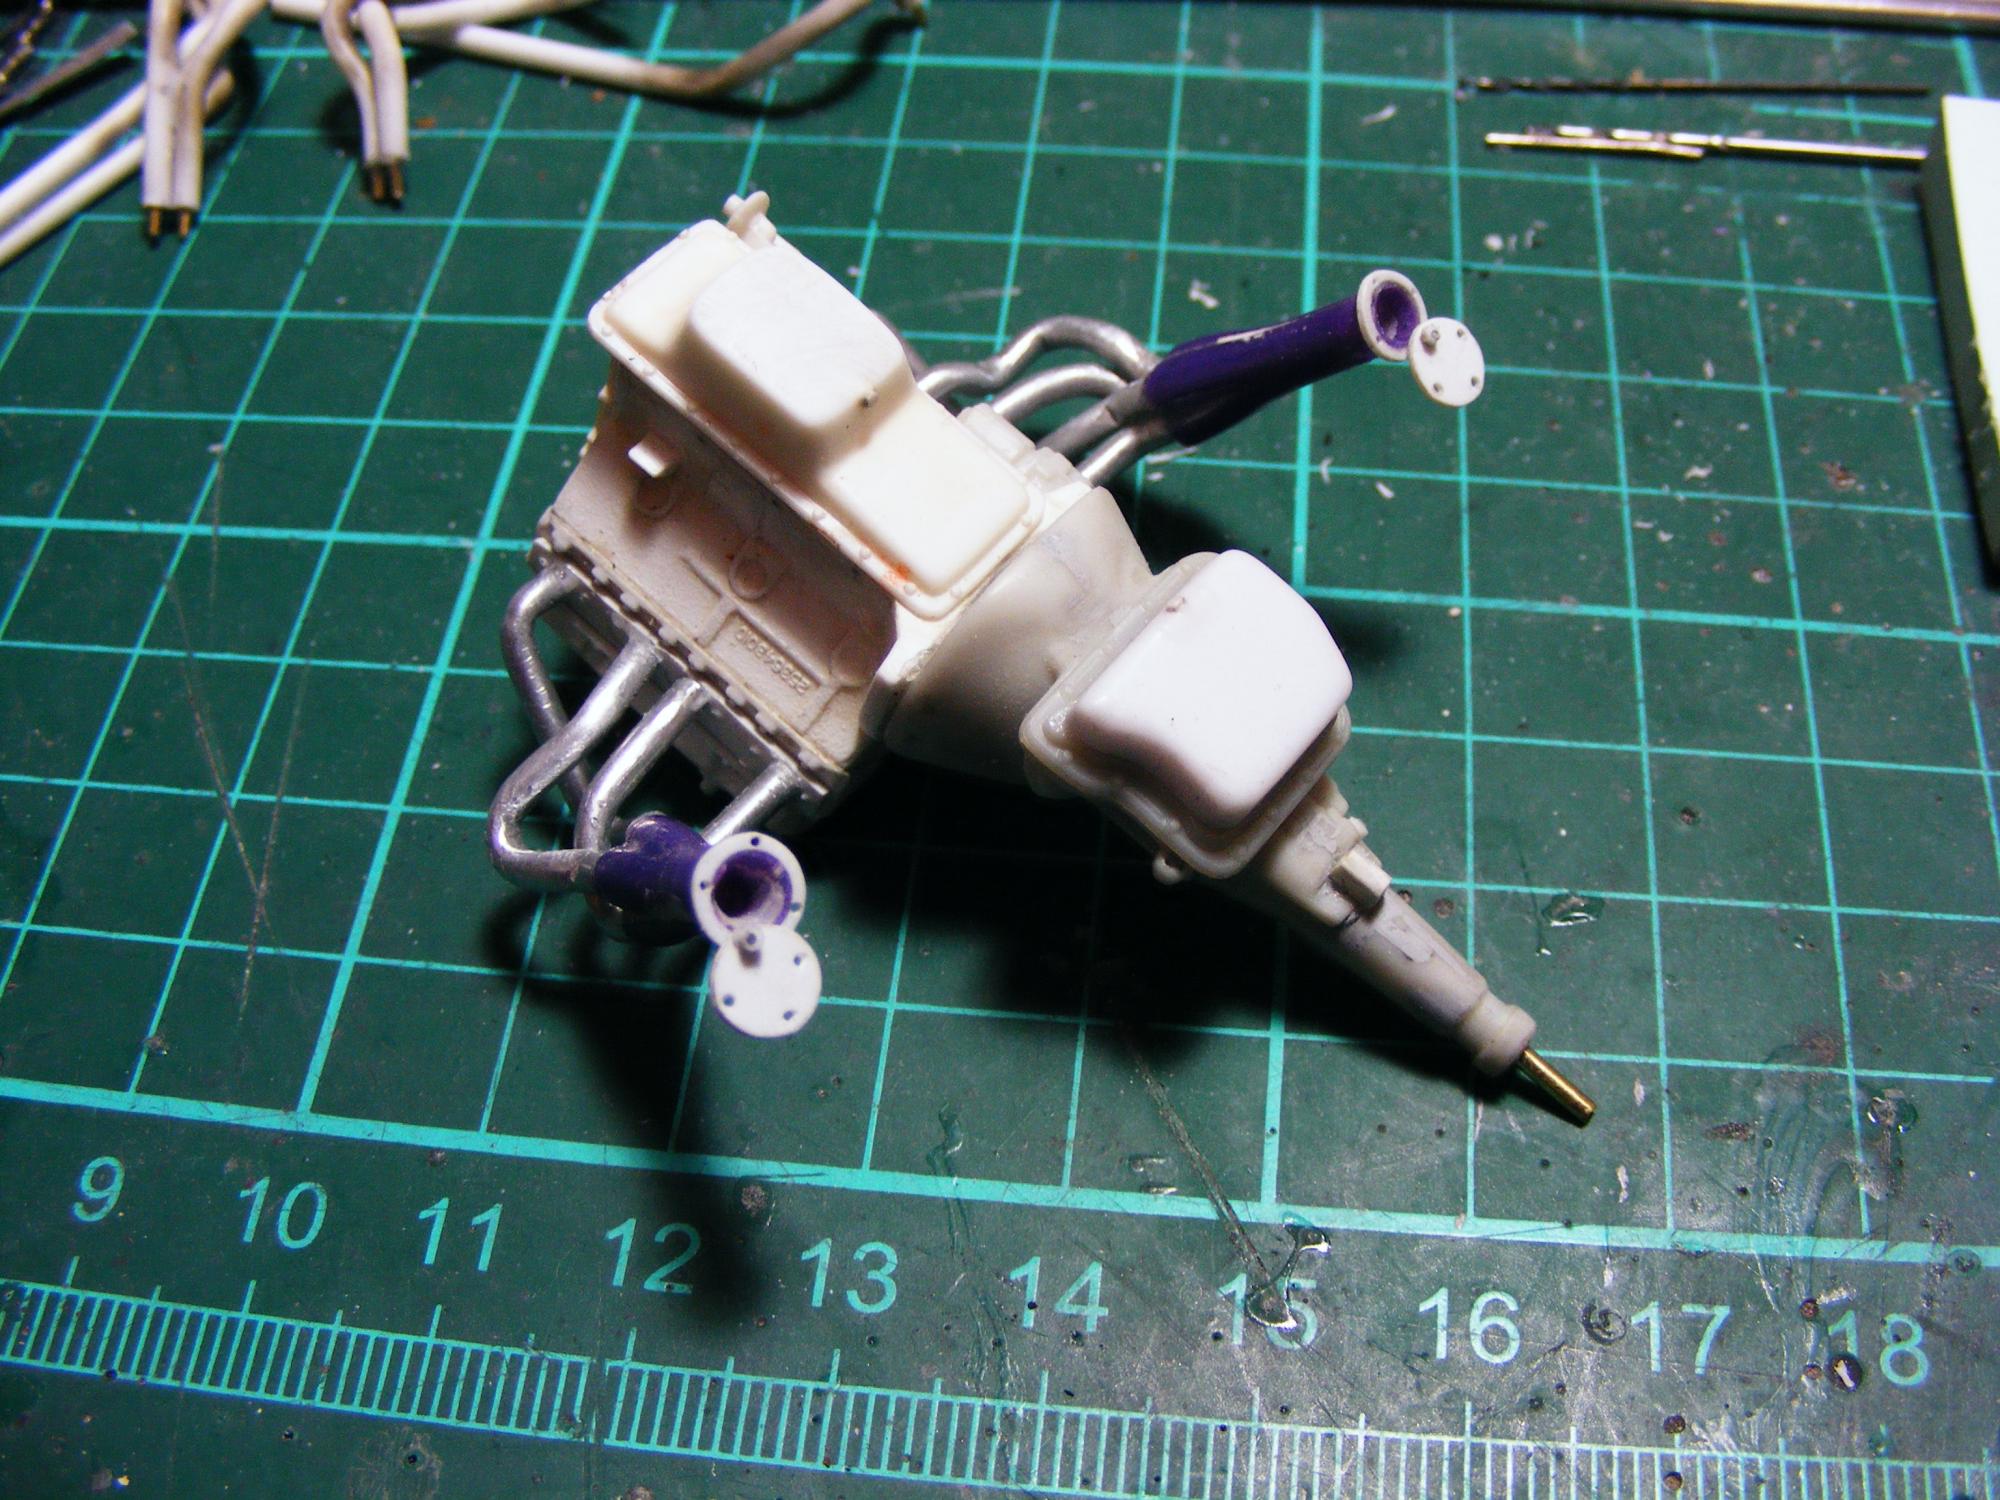
The Engine And Transmission: In my attempt to build an accurate Max Wedge powertrain, I used several sources for components. The trans is from the AMT 71 Charger--it appears to be the most accurate in appearance and scale, and the separate trans pan is outstanding in its accuracy even if it may be a tad shallow. I did modify another pan with more depth, but will use it for another project. The block, valve covers and heads are from an old Pro Modeler Daytona because despite the identical parts being in my 68 Charger donor kit, the Pro Modeler stuff was crisper and the details were much sharper--i guess 'cause the molds were newer? I drilled bolt holes and added details to the ends of the heads. The rest was a mix of parts box items and donor kit parts. I removed the belt from the pulleys and grooved them with a razor saw for a belt. I also made a deep sump oil pan, but that will be replaced with a more accurate pan. The exhaust will be fenderwell headers made from aluminum tube, styrene and collectors from an old Revell Oldsmobile Pro Stock. I WAS going to use the manifolds from the new Moebius Belvedere, but due to time restrictions, I couldn't wait for its release. I have the Belvedere kit now and will use the manifolds on a similar Max Wedge Plymouth project I have in line. The intake is of unknown origin, but I detailed it with bolt access plugs and frost plugs, as well as some reshaping. The carbs are from a couple of AMT 71 Charger kits because the air cleaners--from the AMT 49 Mercury--will be glued in place.

-
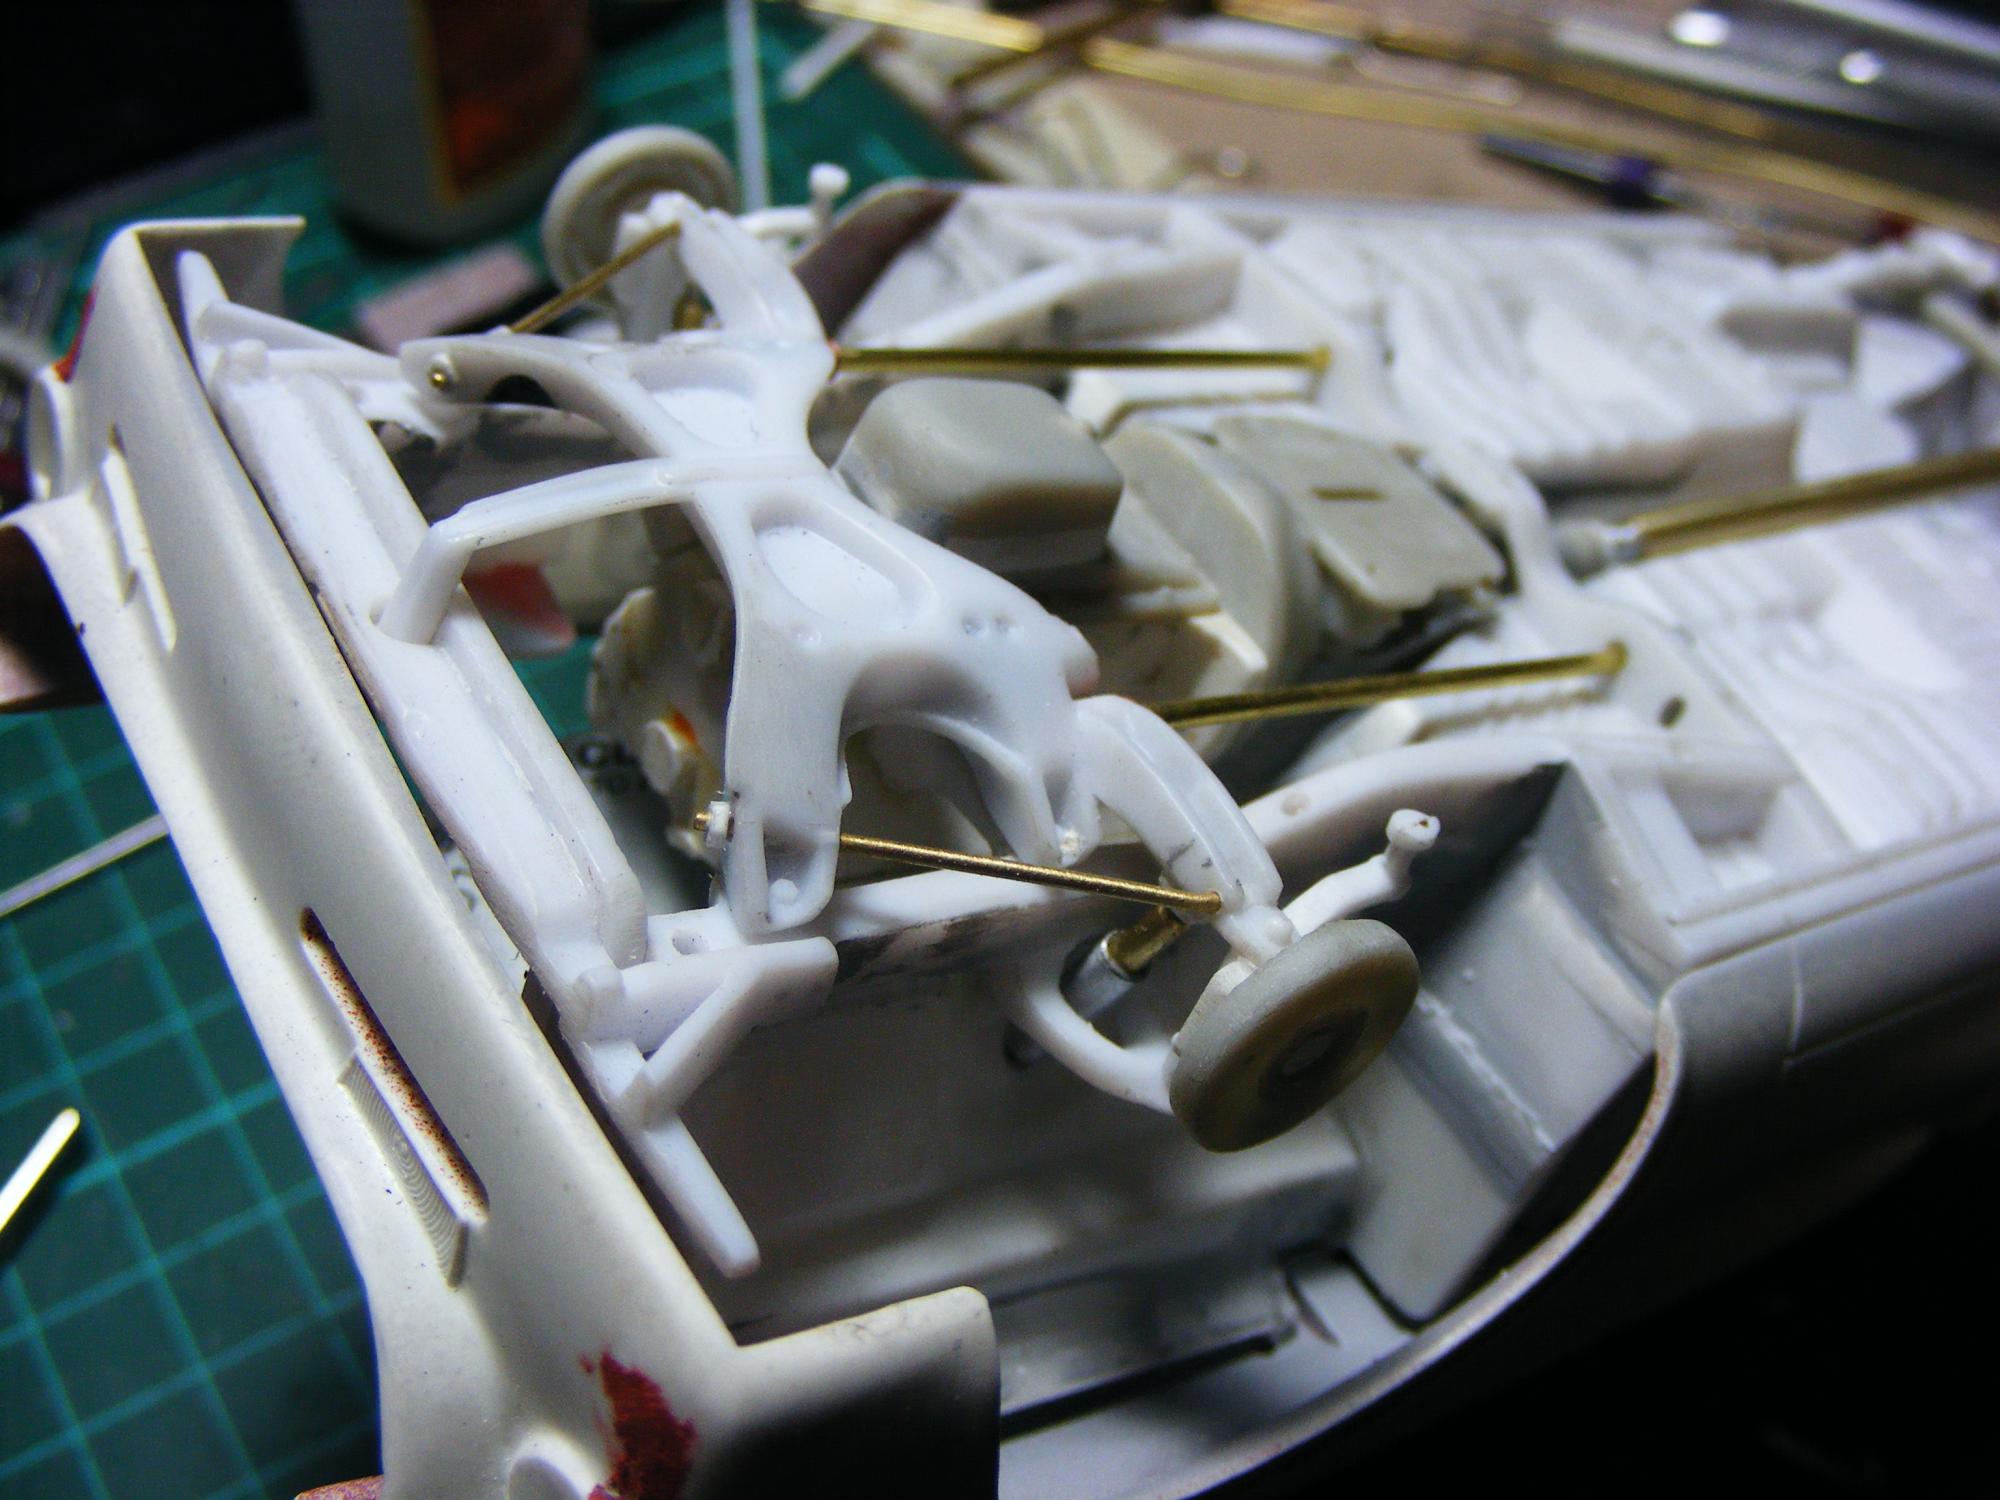
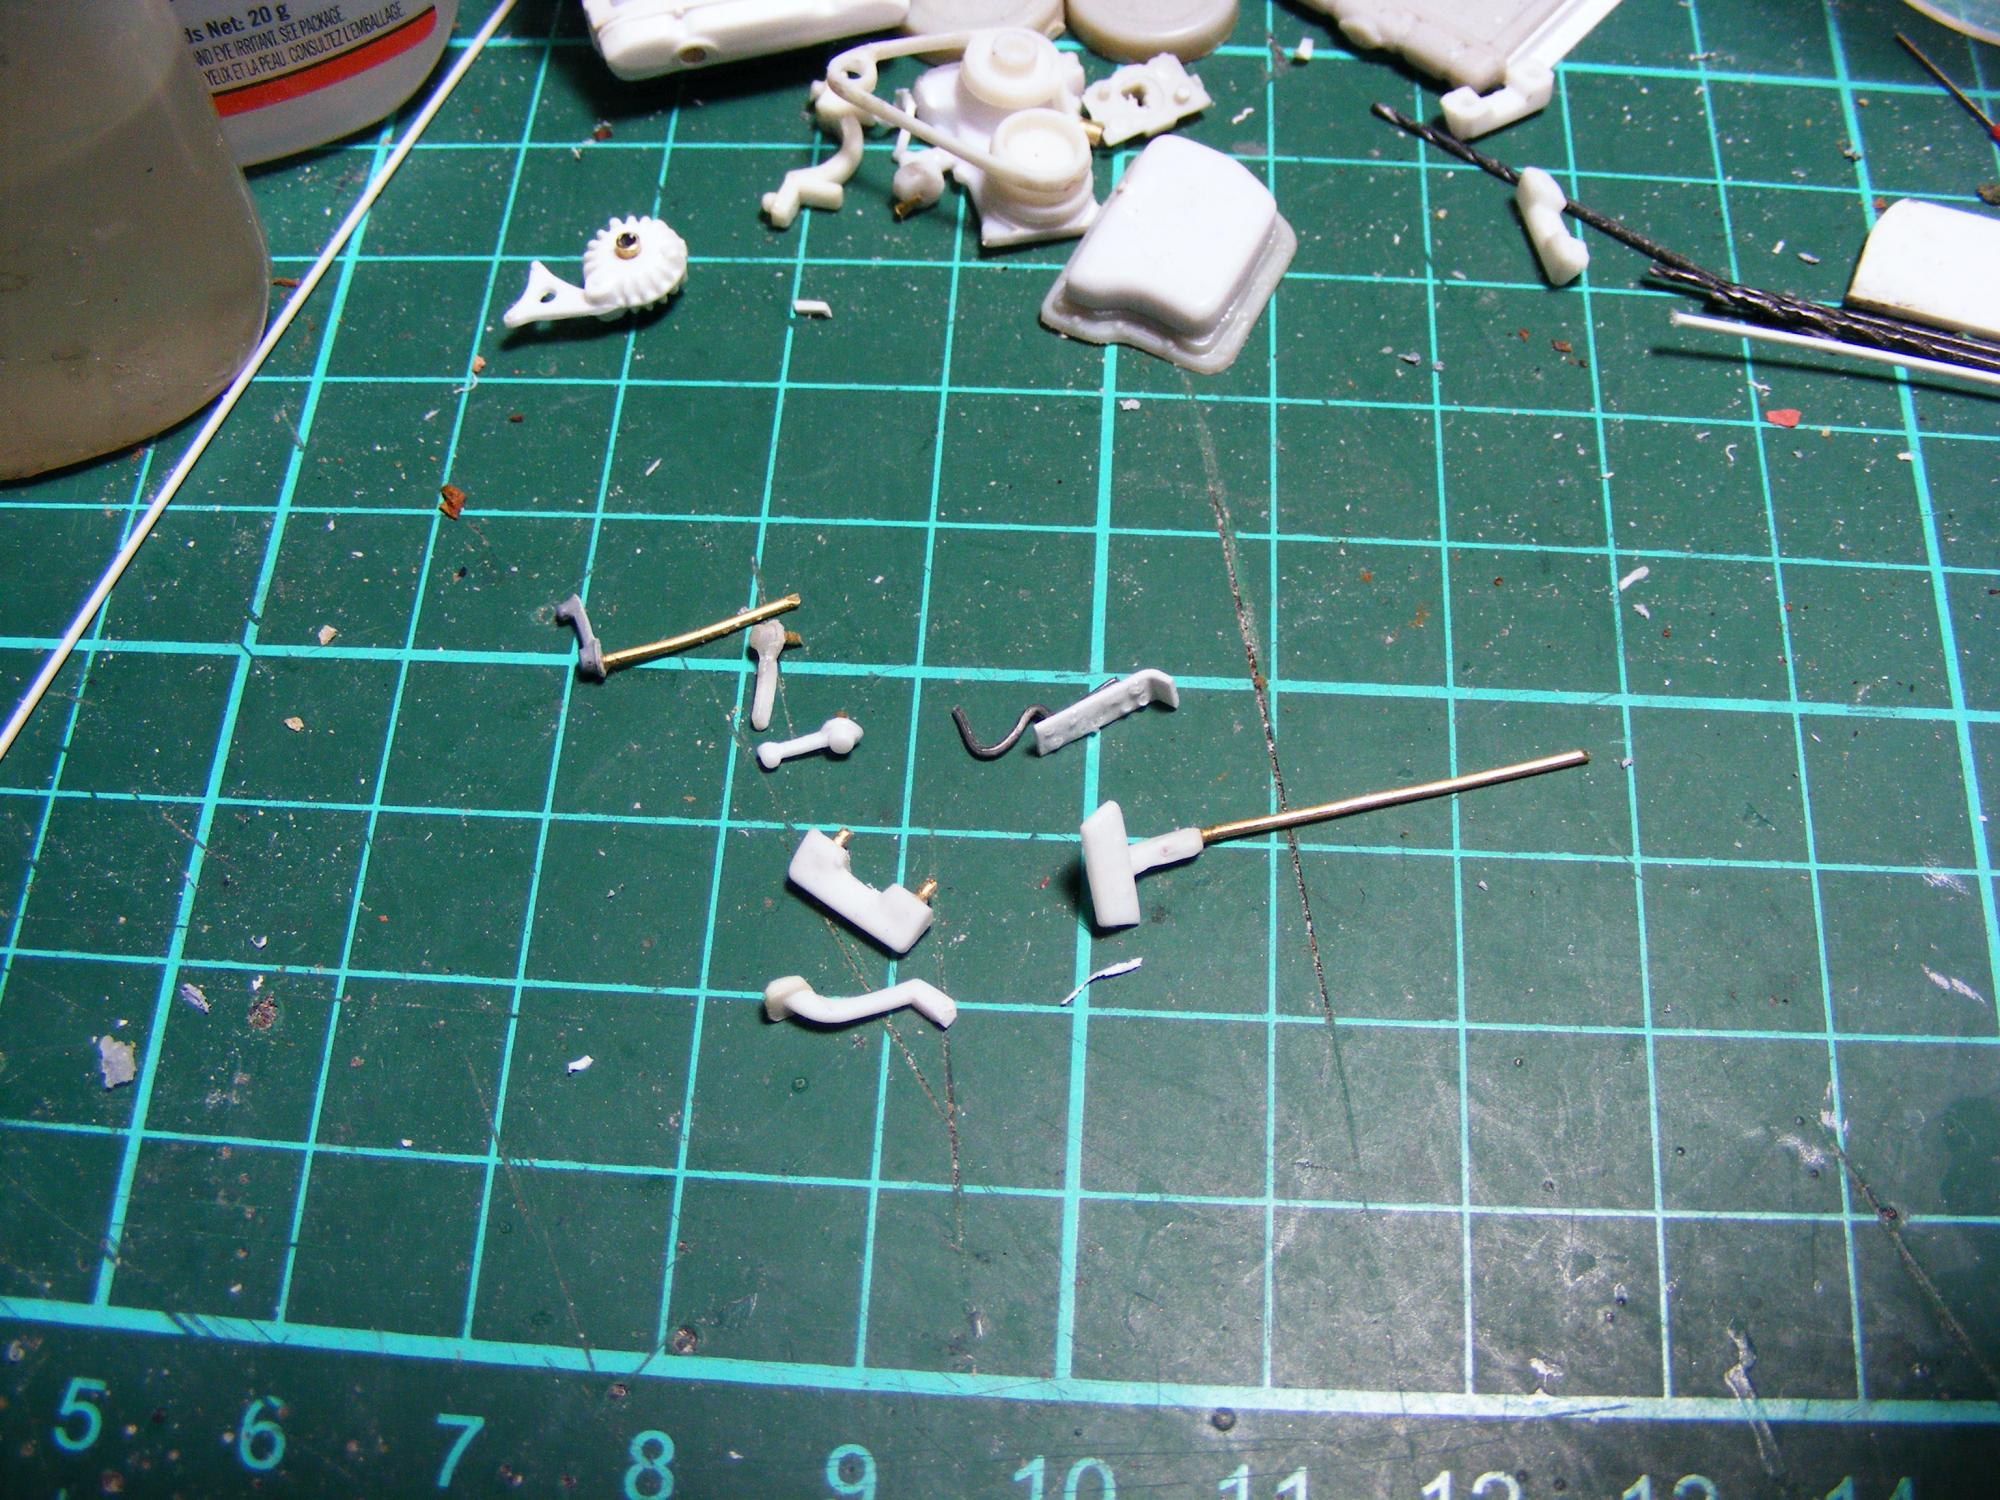
Chassis details: I dislike kit supplied shocks, driveshafts or anything else that should be perfectly round but isn't. I make these parts from brass as well as styrene tube and hex stock--for nuts and bolt heads. I guess I could use photoetch bolt head detail or model railroad nuts and bolts, but I prefer scale realism when at all possible; no manufacturer used nuts to hold shocks in place with a 1 1/16" head and some of the aftermarket hardware I see in use is HUGE! So... I made up a driveshaft, 4 shocks, radius rods and hardware and a set of torsion bars and sockets for the control arms. Overall--simple stuff, although the shocks are time consuming.
-
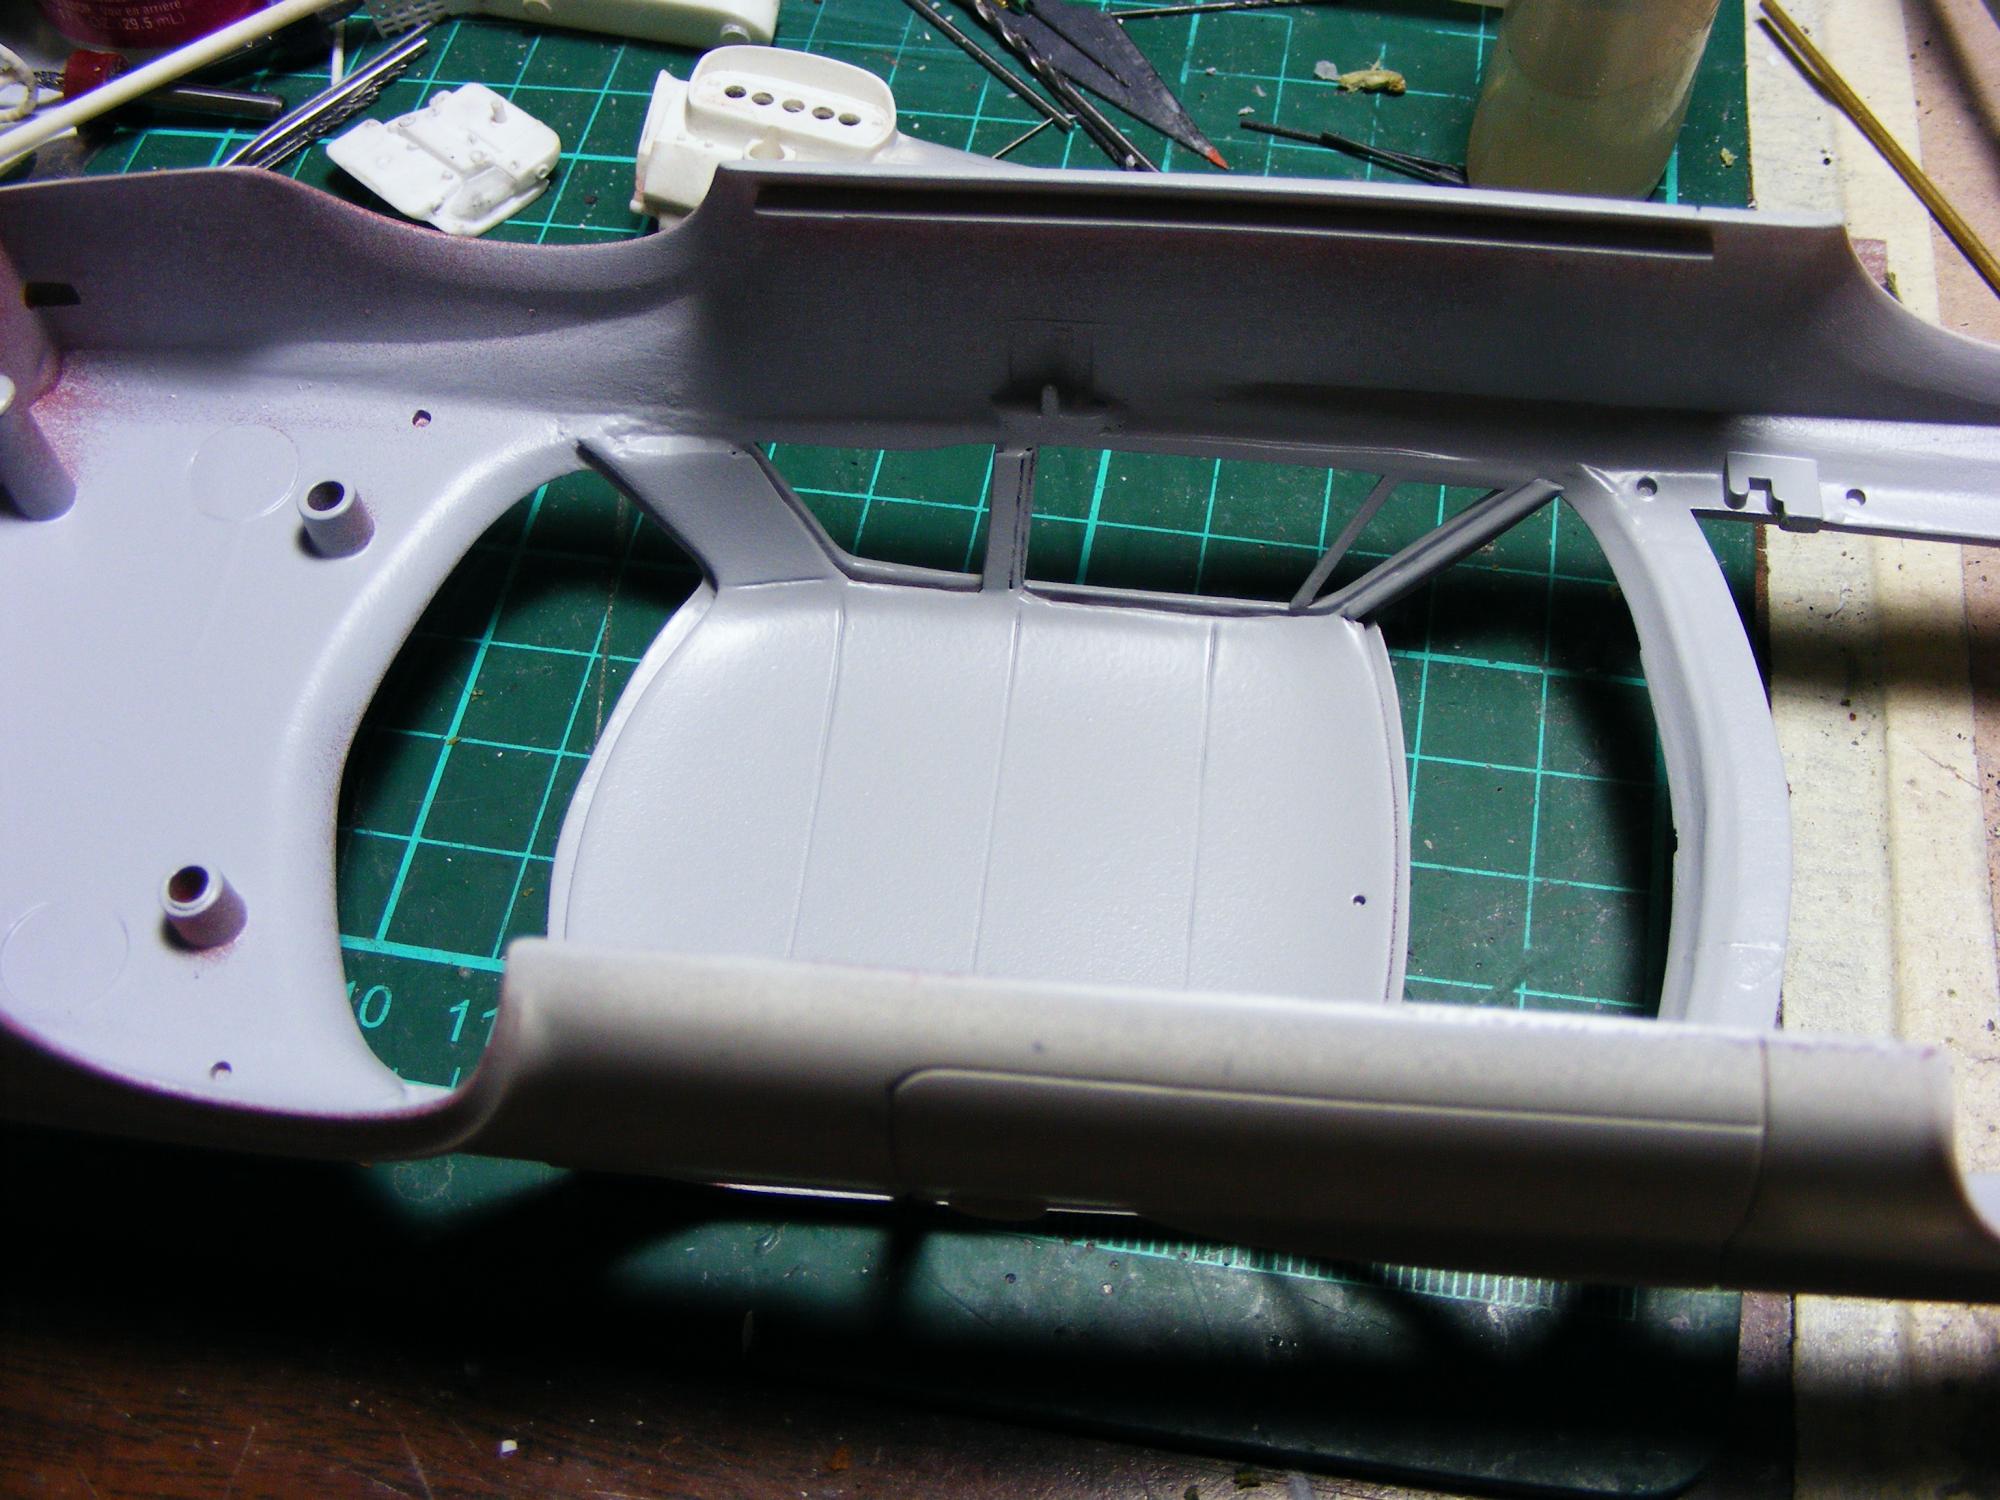
The Headliner: something lacking in most model kits. Once I made retaining channels and "weatherstrip" for the trimmed kit glass, a headliner is almost mandatory to make the ceiling complete. Also used this time to begin correcting the kit-supplied 63 Polara dash back to a facsimile of a 62 Dart dash. It looks a little rough now, but paint, foil and detailing will fix it up visually.
-
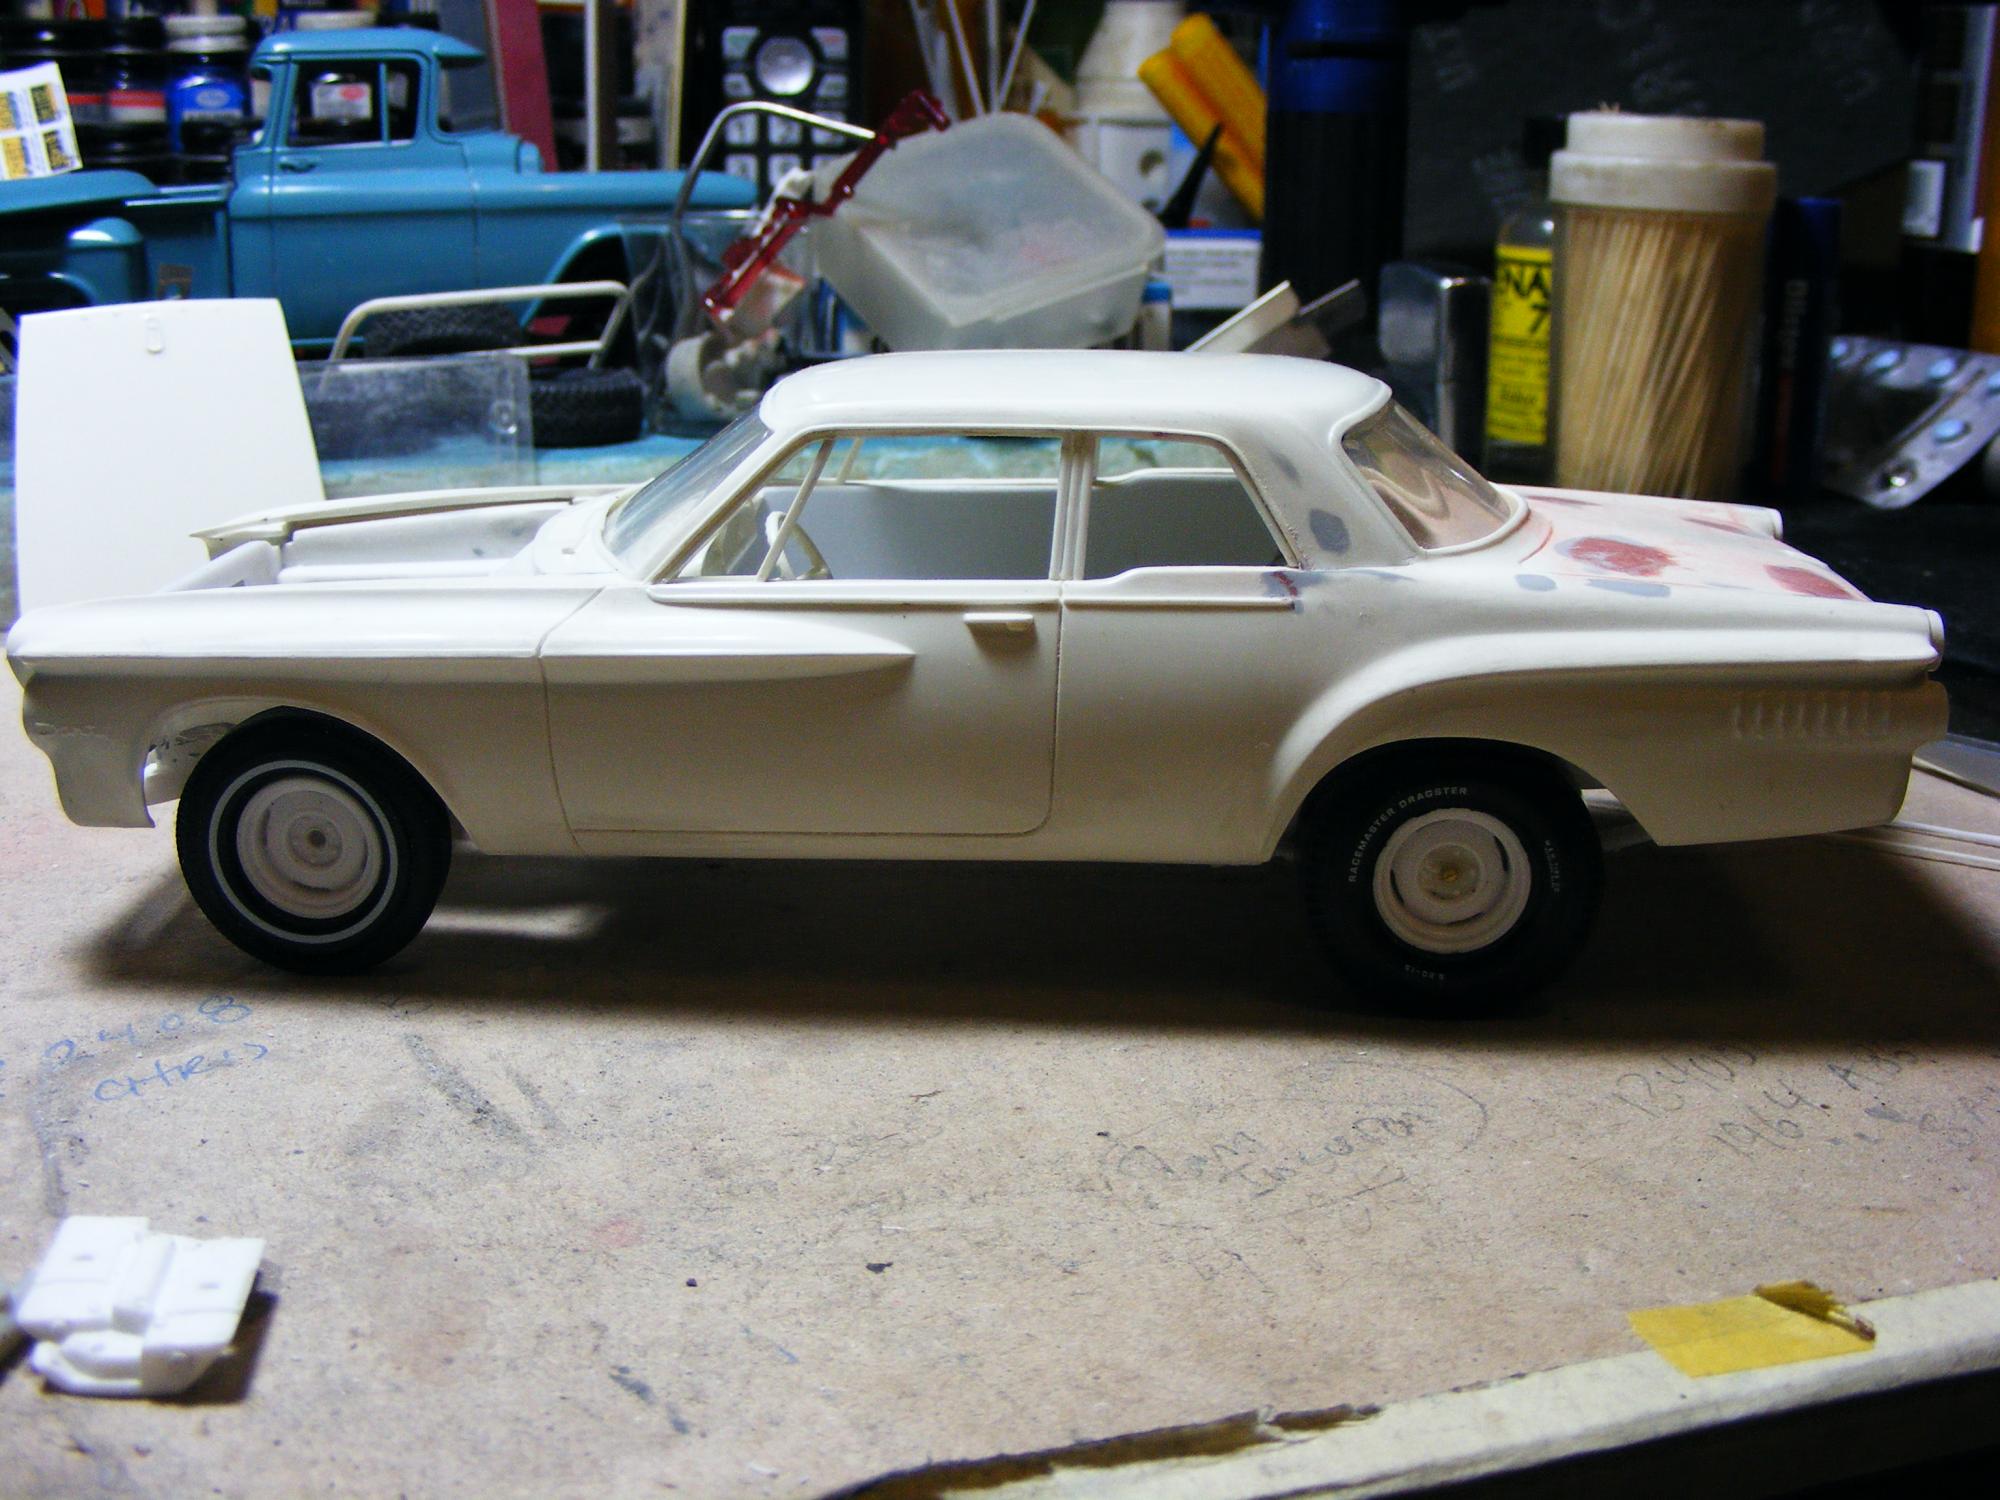
Real Time Build or not, I haven't been able to update as I planned due to life getting in the way. I am well under way to have this completed by the end of April for an IPMS show. I have a lot more pictures, but these will give a general idea of progress thus far. (For those who haven't given up on following an "In-Progress" build last updated in February! The scratchbuilt interior bucket is completed and the Lindberg seats are ready for upholstery. I cut the door handles and window cranks from the Lindberg door panels to go with the arm rests.
-
-
-
-
-
-
...You and me both. BUT--from what I have gathered and seen in pictures, the soon to be released 1965 Belvedere from Moebius will have some pretty sweet Max Wedge manifolds as well as the dump tube exhaust. I have one reserved at my LHS for a build I'm doing now. I'll try to find the post...here it is
-
...some see a Johan Model and put it on a shelf with a bunch of other unbuilt Collector Items...I break out the razor saw and start cutting. These are injection molded styrene parts that have no value to me as anything else. Sacrilege? Perhaps, but when I get my hands on a Johan 1963 Polara (after a lottery win, of course), that box is getting opened and I'll be snipping parts from the sprues pretty quick in order to start the very same project again! I want to build all of the models I missed out on as a kid. Making an interior was simple: trace out door panels using the interior bucket as a template and transfer the patterns to styrene sheet. I cut 2 sets of door panels in order to laminate them to gain a thickness that lends itself to carving, sanding and shaping. I removed the Johan package tray from the tub and secured everything together using the inside of the body and the Revell Charger floor as a guide. The screw posts in the body only needed light sanding in order to use them for maintaining chassis placement within the body. I hang the dash last so I can adjust its height according to its fit with the kit glass and correct any space between the leading edge of the dash and the windshield base. Once the interior and chassis are more or less in their final placement I can slap together some suspension in order to set wheelbase and ride height. I used the Charger suspension--with the exception of an AMT 8 3/4 rear end from an unknown kit. The wheels came from the Charger and the tires are from the AMT slicks and white wall parts packs. It was also at this time that I decided I should use the Lindberg door pillars and make this a sedan. I also used the Lindberg firewall and inner fenders, which definitely required some gap filling and adjustment. This is some mock up to get an idea where I'm at. I don't clean my fabrication desk every time I take pictures or I'd get nothing done...
-
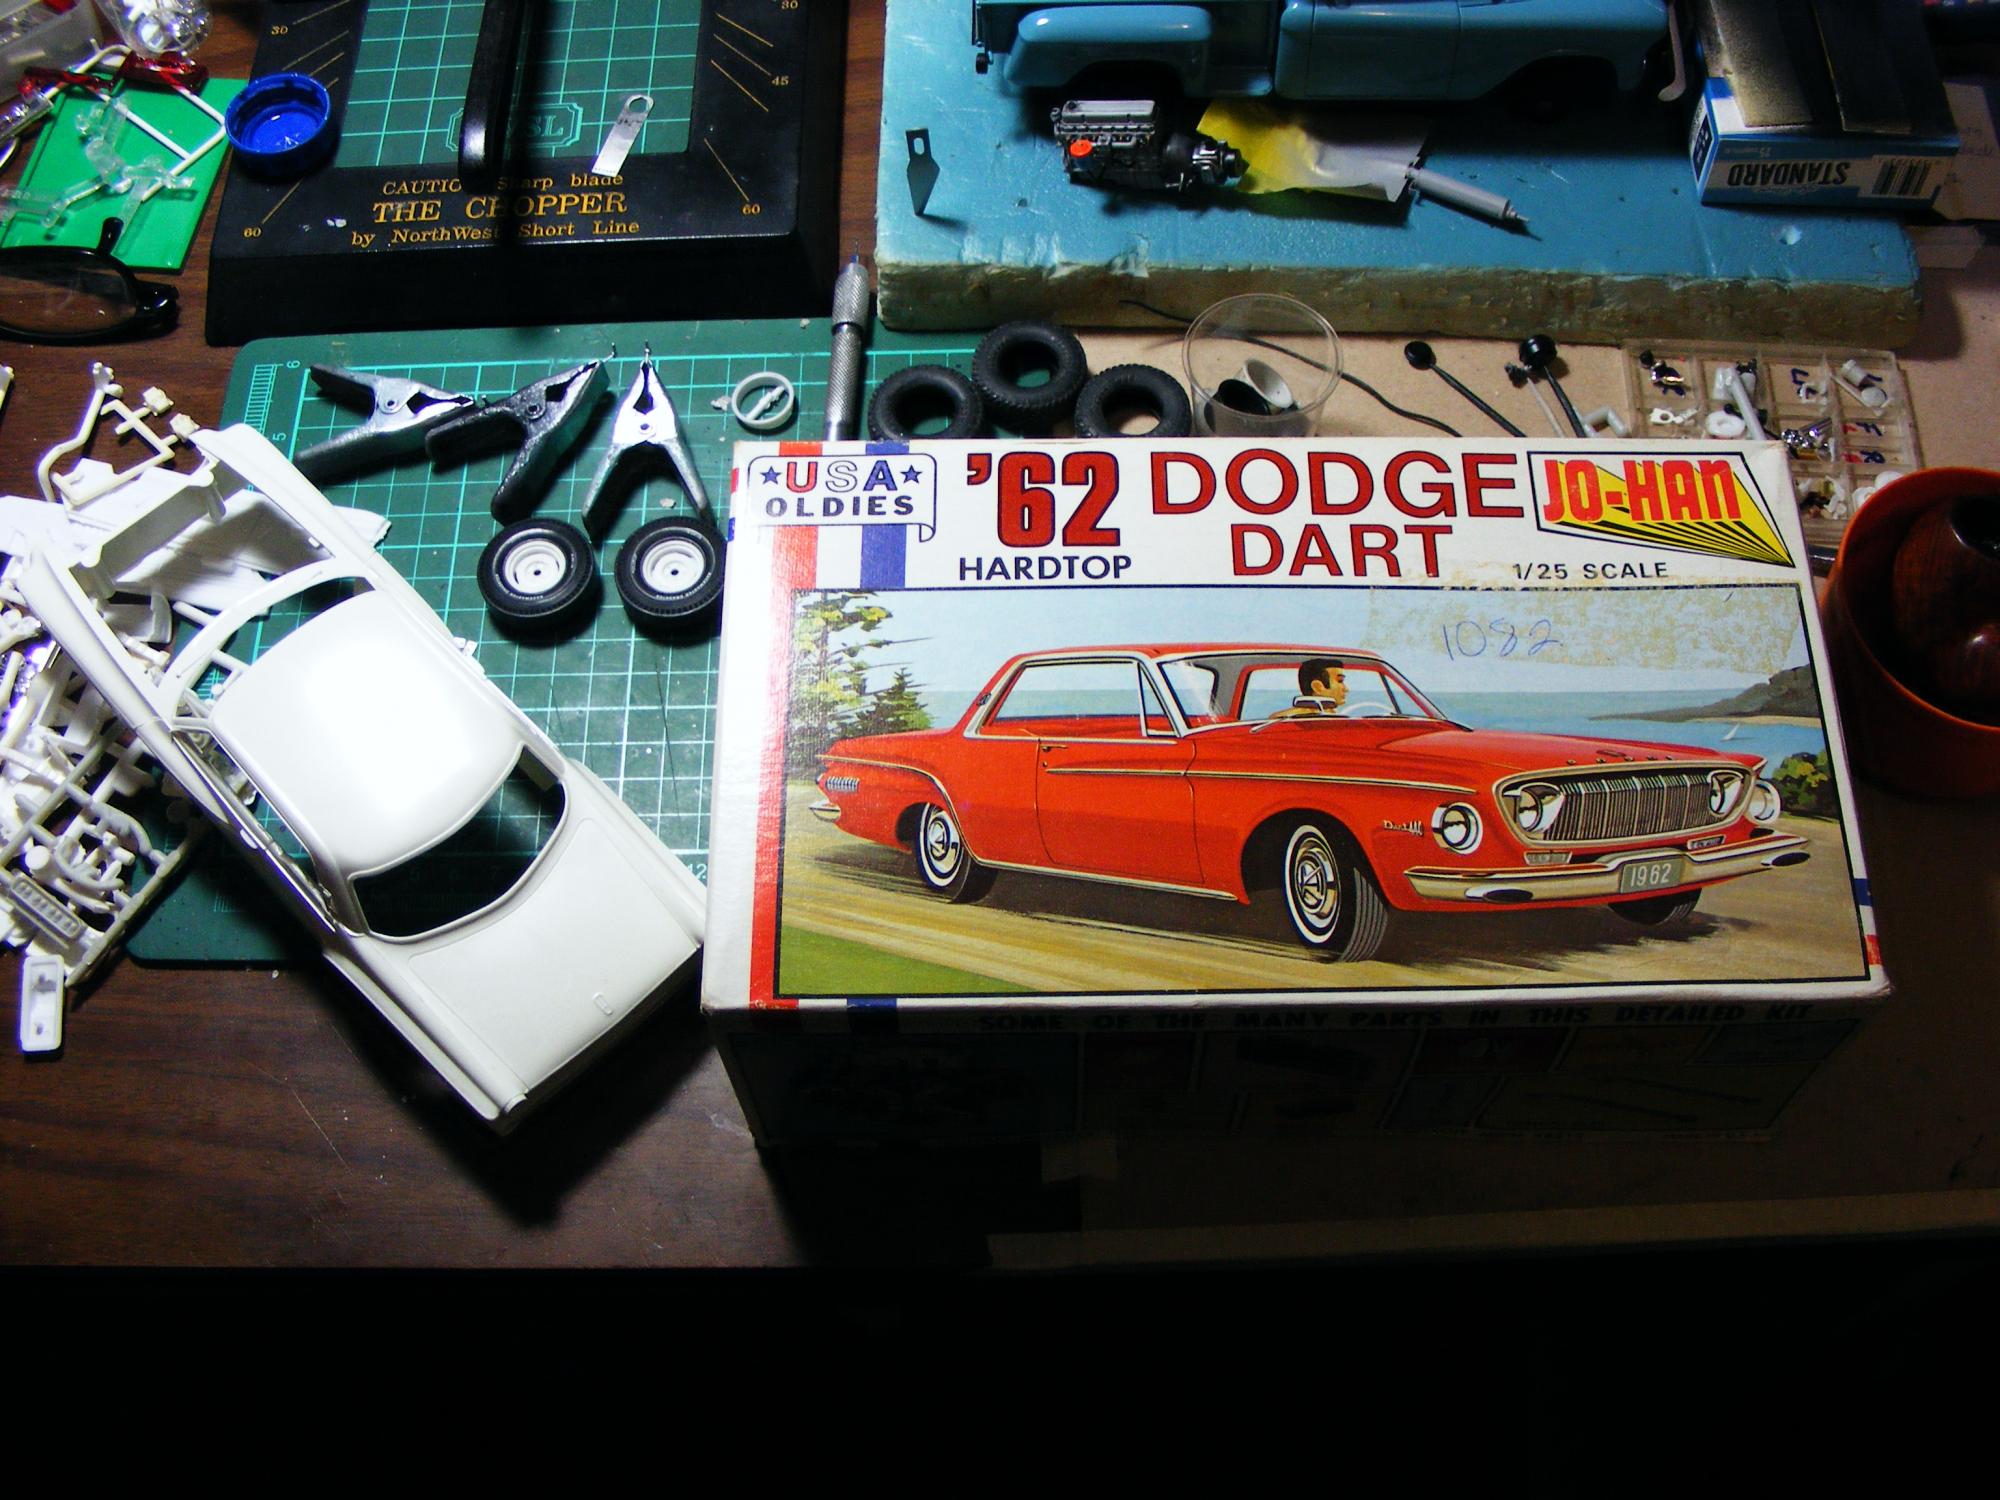
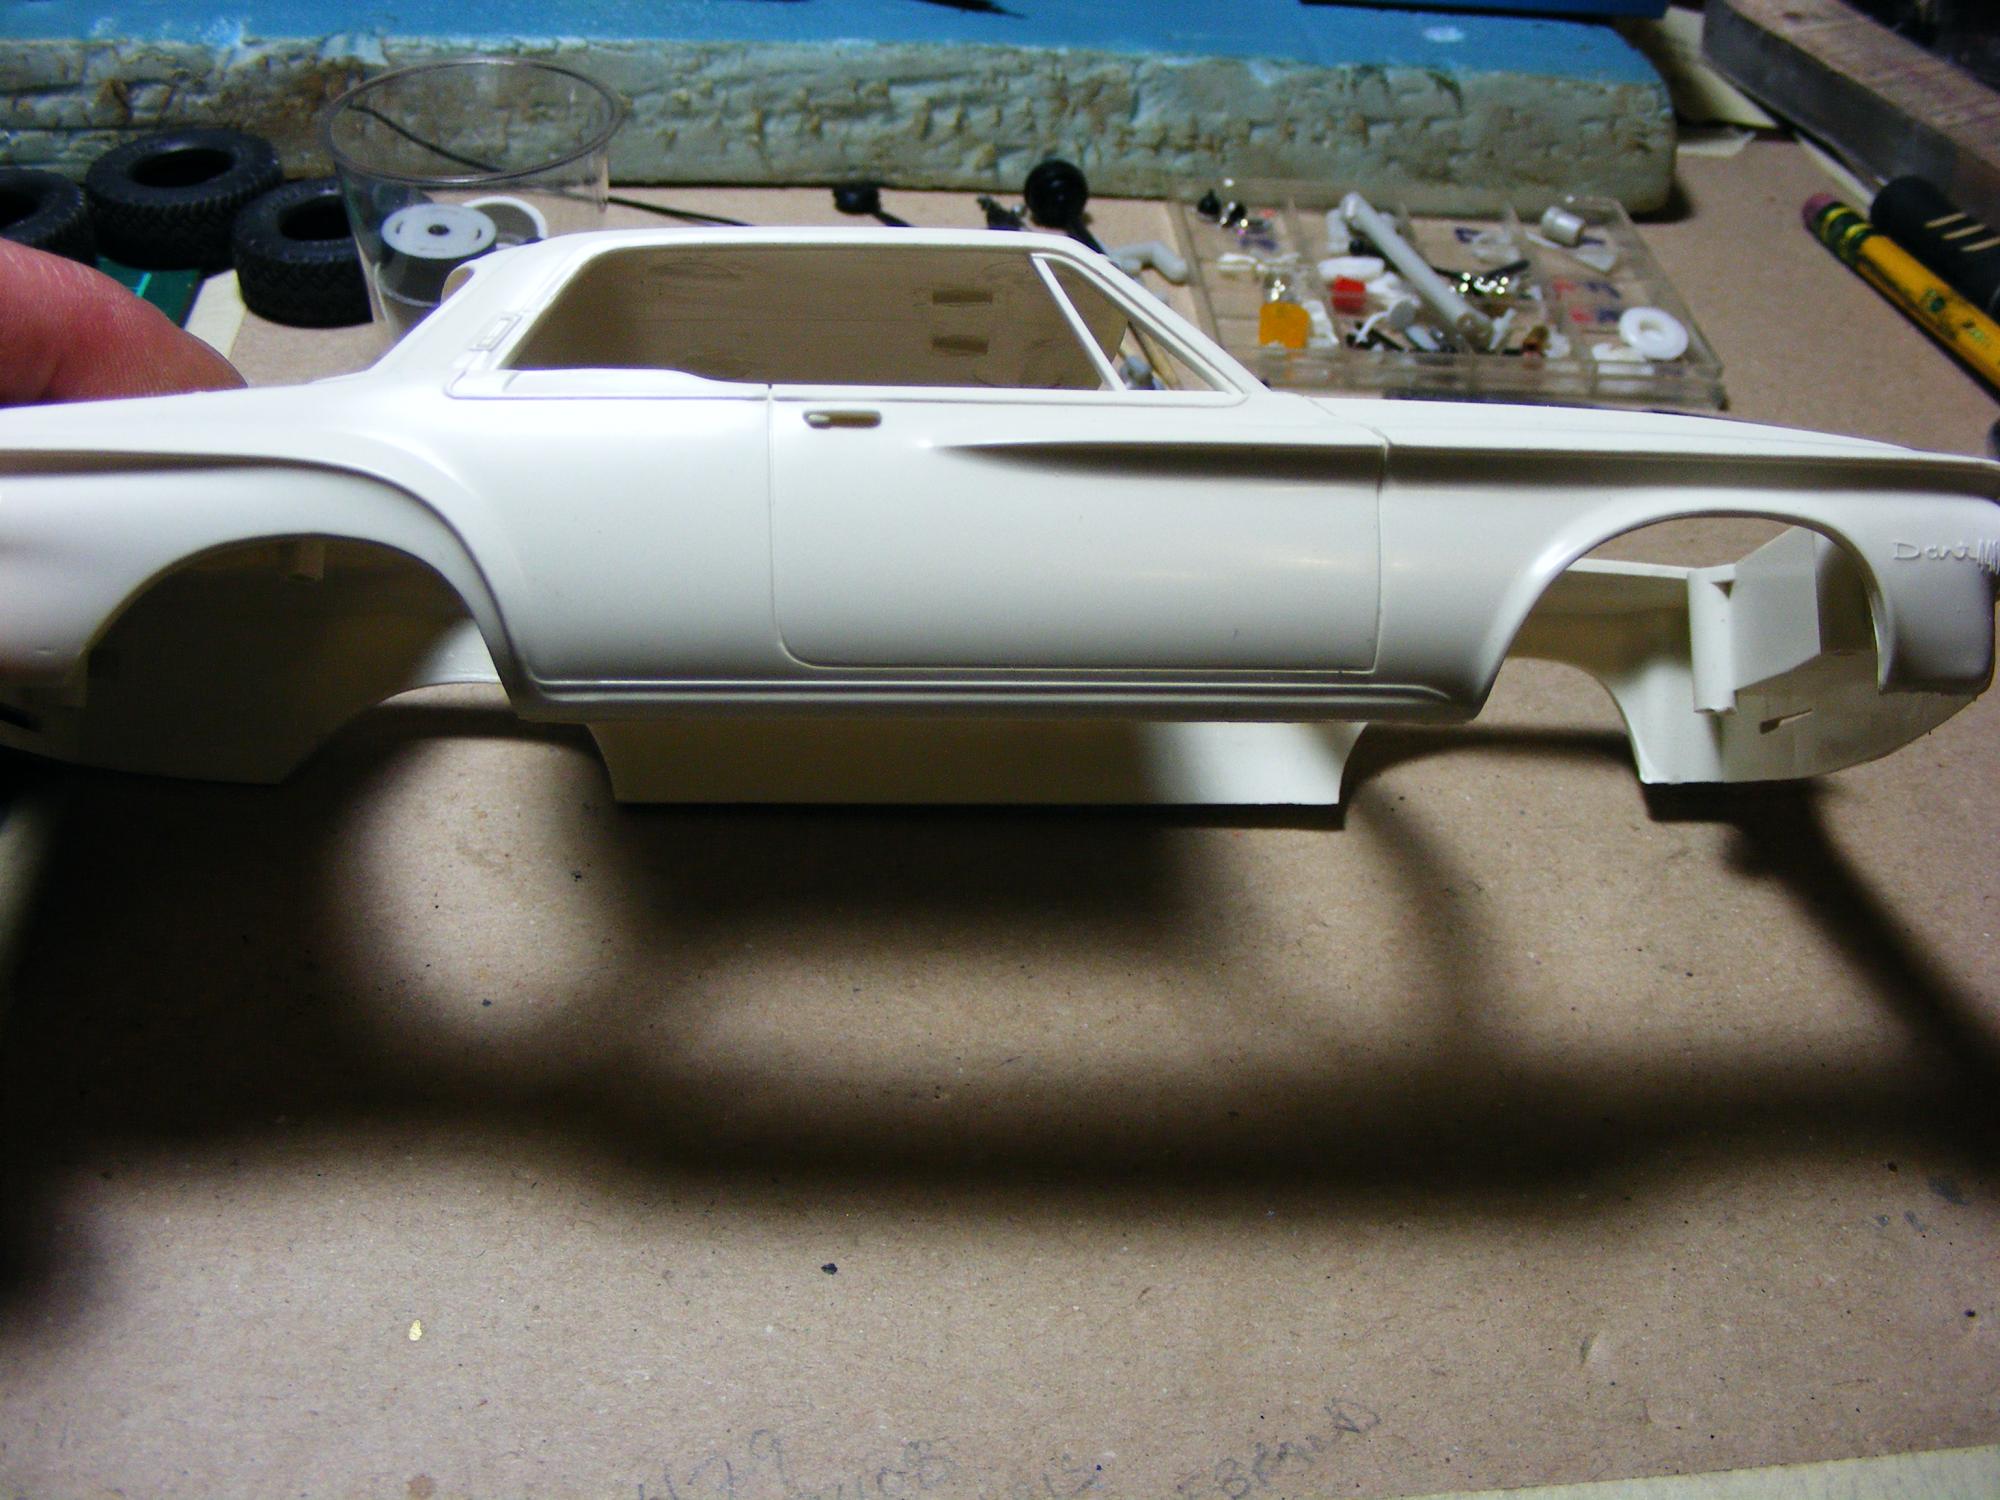
This will be my 1st "Real Time"build coverage on a modeling forum. I normally build very slowly as my time is limited, but medical leave from work has given me a lot of free time. I also want to enter this in a local IPMS show in spring, so hopefully being almost obligated to make regular posts if anyone is following will keep me motivated. Anyhoo: It begins with a purchase via a club member. I got it home and immediately began assembling parts from the spares bins and kits. Although the lion's share of conversions I have seen like this use the Lindberg Polara as the donor, the full chassis will come from the Revell 1968 Charger kit. There are many reasons I prefer this B body offering over the Lindberg; most notably being that the Lindberg front suspension isn't as good as the Revell offering in my opinion. The Revell chassis fit with minimal trimming at the ends and rear wheel wells and required only a tiny wheelbase adjustment. The trim line demotion of the Dart from a 440 to a 330 required the removal of the rear quarter trim, the rocker molding and the removal or correction of the trim running below the rearmost side glass, up the B pillar and over the drip rails. The only kit supplied interior parts I would be using would be the dash ( There has been previous discussion regarding the dash and a review of this kit in other sections...) and steering wheel as well as a trimmed section of the package tray. The seats would be modified Lindberg units and the interior floor pan would come from the Charger, but the rest--door panels, headliner, etc--would be scratch built. I try to get that stuff close, but I try not to take the fun out of it by getting too carried away with being exact or spending a bunch on stuff I could make myself. Comments are welcome and since there are a whole bunch of builders here that can put my stuff in the weeds on their worst day--including another current build of this same subject-- tips or constructive suggestions are appreciated. Thanks for looking
-
...but I hadn't caught my use of "tha" instead of the more correct version "the". My Internet Win has become tainted by an asterisk.
-
.BobbyG's looks way better than mine! If someone would like to send me another dash to convert (This one needs to be done ASAP so I can enter a spring IPMS show with it) so they can cast it--I don't do resin casting--I would be more than willing to do it. Send me a PM and we can work out the details. I have often considered getting into casting unique parts i've made, but I think I draw the line at mini lathes and resin casting...it takes me more than enough time to complete a project as it is
-
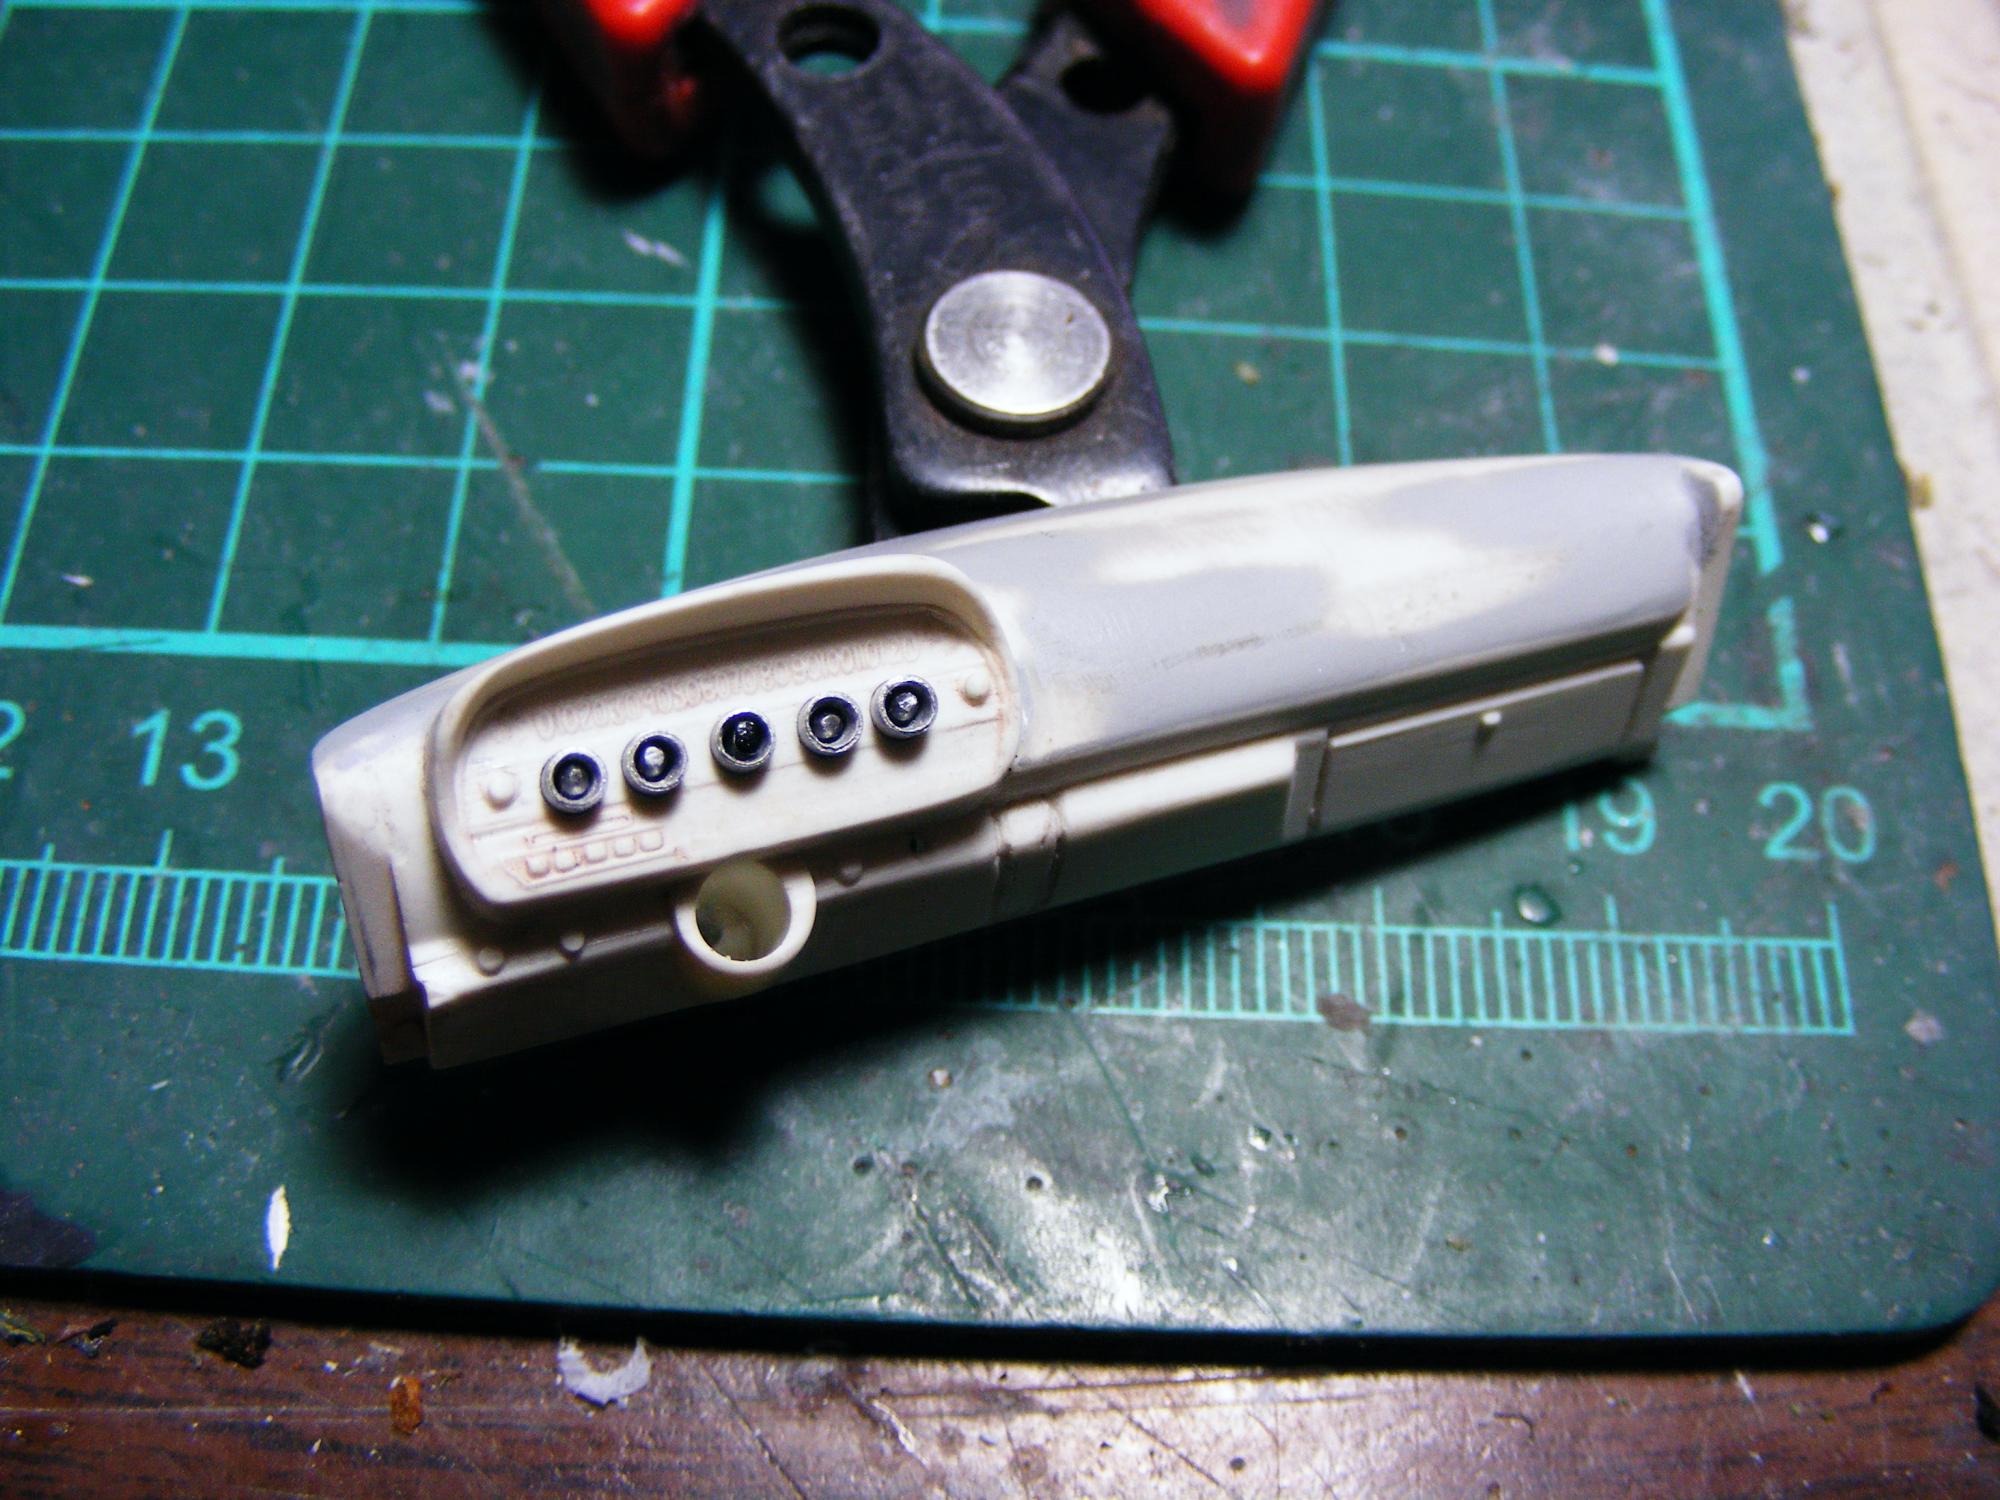
Well- the incorrect dash problem has been rectified, with the exception of the defroster vents and speaker grille. Aluminum tube scuffed with a Scotchbrite pad along with pieces of paper clip inserted partially up the holes and installed in holes drilled through the dash. Install following painting tha dash assembly and voila--a 62 Dart dash from a 63 Polara dash.
-
 I seem to remember that Modelhaus had a Max Wedge listing. I'll have to check, because for some reason I think the manifolds were for a 426 stage III engine--which were decidedly different in appearance as compared to 413 manifolds. The manifolds that came with the AMT 49 Mercury were kinda close (But not really...) The manifolds in this kit are spot-on for a 413 and early 426. and fenderwell headers, while a cool substitute, are a pain to make I'm really looking forward to this one and have a copy reserved at my LHS when they arrive
 -
The racers that ran hard tops quickly discovered how flimsy the acid dipped modified bodies were compared to the pillared sedans. I'm building a Max Wedge Dart right now and am really hoping that this kit gets released before I have to start scratchbuilding those wedge exhaust manifolds that come with it...the Super Stock primary exhaust and dumps will make my life easier as well...
-
1962 Dodge Dart 440 Hardtop Jo Han C-4162 "USA Oldies" series
DR JAY replied to Junkman's topic in Car Kit News & Reviews
The "shortcomings" of Johan kits don't concern me...My building style pretty much excludes Johan interiors and chassis from the finished product. The bodies, however, are the reasons I seek out these unique subjects for my builds. My current project is a Max Wedge 62 Dart that I purchased as a complete kit for the body, glass and chrome only. I DID ask about the incorrect dash in another post out of curiosity, but consider the "Back-Dating" to the correct 62 dash as just another part of the build. I chose the Revell 68 Charger as the chassis donor rather than the Lindberg Polara and the interior is entirely scratchbuilt--except for the dash, of course...Thanks for posting the kit review to confirm my suspicions!
-
Nice work, Bob! I've done exactly the same work to my body as you have done, and this evening's task is the dash and door panels. The dash has been sanded on the left and now it's time for the gauge bezels. The door panels just need scribing...I Have used the 68 Charger chassis as the basis--I prefer the detail to that of the Lindberg. Thanks for the info regarding the dashes...I thought it was maybe something like that
-
The dash in the kit was definitely for a 63 polara. The 1st image is a 62 Dart dash, the 2nd is a dash from a 63 Polara
-
..As I was scratchbuilding an interior for my Max Wedge, full detail conversion of the Johan USA Oldies release of the 62 Dart, I noticed something wrong about the kit supplied dash. After a brief image search, my suspicions that the kit had the wrong dash were confirmed. The dash is for a 1963 Polara, not a 62 Dart. As this is my 1st time working with this kit, my question is- `was this "normal" for this particular kit to have the wrong dash for the newer Dodge? I got the kit as an opened but complete model with some parts off the sprues but completely accounted for in the box. I'm currently attempting to convert the dash back to a close copy of the 62 dash, but it will need some work. I was just curious--My scratchbuilding skills far outweigh my frugal nature and I can't see looking for and purchasing a resin dash in my future. It just seemed strange, is all...
-
Max Wedge under hood decals
DR JAY replied to DR JAY's topic in Car Aftermarket / Resin / 3D Printed
I asked Pete at Sparetime today...his scanner is at home but he would be willing to do it for me if I found no joy on my search. He has done some cool stuff for me in the past and treats me like gold as a customer. I was also able to print up perfectly sized valve cover decal replicas--albeit on paper--as a last resort. Keith Marks...well, I lent him a Johan Rebel Machine model to mock up decals a few years ago. I never got the model back and when I asked for its return, I was told that he returned it, then was told that he can't find it, then was told that someone whom I don't know picked it up from his house, then was told "I don't know what to say; it's gone."...Johan models aren't cheap--the Rebel was a Grail subject for me--The whole thing soured me on anything Keith Marks--on a personal and product level. The results of others may vary, but that was my result--which is too bad: aside from his decals needing 2 layers to prevent bleed through and being prone to chipping, they were quite good in detail. Live And Learn... -
Max Wedge under hood decals
DR JAY replied to DR JAY's topic in Car Aftermarket / Resin / 3D Printed
Well...I found a reasonably close representation of the air breather decal on the sheet for the Revell 1968 Charger. Lucky for me, I had a left over Charger sheet in my decal box and I had purchased another Charger kit yesterday for the chassis and suspension to go under the JoHan 62 Dart body, so I found the decal for the 2nd breather on that sheet--I figure I can modify the valve cover decals from the Lindamood Polara to the 413 version with a little paint and some engine weathering. I spent a LOT of time looking for these decals online...still haven't found any. I guess the aftermarket hasn't siezed the opportunity as Max Wedge equipped modern kits are in no way plentiful--I can only think of the one Lindberg kit off the top of my head. -
I was wondering if anyone in the aftermarket produced the air breather decals and 413 max Wedge decals for the valve covers. The Color me Gone sheet has 426 decals (Wrong for a 413). I am sitting down right now for a search, but any tips that cut the search time down would be appreciated.


.jpg.aef15e03ef7921af7c6dace116bbda08.jpg)