
Lovefordgalaxie
-
Posts
3,273 -
Joined
-
Last visited
Content Type
Profiles
Forums
Events
Gallery
Everything posted by Lovefordgalaxie
-
Hard to imagine something more "Art Deco" Headlights are specially beautiful.
-
That one is easy. I would love if cars started to look like this again.
-
Nice looking model, for sure. One has to have courage to drive the big cam, dual quad side oiler 427 on the street. Not a grocery getter.
-
Yep, it's red. Really loved it!! I also built this kit, but mine was painted Cascade Green. Also used the Autolite 4100 four barrel with the big round air cleaner instead of the multiple carb setup. Also great is the base, that looks very real.
-
That looks great Mike. I wouldn't dare to get in the endeavour of decaling a rally car. i'm very very bad with decals any bigger than a licence plate.
-
OOOPS too late... Just kidding!!!
-
That is awesome. I was sceptical at first. Tamiya doesn't build models of the cars I like, but then I recognized the military kit. The tiny size only makes the craftsmanship involved into this build even more awesome. If Tamiya started building Fords Chevrolets and Chryslers of the 1940s, 1950s and 1960s I would become a a die hard buyer of their kits, and not only of their excellent paints.
-
Well, I think the fact that Doug works painting 1:1 cars helps a lot, LOL!!!! He painted his own Galaxie, and it's flawless, the car looks like glass. he also painted the door of my Focus, and not only the color match was perfect, but the texture matches 100% the factory paint on the fender and on the rear door. Knowing this I knew the paint would be nice, but the foil was a surprise. A great one. If only I could convince Doug of taking pictures of his models... beat you guys would love them, even with silver paint as trim.
-
This Monogram 1957 Bel Air was built by my friend Doug, the very same one that I built a front bumper from scratch to. The bumper topic can be found here: http://www.modelcarsmag.com/forums/index.php?showtopic=100173 Up to a close inspection, the kit was also missing one of the windshield wipers (that is the risk of buying a opened kit from the internet). Doug used one from a '69 Camaro kit. The blower air intake was also scratchbuilt by me, with epoxy putty. Other things I did were the plates and the dealer decal. Doug did all the rest. It was his first airbrush paint job, and I lent him my Badger 350 so he could decide if he wanted to buy a airbrush. The answer is YEP!!! It was also his first foil job, and it's not bad at all!!! Doug speaks zero English, and is not into forums, so I decided to take some pictures of the car when he brought it for me to see, and post them here. 1957 Chevrolet Street Machine by Lovefordgalaxie, on Flickr 1957 Chevrolet Street Machine by Lovefordgalaxie, on Flickr 1957 Chevrolet Street Machine by Lovefordgalaxie, on Flickr 1957 Chevrolet Street Machine by Lovefordgalaxie, on Flickr 1957 Chevrolet Street Machine by Lovefordgalaxie, on Flickr 1957 Chevrolet Street Machine by Lovefordgalaxie, on Flickr 1957 Chevrolet Street Machine by Lovefordgalaxie, on Flickr 1957 Chevrolet Street Machine by Lovefordgalaxie, on Flickr 1957 Chevrolet Street Machine by Lovefordgalaxie, on Flickr
-
Make your own foil.
Lovefordgalaxie replied to Lovefordgalaxie's topic in Tips, Tricks, and Tutorials
yes, I just didn't wipe the residue with a wet cloth. It will come off with ease. I never said anything about the price of BMF, I said about it's poor quality. The last sheets I got are so full of orange peel I can't use them. If the foil you get is not really bad, they are sending the bad stuff overseas. In either case, I won't give them a dime anymore. -
Make your own foil.
Lovefordgalaxie replied to Lovefordgalaxie's topic in Tips, Tricks, and Tutorials
The glue i'm using, the leaf adhesive, is water based. It won't leave a residue, but if it leaves, just wipe it off with plain water. -
Make your own foil.
Lovefordgalaxie replied to Lovefordgalaxie's topic in Tips, Tricks, and Tutorials
Well guys, I went back to that food businesses supply store and was happy to find the candy wrap foil in sheets for a very low price when compared to BMF. A 100 sheets package costed about 10 Reais. That's about four Dollars!! For 100 sheets!! Each sheet is just a little smaller than a BMF sheet (there are several sizes available), and has the same capability to make compound curves or even better, as it can be smoothed with a Q-tip leaving no wrinkles behind. Used my regular glue I showed you before, and did a test foiling a AMT prepaint Edsel. It came out better than the one I foiled with BMF. Just after foiling, I put the body back on the box, as I won't assemble the kit now, but when I decide to do so, the foiling is done. The foil package. Big enough to make about any trim on a 1/25 scale car without seams. Making my own foil. BMF never again. by Lovefordgalaxie, on Flickr Making my own foil. BMF never again. by Lovefordgalaxie, on Flickr The result on my prepaint Edsel. Making my own foil. BMF never again. by Lovefordgalaxie, on Flickr Making my own foil. BMF never again. by Lovefordgalaxie, on Flickr Making my own foil. BMF never again. by Lovefordgalaxie, on Flickr After foiling, if you want more shine, just polish the trim with car wax. The trim won't come off like BMF sometimes does, especially when it's a little on the old side. -
Nice mods on the Fiat Viaggio.
-
Make your own foil.
Lovefordgalaxie replied to Lovefordgalaxie's topic in Tips, Tricks, and Tutorials
Ok gentlemen, I asked a friend of mine that does craft work on statues and art work in general about the glue. He is Brazilian and is making a post graduation course in the U.S. He told me the product called "Mona Lisa Metal Leaf Adhesive" is the very same product I'm using. Water base, brush on the back of the foil, and in about 10 to 15 minutes it gets tacky. The product i'm using is made by Brazilian company Acrilex, and they use the same formula, that has being around since about the 1940s... Also got some candy bar wrap foil, and the stuff is just the same gauge foil as BMF. You can buy it on rolls at food businesses supply stores. The technical name is lead foil, and although the name it has no lead on it. It's just a very thin, chrome foil to wrap chocolate bars, and other kind of candy. Did a test foiling a prepaint Edsel body with the candy bar wrap and my leaf glue, and the result was even better than with regular household aluminum foil. Light years ahead of BMF. -
Make your own foil.
Lovefordgalaxie replied to Lovefordgalaxie's topic in Tips, Tricks, and Tutorials
Making my own foil. BMF never again. by Lovefordgalaxie, on Flickr Making my own foil. BMF never again. by Lovefordgalaxie, on Flickr -
Well, I think everybody have noticed BMF is going worse and worse. The last sheets I got have a ugly and prominent texture like orange peel, and will make the model to look very unrealistic. Being kind of used to the easy to use of BMF when compared to my old technique of household aluminum foil and white glue, I decided to give a try at making my very own foil, at home, for cheap, and better than the regular BMF. Just went to my favorite craft store, and got water based "gold leaf bond" or verniz mordente in Portuguese (literal translation would be biting varnish). This is how I did it: The varnish was applied very thin with a brush on the back side (the less shiny side) of the regular household aluminum foil (the cheaper and thinner the better), and after about 10 minutes it gets tacky, just like the BMF glue. I then cut pieces of the foil, and used it just like BMF. The results put the commercial stuff to shame, to say the very least. Compare on the picture of the trim on my '57 Chevy. The hood trim was given a home made foil treatment. The fender "eyebrow" was foiled with Bare Metal Foil. Look at the difference in texture. Also used my home made foil to restore a little part of a Monogram '57 Chevy bumper, that was scratched from rolling inside the box. Again it worked like a charm. I won't be buying BMF anymore. Making my own foil. BMF never again. by Lovefordgalaxie, on Flickr Making my own foil. BMF never again. by Lovefordgalaxie, on Flickr Making my own foil. BMF never again. by Lovefordgalaxie, on Flickr Making my own foil. BMF never again. by Lovefordgalaxie, on Flickr Making my own foil. BMF never again. by Lovefordgalaxie, on Flickr Making my own foil. BMF never again. by Lovefordgalaxie, on Flickr Making my own foil. BMF never again. by Lovefordgalaxie, on Flickr Making my own foil. BMF never again. by Lovefordgalaxie, on Flickr Making my own foil. BMF never again. by Lovefordgalaxie, on Flickr Making my own foil. BMF never again. by Lovefordgalaxie, on Flickr
-
Technically, the car's name is Uirapuru, the name from a bird of the Amazon. Brasinca was the company that built the GM cars's bodies well into the 1990s. The Uirapuru had the GM 261 six from the GM trucks, with a couple of SU carburetors and was considered very fast for the time it was built. The body was all steel, and the frame was a very sturdy 3D structure. The Interceptor was inspired much by the Uirapuru, and I think it to be better looking than the Brasinca car. Not to mention the V8.
-
Wrong again. That's no BMW.
-
No Moskvich has nothing of Fiat. Just good old prejudice here hum?
-
Defective Testors spray
Lovefordgalaxie replied to TonyK's topic in General Automotive Talk (Trucks and Cars)
To avoid problems with Testors, the only way is Tamiya. I just use spray paint from Tamiya. The Testors cans I had ended in the trash long ago. -
Scratchbuilt 1957 Chevrolet Front Bumper
Lovefordgalaxie replied to Lovefordgalaxie's topic in WIP: Model Cars
Thanks a lot for the comments guys!! The box appears on some of the pictures holding the part. It's called Durepoxi. It's a two part epoxy putty, and it's like clay to work with. After two hours it can be sanded, cut, grinded... After a day it's rock hard, and will accept and bond to new pieces made from the same material, so, the construction can be done in stages -
Scratchbuilt 1957 Chevrolet Front Bumper
Lovefordgalaxie replied to Lovefordgalaxie's topic in WIP: Model Cars
Last part: Scratchbuilt Bumper by Lovefordgalaxie, on Flickr Scratchbuilt Bumper by Lovefordgalaxie, on Flickr Scratchbuilt Bumper by Lovefordgalaxie, on Flickr Scratchbuilt Bumper by Lovefordgalaxie, on Flickr Scratchbuilt Bumper by Lovefordgalaxie, on Flickr Scratchbuilt Bumper by Lovefordgalaxie, on Flickr Scratchbuilt Bumper by Lovefordgalaxie, on Flickr Scratchbuilt Bumper by Lovefordgalaxie, on Flickr Scratchbuilt Bumper by Lovefordgalaxie, on Flickr Scratchbuilt Bumper by Lovefordgalaxie, on Flickr -
Scratchbuilt 1957 Chevrolet Front Bumper
Lovefordgalaxie replied to Lovefordgalaxie's topic in WIP: Model Cars
Continuing: Scratchbuilt Bumper by Lovefordgalaxie, on Flickr Scratchbuilt Bumper by Lovefordgalaxie, on Flickr Scratchbuilt Bumper by Lovefordgalaxie, on Flickr Scratchbuilt Bumper by Lovefordgalaxie, on Flickr Scratchbuilt Bumper by Lovefordgalaxie, on Flickr Scratchbuilt Bumper by Lovefordgalaxie, on Flickr Scratchbuilt Bumper by Lovefordgalaxie, on Flickr Scratchbuilt Bumper by Lovefordgalaxie, on Flickr Scratchbuilt Bumper by Lovefordgalaxie, on Flickr Scratchbuilt Bumper by Lovefordgalaxie, on Flickr -
Me and my big mouth... Friend of mine got a Monogram 1/12 scale 1957 Chevrolet from eBay a few years ago. Last week, he came to my house so I could do a tune up on his Galaxie, and he saw the work I was doing on my black 1957 Chevy kit. He said he would start his own kit, and build it with the blower and velocity stacks, like the one on the side of the box. About a day latter I got a call from him asking me if I had a front bumper for the Chevy on my parts box. I didn't. Last week got lucky getting one for my project, I would never get another, not as fast as the guy wanted, you know, he had the "building bug" and wanted to build the kit "for yesterday". Here enters my big mouth. I told the guy I could make a front bumper from scratch for him. Over the weekend... How much experience do I have on scratchbuilding entire parts? None. Got some epoxy putty and went to work. The part is actually done already, but I decided here would be the best place to post it. Hope you guys think it looks half decent. My friend must be installing it on his kit about now. Scratchbuilt Bumper by Lovefordgalaxie, on Flickr Scratchbuilt Bumper by Lovefordgalaxie, on Flickr Scratchbuilt Bumper by Lovefordgalaxie, on Flickr Scratchbuilt Bumper by Lovefordgalaxie, on Flickr Scratchbuilt Bumper by Lovefordgalaxie, on Flickr Scratchbuilt Bumper by Lovefordgalaxie, on Flickr Scratchbuilt Bumper by Lovefordgalaxie, on Flickr Scratchbuilt Bumper by Lovefordgalaxie, on Flickr Scratchbuilt Bumper by Lovefordgalaxie, on Flickr Scratchbuilt Bumper by Lovefordgalaxie, on Flickr
-
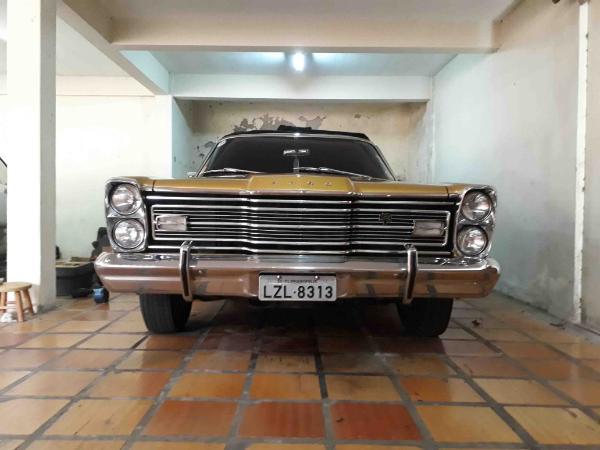
1965 Ford Galaxie 500 XL Outdoor Pics!
Lovefordgalaxie replied to smellyfatdude's topic in Model Cars
Very, very nice. Great looking Galaxie, specially the color. Also loved the cragars.