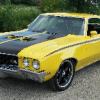
Timonator Posted November 27, 2016 Share Posted November 27, 2016 I'm trying to paint my Tamiya LaFerrari for the 3rd time. After applying the 2nd clear coat I noticed that the white primer started showing through. Anyone else ever have this happen? Quote Link to comment Share on other sites More sharing options...
935k3 Posted November 27, 2016 Share Posted November 27, 2016 Tamiya's Clear is pretty hot. It's possible if put on to wet. I would not any solid color paint, only metallics. I stop using their clear and switched to Testors Wet Look Clear. I have been very happy with the Testors but I usually airbrush it, Quote Link to comment Share on other sites More sharing options...
Timonator Posted November 27, 2016 Author Share Posted November 27, 2016 This was my first time using it . first coat went on well. second coat looked a little peely on top so I added a bit more and I'll bet that's what did it. This wa right ot of the can. I'm not having the best of luck learning the airbrush. Quote Link to comment Share on other sites More sharing options...
High octane Posted November 27, 2016 Share Posted November 27, 2016 Hmmm, I don't recall ever having a problem with Tamiya, Testors, Black Gold, or MCW Clear paints from the can ever. Looks to me that maybe your color coats were too light in some spots. Quote Link to comment Share on other sites More sharing options...
espo Posted November 27, 2016 Share Posted November 27, 2016 I have used Tamiya clear and Testor Wet Look both. I have not had this problem before. The only thing I can think of is if you might have sprayed a coat to heavy. Quote Link to comment Share on other sites More sharing options...
Pete J. Posted November 27, 2016 Share Posted November 27, 2016 (edited) I assume you are using Tamiya rattle cans. All Tamiya rattle cans are synthetic lacquers. All lacquers melt the under coat to some degree or other. That is just the way they work. If you could see them in cross section they are one continuous layer. Your big mistake was trying to correct orange peel with more paint. This is what is causing your problem. Always, ALWAYS lay lacquers on in thin coats with some flash time between coats. Lacquer solvents dry exponentially. What that means is that if you double the thickness of the paint layer you quadruple the time it takes for the solvents to evaporate. The fact that you have the unevaporated solvent in contact with the lower layer longer, the more likely it is that you will have problems with the lower layer. If you get orange peel in lacquer, stop painting immediately. Let is dry for a couple of hours in a food dehydrator or overnight at room temperature and sand it flat and then respray. The real beauty of lacquers is that they are easy to polish to a high gloss. Light coats only. I noticed that you were spraying red. A word of warning. Reds and yellows are translucent. When laying down the color coat, it may take 3 or 4 coats to get good coverage. Don't get carried away with trying to lay down too much on each pass. With rattle cans you can get too much in the creases and as the propellants off gas you may get bubbles underneath. Then when you spray the clear it can melt the top of the bubble and cause the primer to show through. I can't tell from the pictures but that my be what is happening here. If that is the case, strip it and start over. It will be way too much work to try and sand down the problem areas.Keep in mind, more paint never solves the problem. Good luck! By the way, you may find this interesting. http://www.tamiyausa.com/articles/painting-with-tamiya-synthetic-lacquers-35?category_id=8#.WDsy-oWcGMo I wrote this many years ago when Tamiya first introduced their paints to the US. Edited November 27, 2016 by Pete J. Quote Link to comment Share on other sites More sharing options...
Timonator Posted November 27, 2016 Author Share Posted November 27, 2016 I assume you are using Tamiya rattle cans. All Tamiya rattle cans are synthetic lacquers. All lacquers melt the under coat to some degree or other. That is just the way they work. If you could see them in cross section they are one continuous layer. Your big mistake was trying to correct orange peel with more paint. This is what is causing your problem. Always, ALWAYS lay lacquers on in thin coats with some flash time between coats. Lacquer solvents dry exponentially. What that means is that if you double the thickness of the paint layer you quadruple the time it takes for the solvents to evaporate. The fact that you have the unevaporated solvent in contact with the lower layer longer, the more likely it is that you will have problems with the lower layer. If you get orange peel in lacquer, stop painting immediately. Let is dry for a couple of hours in a food dehydrator or overnight at room temperature and sand it flat and then respray. The real beauty of lacquers is that they are easy to polish to a high gloss. Light coats only. I noticed that you were spraying red. A word of warning. Reds and yellows are translucent. When laying down the color coat, it may take 3 or 4 coats to get good coverage. Don't get carried away with trying to lay down too much on each pass. With rattle cans you can get too much in the creases and as the propellants off gas you may get bubbles underneath. Then when you spray the clear it can melt the top of the bubble and cause the primer to show through. I can't tell from the pictures but that my be what is happening here. If that is the case, strip it and start over. It will be way too much work to try and sand down the problem areas.Keep in mind, more paint never solves the problem. Good luck! By the way, you may find this interesting. http://www.tamiyausa.com/articles/painting-with-tamiya-synthetic-lacquers-35?category_id=8#.WDsy-oWcGMo I wrote this many years ago when Tamiya first introduced their paints to the US. I did read that article. it is really good. Thanks for the advice Pete. It looks like I should probably strip it again. Quote Link to comment Share on other sites More sharing options...
Timonator Posted November 27, 2016 Author Share Posted November 27, 2016 How long should you give tamiya spray paint to dry before sanding out dust or hair in each coat ? Quote Link to comment Share on other sites More sharing options...
Pete J. Posted November 28, 2016 Share Posted November 28, 2016 Overnight for room temperature. A couple of hours in a food dehydrator. Quote Link to comment Share on other sites More sharing options...
Chrischu33 Posted November 28, 2016 Share Posted November 28, 2016 my guess is you didnt wait long enough between coats. Wait at least 12 hours between color coat and clear, and once you start clearing, start with a mist coat, wait 15 mins, go back and do a harder coat, and build up to 3 hard coats. then wait 1 week for it to dry and then u can start polishing. Quote Link to comment Share on other sites More sharing options...
Pete J. Posted November 28, 2016 Share Posted November 28, 2016 Tim, I should have noted something here that is in the article. All of this is dependent on temperature and humidity. The hotter and dryer it is the quicker paint cures. This is why I like the food dehydrator. It is designed to maintain a constant temperature of around 110 degrees and move air through the machine. This aids the curing time. As I said it is dependent on how thick you spray the paint on. Tamiya paints polish out very nicely so a lot of mist coats with time in between, will polish out as well as a couple of thick coats and cure much quicker. This paint doesn't create layers. Each slightly dissolves the layer below and it becomes a single layer. Quote Link to comment Share on other sites More sharing options...
Timonator Posted November 29, 2016 Author Share Posted November 29, 2016 Tim, I should have noted something here that is in the article. All of this is dependent on temperature and humidity. The hotter and dryer it is the quicker paint cures. This is why I like the food dehydrator. It is designed to maintain a constant temperature of around 110 degrees and move air through the machine. This aids the curing time. As I said it is dependent on how thick you spray the paint on. Tamiya paints polish out very nicely so a lot of mist coats with time in between, will polish out as well as a couple of thick coats and cure much quicker. This paint doesn't create layers. Each slightly dissolves the layer below and it becomes a single layer. Thanks again Pete, What I don't like about the mist coats is that they seem to leave a rough texture like orange peel Quote Link to comment Share on other sites More sharing options...
Pete J. Posted November 29, 2016 Share Posted November 29, 2016 (edited) Thanks again Pete, What I don't like about the mist coats is that they seem to leave a rough texture like orange peel.*********This is a problem with the wording of "mist coat". What we are talking about is a very thin coat of paint. The rough texture says you are getting says you are spraying too far away and the solvent in the paint is evaporating as it passes from the nozzle to the model. There isn't enough solvent left when it gets to model for the leveling process to happen. You need to move closer to the model with the can to reduce that drying process.As you move closer there are two factors to keep in mind. The first is speed and the second is distance. The speed is obvious. Move faster and less paint. Distance is a trickier. The paint comes out of the nozzle in a cone shape. As you get closer, the diameter of the cone decreases but the amount of paint remains the same so it is more concentrated. The problem is that for about every inch you move closer, the paint per square inch almost doubles, so a little closer, makes a big difference. To offset that additional density, you have to move faster to get it on the surface in a thinner layer. If you get really close, then you can literally drowned the surface and it will run.Best thing to do is get something the size of poster board and make several single passes at different distances. This way you can get an idea of how much paint you are getting at what distance. Then once you get the best distance, make several passes until you get a feel for the speed you have to have to lay down a mist coat. Good luck! Edited November 29, 2016 by Pete J. Quote Link to comment Share on other sites More sharing options...
Art Anderson Posted November 29, 2016 Share Posted November 29, 2016 Start with a basic premise here: Lacquers, by the very nature of their solvents, WILL penetrate (somewhat dissolve) the surface of lacquer previously laid down. That said, unless you get really crazy laying on a further coat of lacquer, that penetration/dissolving isn't at all a bad thing--it ensures the perfect bonding of succeeding coats of lacquer to those previously sprayed on.Art Quote Link to comment Share on other sites More sharing options...
Pete J. Posted November 29, 2016 Share Posted November 29, 2016 Start with a basic premise here: Lacquers, by the very nature of their solvents, WILL penetrate (somewhat dissolve) the surface of lacquer previously laid down. That said, unless you get really crazy laying on a further coat of lacquer, that penetration/dissolving isn't at all a bad thing--it ensures the perfect bonding of succeeding coats of lacquer to those previously sprayed on.ArtYup! Quote Link to comment Share on other sites More sharing options...
Art Anderson Posted November 29, 2016 Share Posted November 29, 2016 To understand what all lacquers basically are (and to simplify this and further discussions), may I present this Wikipedia article? It should greatly help further discussions, without a whole lot of technical descriptions: https://en.wikipedia.org/wiki/Lacquer Art Quote Link to comment Share on other sites More sharing options...
Pete J. Posted November 30, 2016 Share Posted November 30, 2016 Good read Art. Worth the time! Quote Link to comment Share on other sites More sharing options...
ZTony8 Posted December 4, 2016 Share Posted December 4, 2016 Remember to take extra care with TS-13 clear. You need to apply it either within about ten minutes of shooting the last color coat or wait at least two weeks until the last color coat dries thoroughly or the color coat WILL crack. Tamiya clear has a different cure rate than their color coats. I speak from first hand experience on this. The easiest way to avoid all this is to use Testor "One Coat" or Model Master lacquer clear. Those won't crack the color coat or crack any decals you've applied and it's compatible with Tamiya lacquers. Quote Link to comment Share on other sites More sharing options...
Recommended Posts
Join the conversation
You can post now and register later. If you have an account, sign in now to post with your account.
Note: Your post will require moderator approval before it will be visible.