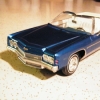
59-Desoto Posted May 28, 2017 Posted May 28, 2017 (edited) Want this one to reflect a true 50ies look from those days gone by, I made a correct connie kit using styrene and had to cut up two perfect original bumpers to create that look, I'll also need to remove one bar from the side od both front fenders as the kit has 5 of them and the real cars only had 4. Also I'll be removing the lettering from the hood and deck lids and replacing correct lettering with photo-etched letters Edited May 28, 2017 by 59-Desoto spell correction
59-Desoto Posted May 28, 2017 Author Posted May 28, 2017 I'll have to get this paint specially mixed at the local paint store and not I'll be replacing the the kit hub caps with corrected wheel covers
Custom Mike Posted May 29, 2017 Posted May 29, 2017 Looks like a good start. Where did you get this kit from? A buddy in High School had a Red & White one, I'd love to replicate it!
59-Desoto Posted May 29, 2017 Author Posted May 29, 2017 (edited) Looks like a good start. Where did you get this kit from? A buddy in High School had a Red & White one, I'd love to replicate it!I made the connie kit Albert as well as the skirts using styrene plastic , the bumper I had to cut up two originals to create a correct bumper to fit the connie , got lucky and score the car on E Bay Edited May 29, 2017 by 59-Desoto
StevenGuthmiller Posted May 29, 2017 Posted May 29, 2017 Looks like a good start. Where did you get this kit from? A buddy in High School had a Red & White one, I'd love to replicate it! They're original AMT annuals Albert. Although, at least Modelhaus did them in resin. Not sure if anyone else did. The annuals come up from time to time on places like ebay, but they generally don't come cheap. I got really lucky with mine. I found it in an antique shop more than 25 years ago for $8.00! Plan on paying at least 3 figures for a really nice one today. You could probably find a glue bomb for less, but even a Modelhaus resin re-pop will probably run you over $100.00, if you can find one. Steve
Custom Mike Posted May 29, 2017 Posted May 29, 2017 Thanks guys, another way to empty my already pained wallet!Oh, and my name isn't any of the ones listed there, it's the tiny name above the link to my Fotki page. I posted all those names just to poke at the powers-that-be over having your name on your profile. So I made a bunch of names up and put 'em there for fun...and I find it hilarious that I've been called Olaf a few hundred times too!
espo Posted May 29, 2017 Posted May 29, 2017 What a lucky find on the old AMT kit. The '58 Bonneville was the best looking Luxo Cruiser from GM. Look forward to watching your build.
59-Desoto Posted May 30, 2017 Author Posted May 30, 2017 Fyi. A convertible will be cheaper than a hardtop. I got a pair of HT , finding decent a convertible cost me more than my HT's did
StevenGuthmiller Posted May 30, 2017 Posted May 30, 2017 I got a pair of HT , finding decent a convertible cost me more than my HT's did You got lucky there!The hard tops are generally much tougher to find. Steve
charlie8575 Posted May 30, 2017 Posted May 30, 2017 Curious- what's wrong with the lettering? And where did you get the photo-etch?Charlie Larkin
StevenGuthmiller Posted May 30, 2017 Posted May 30, 2017 Curious- what's wrong with the lettering? And where did you get the photo-etch? Charlie Larkin The AMT annual had "PONTIAC" lettering on the hood & trunk lid. The 1:1 had "BONNEVILLE" lettering. I would be interested to know where the photo etched parts came from as well, just in case I ever build another. Steve
gearhedjon Posted May 30, 2017 Posted May 30, 2017 How did you make the fender skirts start to finish including thickness of styrene as well as lip on bottom of skirt. Thanks
gtx6970 Posted May 30, 2017 Posted May 30, 2017 You got lucky there!The hard tops are generally much tougher to find. Steveagreed.I got lucky....bought my convertible 2 years ago. And paid about $65 for it. Since then I see them selling in the $80 - $100 range.Seems like a hardtop builder regularly sells for over $100 .
59-Desoto Posted May 30, 2017 Author Posted May 30, 2017 The AMT annual had "PONTIAC" lettering on the hood & trunk lid. The 1:1 had "BONNEVILLE" lettering. I would be interested to know where the photo etched parts came from as well, just in case I ever build another. Steve The lettering can be found on E Bay , it is for the 1960 Trumpter Bonneville, also on the front fenders of the annual kits is one more mistake. There are five bars and the 1:1 only has four, so removing the upper bar will make it a correct as it can be Steve and Charlie
59-Desoto Posted May 30, 2017 Author Posted May 30, 2017 How did you make the fender skirts start to finish including thickness of styrene as well as lip on bottom of skirt. ThanksJohn I use a sheet of .060 styrene for the shirts and use a .030 styrene square rod for the lip, there was a little shaping to be done but wasn't a big deal an the lip. As for the skirt I placed some tape on the inside of the body and cut it with my exacto knife, then stuck it to the styrene sheet and made a ruff cut and used a file to work it down till I had my skirt. Had to use some light heat to give it a little roll to fit the body using a round number 2 pencil
StevenGuthmiller Posted May 30, 2017 Posted May 30, 2017 There are five bars and the 1:1 only has four, so removing the upper bar will make it a correct as it can be Steve and Charlie Yes, I discovered that........after I built mine some years ago. My understanding is that with a lot of these annual kits, the development of the promos & kits coincided with the development of the actual vehicle & on occasion the molds for the models were ready for production before the actual vehicles were released. That meant that if anything was changed during the development of the 1:1, it may not have translated to the model in time to be changed by the kit manufacturer. Either that or AMT just screwed up! Steve
StevenGuthmiller Posted May 30, 2017 Posted May 30, 2017 John I use a sheet of .060 styrene for the shirts and use a .030 styrene square rod for the lip, there was a little shaping to be done but wasn't a big deal an the lip. As for the skirt I placed some tape on the inside of the body and cut it with my exacto knife, then stuck it to the styrene sheet and made a ruff cut and used a file to work it down till I had my skirt. Had to use some light heat to give it a little roll to fit the body using a round number 2 pencil Just as a suggestion, when you are ready to install the skirts, you can just tape them in place from the inside of the body.That way they can be removed later if you so wish without any damage.It will also save you from worrying about winding up with a glue mess trying to permanently install them. Steve
59-Desoto Posted May 30, 2017 Author Posted May 30, 2017 Just as a suggestion, when you are ready to install the skirts, you can just tape them in place from the inside of the body.That way they can be removed later if you so wish without any damage.It will also save you from worrying about winding up with a glue mess trying to permanently install them. SteveI plan to make some kinda pins to hold mine in place from the inside, a guild pin at the top and one that will run length of the skirt that will hook into a hinge of short. Much like the 1:1 cars did
CometMan Posted May 31, 2017 Posted May 31, 2017 Off to a nice start, Gene. Very interesting subject too.
misterNNL Posted May 31, 2017 Posted May 31, 2017 looking very accurate.Nice to see the correct design on the shelf and bumper for the continental kit.I remember drooling over the real cars when I was in high school in the '50's.
Recommended Posts
Create an account or sign in to comment
You need to be a member in order to leave a comment
Create an account
Sign up for a new account in our community. It's easy!
Register a new accountSign in
Already have an account? Sign in here.
Sign In Now