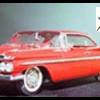
59 Impala Posted August 19, 2018 Posted August 19, 2018 I was given this car from one of the guys in our club (BSAC) with the stipulation that I had to (FIX) it. Well, here is the start of what I have to work with.
bbowser Posted August 19, 2018 Posted August 19, 2018 Wow! Apart from the butchered rear quarters it doesn't look too bad?
StevenGuthmiller Posted August 19, 2018 Posted August 19, 2018 21 minutes ago, bbowser said: Wow! Apart from the butchered rear quarters it doesn't look too bad? Yeah, but if you plan on going back to stock, you have a little work ahead of you. Looks like another candidate for a custom. Steve
59 Impala Posted August 19, 2018 Author Posted August 19, 2018 Thanks guys and yes Steve, this is another custom fer sure. There is just to much damage to it to make it stock. This is how it looked after stripping it. The hood is cracked and the body is a mess. The windshield frame is broken and I tried to save it but that's a no go. I have to use other parts for that.
StevenGuthmiller Posted August 20, 2018 Posted August 20, 2018 She is a mess! You have more ambition that I do! Steve
Bucky Posted August 20, 2018 Posted August 20, 2018 Gonna be interesting to see this happen. Soldier on, brother!!
Rat Roaster Posted August 20, 2018 Posted August 20, 2018 (edited) I have one of these, nearly as bad. Didn't have the skirts but was brush painted with auto lacquer that bonded to the plastic. I cut it up with the hot knife in order to kill any lingering fantasies about making something out of it '59 Pontiacs and '60 Oldsmobiles are practically impossible to make right after they've had skirts welded to them. '58 Pontiacs can be saved but they take up a lot of hours to fix the craters. BTW i fix broken W/S frames like that all the time by grooving the underside of the frame on both sides of the break then supergluing in a section of sewing straight pin. Edited August 20, 2018 by Rat Roaster
59 Impala Posted August 20, 2018 Author Posted August 20, 2018 (edited) Thanks guys. I tried to save the windshield frame, but it was broken in the middle and on both sides. Plus the windshield itself was cracked in two places. What I did was use the frame and windshield from the Revell 59 Impala. I had to adjust the frame a tad and it turned out very good. Here are three more pics to show some of the filler I had to use and fix the windshield frame. I am able to use the Revell windshield this way. I had to adjust the frame to fit the cowl trim and that worked out fine. Edited August 20, 2018 by 59 Impala
StevenGuthmiller Posted August 20, 2018 Posted August 20, 2018 Well, you're already off to a pretty good start! Steve
ChrisBcritter Posted August 20, 2018 Posted August 20, 2018 Dan, I don't envy you that job! Does the bottom of the '59 Chevy windshield line up with the Pontiac's cowl OK? Here's mine, someday to become a hardtop: On all these Pontiacs, the tops of the front fenders need surgery to line up with the grille. Good luck!
59 Impala Posted August 20, 2018 Author Posted August 20, 2018 Thanks guys. Chris, if you look at the second picture, you can see where I cut the front part of the Revell piece and then I had to work it to fit the Pontiac's trim on the cowling. Dan
59 Impala Posted August 20, 2018 Author Posted August 20, 2018 8 hours ago, ChrisBcritter said: Dan, I don't envy you that job! Does the bottom of the '59 Chevy windshield line up with the Pontiac's cowl OK? Here's mine, someday to become a hardtop: On all these Pontiacs, the tops of the front fenders need surgery to line up with the grille. Good luck! I wish that mine looked this good at the beginning cause I wanted to keep it stock, but because of how much this thing was damaged, I had to make it custom.
59 Impala Posted August 21, 2018 Author Posted August 21, 2018 I had to fix the grill. The original one had something glued on both sides and was a mess. I used two grills (custom) from the AMT 53 Ford truck to make new ones. I did save the head lights from the original grill. I also had to repair the rear bumper. More to come. Dan
StevenGuthmiller Posted August 21, 2018 Posted August 21, 2018 57 minutes ago, 59 Impala said: I had to fix the grill. The original one had something glued on both sides and was a mess. I used two grills (custom) from the AMT 53 Ford truck to make new ones. I did save the head lights from the original grill. I also had to repair the rear bumper. More to come. Dan This might have been a great opportunity to replace the grille with some fine mesh & possibly find some headlight buckets with clear lenses. But on the other hand, if you're building it as a curbside, you really don't need an open grille. But the headlights might be something to think about. Steve
geetee66 Posted August 21, 2018 Posted August 21, 2018 On 20/08/2018 at 4:32 AM, 59 Impala said: Thanks guys. I tried to save the windshield frame, but it was broken in the middle and on both sides. Plus the windshield itself was cracked in two places. What I did was use the frame and windshield from the Revell 59 Impala. I had to adjust the frame a tad and it turned out very good. Here are three more pics to show some of the filler I had to use and fix the windshield frame. I am able to use the Revell windshield this way. I had to adjust the frame to fit the cowl trim and that worked out fine. Nice save! That's the part that sprang to mind when I saw you had a dodgy frame. I kept one in my stash, for the same reason. It's great to see old kits or builds, given new life. It'll be interesting to see how it's going to look, when you're done.
59 Impala Posted August 21, 2018 Author Posted August 21, 2018 Thanks guys. I wanted to save as much of the grill as I could and the lights were the only parts that I could save. I'm using only lacquer paint on this build and I sprayed a very thin coat of Red Oxide primer, then another thin coat and lastly a heavier coat. No crazing. I had to fix the wavy sides of the body where the chrome used to be. Who ever carved this sure did a very bad job of it. More to come. Dan
StevenGuthmiller Posted August 21, 2018 Posted August 21, 2018 I think you're really on to something Dan! Steve
59 Impala Posted August 22, 2018 Author Posted August 22, 2018 Thanks Steve. Here are some more pics of more work on the rear end. I had to fix the carvings on the rear of the body. These were really in bad shape. I wish somebody wouldn't have removed the inner fins on this car. The Pontiac looked perty good with both of them. Dan
bbowser Posted August 22, 2018 Posted August 22, 2018 Looking good! I'm working on a similar project, '59 Buick. Those side skirts certainly were popular!
High octane Posted August 22, 2018 Posted August 22, 2018 Lookin' real good so far Dan, and I wish that I had the ambition that you have. Right now I've been on a modeling hiatus. DANG!
dino246gt Posted August 22, 2018 Posted August 22, 2018 Wow that's looking good and it's a lot off work that you're doing, nice to see!
Dirkpitt289 Posted August 22, 2018 Posted August 22, 2018 I like to see people do this kind of work. I'm diggin it
59 Impala Posted August 23, 2018 Author Posted August 23, 2018 Thanks guys. I've painted the chrome parts with the Molotov chrome ink. All the small parts and frame were sprayed with the air brush. The floor pan is gloss black.
59 Impala Posted August 23, 2018 Author Posted August 23, 2018 Here are some more pics. The interior is from the AMT 62 Catalina custom parts. The chassis and floor pan after painting and the Blue dots on the tail lights. The bumper is sprayed with the Molotov ink. More to come. Dan
Recommended Posts
Create an account or sign in to comment
You need to be a member in order to leave a comment
Create an account
Sign up for a new account in our community. It's easy!
Register a new accountSign in
Already have an account? Sign in here.
Sign In Now