futurattraction Posted October 31, 2012 Posted October 31, 2012 Something I failed to comment on that someone else mentioned is the different materials you used for the blanket straps that really set them off and add a whole 'nother level of realism to your trans, Joe. I'm looking forward to your updated pics...
Red rocket 10 Posted October 31, 2012 Posted October 31, 2012 Joe the tranny is very well executed , I'm learning something every time I visit your build. Well done.............. Leonard
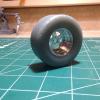
Prostreet Posted November 2, 2012 Author Posted November 2, 2012 (edited) Thx. Scott and Leonard. After pulling out what's left of my hair i have the trans installed, unfortunately i had to take my gas pedal back out because i could not get the clutch can past it. It's all good now and reinstalled, I couldn't make the connectors like the 1:1 uses so i just used some brass nuts. I could have made the reverse shifter a little closer to the drivers side, where it's at now you could never reach it from the seat. I turned the push buttons down on the lathe and hit them with some 1000 grit so they look like brused aluminum. You can't see it but i had to put the clutch can decal on the drivers side, all in all i'm very happy with the way it turned out. Once i find some 1/16th buckles that i think will look good i will do the seat, going to work on the rear end next and try and get the tubs installed. My goal is to be able to show it at NNL east 2013. Used Ted's modeling black rubber line RB motion nuts and stainless rod Scale hardware brass nuts. Also had Jim machine me up some Lamb calipers for the rear. He even put the name on them. Edited November 2, 2012 by Prostreet
stump Posted November 2, 2012 Posted November 2, 2012 Joe, this is looking so darn fabulous mate. Absolutely AWESOME actually.....The trans and associated hardware looks spot on, no wonder you're so pleased....as you are so well entitled to be mate. Great work.
W-409 Posted November 2, 2012 Posted November 2, 2012 That transmission looks fantastic, Joe! This build is coming along very nicely... I'm sure it'll be excellent when finished, the chassis is looking so good already!
tyrone Posted November 2, 2012 Posted November 2, 2012 Joe.... my man this build is looking fantastic... I am really enjoying it more as you're starting to add the detailed parts to it... BRAVO......
Mooneyzs Posted November 2, 2012 Posted November 2, 2012 Joe.. awesome work on that tranny with the shift buttons. Looks amazing. You have talent my friend. i am going to have to pick yp sone of those calipers from jim. they look great. also i may borrow some of your ideas for my pro mod build. I look forward to more and I keep forgetting to email you those pics. will email them soon.
vintagedragfan Posted November 3, 2012 Posted November 3, 2012 awesome Joe!! lets keep it moving along bro!!
cobraman Posted November 3, 2012 Posted November 3, 2012 Very nice work. That transmission is beautiful.
Dyno Davo Posted November 4, 2012 Posted November 4, 2012 Incredible detail Joe, love every pic you post, inspiring stuff
Prostreet Posted November 5, 2012 Author Posted November 5, 2012 Thx. for all the positive feedback guys, Working on the rear. Hope to have some updates tommarrow night.
Prostreet Posted November 9, 2012 Author Posted November 9, 2012 Thx. Dave. Need some help guys, Had a setback and hope it's not going to turn into a major one. i had my wheel tubs stored in an air tight container and the edges of the carbon decal in some spots are turning white, looks like maybe the clear is still eating at them? Is it possible being in an air tight container did this?. The carbon decals on the chassis are fine so far and there were all done with in weeks of each other except the chassis was never stored in a container. I used scale motor sports decals and model masters laquer clear. Now, how do i strip these to redecal them, can i use the purple pond? if so will that mess up my glue joints? or do i just sand them down best i can and try redecaling them? Make news tubs really isn't an option i want to use as these fit to good.
vintagedragfan Posted November 9, 2012 Posted November 9, 2012 it is very possible Joe, there is no where for the fumes to escape as the paint is still curing, I would throw them in warm water and hope it loosened them up, its not going to hurt anything to try that
Prostreet Posted November 9, 2012 Author Posted November 9, 2012 Never thought of the water Bill, I did let the paint itself cure for 2 weeks before I decaled them, I think I let them sit a week after clear then they went in the container. I was guessing it was still fuming also
vintagedragfan Posted November 9, 2012 Posted November 9, 2012 I think I would forget about the container thing just in case, lol were you able to get the decals off?
Prostreet Posted November 9, 2012 Author Posted November 9, 2012 Will try tonight after work, there sealed in clear, would hot water work? Would that effect the CA?
eviltwincustoms Posted November 9, 2012 Posted November 9, 2012 (edited) Joe, if you have already cleared your tubs and the polyurethane has hardened on top, the decals are not coming off with Hot Water. That is like a hard candy coating that will only come off with a lacquer thinner or some sort of solvent. I have never tried it and not sure if it will work, but since it is a much smaller part then 1/10th scale.. that I use to work with. Try the Purple Power, based on another RC Car forum I use to be on all the time... They are saying it will not affect your CA Glue at all, so they shouldn't fall apart on you. So you should be safe, I can't say for sure as I have never tried it. Edited November 9, 2012 by eviltwincustoms
Prostreet Posted November 9, 2012 Author Posted November 9, 2012 I tried the purple stuff before on a car body and it worked pretty good, I did try it on laquer before and it doesn't work that great and these are cleared in laquer. I was thinking about trying to sand them. never thought this would happen from them being in a container. learned the hard way lol.
tyrone Posted November 10, 2012 Posted November 10, 2012 Dang Joe thats a bummer.... I don't know of any suggestions for you... but I know you'll bounce back....
vintagedragfan Posted November 11, 2012 Posted November 11, 2012 hey Joe, I figured hot water would be the least damaging thing to try, hoping it would wick under the clear and loosen the decal itself, I figured it was worth a shot, you can always try a more aggressive approach, is it possible to decal over what you have with out removing it? you won't see much of the tubs when the car is complete
Prostreet Posted November 12, 2012 Author Posted November 12, 2012 Bill, I sanded the tubs down smooth and redecaled one and so far it looks better than the original. i was talking to Dave through emails and he said the same thing , best to go over them. Now the question is what clear to use.?
vintagedragfan Posted November 12, 2012 Posted November 12, 2012 urathane clear usually isn't very aggressive if you can use something like that, with a fast catalyst to where it will cure as quick as possible
Mooneyzs Posted November 12, 2012 Posted November 12, 2012 Joe... sorry to hear about the rear tubs with the decal and clear. AS Bill mentioned I personally use Urathane clears on my builds and never had had trouble with the clear. I mist the first two coats on then heavier with the next two.
Prostreet Posted November 12, 2012 Author Posted November 12, 2012 What clear are you guys using ? I'm debating using the model masters again, I assume the urathane is 2 part for airbrush, is so what mixture?
Recommended Posts
Create an account or sign in to comment
You need to be a member in order to leave a comment
Create an account
Sign up for a new account in our community. It's easy!
Register a new accountSign in
Already have an account? Sign in here.
Sign In Now