Prostreet Posted September 11, 2012 Author Share Posted September 11, 2012 only the lines Joe? everything fights me!! LOL ready to see the next update!! Me to, just the lines at that time LOL. This thread has been nothing but pure eye candy. Thank you for keeping it going. Thx. Cranky. Quote Link to comment Share on other sites More sharing options...
Prostreet Posted September 11, 2012 Author Share Posted September 11, 2012 (edited) Got the bottles mounted and lines added, Used RB motions new anodized fittings and Ted's modeling hardline, Great stuff. Tommarrow i will add the top part of the brackets and the lines and handles, Still waiting on decals to add the gauges to them. Edited September 12, 2012 by Prostreet Quote Link to comment Share on other sites More sharing options...
vintagedragfan Posted September 11, 2012 Share Posted September 11, 2012 thats beautiful Joe, very nice work man, the fittings are sweet! Quote Link to comment Share on other sites More sharing options...
Mooneyzs Posted September 12, 2012 Share Posted September 12, 2012 Joe... those fire bottle turn out sweet man!! The RB motion anodized fittings look great. I need to pick up sone of those. this build is flat out awesome!! i also wanted to ask on the pro tech hard line did it cone in straight sections or rolled up and you had to straighten yourself?? Keep up the killer work Bro! Quote Link to comment Share on other sites More sharing options...
Prostreet Posted September 12, 2012 Author Share Posted September 12, 2012 (edited) Thx. Chris, The Ted's modeling hardline comes rolled up. For long straight runs you will have to work it to get it straight. I think it will be hard to get it perfectly straight, but still great stuff to work with. I made the fire bottle handles tonight and added the lines, I used small pieces of styrene for the handles and painted them red. I hope to finish the bottle brackets tomorrow after work, Then the back half of the fire system will be done and i can move on to the pedals. Edited September 12, 2012 by Prostreet Quote Link to comment Share on other sites More sharing options...
tyrone Posted September 12, 2012 Share Posted September 12, 2012 Joe this build is looking very... IMPRESSIVE... bro.... Quote Link to comment Share on other sites More sharing options...
MicroNitro Posted September 12, 2012 Share Posted September 12, 2012 The bottles look great. Thanks for making the parts looks so nice. Do you mind if I use the picture of the bottles? Quote Link to comment Share on other sites More sharing options...
Prostreet Posted September 12, 2012 Author Share Posted September 12, 2012 Joe this build is looking very... IMPRESSIVE... bro.... Thx. Tyrone, I learn a lot from you guys. Quote Link to comment Share on other sites More sharing options...
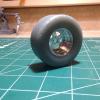
Prostreet Posted September 12, 2012 Author Share Posted September 12, 2012 The bottles look great. Thanks for making the parts looks so nice. Do you mind if I use the picture of the bottles? Thx. Jim, you can use the pictures if you like , there are pictures of the finished wheels a coupl pages back. Quote Link to comment Share on other sites More sharing options...
Prostreet Posted September 12, 2012 Author Share Posted September 12, 2012 Joe... those fire bottle turn out sweet man!! The RB motion anodized fittings look great. I need to pick up sone of those. this build is flat out awesome!! i also wanted to ask on the pro tech hard line did it cone in straight sections or rolled up and you had to straighten yourself?? Keep up the killer work Bro! Chris, I edited my post. That is actually Ted's modeling hard line, sorry for the confusion. Quote Link to comment Share on other sites More sharing options...
Mooneyzs Posted September 12, 2012 Share Posted September 12, 2012 Thanks Joe... i will have to take a look at it. i have been using some aluminum and steel wire (bead wire) from hobby lobby and micheals as well as K&S piano wire and guitar string. Quote Link to comment Share on other sites More sharing options...
TedsModeling Posted September 12, 2012 Share Posted September 12, 2012 (edited) Thanks for the plug, Joe. Chris - I have soft aluminum line from .014" to .205" which is equal to 3/16" to 3 1/4" in 1/16 scale. My soft black line covers the same range which is either solid rubber or rubber tubing. An easy way to make the hard line straight (also works for Pro Tech braided lines) is to place it on a smooth surface and roll your hand over it. Joe did a great job in routing the lines to make it look realistic. Edited September 12, 2012 by TedsModeling Quote Link to comment Share on other sites More sharing options...
comp1839 Posted September 12, 2012 Share Posted September 12, 2012 wow joe. that's just plain old fantastic craftsmanship! Quote Link to comment Share on other sites More sharing options...
Prostreet Posted September 13, 2012 Author Share Posted September 13, 2012 Thx. Dave, Added the brackets tonight shaped out of some styrene and added RB motion bolts. Quote Link to comment Share on other sites More sharing options...
stump Posted September 15, 2012 Share Posted September 15, 2012 Joe, I thought you'd be finished this by now............................... Only kidding mate. Man, this is another build going way beyond the red on the awesome scale Joe. SUPERB work my friend. It all looks to be coming together so well, the chassis, the motor work......man, I got some serious catching up to do. Keep picking away Joe, this will be a winner. Quote Link to comment Share on other sites More sharing options...
vintagedragfan Posted September 16, 2012 Share Posted September 16, 2012 keep pluggin away Joe! looks fantastic bro! Quote Link to comment Share on other sites More sharing options...
Prostreet Posted September 25, 2012 Author Share Posted September 25, 2012 (edited) Thx. Bill and Greg, Been slow going been so busy doing side jobs. I got the hand brake made and installed with linkage and also got the pedals and master cylinder installed. I Tried to make it look like the lines run through the chassis,I used some sandpaper to make the foot pad look like the grip tape they use. Now i can install the lower panels on the drivers side. Working on electrics and the selinoids the supply the shifter pods. Edited September 25, 2012 by Prostreet Quote Link to comment Share on other sites More sharing options...
Mooneyzs Posted September 25, 2012 Share Posted September 25, 2012 Joe... Very nice work on the break set up. Man it is looking sweet. That brake handle is killer too. Glad to see you getting some more time in on this bad boy. Keep up the great work Bro!! Quote Link to comment Share on other sites More sharing options...
Mister Twister Posted September 25, 2012 Share Posted September 25, 2012 Super details! Quote Link to comment Share on other sites More sharing options...
Dyno Davo Posted September 25, 2012 Share Posted September 25, 2012 Amazing build Joe, precise detailing great build Quote Link to comment Share on other sites More sharing options...
Prostreet Posted October 5, 2012 Author Share Posted October 5, 2012 Thx. Guys, No updates will have some this weekend. I need a favor, Need some pictures of a promod seat in the car if possible with the belts in so i can see how they run and what the buckles look like, i come up empty when i look. Quote Link to comment Share on other sites More sharing options...
Prostreet Posted October 23, 2012 Author Share Posted October 23, 2012 Back from the dead, I was finnally able to get my main electronics done. Man it really kicked my Butt with these tiny wires and nuts and bolts, but i was able to get through it and pretty happy with the way it turned out. All the stuff was scratch built except the obvious like wires and bolts, My battery ended up being a generic brand lol. I was unable to print the decal with good quality so it wasn't worth putting it on, I scratch built the battery hold down also. I turned down the starter selinoid that you can see next to the battery and also the little selinoids on for the shift controler, that is the one next to the big stuff and the race pak. Working on the trans and seat next, Trying to turn down the bell housing and trans, will see how that turns out. working through some problems with that. Parts used: Protech wiring and some fittings. Ted's modeling black hose and resin hardware RB motion hardware Scale hardware Quote Link to comment Share on other sites More sharing options...
tyrone Posted October 23, 2012 Share Posted October 23, 2012 OFF THA CHAIN.... The electronics look great... Quote Link to comment Share on other sites More sharing options...
pharr7226 Posted October 23, 2012 Share Posted October 23, 2012 Very nice work on the electronics. Quote Link to comment Share on other sites More sharing options...
comp1839 Posted October 23, 2012 Share Posted October 23, 2012 great work, joe! looks fantastic! Quote Link to comment Share on other sites More sharing options...
Recommended Posts
Join the conversation
You can post now and register later. If you have an account, sign in now to post with your account.
Note: Your post will require moderator approval before it will be visible.