tyrone Posted May 27, 2012 Author Posted May 27, 2012 Alright fellas, I was really busy last weekend with my son graduating from high school, so I did not get any time in at the bench.. but today I did get a little bit done.. I got the drivers floor area done..made a battery box, got the steering shaft done and I re-did the back of the chassis, It was to narrow to mount the coil overs, so I got everything mocked up after changing the back of the car....
futurattraction Posted May 27, 2012 Posted May 27, 2012 It's looking really great Tyrone. Congrats on your son's graduating from HS, too!
Mooneyzs Posted May 27, 2012 Posted May 27, 2012 Tyrone... Chassis looks mighty fine sir!! Very nice work to go back and redo what you did on the rear of the chassis. I know what it feels like and it is totally worth all of the hard work. the floor looks awesome! and the seat is pretty sweet too. Congrats on your boy graduating high school, you have to be a proud dad I bet.
eviltwincustoms Posted May 27, 2012 Posted May 27, 2012 Tyrone, I have to say that second time looks a 110% better, much much better than before! I know we each sure hate to tear things back apart, but you knocked that one out of the park with the changes you did. If you dont mind me asking is the rear end set at ride height now then with your shocks in place? You may have just left that one out of the shots above, but was wondering. Something I do see.. unless it is the way the chassis is setting is your front strut looks like it may be leaning forward? Can't quite tell.... if by chance it is, any plans of going back and re adjusting that top strut mount? I would think you can just un weld it and move it back a bit and fix the issue pretty easy. What did you use to wrap around your seat.... kinda looks like some sort of foam tape? I say it looks darn near the part, nice job! You even did some "Wayne" touches on the floor with the bits inside of your bars.. nice touch! I bet that wasn't an easy task... man in 1/24th scale that is not an easy task! Nice all around job!
tyrone Posted May 27, 2012 Author Posted May 27, 2012 Thanks alot fellas, for the kind words.. Bart I use Johnson & Johnson medical tape for the seat.. I also use it for seat harnesses, blower straps, trans blankets, wheelie bar nets. etc.etc. I use a sharpie for color... the rear end is pretty much at ride height, and it maybe the pics, I think the front struts are o.k. here's a few more pics I could not get up last night my photo bucket was acting up....
eviltwincustoms Posted May 27, 2012 Posted May 27, 2012 I agree with Wayne it looks good... It really is strange how pictures can make things look off. As well I just noticed how much work you have done on knocking down all that resin on the inside of the quarter panels. I am amazed that those big pegasus tires fit under the car!
comp1839 Posted May 27, 2012 Posted May 27, 2012 the fit on all of the parts is just aces tyrone. the chassis fits like a glove front to rear. excellent work. the 4 link and front are just nuts. super job.
tyrone Posted May 27, 2012 Author Posted May 27, 2012 Thanks alot fellas.. well I've got a small update... I've been wondering how I was gonna mount these big rear shoes on the back.. and since the rear end was out of the pro stock cutlass kit... I used the wheel backs from the same kit I just had to do some modifications I cut the center pieces out and glued them to the back of my wheels.. they turned out great... a little more sanding on my joints on the cage and then I'll get some paint on it... heres the first few mock ups of it sitting on all fours... here's a pic of the center pieces I use from the pro stock cutlass kit.. here's a few mock up pics..
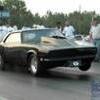
tyrone Posted May 27, 2012 Author Posted May 27, 2012 here's a few pics with the body on... I had to thin the inside of the rear quarters a good bit to get the rear slicks to fit but I think it was well worth it...
Mooneyzs Posted May 27, 2012 Posted May 27, 2012 Holy Smokes Tryone... this build just keeps impressing me... Man it is looking sweet. and you sure have some talent. Nice work man!
1320wayne Posted May 27, 2012 Posted May 27, 2012 I'd say that you thinned the inside. So much so that it is almost transparent. Fits good with all of the work.
Mister Twister Posted May 27, 2012 Posted May 27, 2012 Very nice work...As Wayne mentioned it does look as though the quarters got pretty thin but that won't hurt it a bit. You can always add a thin skim of body putty to the inside if need be. Keep at it!
Dragracer Posted May 28, 2012 Posted May 28, 2012 The chassis/rear-end look great Tyrone, the mock-ups with the body on also look killer!, right up there with all your other bests!, Also congrats on your son making it thru school!
comp1839 Posted May 28, 2012 Posted May 28, 2012 the straight on rear shot sends chills up my spine tyrone. i think you know why, hehe. the whole thing is coming together quite beautifully. just an outstanding effort!!!!!!!
tyrone Posted May 29, 2012 Author Posted May 29, 2012 thanks fellas for all the nice compliments.. I appreciate it.. Well I got some titanium paint on the chassis and a couple of coats of clear on it.. I got the rear coil overs touched up, and I've got the rear disc brakes done and ran the brake lines from the calipers to the t- block... got the front struts and springs painted up and I've got the front rotors and calipers ready to be plumbed... thanks for looking in and comments welcome...
Prostreet Posted May 29, 2012 Posted May 29, 2012 Looks great Tyrone, Your flying through it, Can't wait till i get to the paint part.
Dragracer Posted May 29, 2012 Posted May 29, 2012 The '57 is looking good Tyrone, some real nice shots you got there!, gotta love the size of them Pegasus slicks.
Recommended Posts
Create an account or sign in to comment
You need to be a member in order to leave a comment
Create an account
Sign up for a new account in our community. It's easy!
Register a new accountSign in
Already have an account? Sign in here.
Sign In Now