diymirage Posted November 23, 2012 Posted November 23, 2012 hey guys after moving into a new house and just being way to busy to do anything model related i finally started a new project today (why finish an old one when you can start a new one right ) the subject is a mongram cop-out duster...from 1973 this model is so old it has "made in america" molded on the inside of the body anywho, this will be a quick build, nothing fancy, just to get something on the shelf before the end off the year pics will follow later but unless you like seeing bare frame rails there really isn't anything to show anyway i got the kit in on trade ages ago and it is missing a few small parts, the main things (i think) are the wheels anyone have a nice set?
diymirage Posted November 23, 2012 Author Posted November 23, 2012 well, it turned out i need more then just the wheels the radius rods are missing , aswell as the top part of the blower on the bright side, i did get to slap on some paint today
crazyjim Posted November 23, 2012 Posted November 23, 2012 I t didn't happen if there's no pics, Eelco. LOL.
diymirage Posted November 24, 2012 Author Posted November 24, 2012 since you asked for it Jim enjoy here is the body and the interior firewall or whatever its called and here is the interior inserted into the body sitting next to the frame im really pleased with the way the red came out ,it is exactly what i envisioned
diymirage Posted November 24, 2012 Author Posted November 24, 2012 thanks the body is alclad (at least the front half of it) and its a bit spotty but i can live with that the frame is rustoleum cherry red and it really pops it took a while to properly dry but im very pleased with it hopefully i can stay on the ball with this one and get her done soon i know this kit was once released as a "easy build" kit so it shouln't be too complicated not sure what to do about the missing parts though, looks like ill be doing sme scratchbuilding after all (on a side note, the two rear back braces in the frame were missing so those were scratched allready)
72 Charger Posted November 24, 2012 Posted November 24, 2012 looking good have you noticed that the rear tyres are not correct ! ? They are not handed so one is in reverse and one is going forward not only that but you would need a driver in it to !
diymirage Posted November 24, 2012 Author Posted November 24, 2012 i've heard that complaint before David and looking back i wish i had paid more attention to see if my wheel sections were marked i did however pay attention to the wrinkles and came to the conclusion its no big deal the way my tires are cast i can put both of them facing the right way, both of them the wrong way or even mix and math ill be sure to include pics in my next update like i mentioned before, mine is the 73 release maybe they changed the tires in newer releases ?
diymirage Posted November 24, 2012 Author Posted November 24, 2012 heres a shot of the body but it is rough...the paint came out all ripped and what not im actually rather pleased with it except for one spot on the hood, where i got to eager to pull the masking tape off before the paint had fully dried and as a result i got a nice red fingerprint on the alclad hood hopefully i can buff it out here is a shot of the tires im having a hard time capturing it in a picture but i can put the rim in from either side putting the wrincle where it belongs...or not if i dont want too
diymirage Posted November 24, 2012 Author Posted November 24, 2012 thanks, ive seen a A body mopar in this paintsceme somehwere, ill try to find a pic of it
72 Charger Posted November 25, 2012 Posted November 25, 2012 your paint looks good . I managed to swap my rears for some from the parts box solving both the tyre and driver problem
diymirage Posted November 25, 2012 Author Posted November 25, 2012 thanks i still need to get me a set of rims from somewhere i posted it in the wanted section so hopefully one will pop up soon
nate47 Posted November 25, 2012 Posted November 25, 2012 Cool looking project, nice work on those tires! As far as the paint blemish...I always thought you were supposed to remove the tape before the paint was dry, if not it pulls the paint. At least thats what I was always tought.
diymirage Posted November 25, 2012 Author Posted November 25, 2012 yeah, but you are NOT suposed to grab hold of a piece of tape with wet paint on it and then place your fingers square on the surface of the car that was taped off the paint tranfered from the tape onto my finger and then from my finger onto the hood
diymirage Posted November 27, 2012 Author Posted November 27, 2012 got a little bit of work done on the duster i wasnt too pleased with the chroming on all of it so here are a few parts ready for allclad (allready in the shiny black paint) and here they are in nice shiny allclad (i really like this shot of the exhaust, i took the time to drill them out and they look way better that way IMHO) and you cant tell it in this shot but this blower is made up out off parts from 3 different kits (looked pretty cool after i stripped the paint, kinda like a VW harlequen)
diymirage Posted November 27, 2012 Author Posted November 27, 2012 i also took a few minutes to ad a little character to the bodywork i used a brush to put down the silver dots and then used a fine sharpie to put a crecent shape underneath to make it pop it is far from perfect and the rivits are different in size and spacing but its the best i could do speaking of best, i love this section right here (reminds me of the terminator minus the accent)
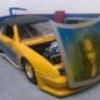
diymirage Posted November 29, 2012 Author Posted November 29, 2012 AAARGH DISASTER STRIKES remember where i said the blower was build up out of different parts? and you cant tell it in this shot but this blower is made up out off parts from 3 different kits (looked pretty cool after i stripped the paint, kinda like a VW harlequen) (see, i said it right there) well, one of those parts that came from the partsbox was the blower hat, a nice wide model with 3 butterfly valves in it i guess i never gave it much thought but when i went to test fit it today (after mounting the engine in the frame) i found out the blower hat is too wide and doesnt fit n the firewall (scrollback up to the second picture and you'll see where it should sit, dead center of the front windshield) so now i need to hunt down another blower hat and alclad that one to match what a pain
W-409 Posted November 29, 2012 Posted November 29, 2012 AAARGH DISASTER STRIKES remember where i said the blower was build up out of different parts? (see, i said it right there) well, one of those parts that came from the partsbox was the blower hat, a nice wide model with 3 butterfly valves in it i guess i never gave it much thought but when i went to test fit it today (after mounting the engine in the frame) i found out the blower hat is too wide and doesnt fit n the firewall (scrollback up to the second picture and you'll see where it should sit, dead center of the front windshield) so now i need to hunt down another blower hat and alclad that one to match what a pain This is your solution, if that Blower hat is really what you're looking for this project. Nice job with the body, I like the paint scheme. Those rivets turned out great. Interesting build, I remember building this kit too and it was alot of fun even if it was quite hard to get together (with my skills maybe 5 years ago ). Yours is looking good!
diymirage Posted November 30, 2012 Author Posted November 30, 2012 i really did like the blower hat i had on it now i had to steal one from a different build i was working on...not to happy about that, specially since that means i have to alclad this one to match thanks for the comments on the body, that did come out pretty close to what i had in mind im curious to see how it comes out once its clear coated
streetmachine11 Posted December 3, 2012 Posted December 3, 2012 Eelco, ive got the same kit and may be able to help you with those wheels. are you needing all four wheels and the inner peices also?let me knowjason
diymirage Posted December 3, 2012 Author Posted December 3, 2012 thanks for the offer Jason but Sstacey47 came through with them i actually found them in the mail today as for the blower hat, im an idiot it didnt call for one (even though HALF of one was included in the kit) either way, i killed the valvebody trying to jimmyrig one from a different kit onto it....no wonder the body wouldnt fit good thing Stacy send me the valve body aswell
diymirage Posted December 9, 2012 Author Posted December 9, 2012 put the whole family to bed early last night to give myself some qaulity modeling time got quite a bit done on this one an a chebby i was working on (if someone from the marina call complaining about a boat drifting aimlessly im not in) thanks to several members on this forum i almost have a complete kit again and i actually managed to take a few mock up shots with the wheels under it (dont worry about the saggy front end, its just a mock up)
Recommended Posts
Create an account or sign in to comment
You need to be a member in order to leave a comment
Create an account
Sign up for a new account in our community. It's easy!
Register a new accountSign in
Already have an account? Sign in here.
Sign In Now