mnwildpunk Posted March 8, 2013 Posted March 8, 2013 How would I go about doing these tail lights so they look half way decent?
GeeBee Posted March 8, 2013 Posted March 8, 2013 I'd cover tham in BMf and then go over the top with Tamiya clear acrylic's
Gluhead Posted March 8, 2013 Posted March 8, 2013 Yep...either the Tamiya or Testors Stop Light Red over bmf.
MAGNUM4342 Posted March 8, 2013 Posted March 8, 2013 I concur. Mask around them first, then bare metal foil and paint. That way when you trim them out you'll remove the excess foil and paint at once leaving behind a nice crisp edge.
mnwildpunk Posted March 8, 2013 Author Posted March 8, 2013 BMF check, stop light red check turn signal amber check How would I do the clear lenses?
PowerPlant Posted March 8, 2013 Posted March 8, 2013 How would I do the clear lenses? You don't. If you do everything tidily the way others explained above, it should look realistic enough without an actual clear piece over it
Casey Posted March 8, 2013 Posted March 8, 2013 I would avoid using both Testors Stop Light Red and Turn Signal Amber metallic paints. Have you ever seen a red or amber lens which was metallic?? I haven't. Tamiya's clear amber and red are better choices IMHO.
Monty Posted March 8, 2013 Posted March 8, 2013 (edited) I would avoid using both Testors Stop Light Red and Turn Signal Amber metallic paints. Have you ever seen a red or amber lens which was metallic?? I haven't. Tamiya's clear amber and red are better choices IMHO. Casey's right on this. Here's another option: Humbrol offers tinlets of clear enamel red #1321 & clear enamel orange #1322 that work well for this kind of thing. You can get them from redfroghobbies.com or your local HobbyTown. Edited March 8, 2013 by Monty
mnwildpunk Posted March 8, 2013 Author Posted March 8, 2013 I guess I should of made myself clearer on of the lights is a back-up lamp. How would I do those paint them white?
Edsel-Dan Posted March 9, 2013 Posted March 9, 2013 Yes, outside of drilling/cutting the cast in place lens out and replacing them with Clear parts you scratch build or resin cast. Simulating the Translucent white lens is the hardest one to due when they are not cast in clear to start with. Look how many kits have th White back up light cast with the clear red tail light lens.
MAGNUM4342 Posted March 9, 2013 Posted March 9, 2013 A good cheap alternative in clear paints i've been using for years is the clear stains used in suncatcher kits. They dry thin and stay where you put them without running. And, if you have a little one around the house they get to make suncatchers with daddy so...bonus!
Deathgoblin Posted March 9, 2013 Posted March 9, 2013 I've got a Countach that I'm making new tail lights for (ex-gluebomb, tail lights and panel were missing). I'm planning on casting a set of tail lights in clear acrylic and then using colored sharpies to get the correct colors, then backing with BMF.
SteveG Posted March 9, 2013 Posted March 9, 2013 I guess I should of made myself clearer on of the lights is a back-up lamp. How would I do those paint them white? There are two good choices, for frosted lenses I use pearl white paint. For ones that appear clear I use aluminum paint. Both are better than bright white. Here's a sample with the backup lenses painted aluminum. -Steve
sjordan2 Posted March 9, 2013 Posted March 9, 2013 There are a few variations on the Countach tail, but these taillights seem to be representative of most of them, and might be helpful in choosing paint.
Skydime Posted March 12, 2013 Posted March 12, 2013 (edited) I dunno if it would work here but, I often use red and orange Sharpies with the extra fine point to color in the reflectors or inside of the lenses, depending on what I am doing. The orange/amber isn't always correct but, it gets the effect that I want most of the time. Yellow sharpies are good for turning chrome into gold quickly and cheaply too. Edited March 12, 2013 by Skydime
heroncustom Posted March 12, 2013 Posted March 12, 2013 A simply solution would be testors window maker/glue. I use this to simulate glass gauge faces and it works pretty well id maybe try painting the a pearl/light mettaluc white then apply the window maker over the whole lamp assembly let try and see how that works. Iv done this on chrome plated headlights to add a bit of depth and relish to lenses. Sorry no pixs worth a shot tho!!
michael1969 Posted March 14, 2013 Posted March 14, 2013 I have had some success using white glue like Elmer's. Paint your color or foil the back up light then place a drop of glue on. Use a toothpick to fill in the area then let dry. Works similar to the window glues.
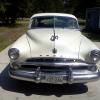
michael1969 Posted March 14, 2013 Posted March 14, 2013 Looking at your picture, I would foil the light. Next color the red reflector as seen in sjordan's photo and let the red dry. Next, I would use the glue on the lens and distribute it using a toothpick. Let it dry. If you don't like the look, peel off the foil and your back where you started.
sjordan2 Posted March 14, 2013 Posted March 14, 2013 (edited) Seems to me that one of the most notable parts of each lens is the mesh pattern, which appears to be molded onto the kit lenses. This is the underside of the lens, which is flat on the outer side. I'd experiment with painting the mesh in the color of the lens, then putting a flat piece of properly tinted clear plastic over the light. The backup light might be foiled, then only the mesh painted white, and the clear plastic put on top of it. I'd also experiment with making scratchbuilt lenses using finer mesh and, if that turns out well, shaving off the kit lenses. In fact, it looks like you could replace both light sections of the body with sheet styrene. They seem very flat. OR You could try making stickers/decals directly from photo reference like this when printed to size. Edited March 14, 2013 by sjordan2
sjordan2 Posted March 14, 2013 Posted March 14, 2013 PS: For the rest of your build, you'll find incredibly detailed reference photography here, when you search for lamborghini countach: http://www.fantasyjunction.com/cars/search
Danger Posted March 15, 2013 Posted March 15, 2013 Skip, thanks for that link. It provided pics of areas I haven't been able to find. Perfect timing too. Danger
Captain Obvious Posted March 18, 2013 Posted March 18, 2013 I will join the Tamiya clear red/clear orange camp...but sometimes BMF makes the lenses appear too bright. Occasionally I will mix a little silver and, say, gunmetal paint, brush that on, and apply the Tamiya color over that.
Recommended Posts
Create an account or sign in to comment
You need to be a member in order to leave a comment
Create an account
Sign up for a new account in our community. It's easy!
Register a new accountSign in
Already have an account? Sign in here.
Sign In Now