ScaleDale Posted August 25, 2013 Share Posted August 25, 2013 To determine how much my Mustang could deviate from stock, I compared an NHRA approved blueprint of a 2012 Camaro sold by 5 Star Race Car Bodies to the same measurements of a Revell stock 2010 Camaro. Here's the blueprint for the Camaro with the dimensions converted to 1:25 in inches and mm. This is the bottom half of the PDF with all the dimensions in 1:1 scale. This is the result of comparing the PS Camaro, Stock Camaro and Stock Mustang. I used these as a base for cutting my body. ComparativeDimensions.rtf Dale Quote Link to comment Share on other sites More sharing options...
GoatGuy Posted August 25, 2013 Share Posted August 25, 2013 Looks like a great start. I will definitely follow this as PS is one of my favorite classes. All the tech info by you guys is really appreciated. Quote Link to comment Share on other sites More sharing options...
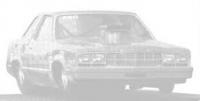
futurattraction Posted August 26, 2013 Author Share Posted August 26, 2013 I made significant progress today. Better than what I expected. I got the driver side pillars cut off last night before going to bed. I got the passenger side done today. Tried to get them evened up so they're as close to identical as I could make them. Both were trimmed so they set down nicely on the quarters. Wonder of wonders, I actually got both sides reattached late this afternoon. I measured the distance between the two pillar sides, did the math to figure out how much I need to remove from the roof section I removed yesterday, transferred those marks to it and actually got it trimmed tonight, so the remainder of the pics tonight are mockups of what it looks like at the moment. ...and the requisite side-by-side comparison with the '06 Mustang. Quote Link to comment Share on other sites More sharing options...
ScaleDale Posted August 26, 2013 Share Posted August 26, 2013 Team Aruba has (or had) an Extreme Pro Stock Mustang. Here's a link to a bunch of reference pics. http://www.bing.com/images/search?q=team+sruba+racing&FORM=HDRSC2 Dale Quote Link to comment Share on other sites More sharing options...
Ace-Garageguy Posted August 26, 2013 Share Posted August 26, 2013 Coming along and starting to look good. Ambitious project, solid progress. I really like the 4th from top (profile) shot in post 32. Definitely getting the right look. Quote Link to comment Share on other sites More sharing options...
Dragfreak Posted August 26, 2013 Share Posted August 26, 2013 great job with the body!! Quote Link to comment Share on other sites More sharing options...
ScrappyJ Posted August 26, 2013 Share Posted August 26, 2013 Very nice work so far! Quote Link to comment Share on other sites More sharing options...
futurattraction Posted August 26, 2013 Author Share Posted August 26, 2013 Thanks for the kinds words, Jeff. I appreciate it. Joe - Thanks for your encouragement! Thanks, too, for bringing the brownies. I hear they're a big hit! LOL Hey thanks Paul. Brownies always draw a crowd... Thank you, Jeremy John. Much appreciated! You're welcome to partake of a brownie, if there's anything left. LOL Brett - So far I haven't messed things up. Hopefully I can stay on the straight and narrow and keep this baby moving along. Thanks a bunch, Leonard! How are you doing with Camaro project??? I'm looking forward to seeing you send through an update one of these days! I could try talking you into scaling down, Dave, but I know it wouldn't work. Besides that, I love seeing the detail you put into your 1/8 builds... Thanks Ira... So far things are going fairly smoothly. Hopefully they'll keep going that way. Hey, I appreciate your encouragement, Dave R. You're right, Bill. This was a pretty ambitious undertaking. There's not a panel on the car that hasn't had at least one intrusion into it, if not several. I'm pretty pleased with how it's turning out so far. There are a couple of nuance-y sort of things I'm not sure if I want to try, or leave well enough alone. On some P/S Mustang pics, it appears the quarters mildly flare out in behind the doors. That may be do-able. I'm not sure whether there is more front end "droop" on the 1:1s than what is possible with the 1/25th version. IF there is, I don't think there's much I can do to enhance the front of the car. By the time the hood is bulged, that will, for sure, help create more of the appearance of a drooped nose, or so I'd think. Thanks for the encouragement, Jason! I truly appreciate it. Dirk - Thanks for the kind words. They'll help keep me going on this. Quote Link to comment Share on other sites More sharing options...
tyrone Posted August 26, 2013 Share Posted August 26, 2013 Hey Scott... I think this bad boy is coming along great... I give you guys all the props to cut up and modify these bodies... This one is looking spot on..I especially like the side shot.... If you do cast this... I could definately see a mustang pro stock build in my future...lol.... Great Job.... Quote Link to comment Share on other sites More sharing options...
DrKerry Posted August 27, 2013 Share Posted August 27, 2013 Oh yeah, now ya got the look. That looks pretty spot on now!!! Great work!!! You have more patience than I would. Always thought about building a Pro Stocker or Pro Mod but was a bit more than I wanted to pull off. Can't wait for more!!! Quote Link to comment Share on other sites More sharing options...
Mooneyzs Posted August 27, 2013 Share Posted August 27, 2013 Scott.... I have to give you tons of credit for cutting this body up. You have totally impressed me with the body so far and I think it is spot on to a new pro stock and I love what you have done. Keep going forward with this because I know this build will just be amazing. Nice work buddy!! Quote Link to comment Share on other sites More sharing options...
tubbs Posted August 27, 2013 Share Posted August 27, 2013 sheeze, I barely have time to build let alone figure out dimensions right down to the nats butt! I usually slice and dice till it looks good. but this is modeling, folks. and its great to see people jumping in to help. keep going Scott, looks real good. Quote Link to comment Share on other sites More sharing options...
futurattraction Posted August 27, 2013 Author Share Posted August 27, 2013 Okay - I'd appreciate people's feedback. In the picture of the Mustang, below, are the rear window sides (adjacent to the C-pillars) parallel to each other or do they widen as the window approaches the deck lid? Thanks for your input! Quote Link to comment Share on other sites More sharing options...
Prostreet Posted August 27, 2013 Share Posted August 27, 2013 Great work Scott, your doing a heck of a Job. Quote Link to comment Share on other sites More sharing options...
flo9mr Posted August 28, 2013 Share Posted August 28, 2013 To me it get a bit wider st the bottom... Quote Link to comment Share on other sites More sharing options...
futurattraction Posted August 28, 2013 Author Share Posted August 28, 2013 Thanks Tyrone. So far it's has gone together pretty well. As with the Fairmont, I'm always waiting for the other shoe to drop and discover I messed something up that I won't know about 'til well after the fact... Hey thanks Kerry! It really is starting to look like what it's supposed to. I have yet to figure out how I'm going to bulge the hood. Chris - Thanks bro. It is a bit unnerving to take a $25 kit and start hacking on it within only a day or so after getting it home... LOL Hey, get with it Al! I want to see more of your stuff! LOL Thanks for the kind words, Joe. Hoping to see some more of your handiwork before too long (unless I've missed it!). Edward - Thanks for your input. I really appreciate it. Dave (comp1839) - Thanks for the pics you sent me. They do help to put a bit different perspective on the rear window of these cars. I'm pretty much committed to what I've going with the new roof. I glued everything in tight last night. I have also made up my mind regarding how to address the rear window. I've added a .060x.040 strip on each side to narrow the opening back down to what matches with the trunk lines on the body, which is the way the 1:1s appear to be. I kept the new rear window shape that naturally occurred when I tipped the pillar sections in. I knew this was going to happen, but it's interesting to see it in reality - by tipping the pillars in at the top, it also effectively laid the windshield back at a flatter angle, which is another aero aspect of the 1:1 cars. Quote Link to comment Share on other sites More sharing options...
1320wayne Posted August 29, 2013 Share Posted August 29, 2013 Superb work so far Scott. As detail oriented as you were with the Fairmont I'm sure that your Mustang body will be as close to accurate as possible. Quote Link to comment Share on other sites More sharing options...
ScaleDale Posted August 29, 2013 Share Posted August 29, 2013 (edited) Here's Larry Morgan's car from the Northwest Nationals here in Kent, Washington. The side of the rear window is parallel to the top plane of the side accent window. Since the car is narrower at the roof line the window flares out. Your photo is the Cunningham MasterCam car. I have other shots of it under cover like yours but not that exact one. They were done with a wide angle lens which exaggerates parallel edges. My collection of shots of that car include interior and dash photos. Want them? EDIT: Changes in Pro Stock The top photo is Larry Morgan's 2013 car (ignore the paint, these cars are cameleons) and the lower one is his 2010 car. Dale Edited August 29, 2013 by ScaleDale Quote Link to comment Share on other sites More sharing options...
Bill Edman Posted August 29, 2013 Share Posted August 29, 2013 nice build Quote Link to comment Share on other sites More sharing options...
PappyD340 Posted August 29, 2013 Share Posted August 29, 2013 Still coming along quite NICELY!! very nice body manipulation!! Quote Link to comment Share on other sites More sharing options...
Mooneyzs Posted August 30, 2013 Share Posted August 30, 2013 Scott...I know what you mean by hacking a brand new kit up but we don't for the love of our hobby . I al loving your progress and your skills. Quote Link to comment Share on other sites More sharing options...
futurattraction Posted August 30, 2013 Author Share Posted August 30, 2013 (edited) Thanks for your vote of confidence Wayne. Dale, I appreciate your additional photos and observations regarding the rear window shape. I think it is pretty evident, with the additional pics that the window does taper wider the closer to the deck lid it goes. Thanks for checking in Bill. I appreciate your stopping. Larry - thanks, too, by popping in. Hey Chris, I guess it's no huge deal, but it does feel sort of strange to cut up a perfectly good body... LOL I started blending the panels together night before last, re-arched the hood (a little too much) and also trimmed off .080 material from either side of the hood, only to realize I'd messed up. Physically, it made the hood closer to fitting the narrowed hood opening. What it didn't do was allow for the fact that the grille dimensions are smaller due to the narrowing of the body. Oops. I should have seen this and not done the dumb thing I did, but it's too late to cry over spilled milk. I have since added the .080 back onto the outer edges of the hood and will take the necessary slice out of the middle to arrive at the correct hood width (and matching to the grille). It's continuing to take shape - just had to take a detour is all... Edited August 30, 2013 by futurattraction Quote Link to comment Share on other sites More sharing options...
Ognib Posted August 30, 2013 Share Posted August 30, 2013 Hey Scott, just found your thread. Looking good. Interested to see how it evolves. Quote Link to comment Share on other sites More sharing options...
futurattraction Posted August 30, 2013 Author Share Posted August 30, 2013 Thanks Ray. It's actually gone together pretty decently so far and I feel like it's a good representation of the 1:1s. Guess I'll see as time goes on. Quote Link to comment Share on other sites More sharing options...
futurattraction Posted September 1, 2013 Author Share Posted September 1, 2013 A few picture updates from the past couple days. I got the hood narrowed, fitted and attached today. I also began blending it into the edges of the fenders like the 1:1s. Here is a pic of how I ended up doing the rear window. It’s starting to look more like the 1:1 - flatter and rounder. LOL Comments/suggestions welcome... Quote Link to comment Share on other sites More sharing options...
Recommended Posts
Join the conversation
You can post now and register later. If you have an account, sign in now to post with your account.
Note: Your post will require moderator approval before it will be visible.