Search the Community
Showing results for tags 'trumpeter'.
Found 14 results
-
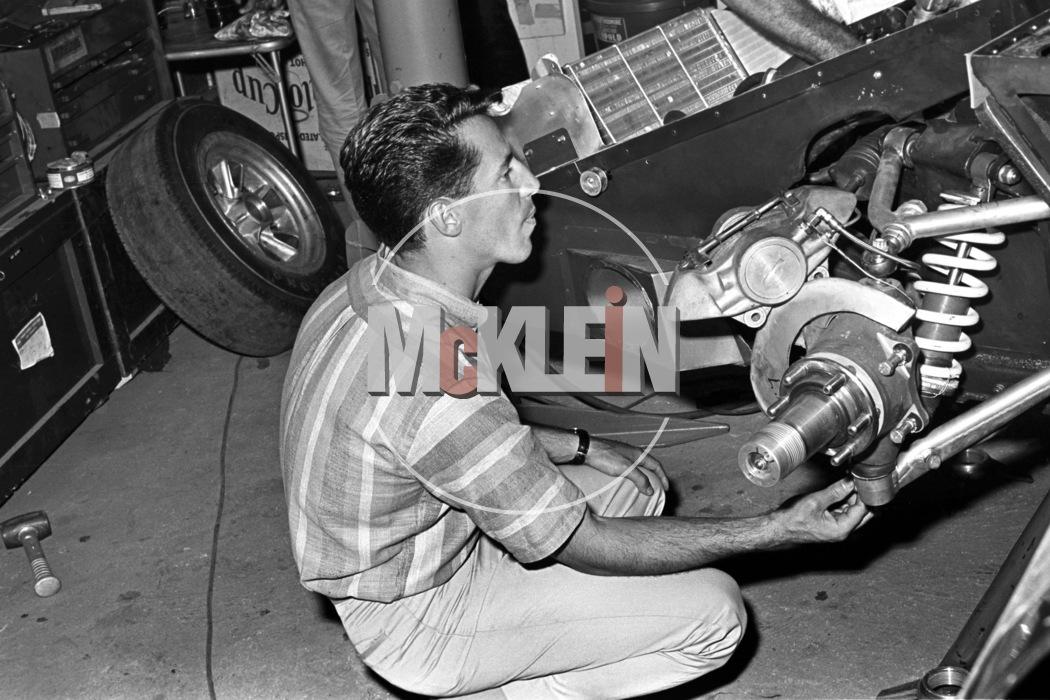
 Starting my first build thread on this forum - the trainwreck called the Trumpeter Ford GT40. There are many inaccuracies with this kit if one wants to build the 1966 LeMans winner and I have read that it does not represent any particular GT40. I don't know how accurate that statement is, but in any case I like to do my own thing from time to time, so I will build this up as I would like it. Visually, it will resemble a MkIIb, but there will be differences under the skin. The first hurdle to overcome is stripping the chrome off of almost all the chromed parts. This was no easy task as the Trumpeter chrome is the most stubborn I have come across. I did find a way, however. Starting with the engine, I cut off all the nodules that are supposed to represent bolts and nuts, and stripped the paint off. Looking around for nuts and bolts to improve the model, I found that Meng makes styrene nuts and bolts and prices them very reasonable, so that is what I am going with. This is a great improvement over the as-molded kit. I have place 57 bolt heads so far and more are sure to come. I'm liking that price on those Meng bolts! The kit left out some necessary components, like the distributor, starter motor, and crankcase breather, so I will be adding these. Must have slipped their mind. The beginnings of a distributor and the breather I knocked out on the lathe. You're welcome to come along for this ride, but it won't be a short one.
 -
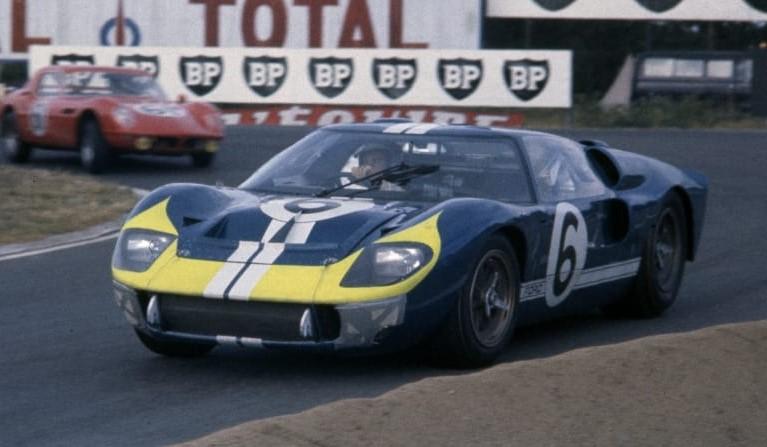
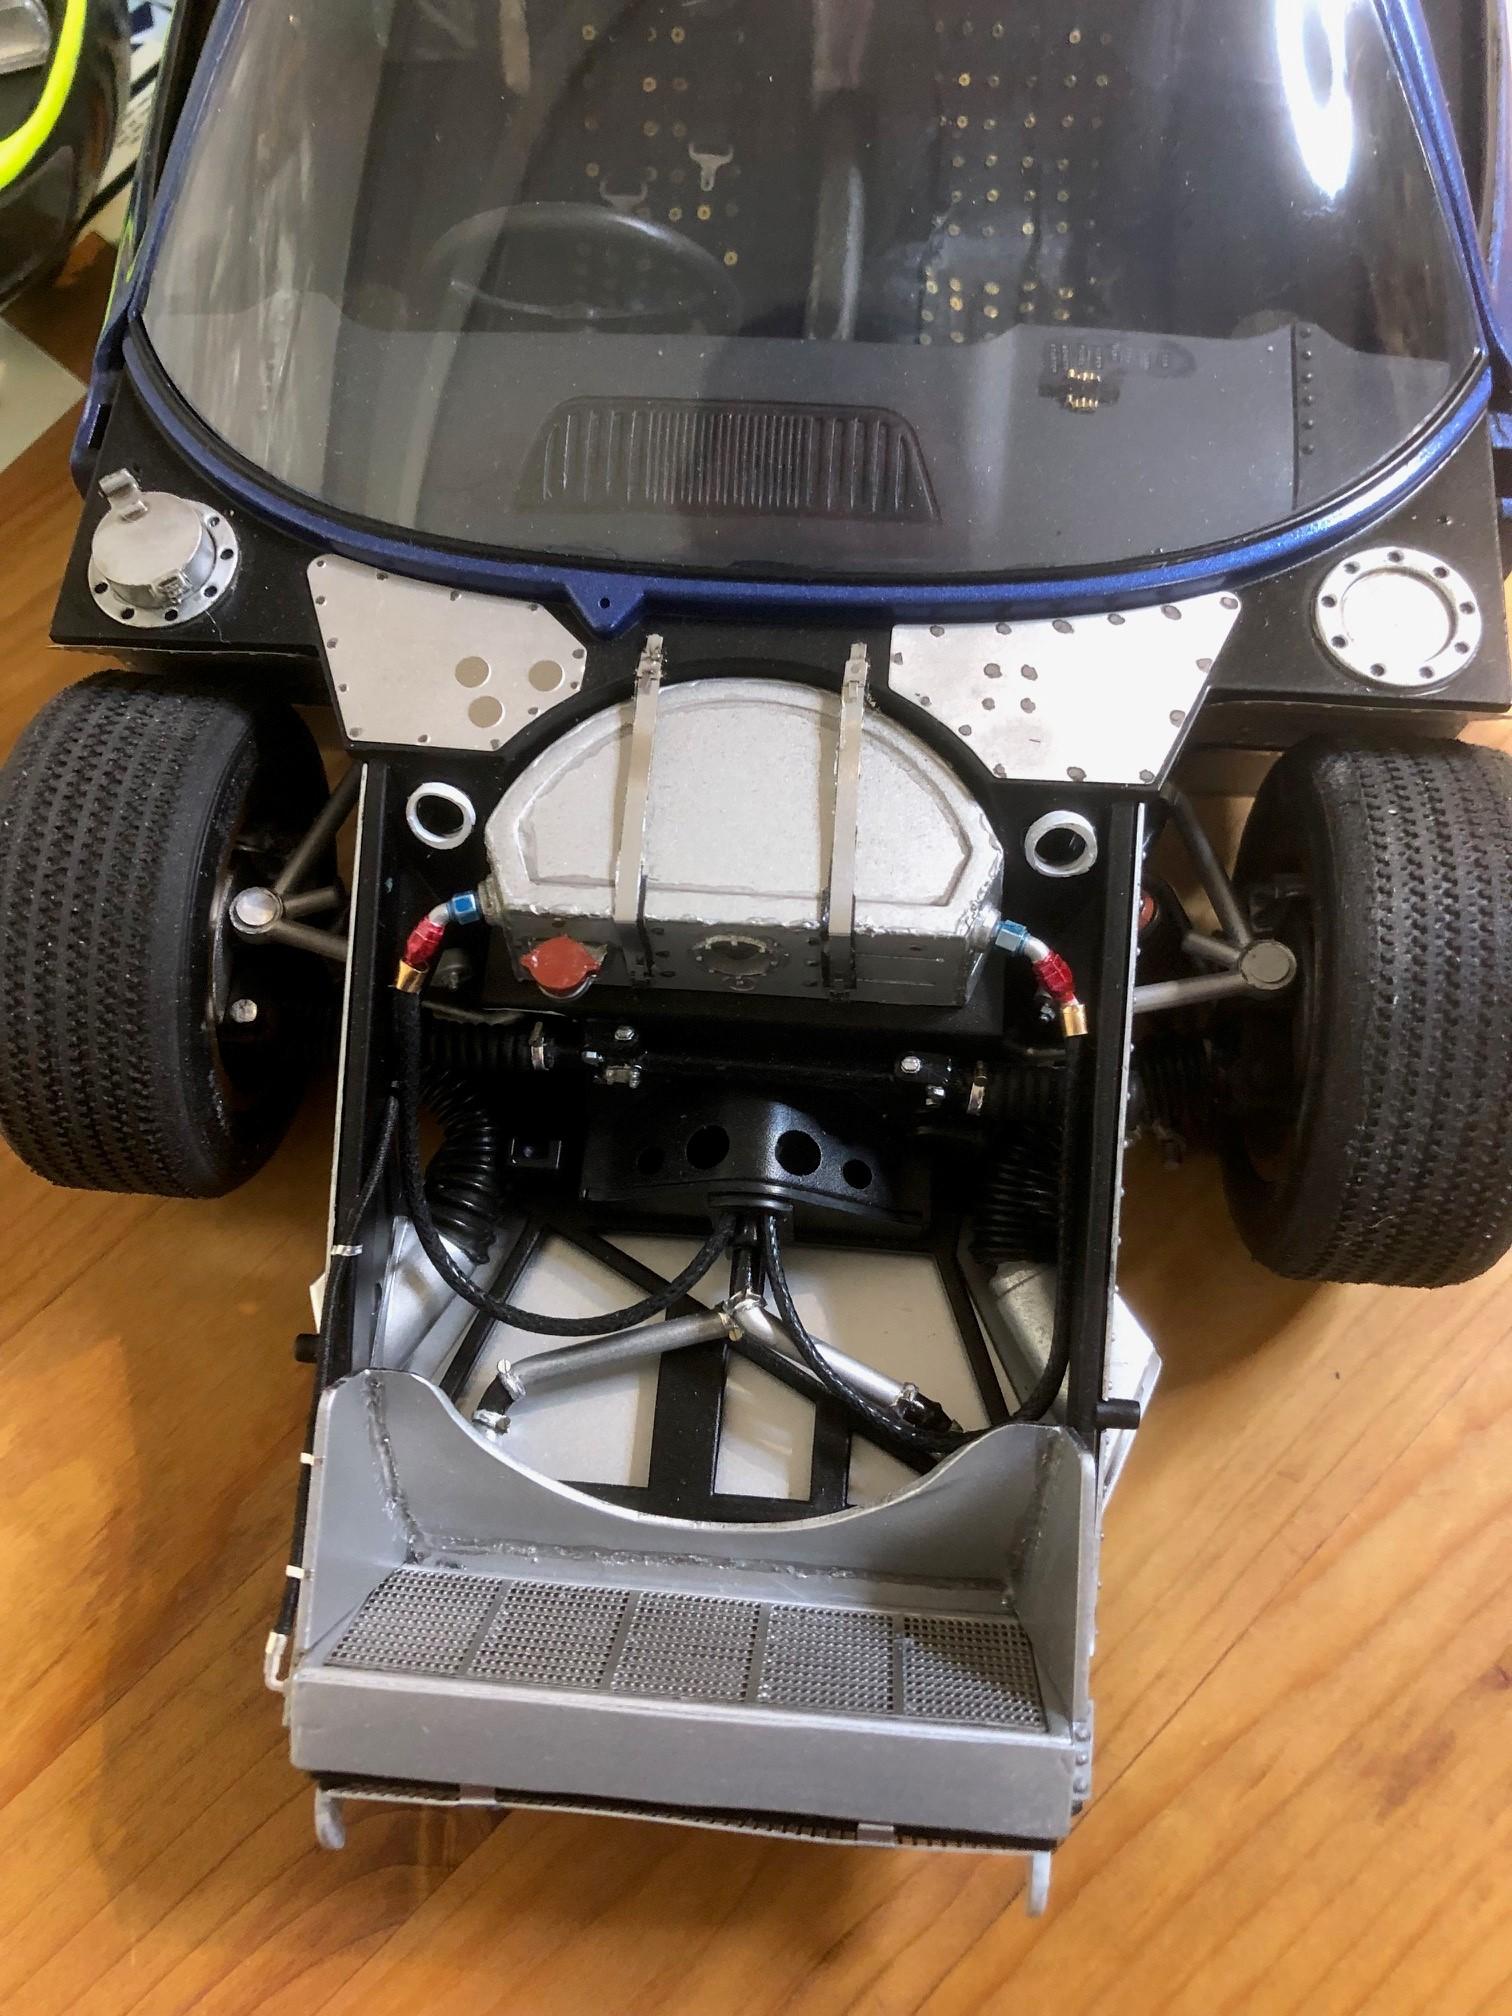
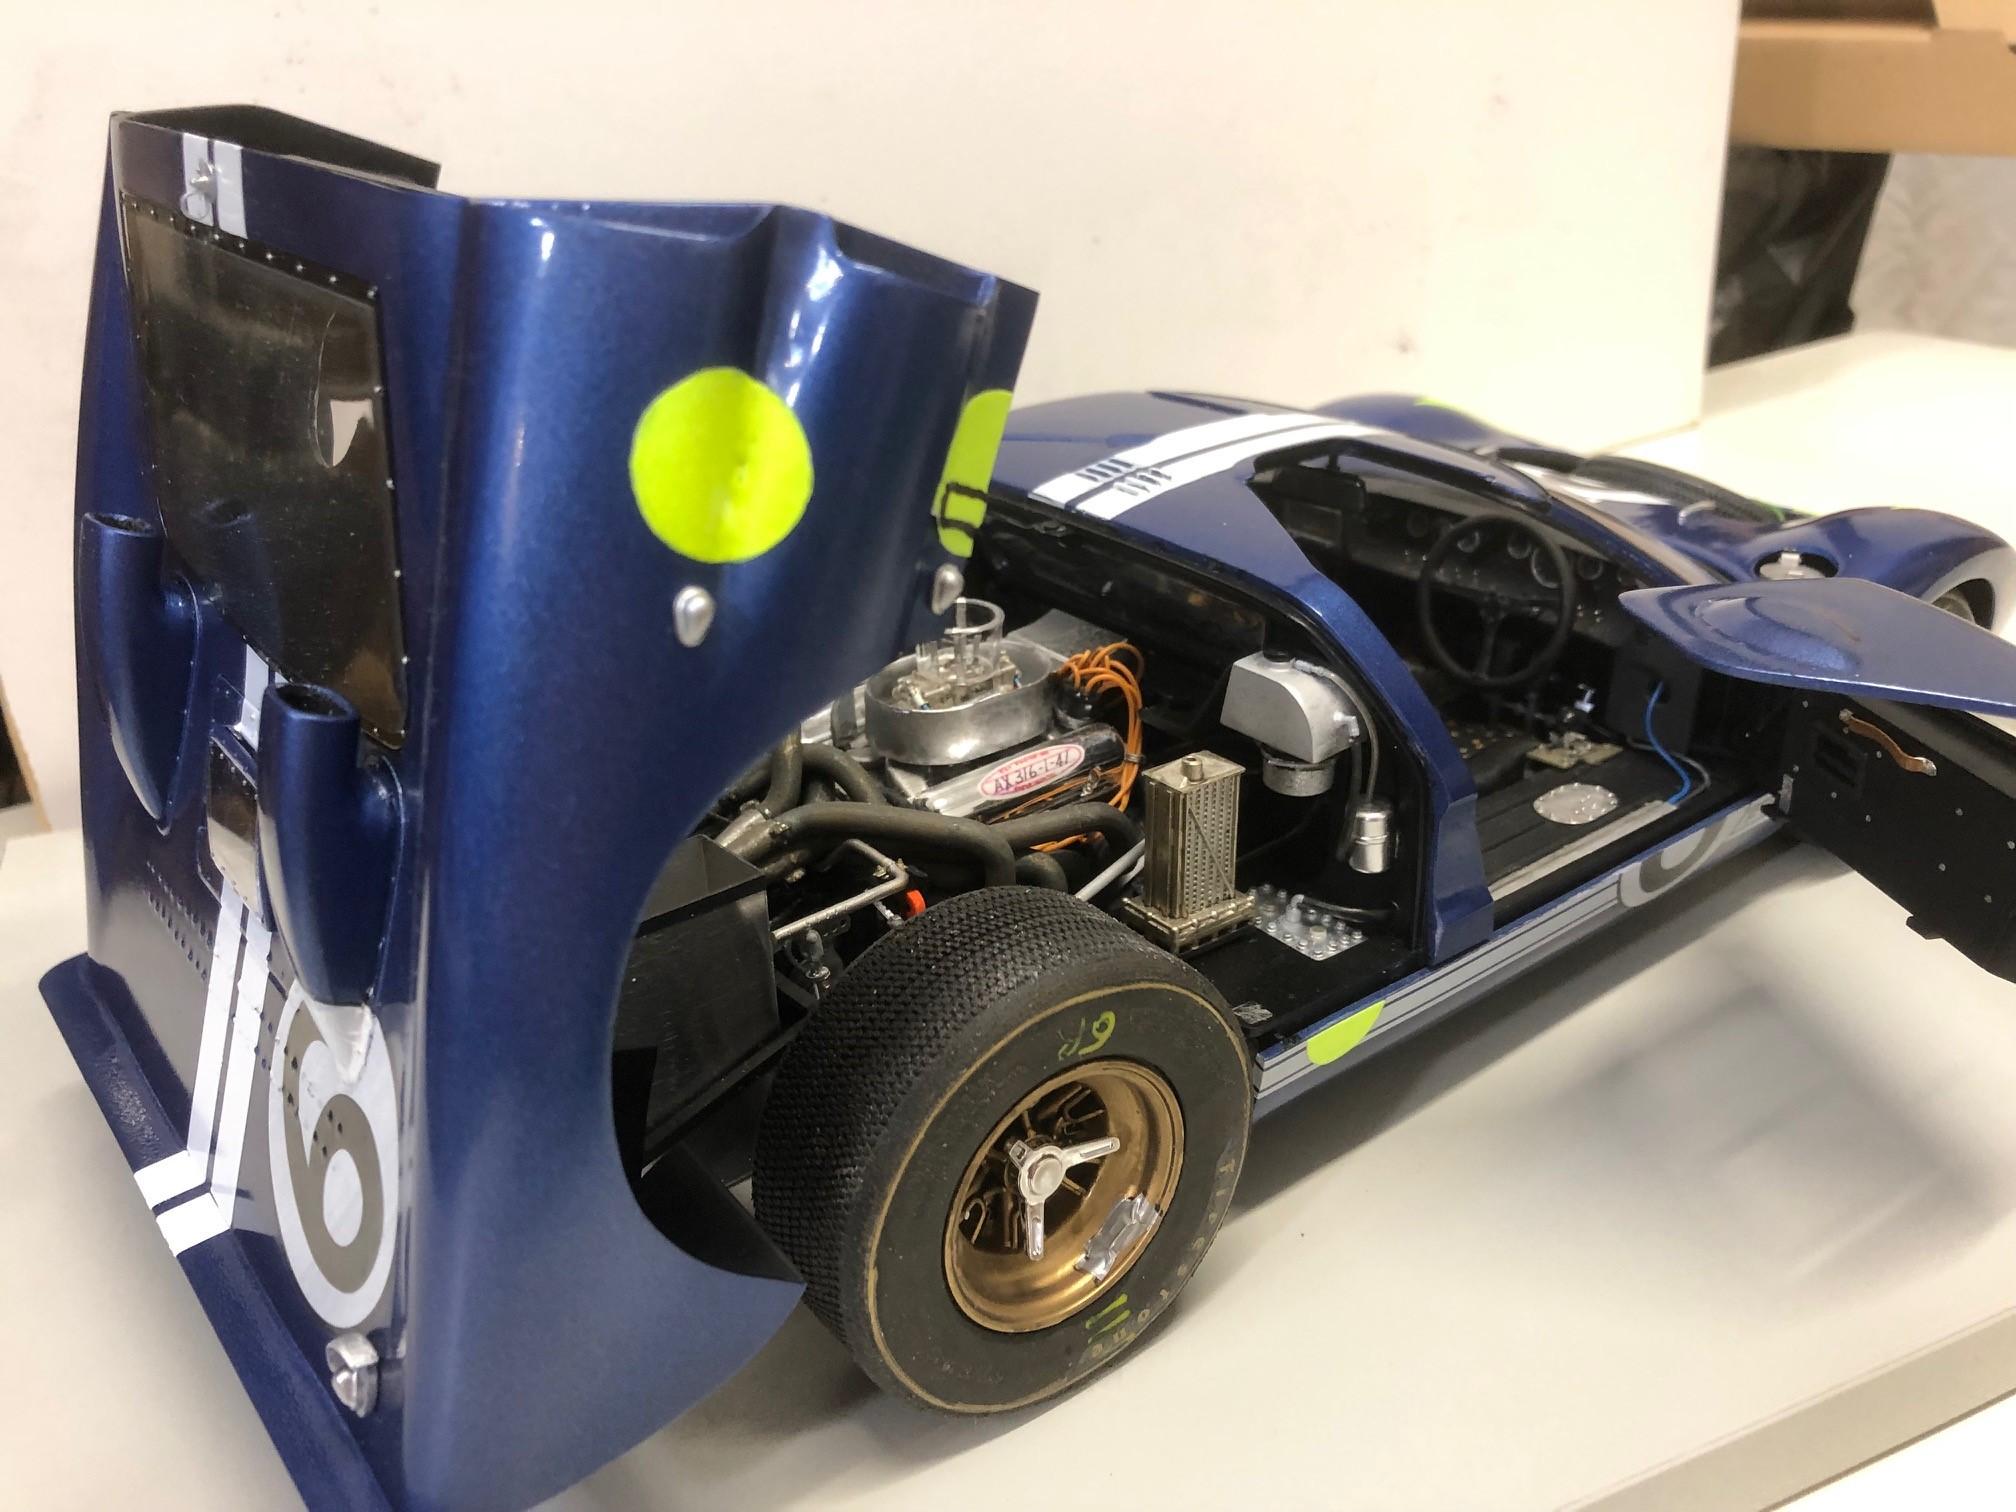
 I’ve finally beaten this into some sort of submission, it’s the Magnifier nee Trumpeter US Sports Car issue. It has several well-known detail short comings, mainly in the chassis, engine, suspension areas but having built it I can see why the designers did it this way, for despite my detailing those areas are pretty much invisible on the completed model. The consensus is that the body shape is pretty much spot on but the separate panels don’t fit together very well, this was my experience too. So, despite spending quite a bit of time during assembly to try and get a snug fit they still refuse to close very well. My builds all reflect drivers or cars that I’ve seen race and although I never saw the Ford race in anger, I did see Mario drive both Formula 1 and IndyCar several times during the Seventies and Eighties so his number 6 car from Le Mans 1966 lets me include the model in the collection. Mario’s car was chassis number P/1031 and was one of three cars prepared by Holman Moody for Fords push to win Le Mans. The HM cars differed in details from the three prepared by Shelby Racing and are certainly different to the car in the kit which is a mish mash of MKII, MKIIB and restored cars along with a good pinch of Trumpeter imagination. The colour scheme is also a change to all those Ken Miles and Bruce McLaren finished models. Unfortunately, the car retired after 6 hours with a blown engine cutting short Mario’s first visit to La Sarthe. Anyway, here’s a couple of pictures of the real thing and one of Mario as a young gun, 26 years old fresh to Le Mans after success in USAC stock cars. The model is finished in an approximation of Ford Night Mist Blue using Halfords rattle can Nissan Indigo Blue, in retrospect it’s a bit light. The dayglo yellow race markings are again Halfords rattle can and do glow in the dark! The markings and paint masks are from Indycal and were fine but the roundels weren’t pure white and show grey printing lines in them under close examination. I used parts from a 3D printed 427 engine but again, the extra detail isn’t really visible. P/1031 had lines of rivets on the rear clip aft of the window and also on the front hatch, these were probably holding reinforcement plates on the inside, the rear ones were painted, the front ones were bare. I used Master rivets in pre drilled holes to replicate them. The kit seats were pretty basic so I covered them in black silk to replicate the parachute nylon on the originals and added RBMotion washers for the vent eyelets. On the whole I'm pretty happy with the final result, I would love a MKI model in 1/12 to do a Gulf car, are you listening Tamiya? LOL
-
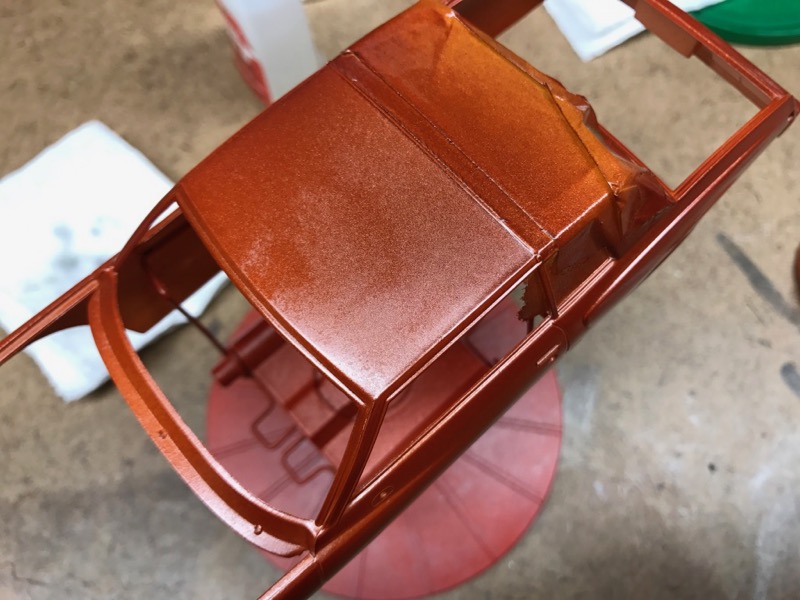
Took advantage of being slow at work and the nice weather we have been having in Maryland and got my 65 Ranchero out. Filled the wrong gas filler door on the passenger side and primed and painted it. Tamiya White Primer with Scale Finishes Chevy Butternut Yellow. The small block Ford looks a bit big in the kit. The 5 spoke wheels need some depth to them to look better in opinion so gonna have to dig out some other wheels
-
 Hello friends, here I bring you the flagship of the Russian Navy, the aircraft carrier Kuznetsov. Final touches are made, planes and helicopters are placed on the deck, elevators are detailed and the roof is painted. The model is placed on a wooden base with water simulation. Greetings and I hope you like it
 -
Hello friends, the engine is completely painted and finished in its support on the transport car. This has been a very entertaining work because of the amount of pieces made to scratch and all the information gathered to make the model as real as possible. https://youtu.be/4pa5DXsmifI Playlist of the entire montage: https://www.youtube.com/watch?v=qH4NLRAHfk4&list=PLR6SGGlMyWrezl_Al_Bc2pkKFYrMp6HXL Greetings and I hope you like it
-
Hello friends, here I bring you the flagship of the Russian Navy, the aircraft carrier Kuznetsov. It is of the brand Trumpeter at scale 1/700 which comes very well detailed. I really liked to make this model for all the details that have been possible. https://youtu.be/aCEIS_ukdSk Greetings and I hope you like it
-
Hello friends, in this third part all the engine components are finished and painted for later ass If you have not seen the other parts here I leave the link: Part 1: https://youtu.be/qH4NLRAHfk4 Part 2: https://youtu.be/P8wTD-OVy2s Greetings and I hope you like them.
-
Hello friends, in this second part the assembly of the engine is continued, painting of interior parts, manufacture of external components to scratch, realization of pipes and much more. We also continue to move forward with the transport car and the support for the engine. https://youtu.be/qH4NLRAHfk4 Greetings and I hope you like it
-
Hi The engine mount of the airplane is shown here. Some improvements have been made to make the model more detailed. The carrier and the transport carriage have been scratched. Some pieces of the box model have been replaced and they have been made to scratch using aluminum to make the motor more real. https://youtu.be/qH4NLRAHfk4 a greeting
-
Hello partners Because of its design and its way of acting on the battlefield, I decided to build this battle tank. The model is the Stridsvagn 103 version C of the Trumpeter brand at 1/35 scale. Being a tank without turret, its low profile stands out against other models. https://youtu.be/p1NLEeblI1U Greetings and I hope you like friends
-
Hello friends Here I show you the Chinook helicopter version CH-47A. I had to scratch a support to place the folded blades for not having enough space. The models are from the Trumpeter brand at 1/35 scale, which in my opinion comes very well detailed. If a partner wants details about the support of the blades he writes me. Greetings and I hope you like it https://youtu.be/cORriK4ePvk
-
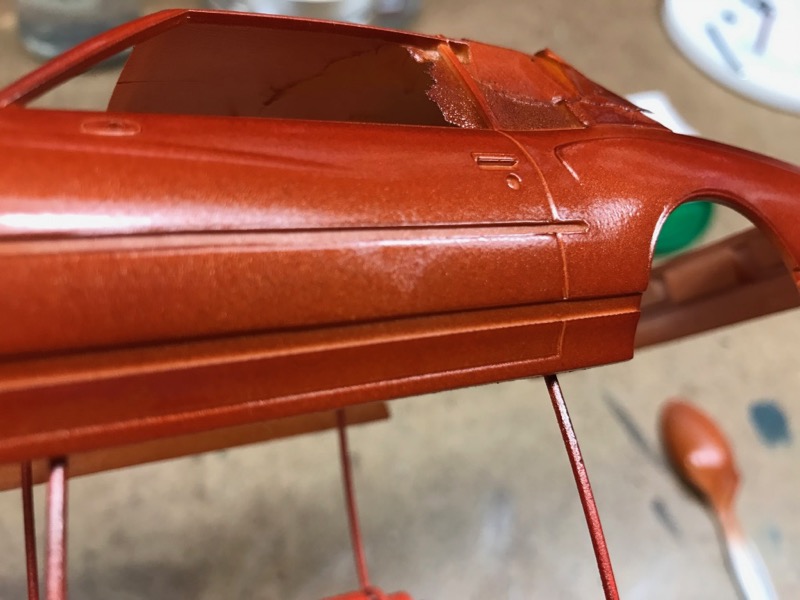
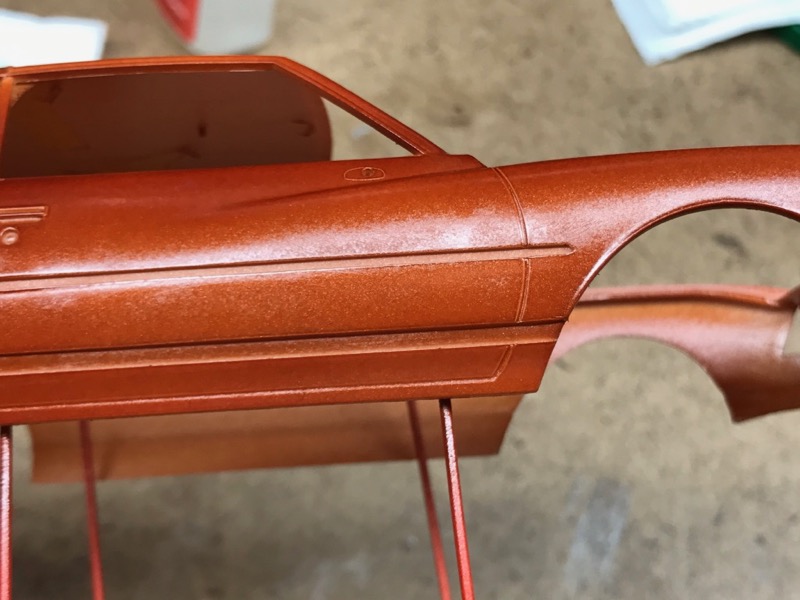
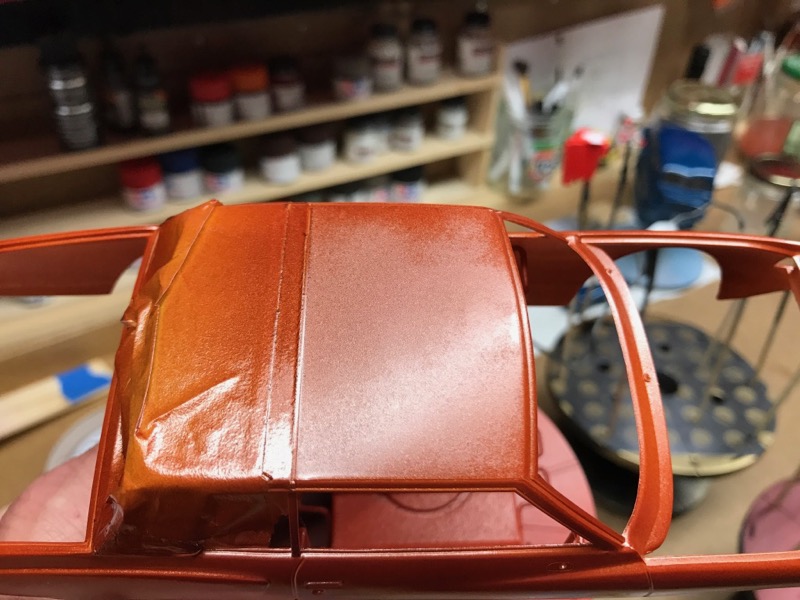
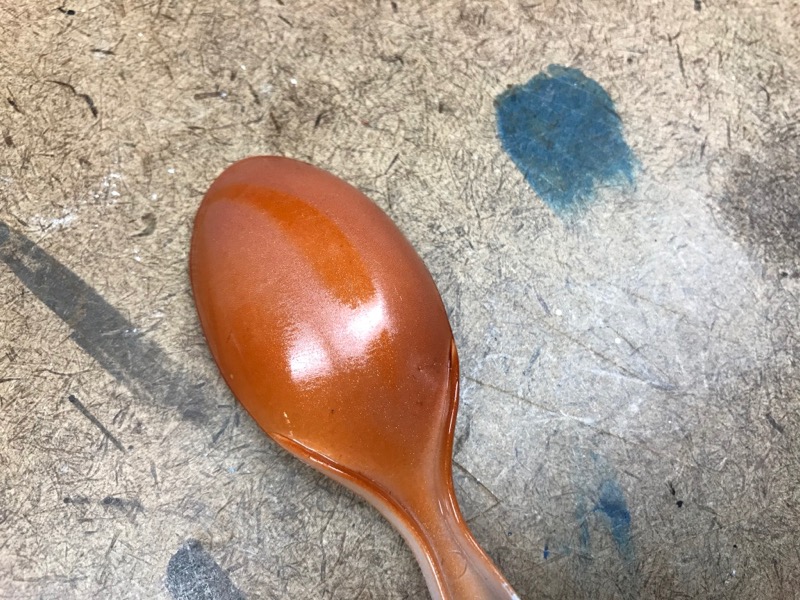
So I'm having another interesting problem with Scale Finishes paint. I am not sure it is specific to that brand. Here is the story. First, spoons. I very often test paint on plastic spoons. I bought a box of 1000 styrene spoons and have bene using them for years. Lately, the spoons show a glossy/not glossy pattern on them - see the photo below. This is with MANY different brands of paint, so I assume it is something to do with contamination in the plastic of the spoon. I tested the Dark Camel color from Scale Finishes on a spoon, and it exhibited the problem. After I applied the paint to the car, I noticed the same problem. See the photos - there are non-glossy patches on the body. This is after several light/medium coats of the paint, and it looked fantastic wet. As it dried, it got blotchy. Notice the picture of the hood, though - it looks great. Yeah it's orange-peely but this is before any gloscoat or sanding/polishing. --> What is going on with this blotchy paint!? Does anyone have any insight? Hoping that gloss coat would make it look right, I took my test soon and put on TWO medium/heavy coats of alclad clear kote, then a very heavy coat. When wet it looked like glass, but after it dried - blotchy. So it seems that no amount of clear coat is going to fix this. It is possible that the hood has more primer on it than the body. I had to fill dimples and depressions, and to cover the putty and sanding it took more primer. Is that the key? A lot more primer? Any help you all can give would be great. Thanks.
-
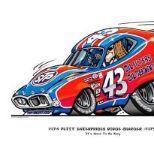
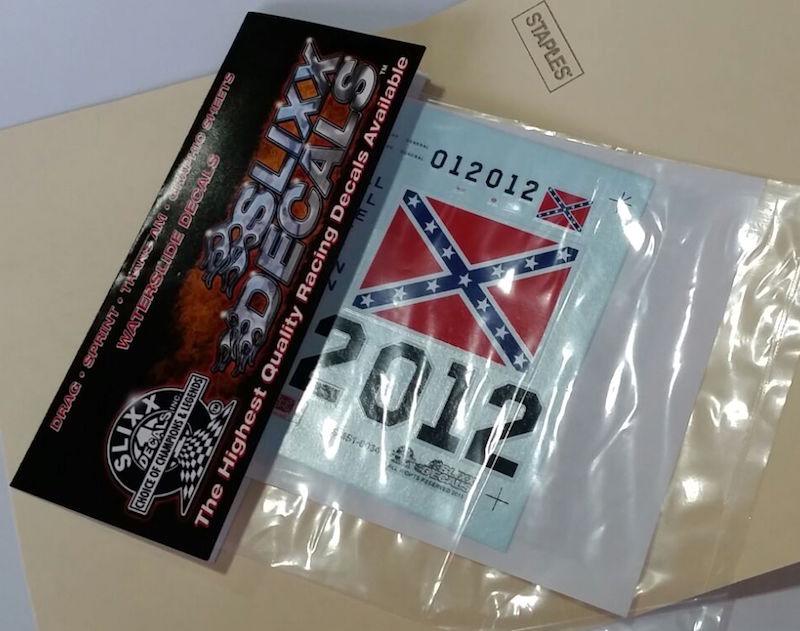
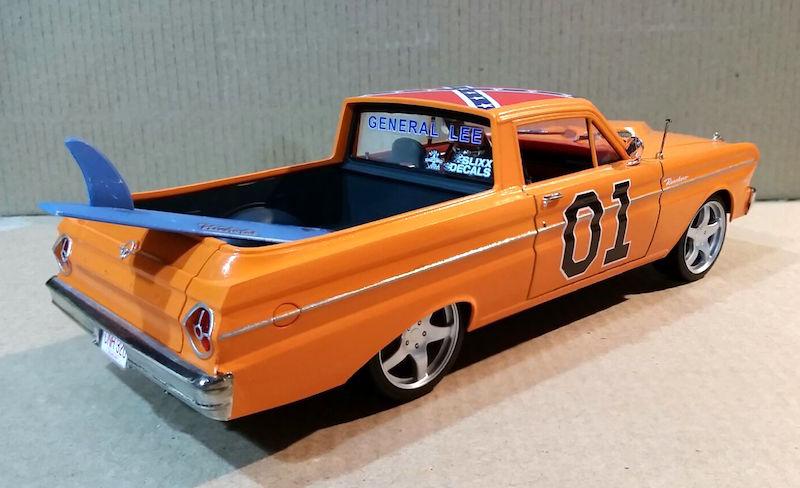
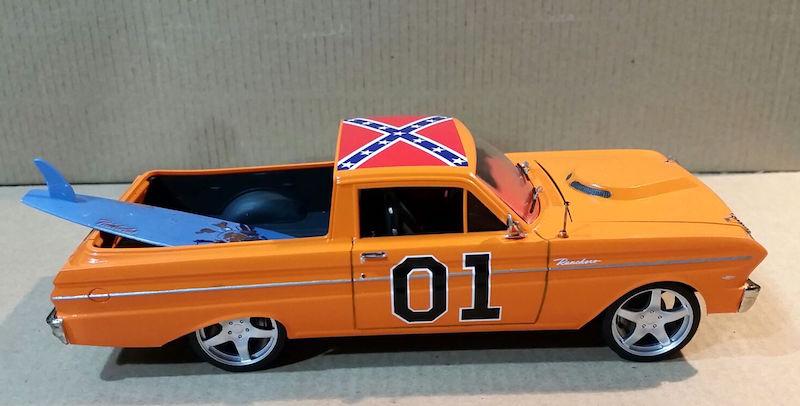
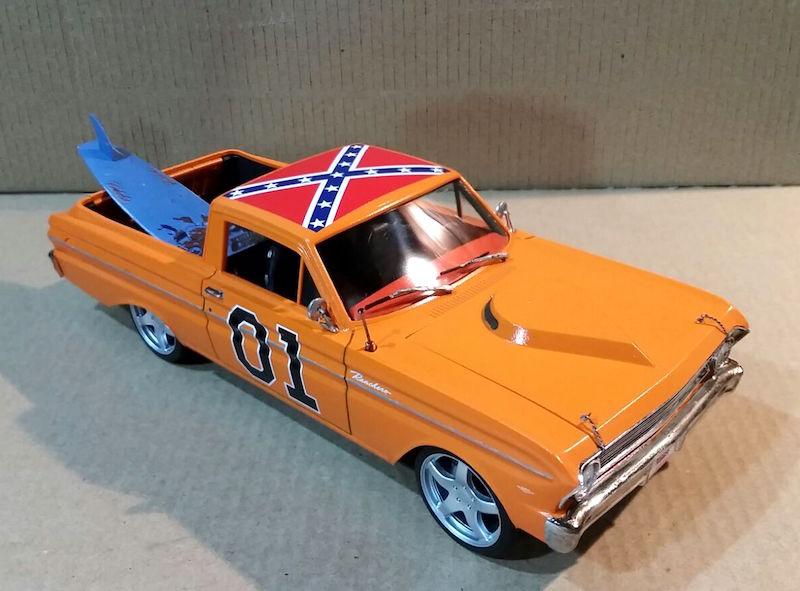
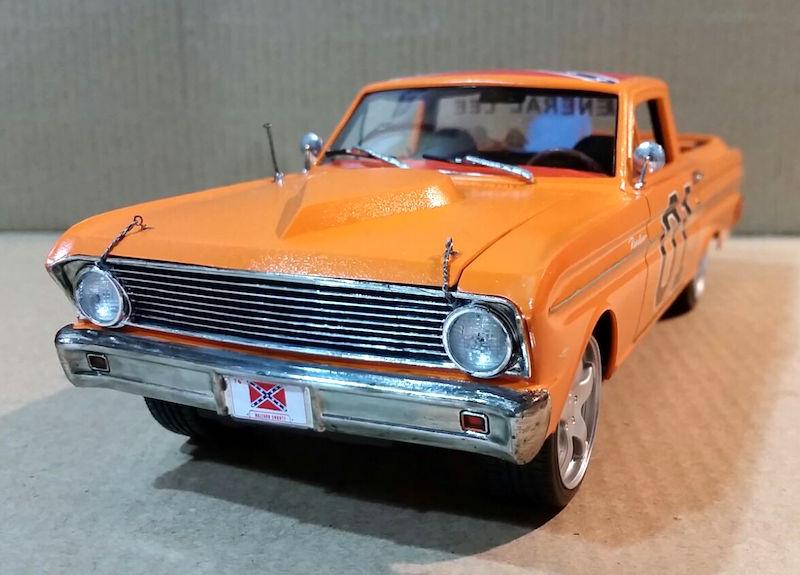
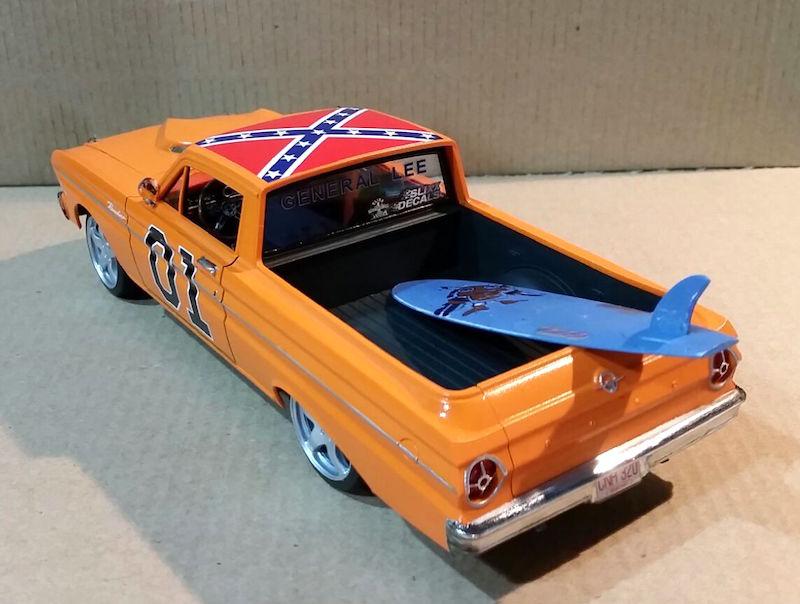
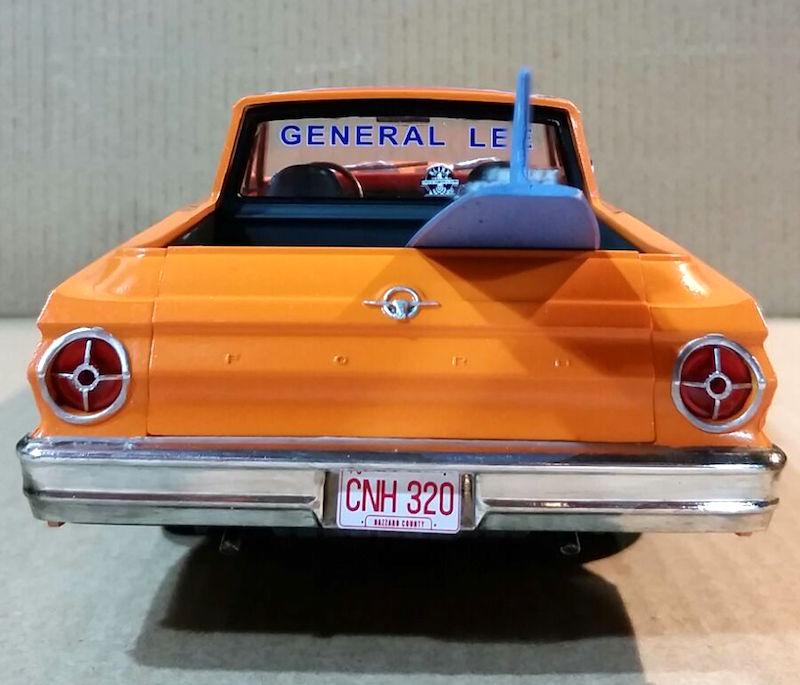
More pics and text (only spanish), here: http://www.angelnoes.es/2016/02/ford-ranchero-1965-general-lee.html Thanks to all for words, tips and recommending Slixx Decals. This is the best model cars forum!!!!
-
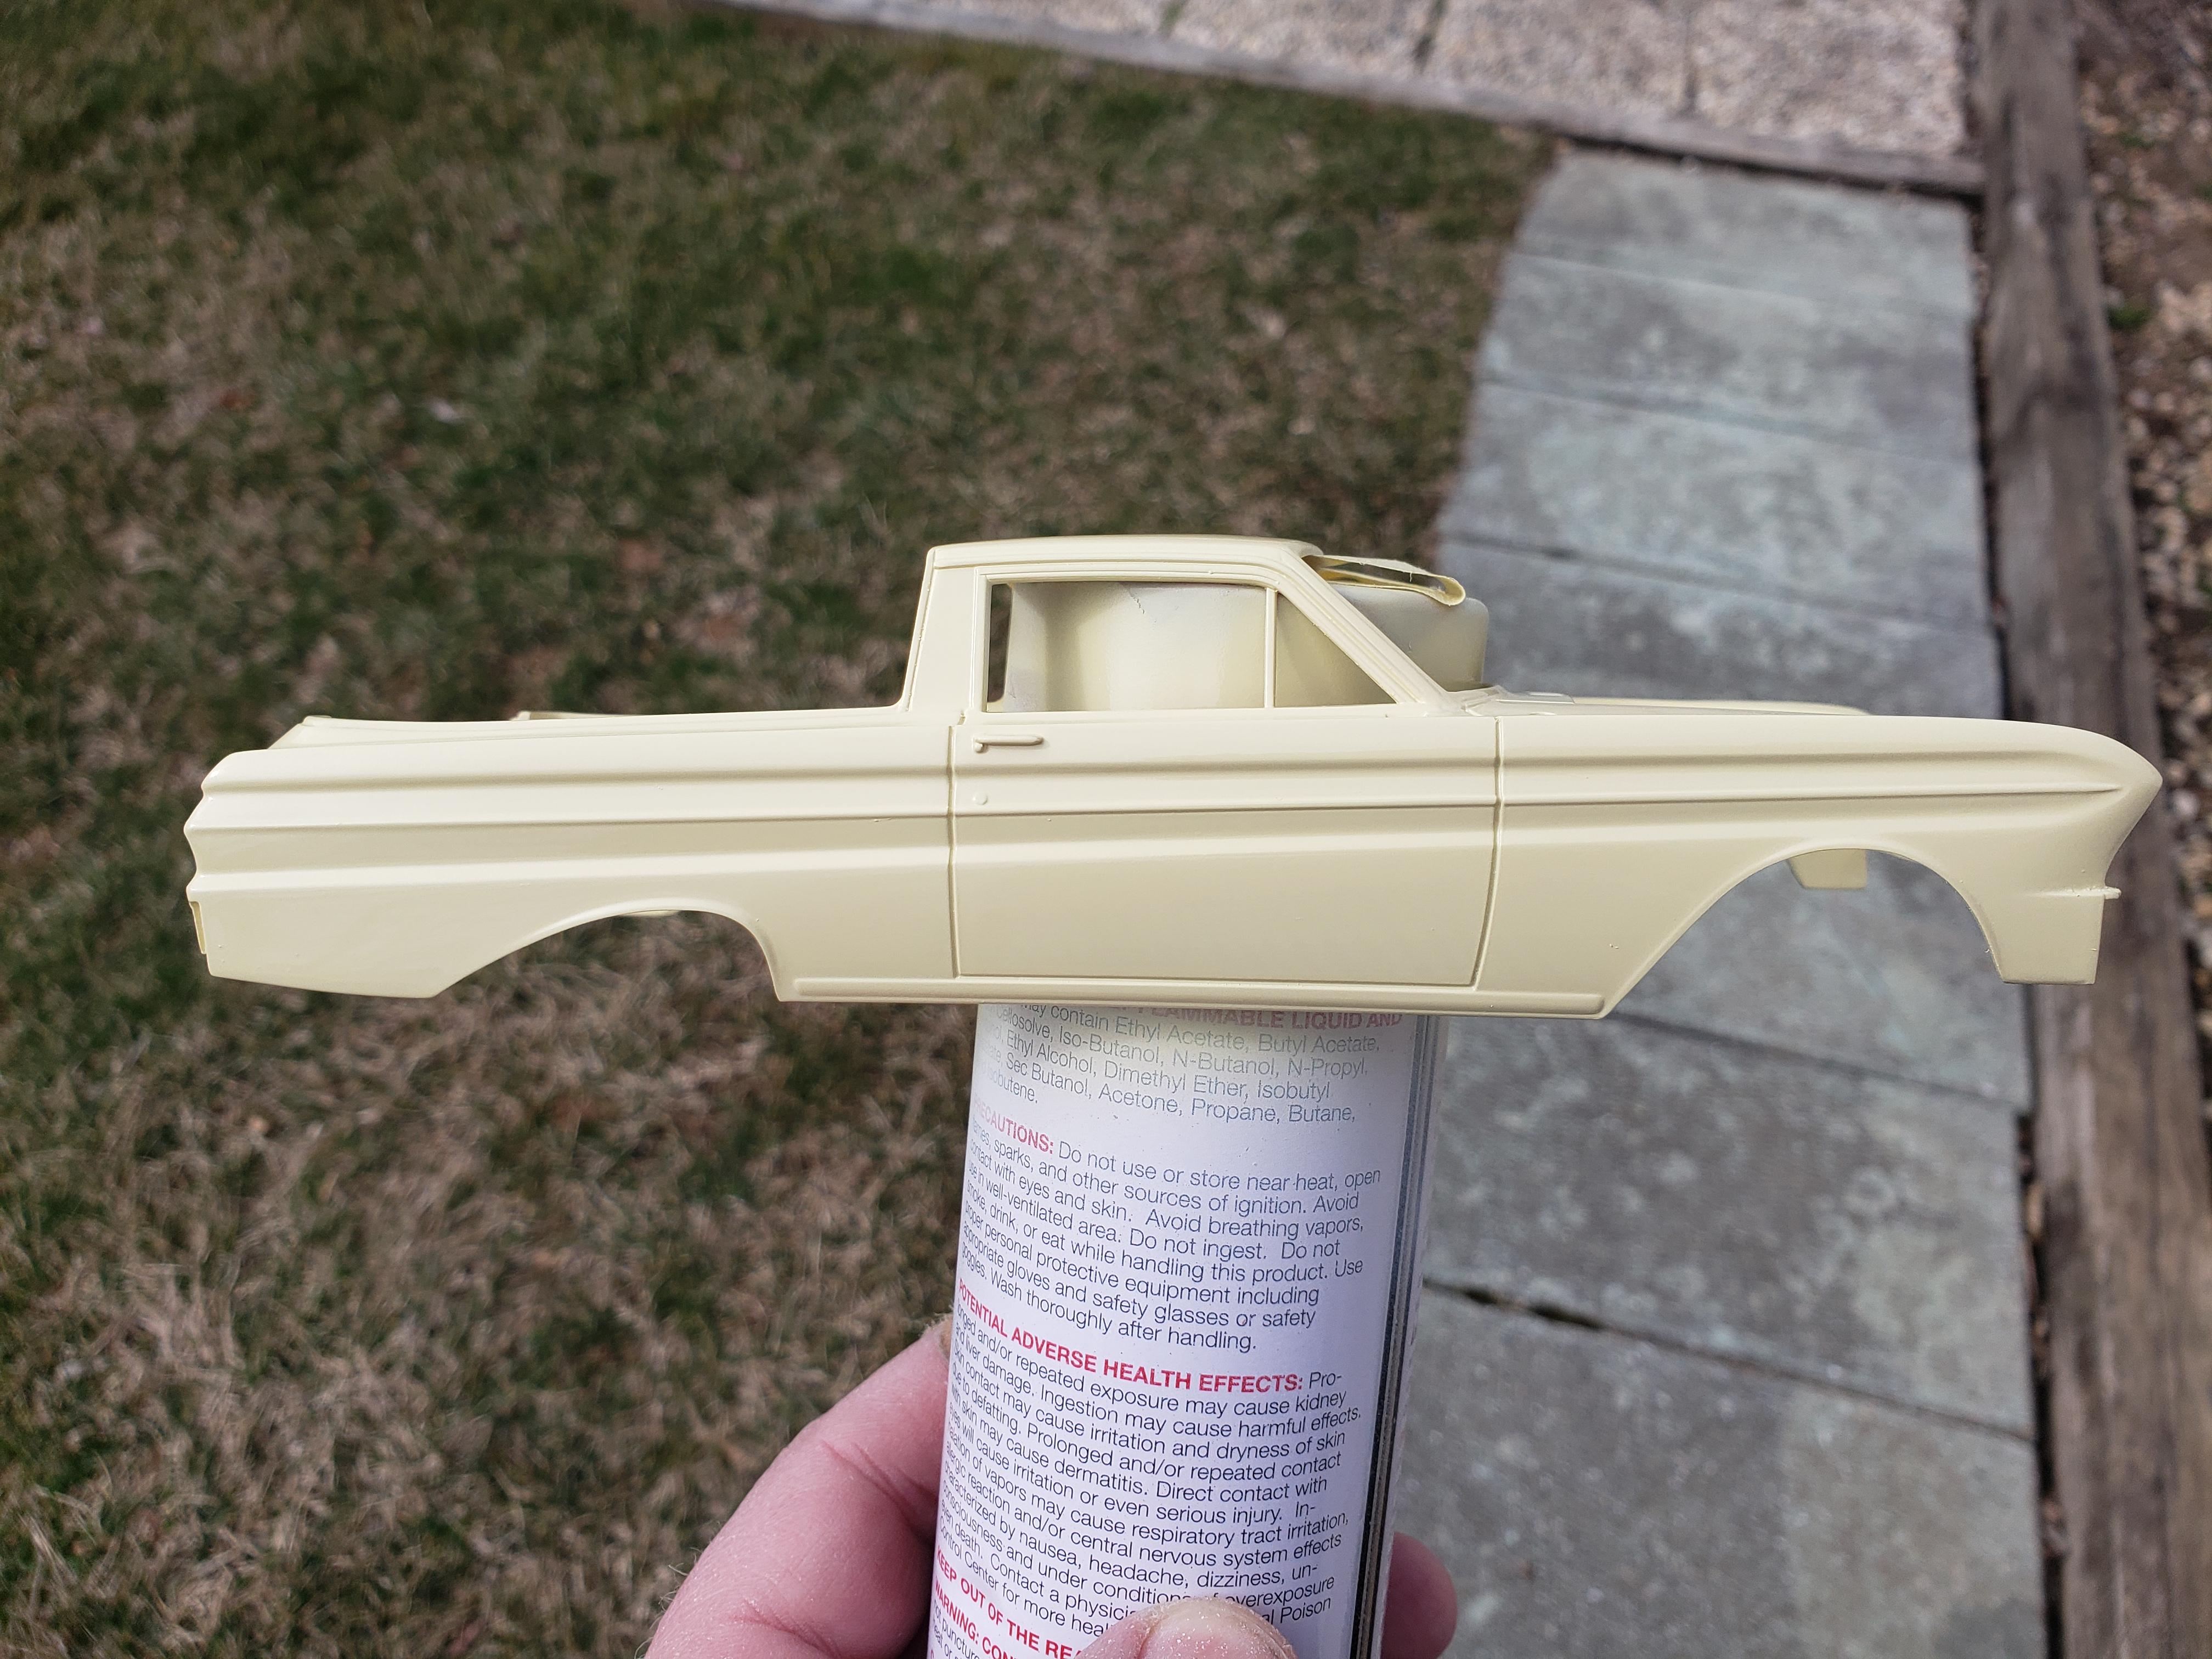
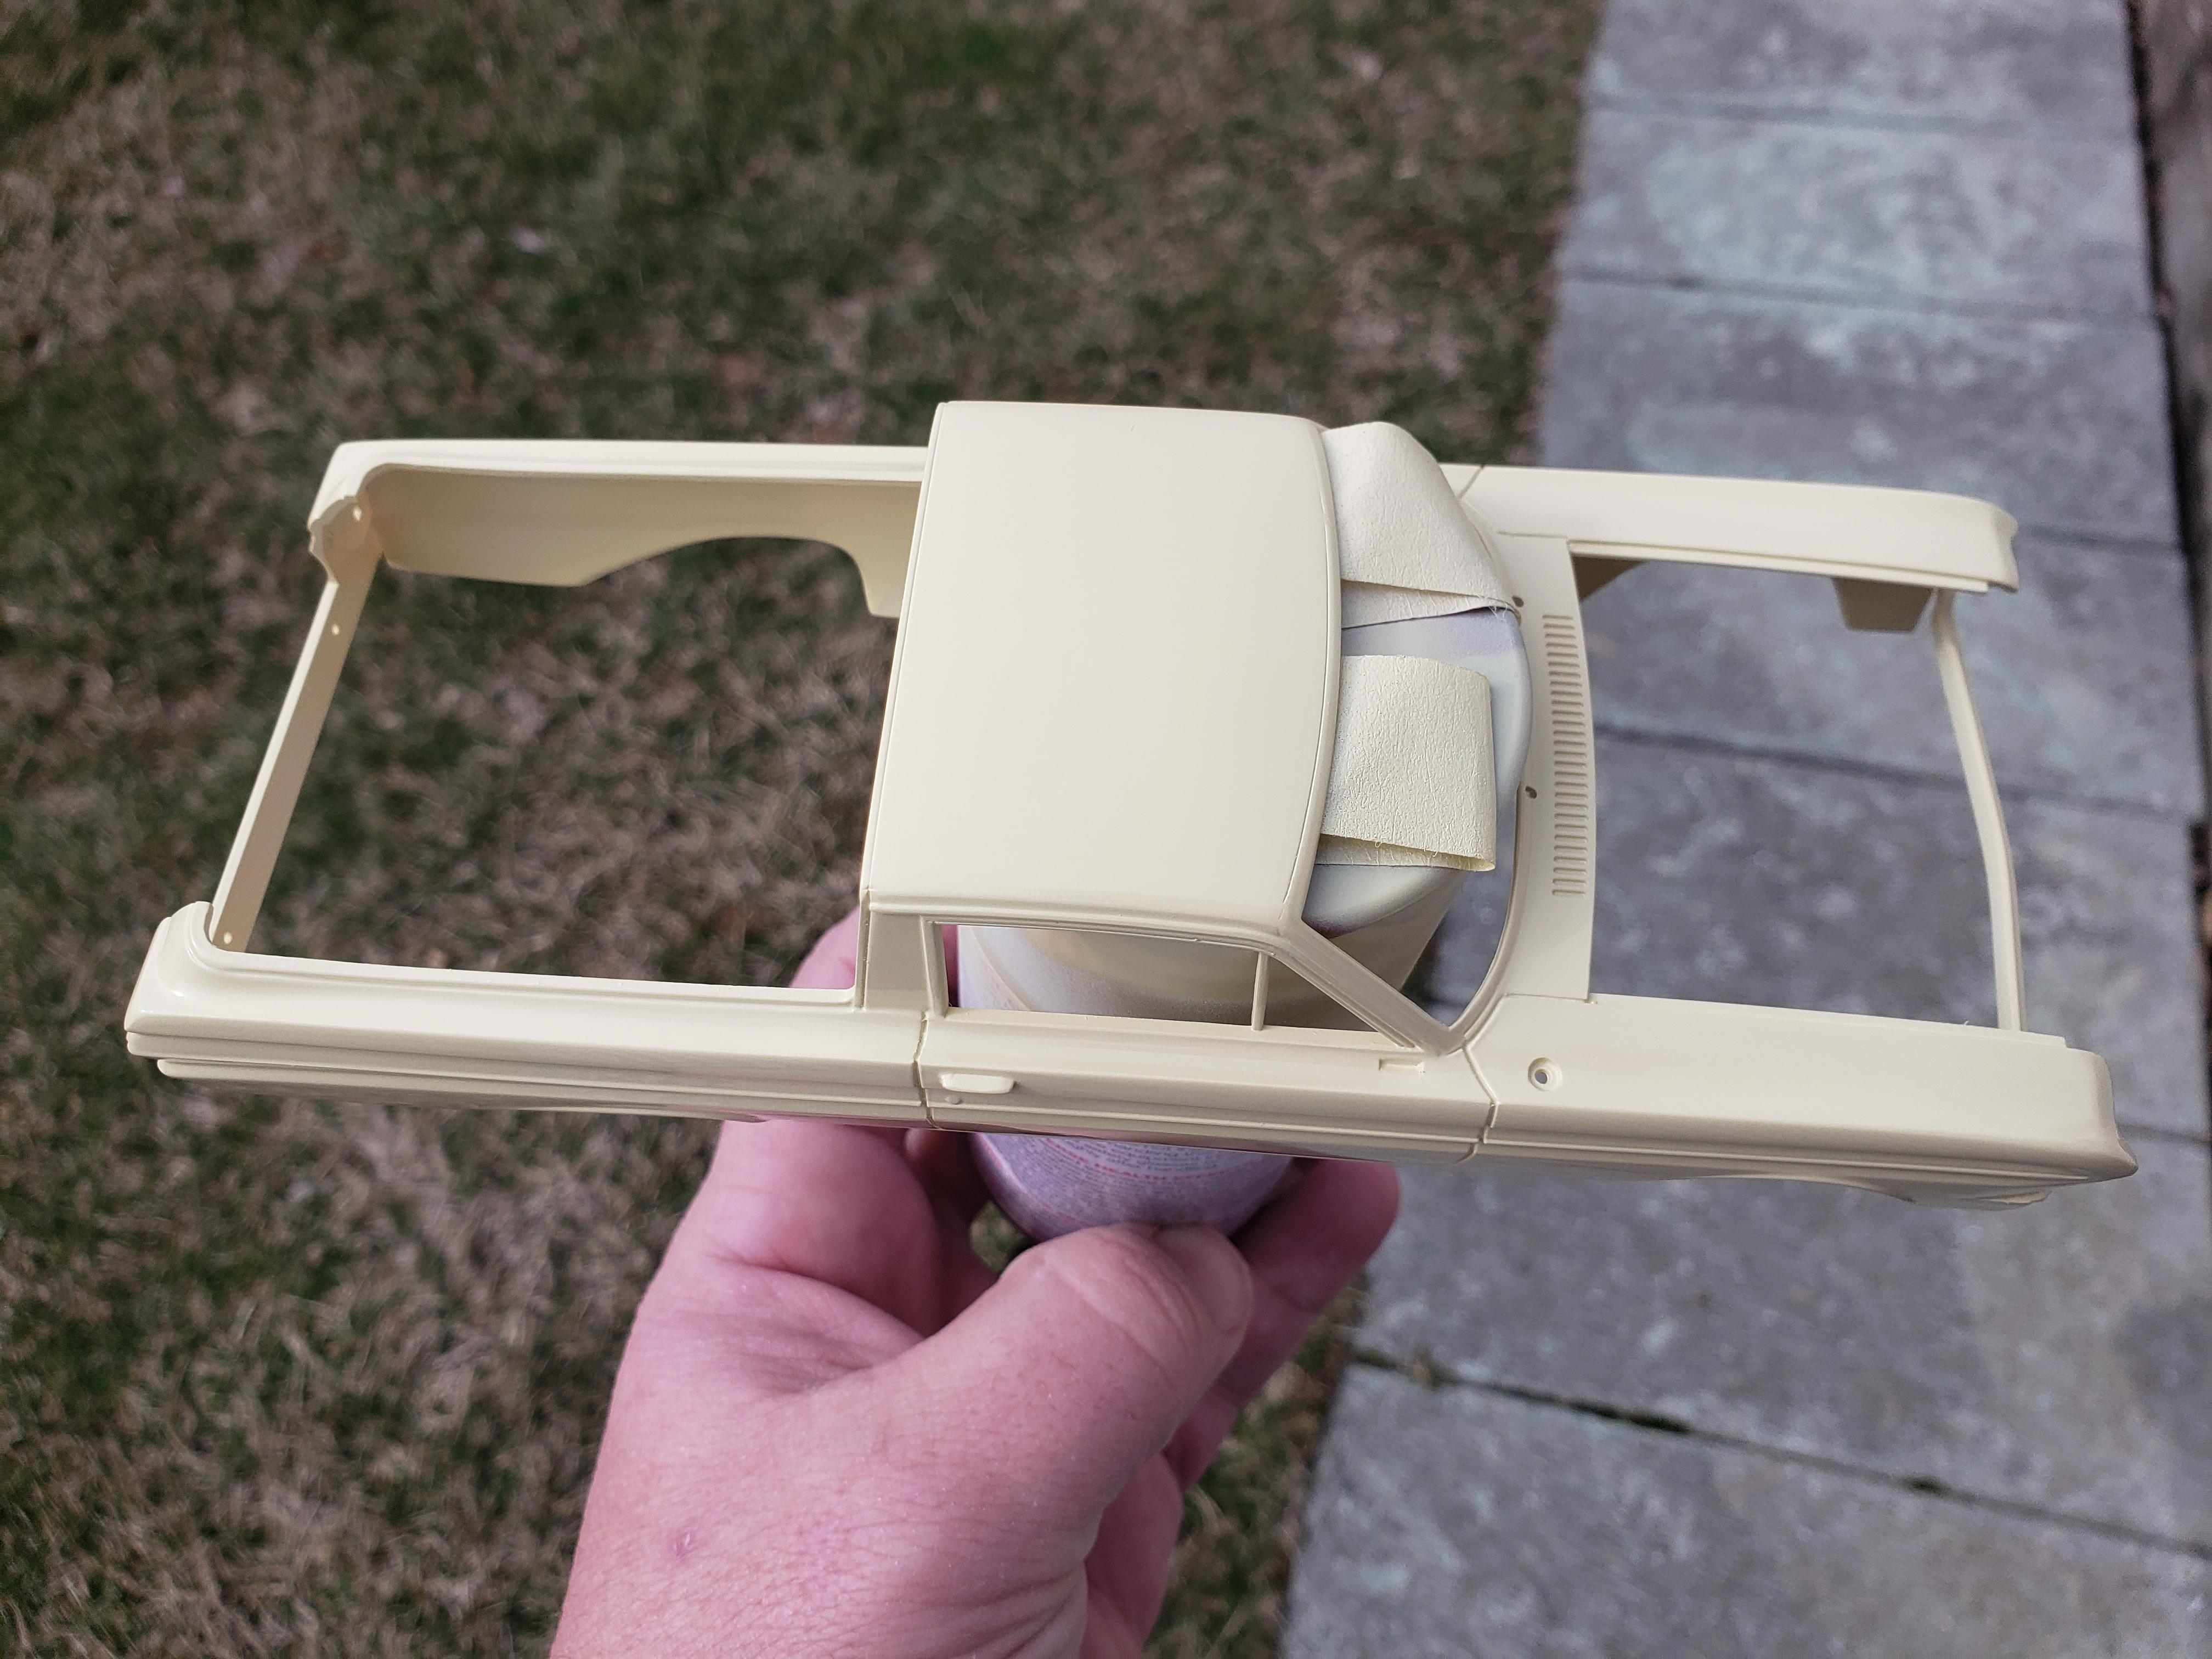
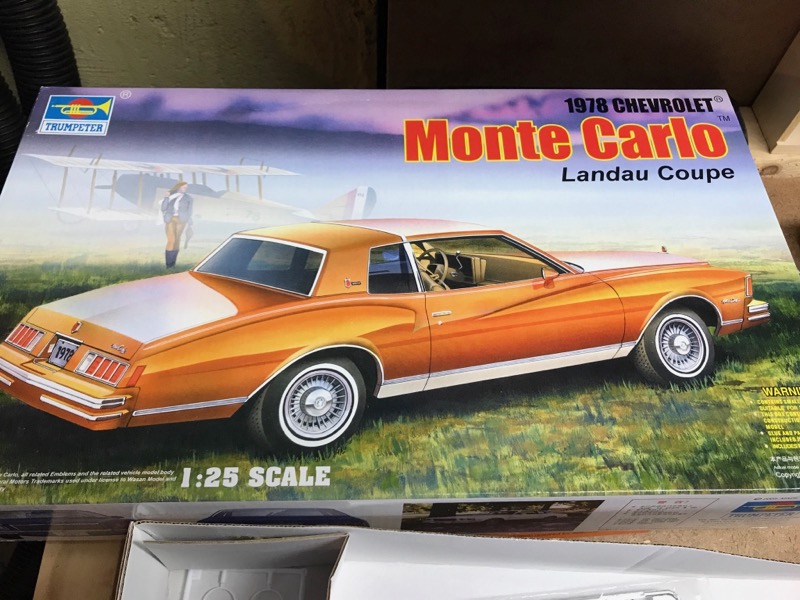
 Well you saw all the parts a few days ago, this will the start of the build up. I have to say after comparing this kit to some of Trmpeter's other kits like the 60 Pontiac and the Chevy Monte Carlo. There has been some noticeable improvements. Not to say there isn't room for more, because there is. I will cover the issues that I found concerning as we go. Gladly I haven't found anything I can't get past and that's a good thing. My goal is to work with what's in the box, using basic skills and materials most modelers have. I'll leave the kit bashing and super detailing to someone else. All my builds are done in a similar fashion, I put together as much as I can without paint, checking how things fit together along the way. When I'm satisfied, I'll break it down, add paint and detailing and then put it all back together again. Sounds easy right .... Like building a 1:1 car, I'm starting with the floor pan, interior tub and the bedfloor. The front inner structure is next along with the basic engine parts. The engine is just resting on the subframe for now. I also glued up the bench seat halves while I was at it. All these parts go together without a problem. I went ahead and glued the front suspension to the front sub frame but I'm only dry fitting it to the floor and the inner front sheet metal for now. I'm going use some tape to hold it in place. I'm also going to tape the rear axle housing in place and slip the tire and wheels on, also dry for now. Once that was done I flipped the chassis over and added the basic interior tub and bed using more tape as needed to hold it togther dry. Now it was just a matter of slipping the body over it all by slightly spreading the lower sections. Amazing ! It's looking like a Ranchero already, not bad for a couple hours work. If you look closely I started block sanding the hood, it has some very slight sink marks from the underside details. It's nothing I can't handle though. You may have noticed the engine in not in place yet, thats because I want glue the subfame to the floor and still be able to slide the engine in and out as needed but not so fast. There's a small problem that I caused not following the instructions. Next time I'll show you an easy fix that will let me do that along more of the build .... For all the photos just follow the link. Stay tuned ..... -Steve http://public.fotki.com/SteveG26/trumpeter-65-ford-r/