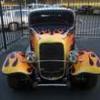
dougp Posted June 16, 2011 Posted June 16, 2011 I built this AMT 70 1/2 Camaro Z28 from an artist's rending of a ZSS I found on the web. I lowered and set the stance with lowering blocks on the rear axle and flipping the front spindles. I removed the front inner wheel wells and re-tubbed the rear to fit the snap kit concept Camaro wheels. I cut the roof panel out and buffed and polished the black to imitate the glass roof in the rendering. I cut up a grease splash screen for the grille. The kit stripes didn't want to cooperate and I was lucky I had scanned them before trying to use them. I made my own stripes and ZSS lettering. The bumpers were dechromed and painted with the rest of the body in duplicolor gm medium metallic blue with several coats of model masters ultra clear lacquer, which was buffed and polished. Thanks for looking and enjoy...
chev12olet Posted June 16, 2011 Posted June 16, 2011 YES INDEED THIS IS HOT 2ND GEN CAMAROS ARE THE BEST
Guest Posted June 16, 2011 Posted June 16, 2011 You definitely nailed the look on this one! Nice work!
aksarben Posted June 16, 2011 Posted June 16, 2011 Honest opinion... Awesome! Very clean build and the engine bay is a standout. Is that chrome foil on the air cleaner? How about some chassis shots? Steve
Flatearthman Posted June 16, 2011 Posted June 16, 2011 awesome build, excelent detail, where did you get the accell coil from?
Steve Keck Posted June 16, 2011 Posted June 16, 2011 Great job! Nice finish! I have to build two of those. My son is working on a 1:1. My first will be as it was resurected last month. The second one will be as he finishes it. I hope my second model looks as good as yours.
Ryan S. Posted June 16, 2011 Posted June 16, 2011 Man, that thing looks sharp! Nice job bringing the picture to life!
Harry P. Posted June 16, 2011 Posted June 16, 2011 Very clean. However, with no inner front wheel wells the fenders and front end have nothing to attach to... so they must be floating by magic!
Scale-Master Posted June 16, 2011 Posted June 16, 2011 Great job! Nice finish! My son is working on a 1:1. I hope my second model looks as good as yours. As far as this model, Ditto! And I hope the real 1:1 one does as well!
redknight Posted June 17, 2011 Posted June 17, 2011 That's an excellent representation of the artist's rendering.
dougp Posted June 17, 2011 Author Posted June 17, 2011 (edited) Thanks for all the great comments everyone. I never expected this many respones. It made it worth the problems I had building it. "Is that chrome foil on the air cleaner?" Yes it is BMF. I painted the air cleaner first, then filled in the center with the BMF. "How about some chassis shots?" This is the only one I have at this time. "awesome build, excelent detail, where did you get the accell coil from?" From one of my favorite and quality suppliers, Morgan Automotive Detail. "However, with no inner front wheel wells the fenders and front end have nothing to attach to... so they must be floating by magic!" Only the wheel wells were removed the side supports and radiator core support still remain. Edited June 17, 2011 by dougp
jeff ewaskey Posted June 17, 2011 Posted June 17, 2011 Good job on your Camaro. You captured the look of the rendering very well. Nice color choice as well.
Bowtienutz Posted June 17, 2011 Posted June 17, 2011 Nice Job, as for Harry's Comment No magic involved the front fenders attach at the cowl and Rad support. It could work but there would be alot of flex in the car. Inner fenders stiffin things up and keep engine compartment clean. On the 1:1 camaro inner fenders would bolt to fender lip area, Rad core support and an additional brace would bolt from inner fender to the firewall. Even with all this in the car there was still flex between the firewall and front subframe. Herb Adams designed tubular triangular braces that bolted to the firewall and attached to front upper control arm bolt this in combination with solid mounts for the front subframe replacing rubber bushings, a few other suspension tricks allowed that generation F Body to pull a g on the skidpad in the early 80's making it a real corvette eater.
Recommended Posts
Create an account or sign in to comment
You need to be a member in order to leave a comment
Create an account
Sign up for a new account in our community. It's easy!
Register a new accountSign in
Already have an account? Sign in here.
Sign In Now