customline
-
Posts
3,791 -
Joined
-
Last visited
Content Type
Profiles
Forums
Events
Gallery
Everything posted by customline
-
Ferbz, I have an Edsel I want to do like this. It looks like it's definitely working. Can you show the pieces you removed from the fenders? Also, I'm thinking there may be a chance that the fenders can get the extensions instead of the hood. That would put the inner fenders in their original locations. Of course, it's more work but it would look factory under the hood, meaningless in the case of a custom, but I'm just thinking about it now. 🤔 Edit: oh....you need to have room for the front wheels, too.
-

1932 ford pickup truck
customline replied to Bullybeef's topic in WIP: Model Trucks: Pickups, Vans, SUVs, Light Commercial
I meant the squirrels, Bill, 🥴 not the pickups. -
Yeah, man! BRILLIANT! 😃 if you just keep the stock grille and bumpers and keep the rear mostly the same, you will have "corrected" the '58 Edsel. With the headlight mod and that nice mild chop, you will have styled it the way it should have been. Not a "kustom". A prototype. 🥴 right?
-
1932 ford pickup truck
customline replied to Bullybeef's topic in WIP: Model Trucks: Pickups, Vans, SUVs, Light Commercial
Do you have them where you are in Z-land, Bill? Don't you have those Tazmanian devils? -
1932 ford pickup truck
customline replied to Bullybeef's topic in WIP: Model Trucks: Pickups, Vans, SUVs, Light Commercial
Nope. They're here in force. I found a '64 Galaxie kit to bash. It'll be here on Monday. 🥴 screw everything else. There's nothing like a chassis swap to get the juice flowing. 😛 -
Somehow, Len, I can't imagine myself doing that. I think I'm just gonna remove the white, but I appreciate your input. But I may get some jelly donuts cuz there's a new DD at the end of my street 😋
-
Nope. Your cred's good. I've got some Gold Bond around here. If it doesn't work, it's Tire City specials. Should I press it on or just lay it on? Edit: oh....you said "DUST it on" .....right. 🤓
-
I feel like I just learned something. Thanks, Len! 🤓
-
At the risk of exposing my ignorance, what does "slush molded" mean?
-
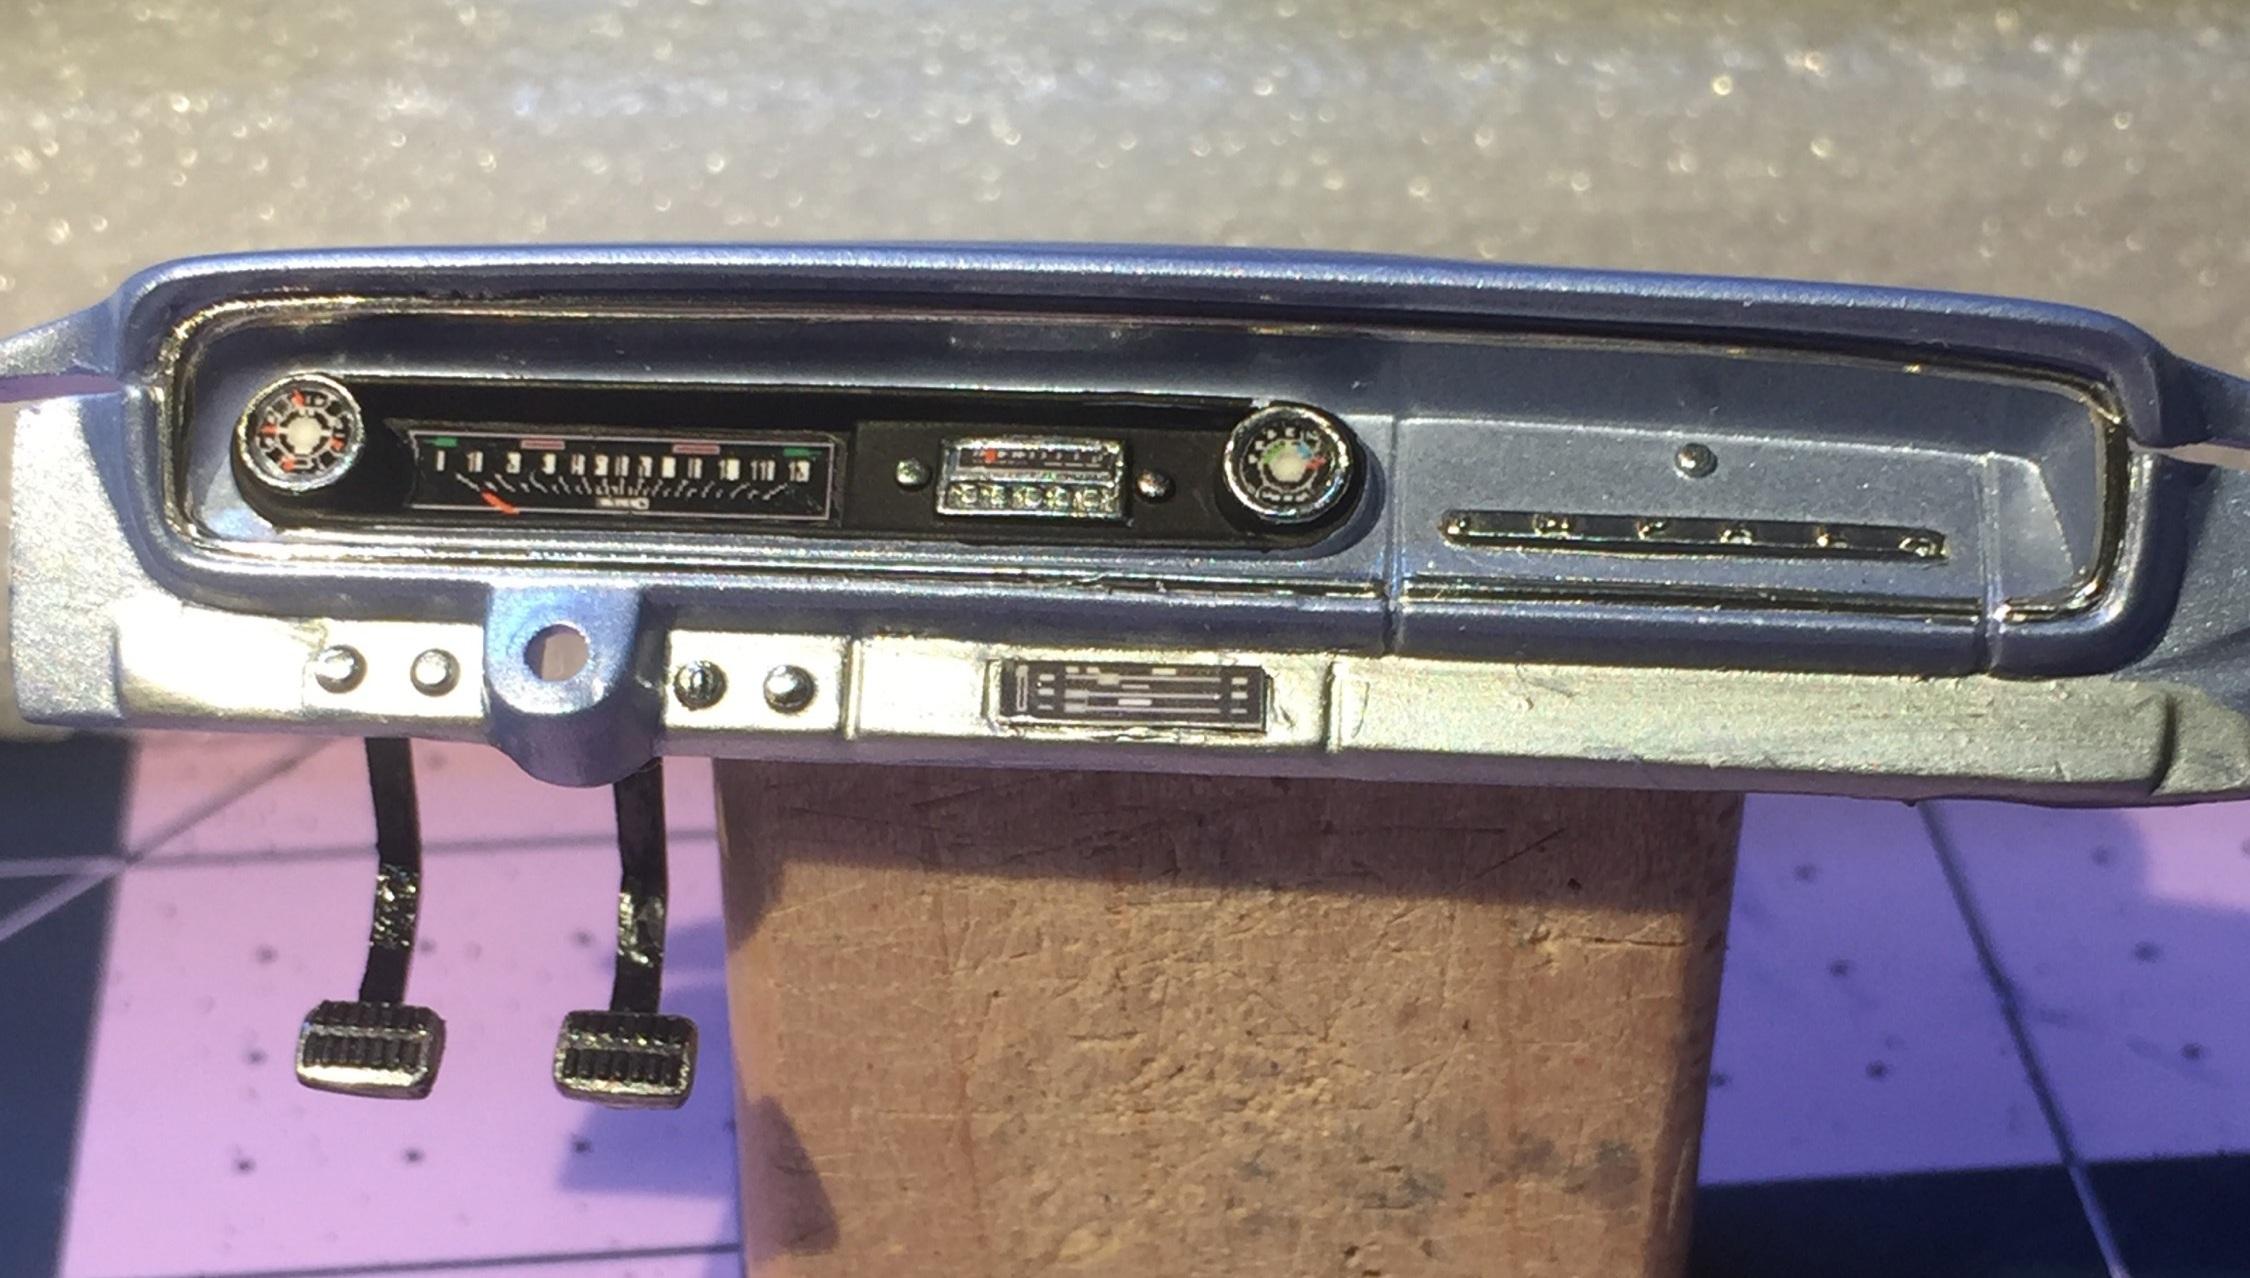
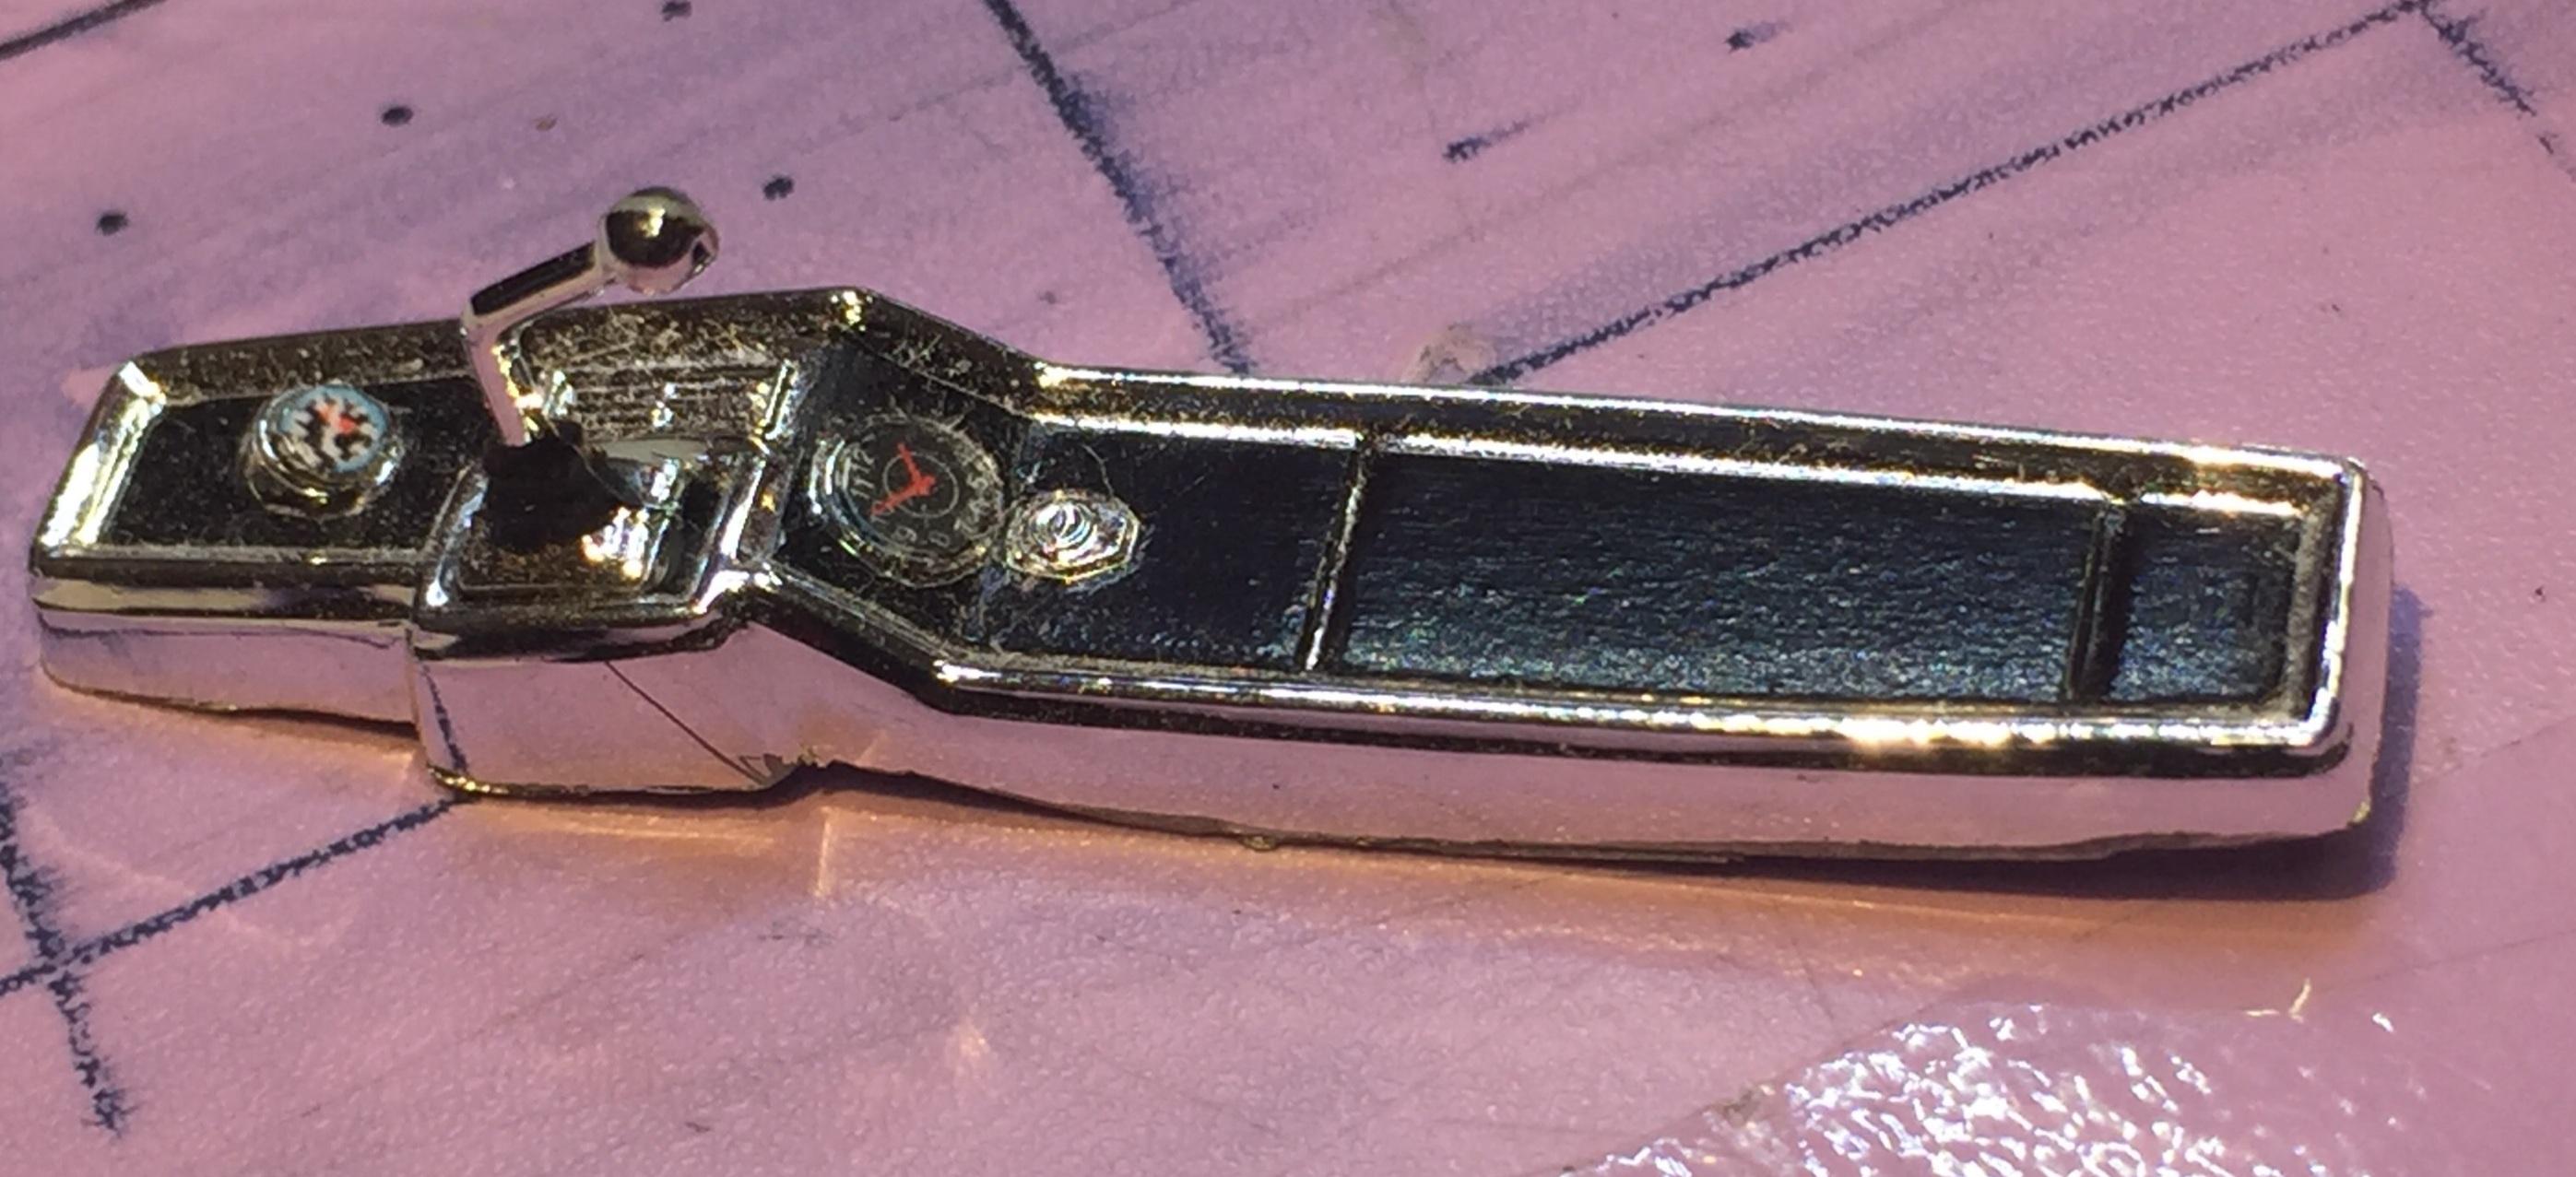
The dash gauges are Best Model Products but the kit did come with a set on the decal sheet. Sometimes cutting a tiny gauge face from a decal sheet will result in delaminating it. Even with a new surgical blade, the film will separate from the paper. Isopropyl alcohol, Topher. Don't drink it. 😵.
-
I really like this. It's a lot of work but reshaping the fenders is most of it. I think the technique that Jon is currently using on his builds to sculpt added styrene into shape may work, at least in part, for this. I think the above is a huge improvement but still retains the Edsel identity. AWESOME !
-
Oh that's gross, Bob. 🤮
-
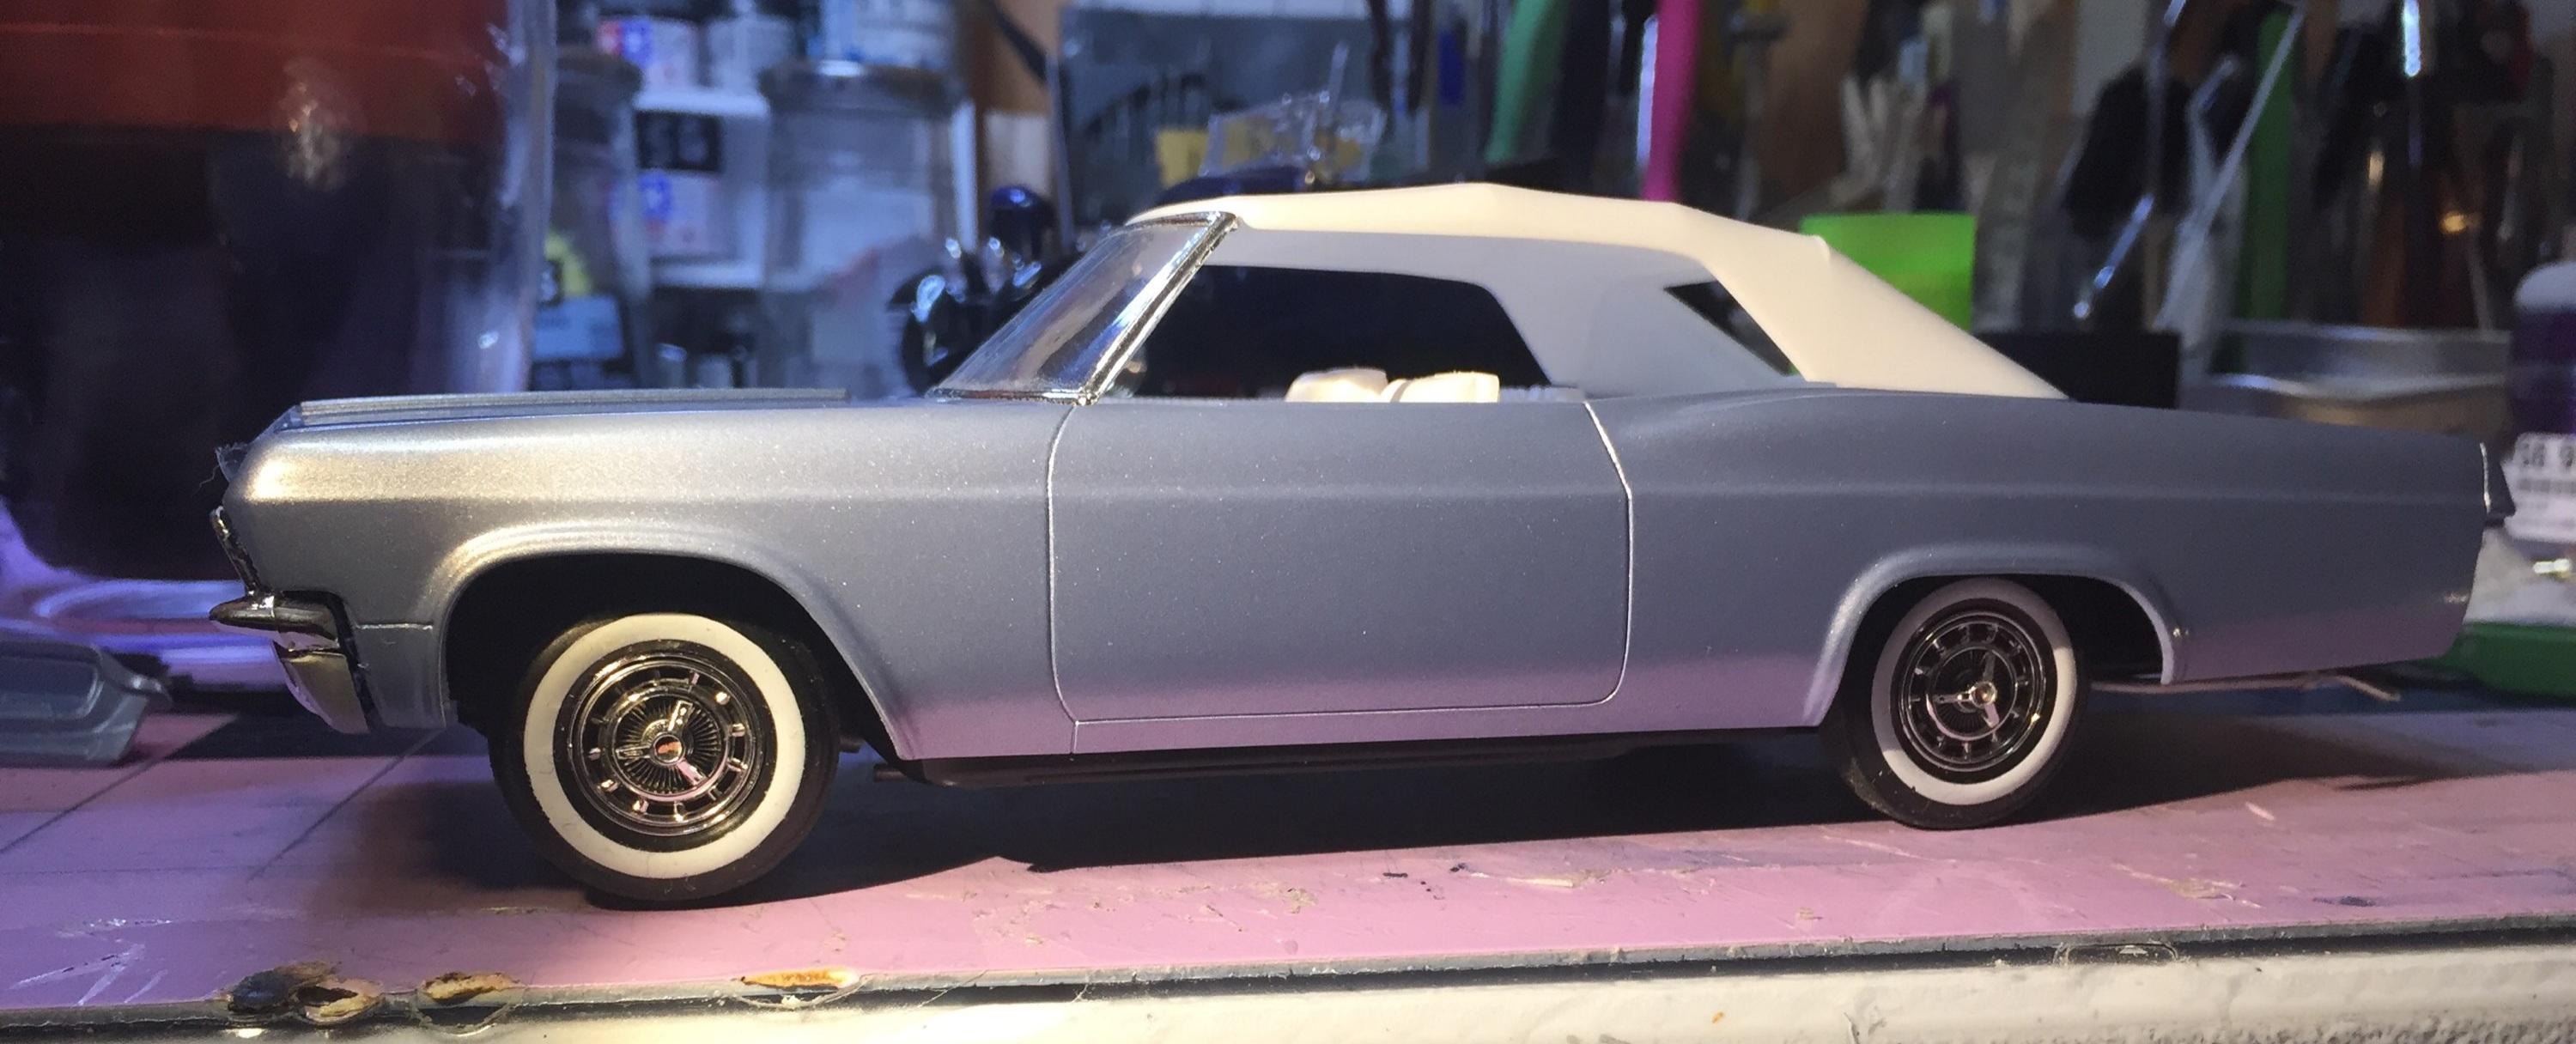
Thanks, David. At this point, I'm considering spraying the body with flat clear to depict a 7 or 8 year old third-owner daily driver, the kind I usually drove back in the day. The top may be flat black to look old.
-
Thanks, J. The tires came in the kit. If it was my 1:1 back in the early '70s, the tires would have been black wall re-treads. I can live with black walls if the stuff comes off, I guess.
-
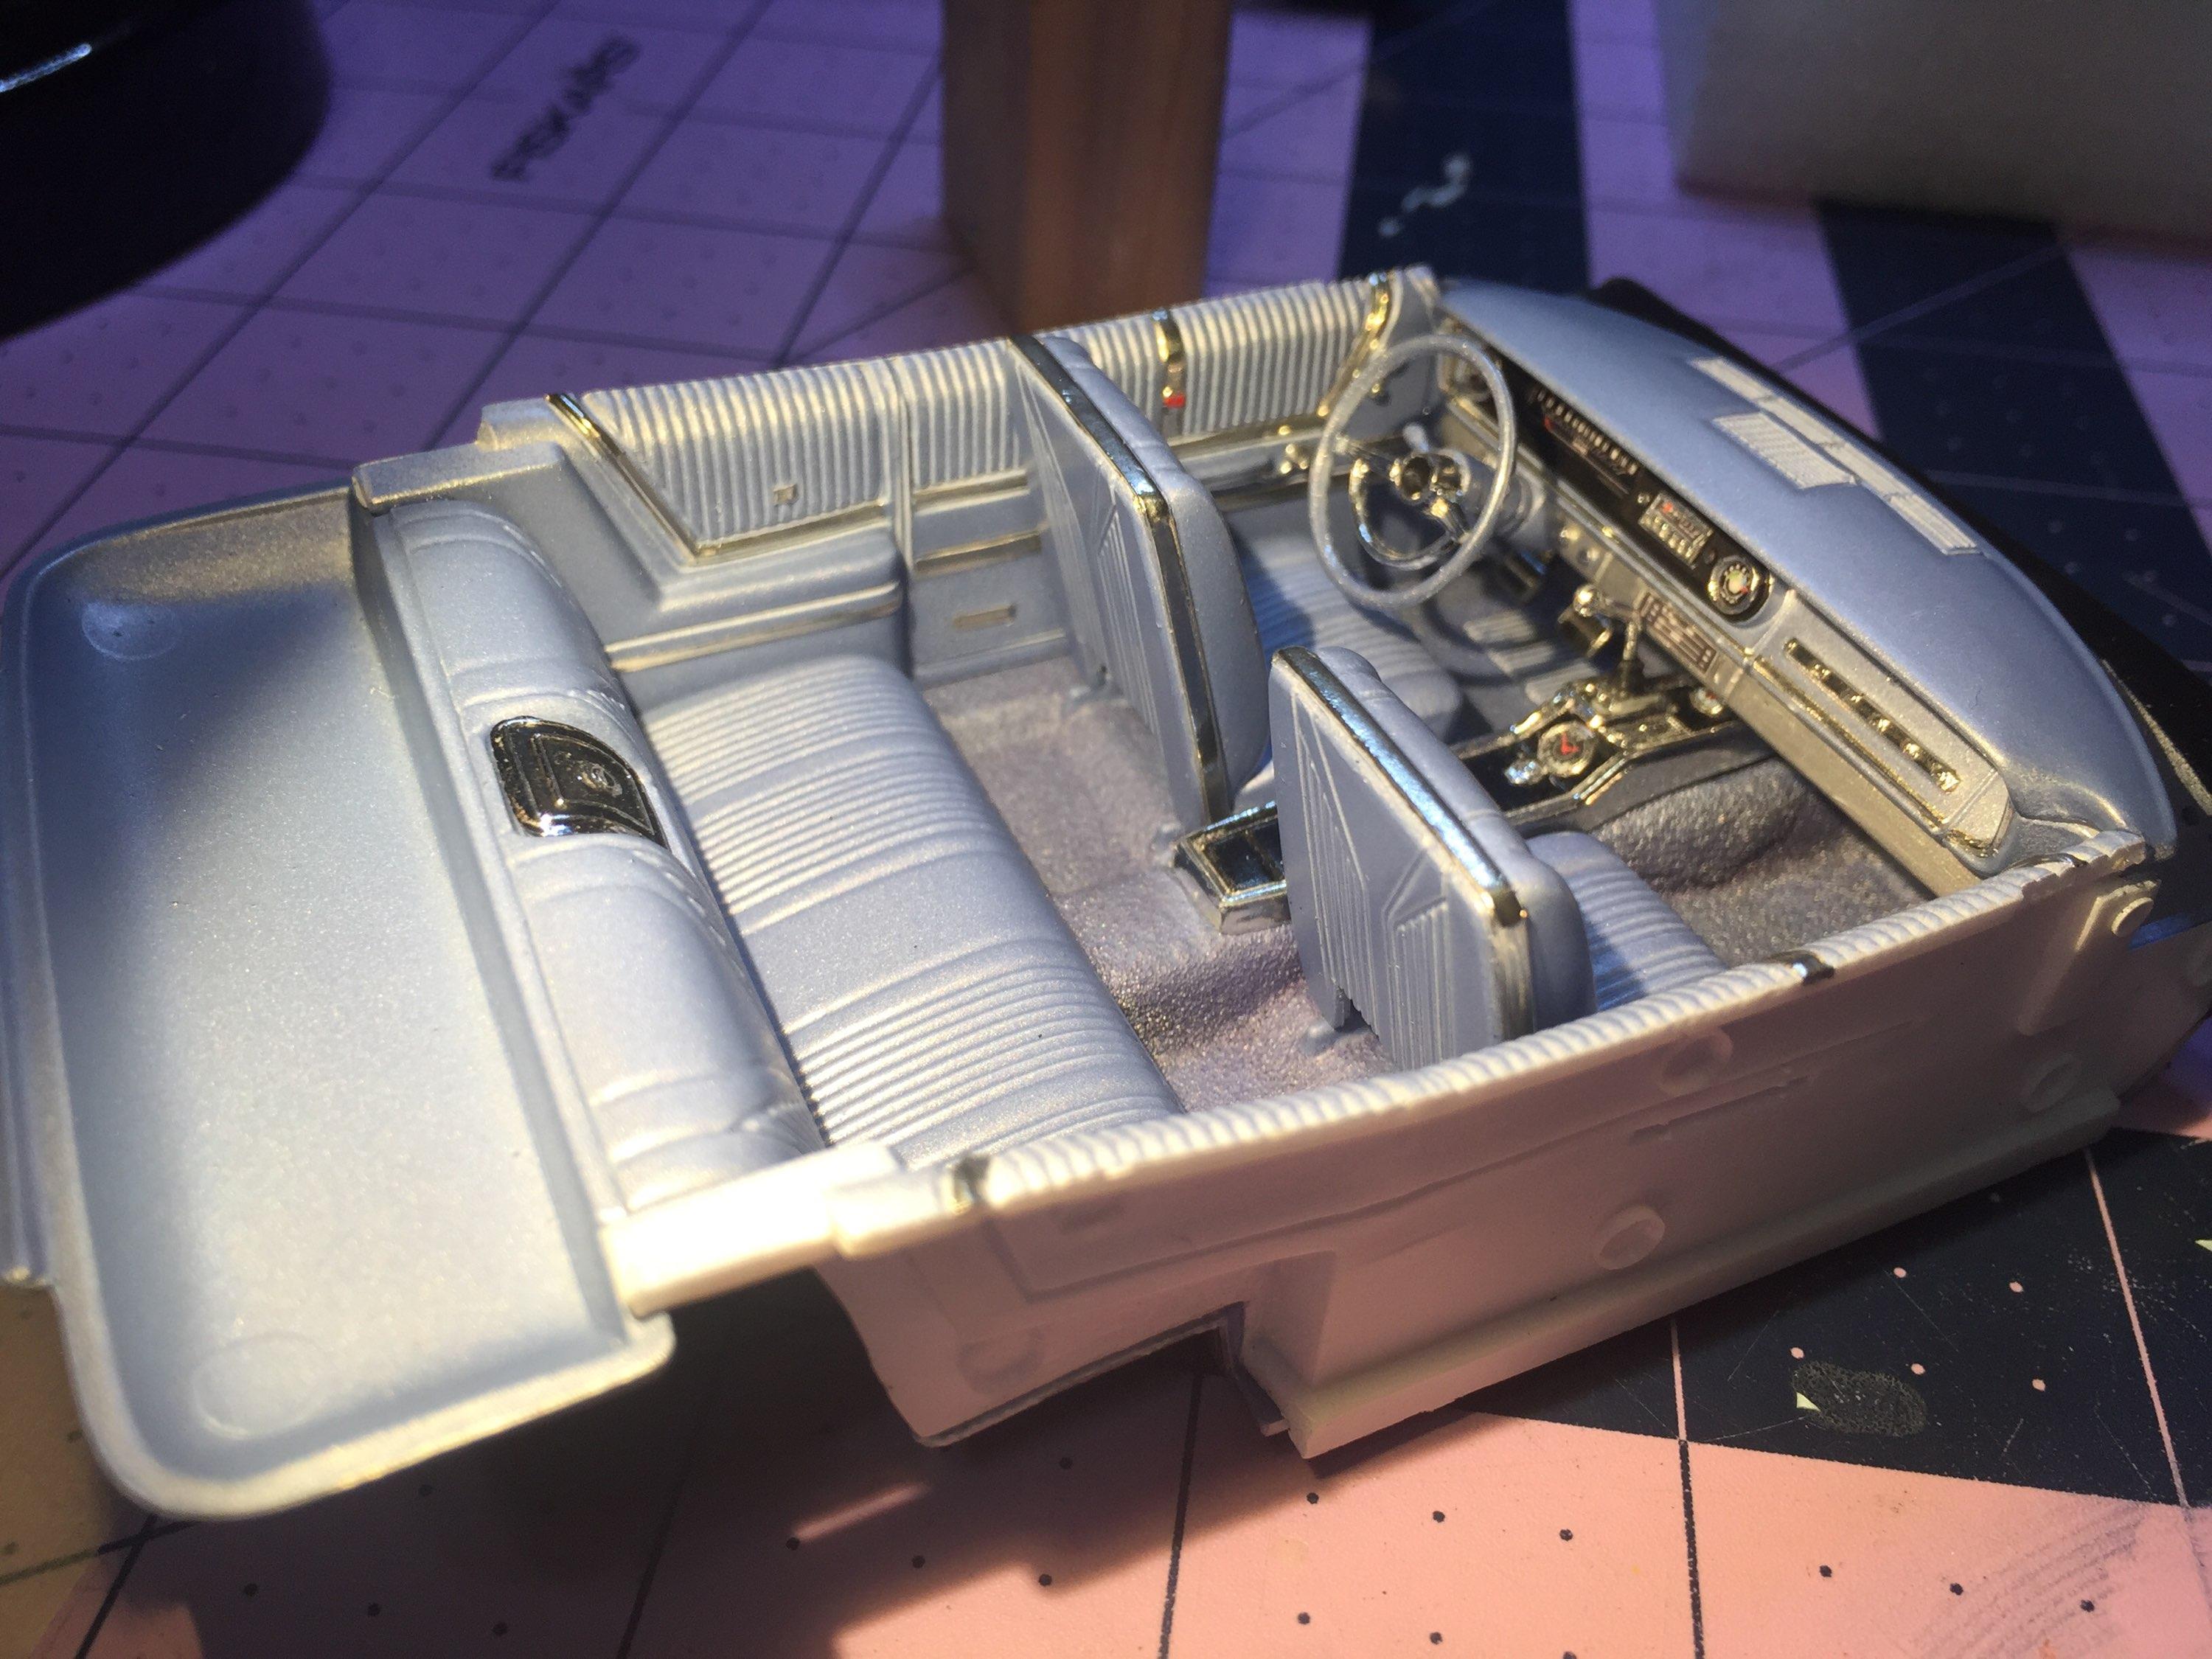
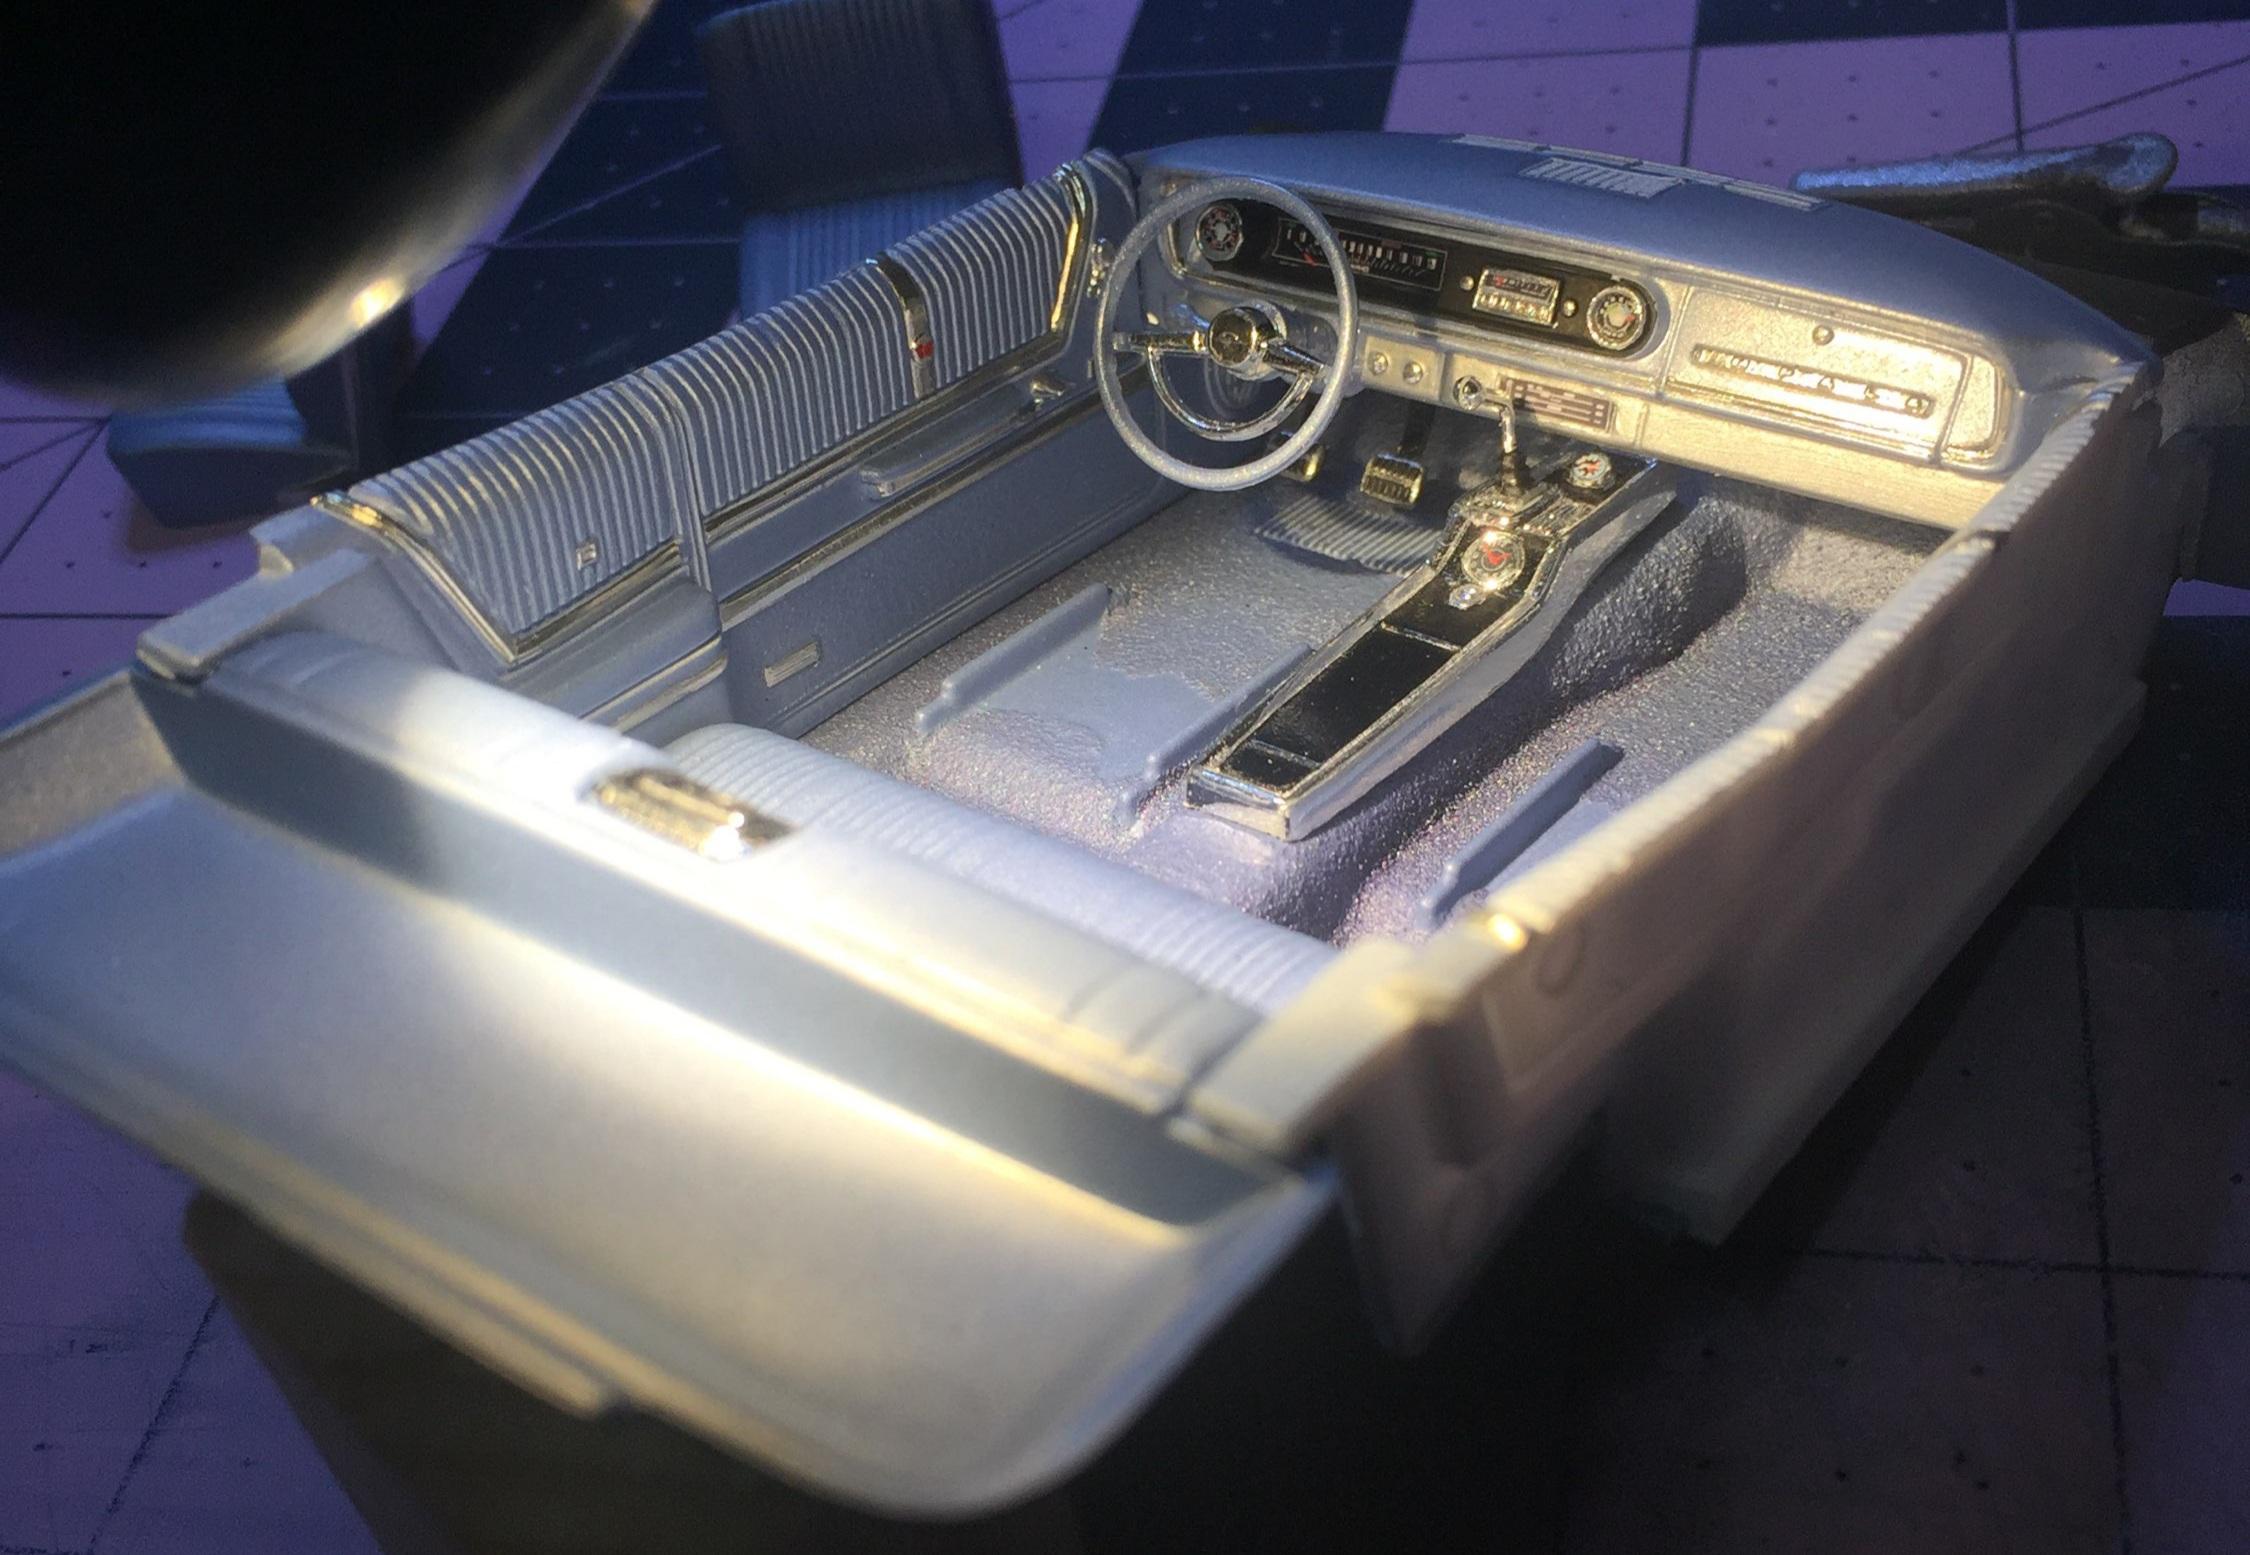
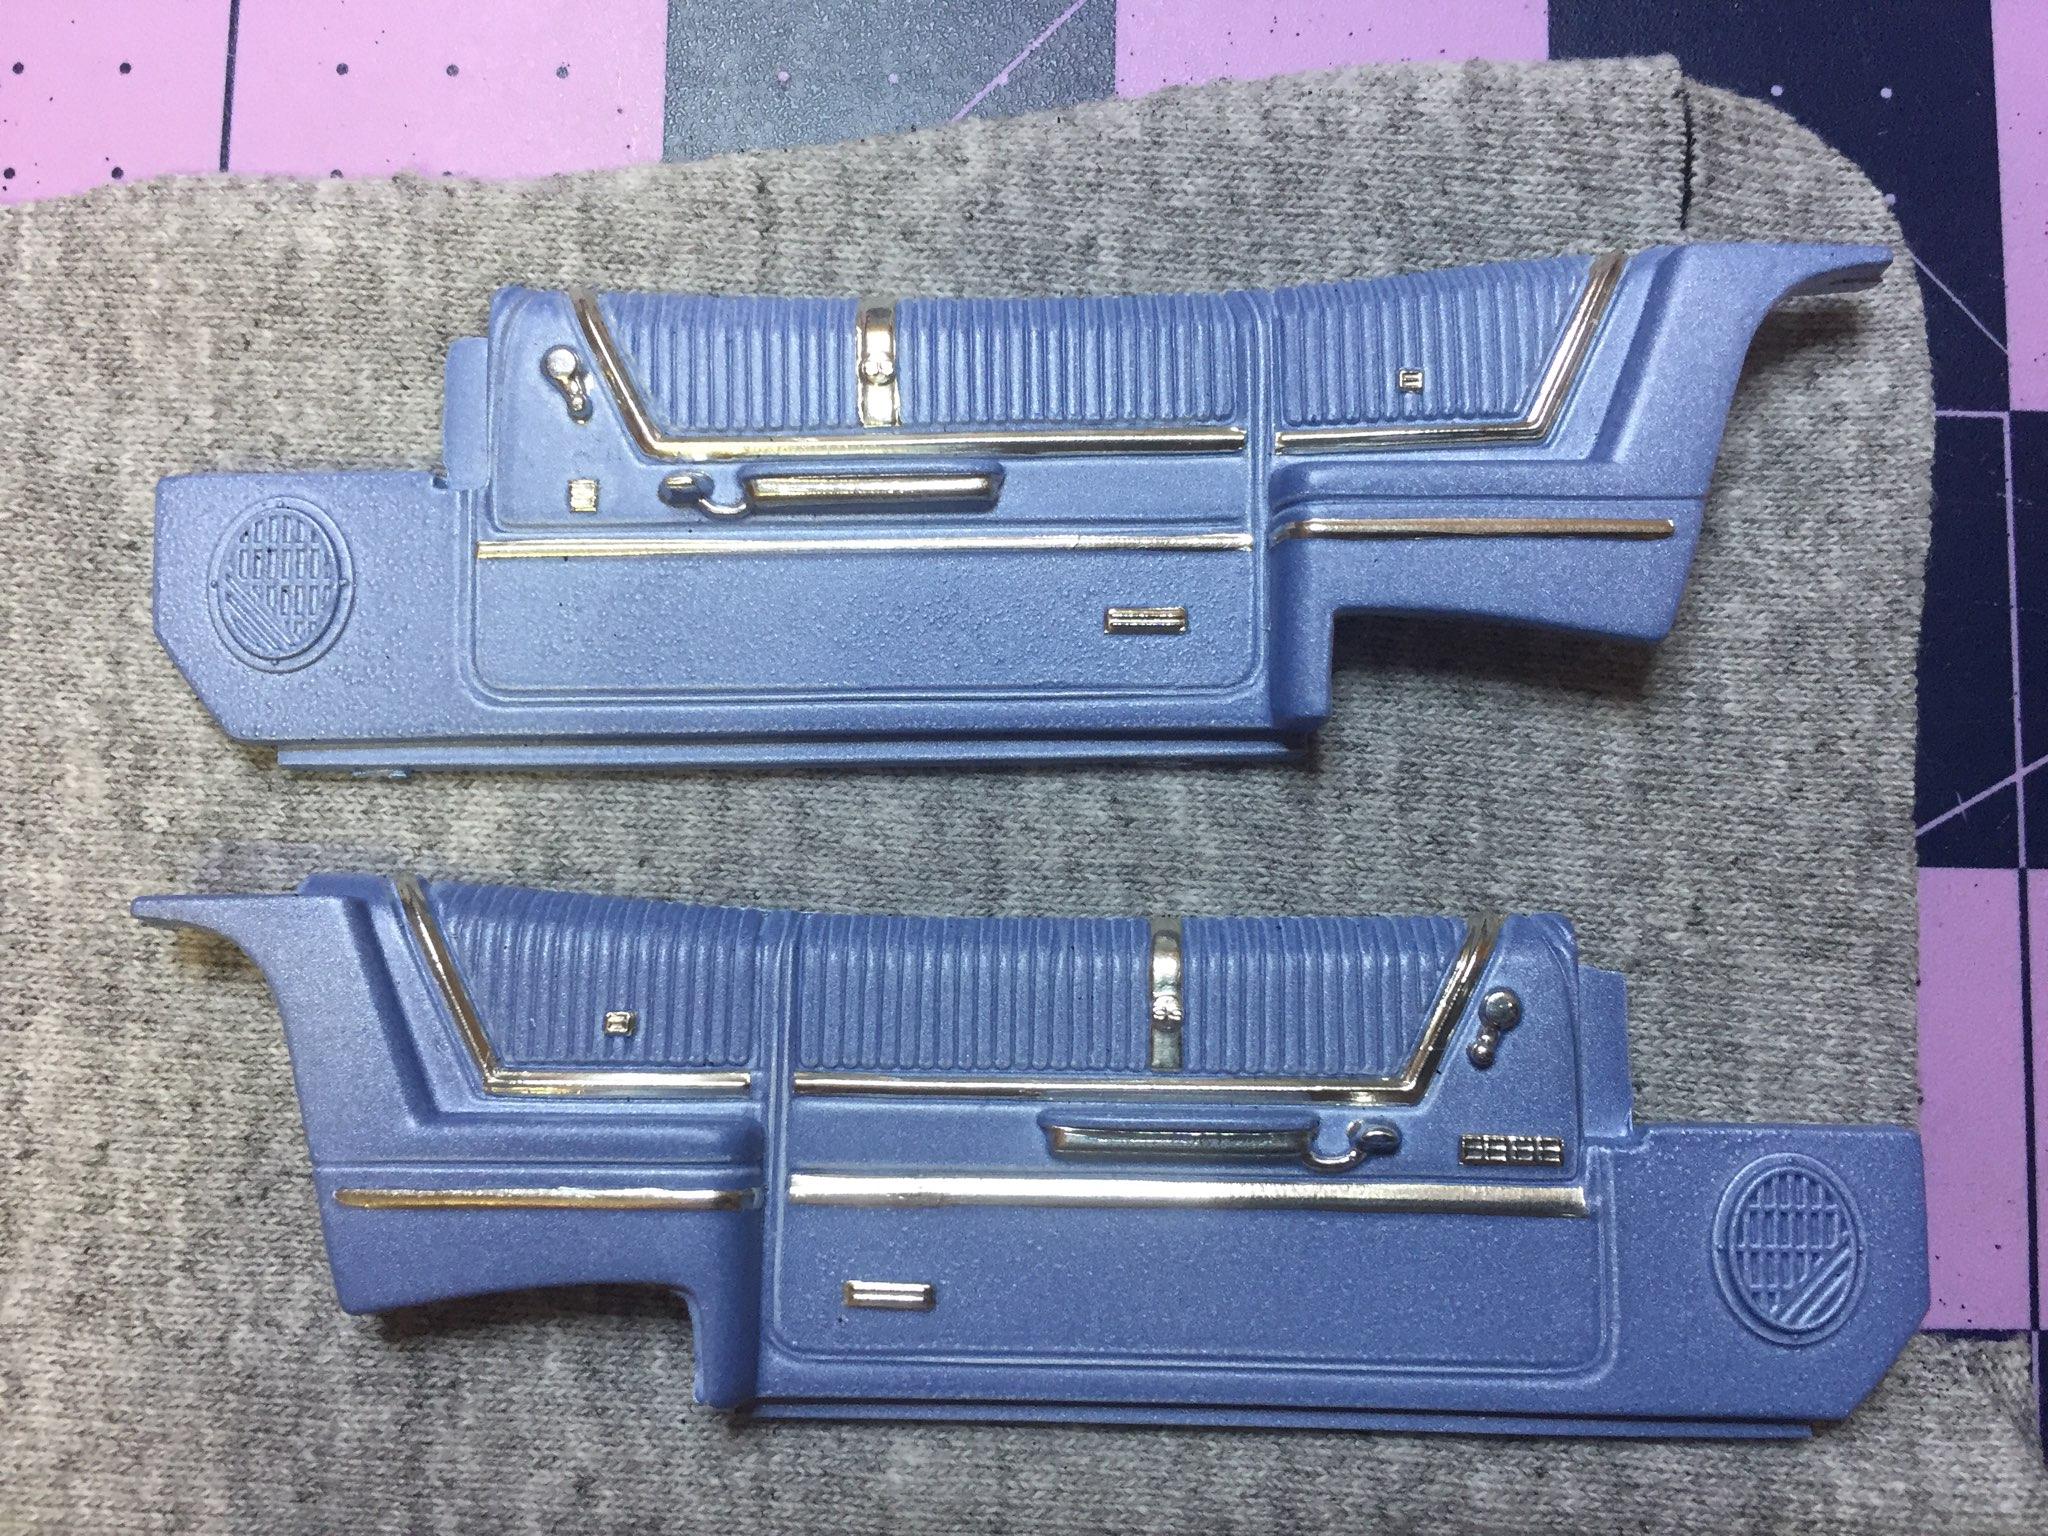
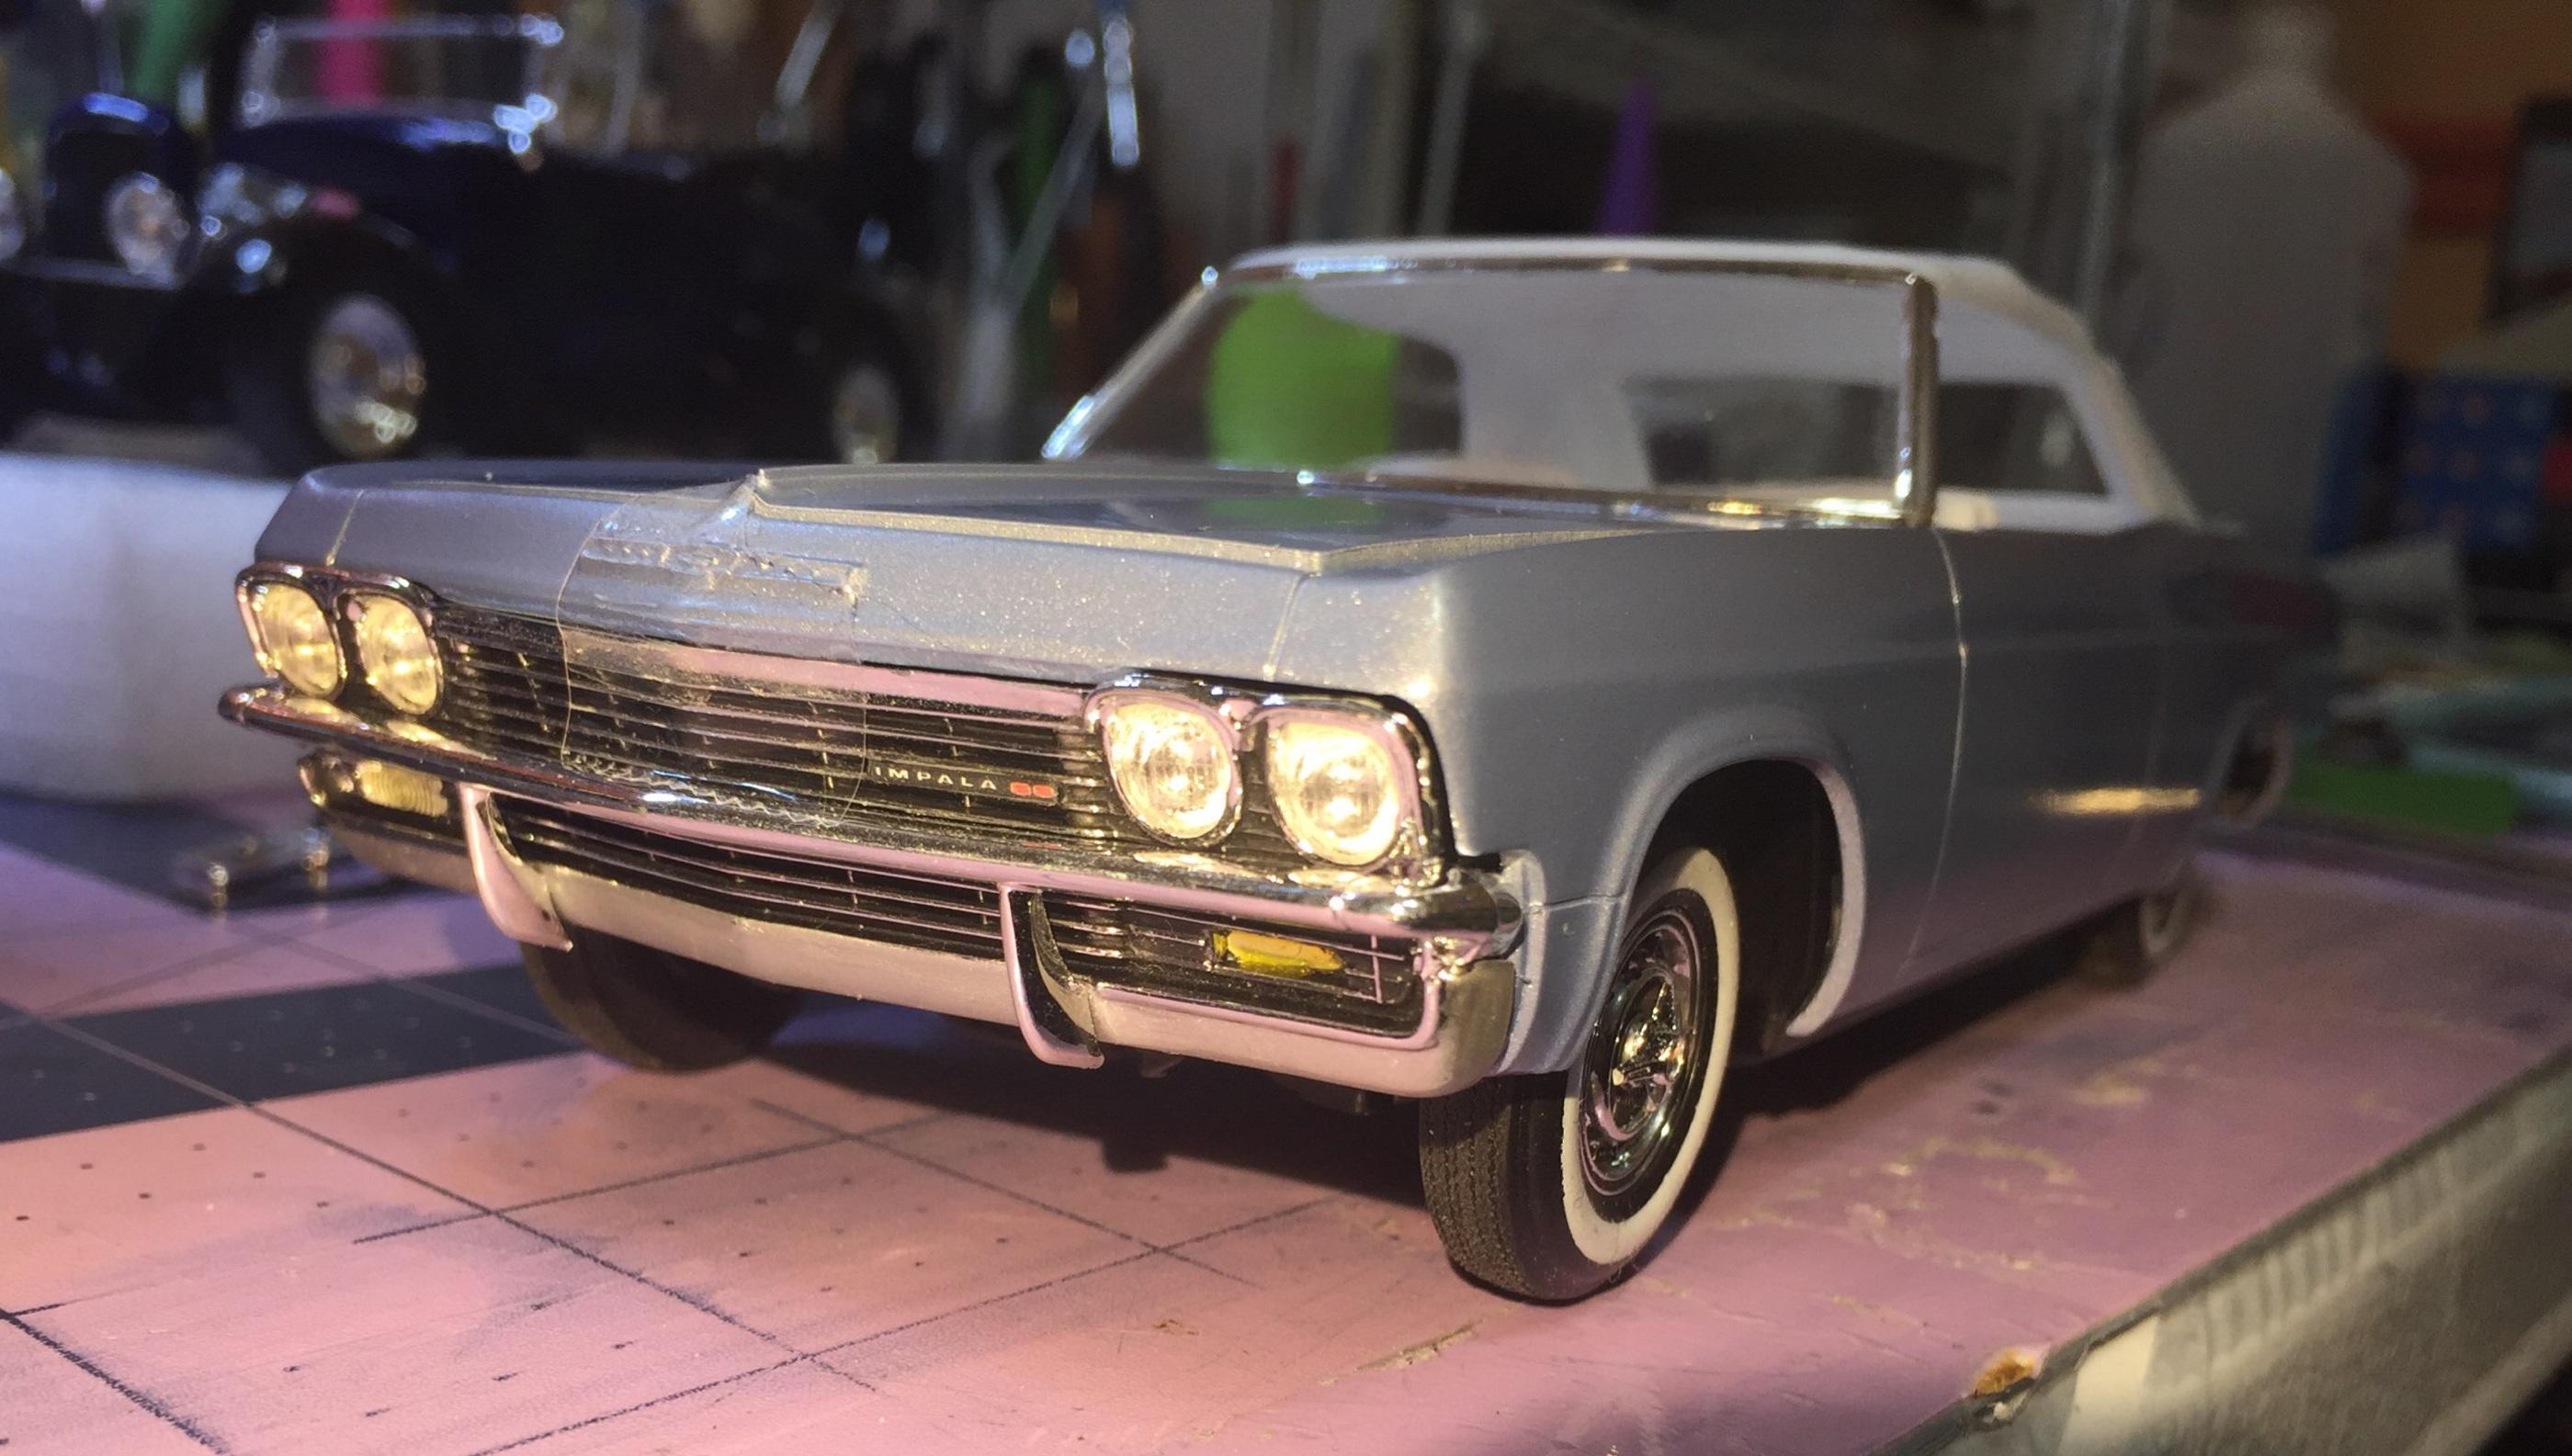
Thanks for your input, DJ. The chrome on the door panels and dash is mostly BMF. Handles and knobs are brushed with "liquid silver foil". The tires are kit parts and pad printed. Maybe I can remove the white.
-
Ferbs, I gotta tell ya, this is brave. The technique being used on the Nash is a possibility. As I look at the full frontal, I think of the '61-ish Chrysler

-
Thanks, Bob, but my problem is sticky white walls. This Revell kit provided the tires with white walls and they were fine when I built the chassis many moons ago. I guess I can remove the white walls with acetone or IPA. If I do, that's it. Black wall city. The wheels are on permanently. Lots of time spent in detailing the wheel covers. I just wonder what will happen if I leave it alone and the stickiness gets worse. 😧
-
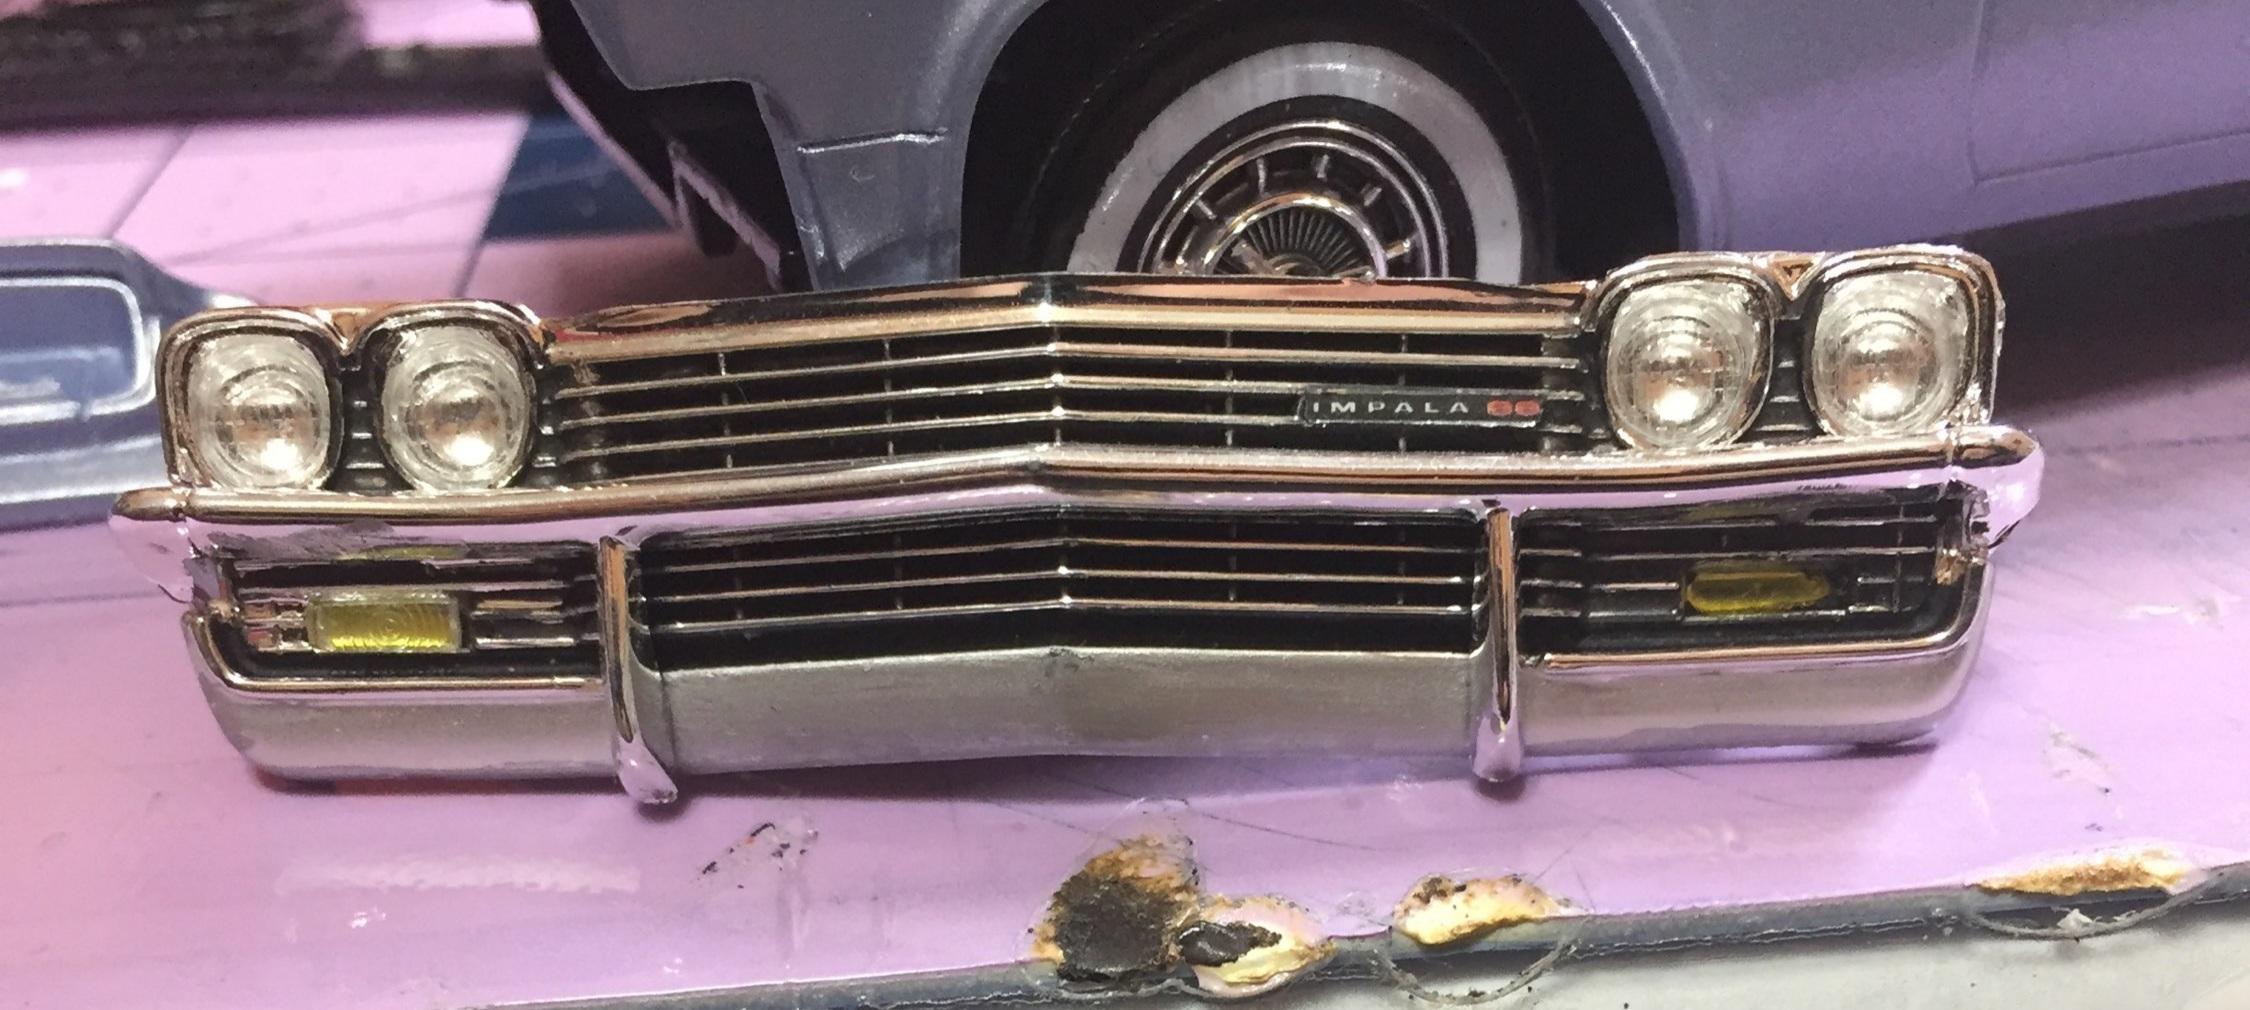
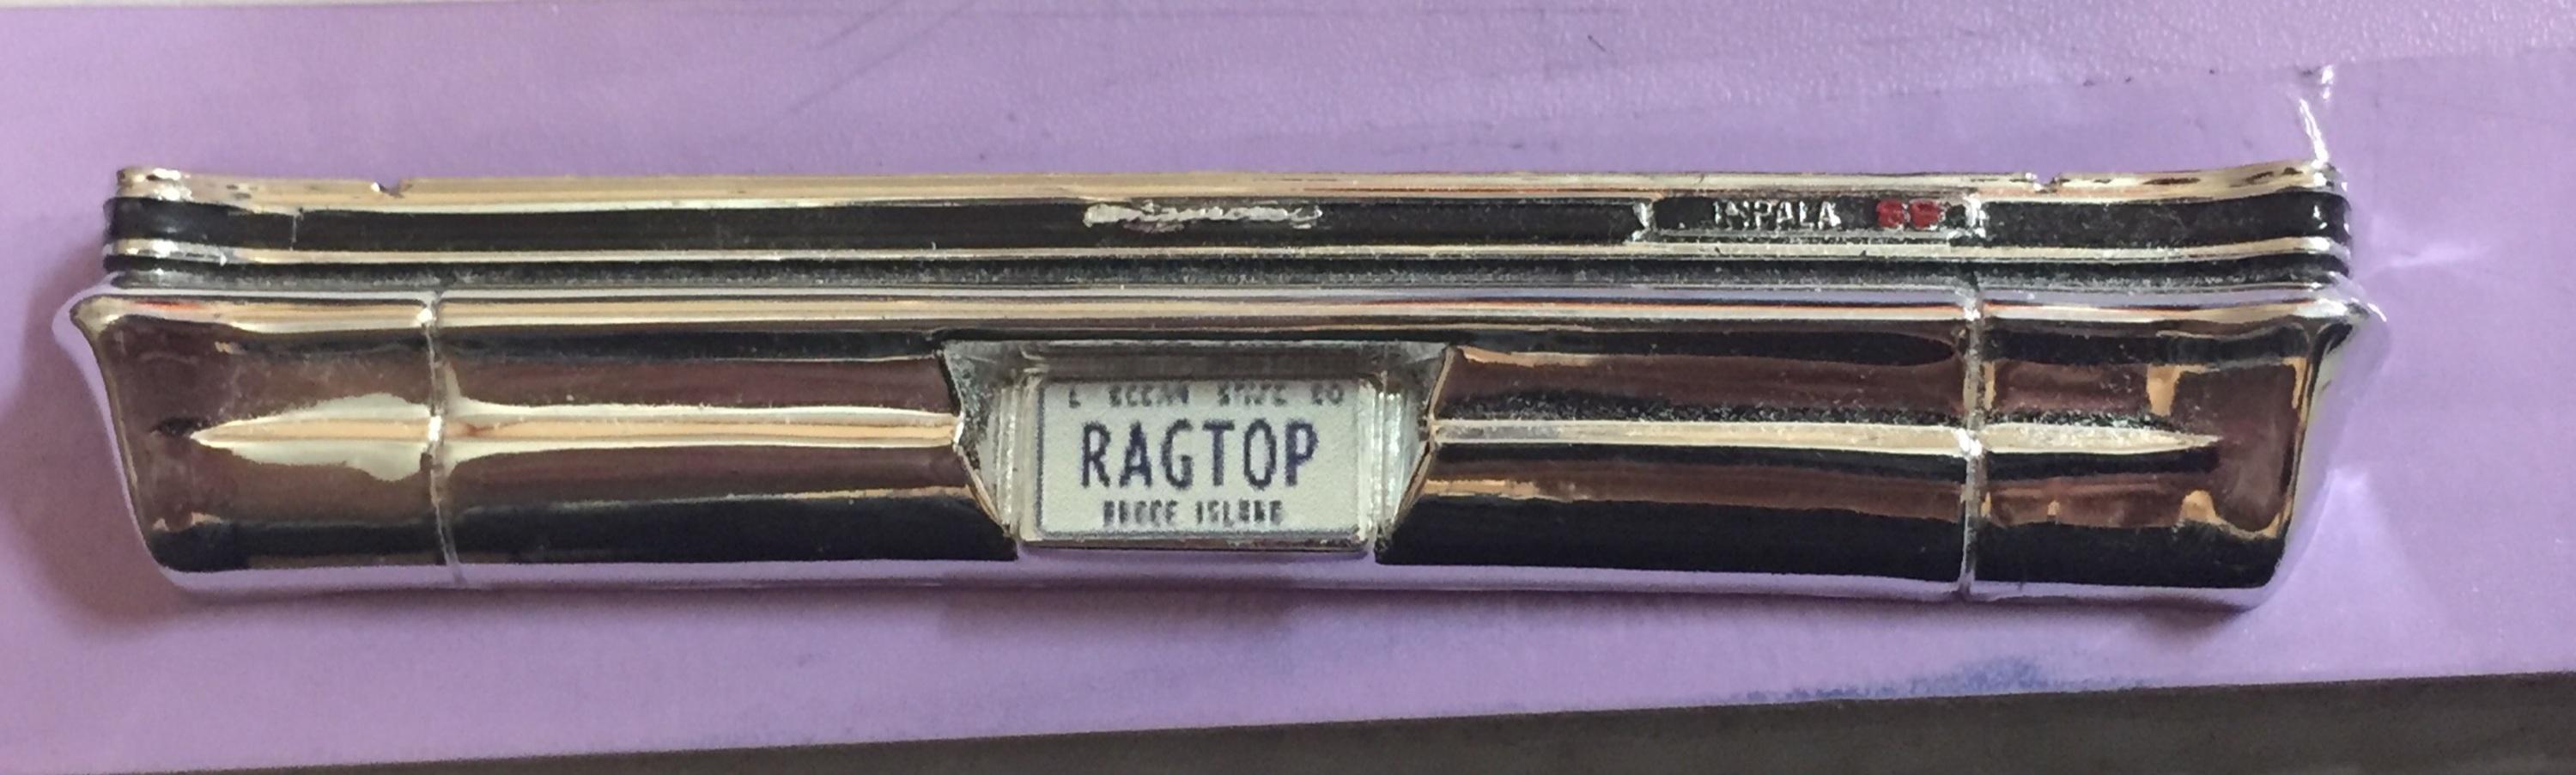
Thanks, Jon. This one has been sitting in the box way too long. It's a fairly well detailed kit and want to finish it, no matter what. I've had a few of these 1:1 mid/late '60s Impalas in my youth and you could always find a decent one for a few hundred bucks.
-
Woo hooo! Great idea! 😯 You can still back out....🥴
-
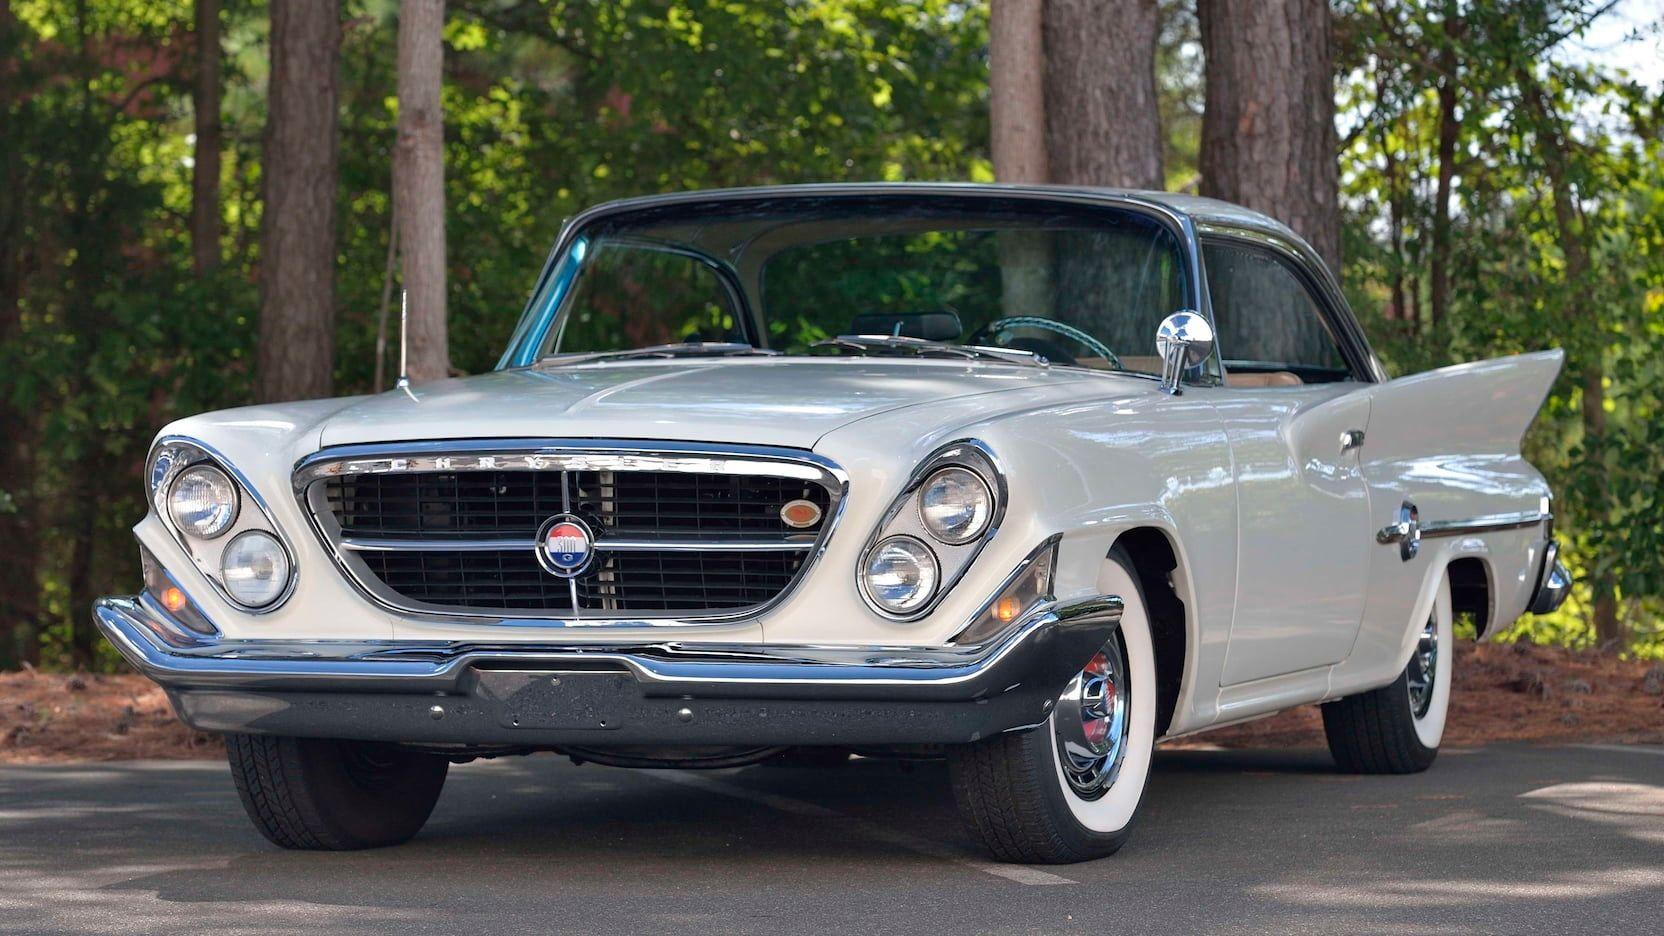
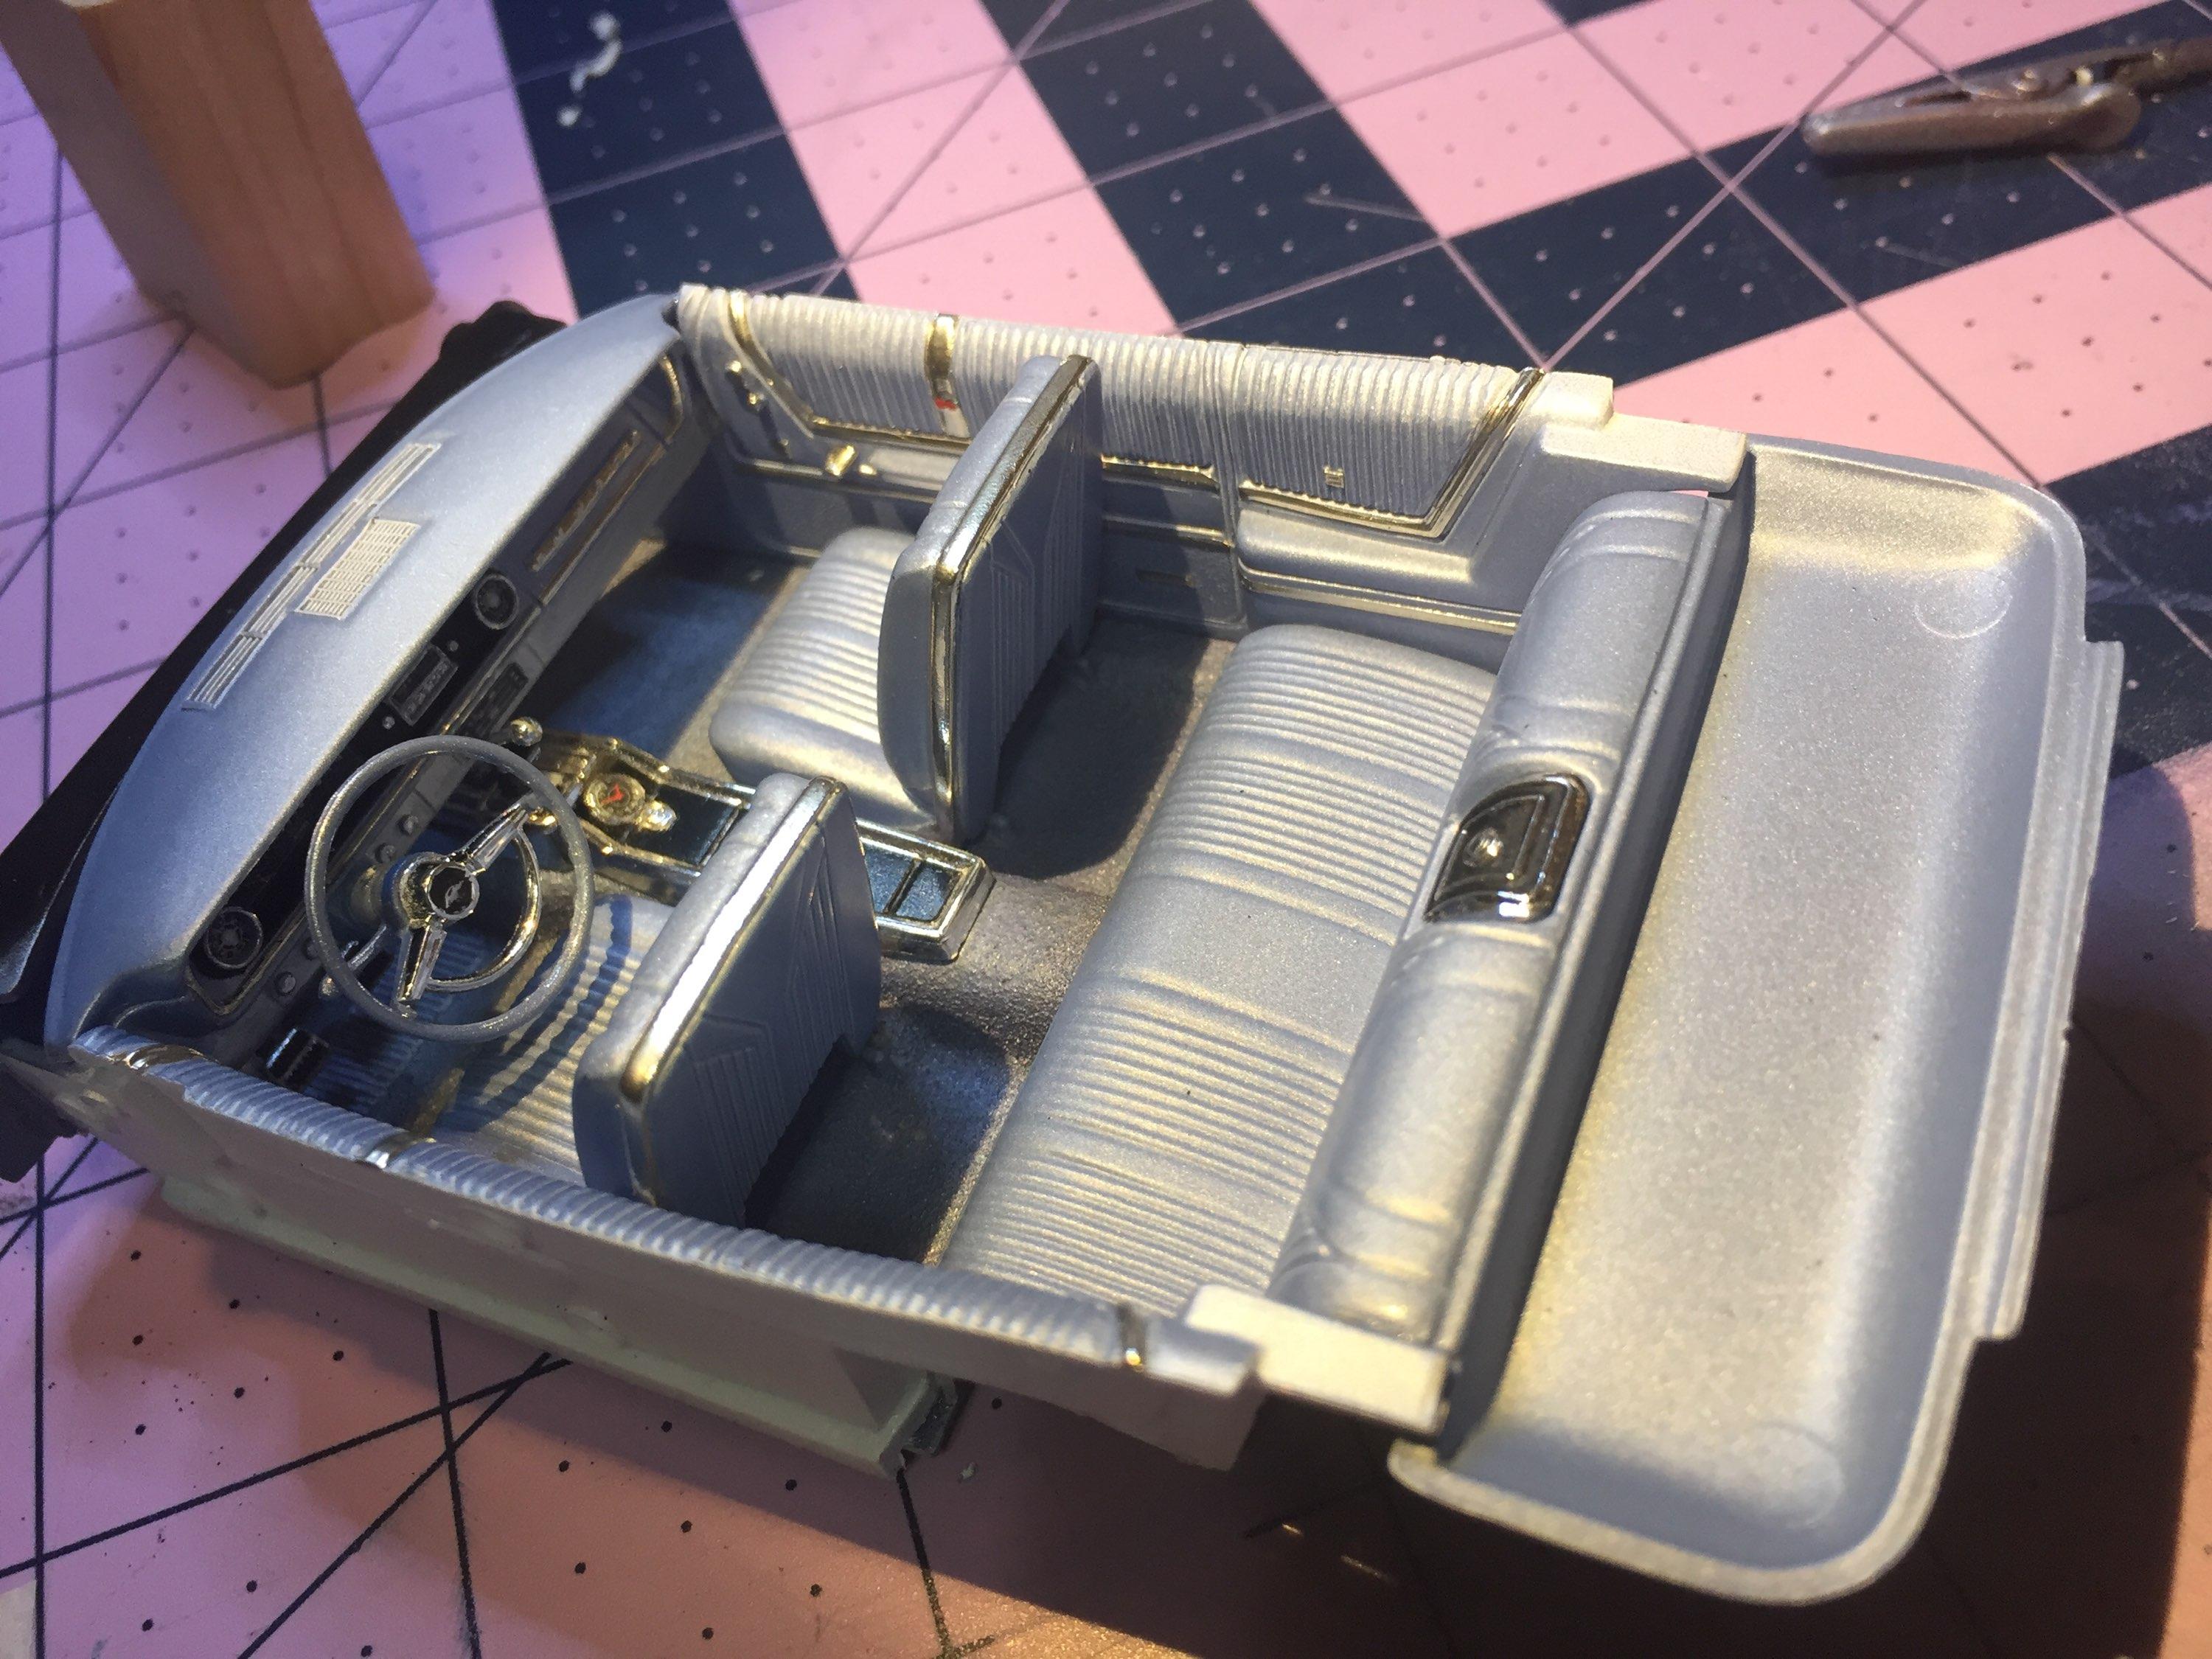
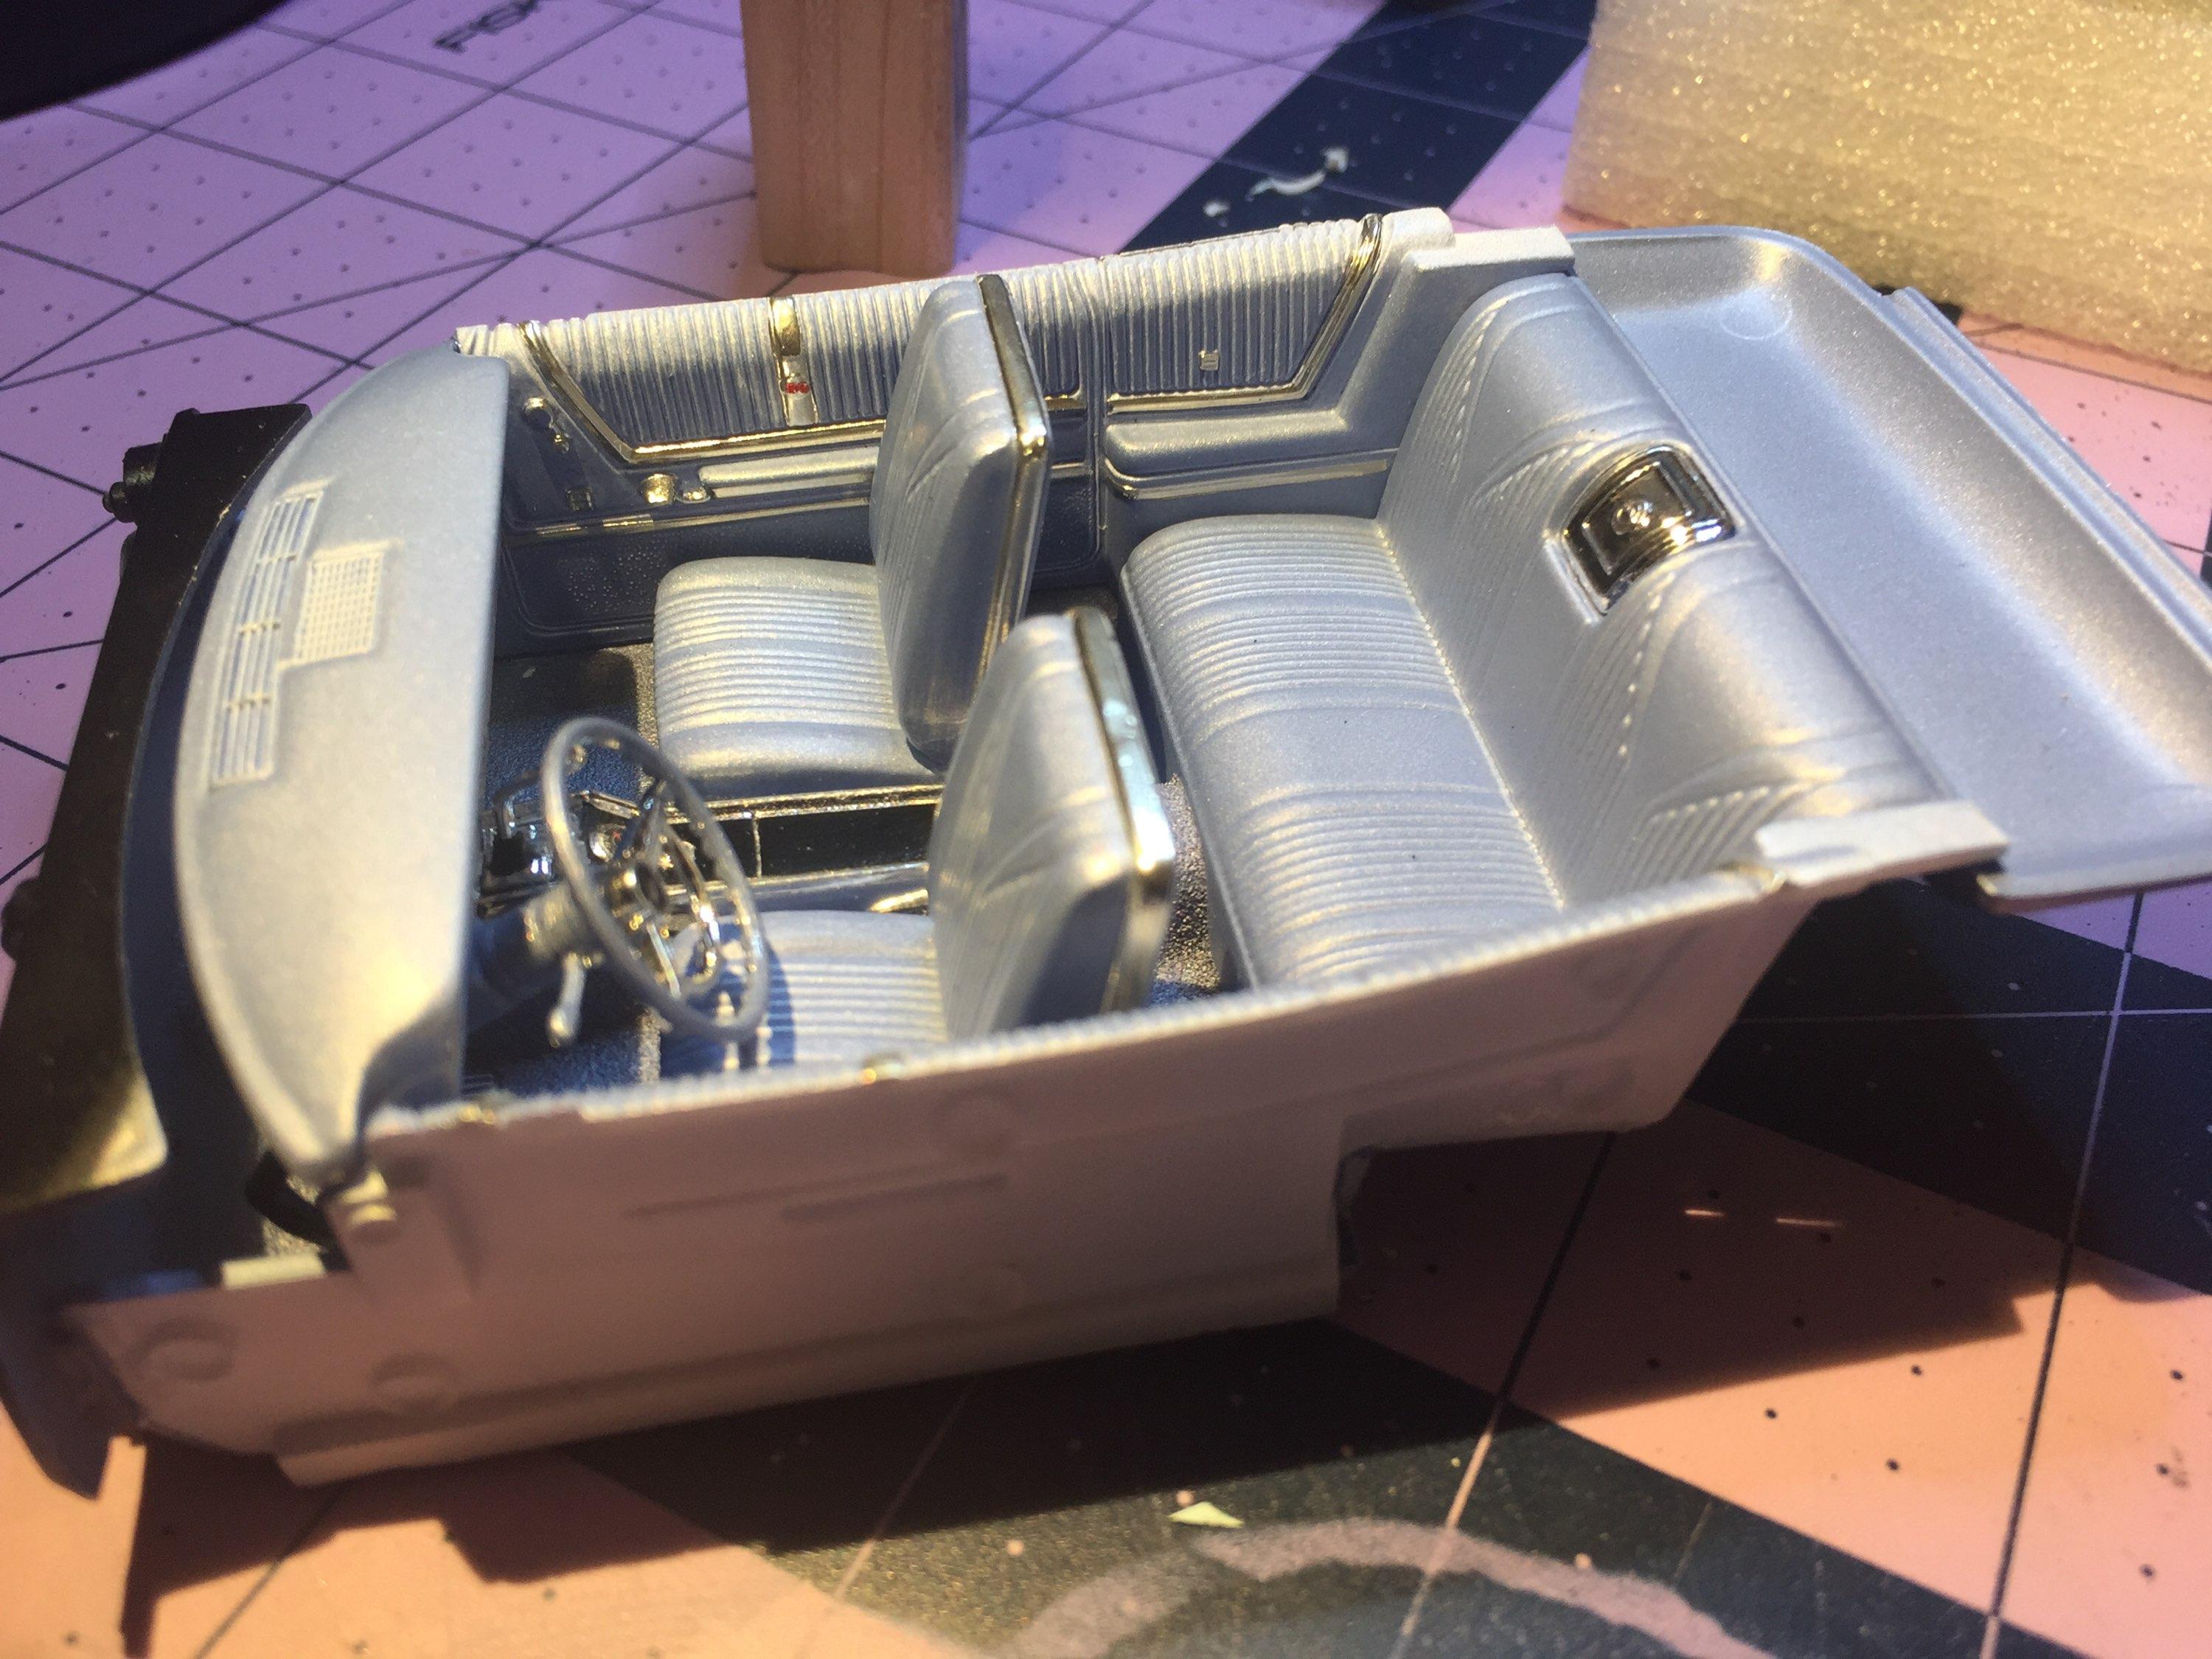
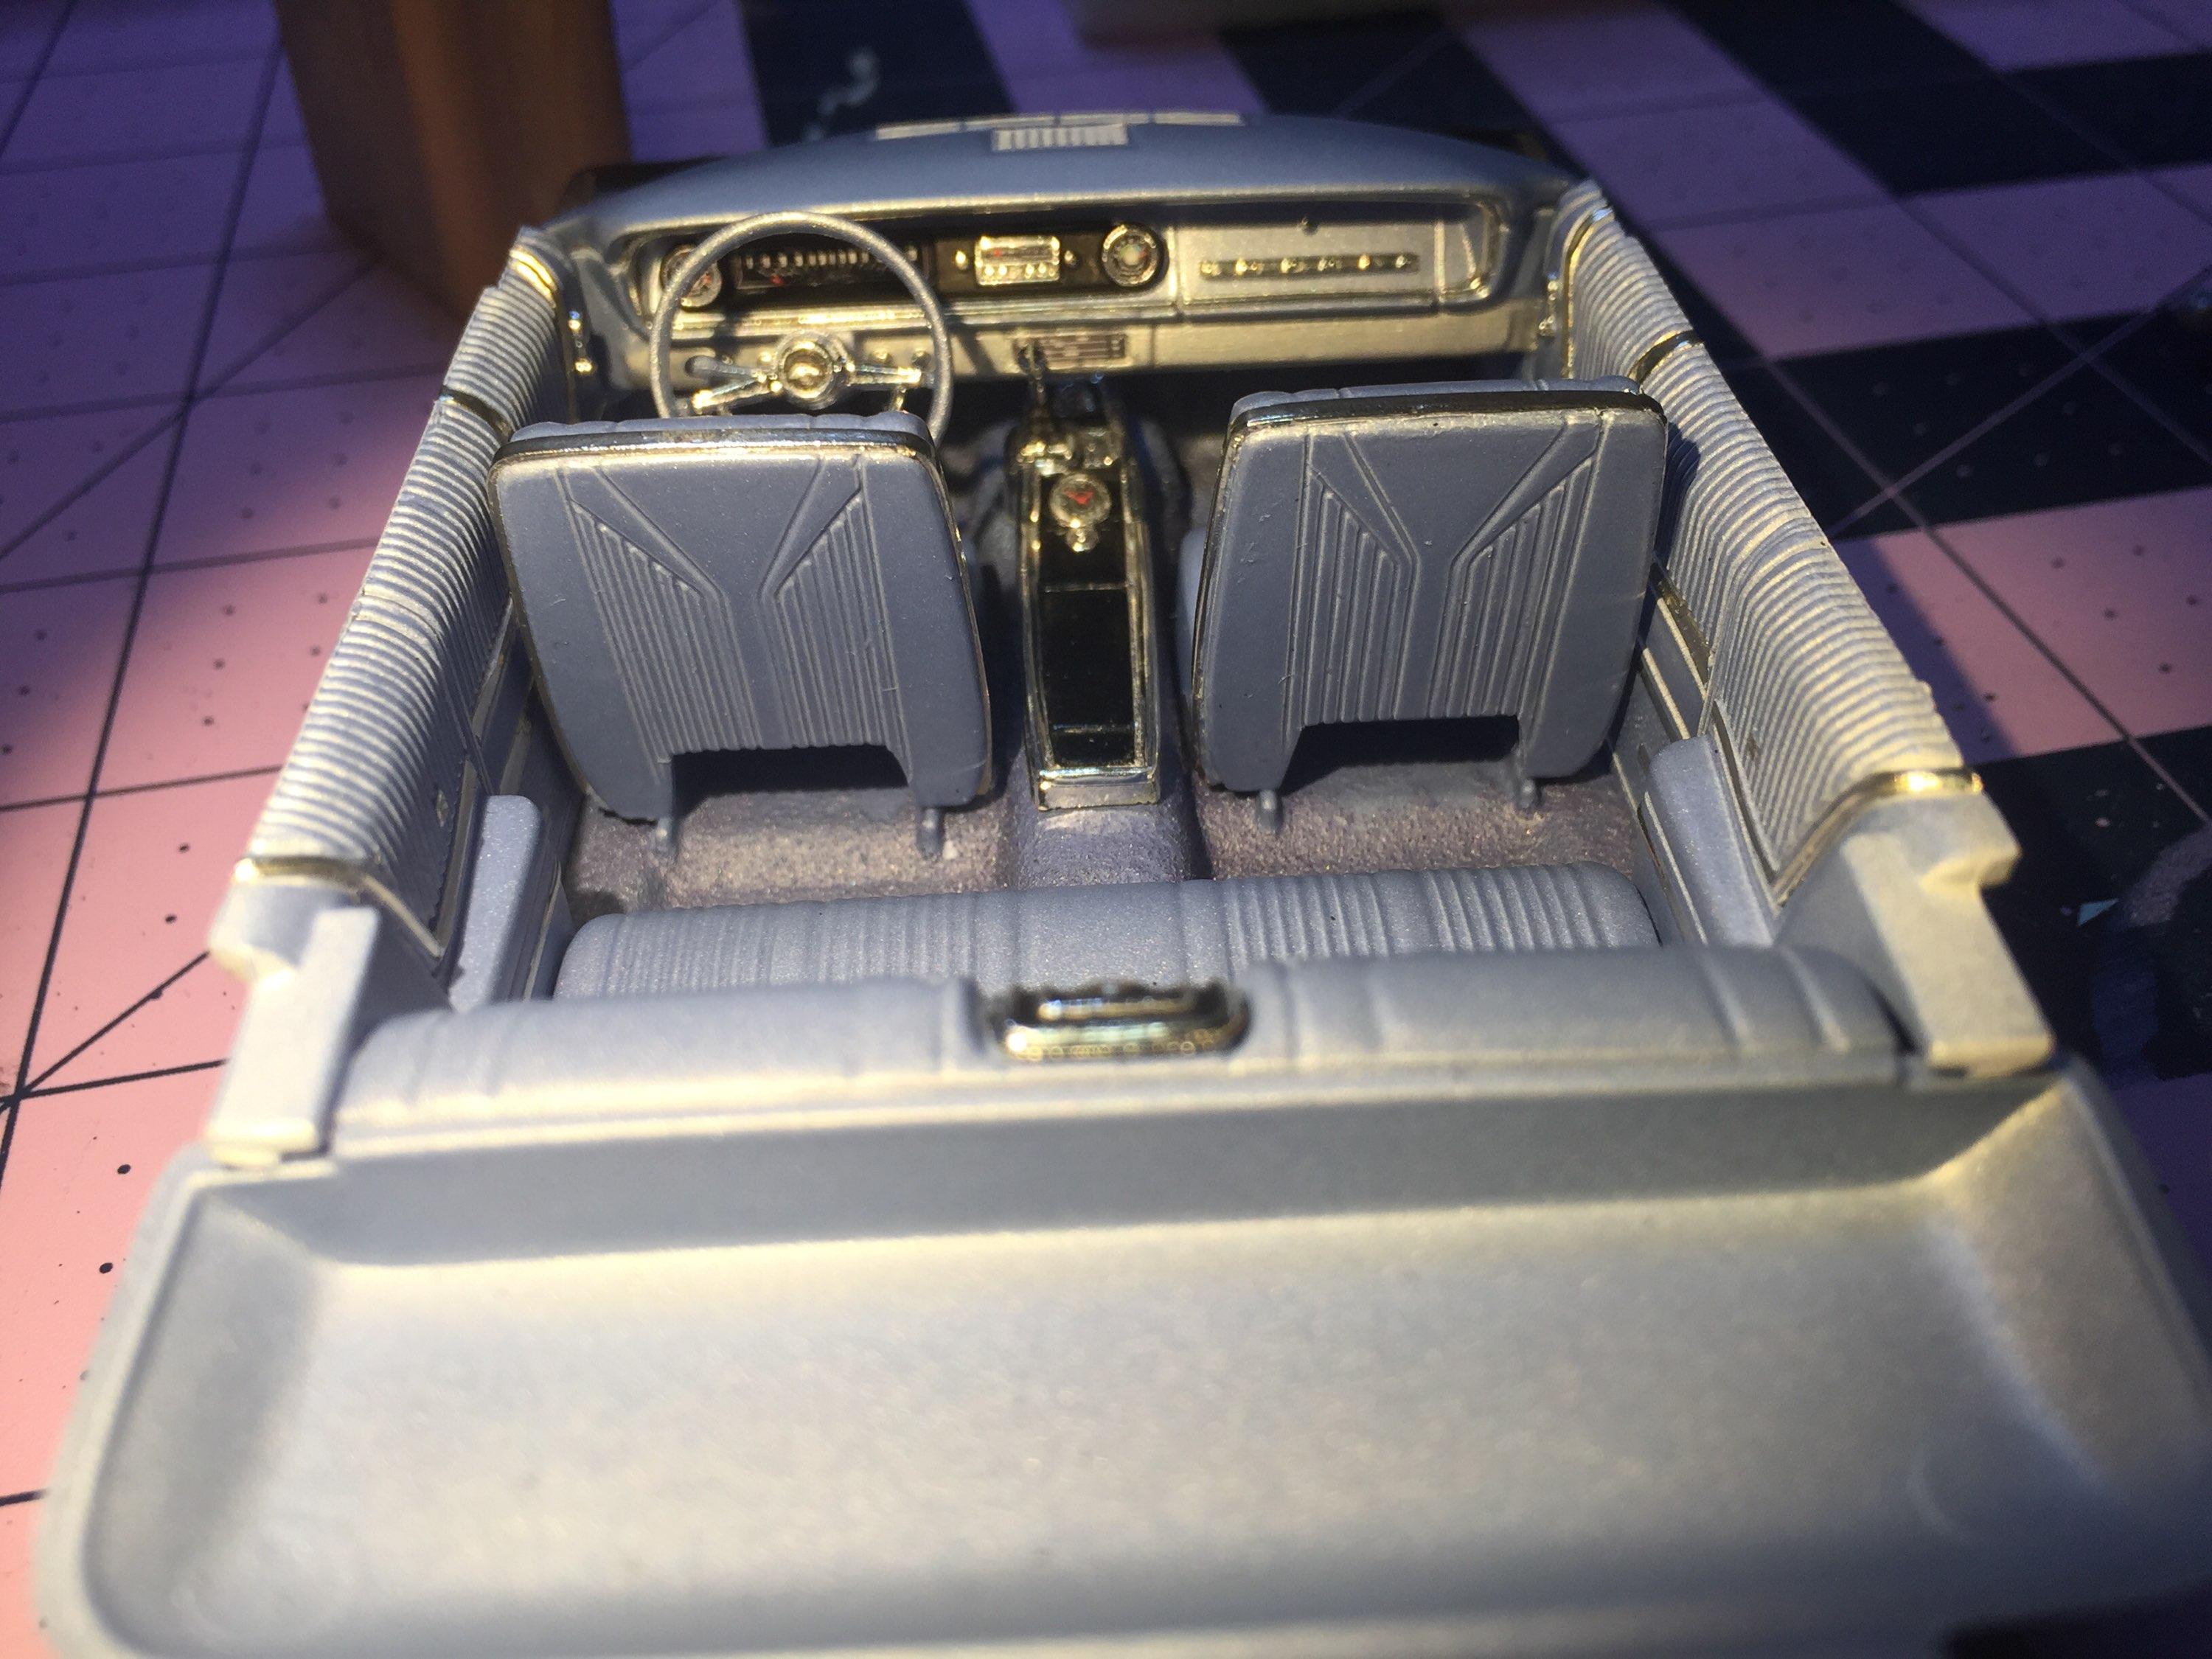
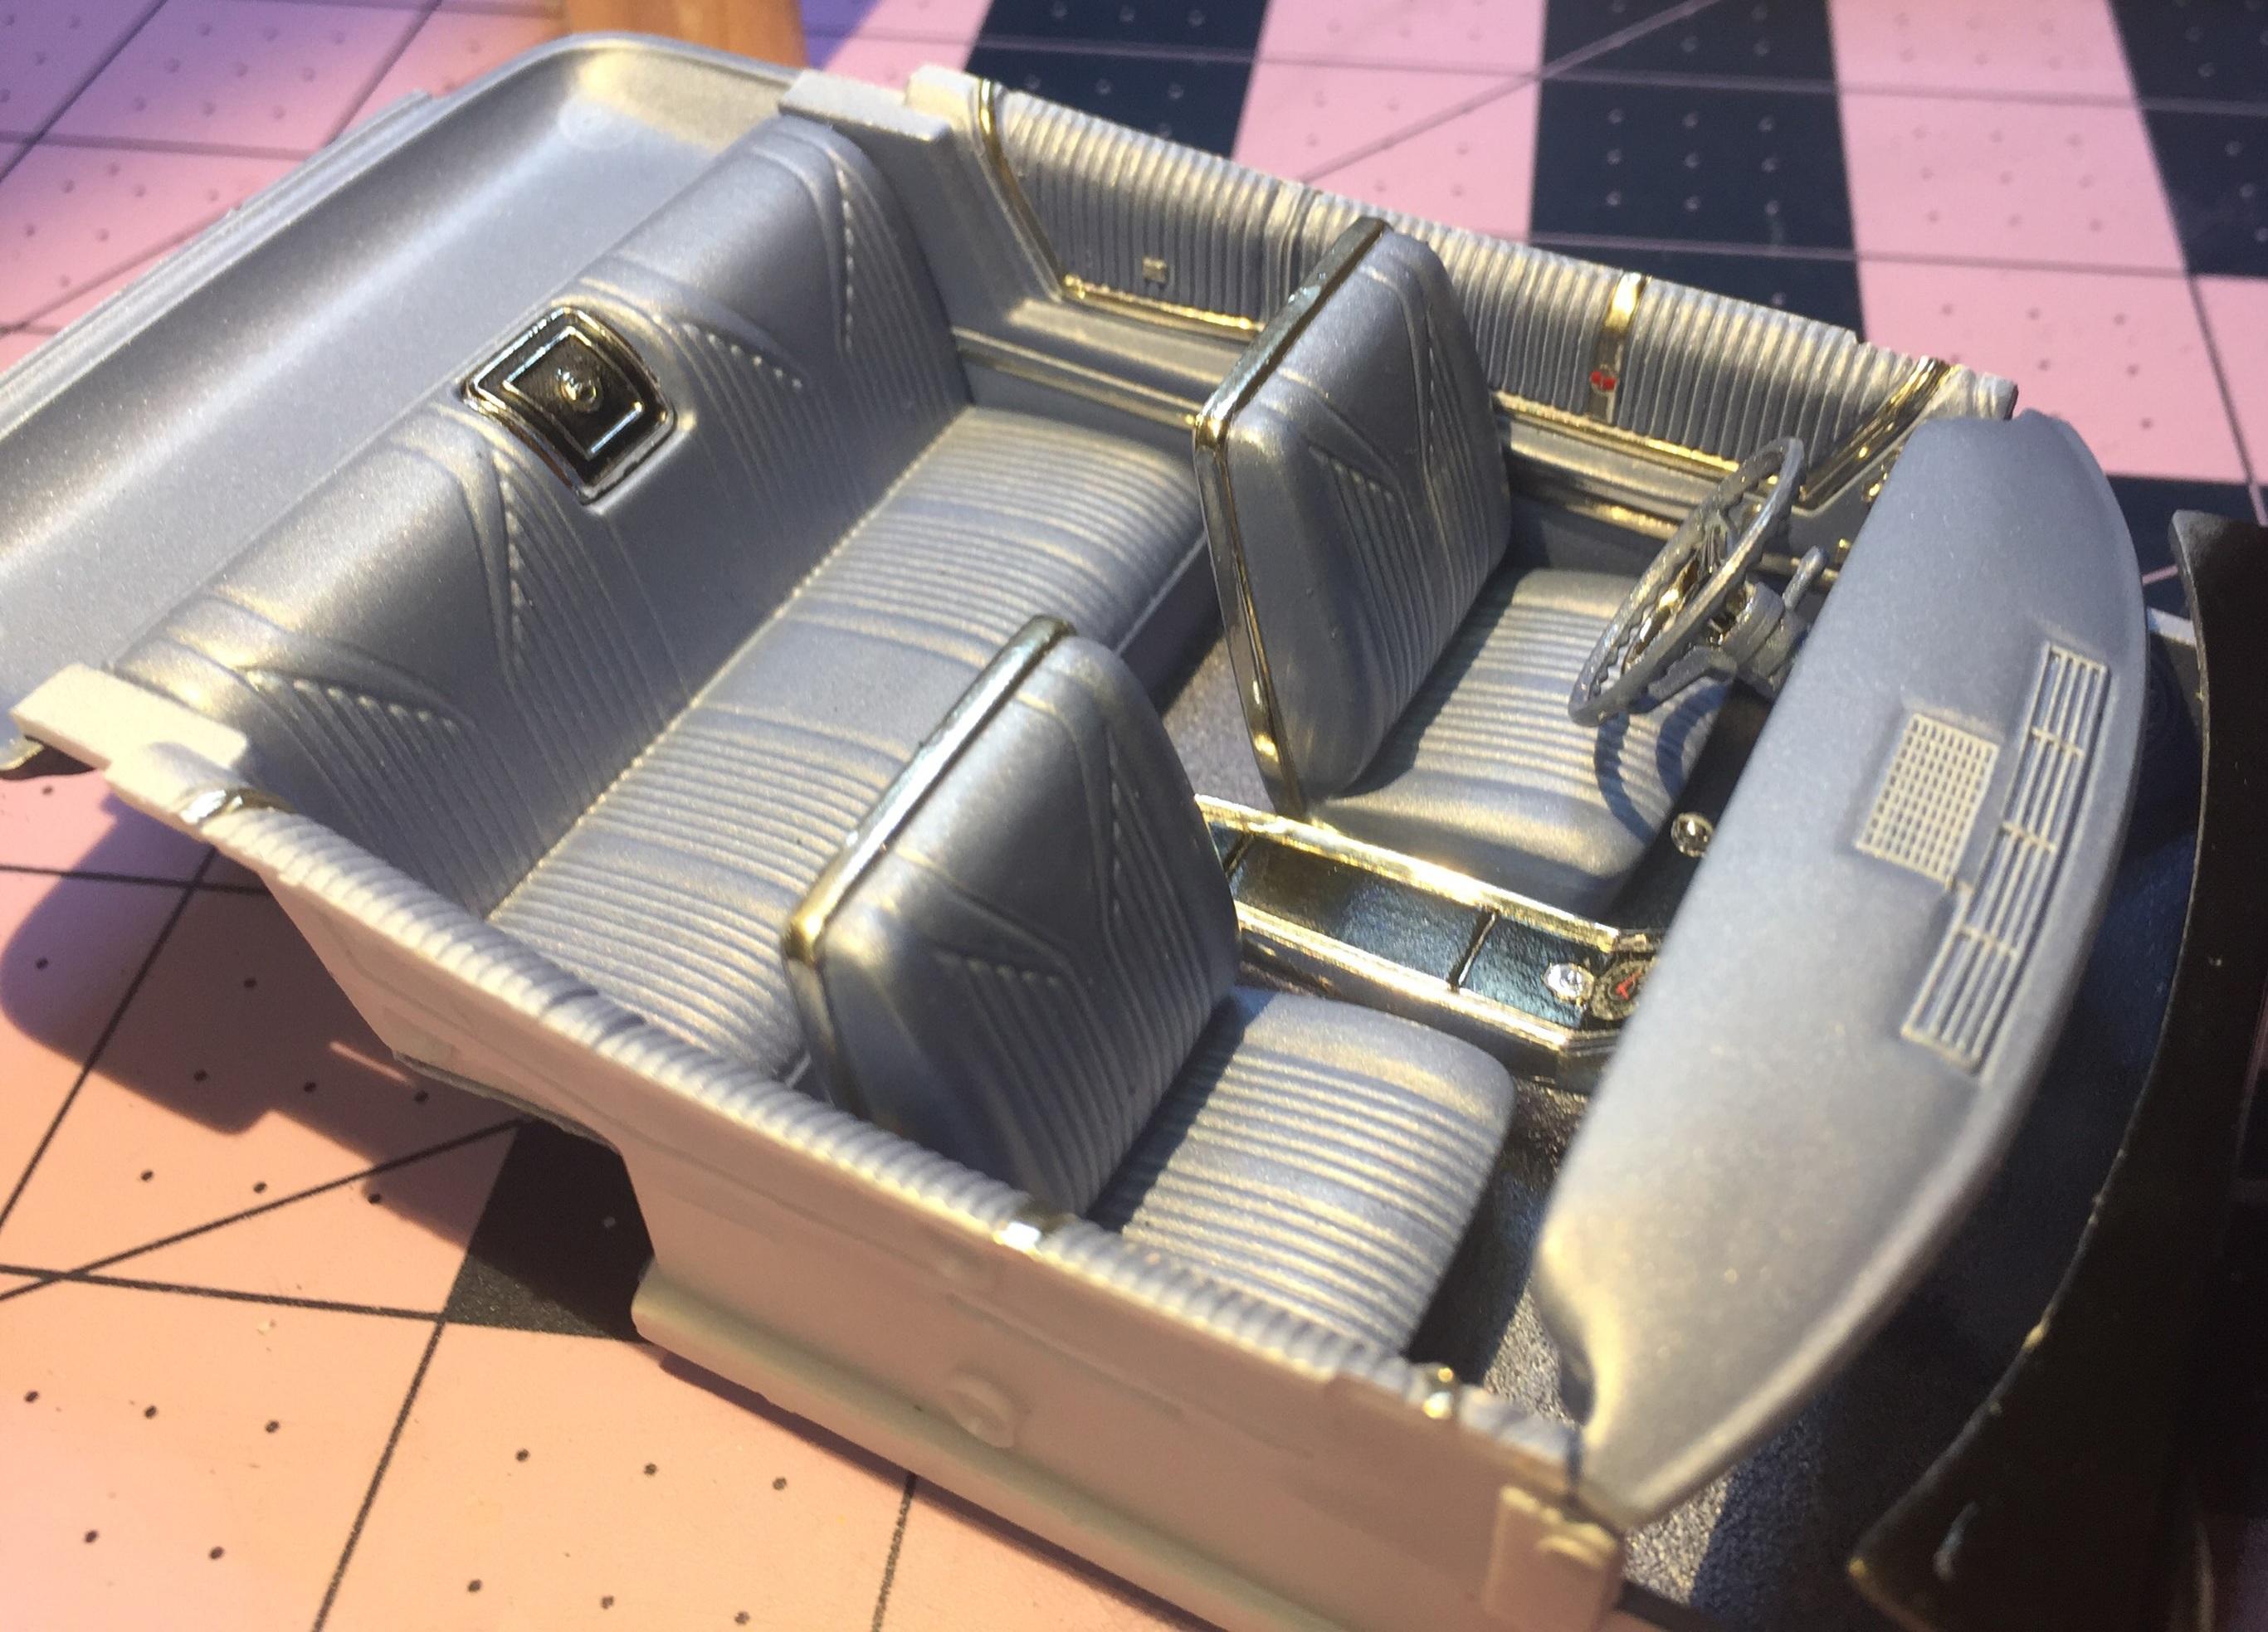
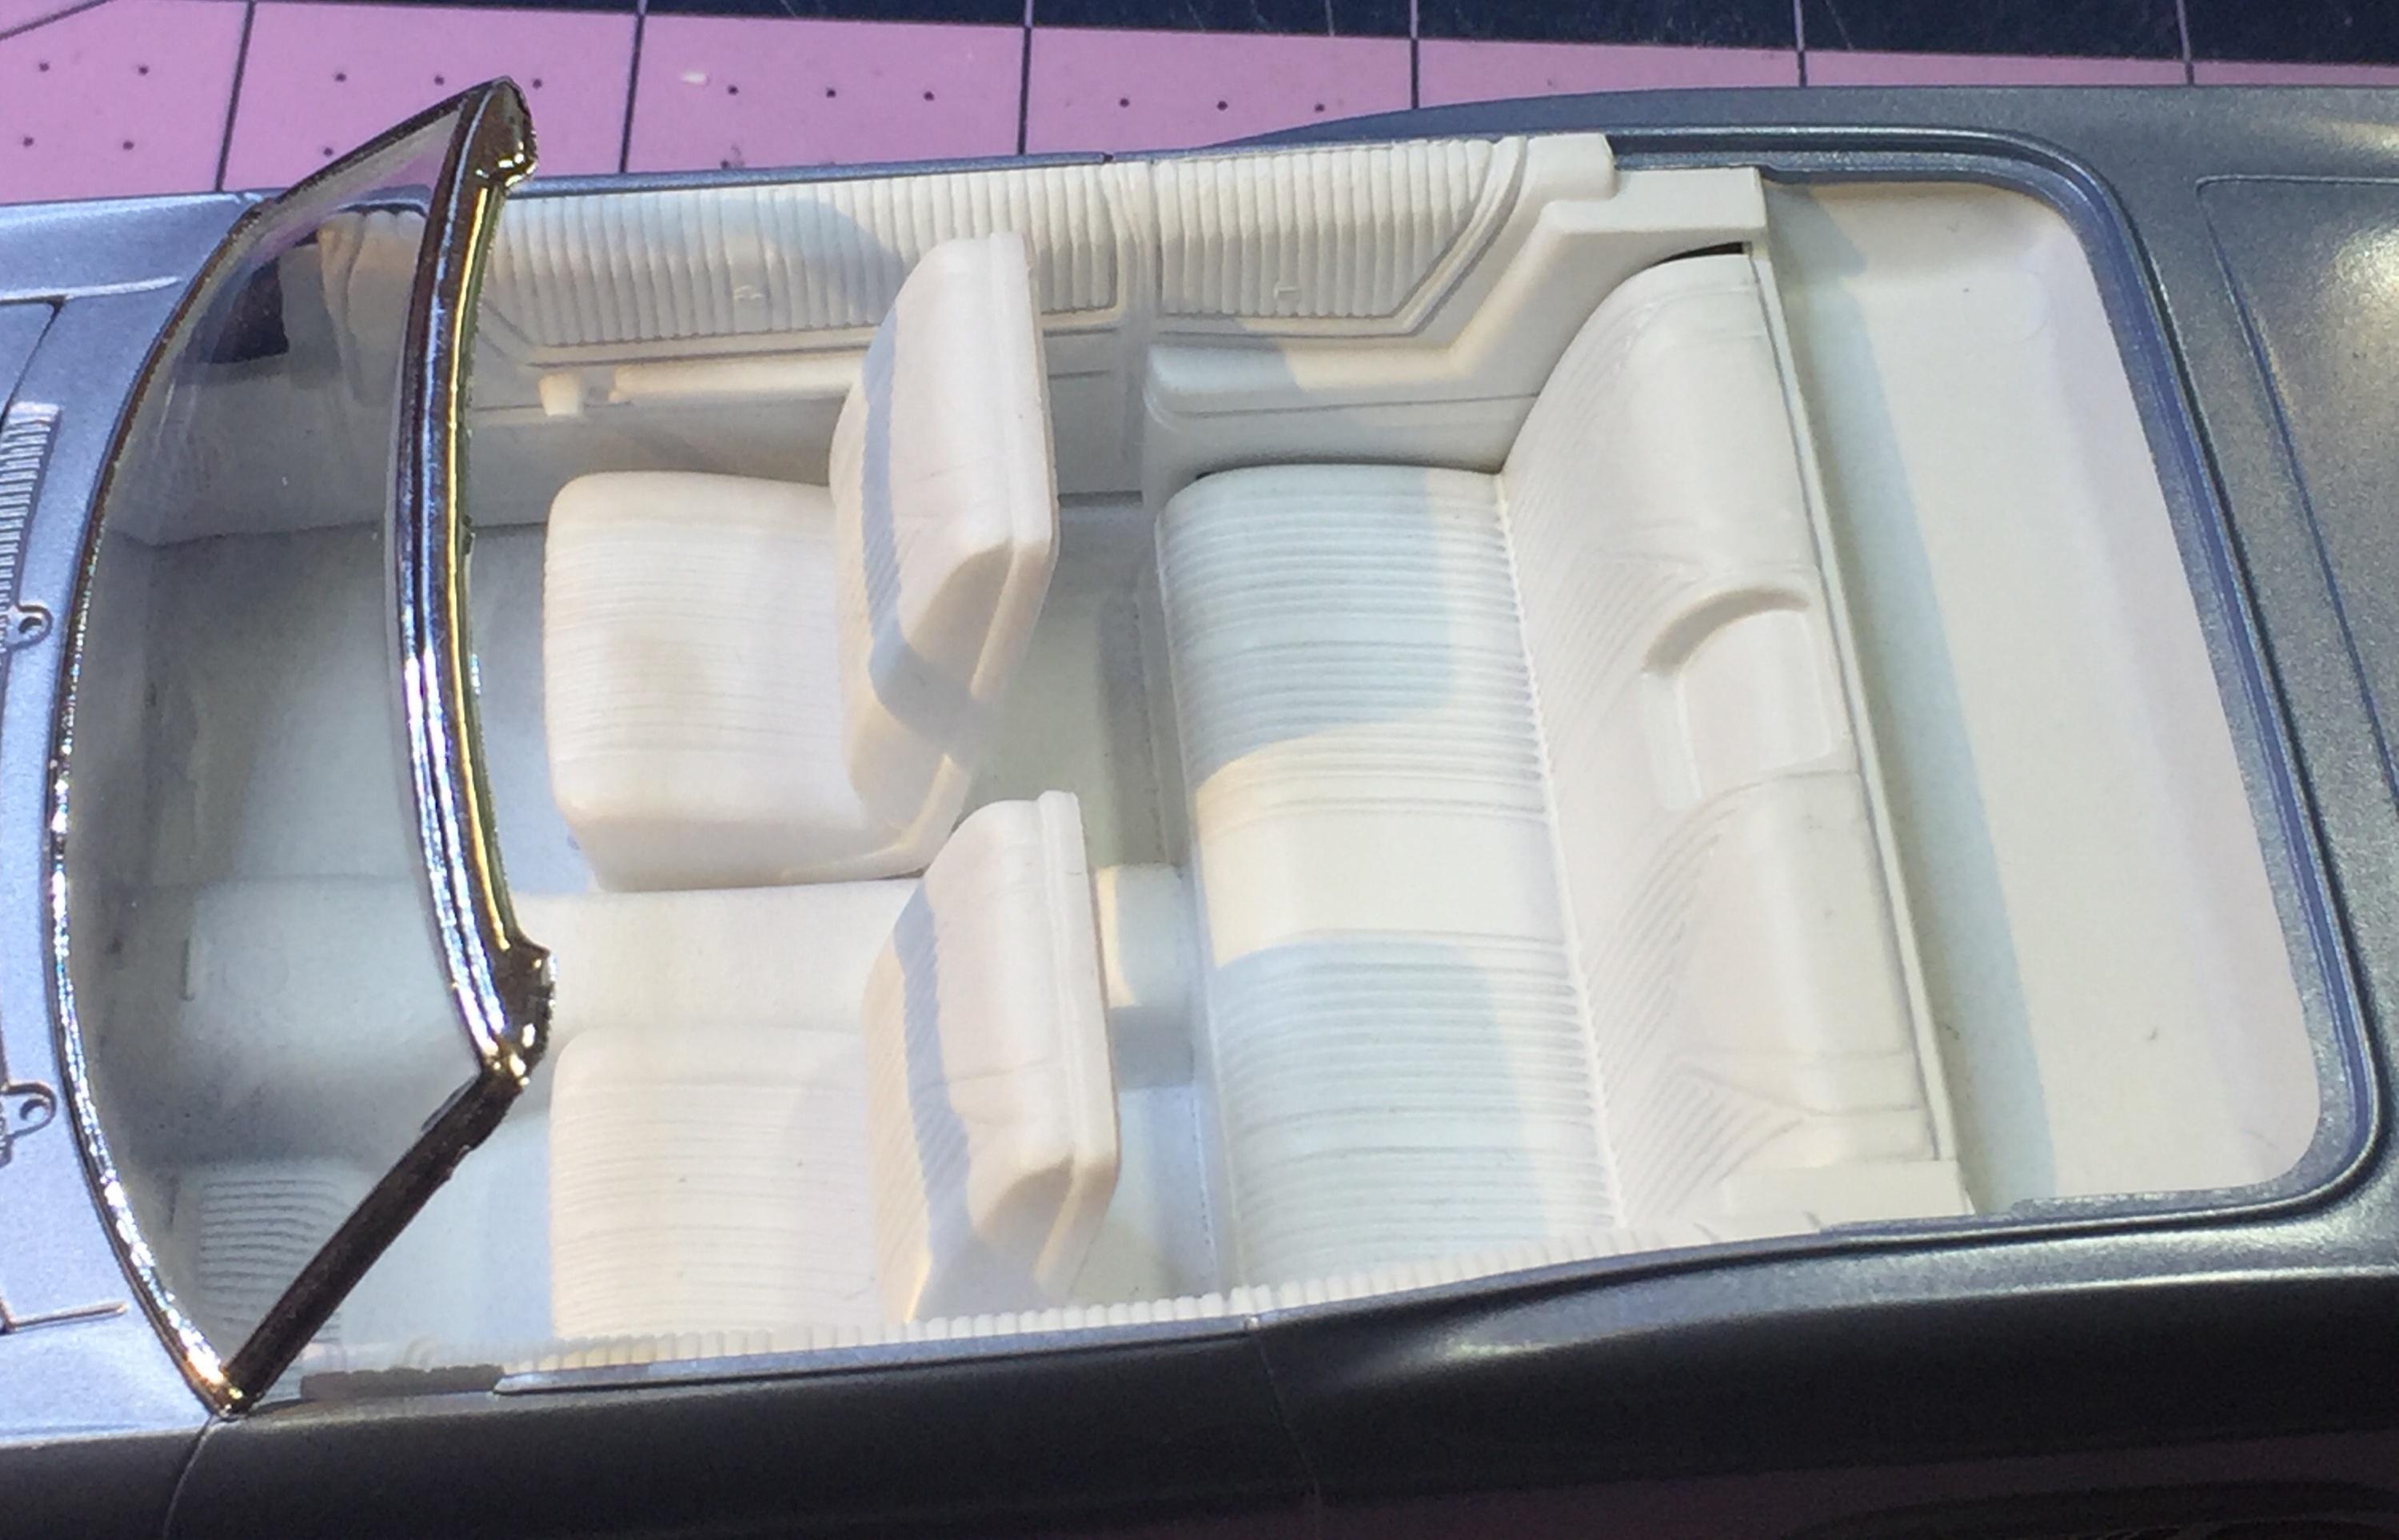
Interior is complete except I forgot to paint the door reflectors. Not to worry. The doors don't open. The A/C vents were eliminated due to a previous plan that has been abandoned. That's it for now. Next I will need to try and remove an unwanted artifact from the trunk lid and then get a few coats of clear on it. Wish me luck. BTW, has anyone dealt with the sticky pad printed white wall thing? Is this a common issue? They weren't sticky when I started this kit. What's this about?
-
Who would do that, Lenny? EDIT: don't answer that.
-
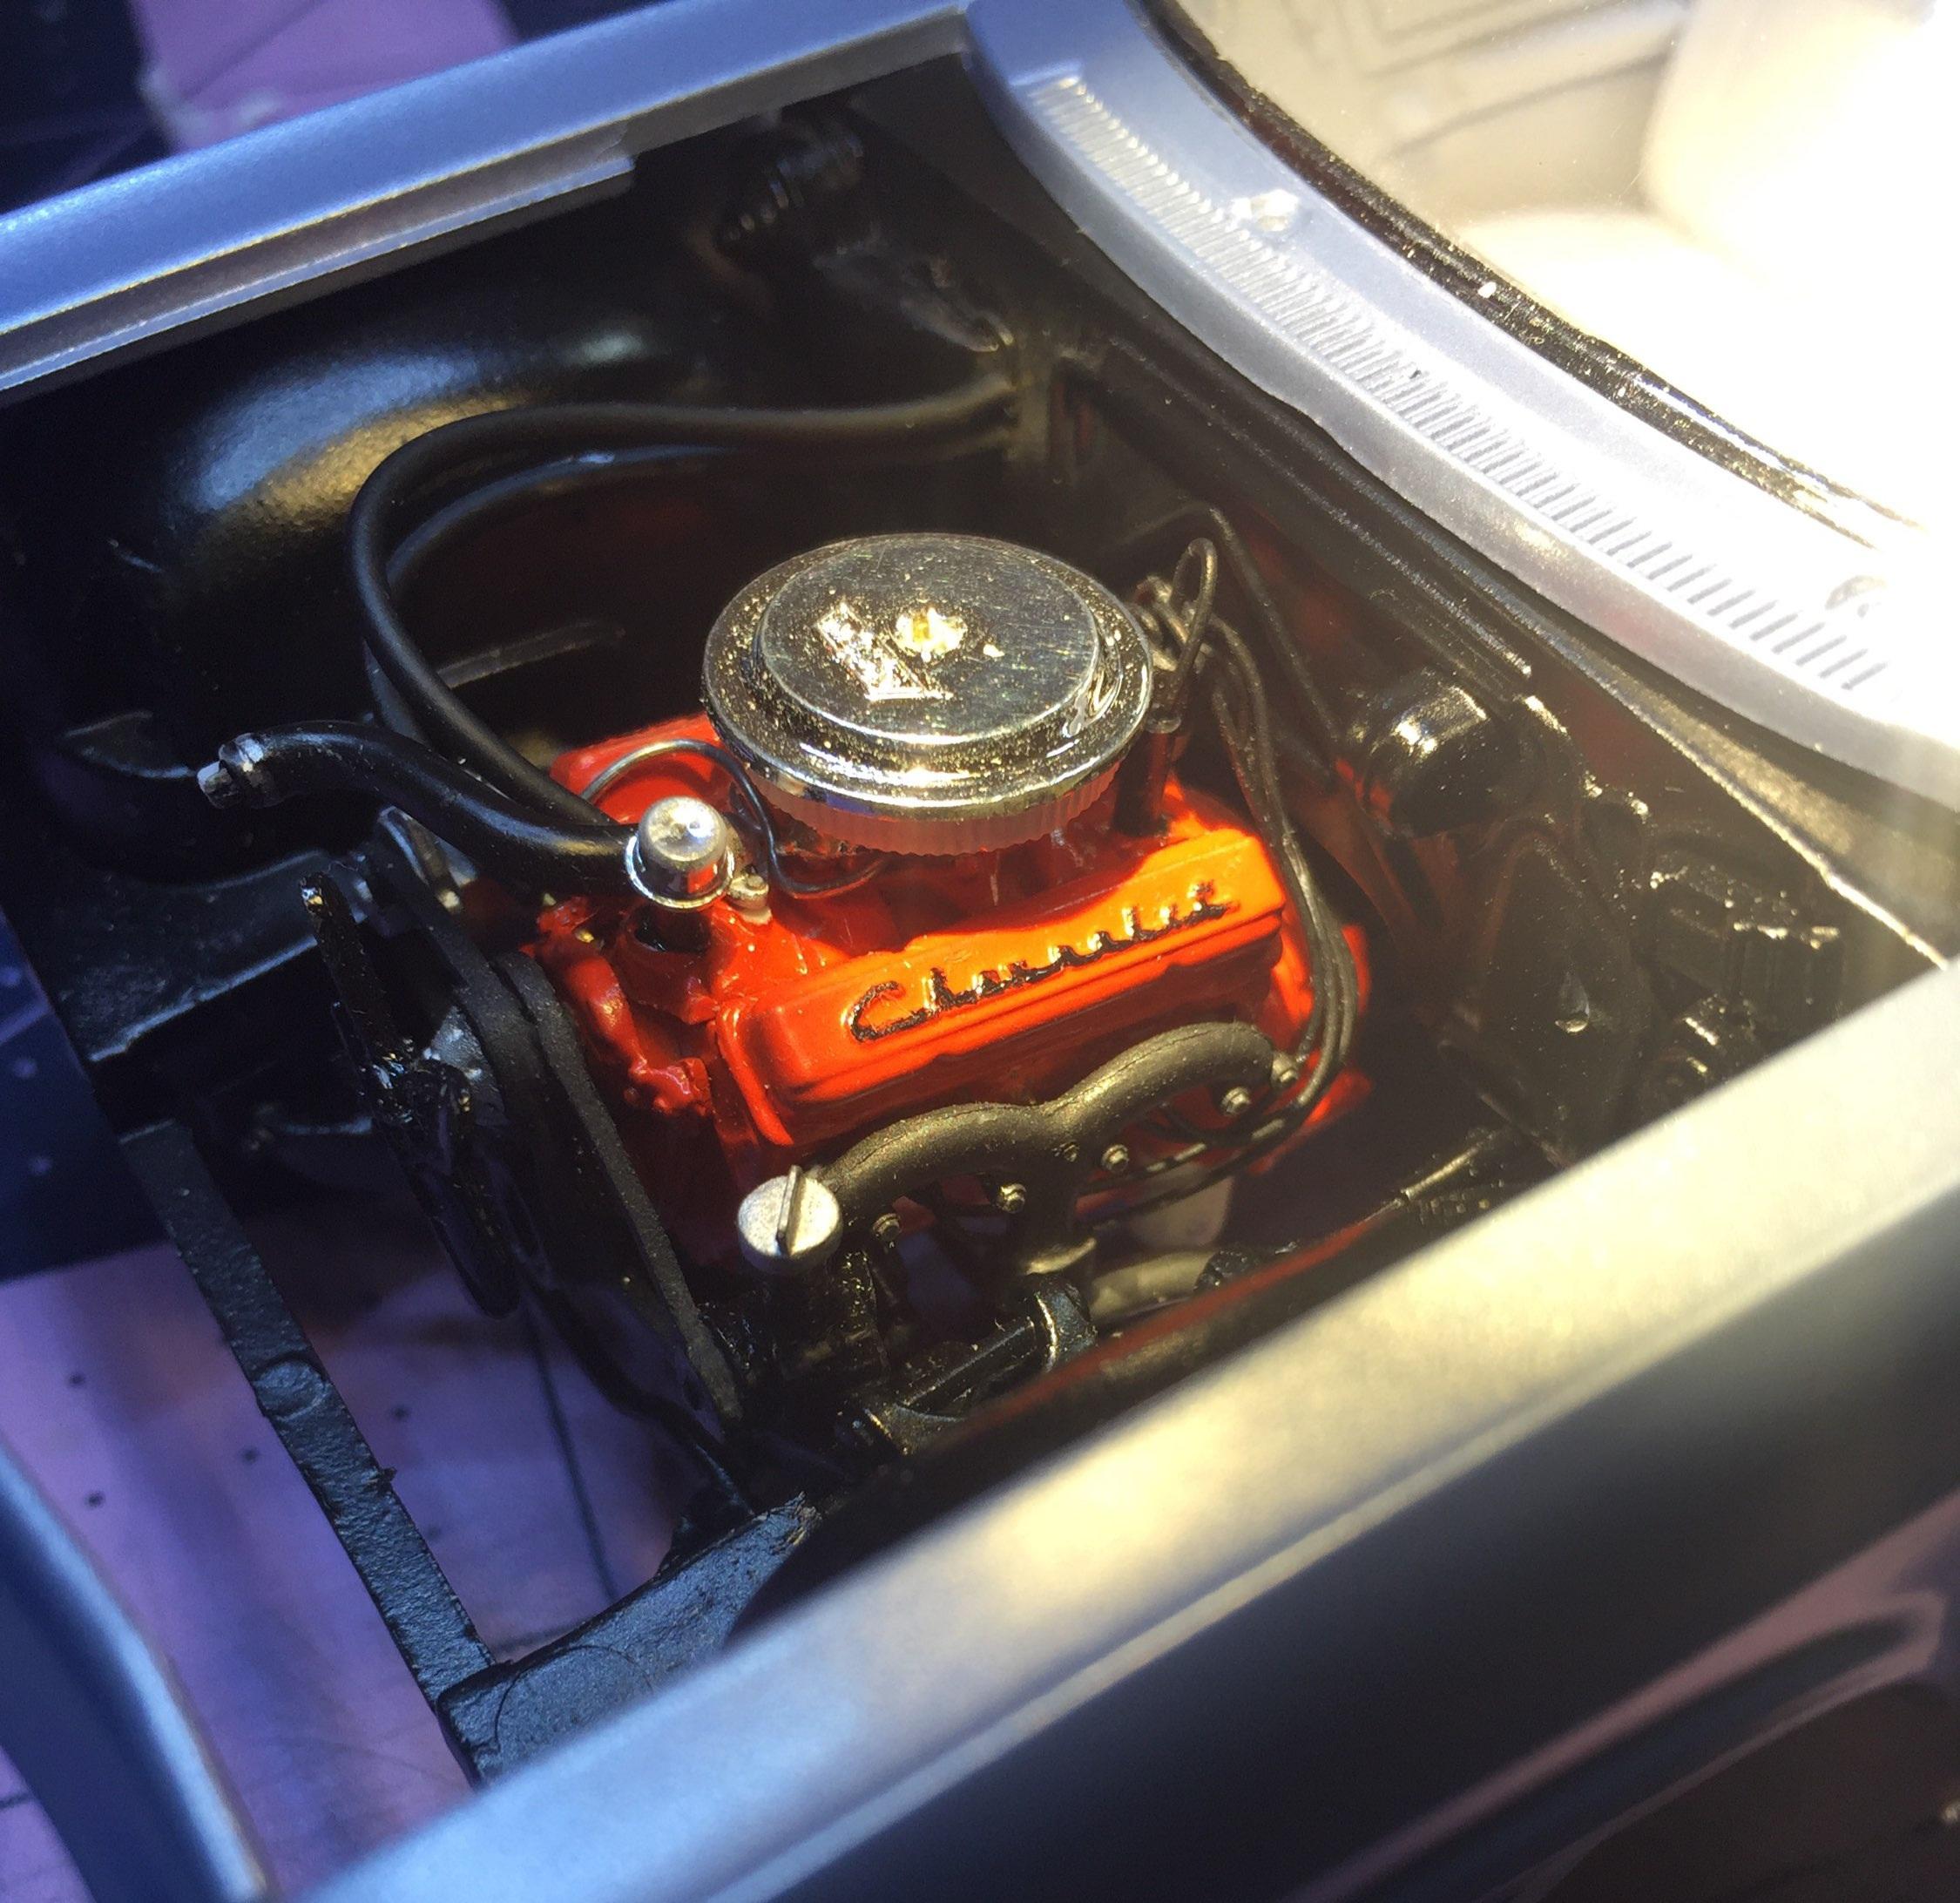
Most of this build happened a several years back. Originally, the idea was to replicate the car I was allowed to drive on occasion. It was the family car back in the late '60s. It was equipped with a 283/ powerglide and was Tahitian Turquoise with a black roof. The kit is the Revell SS 409/stick with A/C. When I opened the box I found a painted chassis, up on all four, and almost complete. The body was primed in white. I don't recall what kit I stole the small block from. We didn't have A/C in our Chevy so I eliminated the supply registers on the dash( and not very skillfully, I might add 😕.) At some point, probably because of the interior, I decided to just build it as an anonymous vehicle. It was not worth the extra work to make it my mother's daily ride. Yesterday I painted it Tamiya light pearl blue. It's very close to the light blue metallic that was popular then (and now.) Anyway, here's what's on the bench today I did a quick mockup to see where I'm at with this long overdue project. The white walls are a bit sticky. I suppose I could ignore that issue but it may be best to remove the stuff before it gets worse. What would you do? 🥴 After checking some interiors to see what needs to be detailed, it's pretty simple for the door panels. The dash...not so much, but I painted it body color and flat cleared the padding. Details later. My thought at the moment is the same blue for the upholstery. The front and rear bumper/grille had been done already and are in acceptable condition. The console was detailed with kit decals, I think. I know I used black BMF on it. This would be a nice ride for a high school senior to take his crush to the prom in if it wasn't for that blasted console. 😉 That's the story. Your thoughts are always welcome.
- 23 replies
-
- 10
-

-
The progress of the sculpting is fun to watch, Jon. I can't wait to try this method in the same manner. I'm psyched. 😀
-
I dunno, Greg. I think they were cut from the same cloth. I "used" this kit (the coupe) once to build a stripped-down hot rod so none of that stuff mattered. The inaccuracies of both of those kits is pretty disturbing. When accuracy matters, you're on your own. My perspective is that a kit is just a box full of raw material. It all depends on what you want from it.
-
That ship sailed 😔