caapa
-
Posts
481 -
Joined
-
Last visited
Content Type
Profiles
Forums
Events
Gallery
Everything posted by caapa
-
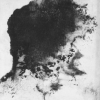
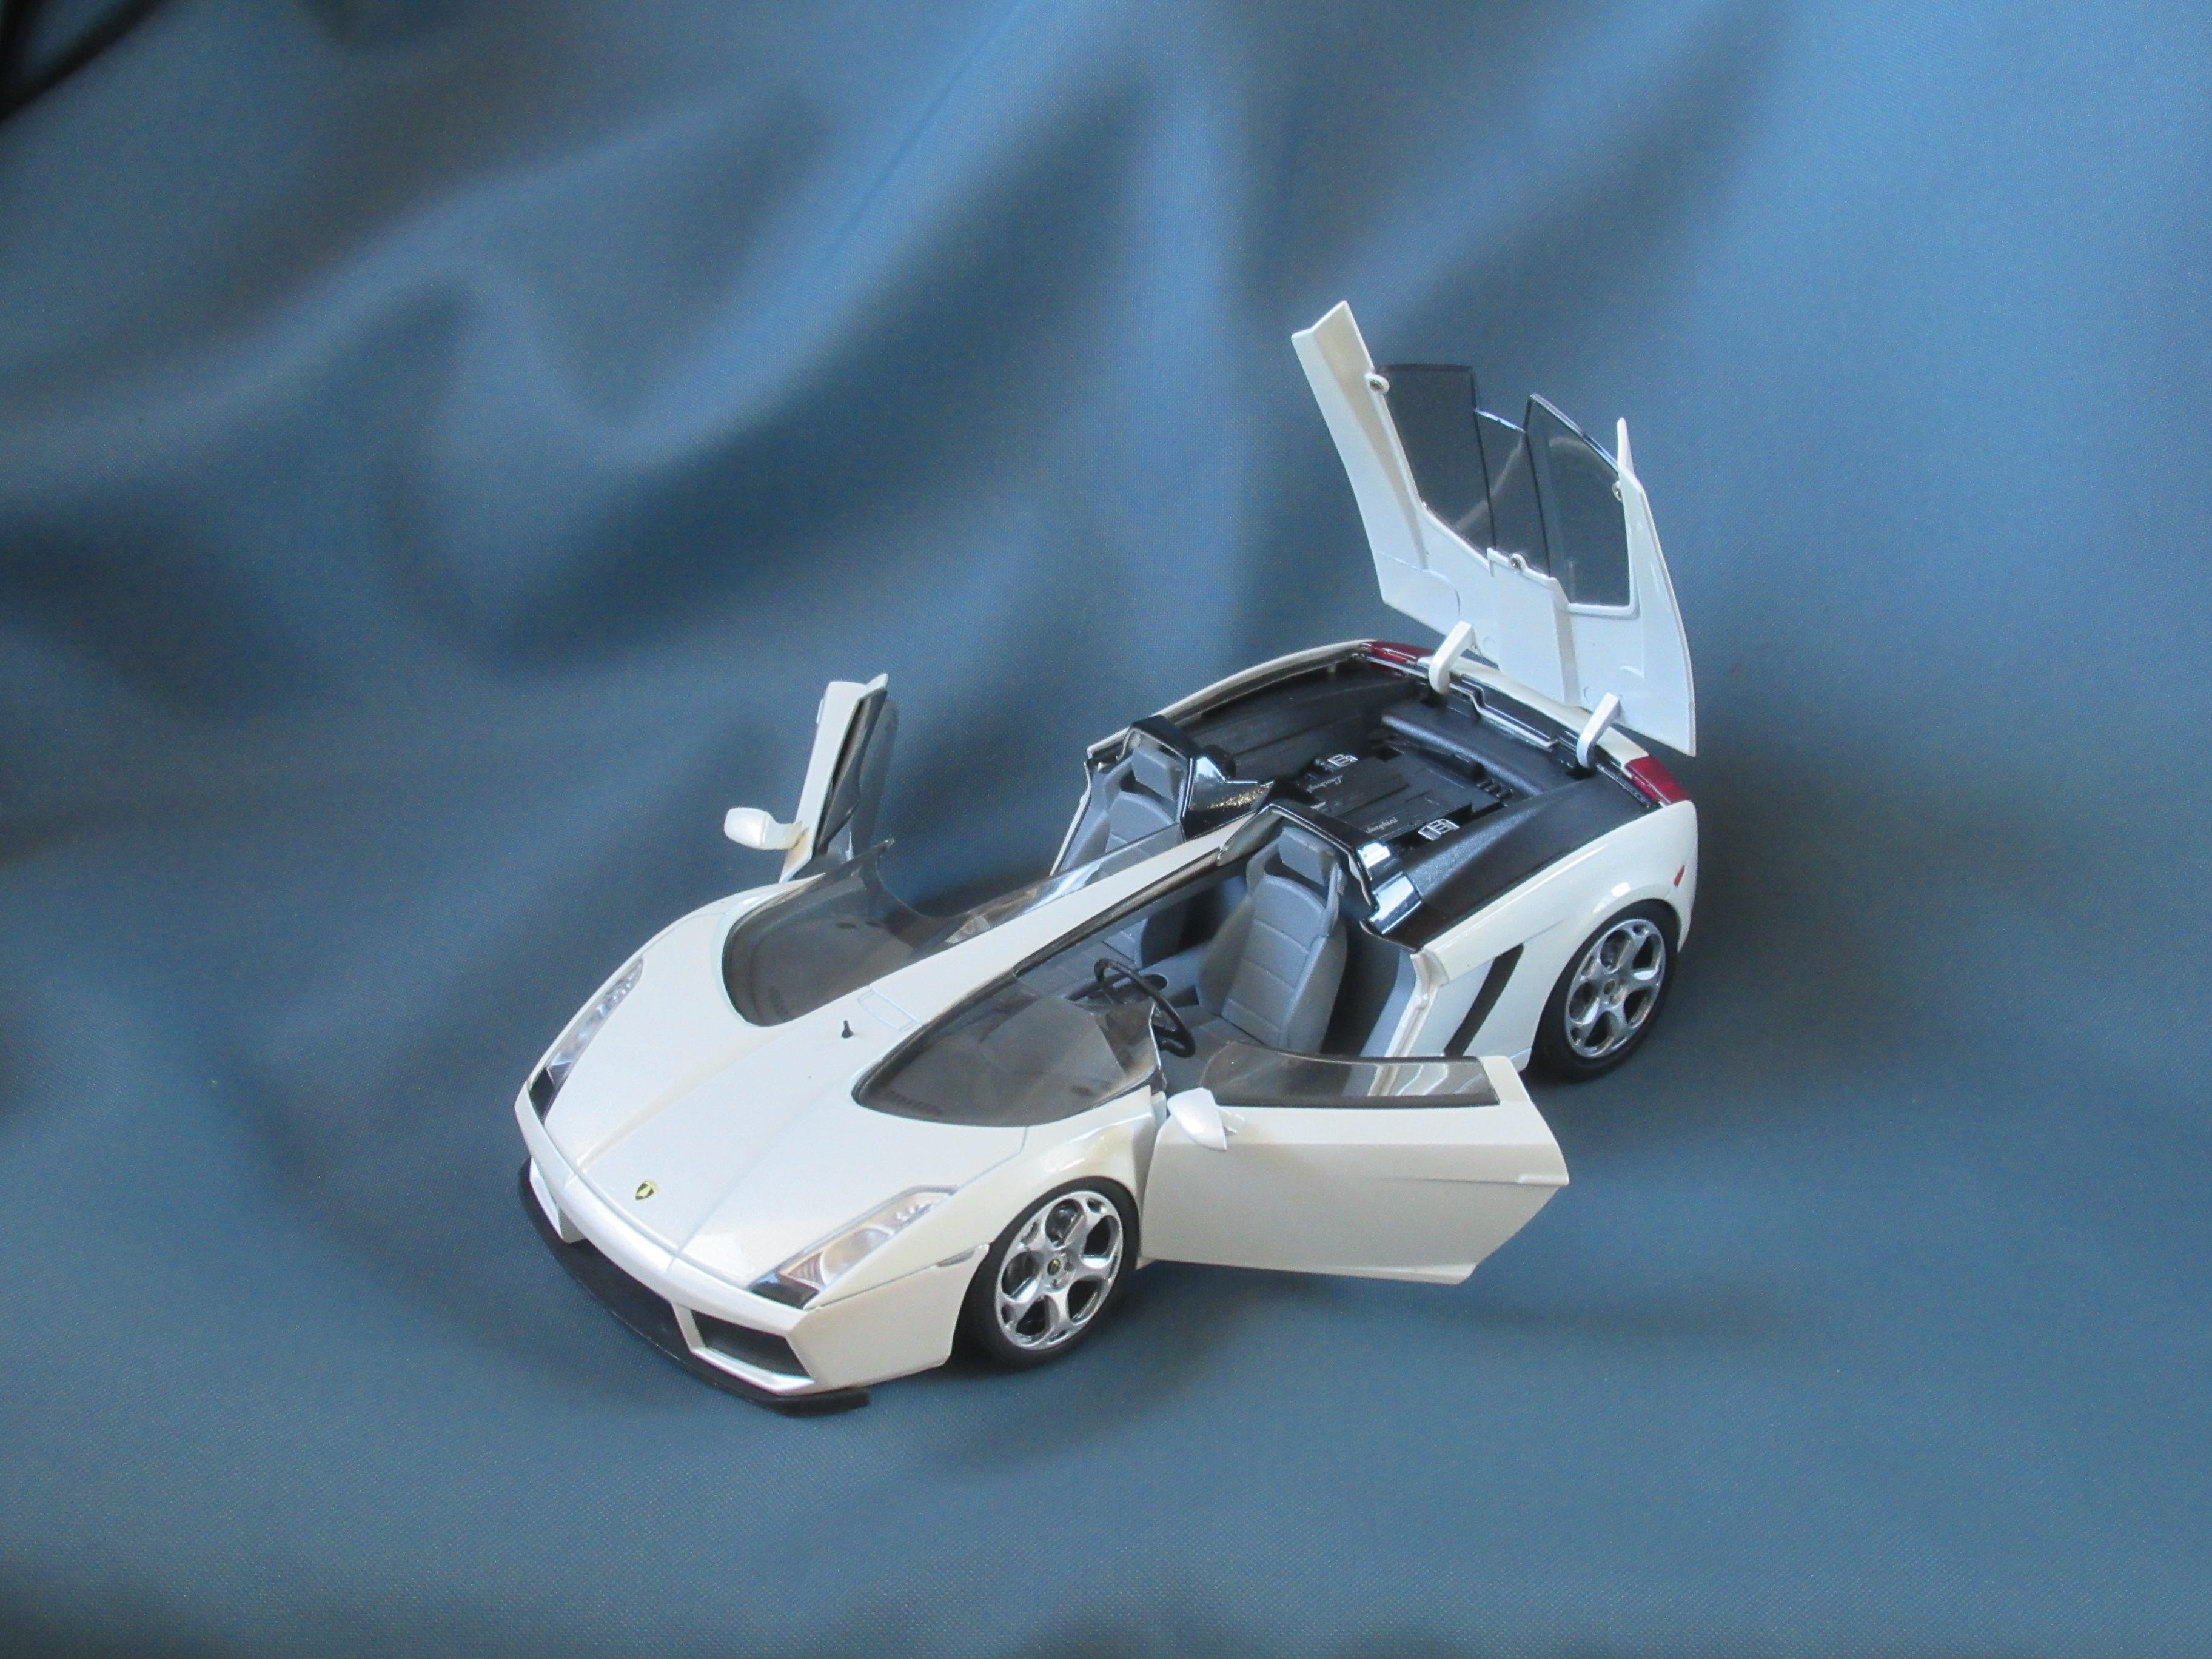
Lamborghini Concept S 2005 The lamborghini Concept S based on the Gallardo and is a styling exercise. There was only 2 cars built against all rumors of 100 cars. One car is in the Lamborghini Museum with high window and without an engine. The low window prototype is a running car was up for auction in Pebble Beach by RM Sotheby but failed to sell The model is made by Mondo Motors 1:24. The doors and engine compartment top are to open. The front wheels are steerable but not by steeringwheel and only to a very small degree. The dashboard is fine detailed. Enjoy the pictures.

-
Hi Gramps46, I`m happy you could purchase the Pegaso after you saw it between my Rare Auto Models.
-
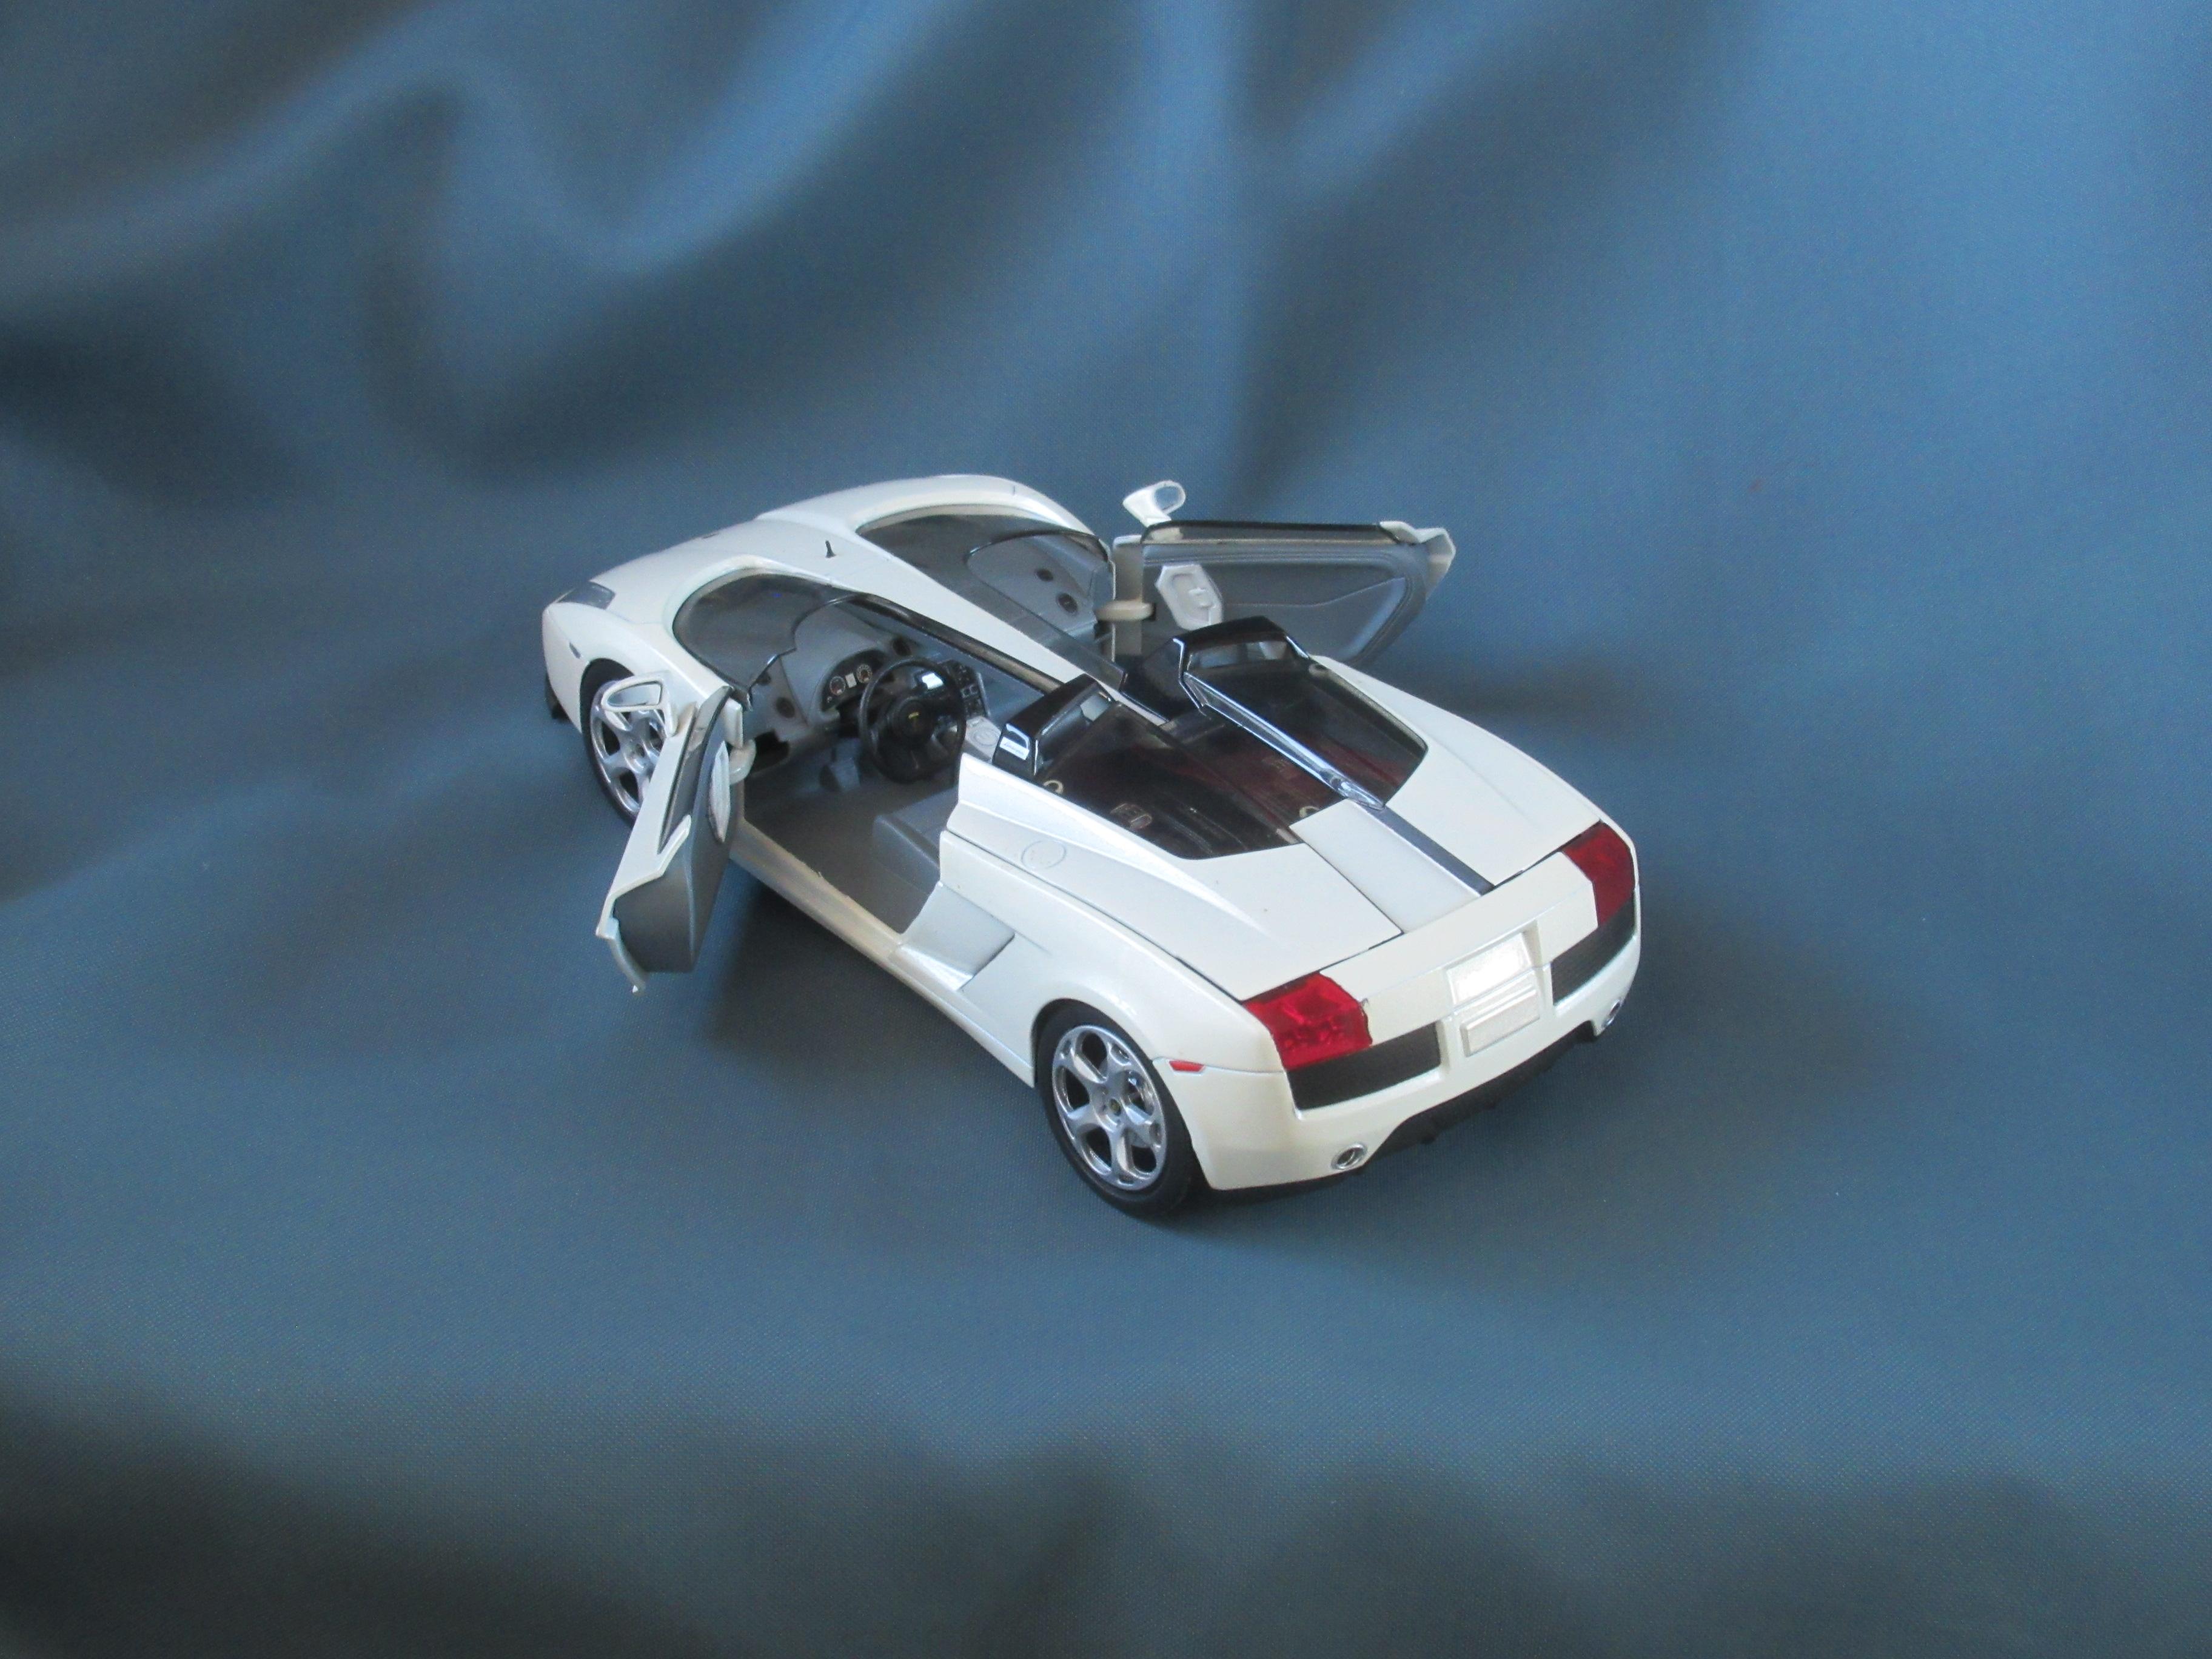
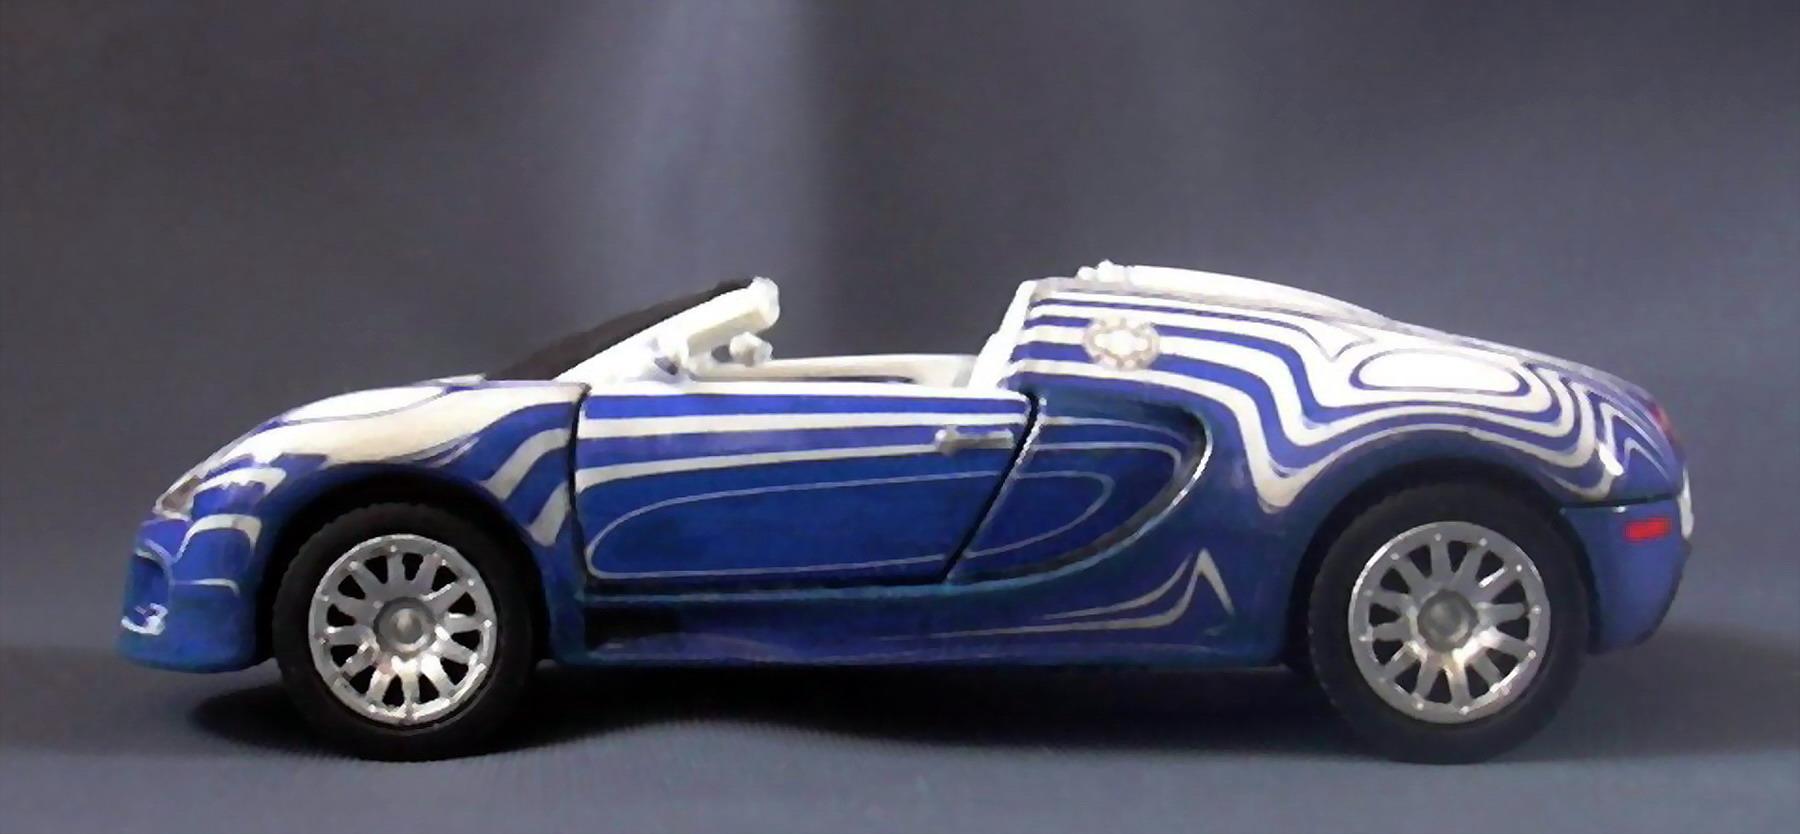
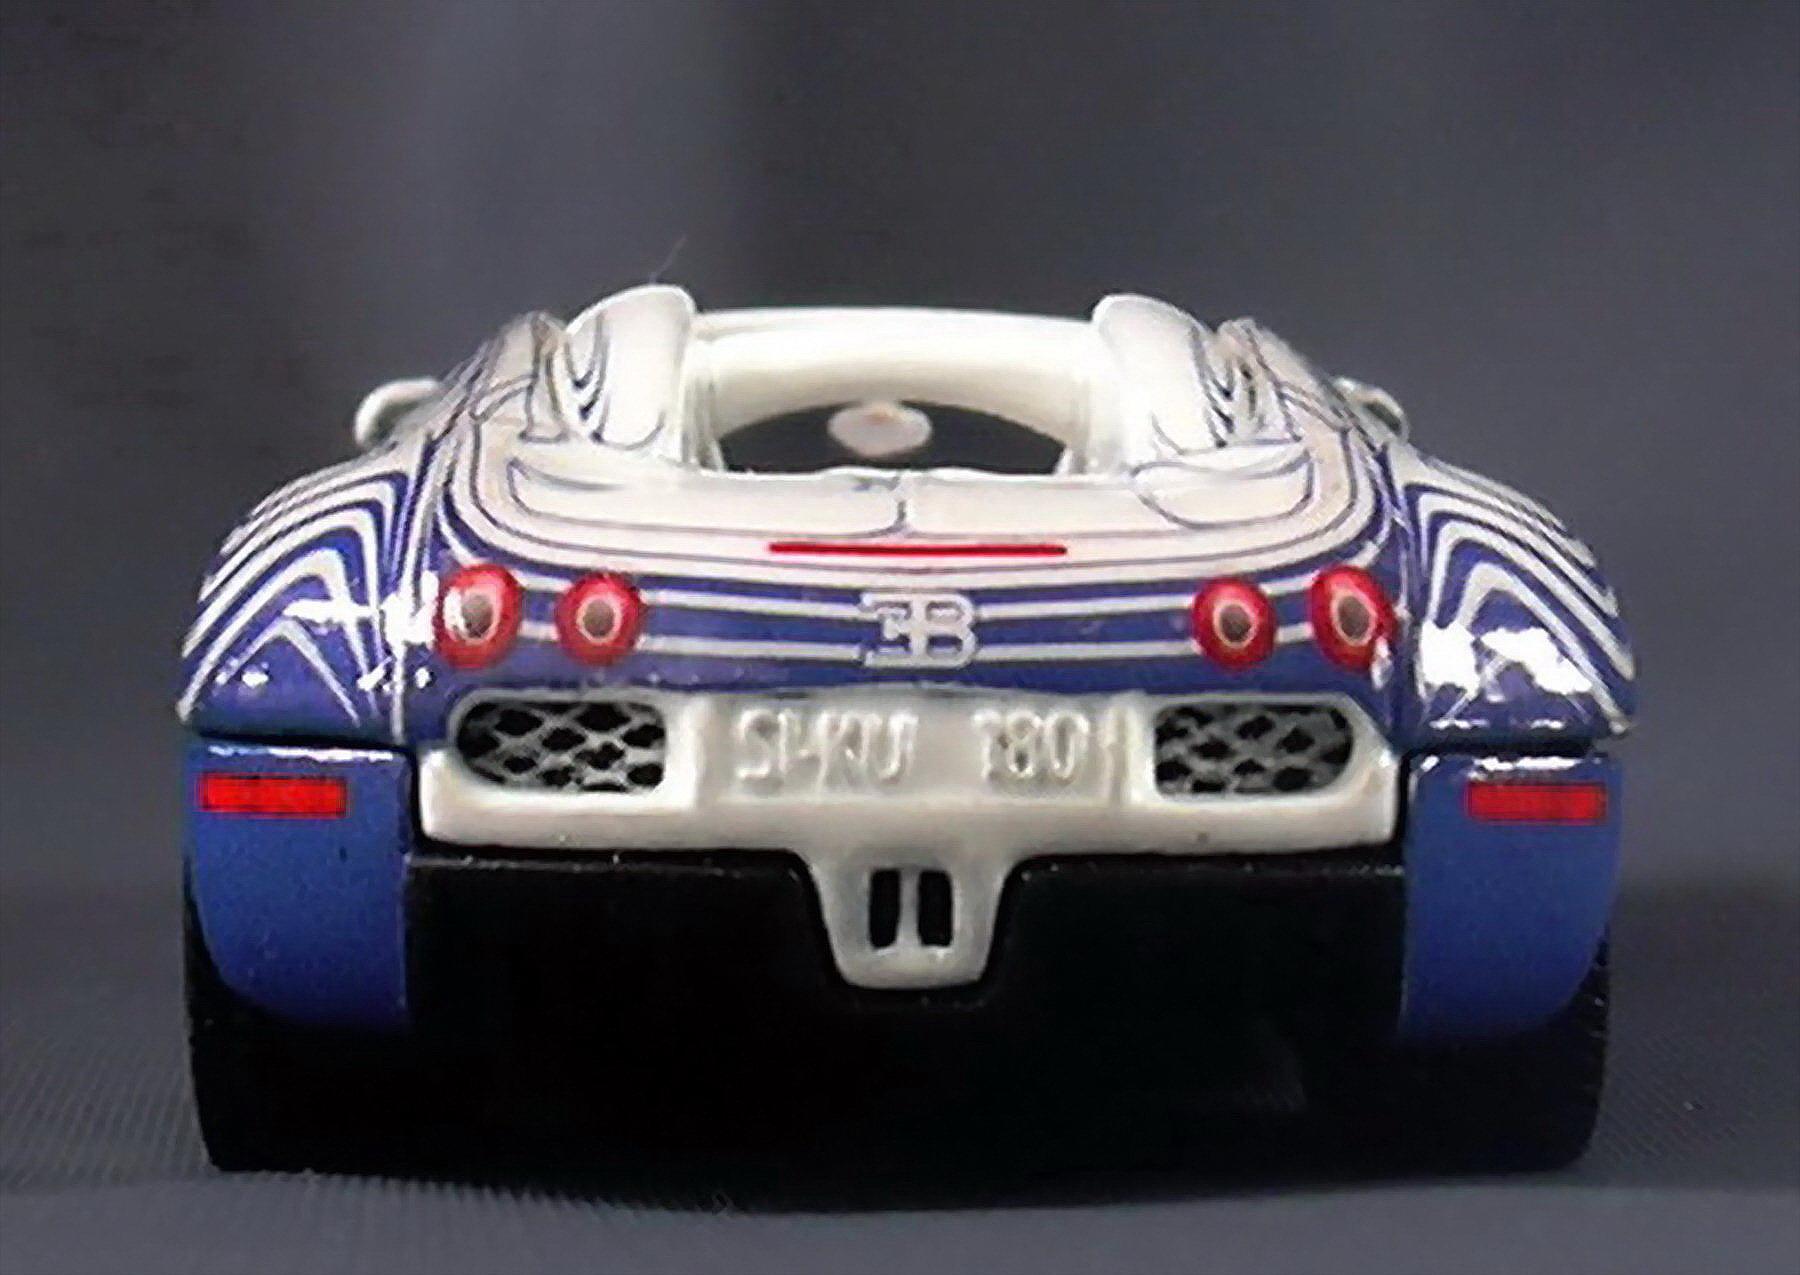
Bugatti Veyron Grand Sport L`Or Blanc 2011 Bugatti made the special edition of Grand Sport in partnership with the Royal Procelain Manufactory Berlin. They used porcelain elements for exterior and interior design. On the outside are the inlays of the center wheel badges, the fuel filler cap, the oil filler cap, as well as the signature "EB" badge at the rear. In inside can be found the famous elephant sculpture on a porcelain laminae. The sculpture was created by Rembrandt Bugatti for the Type 41 Royales. The swirls „paint” is made with a precision tape made of delicate Japanese soft tissue which is stretchy somewhat and adheres perfectly. The price for this unique model started at 1.65 million €. I converted a Bugatti Veyron Coupe from Siku about 1:56 to a Grand Sport by removing the top and curving the targa bar behind the seats. I made the swirls patern with decals. I devided the body surface to more sections and made templates of tham by masking tape. I scanned these and drew the design on it. The home printed decals were used for the full out- and inside to cover. A clear coat gives the protection of the delicate decalwork. Enjoy the pictures.
- 447 replies
-
- 1
-

-
- conceptcar
- showcar
- (and 1 more)
-
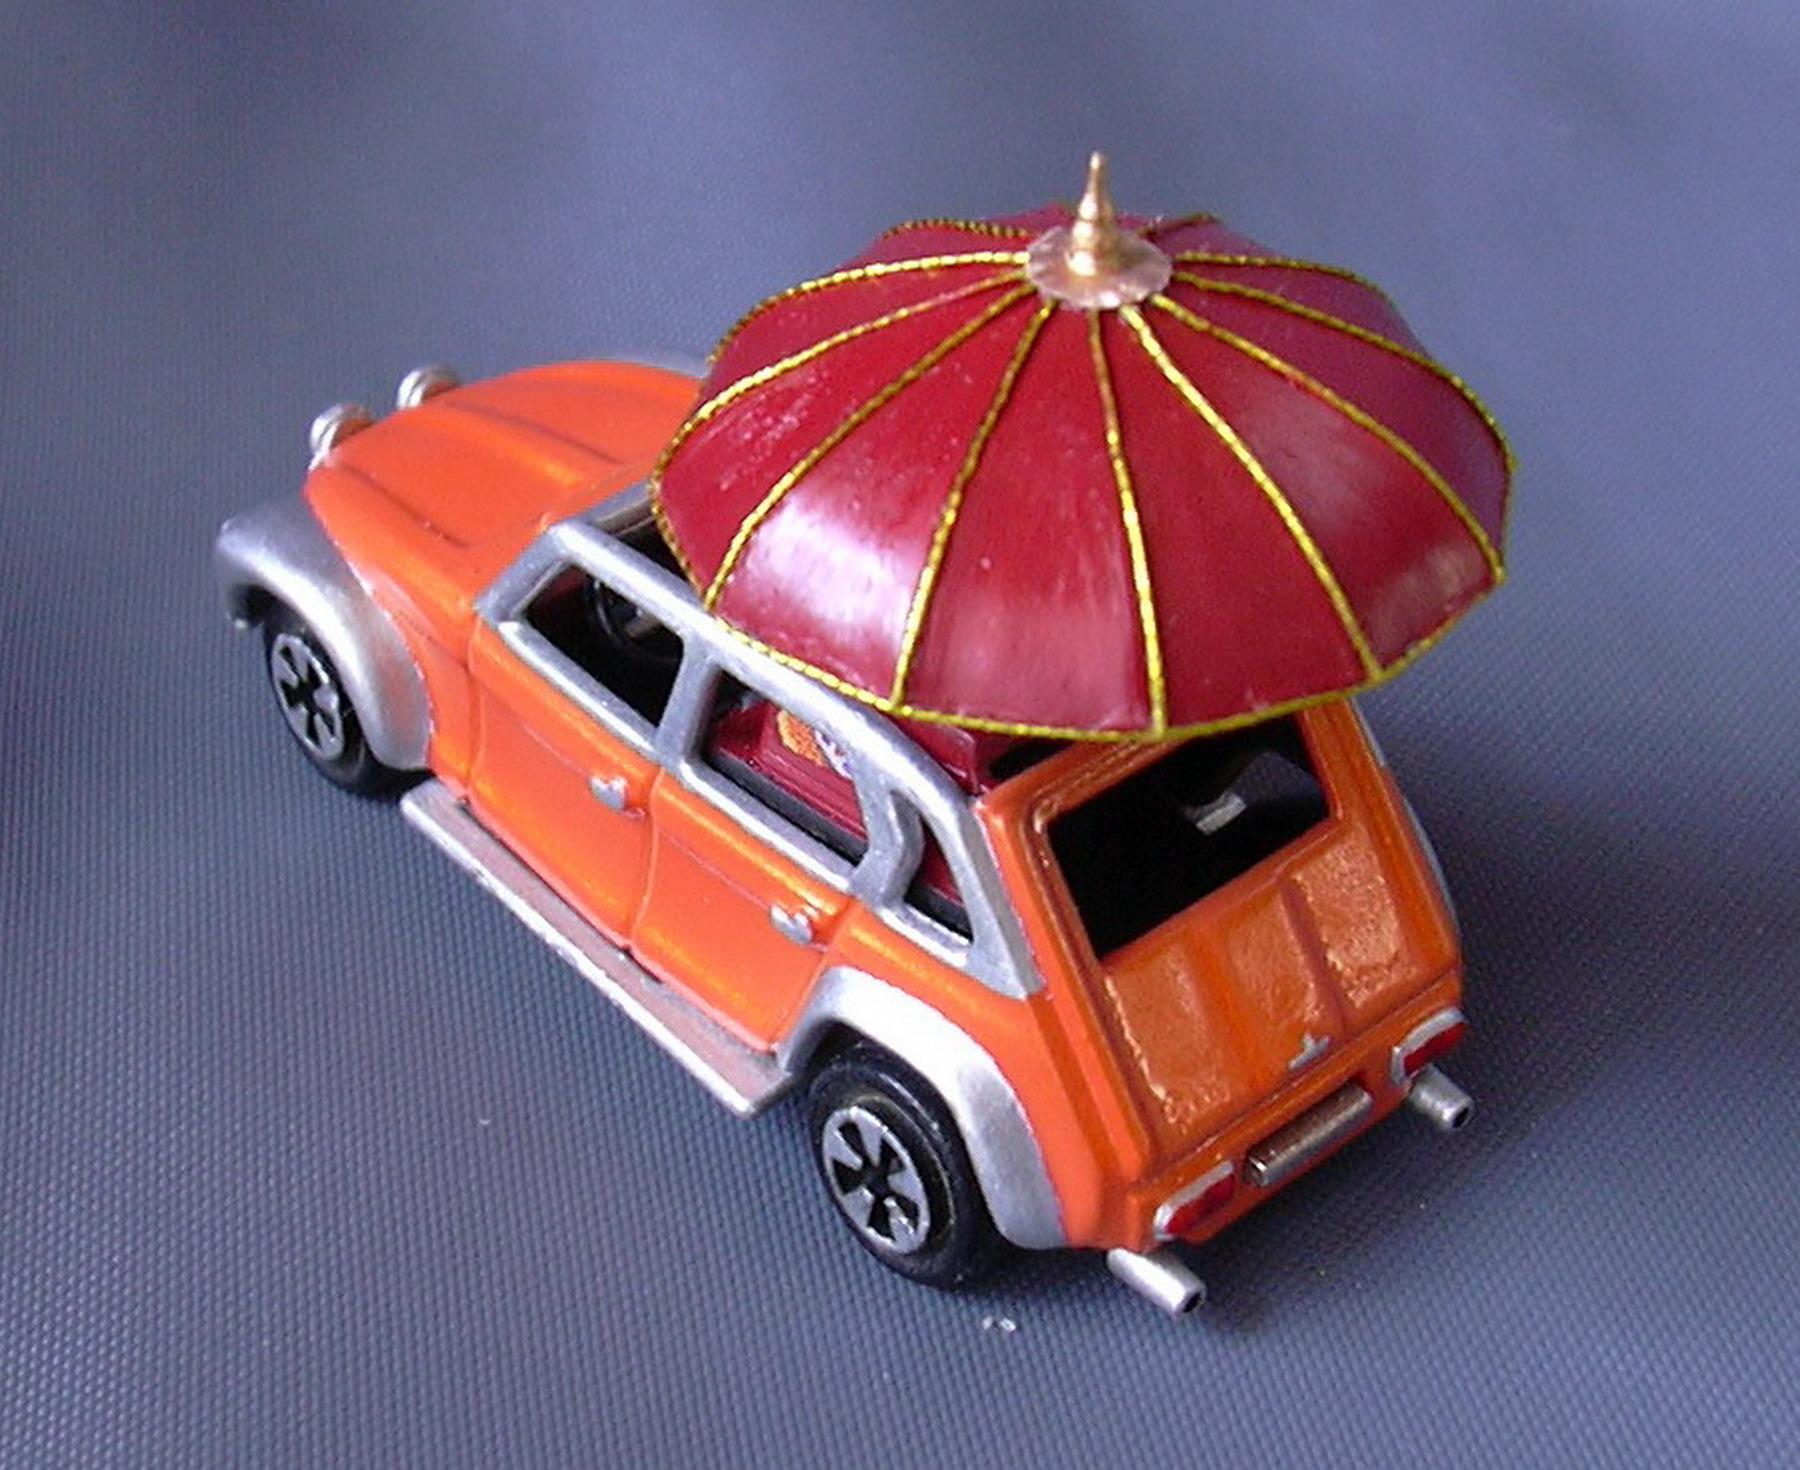
Citroen Dyane Maharadjah Majorette made a Dyane version named Maharadjah #237 in 1:60 about end of the `70s. The toycar had a parasol rotating by moving the car. I found one on a flea market without rotating the parasol. An idea came accross my mind that how should be well fitted a Citroen Dyane if a maharadja would want one. The body color combo of silver and metalic orange is the same as a 1:1 Rolls Royce of a maharadjah. I made seat upolstery with tiger fur design. Other upolstery made with original indian carpeting design. The parasol scratch built decorated with „gold”yarn. I hope a maharadjah could enjoy these. Enjoy the pictures. P.S.: I try to make new posts weekly.
-
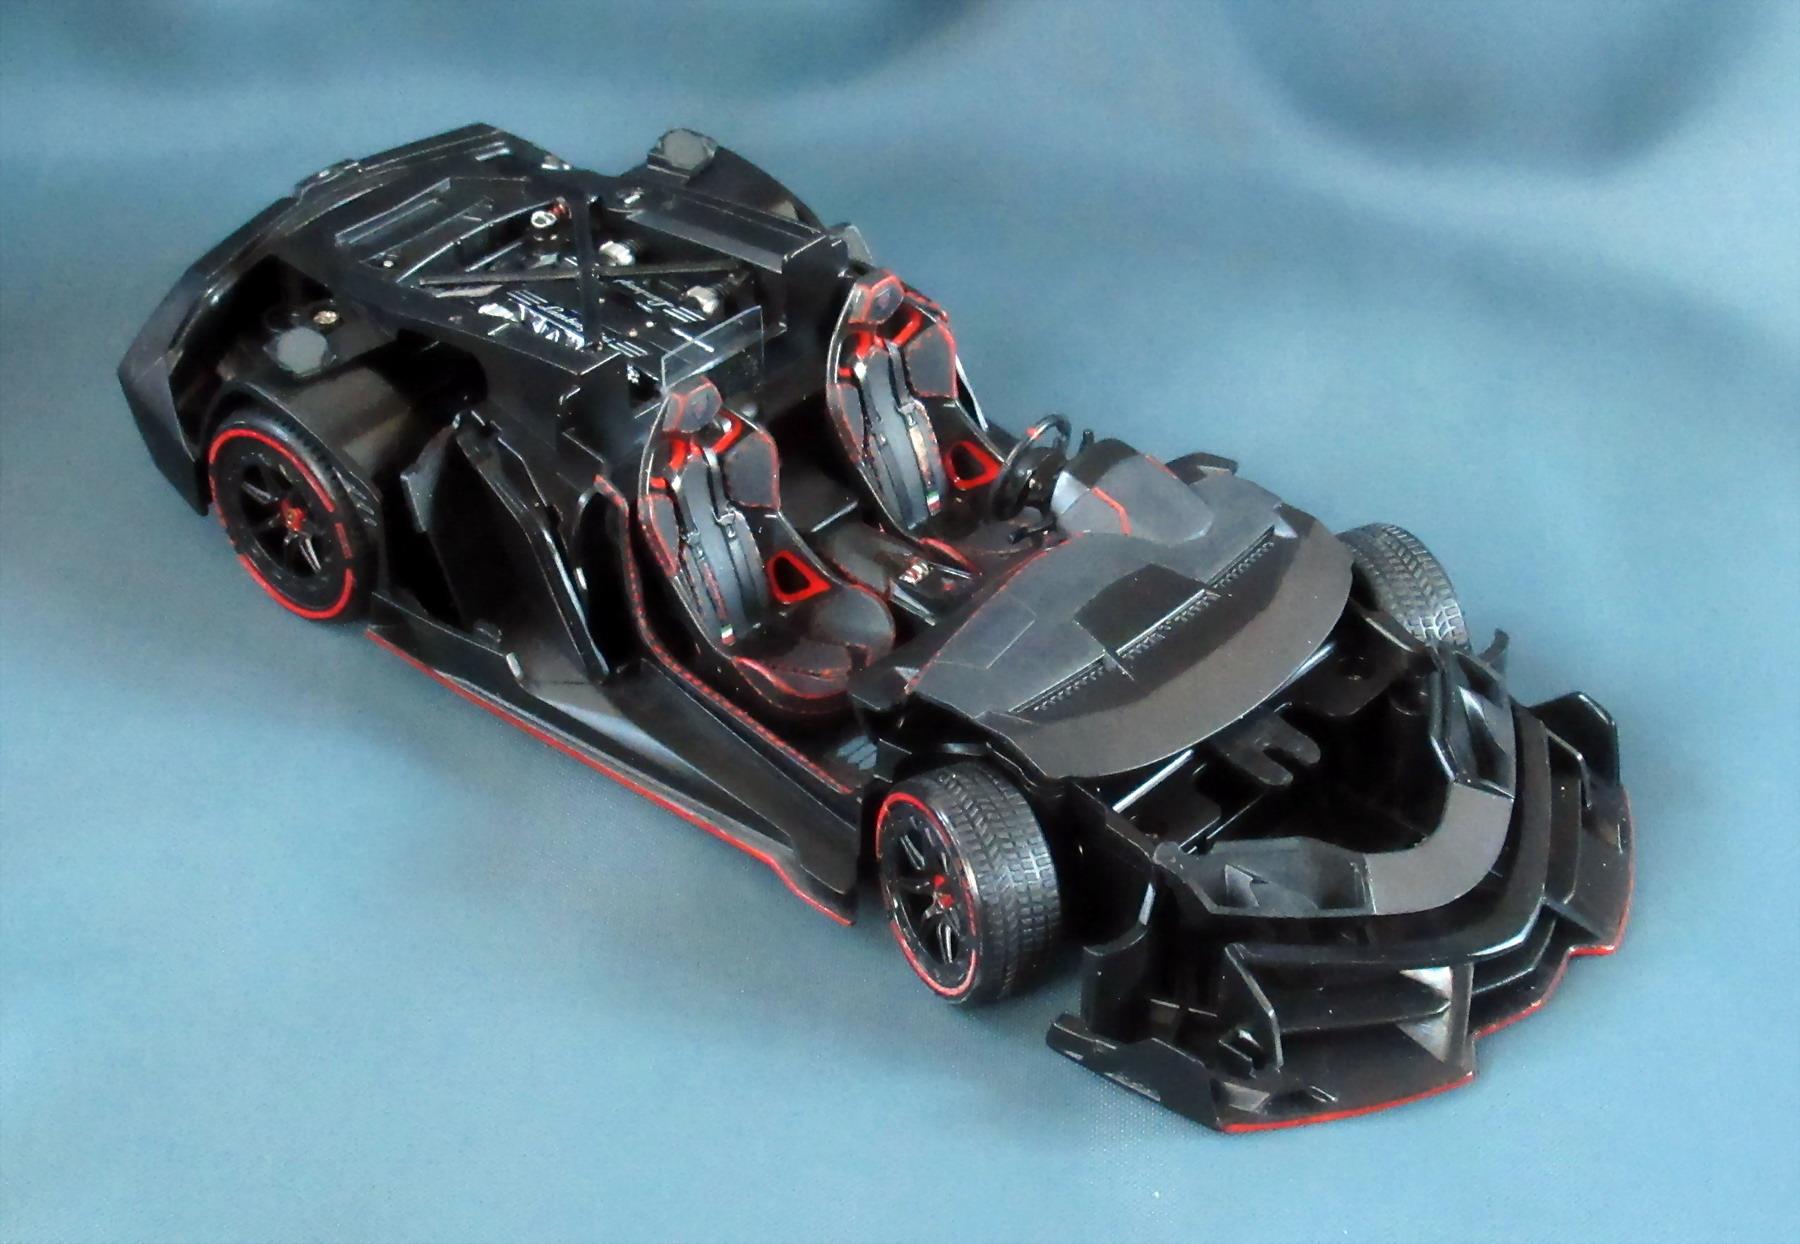
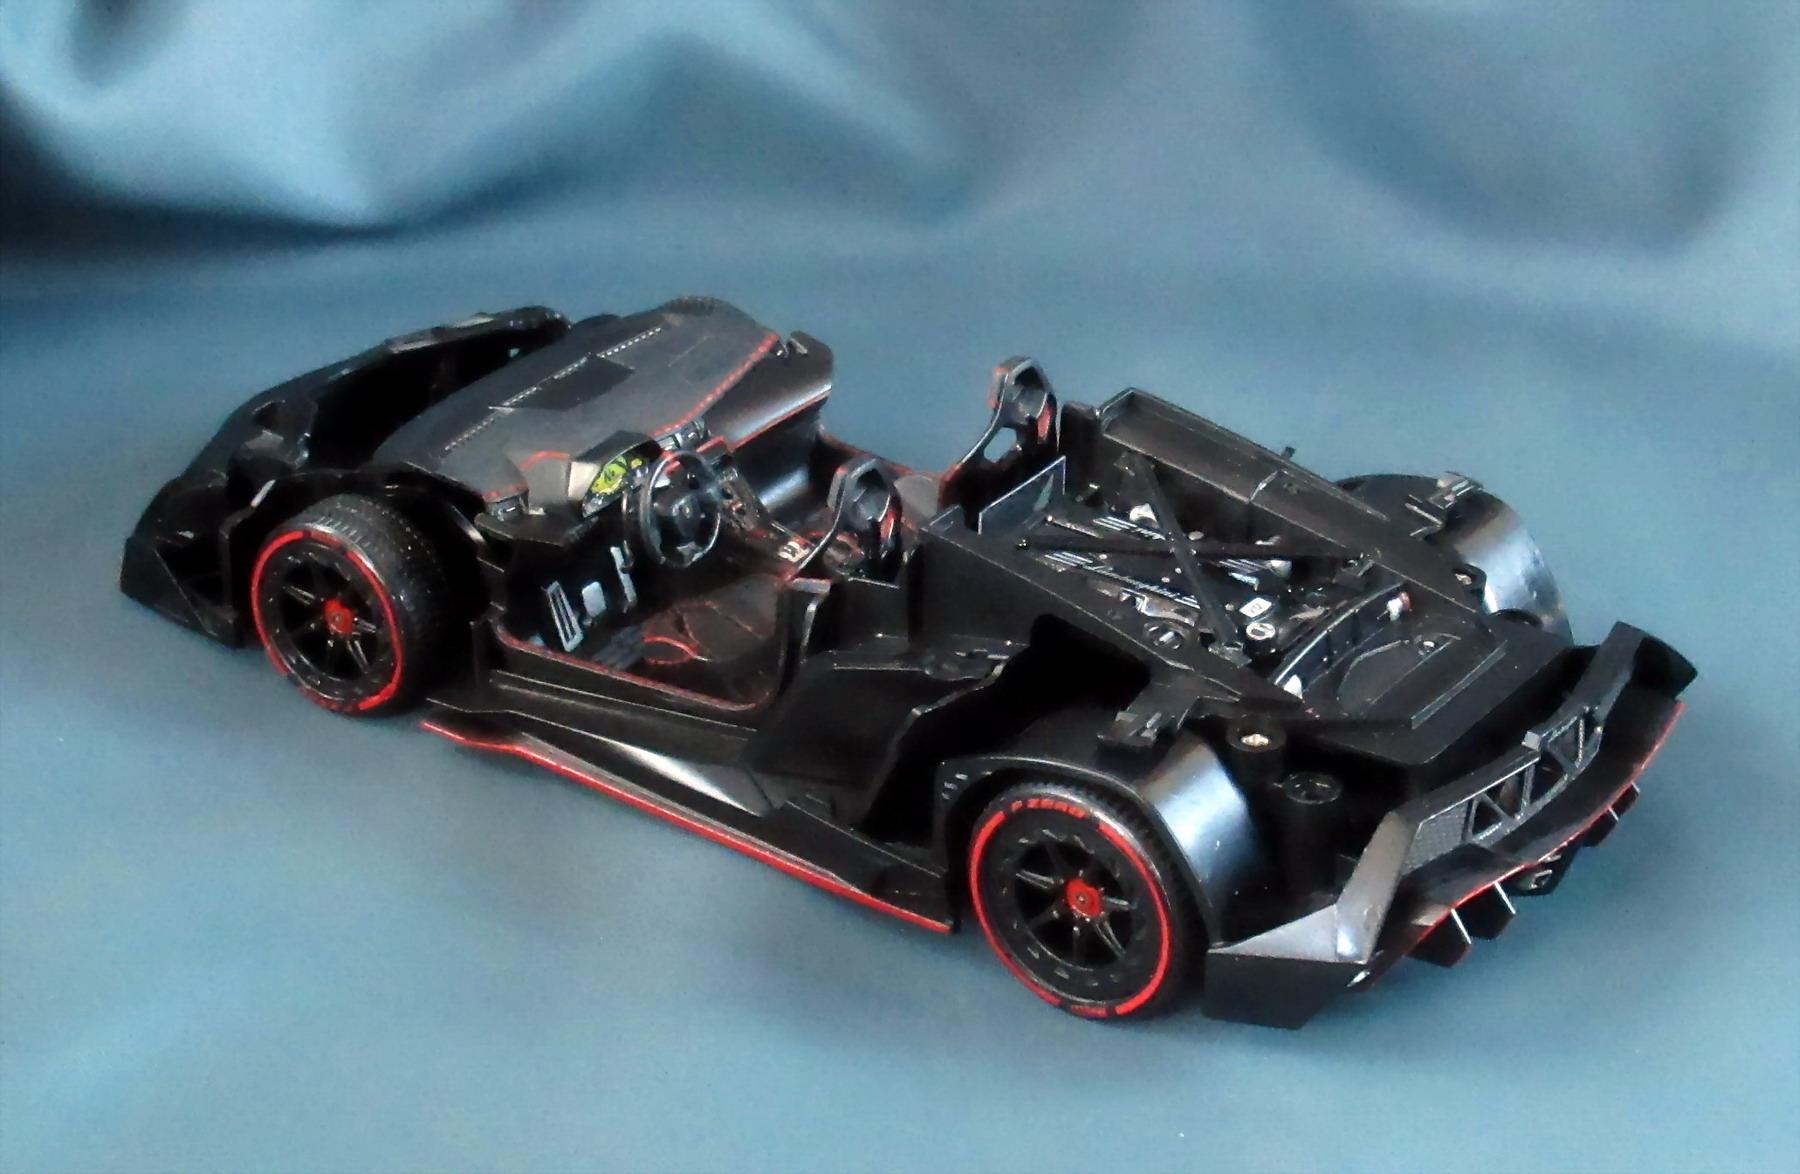
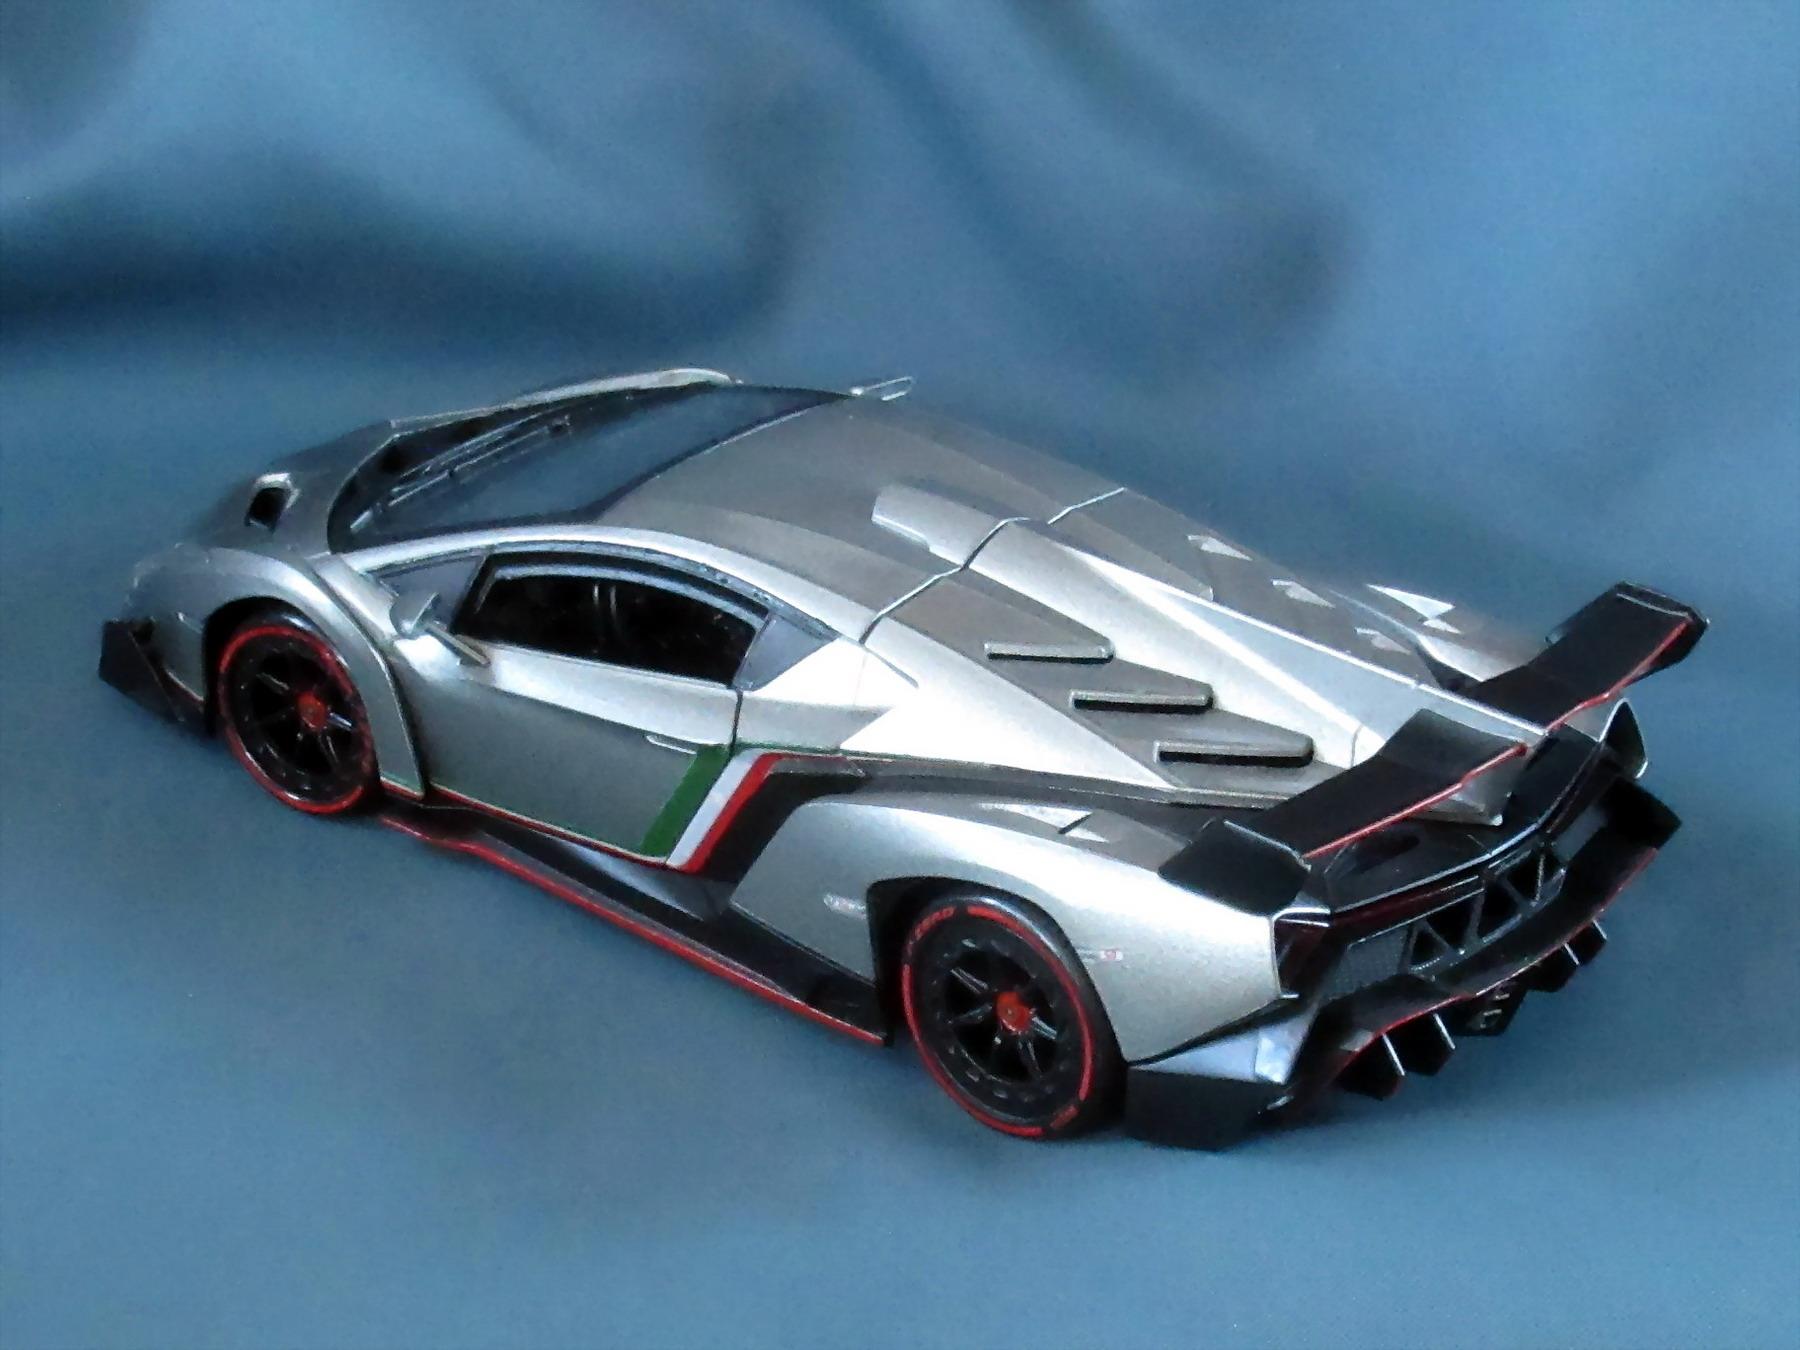
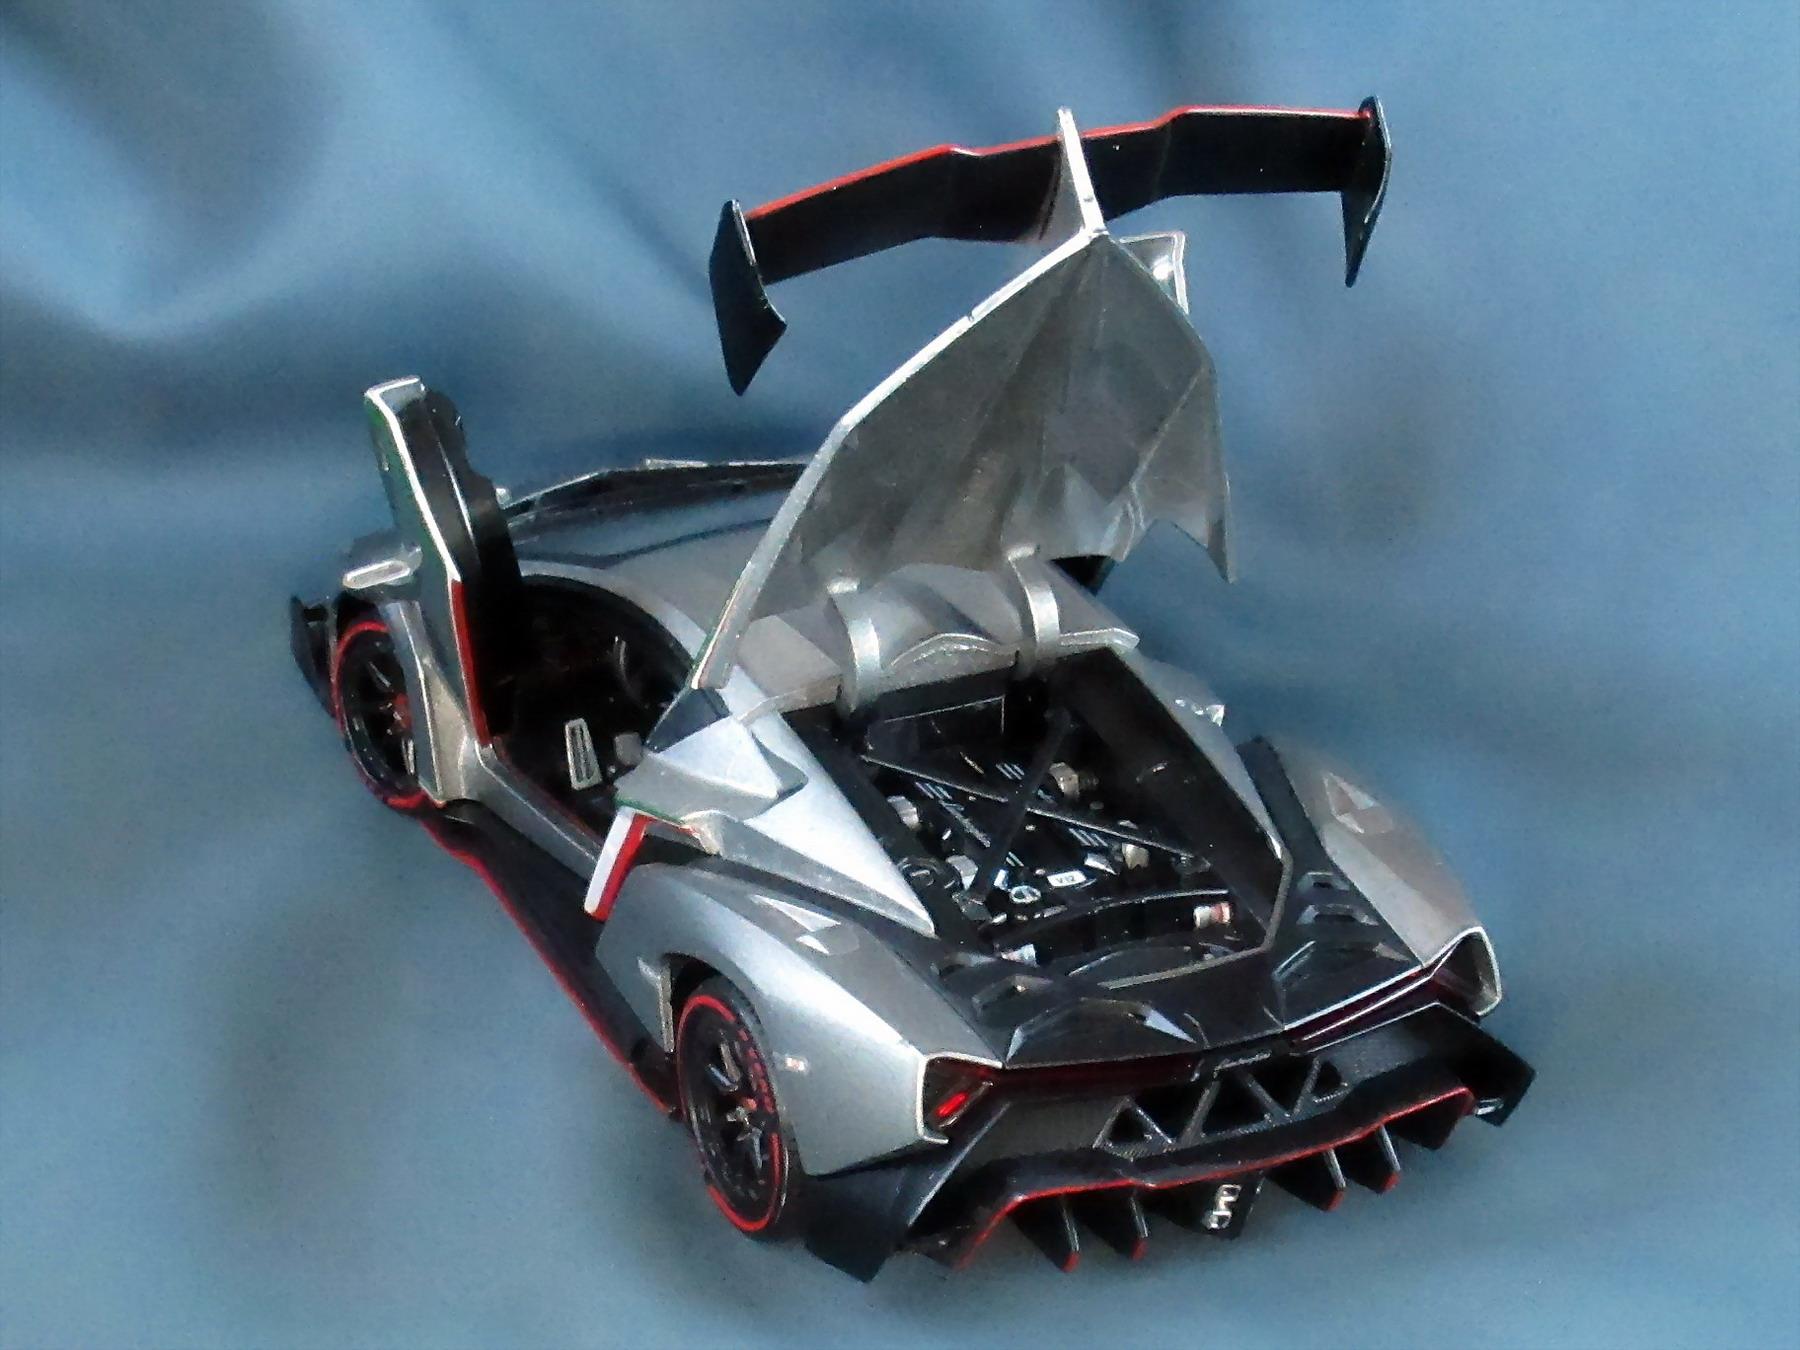
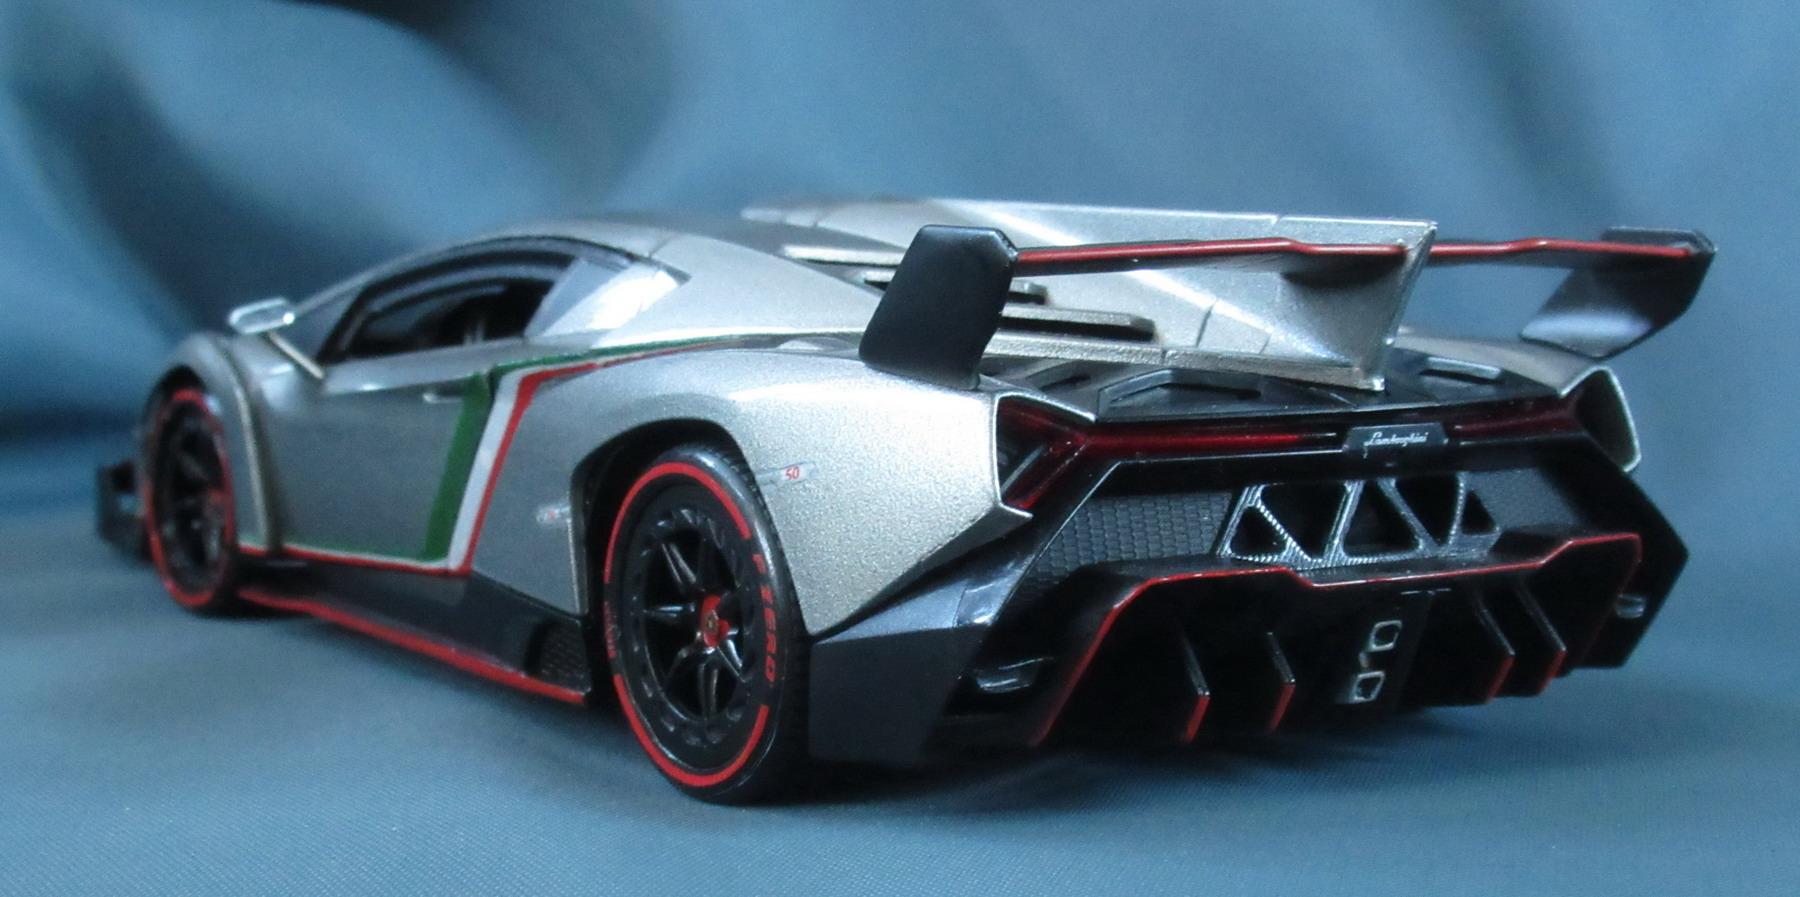
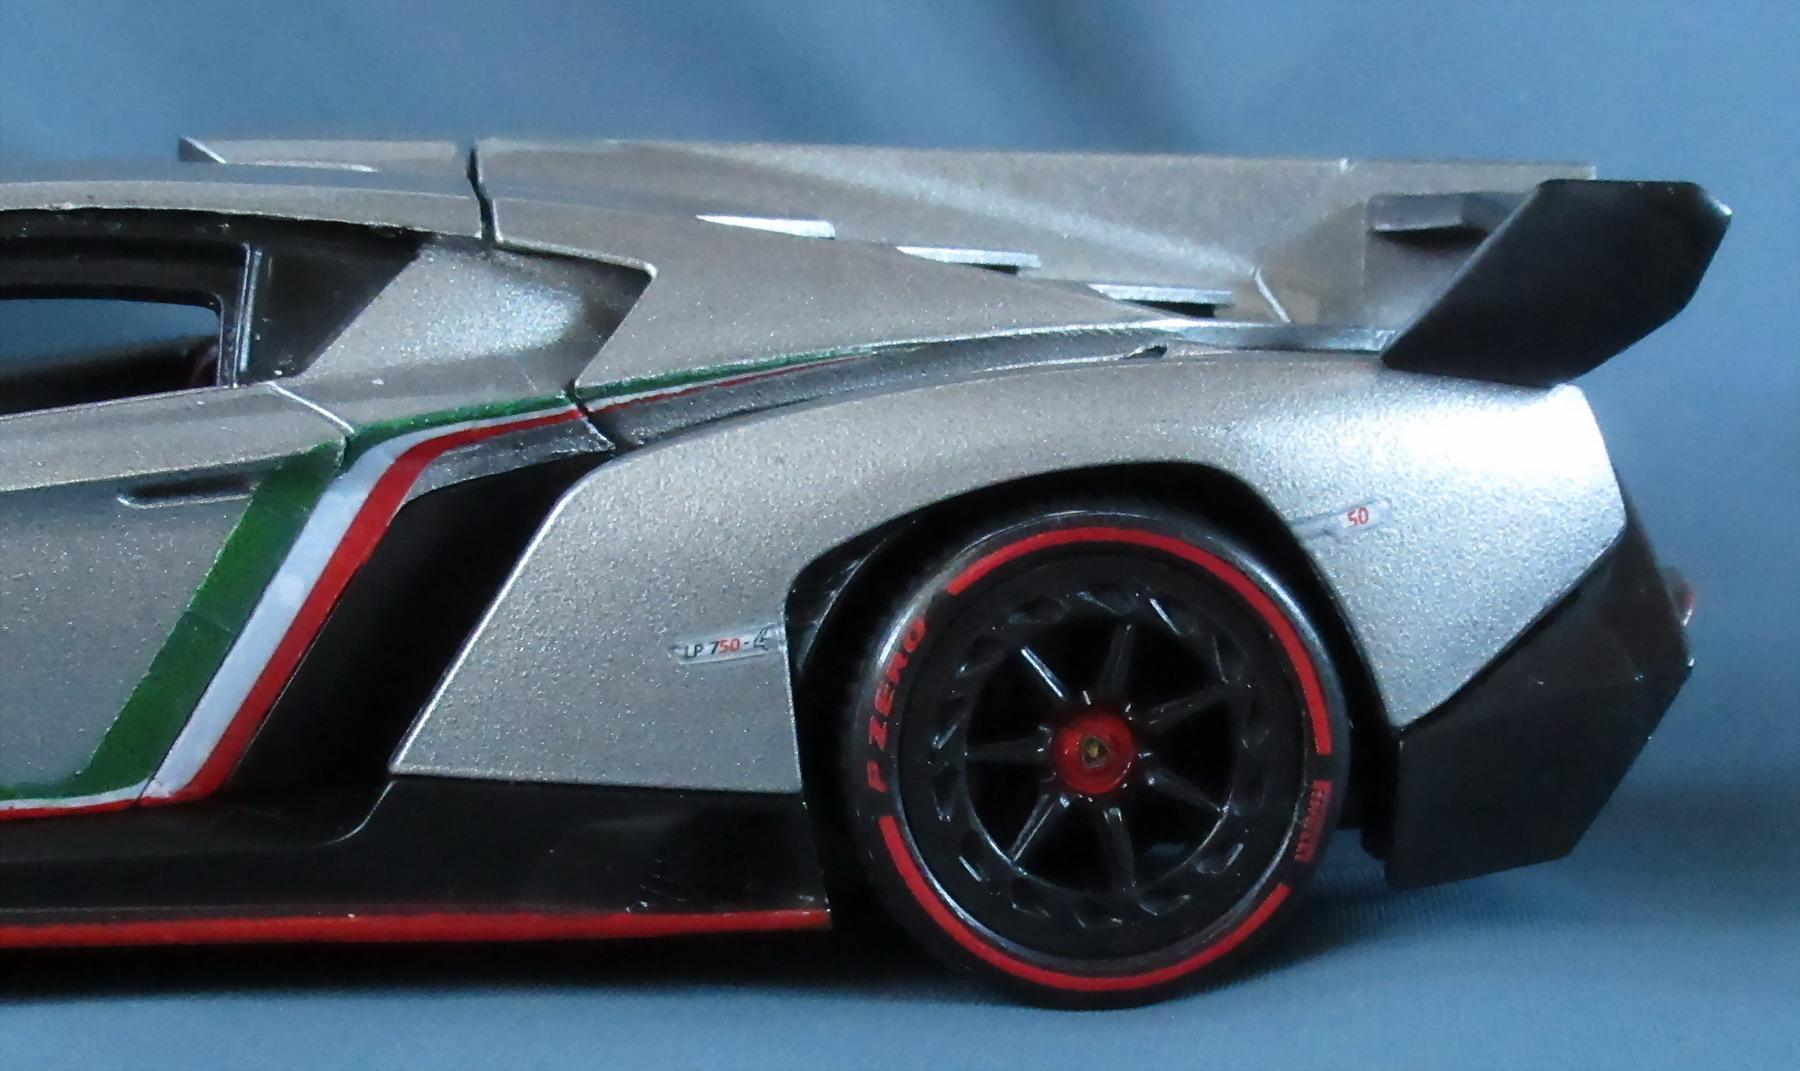
Lambotghini Veneno Concept 2013 The Lamborghini Veneno was developed to celebrate Lamborghini's 50th anniversary. The car based on the Aventador and produced in a limited quantity. That time it was one of the most expensive production car. The model is made by MZ China in 1:24 scale rather good detailed. But that don`t mean there was not some further detailing possible first of all in the interieur – there were missing: - the red seaming on the seats, doors, dashboard and inside upholstery - the display on dashboard was not authentic - Lamborghini label on the middle of dashboard - the minus and plus signs on the paddle shifters behind the steering wheel - the red mark on steering wheel to show the straight position of wheel - carpet pad before the seats - the safety belts upper part and the Lamborghini name and italian flag on it - the Lamborghini logo embroided on the headrest - the Lamborghini logo on the steering wheel - the X-shaped brace in the enginebay - the lettering Lamborghini on the top of cylinder-head The outside needed some addition too: - the ornamental strips with the italian national colors – green-white-red ( the colors should be in a sequence read from left to right and from high to down. But the strips turning to horizontal and making a little confusion on the right side of the car – over there the sequence is red-white-green and that is the hungarian national tricolor.) - the door-window frames semigloss black paint - the rear light got an aluminiumfoil backing to reflect more enviromental light - Lamborghini label in the middle of rear light - red Pirelli rings on the tires - the red strips got some correction along the edges - little decals LP 750-4 and 50 before and behind the rear wheels The model is a bit more similar to 1:1 now. Enjoy the pictures.
- 447 replies
-
- 1
-

-
- conceptcar
- showcar
- (and 1 more)
-
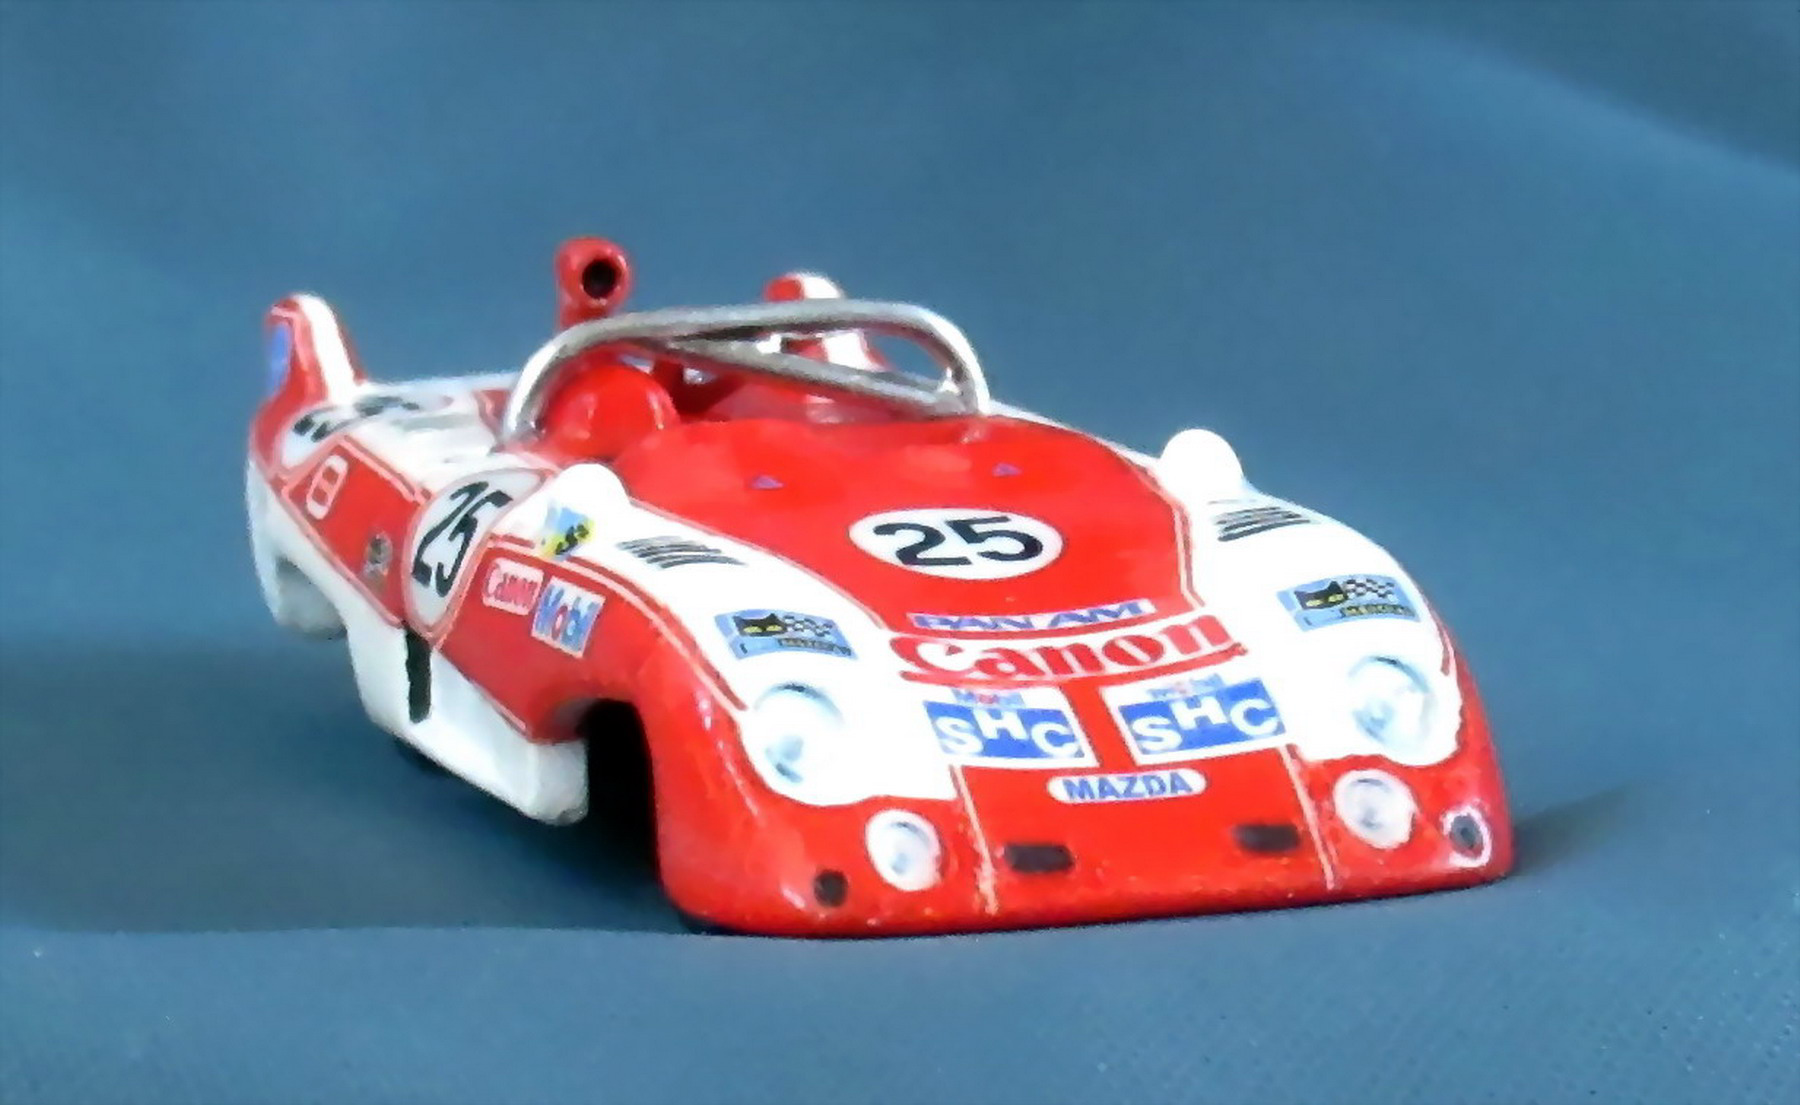
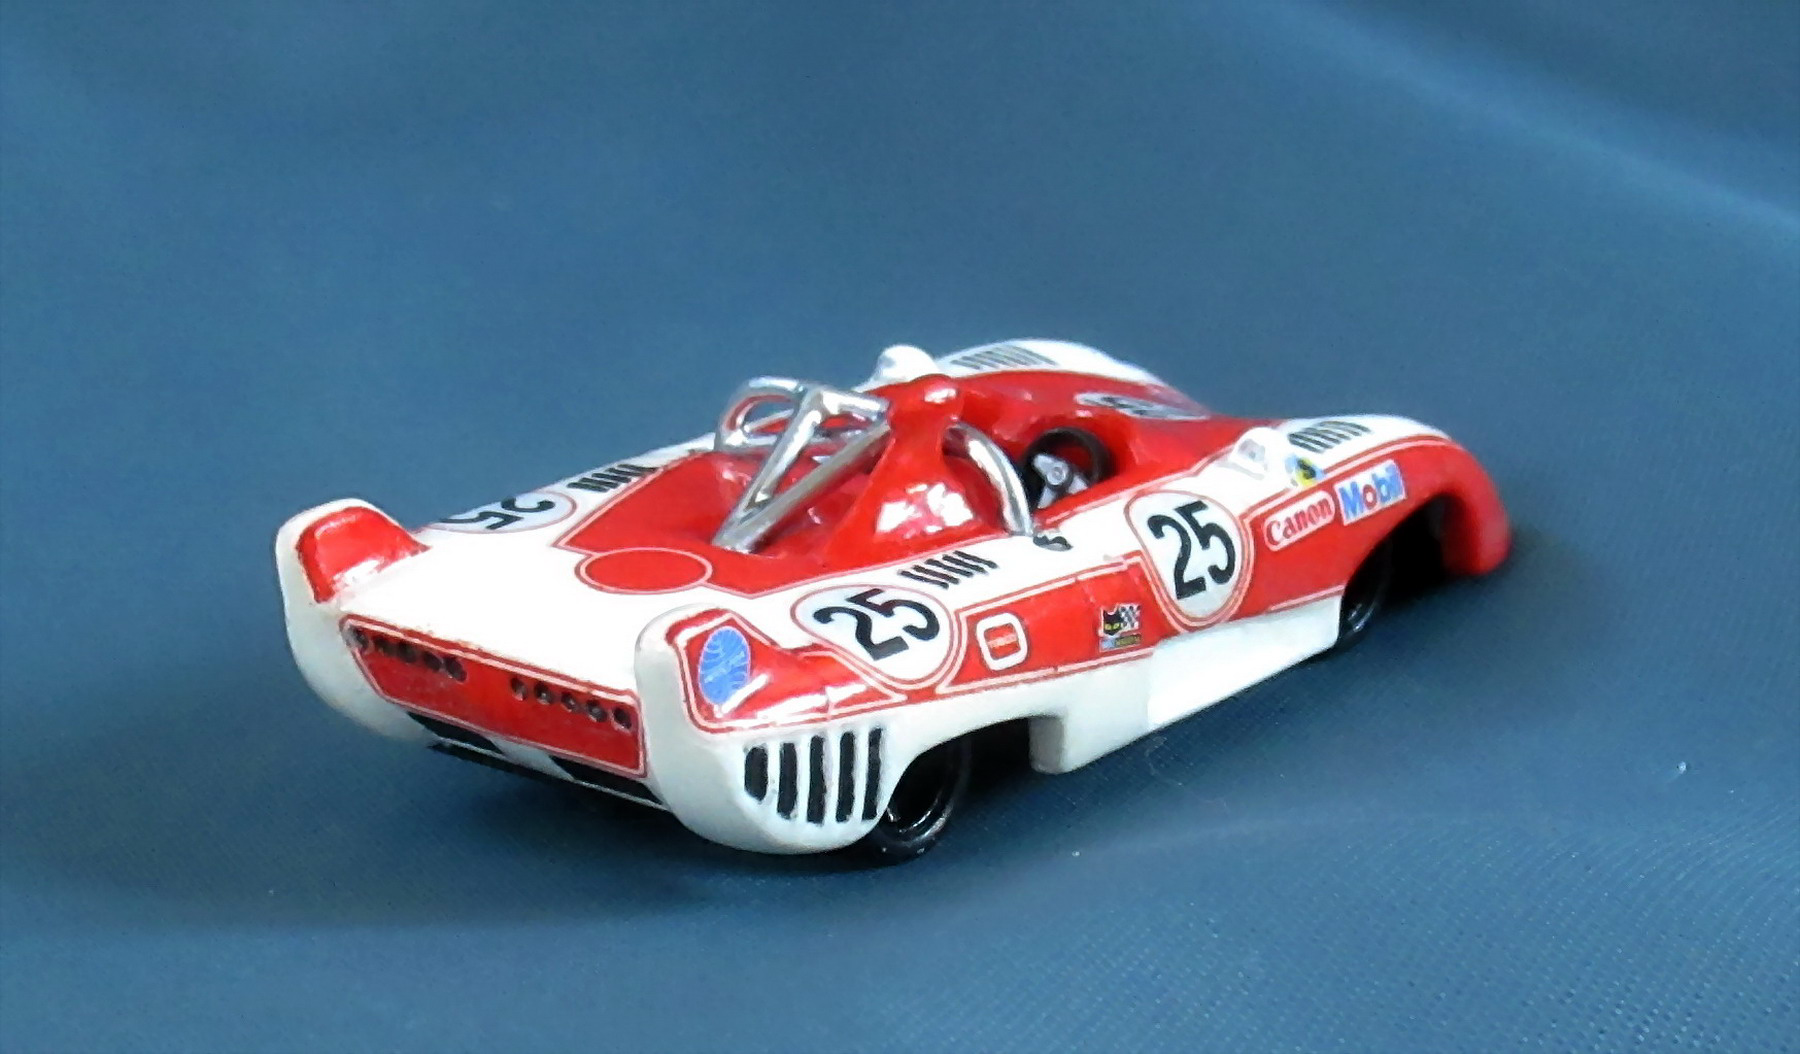
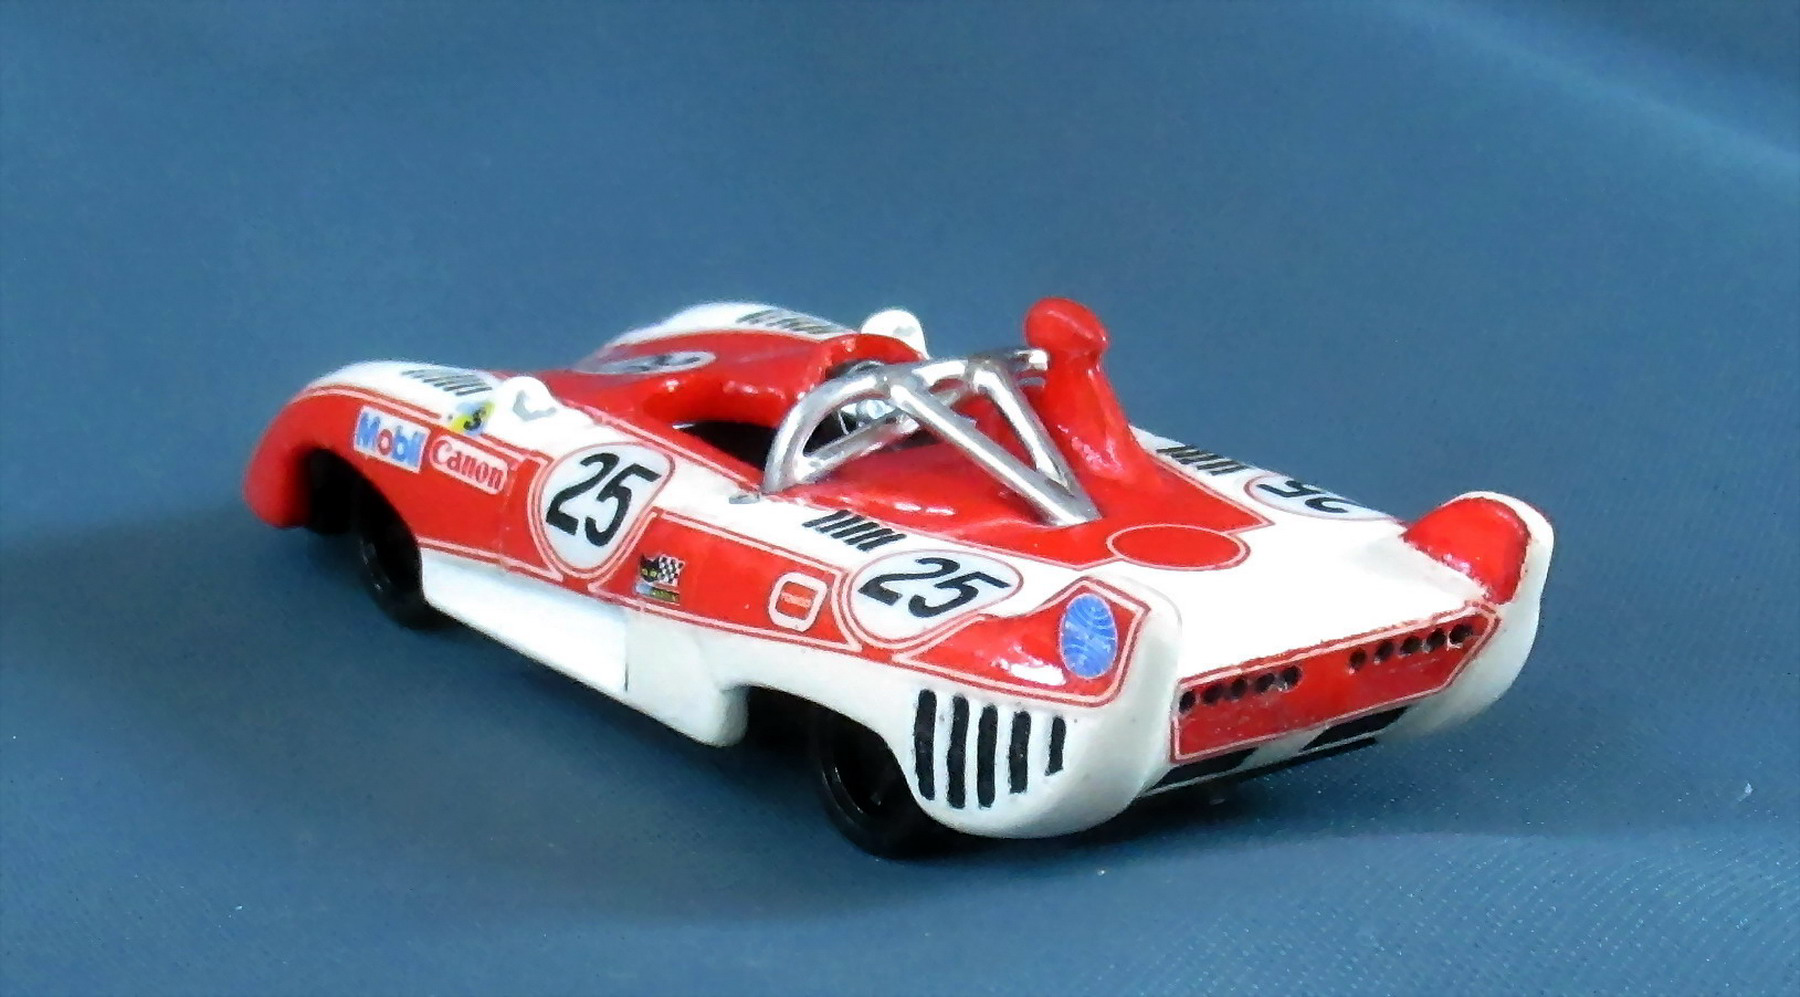
Mazda Sigma MC74 Le Mans 1974 Mazda started with the Sigma 73 first time in Le Mans. The car was out of the race after 12 hours with a transmission failure. In 1974 the Sigma 74 finished the race but they were not classified because they achieved 156 laps only and it was less than 70% of the winners distance. (336 laps) But the Sigma MC74 powered by a Mazda 12A rotary engine was the first engine and team from outside Western Europe and the United States to finish the entire 24 hours of the Le Mans race. The model made by Tomica from 1975. The car was worn of its age accordingly. The wheels and base were in a good condition surprisingly. But specially the air intake over the drivers head was nearly disappeard. Must make a scratchbuilt one and glued with epoxy putty. The rollbar was a simple one must changed to a scratchbuilt version. I made templates for the decals by addhesive tape wich was flexible enought to be layed out even on the 3D curved surfases too. But this flexibility made me problems because at shelling the templates the material expanded and during smooth out to 2D the shape became dirtorted. So some of my printed decals were useless. After some correction on prints and using a lot of Decal-Set and Softener I did the work ready. Enjoy the pictures.
- 447 replies
-
- 2
-
-
- conceptcar
- showcar
- (and 1 more)
-
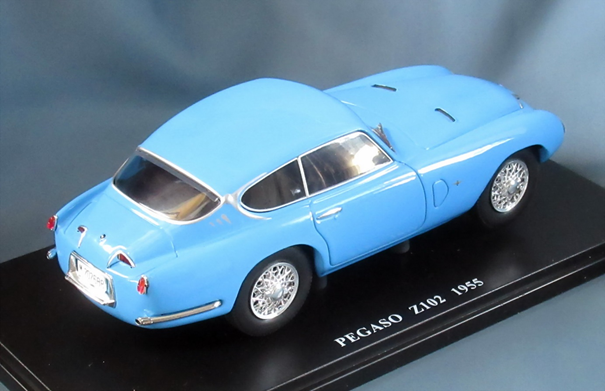
Pegaso Z 102 1955 Pegaso was a well known truck and bus manufacturer when they started a sportscar project in 1951. They recruited a talented ingenieur team from former Alfa Romeo and Ferrari applies. The car was at its time the world fastest production car with the top speed of 240 km/h. On the other part the car was rather heavy and hardly to drive. So the car couldn`t make a good name by racing succeses and without that who want a sportscar from a truck factory ? The very expensive production made an end of the project in 1958. The diecast model is made by Salvat S.L. Spain in scale 1:24. The car is made beautifully – only that right rearlamp . . . – with a black plastic base. The packing is a blister like plastic bubble with backside black cardboard. I think it is acceptable for the price 30.00€ with postage. Enjoy the pictures.
- 447 replies
-
- 1
-
-
- conceptcar
- showcar
- (and 1 more)
-
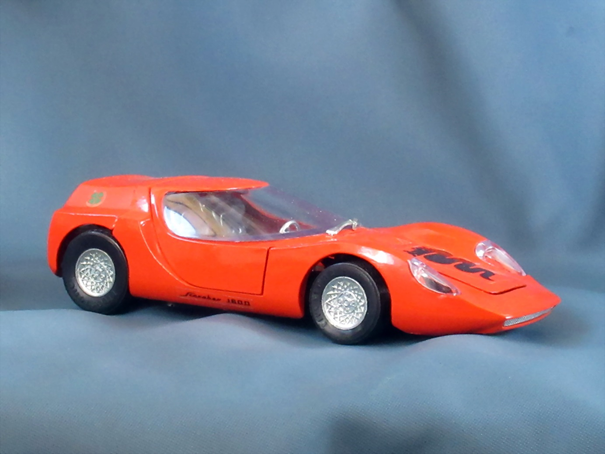
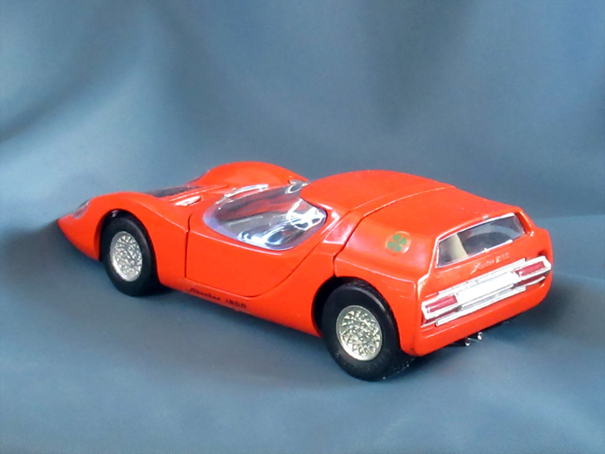
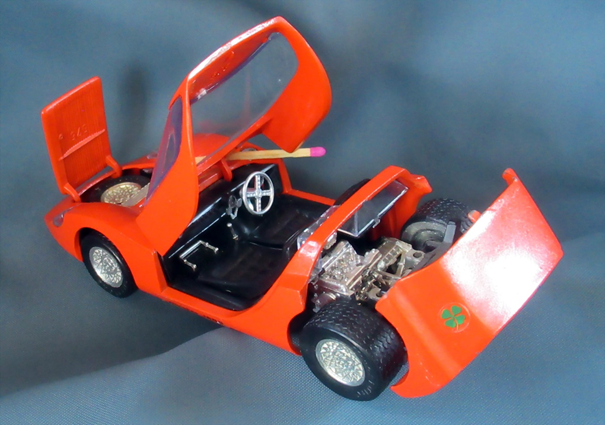
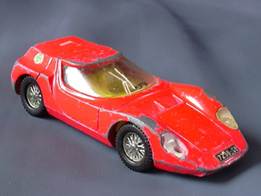
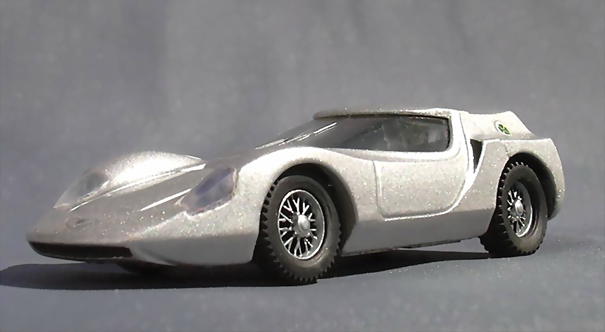
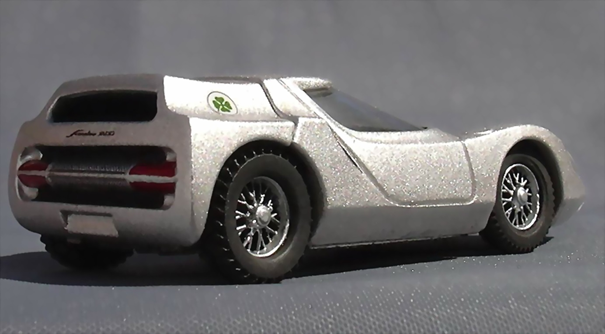
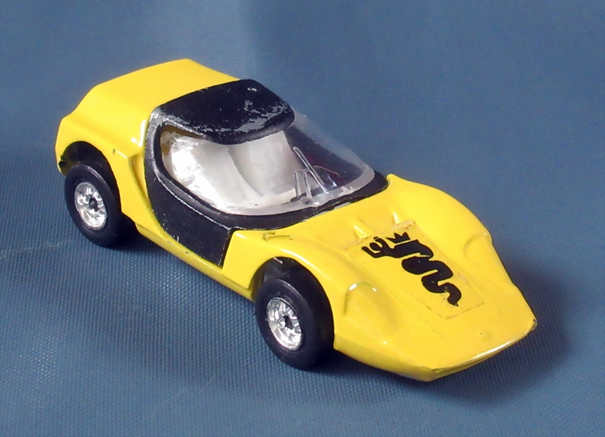
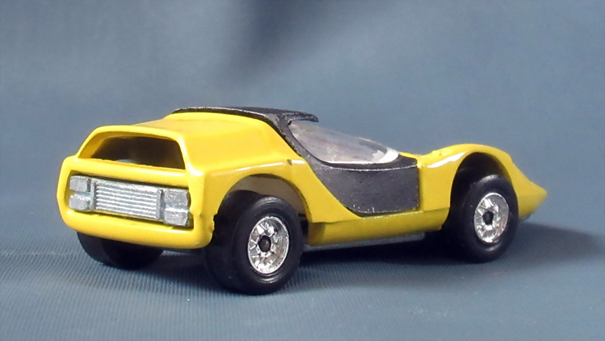
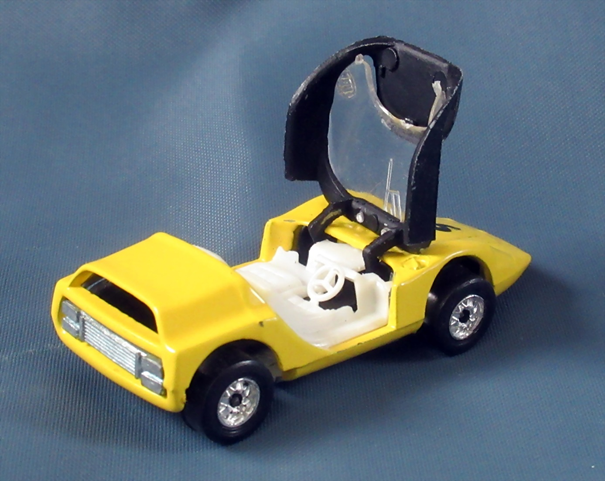
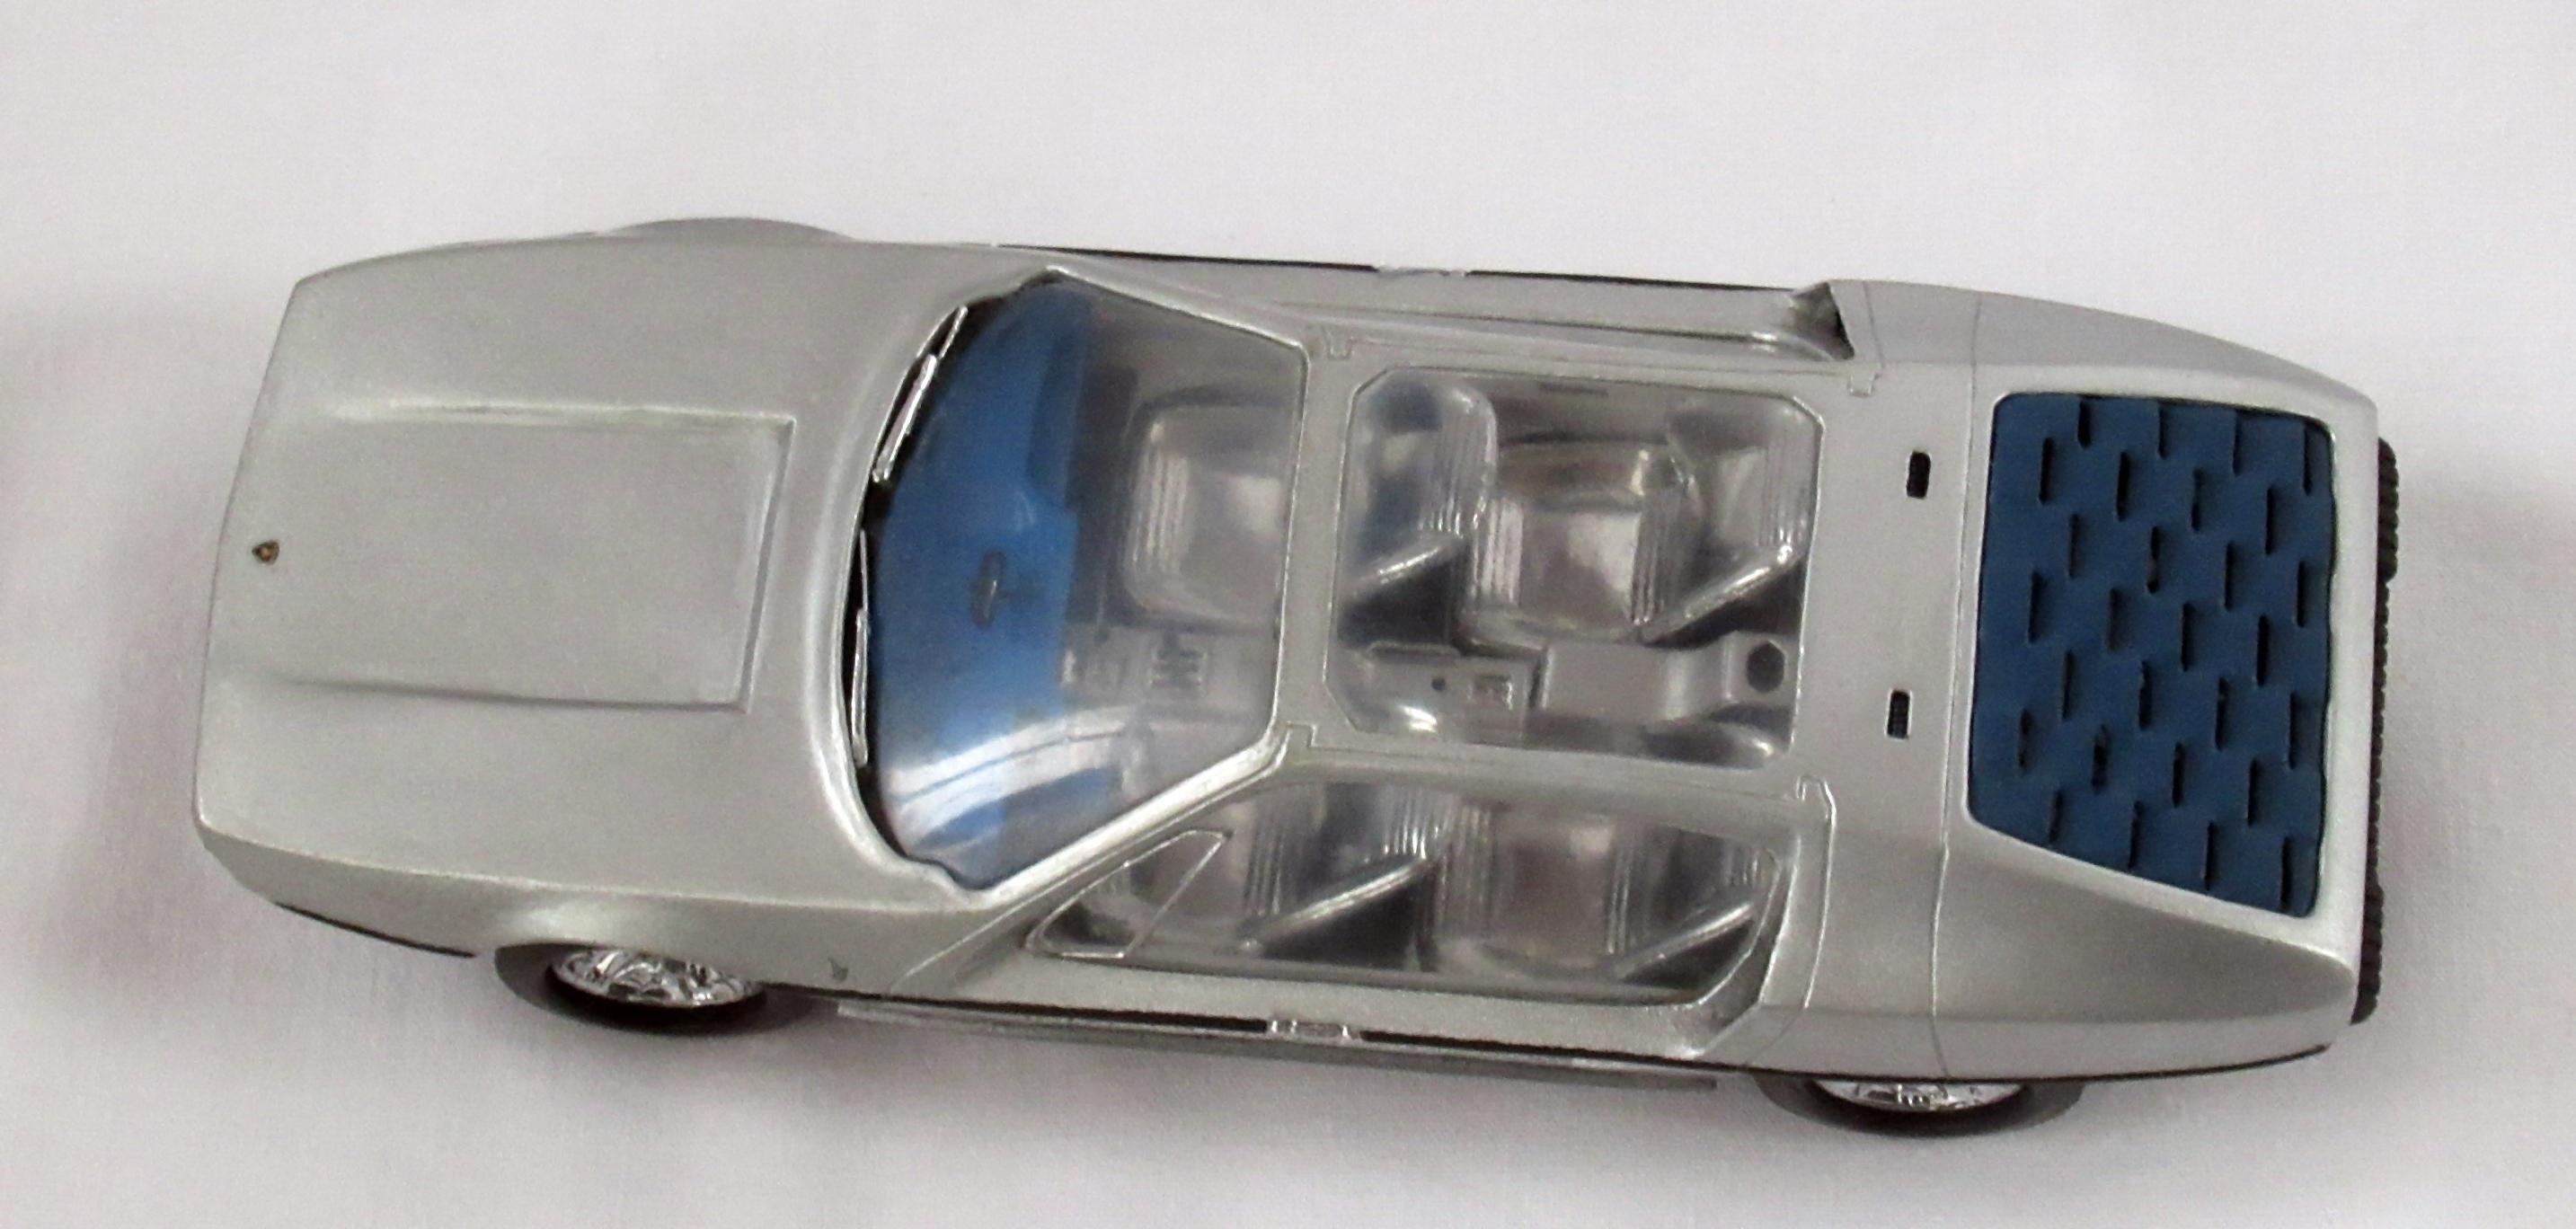
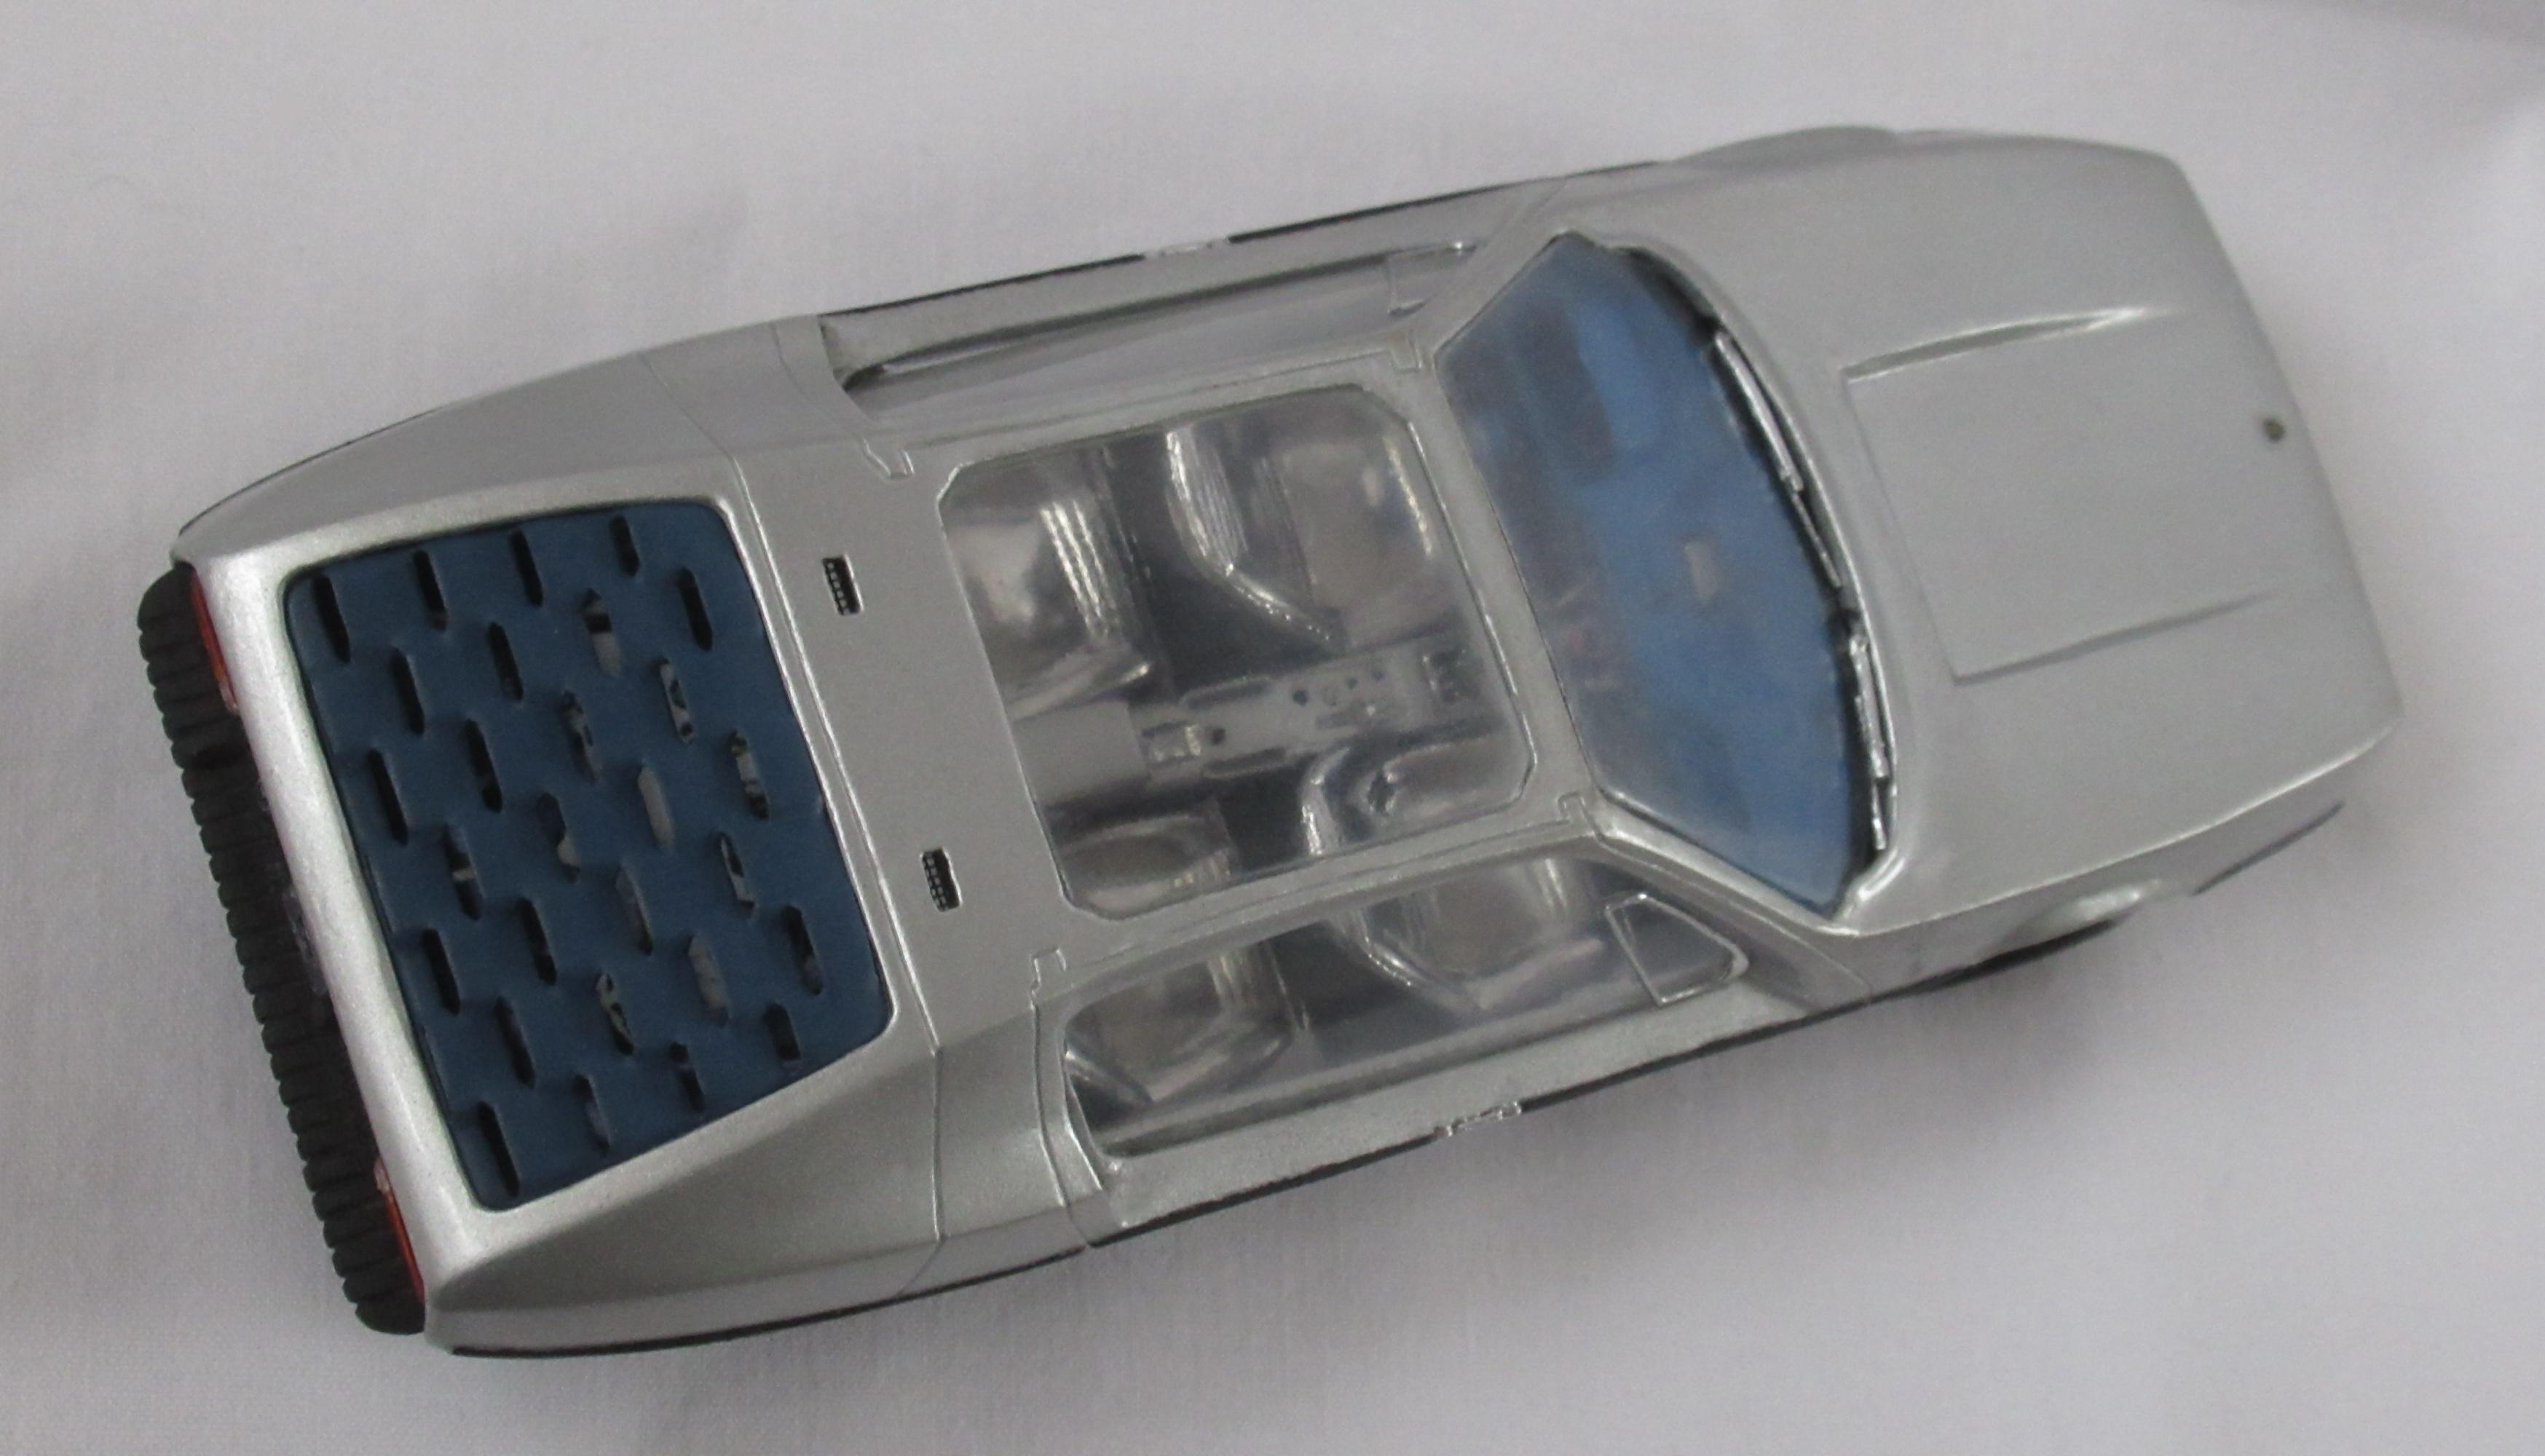
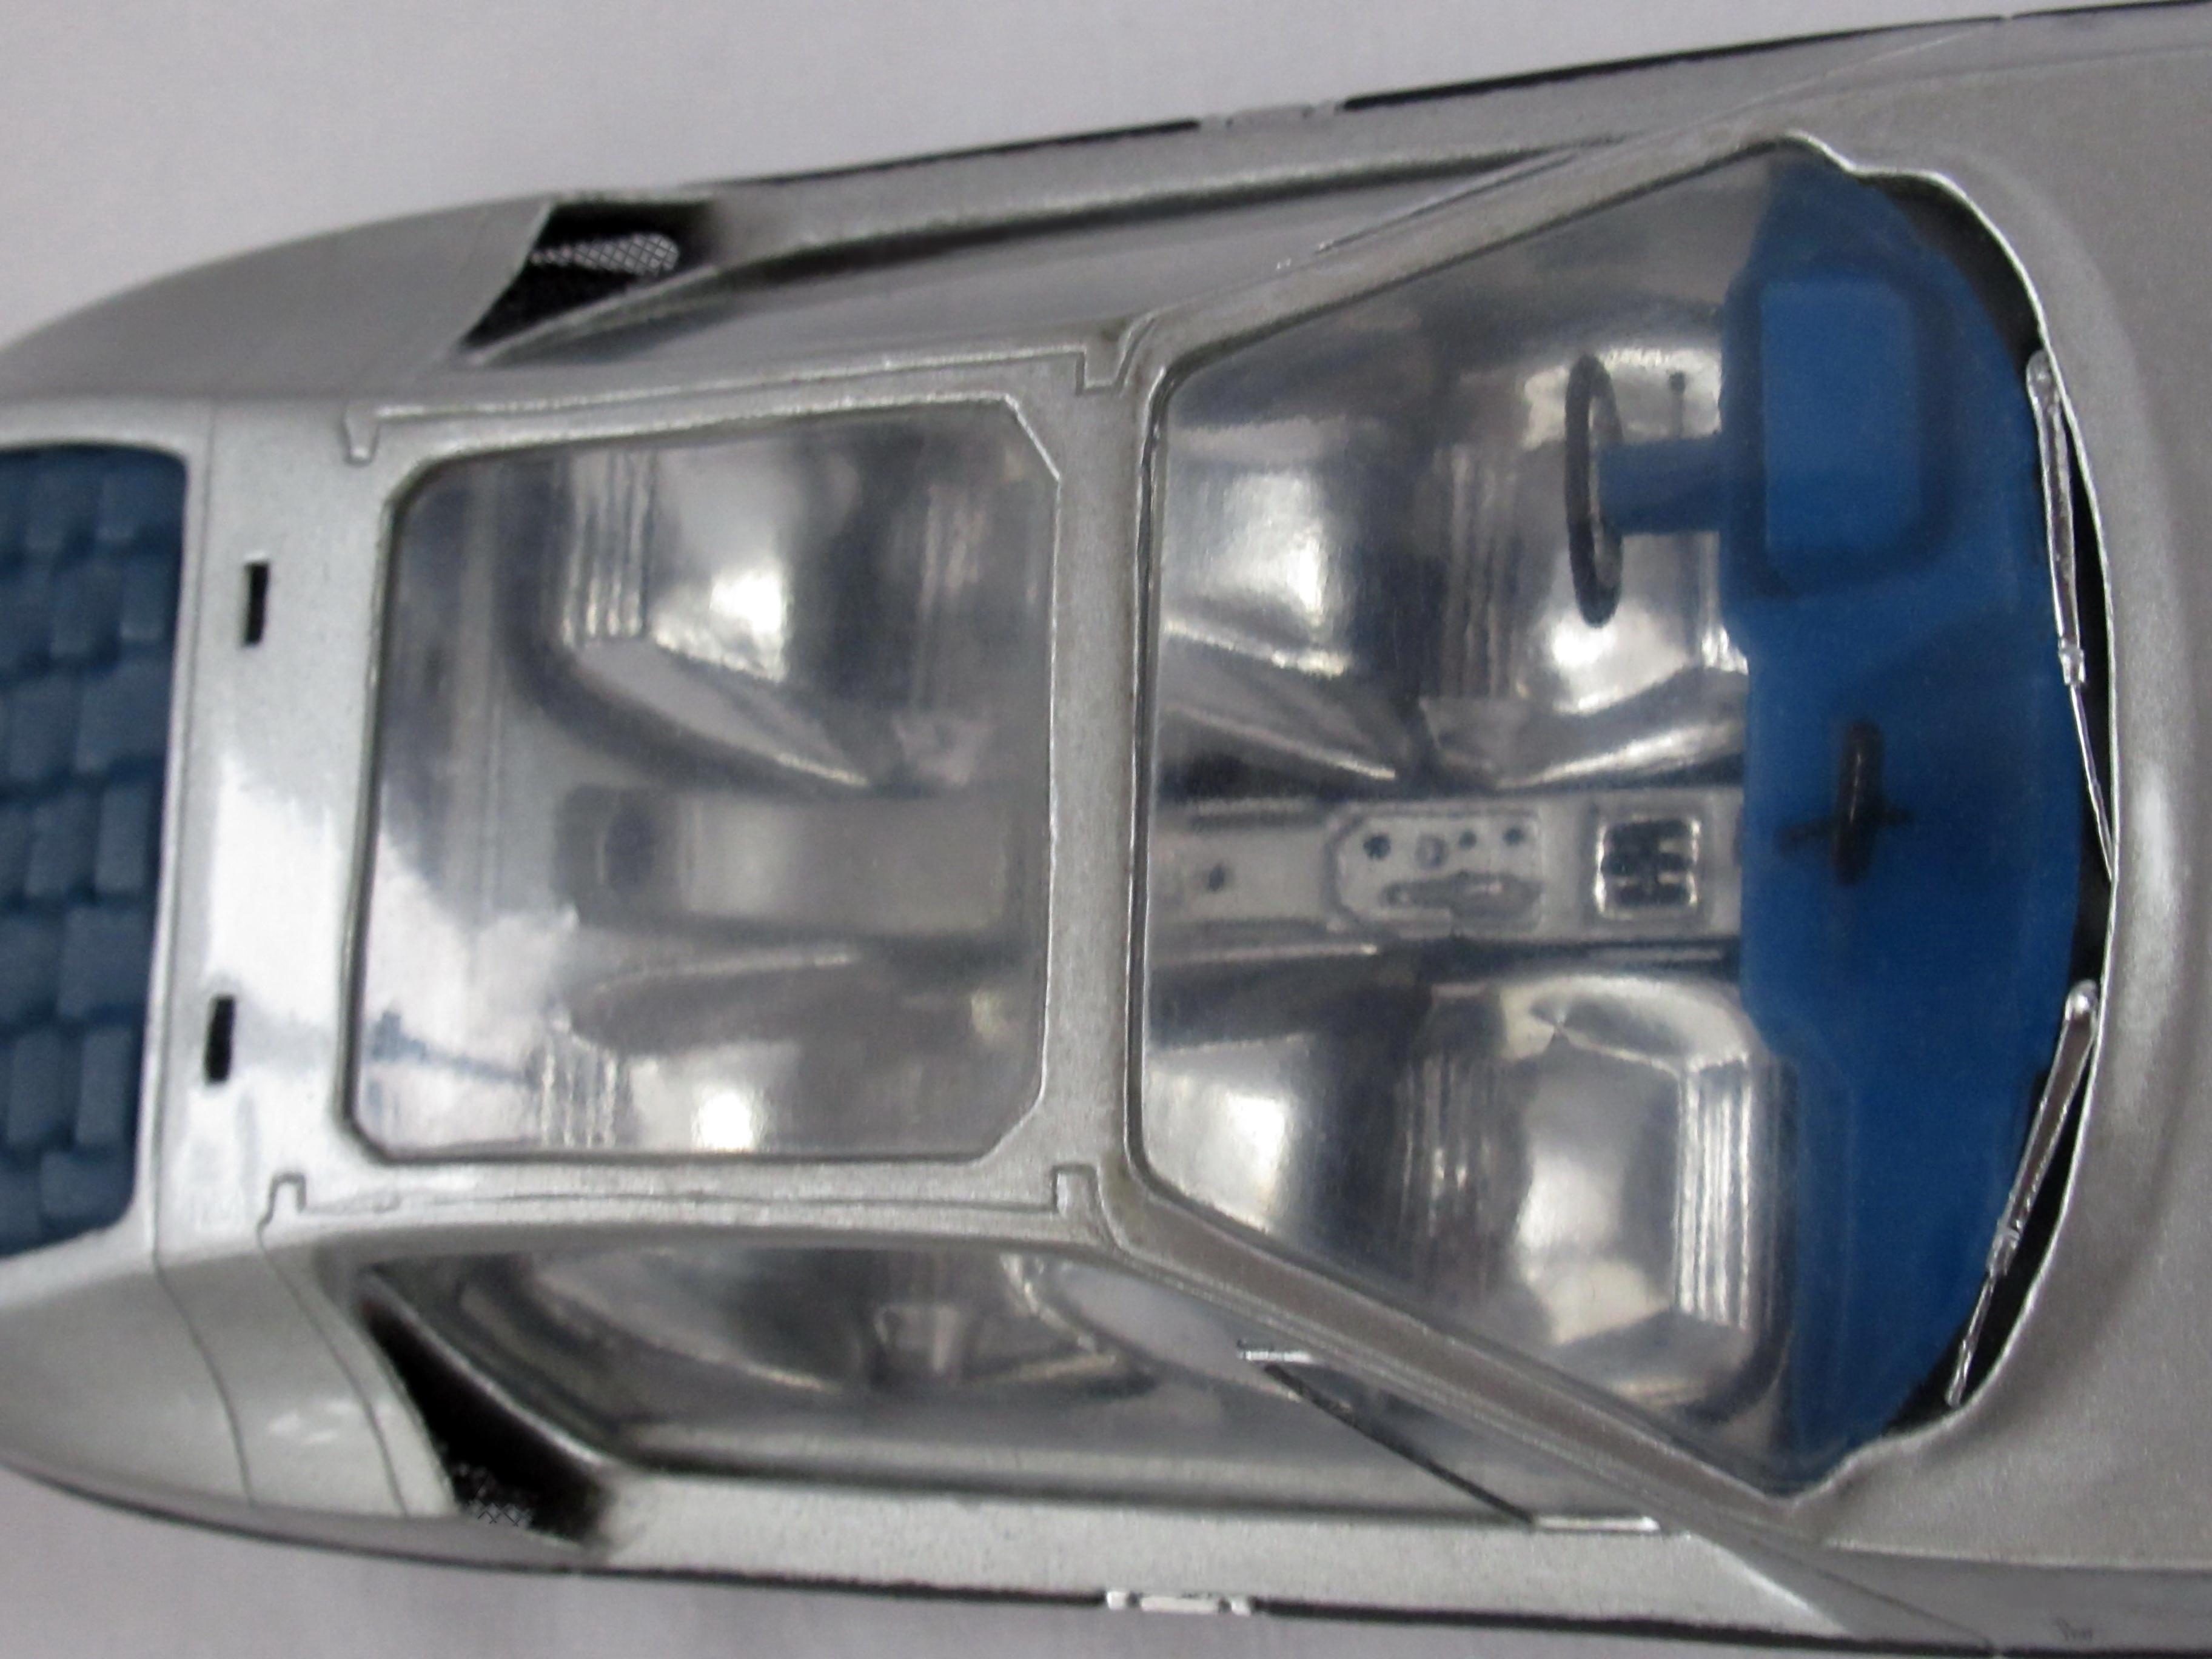
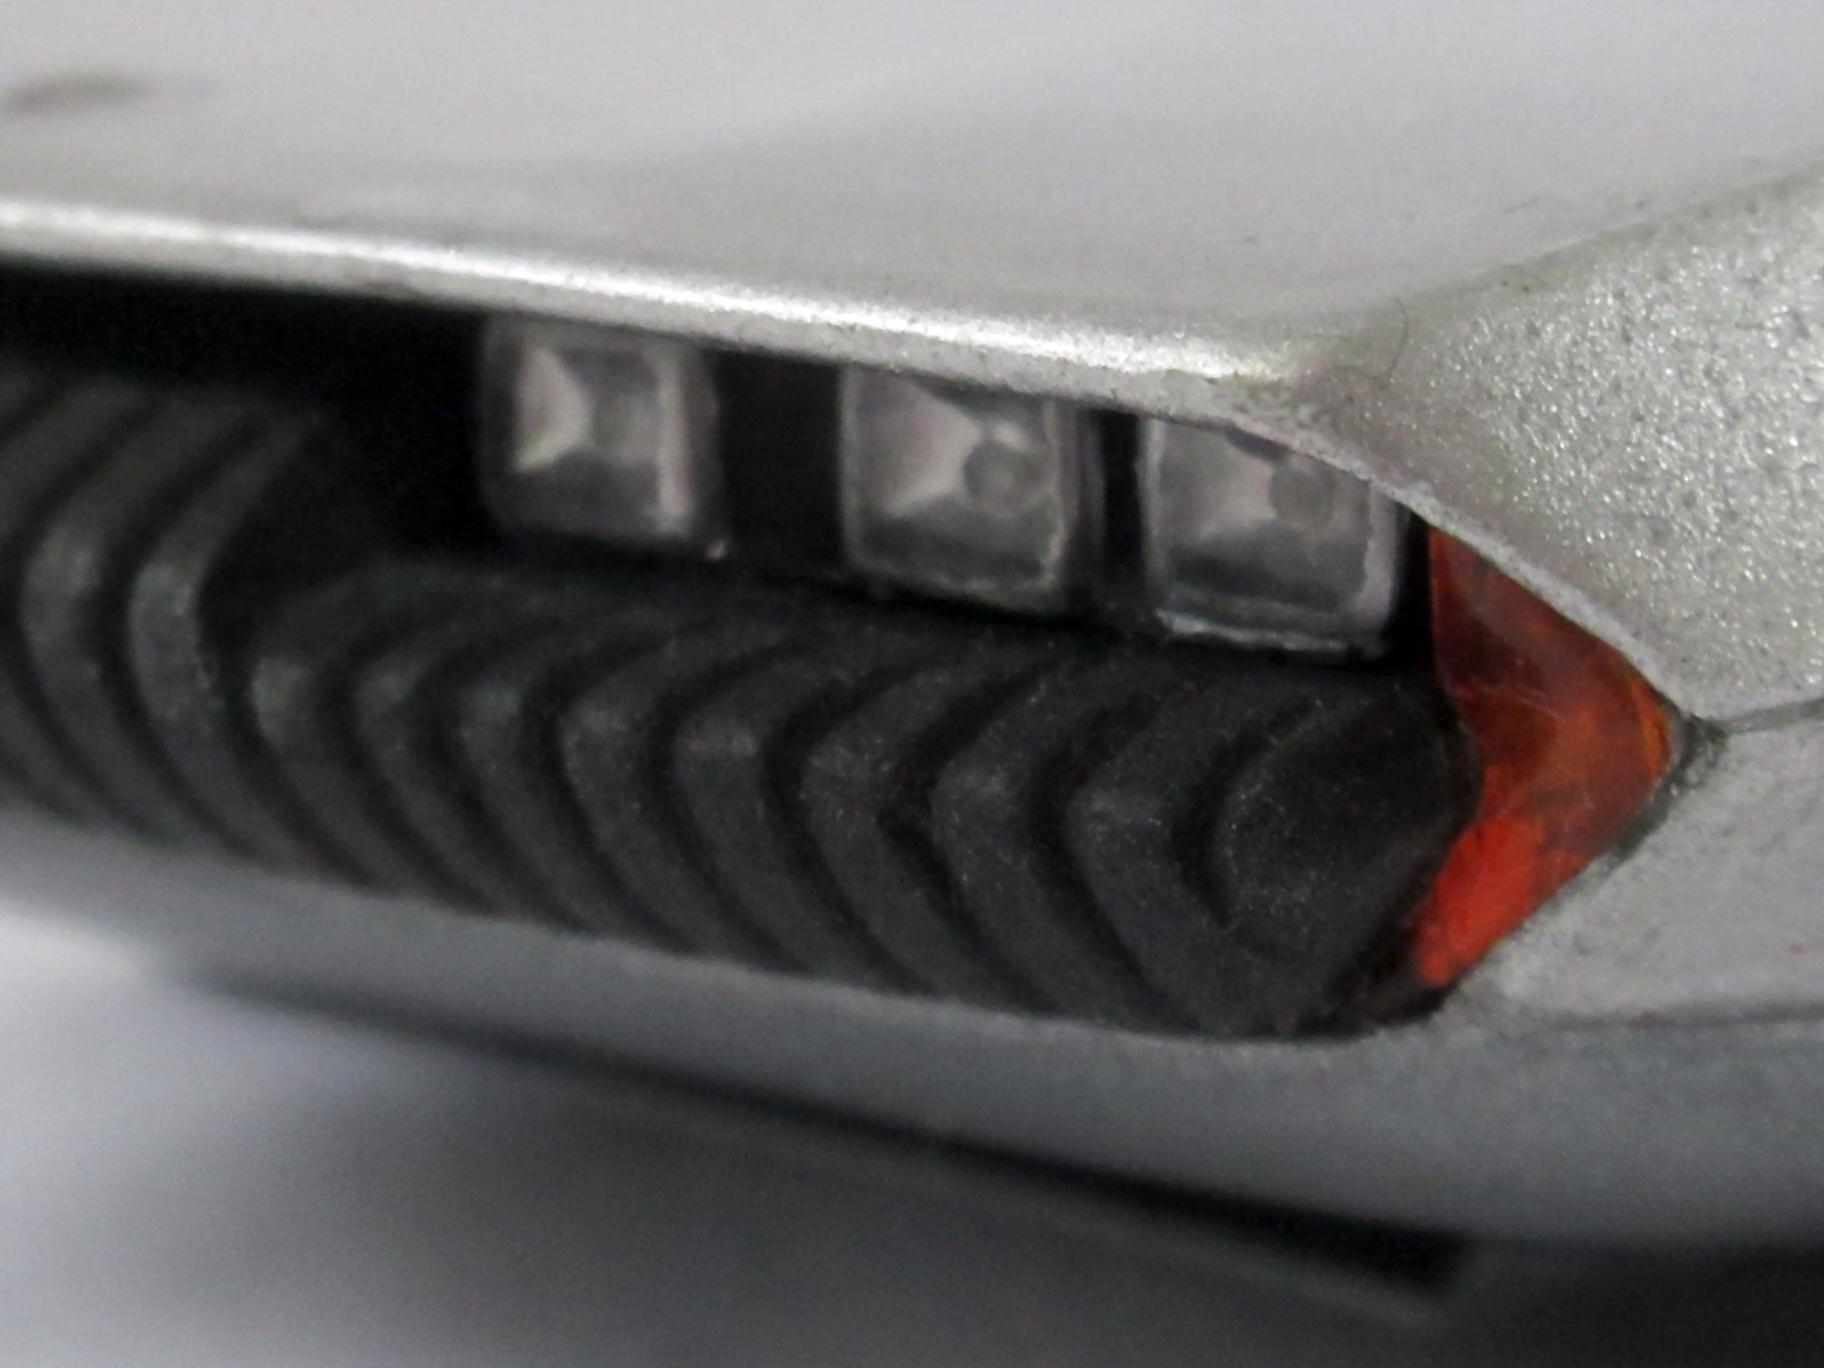
Thank you for nice comments. My next car is the Alfa Romeo Scarabeo OSI 1966. The body design is made by OSI (Officine Stampaggi Industriali.) The extravagant and well streamlined body is seating on the tubular chassis of Alfa Romeo Typo 33. The Scarabeo was mounted with the Alfa Romeo 1600 inline-four engine transversally in the chassis and completed with suspension elements of Renault 8. The sleek and light body made the car 200 km/h quick. A second prototype was built with lightly simpler design too. The greatest of the models is the red 1:25 Politoys car. Well detailed, everything is to open, steering the front wheels is working. Little detail delicatessen: the window behind the driver&copilot has a horizontale step for the carburators just behind the head of copilot. The silver model is 1:43 scale made by Dinky. In original codition was the model playworn, only one headlight missing but no greater damages. Wirewheels are not the same that had the original car. I repainted the car in silver metalic – the color of the first concept car – and made new healights and plastic covers. I completed the model with some decals and detailings by painting. The yellow model is made by Guisval/Spain category 3”. The little toycar is in original factory outfit and in a rather good condition. The top of the car is opened. The rear has a simpler design as the original. The wheels are nice looking. There is no engine copy in the rear of car. Now the rear slot is open - would be nice to see an engine copy. Enjoy the pictures
- 447 replies
-
- 1
-
-
- conceptcar
- showcar
- (and 1 more)
-
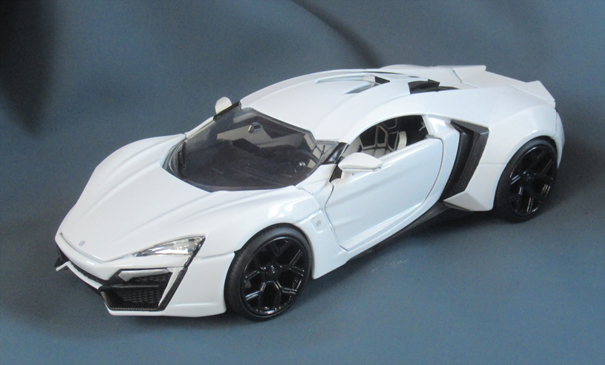
I mean rare auto models could be models of rare autos, rare models of autos and rare models of rare autos. They could be produced by factories or the factory models customized by collectors or scratchbuilt models made by enthusiast DIY guys. In my collection are all three type of rarities to find but I have to admit I can`t decide how much rare is a model of a car in the world – I know only how difficult was for me to find that one. The scratch built models are all one-off and I dare say they are rarities. But this forum is about diecast models I don`t know may I show here such models ? W-Motors Lycan HyperSport 2012 and Fenyr SuperSport 2015 Wikipedia says: W Motors is an Emirati sports car company founded in Lebanon in 2012, being the first developer of high-performance luxury sports cars in the Middle East. Based in Dubai, the company's activities include automotive design, research and development, as well as vehicle engineering and manufacture. I found the model of Lycan HyperSport first. The model is made according the box by Mondo Motors but on the base of car is www.jadatoys.com and Made in China. The scale is 1:24. (some years later Jada made a 1:55 Lycan) After checking photos I decided to detail the model, especially the enterieur by painting. There are a lot of details in the casting but everything is black plastic. It is too bad that after assembly the inside is nearly invisible. And some elements of inside: The Fenyr SuperSport is a really toy car (with pull back motor, ligts, motorsound or musik) but the shape is really good. The model produced by Newao Toys in 1:24 scale. The inside is detailed a bit in factory but not perfect to 1:1. As there are so much electronic with wiring in model I don`t dare to take apart the car. (for the time being) Enjoy the pictures - all comments are highly appreciated.
-
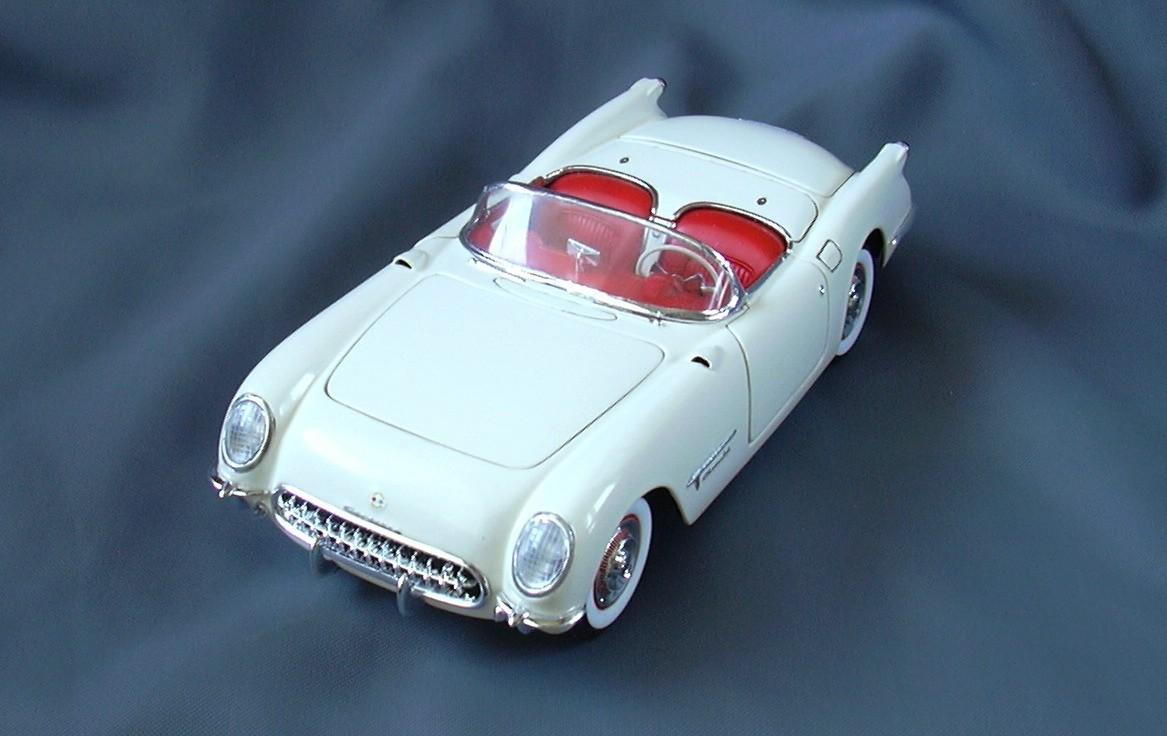
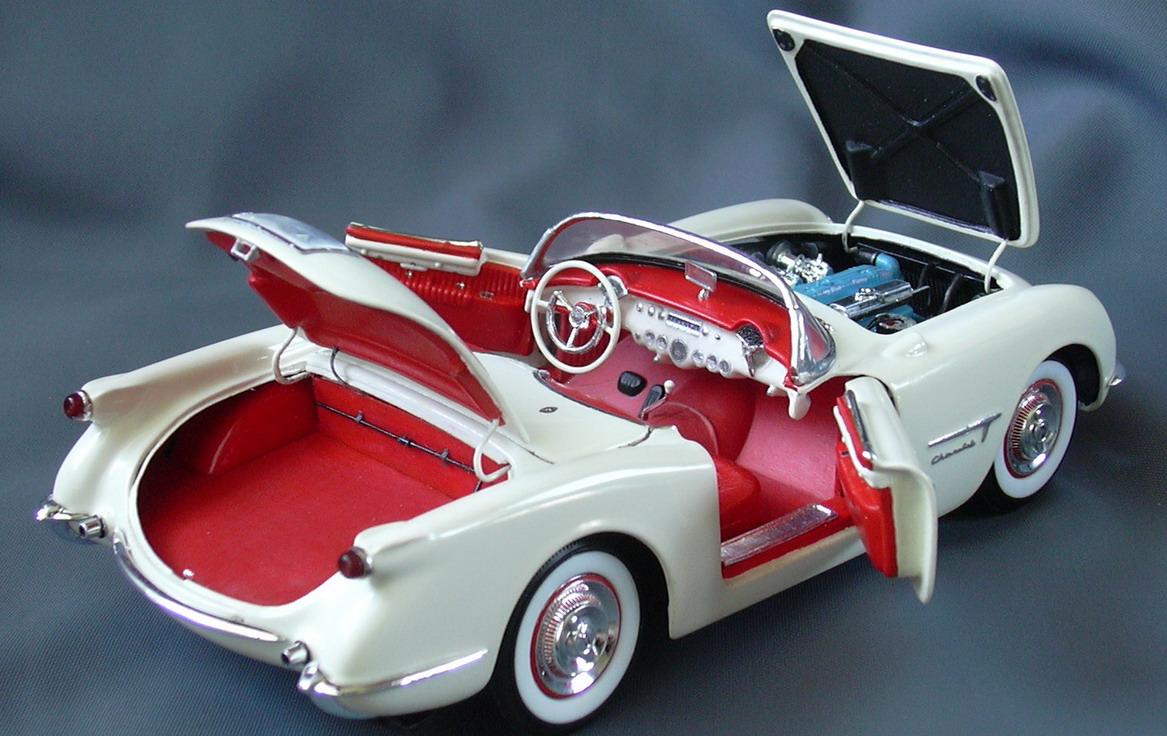
Hi Tim, it is a Revell Corvette 1953 2 in 1 plastic kit 1:24. Modified to prototype by the few differences outside and more in enginebay.
-
For white Corvette fans: the very first Corvette - the Prototype. P.S.: More pictures: Under Glass - The Very First Corvette.
-
And here is a photo:
-
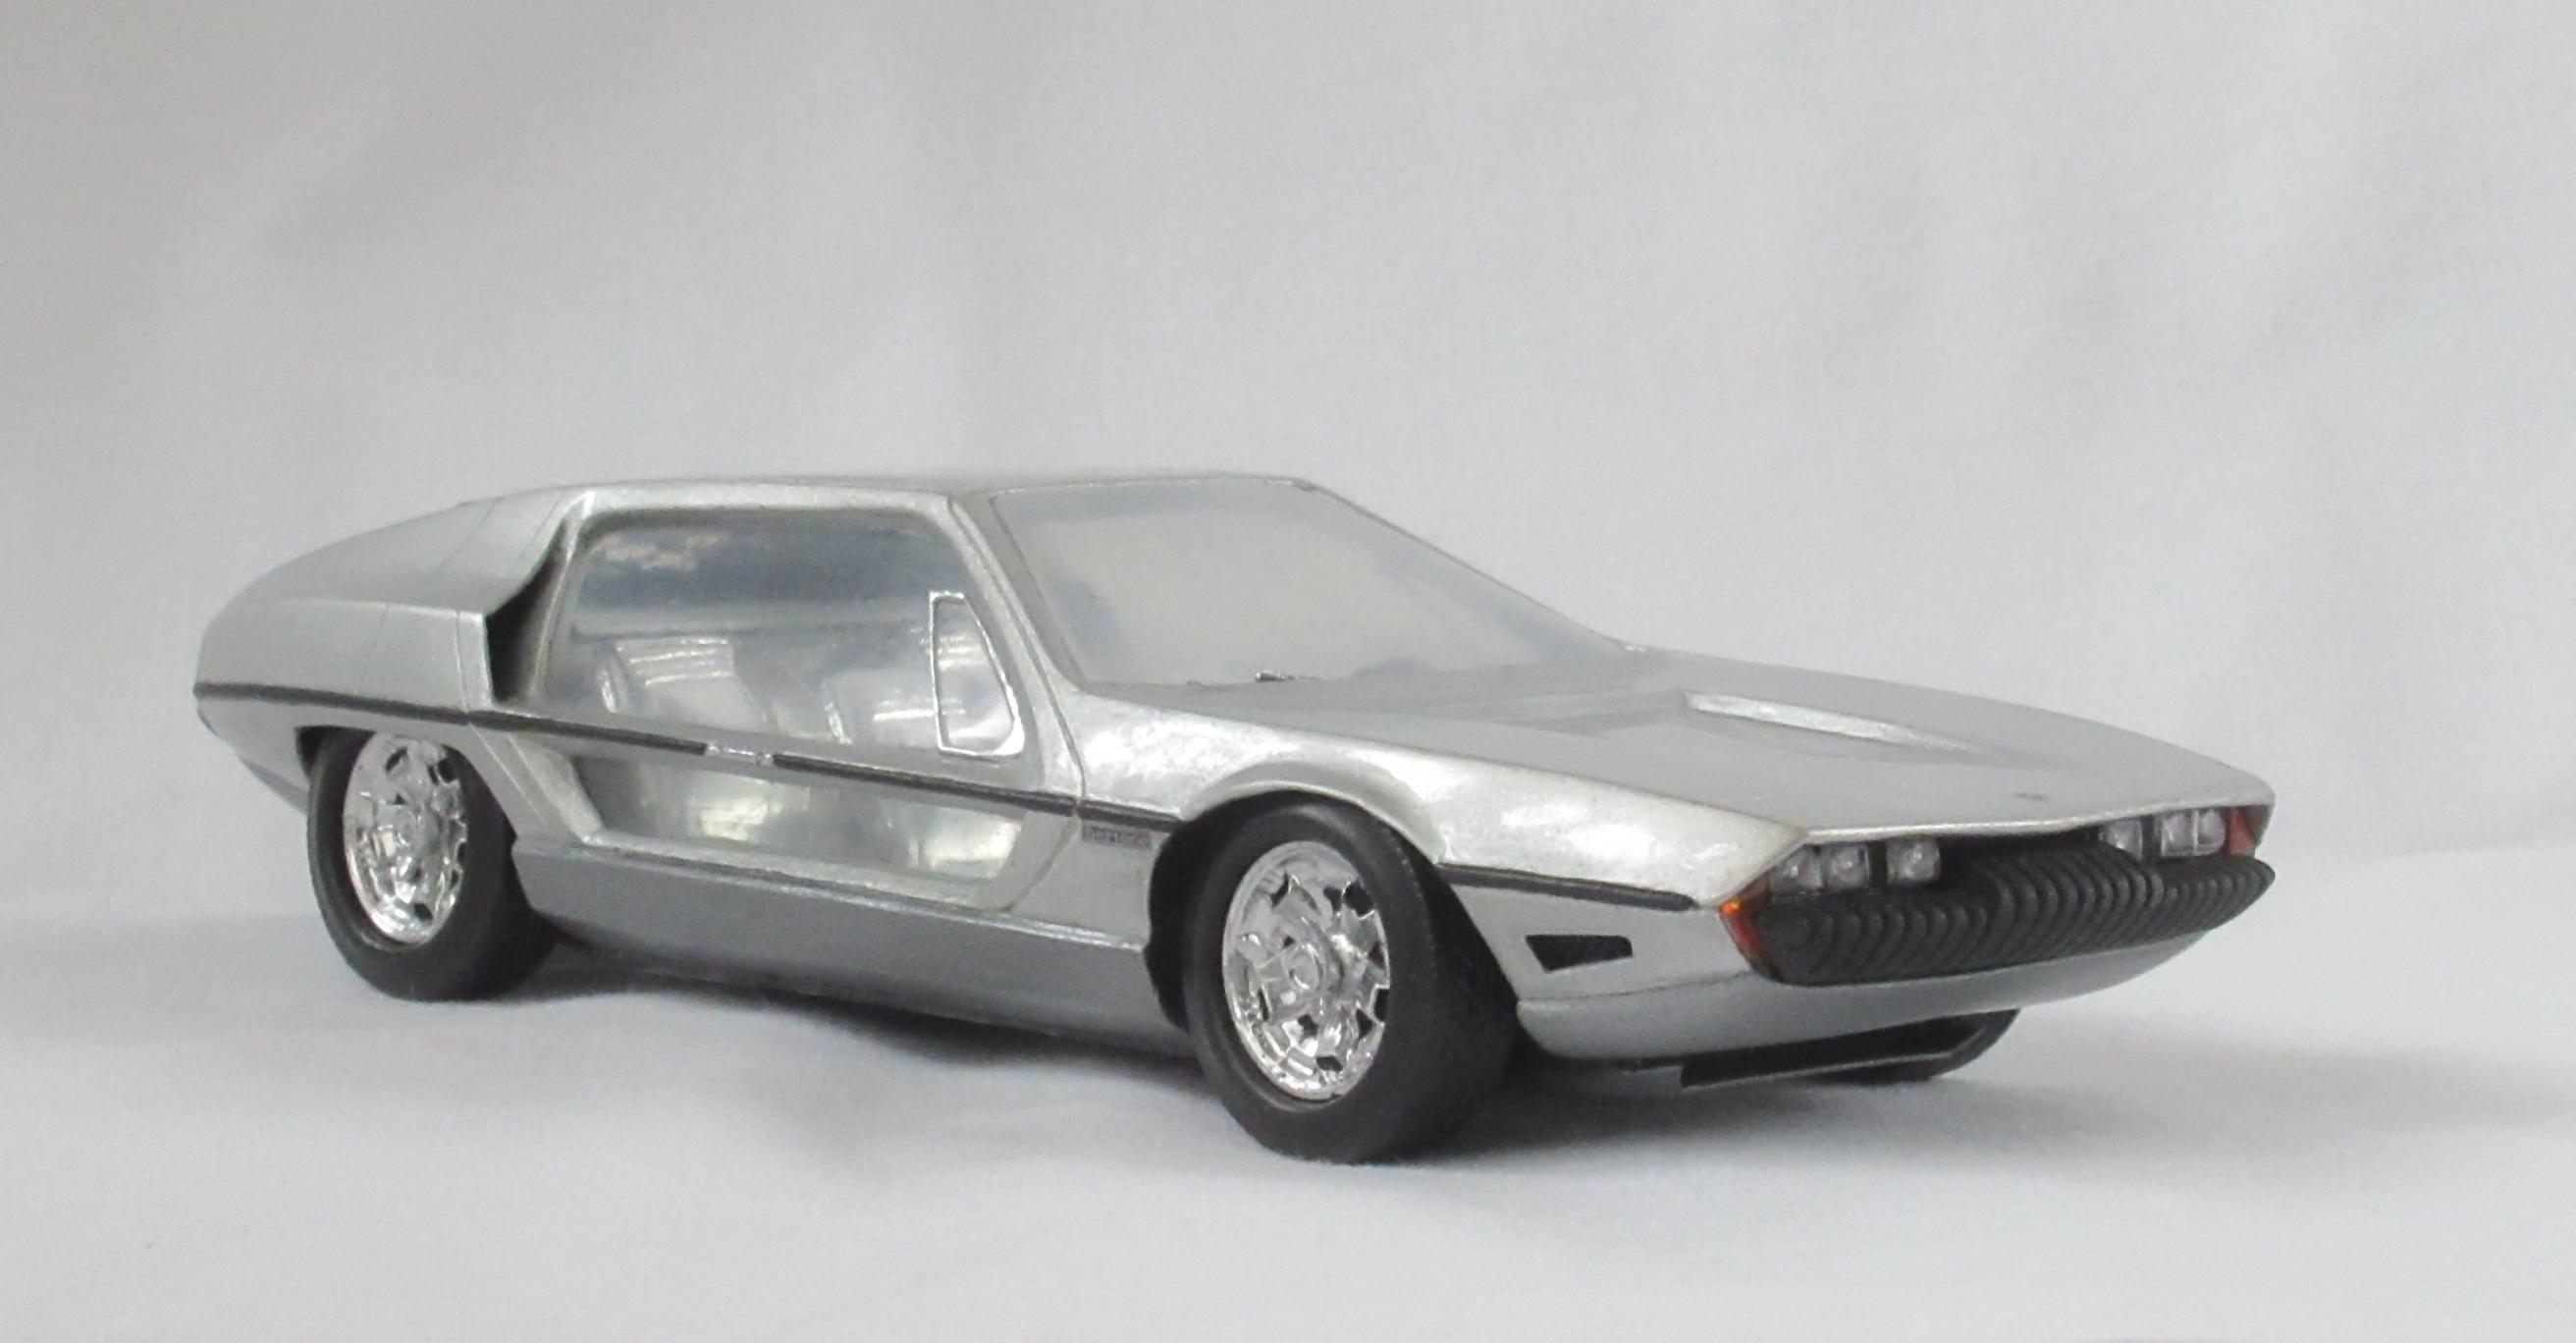
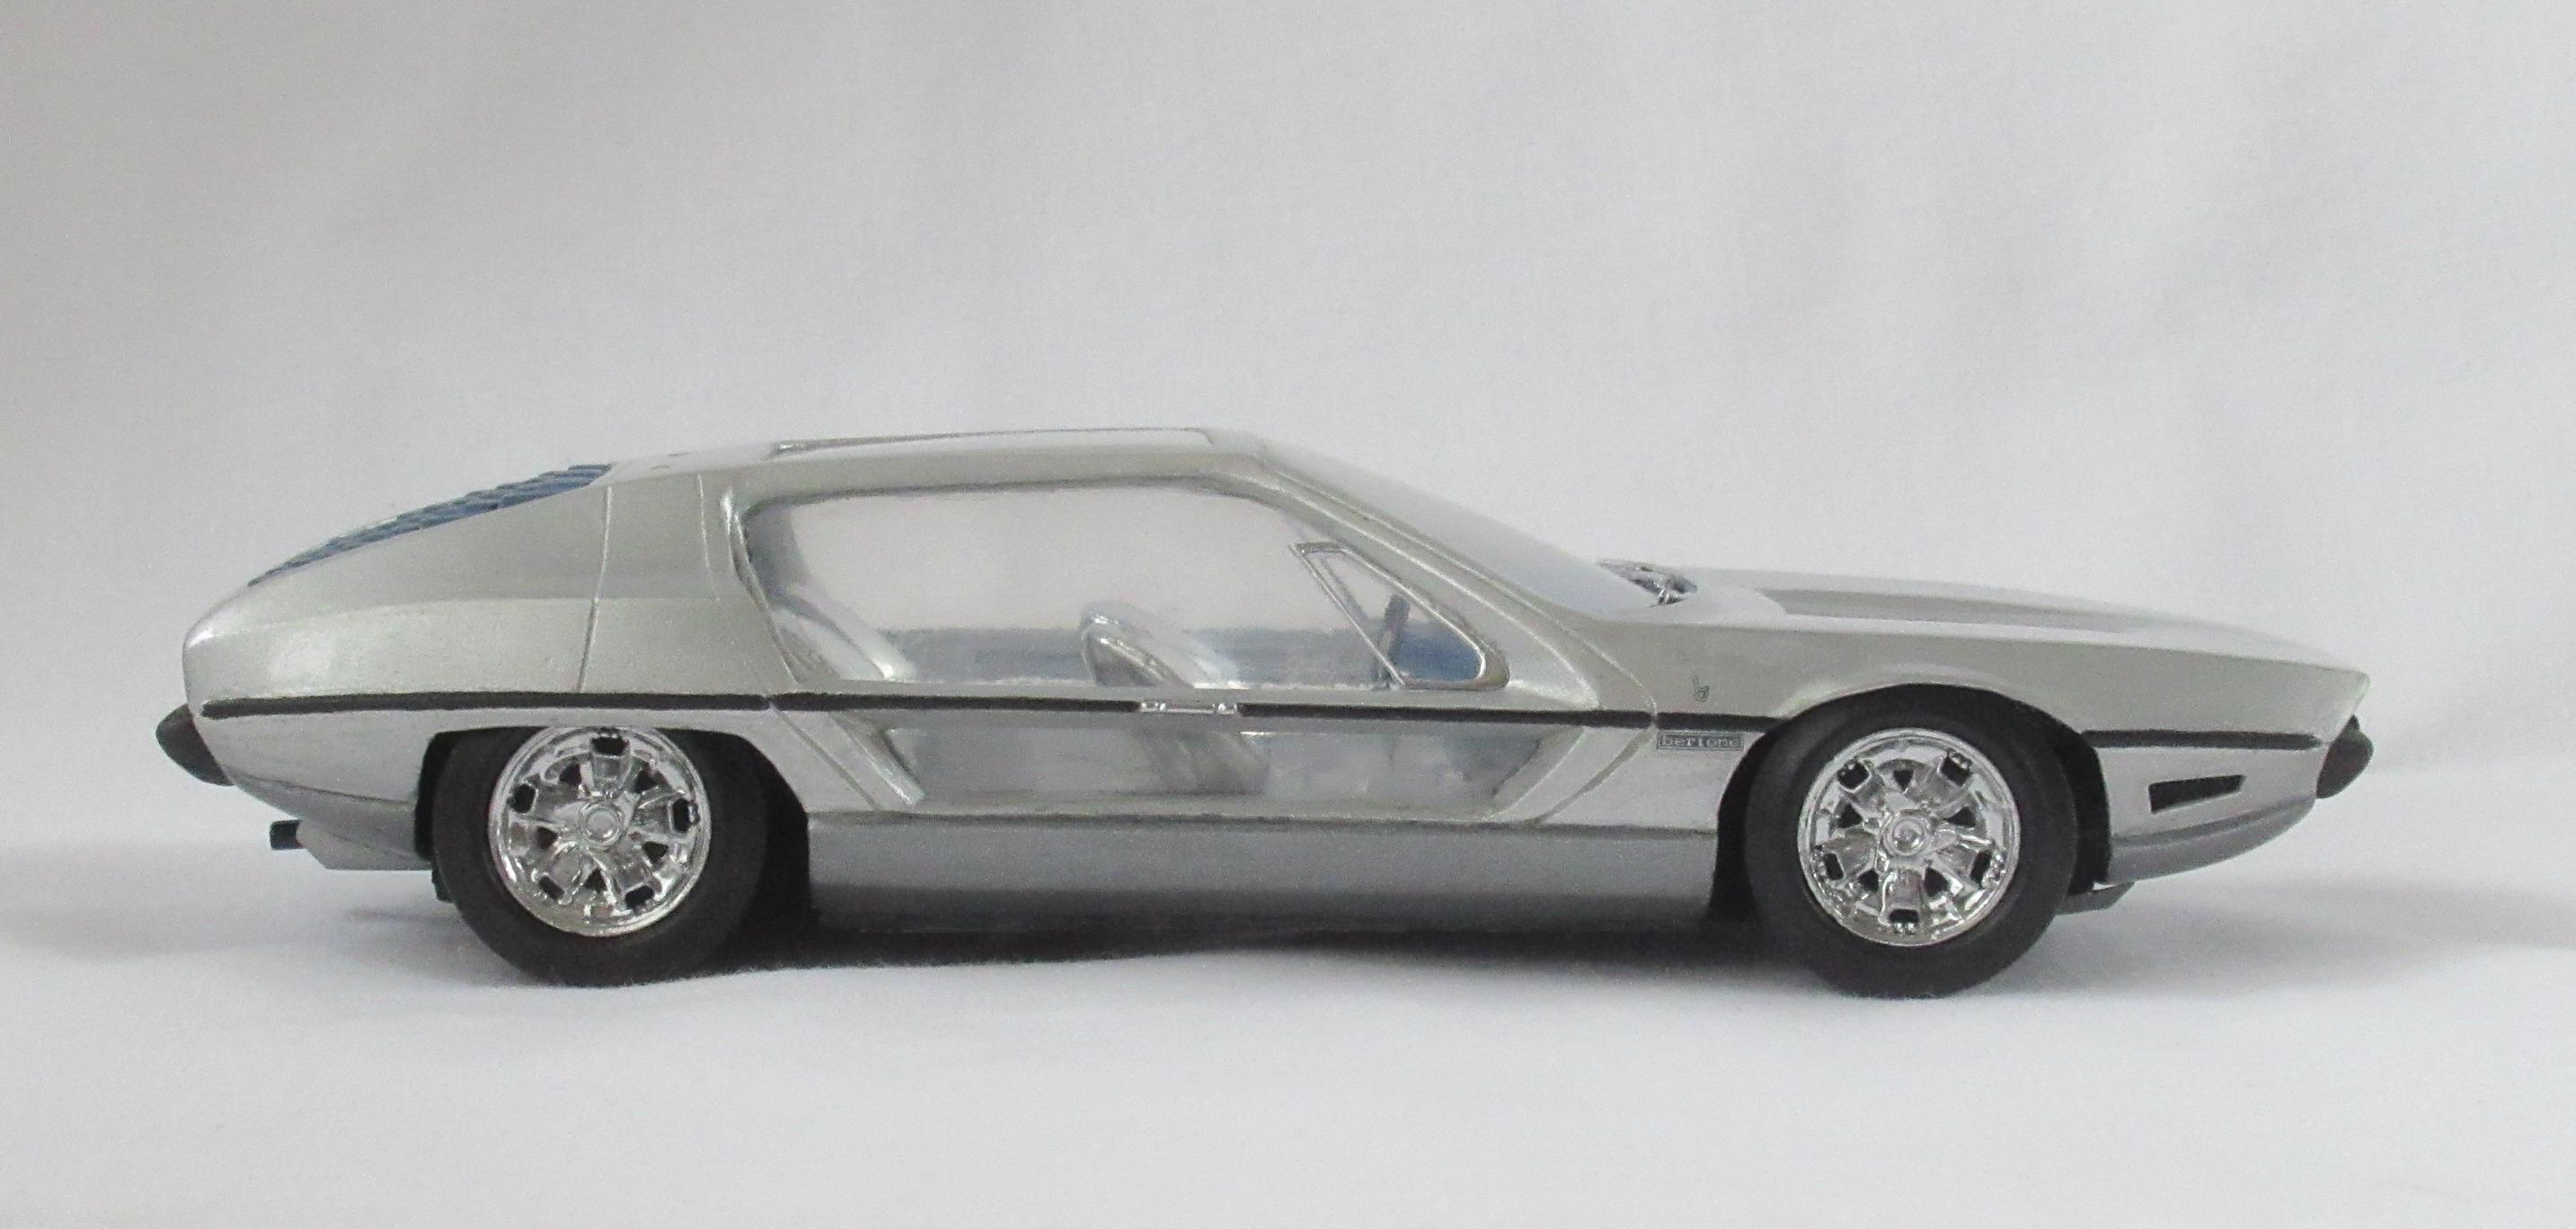
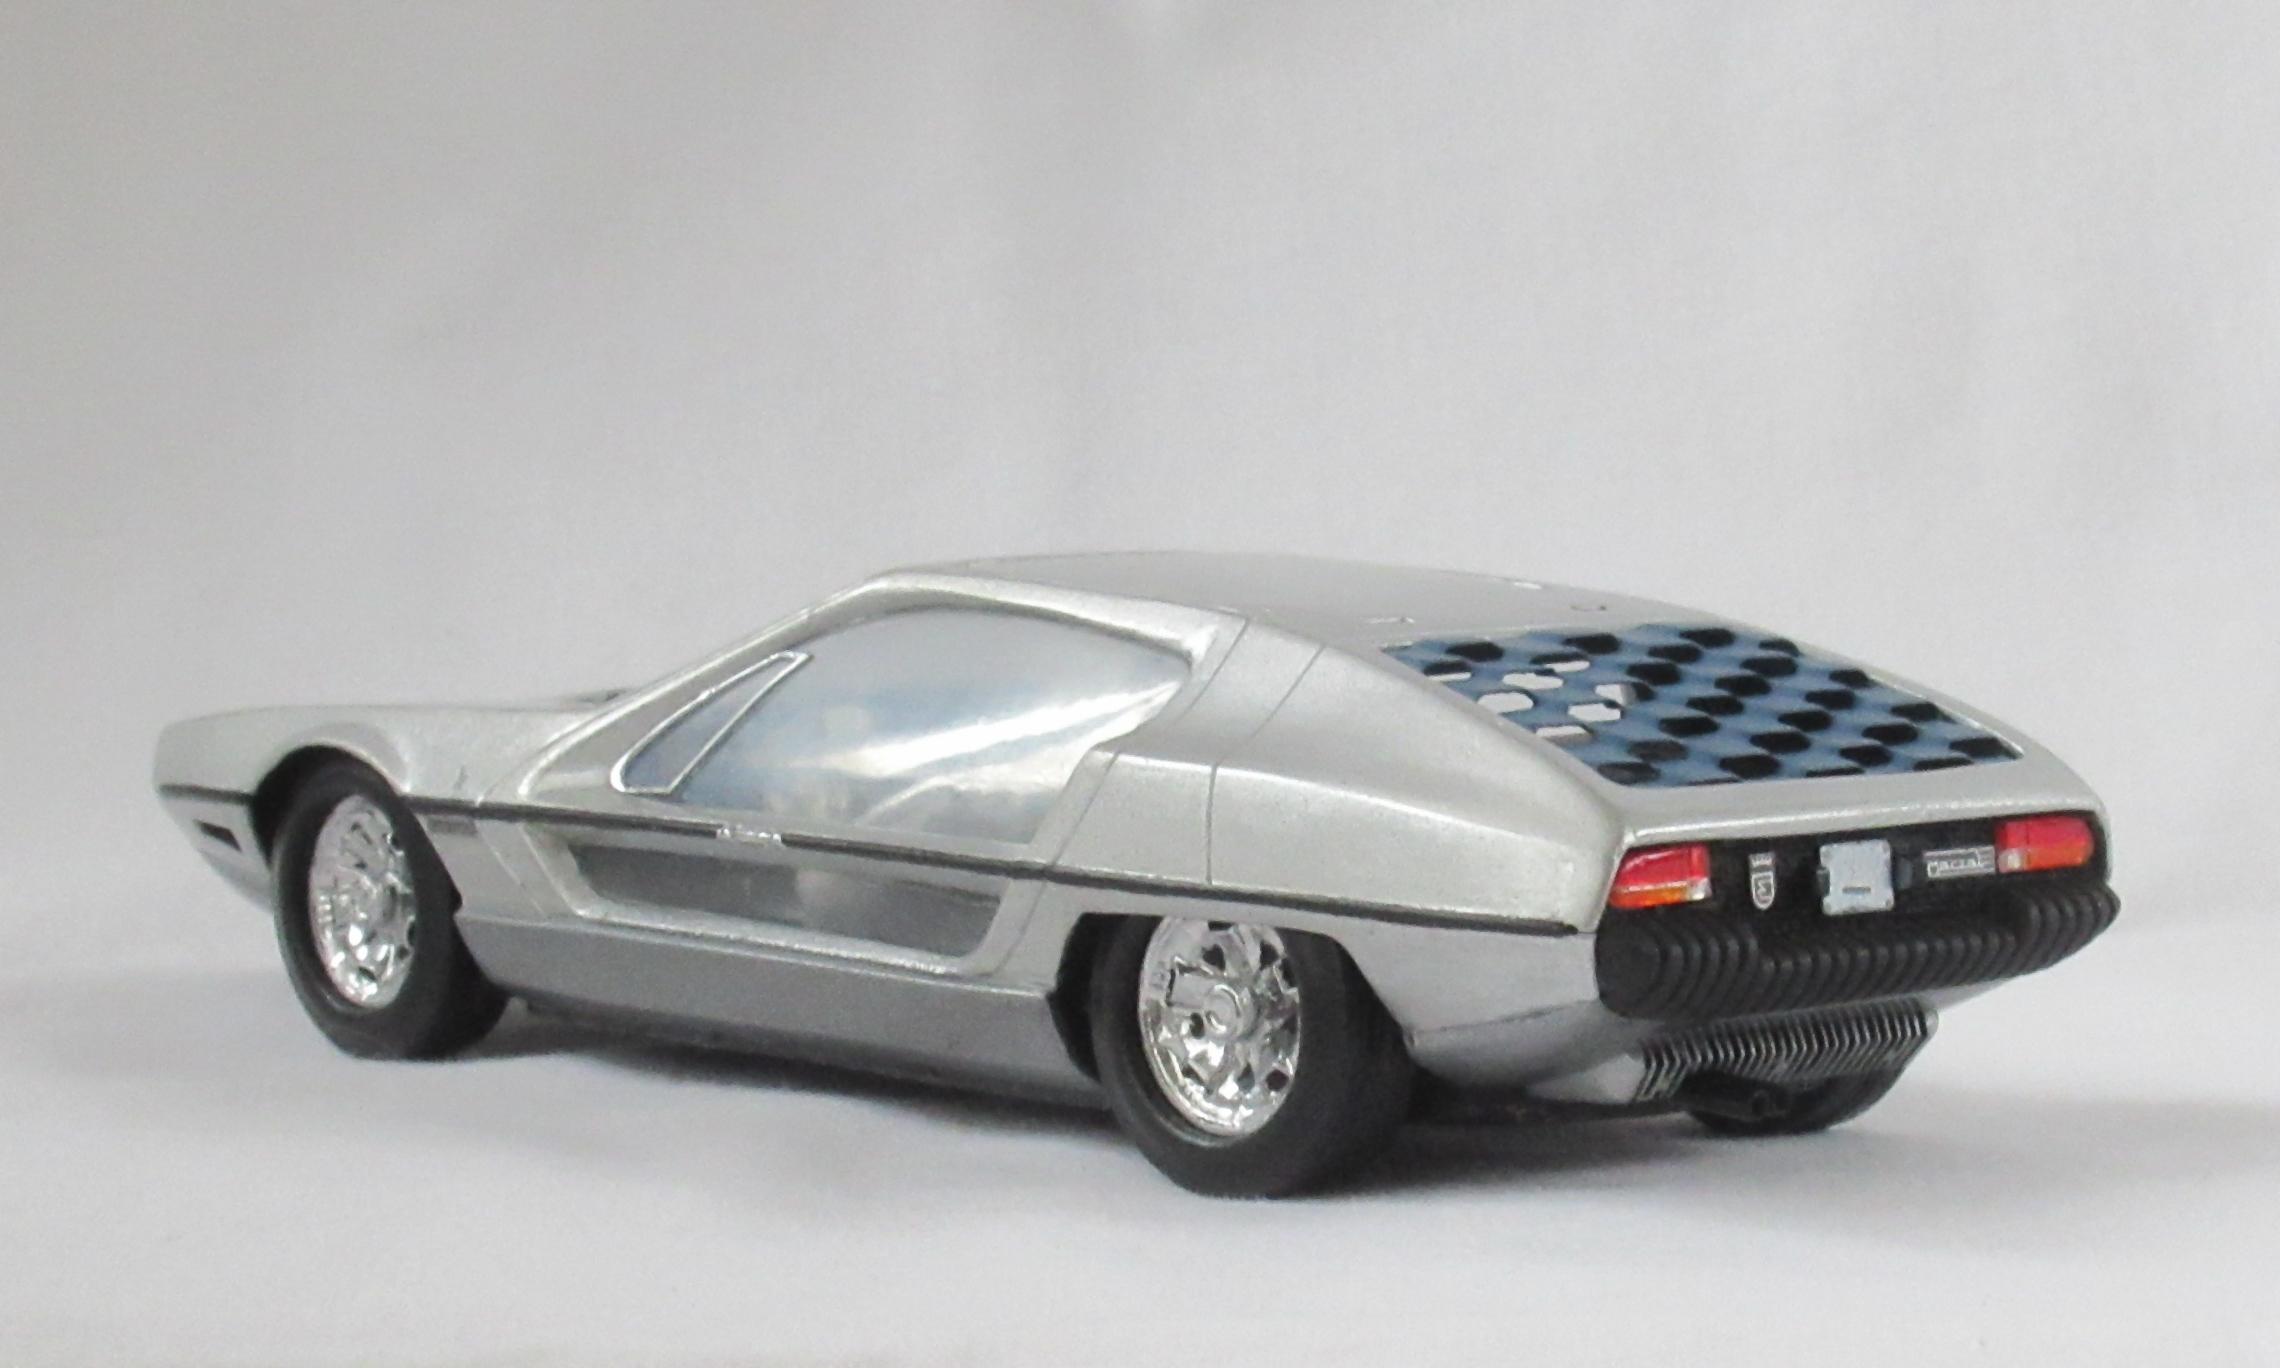
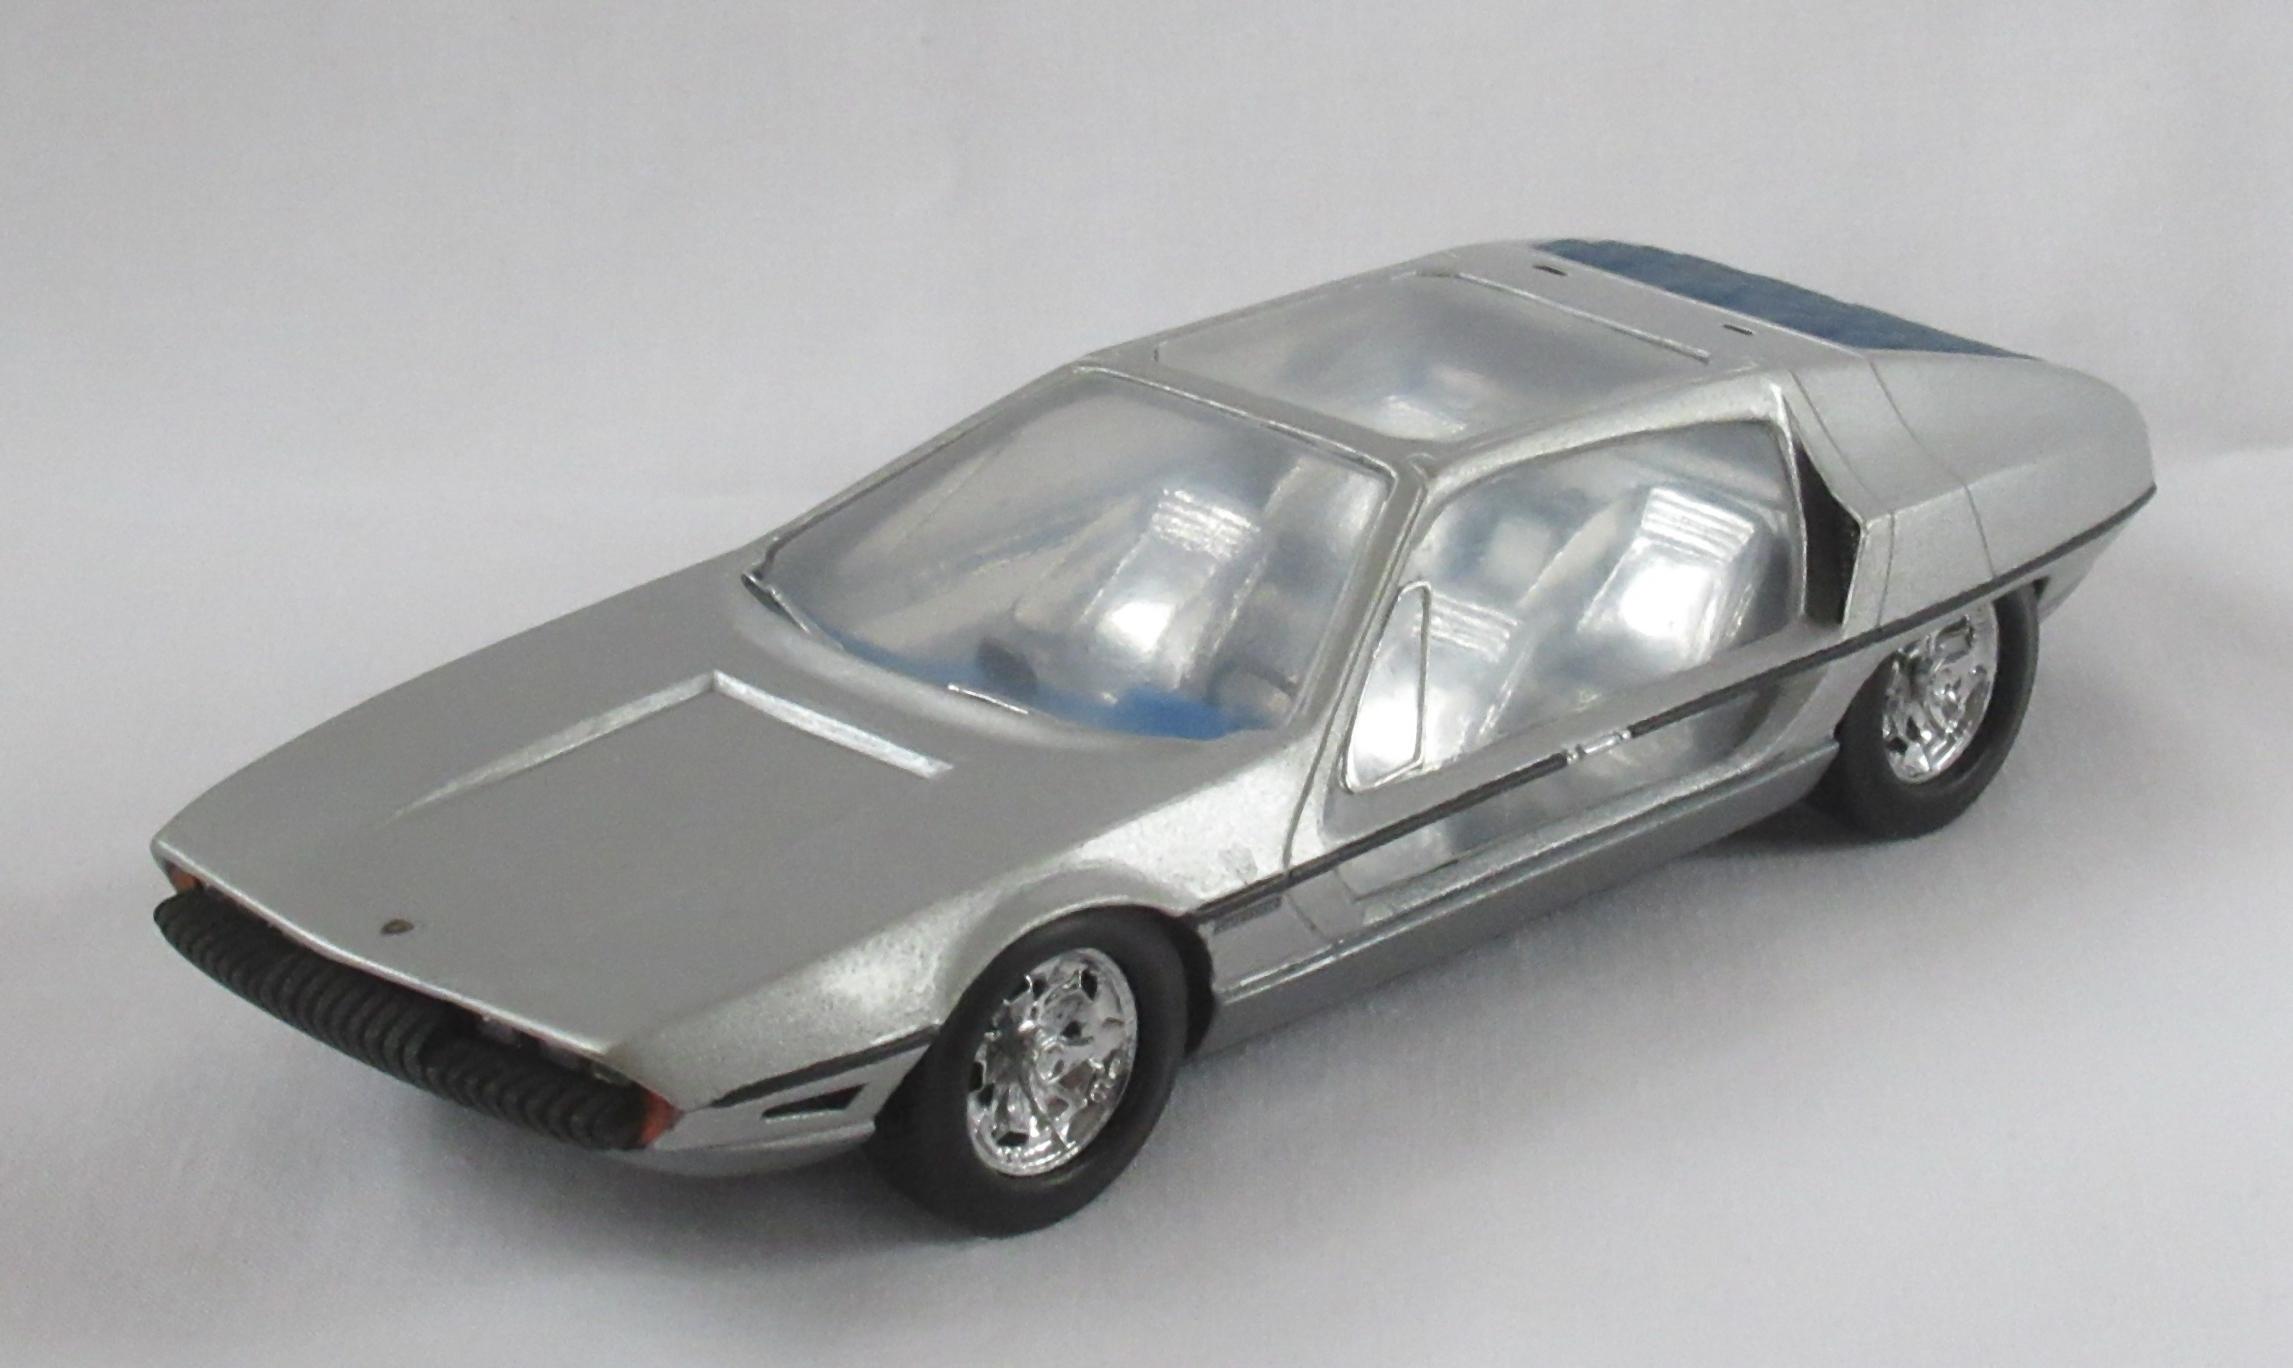
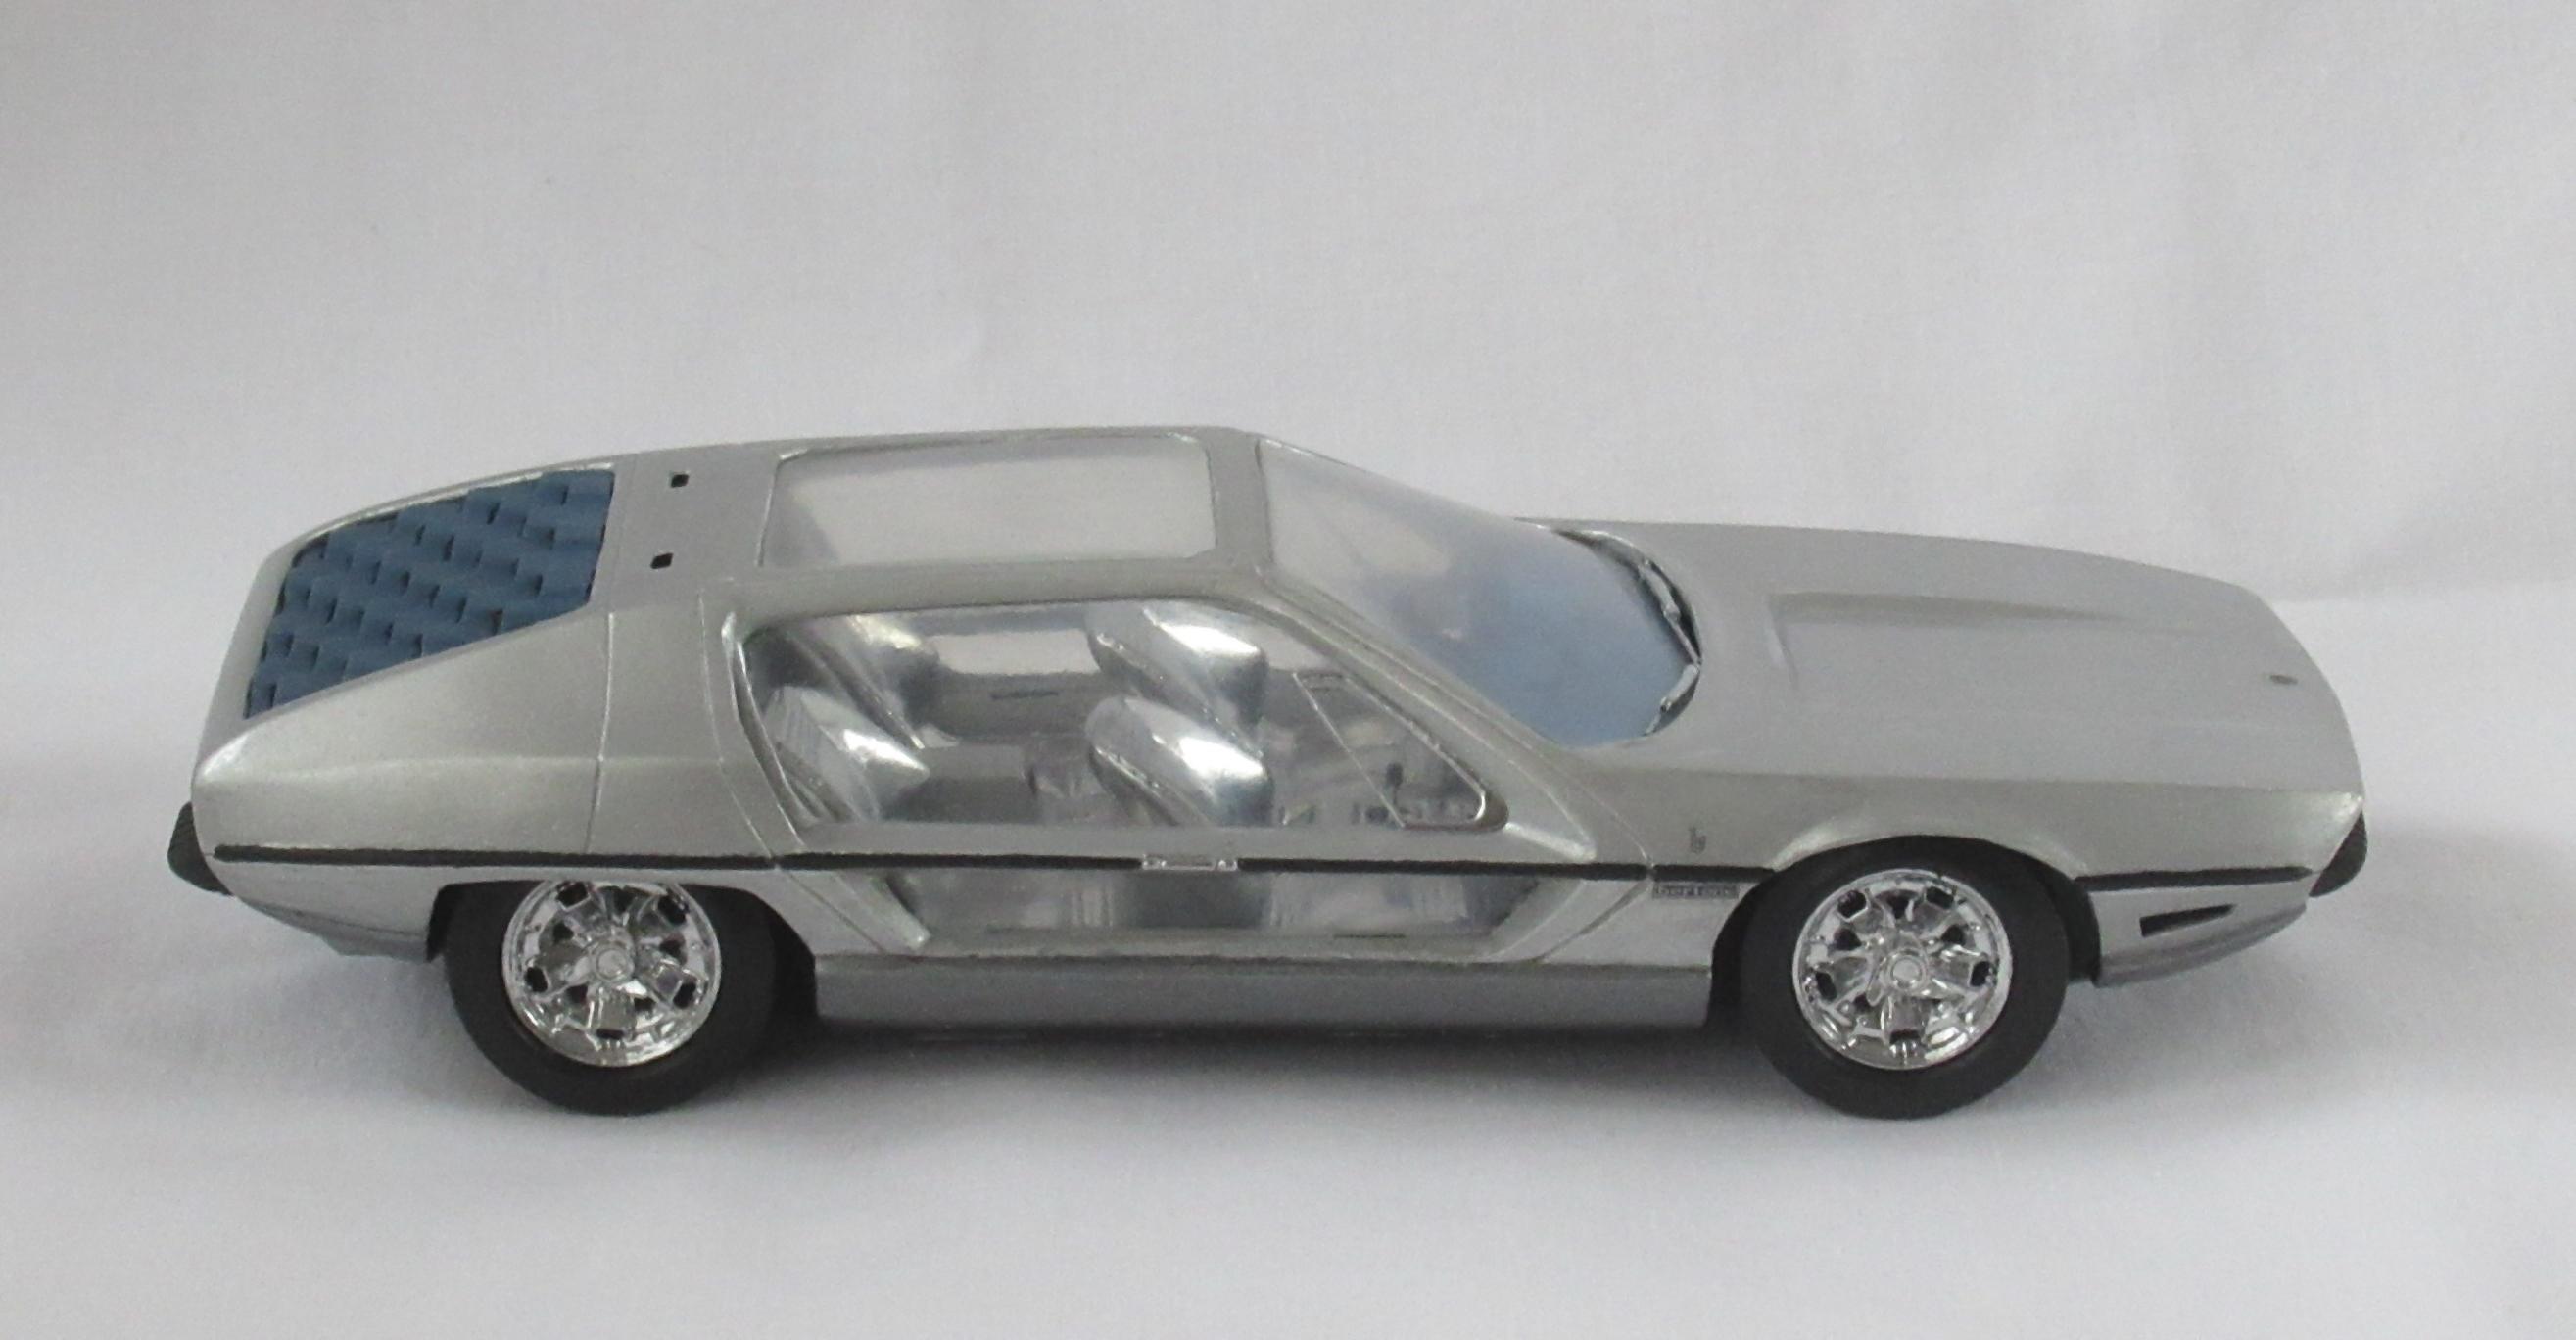
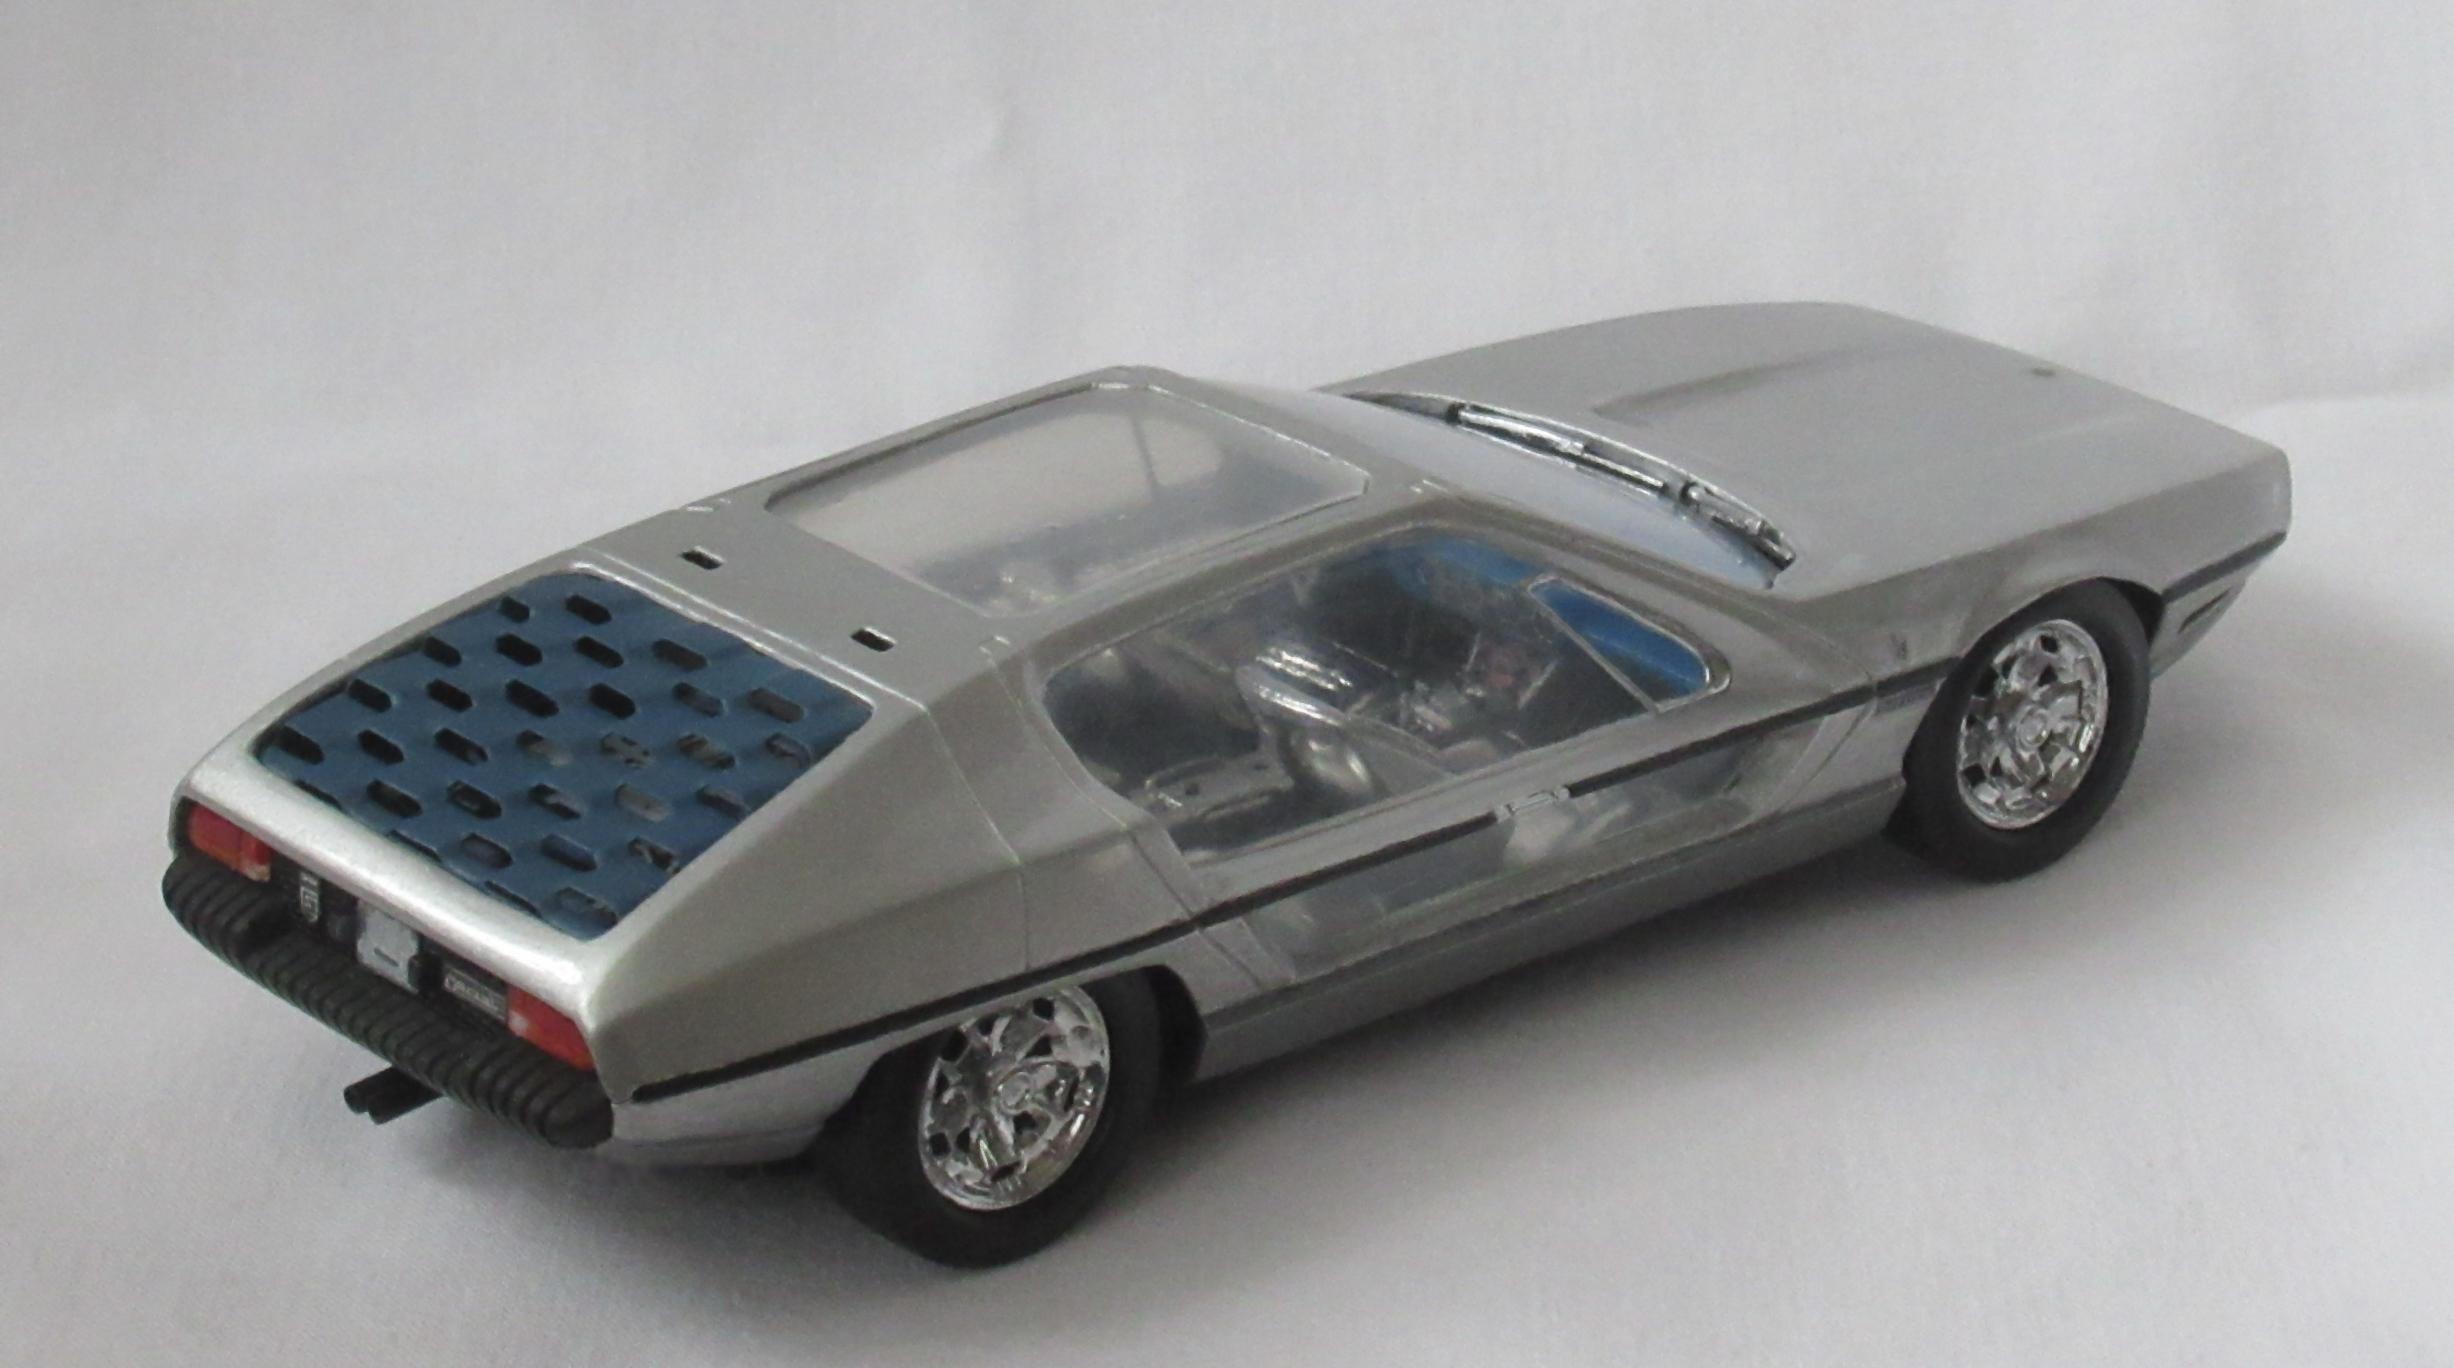
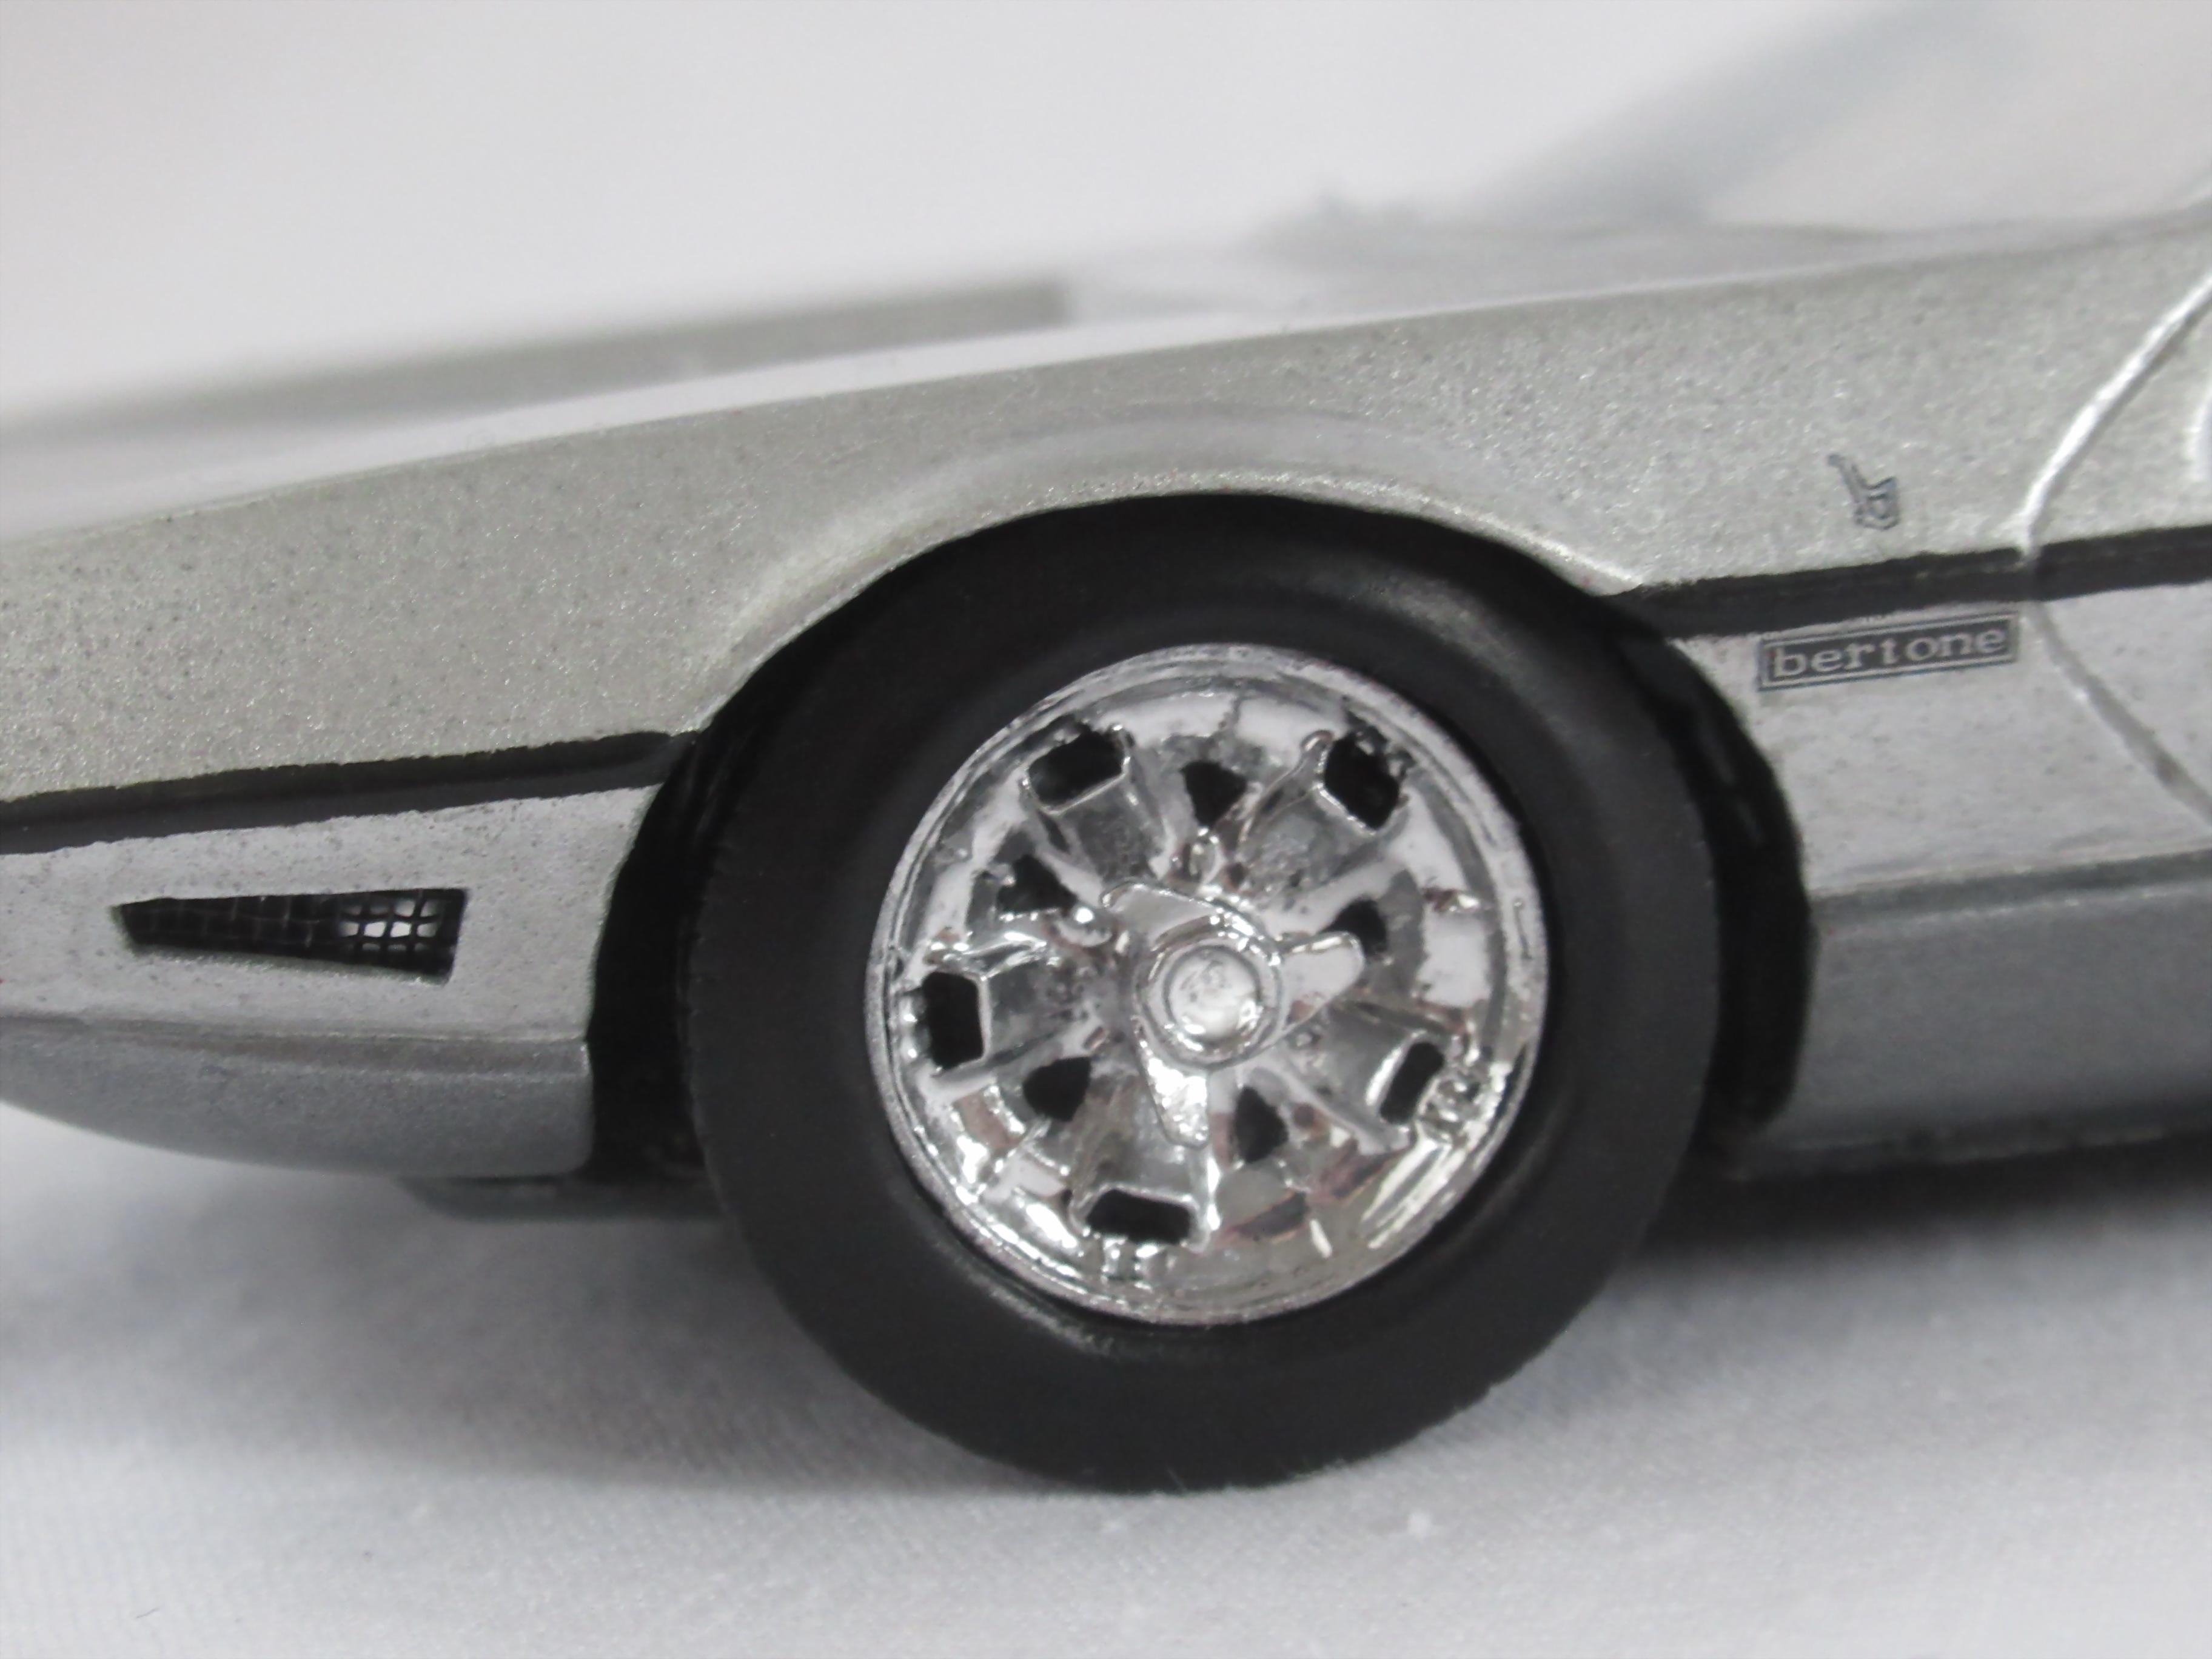
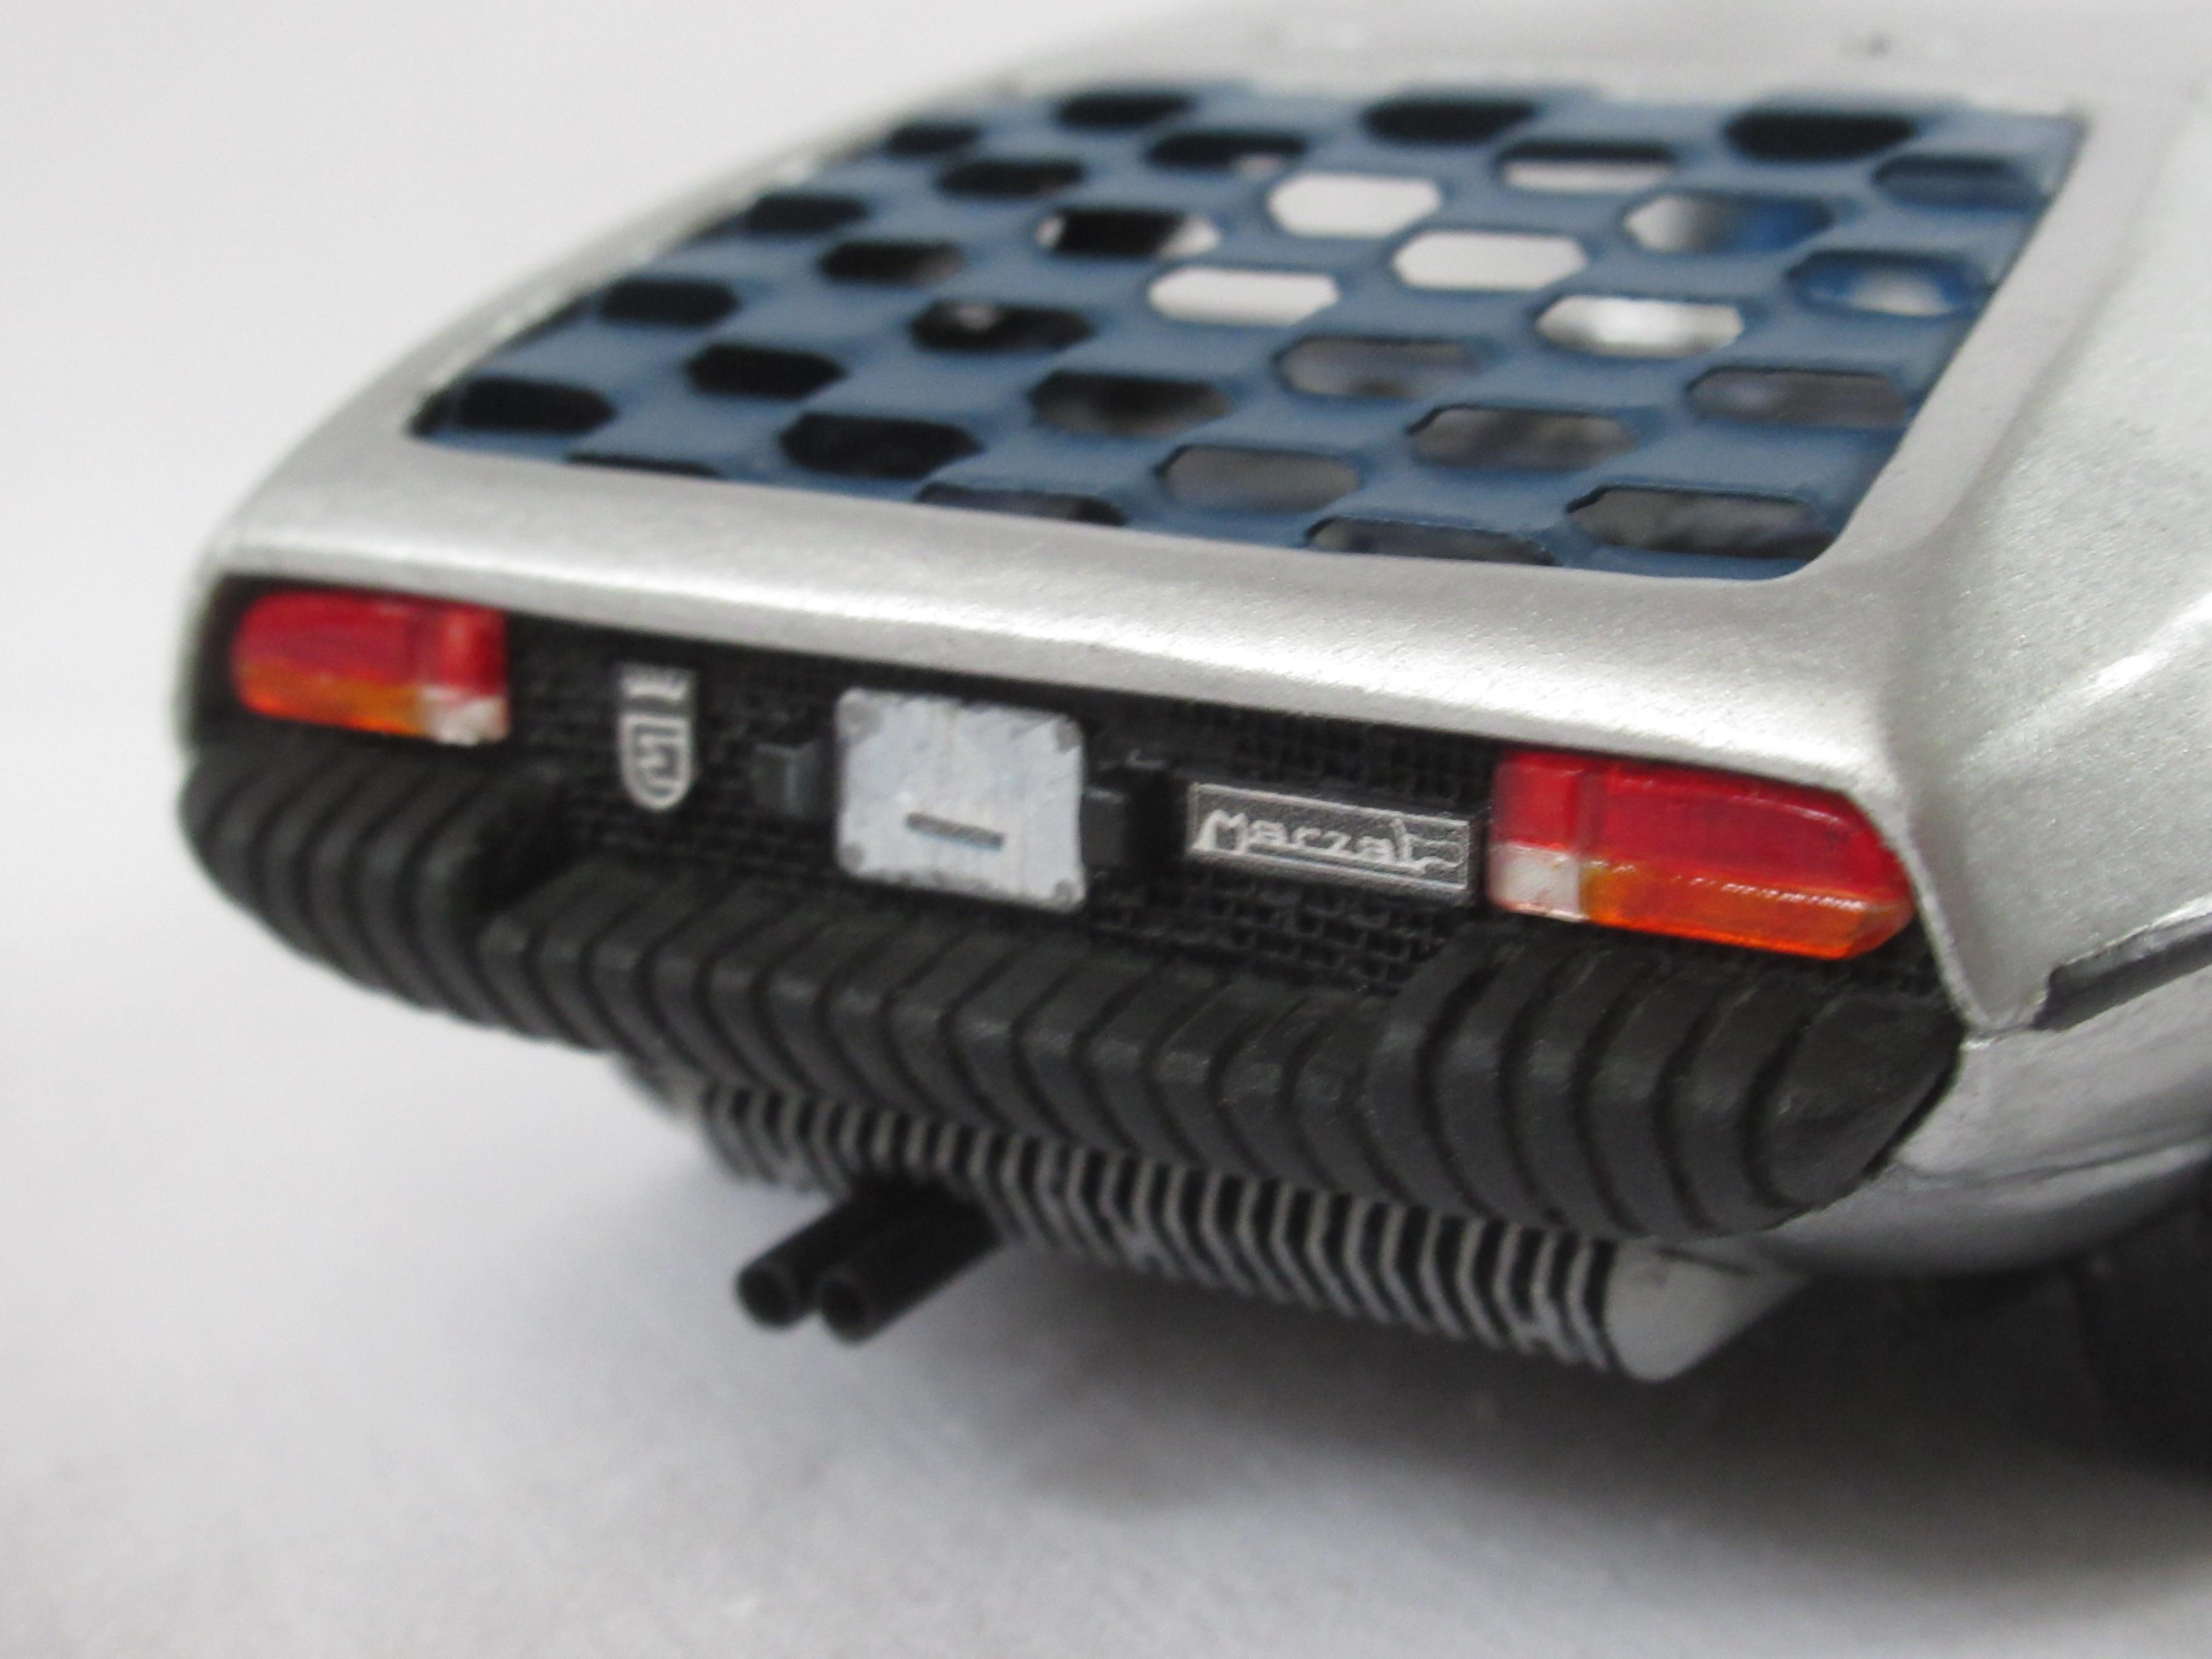
I collect mainly 1:64 (in truth between 1:50 to 1:80) sportscars, concept- and showcars, coupes, cabriolets, nobel cars (Rolls Royce, Bentley, Cadillac...) some racecars (F-1, Can-Am, Groupe cars) and some 1:24 from the same categories. I like to restaurate the havy playworn ones and "customize" mainly by painting/decaling. Few times I modify some of tham to more realistic. The collection is near to 3000 pc and have only few duplicates. There are items from 90+ manufacturers - of course Hotwheels, Matchbox etc. On the other hand I made models in 1:75 scale (first curved from wood later "built" from plastic/resin/metal/rubber parts together) which ones were not manufactured by toy/model maker companies. My last work and the first in 1:24 scale is the Lamborghini Marzal. (check out Under Glass: WOLOMOPRO - World Longest Modeling Project)
-
Hi Martin, thank you very much the nice comment. Yes I`m a little bit proud but mostly happy to completed the model. It was on my workbanch aside the field of action and looked with blame me for waiting so long. Now it can not blame anymore ! ? Best regards: János
-
Hi Alan, thank you for your nice appreciative words. I built some plastic kits during my decades. But I can imagine how hard could be the work of the engineers who are plan and do the kits with that accuracy really only now. It seemed who commented and probably the most of the visitors have the Matchbox Lamborghini Marzal - I have the metalic red too ! Best regards: János
-
Hi, thank you guys for the comments. Hi Claude, happy you have nice memories with Lamborghini Marzal. I know a similar one as yours was manufactured by Dinky Toys 1:43 with hinged front and rear. This is probably the best toy Marzal !
-
Hi Sonny, thanks for the nice comment. The model is 1:24 scale. The use of wax for molds isn`t my „contrivance”. I remembered that wax was used during making master pieces for casting bronze statues in ancient Egypt and in the middle age for bells too.
-
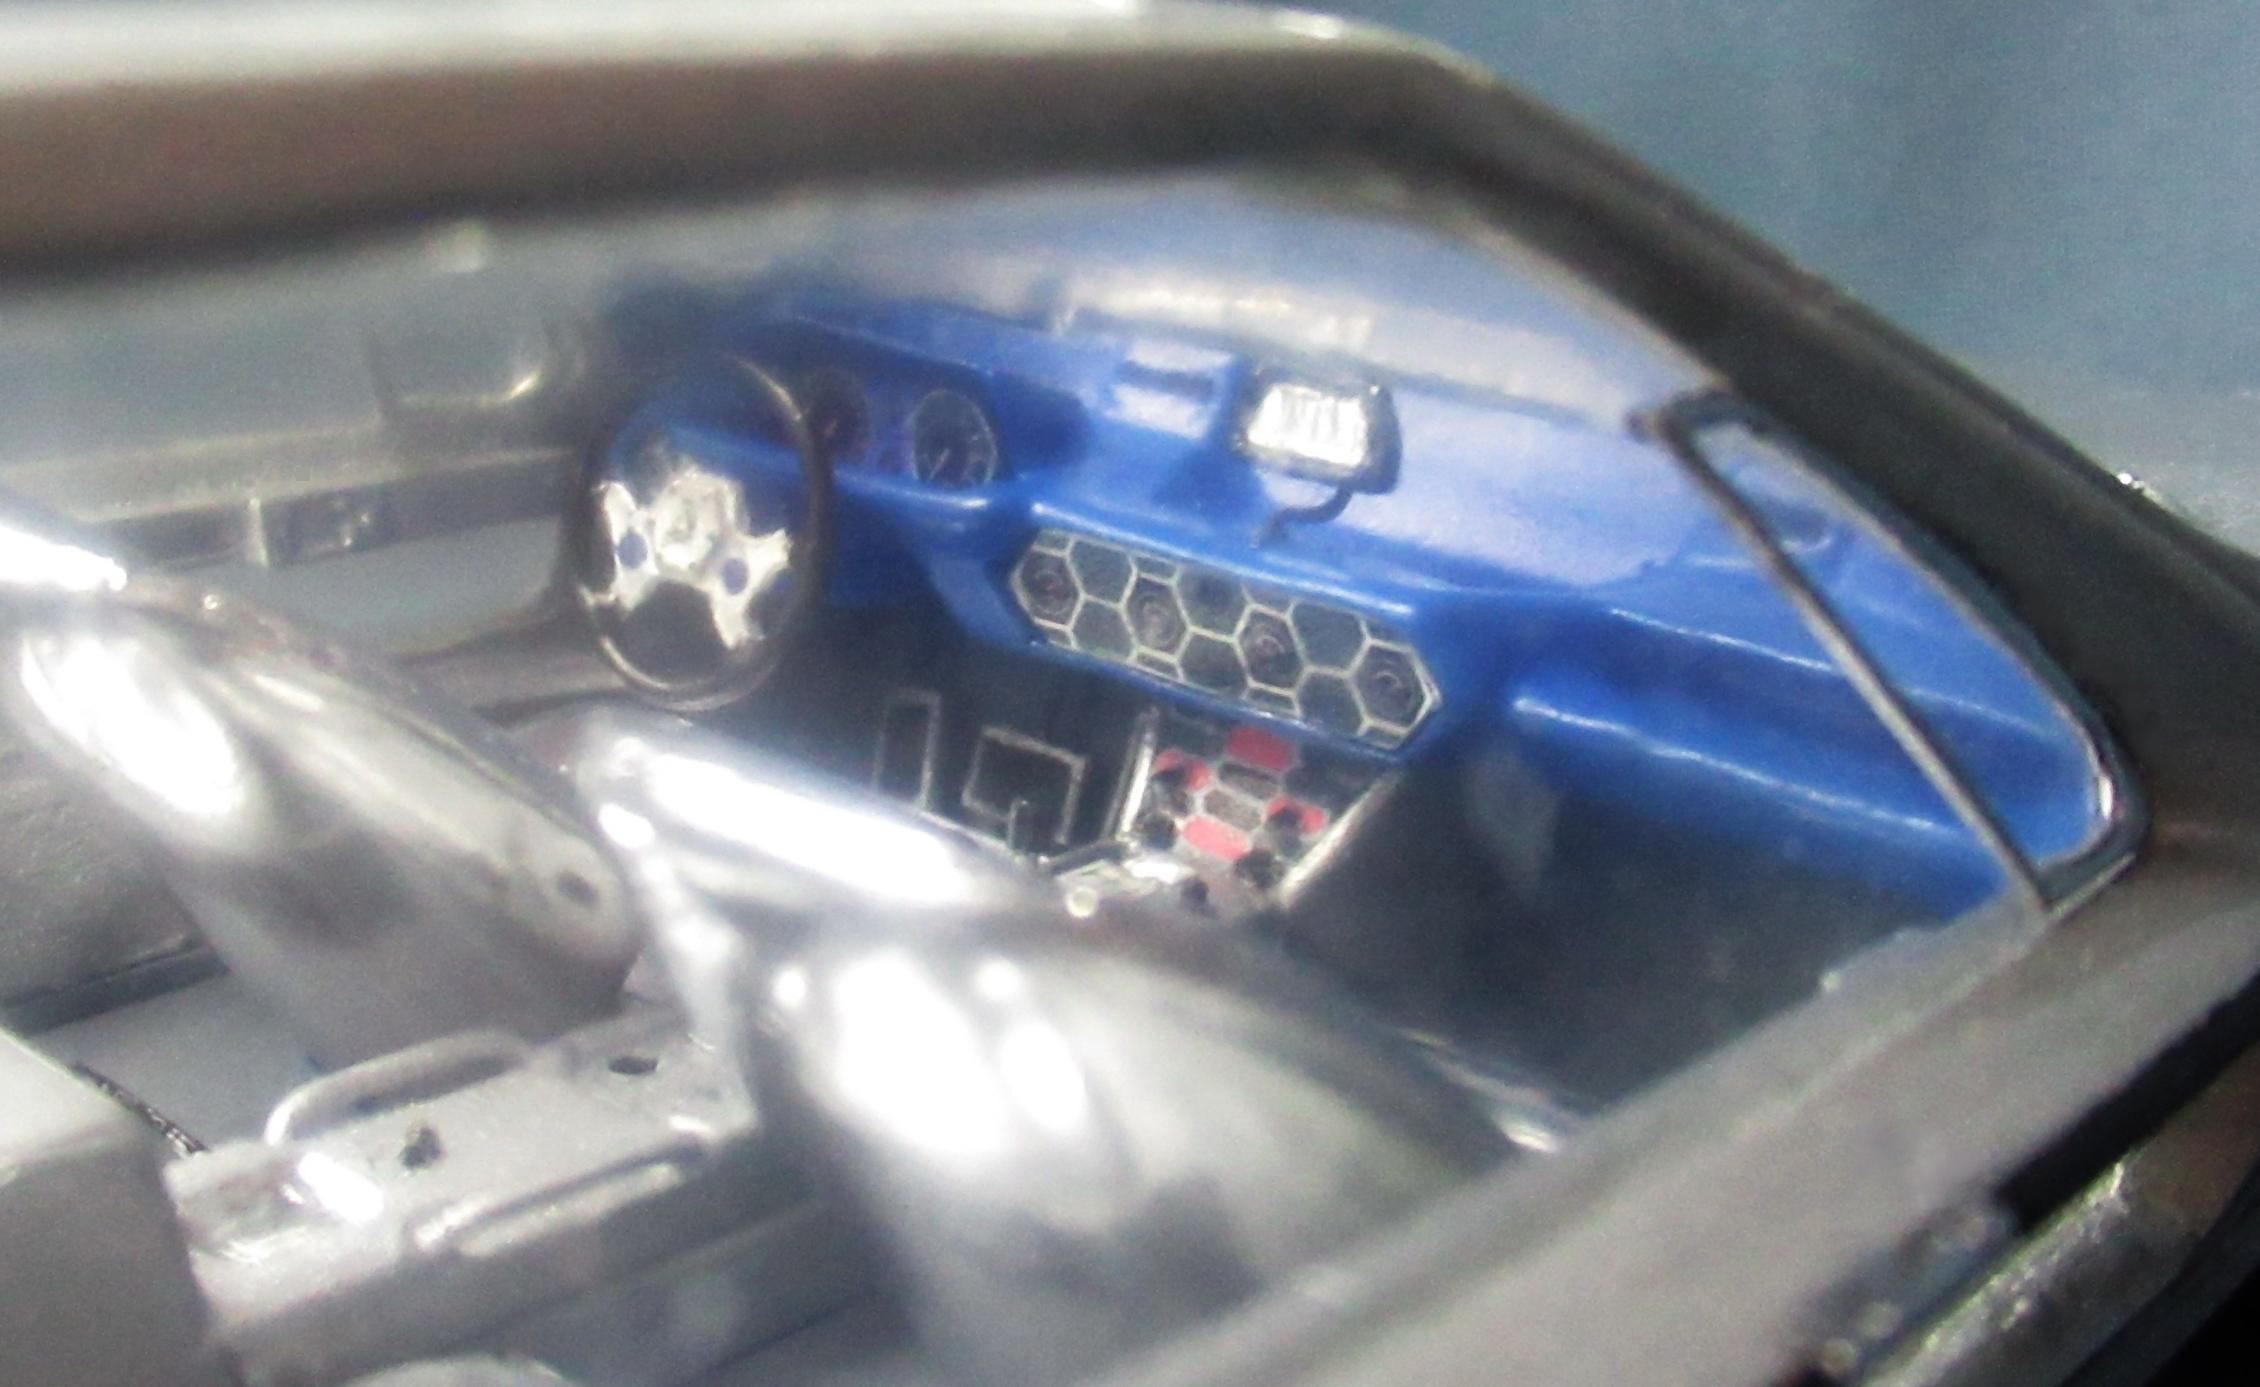
Finally I managed to make an inside picture half way acceptable. The plastic of the window made the distortion. Alas all of the windows are doing the same.
-
Thank you for the nice comments.
-
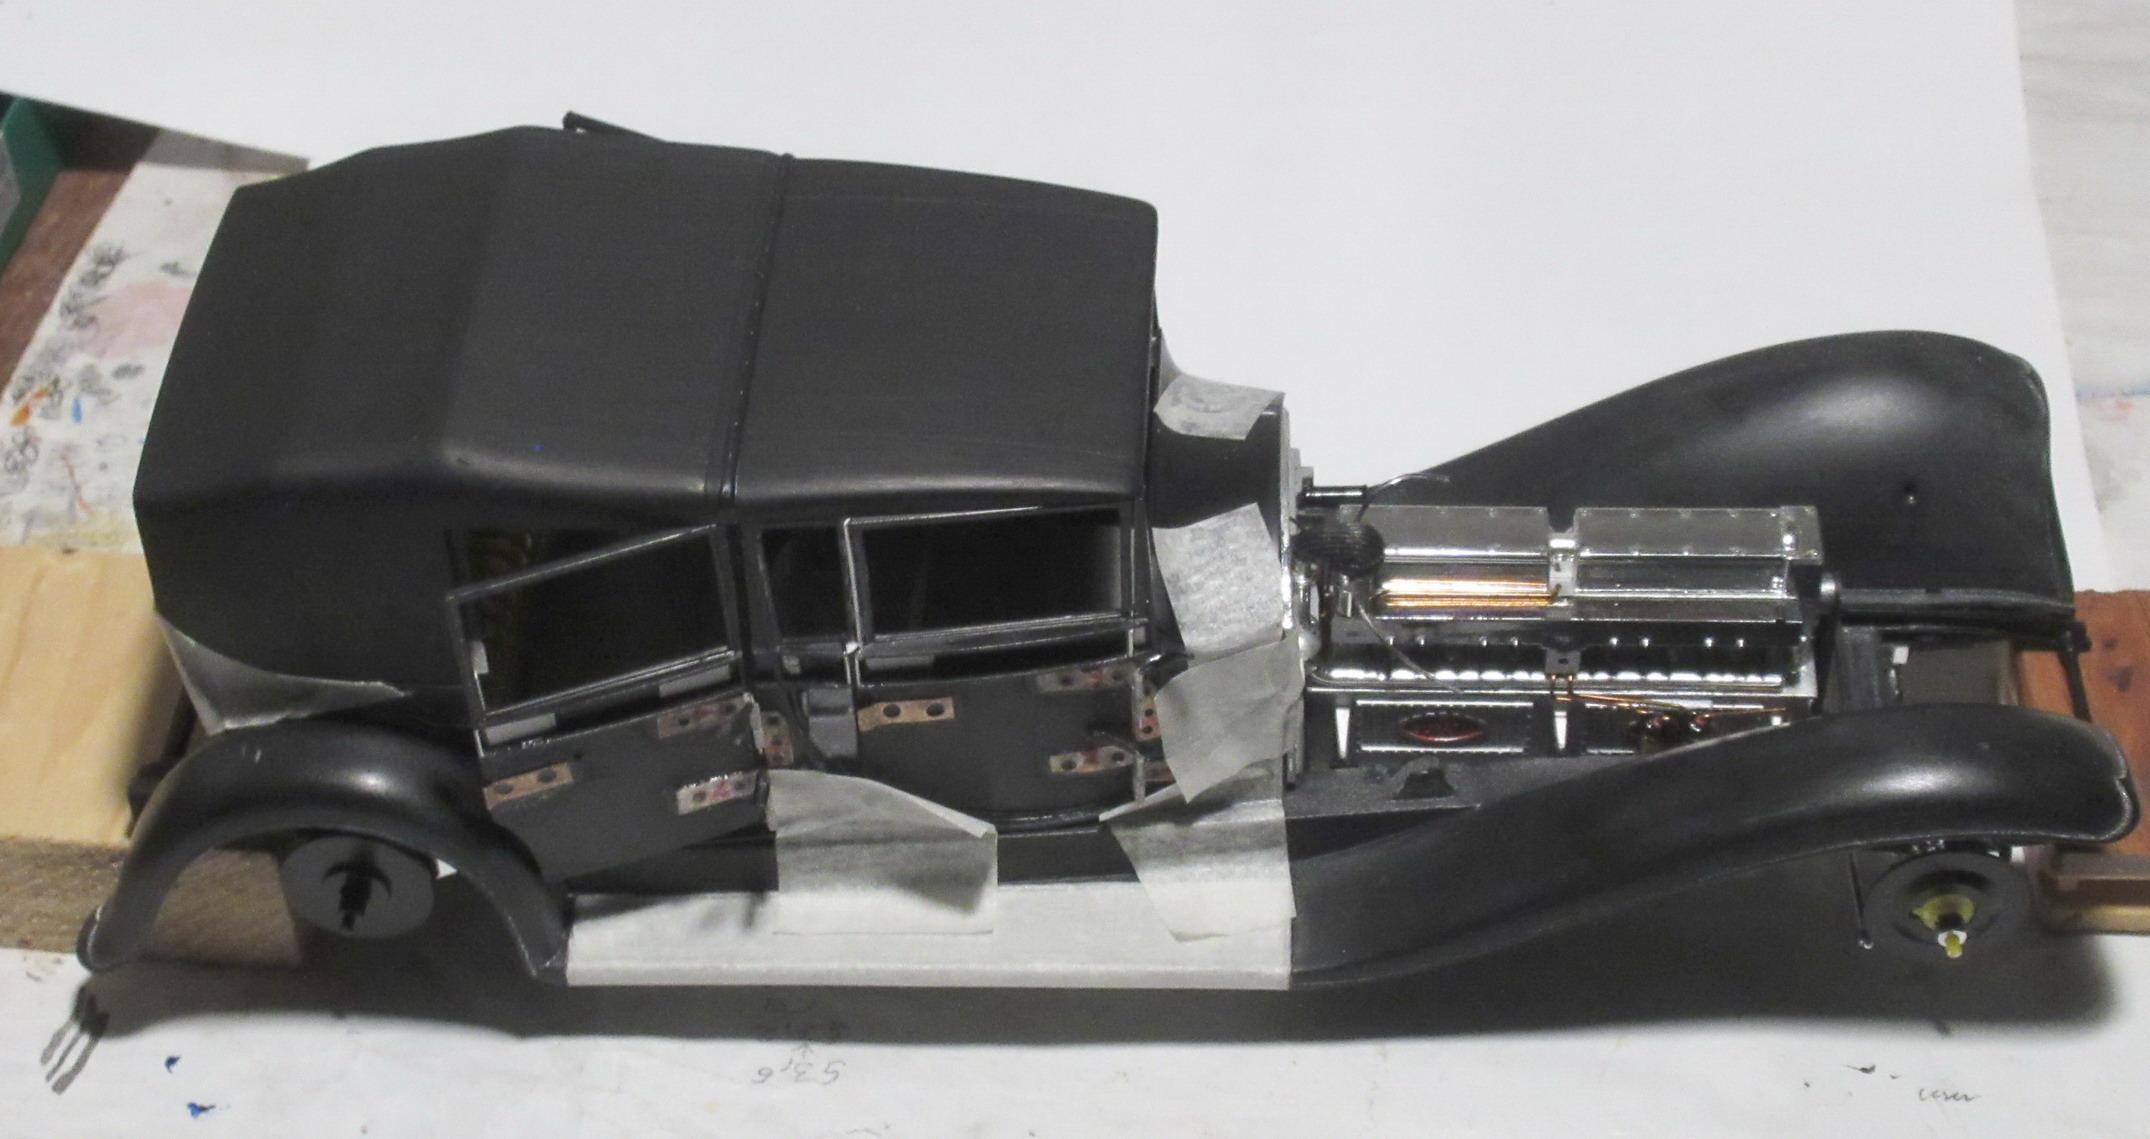
WOLOMOPRO say Worlds Longest Modeling Project: It began in early 1968 as I saw first time pictures of the Lamborghini Marzal in the hungarian Auto-Motor magazine. I fell in love with in no time. I was a young draftsman and I made the 4 views based on the photos and main dimensions. And with my ambition to be ones an auto-body designer. Naturally my goal was to make a model . I took a block of polystyrene foam (insulation) and curved the body. My idea was to laminate some layer of newspaper with epoxi on the surface and remove the polystyrene foam after . But this would give a very thin lamella so I cut grooves first in the styrene for drag-wires glued with the same epoxi. After some sanding the body looked better as I hoped. In the 70`s I started to make dashboard, front and rear panels with rubber bumper, etc. I came to realize before long that windows should be made too. But I had no idea what material can I get and with which technology can I make this huge windows. The initial momentum die down slowly . At end of the 80`s I made seats with similar method as the body and tried to make wheels but I couldn`t make the fine details. During the 90`s could gear my workshop with more and more tools and my technological knowledge broadened materially. So I could make the wheels higly detailed. I made a negativ by candel wax from the wheel had been made formerly and scratched the details negativ in wax. After than I dilute the mixed epoxi by nitro thinner and „painted” the form inside. As the nitro evaporated I molded with normal epoxi much like a pasta. Next I copied a tyre and made „rubber” tyres by black silicon sealing-compound. Since I retired have more time. I made a little vacuum table and made more windows for 1:64 and similar. The only problem of Marzal remained the window furthermore. I coudn`t found any water-clear plastic for vauumforming. Before 2- 3 years my son asked me why don`t make the Marzal ? I told him the problem. I visited him January 2020 and FOUND material ! As I finished the Bugatti Royale Berline de Voyage I gone on the Lamborghini Marzal projeckt to finish. With the help of reference pictures I could make many details. What I made during the 5 decades was not all of the parts good enough . So I could use only the body, dashboard and the wheels. The other parts must be corrected or made new. Totaly I build the model from 234 pieces - scratchbuilt, molded, printed, curved, cut, bended or vacuum formed and plus 4 pc pins from 1968. (they are the axles) The body upper half painted with Strato Silver the under one with Nimrod Grey metalic by Holts Repair Paint. The inside is brush painted with Revell Aquacolors. Chrome made by Molotow pen. (I apologize for my poor english)
-
I enjoyed the pictures. Great job with the kit and what is more to open the doors. I was "infected" with the idea to open doors (or anything else what to open on a car) by a friend of mine before many years. I`m glad to see that you got this "infection" too ! IMO the openeable doors, etc. are an important part of our endevour to make a model lifelike as far we are able to do.
-
Wonderfull model, great job. The colour combo is very nice. Congratulation.
-
I like it ! Very nice !
-
Hi Bugatti Fan thanks for the nice comment. I used the Revell Aquacolor paints. It is a waterborn paint easy to thin by water. (I found on Internet the advise to thin with vodka - good joke)
-
Hi doorsovdoon and drodg, thanks for the nice comments. The paint job was a really challenge. After more experiment my solution is: forget the Gloss colors except the Clear one. I painted everywhere with Flat colors, more coats than sanded with 800. But forget the wet sanding only dry. That mean use open grain sandpaper and after a short use always clean the paper from paintdust by a hard brush. If necessary repeat flat coats. If OK 1 - 2 coats of Flat again and sanding with 1200. The final coats are Clear Gloss. More coat is better because you will need again sanding. If the surface rough sand with 800 than 1200. Finally polish it as fine you like it. (attached photo shows the body lower part sanded before clear coating)