72 Charger
-
Posts
2,736 -
Joined
-
Last visited
Content Type
Profiles
Forums
Events
Gallery
Everything posted by 72 Charger
-
TAT RoG Wrecker
72 Charger replied to Madd Trucker's topic in WIP: Model Trucks: Big Rigs and Heavy Equipment
Any pics ? -
1969 Dodge Super Bee HELP
72 Charger replied to 72 Charger's topic in Model Building Questions and Answers
Jon I am just getting in to MOPAR's really . I'm on my 8th or 9th one now and I cant get enough of them . I own a 1/1 1972 Charger as my first car and I love her . She's not a Super Bee just a base model but hey its a Charger and over here its rare . I'm trying to push myself in to doing more detail on my projects . I was originally just baffled by the instrutions as one drawing shows the filler on the left and in the next one it was on the right . I guess the artist was not a MOPAR fan -
Flash looks at home in there John . Coo choo choo
-
1969 Dodge Super Bee HELP
72 Charger replied to 72 Charger's topic in Model Building Questions and Answers
Thanks guys for all your help . I am going to alter the covers to be correct -
1968 Plymouth Roadrunner COMPLETE 2-19-2017
72 Charger replied to 426-Hemi's topic in WIP: Model Cars
That's a stunning shine on that John . Looking forward to the finish -
1969 Dodge Super Bee HELP
72 Charger replied to 72 Charger's topic in Model Building Questions and Answers
I cant upload a pic at the moment ? Too big . I understand what you are saying Ed. But my kit parts clearly has one smooth cover and one with a breather and oil filler ? I did find a pic on the net that shows the same set up bet that's too big too So I'm even more confused now! -
John I had read about you accident but I didn't know to what extent your injury stopped you building models . Looking at the skills you have I thought you had fully healed
-
1969 Dodge Super Bee HELP
72 Charger replied to 72 Charger's topic in Model Building Questions and Answers
Well after a day of research I have come to the conclusion that the valve covers are from the 70 Super Bee not the 69 . The 70 has got the breather and oil filler on the right bank and a smooth cover on the left bank -
1969 Dodge Super Bee HELP
72 Charger replied to 72 Charger's topic in Model Building Questions and Answers
Thanks Snake . So far the ones I have looked at show the breather on one valve cover and the filler on the other . Not as the kit has them both on one cover. Also the shape of the covers are different on the 1/1's compared to the kit . -
Hi all I am in the proses of building the engine for the 69 super bee and I have a problem with which way round do the valve covers go ? in the instrutions one pic shows the smooth cover on the left bank and in the next one it shows the oil filler and breather on the left bank and the smooth one on the right? So which is it ? Please someone put me out of my misery Thanks Dave
-
I know what your saying about that chassis John it truly is a shockingly bad fit. Looking good so far BTW you still need to BMF the door handles
-
Beep Beep LOL That is nice Jim
-
I was wondering that too . Who do you get MCW paint through in the UK ?
-
1968 Plymouth Roadrunner COMPLETE 2-19-2017
72 Charger replied to 426-Hemi's topic in WIP: Model Cars
One step at a time John every little helps -
Road Race/Pro Touring Cuda - Project "HELL BOY”
72 Charger replied to Mopar426's topic in WIP: Model Cars
I think it look great carry on -
Autocar DC9964?
72 Charger replied to guitarsam326's topic in WIP: Model Trucks: Big Rigs and Heavy Equipment
Looking good Sam -
Looks cool it reminds me of the Road kill Challenger
-
Mack DM600 Crane Truck 1/25 MPC
72 Charger replied to dragstueck's topic in Model Trucks: Big Rigs and Heavy Equipment
They are fibre glass . Although that does look like rust to me to -
Mack DM600 Crane Truck 1/25 MPC
72 Charger replied to dragstueck's topic in Model Trucks: Big Rigs and Heavy Equipment
Fantastic work . The only thing I see wrong with it is the hood would not rust ....! -
Love the colour . But I'm not sure about the wheels. Maybe a black wash would tone them down a bit...
-
Any progress John ?
-
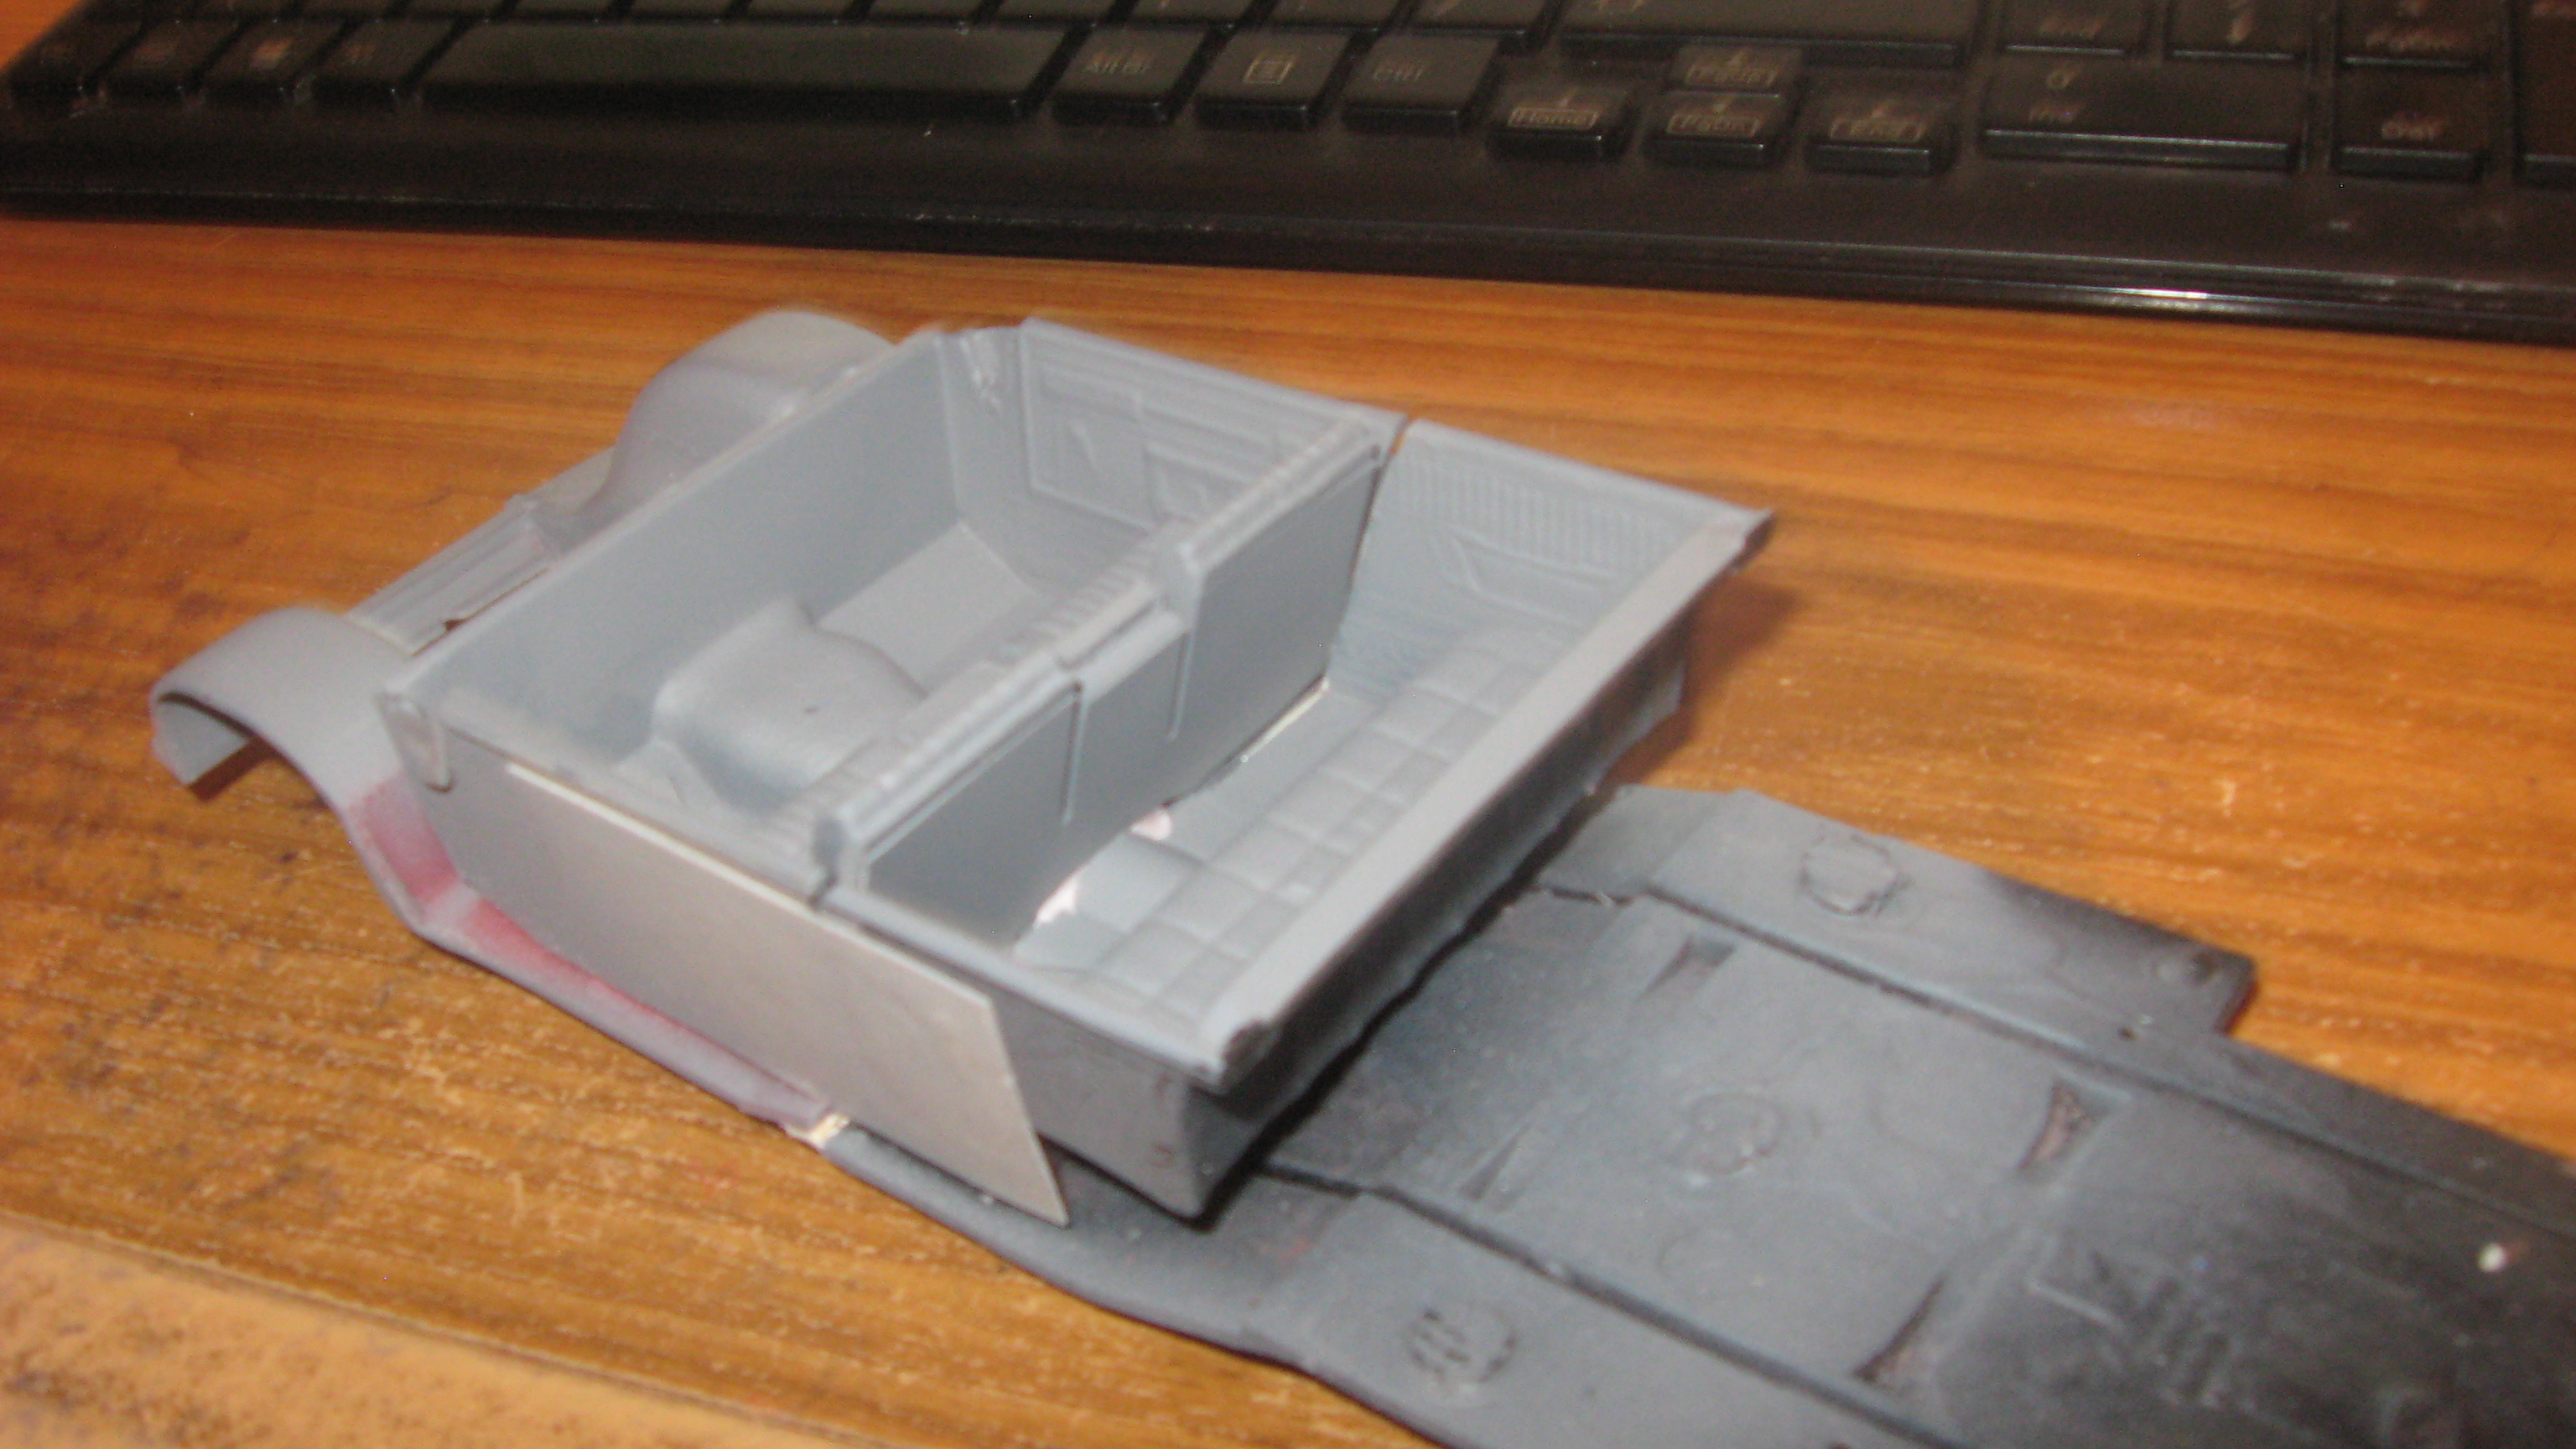
Sorry John I don't but if you look at the first page the pics should give you an idea. I can tell you that the rear doors should measure 33mm from the back of the door to the cut line which follows the door shut line . I then stepped the cut to back to get the shut line right like the real truck. With the interior's I cut the front door at an angle to match the rear of the front seat and butted them together . I hope the pic shows you where the cut was made . If you look at the chassis you can just see where the chassis was cut . I removed the trans tunnel hump and replaced it with a straight tunnel I hope this helps you with your future build

-
Firstly welcome secondly wow that's a nice OLDS . If you go to the aftermarket page you will find a load of useful sites for almost anything you could need .
-
TAT Transtar 5 Car Hauler DONE
72 Charger replied to kilrathy10's topic in Model Trucks: Big Rigs and Heavy Equipment
Just messin with ya . Happy birthday BTW -
TAT Transtar 5 Car Hauler DONE
72 Charger replied to kilrathy10's topic in Model Trucks: Big Rigs and Heavy Equipment
Fantastic work JT . How would you go about changing the rears on that ?