Karl LaFong
-
Posts
335 -
Joined
-
Last visited
Content Type
Profiles
Forums
Events
Gallery
Everything posted by Karl LaFong
-
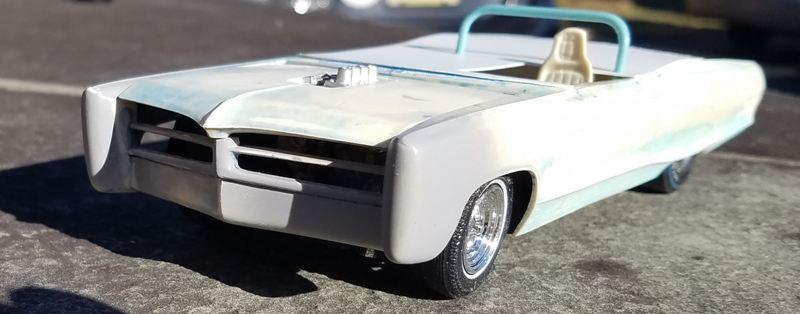
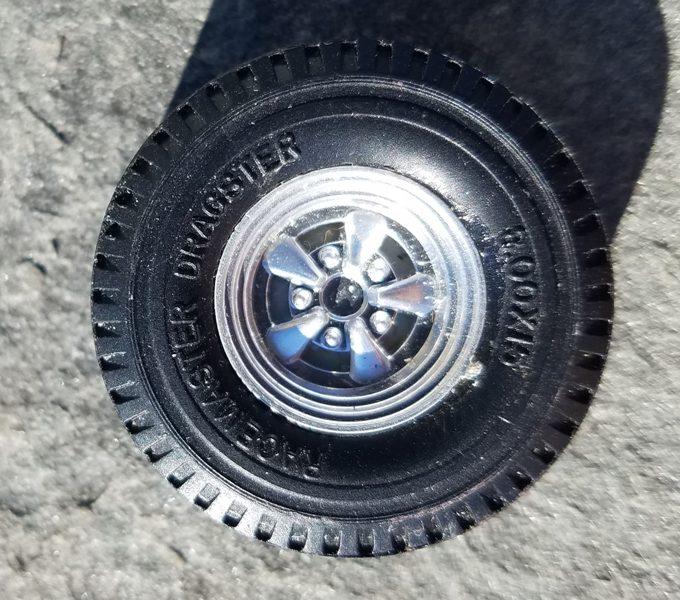
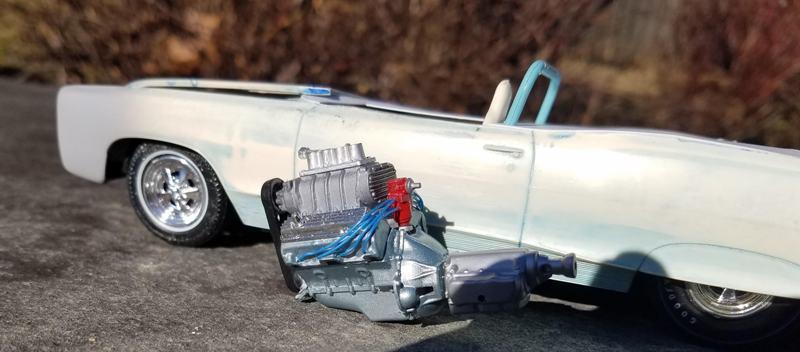
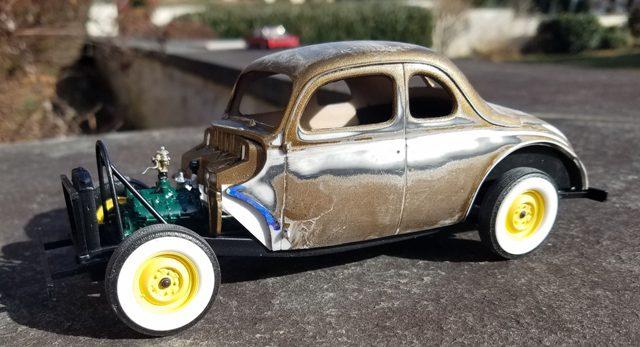
Even when I was 11, I was drawn to cars that shouldn't be race cars - there just something about a land yacht as a dragster that I find appealing. This MPC 1966 had a cloth tonneau cover, cut down kit hood scoop, Winfield Terra Thrust mags, and three distinct exterior colors : green, orange, and, considering the difficulty I had removing it, an AMT dark blue lacquer. I stripped the paint, added a tonneau cover from sheet styrene, molded the front pan, and dug out some Terra Thrusts from one of the newer issues of the AMT 1925 model T. The front tires are 60's survivors; the rears are new Goodyear Bluestreaks (I wish we had tires this nice back in the 60's). The engine is a Revell parts pack 421 Pontiac, the seat is a custom seat from the Bonneville from which I had to strip yellow Funny Fur, the roll bar is from the Revell "Miss Deal" kit. I need to primer the body and repair any (or many) rough spots. I think the final color will be Testor's Emerald Green metalflake.

-
 For me, doing a (semi) clean version of a vehicle is a challenge!
-
1940 Ford Jalopy race car
Karl LaFong replied to Karl LaFong's topic in WIP: Other Racing: Road Racing, Land Speed Racers
Done! Completed photos are in the Under Glass section. -
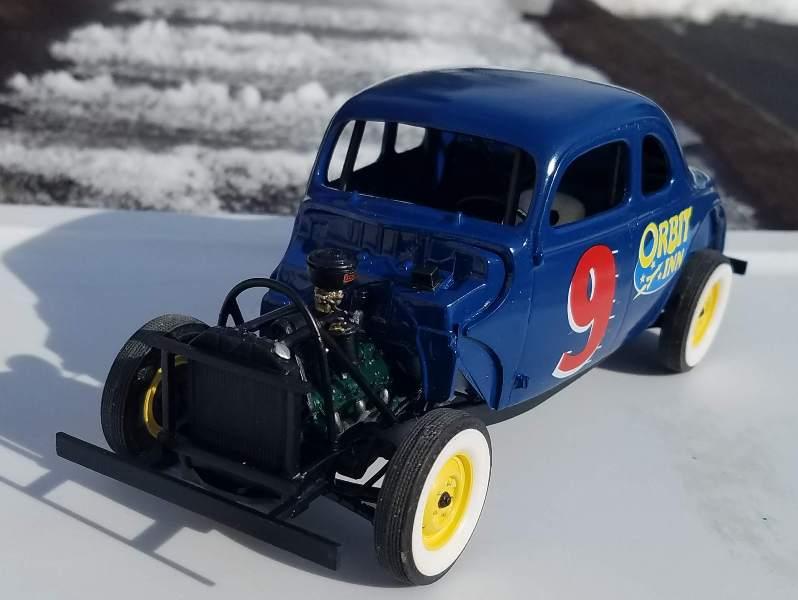
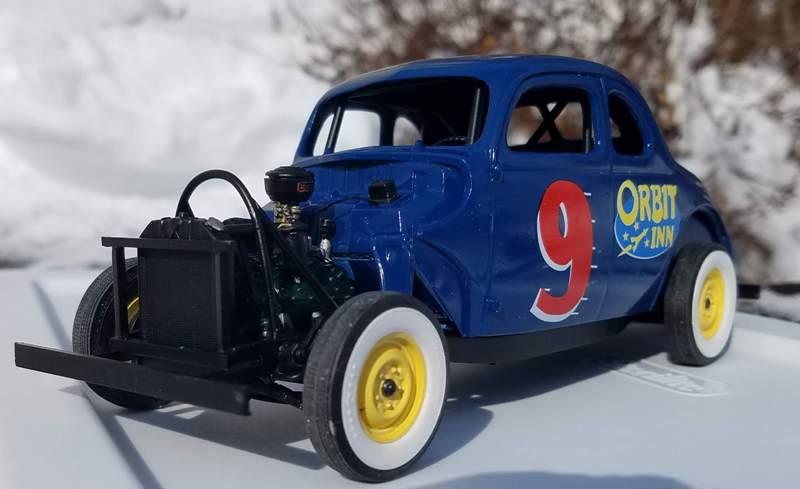
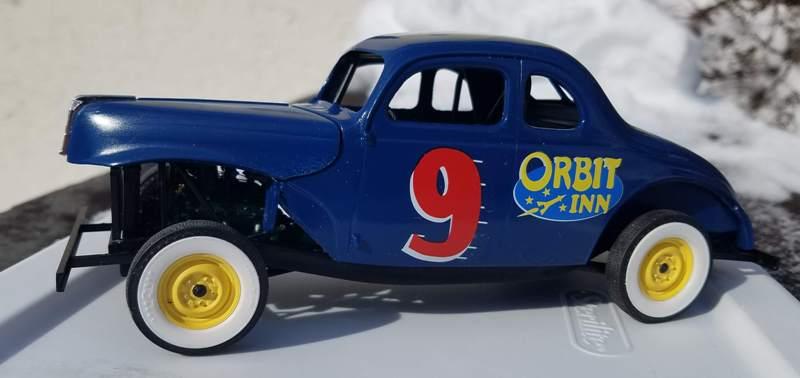
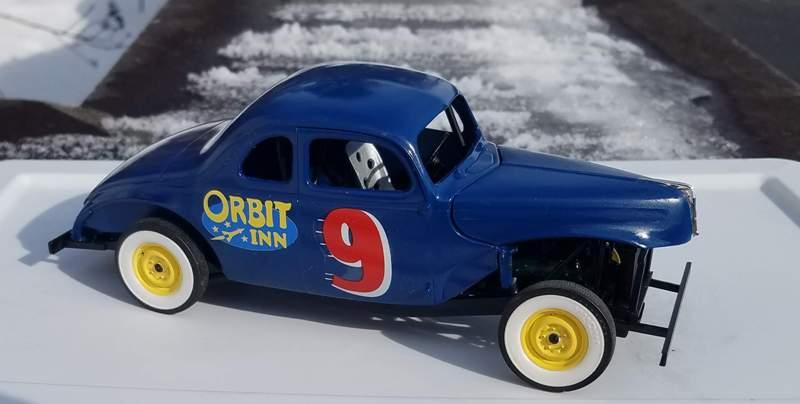
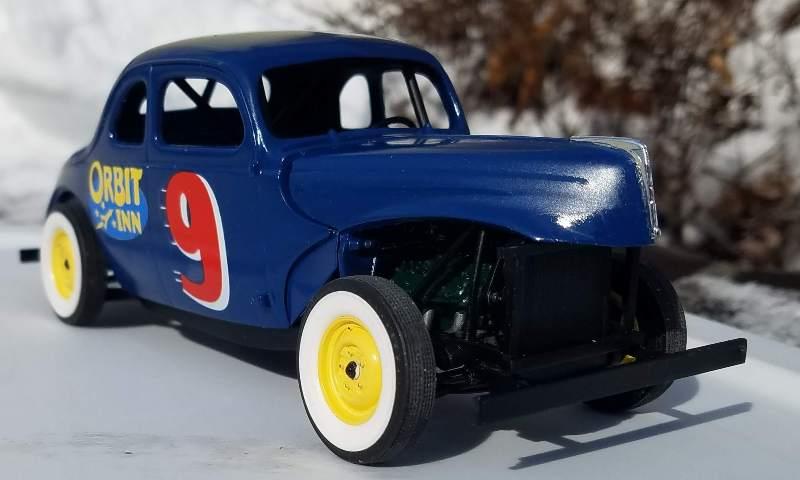
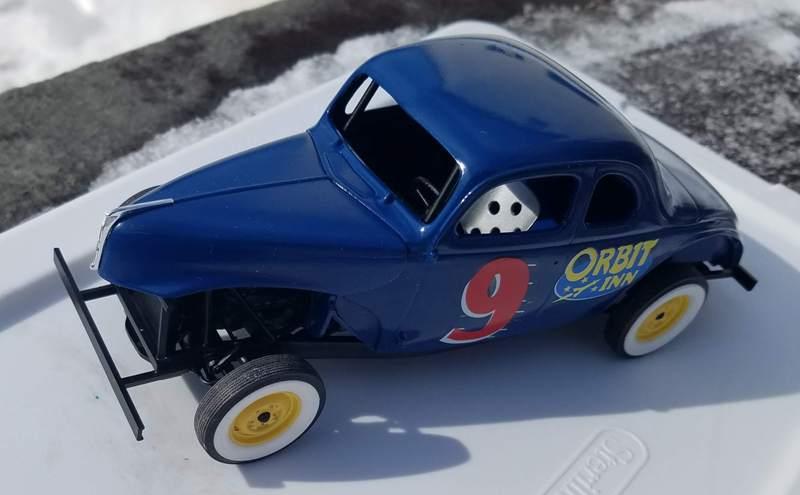
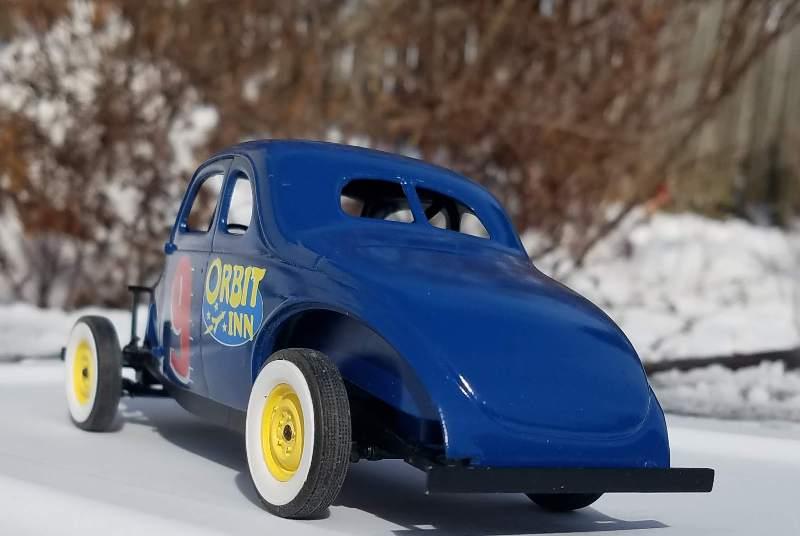
My Revell '40 Ford jalopy is finished. The WIP info is in the WIP section; the number decal is from a Moebius Tim Flock Hudson kit, the "Orbit Inn" is from 2 Woodland Scenics dry transfer sheets. It's too shiny and undented to have seen any active racing, so this is a day before build.
-
1940 Ford Jalopy race car
Karl LaFong replied to Karl LaFong's topic in WIP: Other Racing: Road Racing, Land Speed Racers
Some updates. Interior is done. Steering column and shifter are from the kit, the steering wheel is from the Revellogram 1950 Ford truck. The engine just needs to have the sparkplug wires and exhaust pipes installed. Paint is Pactra Leaf Green, which, to my eyes, looks like the stock engine color. The body was painted and the interior installed.
-
And I wonder if it has the way too small windshield glass.
-
1940 Ford Jalopy race car
Karl LaFong replied to Karl LaFong's topic in WIP: Other Racing: Road Racing, Land Speed Racers
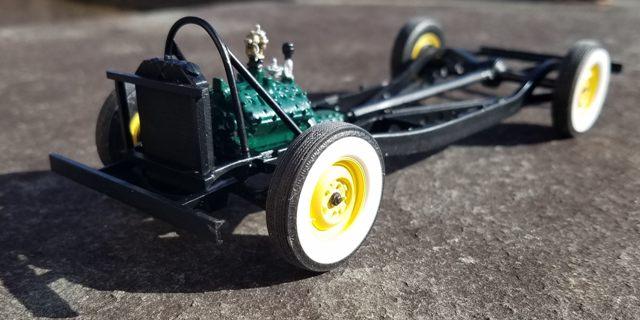
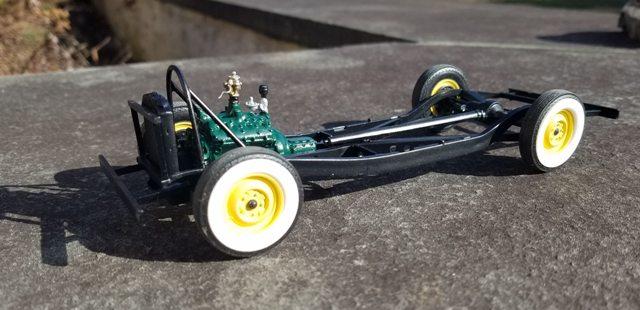
The roll cage is finished - it's made up of 3/32nd Evergreen rod and an AMT 1940 Ford coupe roll bar. The seat is a Replica and Miniatures item, with Evergreen bits to raise it to (almost) stock height. Model Car Garage seatbelt buckles are mounted on medical tape seatbelts, painted black with a Sharpie.
-
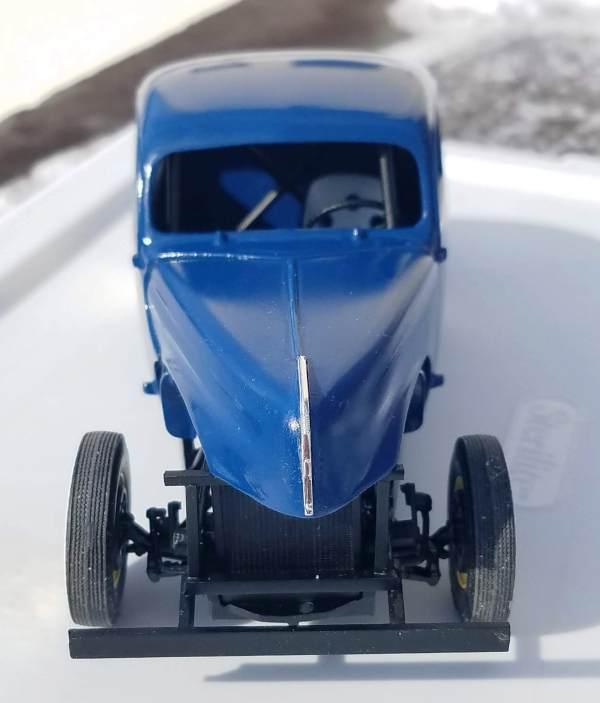
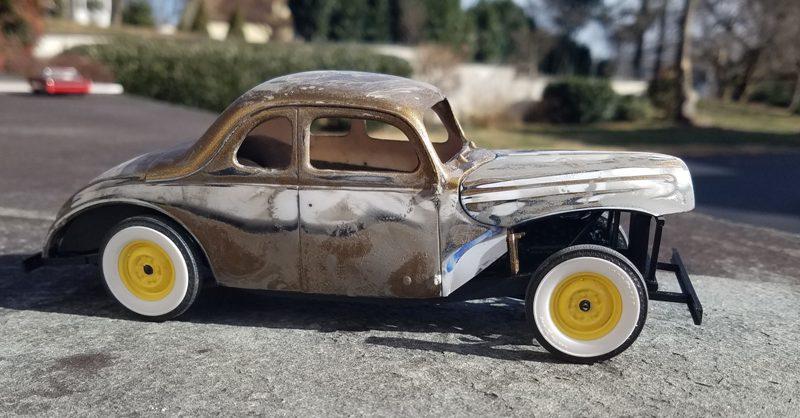
This is a Revell 1940 Ford Standard Coupe, which I originally planned to represent a 50's street rod (hence the yellow wheels and bronze paint). The project stalled, and remained in the box for around 10 years. I had started the chassis for another stalled project. I wanted to do a 1950's jalopy racer, so I combined the two projects. The engine is from my original intention to do a replica stock '40 Ford. The only modifications to the body are removal of the chrome trim and drilling holes for the former location of the door handles. The bumpers, hood support, and radiator guards were constructed of Evergreen styrene stock. The eventual body color will be Tamiya Blue.
-
What did you see on the road today?
Karl LaFong replied to Harry P.'s topic in General Automotive Talk (Trucks and Cars)
From a couple years ago - just because you can, doesn't mean you should.
-
I finished the interior. For a drag car, it looks a little naked without seatbelts, so I think I'll add some from a mid-60's kit.
-
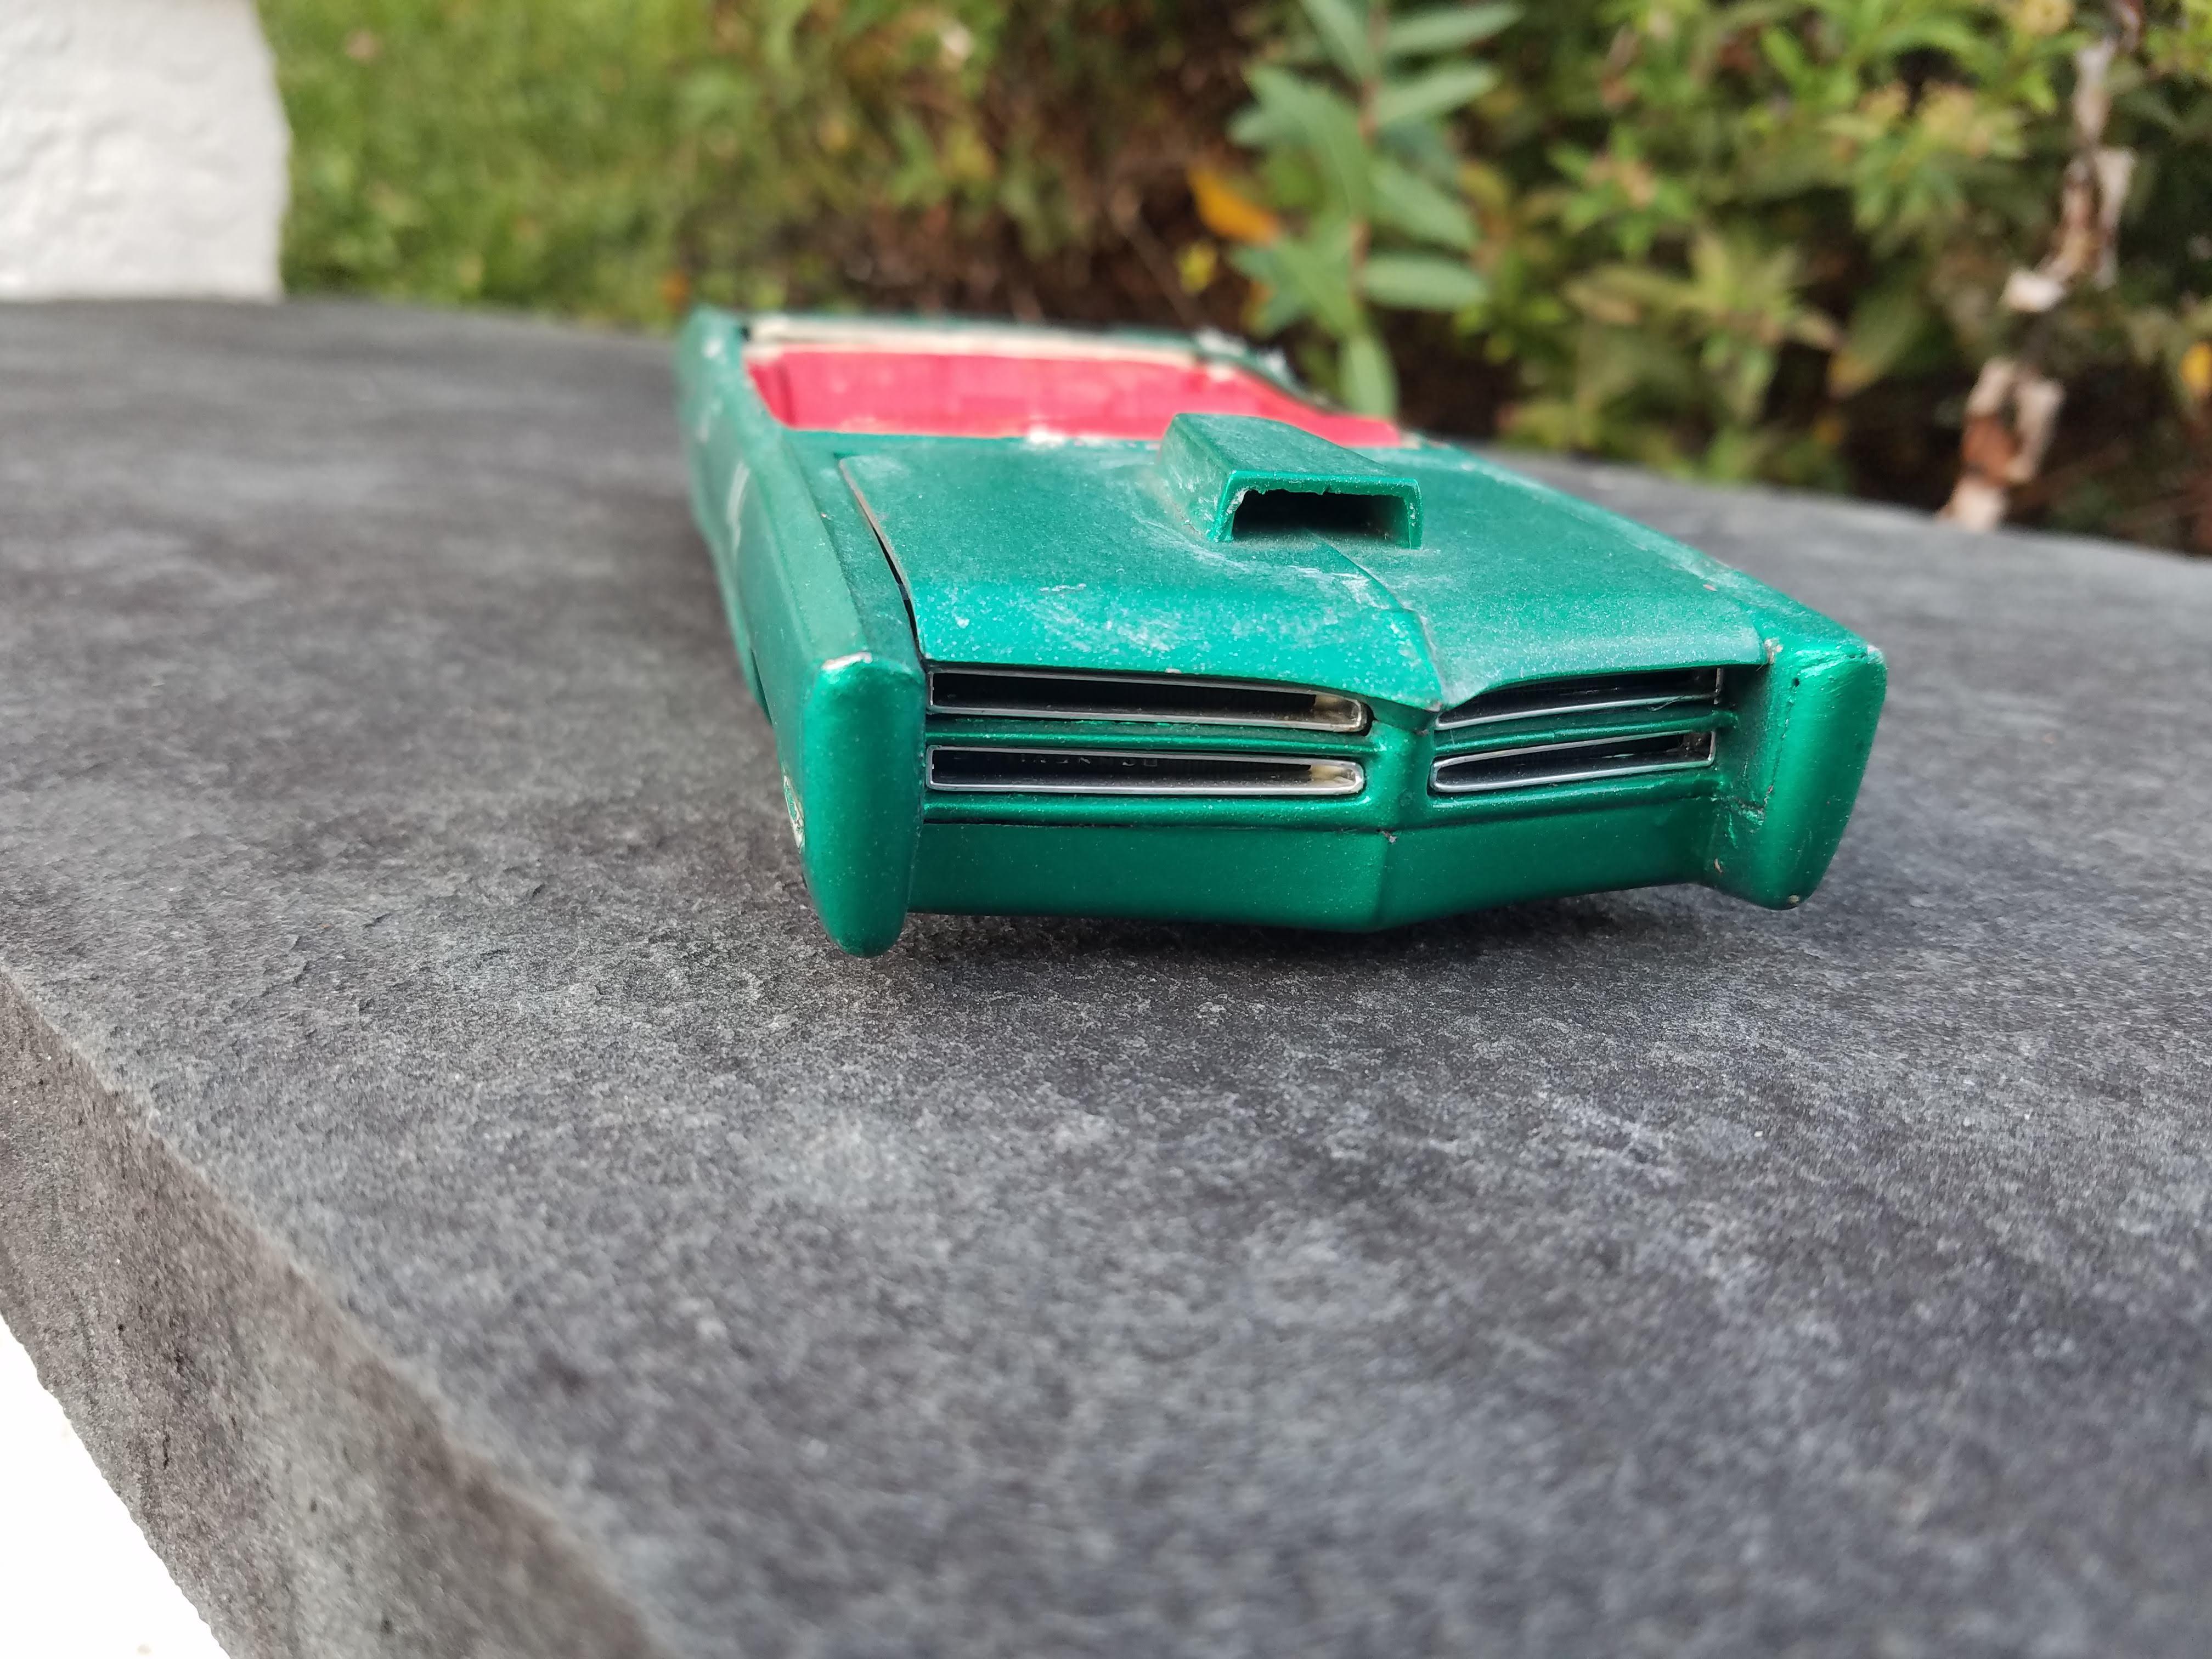
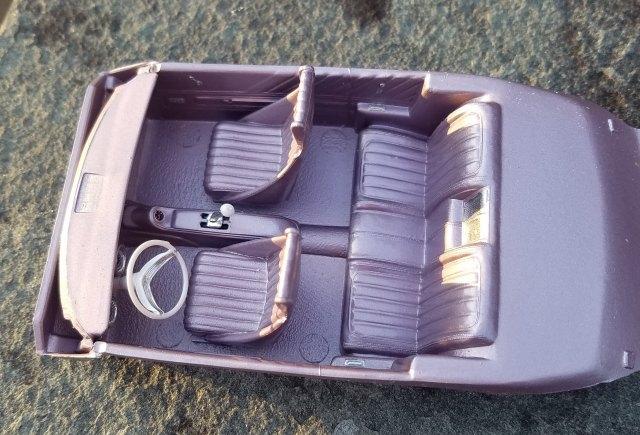
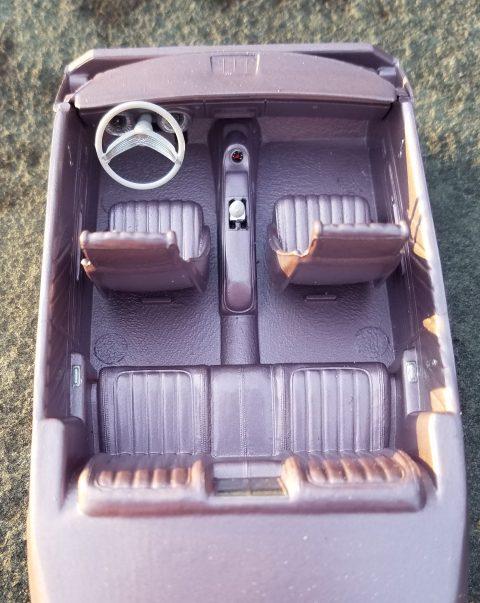
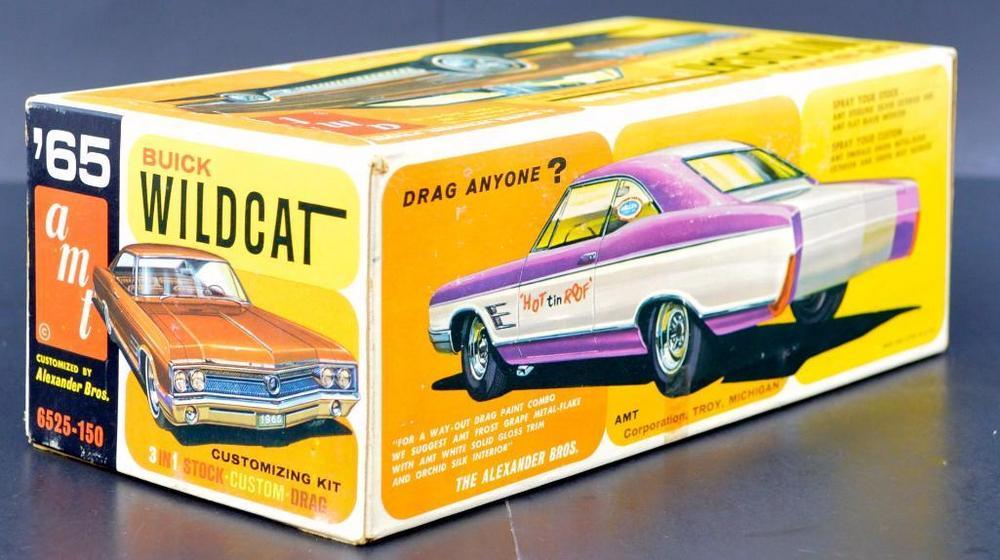
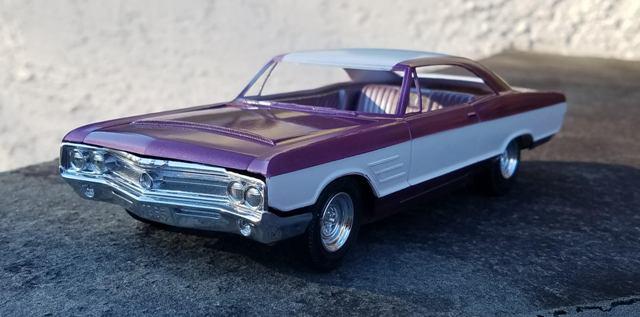
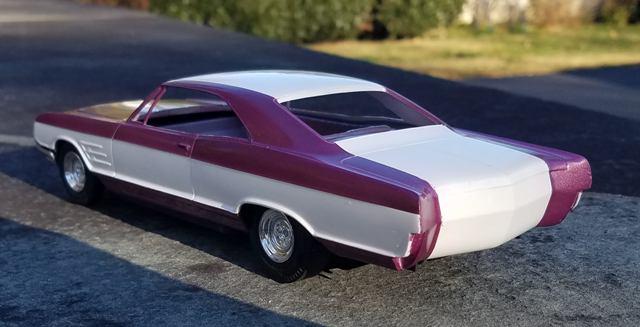
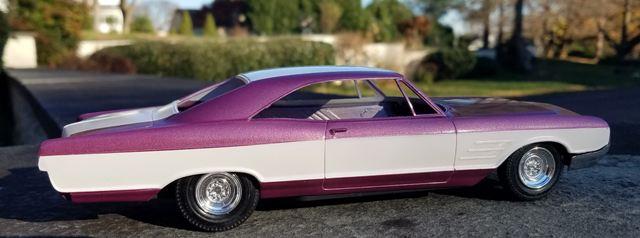
When I was 10 or so, I tried to reproduce the box art drag car - even at that age there was something very cool about a land yacht as a dragster. I don't know what paint I used, but it was applied directly over the white plastic. I suspect it was either a Pactra or Testor's enamel, as a soak in the purple pond easily took the paint off. I had plans of doing a replica stock, so I saved the rear pan. I came across some 1965 Buick custom parts, so I scuttled the replica stock idea and went for the drag car. The only actual 1965 Buick parts are the body, rear pan and taillights, hood, and front bumper. The rest of the Buick parts are from the AMT 1966 Buick. Wheels are from the recent issues of the AMT 1936 Ford, slicks are 1960's MPC items (I think), fronts are 1960's AMT Firestones with the white wall removed. The interior paint is Testor's Enamel Purple Metalflake, decanted and mixed with AMT silver and airbrushed - I was attempting to match the old AMT Silk Orchid. Exterior paint is Testor's Enamel Purple Metalflake airbrushed over Tamiya Pure White. The front bumper looked more like satin than chrome, so I airbrushed Molotow chrome over the old chrome. I'm not looking forward to applying bare metal foil...
-
Alan, I'm not in the league of Bill Borgen and Gary Nash - but thanks! Besides, if I was Bill Borgen, there would be a lengthy back story "The Schupsky brothers salvage yard was the scene of many an altercation in Cleveland, Ohio....."
-
The instructions with the rust kit show it being applied with brushes or airbrushes. Neither worked for me, but the make-up sponges worked well. Thanks for the kudos!
-
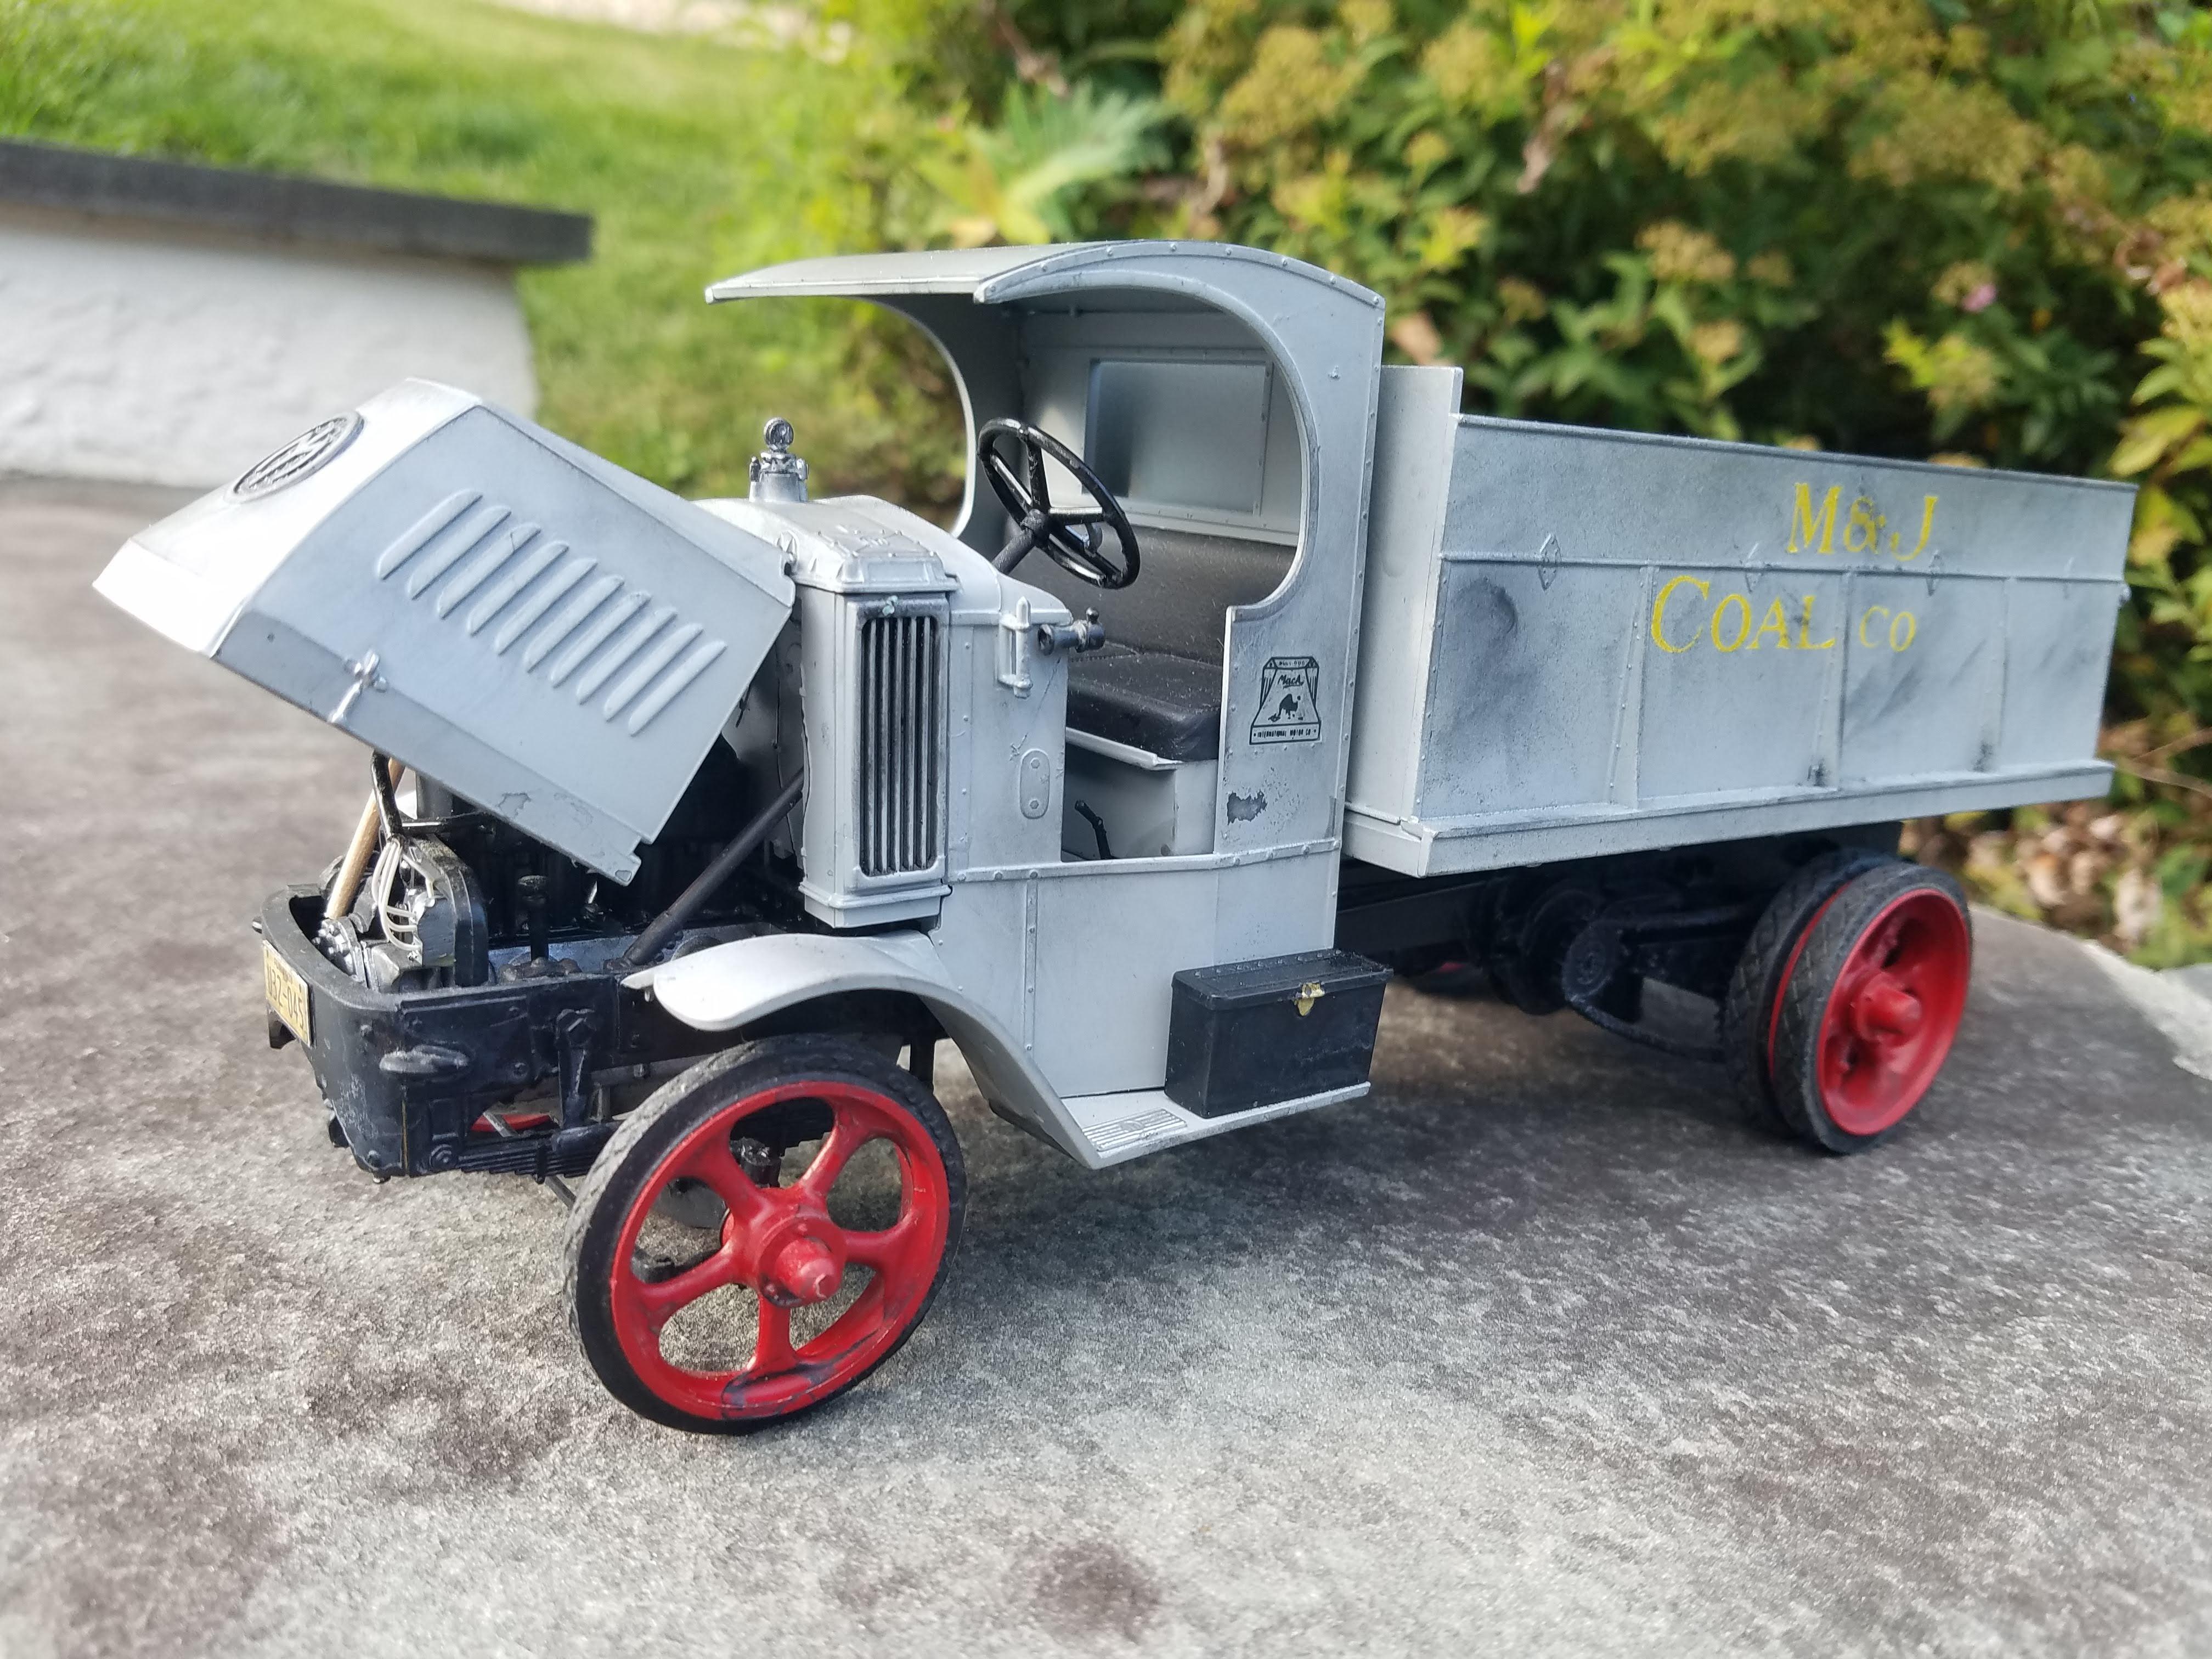
The rusty Mack AC is done. Details are in the Diorama / Under Construction section. Briefly, the running gear was what remained of a kit I had sold off, it was too good to toss, so I turned it into a derelict.
-
I finished the Mack - the remaining pics are in the "Under Glass" section. One final comment is that previously I didn't have much luck with the Vallejo rust kit - things worked out much better when I 1) ignored the instructions and 2) used cheap make up sponges for application. Viva Dollar Store!
-
I got some more work done on the Mack - rust never sleeps.
-
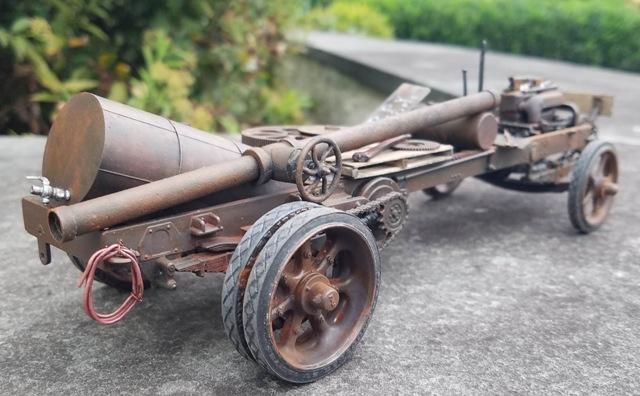
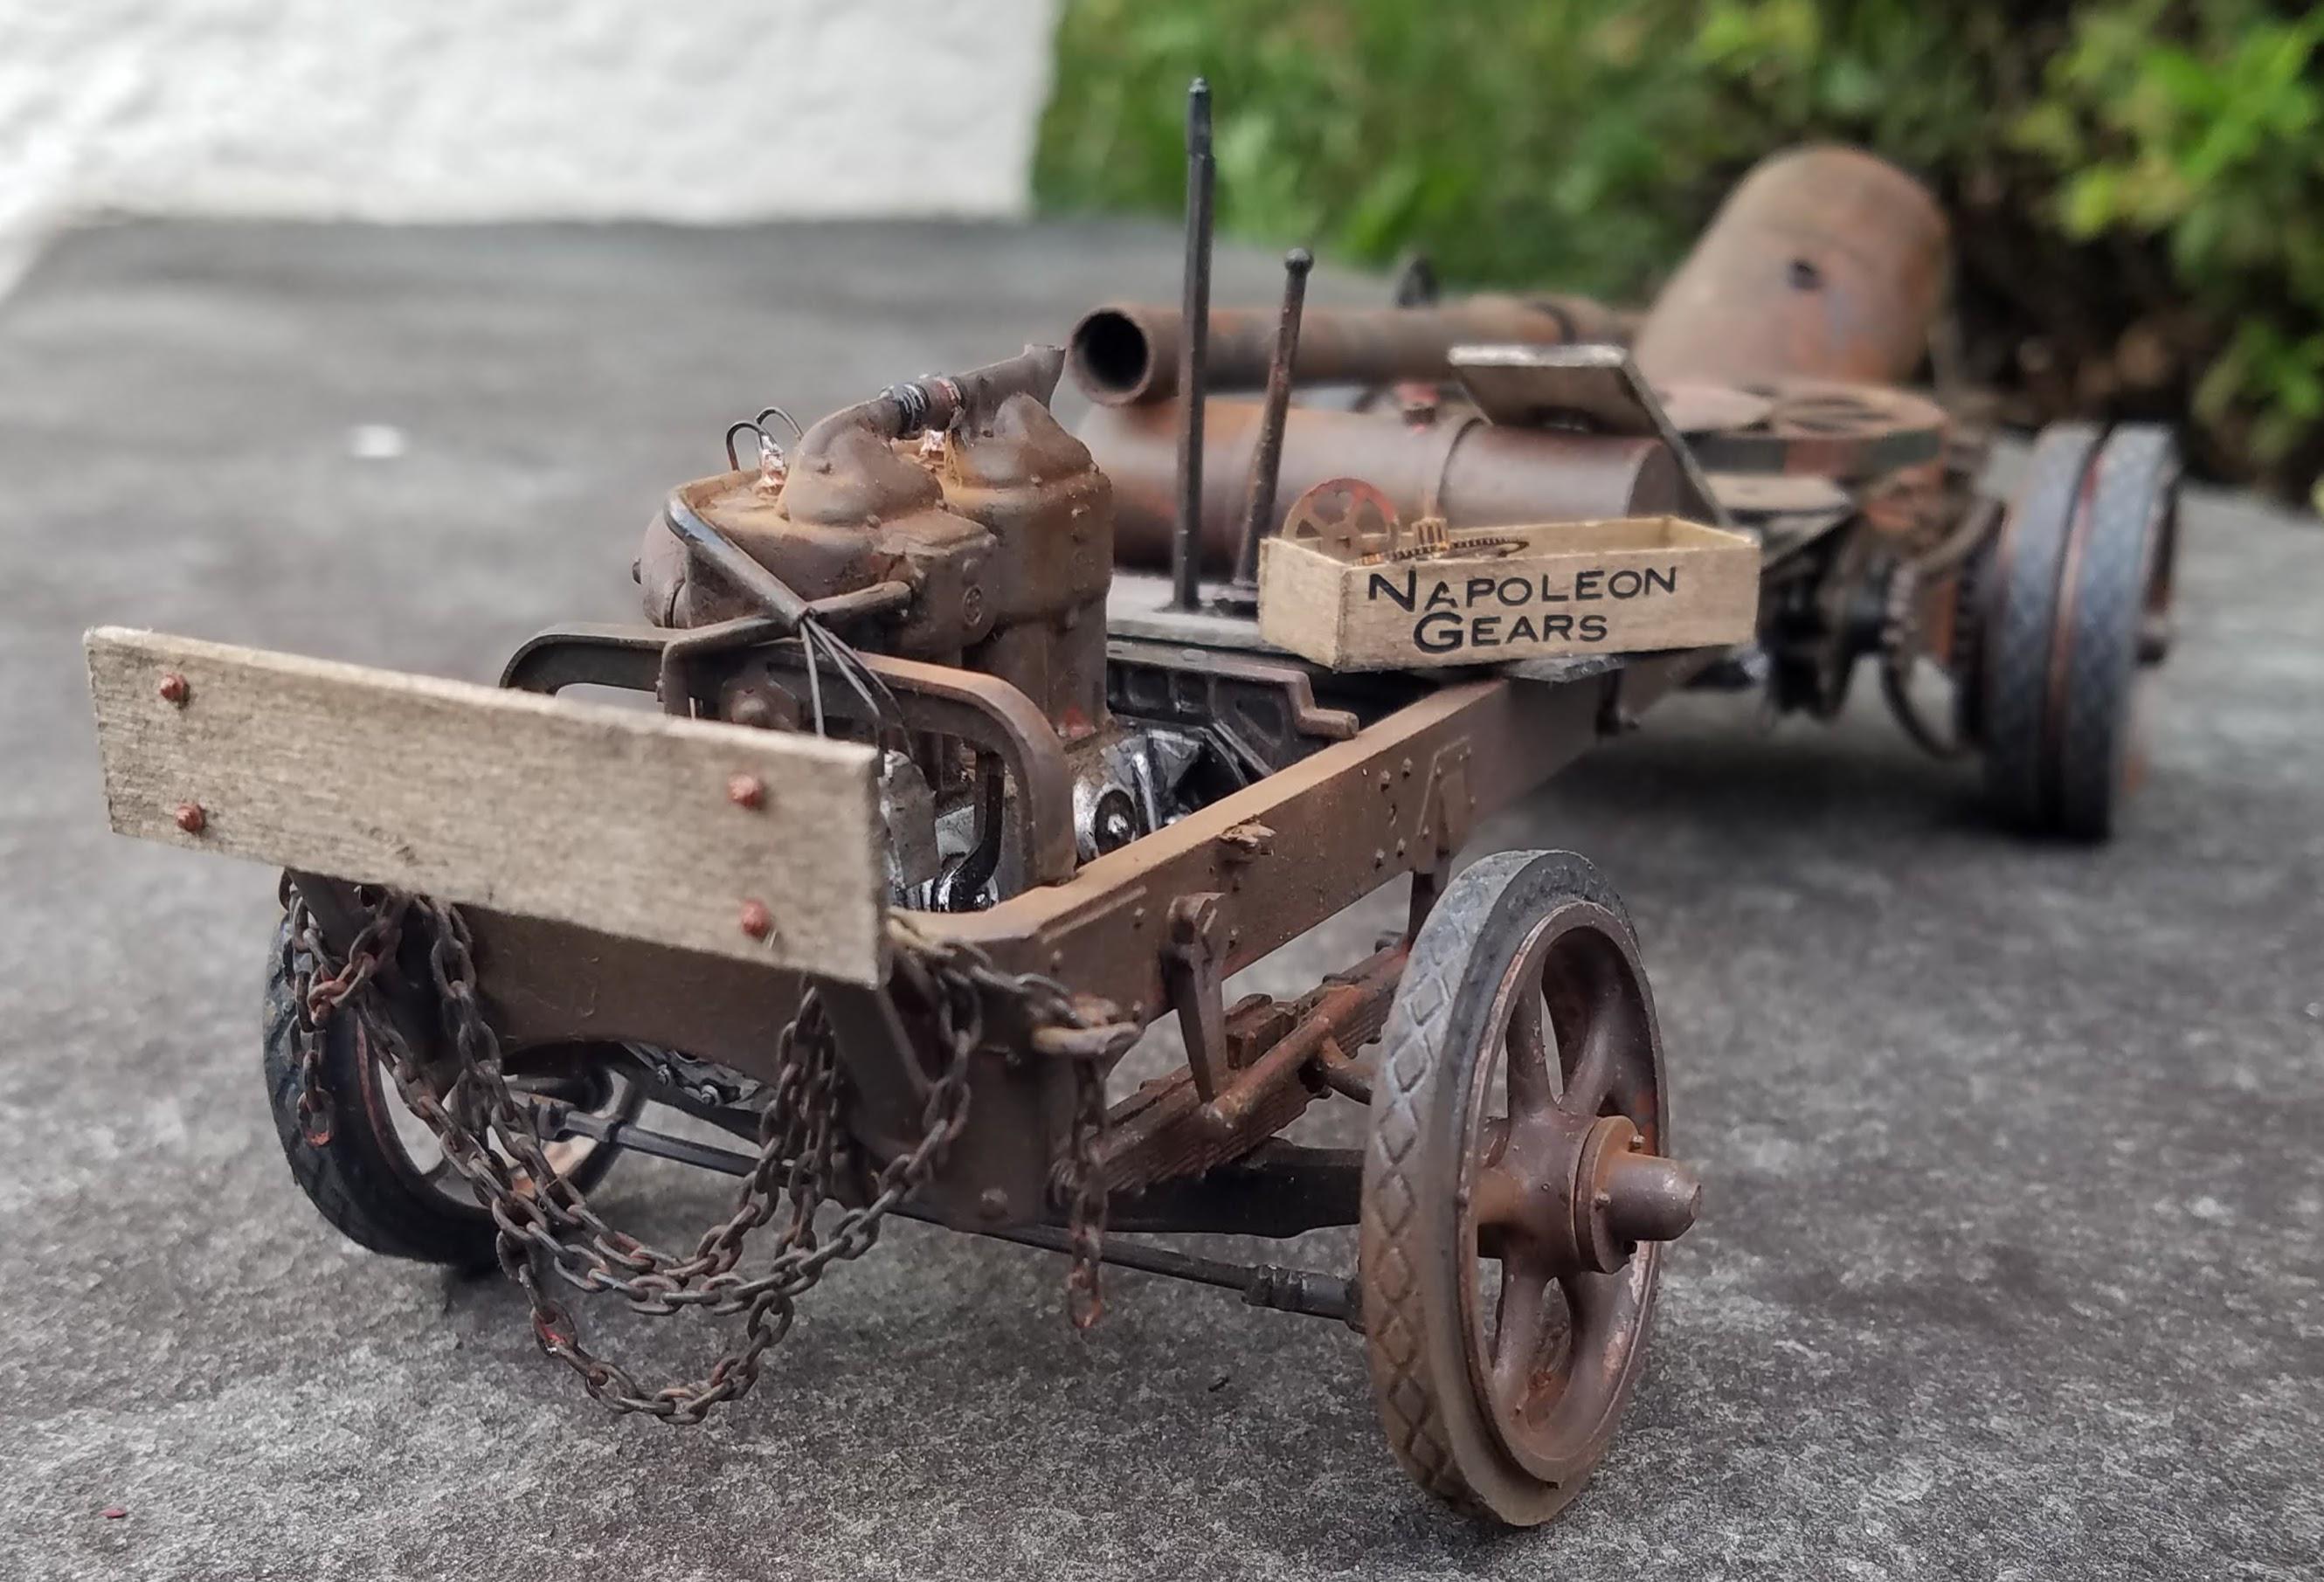
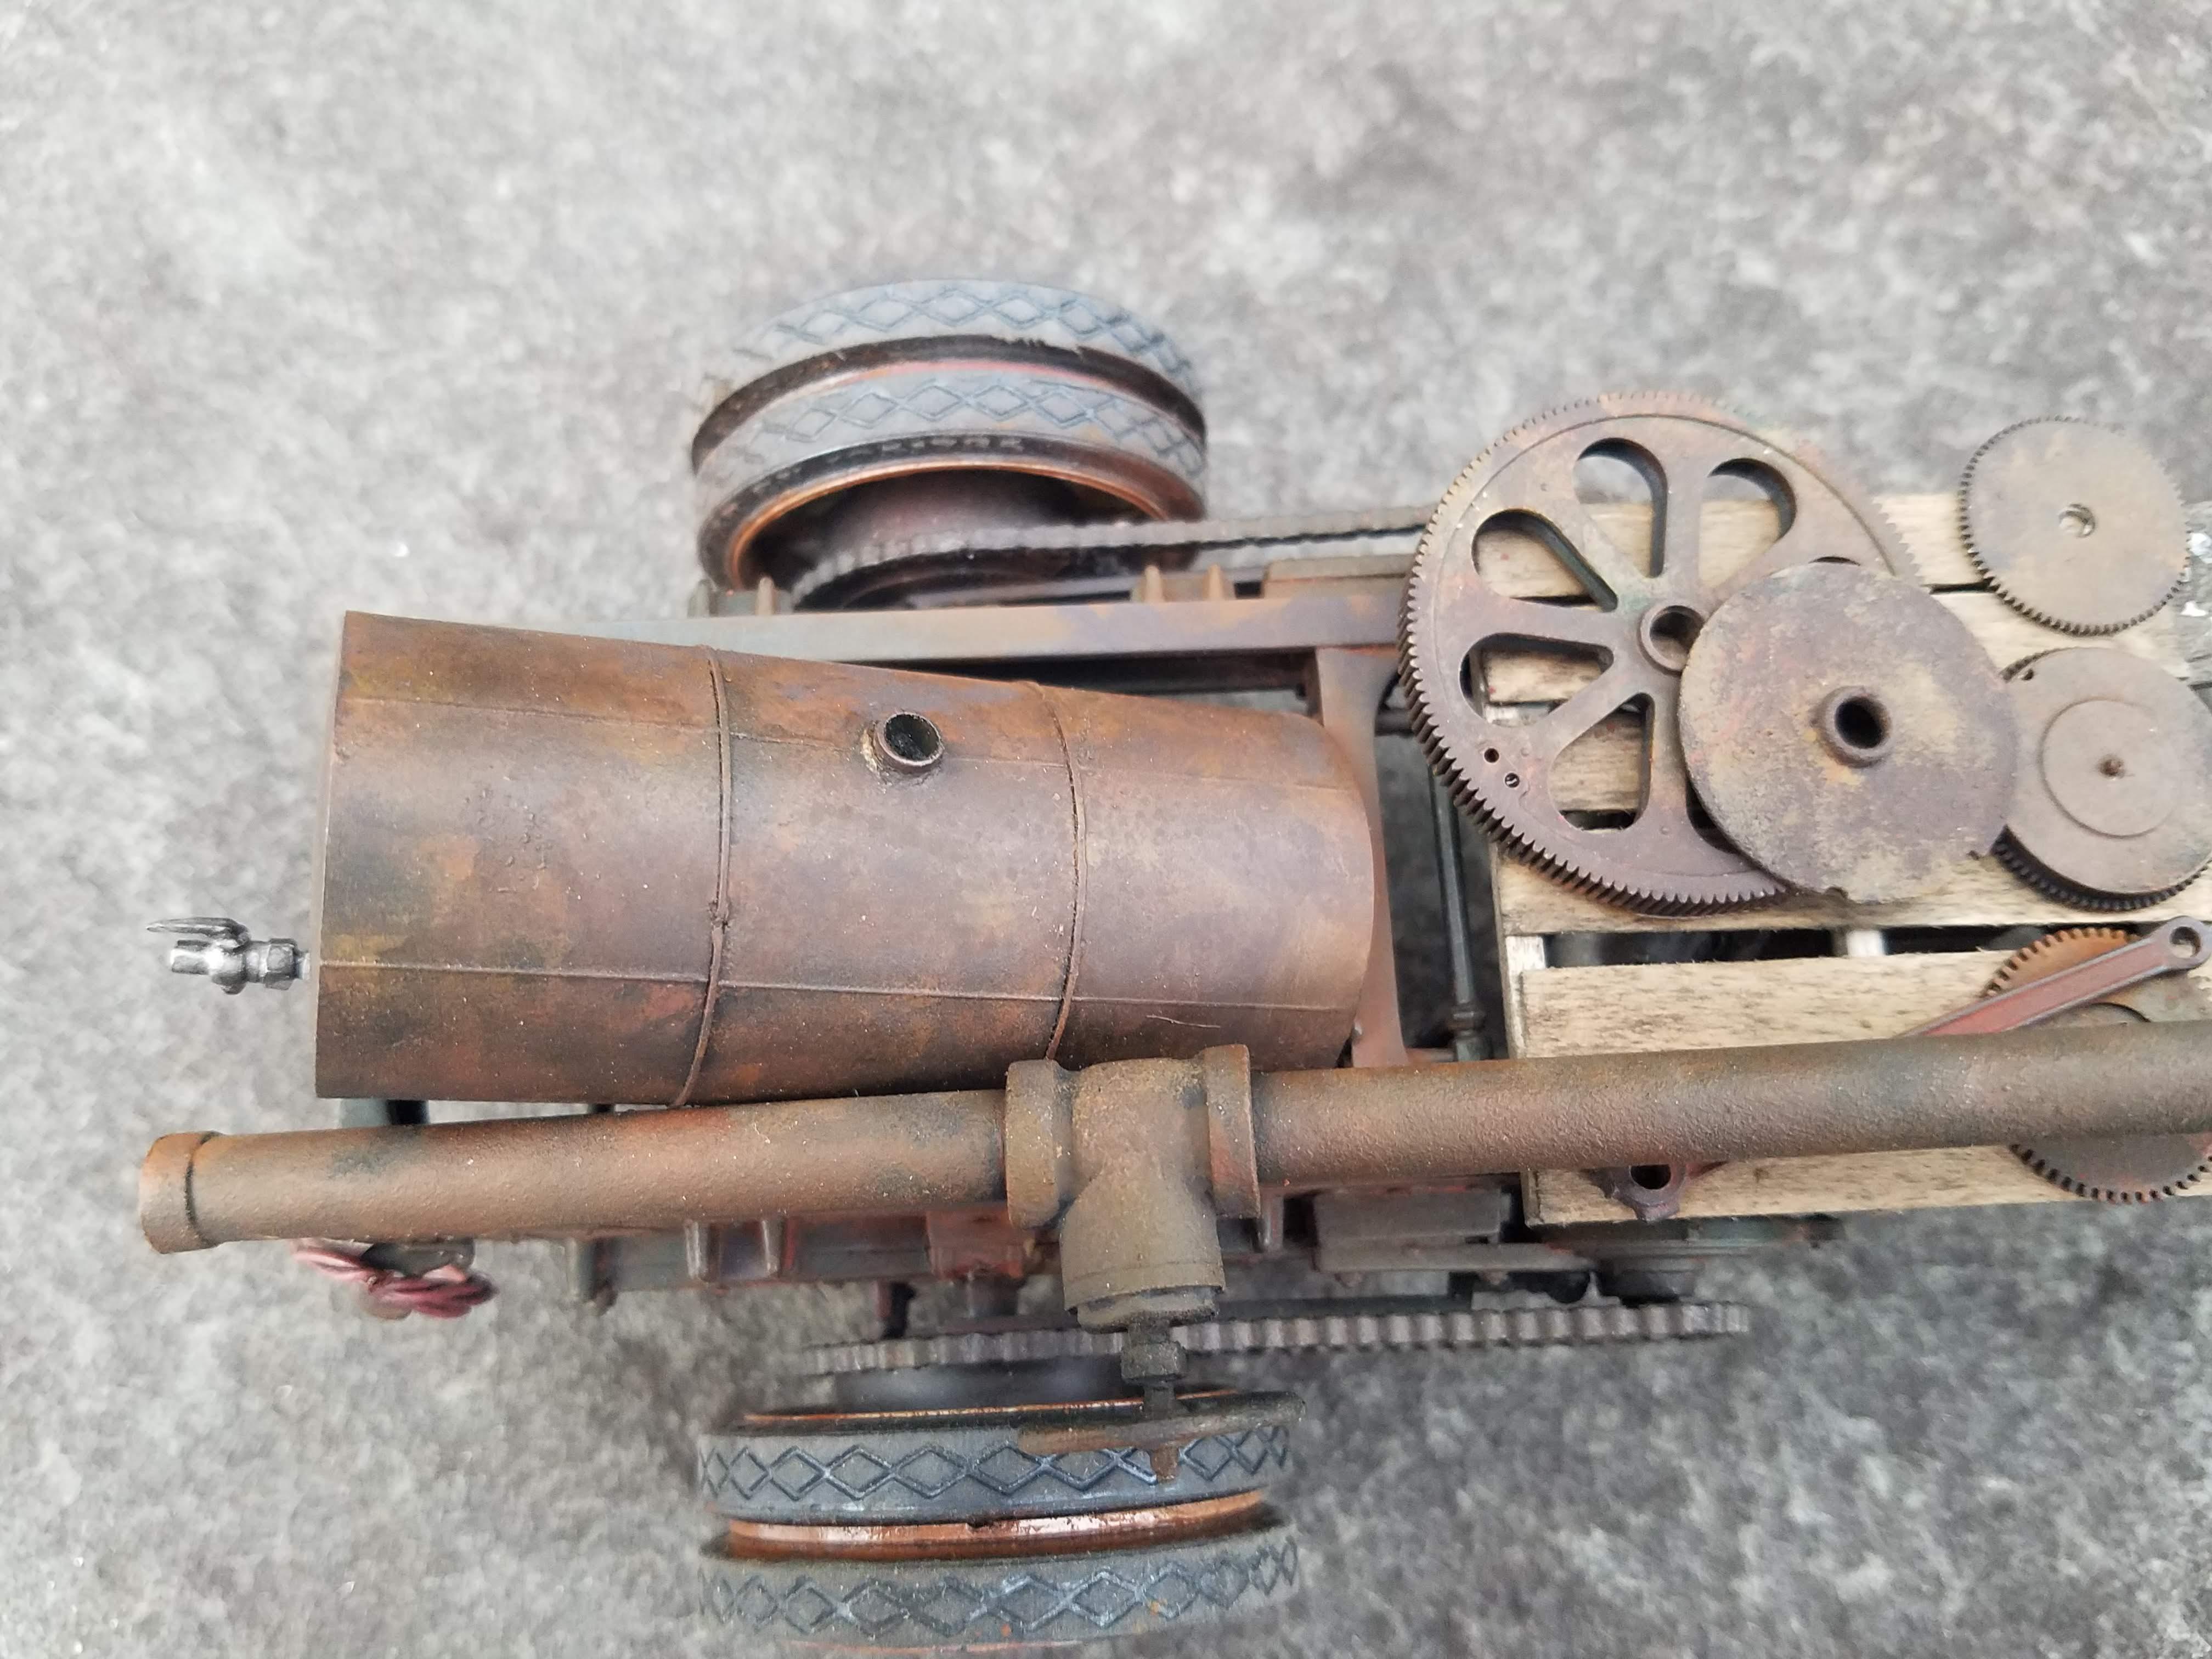
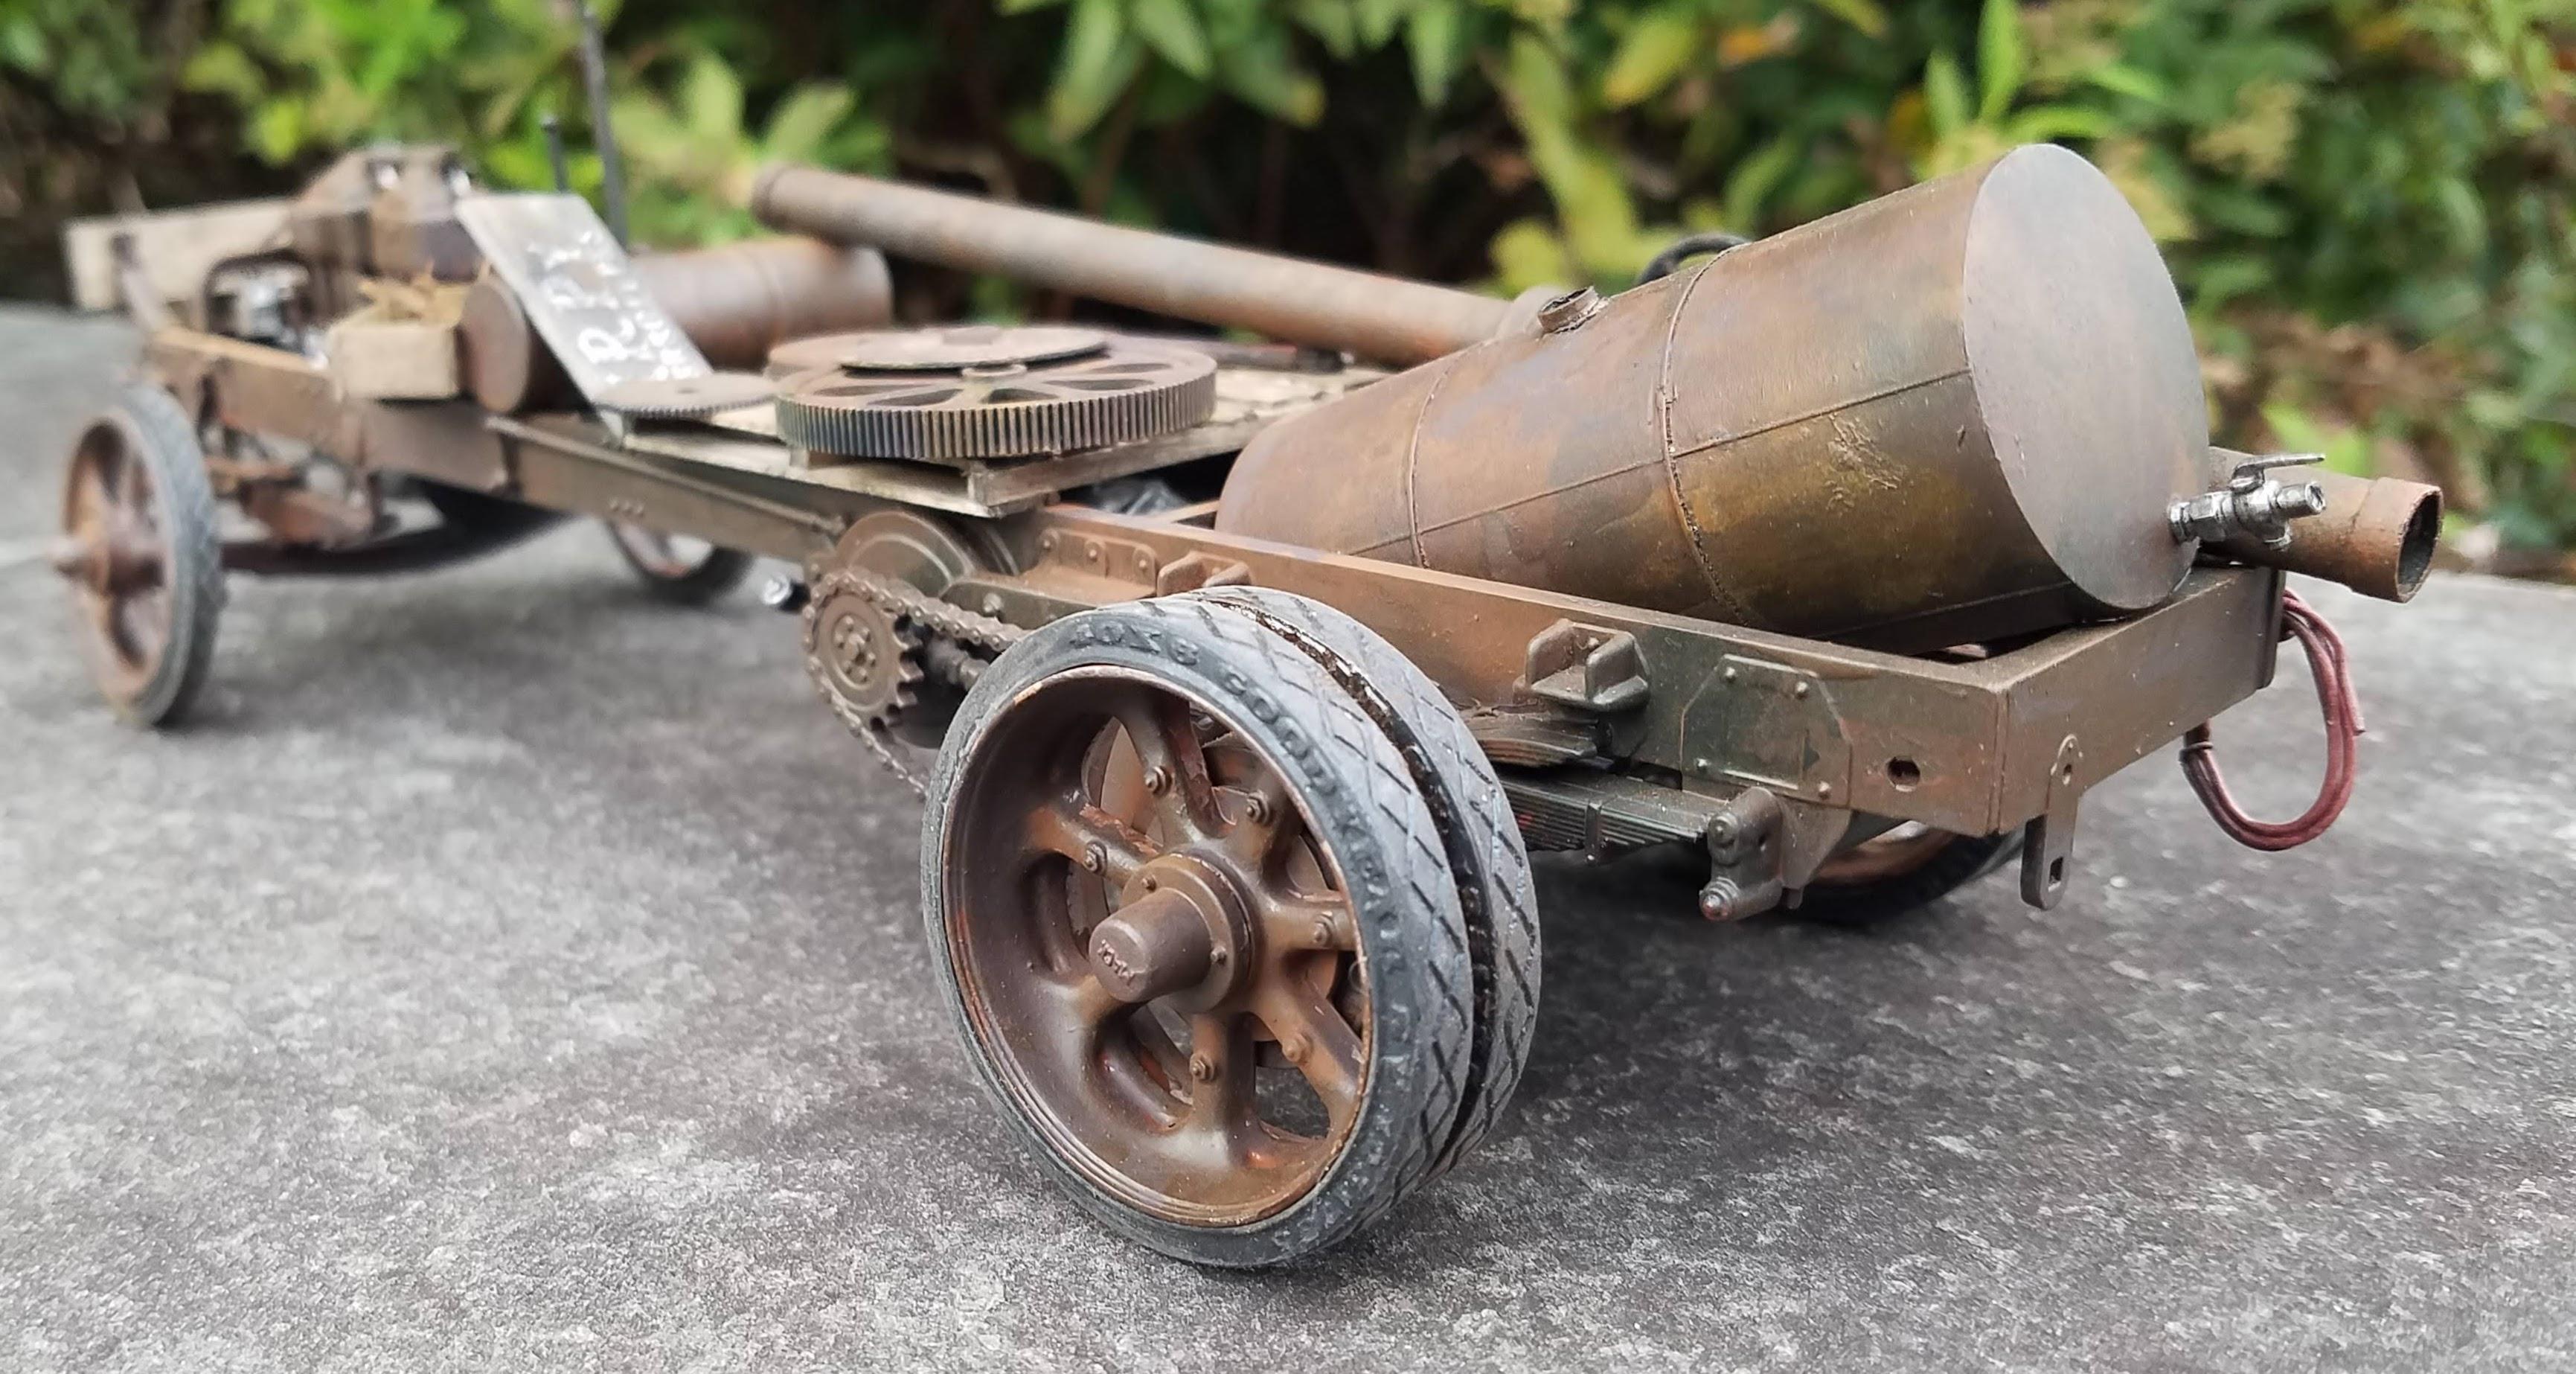
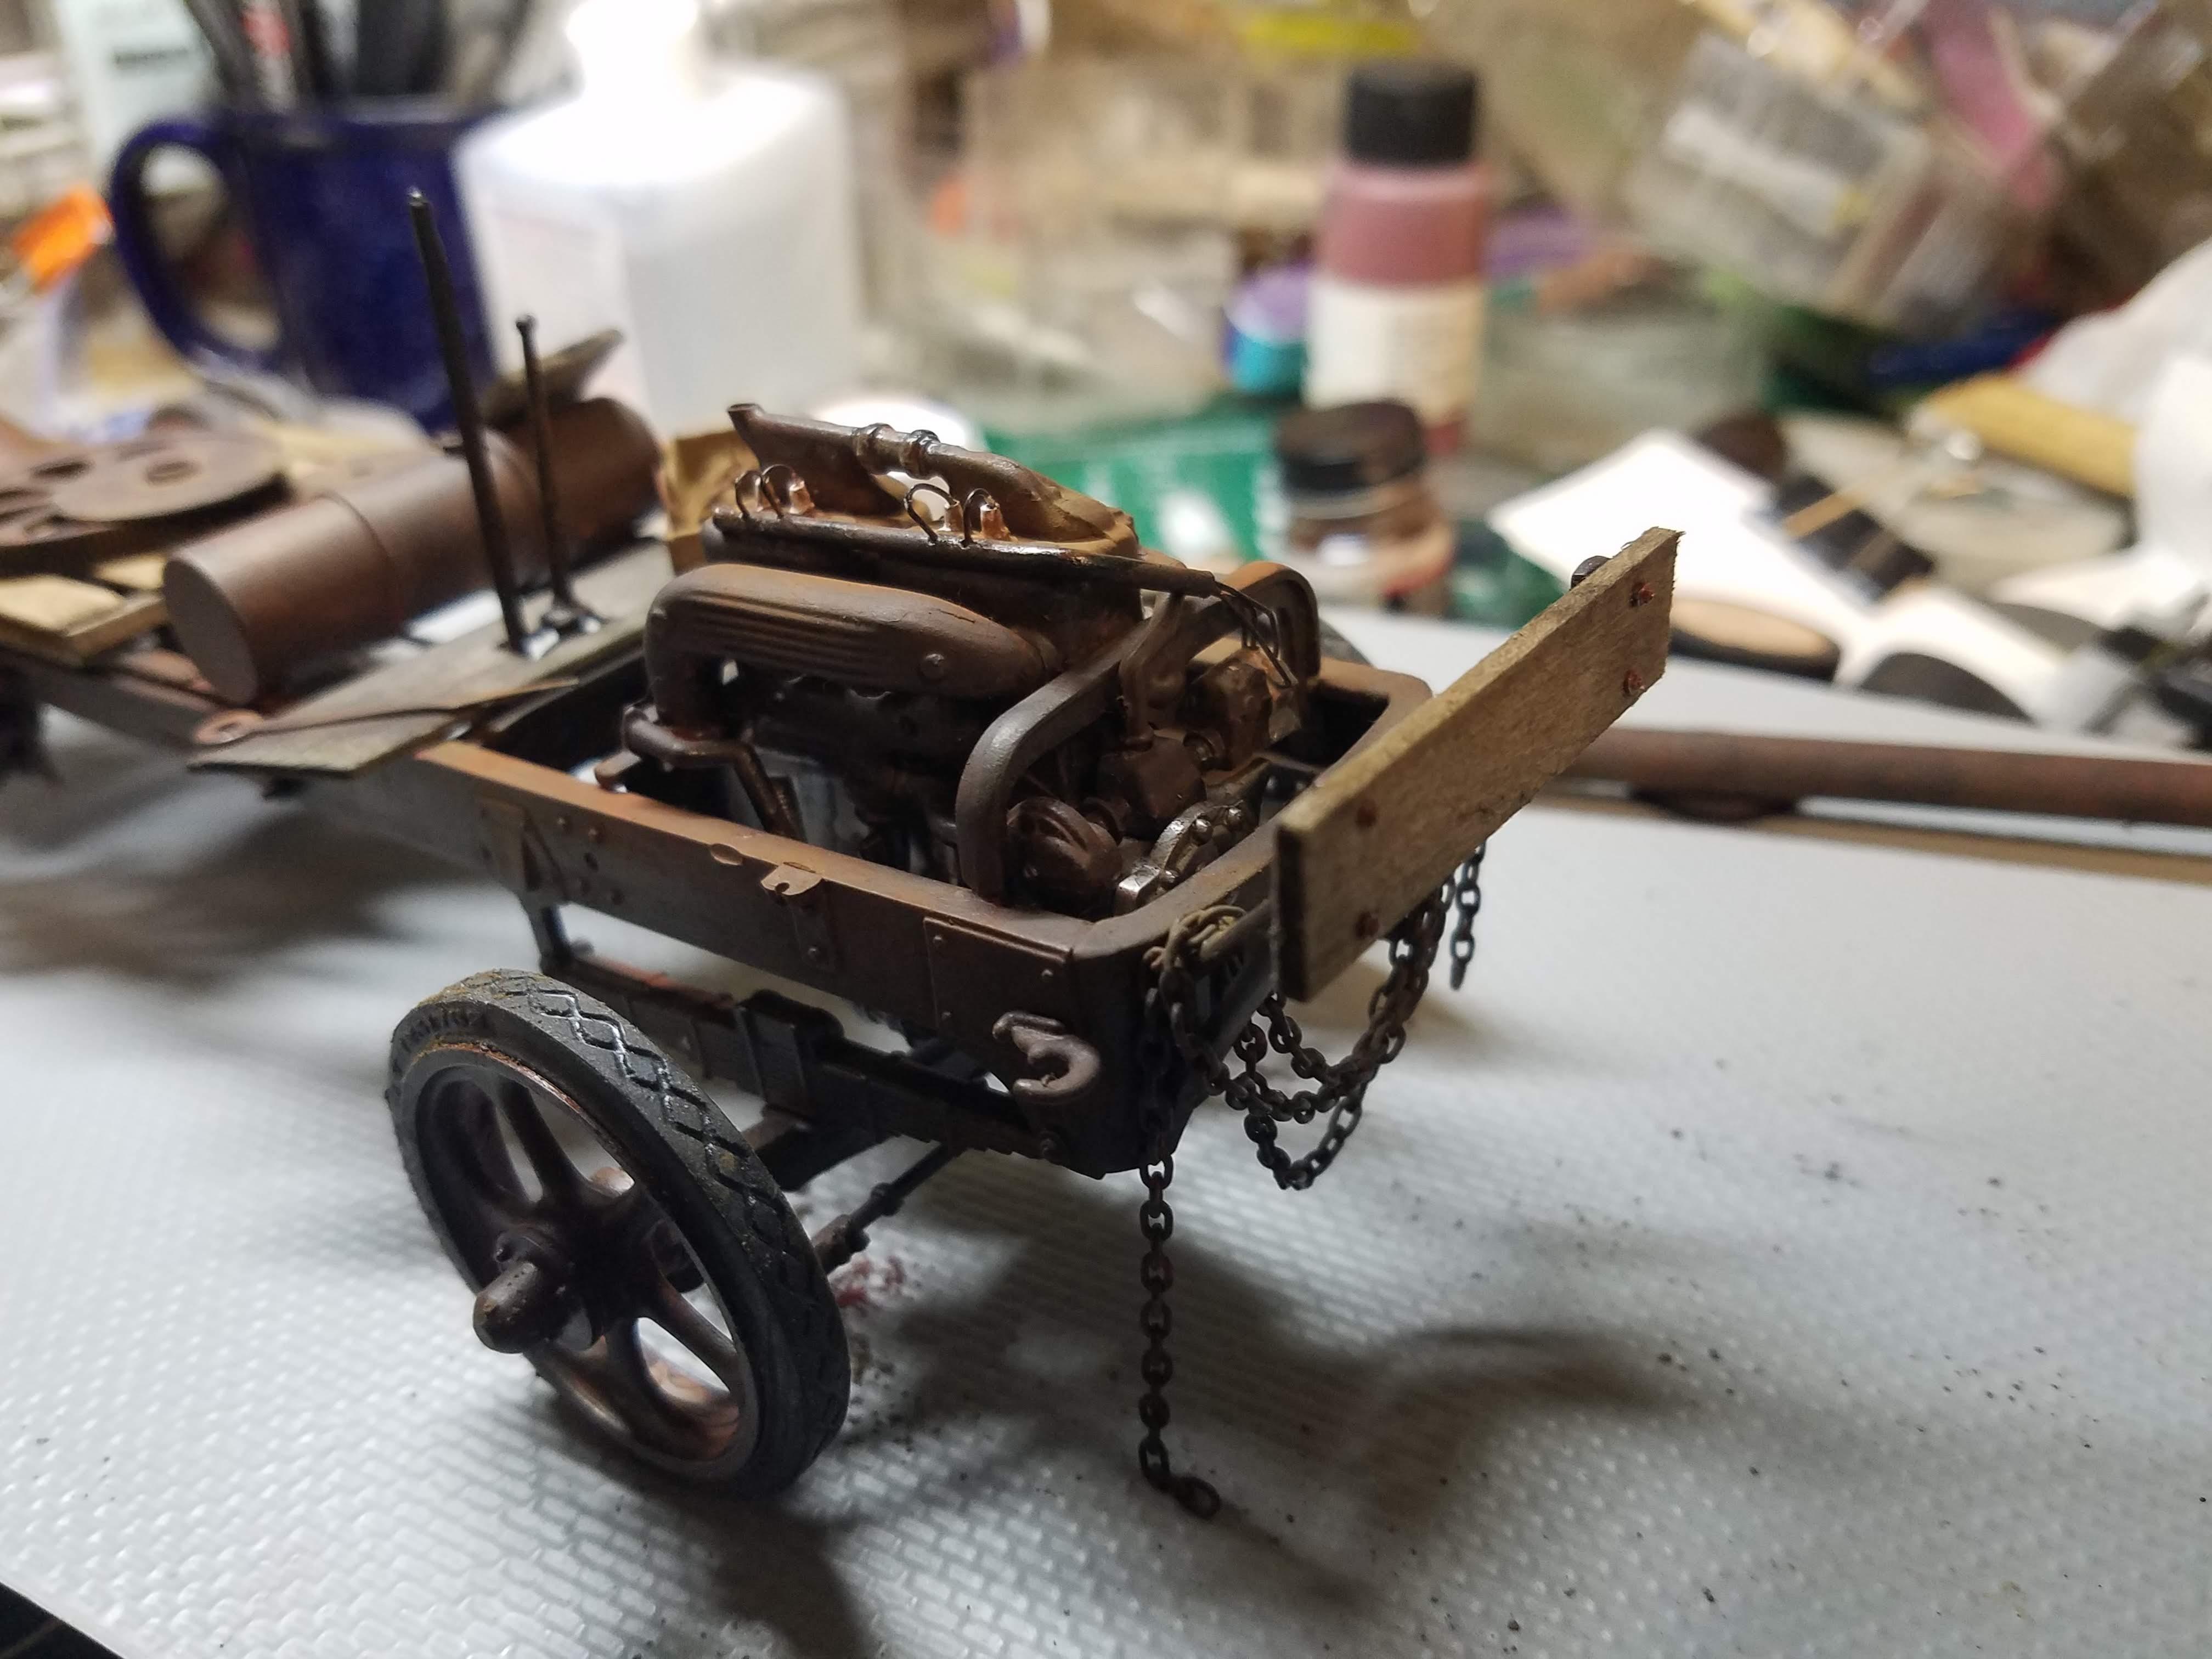
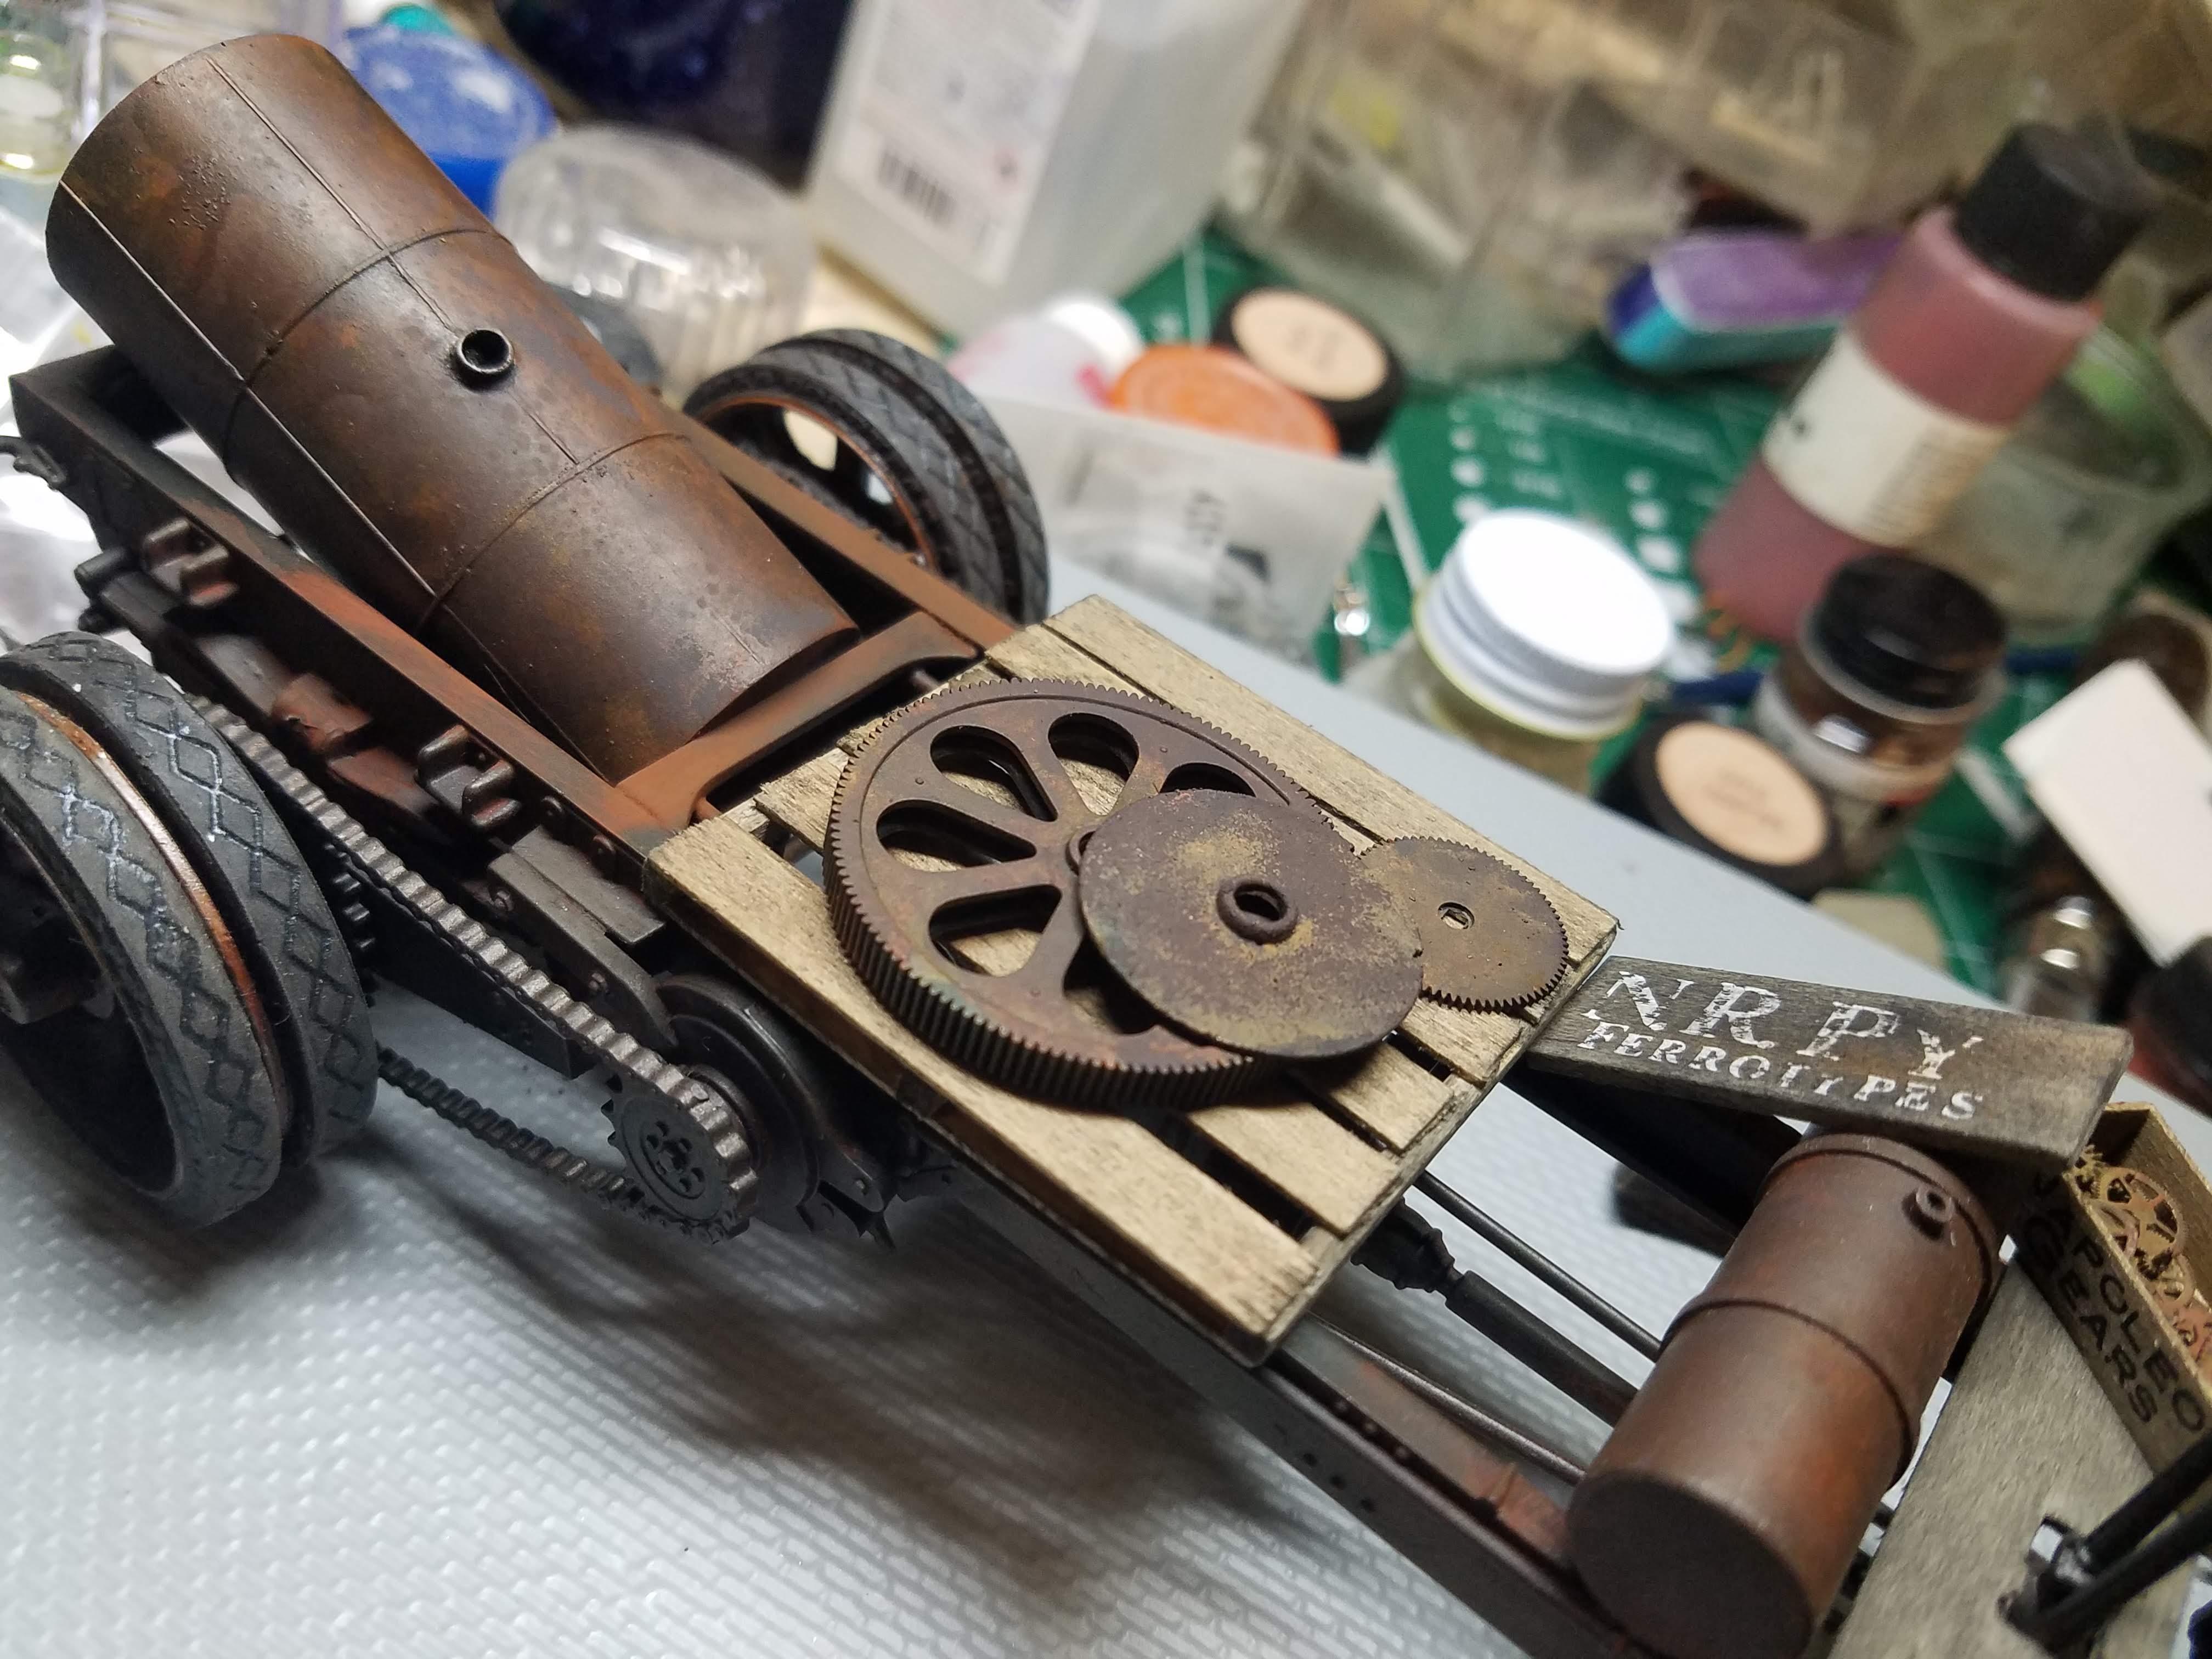
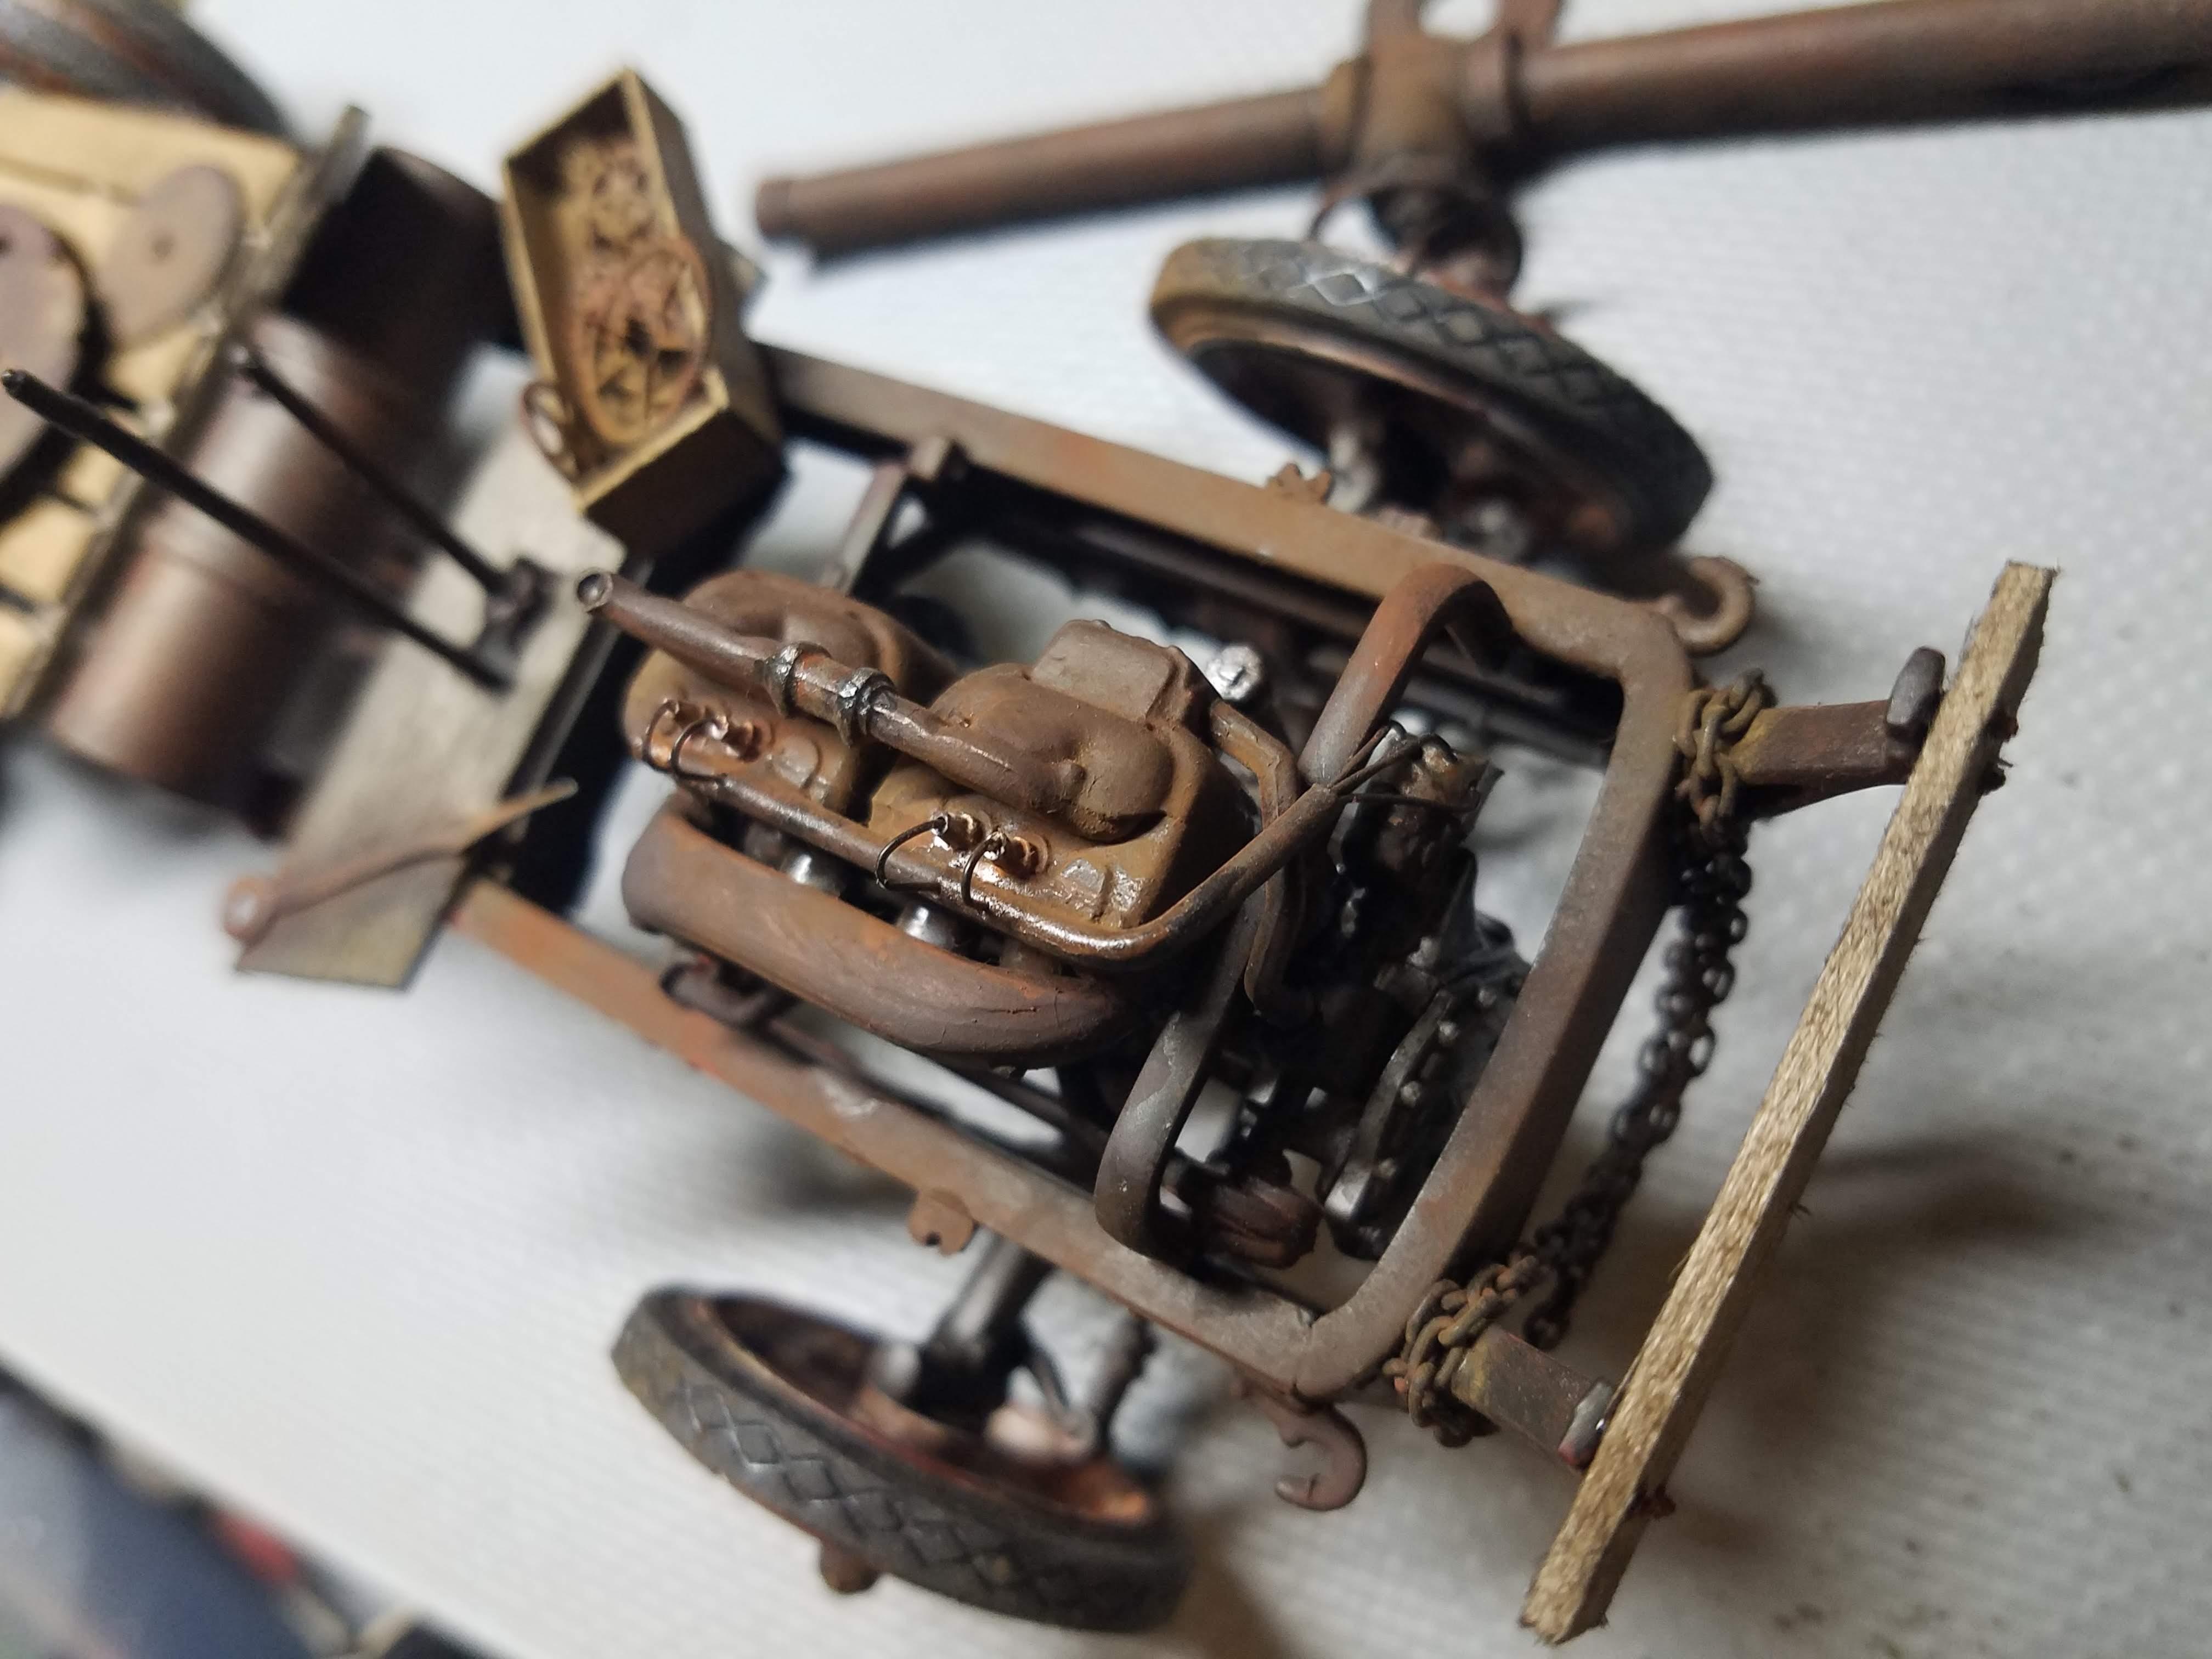
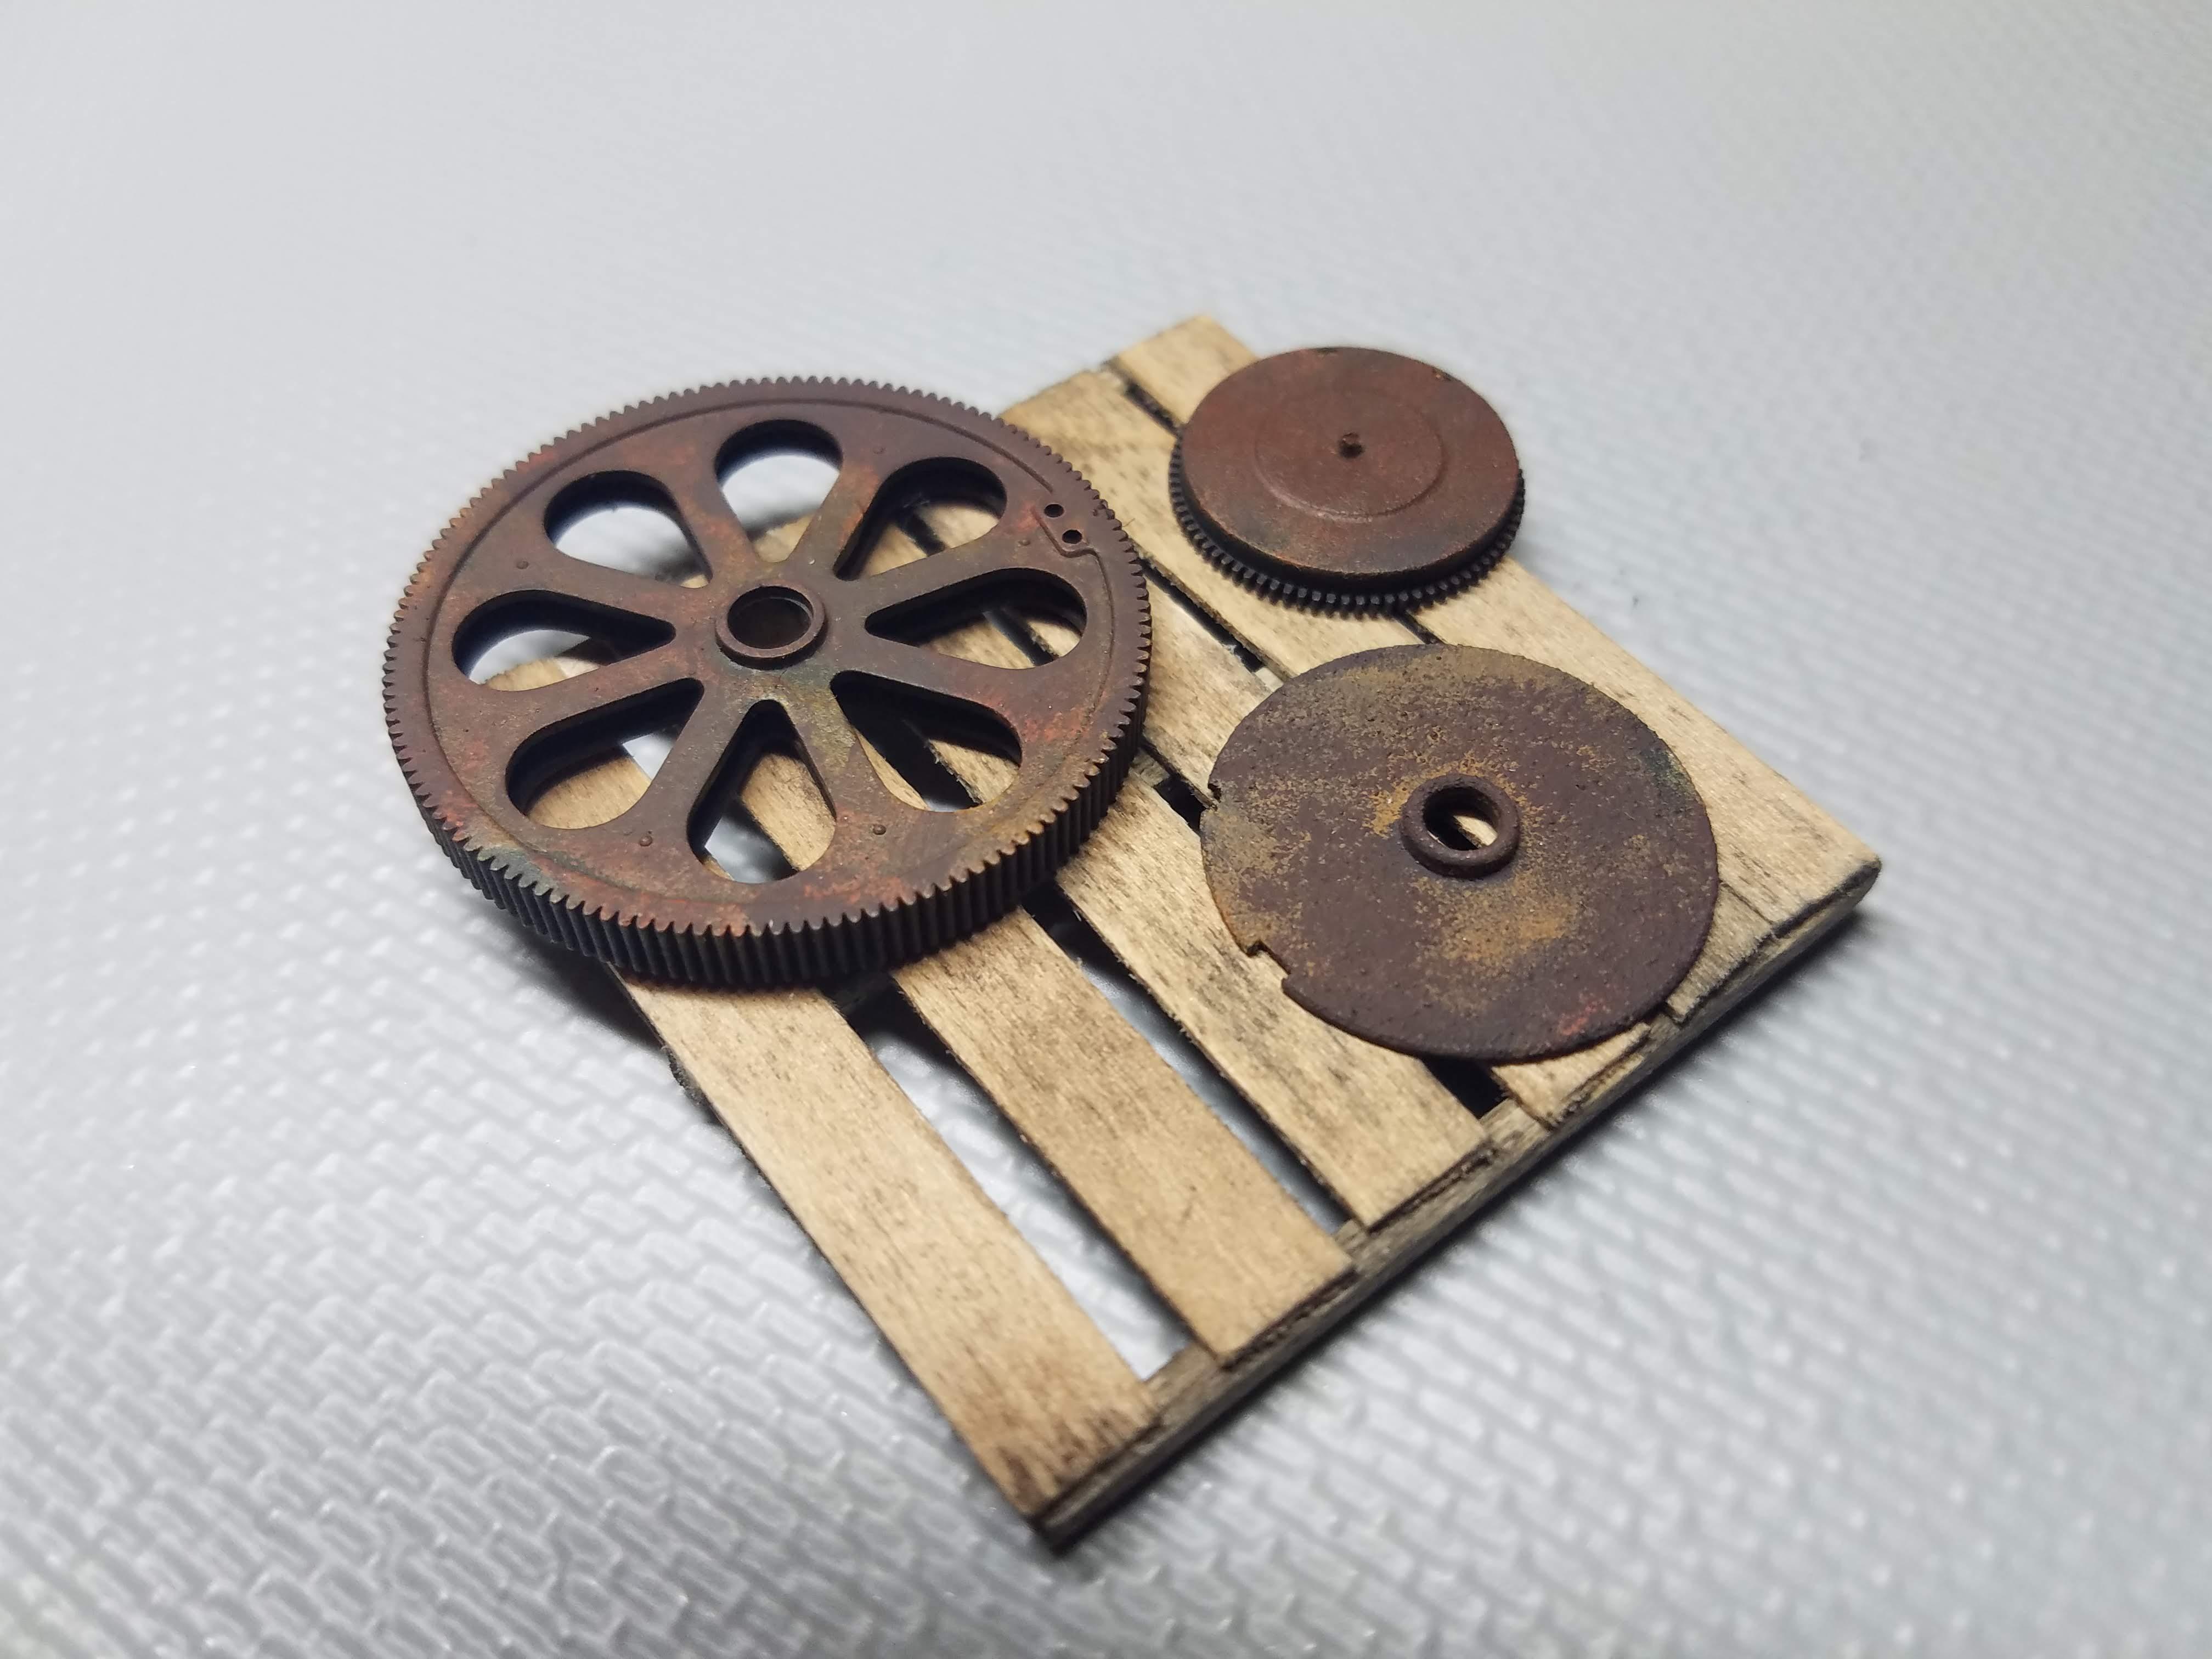
This may be in the wrong topic but... Several years ago I purged my model stash. I should have been more careful, as I had the running gear for the 1926 Mack AC, but only a very odd selection of body parts. So I added a gas tank built from Evergreen styrene, a floorboard cut from 1/32" basswood, and a front bumper also made from basswood. All plastic parts were weathered with various shades of rusty brown paint and washes. The wood was stained with an alcohol/brown or black ink mixture. It's kind of boring, so I'll be adding some scratchbuilt or modified kit pieces. The gearbox was made from basswood, lettered with Woodland Scenics dry transfer letters, and stained with alcohol/ink. I'll be adding rusty watch gears and other parts later. The sign was constructed of the same materials as the box. A HO scale Walther's storage tank was modified with an Ozark Miniatures stopcock and aluminum tubing inlet and rusted with paints and washes. A pallet was constructed of basswood and stained. The large gear is an HO scale item, the other gears are watch parts. Finally, an industrial piping fixture was made from an Ozark Miniatures shutoff valve and aluminum tubing, painted with Rustoleum black primer (which yielded a nice gritty surface), and rusted in the same manner as the other pieces. More details will follow.
-
One of my recent modeling activities has been to actually finish a project (what a unique concept!). About 15 years ago I was on a Monogram 1926 Mack AC kick. My maternal grandfather worked at Mack trucks during the Mack AC era (1912-1938), so I have a special connection to these trucks. I dug this one out and finished it today. This one represents a well used coal truck. The color is Testor's Gull Gray, decanted and shot through an airbrush. The engine has been wired and the vehicle was weathered with black washes and pastel chalk. The load is model railroad coal (which smells like real coal). The period correct license plates were created on the Acme License Plate site. Otherwise, it's pretty much out of the box.
-
I only seem to find rusy tools and scratchy Guy Lombardo records at estate sales, but today was the exception. Props to my wife for finding the sale; the entire haul set me back 20 bucks. I think I now have a lifetime supply of flat black paint!
- 39,274 replies
-
- 1
-

-
- johan
- glue bombs
- (and 1 more)
-
This is great news! I was hoping that it would include the roadster chassis equipment, which is crammed with goodies. Still, it's like being told that you've been given $1000, but it'll consist of ten 100 dollar bills, rather than the hoped for fifty 20 dollar bills.
-
1/25 Atlantis H1223 Mooneyes Dragster
Karl LaFong replied to Casey's topic in Car Kit News & Reviews
So.... What's inside the box? Does it include ALL the trees & tires that were in the original Revell Mooneyes/Sanitary T kit, minus the T frame and body? One of the previous links alluded to the addition of the Chrysler engine that was used in the Sanitary T. True or False? I'm looking forward to not having to scrounge parts from the Miss Deal kit or Revell Parts Pack gluebombs in order to built a period correct dragster! -
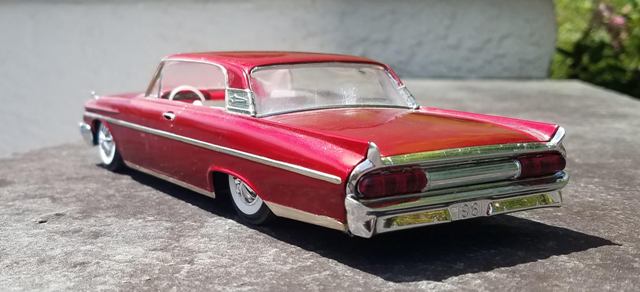
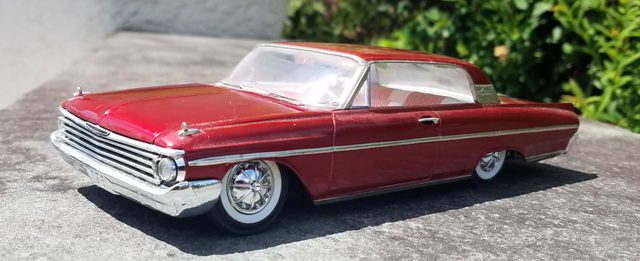
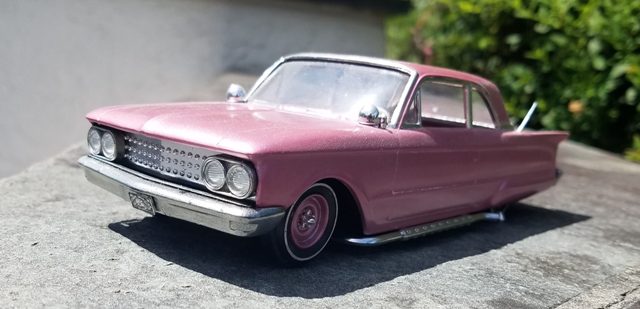
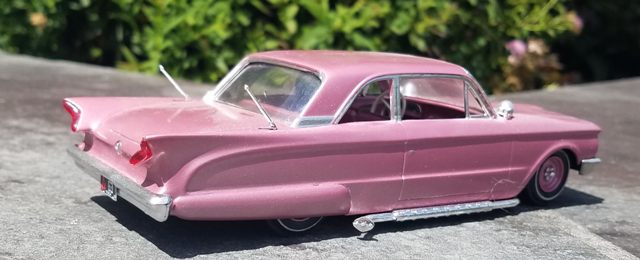
Here's a couple of '61 Mercs: First up, a large 61 with the Kit Kustom parts and 61 (I think) Thunderbird custom wheels. Paint is Tamiya Clear Red, interior is Tamiya Pearl White with Scale Motorsport upholstery decals. Next, is a 61 Comet with assorted period cusom parts. Paint is Tamiya Light Red Metallic.
-
86 monte carlo dirt st.stock
Karl LaFong replied to cheyenne93's topic in WIP: Other Racing: Road Racing, Land Speed Racers
You nailed it!! Nice job! -
86 monte carlo dirt st.stock
Karl LaFong replied to cheyenne93's topic in WIP: Other Racing: Road Racing, Land Speed Racers
Good job so far! What kind of tires are you using? -
Thanks for the kudos!


.jpg.c5a5f660077d0c905314b87d2073cd60.jpg)
.jpeg.fd36b99614bd20390fbc23e93d3ba392.jpeg)


.jpg.f46d679f044eb5375de97d5ea4a07300.jpg)
.jpg.8b1a68ca1ef5534c0048910368e8bbad.jpg)
.jpg.fc7893d44b6933e1d0ec4a0607783e04.jpg)

.jpg.71a51fcc2f6052a13481ac843cb76cae.jpg)
.jpg.0582ad2ac7a4099cea3ff8f4e822839b.jpg)