butter
-
Posts
63 -
Joined
-
Last visited
Content Type
Profiles
Forums
Events
Gallery
Everything posted by butter
-
Vintage Top Fuel FEDs, 1:16 brass chassis
butter replied to Mike Williams's topic in WIP: Drag Racing Models
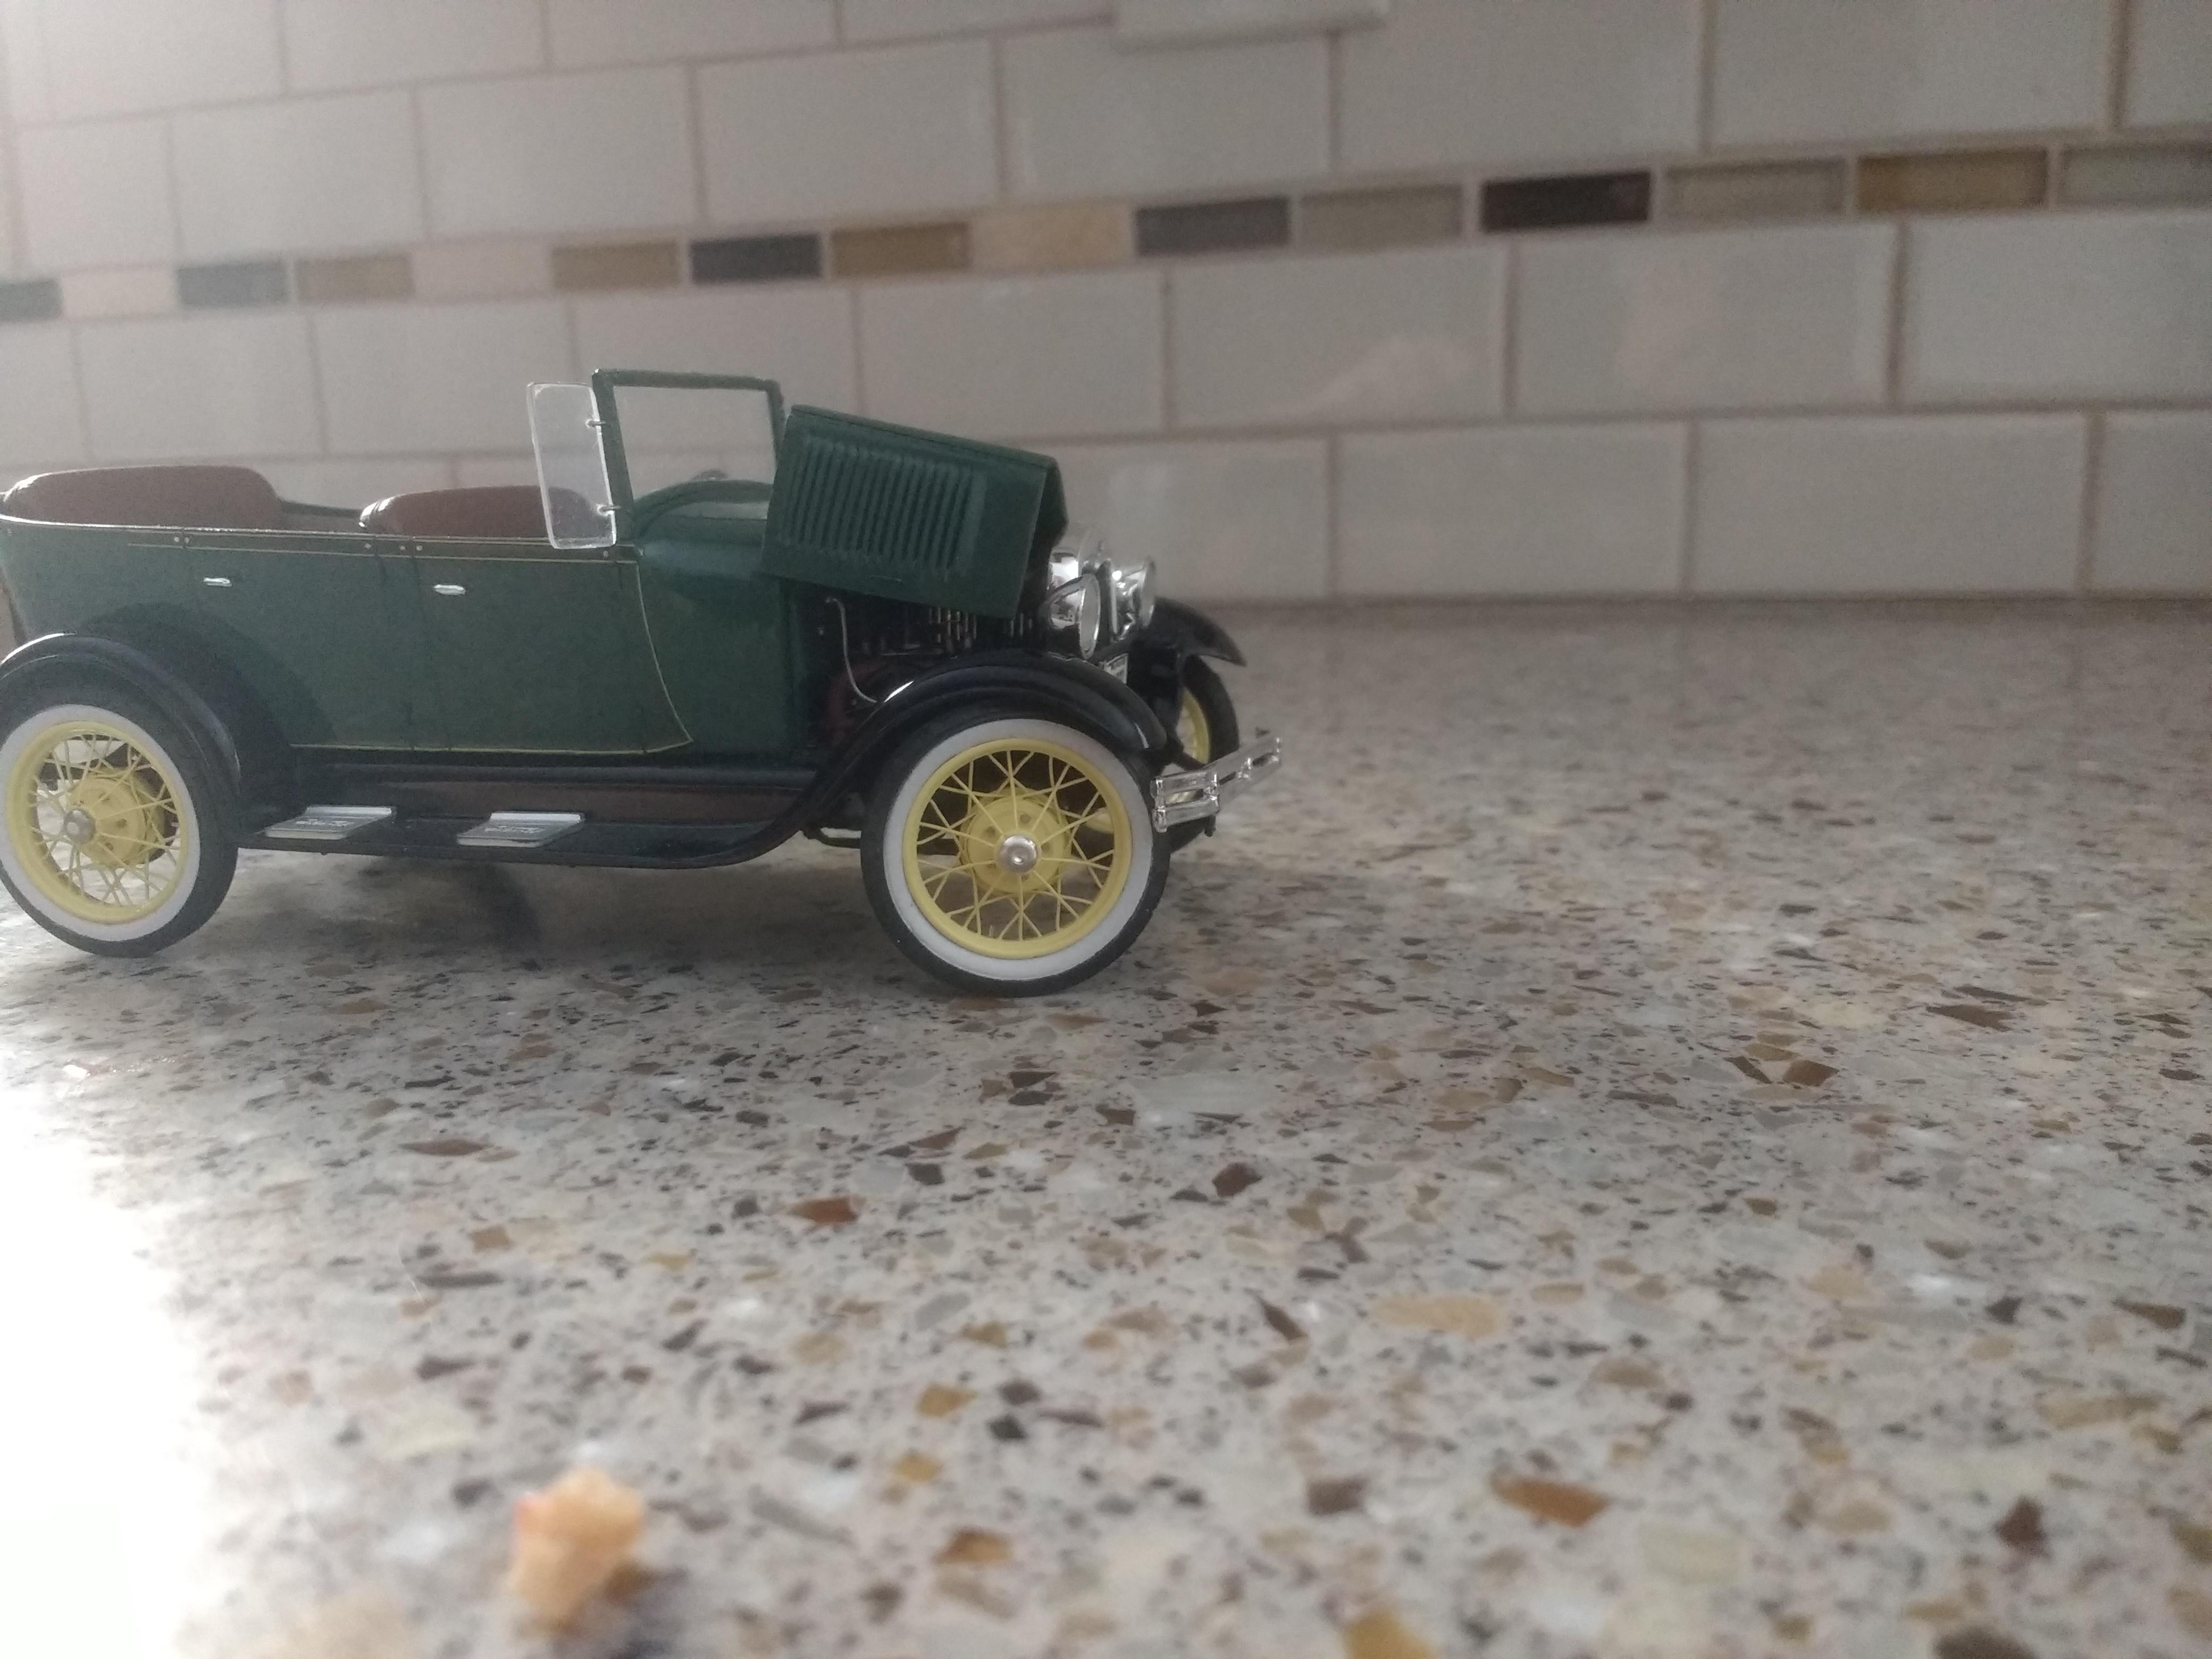
I hand laced some wheels for a model A I built years ago. I drilled out all the holes in each rim, string the wires as you did and just twisted the excess wire together outside the rim and inside the tires I hogged out to make room. none of the wires were attached to the rim with glue or solder. They all straightened out as I applied tension during the twisting process. Attached is a pic of the model with the wheels I am talking about. (Sorry, I work in 1/25th scale.) By the way. Your craftmanship is absolutely amazing!!! Always looking forward to your next installments.
-
34 Church Truck
butter replied to OldNYJim's topic in WIP: Model Trucks: Pickups, Vans, SUVs, Light Commercial
I like the way you detailed the motor. The gold valve covers are so 1960's. Nice build. -
De Foosing the FD-100
butter replied to butter's topic in WIP: Model Trucks: Pickups, Vans, SUVs, Light Commercial
Thanks for the feedback Francis. Your comments are always appreciated! The lower A arms are not correct so I am rebuilding. I will update when I get the whole front suspension roughed together. -
Looks good. Dash gauges and paint detail are well done.
-
charlie libby 1965 mustang dragcar
butter replied to charlie libby's topic in WIP: Drag Racing Models
Just stumbled on to this. Bigger scales are tough to get right but you have done it so far!! -
64 Dodge D100 Pickup Pro Street
butter replied to AmericanMuscleFan's topic in WIP: Drag Racing Models
Nice wok Francis. That bracket fits to the body like a glove and the fire extinguisher is a work of art. Awesome. -
De Foosing the FD-100
butter replied to butter's topic in WIP: Model Trucks: Pickups, Vans, SUVs, Light Commercial
I roughed together some A arms for the Heidts front end from paper clips, aluminum tubing and plastic. The first pic is a top view of the upper A arm from my 1:1 truck I used to model the uppers. I primered a couple of them to make sure they will look ok. To make all that stuff stick together I use a mixture of super glue gel and Testors liquid cement. 80 to 90% super glue, the rest Testors. This lets me move the parts around for a moment before the super glue sets. I use this glue for about everything (plastic to plastic, plastic to metal and metal to metal) because it is easy to use and holds like iron. The body of the 56 panel I show earlier in this thread was glued together and painted over 20 years ago and as you can see from the pics all the cuts for the chopping and sectioning still do not show.
-
64 Dodge D100 Pickup Pro Street
butter replied to AmericanMuscleFan's topic in WIP: Drag Racing Models
That is about the nicest dash I have ever seen!!! The clarity of the gauges is unbelievable. As always with your work, it all fits, and it's all in scale. -
1955 Big Block Truck
butter replied to Lorne's topic in WIP: Model Trucks: Pickups, Vans, SUVs, Light Commercial
Hey Lorne. Beautiful work with the RD Unique front end. The plumbing you added to the rack appears to be spot on. I am digging one of those out of my aftermarket stash to throw under my 56 F100. Like you, I wish I had a few more, I only have 2 that have not been used. As everyone else has already said, all of your work is fantastic! -
Westernstar 6900 oilfield bed truck
butter replied to yh70's topic in WIP: Model Trucks: Big Rigs and Heavy Equipment
The weathering on the frame and engine came out really nice. -
Curtis Turner's 1966 Impala
butter replied to Bmargo11's topic in WIP: Stock Cars (NASCAR, Super Stock, Late Model, etc.)
Very nice and clean build. Gotta love those 60's NASCARs. -
Don't know if you are interested in opinions about the quarter panel, but I kind of like Steve H's photoshopped idea. Still looks "Olds" but flows into the door nicely. BTW. really like this build. regardless of what you do it will be way cool.
-
64 Dodge D100 Pickup Pro Street
butter replied to AmericanMuscleFan's topic in WIP: Drag Racing Models
That is as far as I would go as well. You need to draw the line somewhere. But, I bet if you wanted to do it, you could figure it out! -
64 Dodge D100 Pickup Pro Street
butter replied to AmericanMuscleFan's topic in WIP: Drag Racing Models
The brass pedal bracket does look better. Once again, nicely done.!! I am assuming functioning pedals and probably carb linkage when all is said and done? -
1974 Dodge Club Cab
butter replied to tuffone20's topic in WIP: Model Trucks: Pickups, Vans, SUVs, Light Commercial
Nice paint and foil work on the letters. Those colors look good on that truck. -
De Foosing the FD-100
butter replied to butter's topic in WIP: Model Trucks: Pickups, Vans, SUVs, Light Commercial
Thanks Tim for sharing your pic of the steal trim. I hope mine works out like yours did. Yours looks awesome. Never thought about silver wire. -
De Foosing the FD-100
butter replied to butter's topic in WIP: Model Trucks: Pickups, Vans, SUVs, Light Commercial
Thanks Francis. I was pretty happy with the way they came out. Everything needs to be pulled apart and cleaned up. I am keeping tabs on your absolutely fabulous build and enjoying every bit of it. -
De Foosing the FD-100
butter replied to butter's topic in WIP: Model Trucks: Pickups, Vans, SUVs, Light Commercial
Thanks for the feed back Jim. Sorry I am so late with a response. I have a daughter living in Tampa so perhaps I can connect with your club sometime when I am in the neighborhood. -
1928 Ford Sedan 60's Style Altered UPDATED 2/10/19
butter replied to Dennis Lacy's topic in WIP: Drag Racing Models
Nicely executed chop. Not too much, not too little. Your choice of colors and paint detail are outstanding. Way cool! -
De Foosing the FD-100
butter replied to butter's topic in WIP: Model Trucks: Pickups, Vans, SUVs, Light Commercial
I decided to see if I could make some working hood hinges so I roughed out the under hood bracing details and added a few pieces of aluminum for hinges. Somehow I got them to work. I need to do a little more clean up and hood adjustment. I have started work on the Heidts front suspension. I will drop some pics when I get a little further along.
-
64 Dodge D100 Pickup Pro Street
butter replied to AmericanMuscleFan's topic in WIP: Drag Racing Models
NICE !!!!!!!!!!!!!!!!!!!!!!!! -
The play by play on building the carbs was very interesting. Thanks for doing that. Amazing detail and everything looks to be perfectly scaled.
-
64 Dodge D100 Pickup Pro Street
butter replied to AmericanMuscleFan's topic in WIP: Drag Racing Models
Hey Francis. The suspension components are superb!! Everything really looks in scale and correct. The seat brackets are also a nice touch. Every single item on this truck is a perfectly executed model in its own right. It will be amazing when it is all together!!!!!!!!! -
1969 C10 shortbed
butter replied to plasticfrog's topic in WIP: Model Trucks: Pickups, Vans, SUVs, Light Commercial
Awesome paint job. -
De Foosing the FD-100
butter replied to butter's topic in WIP: Model Trucks: Pickups, Vans, SUVs, Light Commercial
You mean like this?? That's too easy. Thanks