Q tip
-
Posts
248 -
Joined
-
Last visited
Content Type
Profiles
Forums
Events
Gallery
Everything posted by Q tip
-

Moebius Models Accessory Pack - Big Rig Wheel & Tire Set
Q tip replied to Diesel Jockey's topic in Truck Kit News & Reviews
i got mine from plastic models.com witch is tower hobby. with my 10 dollar gift code from them i spent a whole 7.00 including shipping. -
peterbilt cab over custom
Q tip replied to Q tip's topic in WIP: Model Trucks: Big Rigs and Heavy Equipment
be my guest, just took one and cut the sides off and used flat stock on the underside, then putty to fill the gap -
AMT Peterbilt 359 Cali. Hauler ?
Q tip replied to Old Buckaroo's topic in General Automotive Talk (Trucks and Cars)
like to have that single axle just to drive to the store -
comprehensive kit list? rigs
Q tip replied to tbill's topic in General Automotive Talk (Trucks and Cars)
great lists! man you talk about cruisin down memory lane, should have asked for directions cause i almost got lost! LOL -
peterbilt cab over custom
Q tip replied to Q tip's topic in WIP: Model Trucks: Big Rigs and Heavy Equipment
yeah i know,pretty cheap for what you get. havent received mine yet, they shipped from the Reno nv. warehouse. just finished painting the frame a gunmetal grey metalic. not very easy to get that finish without shadowing but i think i pulled it off. looks good. should work well with the metalic red. -
peterbilt cab over custom
Q tip replied to Q tip's topic in WIP: Model Trucks: Big Rigs and Heavy Equipment
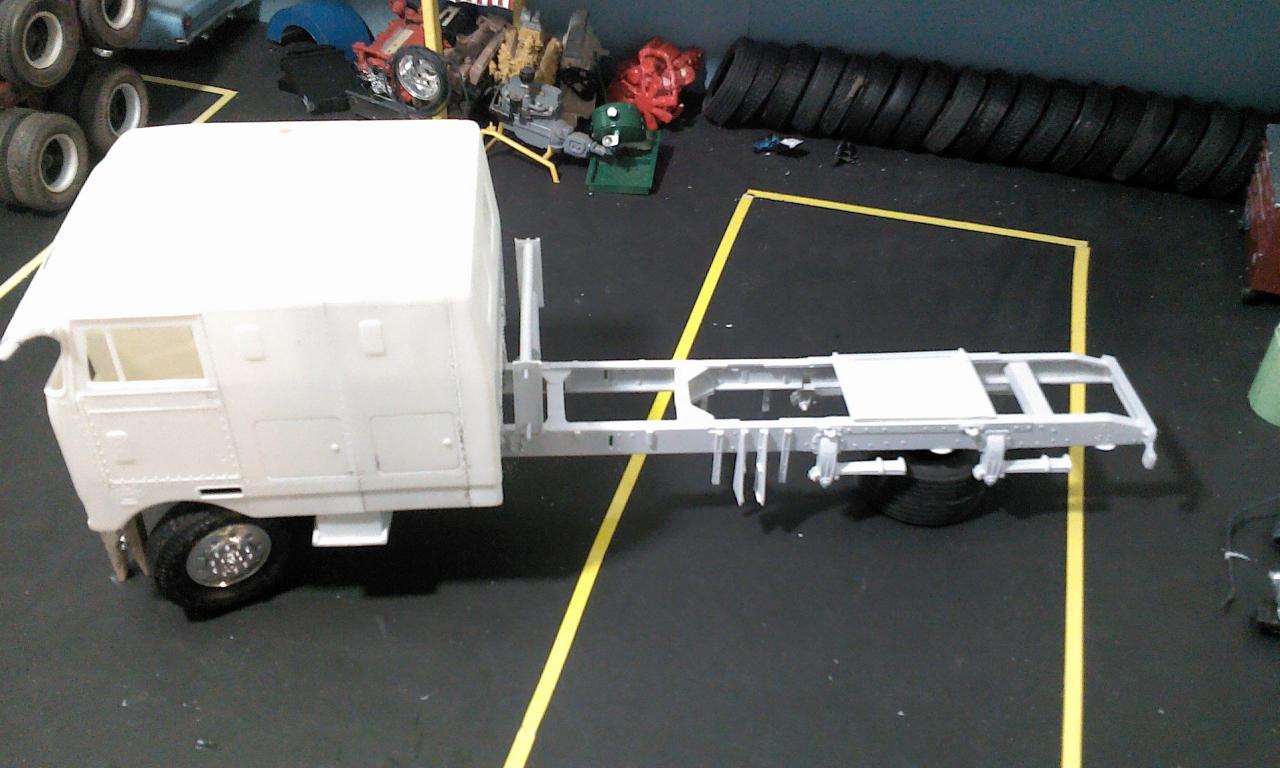
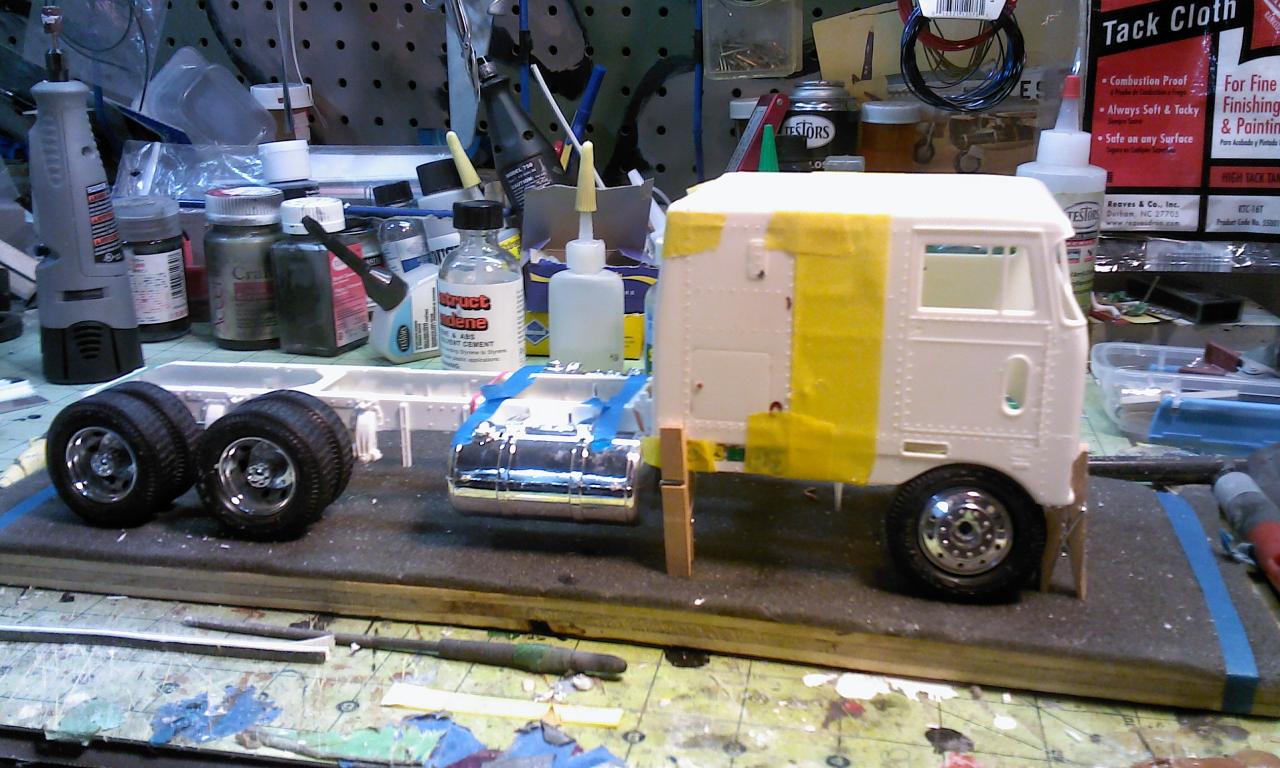
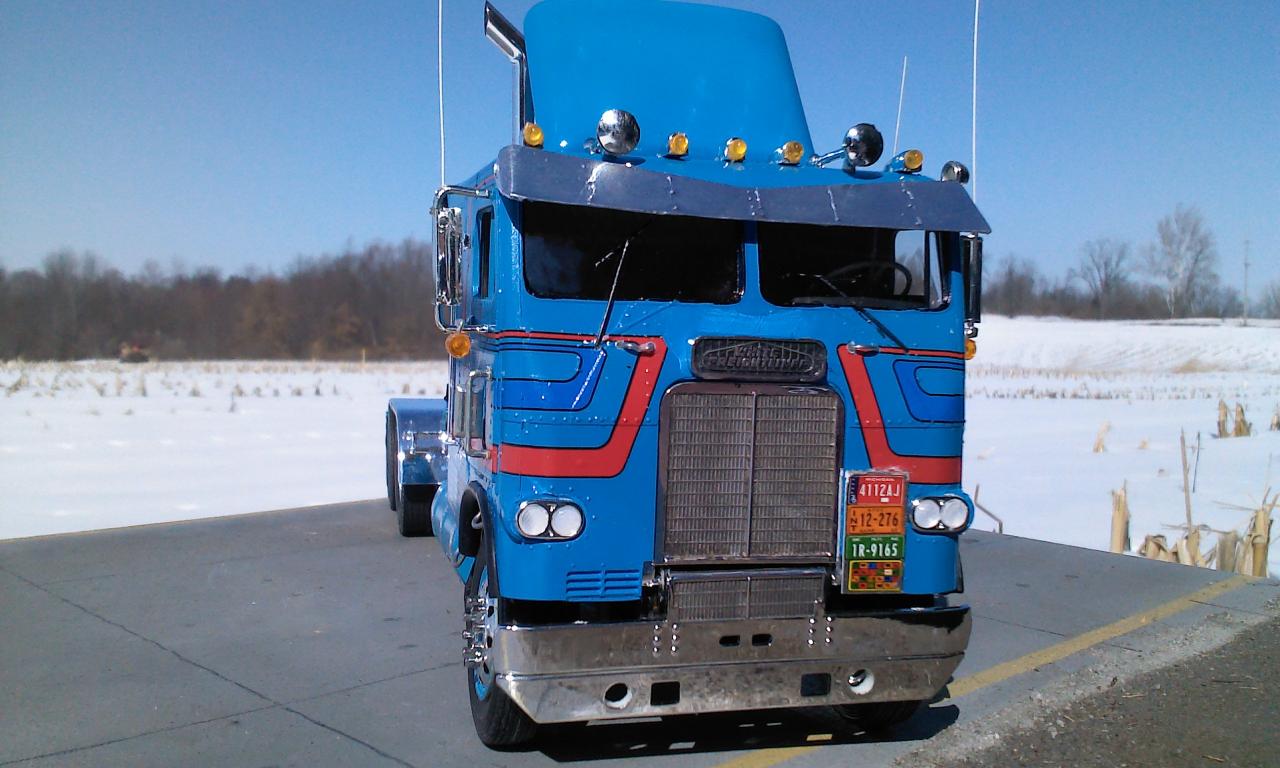
With the chassis pretty much set up with the modifications it needed I went ahead and primed it for paint. Since I'm planning on using the Möbius wheels and tires when they arrive I can't really mount the rear drives. The steer is on just for effect since the front axle is movable. The visor was made from two amt visors. Enjoy
-
peterbilt cab over custom
Q tip replied to Q tip's topic in WIP: Model Trucks: Big Rigs and Heavy Equipment
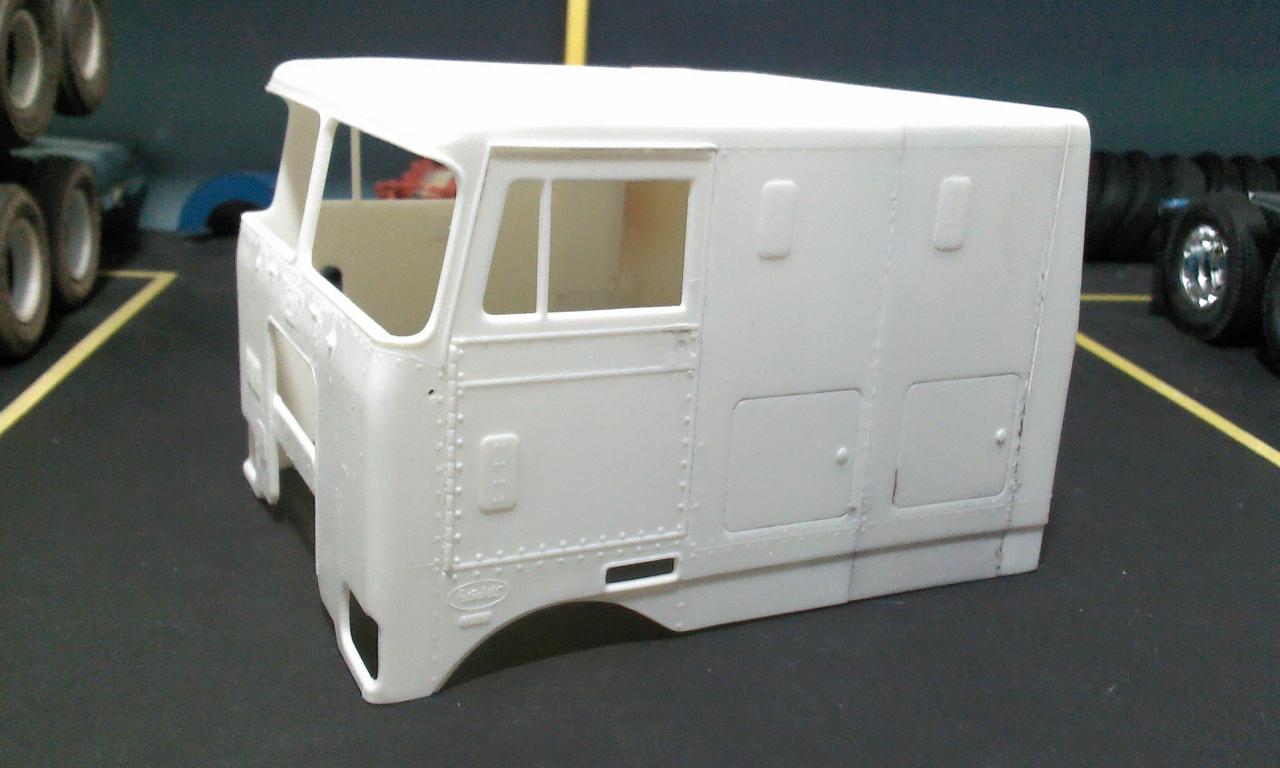
i have working on the cab to knock the rivets down a little and i'm gonna leave the second box cause thats how they came. thought about removing the second air vent but since this is going to be kind of "custom show truck" if figured i have a little bit a room to not be stock. ordered the mobius wheel and tire set for it so that kind of shows the route i'm taking. for the cuts on the cab i used a razor saw with masking tape guide lines................thanks for lookin, should have new pics soon..the visor is killer! -
AMT Peterbilt 359 Cali. Hauler ?
Q tip replied to Old Buckaroo's topic in General Automotive Talk (Trucks and Cars)
ok , so your gonna keep me in suspence. may i suggest a 60" bare metal Able sleeper? all the white w/s ,diamond reo and road boss have them. wouldnt take much to combine a couple. oh yeah, i can see it now! -
AMT Peterbilt 359 Cali. Hauler ?
Q tip replied to Old Buckaroo's topic in General Automotive Talk (Trucks and Cars)
ah-ha, now i know what your up to! thats how i would fix it, just a small piece of plastic to fill the gap. and the narrow window is the nicer looking of the two. its from the 60's where the bigger window was the updated product that lasted until the late 80's to be then replaced with the 379. -
peterbilt cab over custom
Q tip replied to Q tip's topic in WIP: Model Trucks: Big Rigs and Heavy Equipment
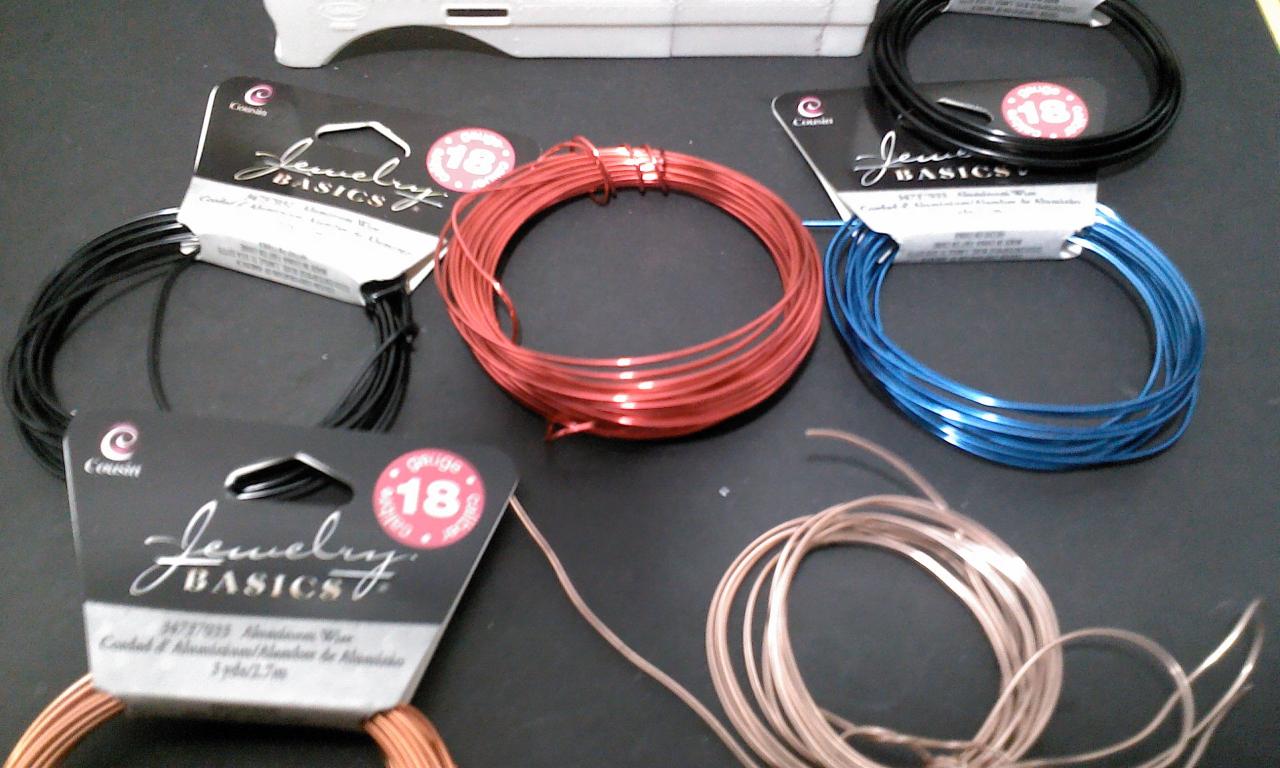
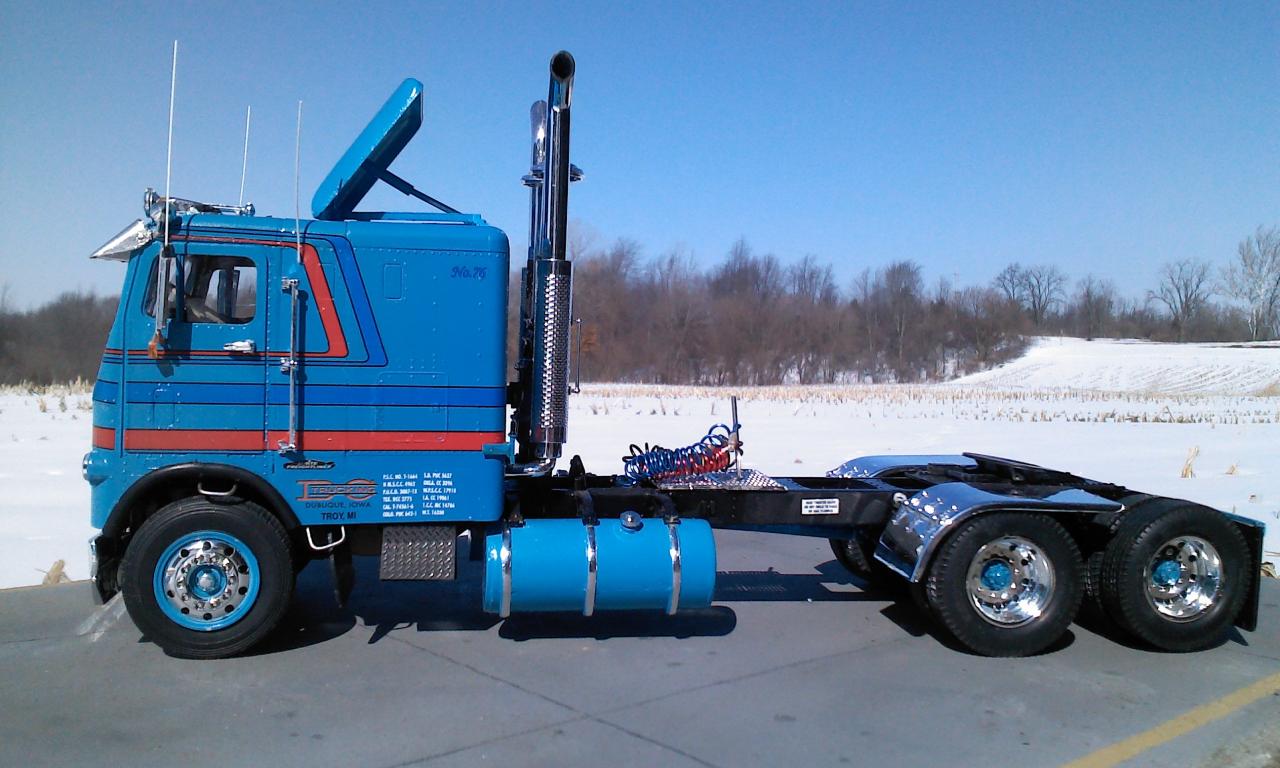
Just a small update of the cab before and in progress. The wire is aluminum i have been picking up at the big box stores. Works really well for about anything you can think of. It only costs around $2.00!
-
a set of michigan gravel boxes would look nice on this..nice truck!
-
peterbilt cab over custom
Q tip replied to Q tip's topic in WIP: Model Trucks: Big Rigs and Heavy Equipment
the wheel base is 12 1/2 inches bumper to bumper, so it should be only a mere 300". i'm thinking of a red metal flake for the cab and tanks and a charcoal metal flake for the frame,but as always,its subject to change.....thanks for all the good comments. -
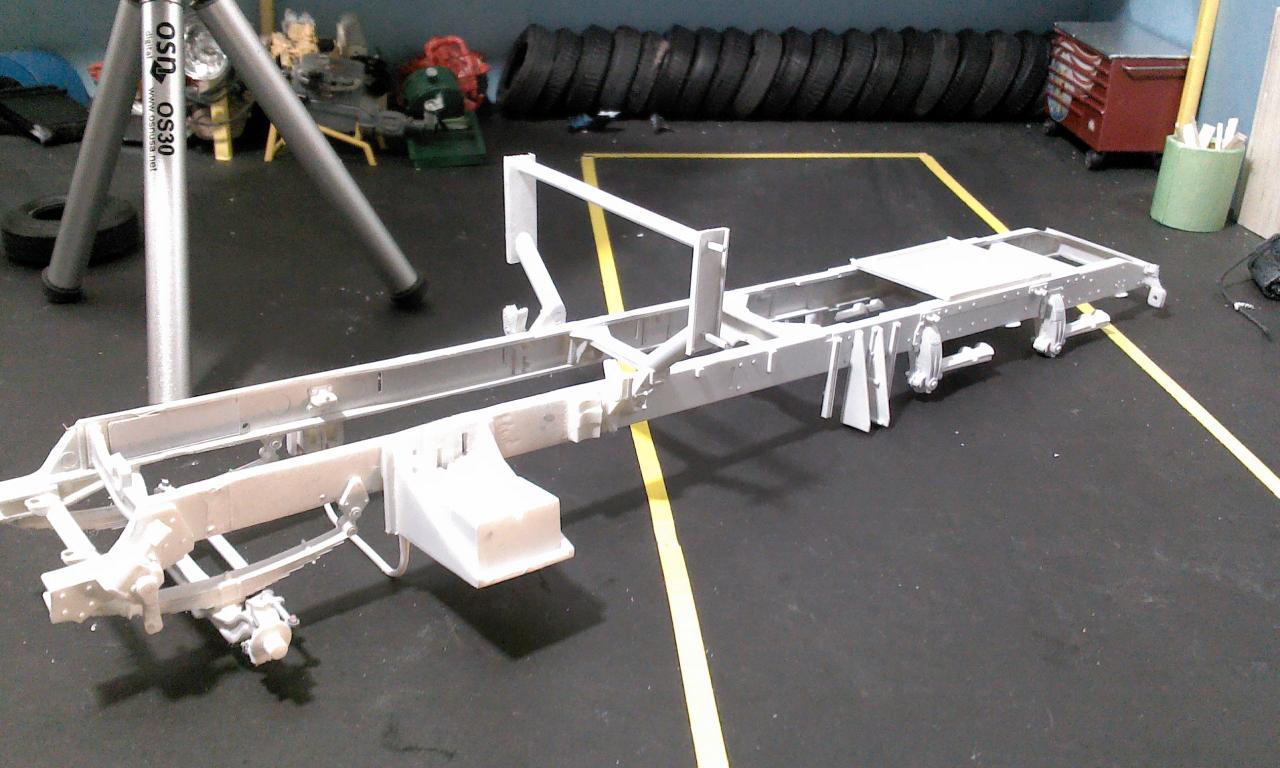
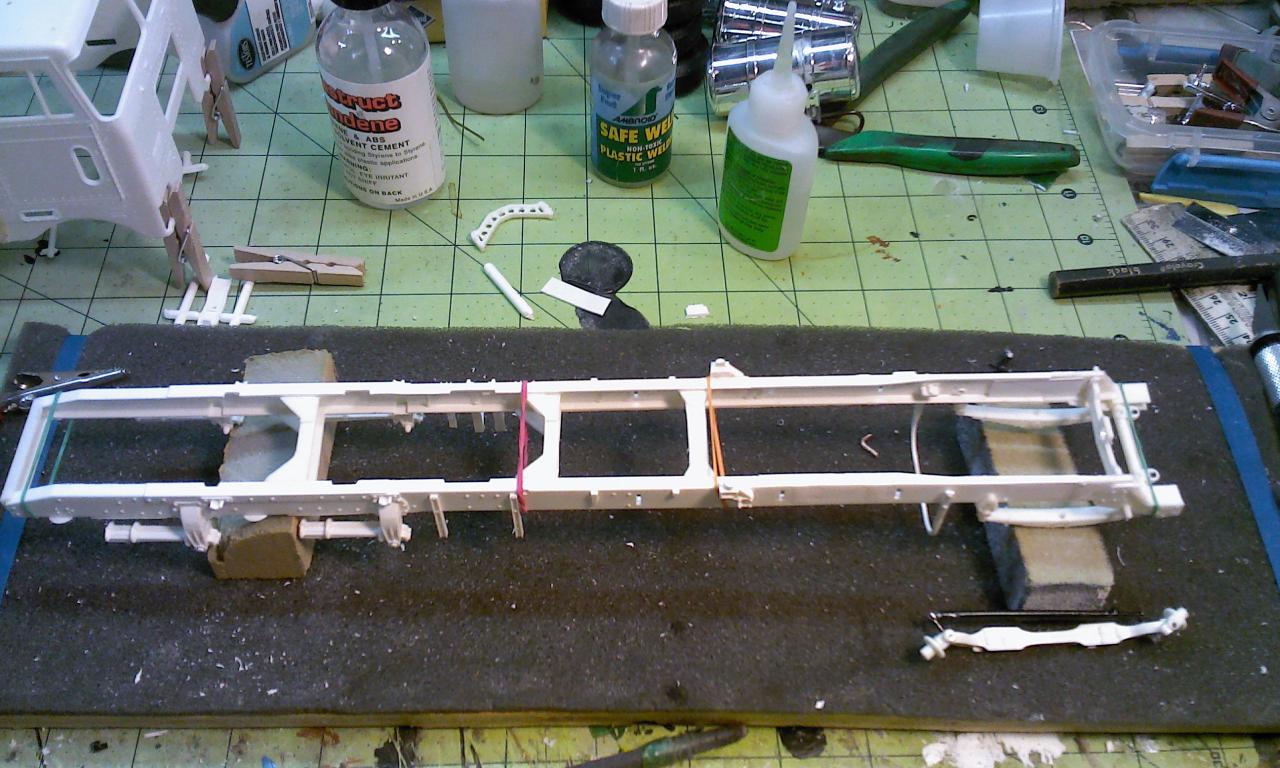
I Starting with amt's 352 and a set of revell left over frame rails to begin a decent attempt for a cool custom. The frame rails carried the length I was after but didn't want to be hassled with cab mount problems. So I cut 1 1/4 inches from the amt rails and mounted them to the revell rails.The mock up is kind of what I'm aiming for. Enjoy!
-
telephone wire. cut the outter casing off and you have four different colors of small gauge wire for airlines,plug wires ect.
-
white freightliner double bunk
Q tip replied to Q tip's topic in Model Trucks: Big Rigs and Heavy Equipment
thanks for the comments! its got a couple of flaws but all in all it turned out pretty good. now onto the peterbilt. -
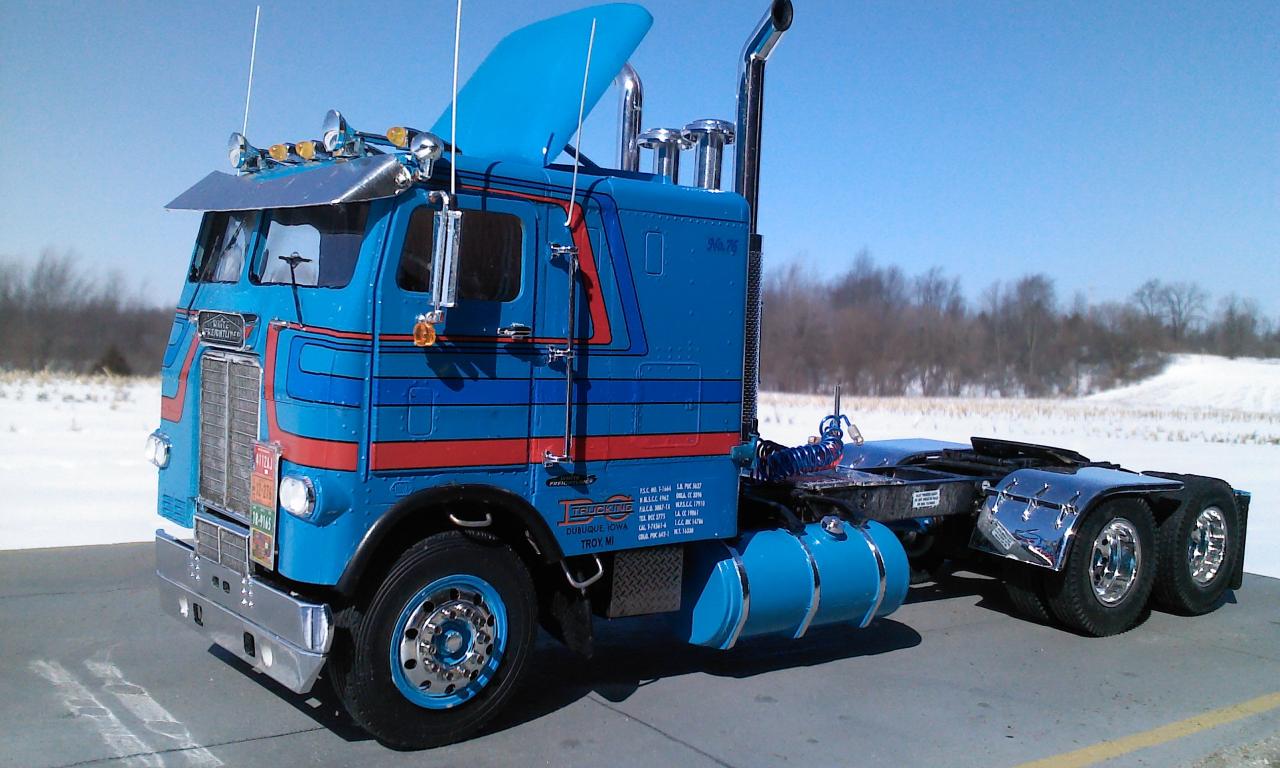
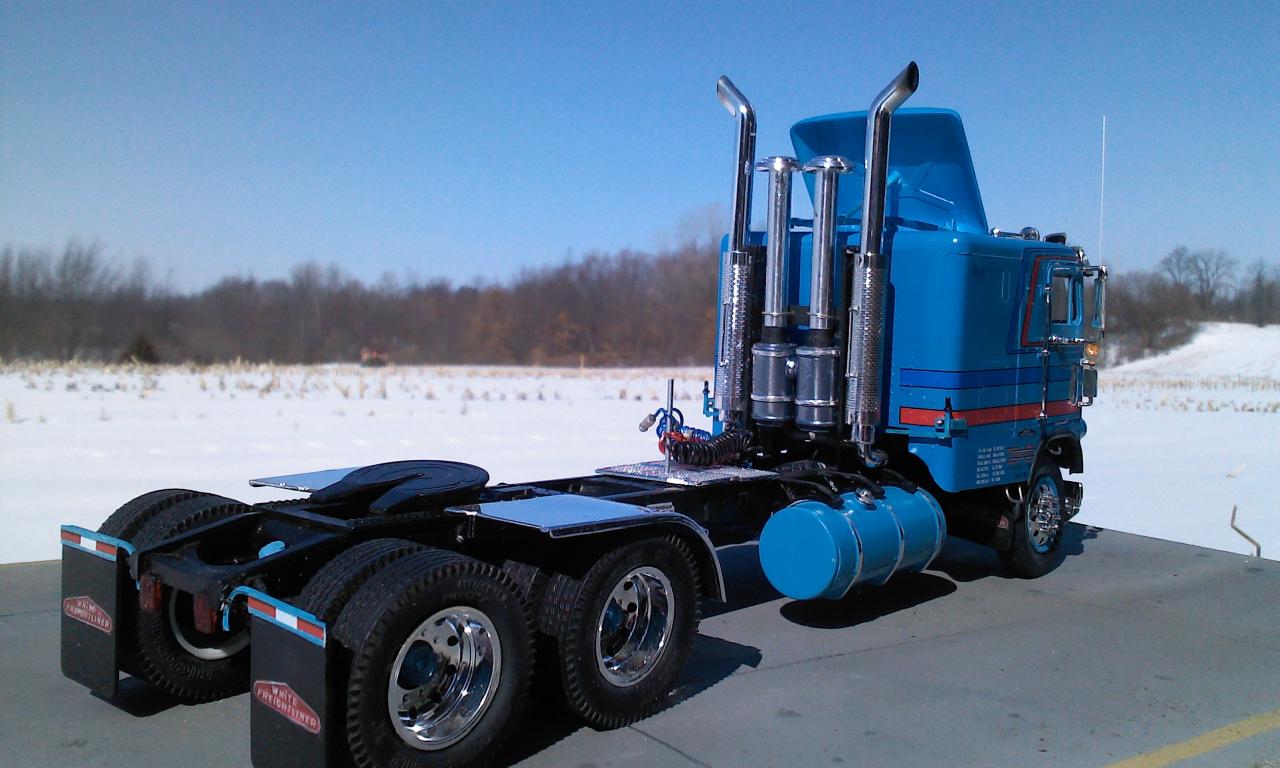
Well this one is completed. I did notice afterwards that the cab locks are upside down,oh well it happens! Enjoy the pics......thanks john
-
i have studied this truck several times now and still can not find the words. it should be the cover photo of a magazine........hint hint
-
Austin Harrison's 379 Pete
Q tip replied to Chaser's topic in Model Trucks: Big Rigs and Heavy Equipment
just how i like 'em, in the weeds and long enough to have their own zip code -
1968 Freightliner
Q tip replied to Old Buckaroo's topic in Model Trucks: Big Rigs and Heavy Equipment
well you know how feel about it Sean. right on the money..............whats next on the menu of plastic? we're hungery for more! -
1968 Freightliner coe
Q tip replied to Old Buckaroo's topic in WIP: Model Trucks: Big Rigs and Heavy Equipment
wait what is that i hear? oh just the static coming from the high stylin' AM radio! bulls eye, you hit the old school look spot on! -
Alternative to Bare Metal Foil
Q tip replied to Baugher Garage's topic in Tips, Tricks, and Tutorials
that tape is great, i've been useing it for a long time. works great with trucks, even better for building semi trailers that get stainless steel doors,sides ect -
Looking for help/info on a trailer.
Q tip replied to stang_crazy's topic in General Automotive Talk (Trucks and Cars)
if you decide to scratch build the conversion will be 1"=2.1 scale feet in 1/25 scale and 1"=2 feet in 1/24. good luck -
KW Car Hauler Finished
Q tip replied to kilrathy10's topic in Model Trucks: Big Rigs and Heavy Equipment
turned out very nice, now what to put on the back???? have you thought about a G.A.T.R. (great american truck racing) truck. everyone has a race car on theirs, you could have a slung low kw racer on yours! -
Freightshaker
Q tip replied to The Modeling Hermit's topic in Model Trucks: Big Rigs and Heavy Equipment
thats a good lookin combo! -
Pete daycab log truck
Q tip replied to Q tip's topic in WIP: Model Trucks: Big Rigs and Heavy Equipment
the thing with this is that i'm just kind of slamming it together. the frame on the tractor was a copper color and the trailer was vermont green. so i just blew gaurds red over all of it and chased it with sand/tan for the dirt aspect. when i started it i was aiming for something that looked good, but not too good if that makes any sense. and Sean, i've been here all along,just had some problems with my surgery recovery,so the meds they have me on turns my hands into paint shakers! LOL. gotta see the bright side.