

tmb727
-
Posts
154 -
Joined
-
Last visited
Content Type
Profiles
Forums
Events
Gallery
Everything posted by tmb727
-
Great pics. Very nice, clean work from every angle.
-
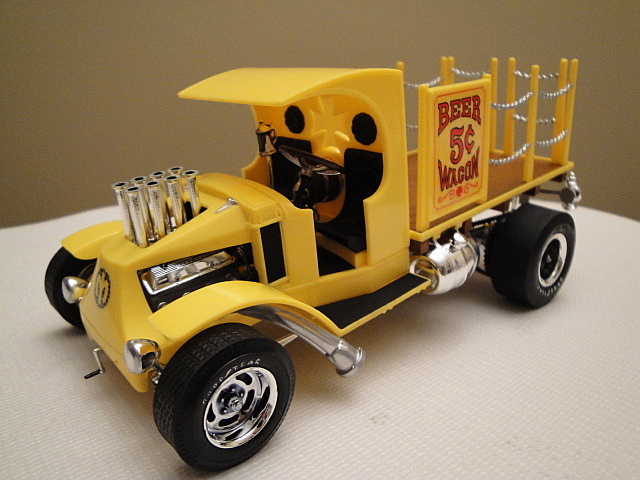
Two Popcorn Wagon posts only a couple of weeks apart! Gotta love that. Yours looks fantastic. Nice job with the wood grain. Everything else clean and nice too. Wish my kit had those original decals... Well done!
-
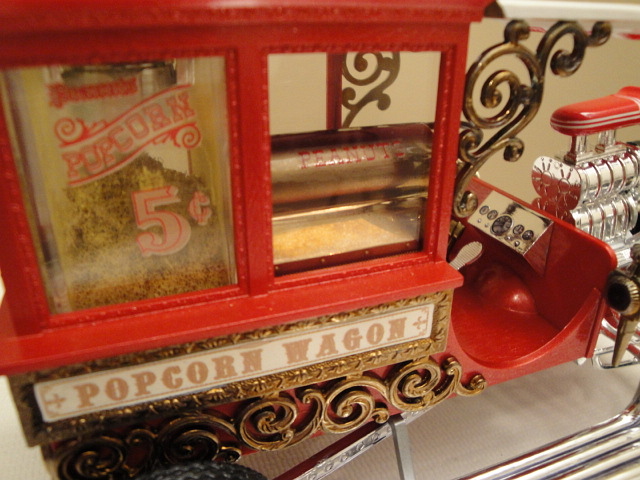
Good question. The original MPC kit actually had guidance for this - break up some styrofoam. However, I remembered that when I did that, the pieces were too big and looked like little rocks. Also, I was afraid that if I tried that again and really ground it up, it would not stay in place if the model was moved around, tipped, etc. So I used a piece of grey, foam, weatherstripping, cut it to fit and plucked off the top with tweezers to give it a ragged "piled up" look. Glued it to the base with white glue and dabbed it with paint and pastels. Looks okay from the sides; not quite "popcorny" enough from the back, but I'll take it.
-
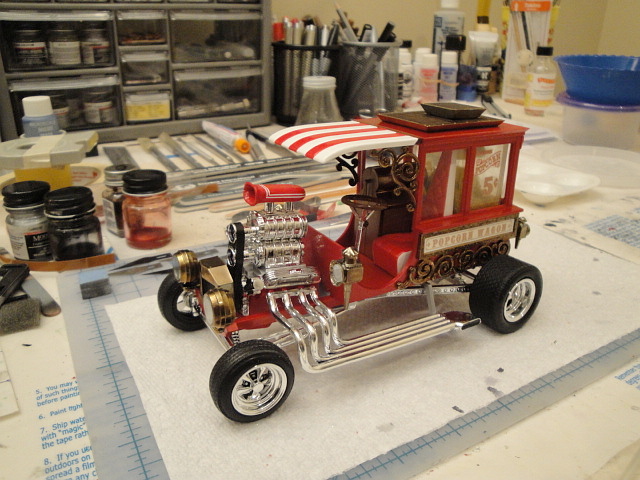
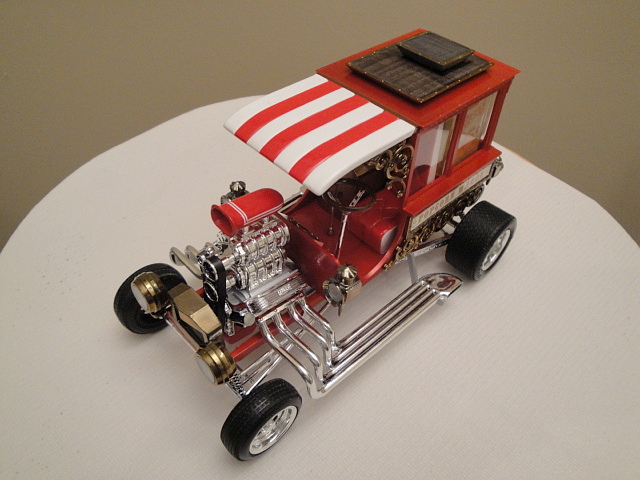
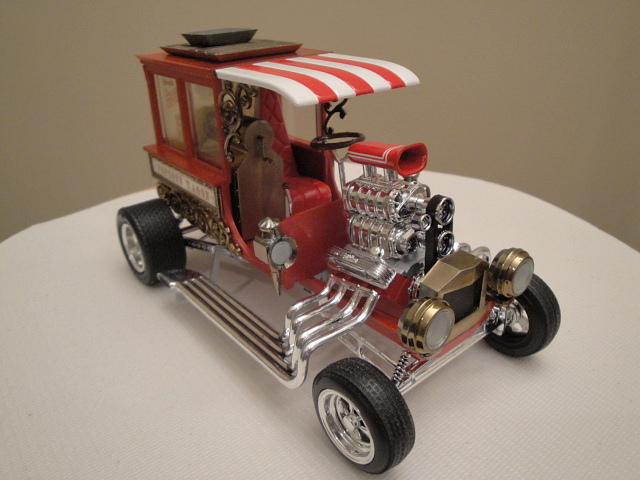
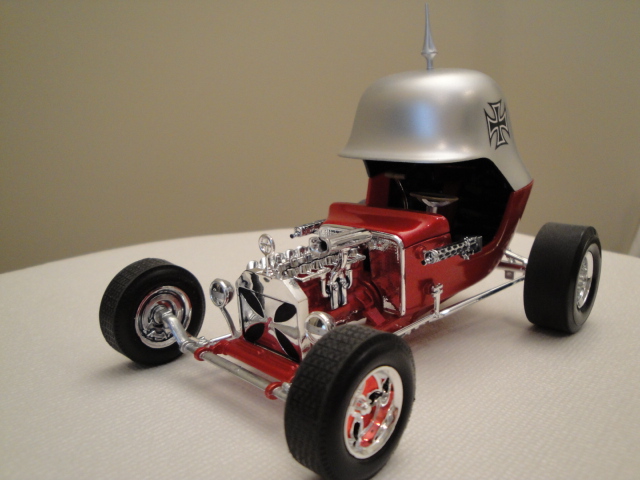
AMT/ERTL release of the Popcorn Wagon show rod. Built the original MPC kit as a kid. Don't think the AMT version was quite as good (old forum threads here seem to confirm this) with plastic front tires, a less inclusive decal sheet, and lower quality on the brass parts being some of the issues. So more challenging than I thought it was going to be, but happy with the end result and glad to call it done and put it back on the shelf again after about 45 years... Paint: Airbrushed Testors "classic" gloss red and white for the canopy, seat, and blower hat. Tamiya TS-18 Metallic Red for the body. Chrysler Engine Red for the engine. Minutes after completion: (with replacement front tires from the spares box) And the rest:

-
Here's three of mine, with a Popcorn Wagon currently on the workbench.
-
That's a gorgeous engine bay. How did you get the texture for the vinyl roof before you applied the semi-gloss black?
-
And the awesome dashboard? Are those decals for the gauges and, if so, do they come with the kit?
-
 Donn Yost recommends the Paasche H in his airbrushing "how to" DVD. "nuff said...
 -
Thanks for the tip, Ray. I think I'm gonna go with the half round styrene strip as a "connector" between the inner and outer wheel rims, thus trapping the tire between them and - hopefully - holding everything in place. Casey, thanks for the offer. If my solution doesn't work, I'll let you know.
-
All, Thanks for the feedback. Casey, your "almost never recommended" comment concerning adhesive on tires confirmed my apprehension about trying that. I took another look at it and did some test fitting with half round strips and it looks like the styrene strip/spacer suggestions are my best bet, as the gaps are too big for Erik's BFM suggestion. FYI...They're the slicks for the AMT/ERTL Popcorn Wagon kit. Gotta love the show rods... Onward...
-
On the current kit I'm working on, the chrome mag wheel covers fit very loosely into the rubber slicks and tires. They also do not meet with the plastic inner wheels, so I can't glue the two together and "trap" the rubber tires between them. Anyone know if super glue would bond the plastic and chrome parts to a rubber tire? If not, any recommendations as to what to try? TIA.
-
First build since childhood and you got those white stripes to lie down perfectly on that hood! After my own frustrating experiences with those stripes, my hat's off to you. Well done.
-
Both the model and how you present it in the photos are stunning. Very well done.
-
Nice, clean work from all angles. I really like how the engine valve covers and the "Mustang" script on the back came out.
-
One that's on the table right now for me. You've got me re-thinking my planned color choice. Nice work. Are those the kit tires and wheels with the plastic whitewall inserts? Wasn't sure about using them, but yours look great.
-
Wow. Just...wow. Absolute perfection. Re: This month's ScaleAuto "Tips and Tech" - I'll bet you're smiling now!
-
Not sure I should take another swing at it...oh, yeah, that's sooo much better... Love it when that happens.
-
Man, maybe I should try this kit, as it seems that it rewards everyone who builds it with beautiful work. Well done.
-
Really nice work all around and great color choices.
-
Shows beautifully from all angles, inside and out, front and back. Clean indeed.
-
Wow, four nice, clean, builds in just one month. I can't even get one kit's parts off the sprues in a month. Well done! Really like the Corvette...
-
Yes, Marina Blue was a '67 color. I lived in the UK many years ago when I was in the Air Force. I can relate to the "more than he bargained for" comment - at least as far as size is concerned. I can't imagine driving that beast on some of the narrow village roads and roundabouts. You would definitely have the right of way, as you would probably take up most of the road!
-
Revell 69 Camaro Z28. Paint: Exterior is Testors Hugger Orange and Testors Ultra Gloss Clearcoat from the can. Engine is Scalefinishes Chevy Engine Orange. Aftermarket: Plug wires, resin carbs, Fireball Modelworks white letter tire decals, Keith Marks decals for the scripts. The kit decals were used for the stripes. Originally, the plan was for white stripes. Suffice to say, that didn't go very well. socal76, if you are reading this, thanks again for the spare white stripes. As you can see, they didn't go very well either. So, in order to save the build, I cut the black stripes into segments for the hood to get them to lie down on the curves. That finally produced acceptable results. Oh, another fun disaster on this one. Eagle eyes will notice the rear valence is not the kit's. That's because I forgot about it when I washed it and the body in the kitchen sink in preparation for primer and paint. Down the disposal it went, which I found out about later that night after dinner... So the piece on the model is a part of a valence from the spares box and sheet styrene. Not perfect, but looks pretty good to me and, again, it saved the build. Thanks for looking!
-
AMT 67 Impala SS427. Paint: Exterior is airbrushed MCW Marina Blue with Tamiya TS-13 clearcoat from the can. Interior is airbrushed Testors Light Ivory topcoated with Tamiya Pearl White from the can. Engine is Scalefinishes Chevy Engine Orange. Aftermarket: Plug wires, battery cables, Keith Marks decal scripts.
-
First time attempting to post photos here. More to follow if this works and I get around to taking them... And another one...


.JPG.7d6c1bbe80aedc5e50d1f8e1fb871792.JPG)