asfastasu
-
Posts
173 -
Joined
-
Last visited
Content Type
Profiles
Forums
Events
Gallery
Everything posted by asfastasu
-
1978 Dodge pickup
asfastasu replied to asfastasu's topic in Model Trucks: Pickups, Vans, SUVs, Light Commercial
Lol. Good eyes. Was wondering if anyone would notice. I lost one tire, it'll pop up in a month or so......right? -
1978 Dodge pickup
asfastasu replied to asfastasu's topic in Model Trucks: Pickups, Vans, SUVs, Light Commercial
Thanks!! I see I also forgot to add the master cylinder, D'oh!! Oh well? That's what happens when you rush. -
Thanks for the kind comments! Yes it was the newest reissue of the revellogram kit. Wish it was as easy to put together as the FD from Tamiya.
-
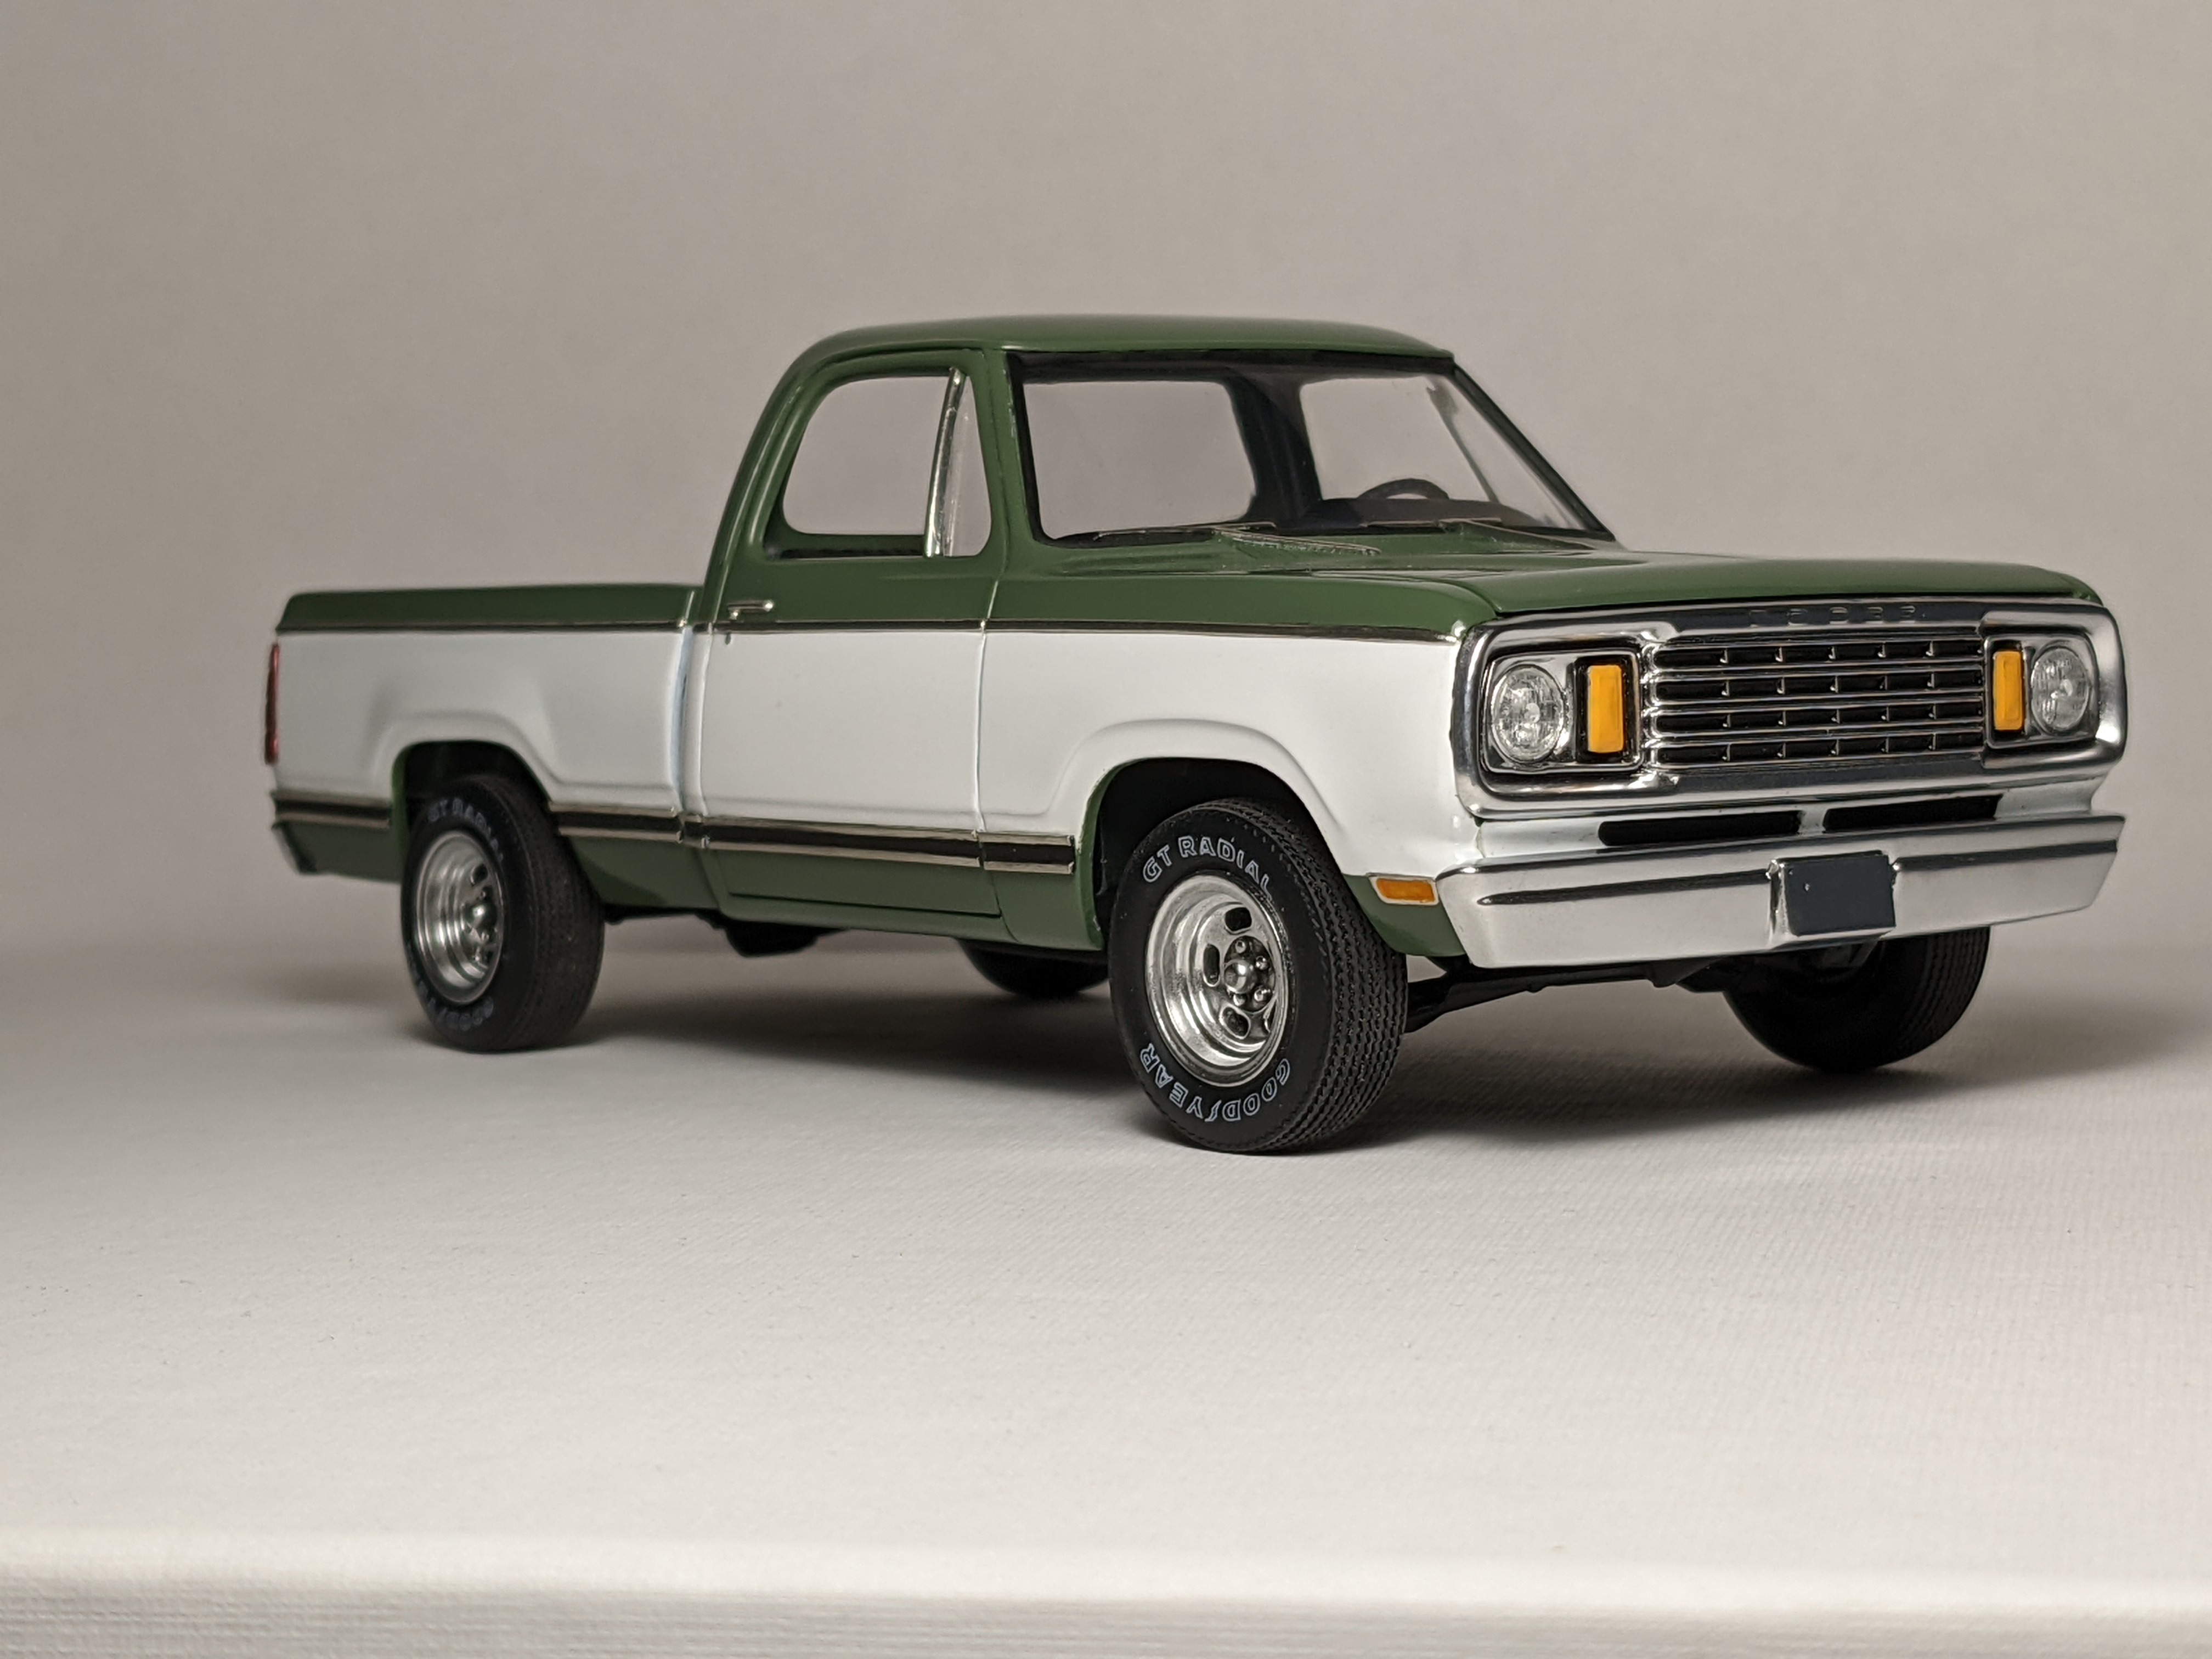
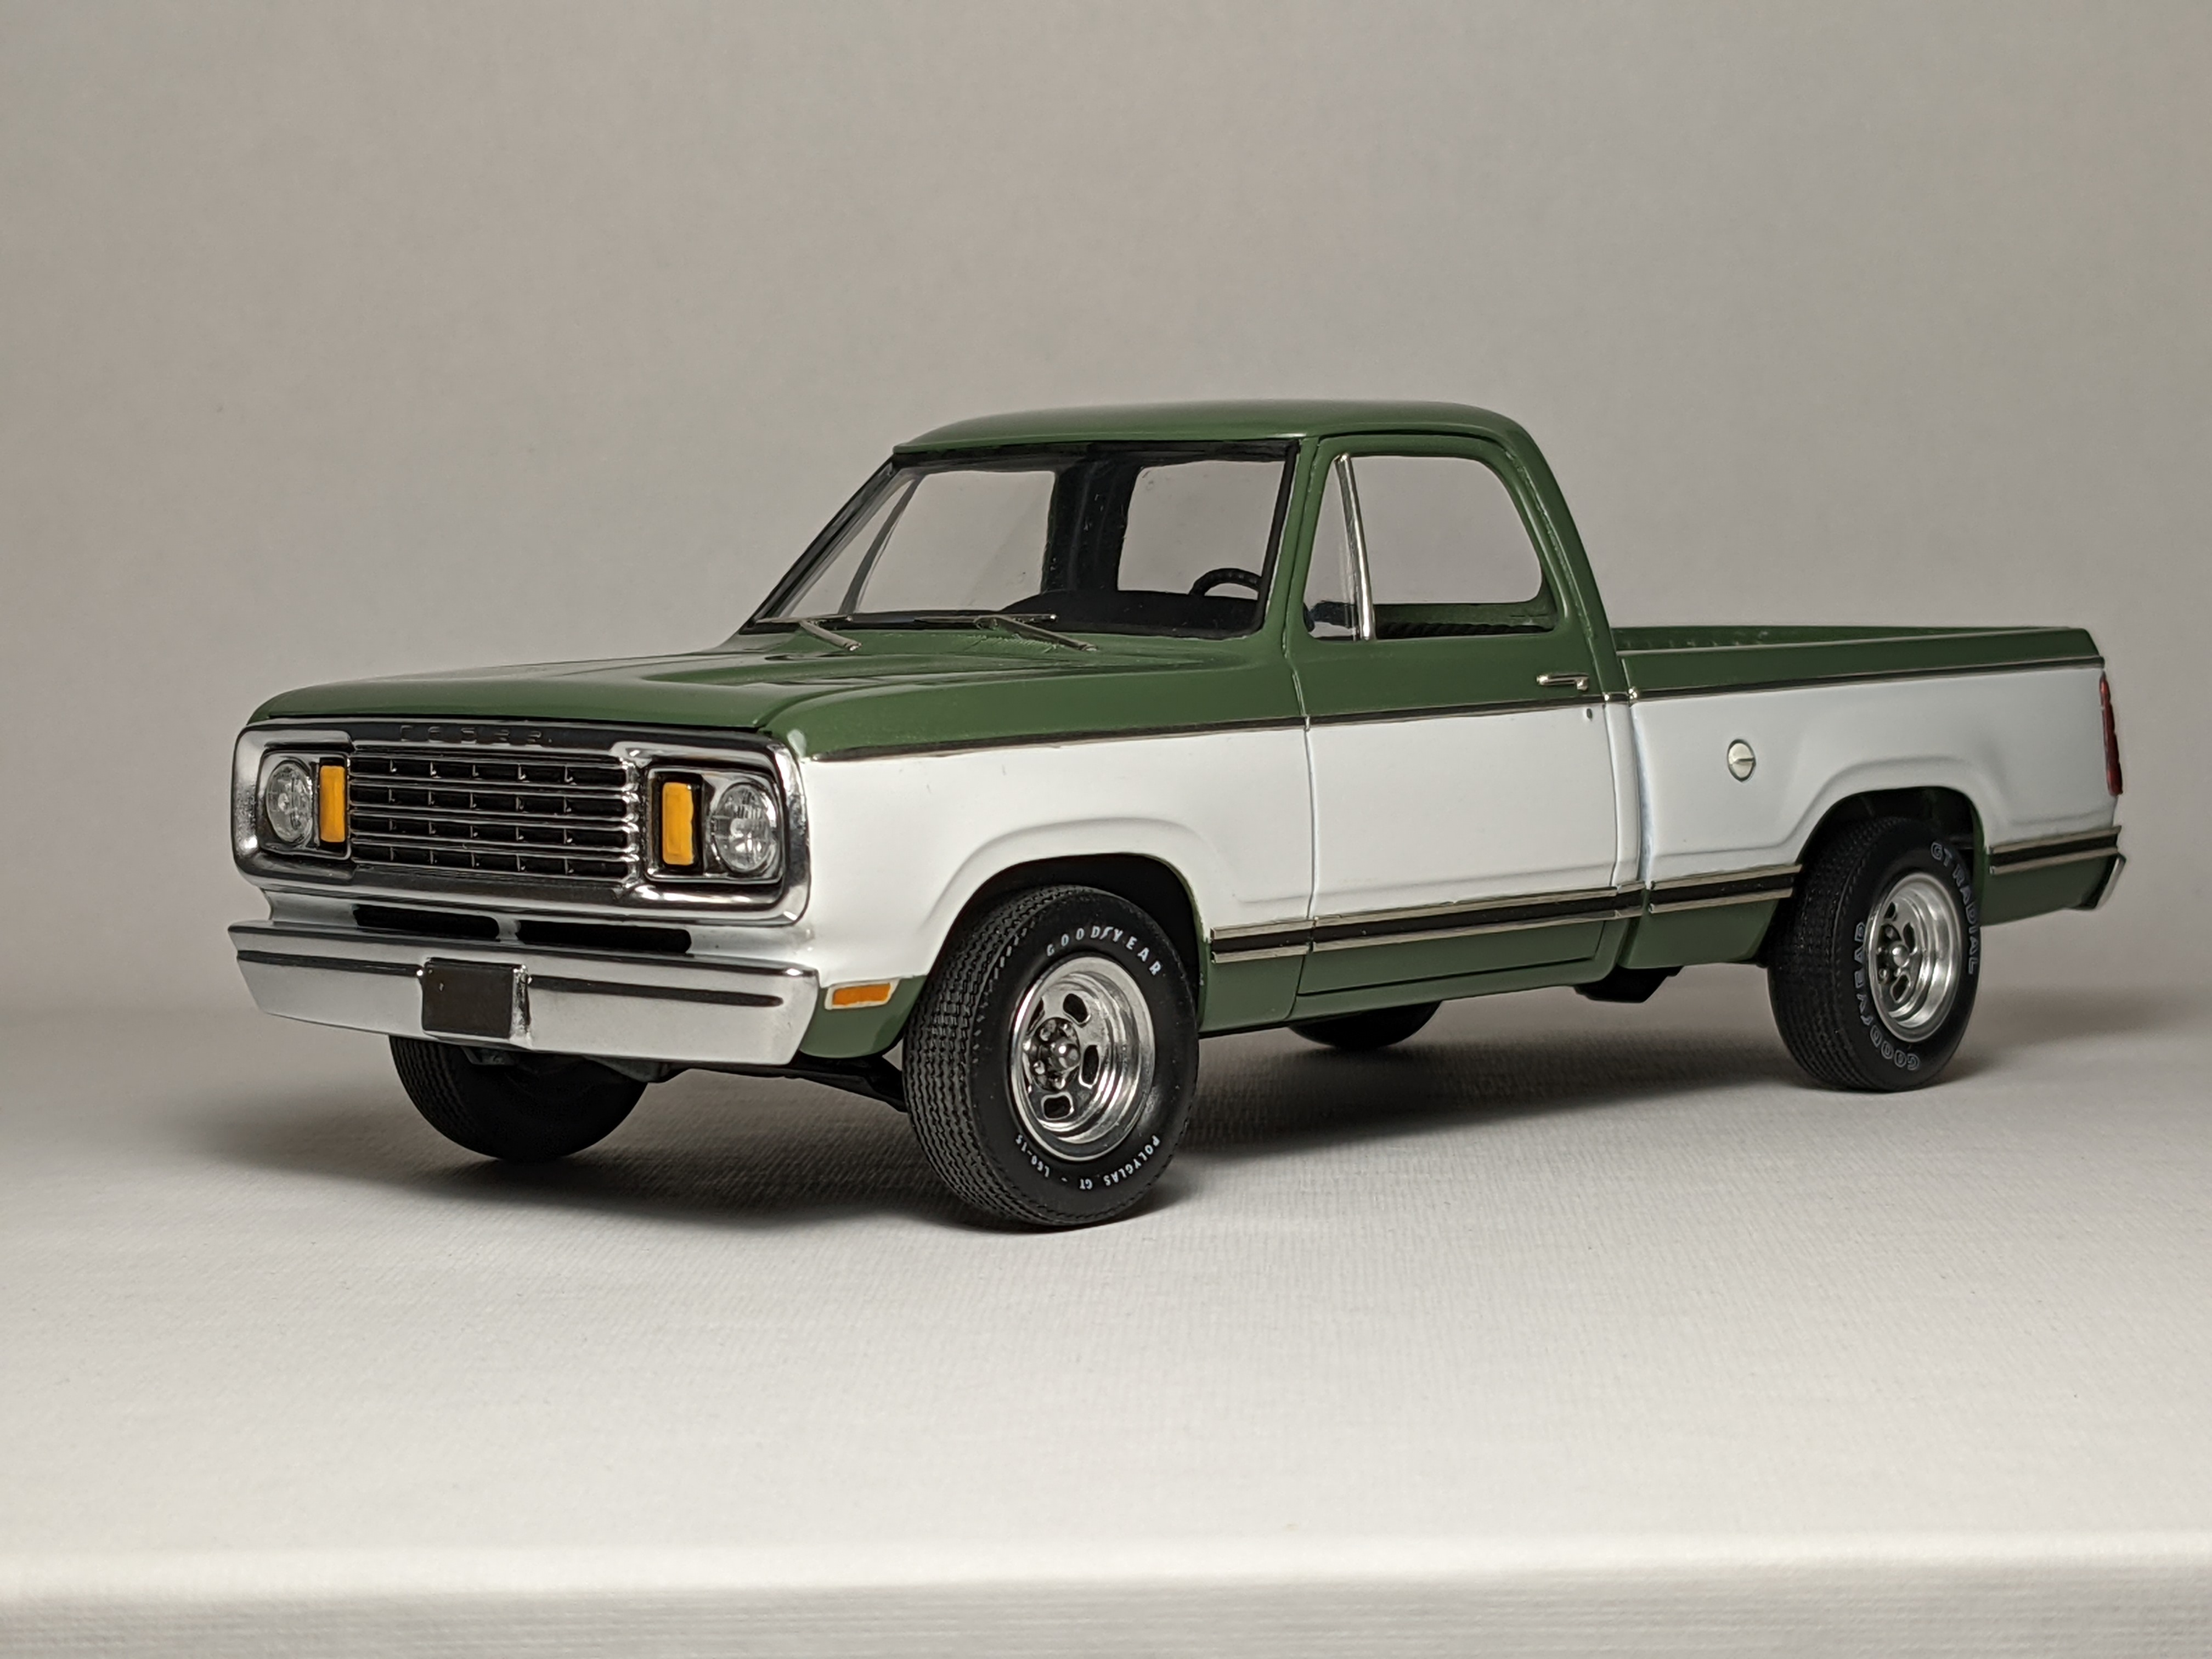
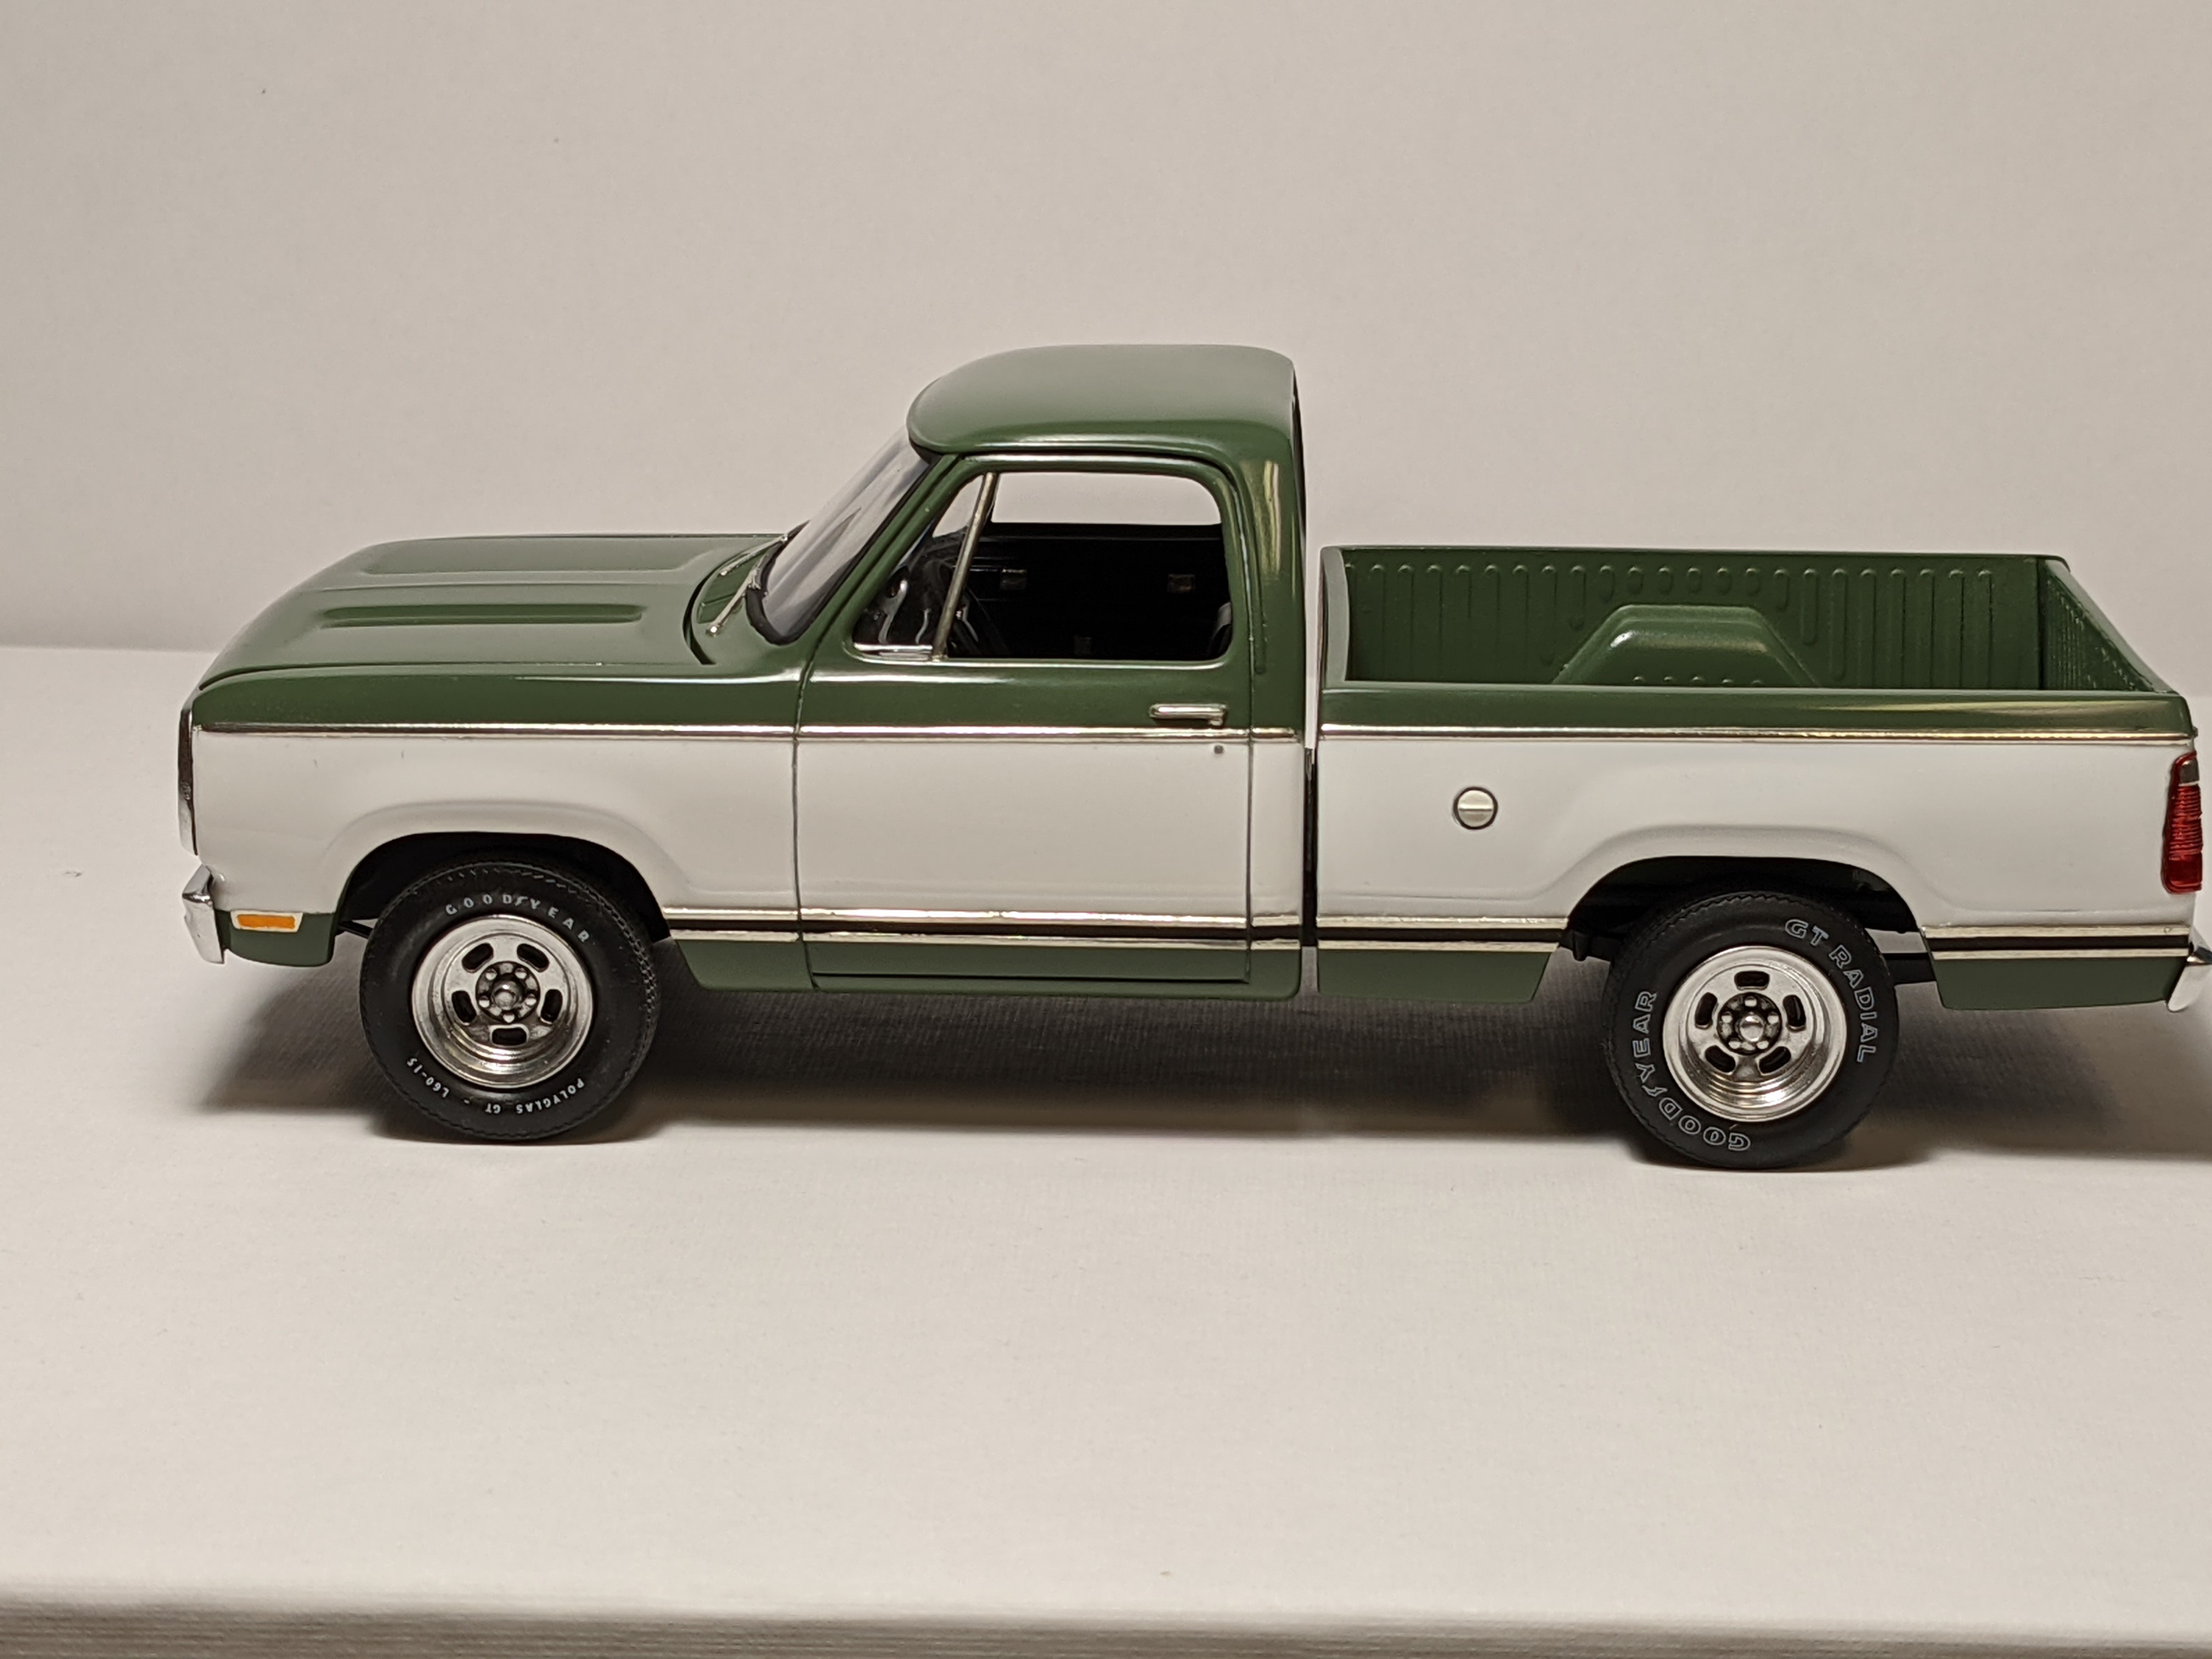
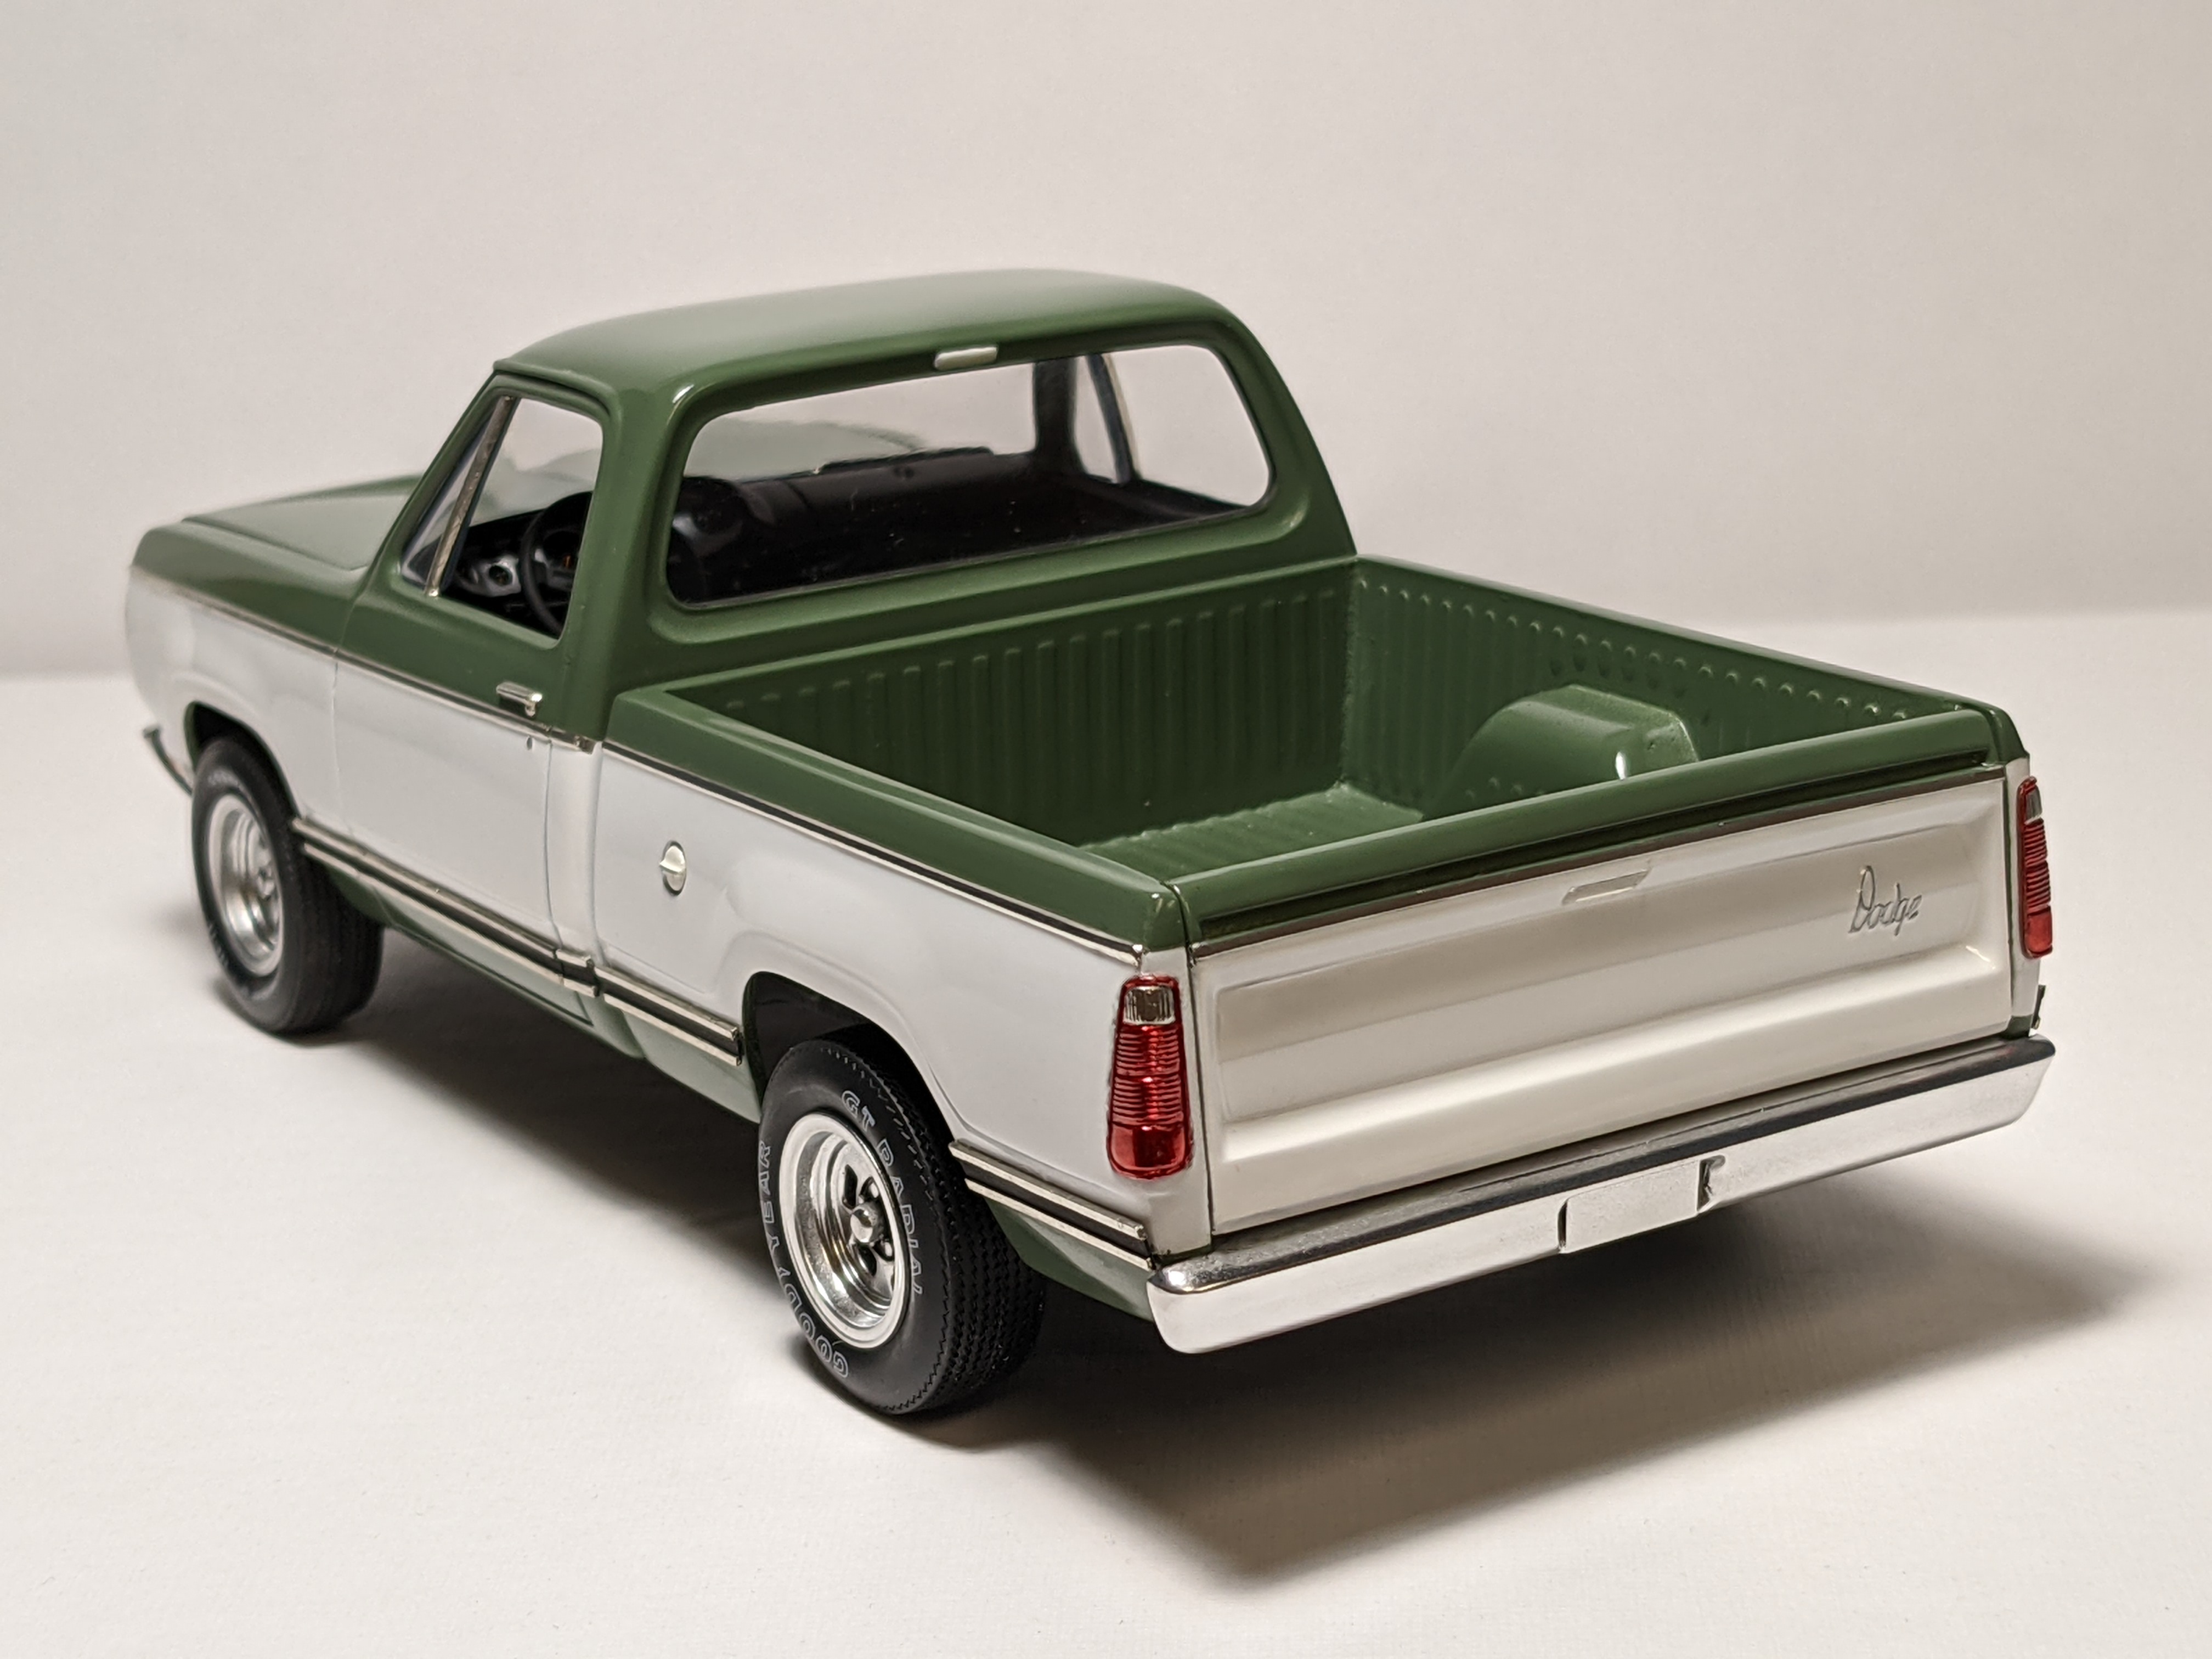
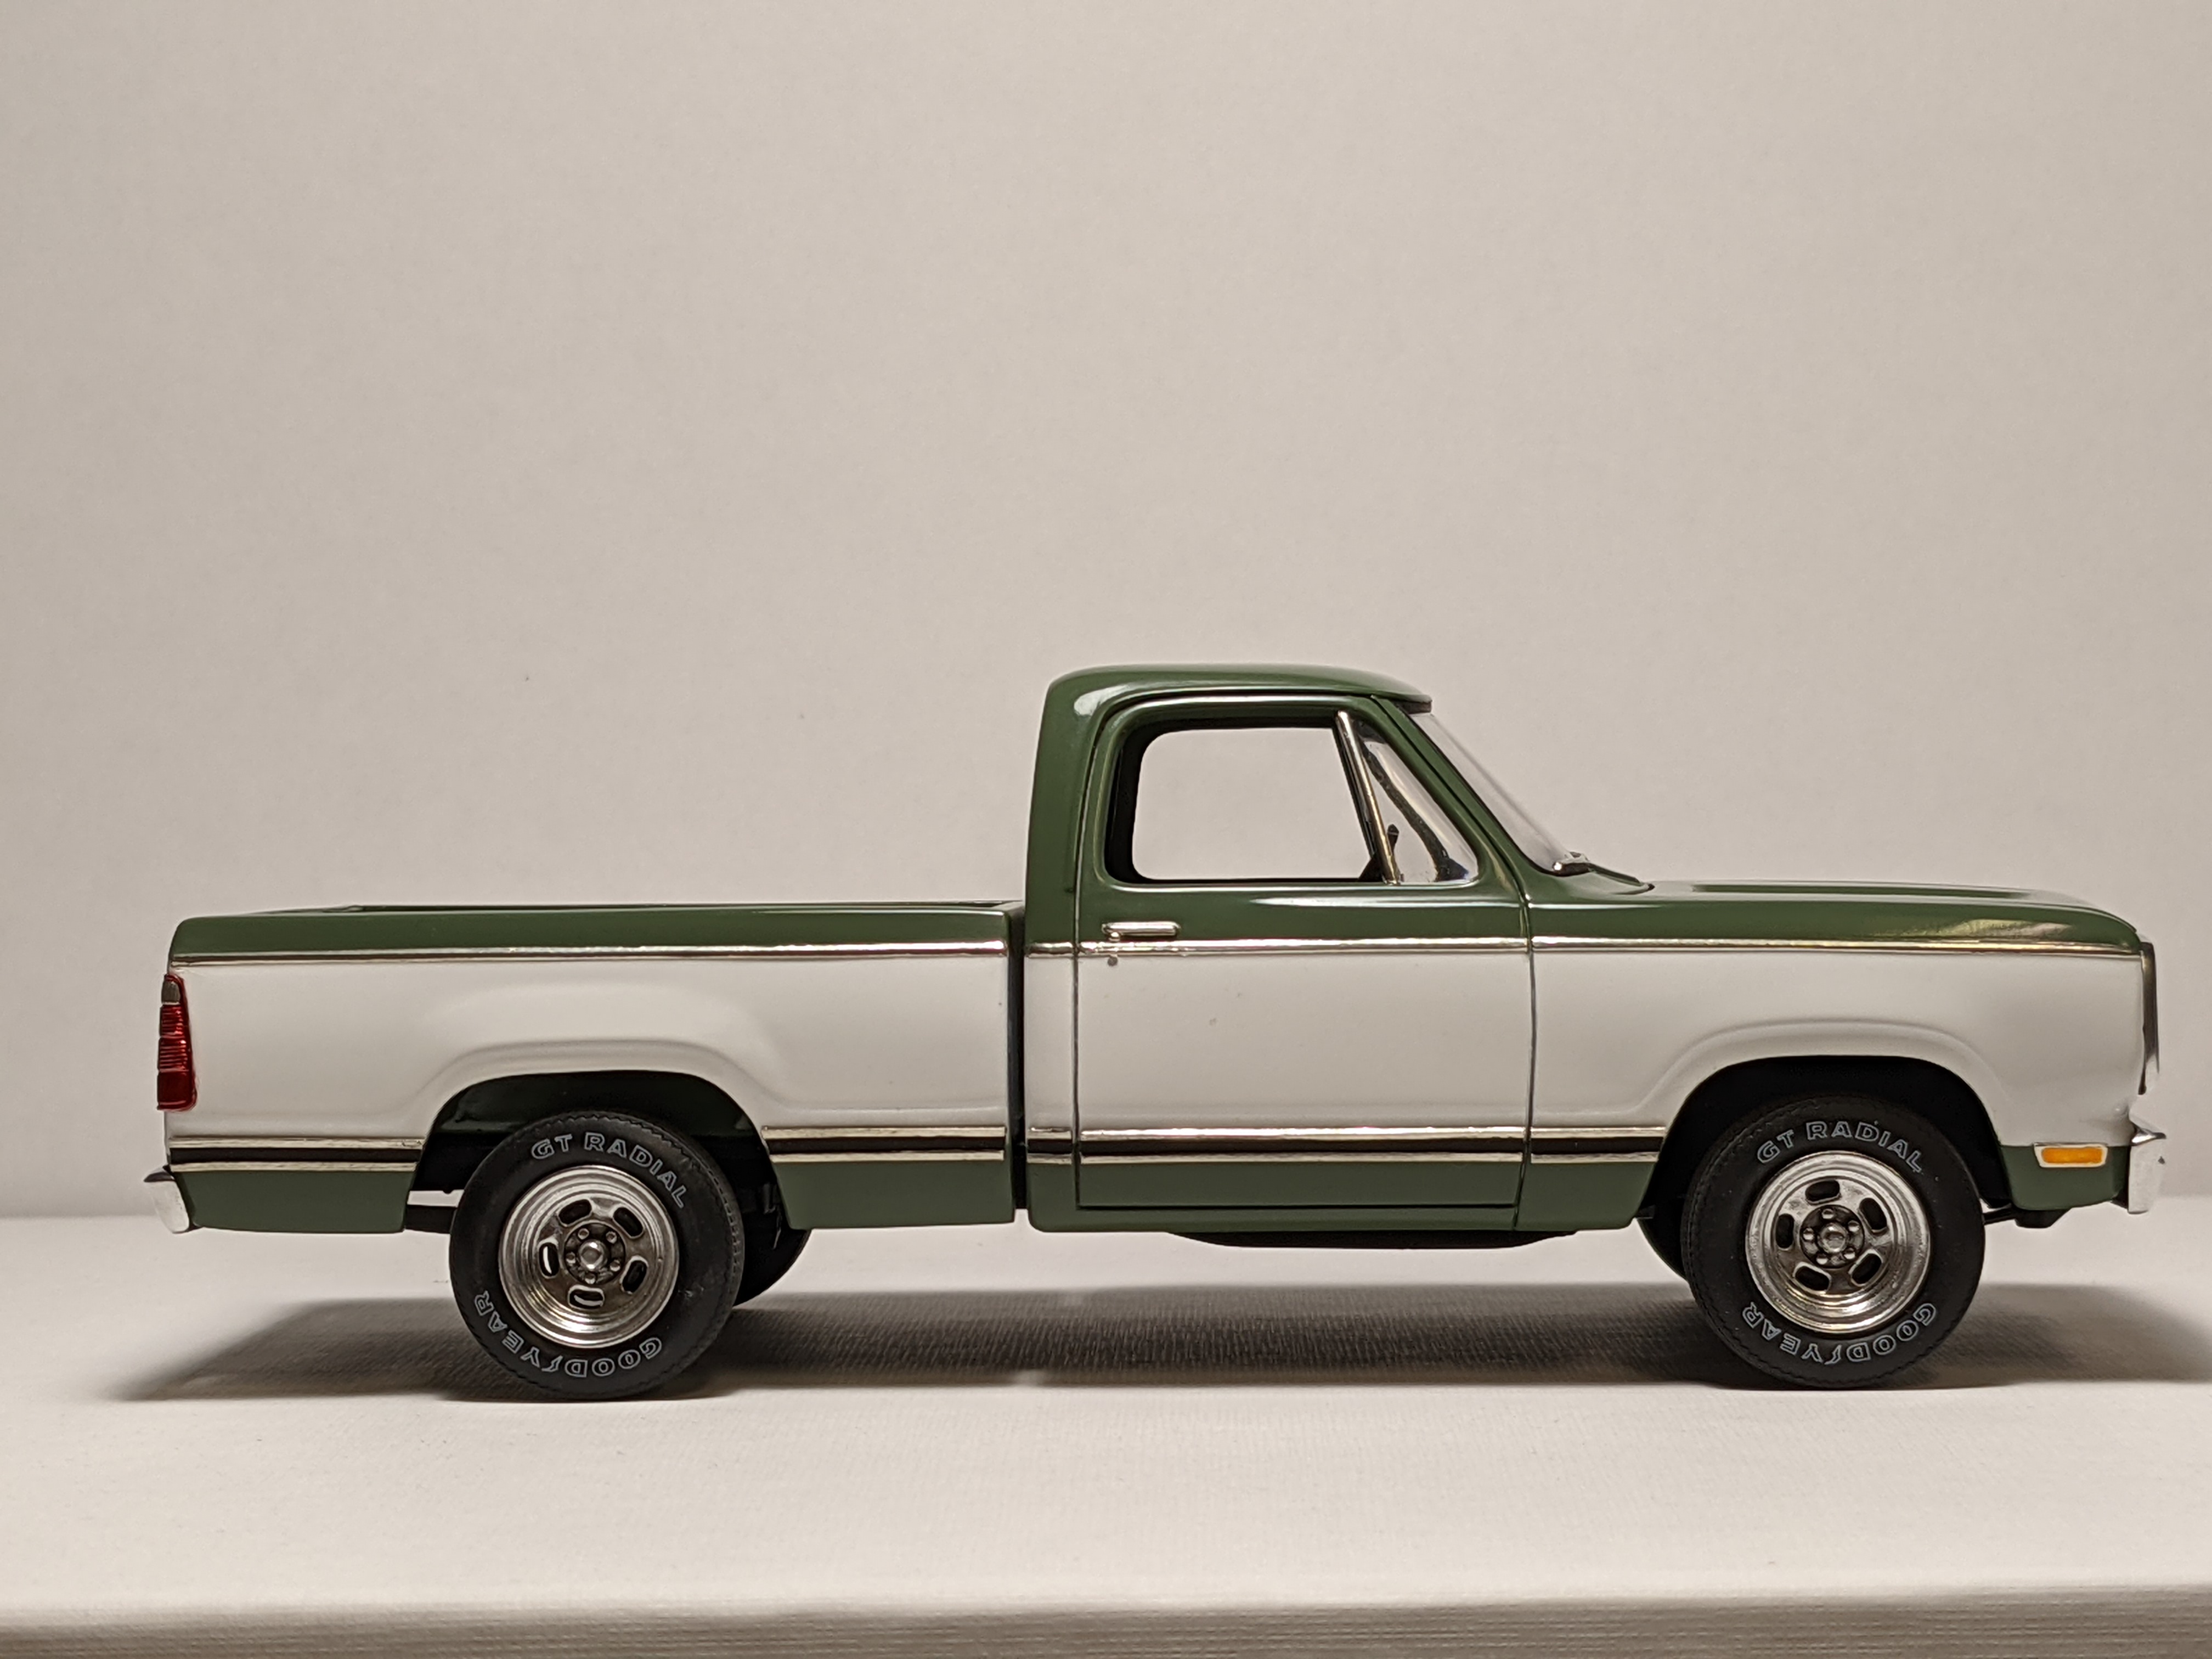
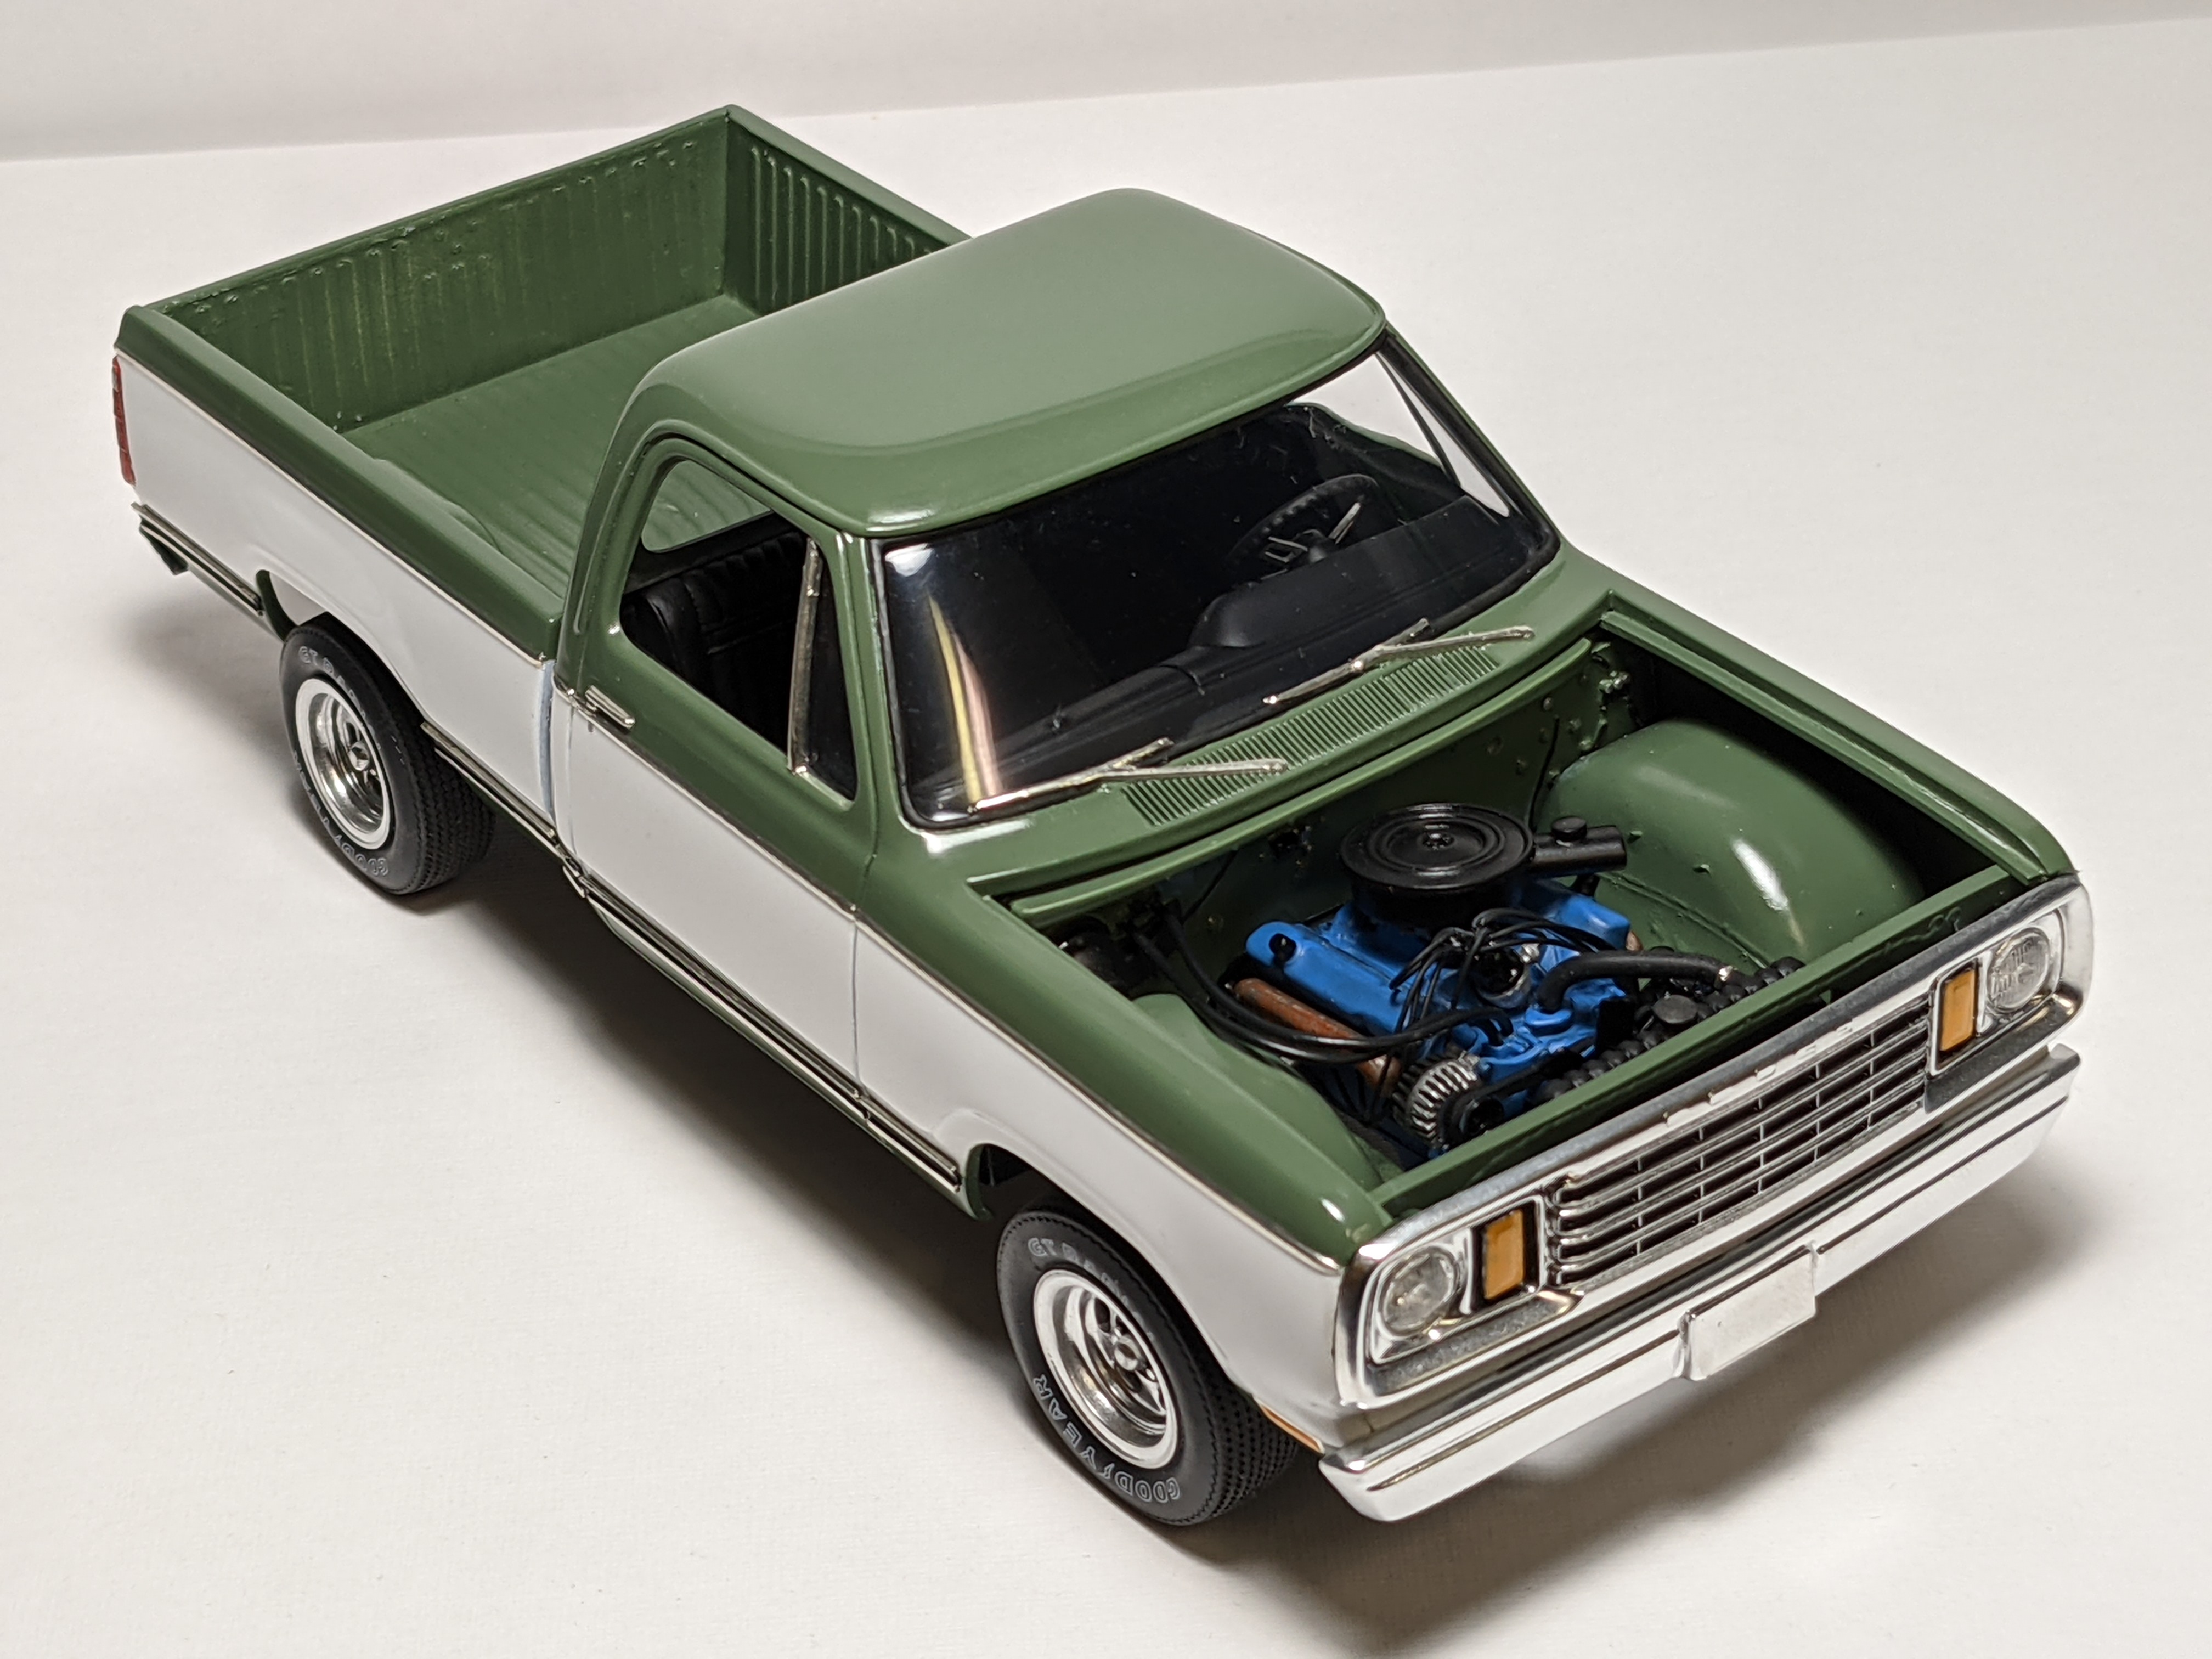
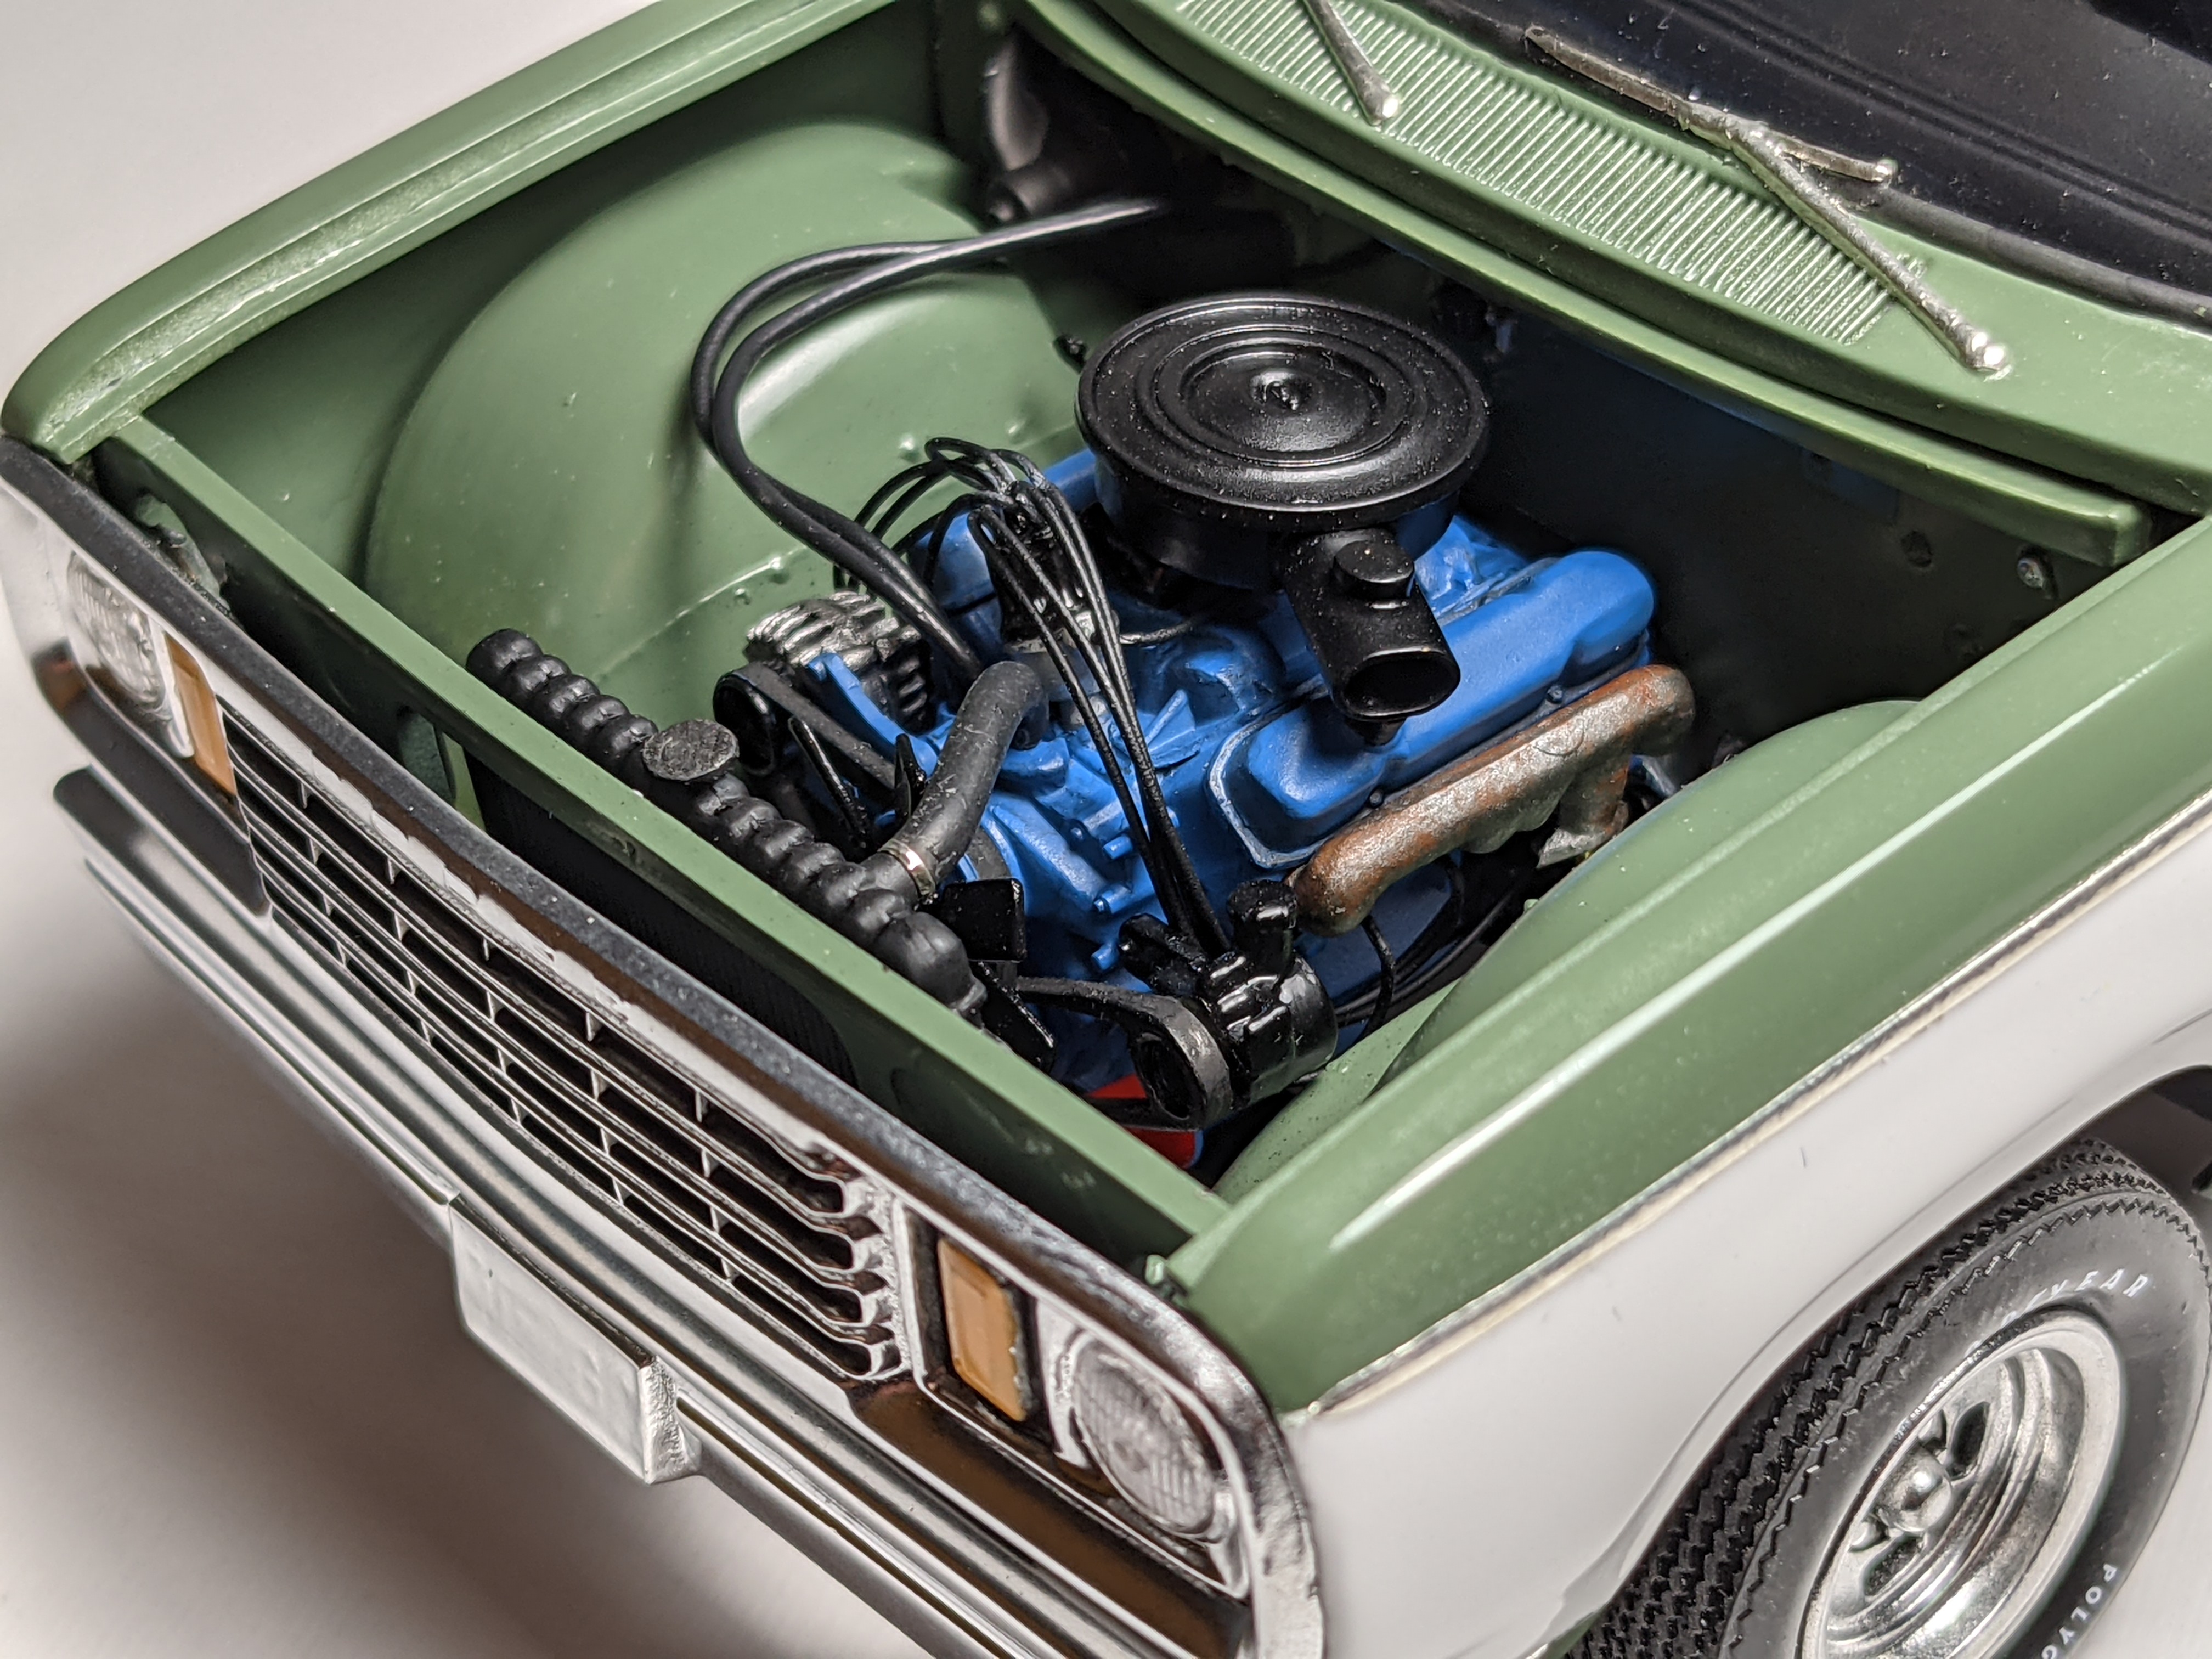
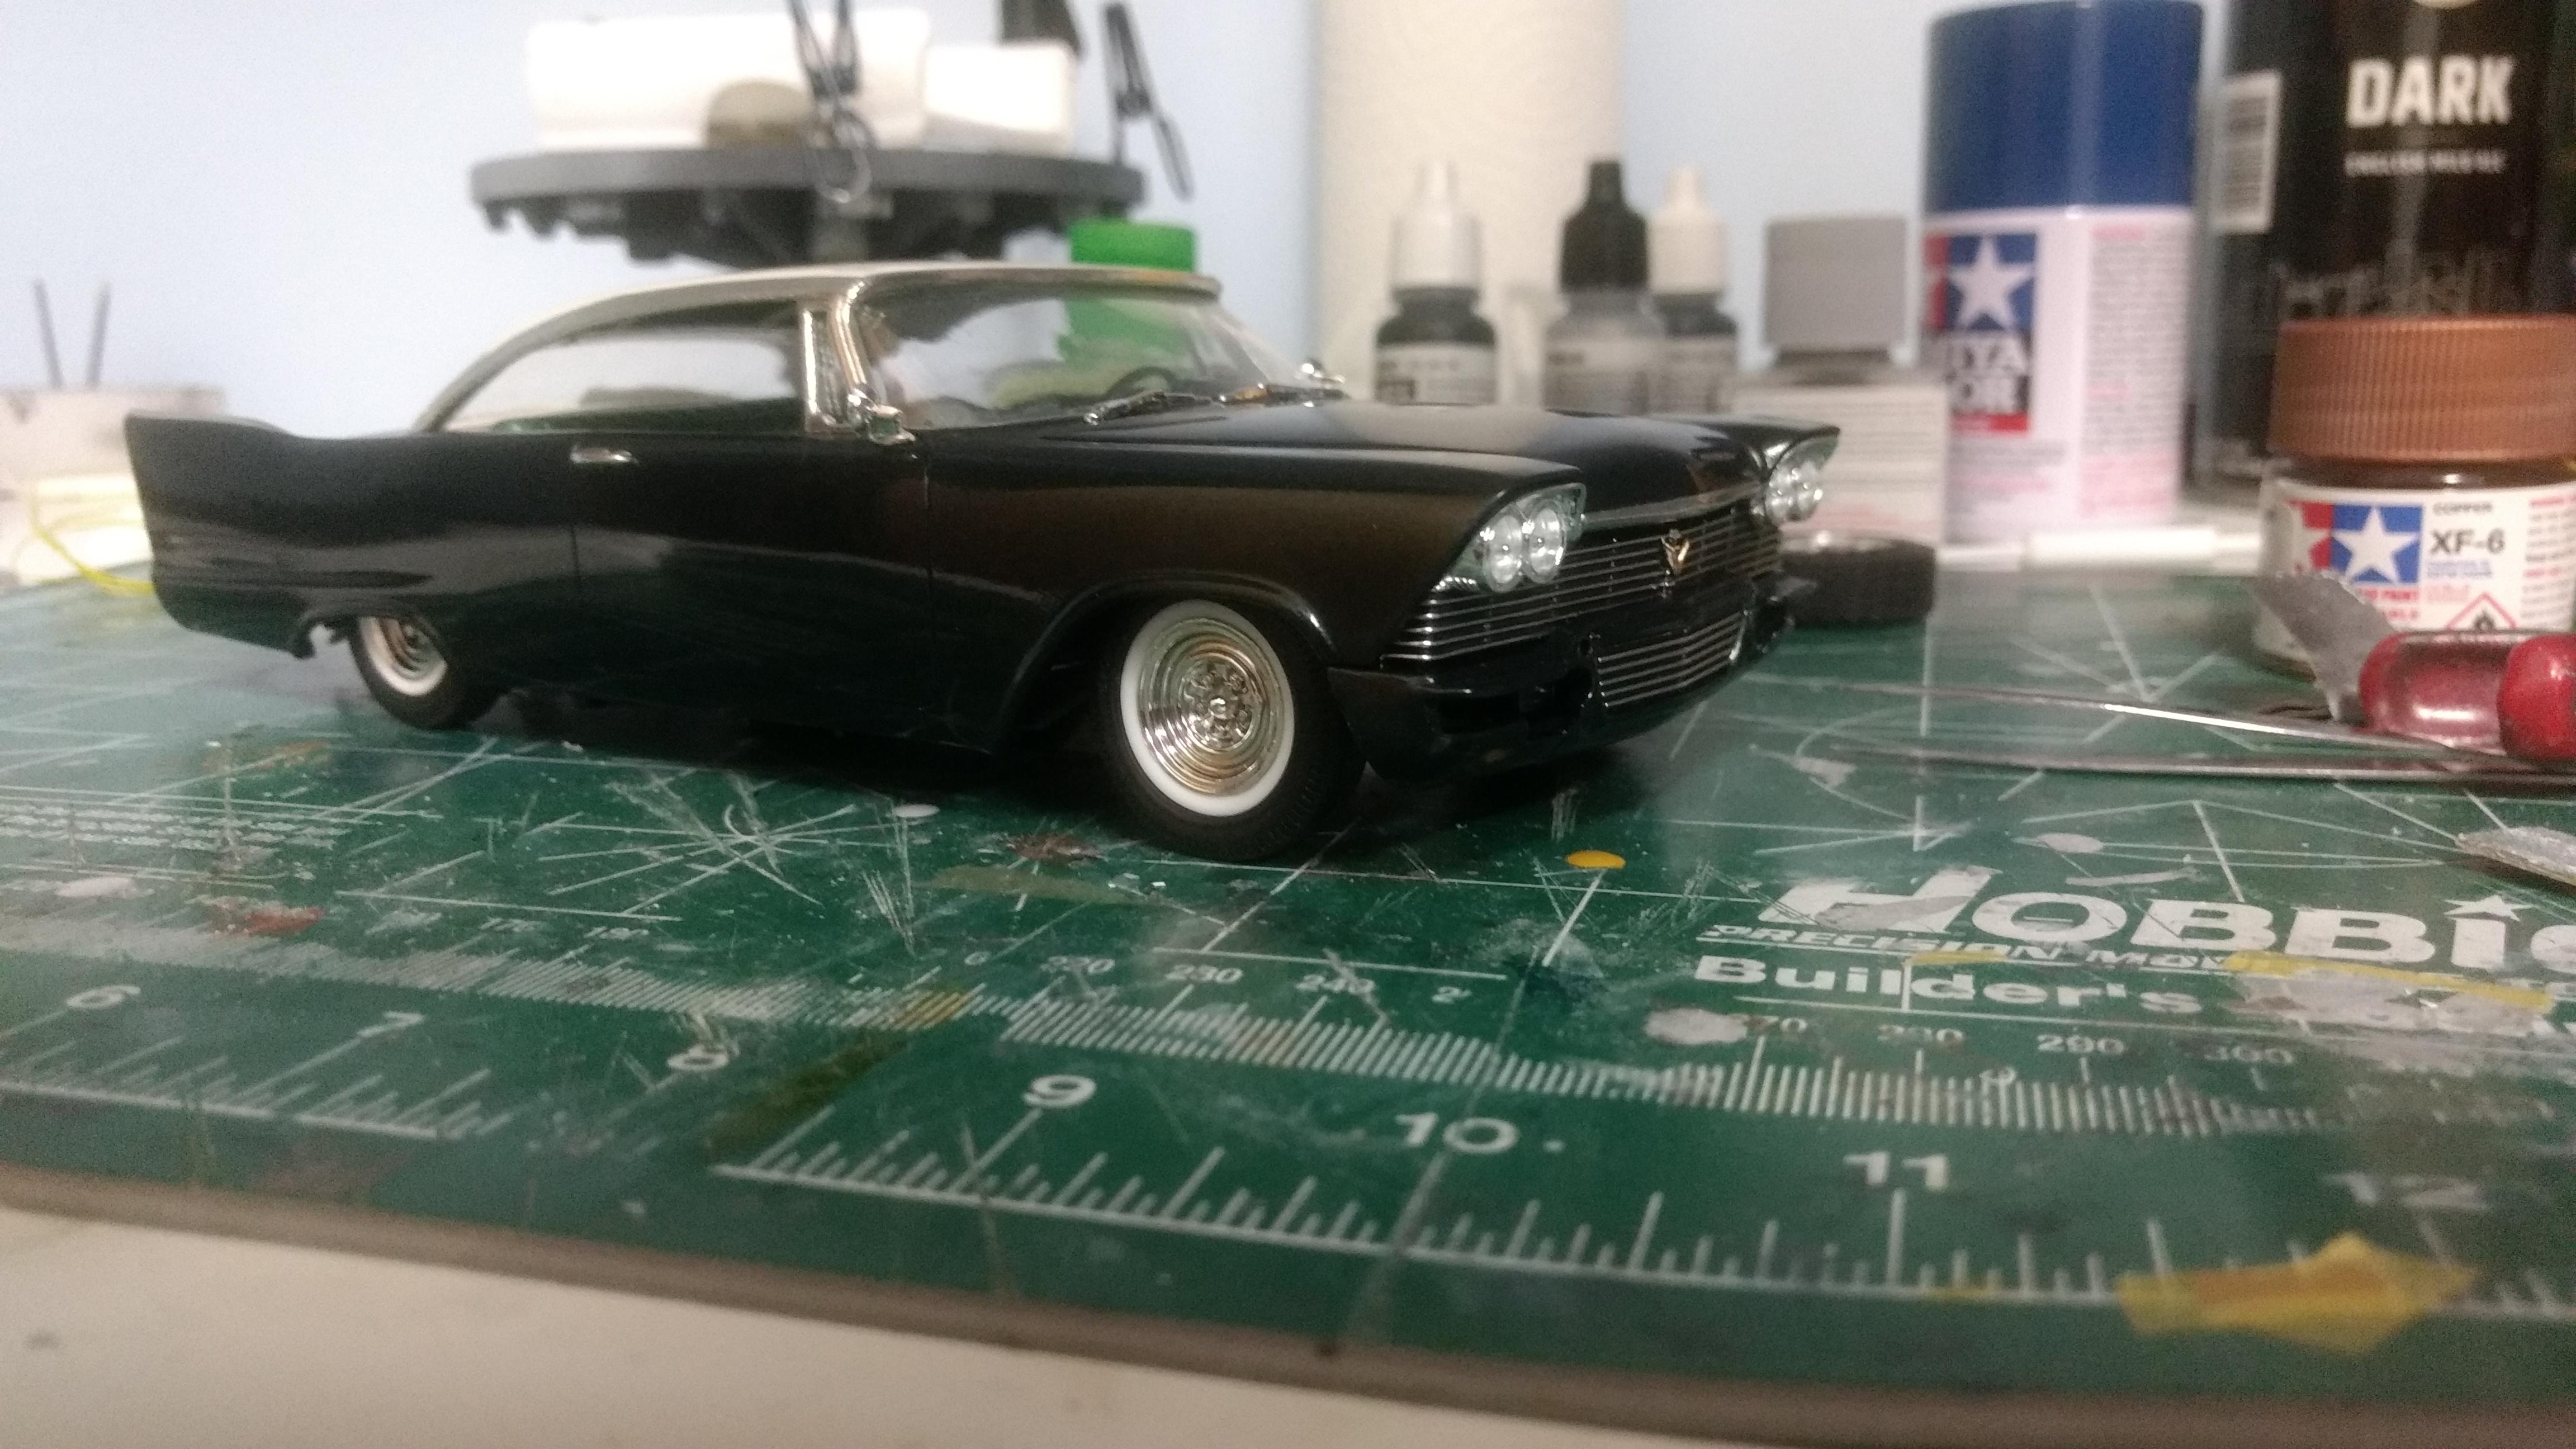
Finally pulled this one off of the shelf of doom and finished it up about half an hour ago! I guess a rainy weekend was the motivation I needed. I say finished but I really mean done for now?. Still need a source for mirrors and add an exhaust. Used the engine from the Revell GTS Dart to represent a 400 big block truck. I mixed up Tamiya acrylics for Mopar engine blue, but for whatever reason, its showing a lot darker than it really is ( I guess my lack of picture taking ability is showing through). The body was sprayed with Tamiya AS-9 RAF Dark Green and the white is Tamiyas primer cleared with ts13. The box is a resin piece I bought off eBay about 10 years ago. The rest of the kit is Little Red Express. I think the tailgate represents an earlier truck(72-76?) but it was all I had at the time I started building this five years ago. The bumpers grill, and rims were stripped of their kit chrome and sprayed using Alcad chrome. I added the upper chrome piece and the lower trim to represent an SE? trim package. I added the drip tray/ trim as the kit one was barely visible, l also should of bmf'd it as well. I also drilled out the molded in headlights and added some parts bin pieces. Comments, criticism welcomed.

- 38 replies
-
- 10
-

-
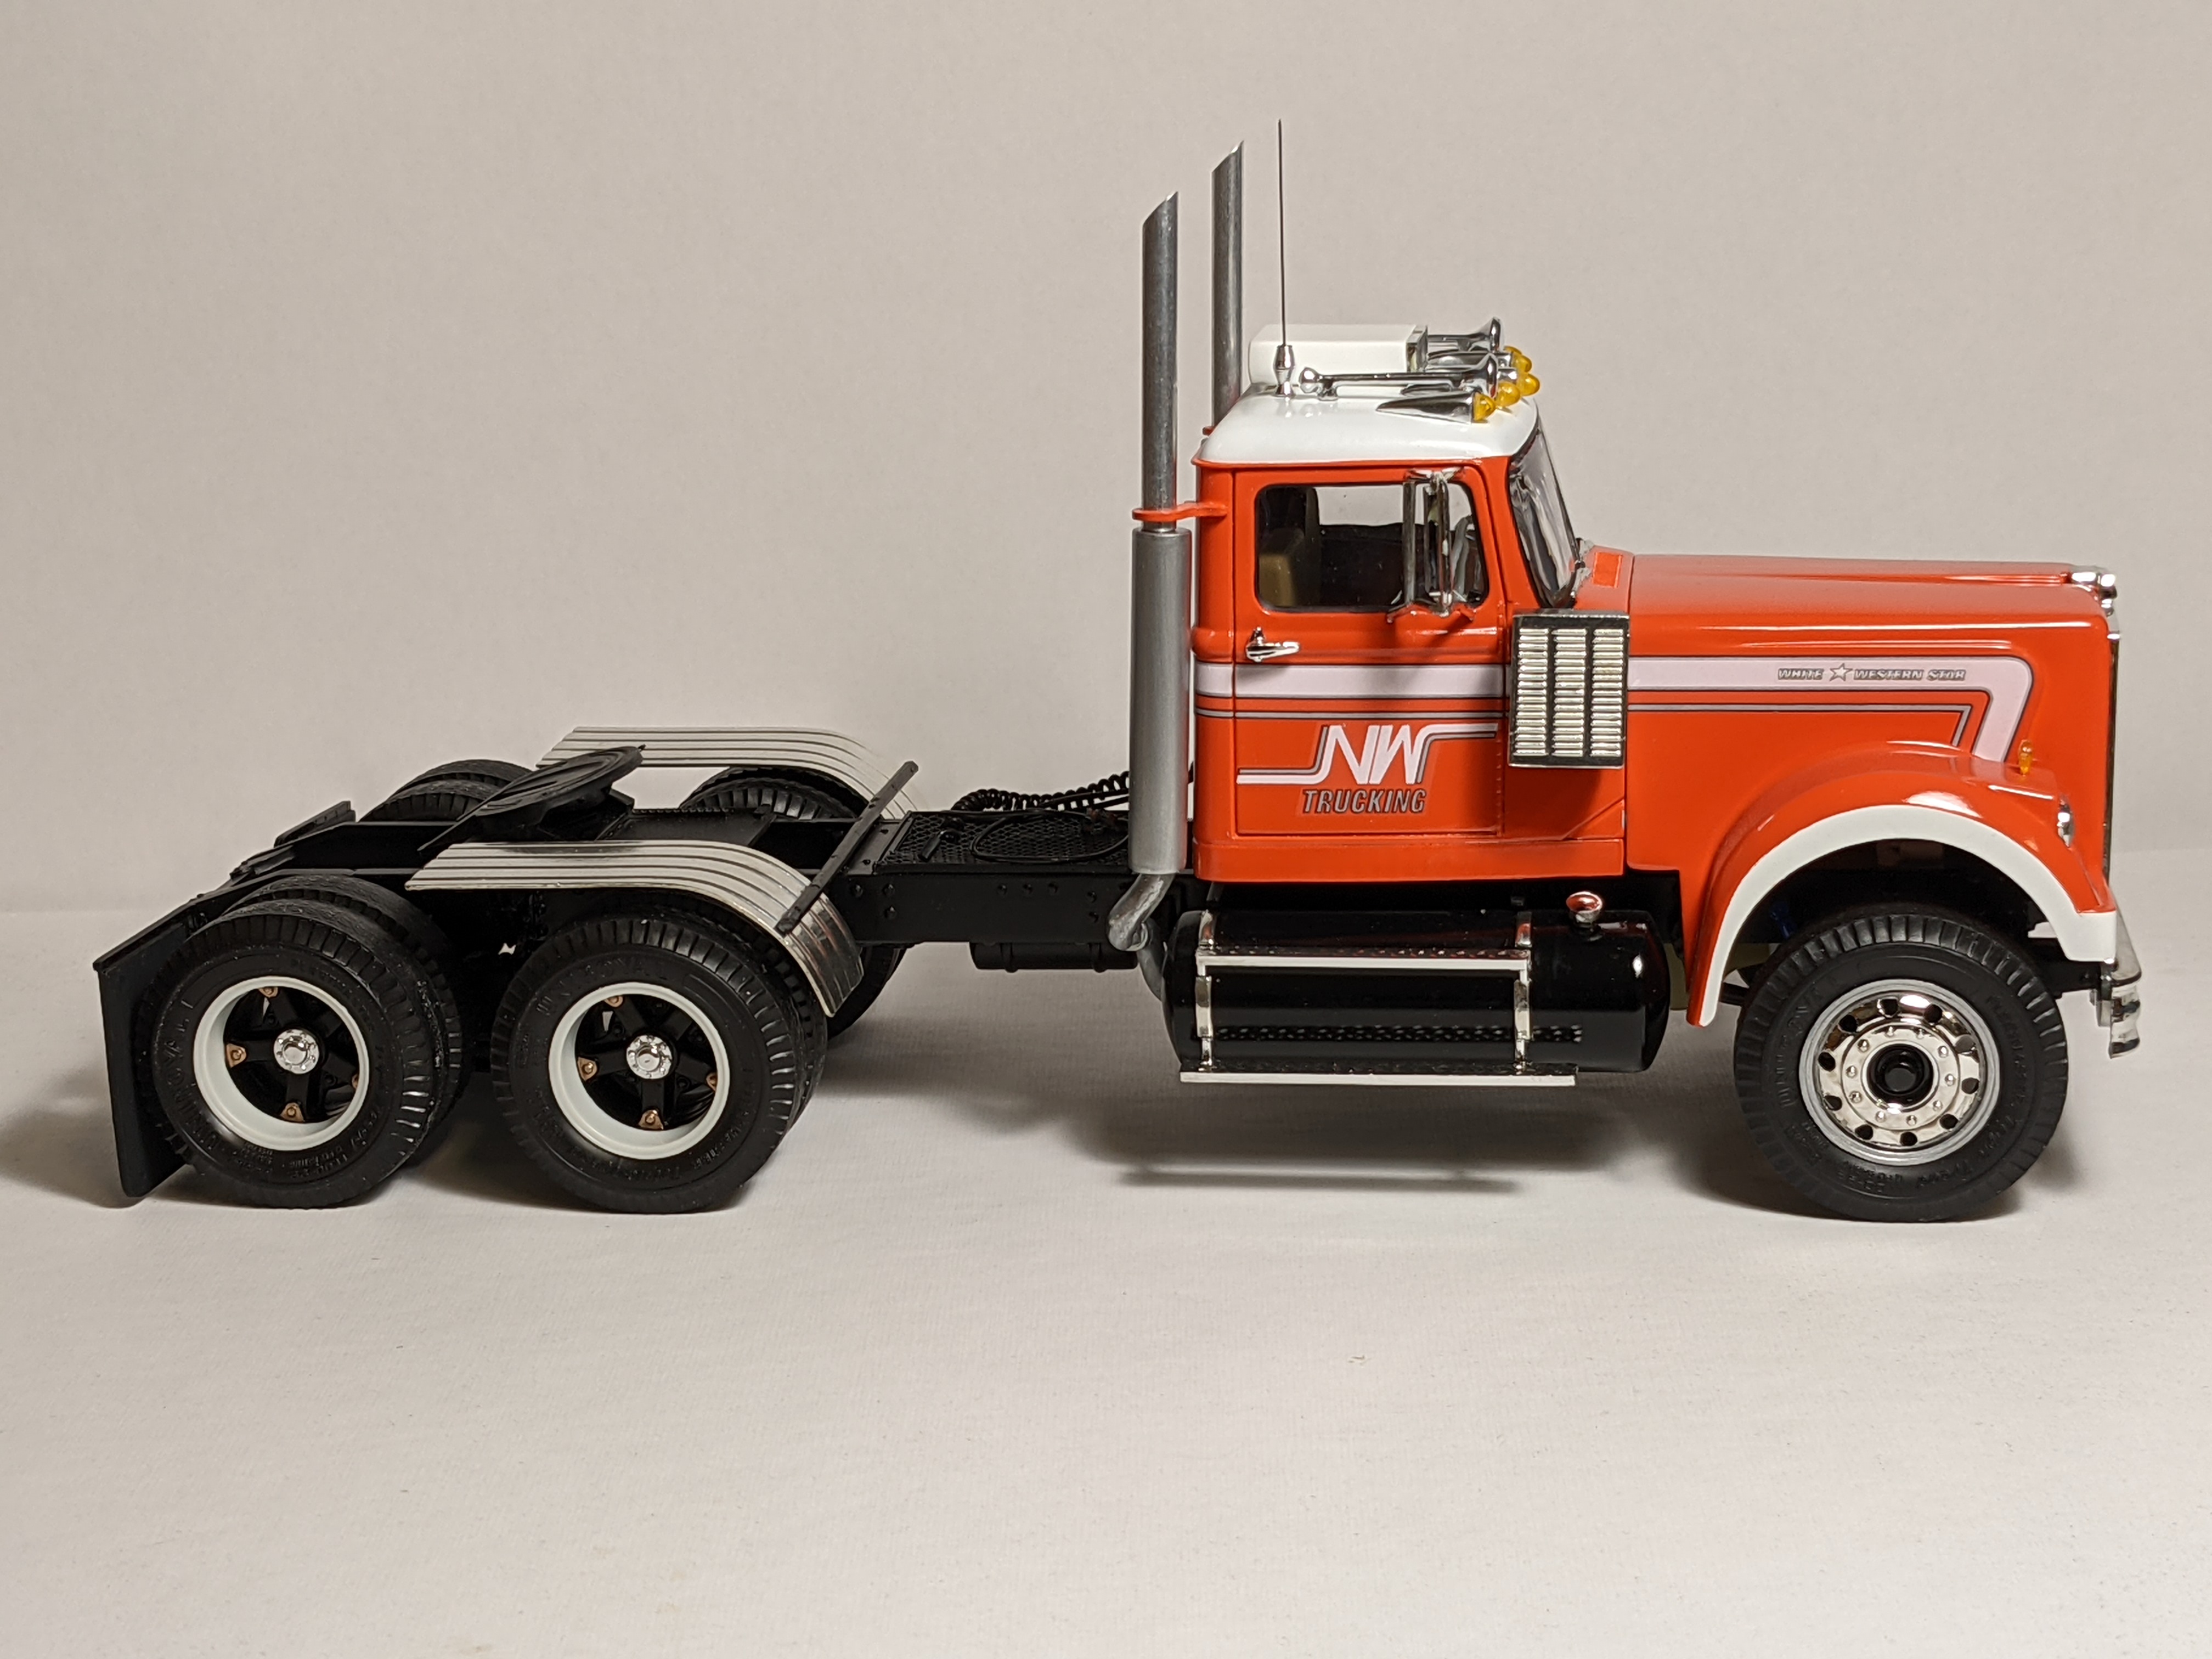
AMT White Western Star
asfastasu replied to asfastasu's topic in Model Trucks: Big Rigs and Heavy Equipment
Thank you. The half fenders are made from Plastruct O scale/1:48 ribbed roof sheets. I formed them over a socket and warmed them up with a hairdryer on low and covered them with bare metal foil. -
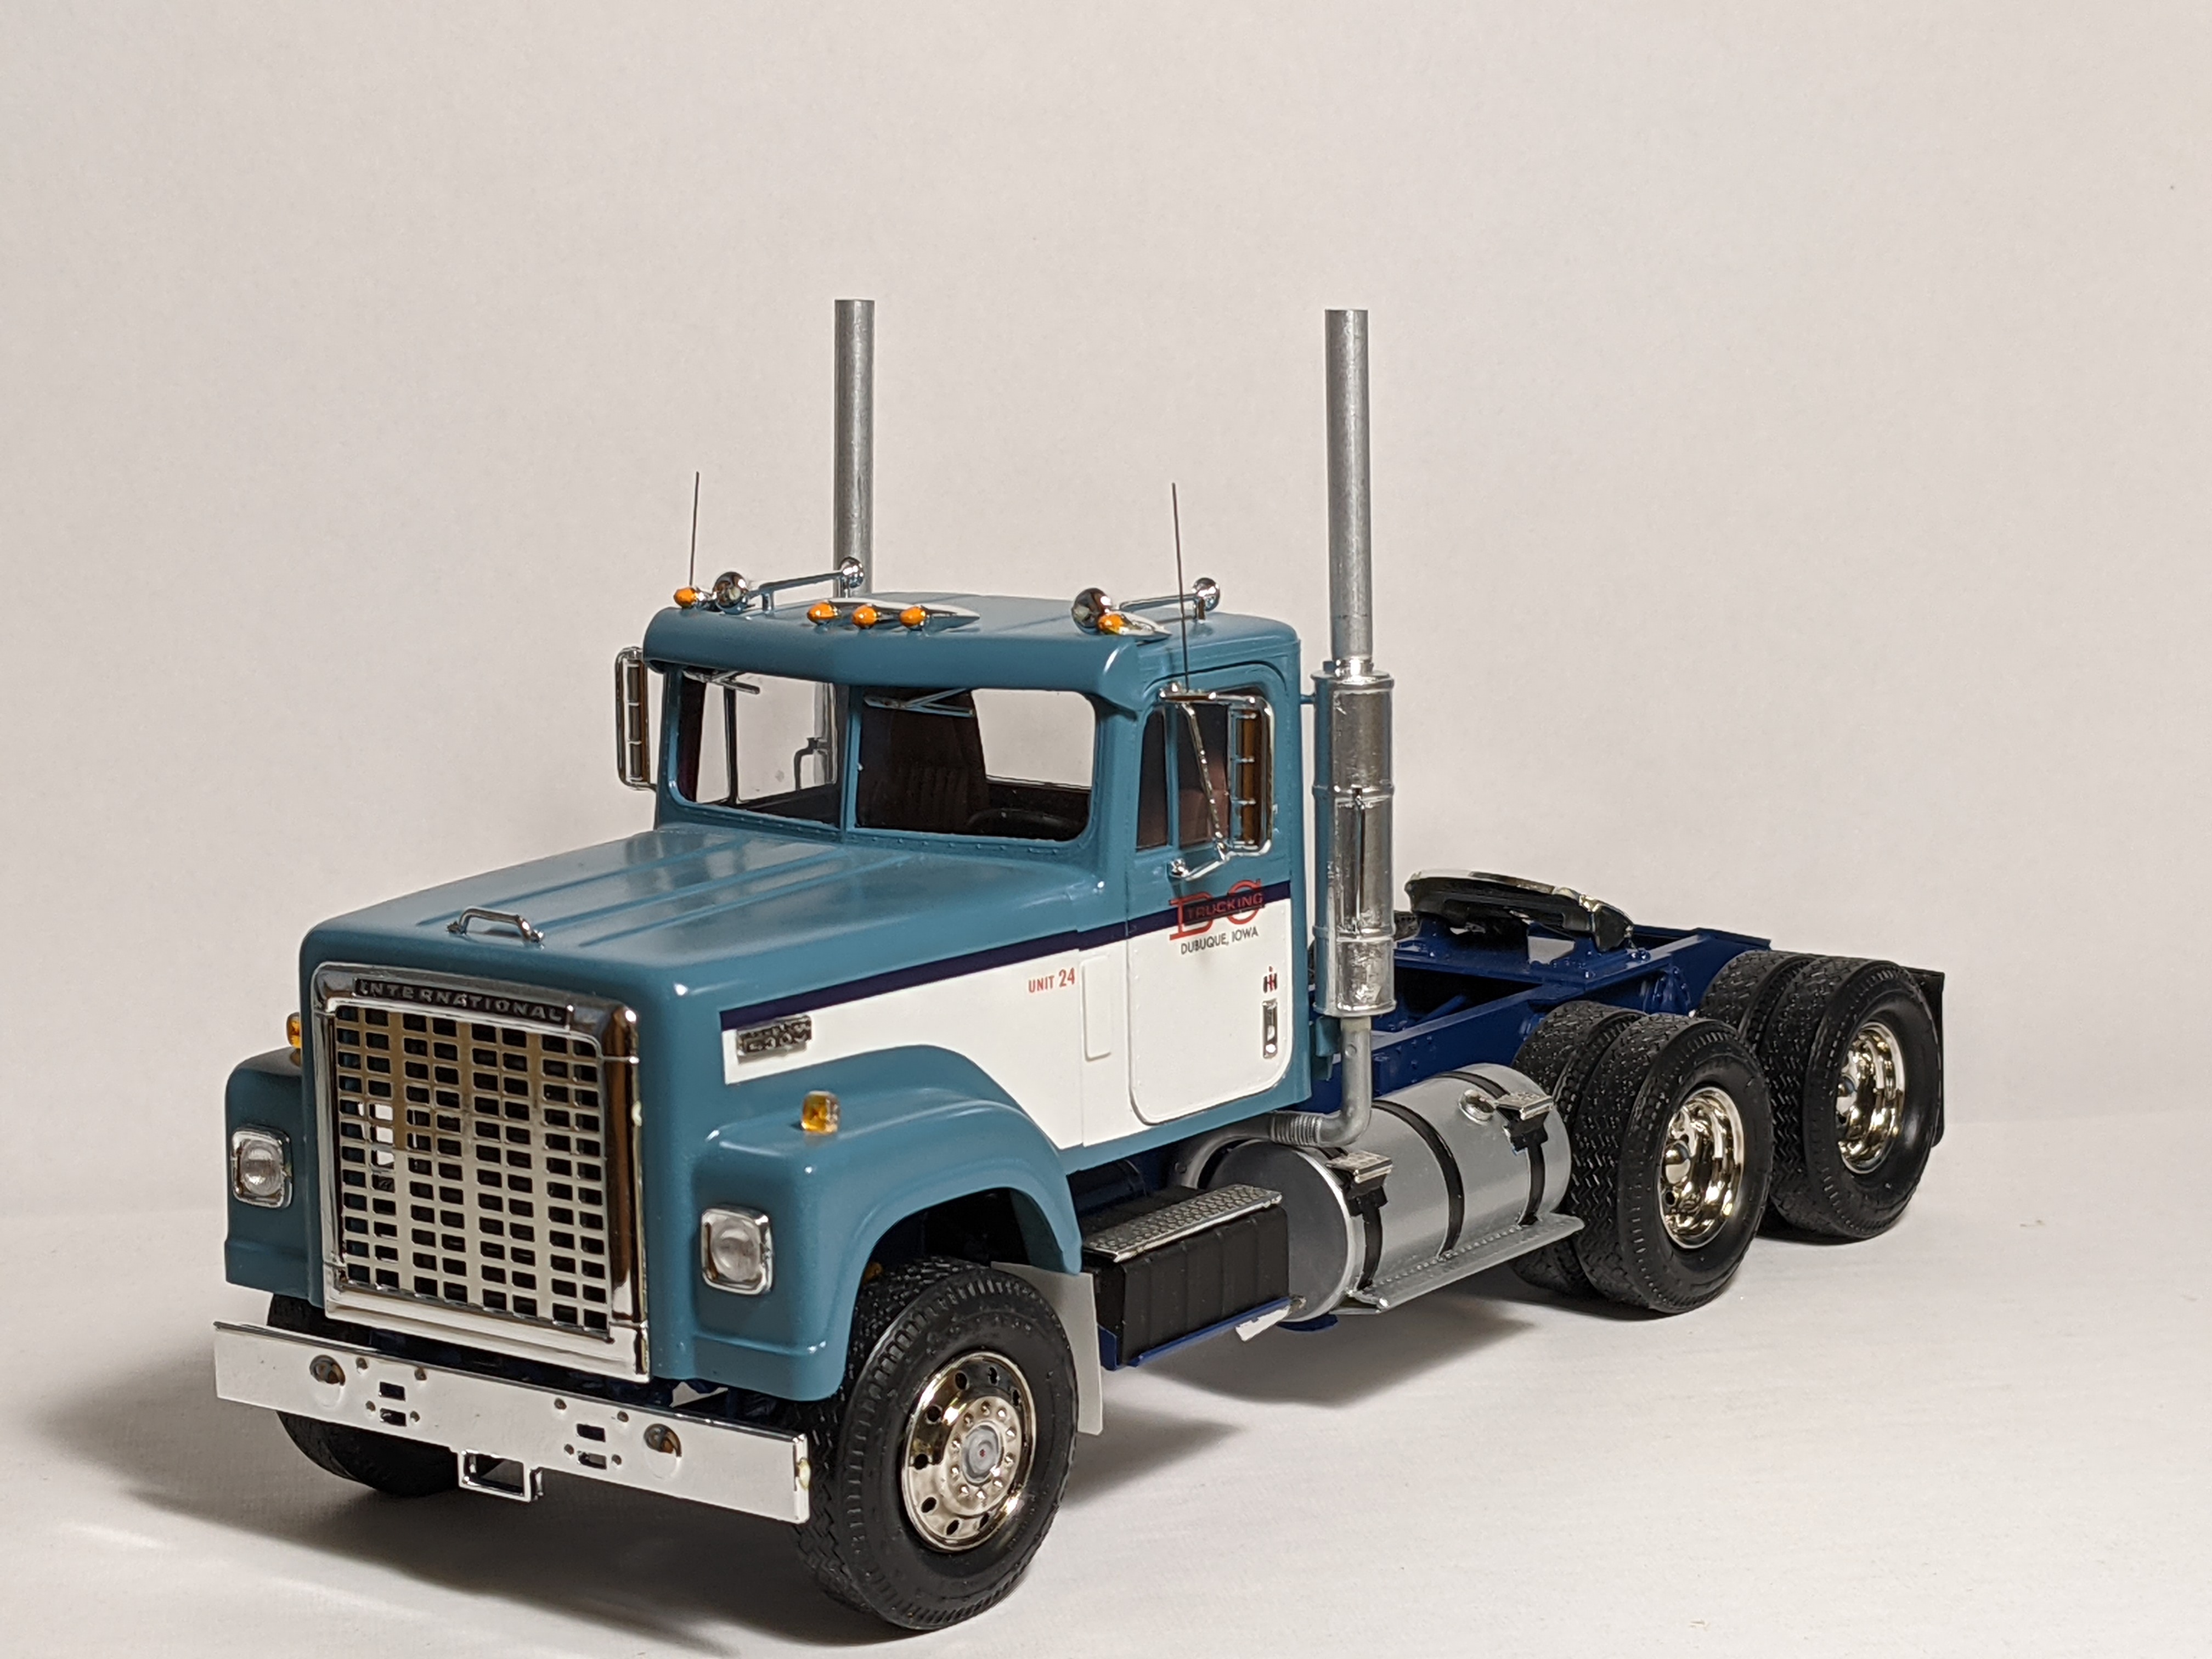
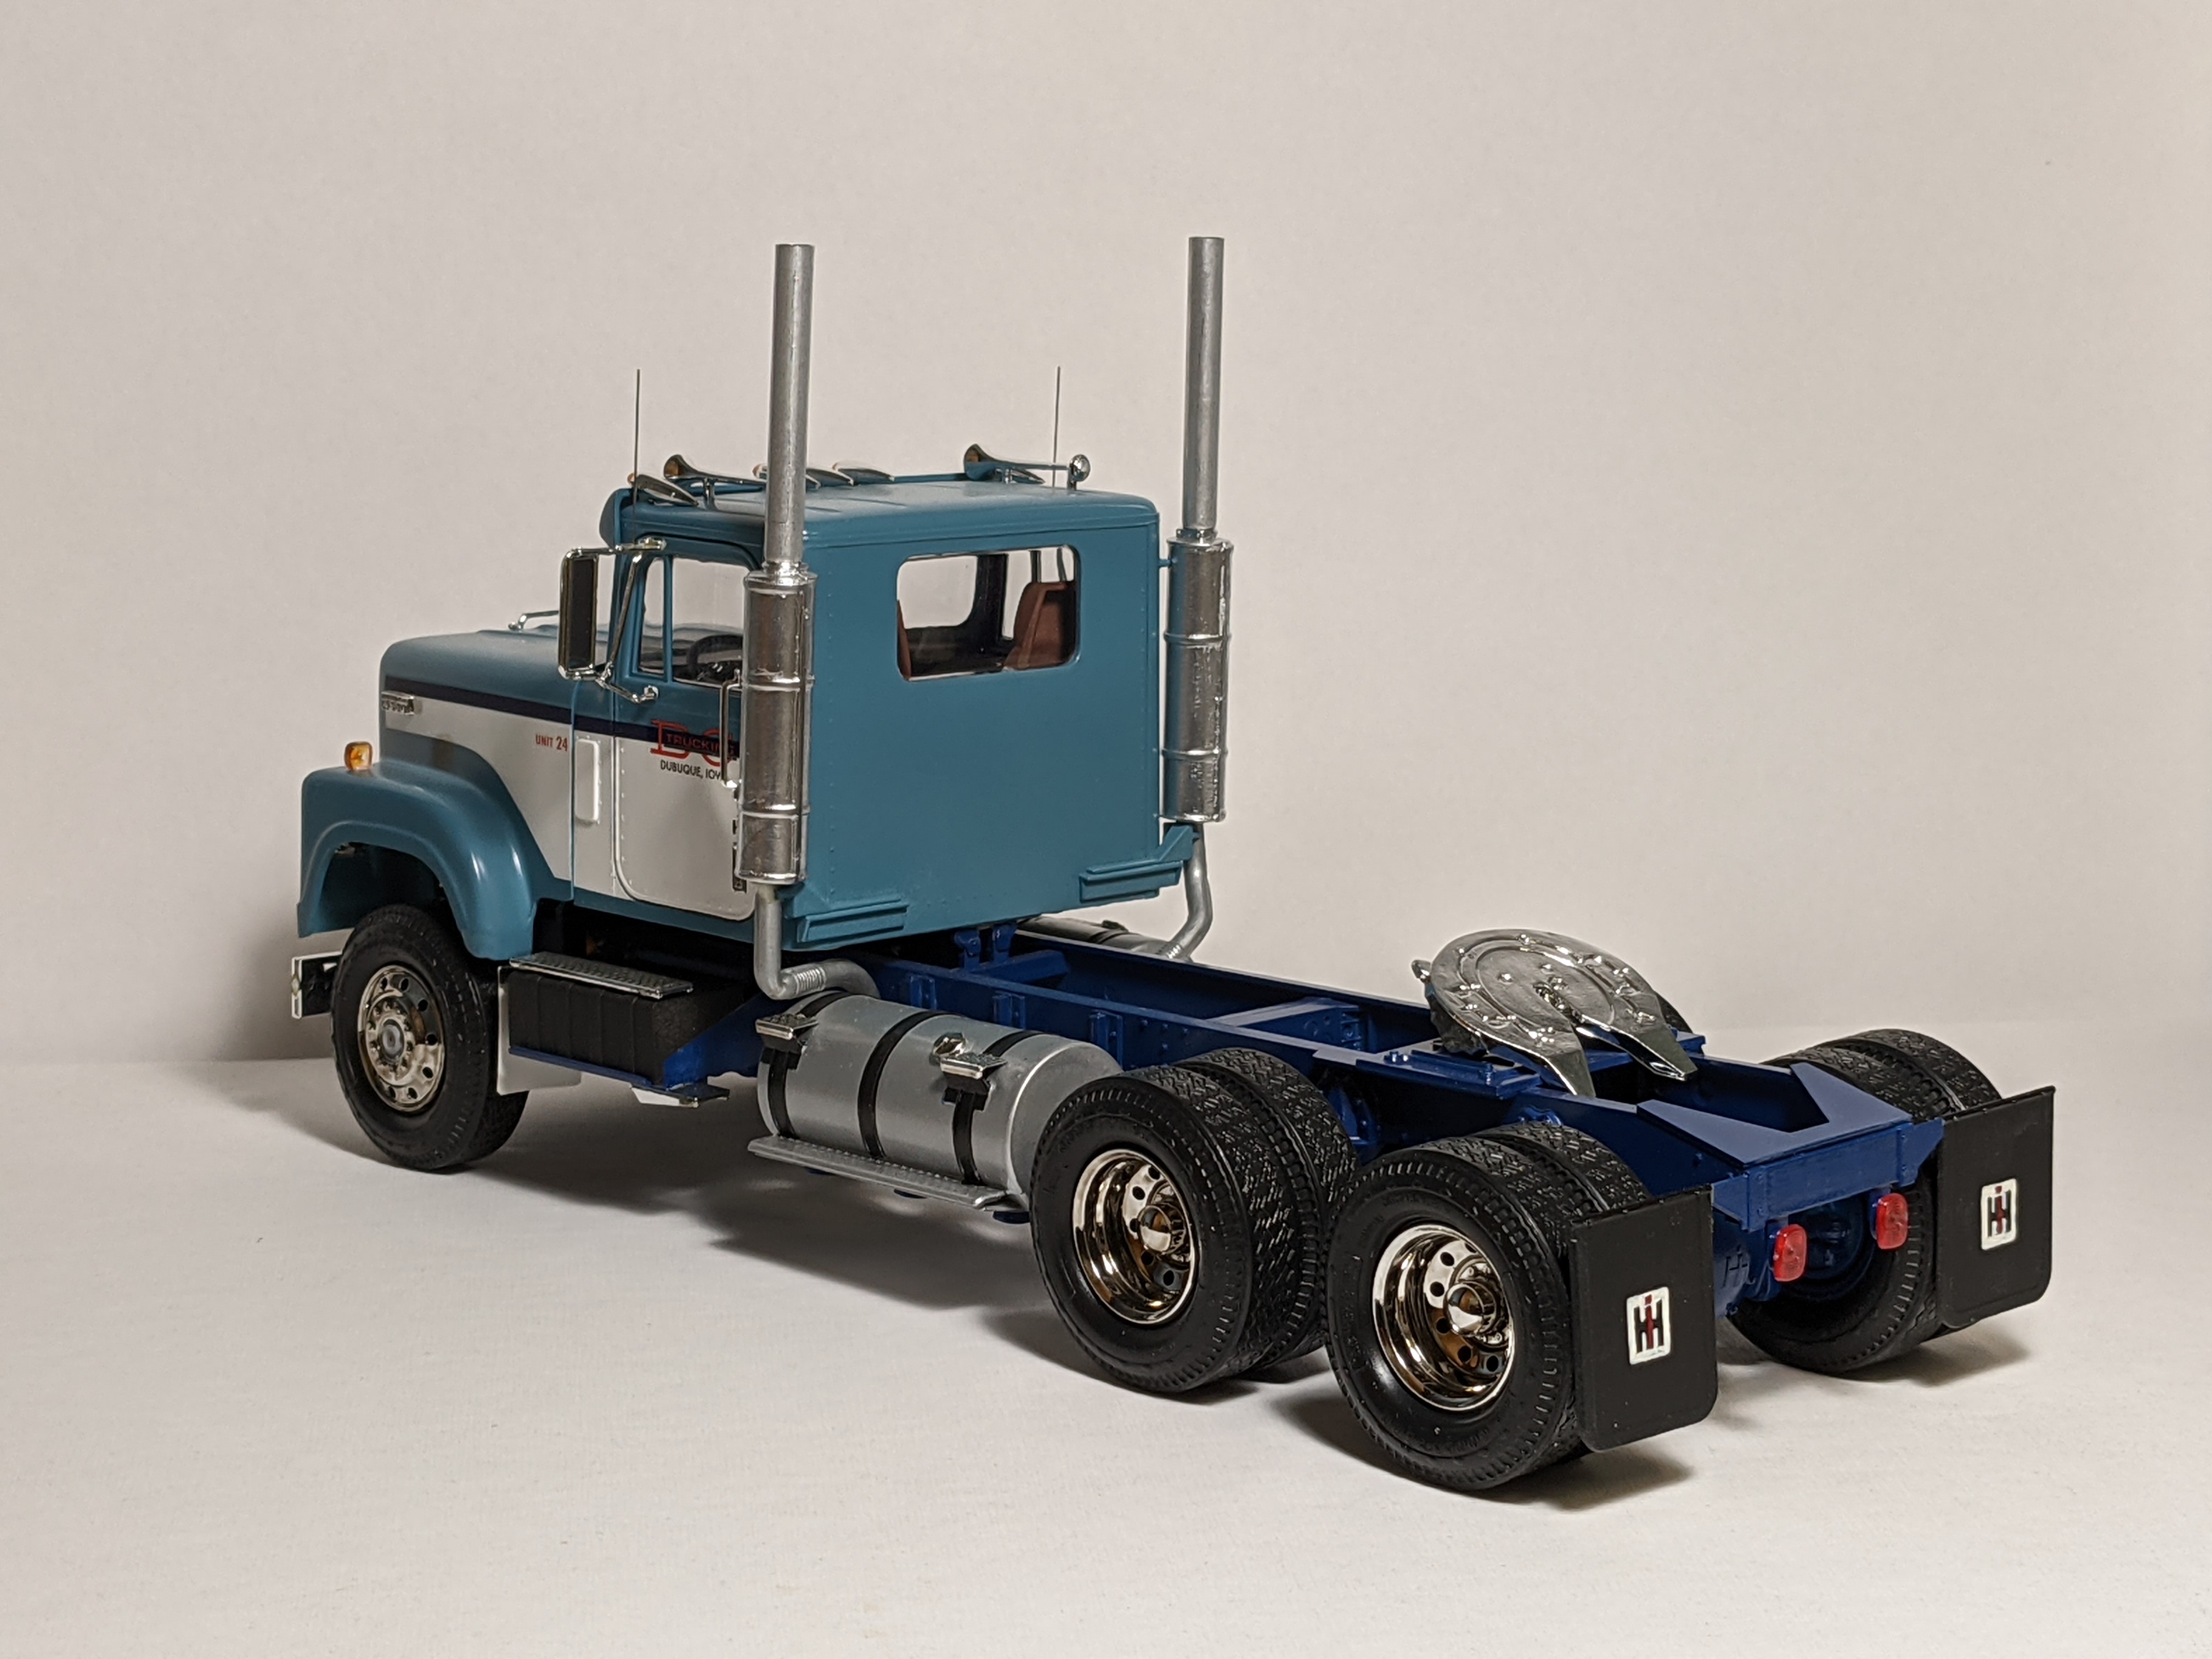
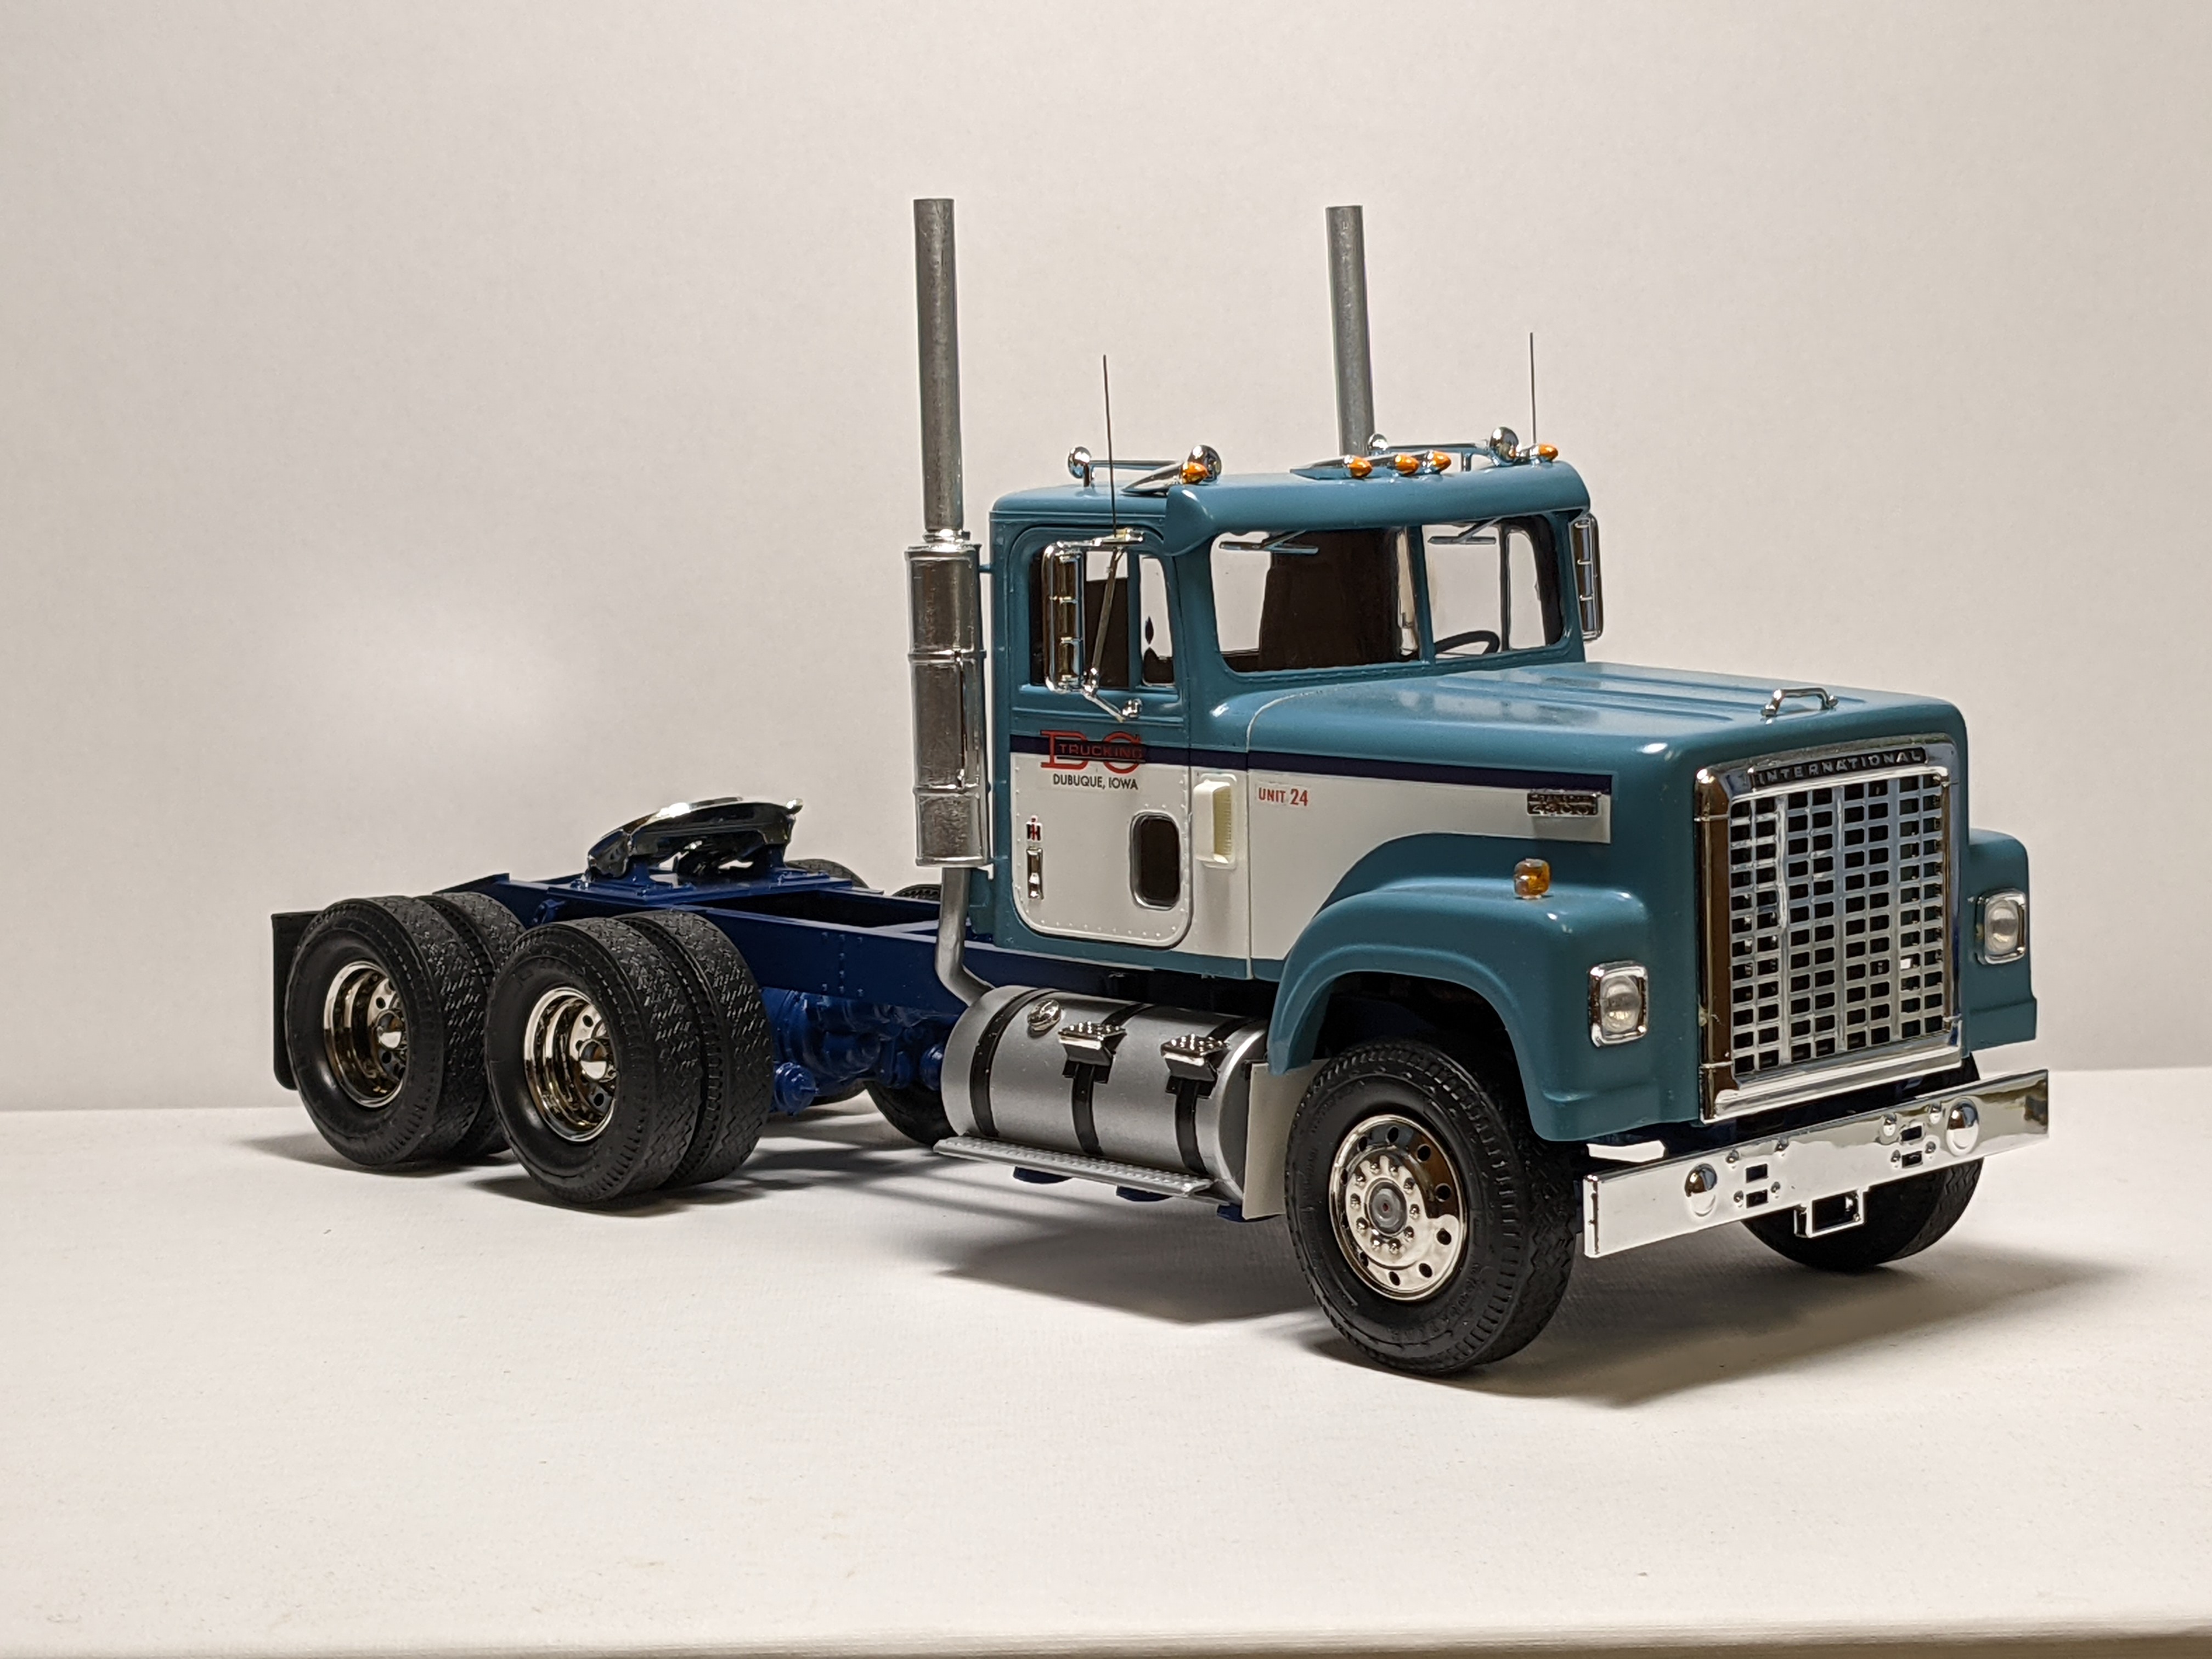
Corn binder 4300*(plus bonus)
asfastasu replied to asfastasu's topic in Model Trucks: Big Rigs and Heavy Equipment
Thanks! Yes it is. I've been wanting/looking for one for years. -
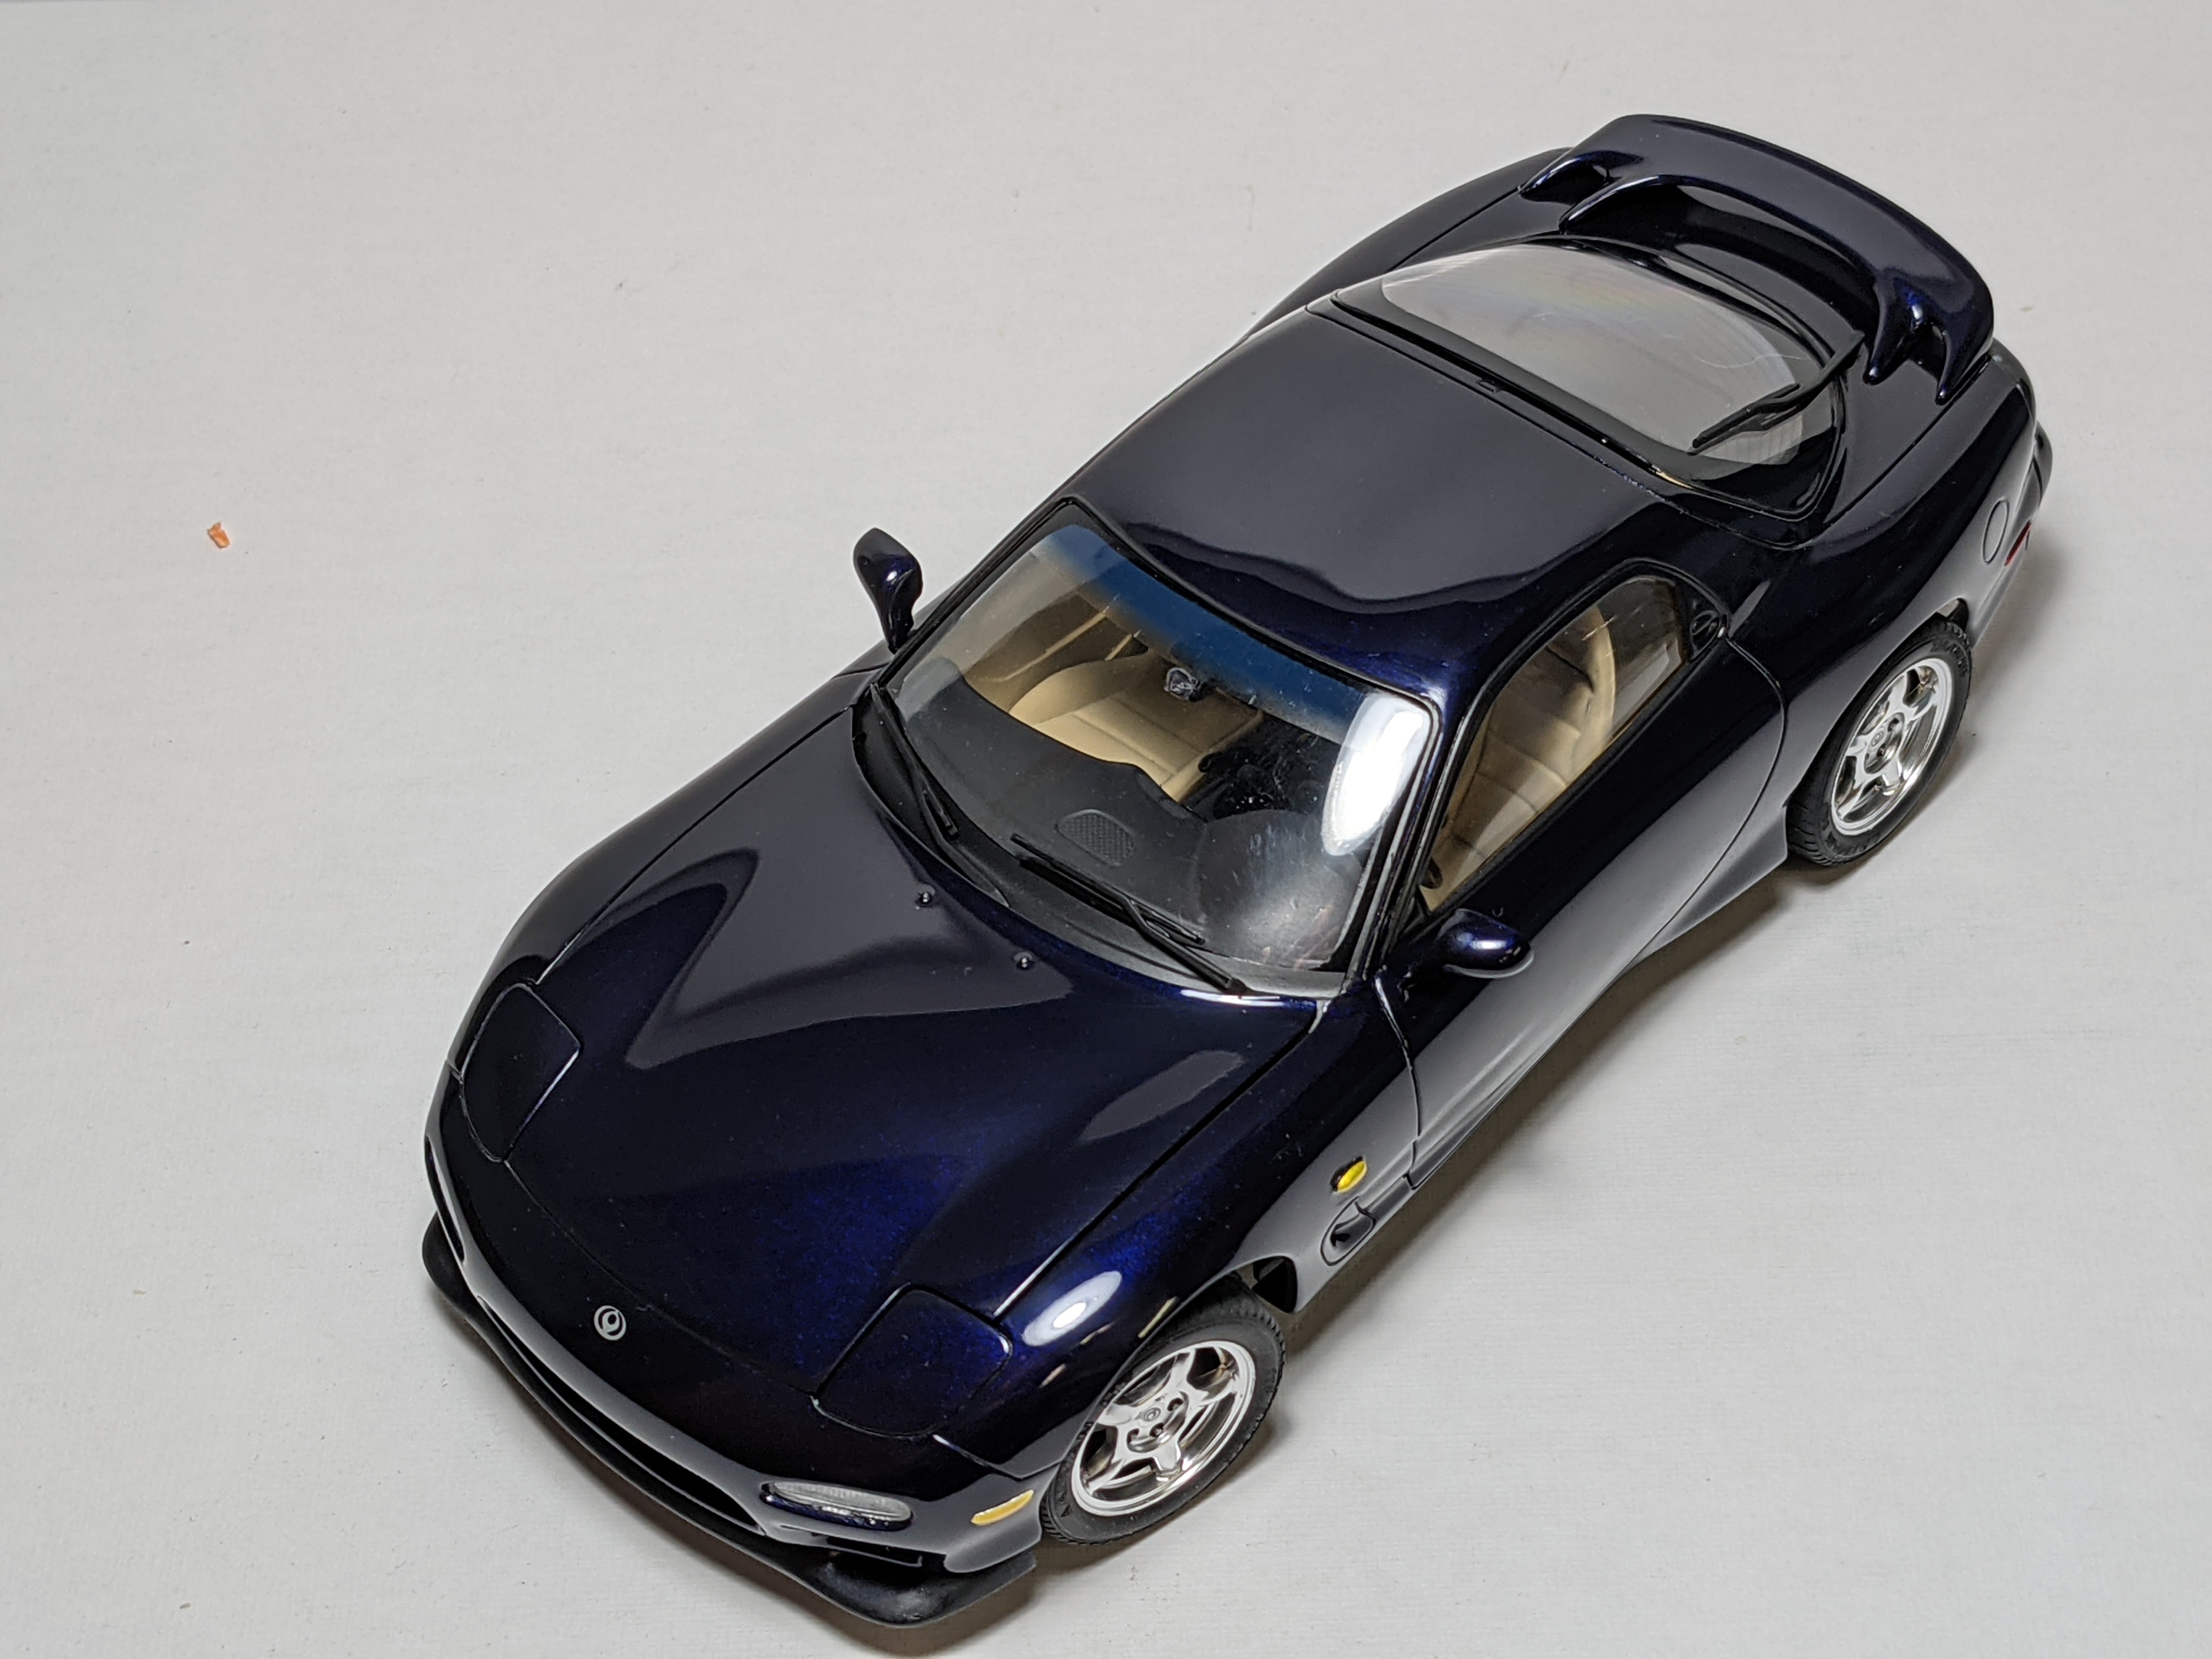
Built OOB. Paint is Tamiya ts53 deep metallic blue cleared with ts13 and then polished. I read on this site that the taillight panel was brittle and to be careful with it and I still managed to break it into three pieces?. Posed next to gramps.lol The brown FB was posted about a year ago on here.
-
Corn binder 4300*(plus bonus)
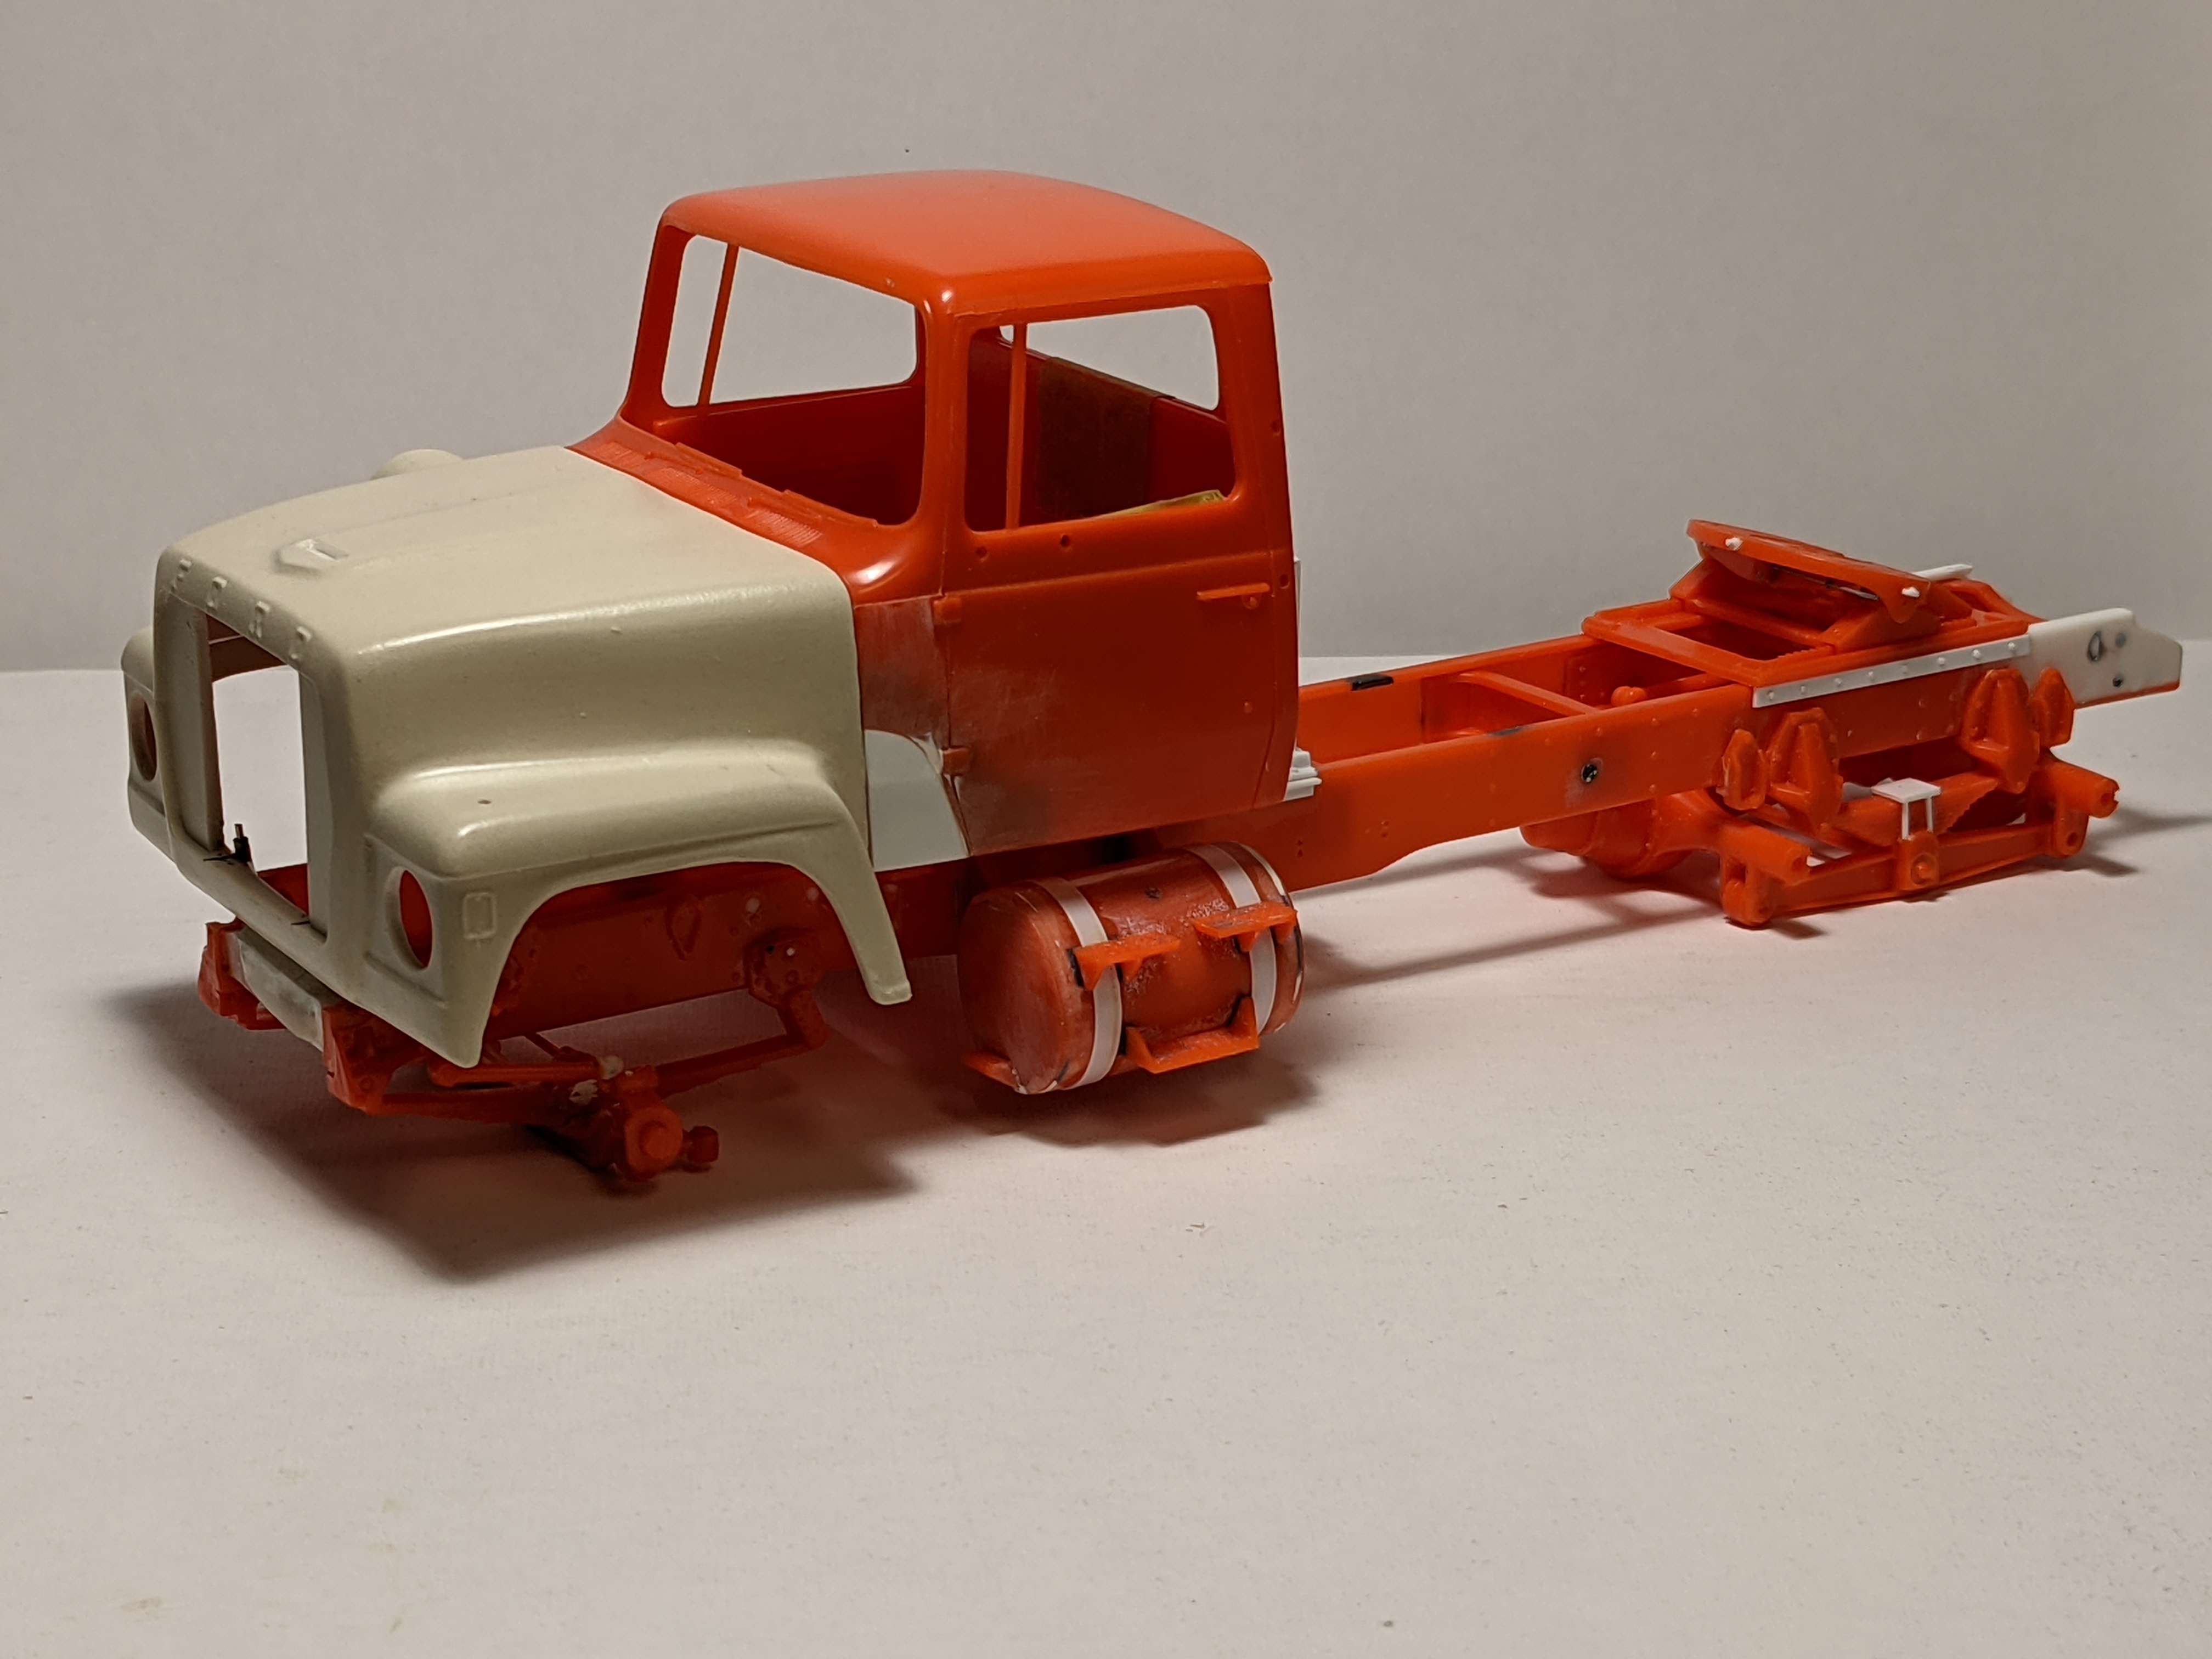
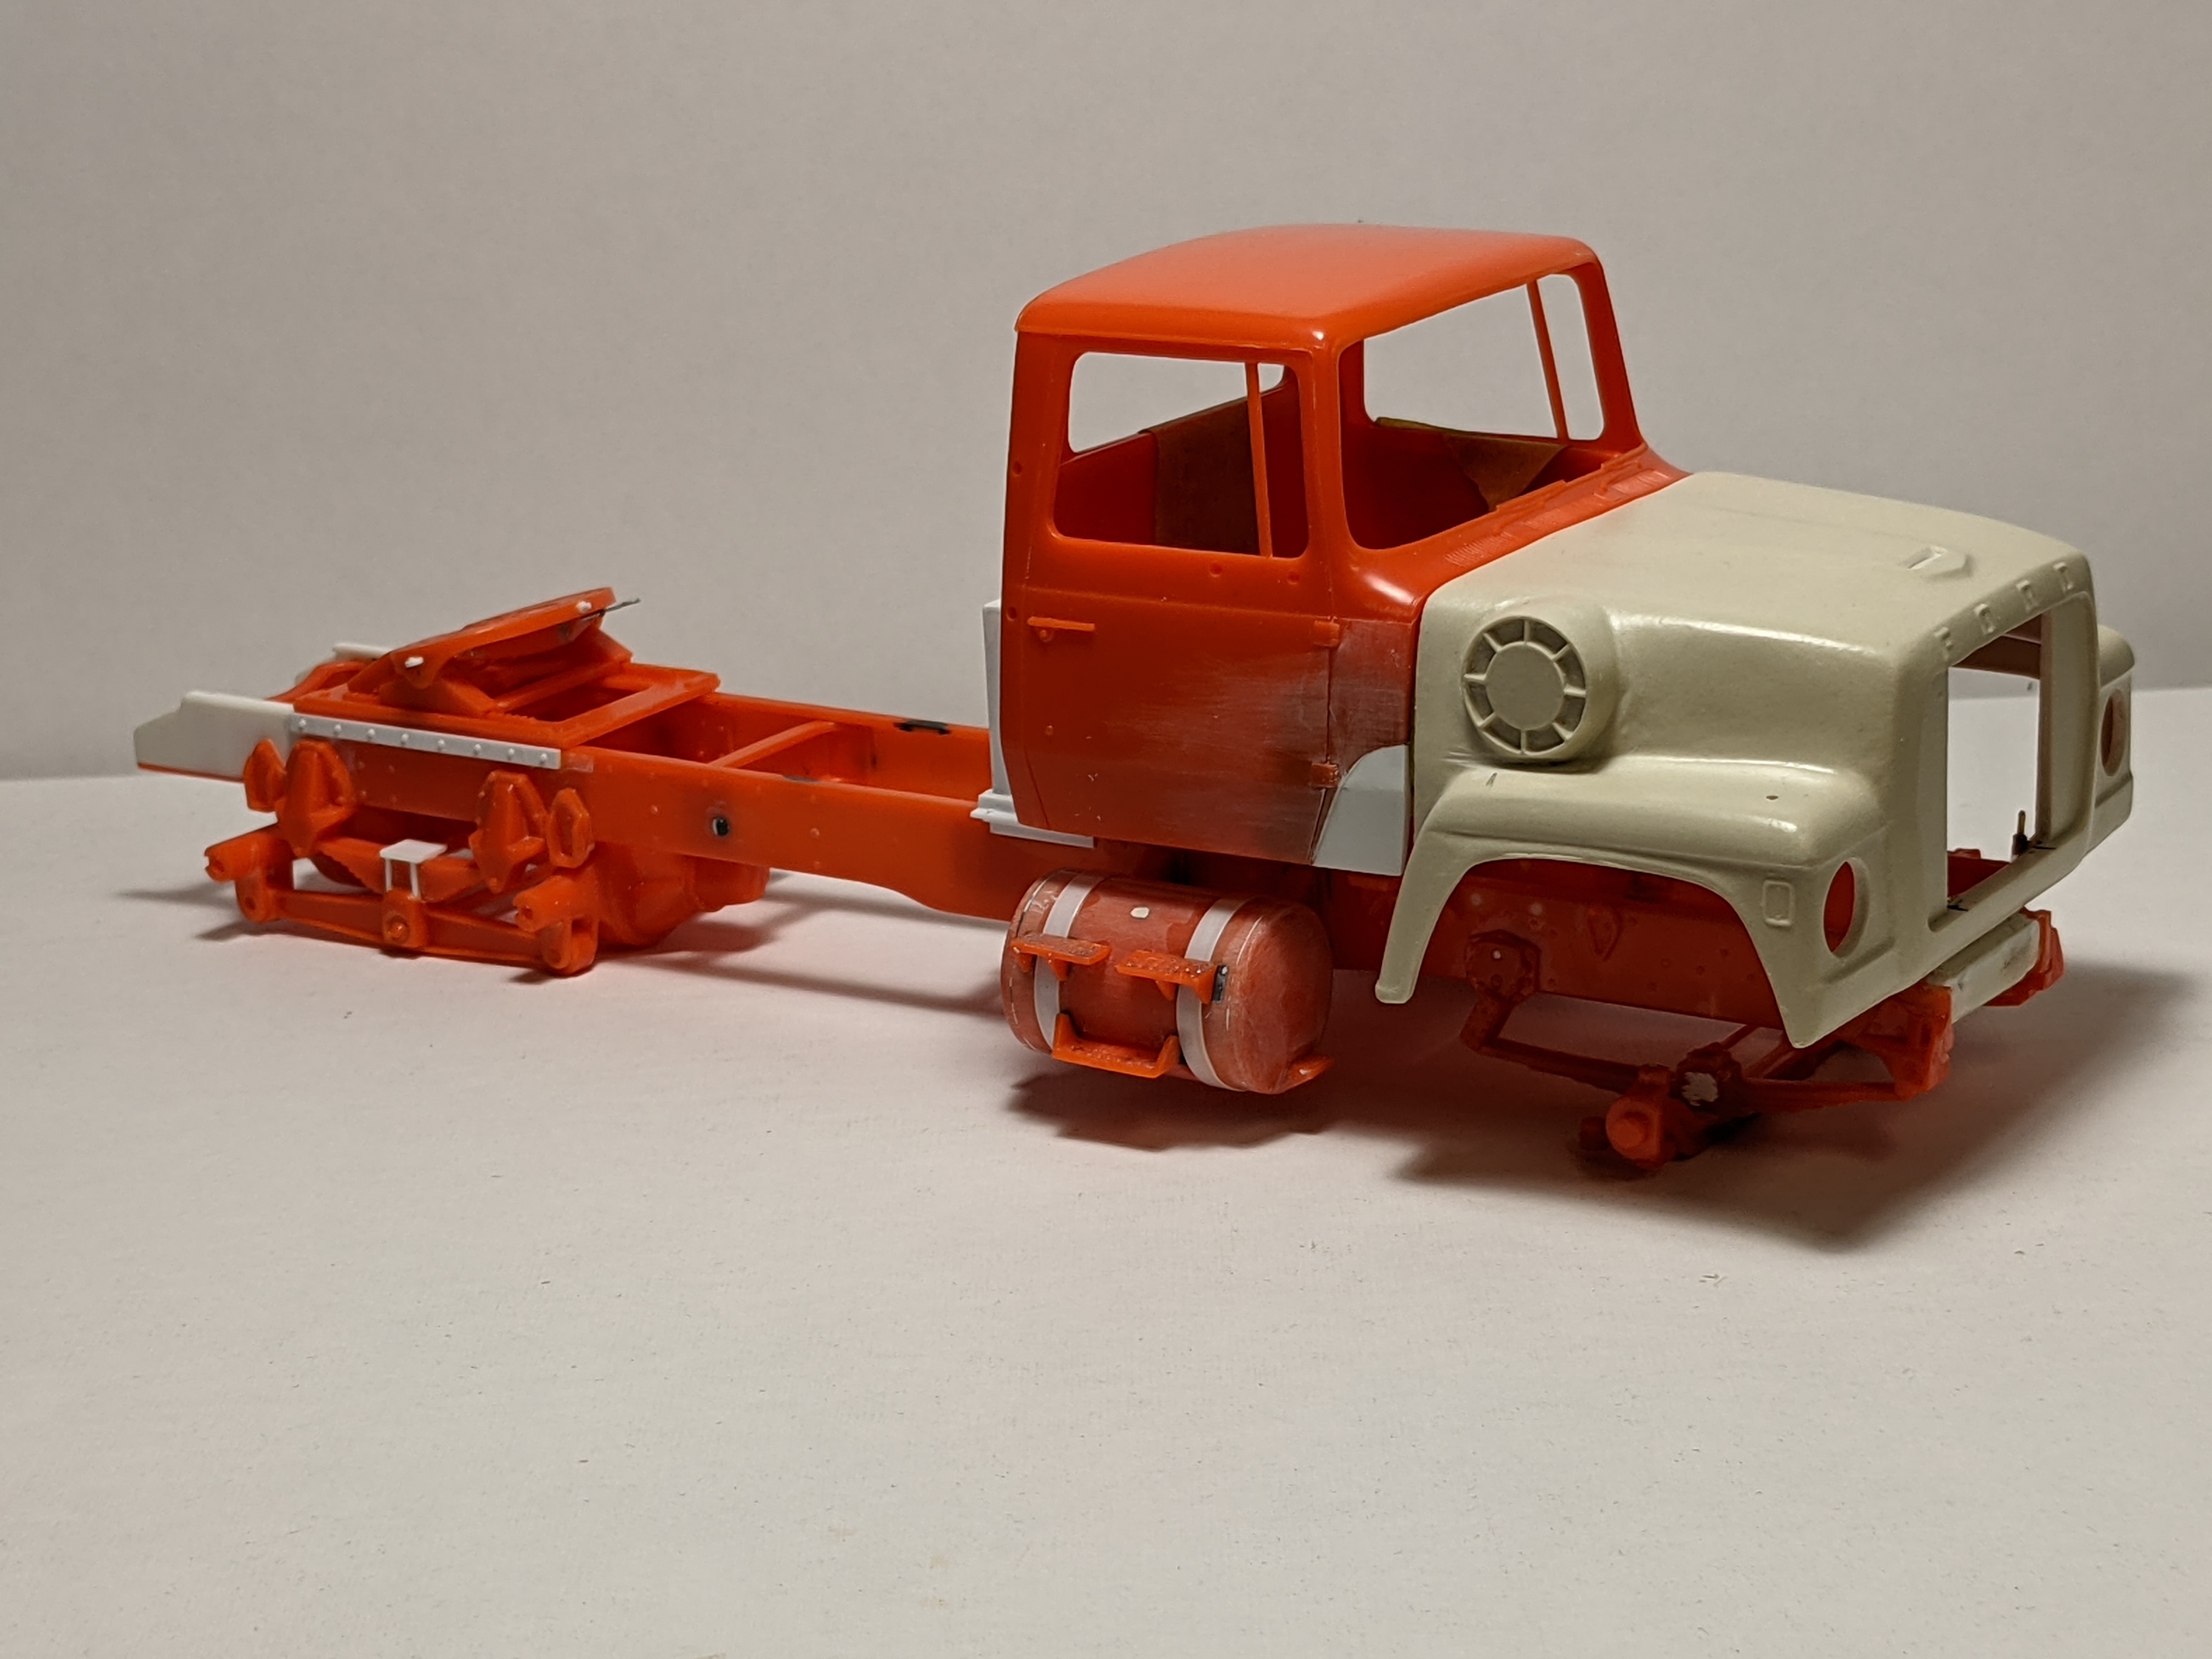
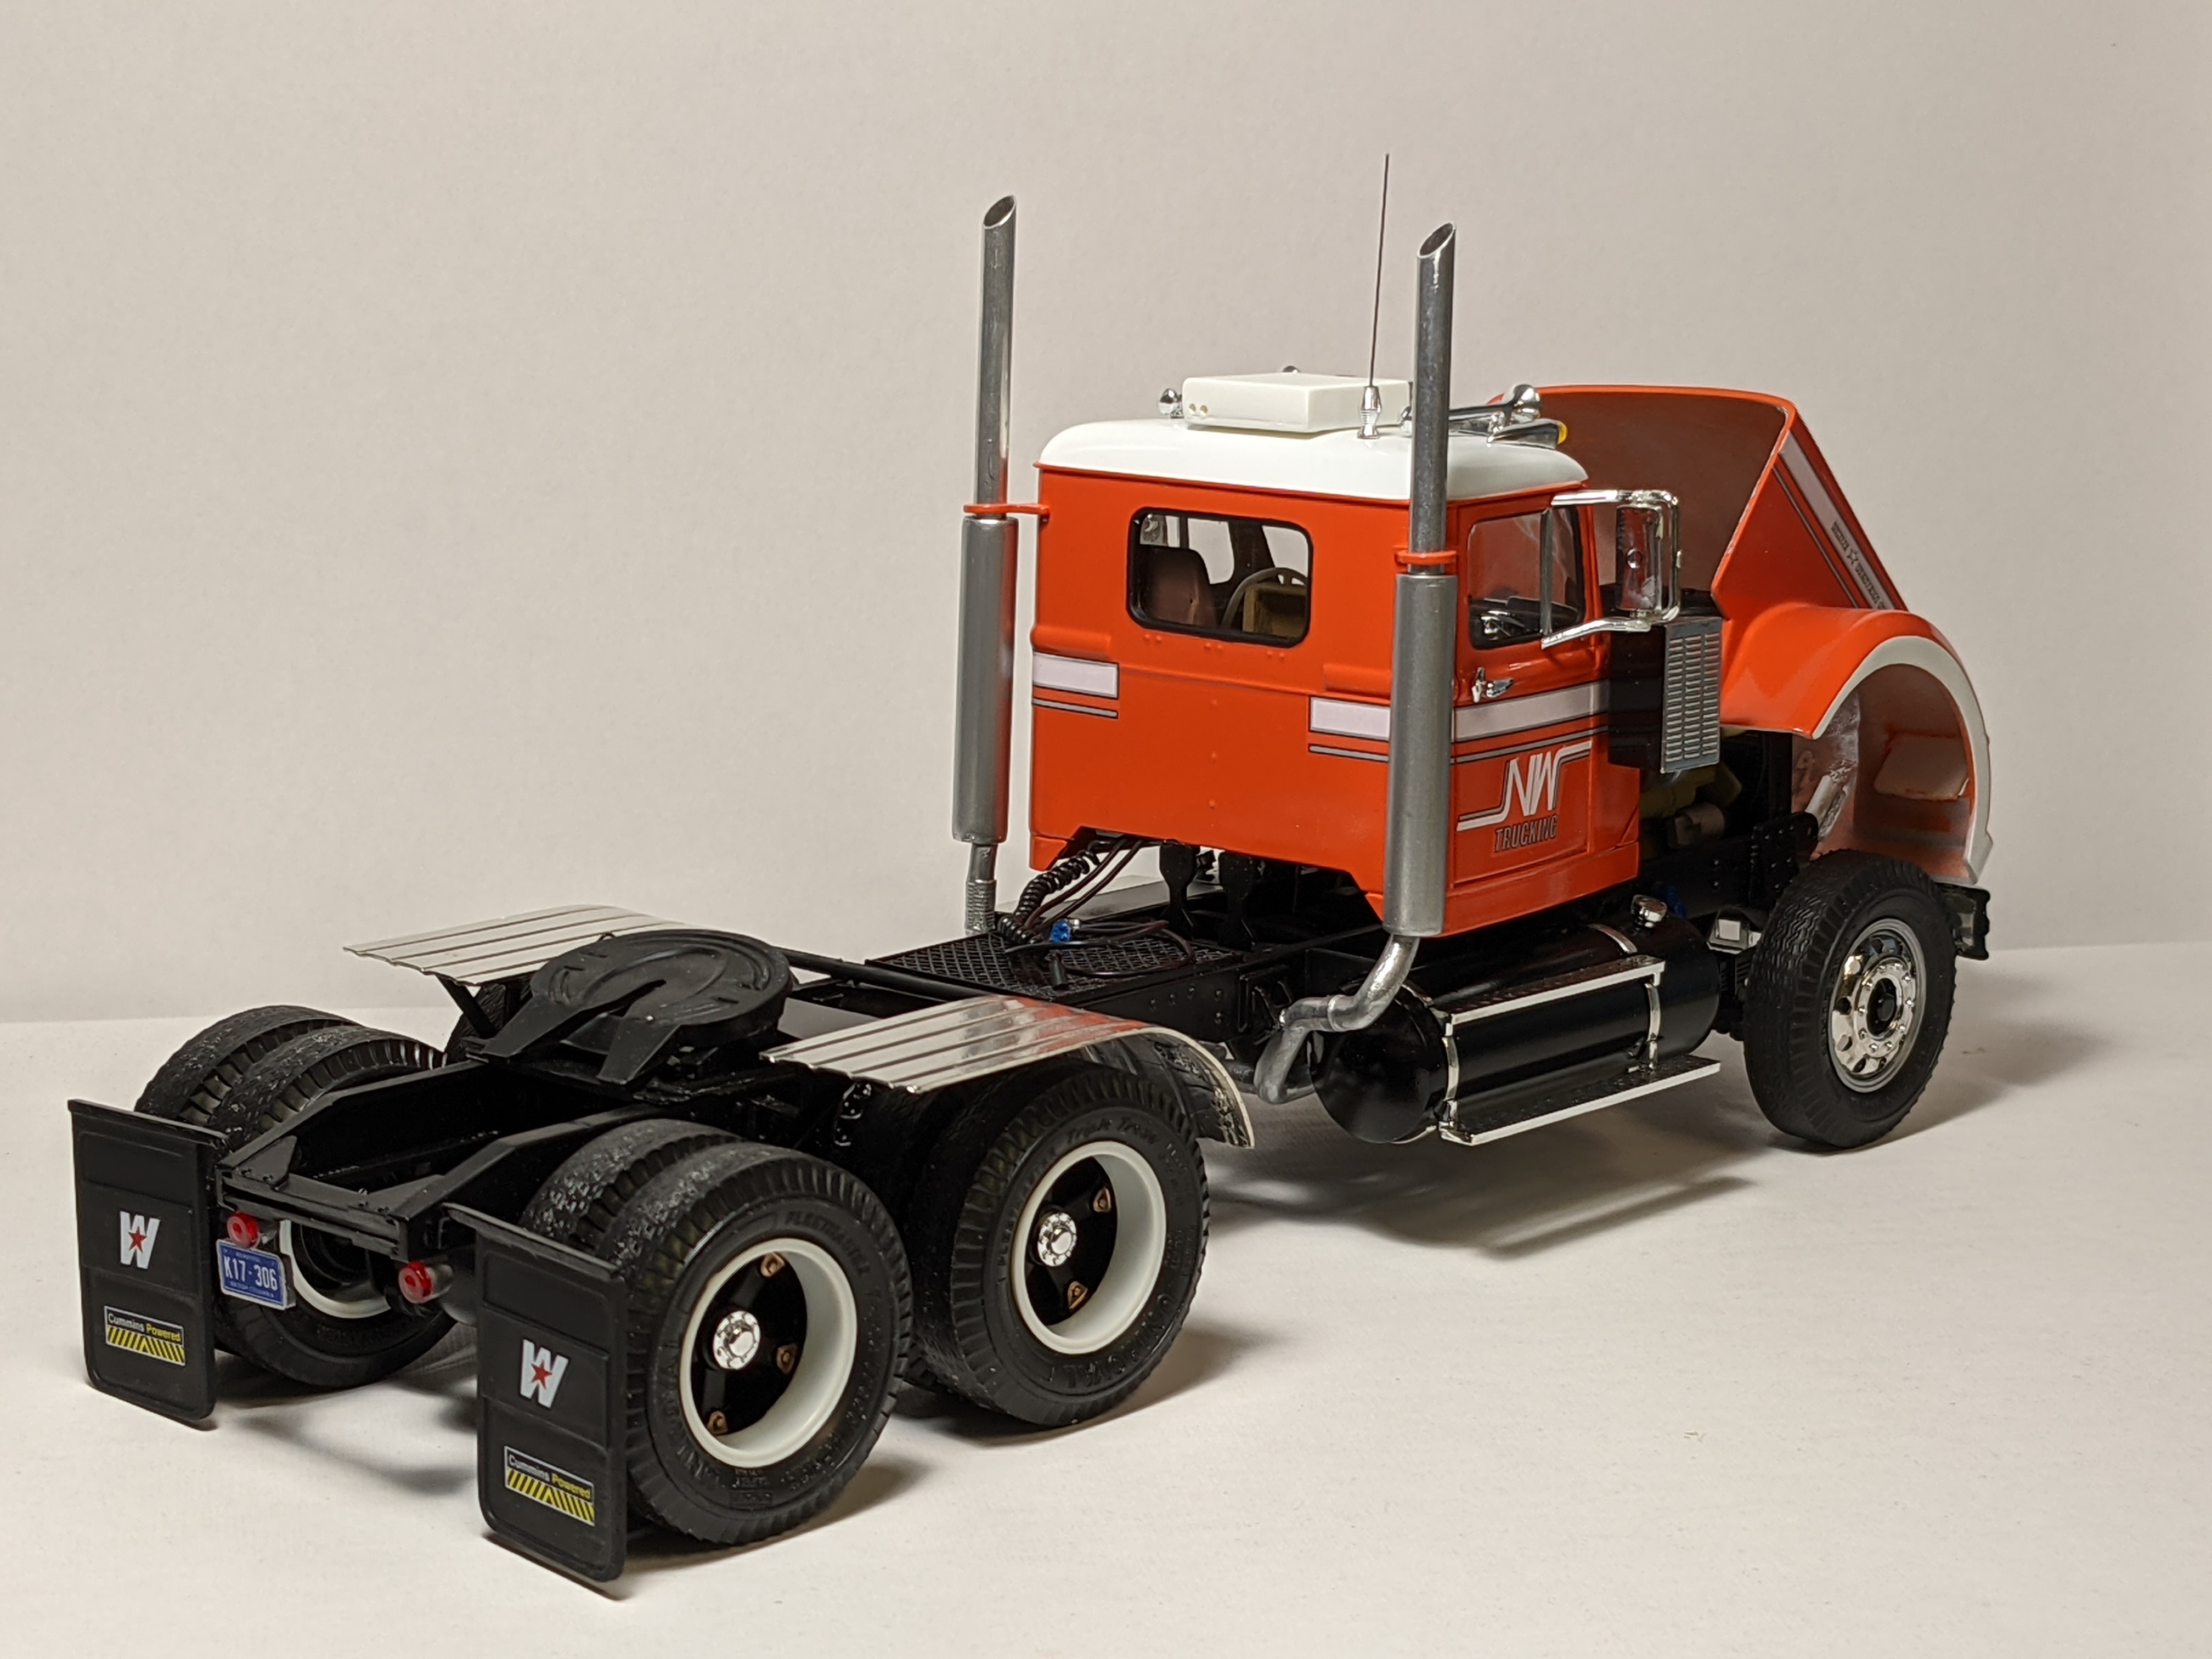
asfastasu posted a topic in Model Trucks: Big Rigs and Heavy Equipment
This is actually the second time I built this kit. The first one was destroyed by my kids. Built about six years ago. The last two photos are of my current project. I started on it about four months ago. I would do a WIP on it but I'm not exactly the speediest builder.lol
-
Built this one about four years ago. Painted with Tamiya spray can orange and white. Built OOB except for adding dual stacks, homemade half fenders, trailer plumbing and added a release handle on fifth wheel. Pics are from my phone.
-
Nice save and good choice on the color. I always enjoy watching your wips and the end result.
-
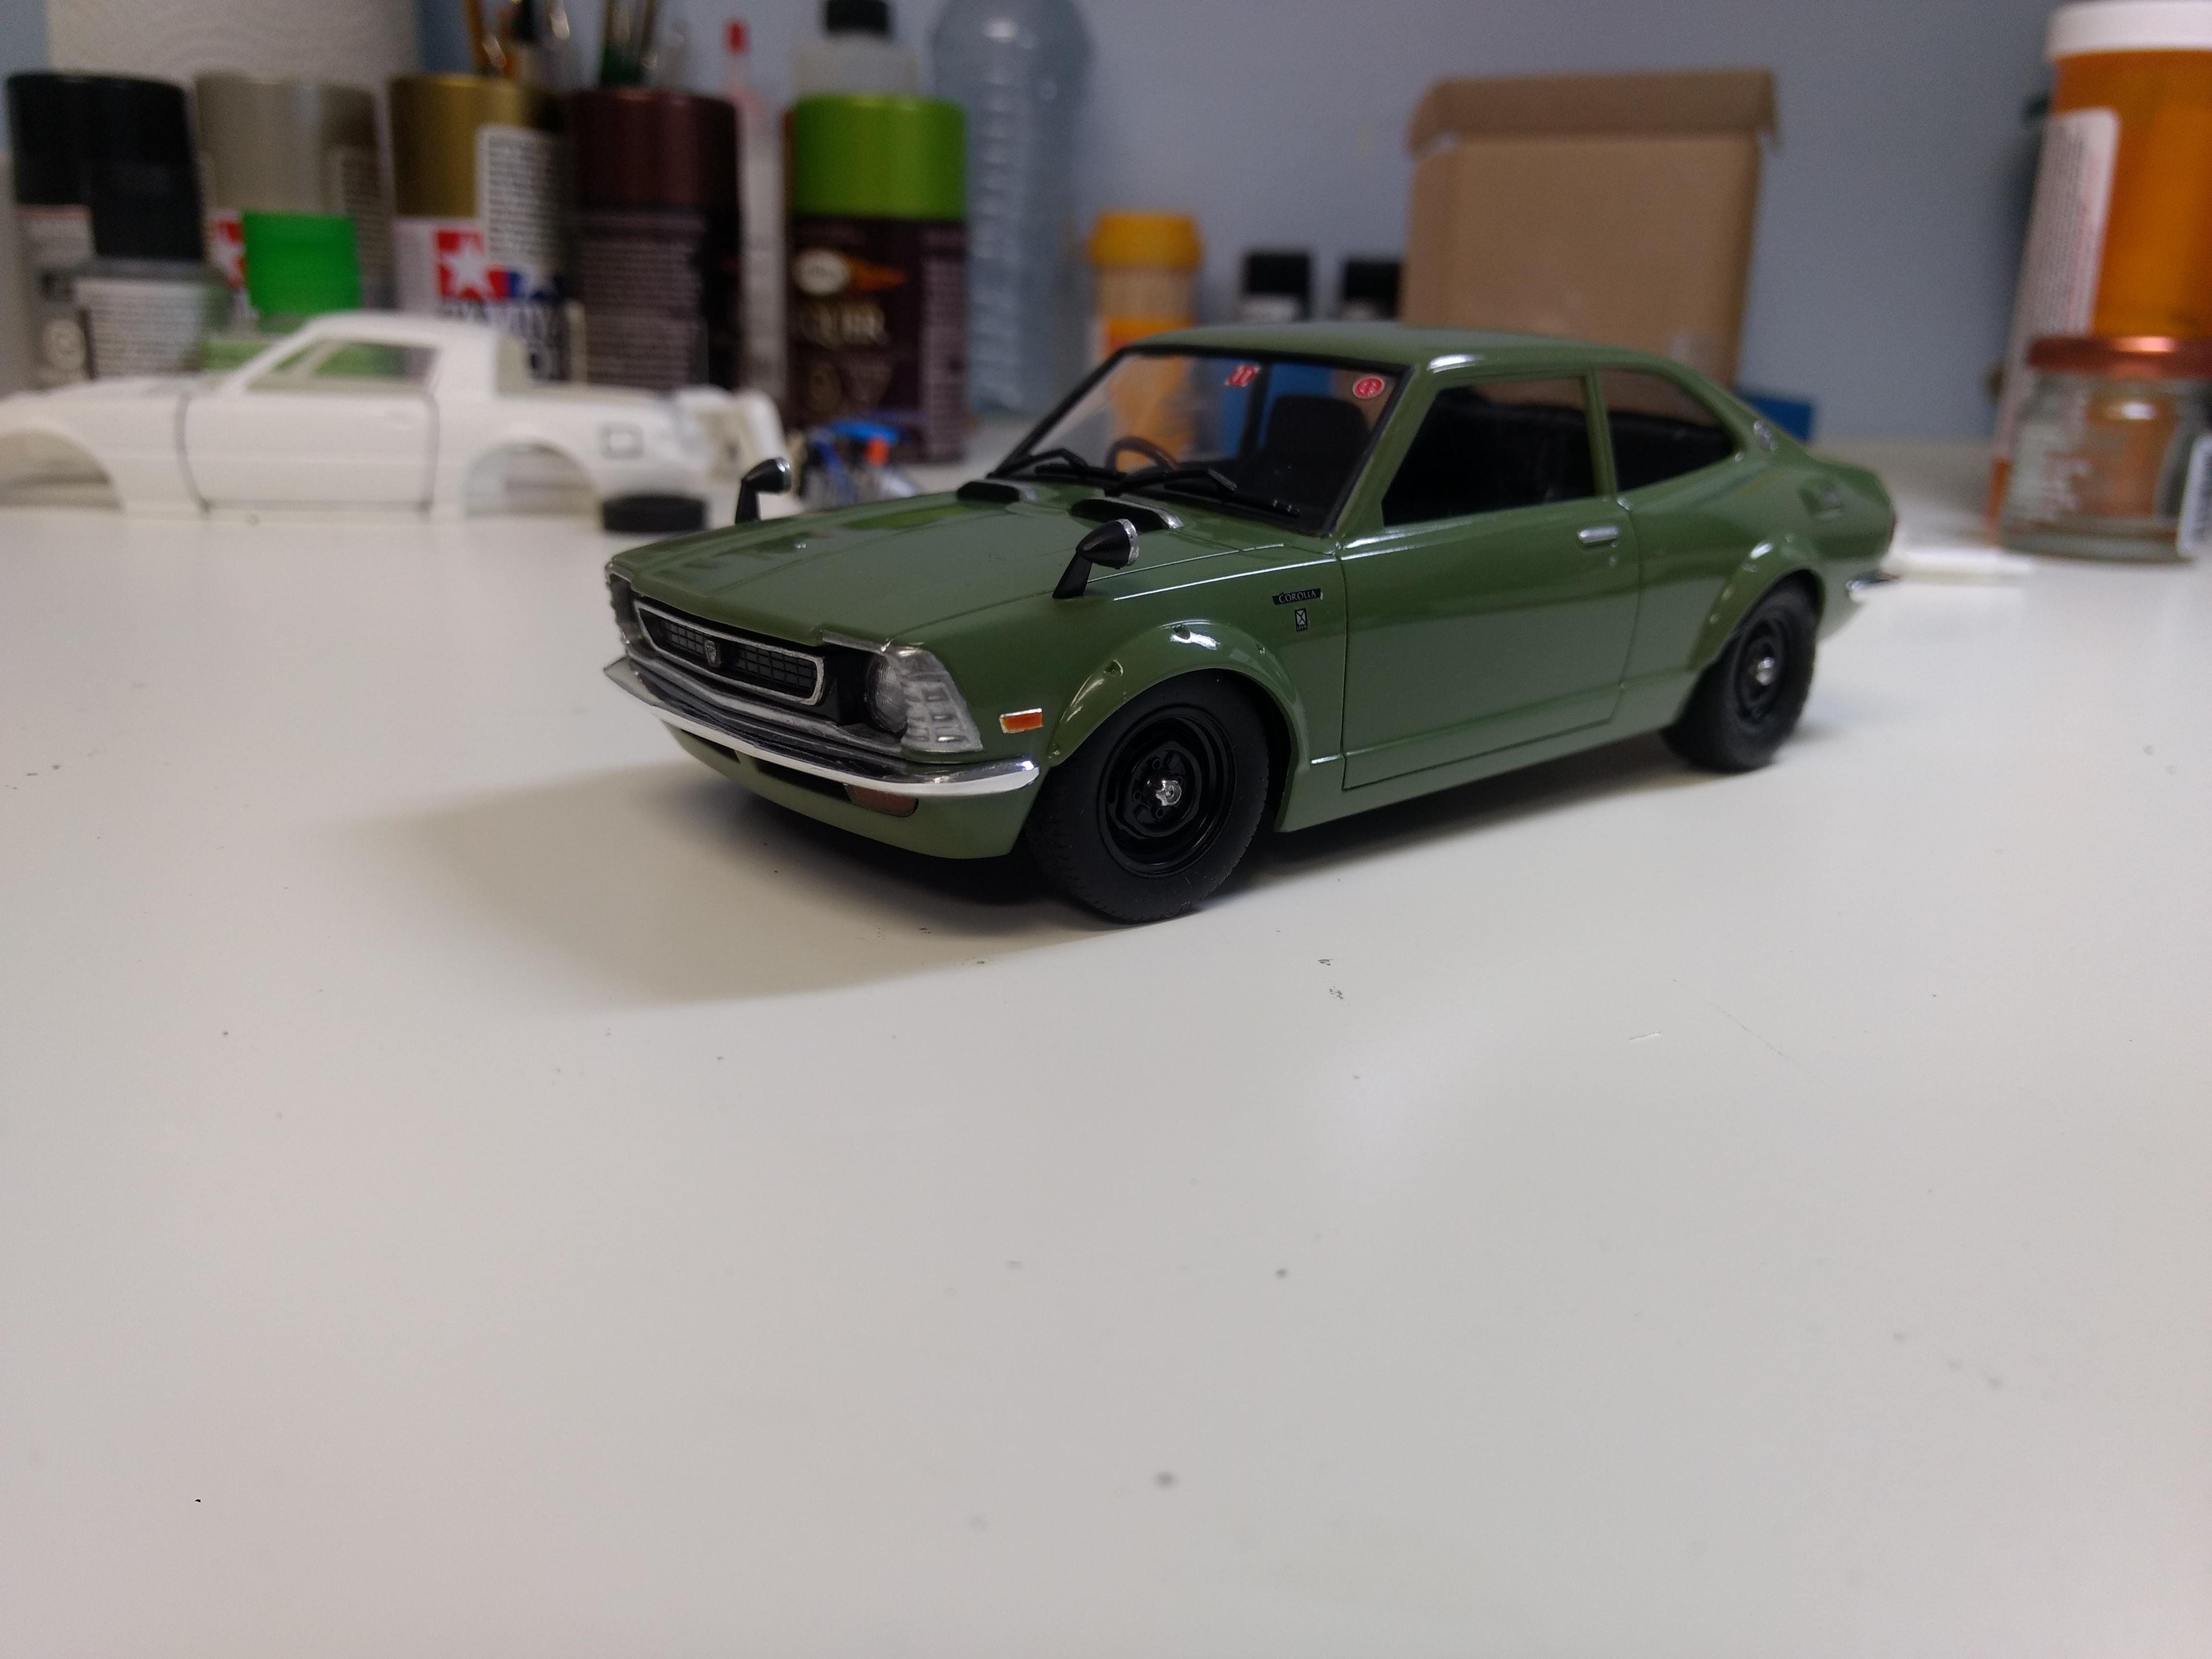
Here's my contribution. Opened and hinged the hood and doors. Paint is Duplicolor from the can with Tamiya ts13 clear. Fujimi wheels and tires, and added the sunroof.
-
Good looking car. What brand of yellow is that?
-
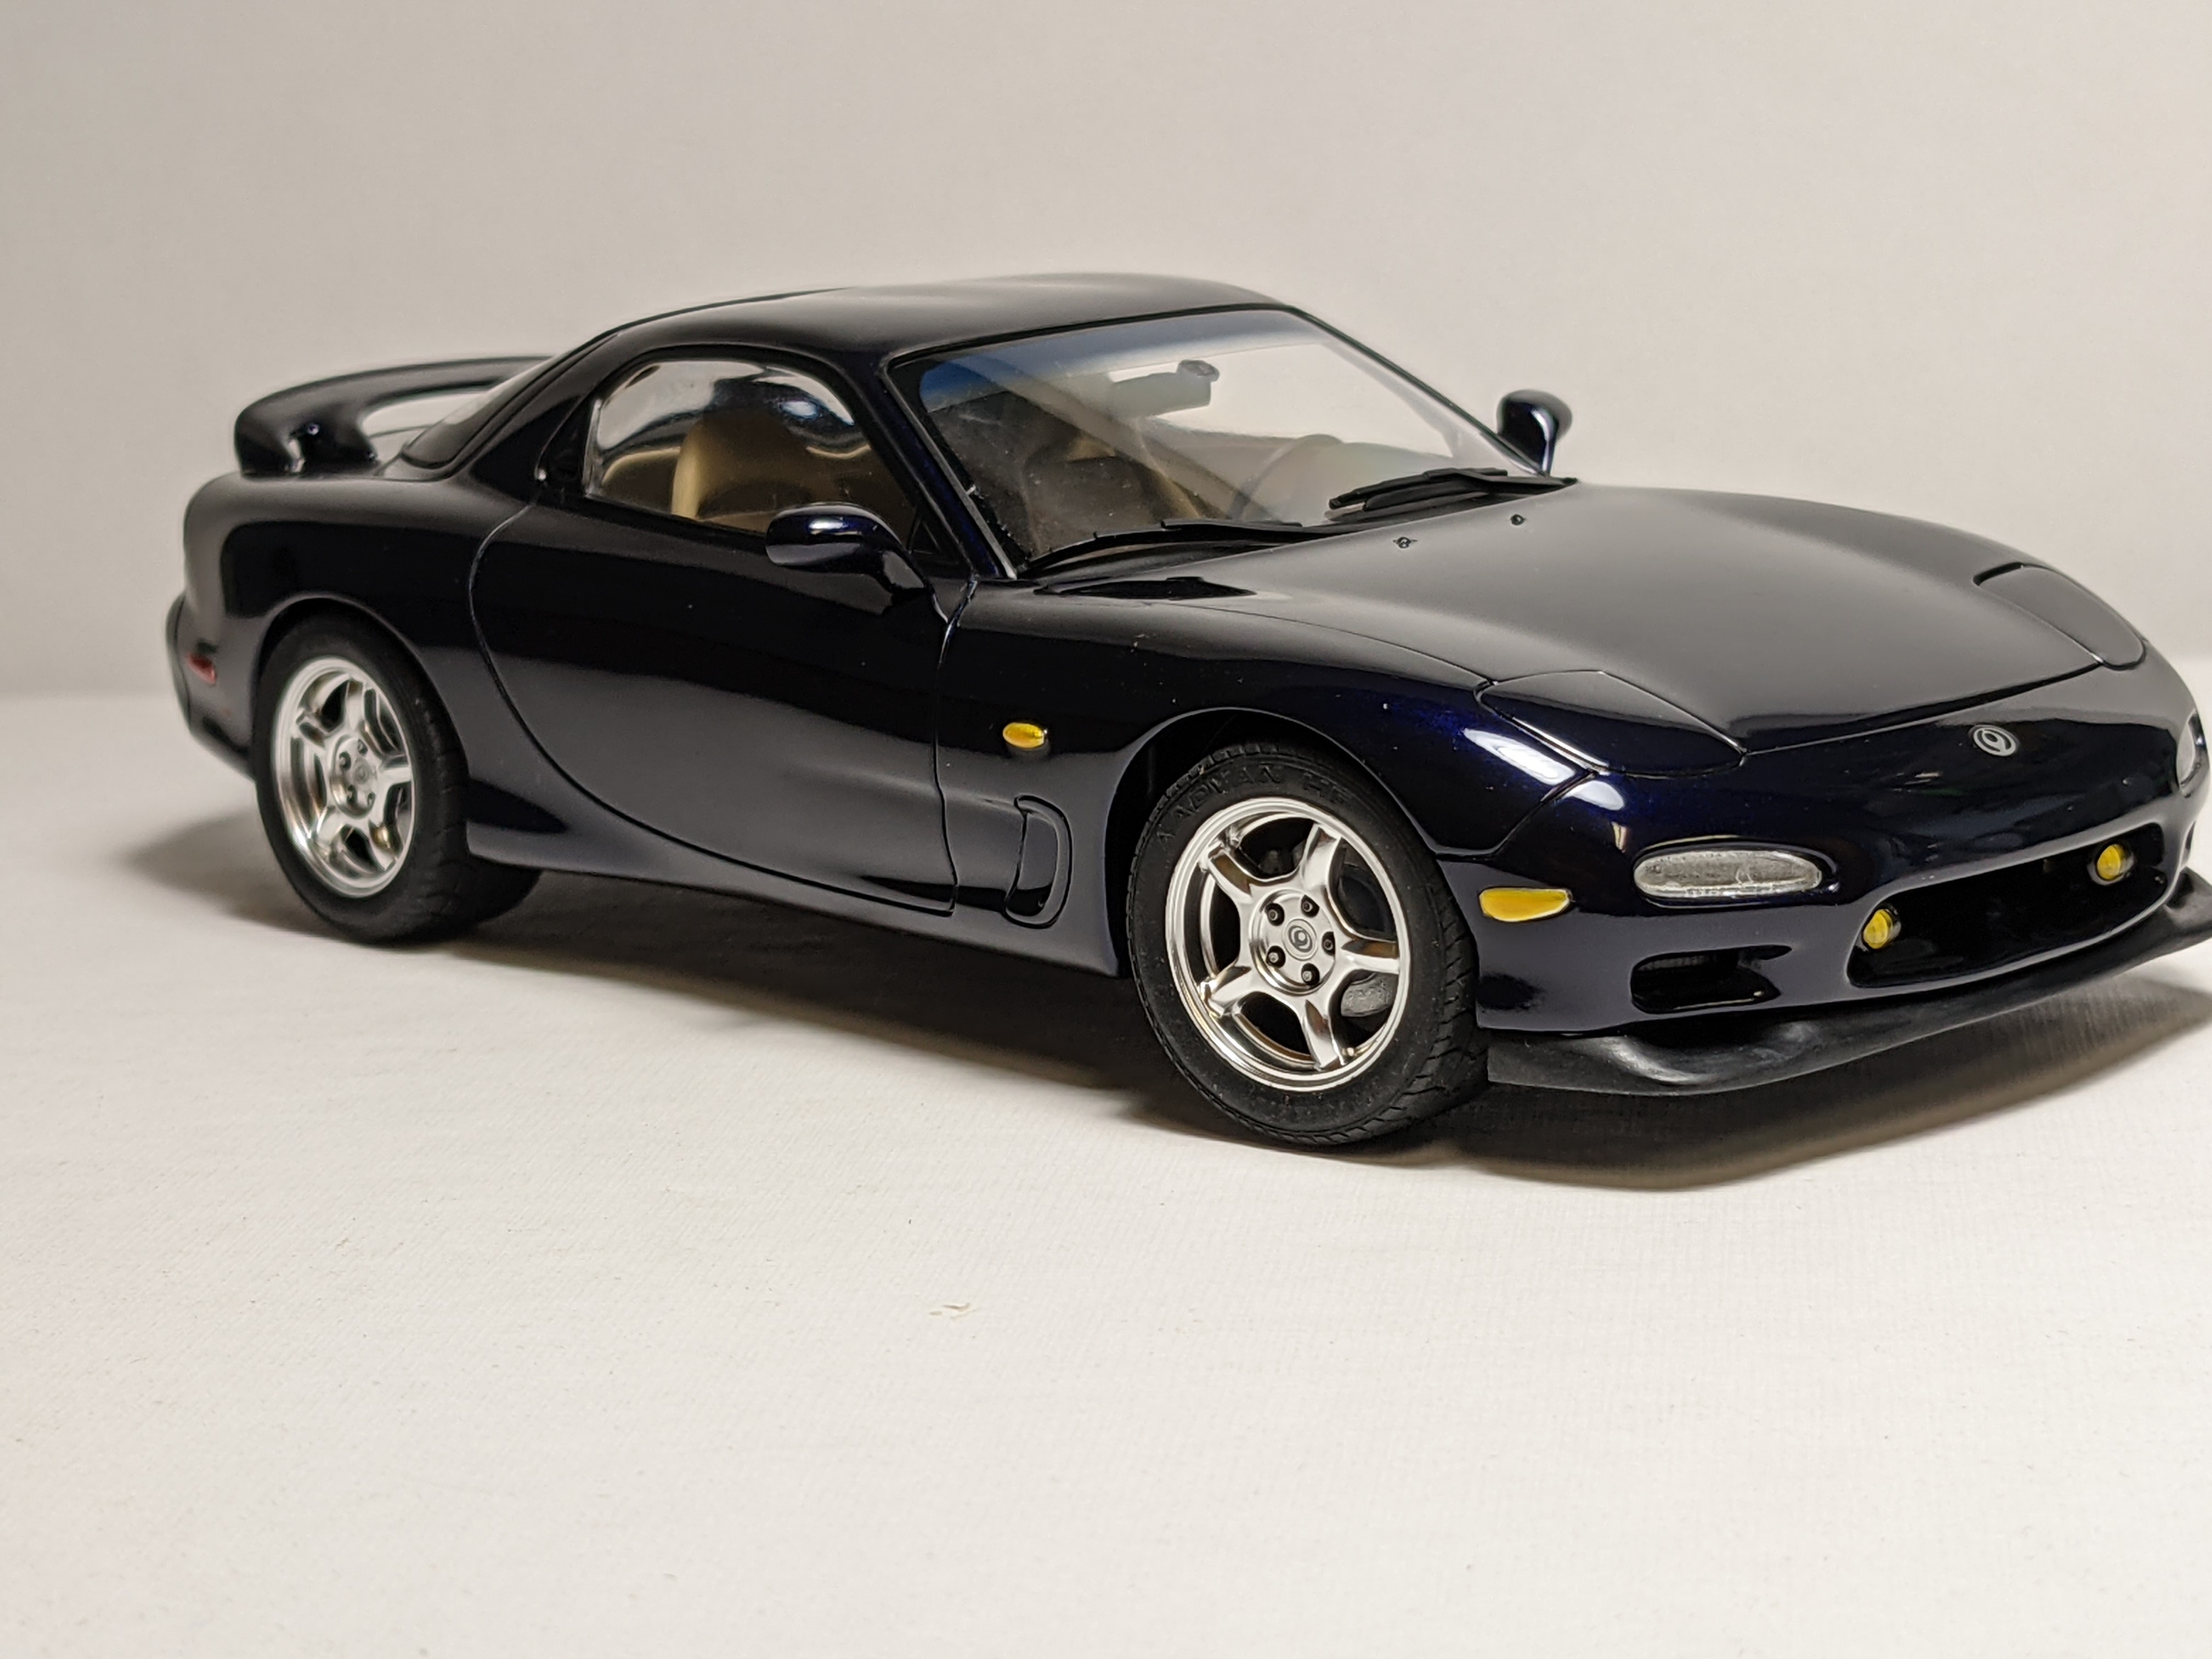
Thanks once again guys. I recently finished the 3rd gen rx7(Tamiya R1). Gonna have to post it soon.
-
Thanks for the comments guys. Spottedlaurel you must get on yours, would be interesting to see what you come up with.
-
A quick build from a couple of years ago. First airbrush paint job using Tamiya acrylics and cleared with ts13 straight from the can and then polished. Box stock except for the front tires and lowered suspension. Was a quick and fun build.
-
Actually, the front bumper isn't glued on, it's just set in place and actually sits there on it's own. It does look a ton better without, and that's how I displayed it at first. But I would have to do something with the mounting holes. Was thinking about some bullets like you would see on a Cadillac, or something similar......
-
This is pure awesomeness. Paint blows me away.
-
Thanks alot guys!!!!! Get a lot of my inspiration/motivation from this forum.
-
Tamiya 1/24 Honda CR-X 1.5i Ballade Sports
asfastasu replied to Italianhorses's topic in WIP: Model Cars
How did you use the boiling water to straighten the windshield post? Did you pour the water over the affected area only, or ? I ask because it looks really good after. Nice build. I have a friend with a 1:1 CRX, cool little cars. -
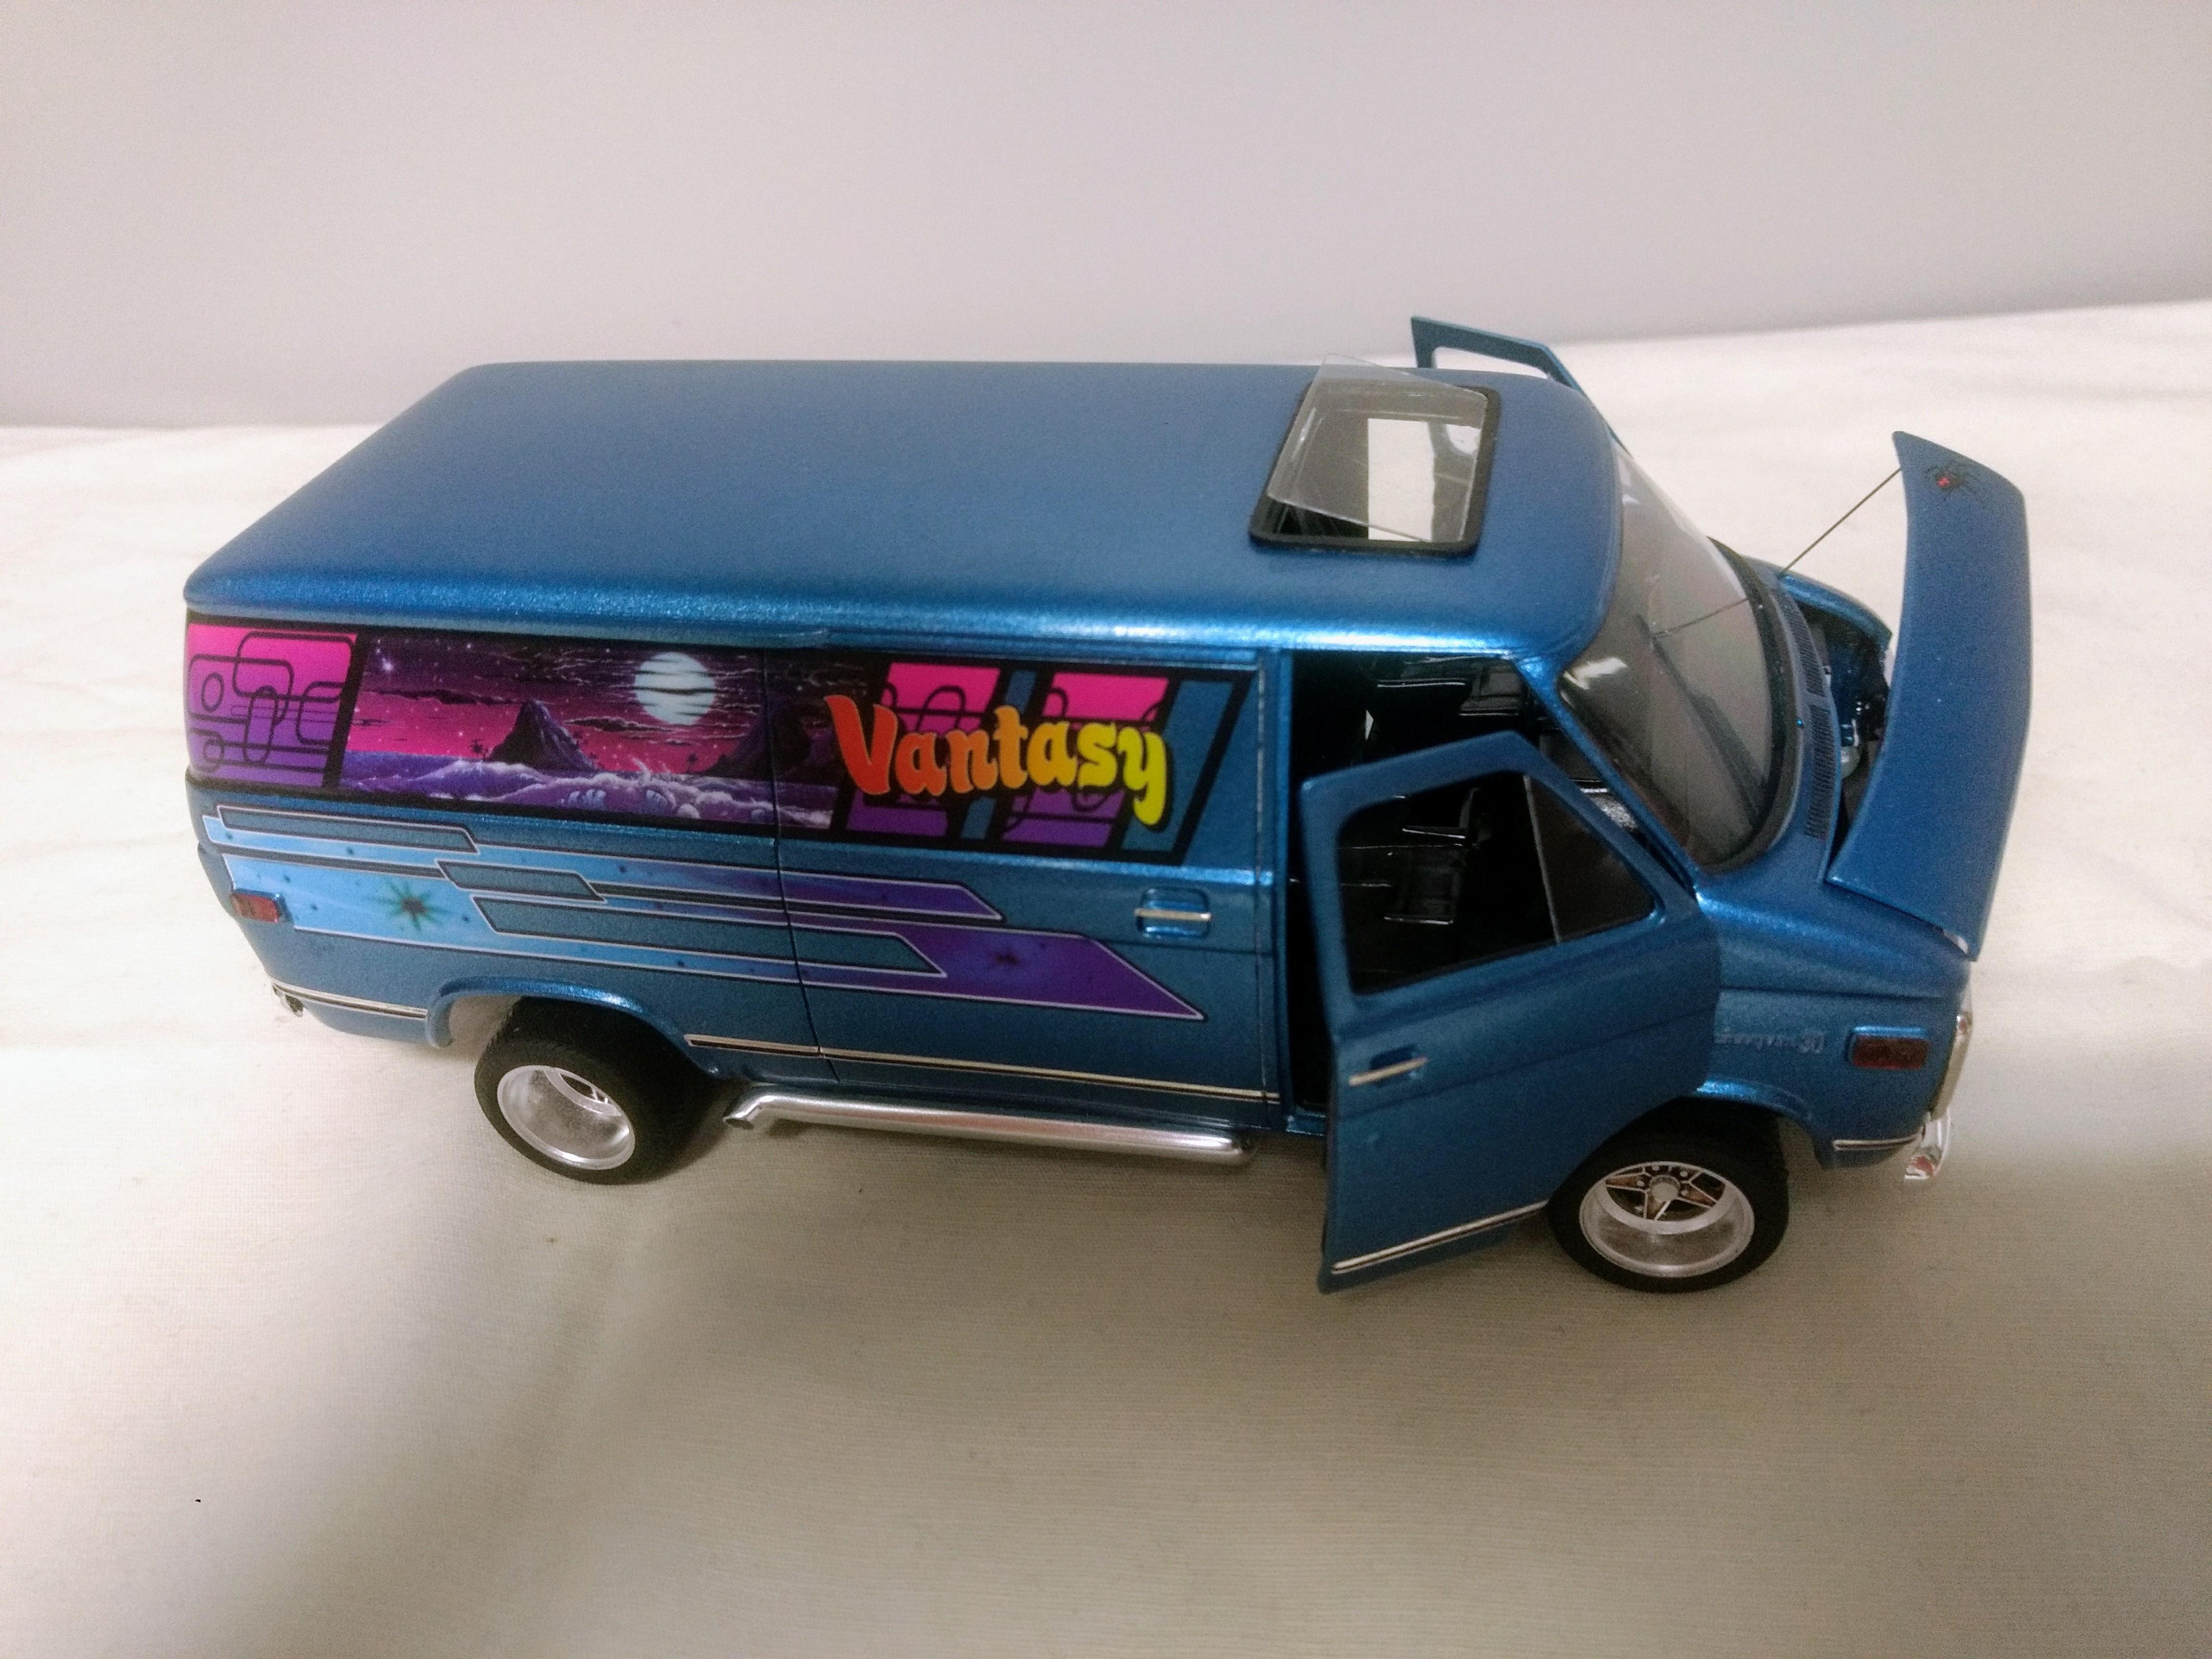
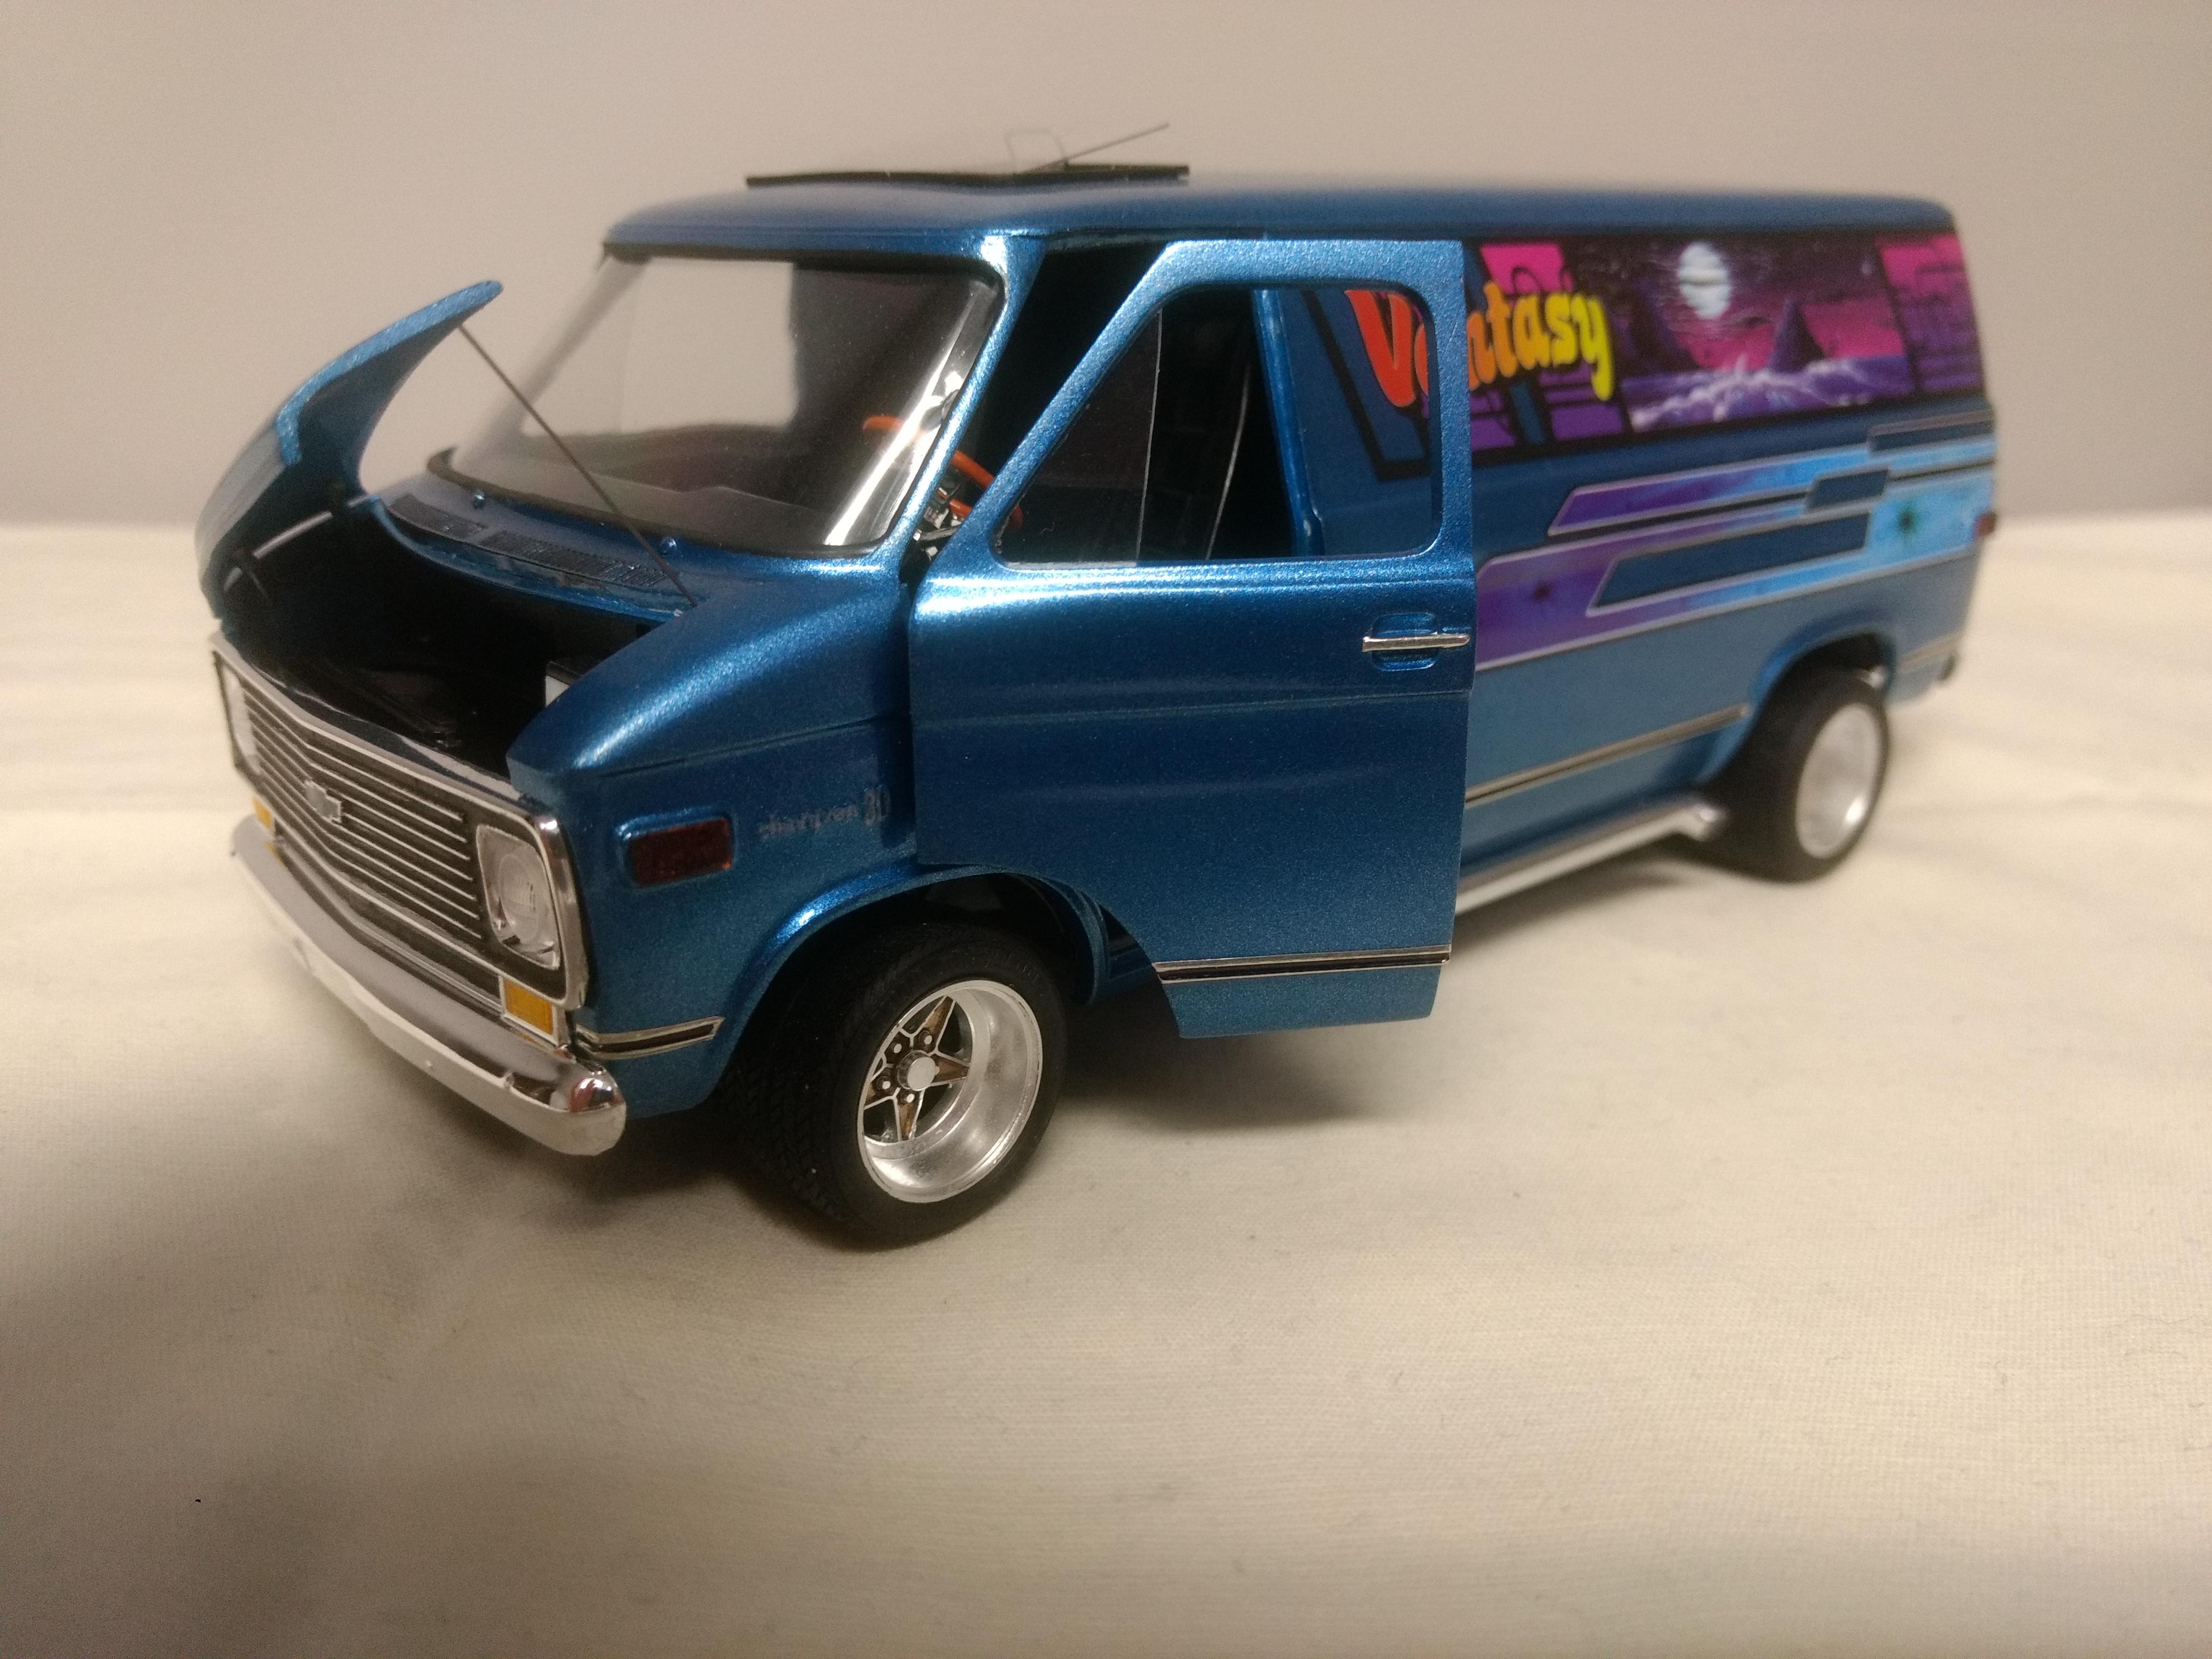
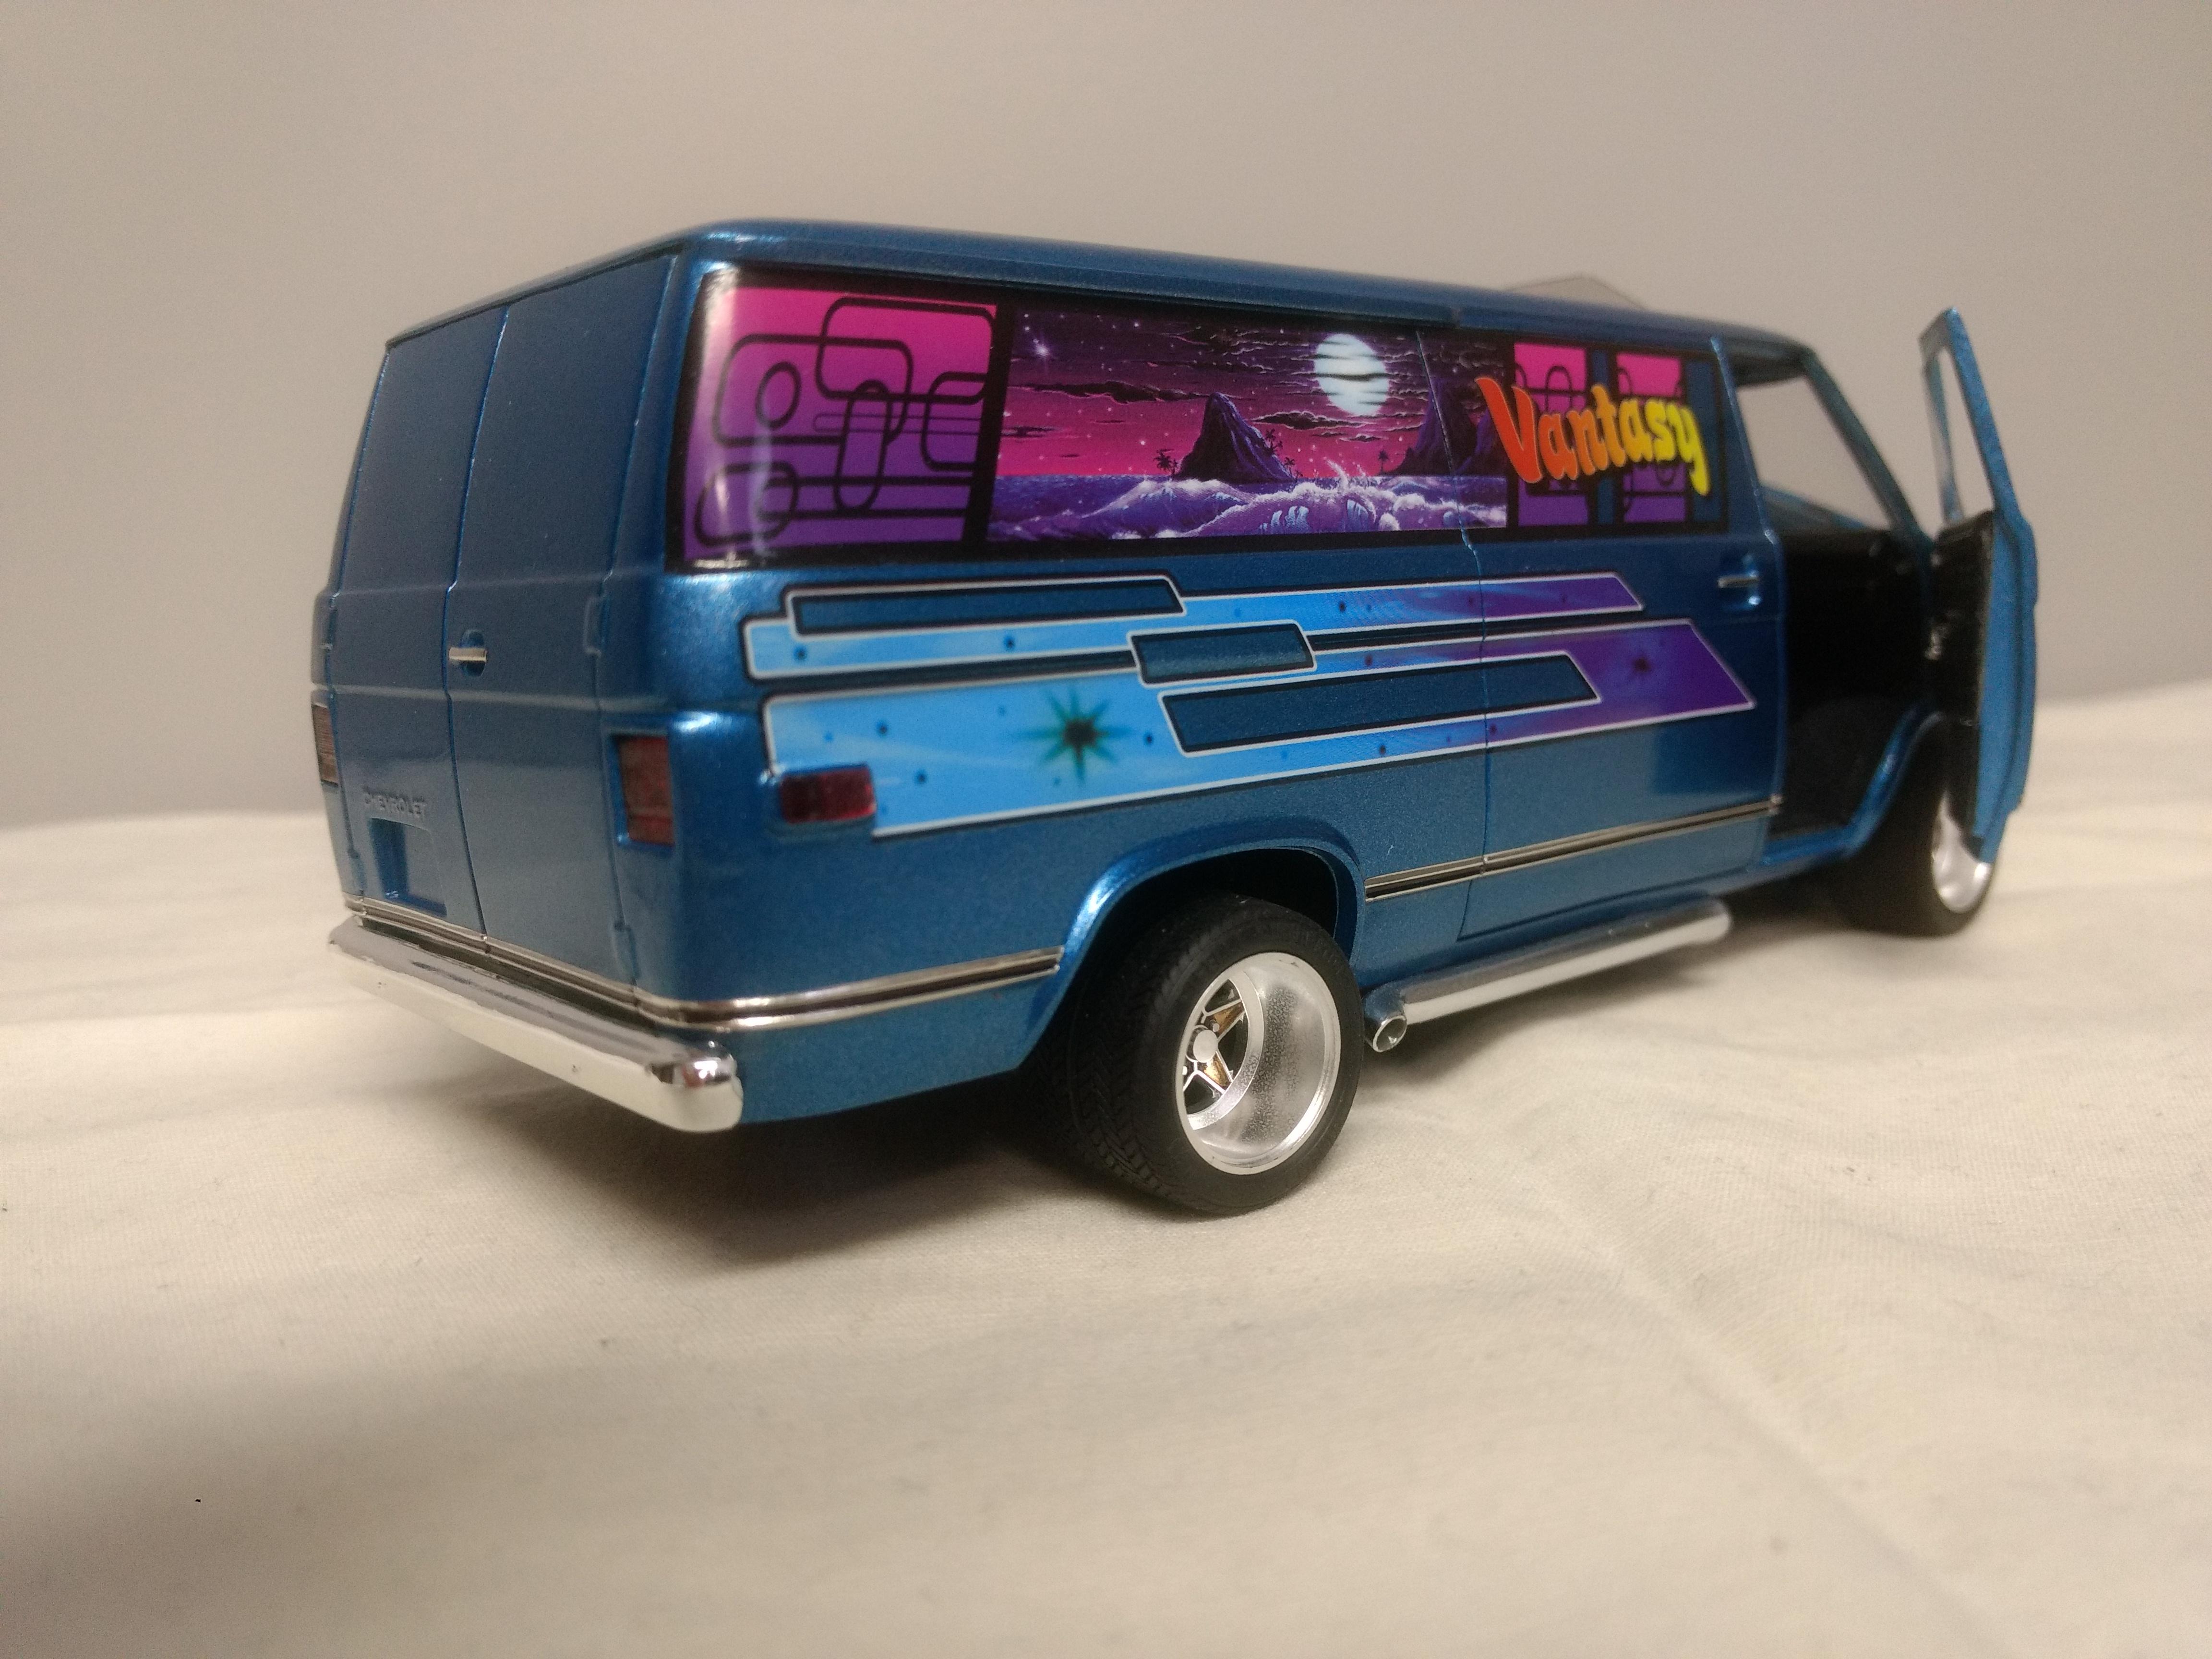
Chevy Vantasy custom van
asfastasu replied to asfastasu's topic in Model Trucks: Pickups, Vans, SUVs, Light Commercial
Well, at least you can remember the 70's. I can't. Cause I was born at the tail end, in '79.? Thanks for all the kind words, folks. -
Looks like you're off to a good start. I agree, the shine needs to be knocked down on the interior. I also suffer from 1/10th RC addiction and 1/24 & 1/25 model cars, but I guess there's a lot worse things to be addicted to.
-
Chevy Vantasy custom van
asfastasu replied to asfastasu's topic in Model Trucks: Pickups, Vans, SUVs, Light Commercial
Thanks guys! -
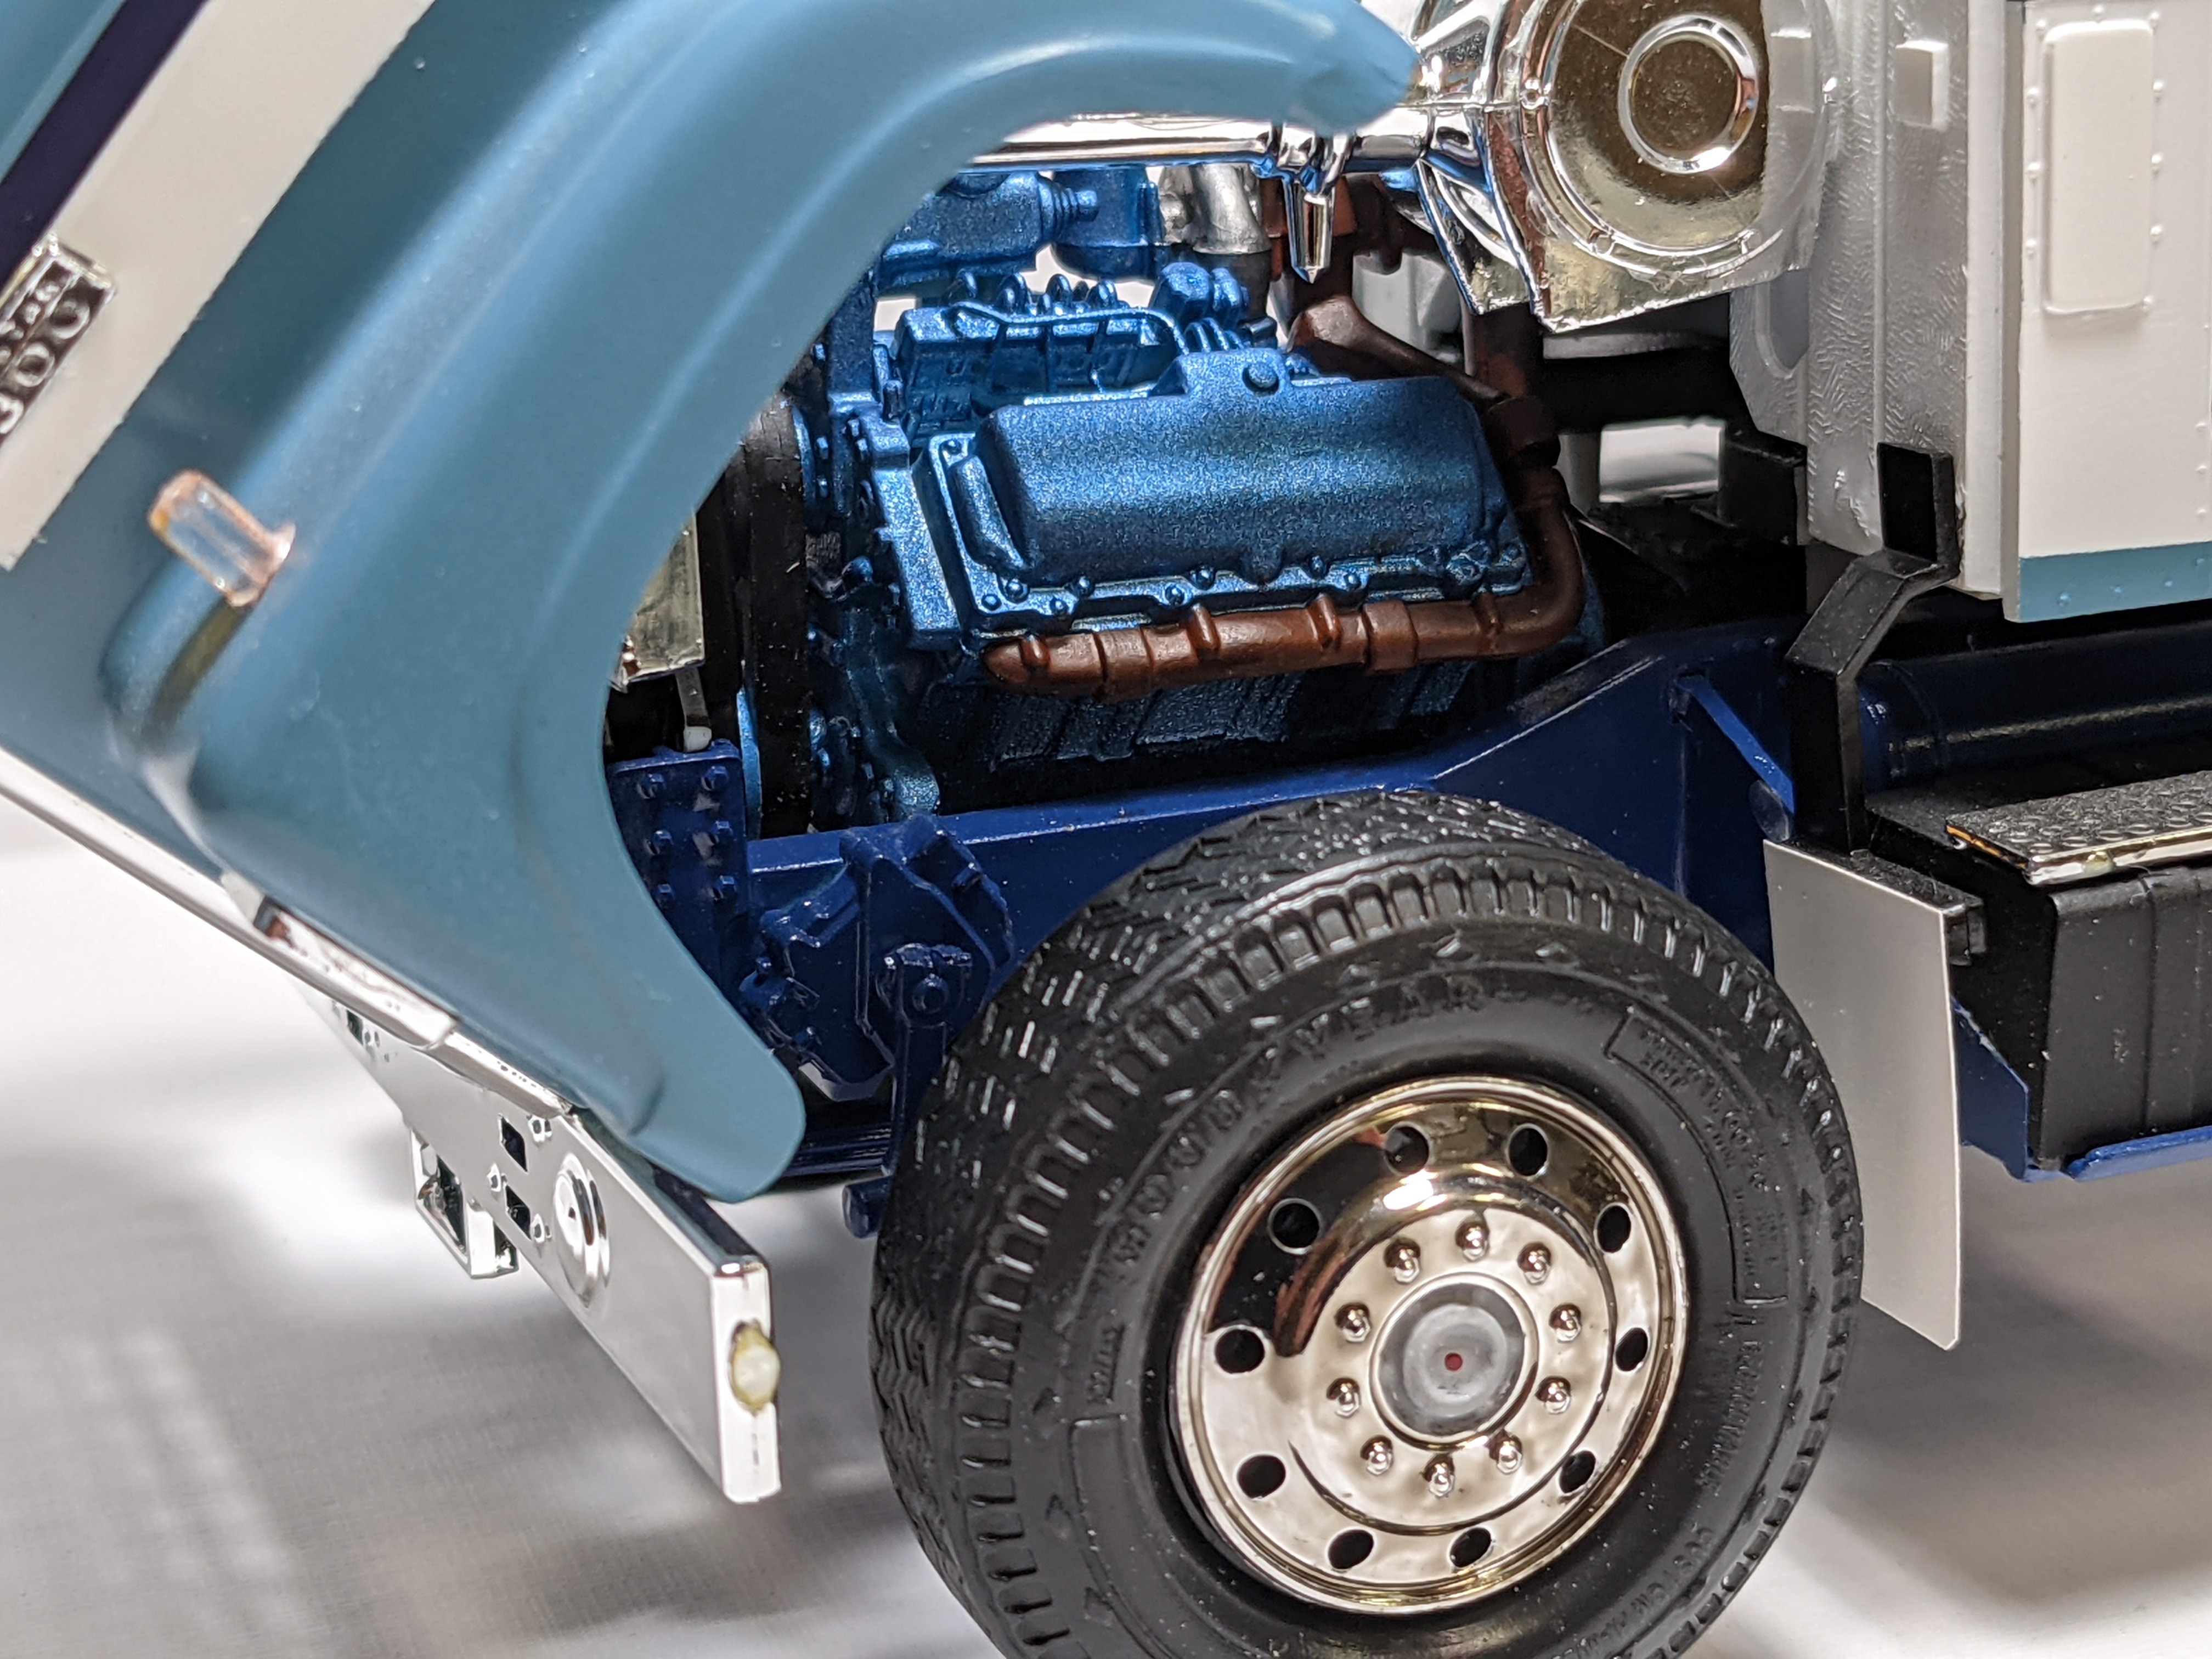
This is the Dirty Donnie's van kit. This is the first and only(so far) kit that I opened the doors on. Had to open the hood too as it was sealed, which is wierd as it includes an engine. Added the sunroof, Fujimi wheels and tires, and painted with Duplicolor Ford medium blue metallic with Duplicolor clear. Used the kit decals. Seems like I can only upload 2 pics for whatever reason, oh well?
-
This is the Dirty Donnie's van kit. This is the first and only(so far) kit that I opened the doors on. Had to open the hood too as it was sealed, which is wierd as it includes an engine. Added the sunroof, Fujimi wheels and tires, and painted with Duplicolor Ford medium blue metallic with Duplicolor clear. Used the kit decals. Seems like I can only upload 2 pics for whatever reason, oh well?