Funkychiken
-
Posts
2,662 -
Joined
-
Last visited
Content Type
Profiles
Forums
Events
Gallery
Everything posted by Funkychiken
-
Who knows, I hardly ever change mine, occasionally I vacuum it, and it lasts a lot longer. I use a 3M face mask with the correct filters too, so not too worried about the fumes...
-
Lovin' the paint work...!
-
Nice, neat & shiny, the PE came out well...
-
Nice colour & certainly an interesting build...
-
Really top notch build!
-
Really nice build, and love the countryside in the background...
-
Perfect build!
-
Porsche 911 Turbo 88-update 10/22/16 Interior
Funkychiken replied to 935k3's topic in WIP: Model Cars
Sharp build and clean lines, I like it! -
Thanks Tim Thanks Mr Cabdriver The paint work is no where near perfect, but it's on par with the best I've ever done. I have lost one car body stripping & sanding back, so I wanted to try and save this one by polishing out...
-
Good start!
-
Scratch Building an engine is impressive! Looks better than some kit mouldings!
-
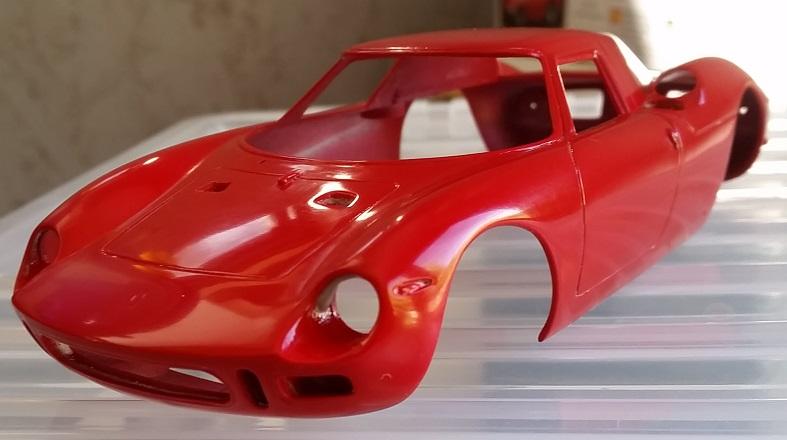
So this is the body shell at the moment, now after several Nuvous grade 3 & 2 polishing. Yet to use the finish/wax. I wanted to paint on the details first...

-
Thanks that is really understandable, I was really worried that you would say BMF, I struggle with it thanks anyway! good tip with the diluted red though
-
Gorgeous!
-
Wow, this build is great, I like the wash in the door and bit lines.
-
Well I still struggle with all my builds, especially the finish on the body's. Anyhow, I really like this car and your build is top notch. One question tho, did you make a mask for the seats? If not, how did you get such a crisp line between the black and red? Cheers buddy!
-
Interesting build, and love the colour!
-
Fantastic little car, and great photos!
-
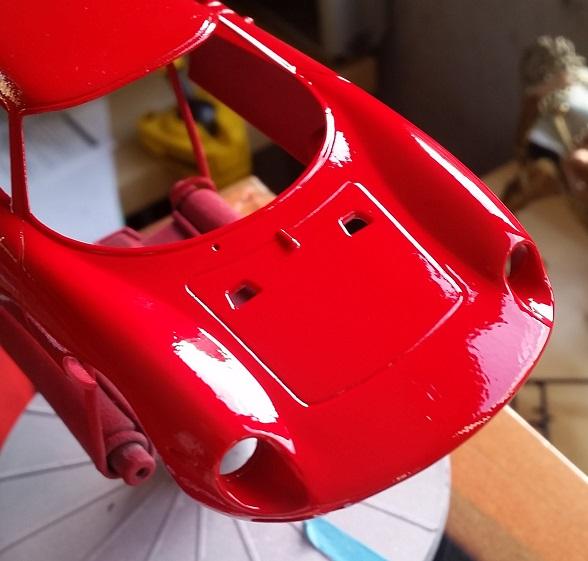
hanks for the kind comments!So the original reason this got shelved is that the paint work did not go so well. First time I had tried to use Zero Paints 2K clear. I was spraying over Tamiya Red from an aerosol can (it was left for 2 weeks to dry) It turns out that the recommended 15% thinner doesn't work, since I have used 40 to 50% thinner, and this stuff sprays really well. But it takes so long to spray, I find that the 2K starts to go-off in the airbrush after the 3rd coat. Anyway, the paint finish was awful, as seen in the photos, I spent (on & off) a couple of months sanding it out - which is where I am today, I have recently masked off a few areas to re-spray - I had some of that Tamiya red left in the can, they are in inconspicuous areas, so I will give it a light dusting... When it's dry, I'll start to finish up, I'm still undecided as to whether to cut out the door sides... Re-spay is here - where I had burned through the finish coats:
-
Neat little car!
-
you can try a bit of varnish or clear paint to stick the emblems, but the build looks great to me...
-
cool kit & great start!
-
Great build! I've never seen one of these before, in real life, or as a kit, and I kind of like the colour combo too.
-
Looking Good!
-
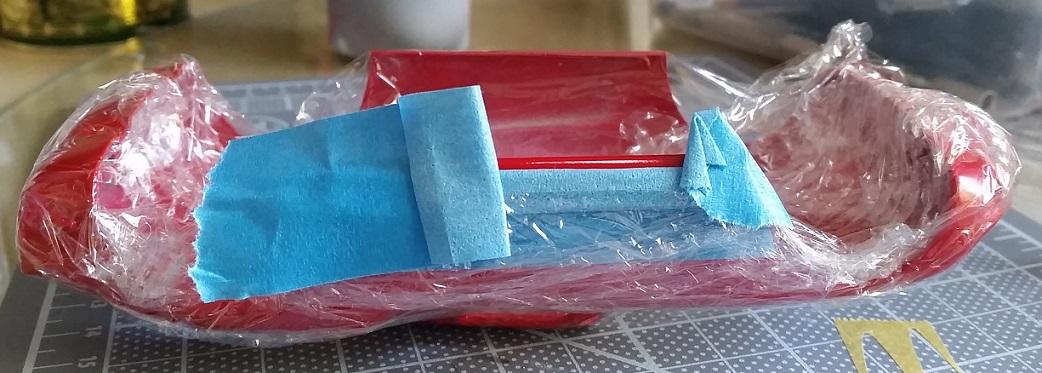
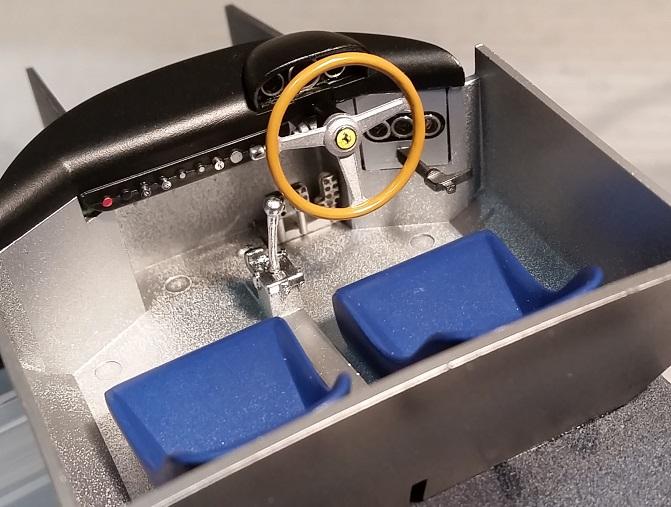
Interior finished. I used "the model car garage" PE bezels for the gauges. I wanted to cut out the door sides & add seat belts, but ran out of patience and time... I might still do it, depending on how it looks when I mock up the body.