dragmodels44
-
Posts
509 -
Joined
-
Last visited
Content Type
Profiles
Forums
Events
Gallery
Everything posted by dragmodels44
-
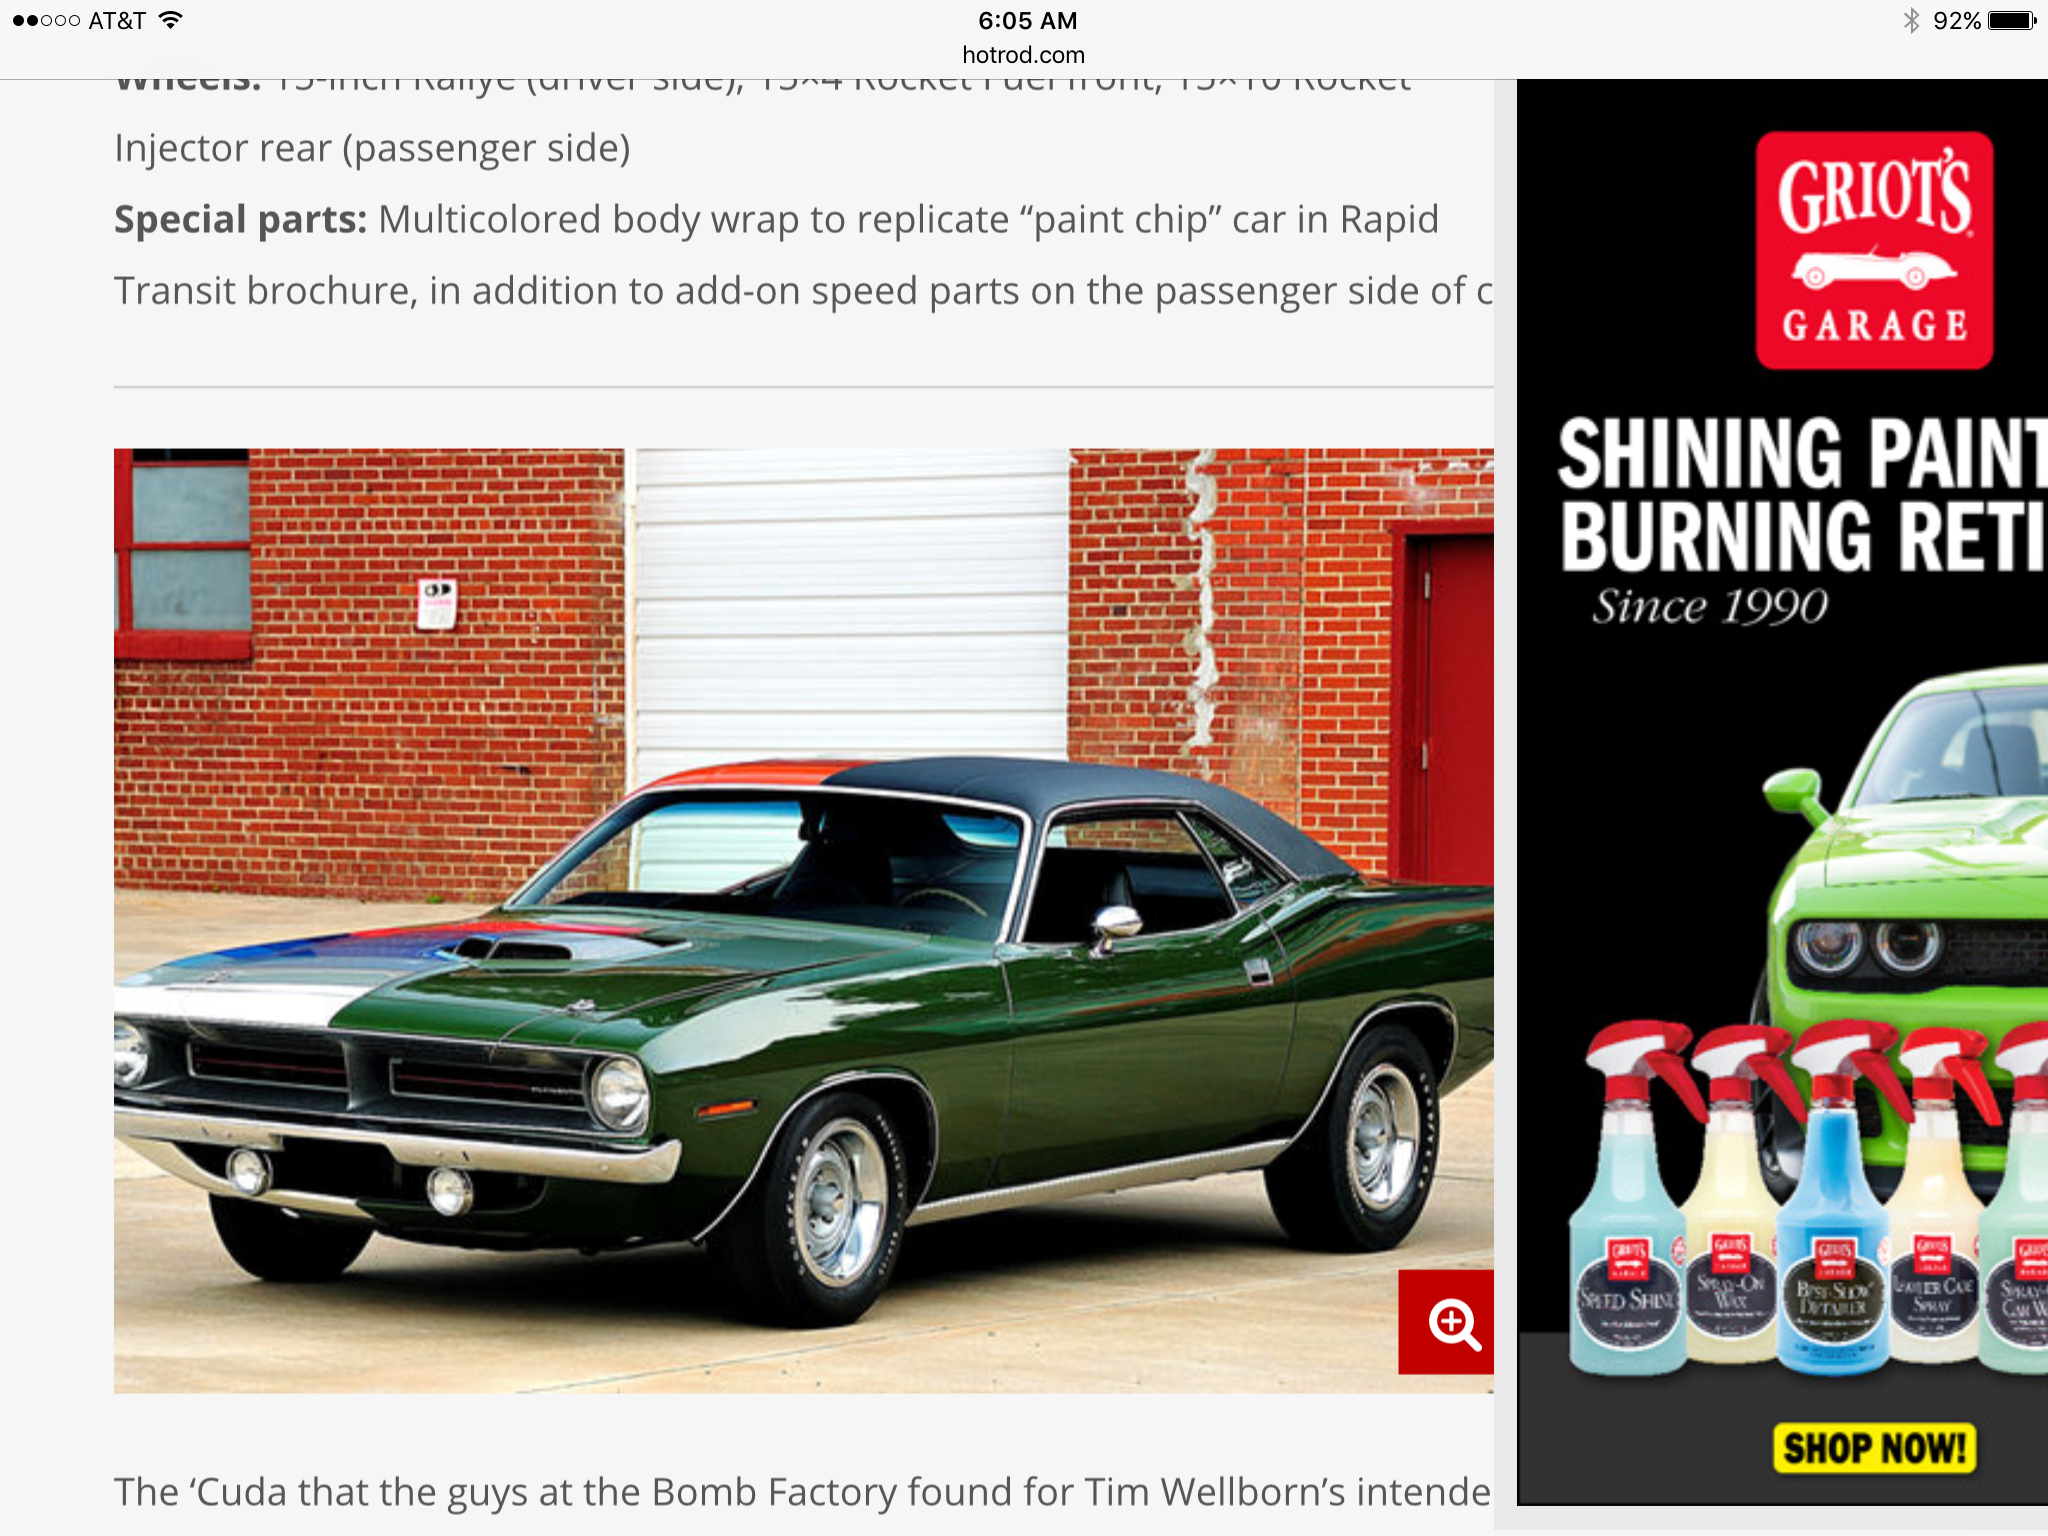
Rapid Transit System " paint code cuda "
dragmodels44 replied to dragmodels44's topic in WIP: Model Cars
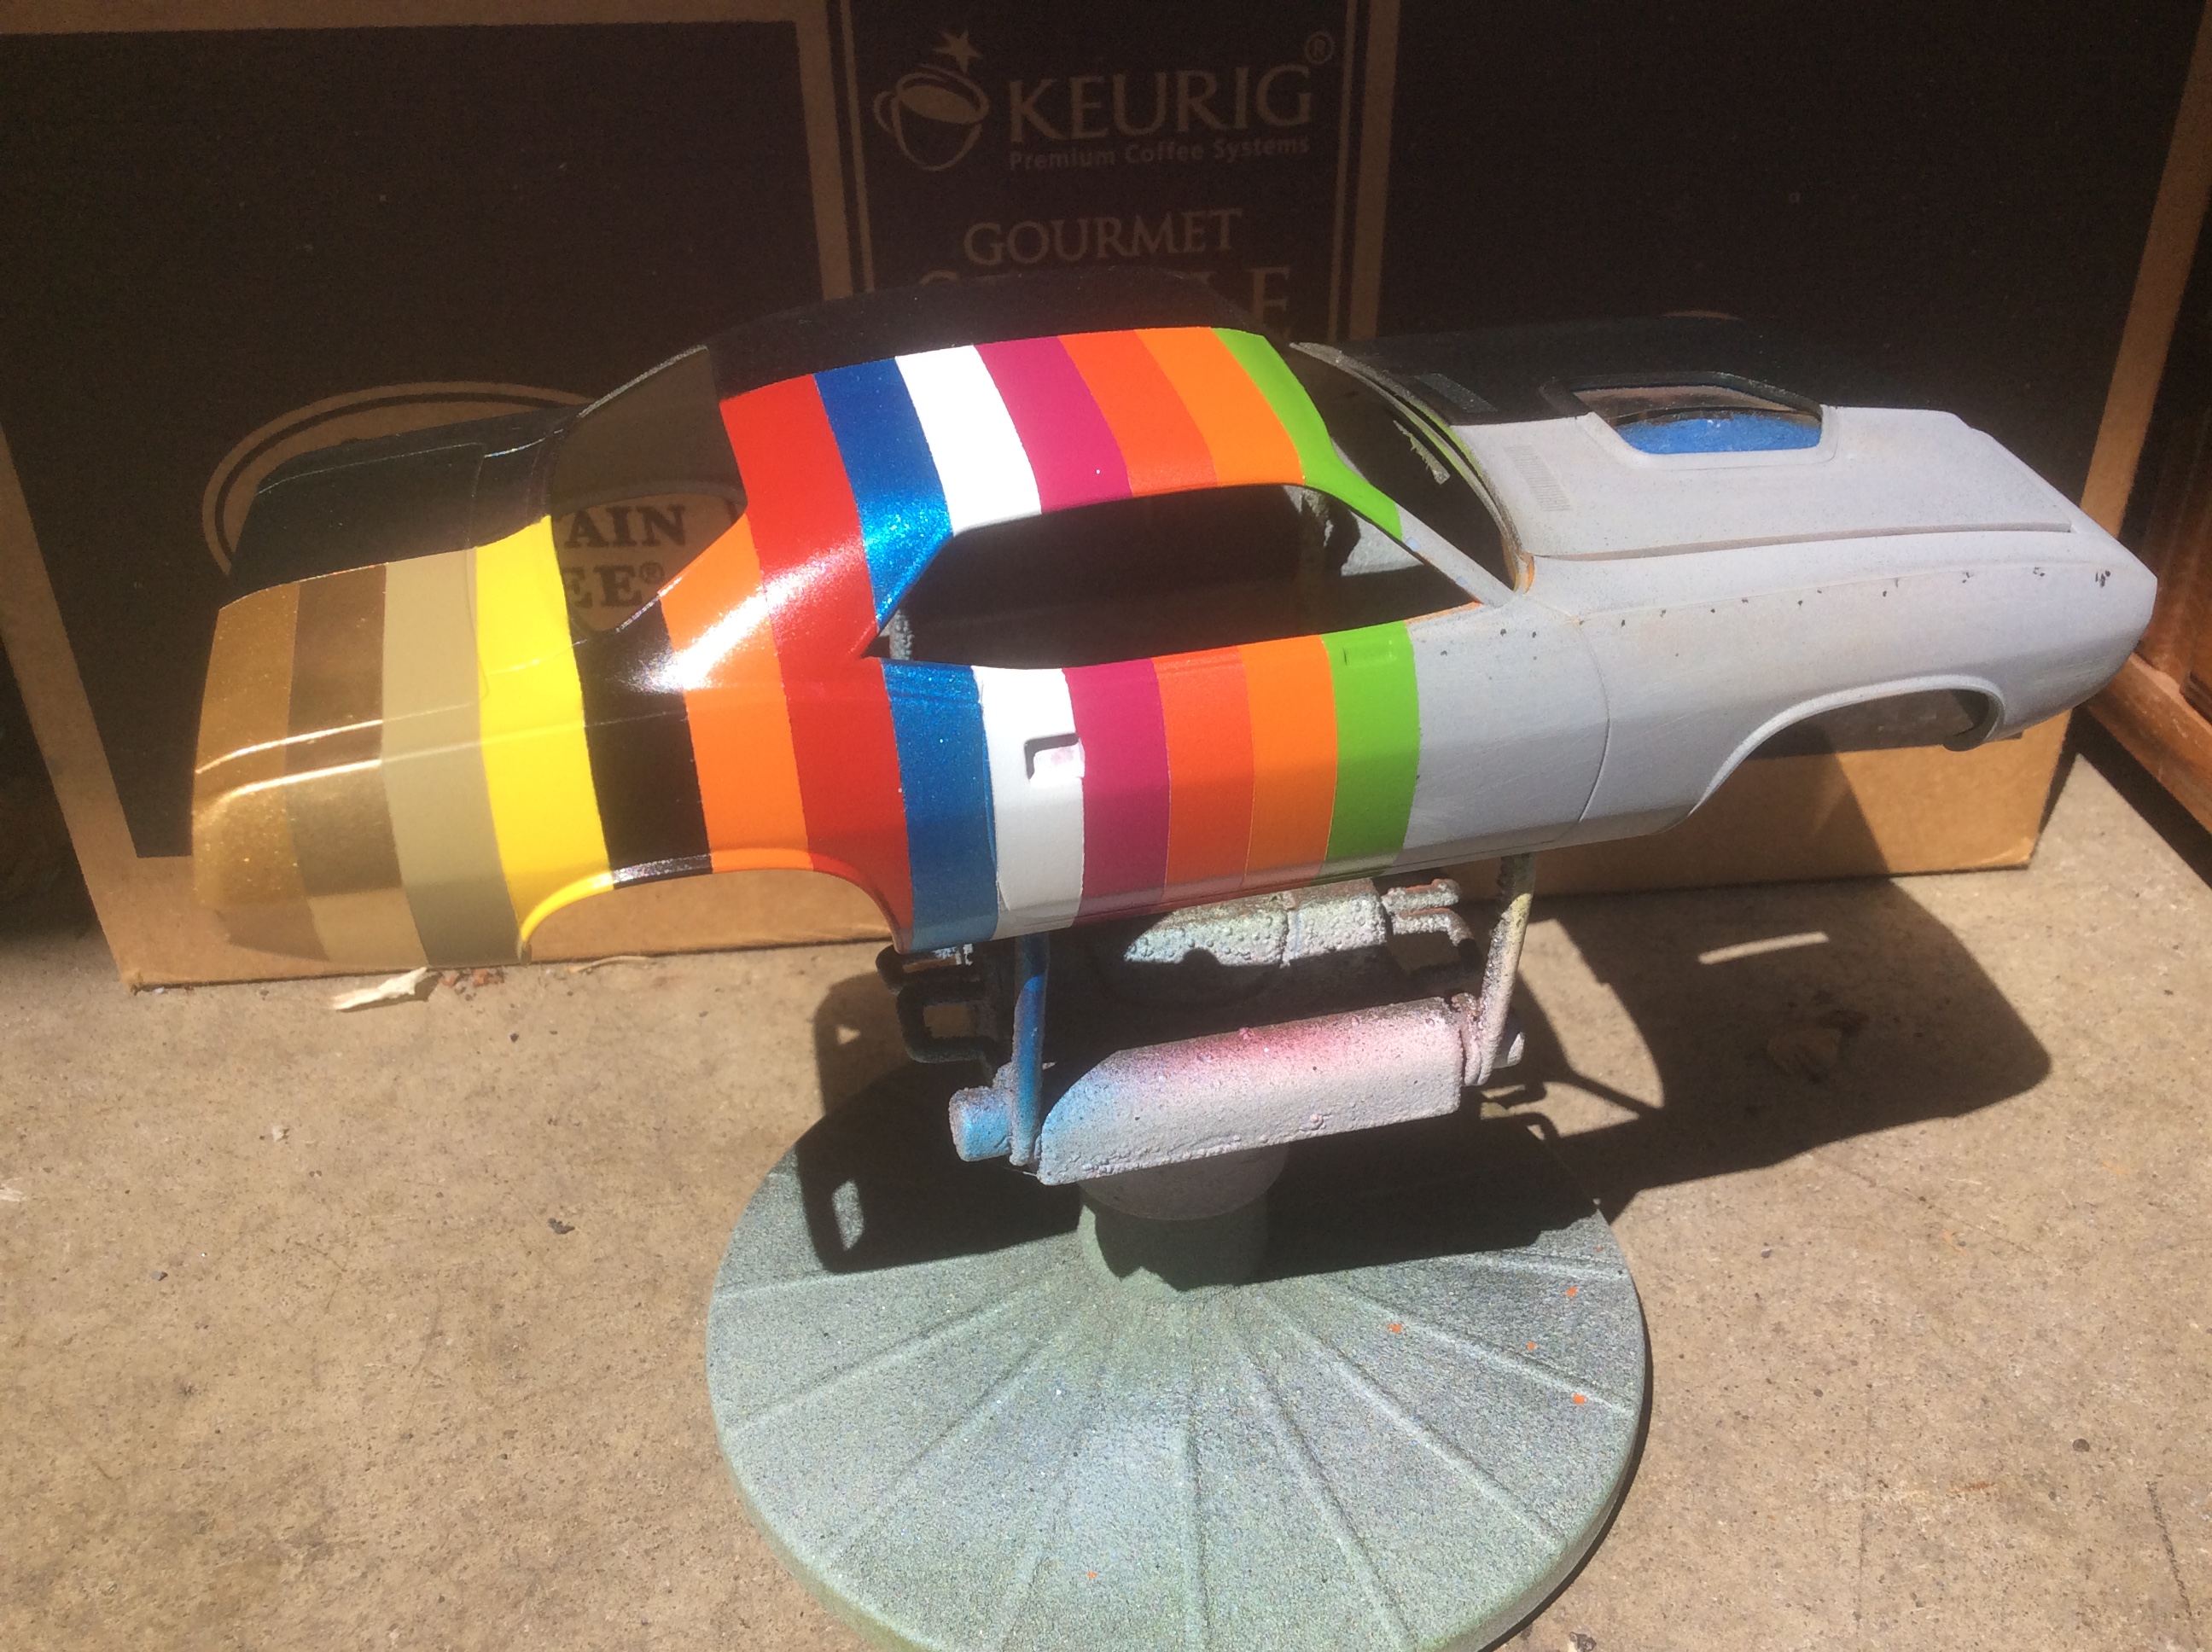
here's the drivers side. I'm probably going to stay on this one!
-
Rapid Transit System " paint code cuda "
dragmodels44 replied to dragmodels44's topic in WIP: Model Cars
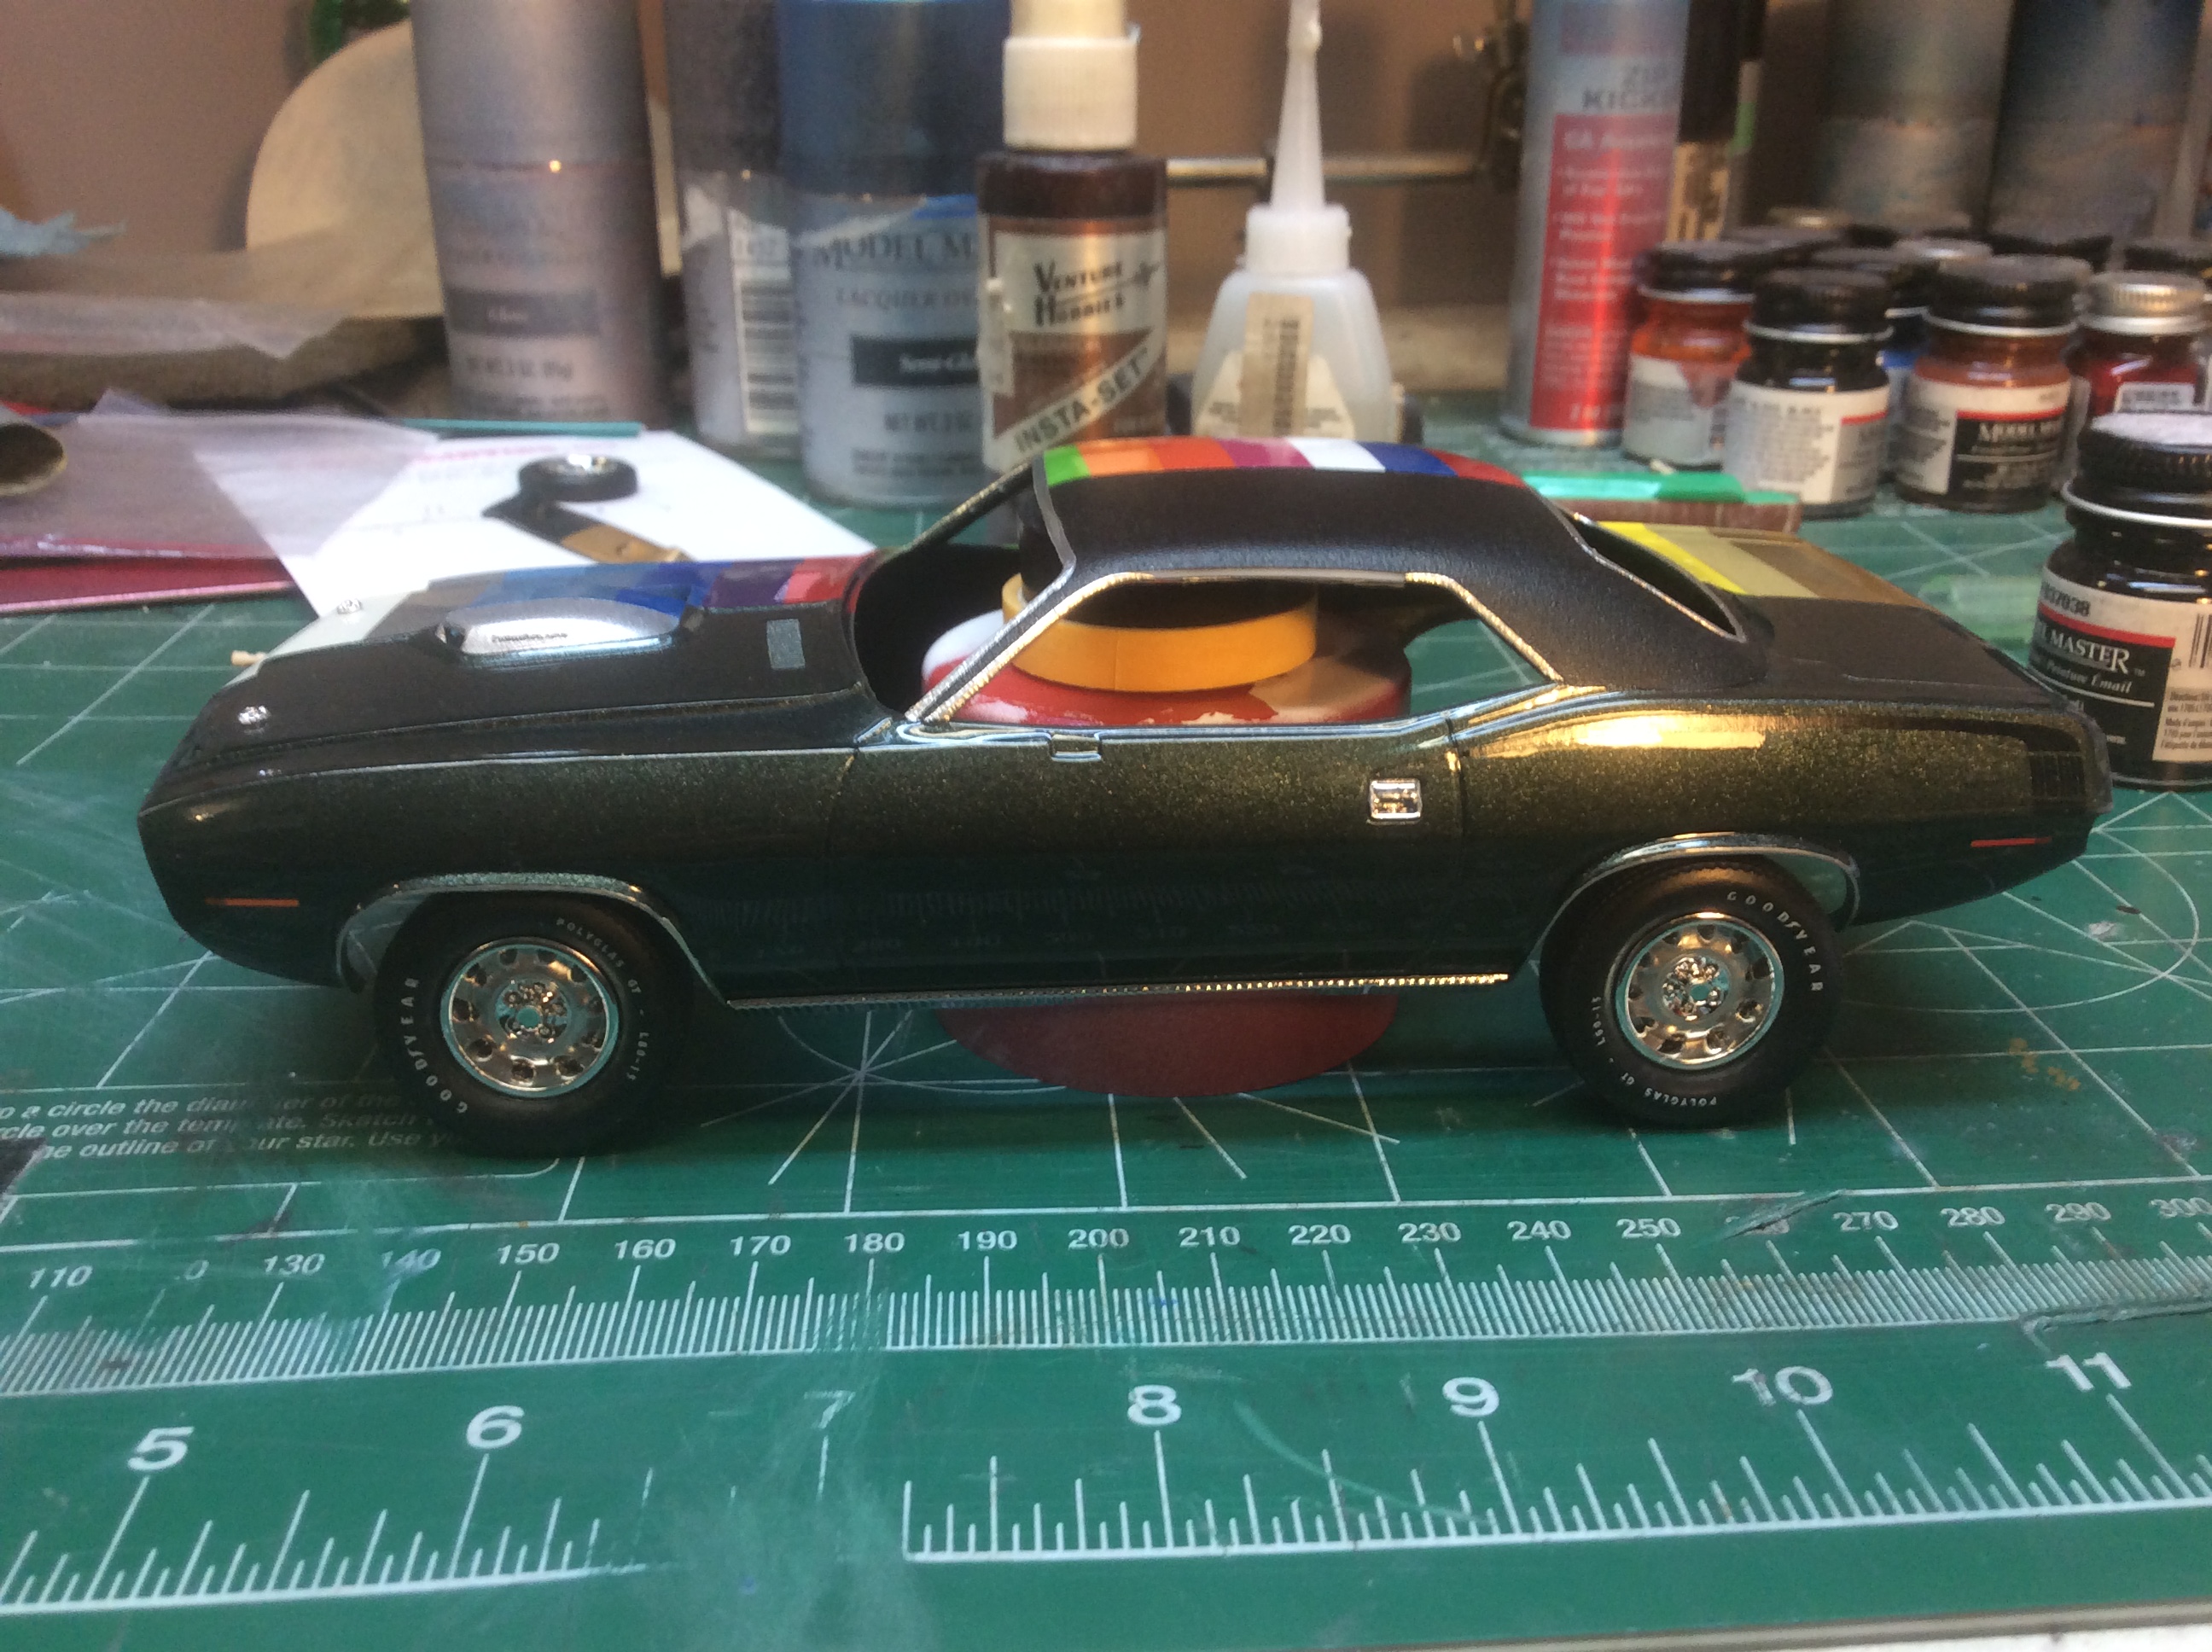
Thank you! Here's an updated pic, foiled and clearcoated.
-
Rapid Transit System " paint code cuda "
dragmodels44 replied to dragmodels44's topic in WIP: Model Cars
Thank you! I have a lot of memorabilia, but not that. -
Rapid Transit System " paint code cuda "
dragmodels44 replied to dragmodels44's topic in WIP: Model Cars
Awesome! Thanks! -
Rapid Transit System " paint code cuda "
dragmodels44 replied to dragmodels44's topic in WIP: Model Cars
Thank you! -
Absolutely beautiful!!!
-
1968 Firebird (Exterior Details) 2 Jul 2017
dragmodels44 replied to taaron76's topic in WIP: Model Cars
WOW! that looks fantastic. I love the opening doors, hood, trunk. I've tried a couple of times and just can't get it. Awesome models! -
Rapid Transit System " paint code cuda "
dragmodels44 replied to dragmodels44's topic in WIP: Model Cars
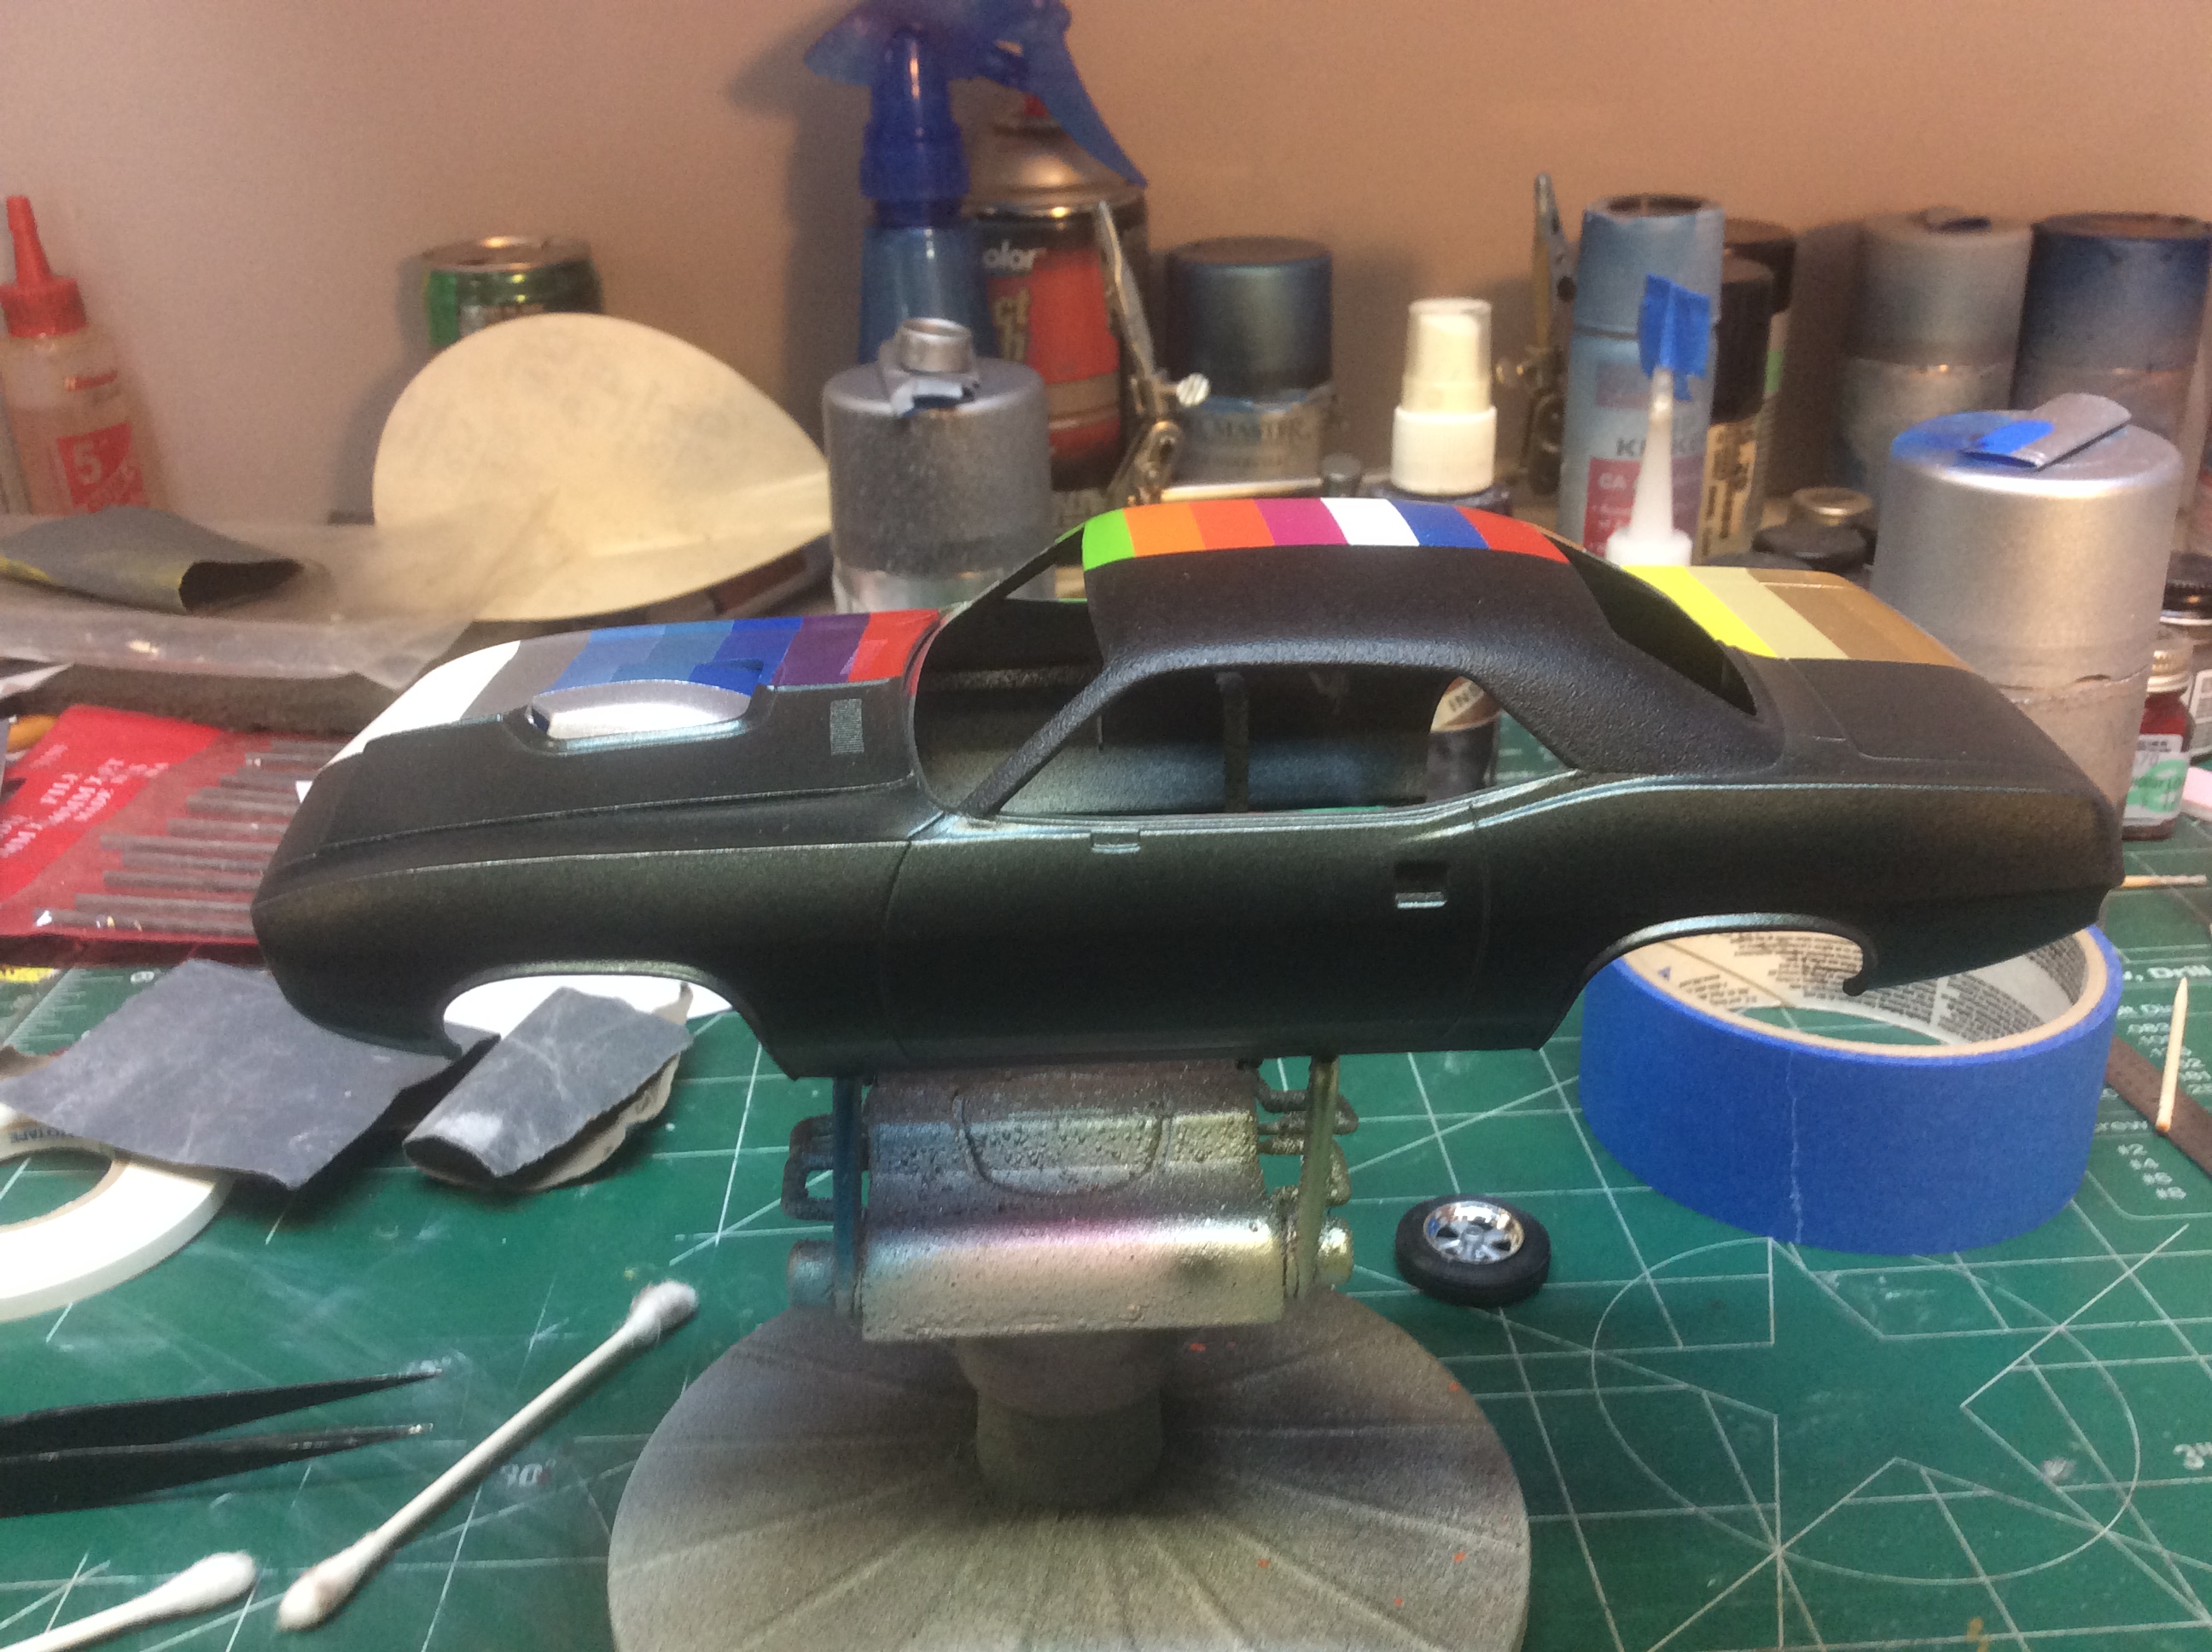
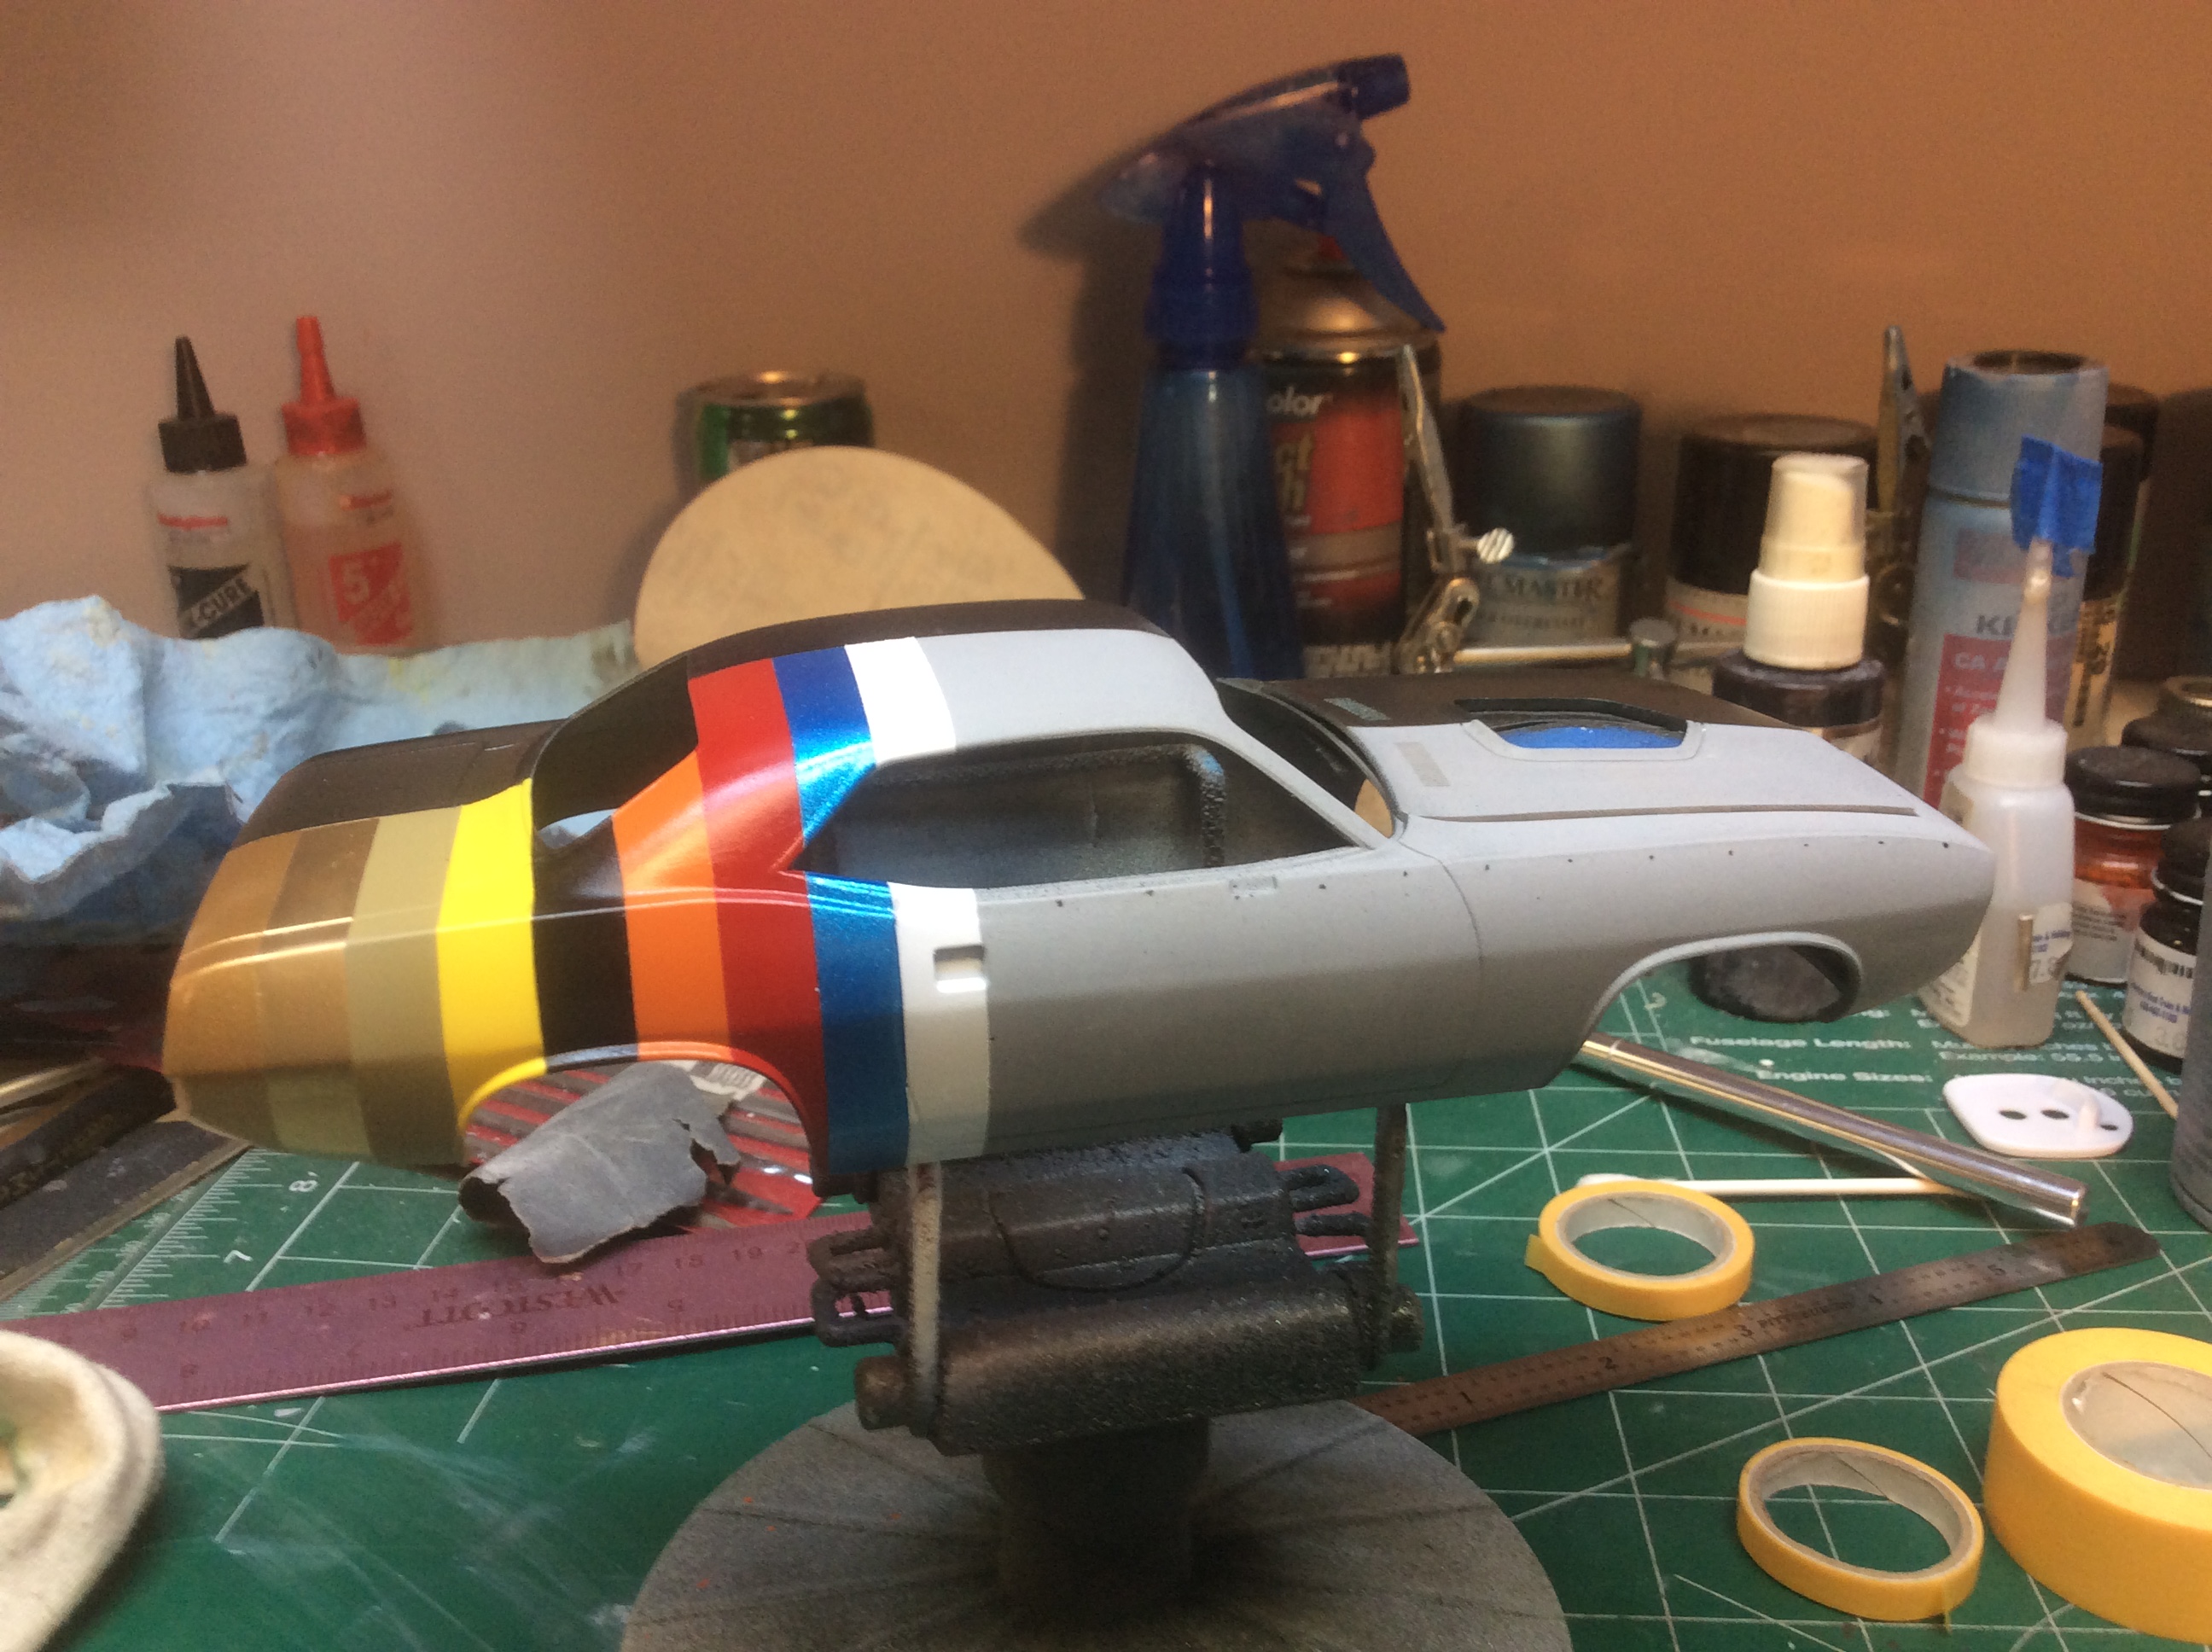
Well boys, here it is. Mocked up with mags and slick. My measurements or my eye was off at the end. It looks like the last few colors are on a slight angle. Ever so slightly... I know the white, or I tried to use what looked like Apline white is too wide. Still, I'm happy with it. It was a real challenge and I'm just glad I didn't have any real issues. Now... the stripes, but in all honesty, I'm probably going to use the white stripes. I can't find thin black unless I can find a bunch of Z/28 decals. Hope u guys like it.
-
Rapid Transit System " paint code cuda "
dragmodels44 replied to dragmodels44's topic in WIP: Model Cars
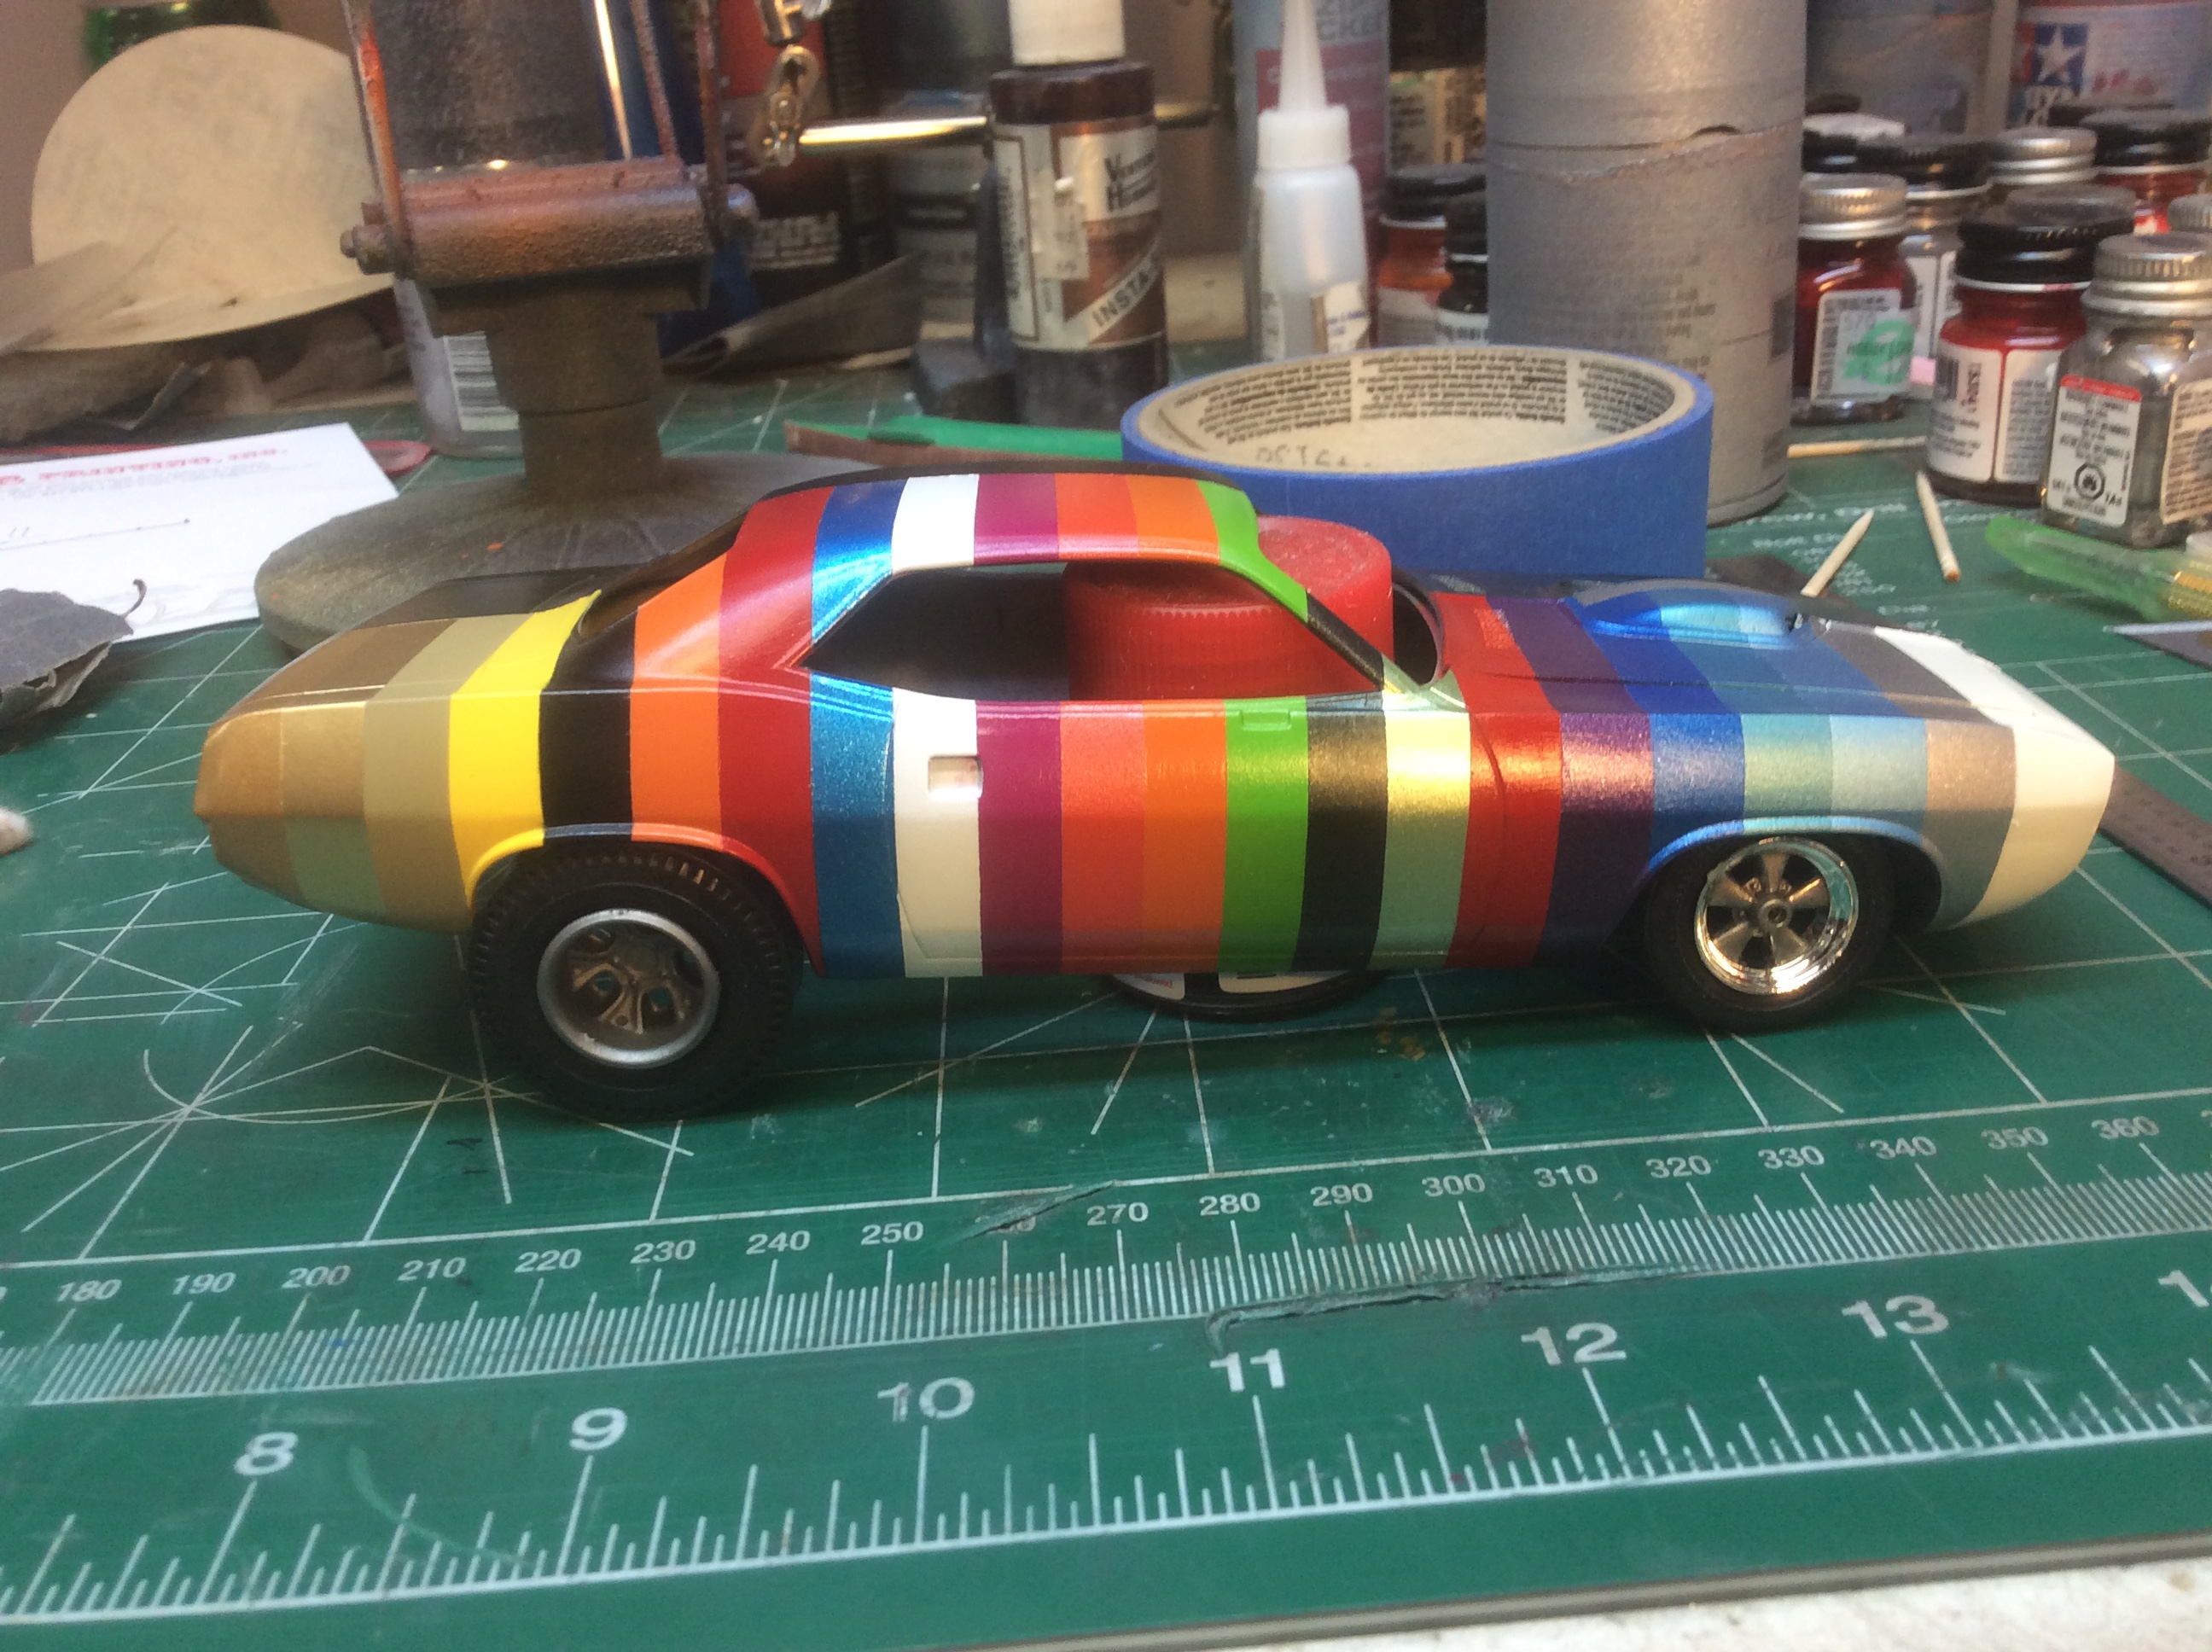
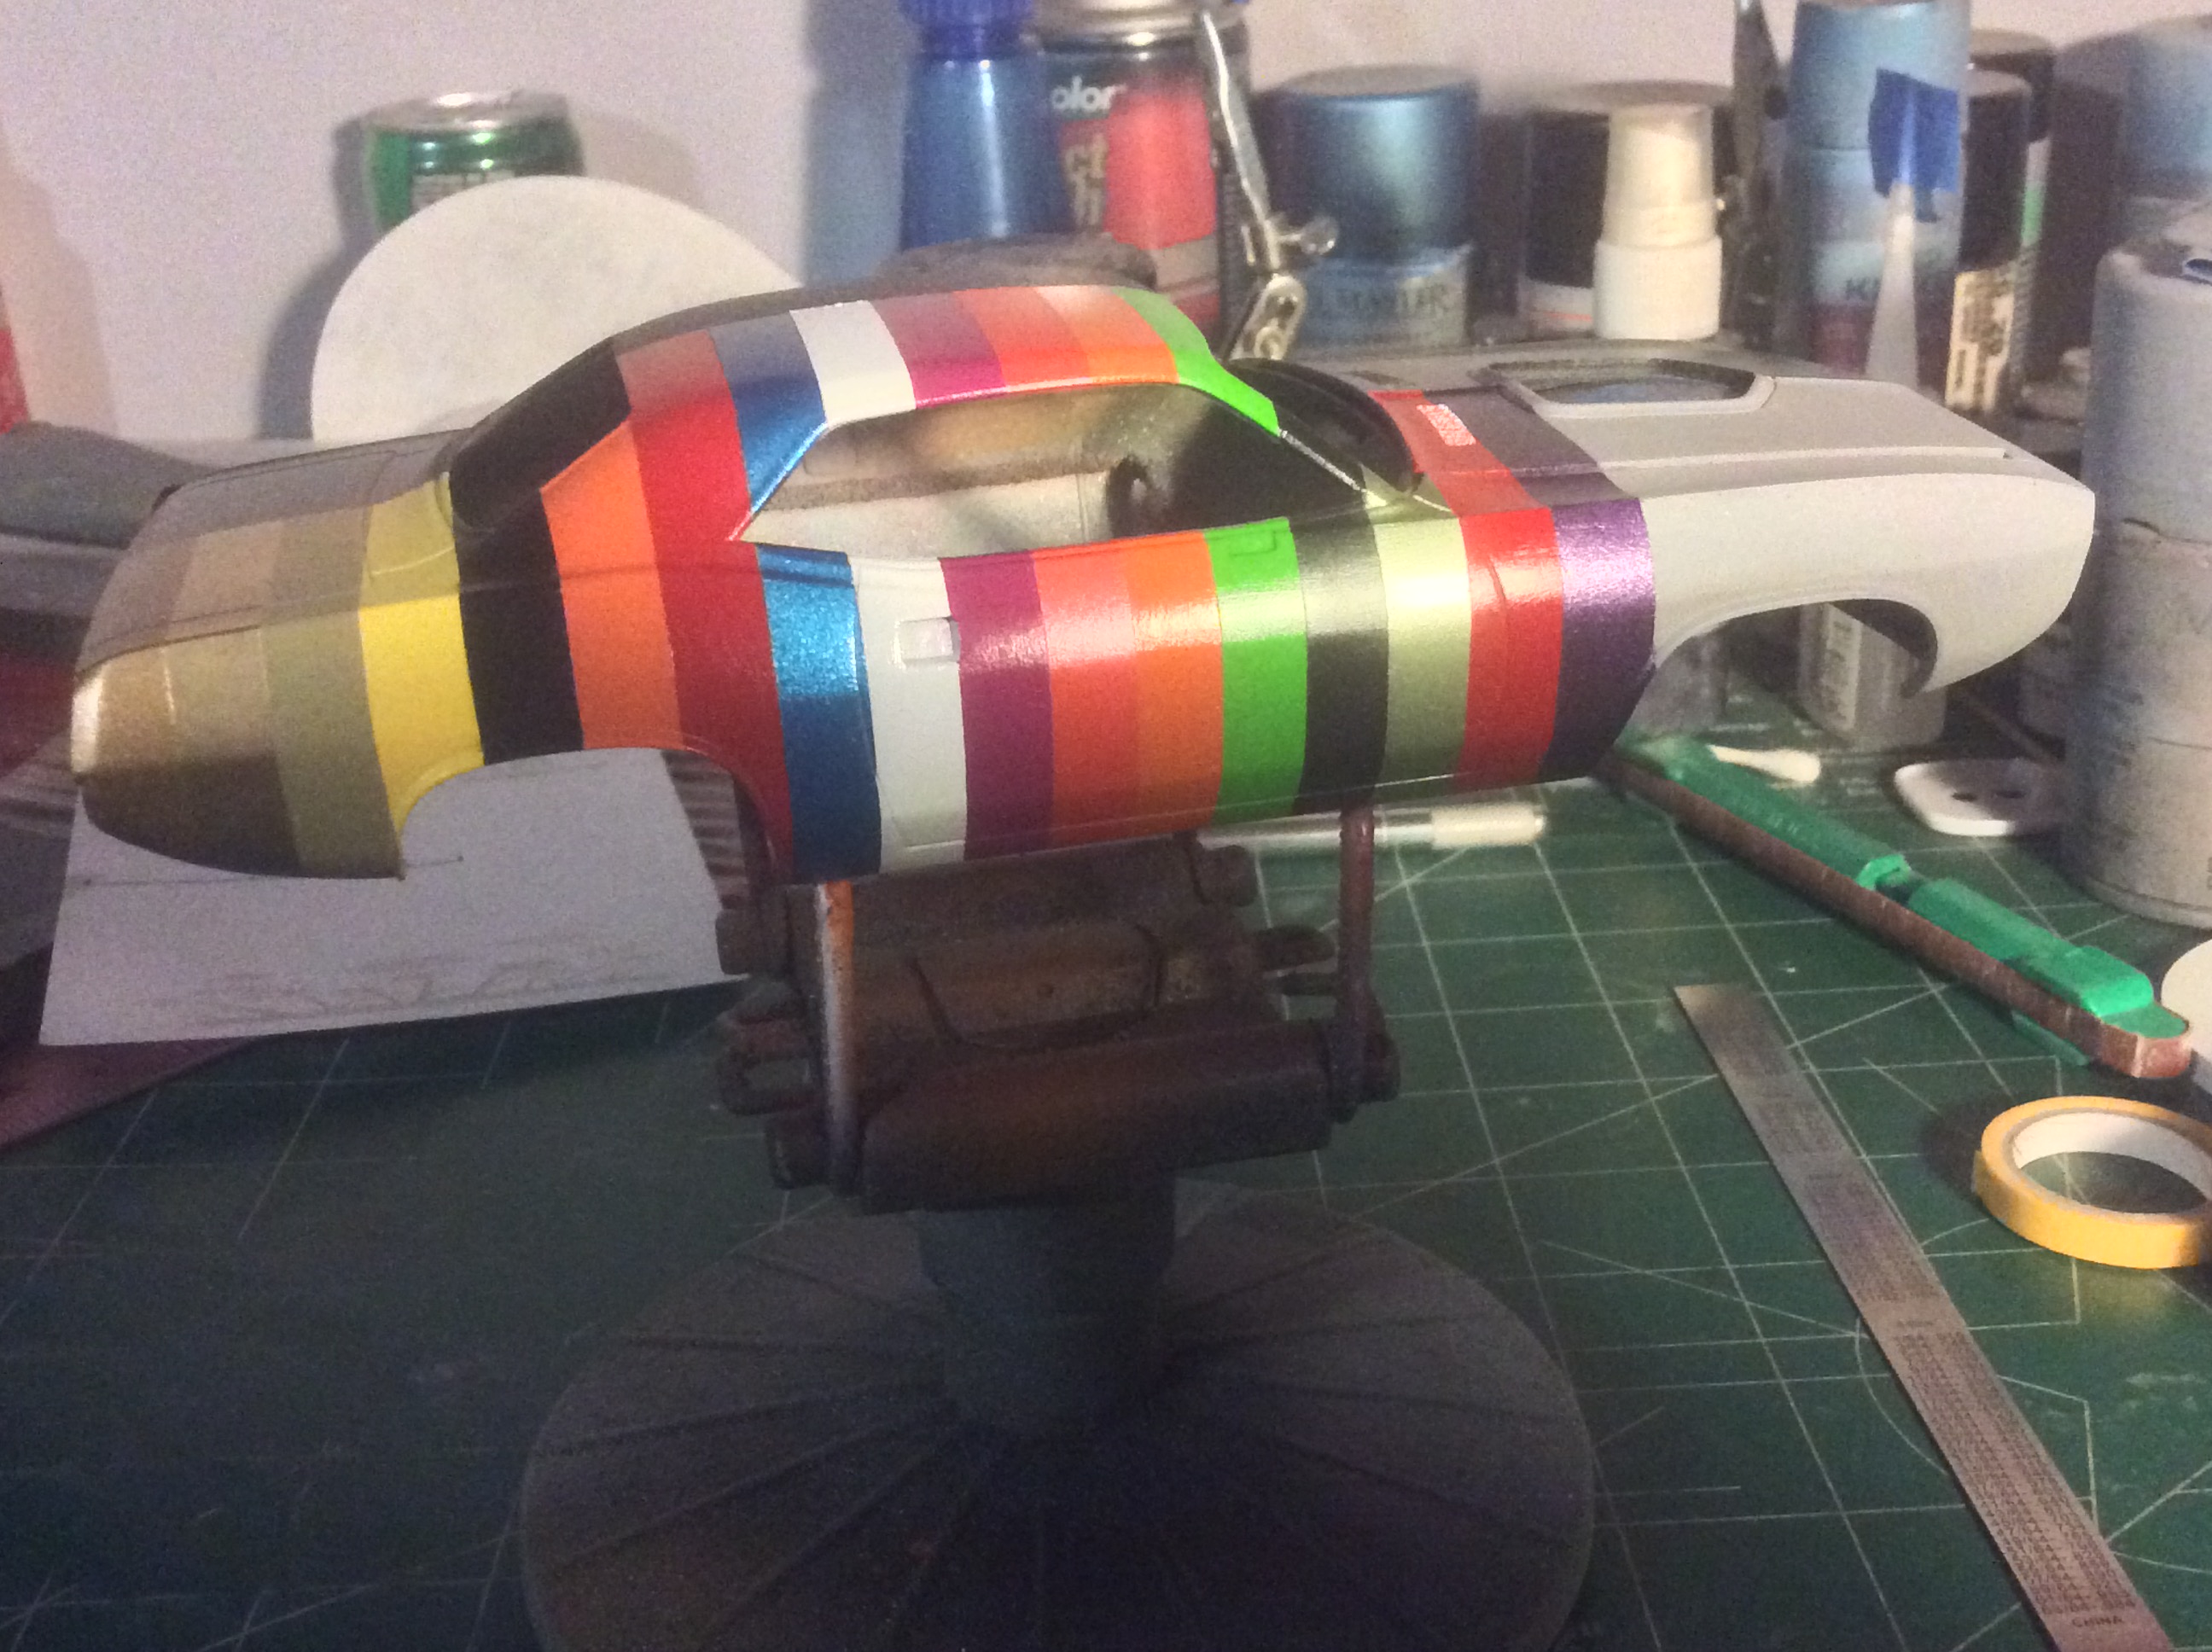
Hey thank you guys! I thought about doing just that, but as I was removing the tape from the dark green, which is in front of the sublime green looking color, I lifted a small chip of the dark green. Sooooo, I haven't decided how to do the lines. But, I'd bet if u tried it, it would come out better than u think. I can't believe the modeling skills of the builders on this forum. But I suppose you being your toughest critic, pushes us to do better. I am 5 colors from finishing! The shaker is going to be lots of fun to do!!! The total number of colors will be 22!
-
Rapid Transit System " paint code cuda "
dragmodels44 replied to dragmodels44's topic in WIP: Model Cars
Just wanted to show the progress. I'm hoping to have most of the colors done by tonite. Since the white stripe, the rest were applied since 5am. About one stripe per hour. I think I figured out how to apply the black separation lines. Using the white pinstripe decals from the Sox and Martin decals, paint those black, then clear them, then apply them. Any thoughts?
-
Awesome build on the Cobra. I actually found that kit at a hobby store in Lagrange. So after I finish the paint chip code Cuda, that's next. How did u paint it? Just out of the airbrush? I was afraid the pattern wouldn't be wide enough for paint/clear.
-
Rapid Transit System " paint code cuda "
dragmodels44 replied to dragmodels44's topic in WIP: Model Cars
Thanks Dave. This is where it's at now. I'm on. A good roll and don't want to lose my momentum! Almost at the half way mark.
-
Rapid Transit System " paint code cuda "
dragmodels44 replied to dragmodels44's topic in WIP: Model Cars
Here's a shot of the drivers side
-
Rapid Transit System " paint code cuda "
dragmodels44 replied to dragmodels44's topic in WIP: Model Cars
-
Rapid Transit System " paint code cuda "
dragmodels44 replied to dragmodels44's topic in WIP: Model Cars
#7 !!! I don't. I'll clear it, but I still need to find the thin black pinstripe -
Rapid Transit System " paint code cuda "
dragmodels44 replied to dragmodels44's topic in WIP: Model Cars
Color #6. Now I'm seeing some fun colors!
-
Rapid Transit System " paint code cuda "
dragmodels44 replied to dragmodels44's topic in WIP: Model Cars
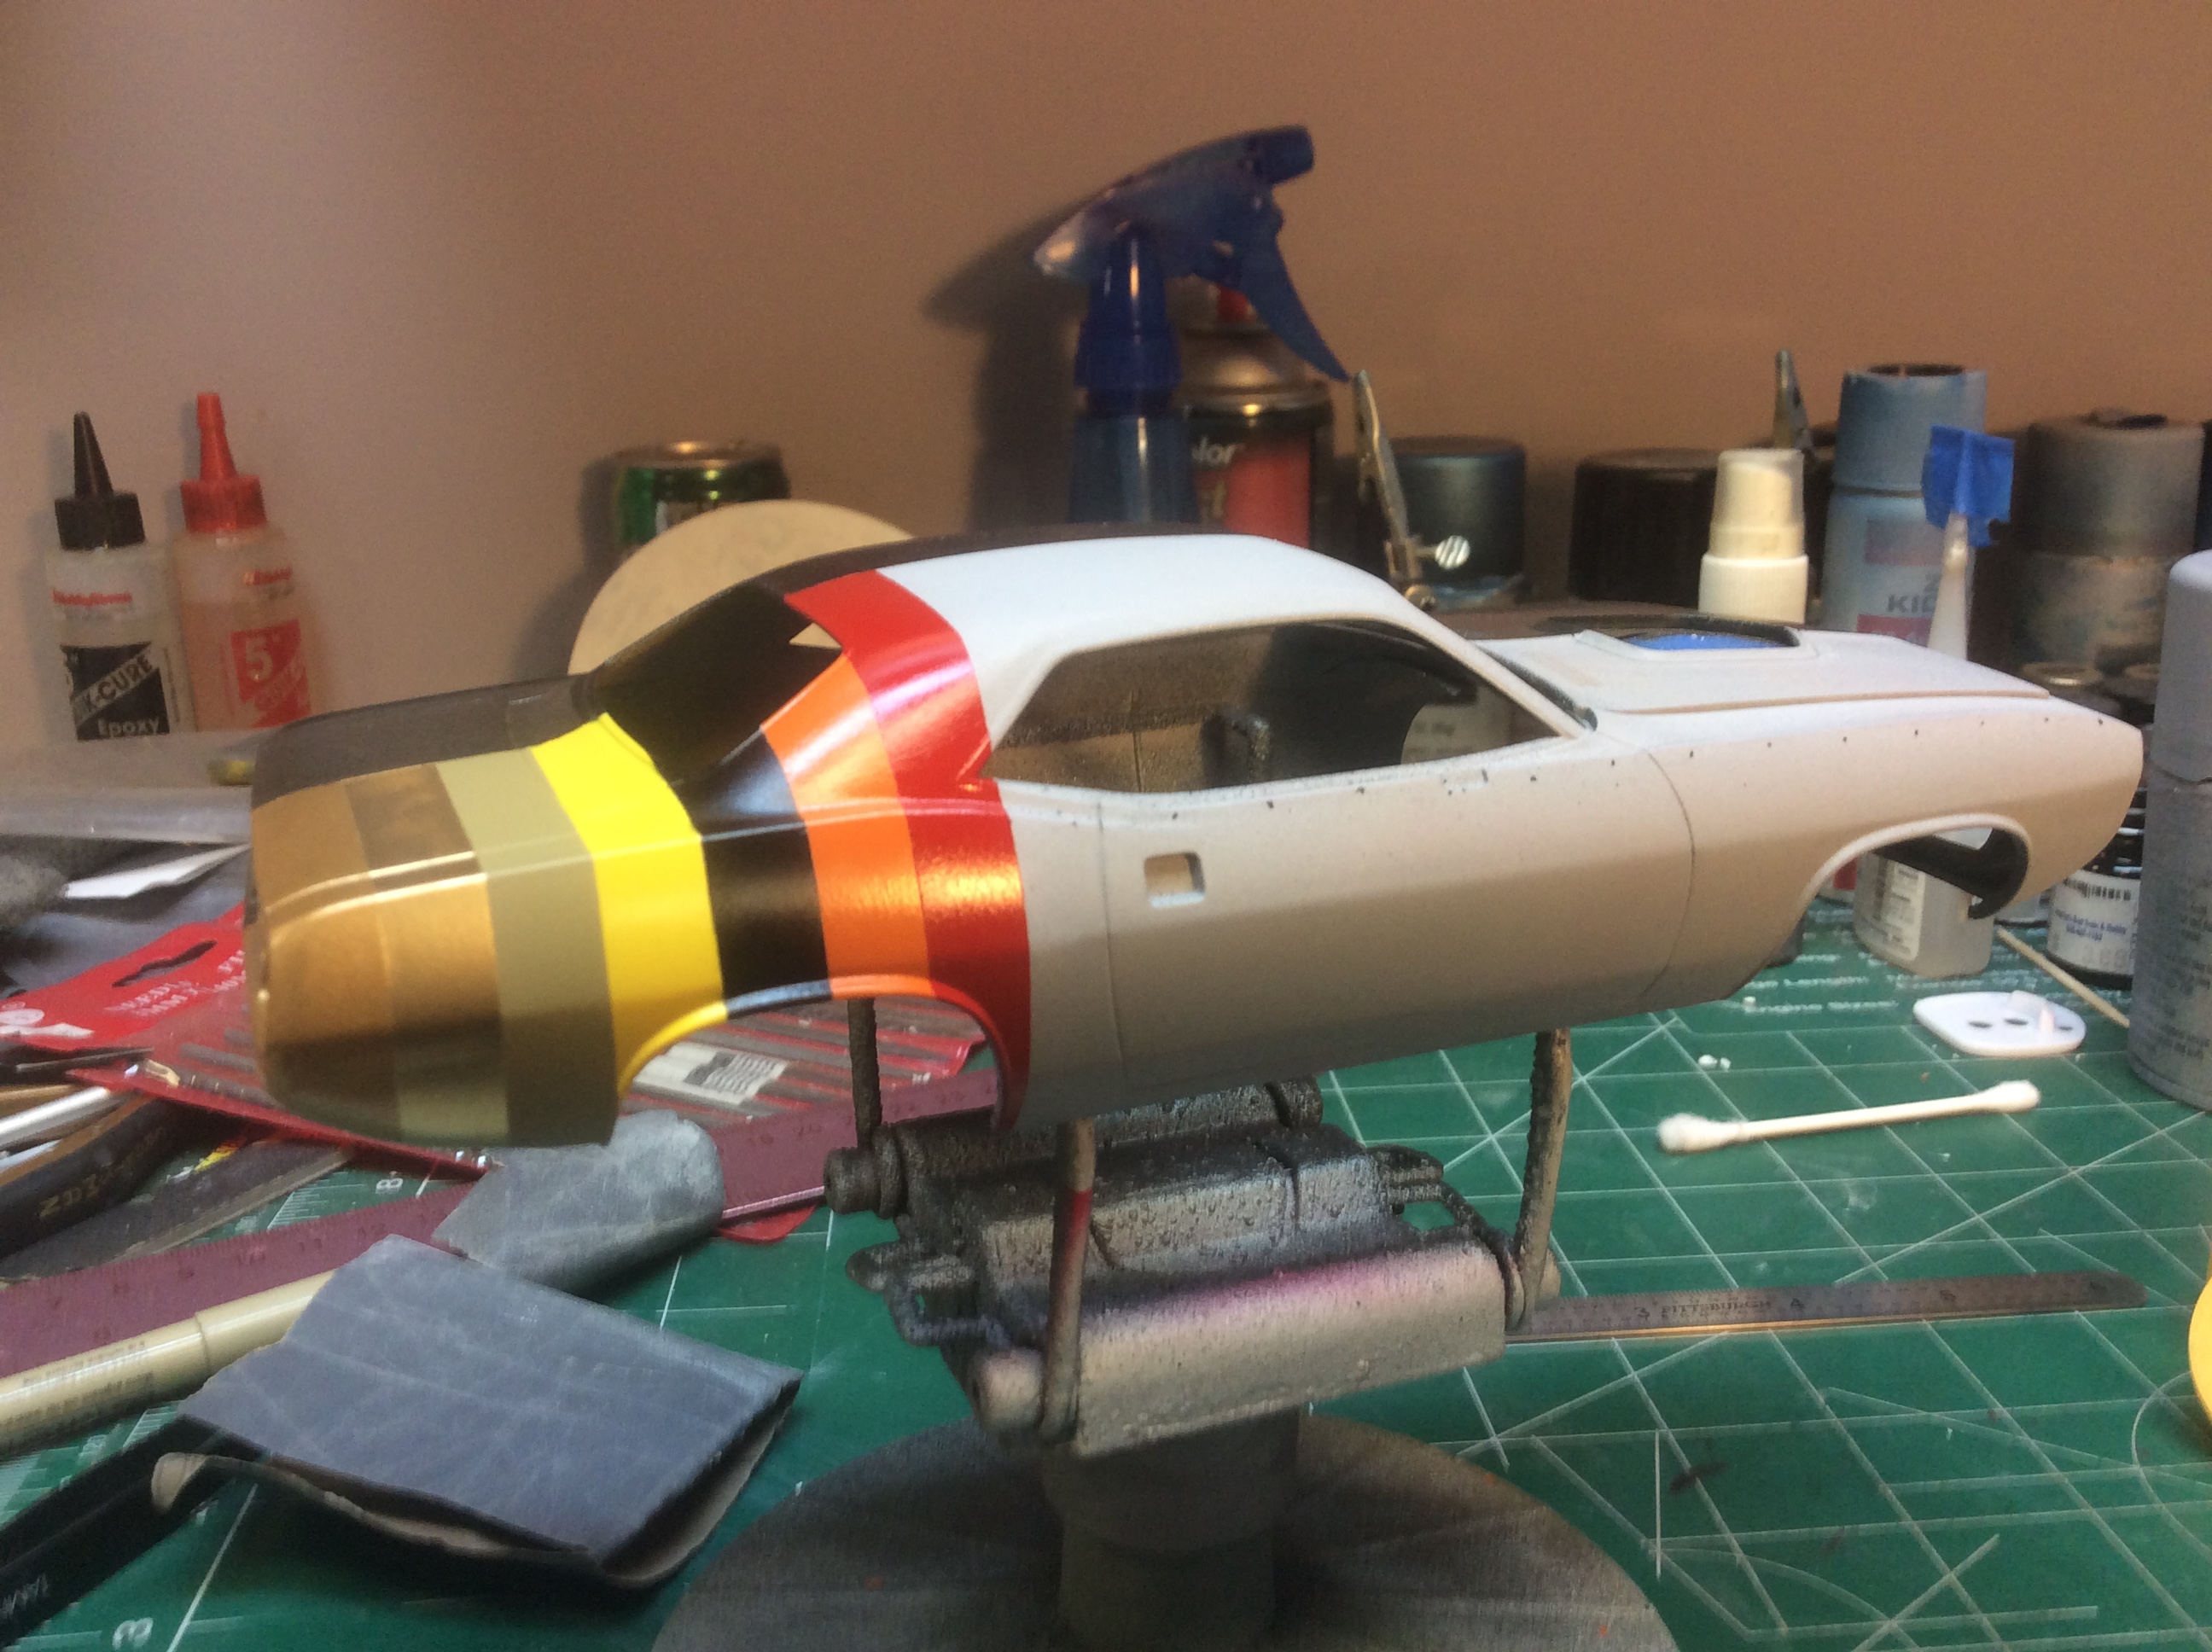
Color #5. You're probably getting tired of one color at a time.LOL. I'm going to add a few b4 another pic, but I'm loving all the feedback and additional info on this "brochure car" ? So , here's pics of my taping before and after a color applied, and true to form as I was removing the tape a chip of the yellow came off with the tape. I can't complaint, as that's the first lifting I've had.
-
Rapid Transit System " paint code cuda "
dragmodels44 replied to dragmodels44's topic in WIP: Model Cars
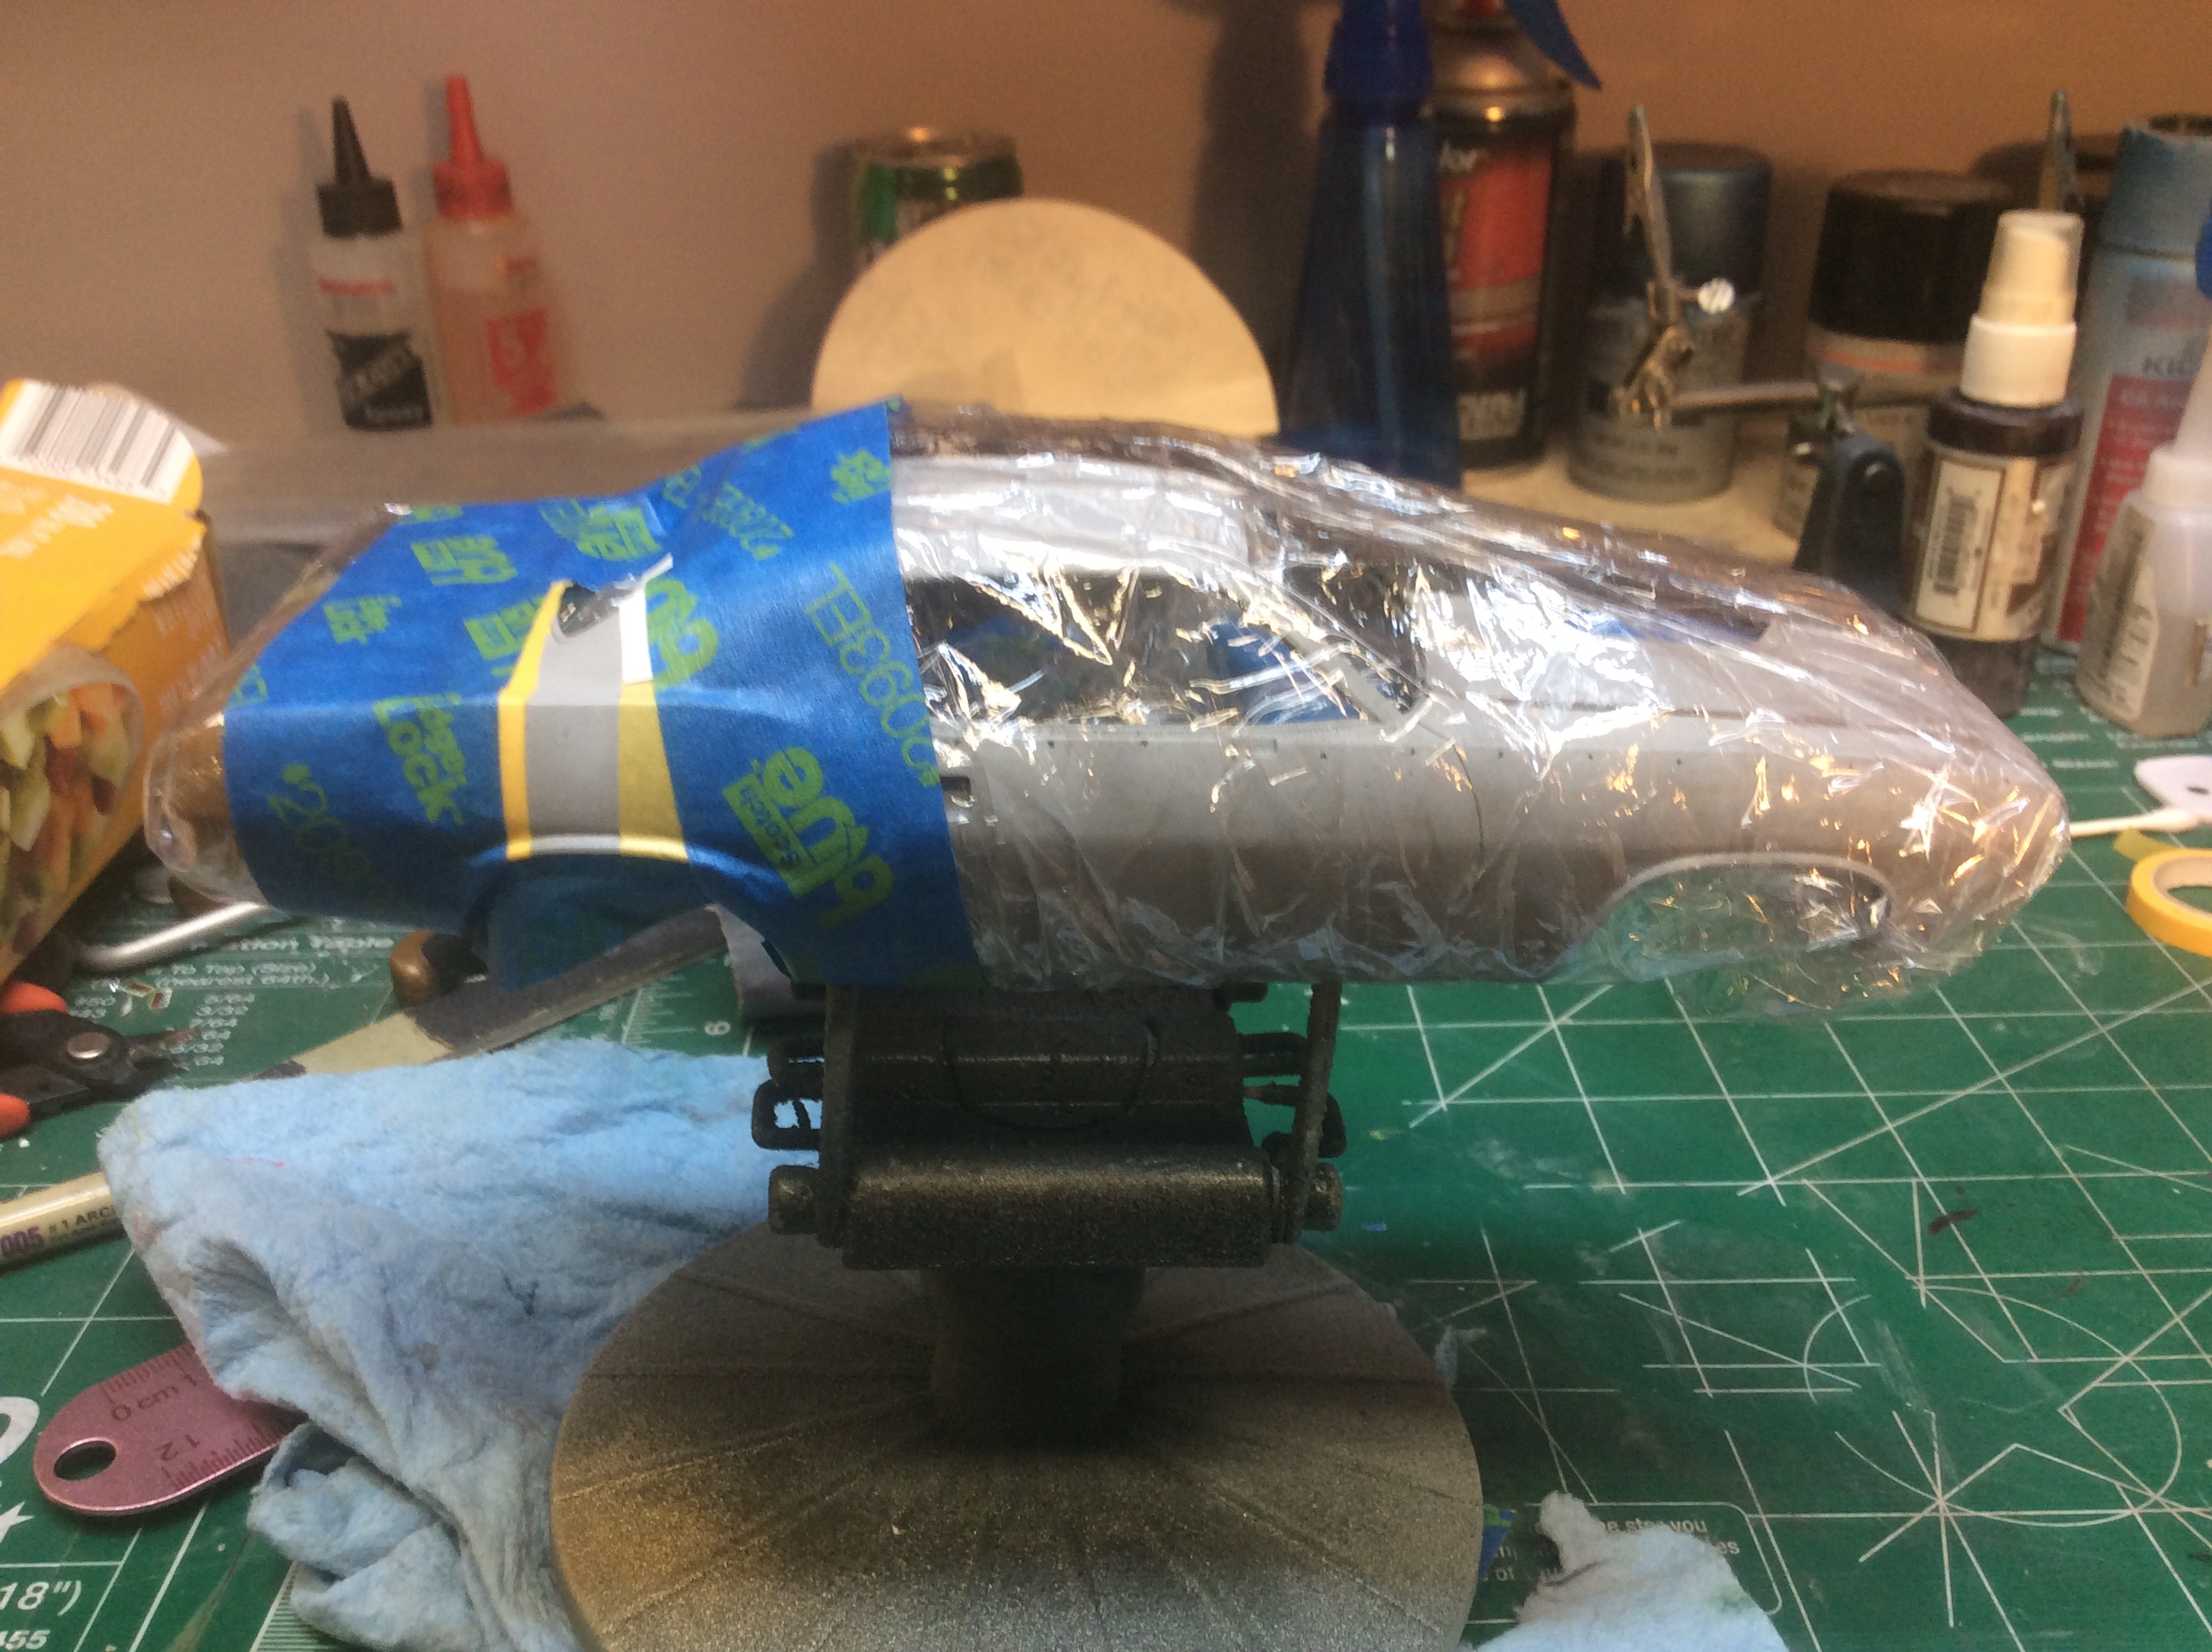
I'm using tamiya fine line tape to mask the separation lines. Luckily there's very few curves. If I had to, I just cut the tape in half to follow a curve. They I'll use 3M blue masking over that that followed by clear Saran Wrap. Next pic will show the masking, which is very tedious. -
Rapid Transit System " paint code cuda "
dragmodels44 replied to dragmodels44's topic in WIP: Model Cars
WOW! Thanks for all the support! MCM Pro . Nice. I don't know about doing this one again though... LOL. ALSO, thanks for all these additional photos and info. I made a little folder with all the reference material I had and I'm going to add these as well! I especially like the wrap part on the real car, which I didn't know. I wish this part was that easy. I've been using my heat gun in between coats to try and bake it on and each time I mask it I tape only what's necessary and use plastic wrap to avoid constantly taping painted areas, especially the drivers side. Krazy Rick was right. Wish I'd started on the stripe side first. Oh well. Hoping for the best...ONLY 17 more to go! -
Rapid Transit System " paint code cuda "
dragmodels44 replied to dragmodels44's topic in WIP: Model Cars
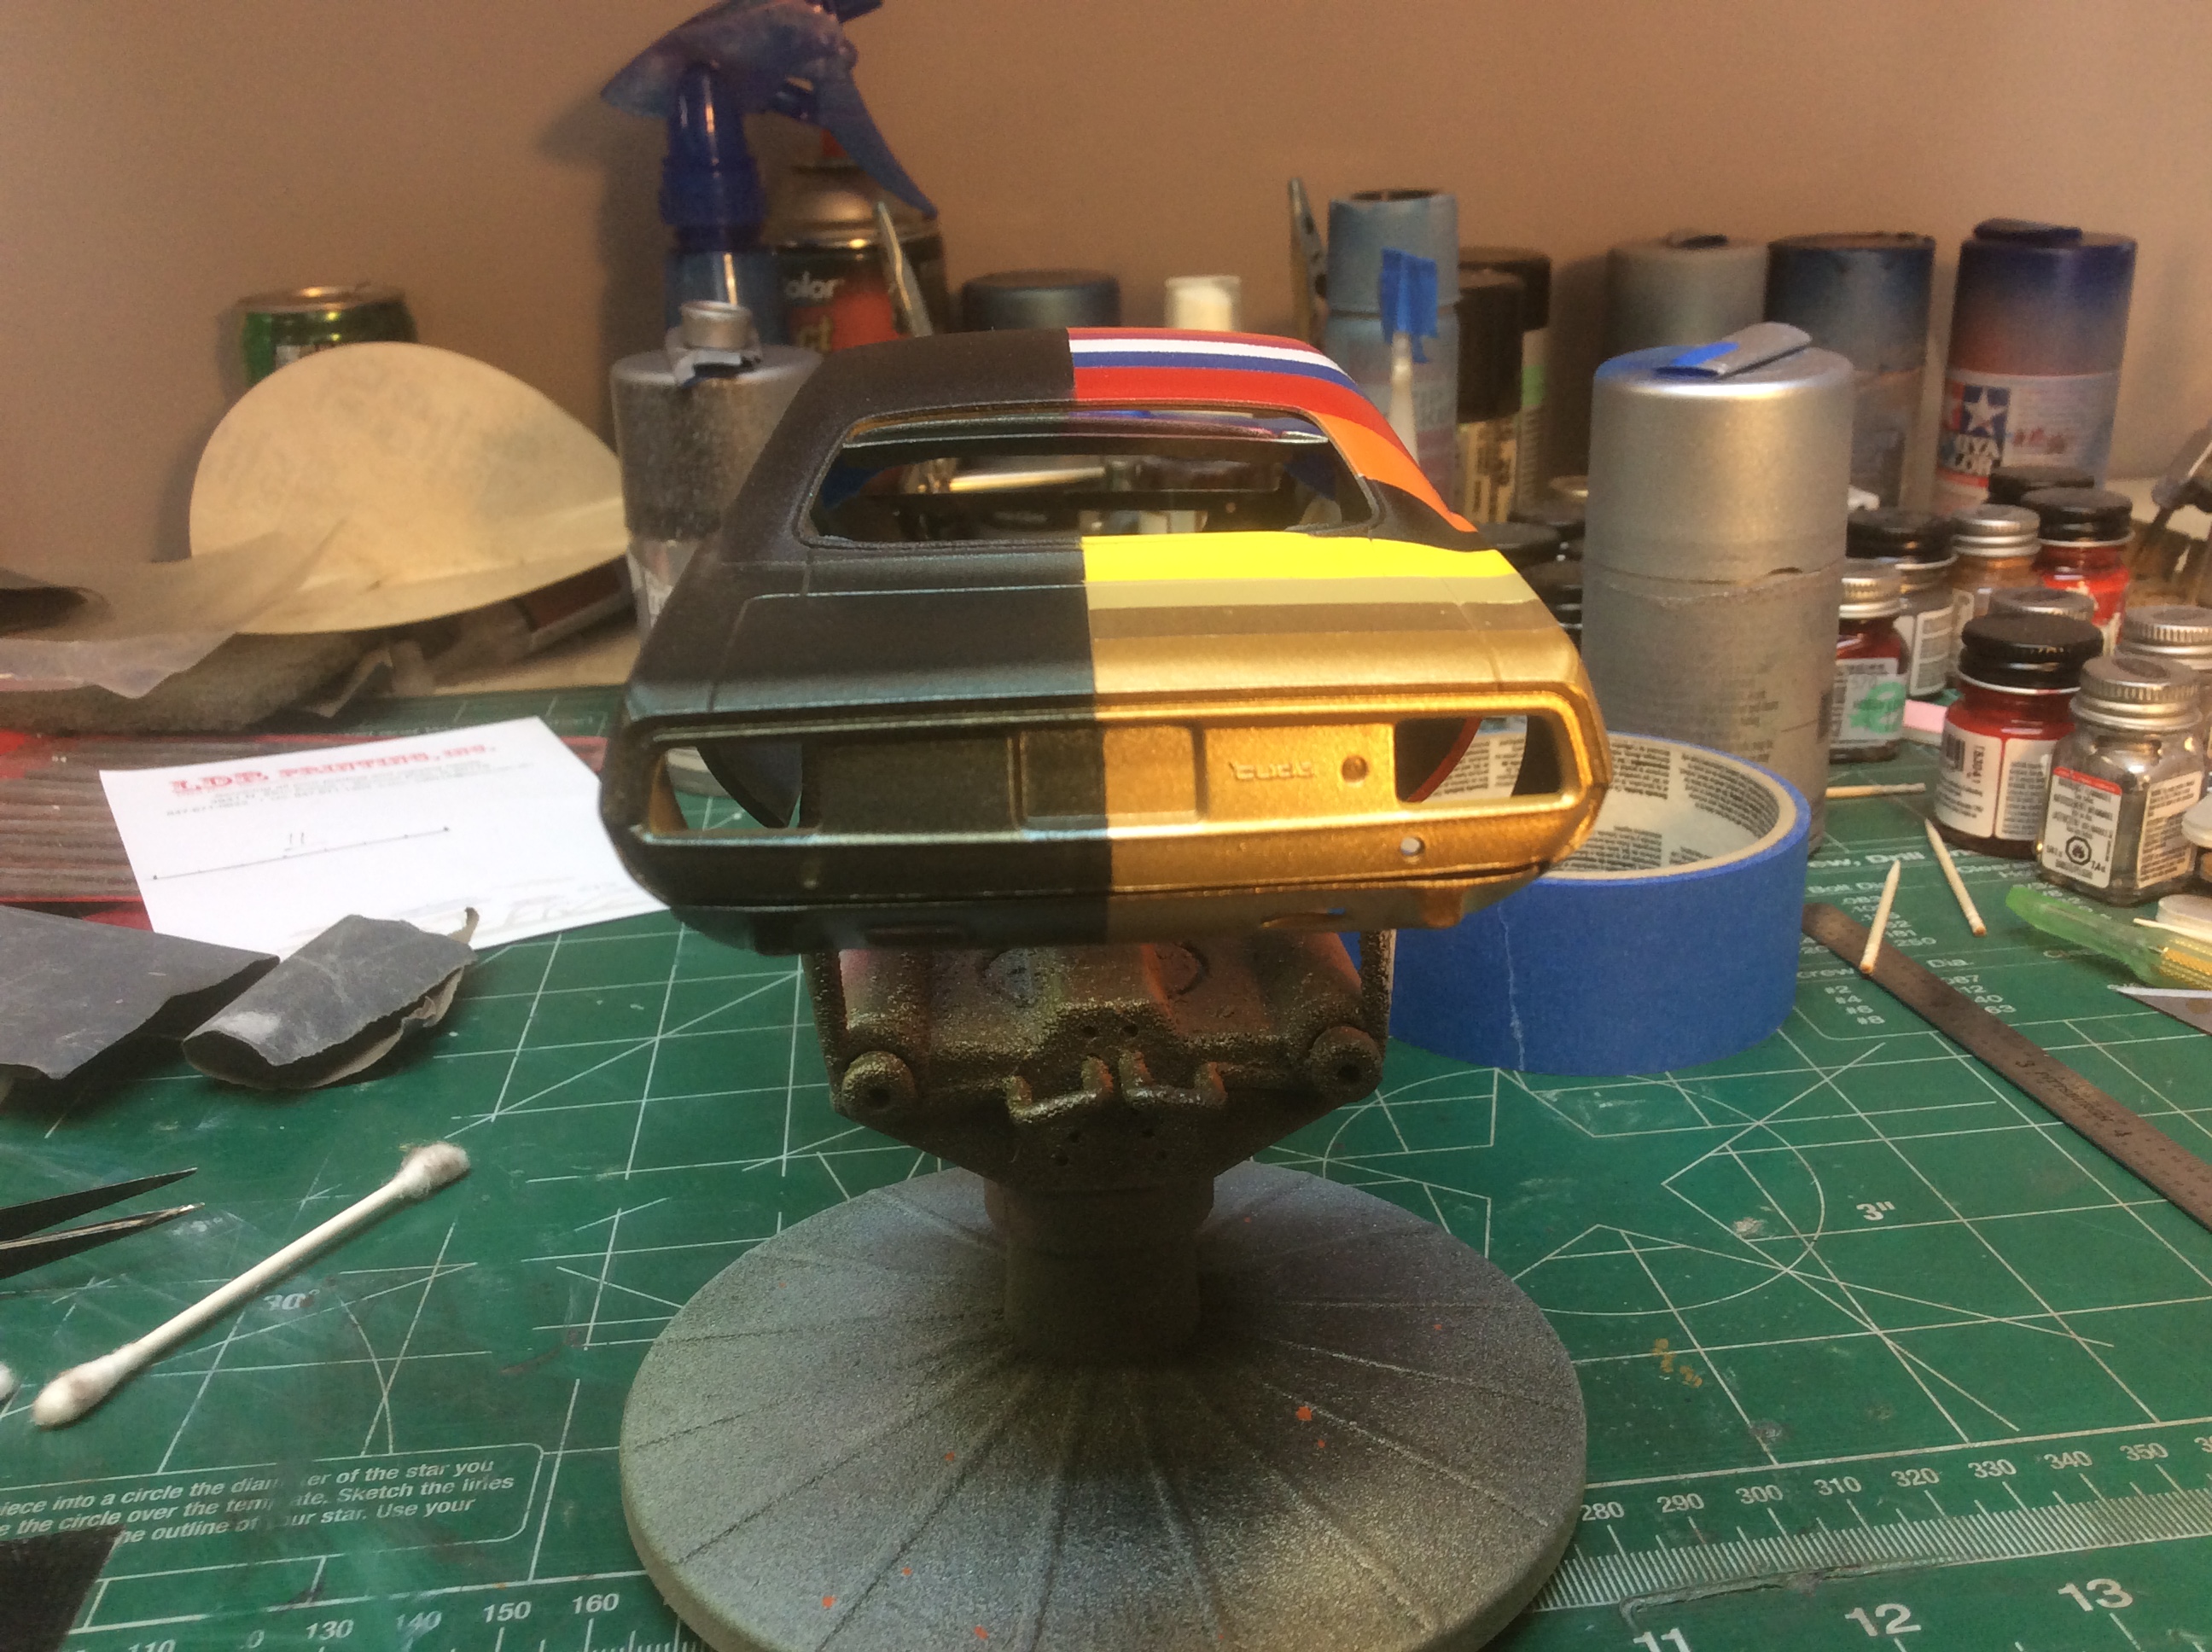
Thanks guys. I meant to say TOP banana . Actually, whether they are actually on the car or not, I wanted to add the hi impact colors. I thought initially the car was meant to show all the hi impact colors anyway. Here's how I broke it down, and I don't mind saying I went back and forth numerous times before I settled on this: starting from the rear, pure gold / gold /dark yellow/ Chrysler yellow/ black/ go mango/ red/ ice blue/ white/ panther pink/ hemi orange/ go mango( again) / sublime/ dark green/ citrus yellow metallic/ red/ plum crazy purple/ med metallic blue/ ice blue(again)/ silver/ white -
Rapid Transit System " paint code cuda "
dragmodels44 replied to dragmodels44's topic in WIP: Model Cars
I found all the "race car" pieces, ladder bar, the correct front & rear mag and the header which I pirated from the polar lights Stardust kit. -
Rapid Transit System " paint code cuda "
dragmodels44 replied to dragmodels44's topic in WIP: Model Cars
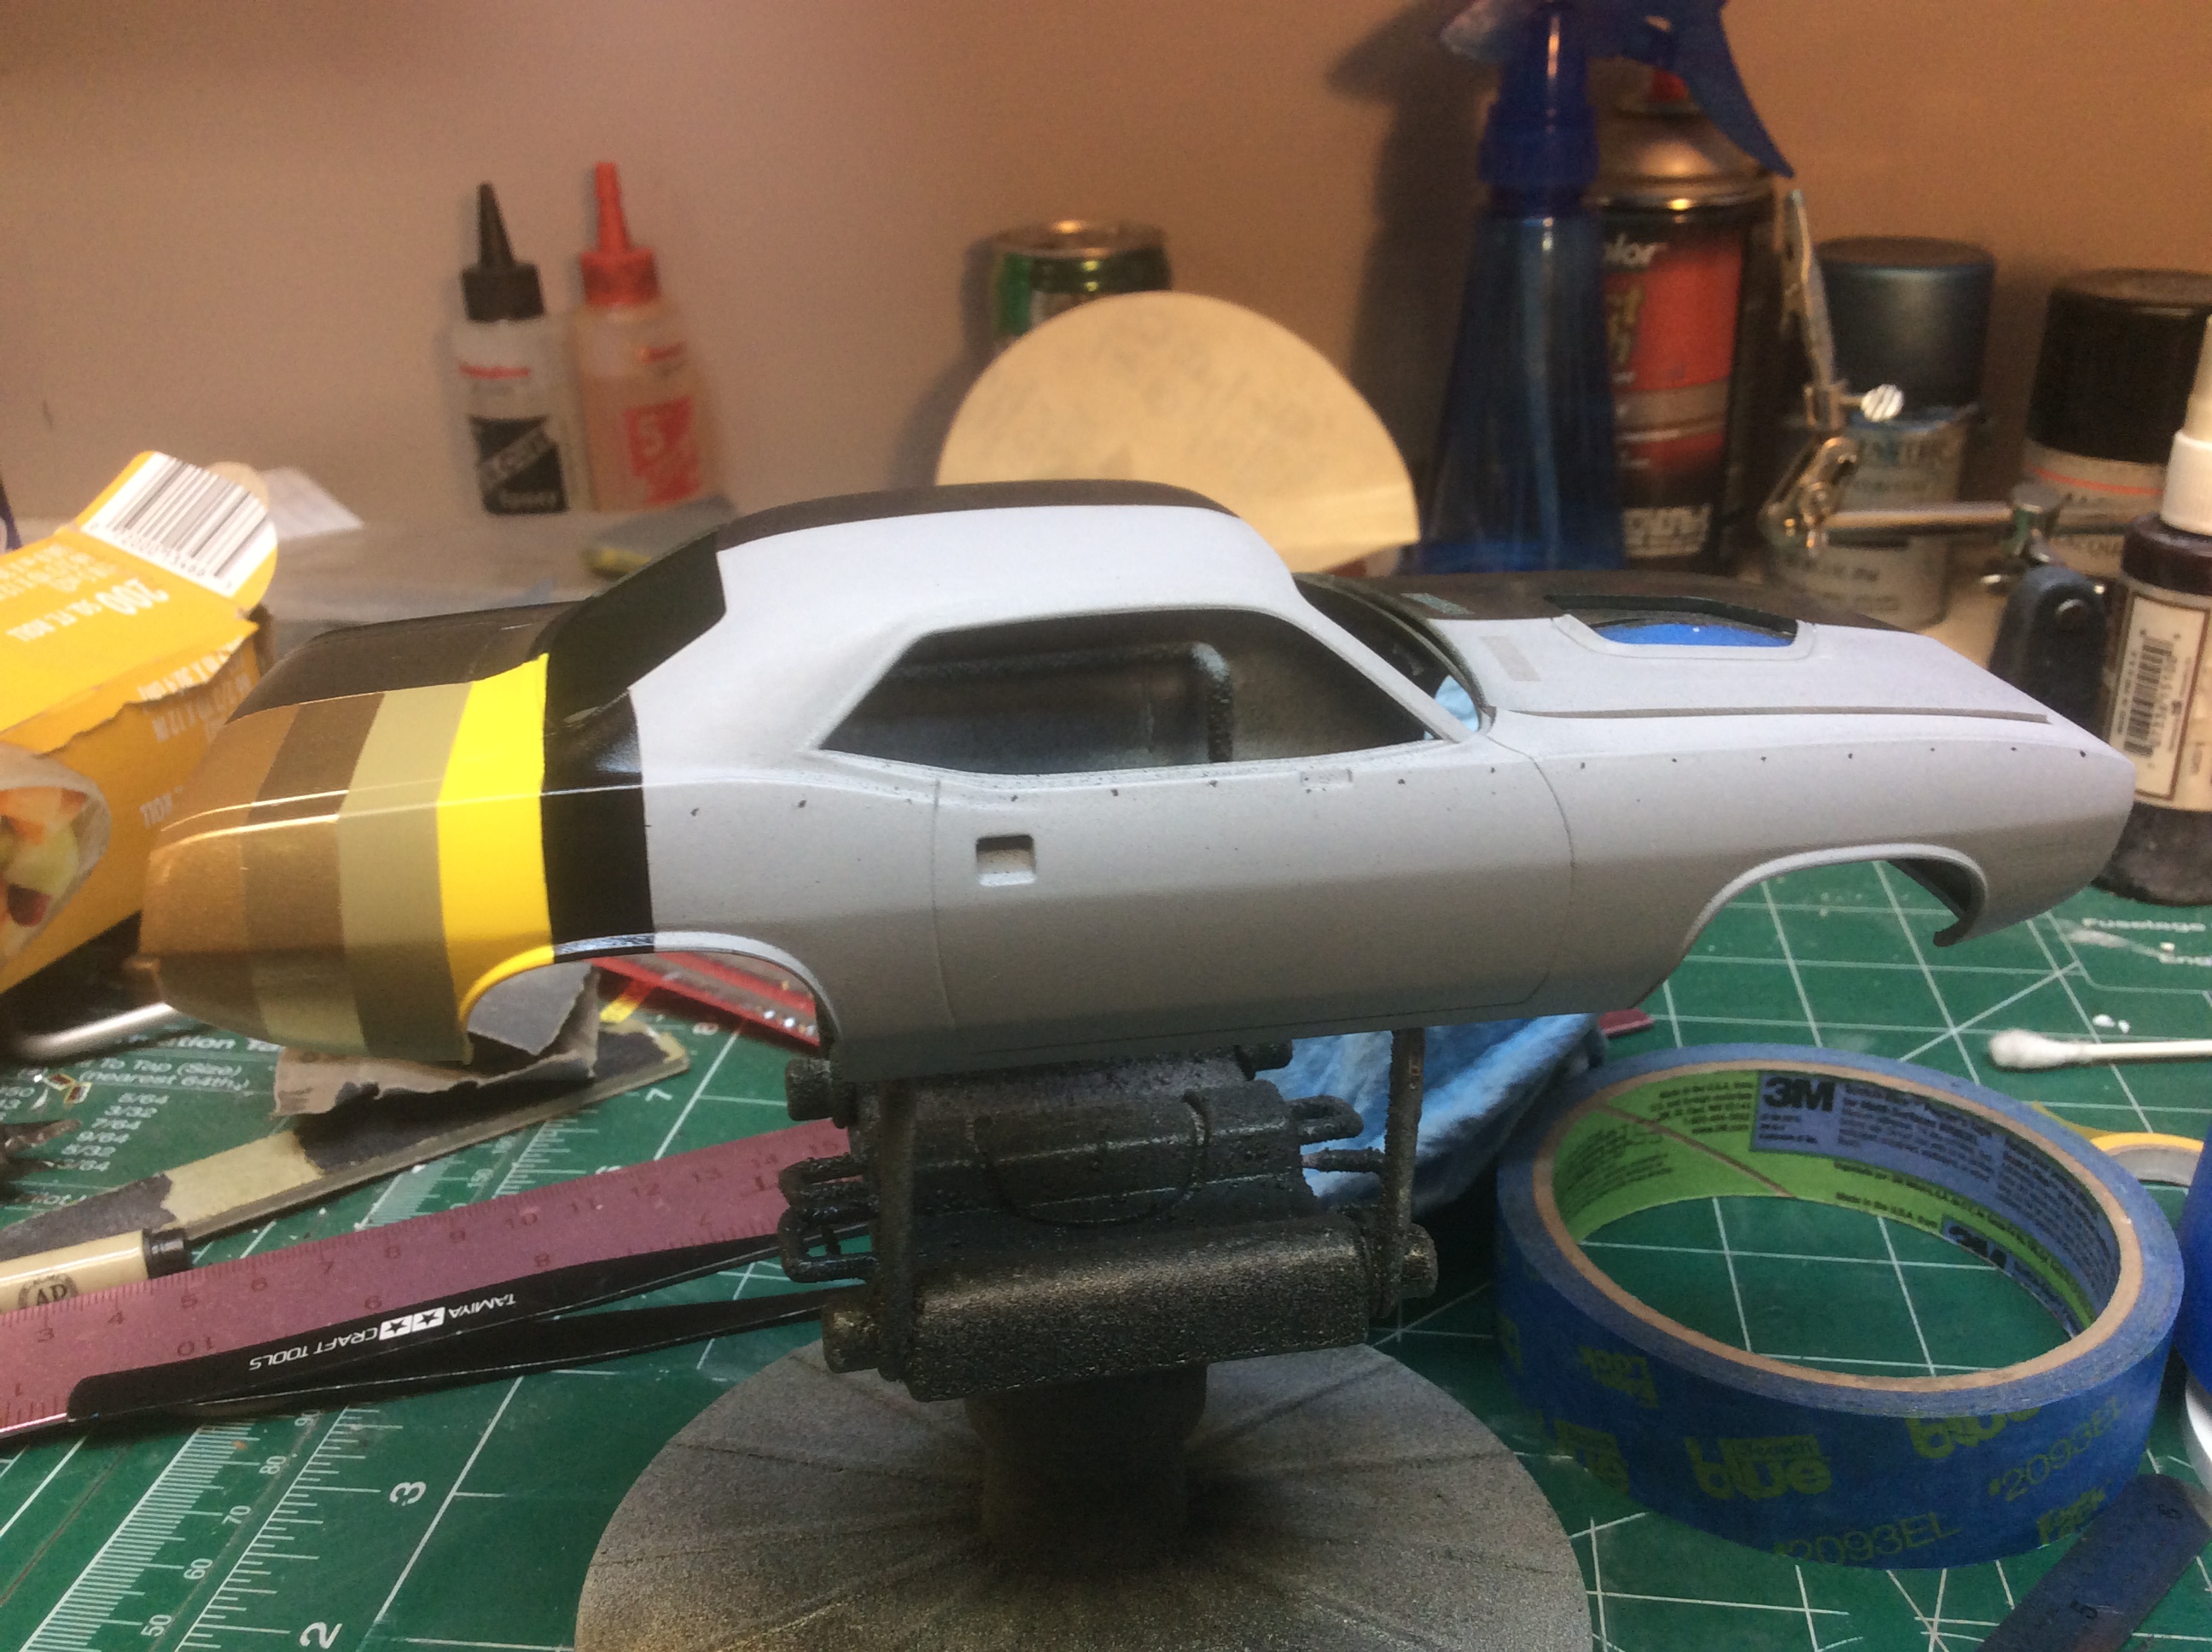
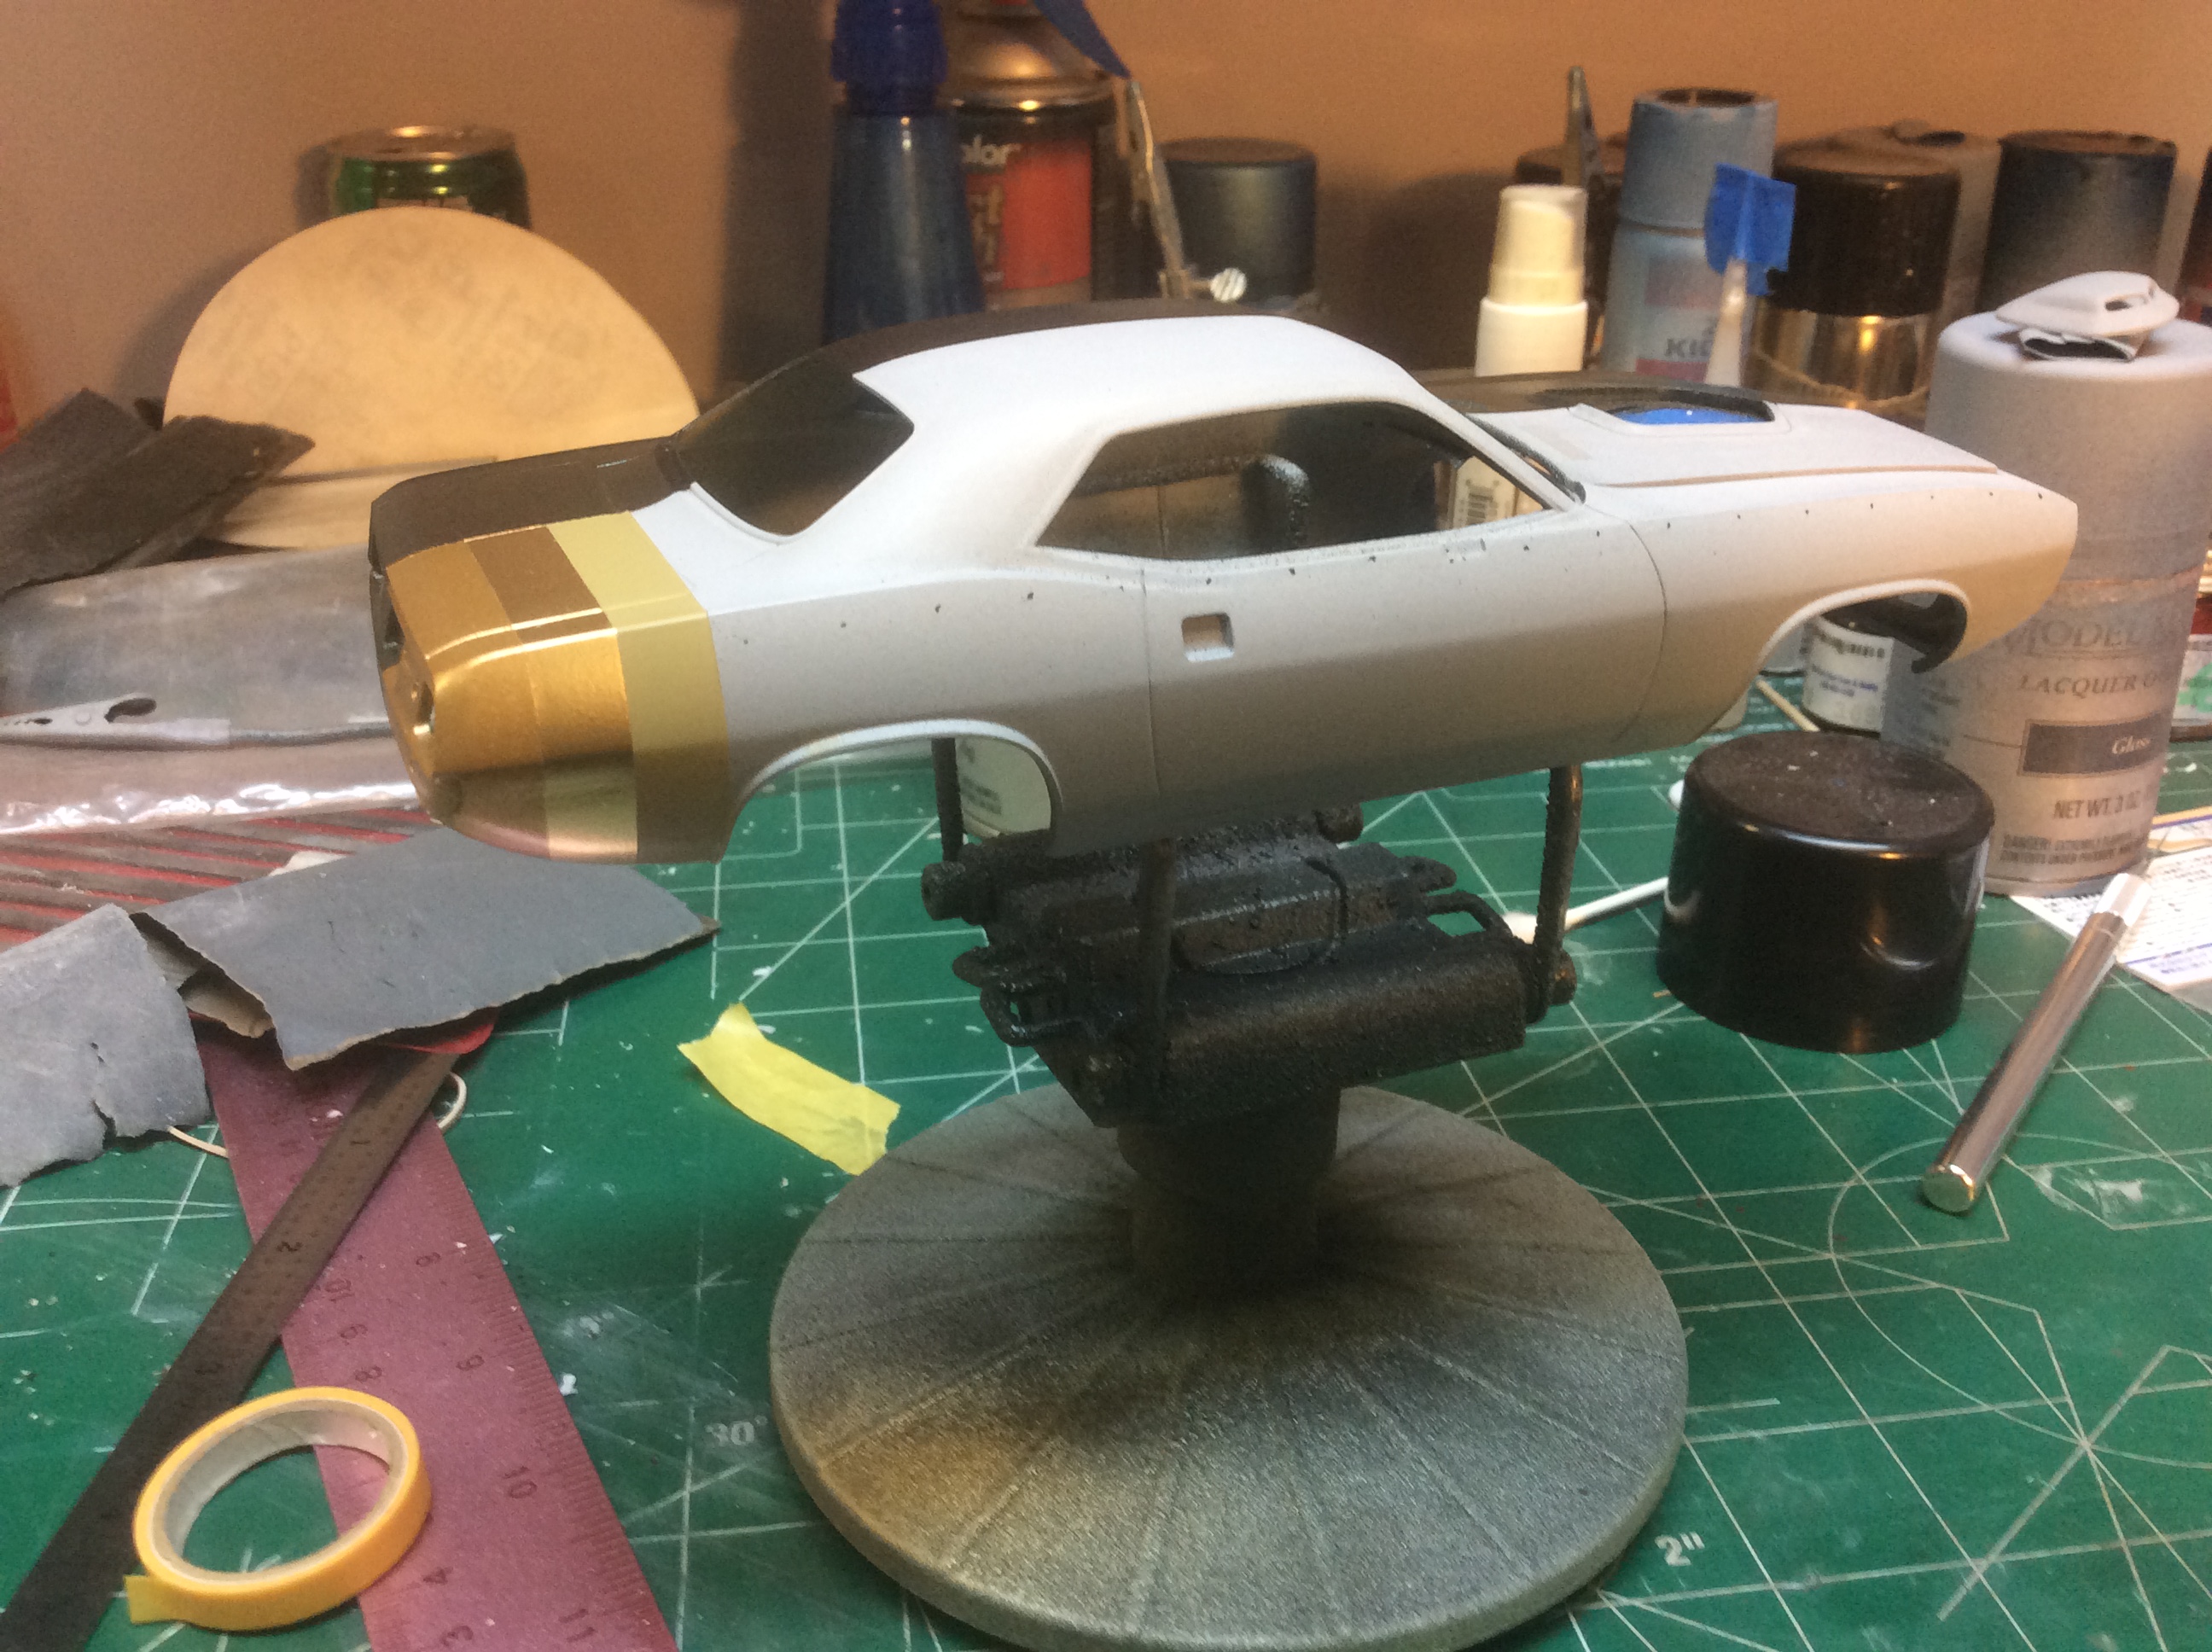
Color # 4. If u notice I ommited the ,well it looked like an off white or tan? So I went to the rope banana / lemon twist, my guess for the yellow. Out of 25 colors I will be applying 21. So far so good. Thanks for all the kind comments.
-
Rapid Transit System " paint code cuda "
dragmodels44 replied to dragmodels44's topic in WIP: Model Cars
Well, color 3, so far so good! I figured it to 21 colors that I'll apply. The car actually had 25, and some of them are hard to tell and it looks like some of the colors are duplicates. And as Krazy Rick pointed out, without exact paint codes none are an exact match, so it doesn't really matter. So, I'll just eye ball it as best as I can! Hope you're enjoying the progress!
-
Rapid Transit System " paint code cuda "
dragmodels44 replied to dragmodels44's topic in WIP: Model Cars
Fixed the centerline and added the next color. So far so good. I feel like I'm pushing my luck, I should let this bake in the sun, if it'd ever warm up!
-
Rapid Transit System " paint code cuda "
dragmodels44 replied to dragmodels44's topic in WIP: Model Cars
That's interesting. So... my pick of the colors will actually be " correct " as it never existed anyway! LOL THANKS FOR THE INPUT AND ADDITIONAL PICS