JTalmage
-
Posts
2,695 -
Joined
-
Last visited
Content Type
Profiles
Forums
Events
Gallery
Everything posted by JTalmage
-
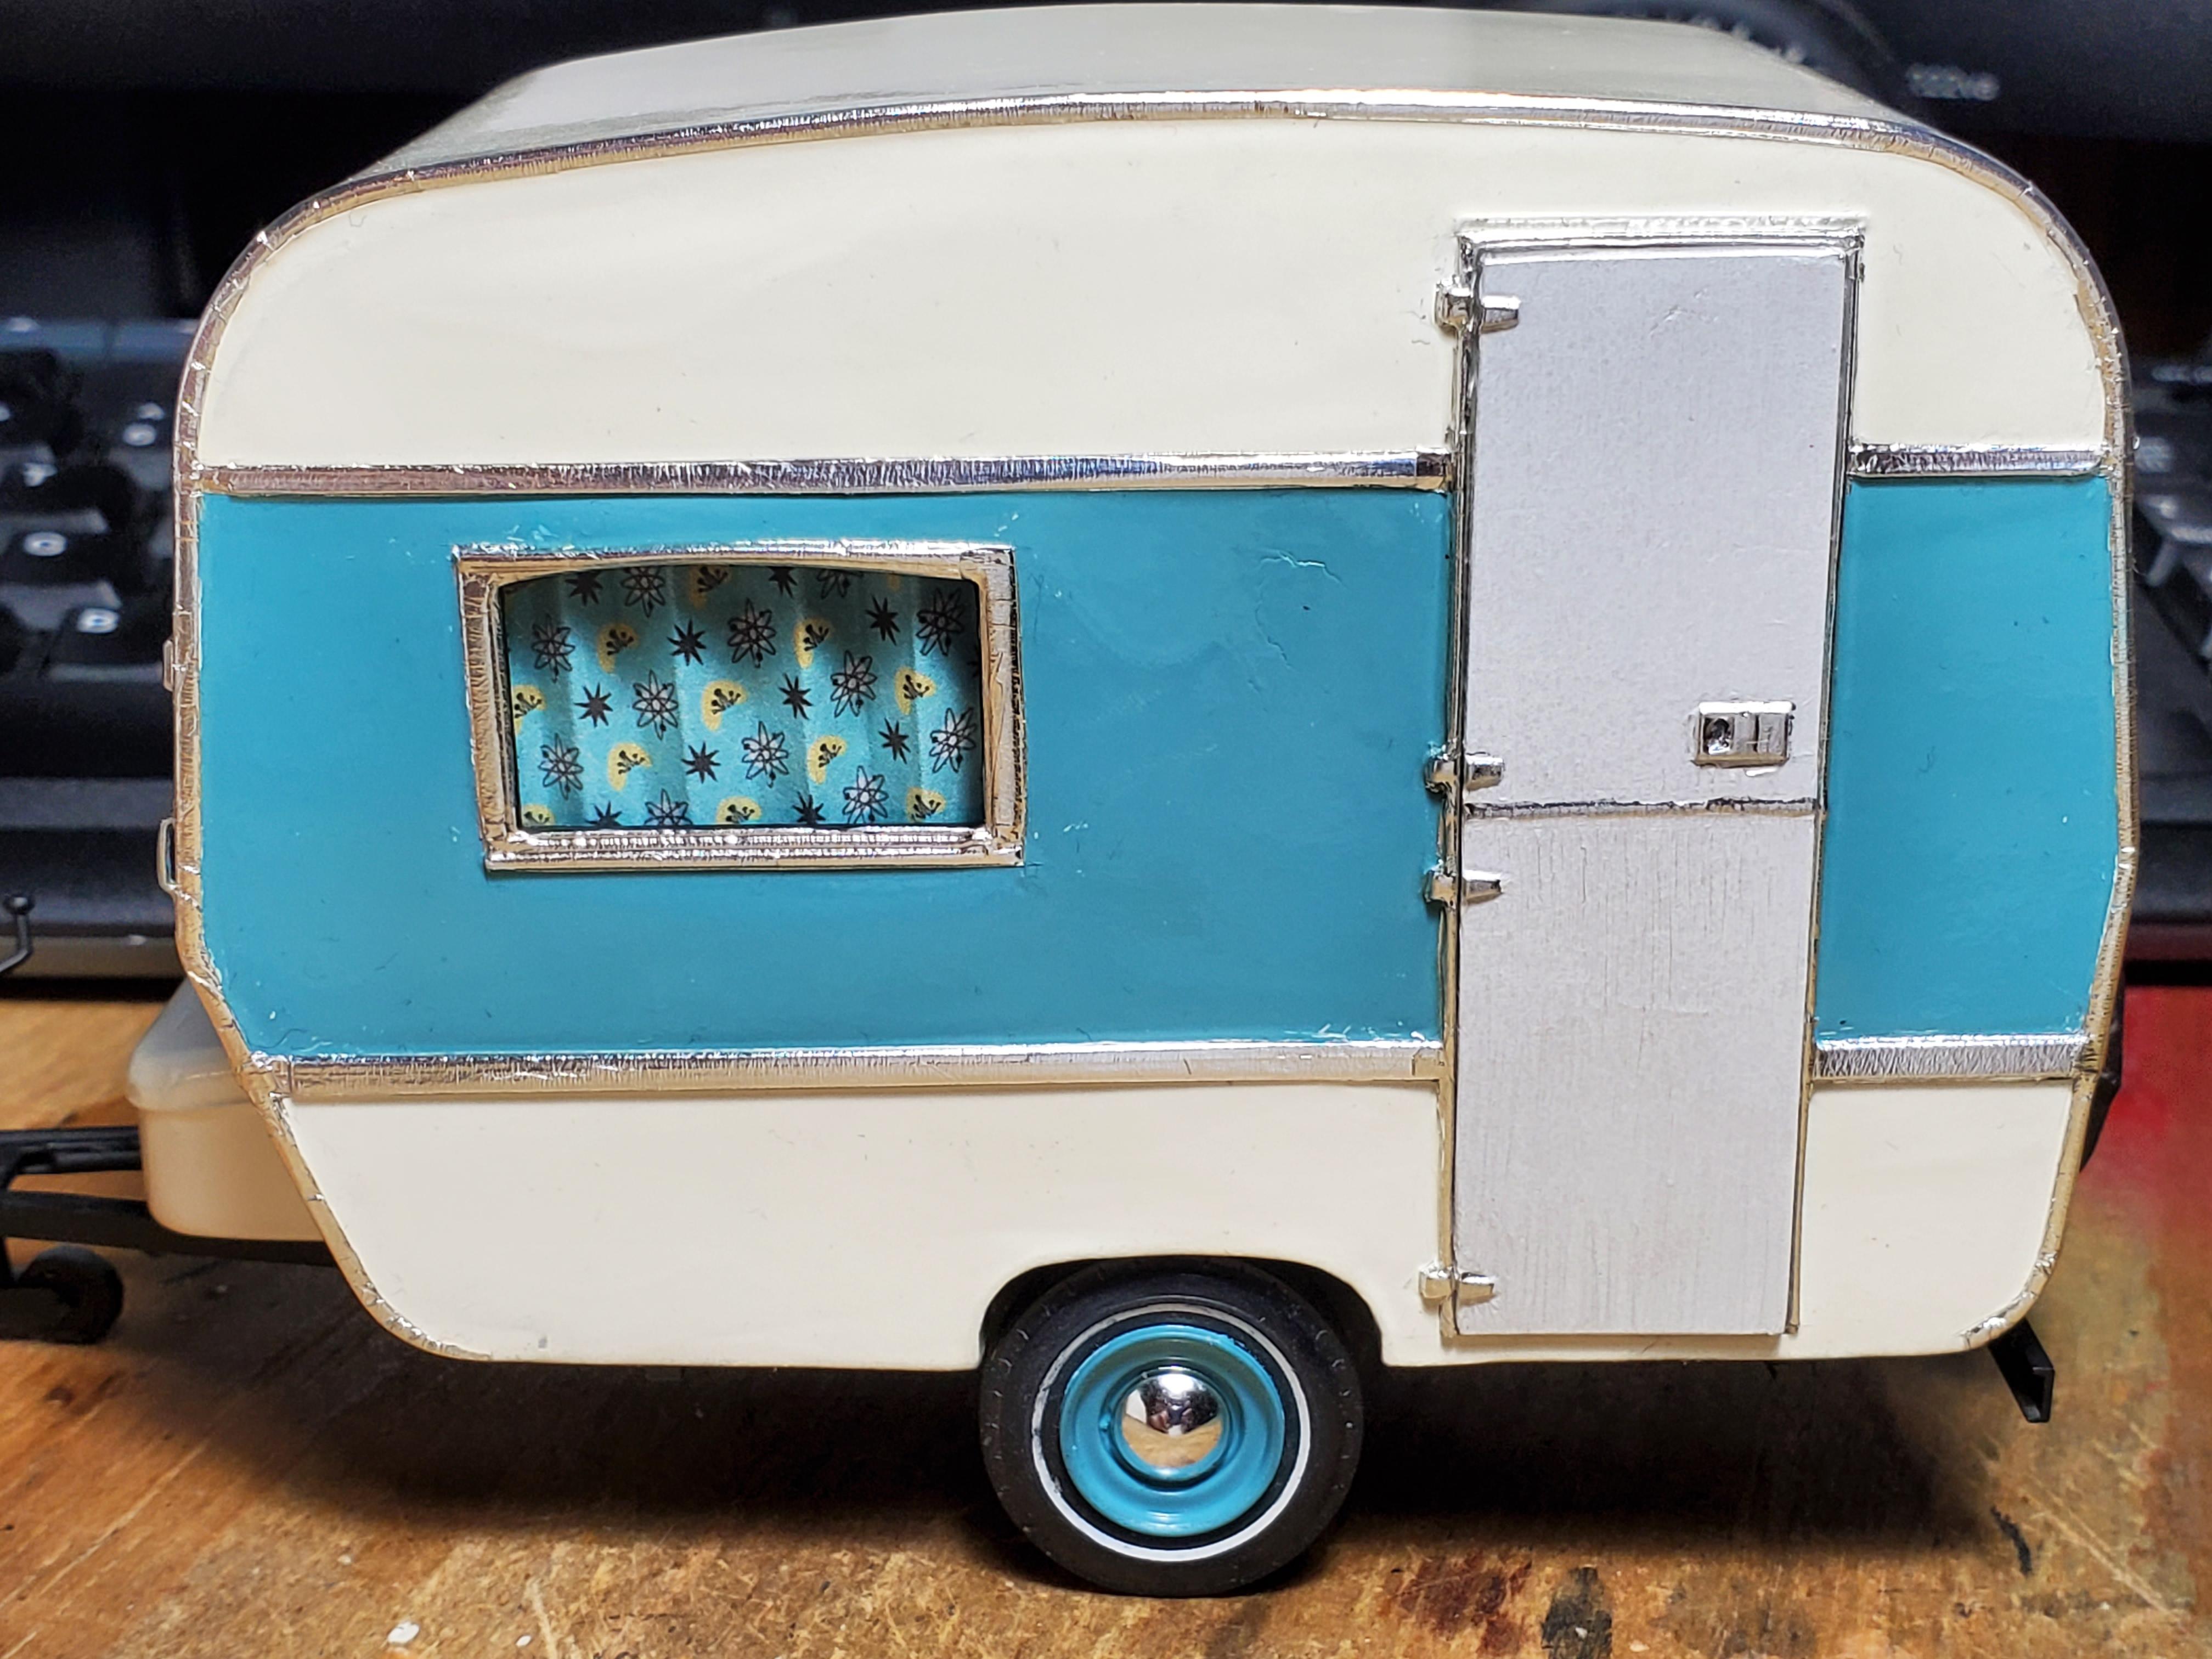
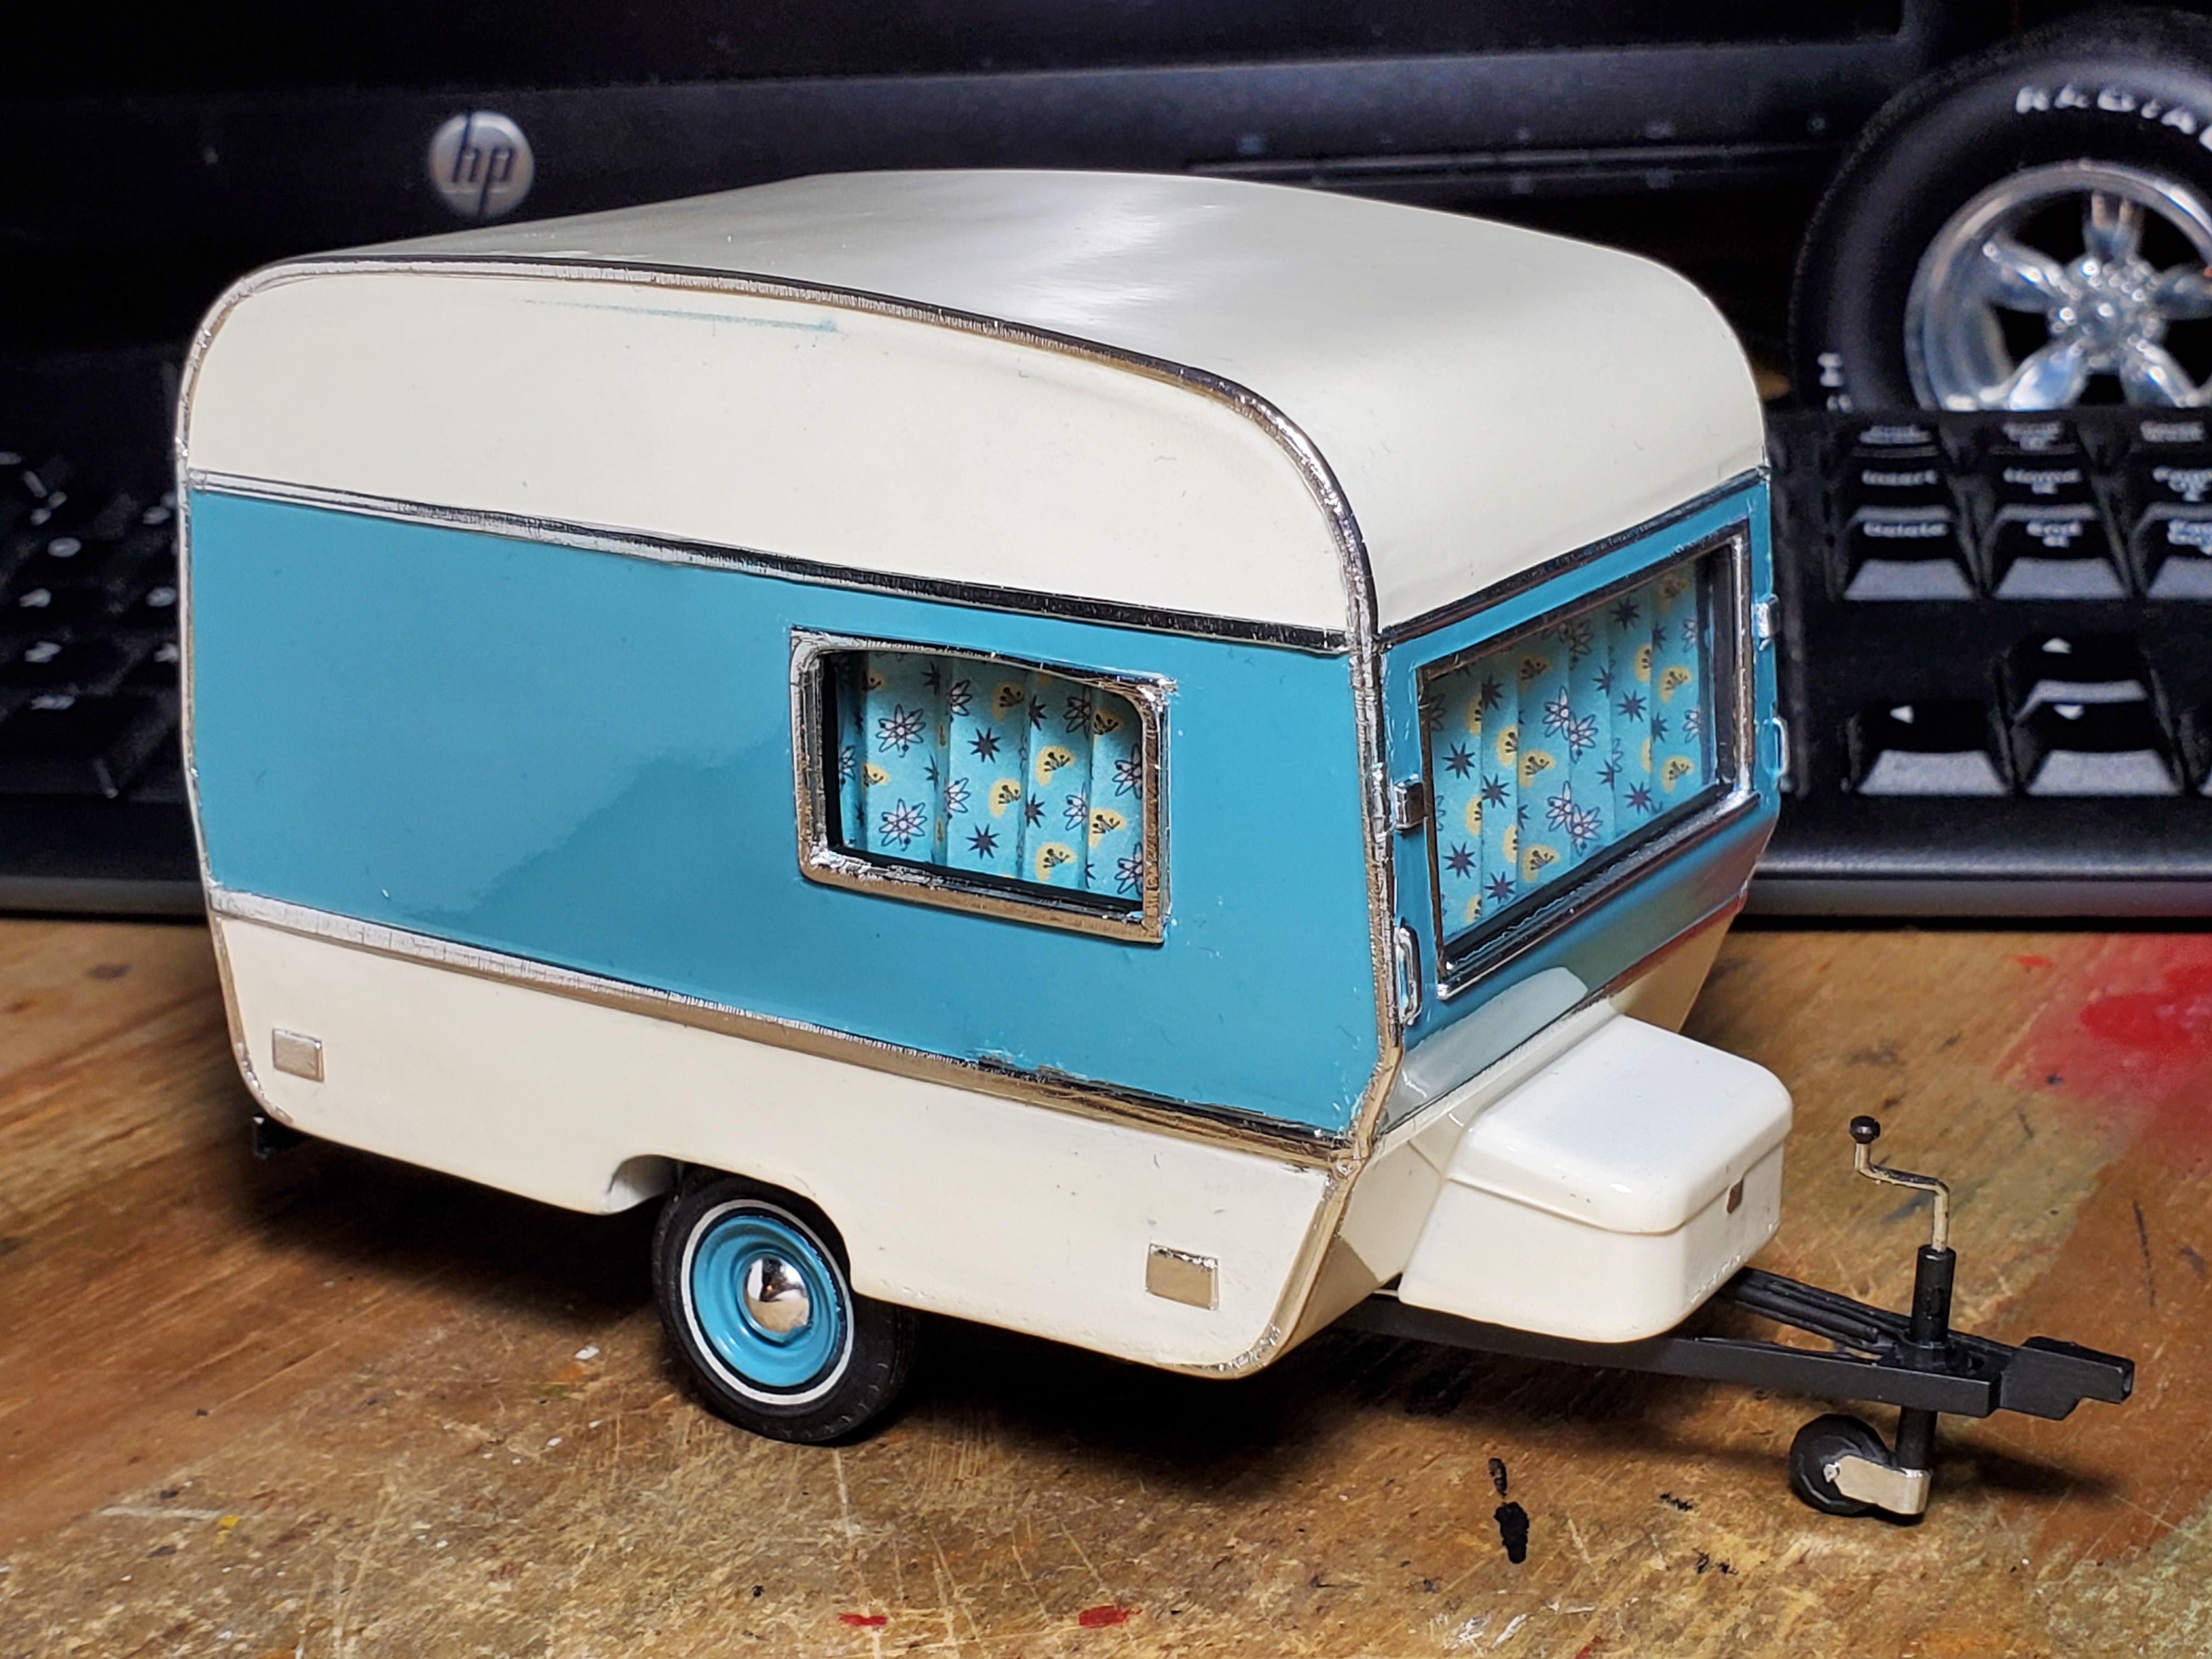
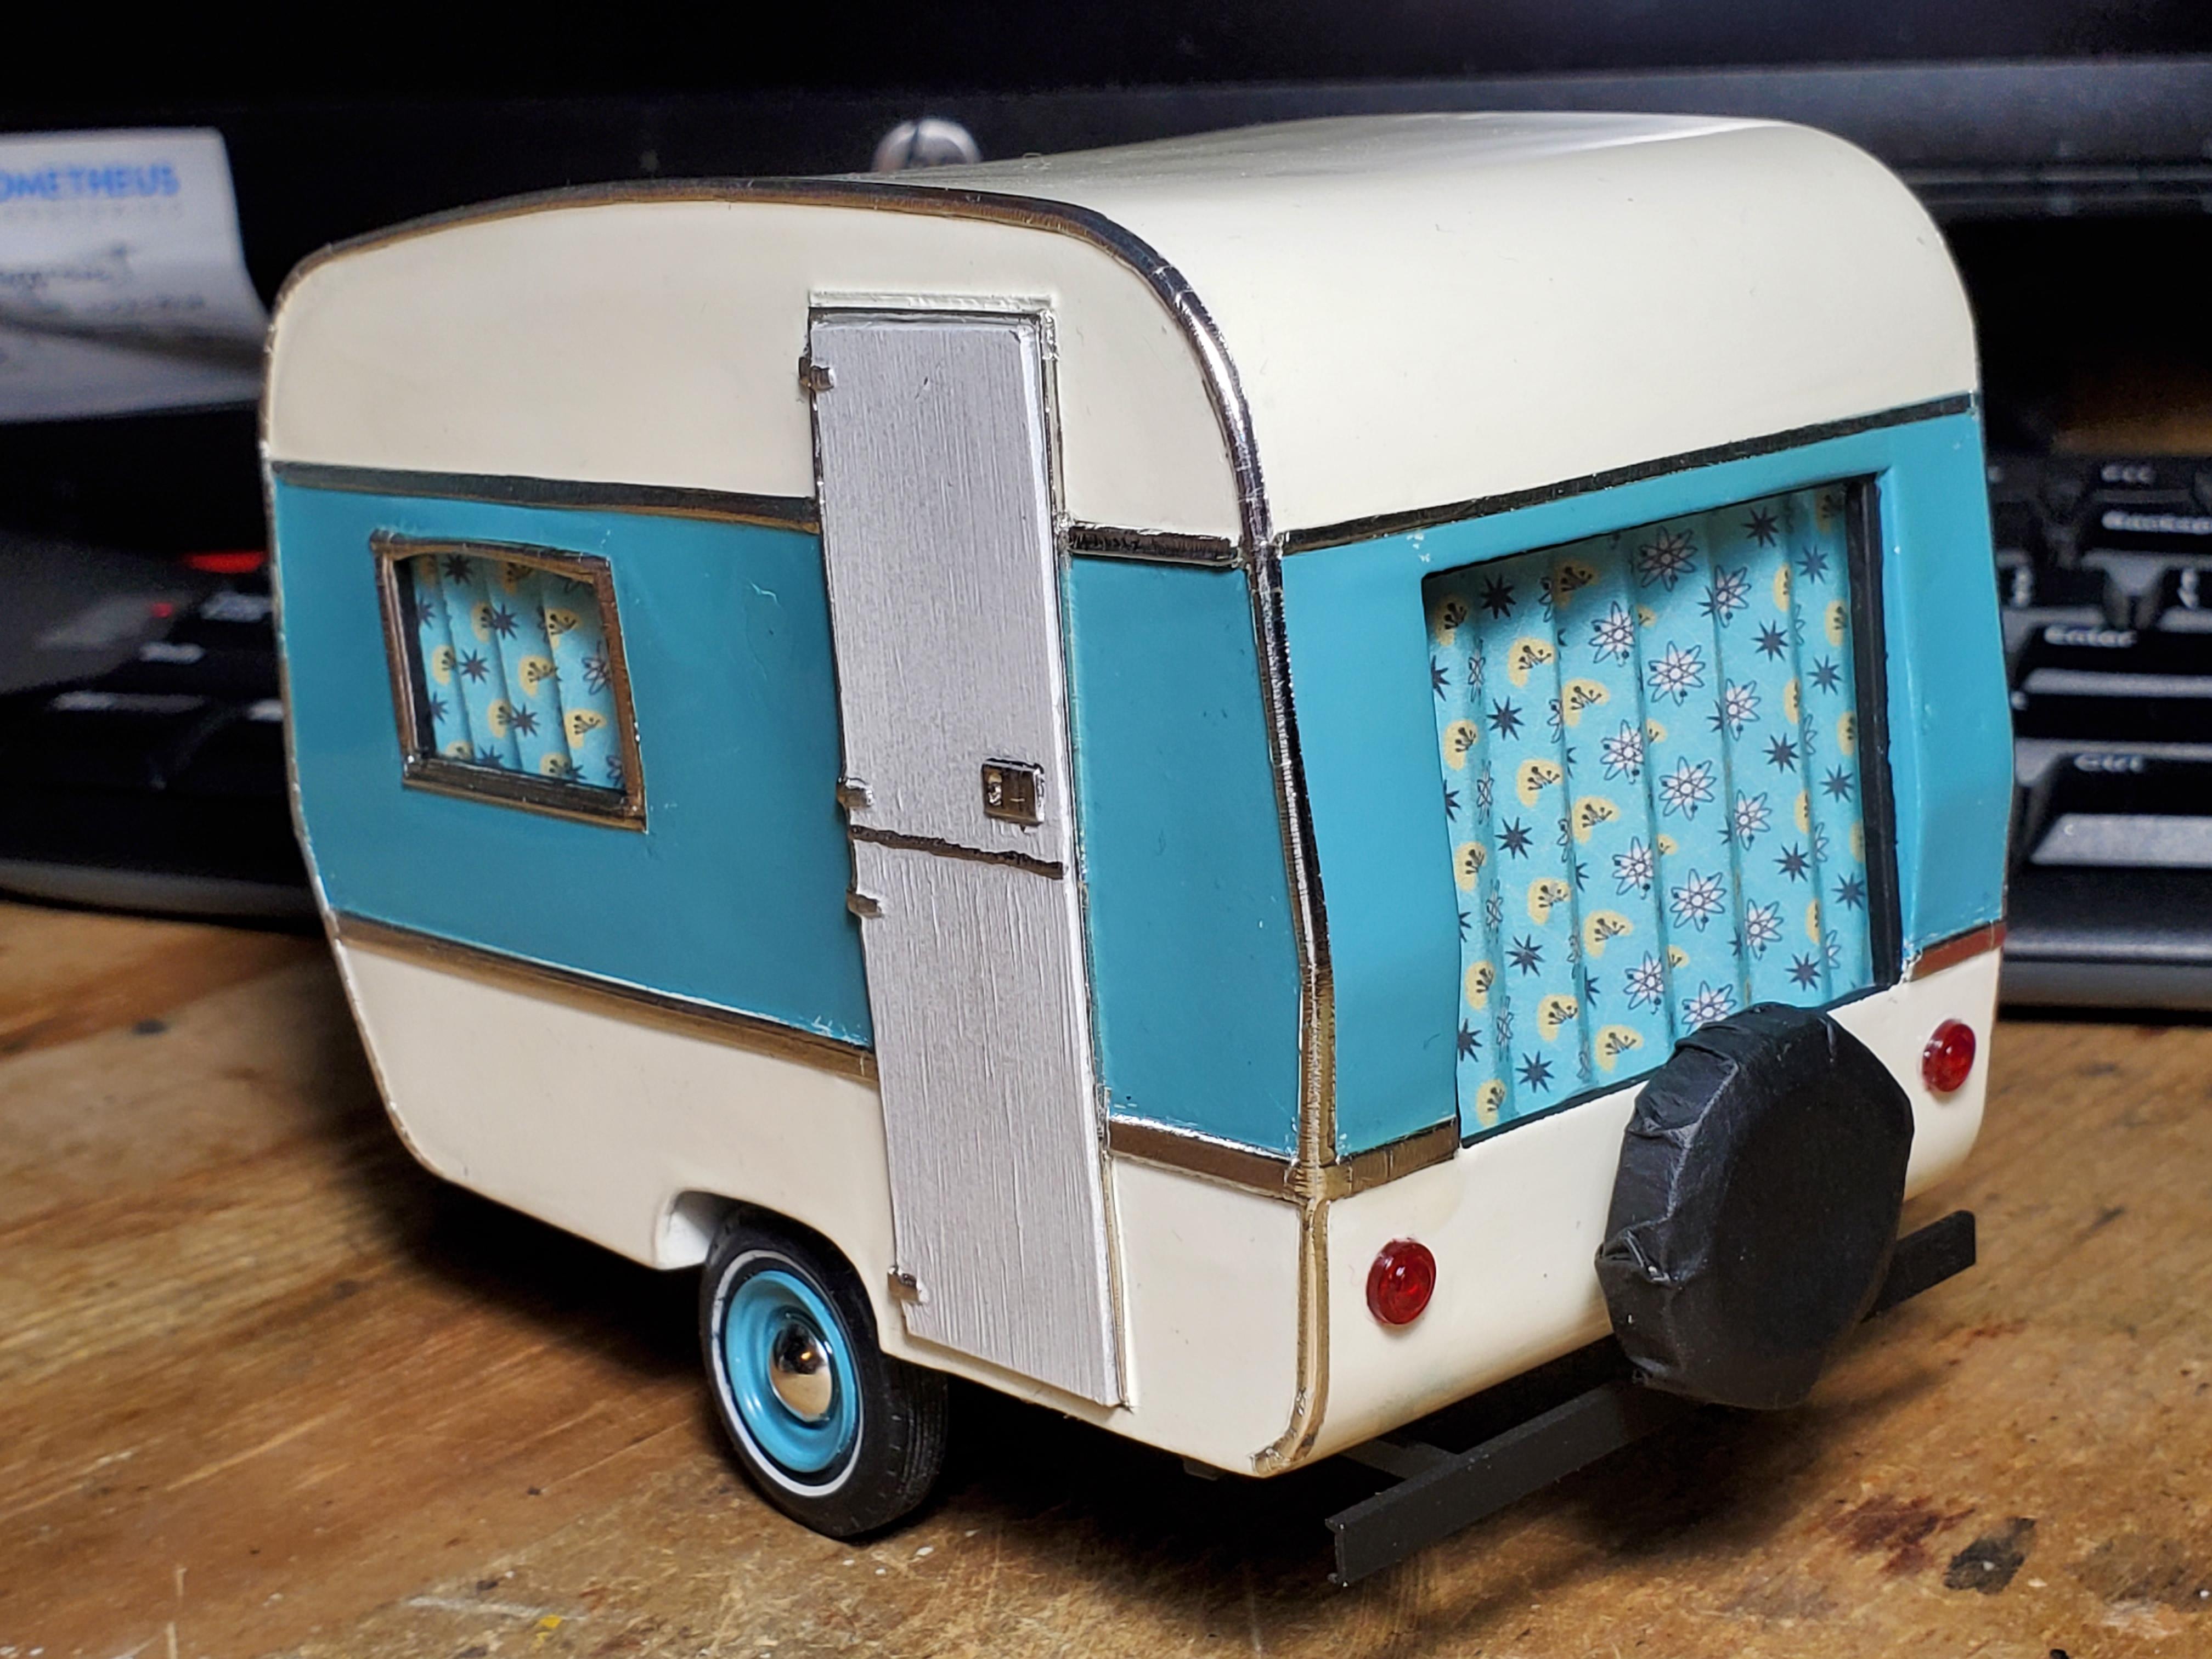
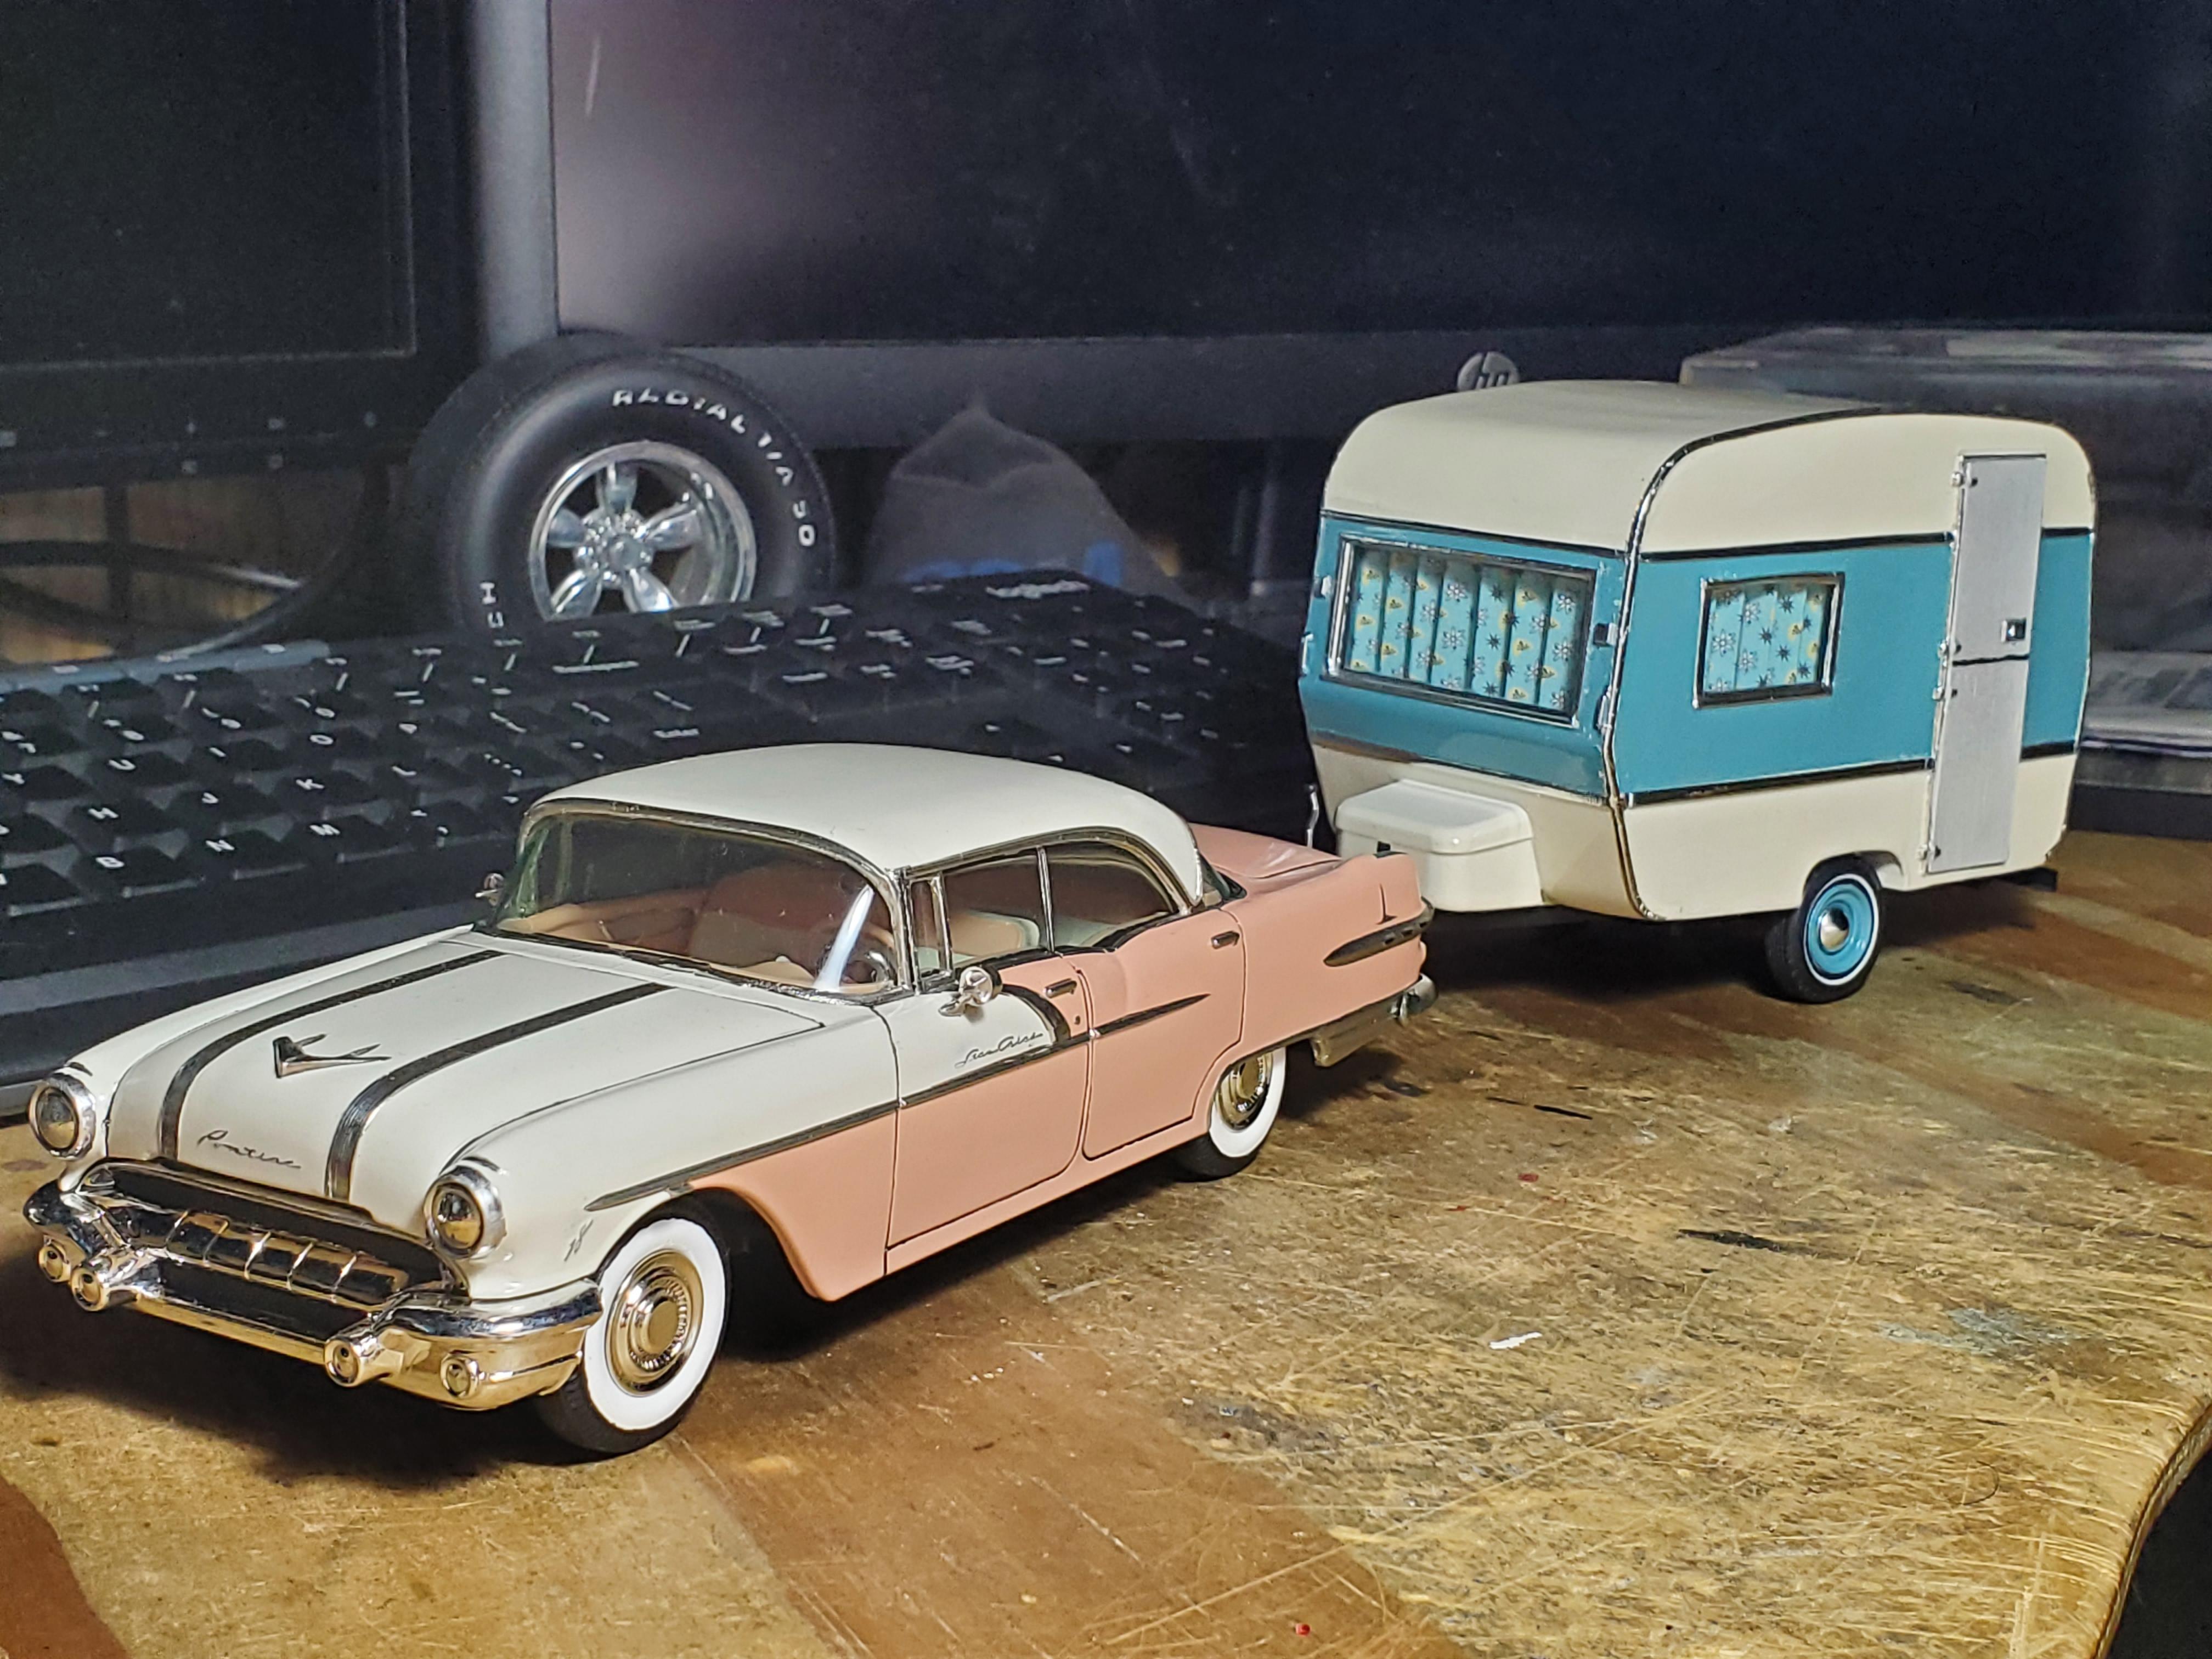
 This was an old Iceman Collections resin kit. A friend gave it to me at a show recently and I had to build it. The body was cracked badly up both sides and one of the walls was very flexible. I cured it as best as I could with a UV light and added superglue all over the inside to add some strength to the braces my friend had put in it before he abandoned it. I painted it with Rustoleum paint and Duplicolor 1k clear. The suspension was raised a little by gluing a piece of styrene tube on top of the original mounting points for the wheels. I only had one original wheel and tire and they didn't fit the bill for me. I found 2 old vintage tires and wheels and 2 dog dish caps. I used my 3d printed wheelbacks I designed in addition to a piece of brass rod to make it all work. I also drilled a small hole in the back and used another one of my 3d printed wheelbacks and a 3rd tire and a piece of brass rod and made a spare. The spare is covered with 3m tape and painted black with craft paint. I cut off the original rectangular taillights and added round period correct units. Foiled the trim and the door (and sprayed it flat clear) and hit a few bits with molotow. I then cut some clear sheet for windows. I went on google and searched for mid-century modern patterns and found one I liked, and put a bunch of the same pattern together and printed two sheets of it. Cut them to the approximate size and folded them back and forth to make my curtains and glued them inside since it's curbside. I am hoping to have some more details made for it and weather it a bit soon, but for now here it is! Stuck my 56 Pontiac in front of it for fun
-
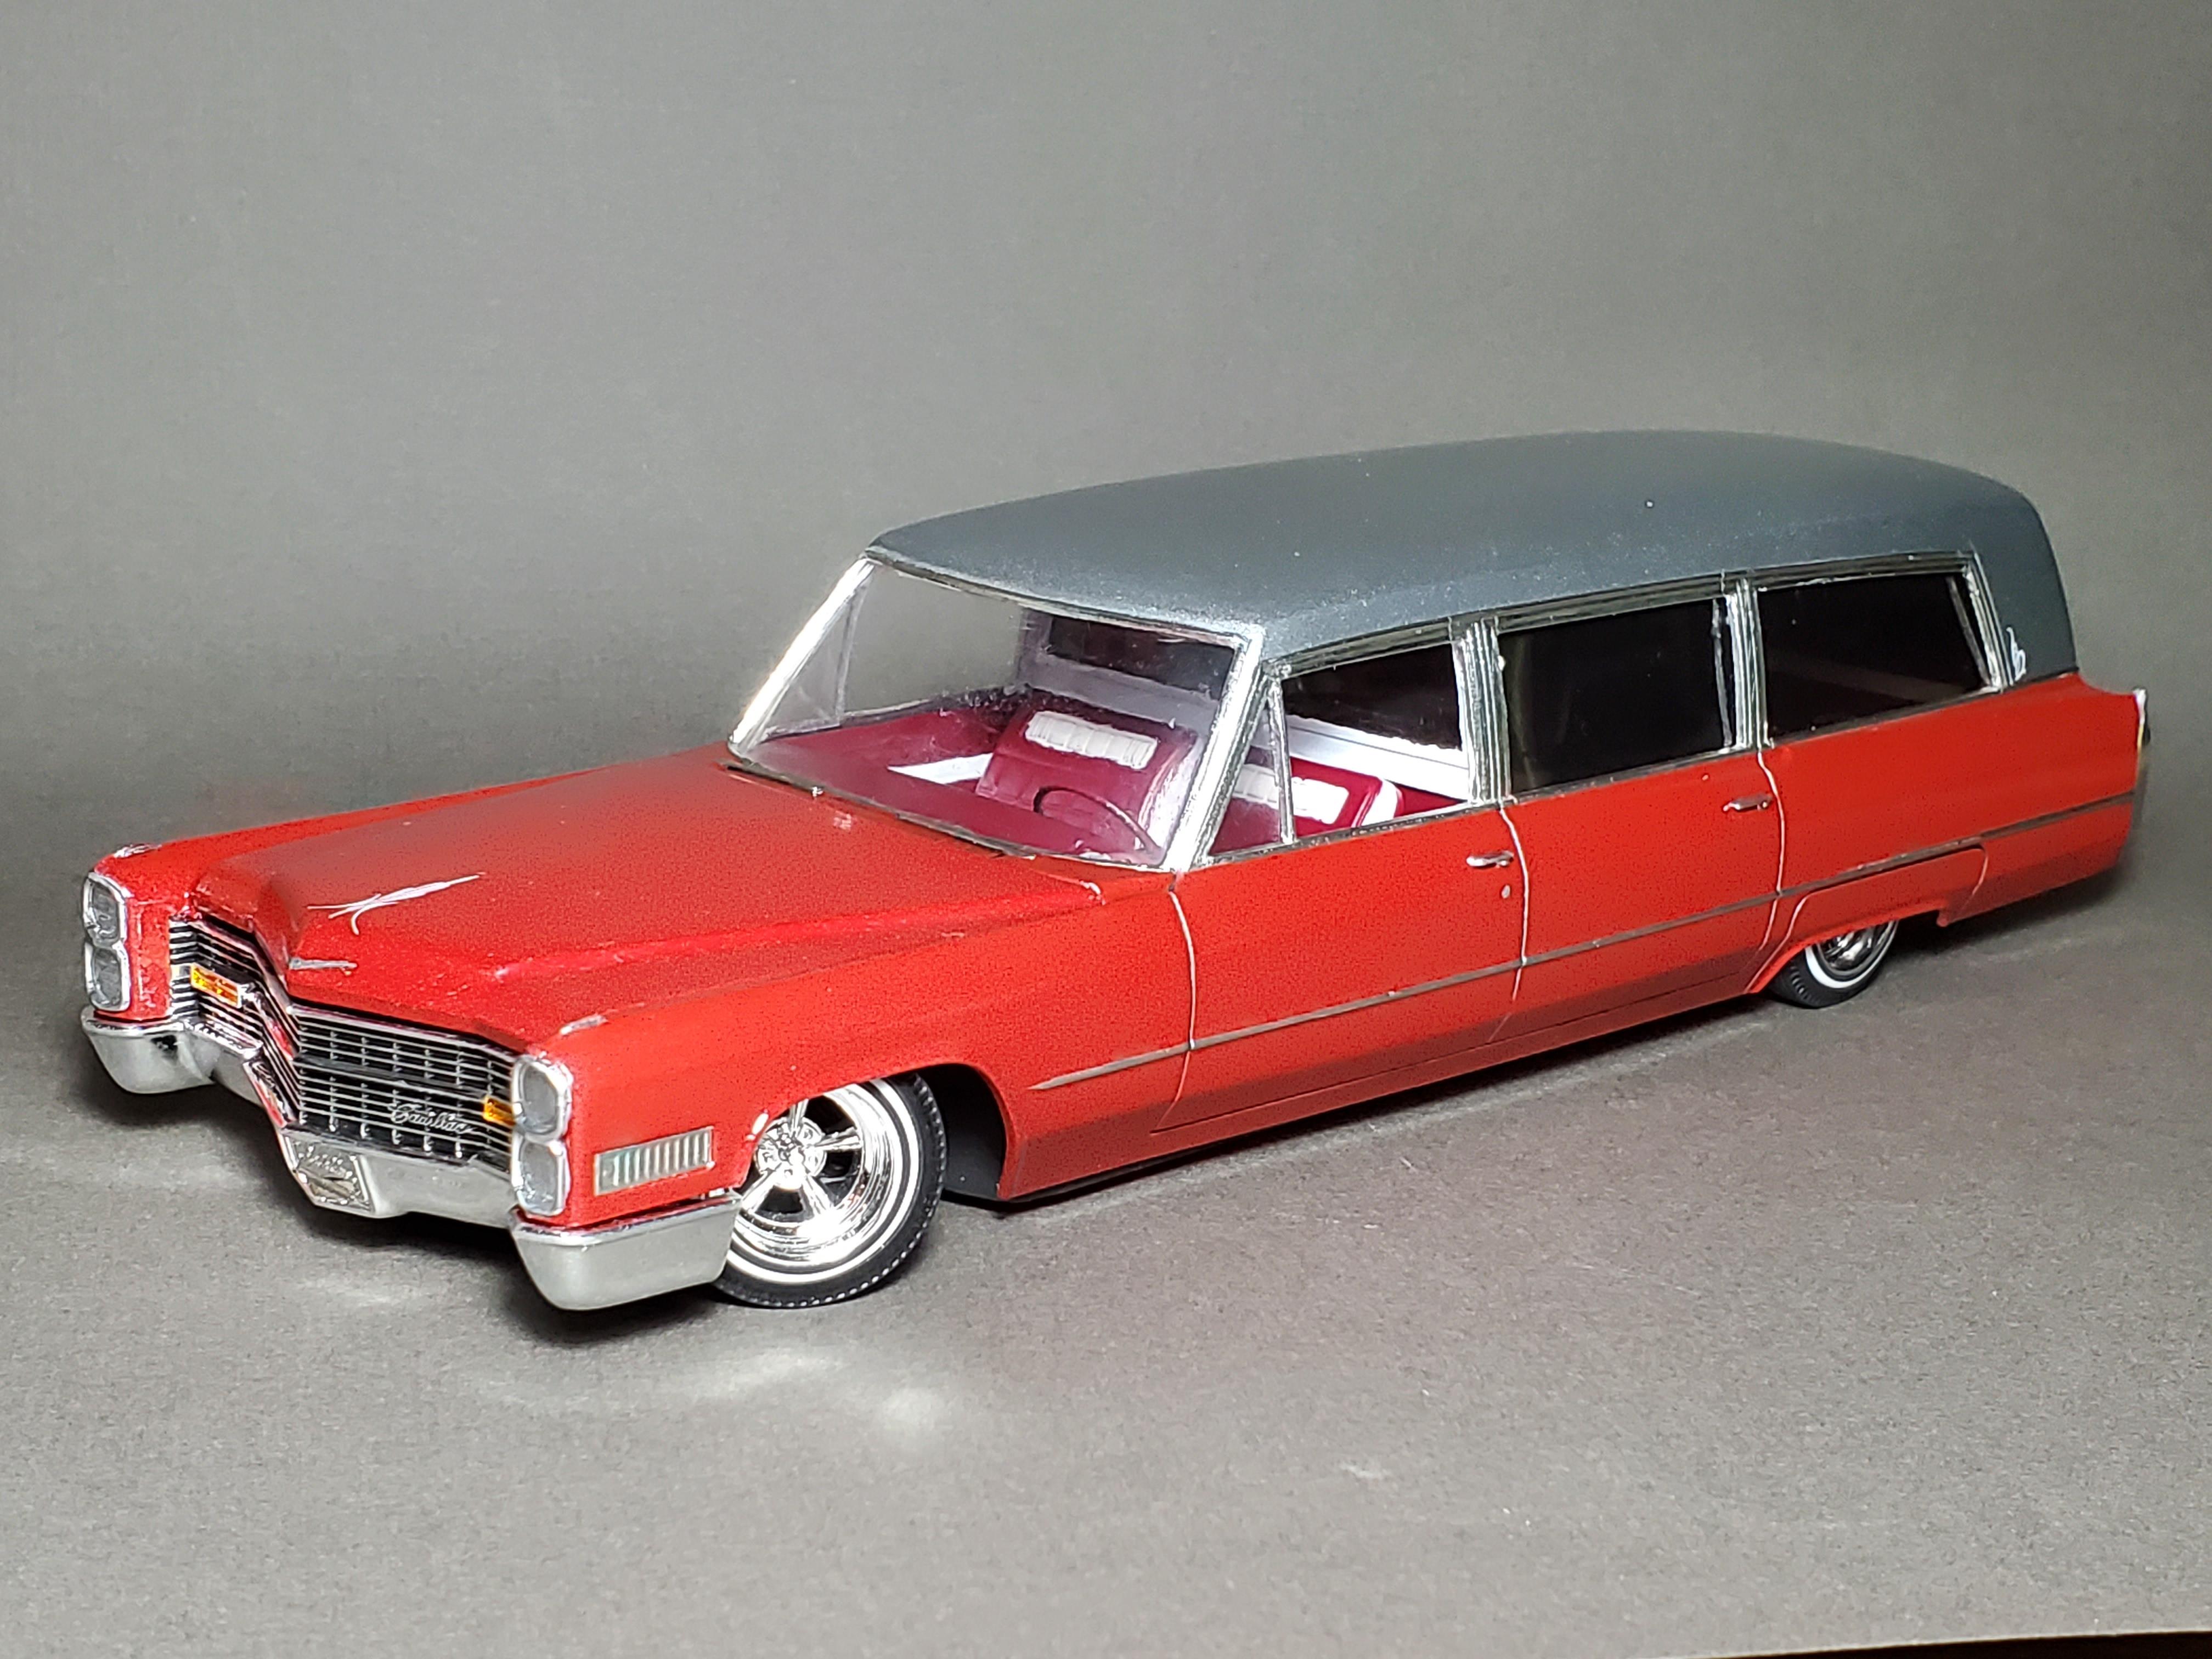
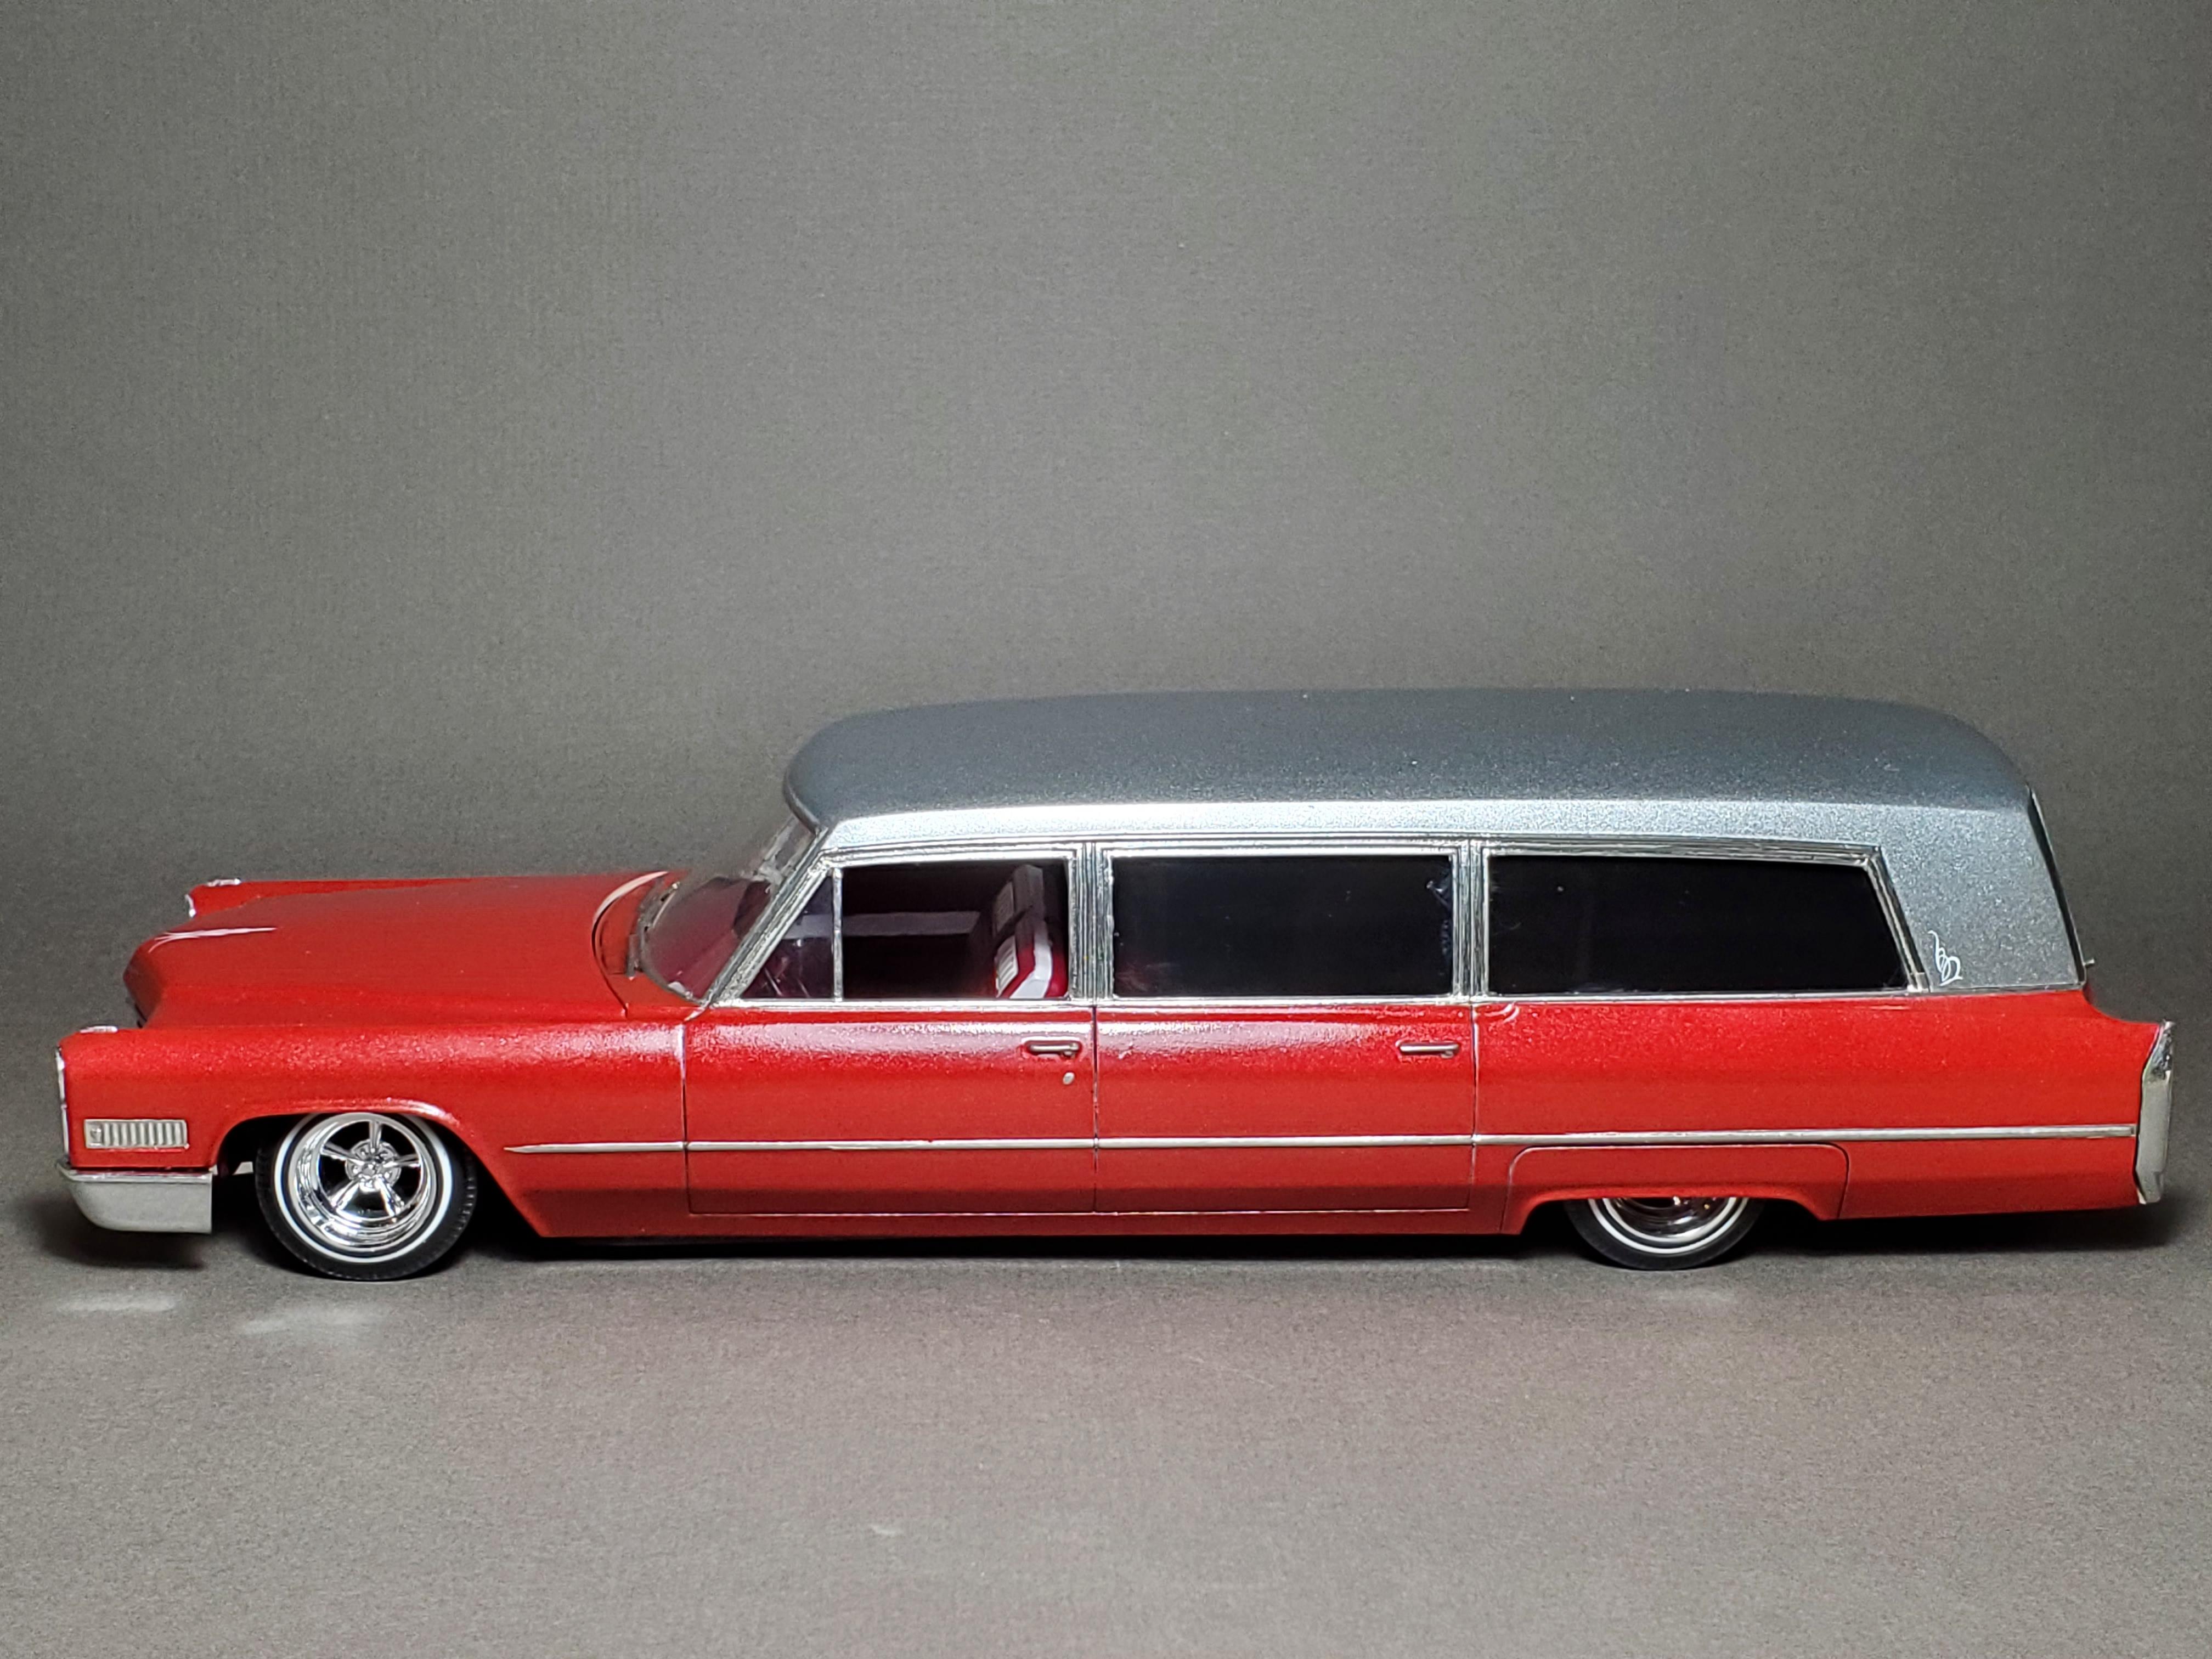
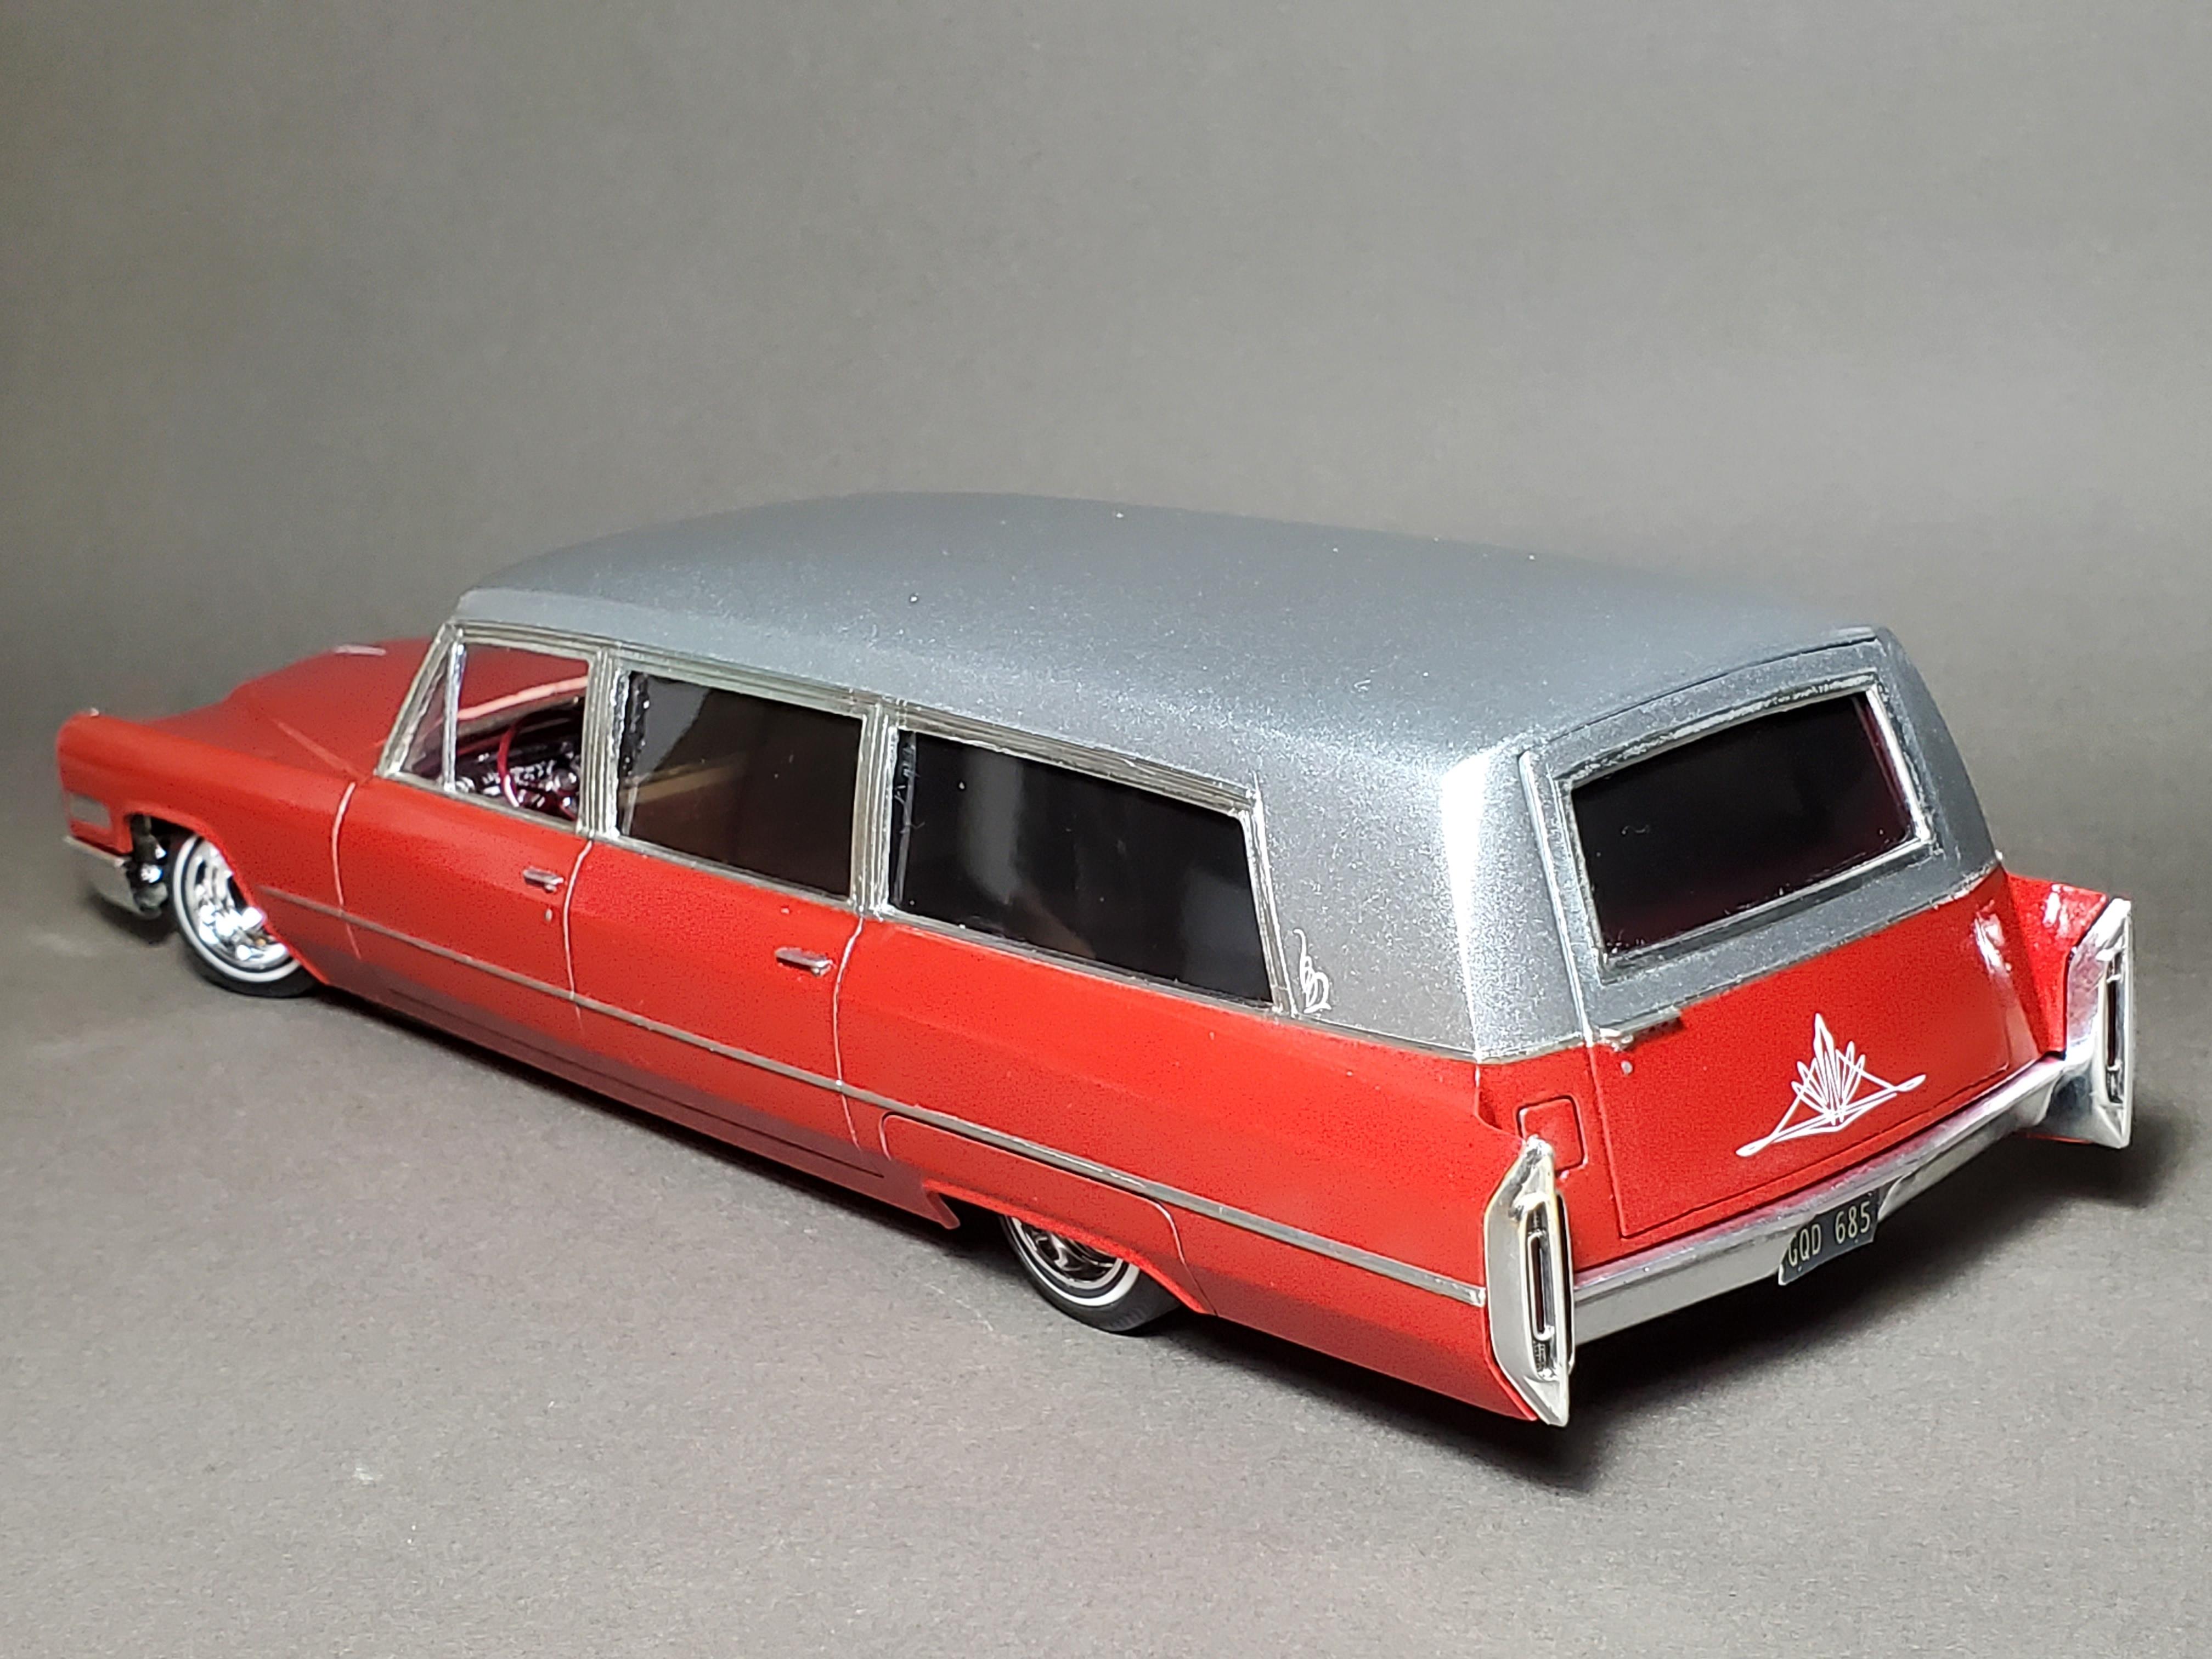
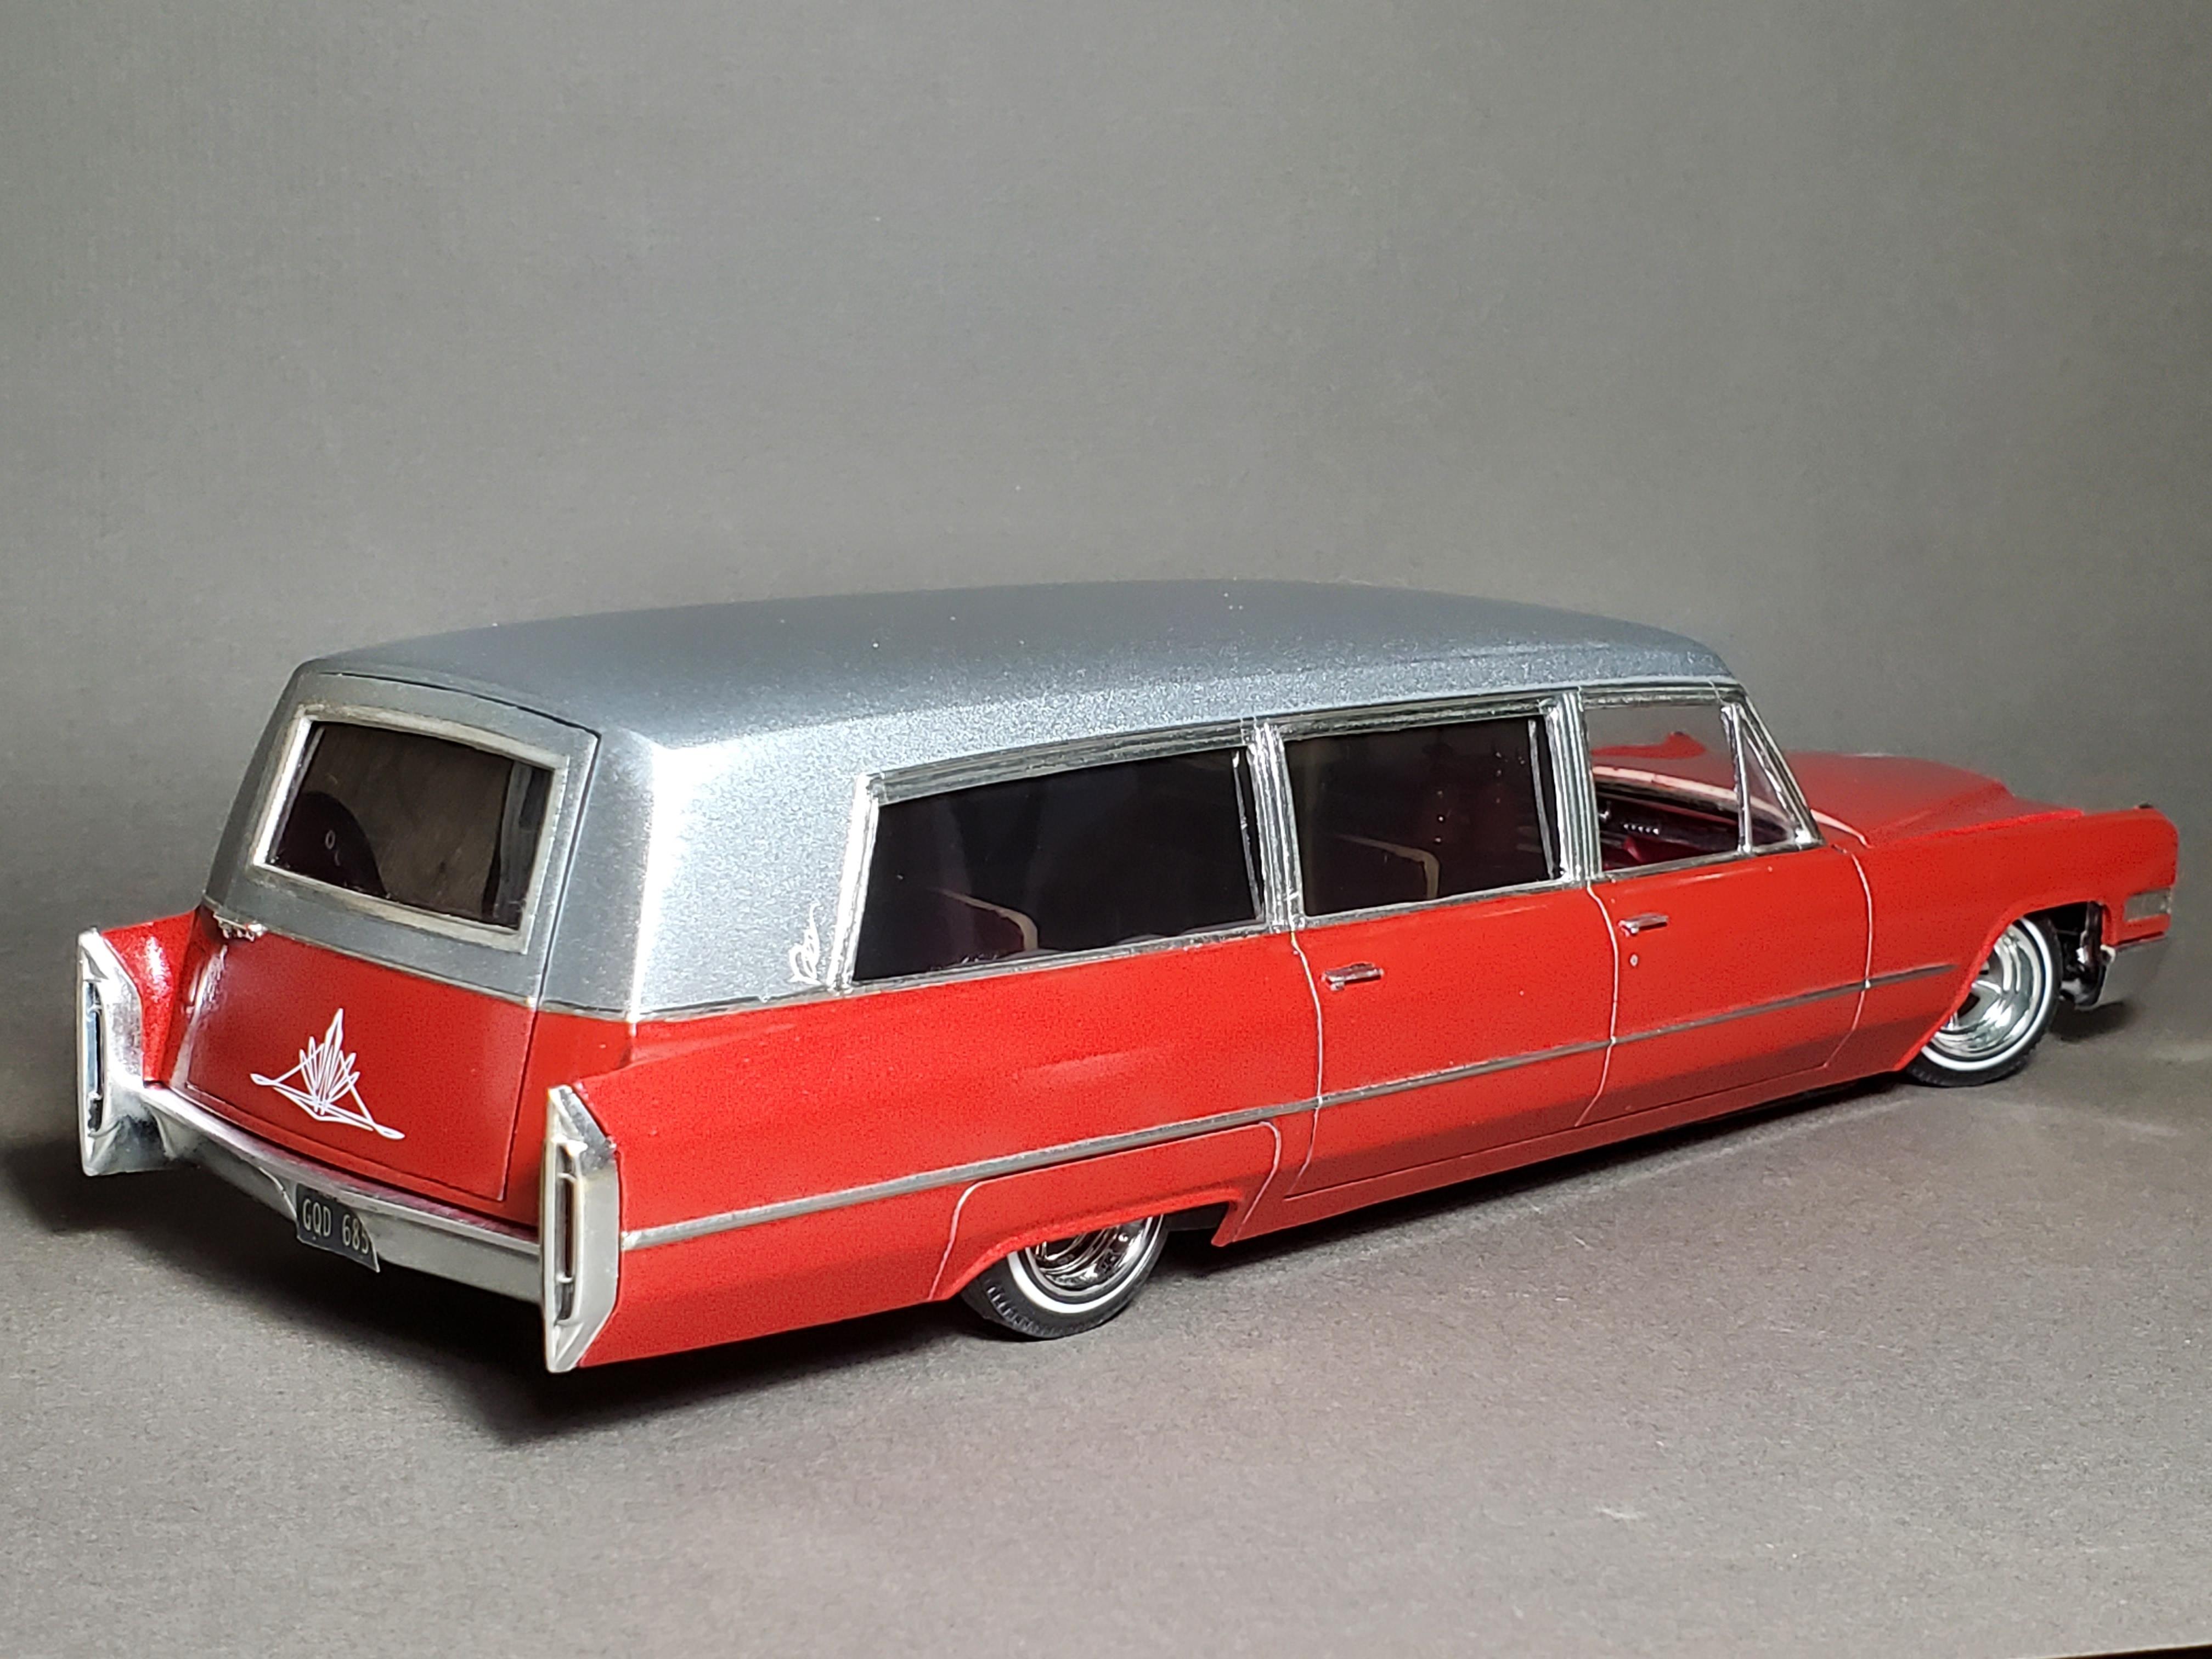
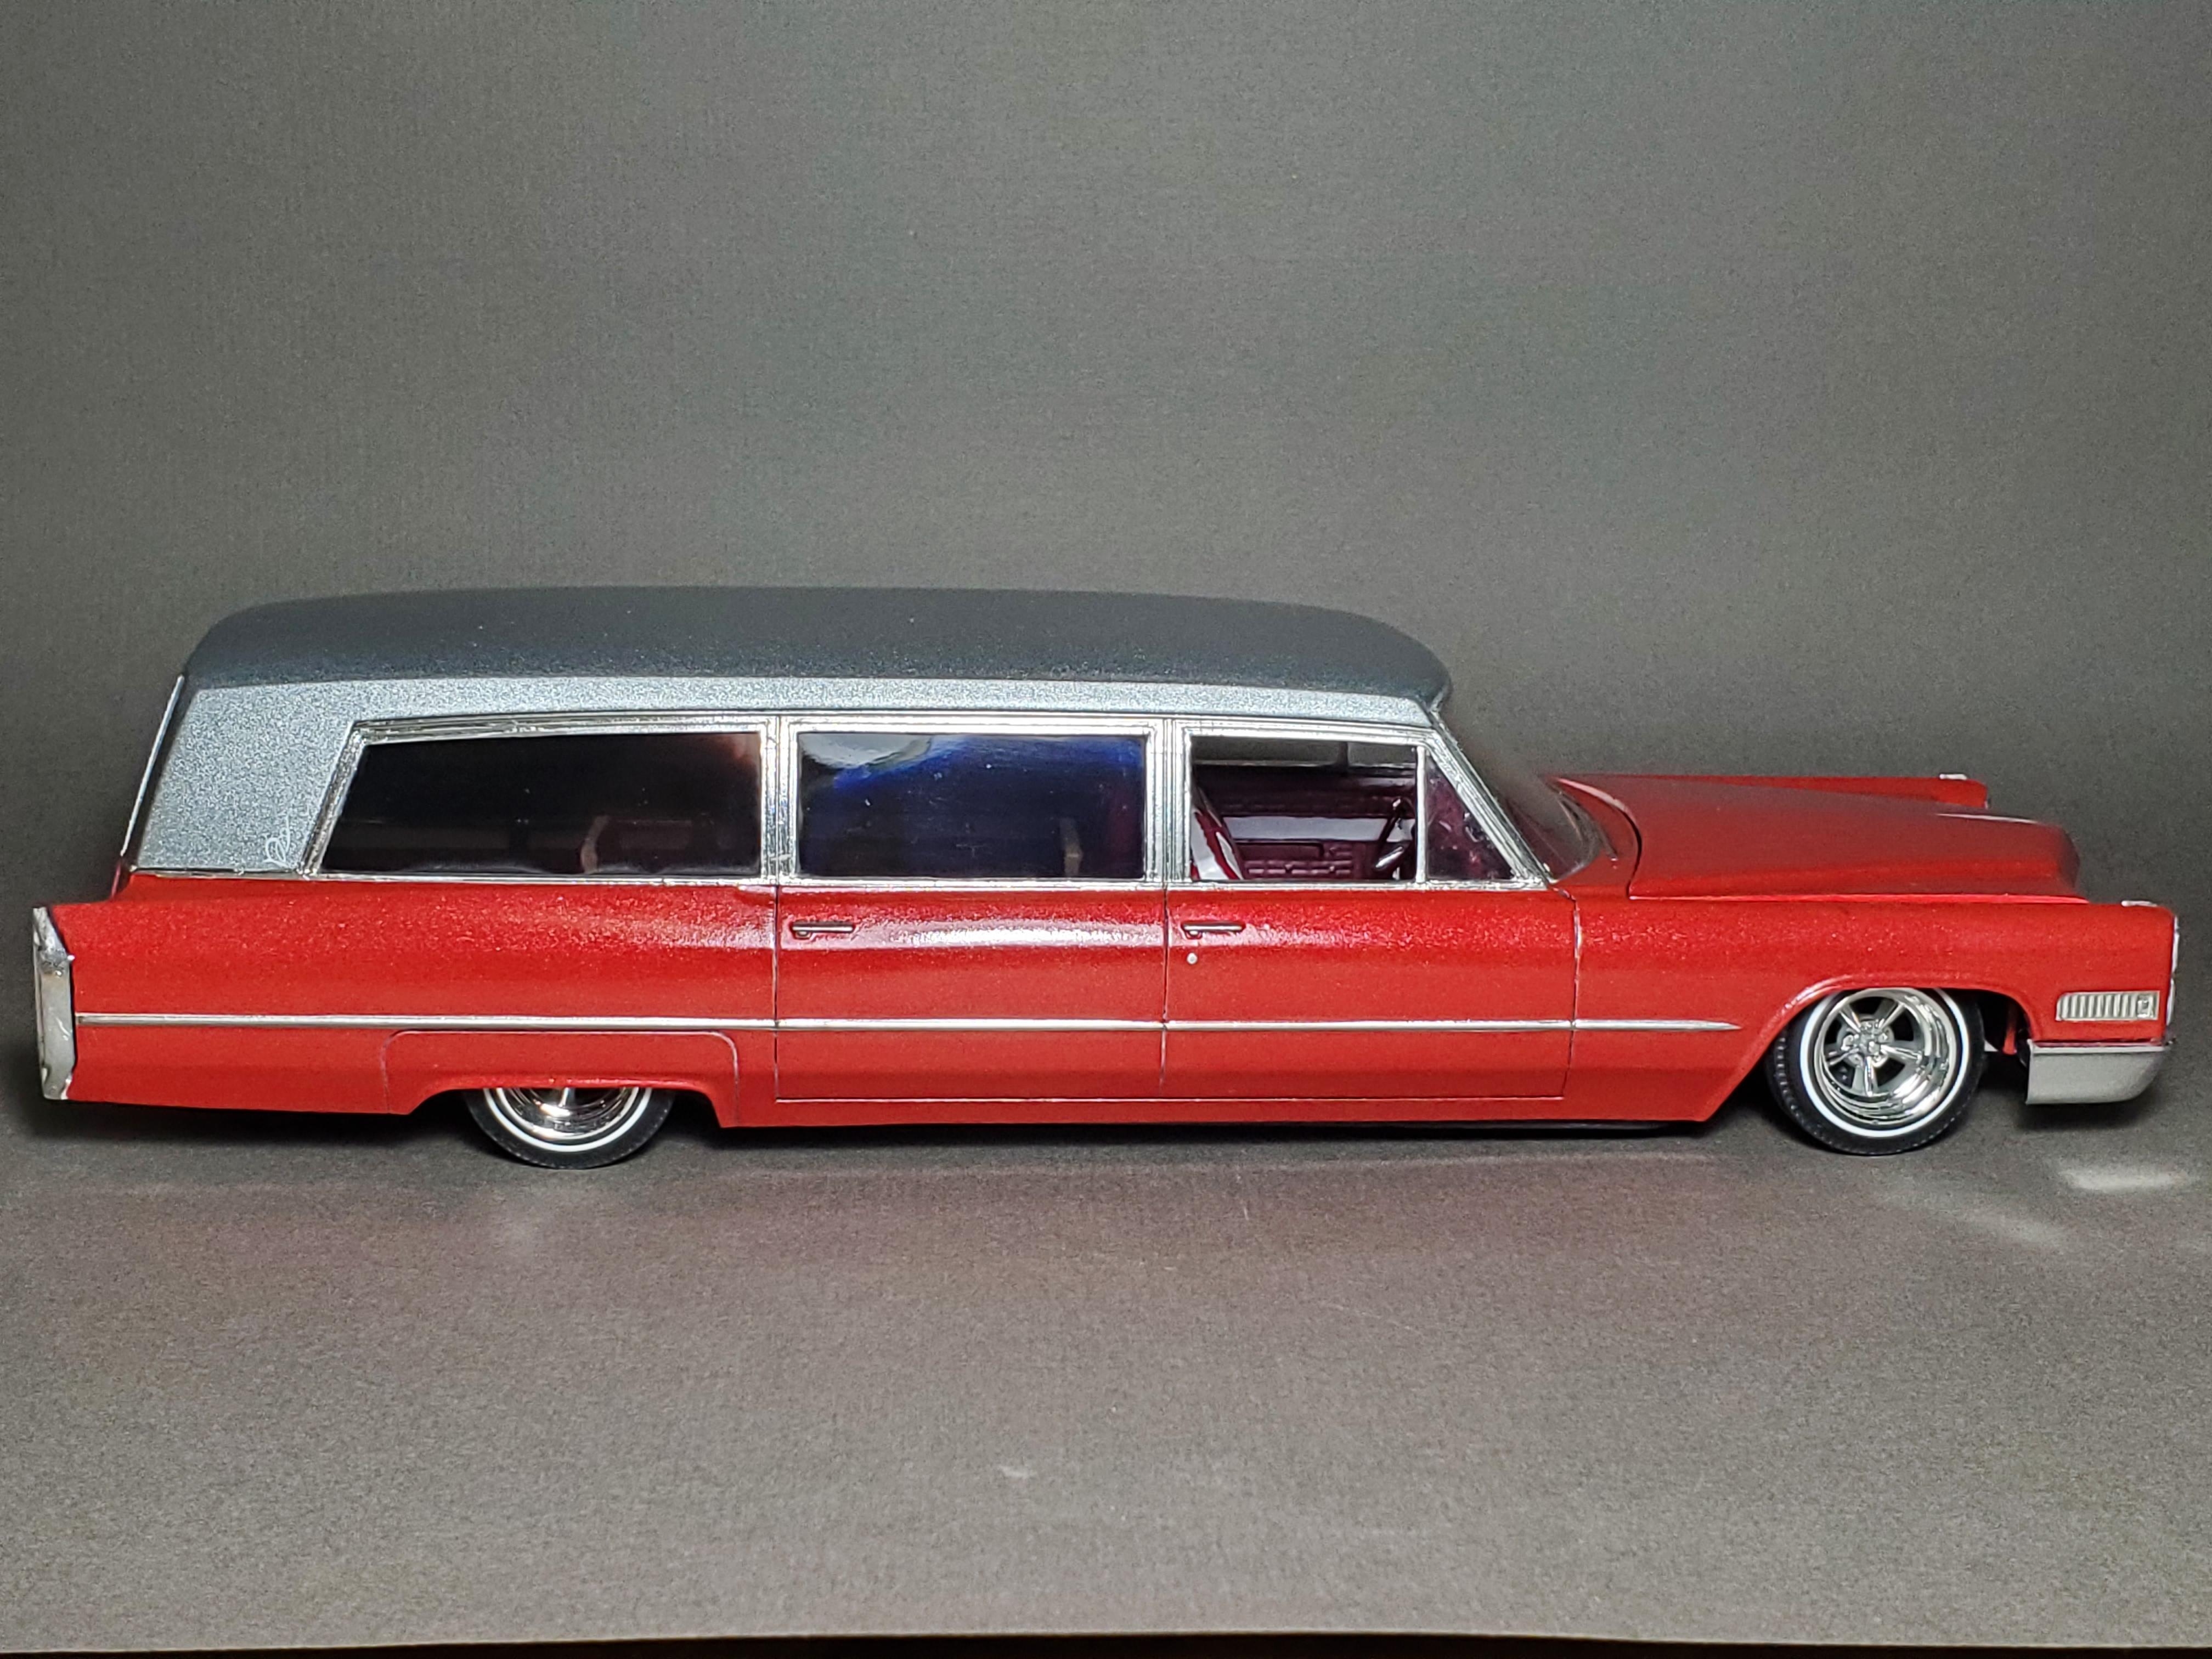
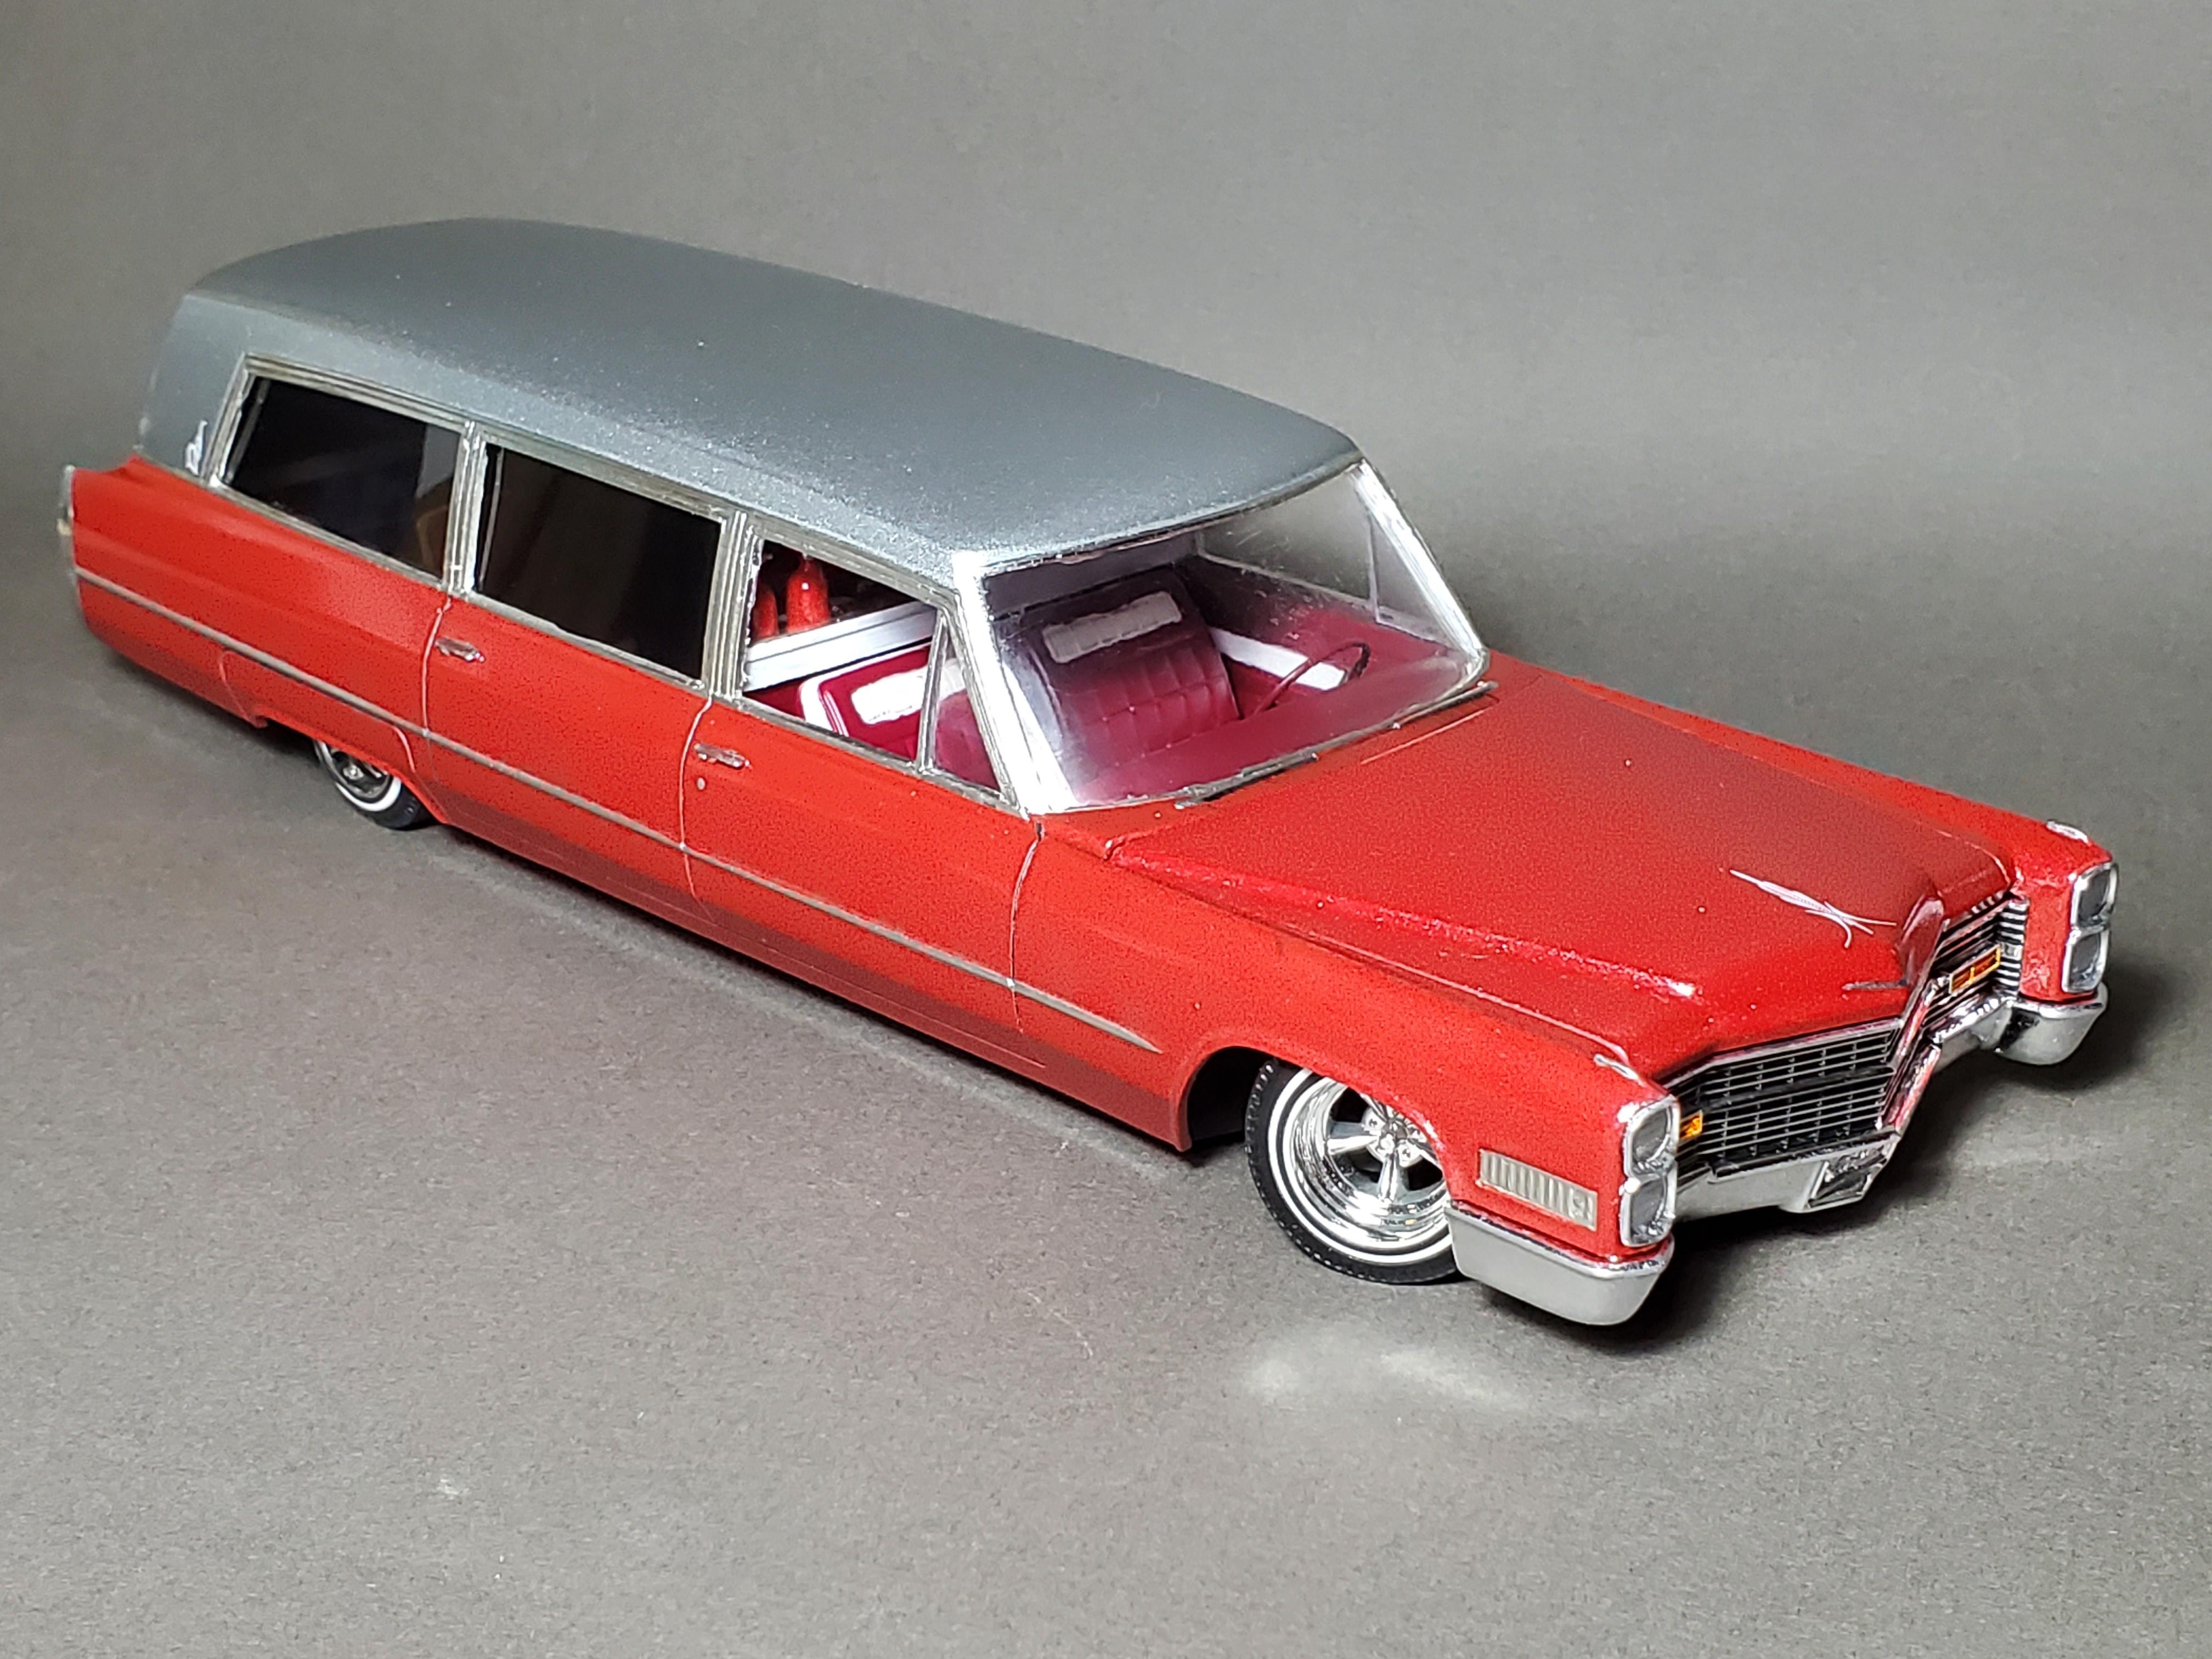
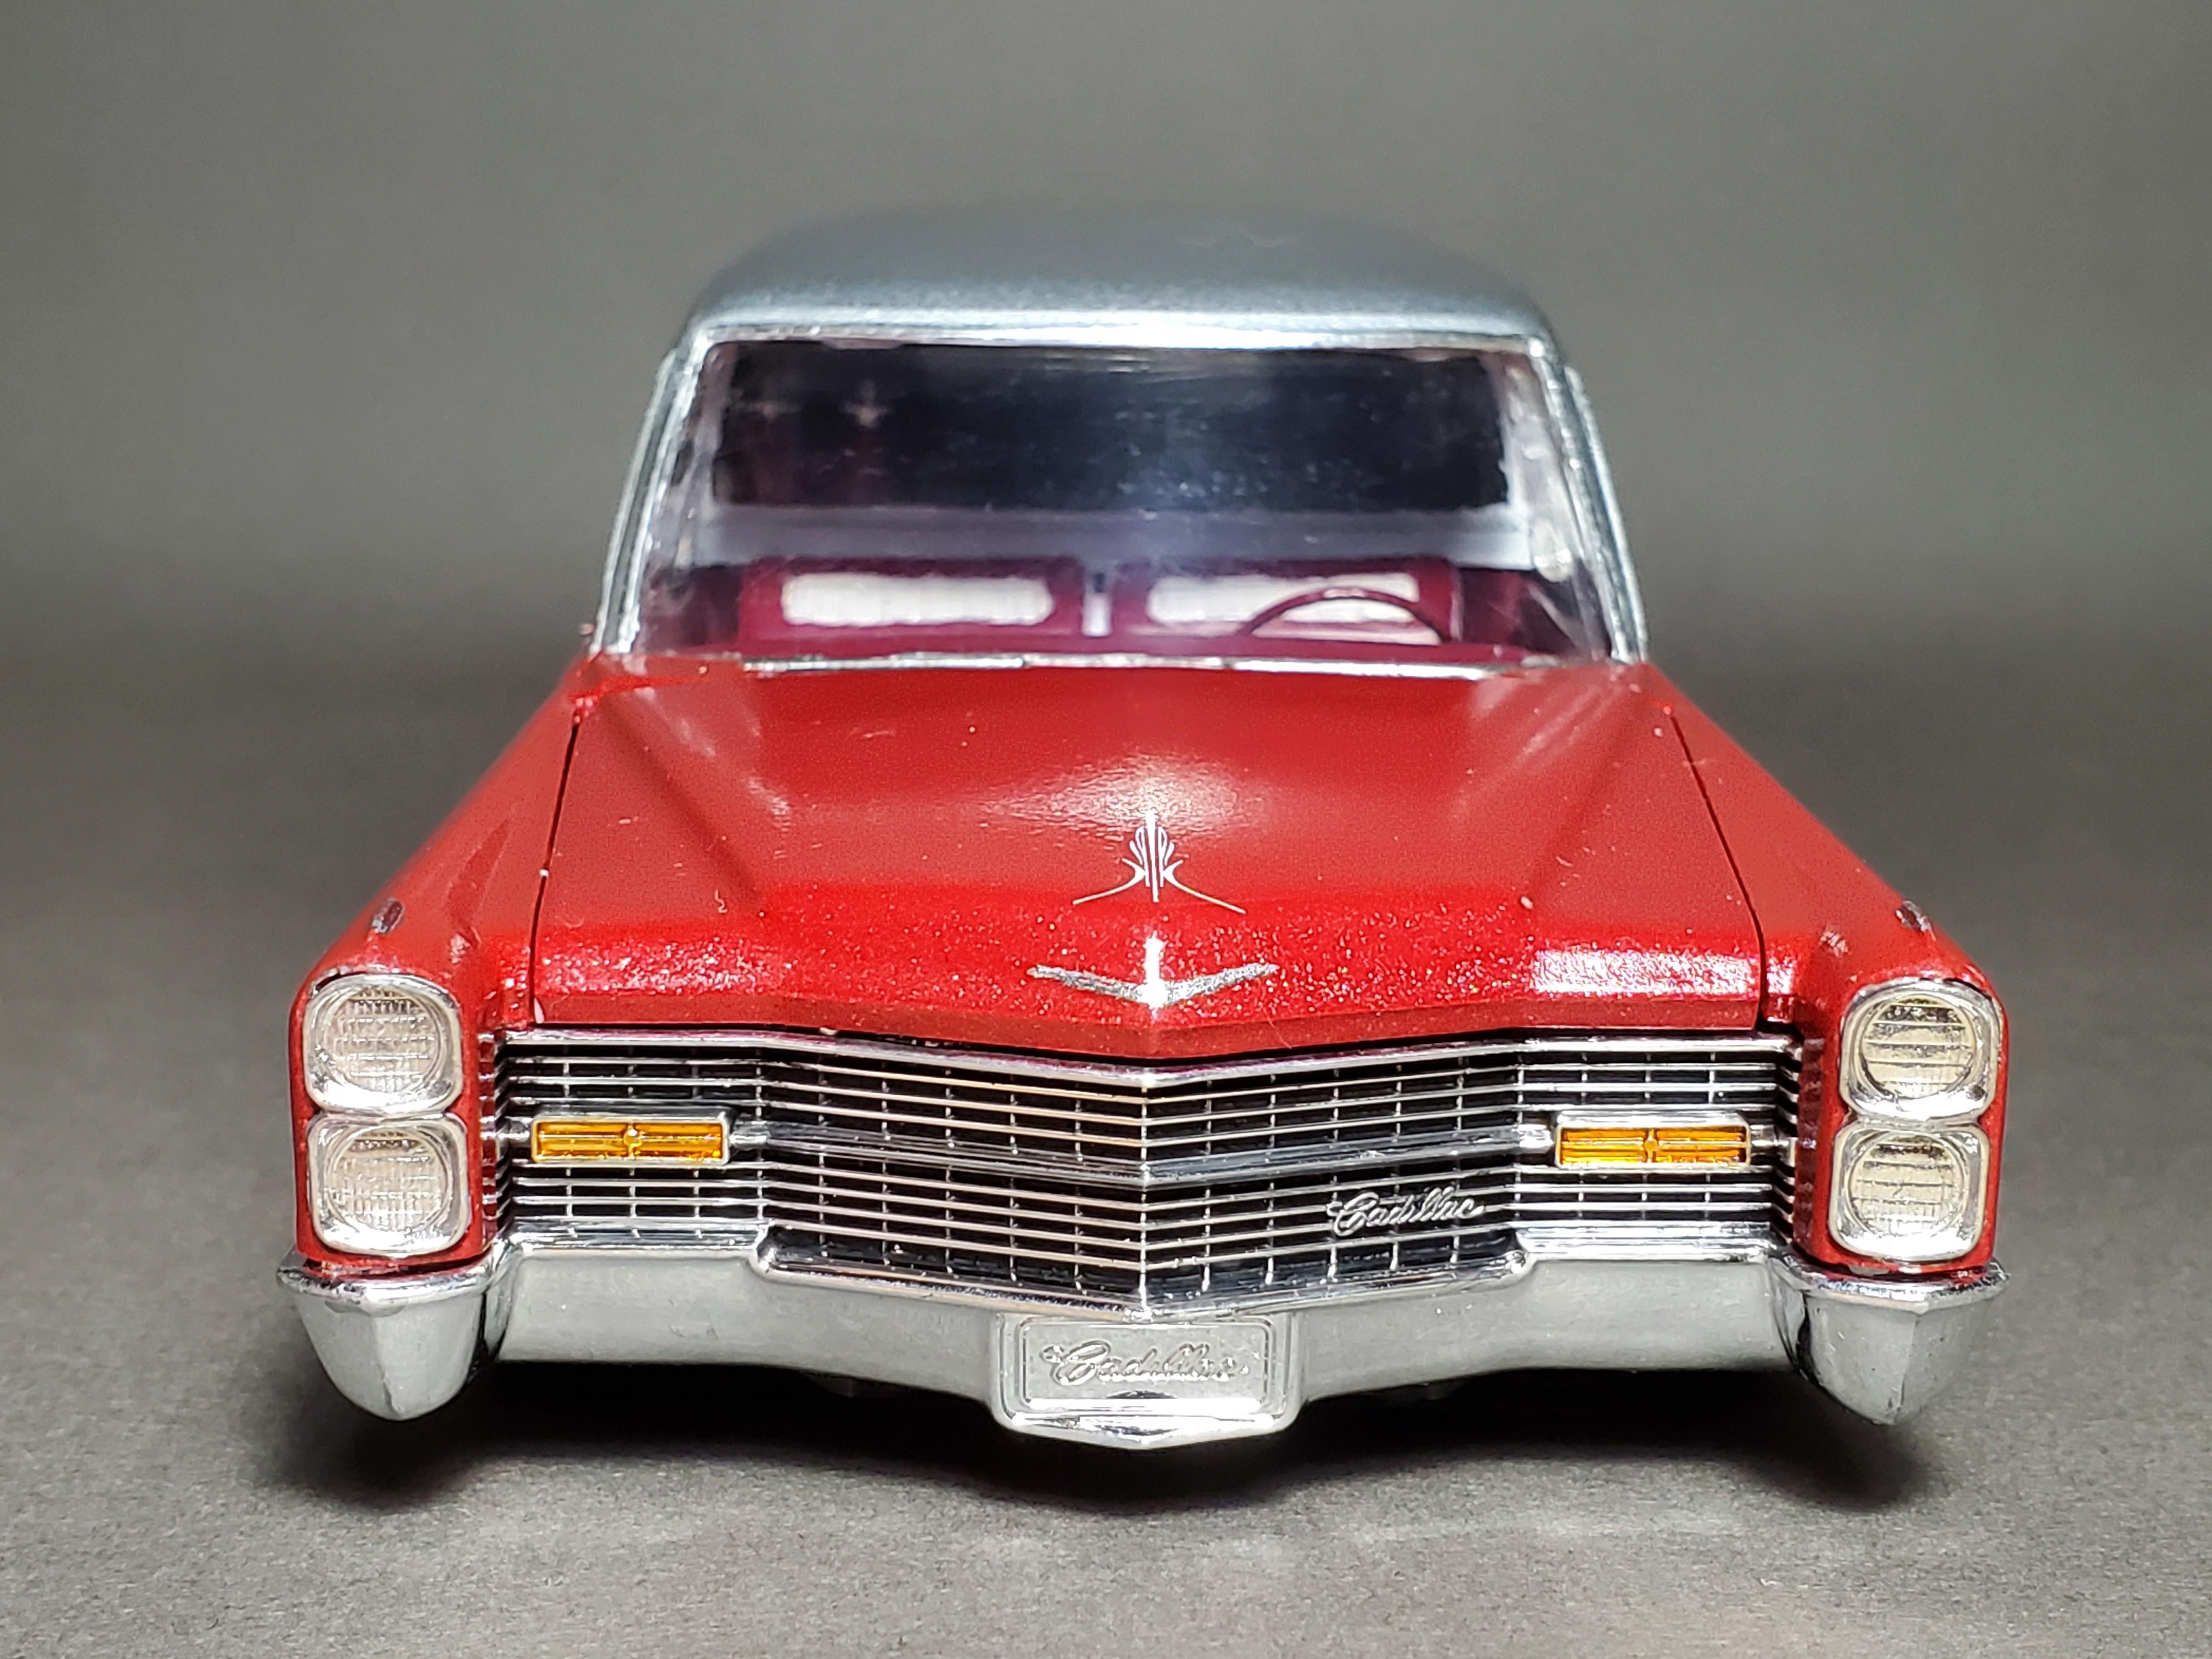
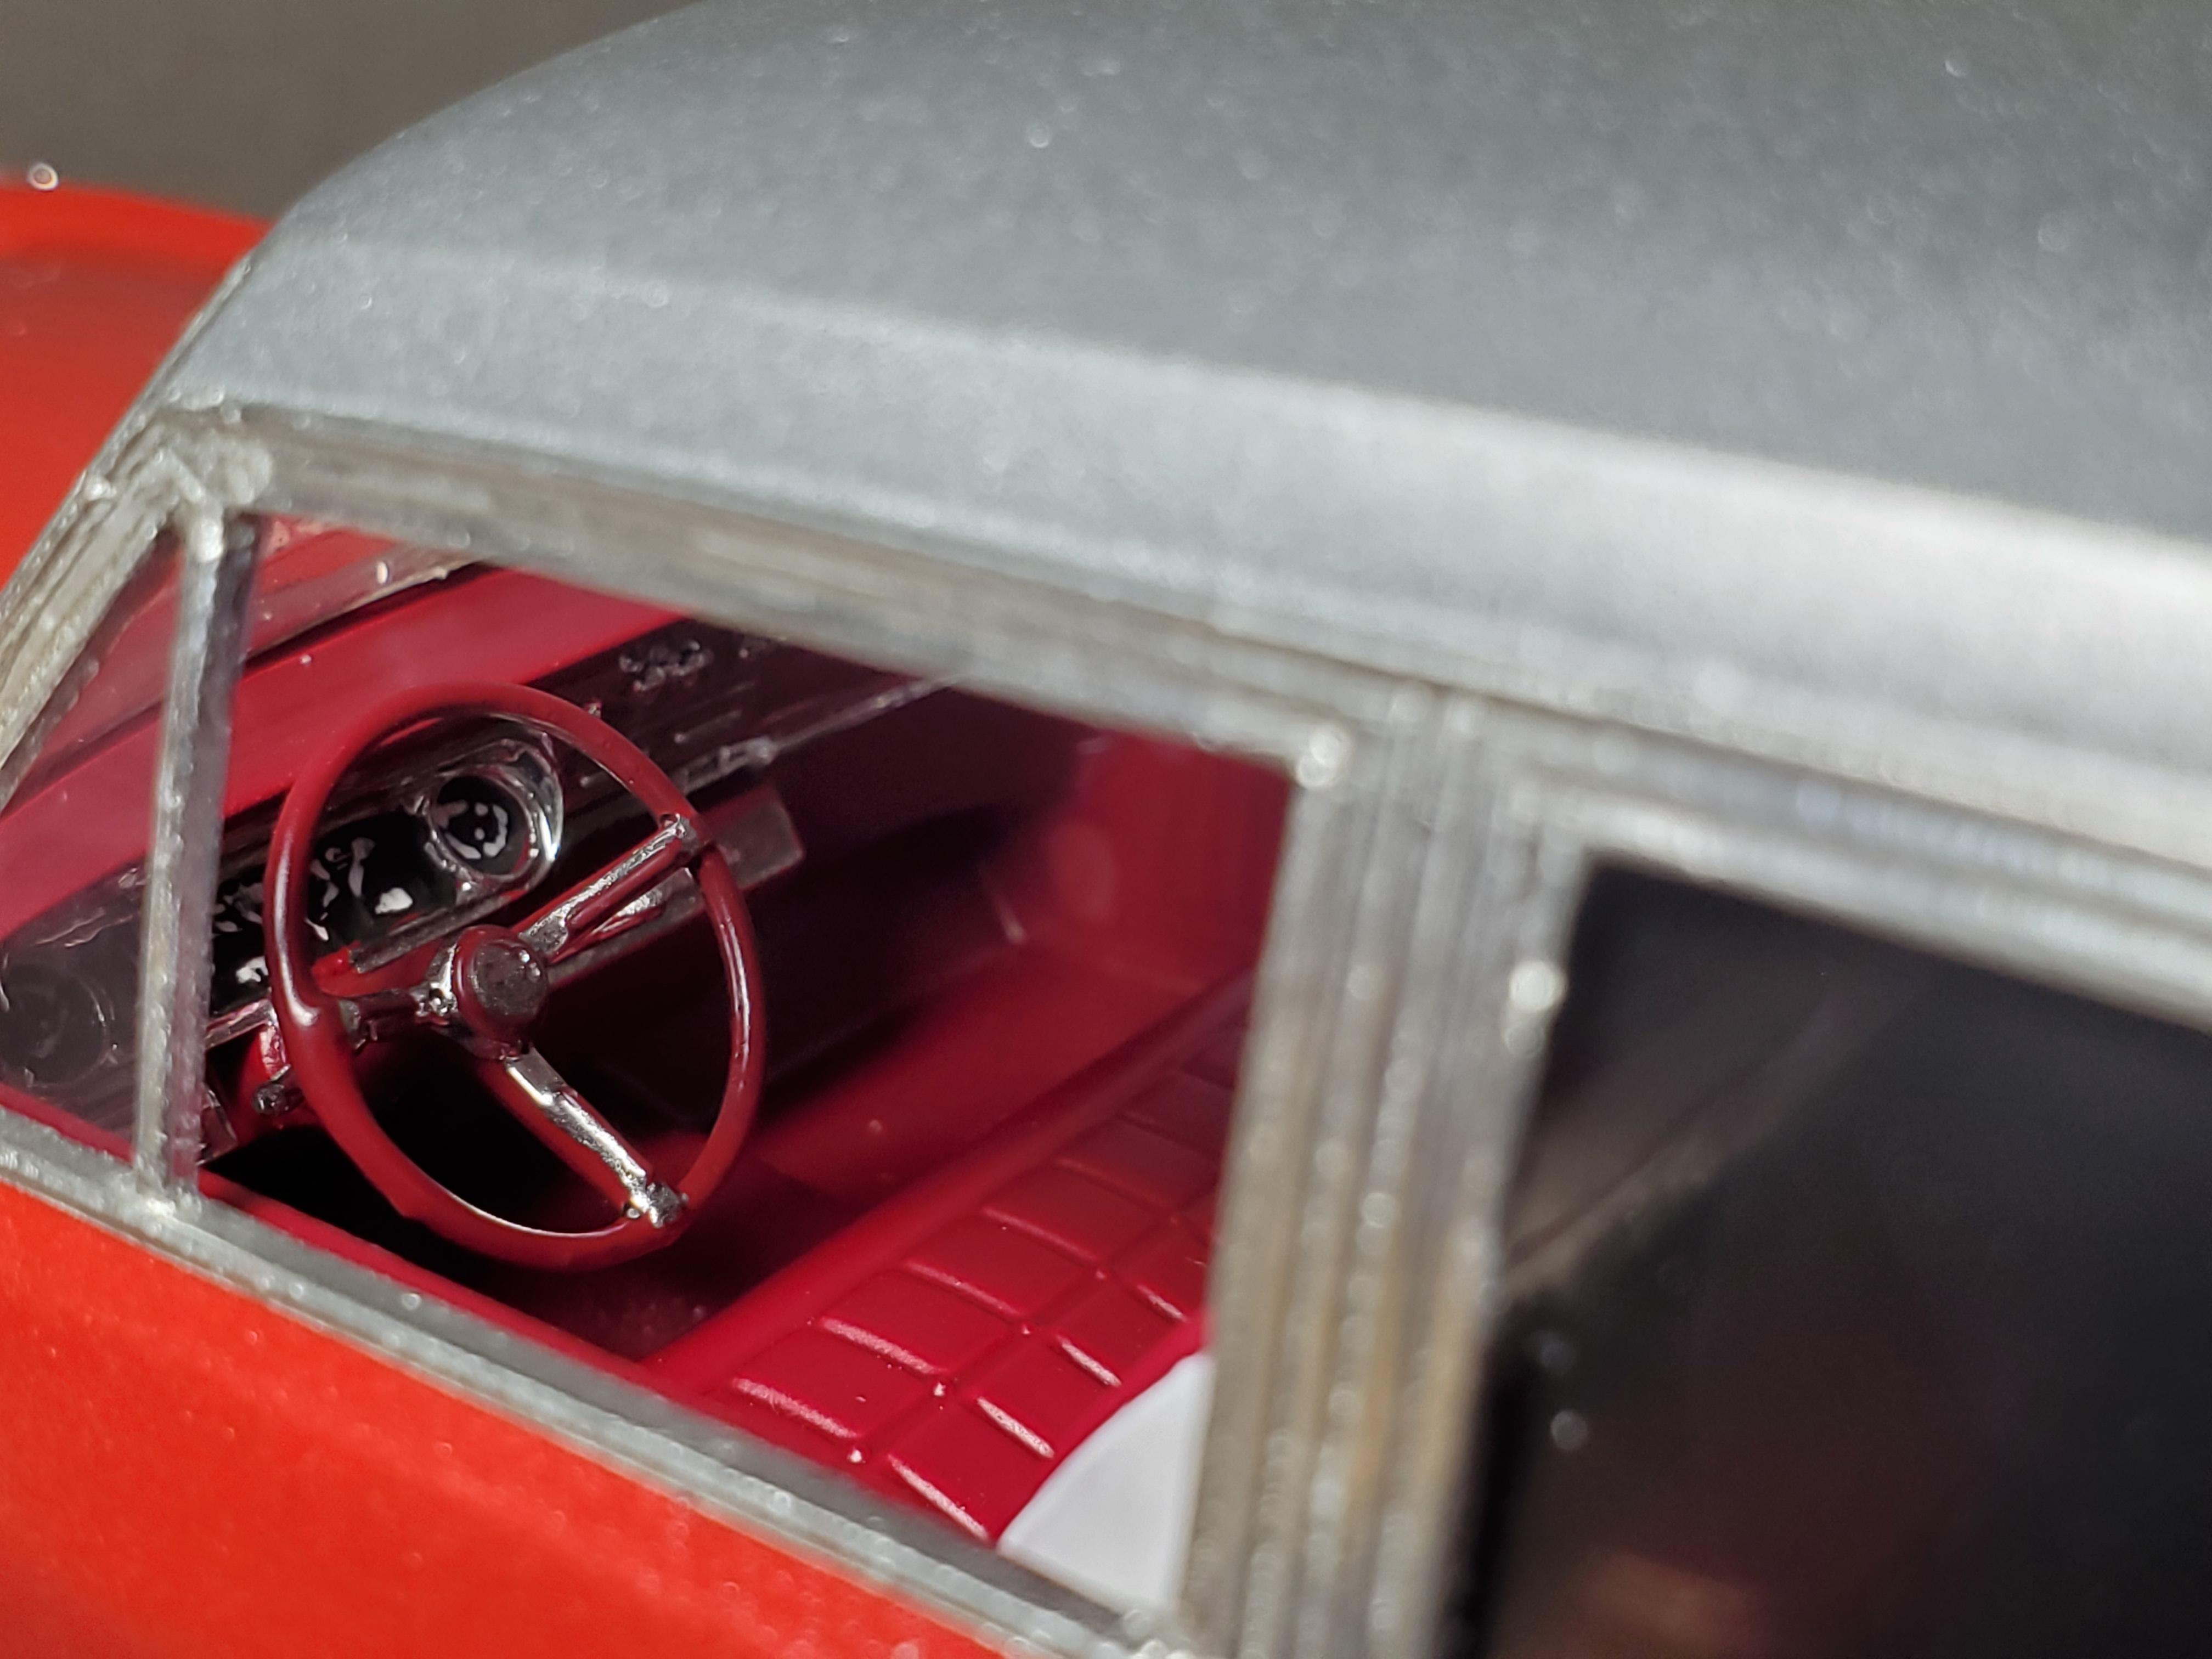
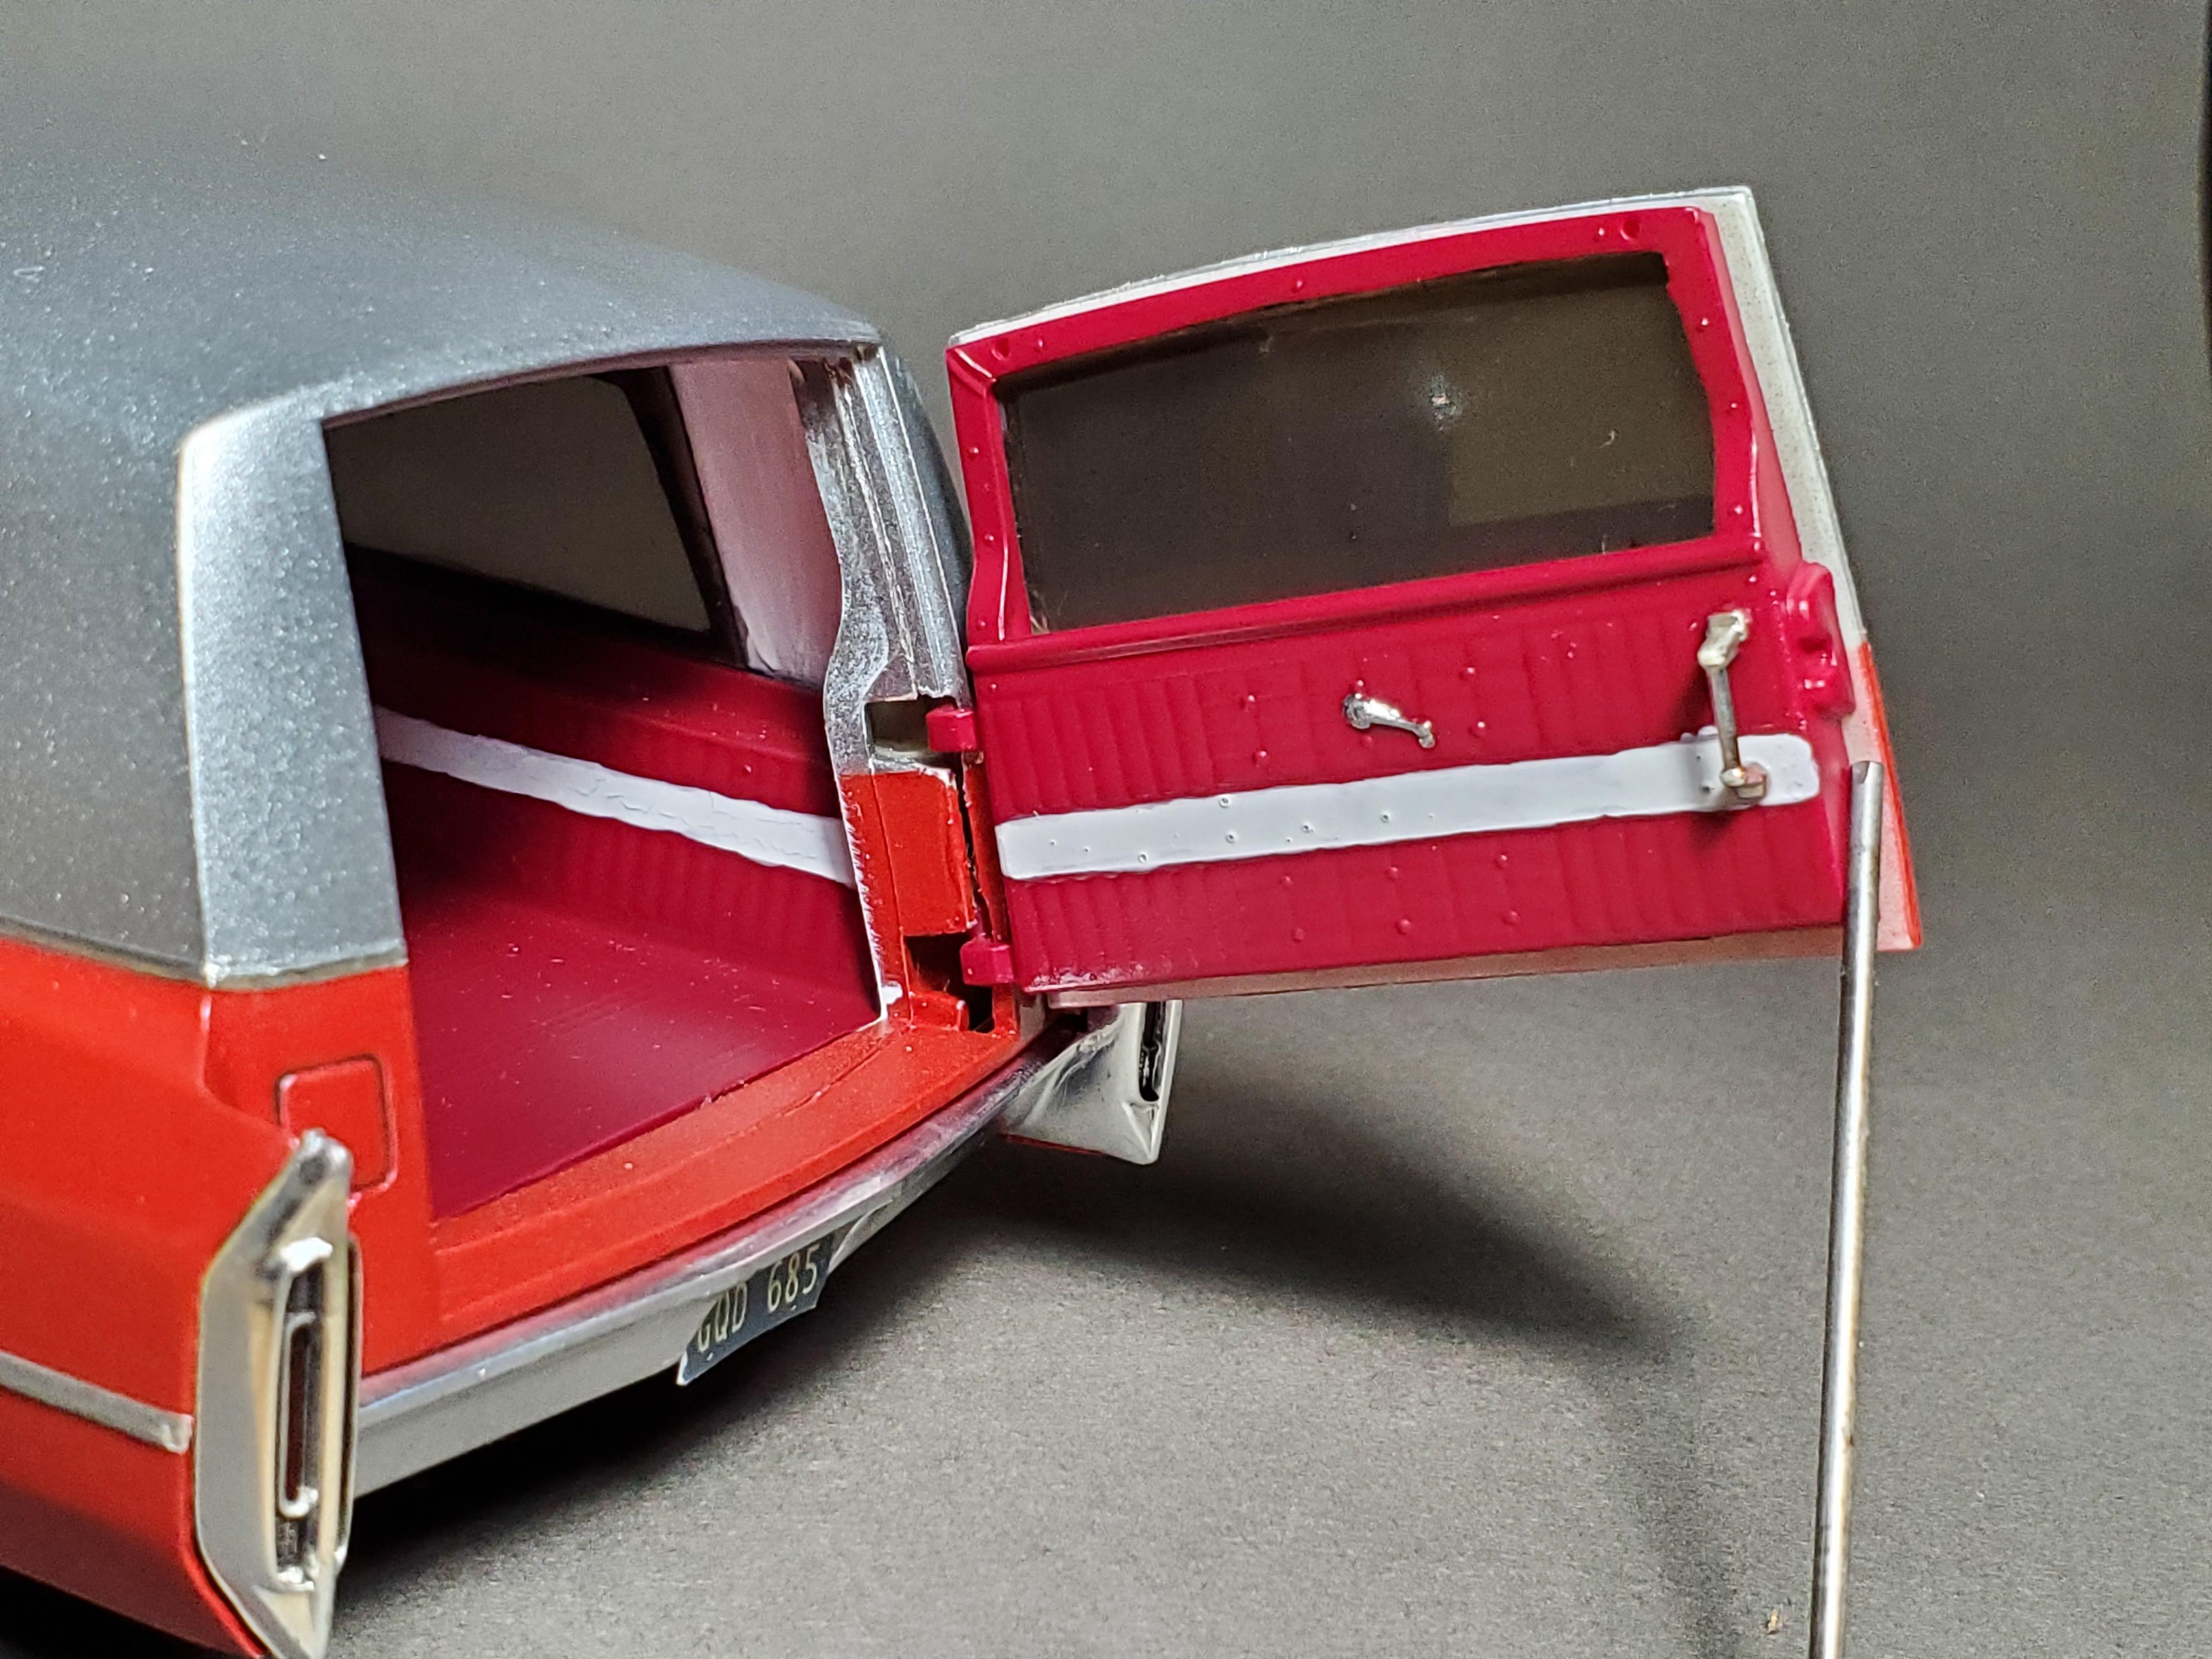
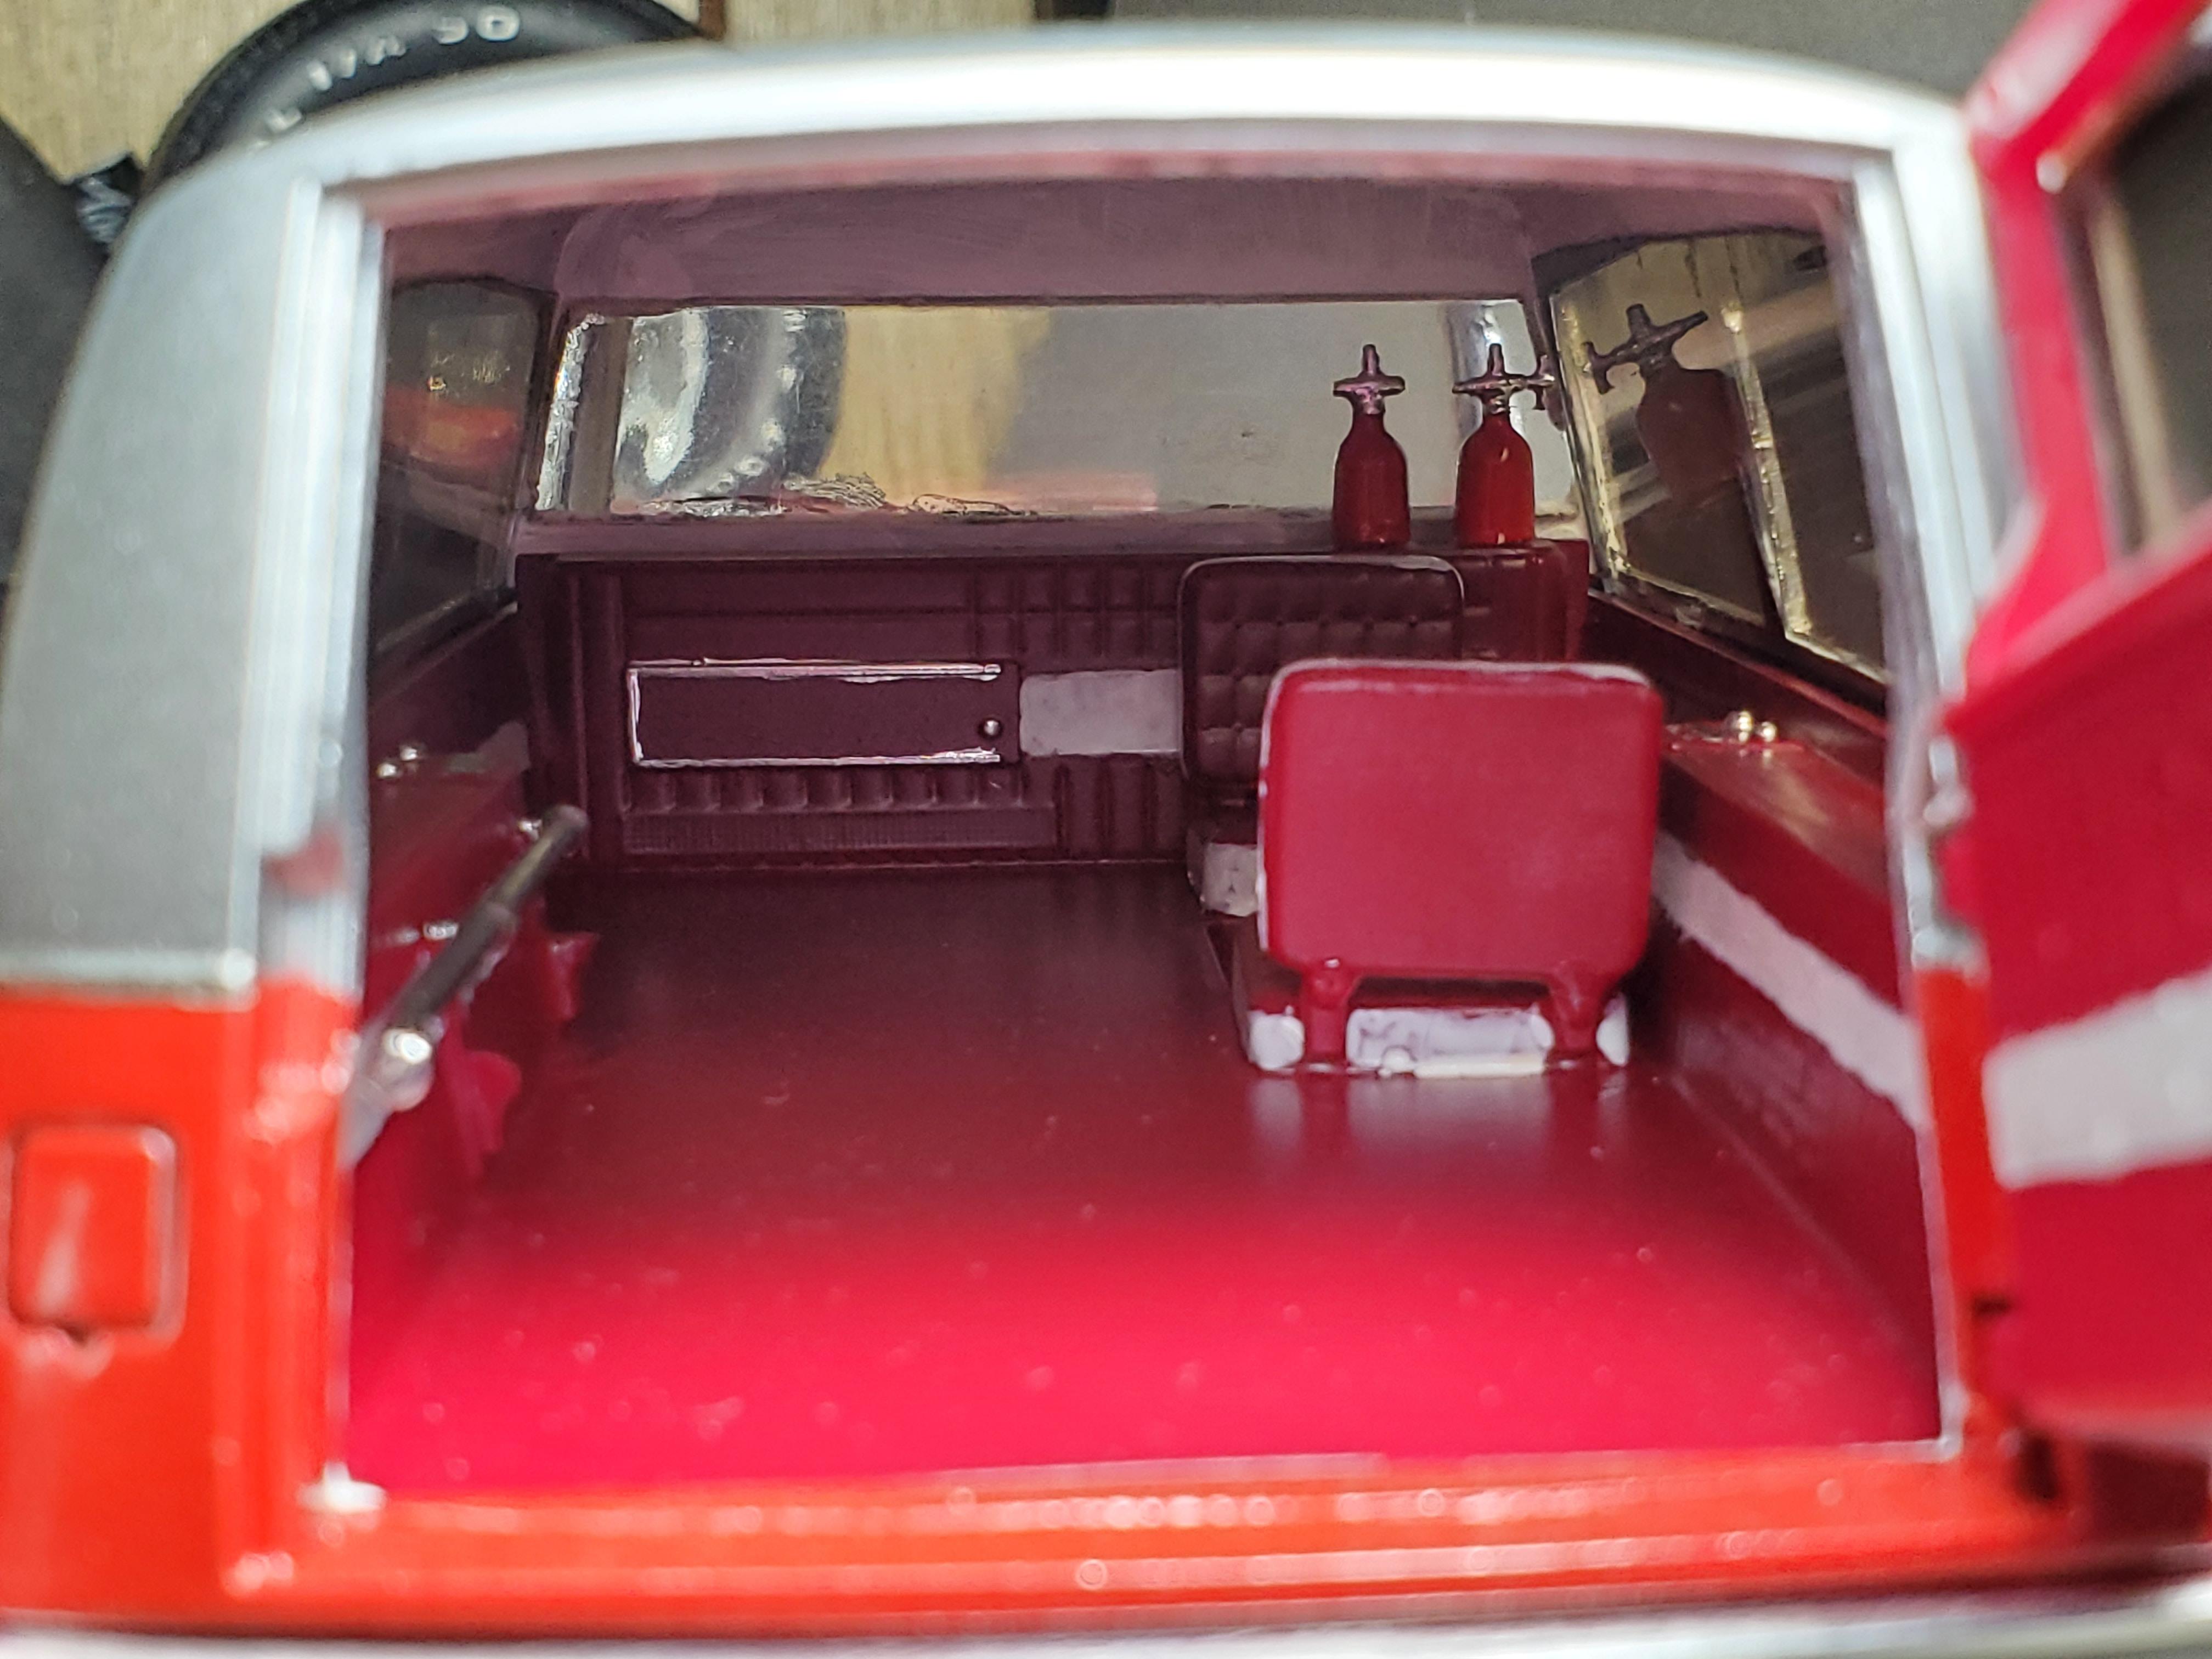
Finished this one tonight. Bought it as an unfinished project from a friend about 5 years ago and stared at it in a display case on my shelf for that long. Finally decided it was time. I completely repainted the body. Foiled the trim. Had to make side glass and wing window glass from clear sheet. I spray tinted all the glass behind the cabin with Tamiya smoke. The chassis and wheel/tire combo was left as my friend had it. I loved the stance. He engineered some way to make it still steer too which was cool. Paint is Testors Revving Red on the body and Testors Diamond Dust on the roof. Interior is a krylon maroon color I had laying around when my old testors Dark Red failed me. Molotow brush painted the dash trim and inside door handles, etc. Also molotow brush painted the door handles, headlights, door locks, front "V" on the hood, and the ornaments on top of the fenders. Decals of the scrollwork are from Gopher Racing. The one on the back door ticked me off because it stuck like glue the second it touched.... and it's crooked. The one on the hood screwed up and I had to use my 2nd decal for it. The engine bay is nothing fancy. I plan to paint some red and silver surfboards for it soon. License plate is an old faded California black plate I printed long ago. Enjoy.
-
2001 Ford Expedition Lightning
JTalmage replied to JTalmage's topic in Model Trucks: Pickups, Vans, SUVs, Light Commercial
I think they reused them from the Mustang Cobra and Saleen kits. -
2001 Ford Expedition Lightning
JTalmage replied to JTalmage's topic in Model Trucks: Pickups, Vans, SUVs, Light Commercial
Yeah. I thought the same thing, but I wouldn't have been able to lower it as much as I did without tucking the wheels under it which I didn't want to do. But yes I agree it needs some bigger wheels. I printed them in correct scale. I have plans and ideas for another, much more radical version. -
2001 Ford Expedition Lightning
JTalmage replied to JTalmage's topic in Model Trucks: Pickups, Vans, SUVs, Light Commercial
Ohhhh not with the amount of super glue I have under there! Haha -
2001 Ford Expedition Lightning
JTalmage replied to JTalmage's topic in Model Trucks: Pickups, Vans, SUVs, Light Commercial
Thank you. I built this out of parts I got 2nd hand. A gluebomb Lightning painted pink and blue metalflake, and an Expedition painted silver with black stripes with paint a mile thick. The majority of the Expedition kits out there are the 4x4 versions which have a moderate amount of lift, and the chassis would require a ton of whacking and hacking to make work, and Im not sure these wheels and brakes would have fit. Also, I used it's original chassis to cut the 4x4 stuff off and add onto another Expedition chassis to do a cheap and easy "lift" kit. I also didn't have to stretch the Lightning chassis, I just massaged the rear end and springs in a different fashion. The chassis could used stretched in actuality, but that was too much work to be fun lol. -
Absolutely beautiful. Color choice makes this car too. Well done.
-
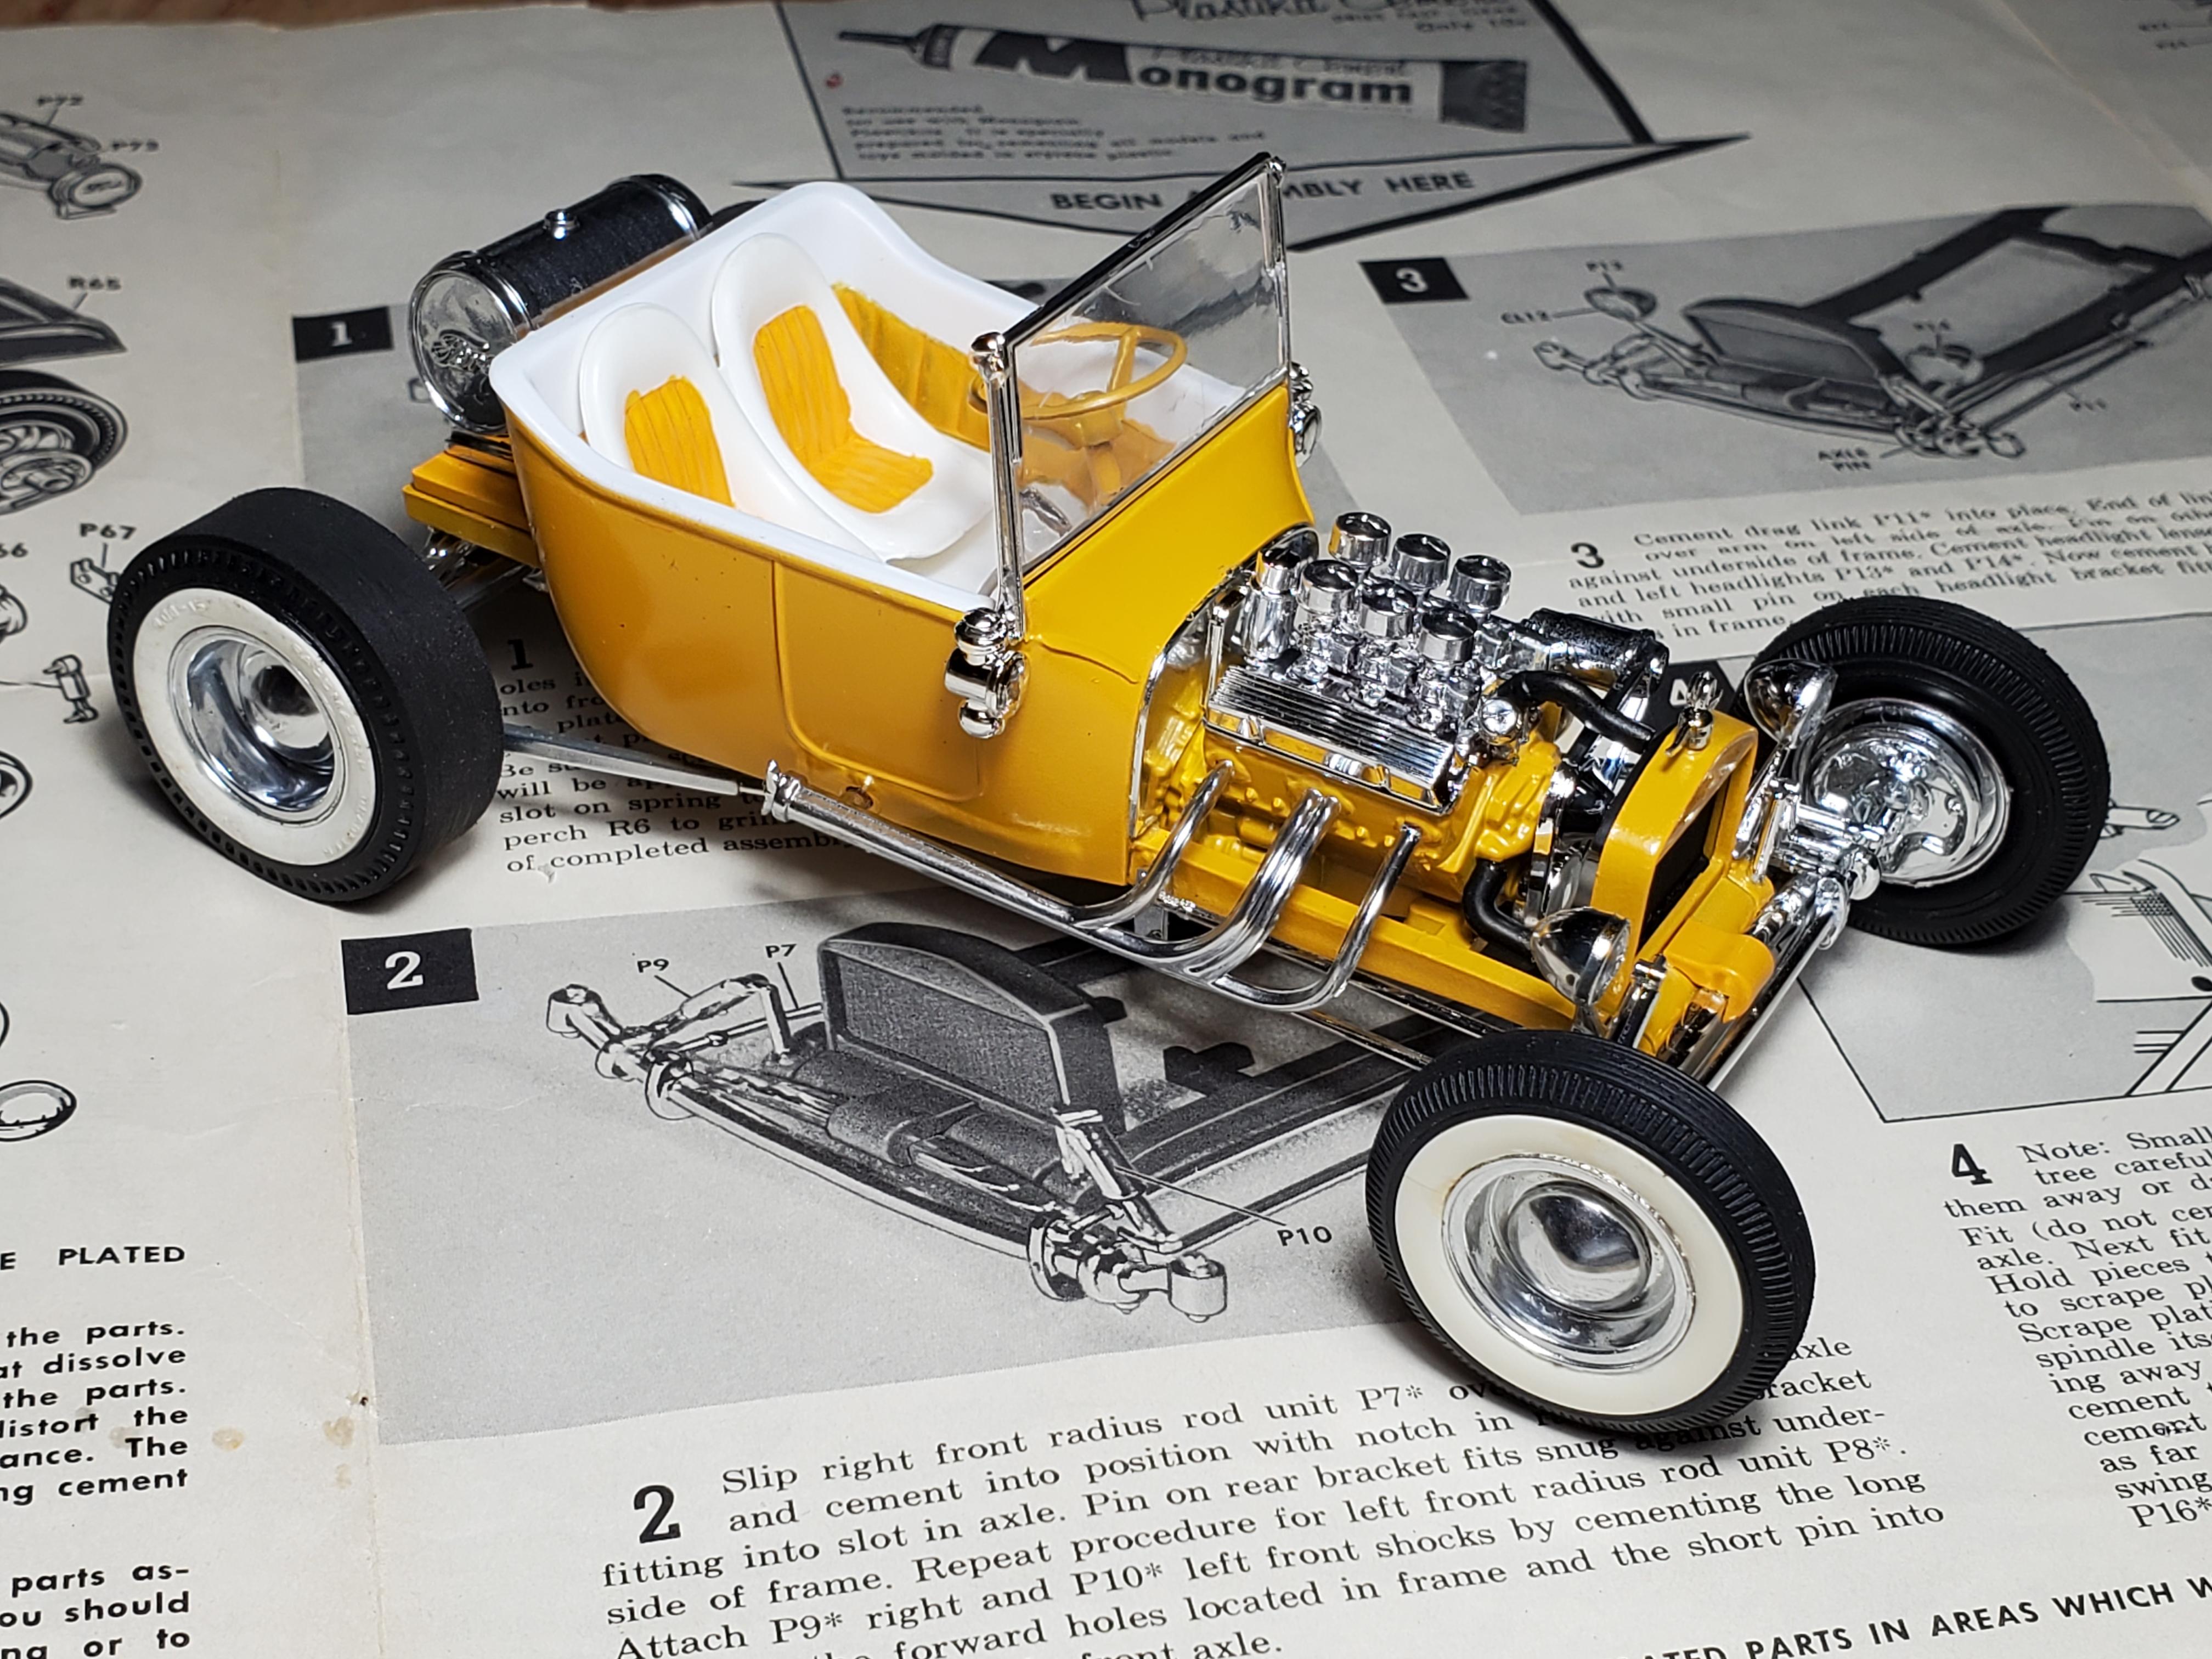
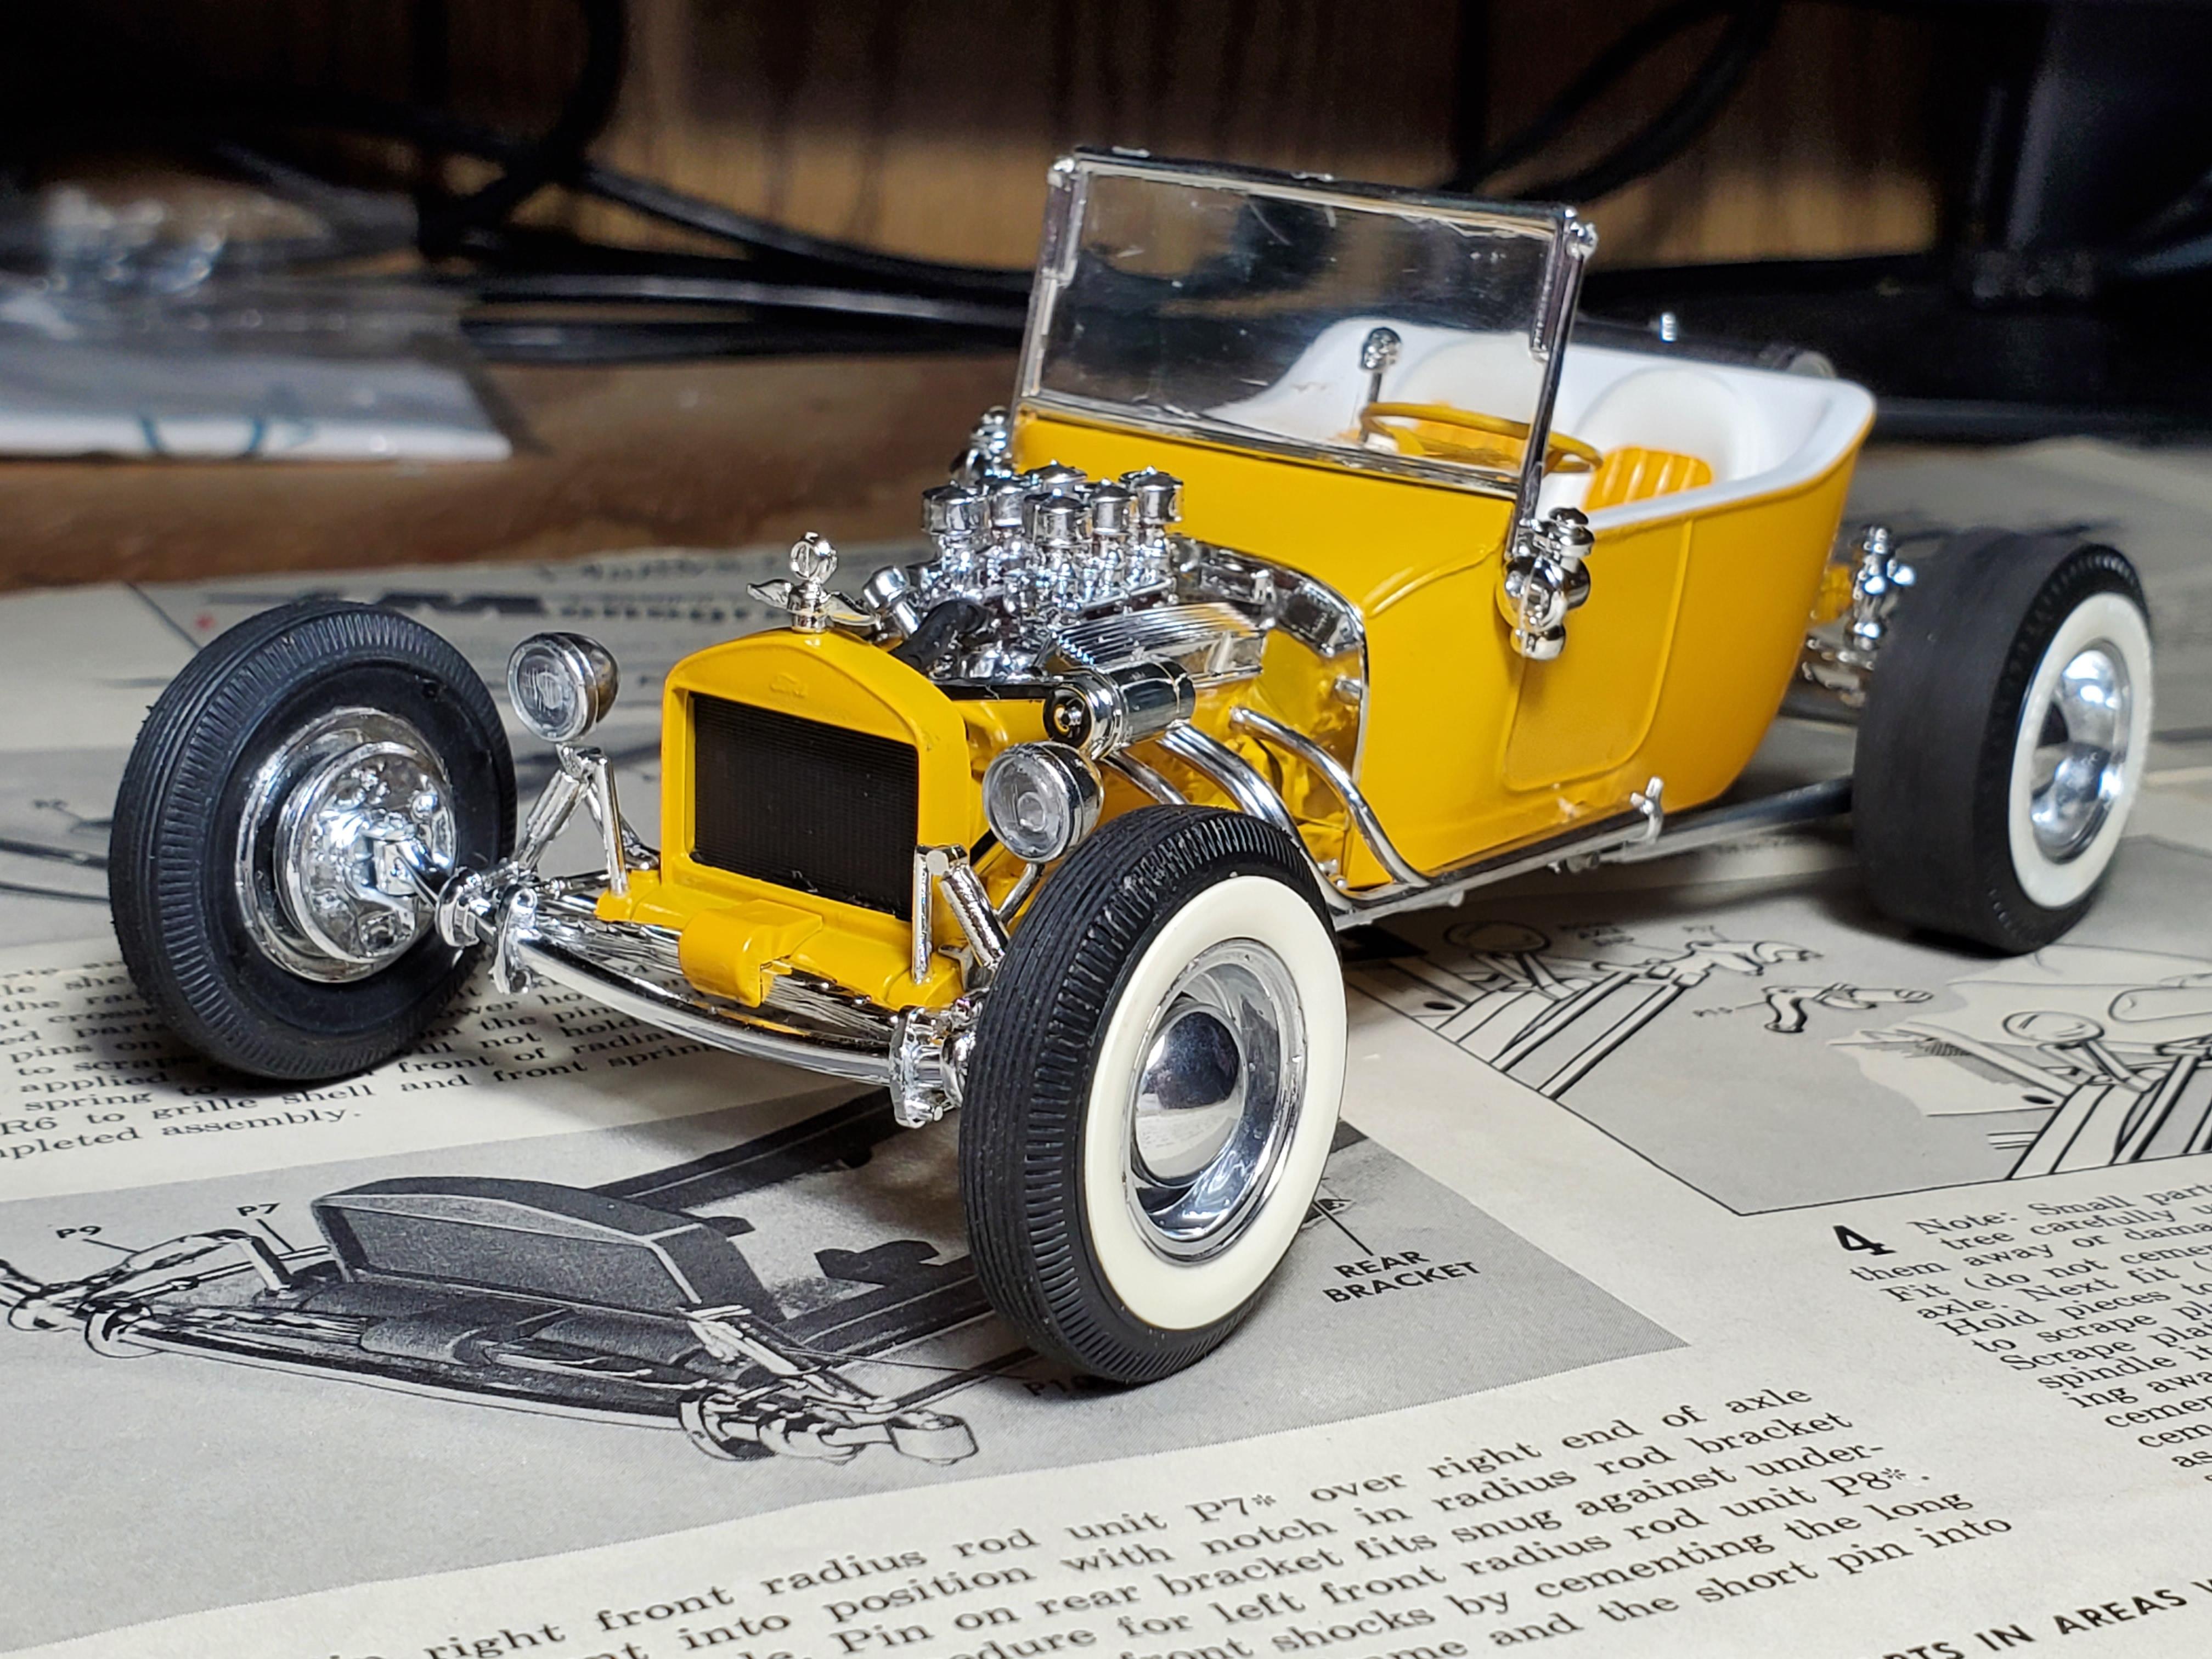
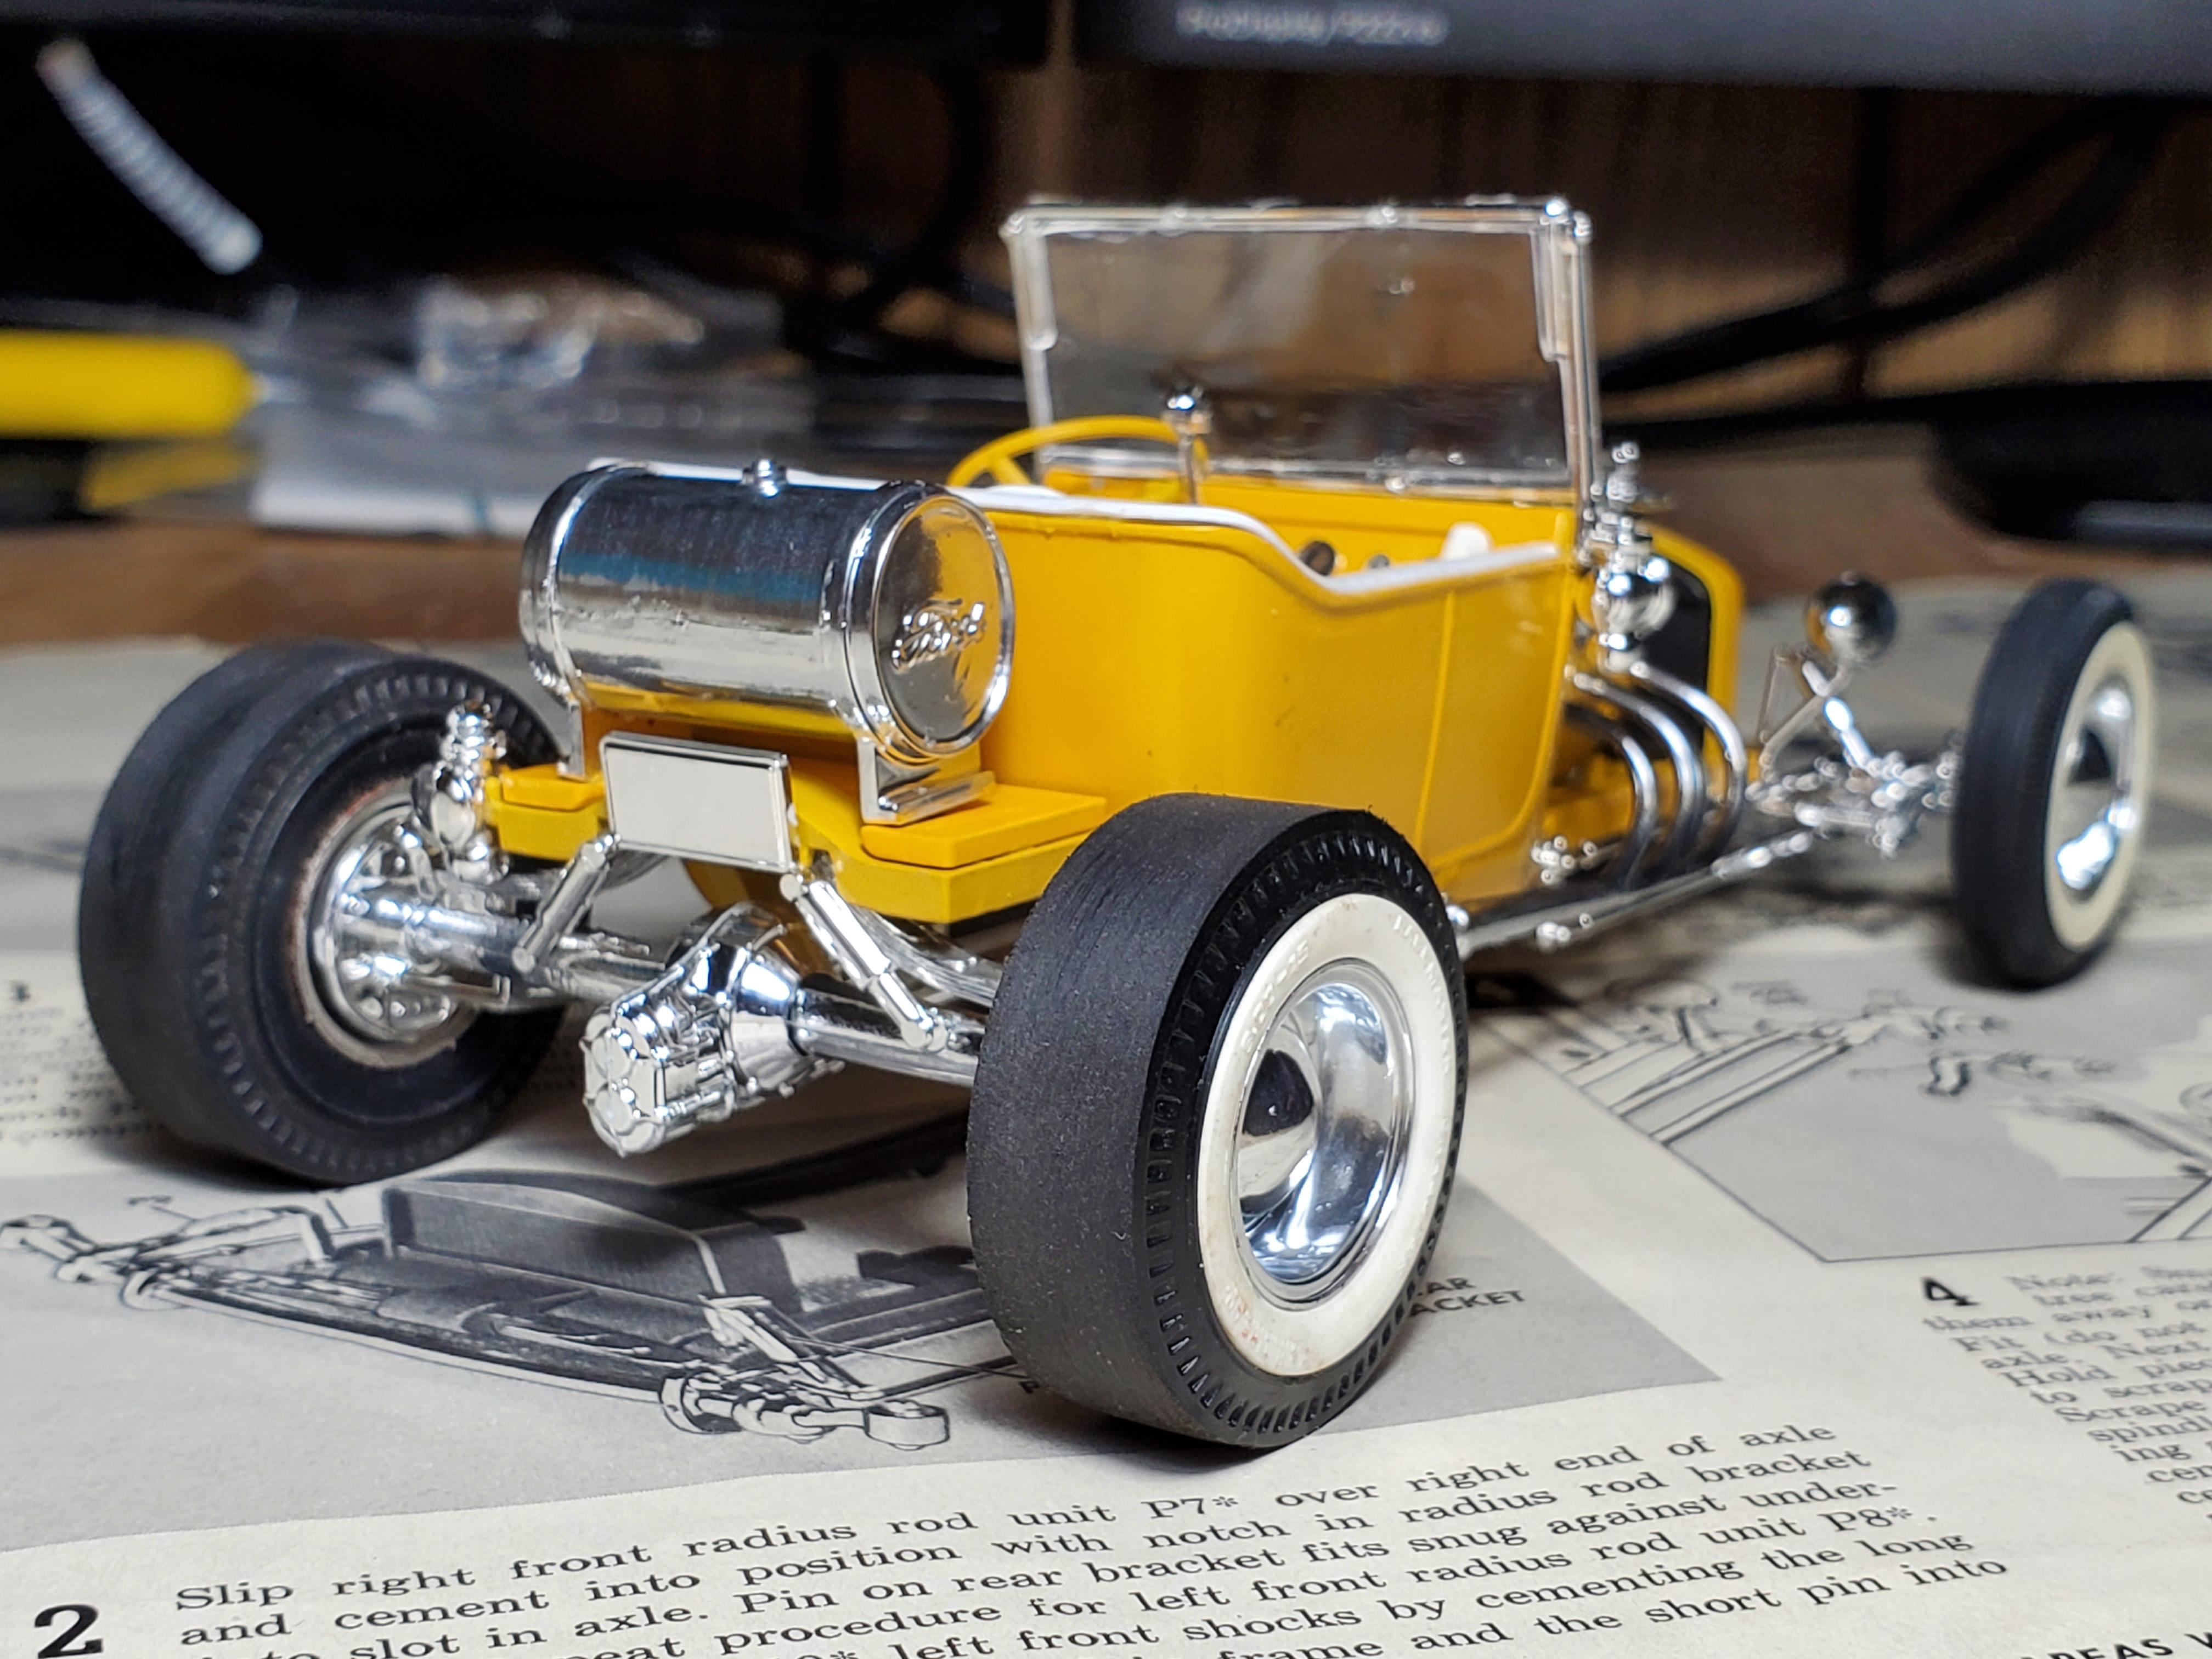
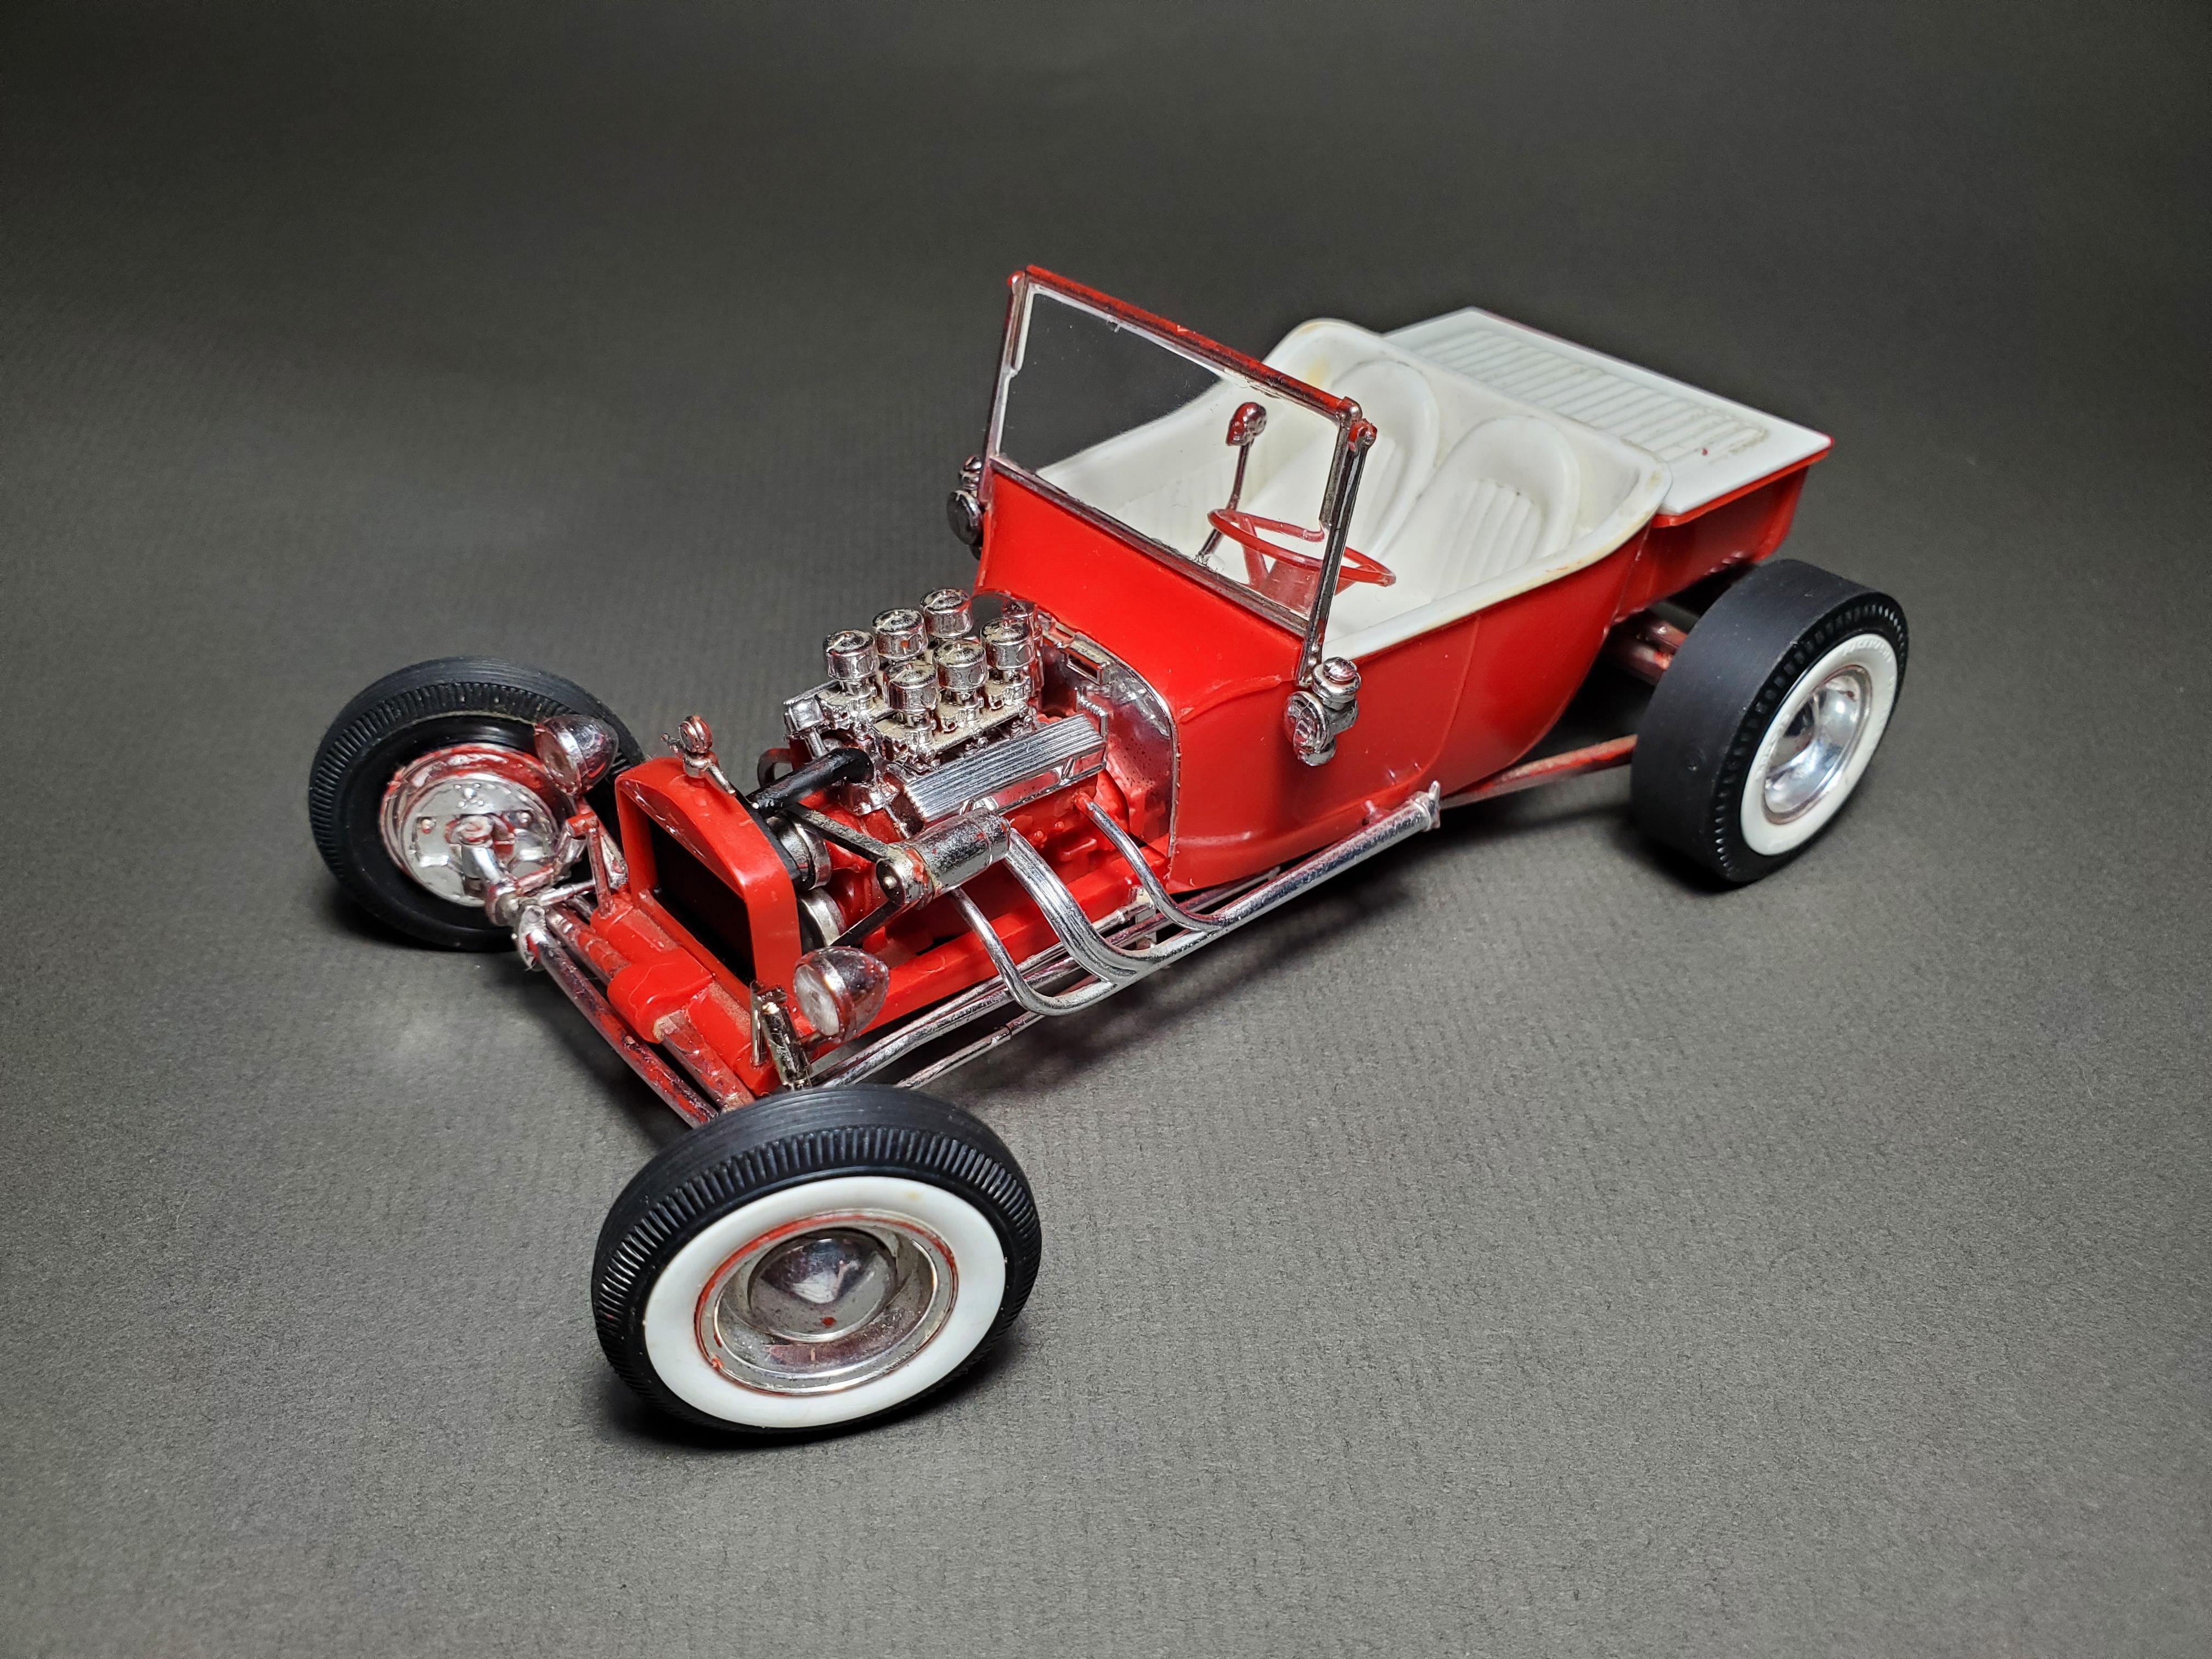
Another project finished. 2 in 1 day! I forced myself thru this one and it shows. This is part 2 of my Little T backdating project. Lot's of mistakes/sloppiness. I just wanted it to be done. I hated this Tamiya Camel Yellow, the stuff is soo thin that almost every part on this thing is a different shade, no matter how many coats I put on.... whatever, sent it. I repainted almost every single piece of chrome that was from the original Little T parts cars on this thing with molotow and a paintbrush. I now have a Little T built in all 3 ways!
-
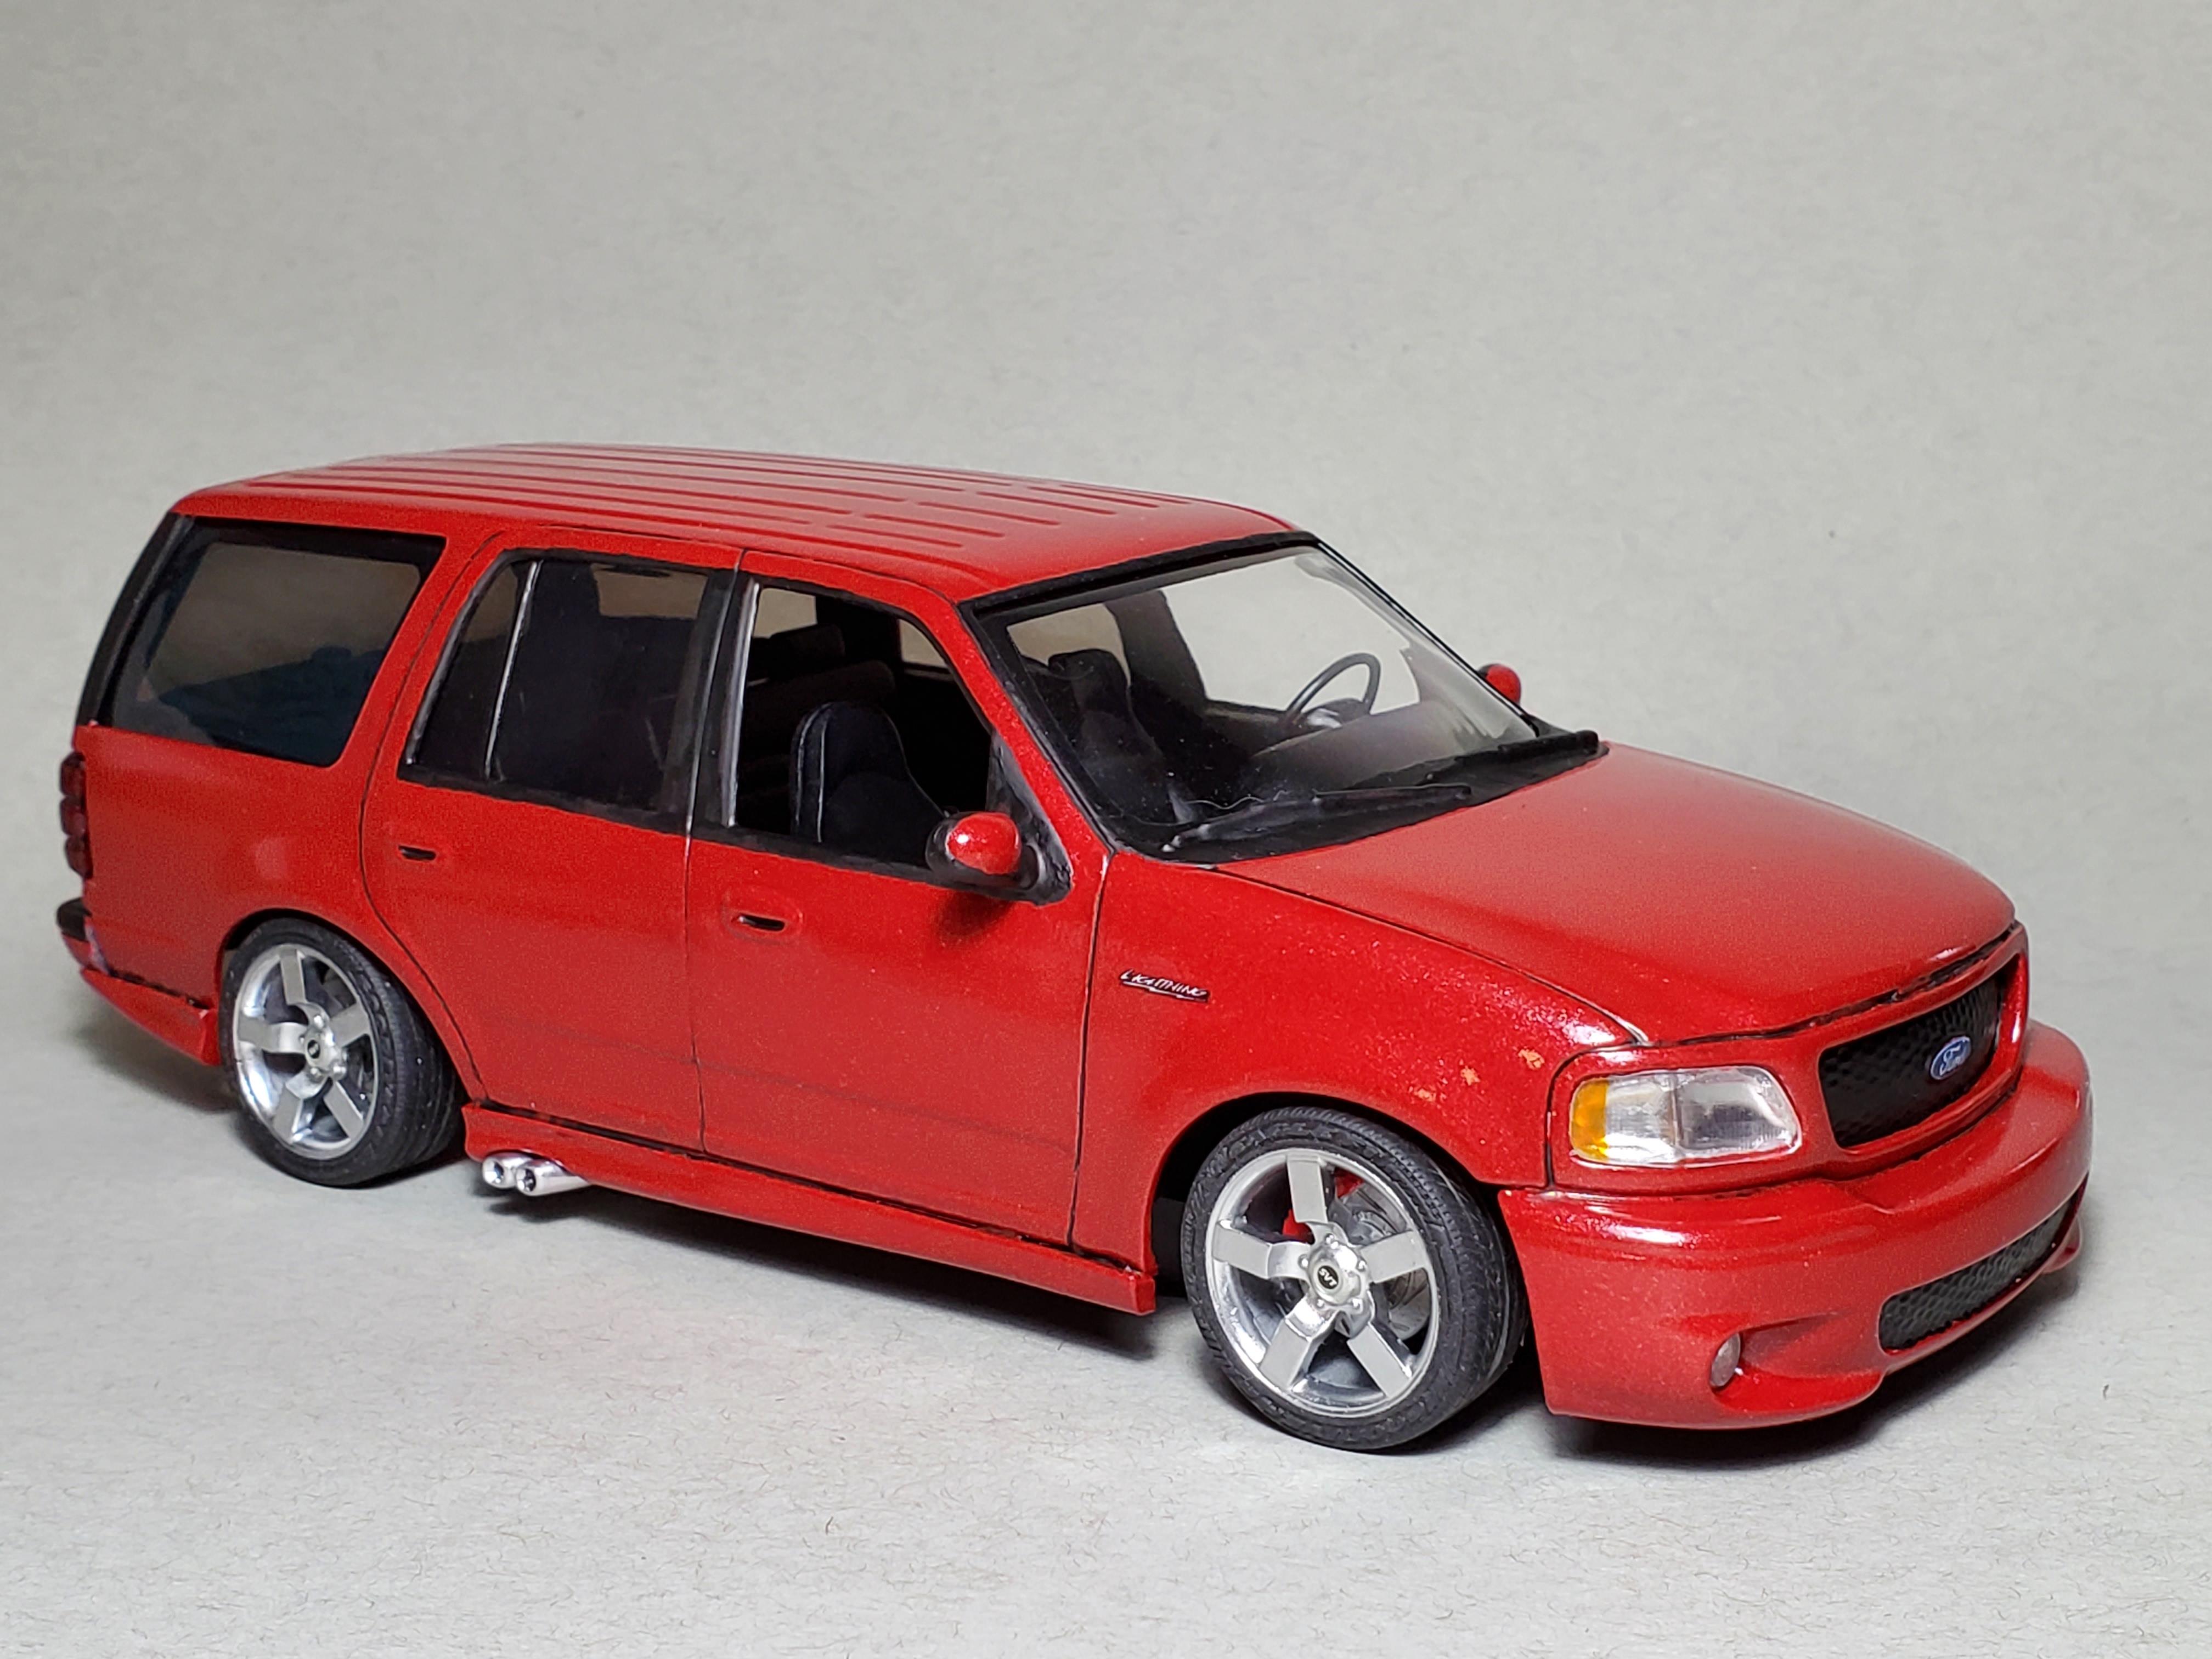
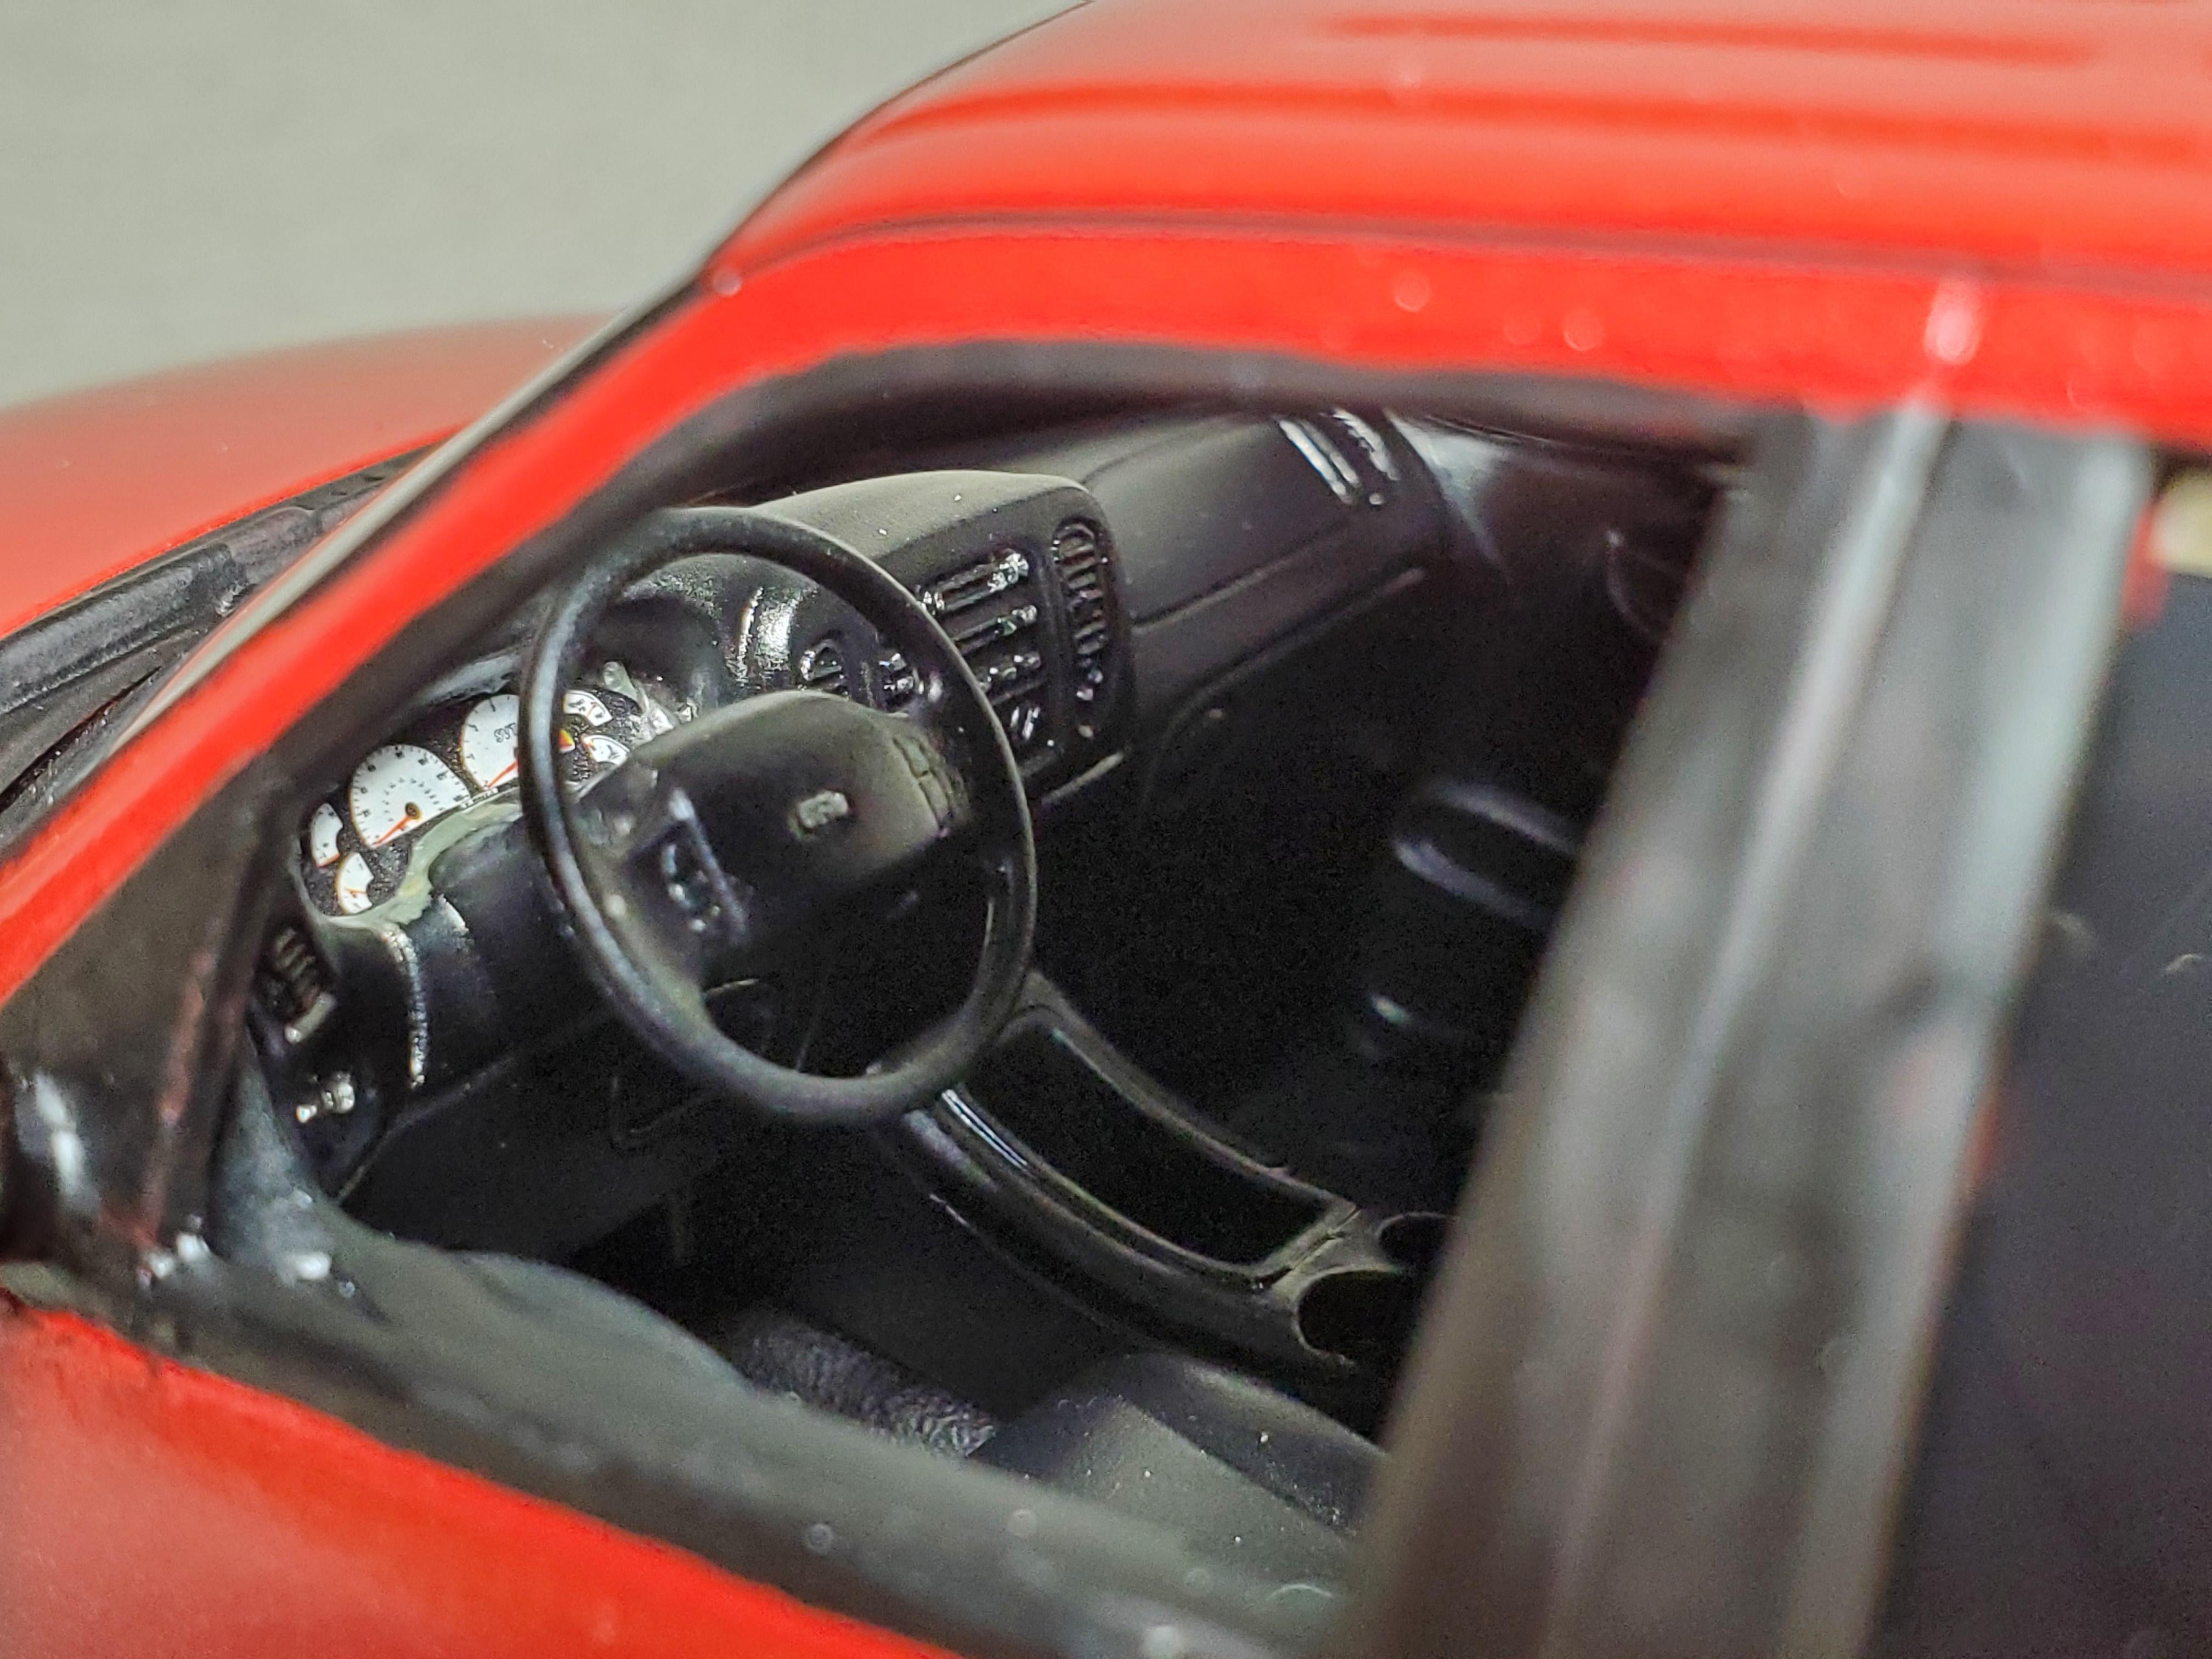
Finished another one this afternoon. A curbside build of a 2001 Expedition Lightning. I 3d printed the wheels and brakes, used the Lightning chassis and severely (and ugly) lowered it, had to move the rear axle back. Although I think it went too far back, but, meh. Used the Lightning kit tires over the 3d printed later Lightning wheels. Glued the side skirts from the Lightning onto the Expedition and puttied them together. Had STS decals make me the necessary decals to get the job done. Painted with Testors Revving Red and covered in their clear. It's a bit sloppy and not as cleanly done as I'd like but overall I'm happy with it. Enjoy
- 20 replies
-
- 11
-

-
Order it online. That's what I did. Got it shipped to the US.
-
Yes. Everything but the two decals I mentioned come with the kit.
-
Finished this one up yesterday. Super happy with the outcome. Yes it's a car based on their die-cast line.... but, technically it's a screwbottom hahaha. Anyway it goes together really well. I had almost no issues with it at all. Paint is Tamiya Candy Lime Green. Interior is Tamiya Light Sand. Bumpers/wheels/blower/grille/headlight buckets, door mirrors and handles, were all brush painted with Molotow and clearcoated with a waterborne clear which helped retain its shine a bit. I had STS decals design the license plates for it, because that green reminded me of the bright green stereotypical cartoon toxic waste. The rubber on the lower quarter panels came from the 90 Mustang kit. Everything else is built as it was from the box!
- 20 replies
-
- 10
-
-
Got my custom license plates today for it. Had to have plates from it's native homeland on it of course.
-
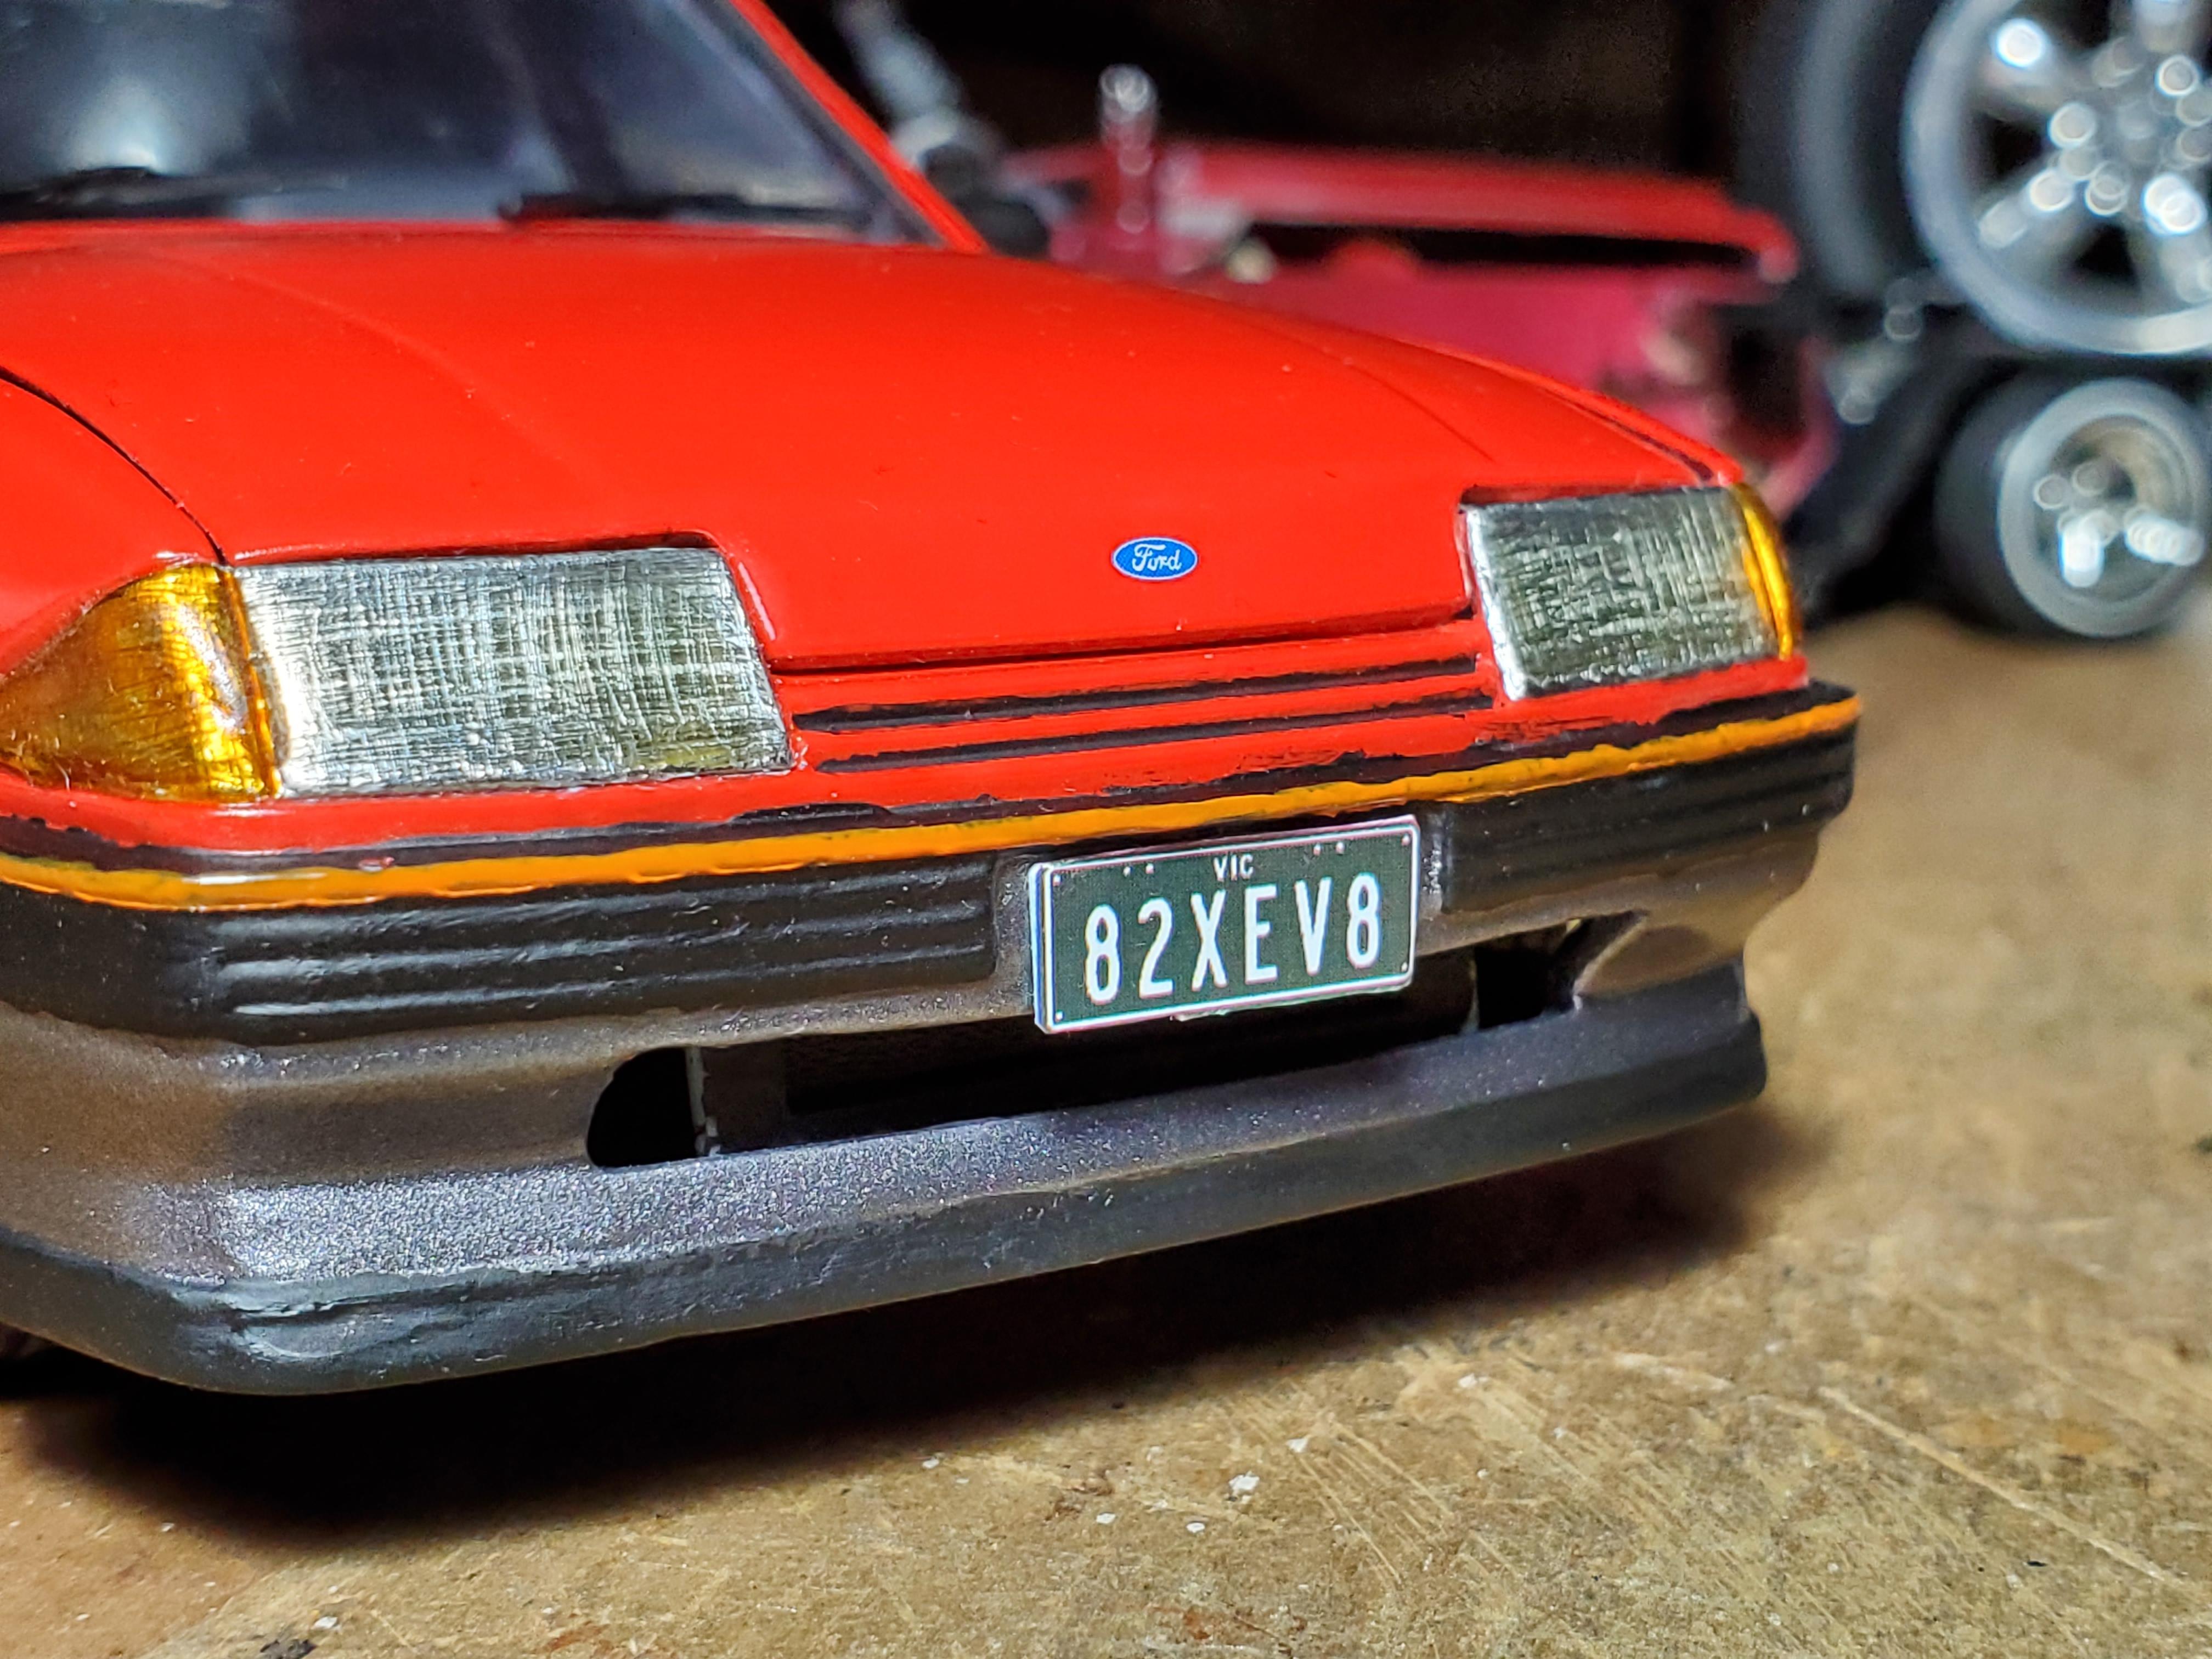
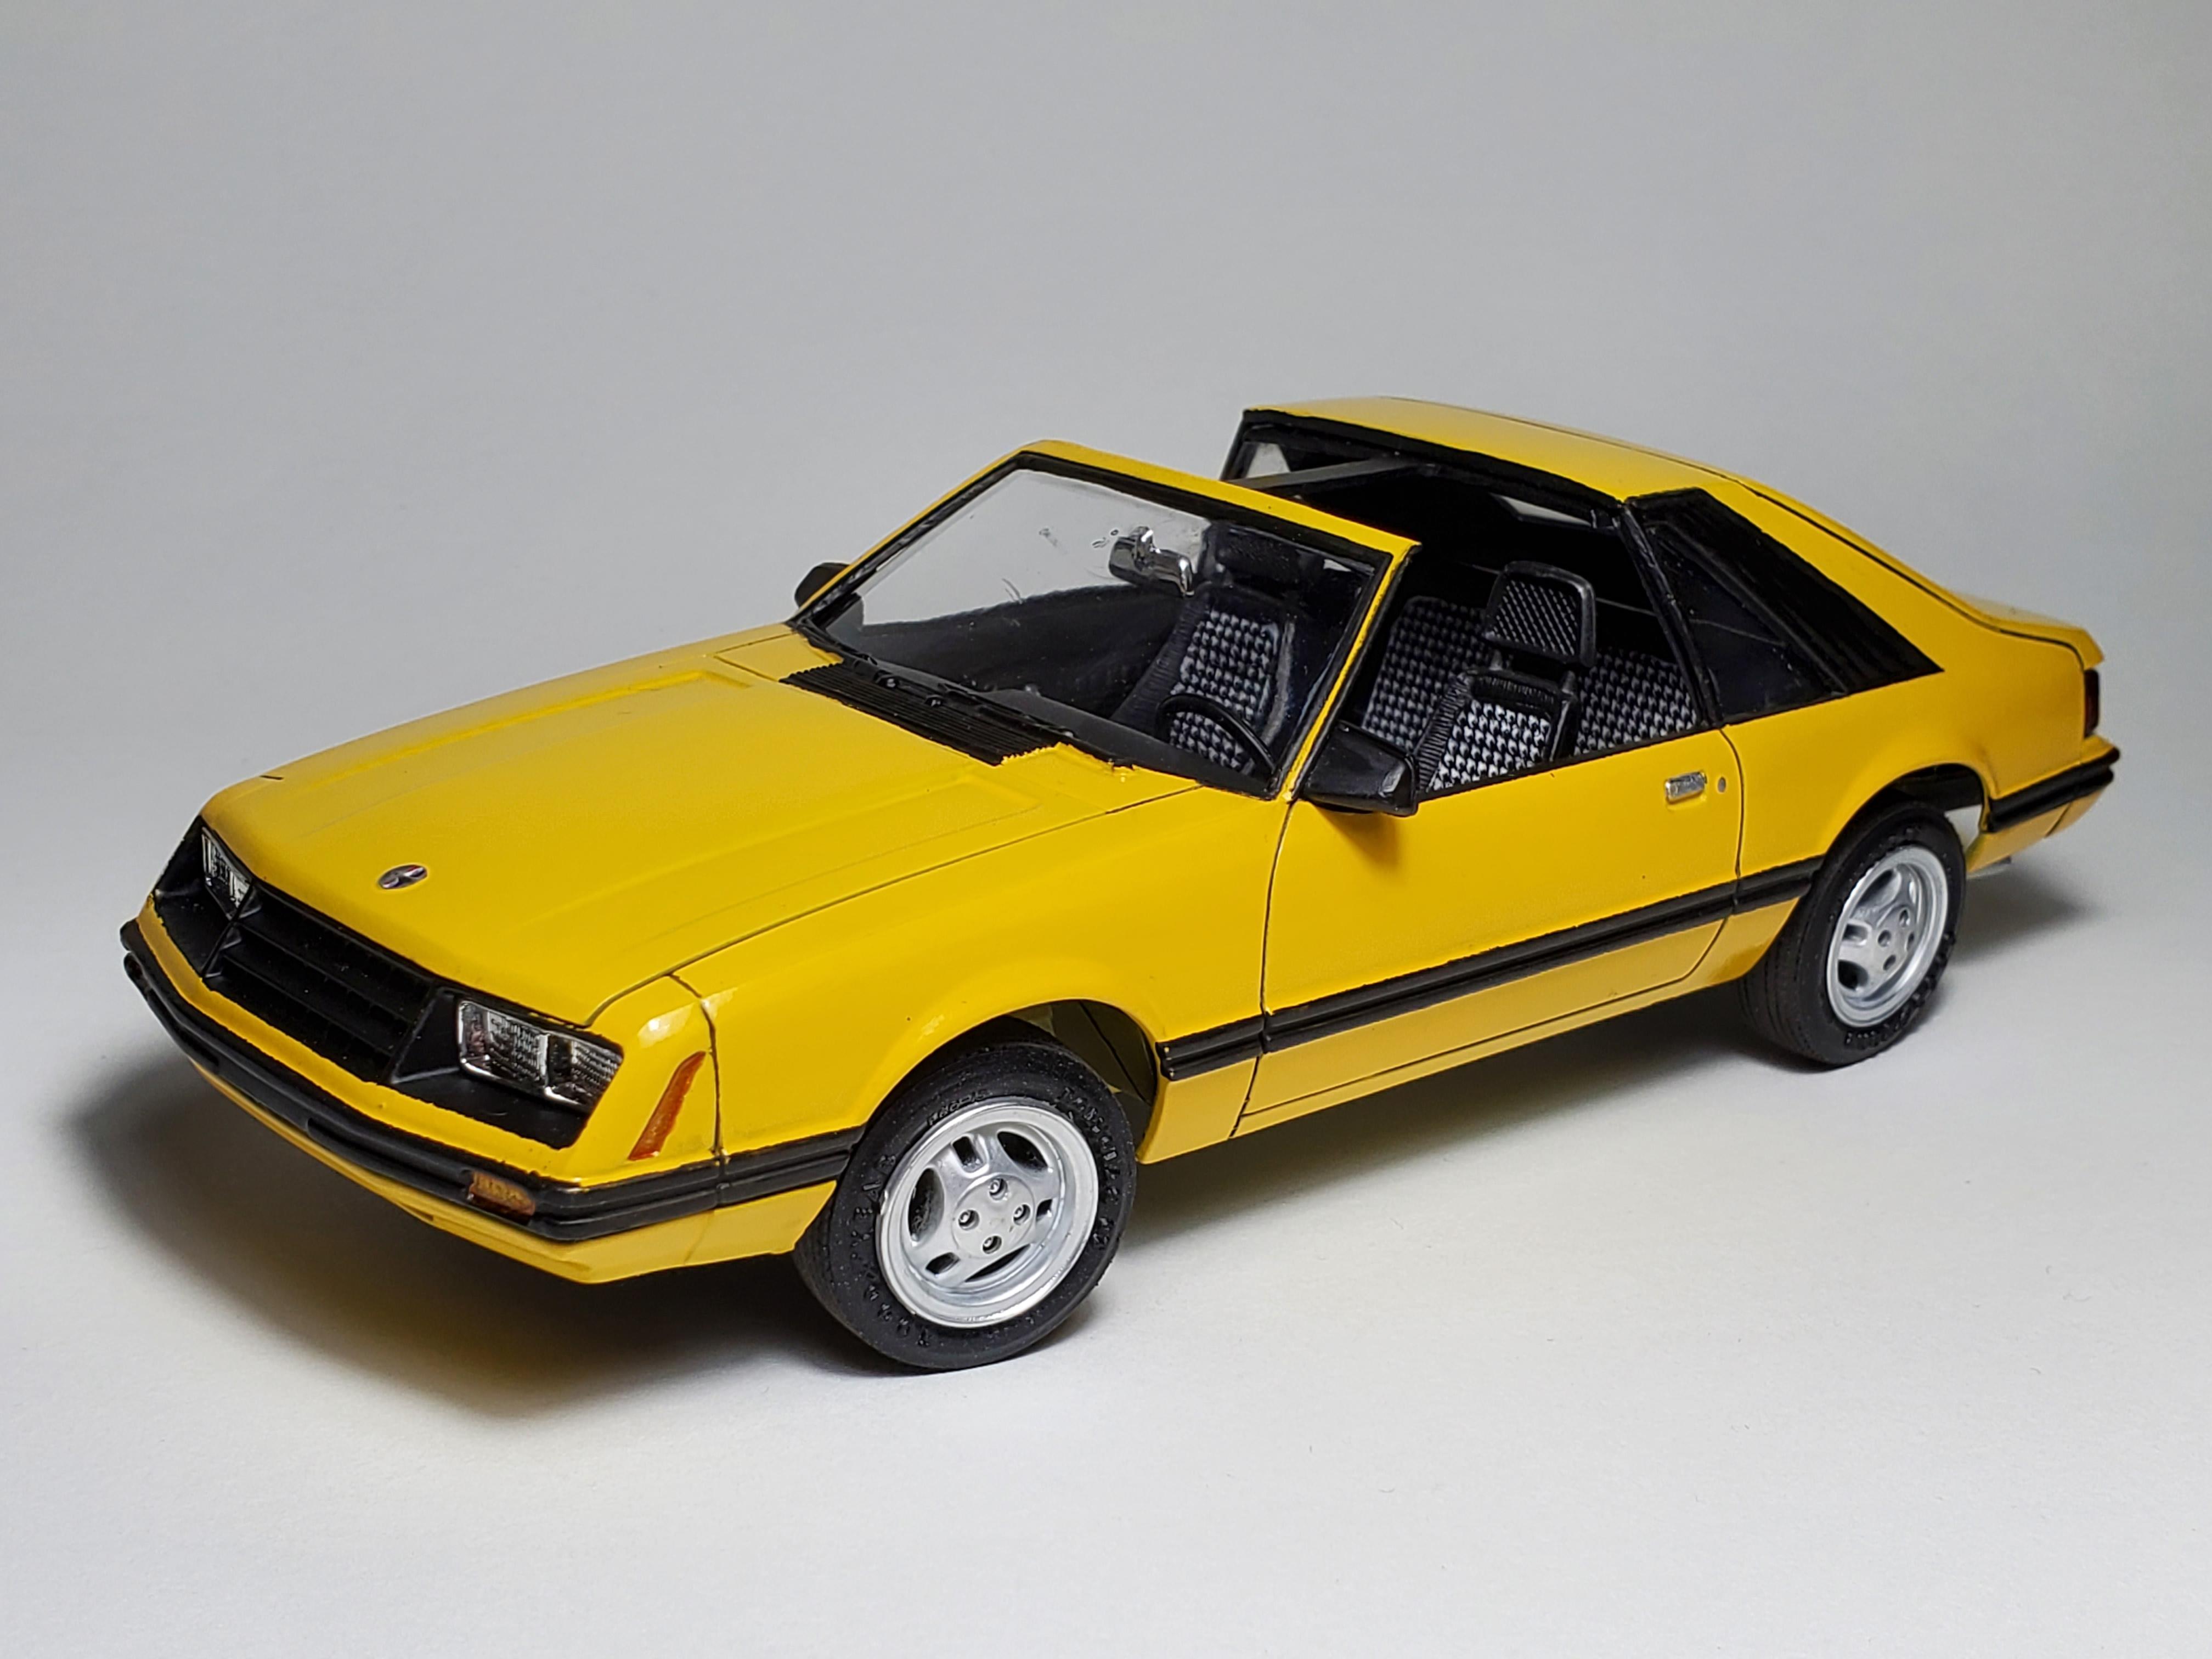
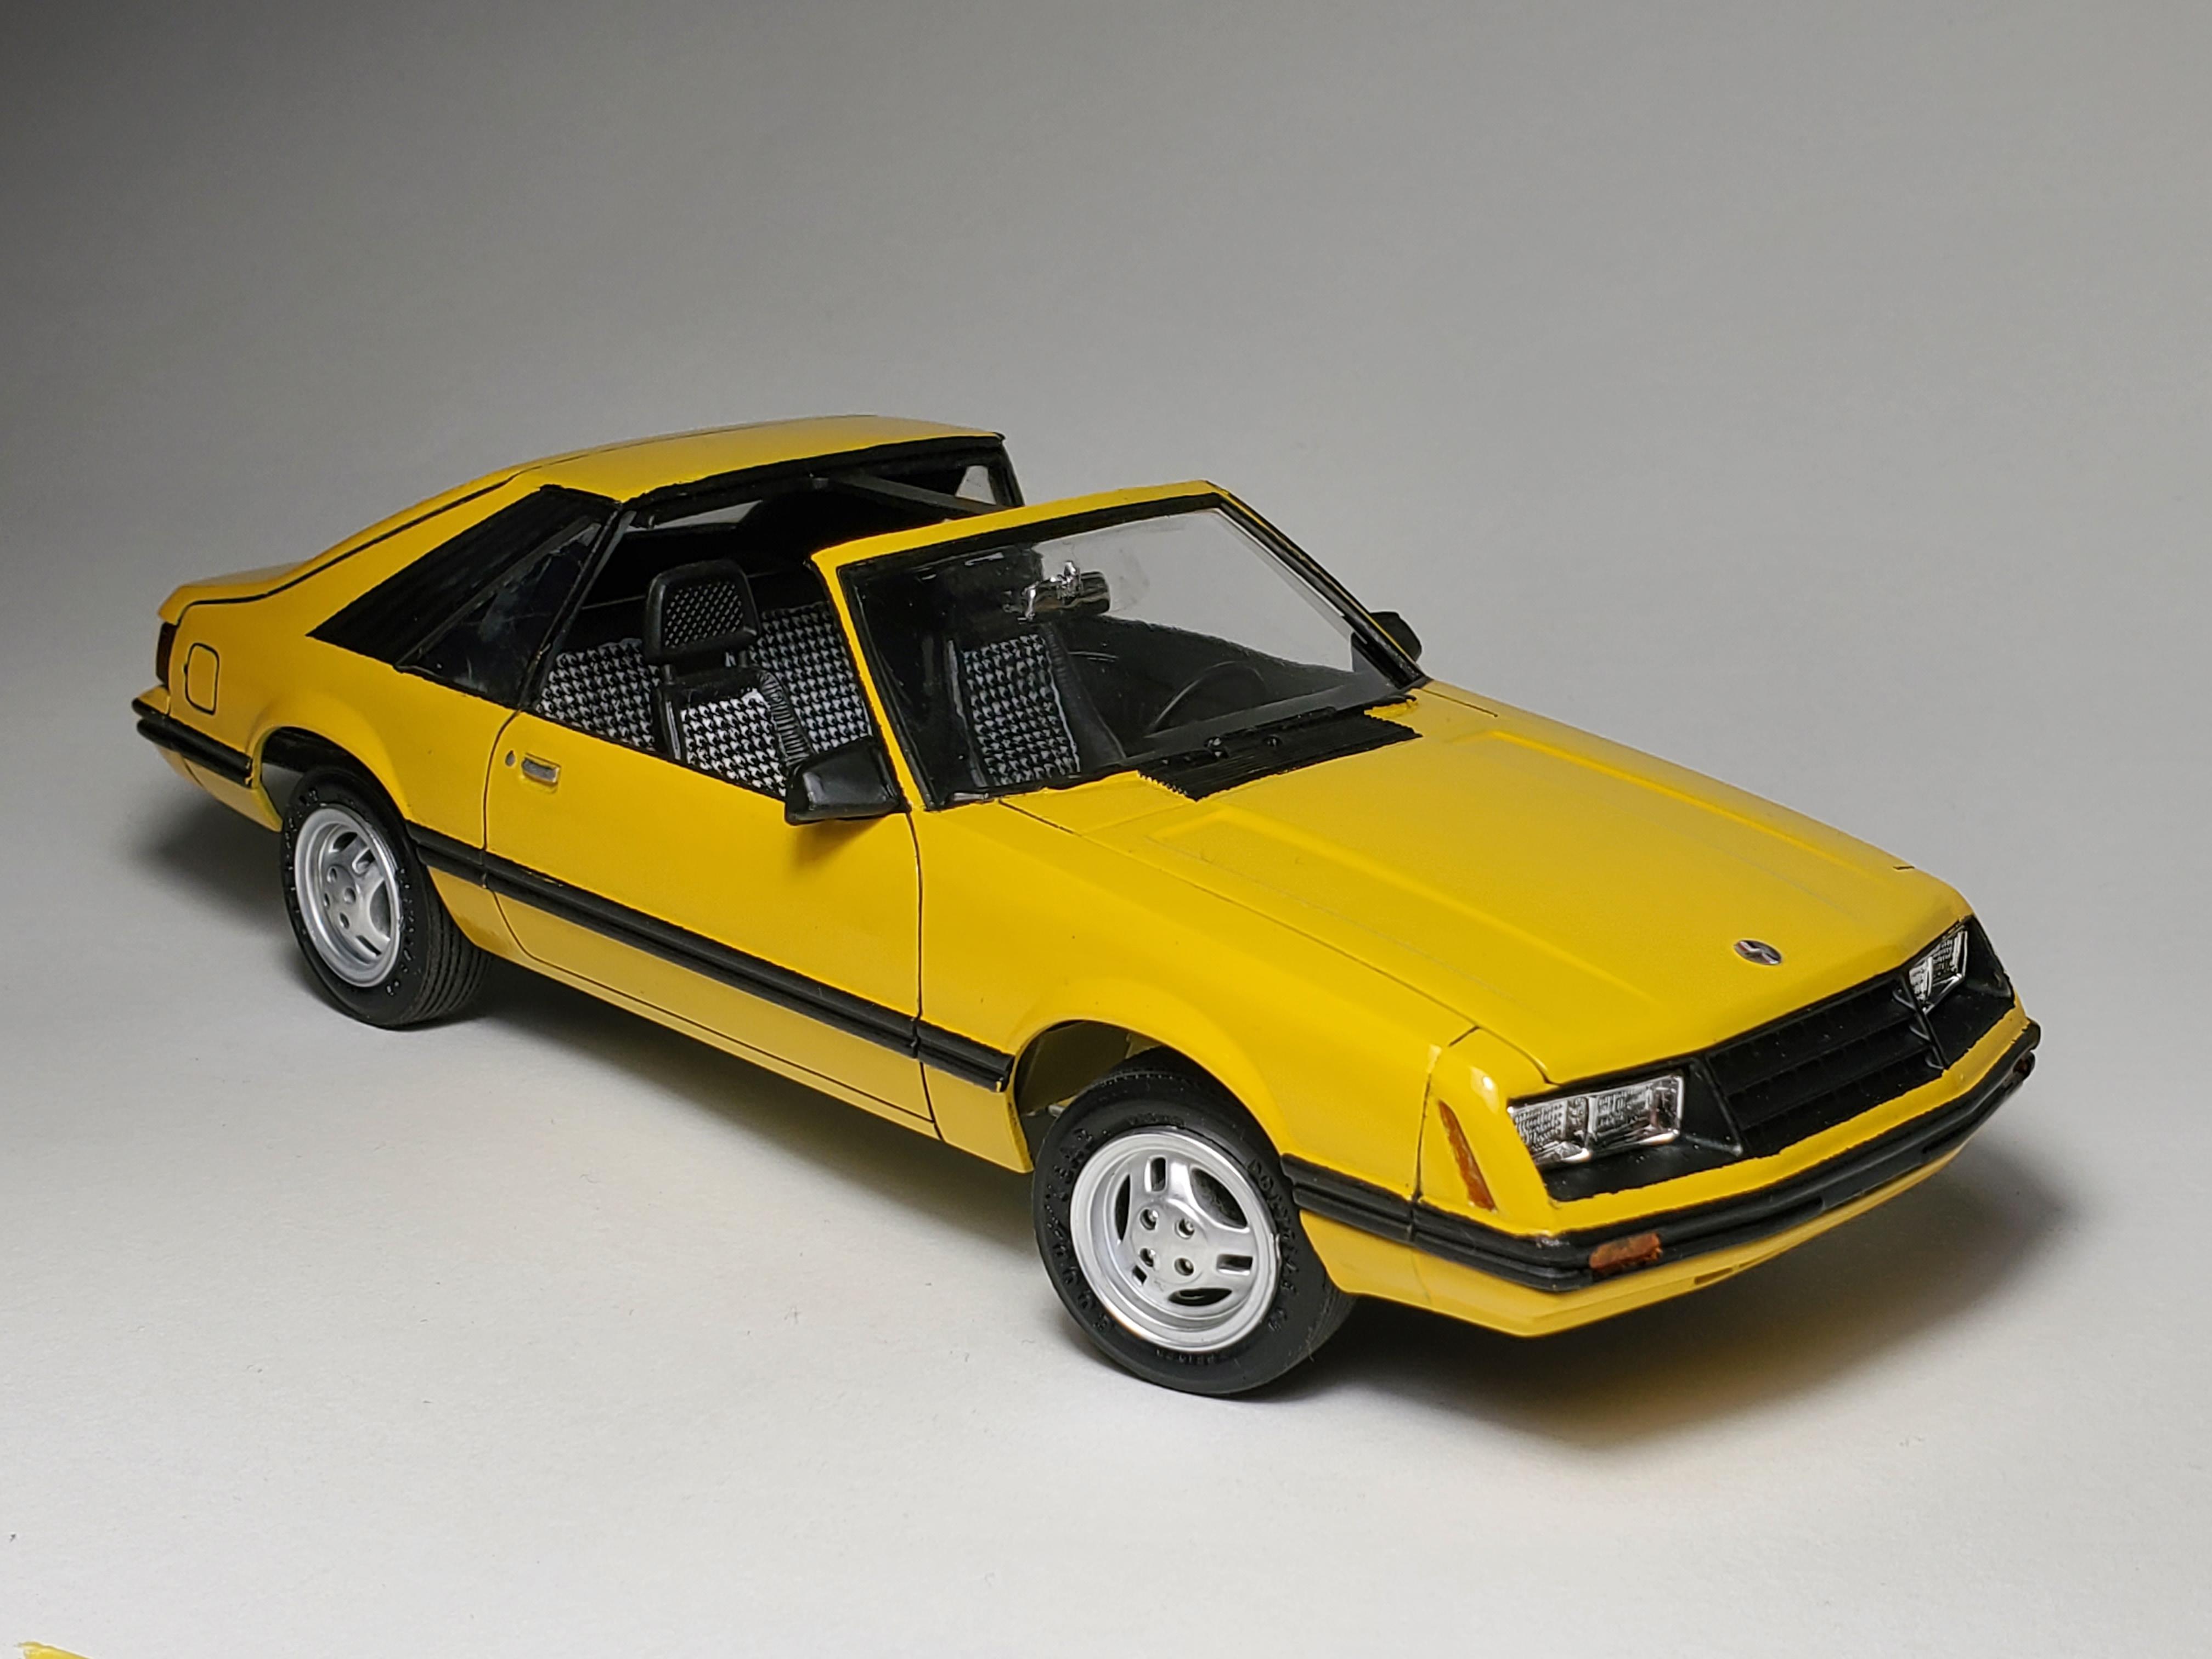
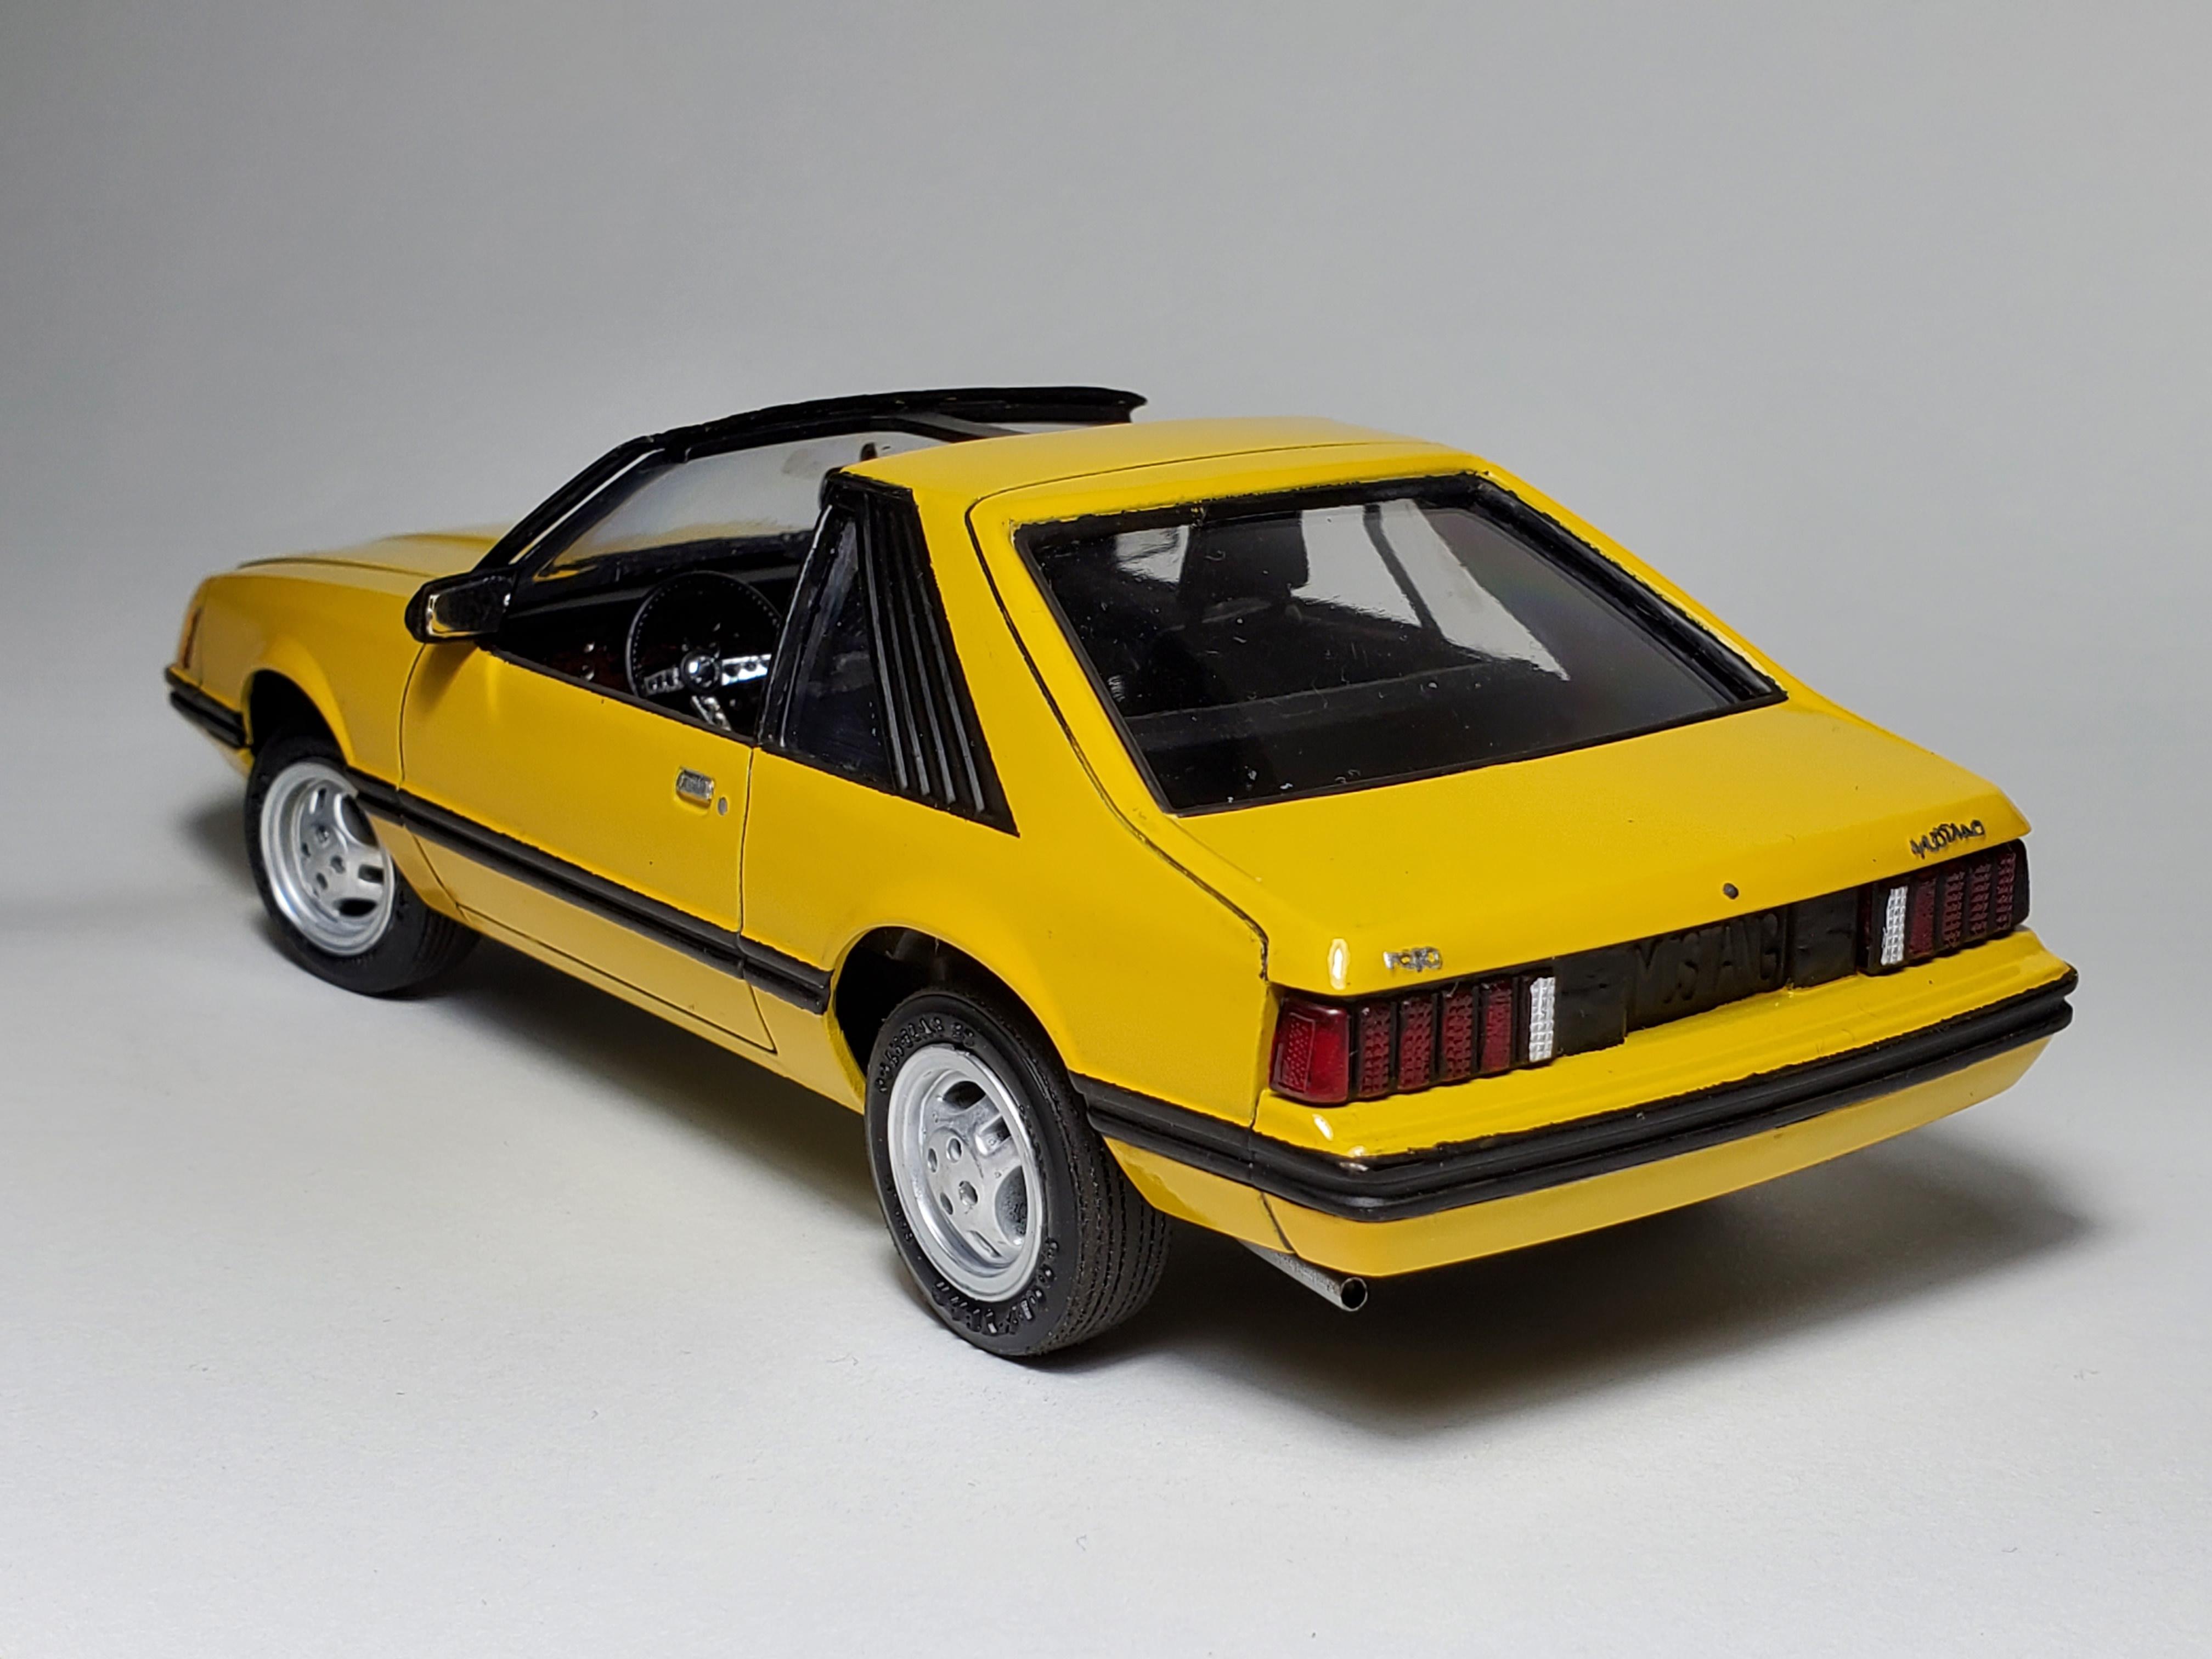
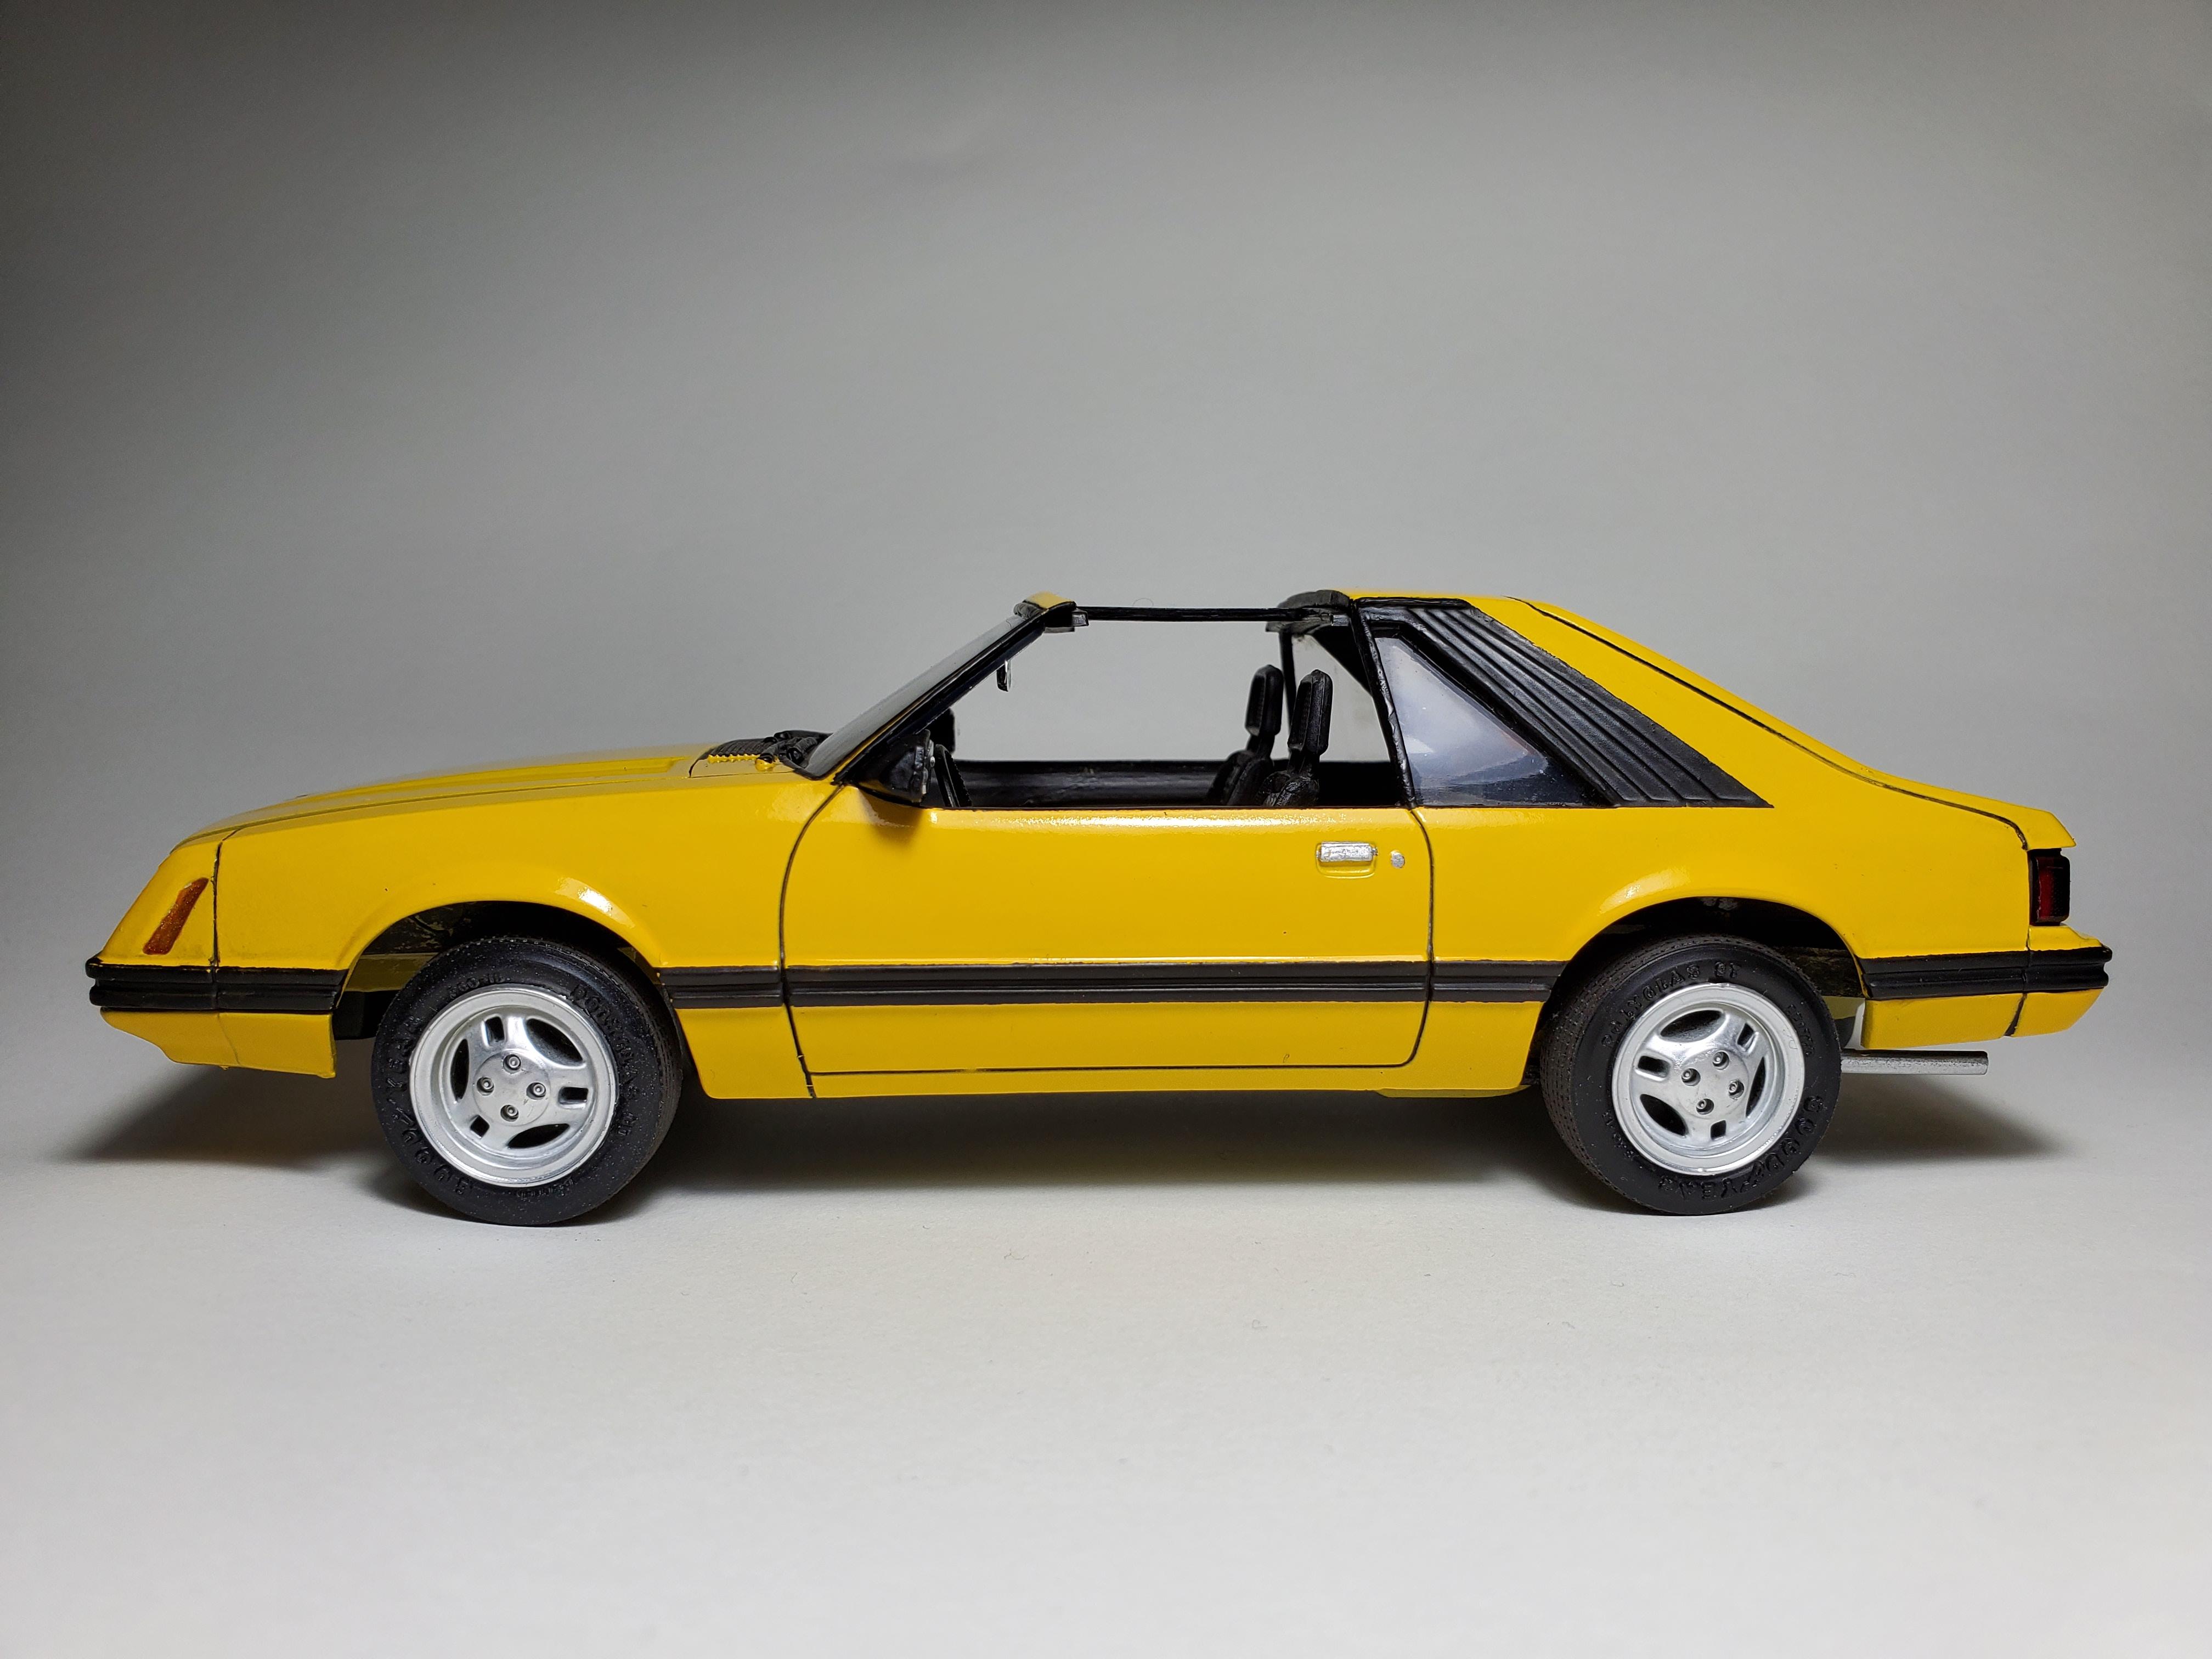
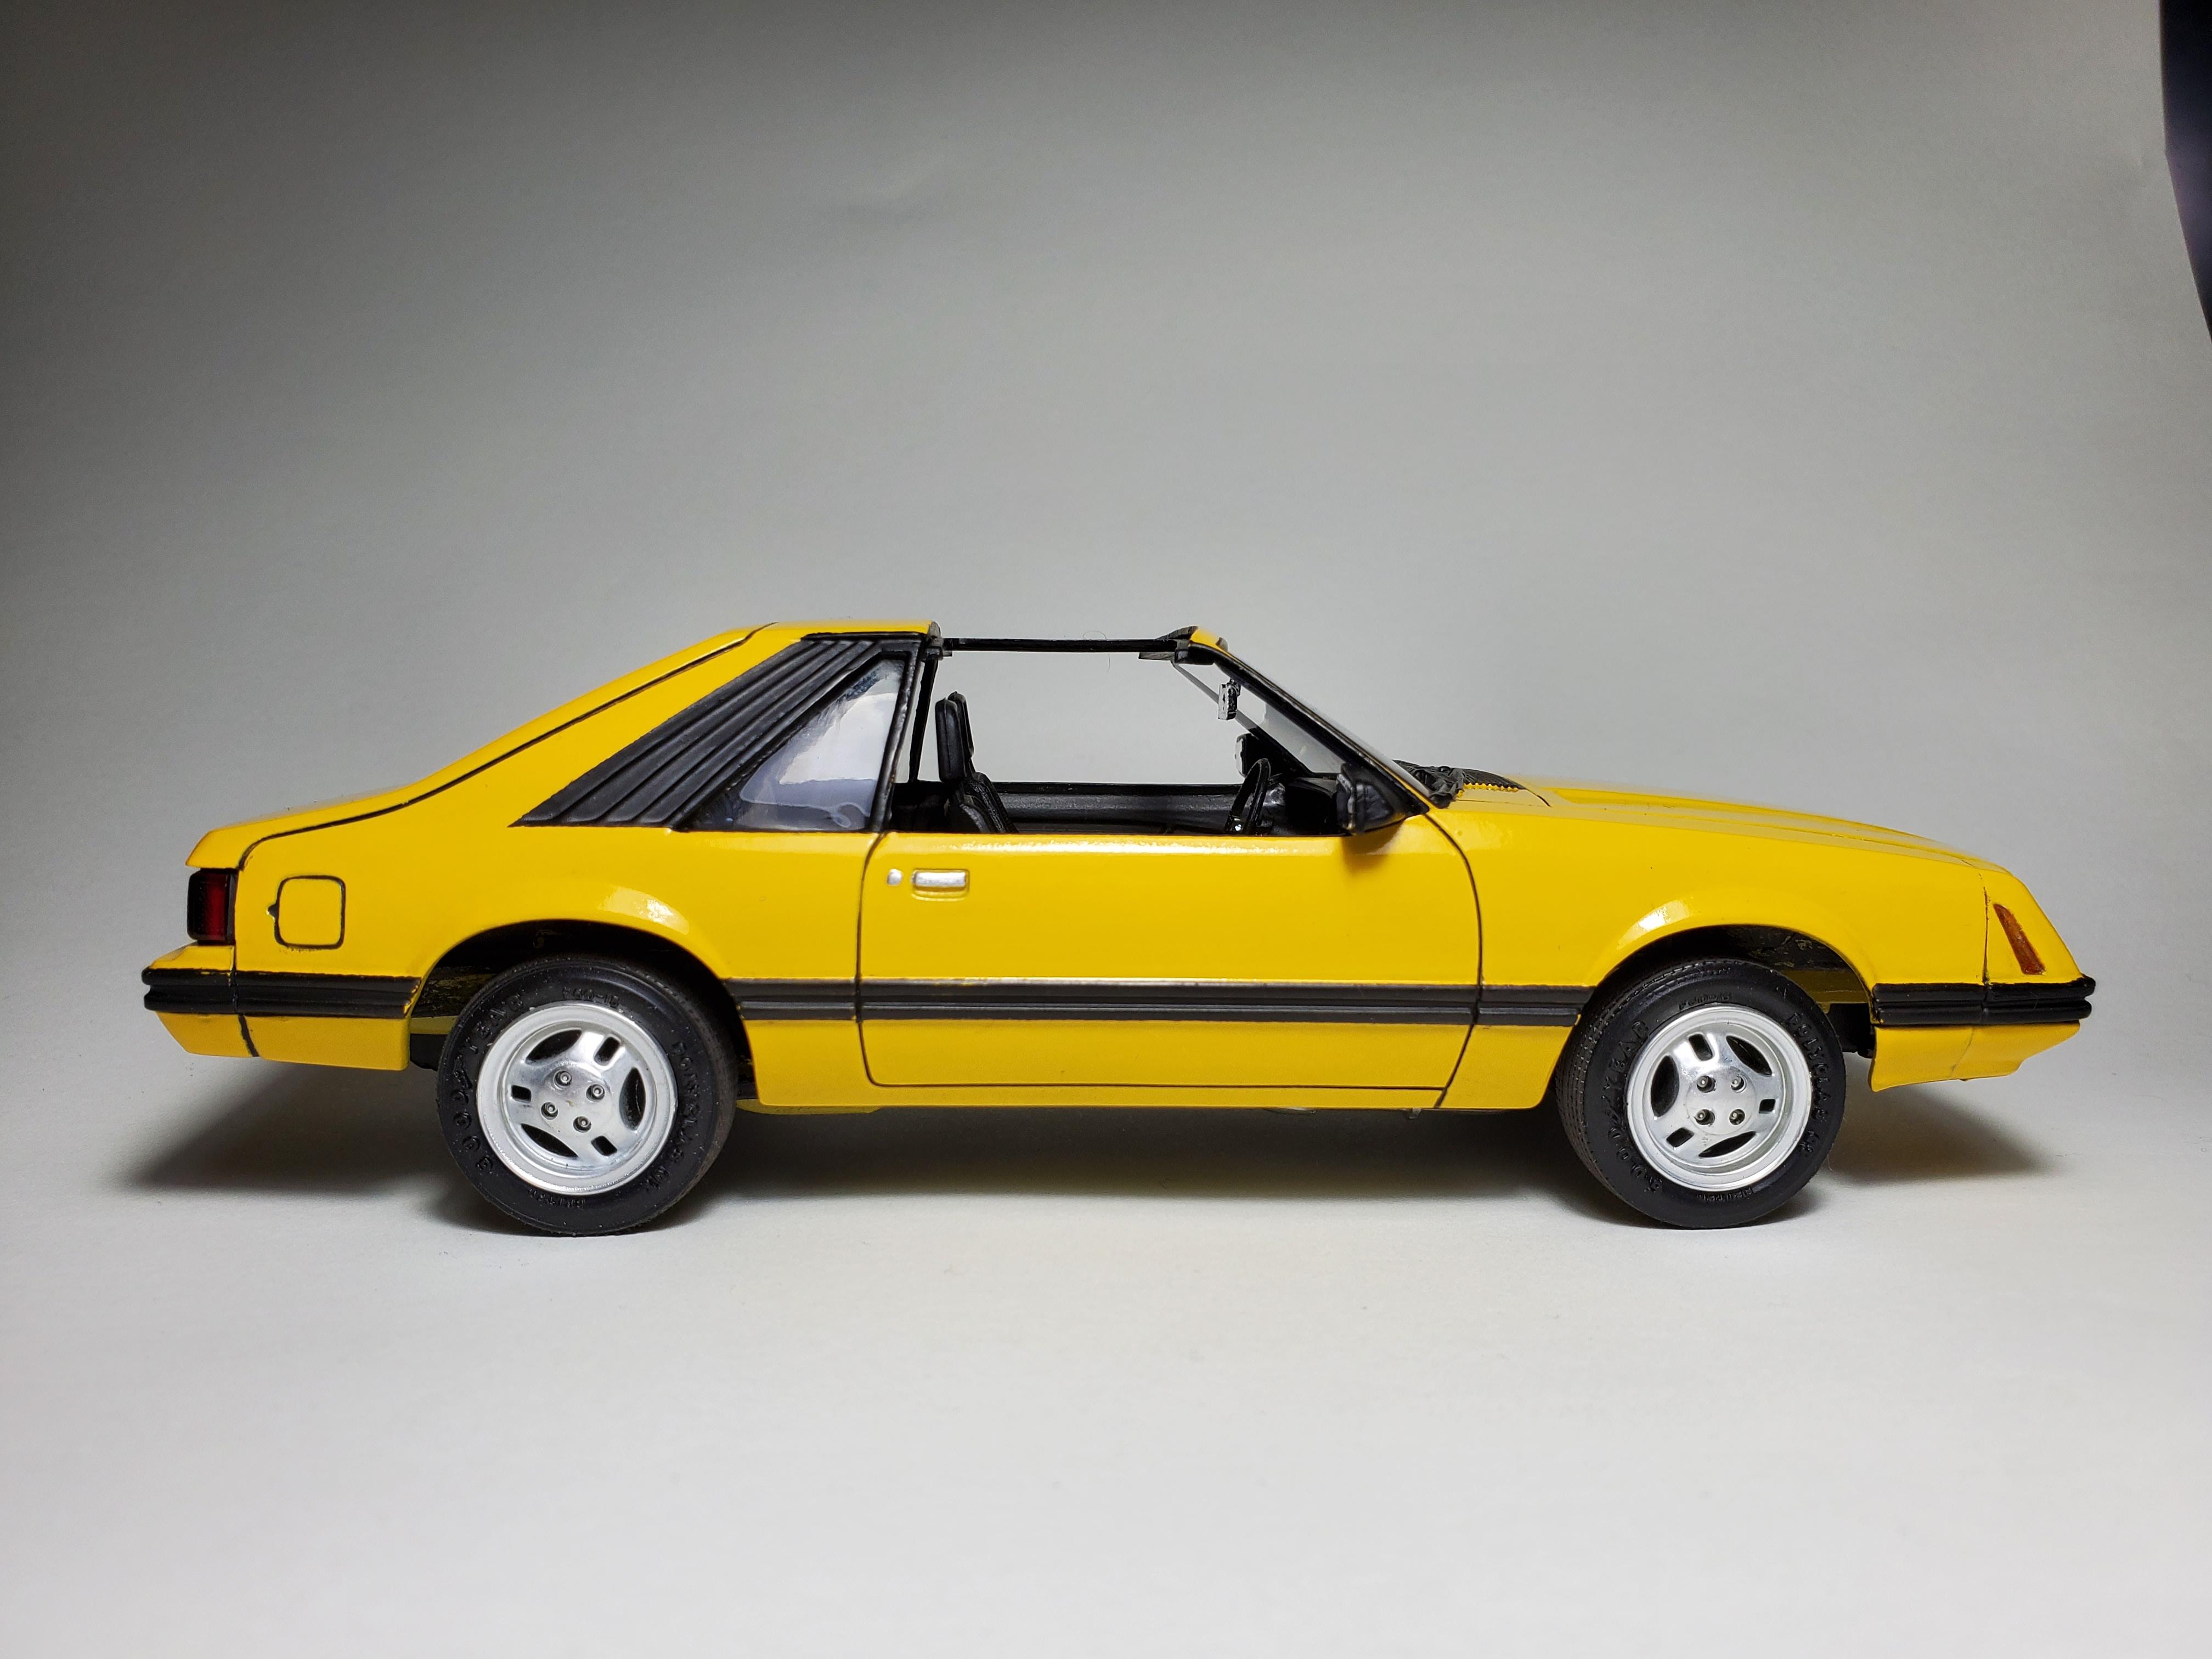
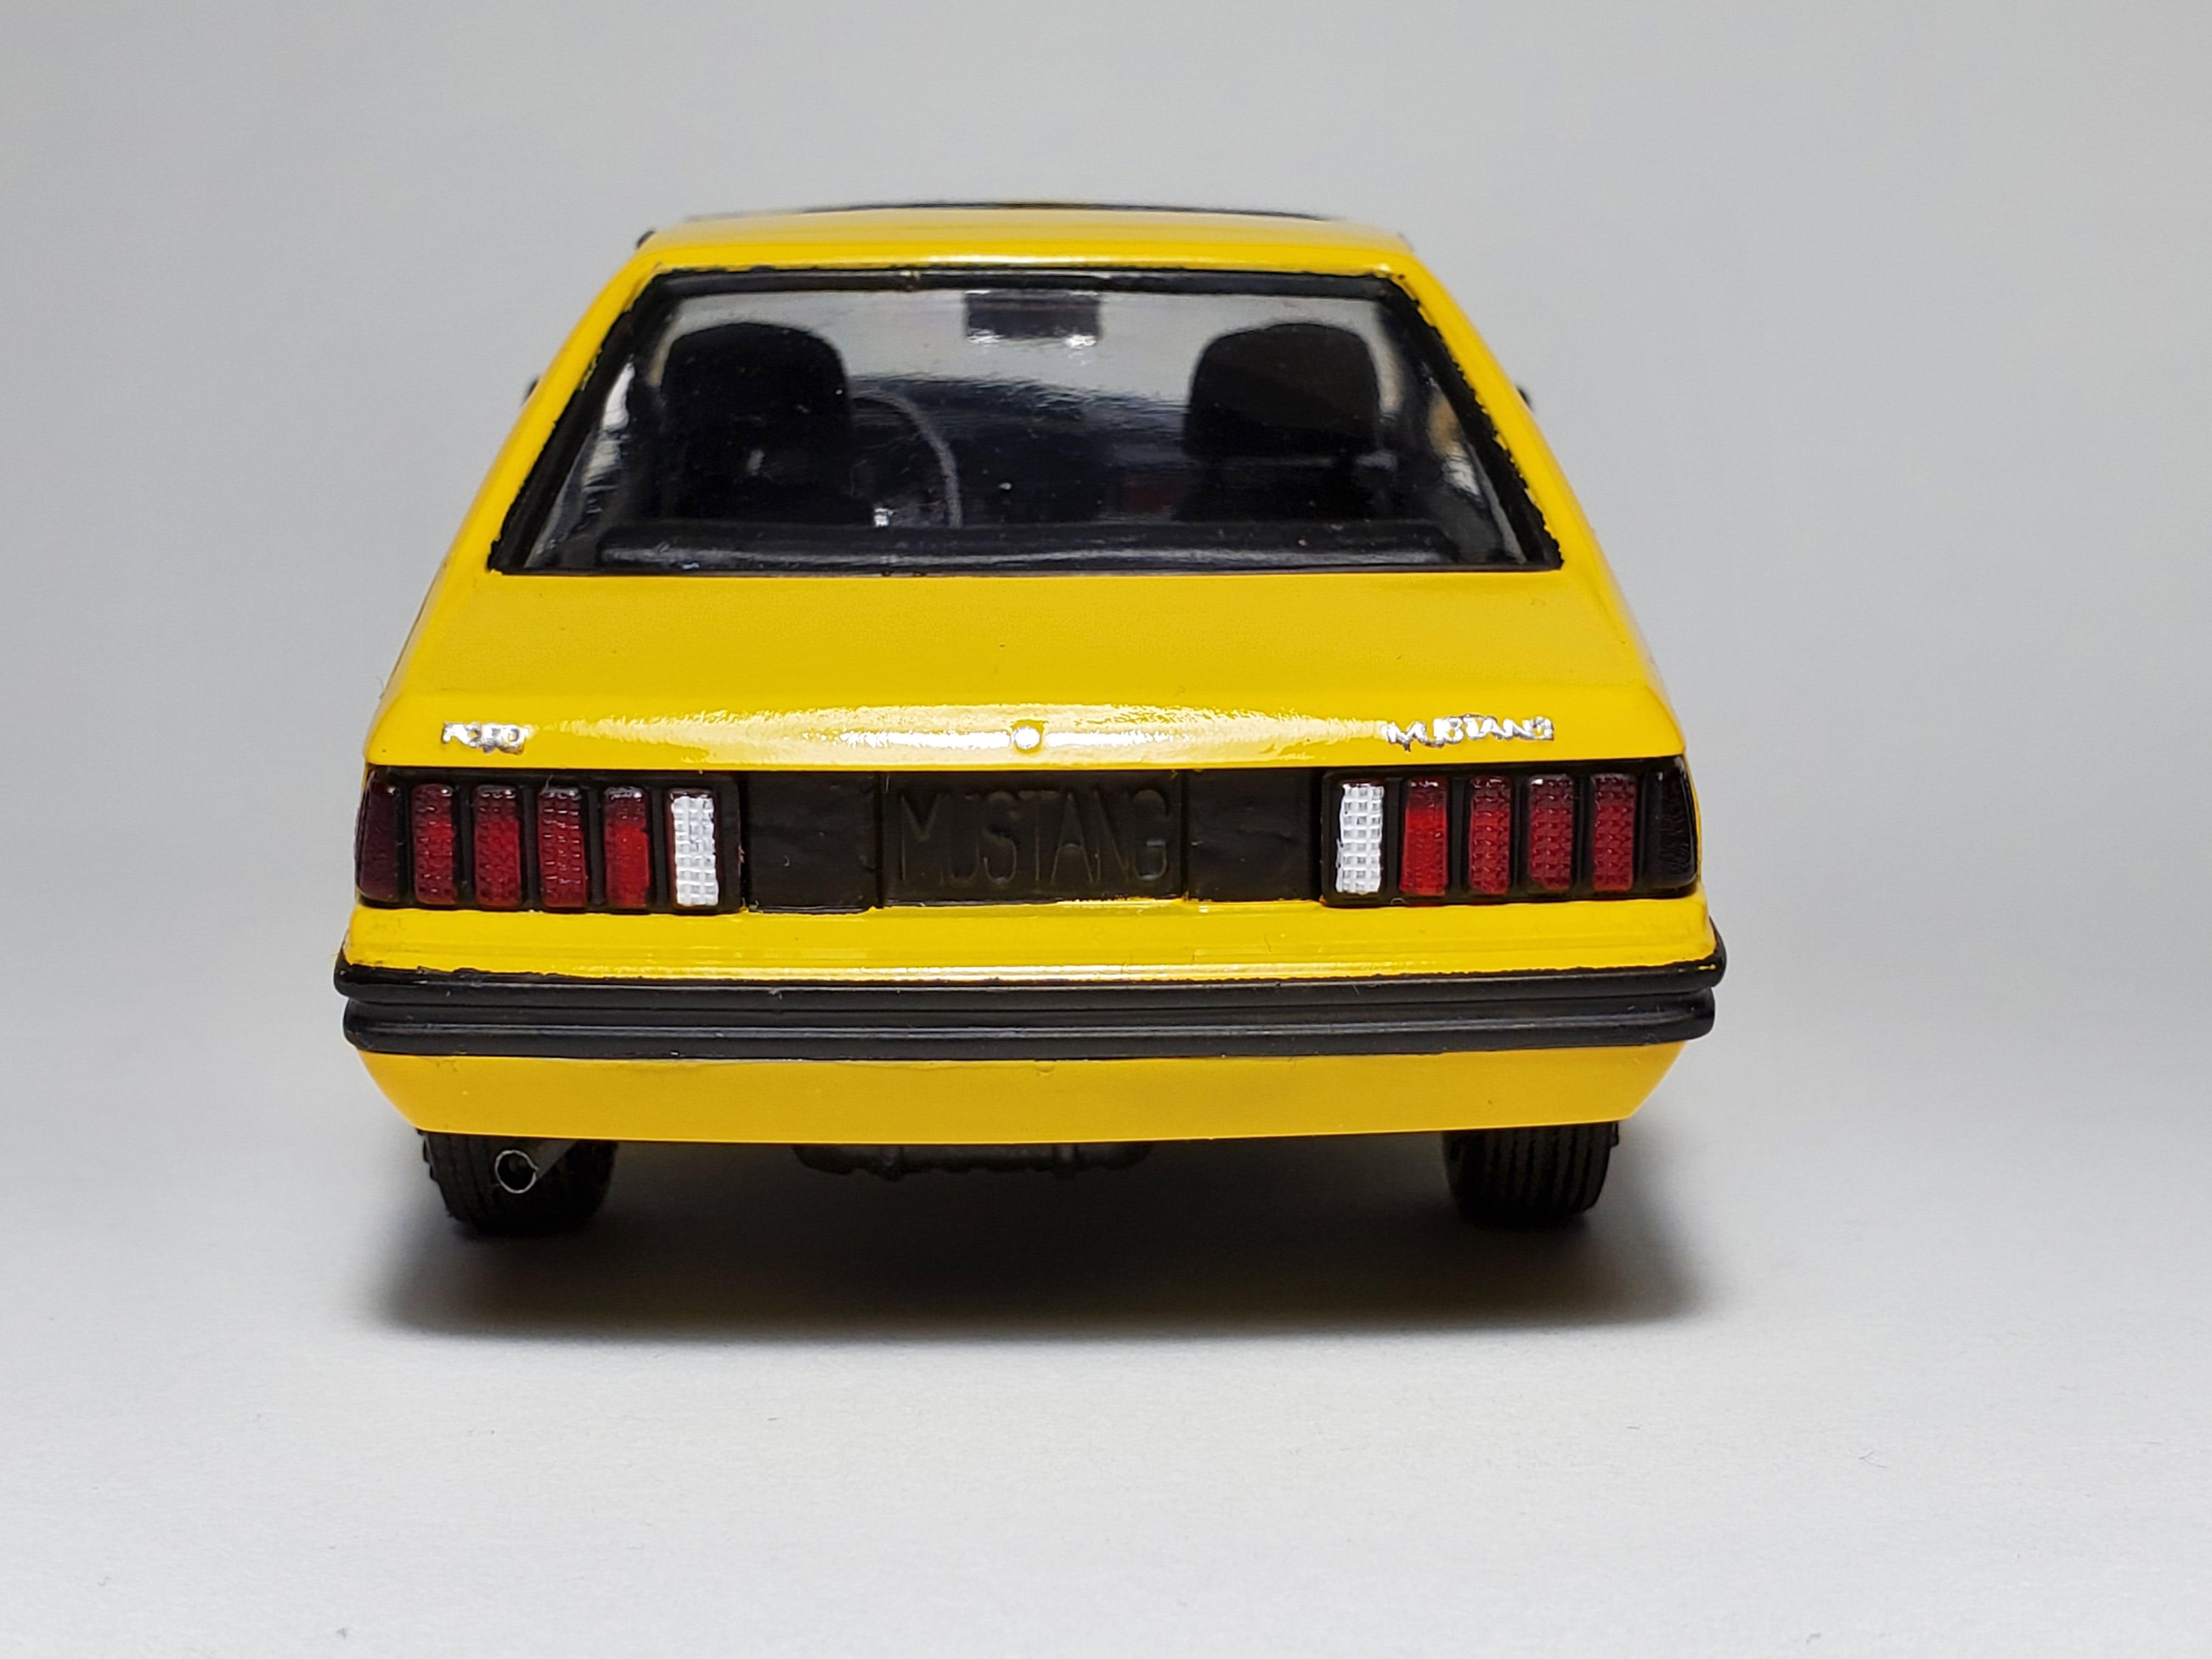
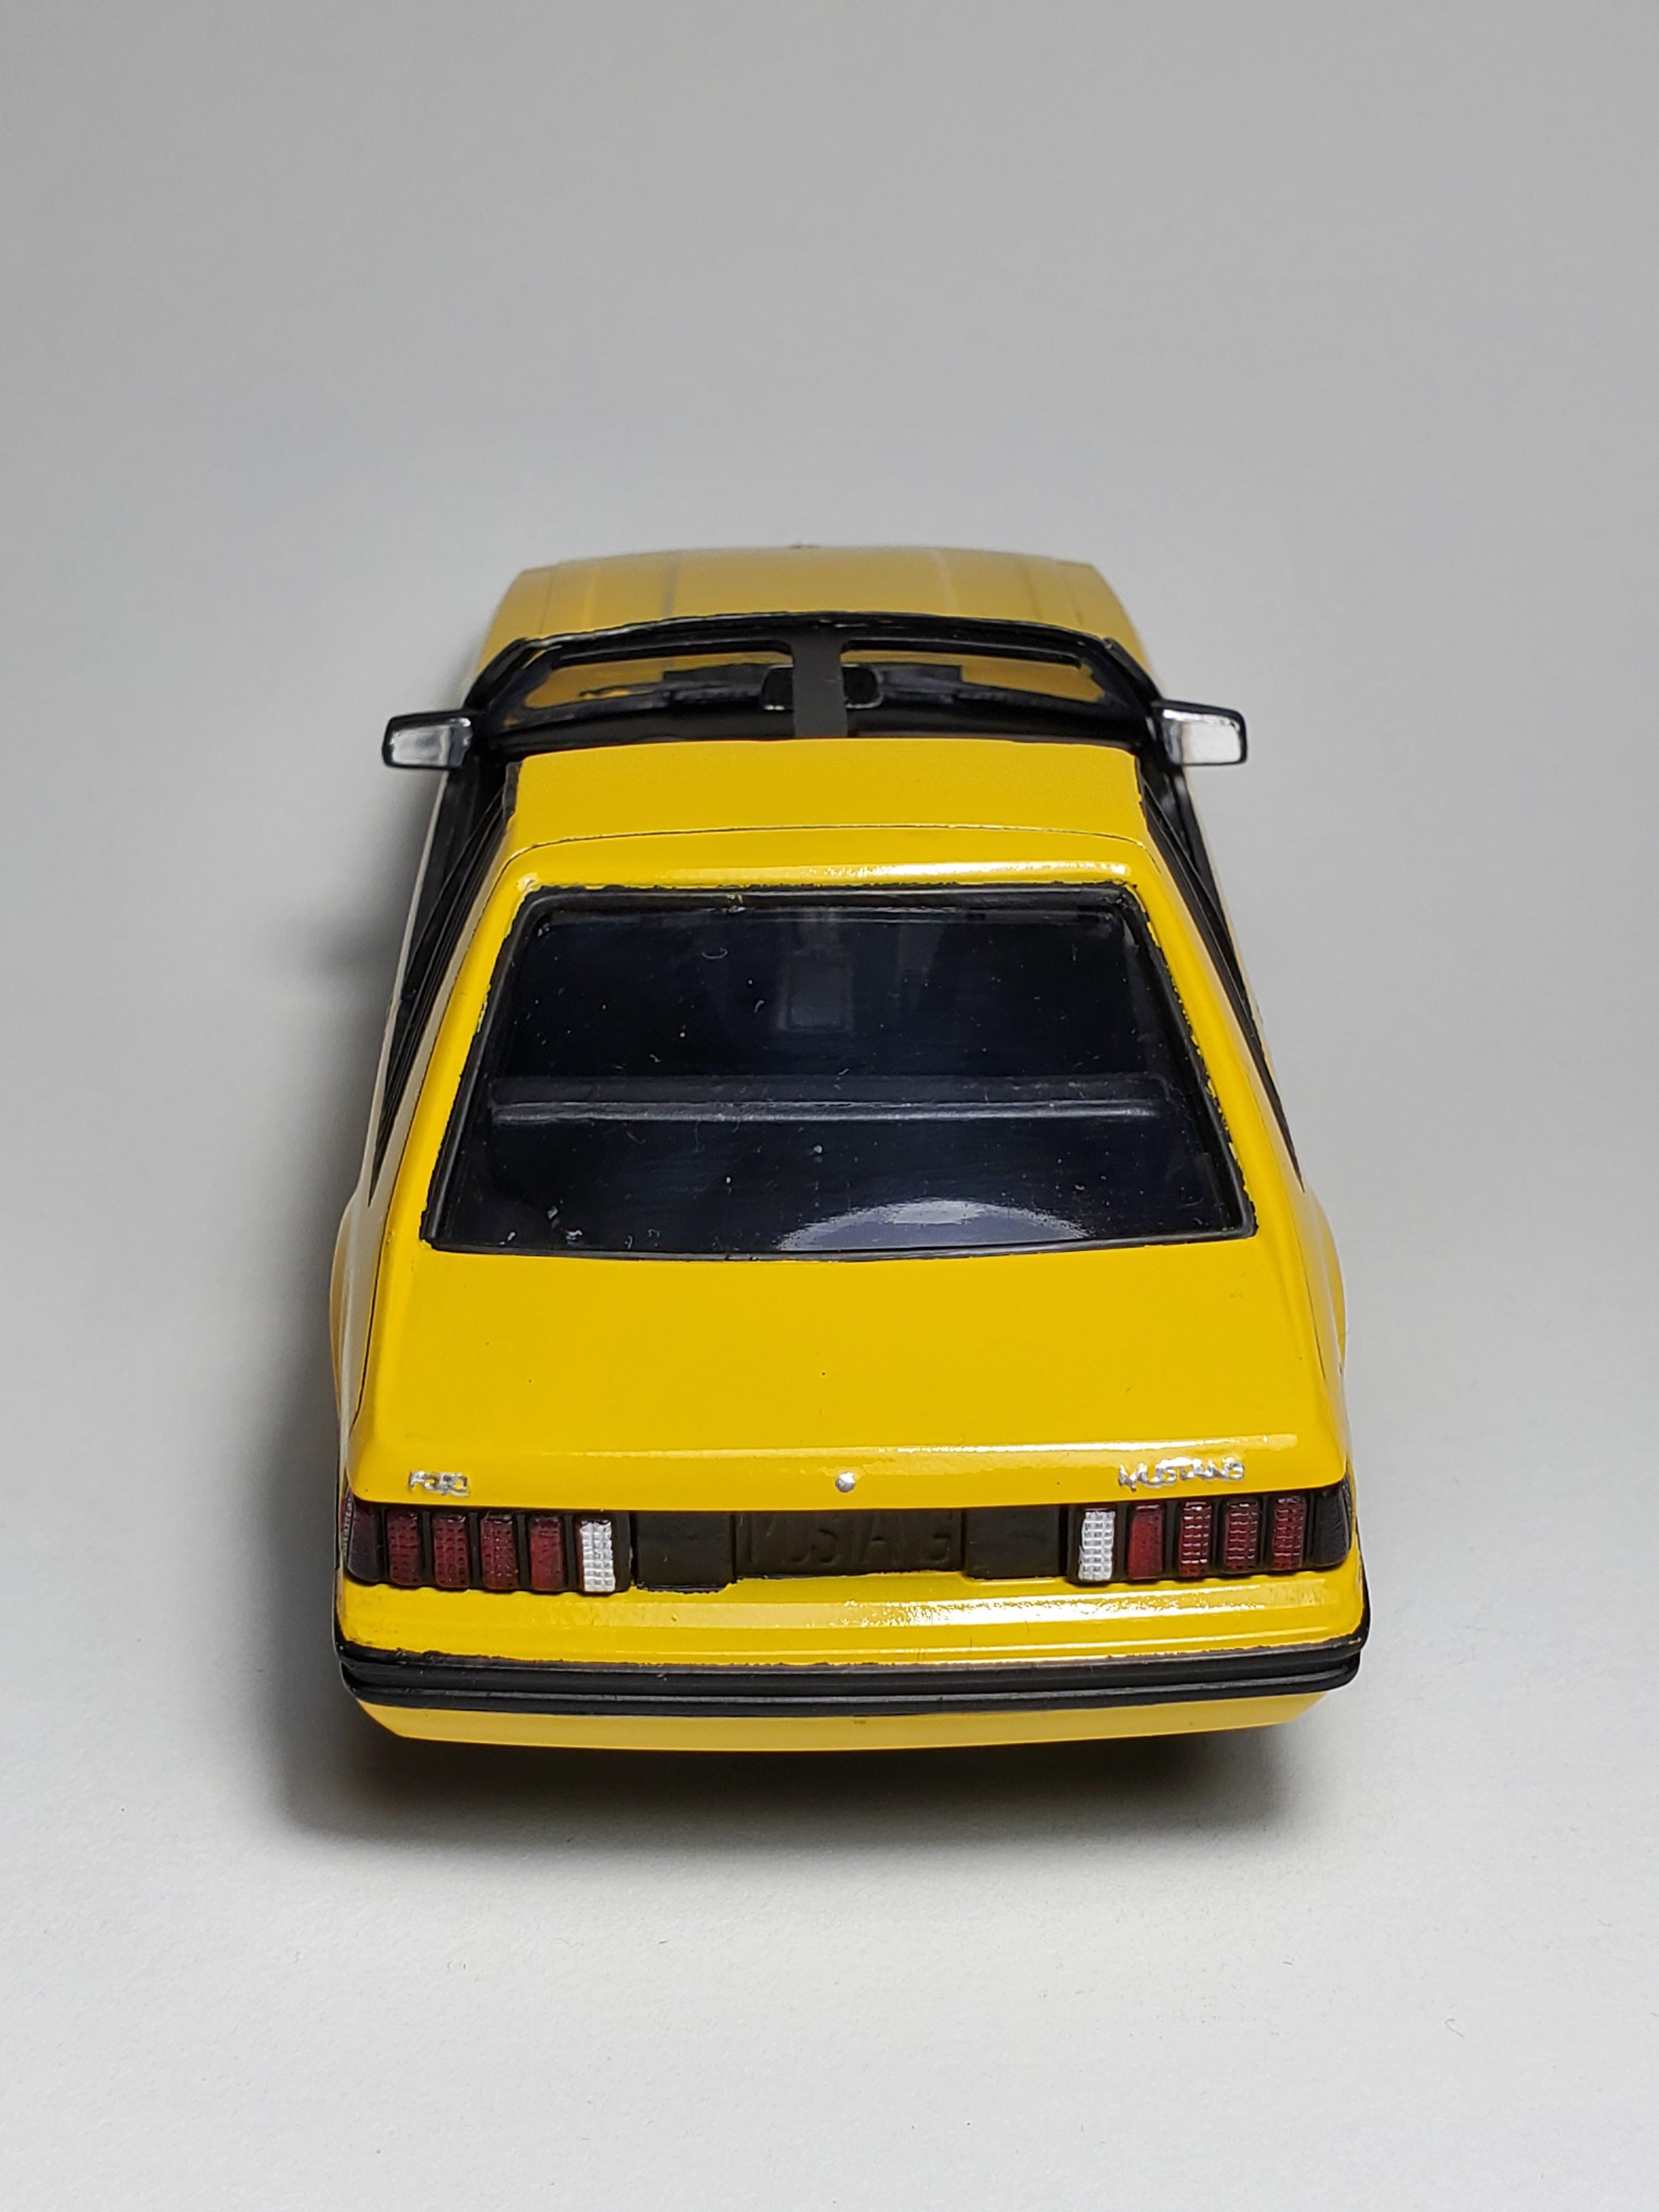
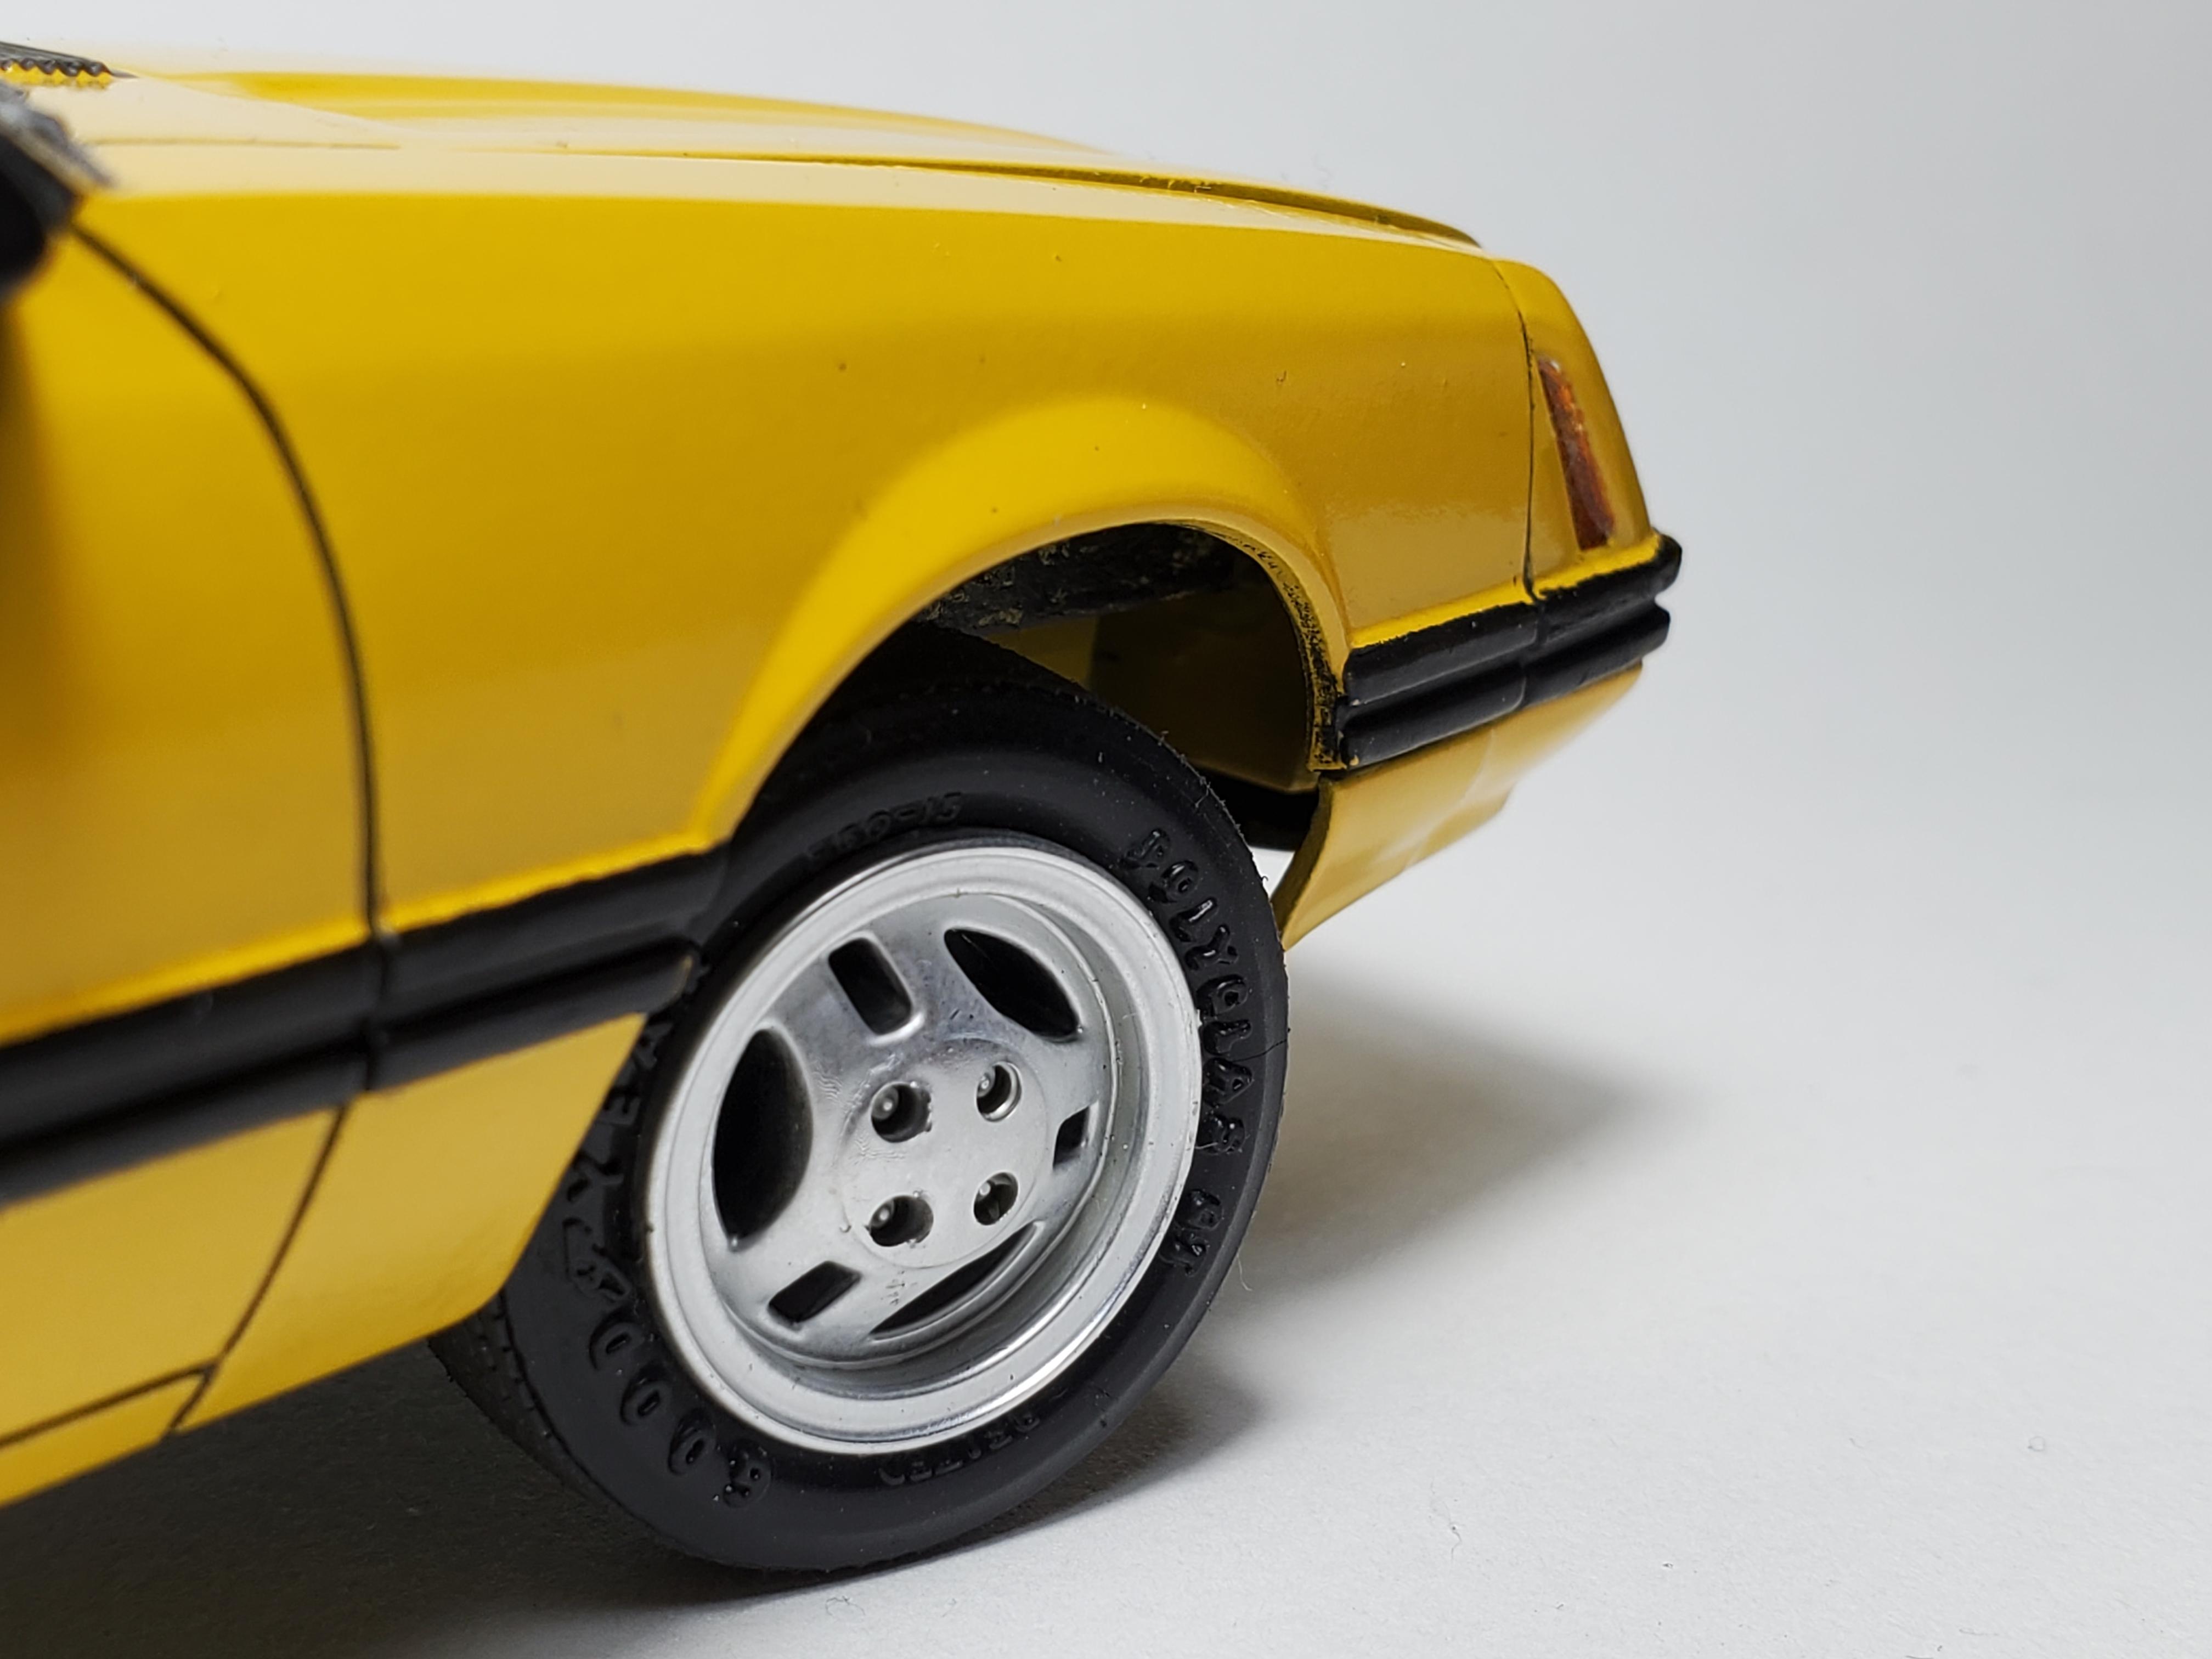
I thought I posted this, but apparently I have not. Built it in like late March or early April. 79 Mustang pace car kit built as a turbo 4cyl t-top non pace car edition. Unfortunately MPC changed the grille from the original issue of the Cobra to the Pace car edition, so the horizontal slat grille is not correct for a base model. But it is what it is. Used Tamiya yellow for the paint. Someone sent me some houndstooth decals some time ago, that I've used for the seats. Probably not correct for a foxbody, maybe more for a Mustang II. No plug wires or anything like that. Just wanted a quick build.
- 22 replies
-
- 12
-
-
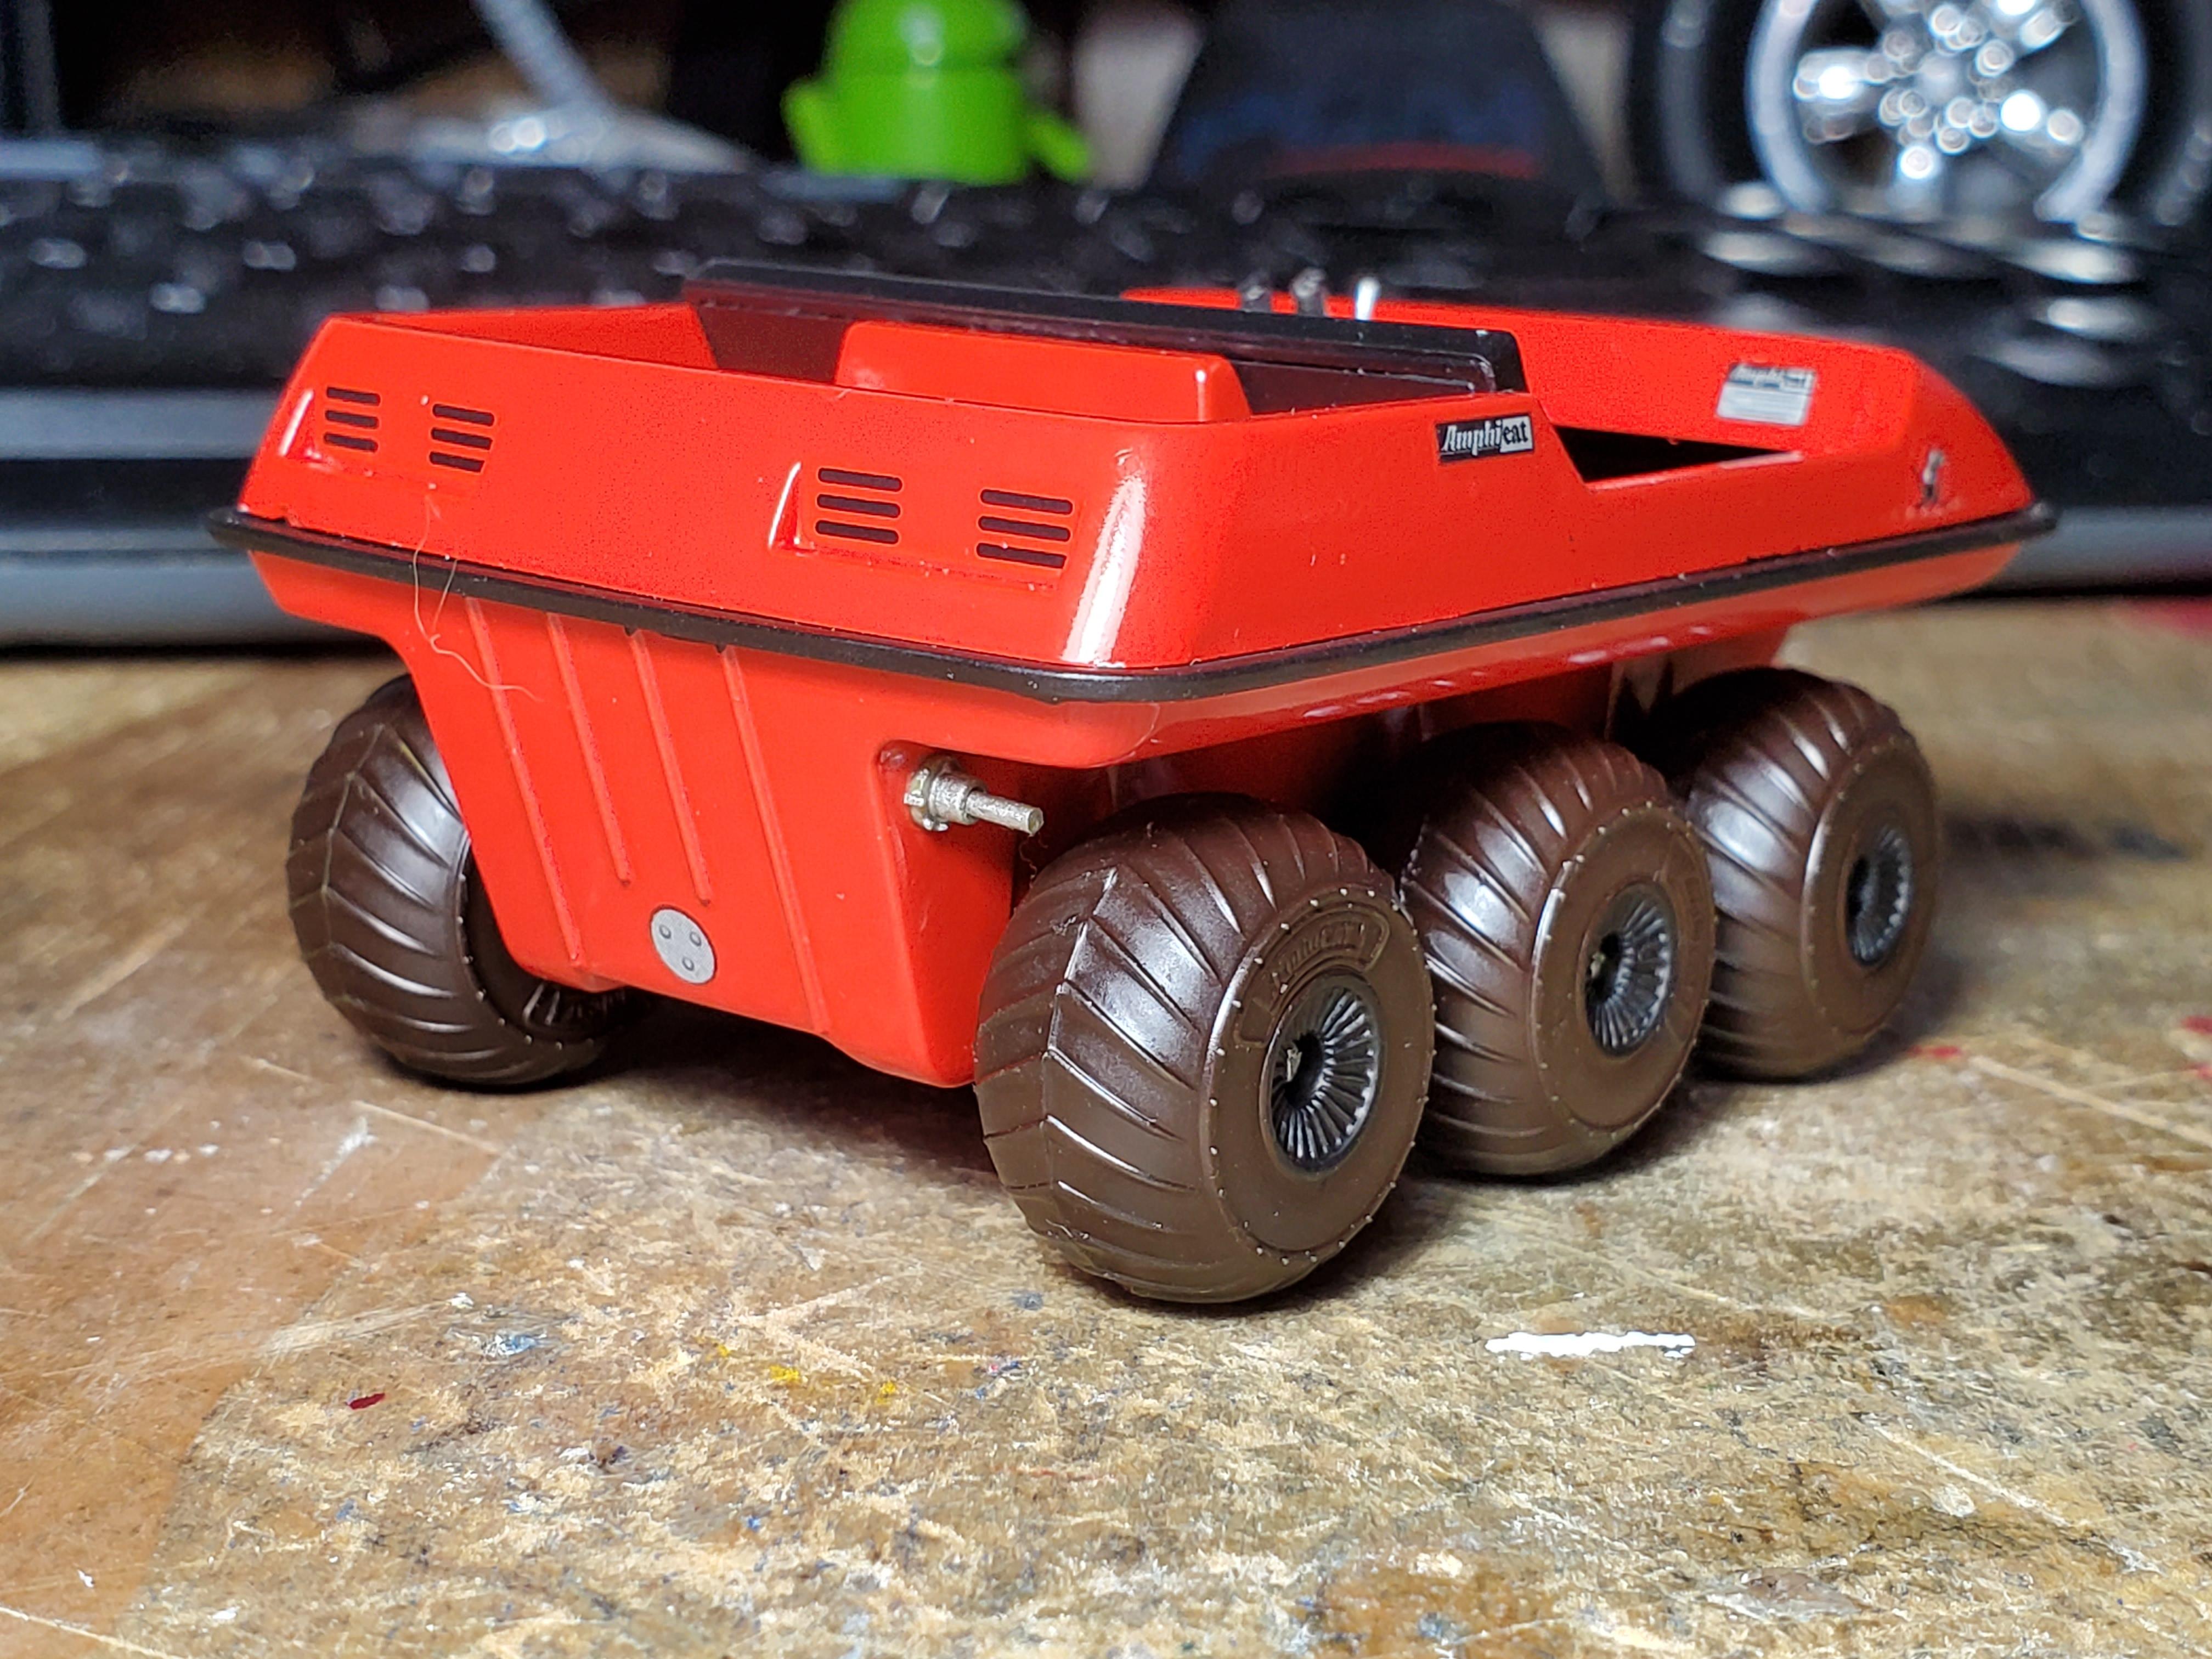
Finished this today. The MPC 1/24 scale Amphicat. This is the recent release of the Space 1999 moonbuggy. Discovered that if you want to be able to disassemble the Amphicat for display, the area where the control sticks go thru needs to be opened up *significantly* I had this pretty much finished a couple weeks ago but lost the fuel cap. I bought a 2nd kit (I wanted one anyway) and cloned the fuel cap with Bondic.
-
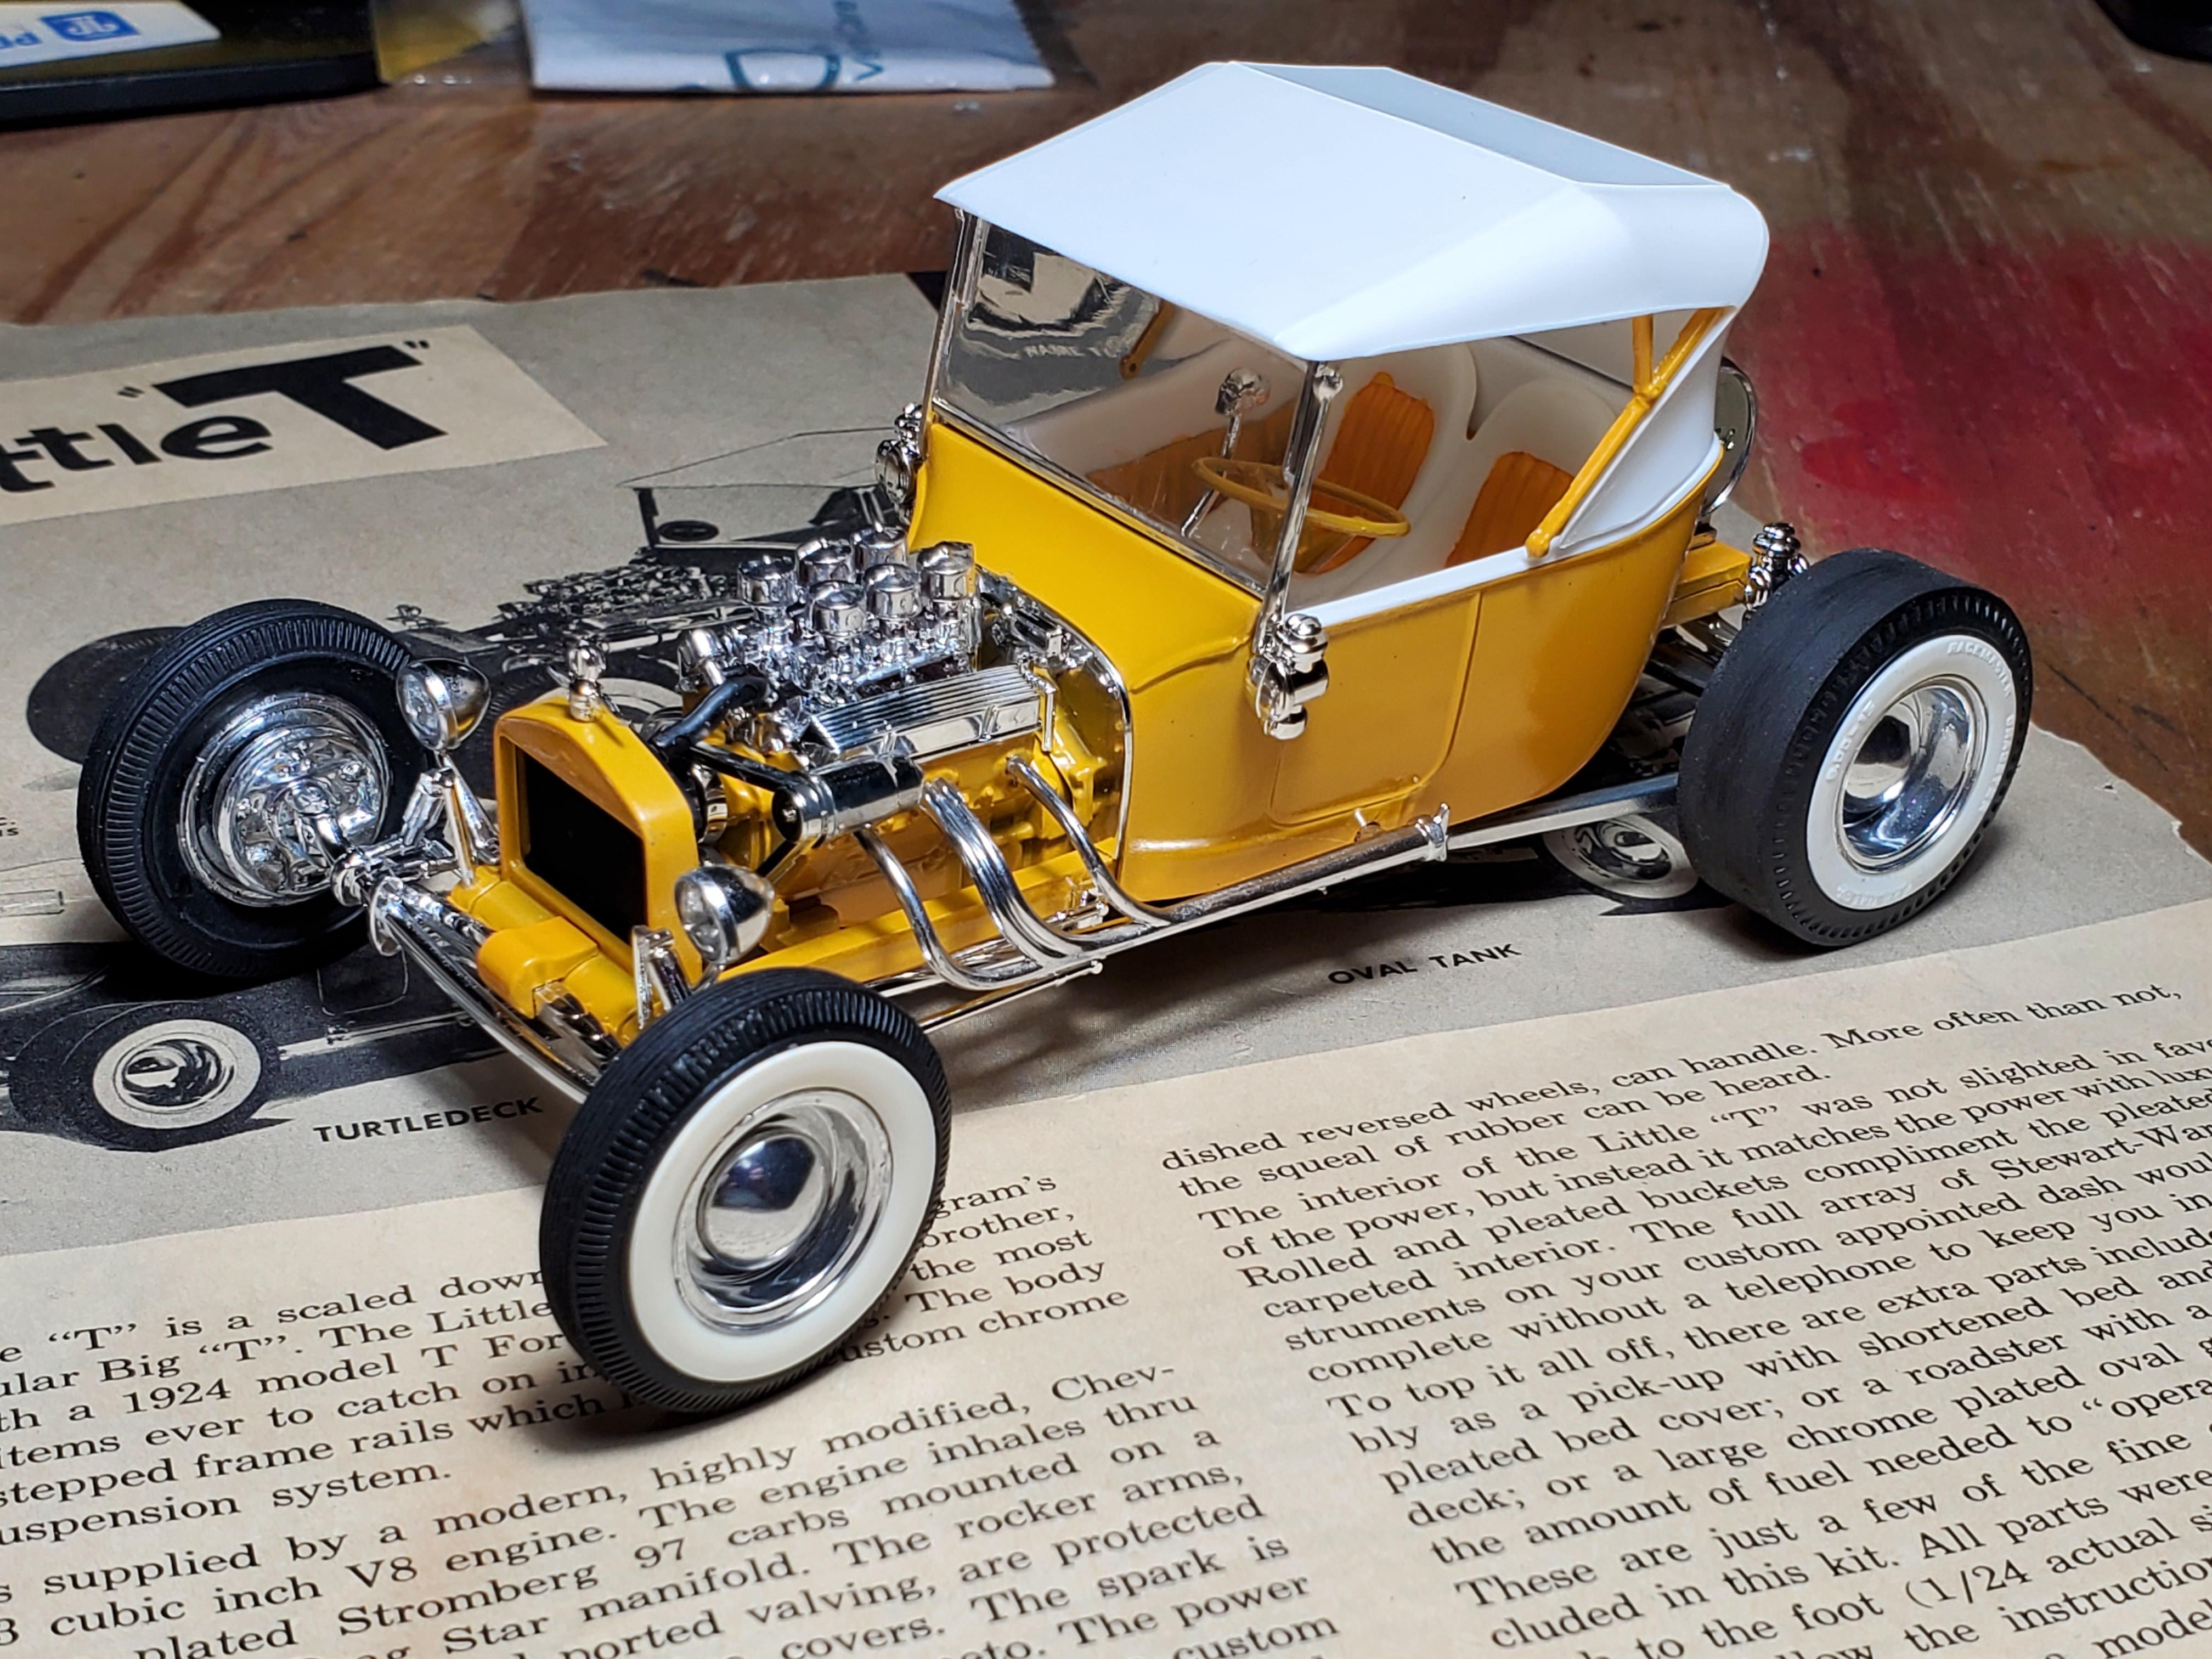
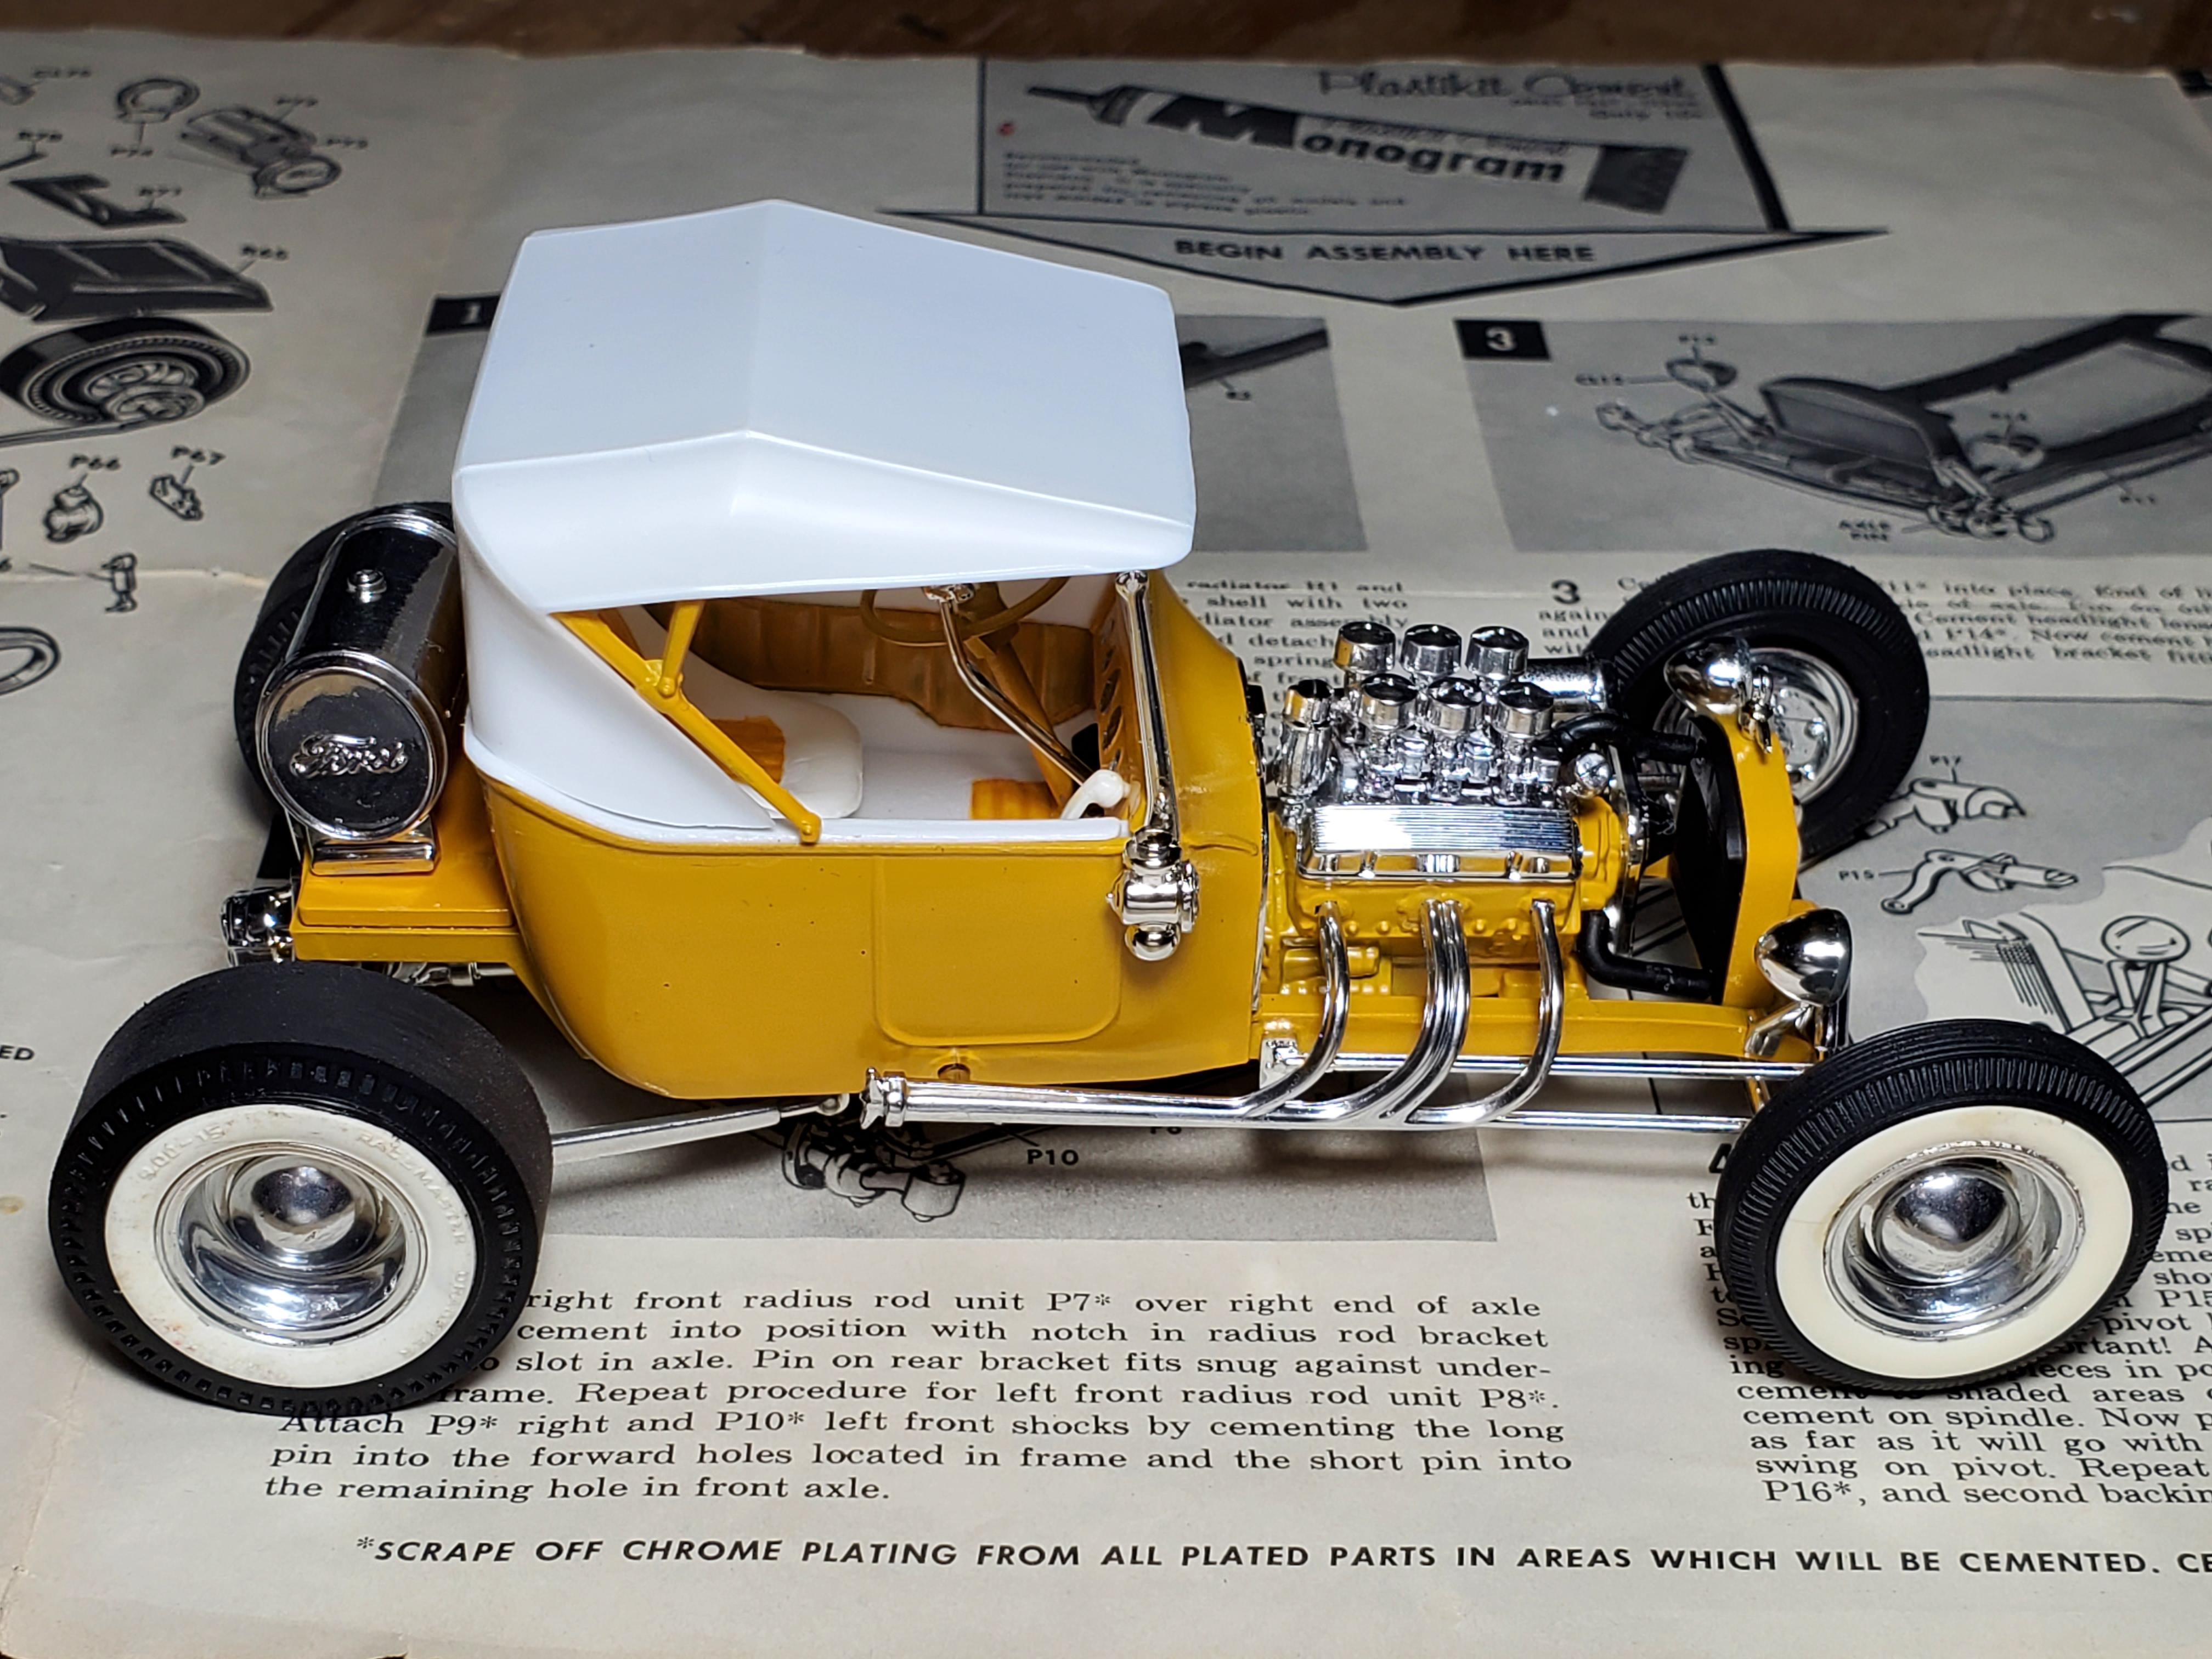
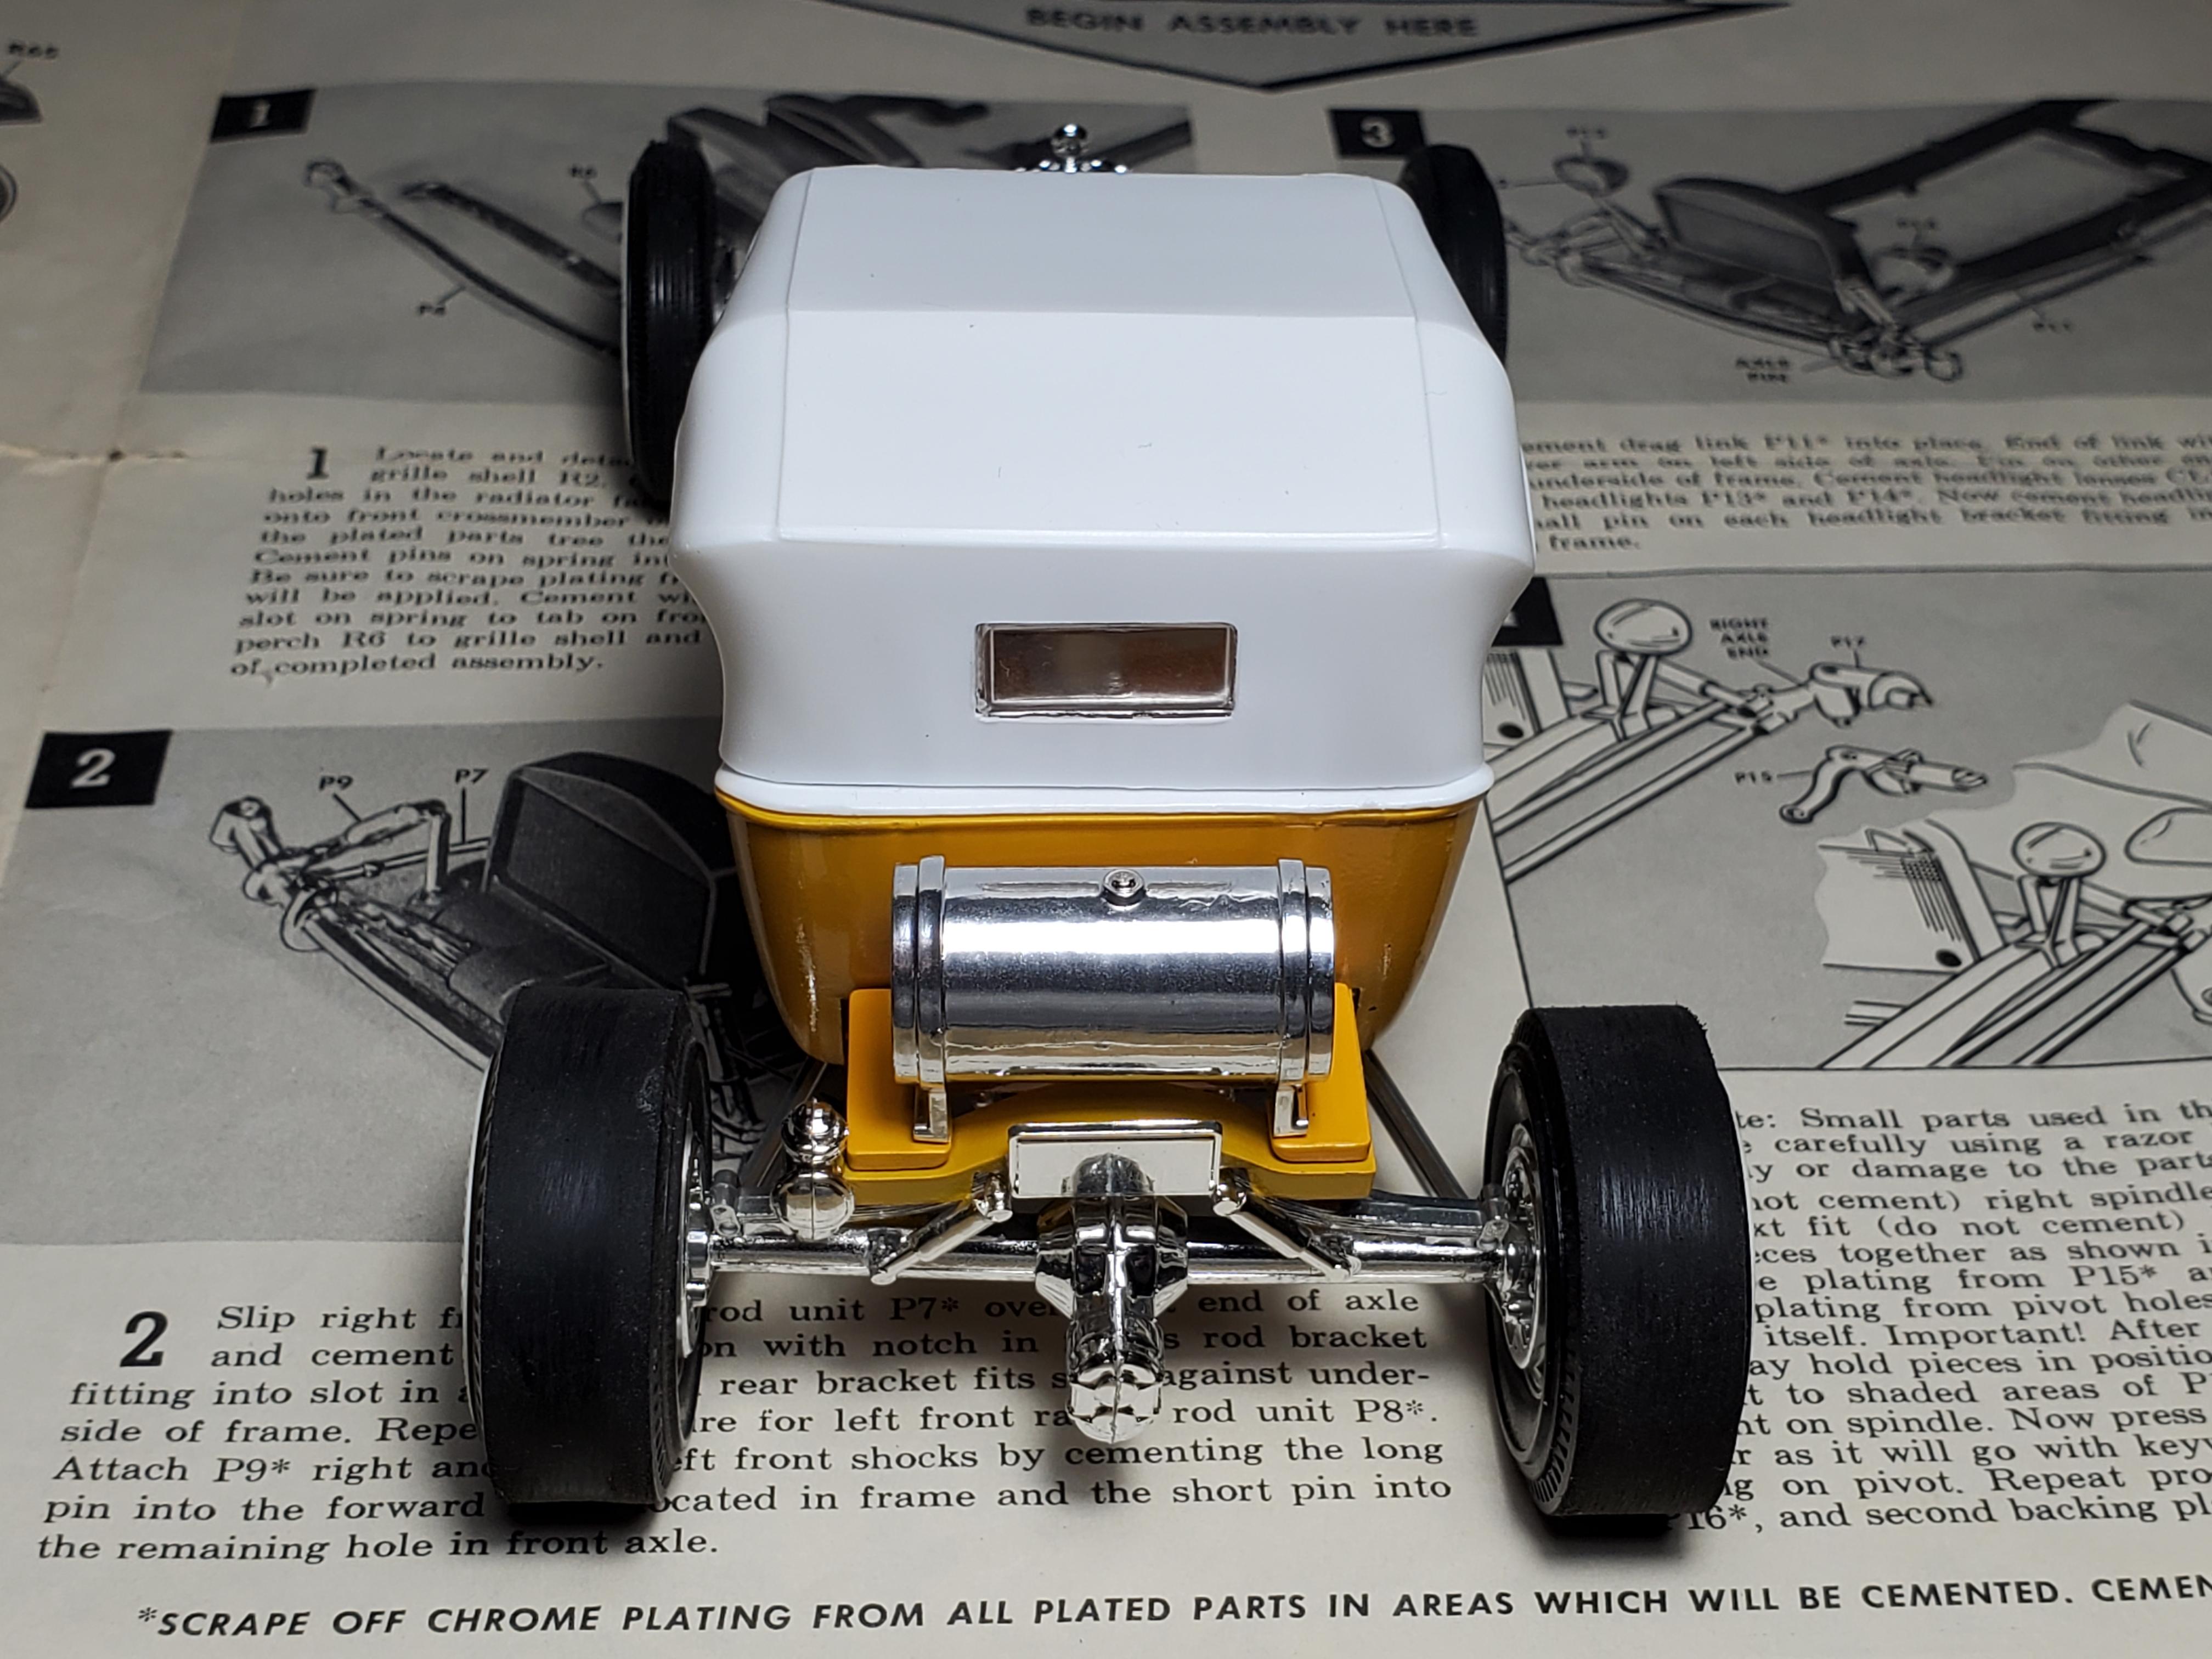
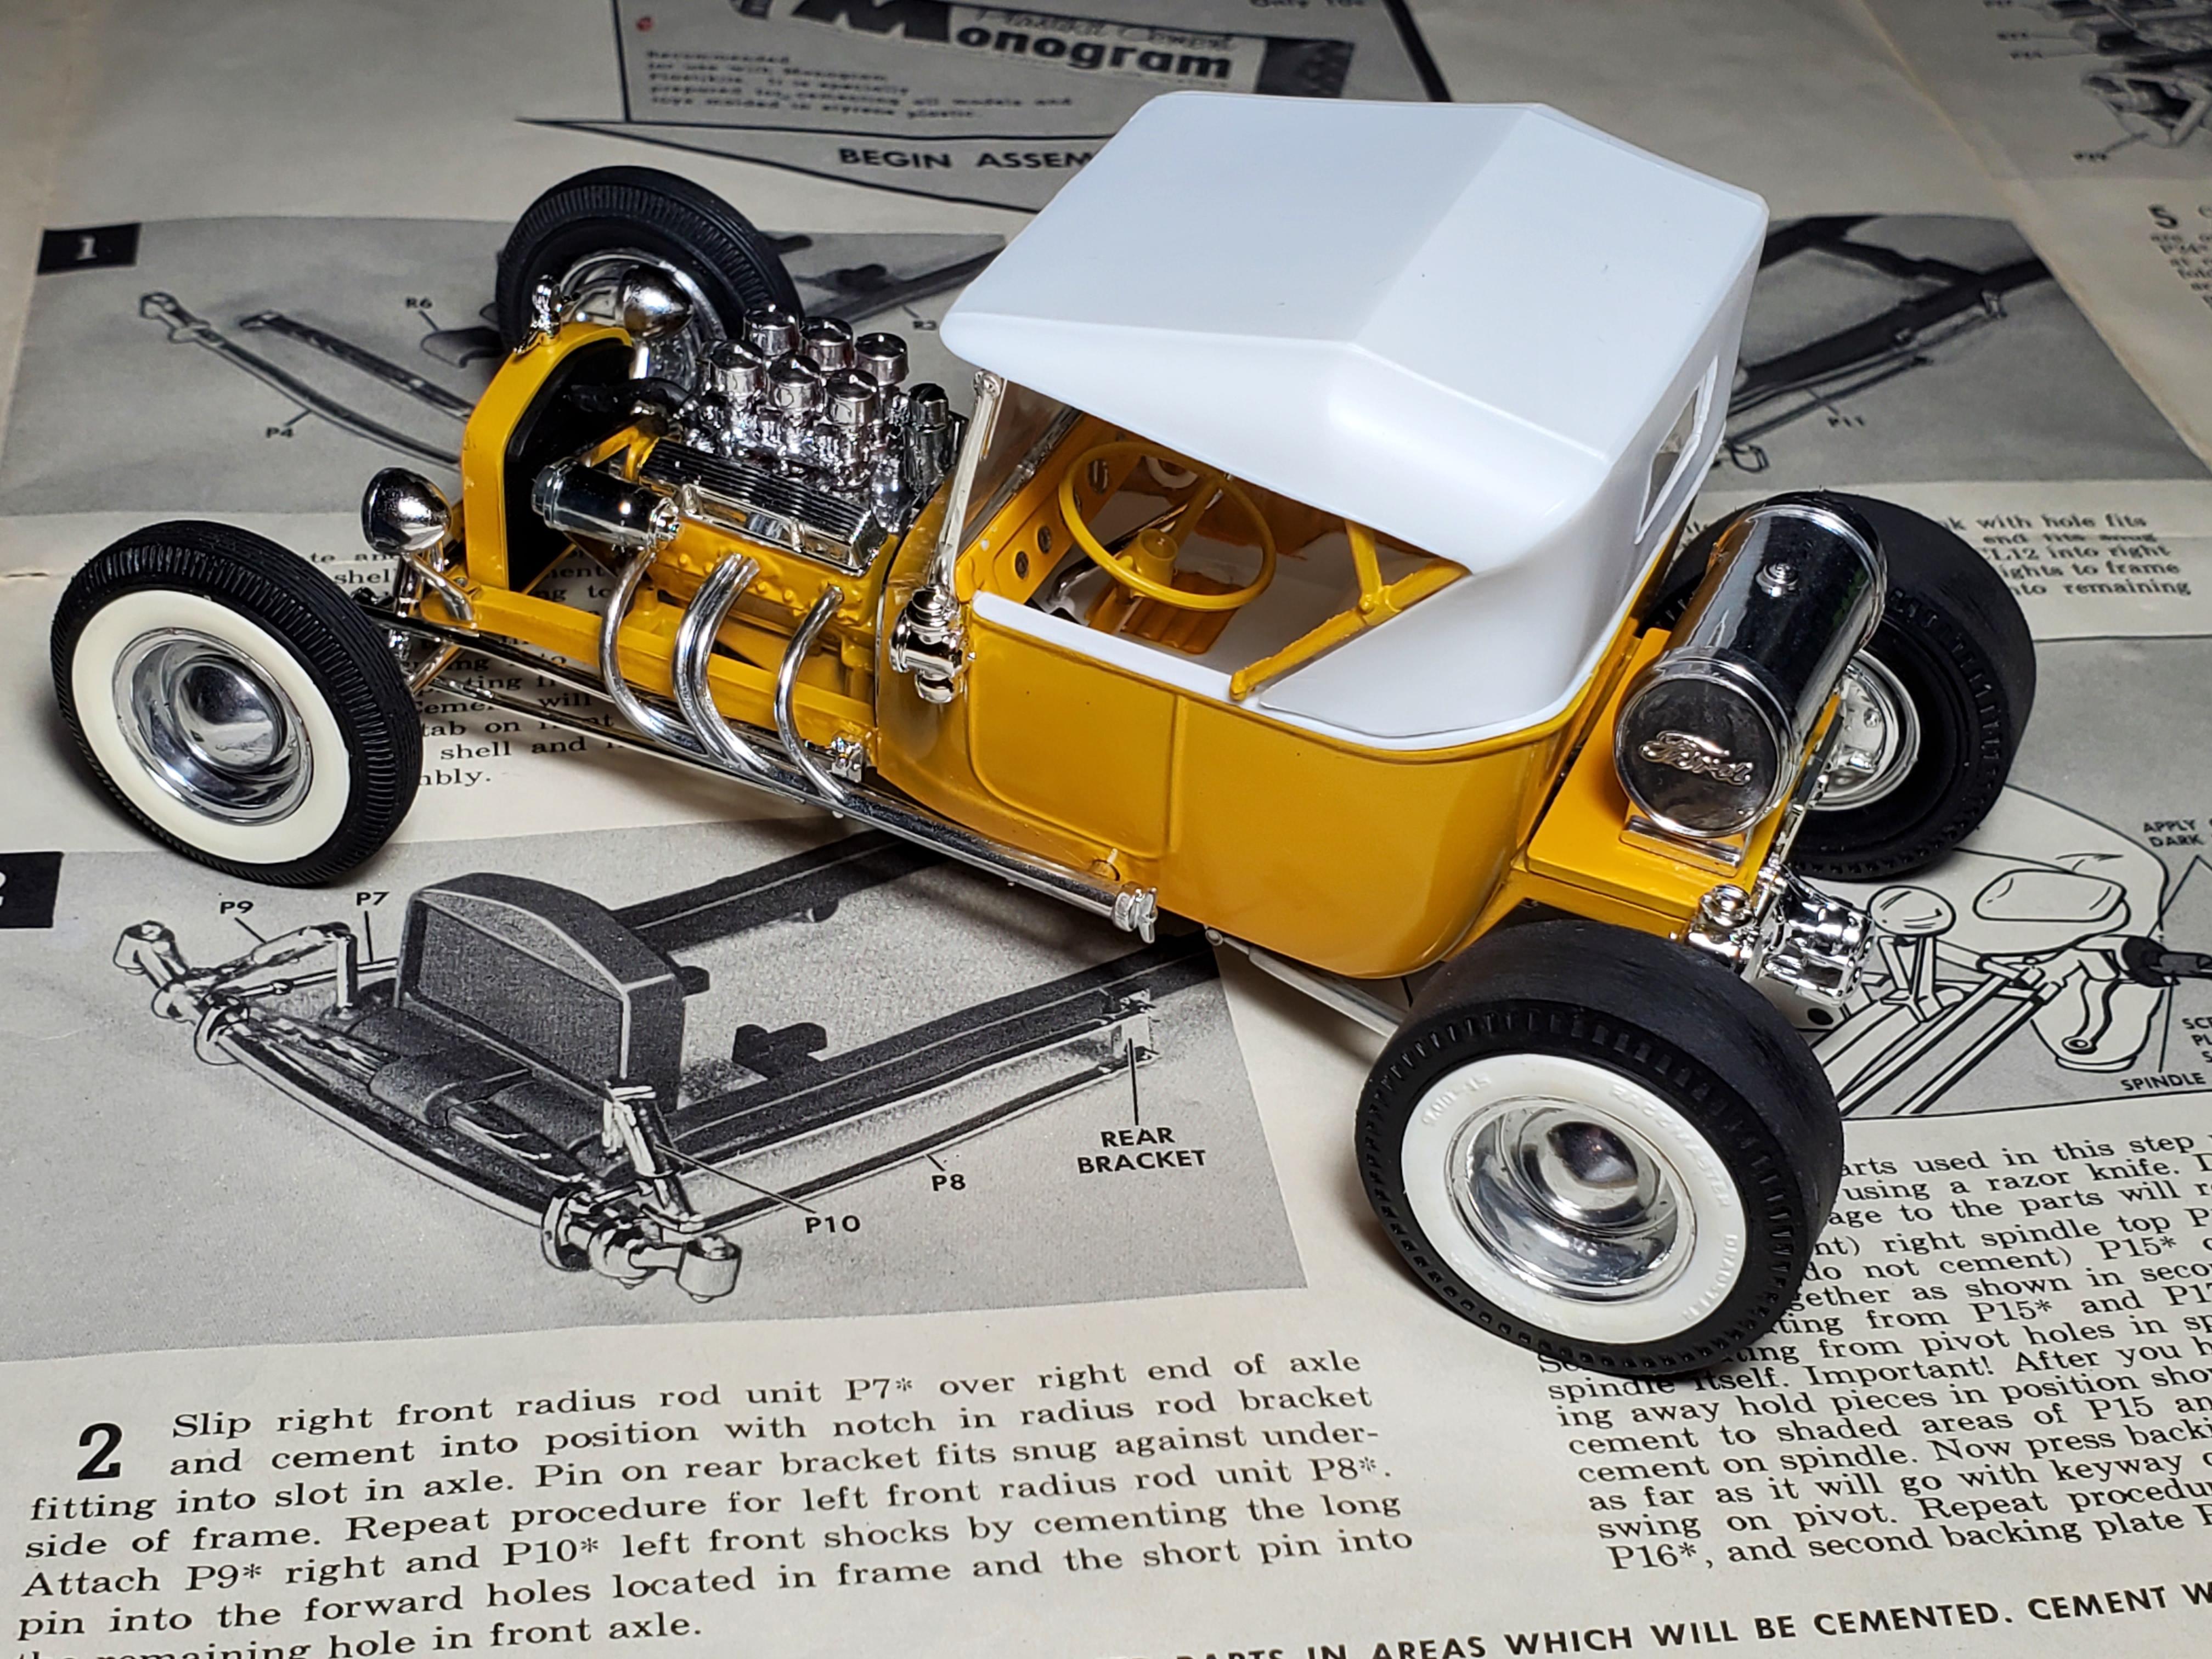
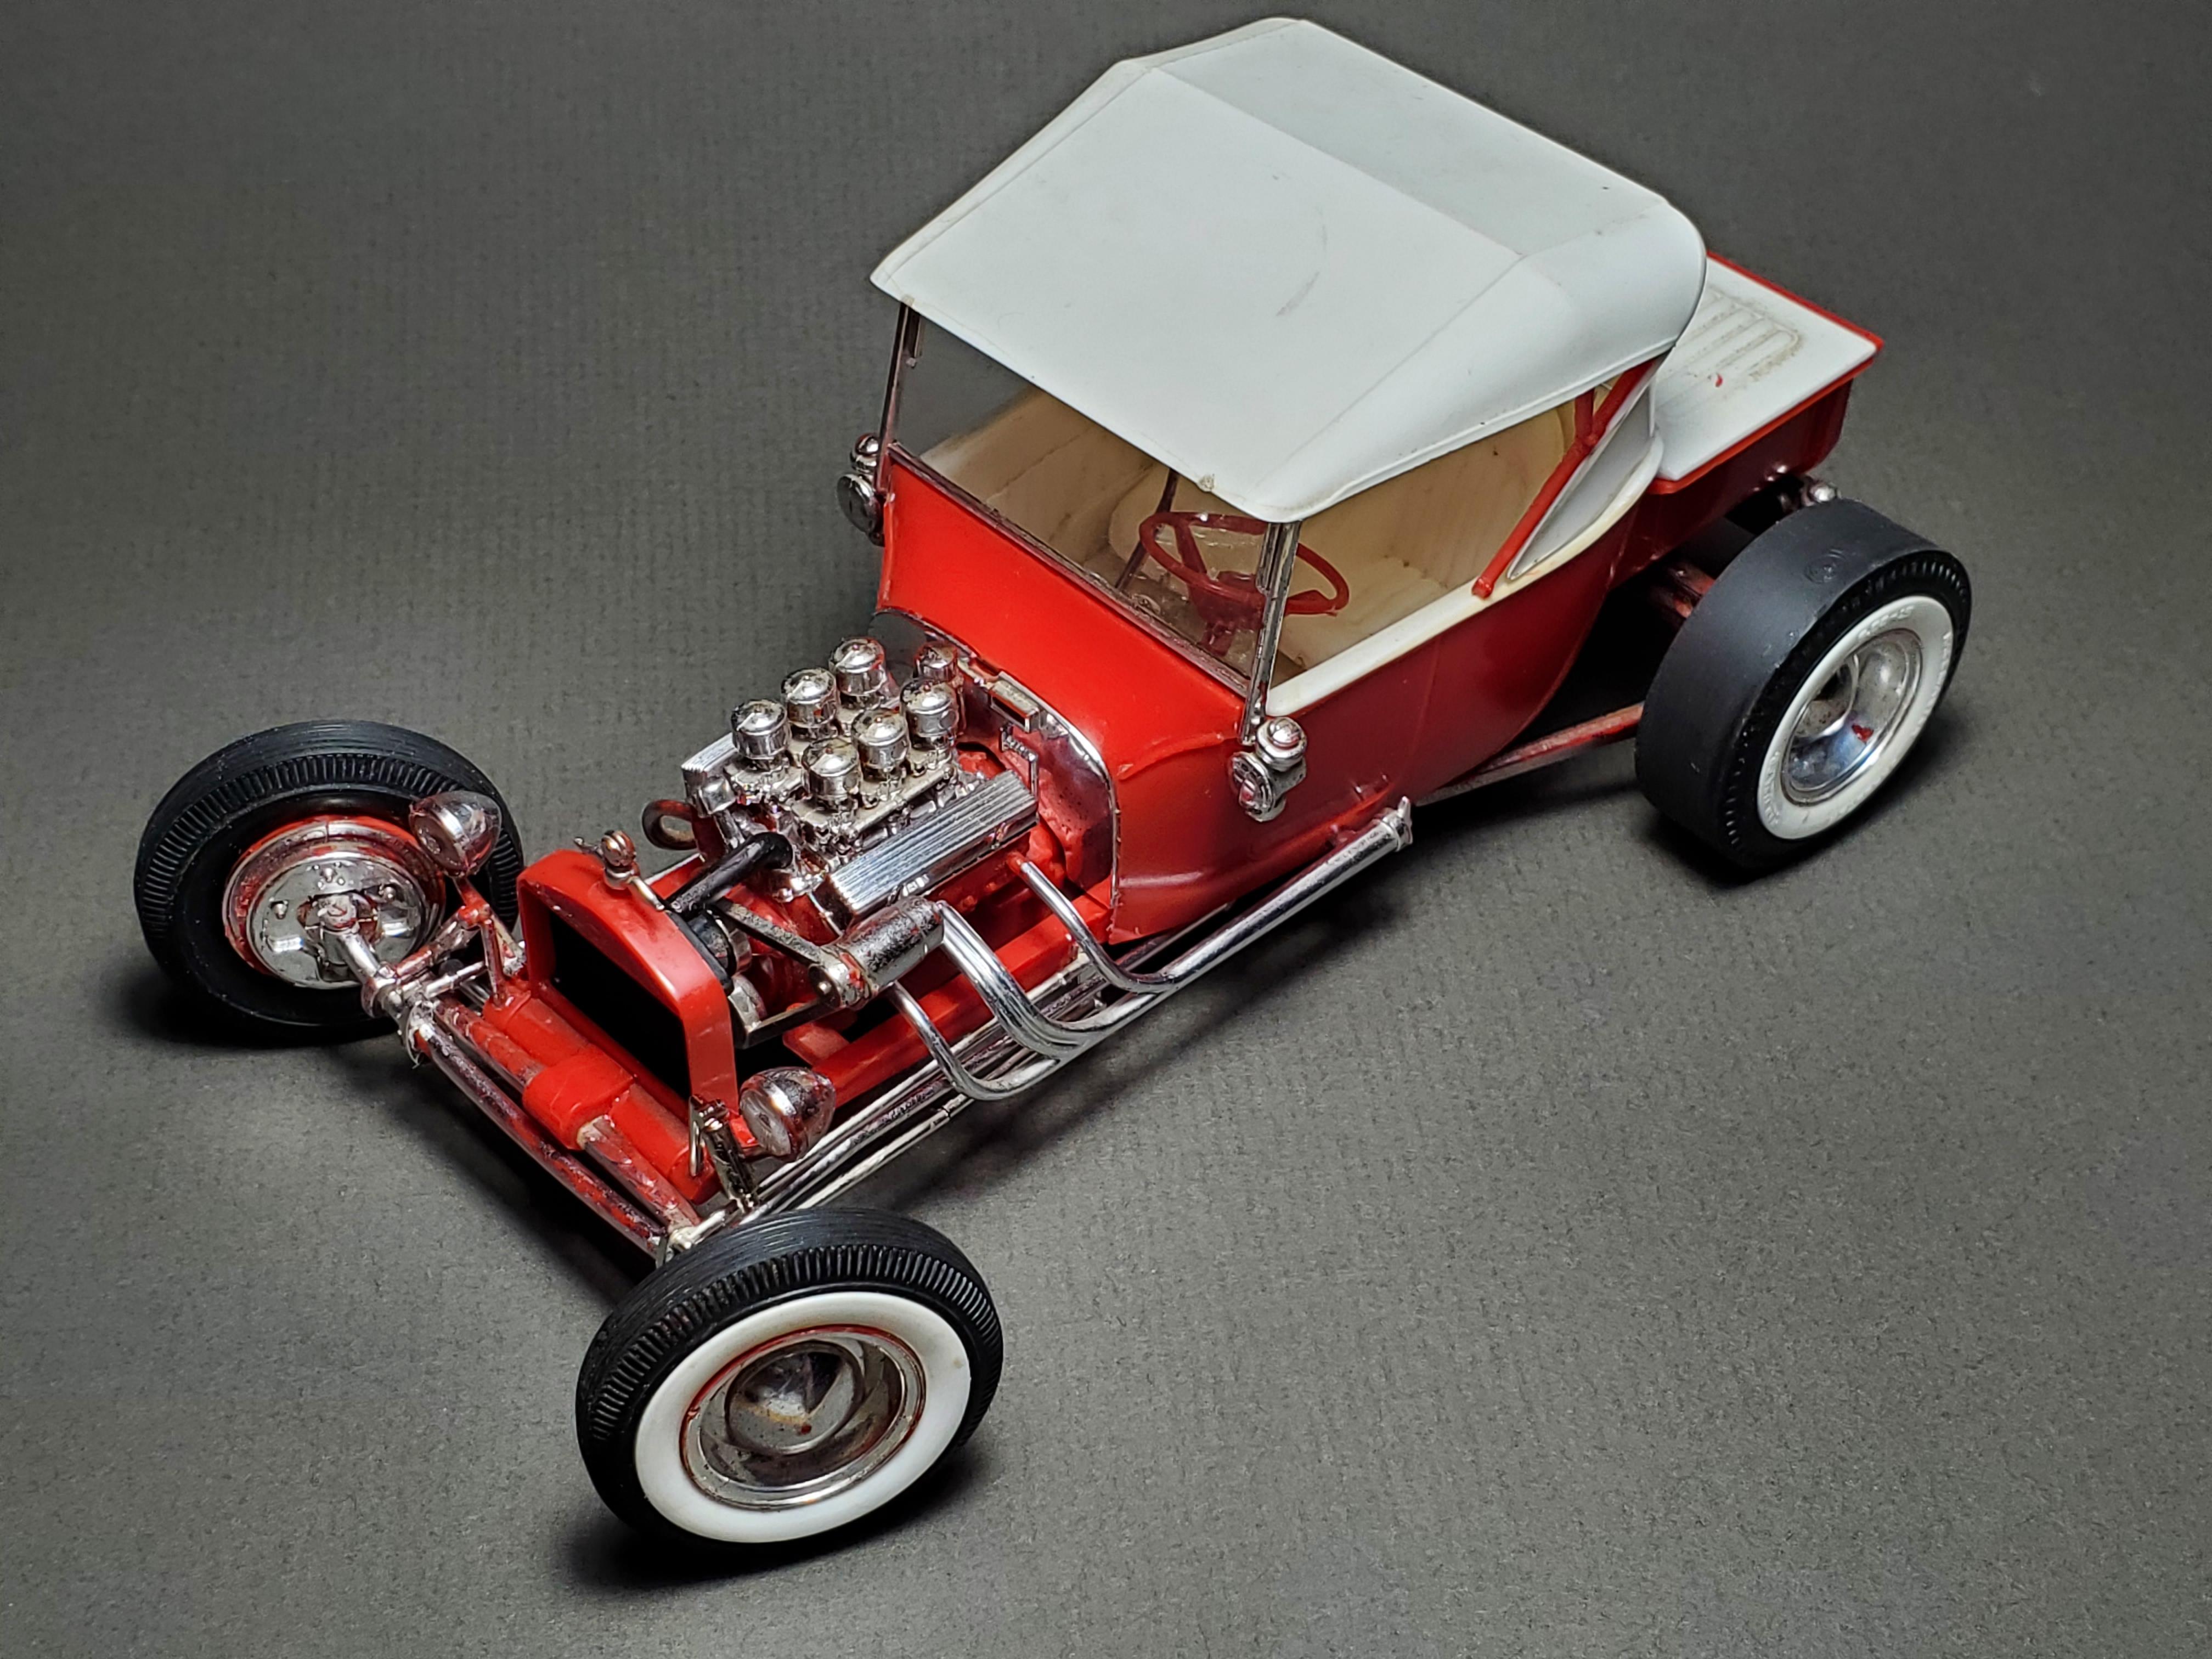
I have plans to backdate a couple Boomer Bucket kits to Little T's in different variations based on original box art photos. Here's project number 1 completed. A lot of folks in the Scale Survivors group on Facebook helped out with acquiring the specific parts. This one is painted Tamiya French Blue which looks nearly identical to old Monogram blue plastic of the Big Drag. I left the phone and mufflers off of this one, as a drag car wouldn't have those. But I left the header caps on, because I didn't want to damage the original headers. Enjoy. Edit: I brush painted almost every original Little T donor part with molotow. And look how you can see my reflection of holding my cell phone to take pics in the last photo!
- 28 replies
-
- 11
-
-
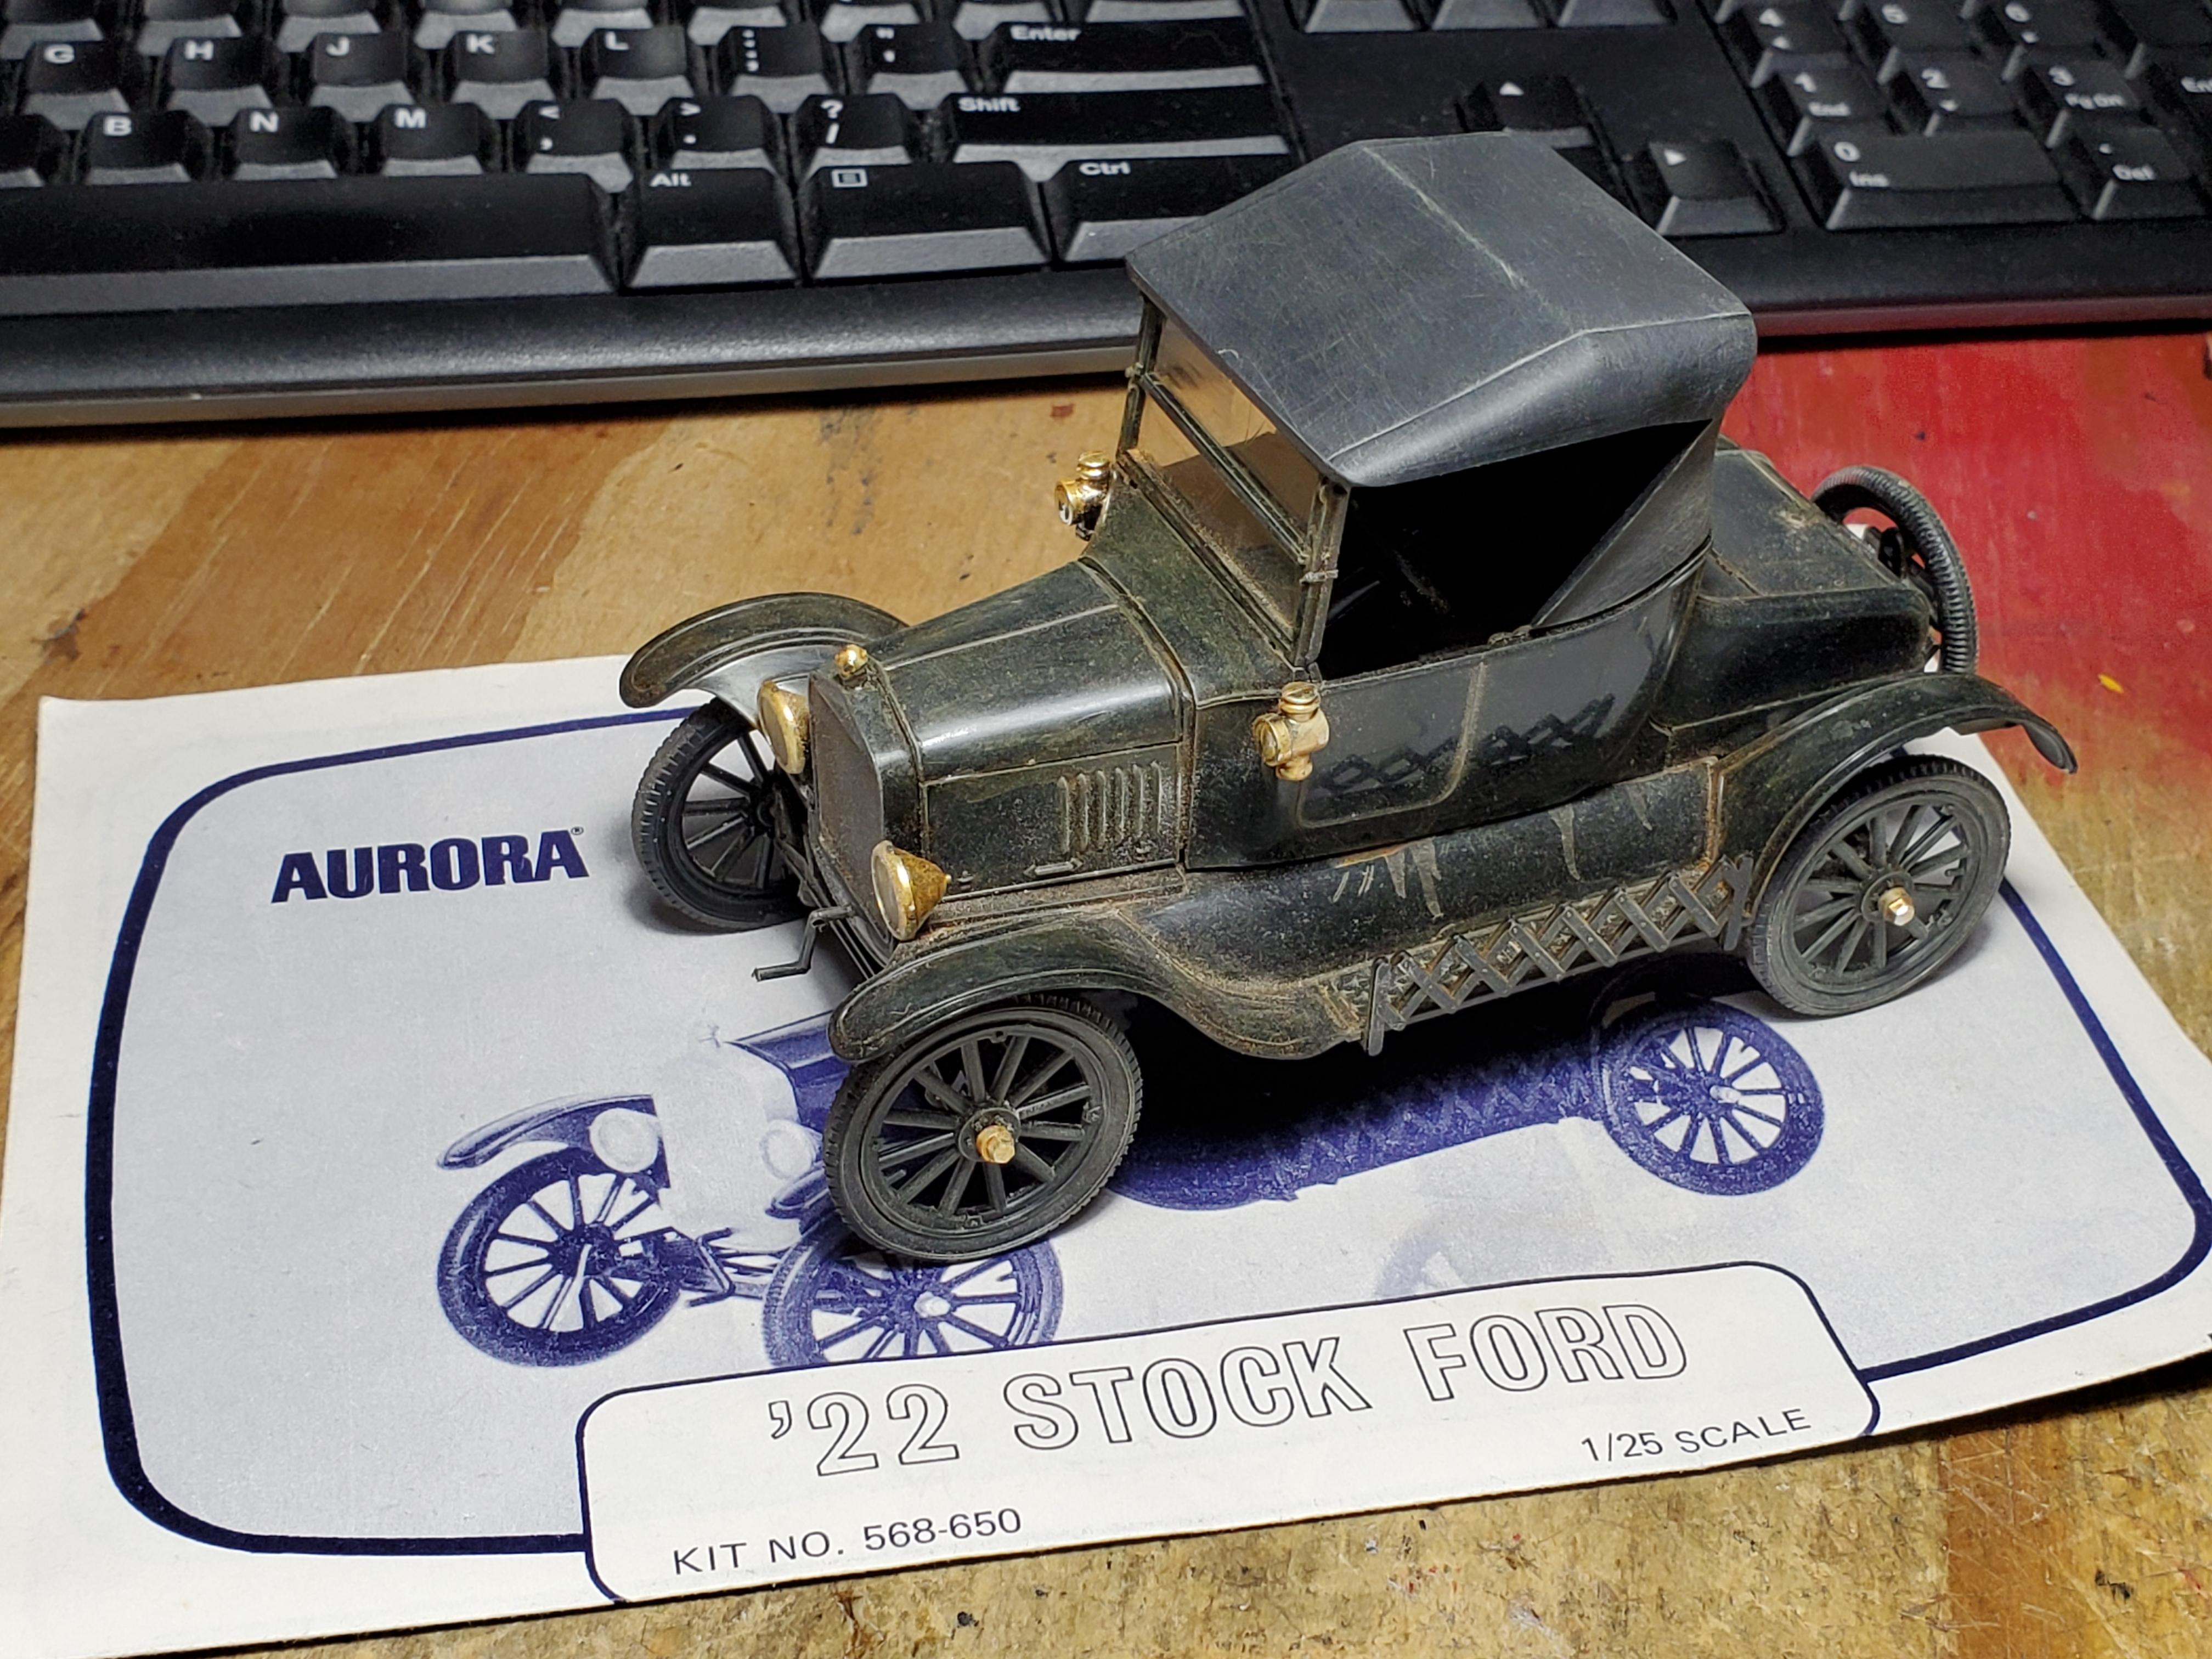
I bought this unbuilt for 5 bucks. It was a Young Builders Club kit. I wanted to build it like it was a surviving driver you'd see on the road a decade or so after it was built. I stripped the chrome off the grille, then coated all body parts in Future. After that I rubbed everything down with tamiya weathering powders and some vallejo washes. Just a light weathering for a quick build.
-
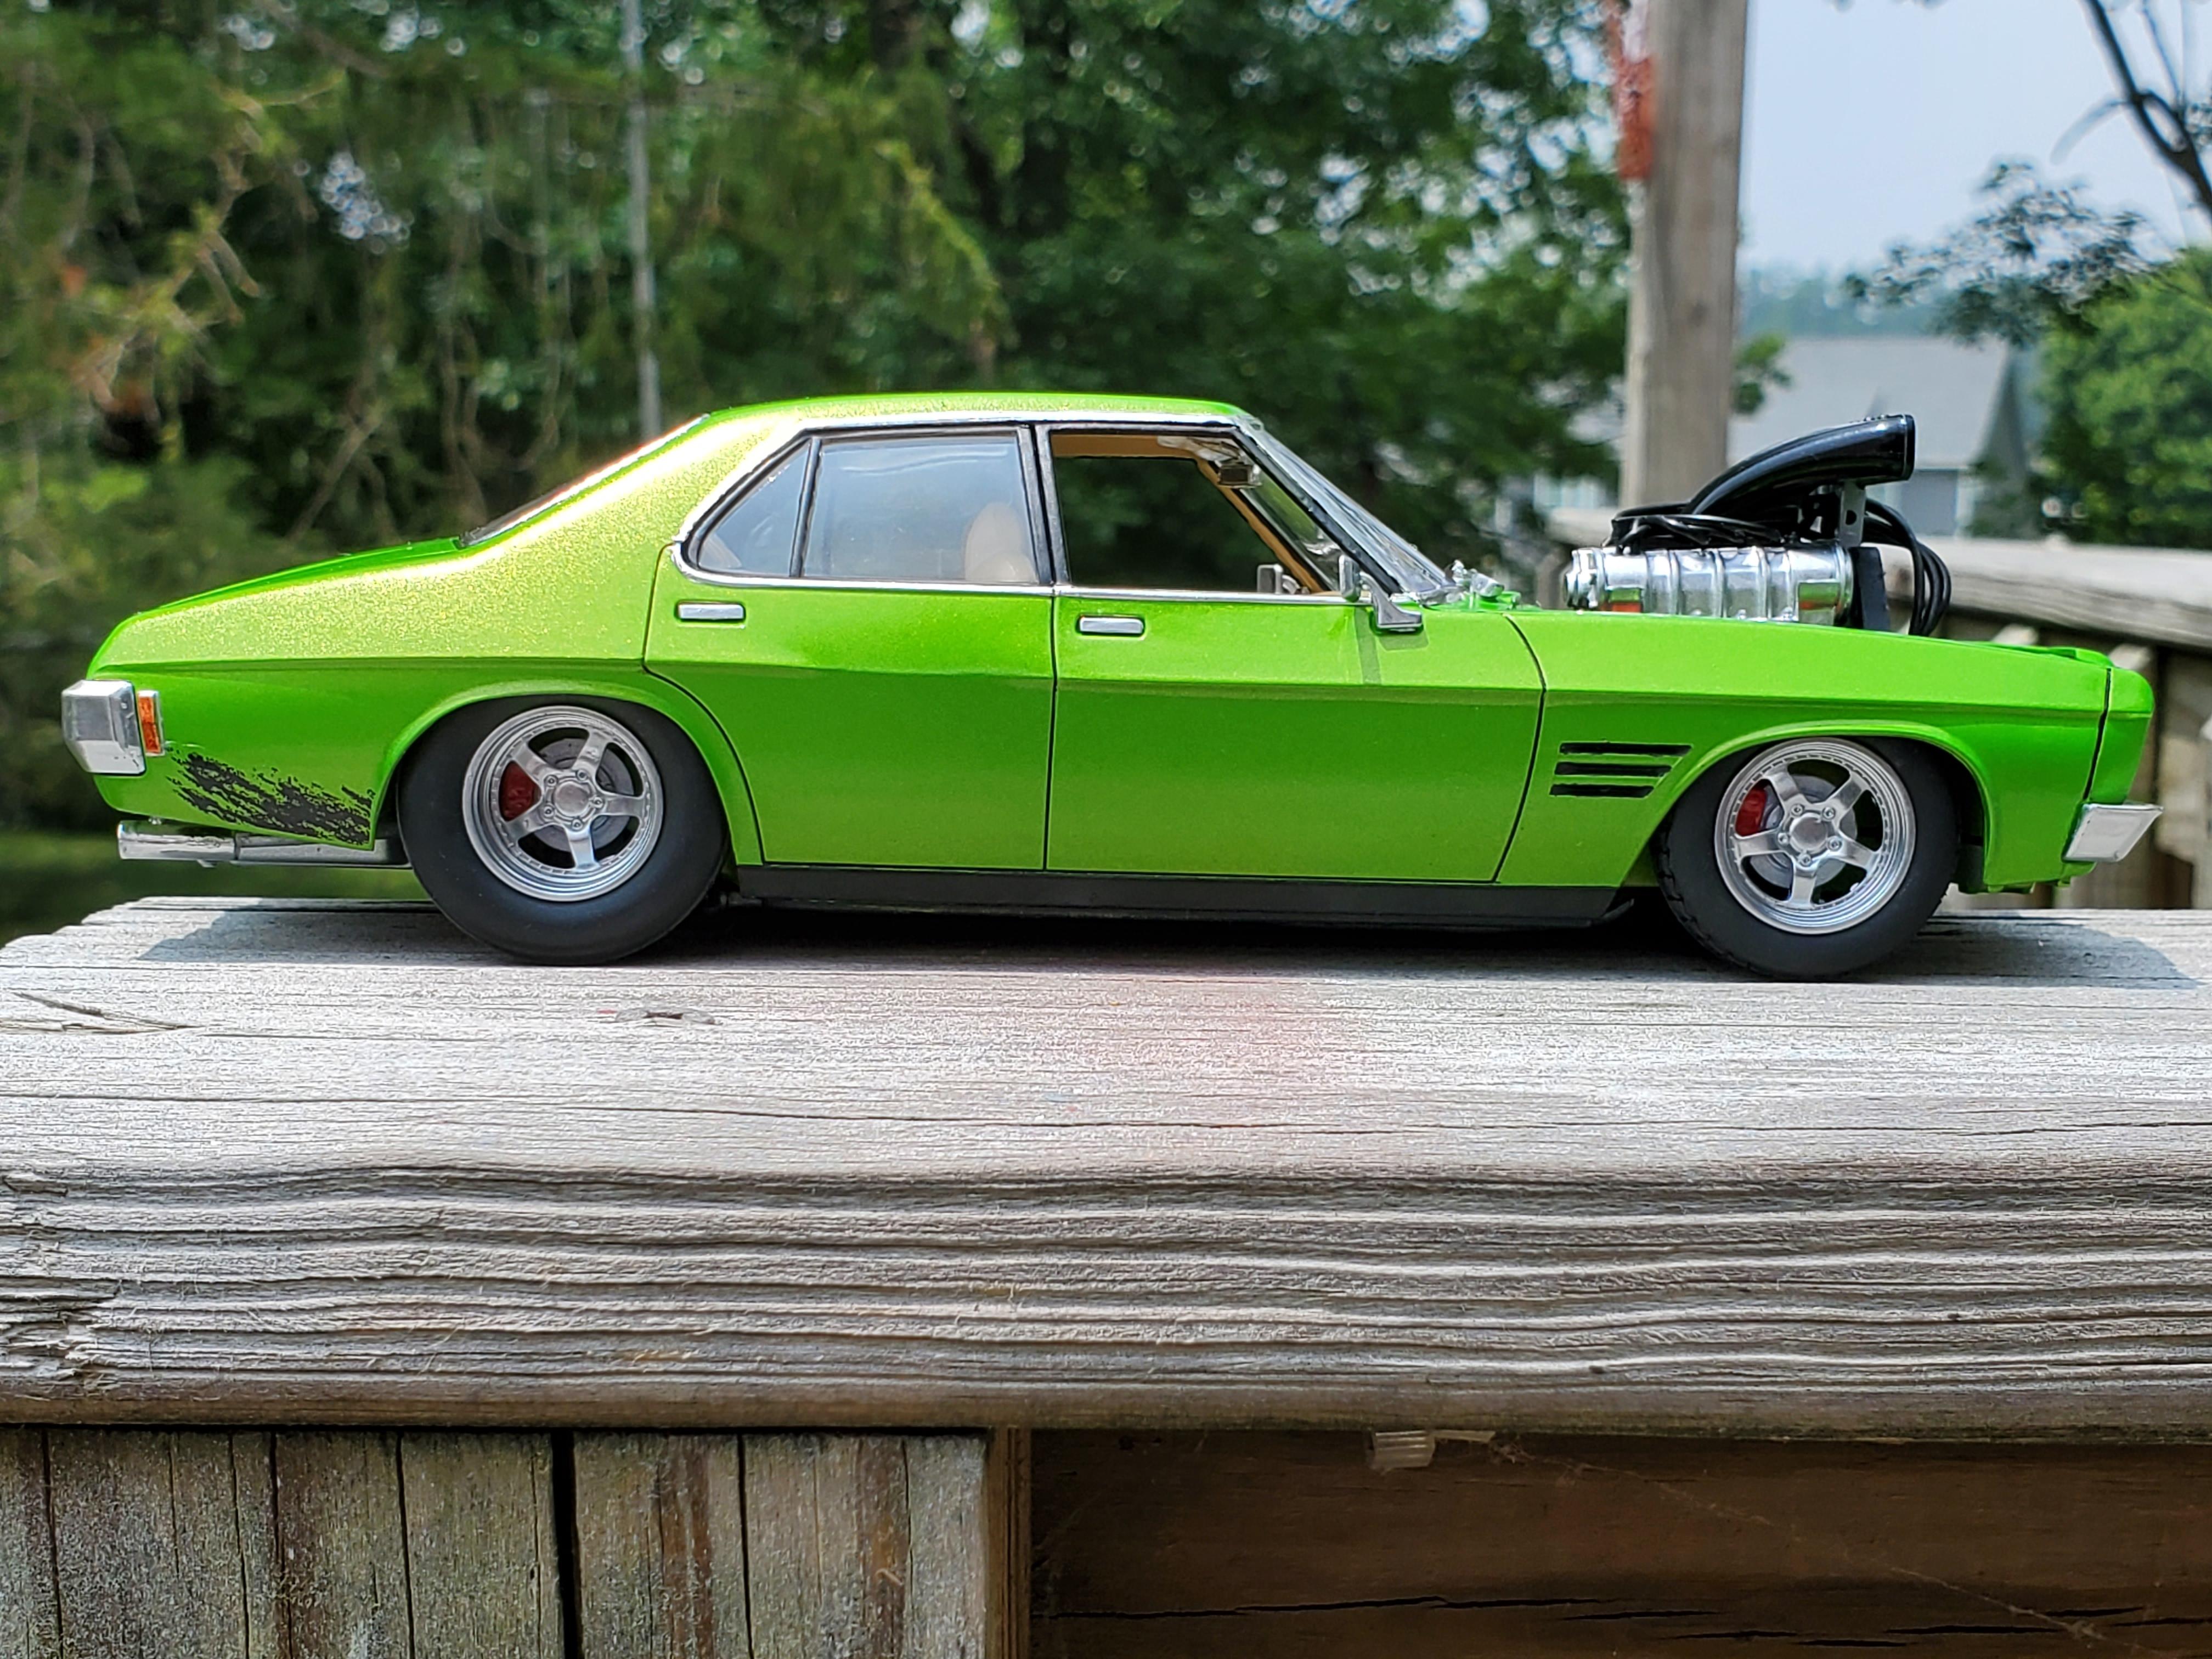
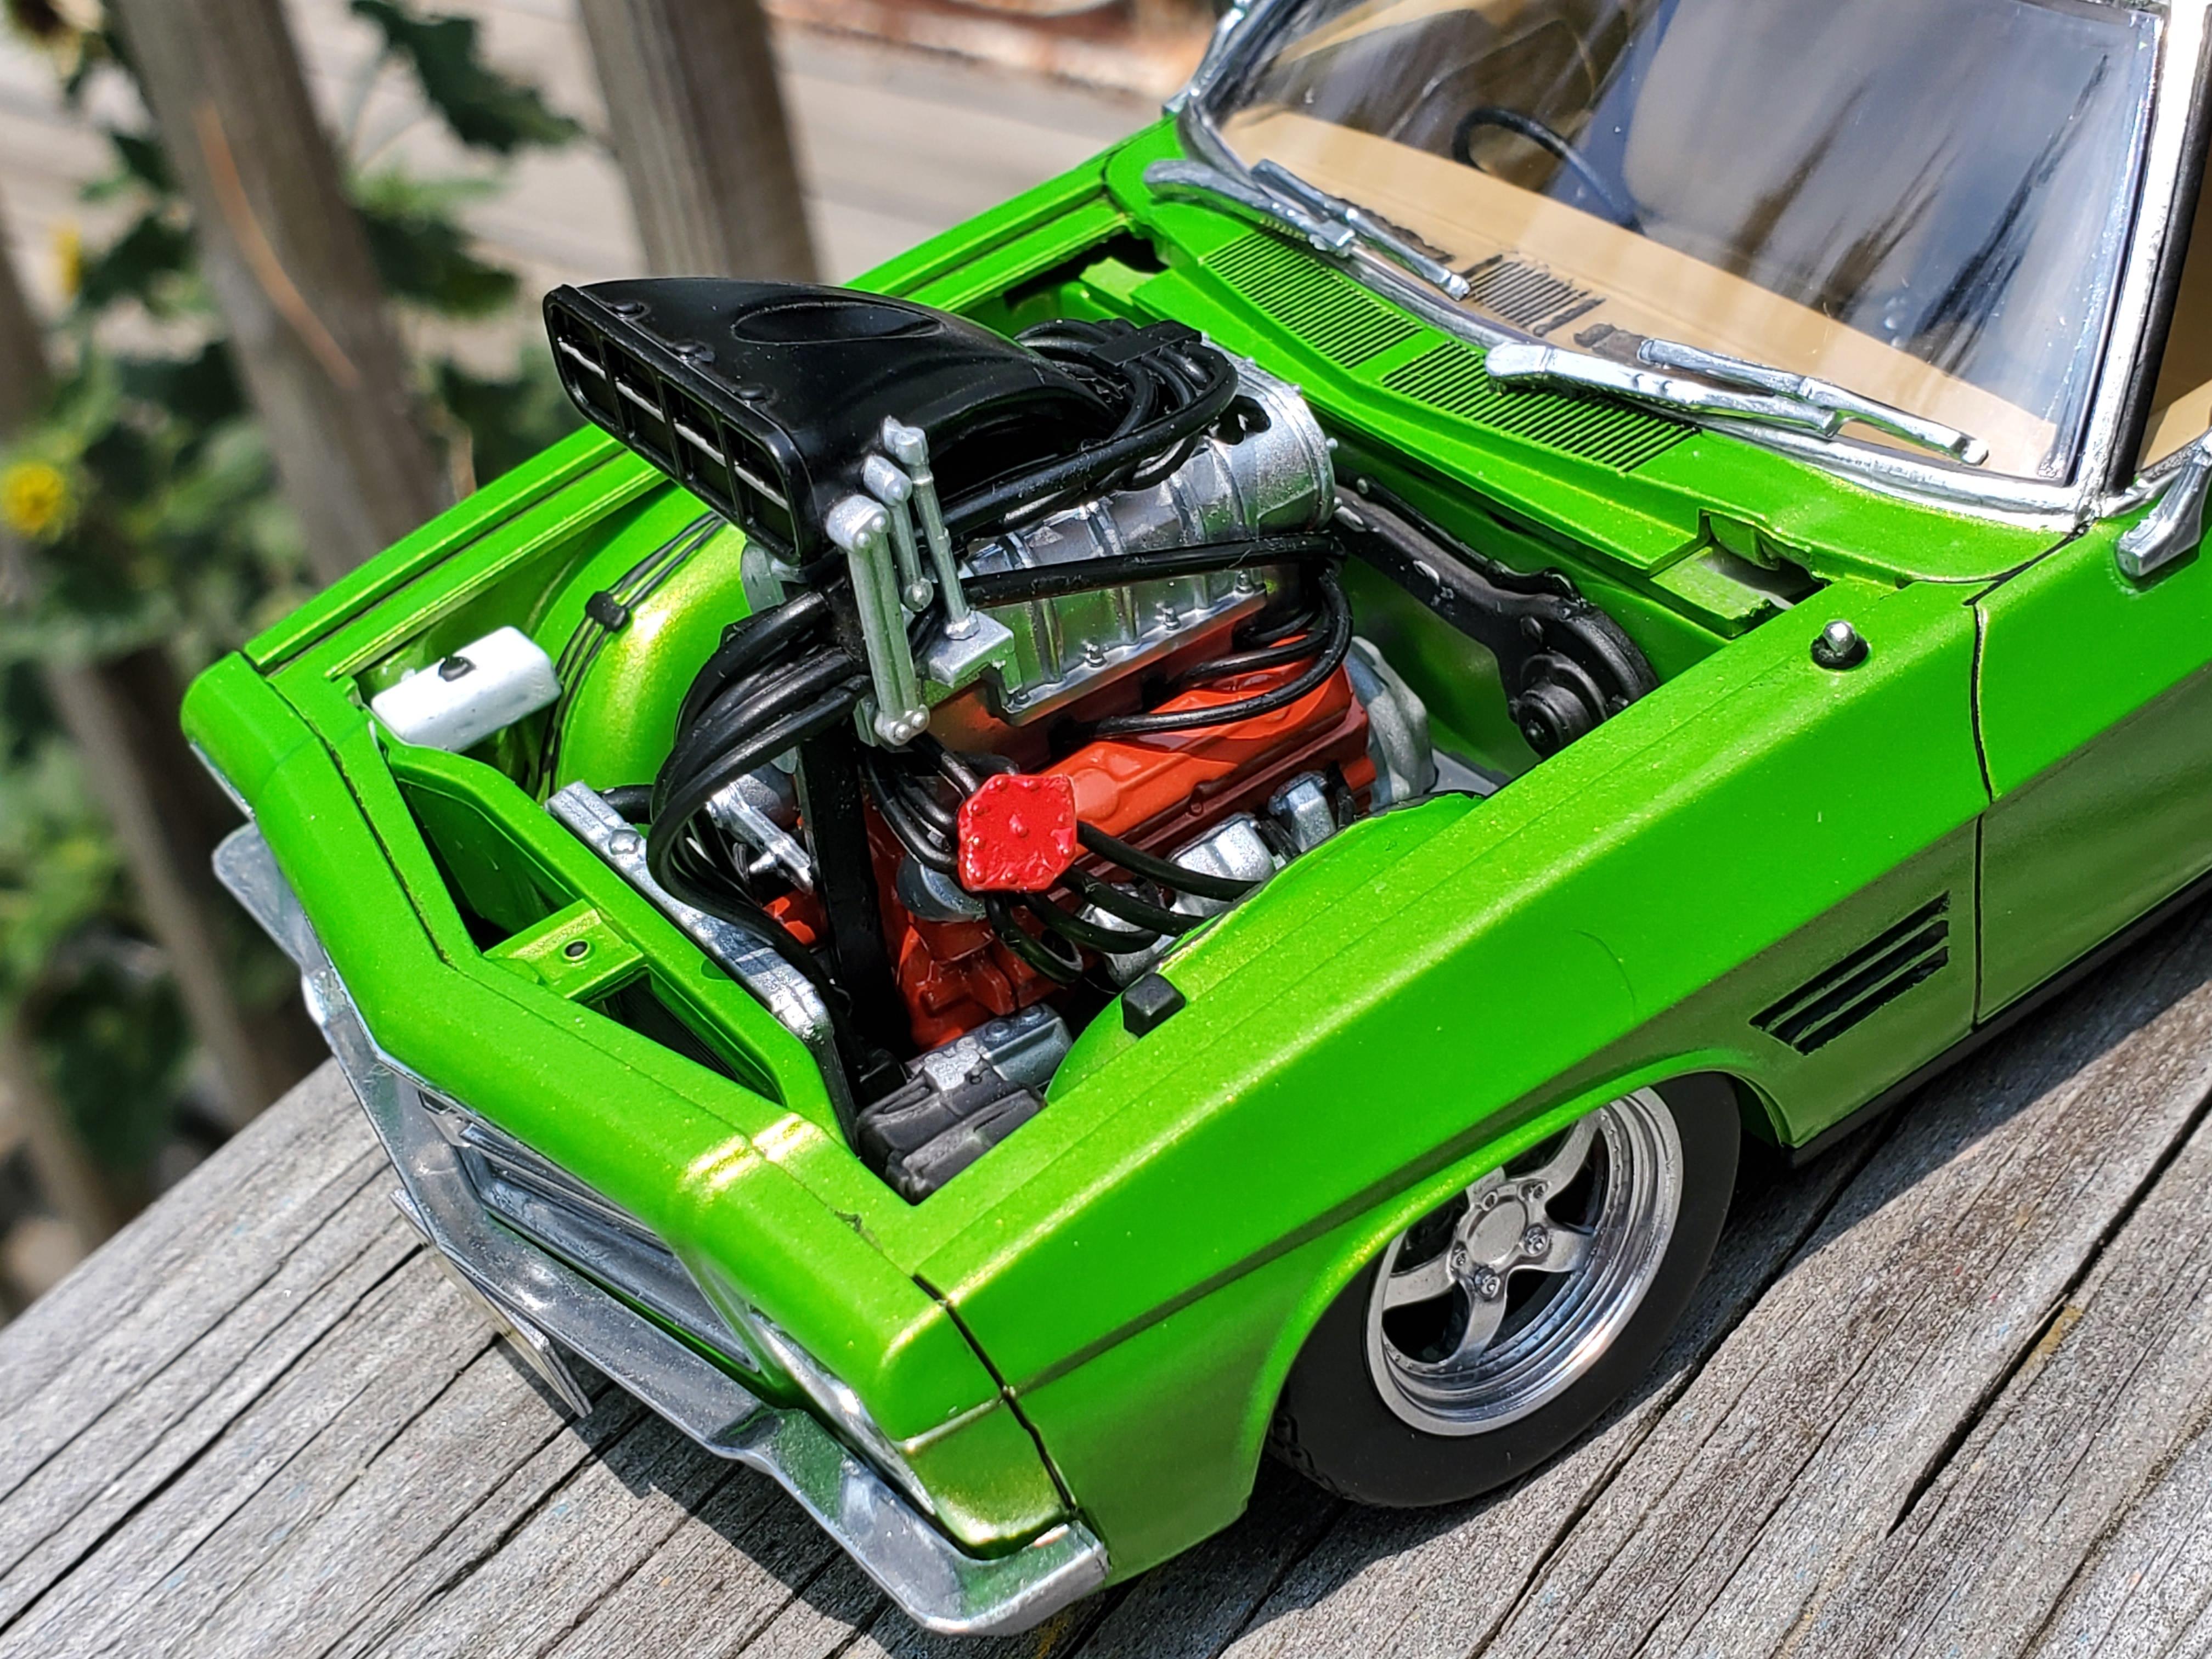
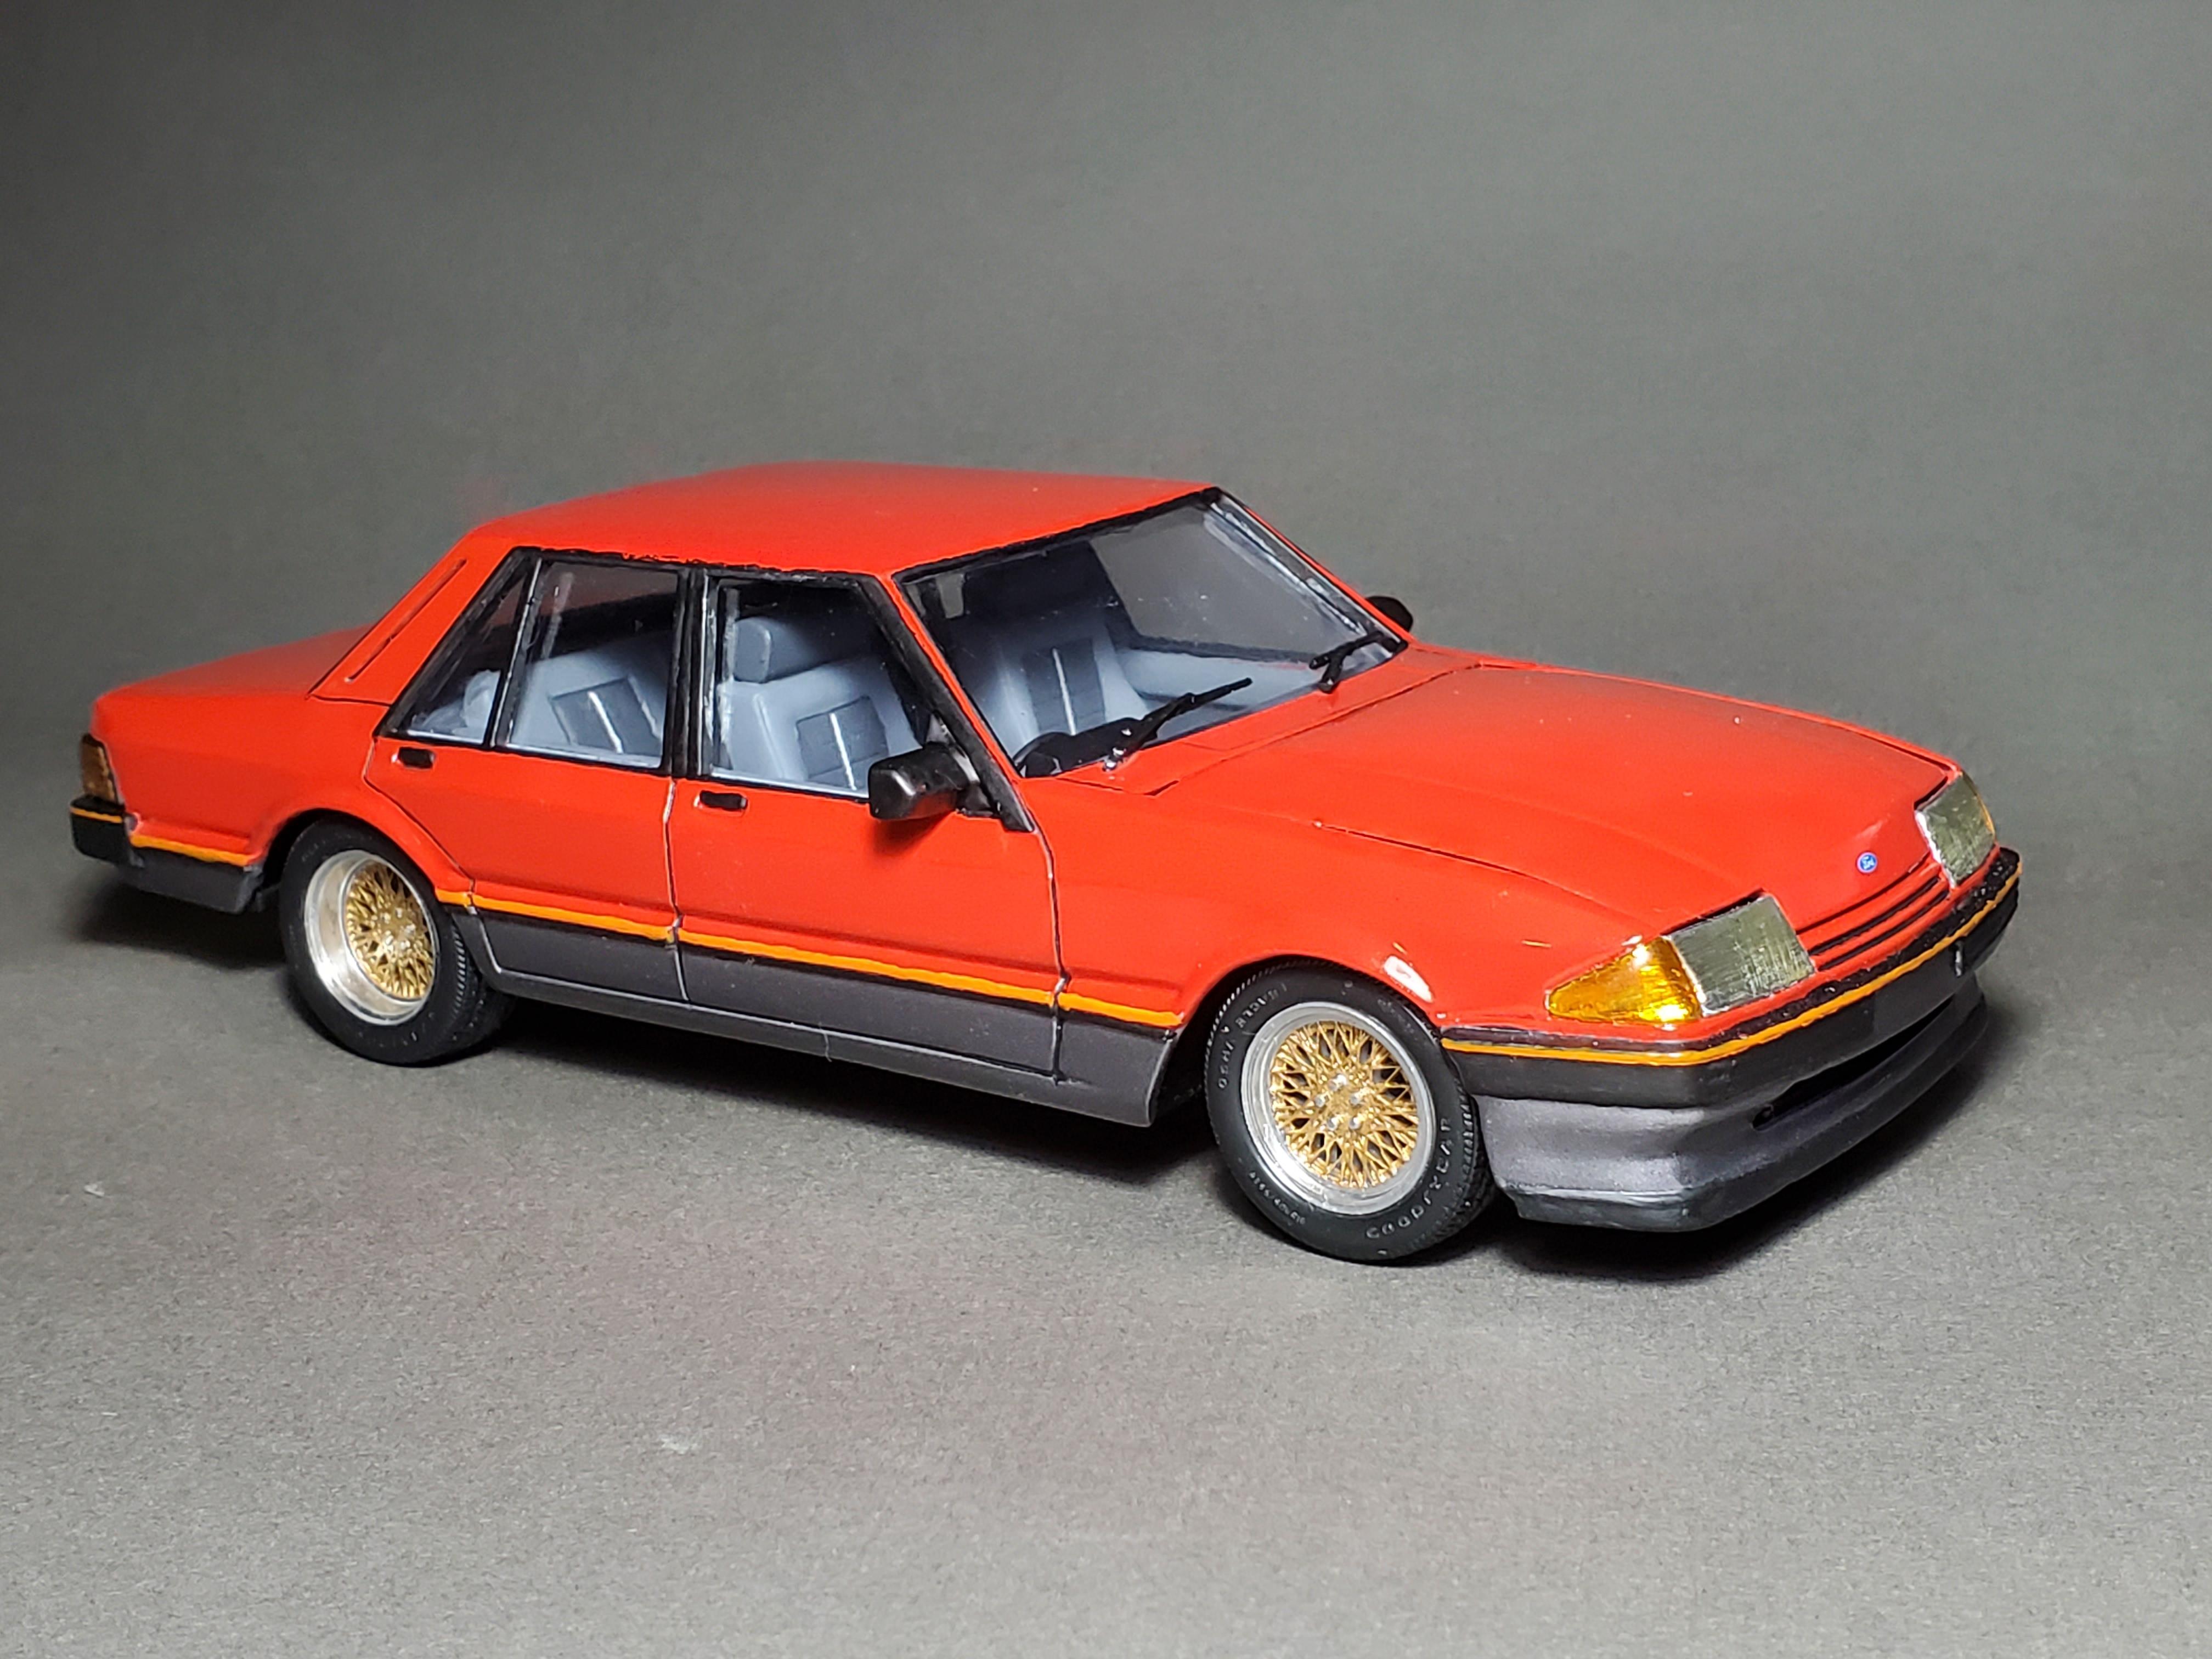
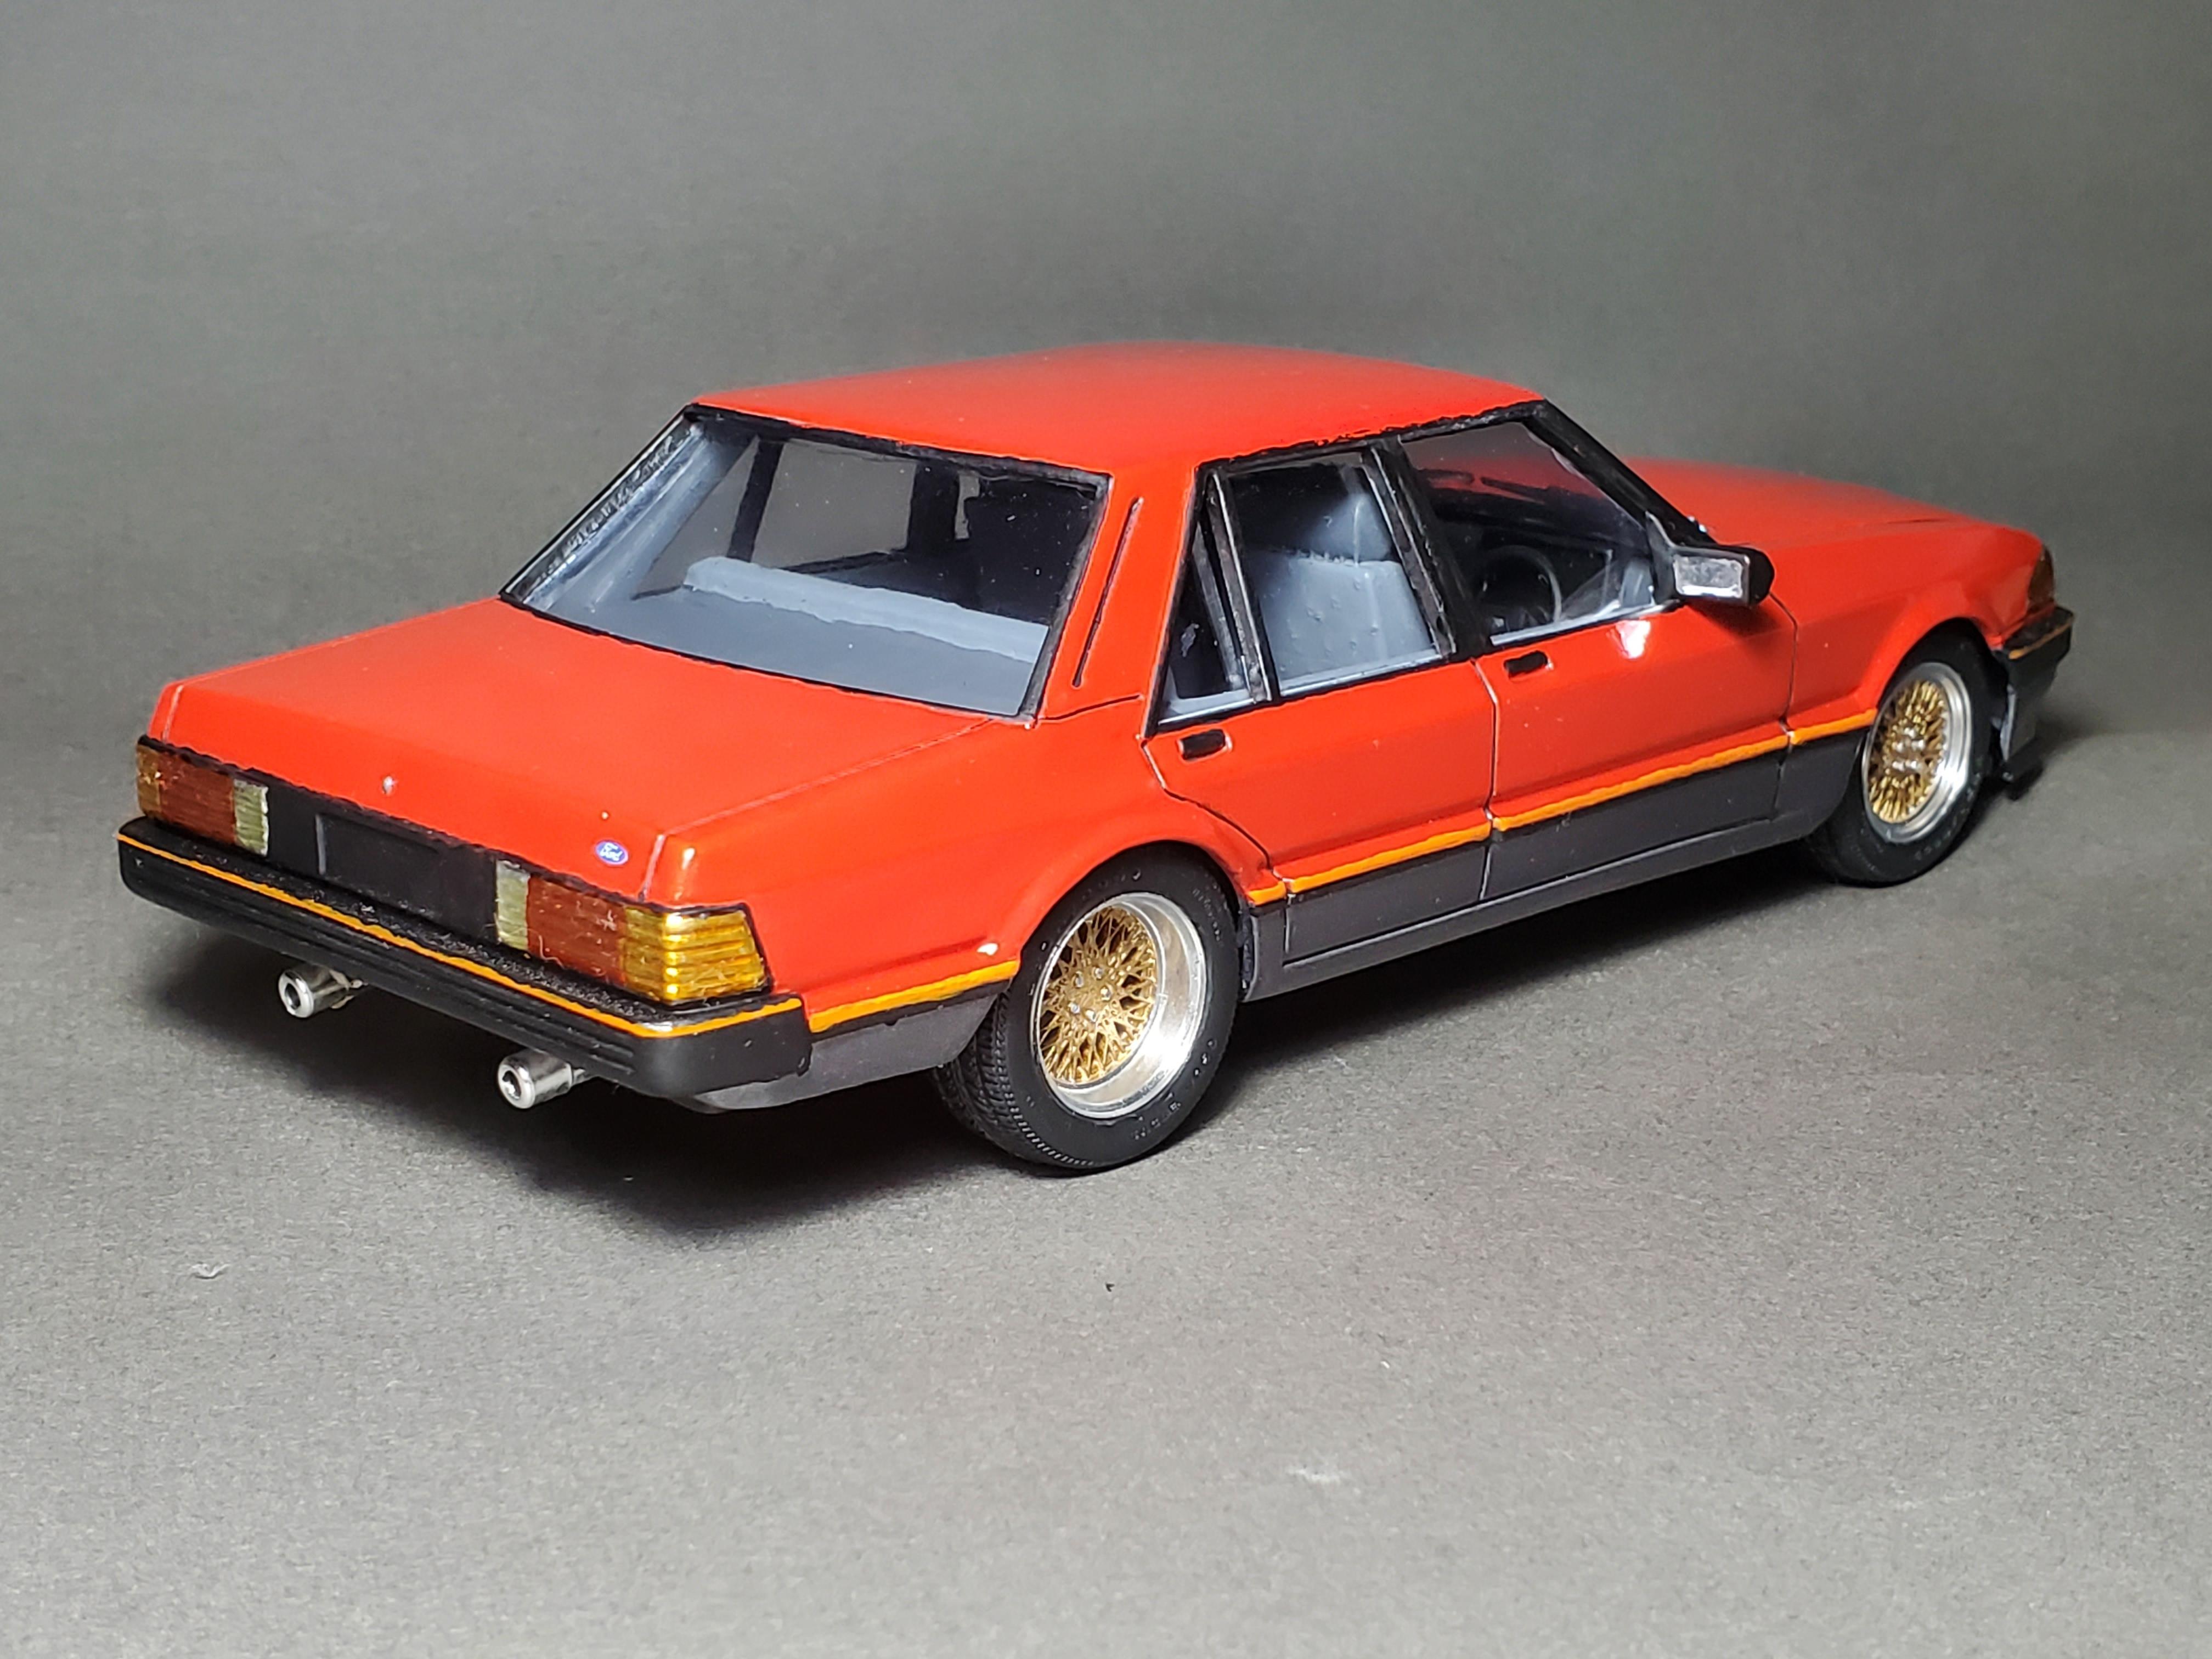
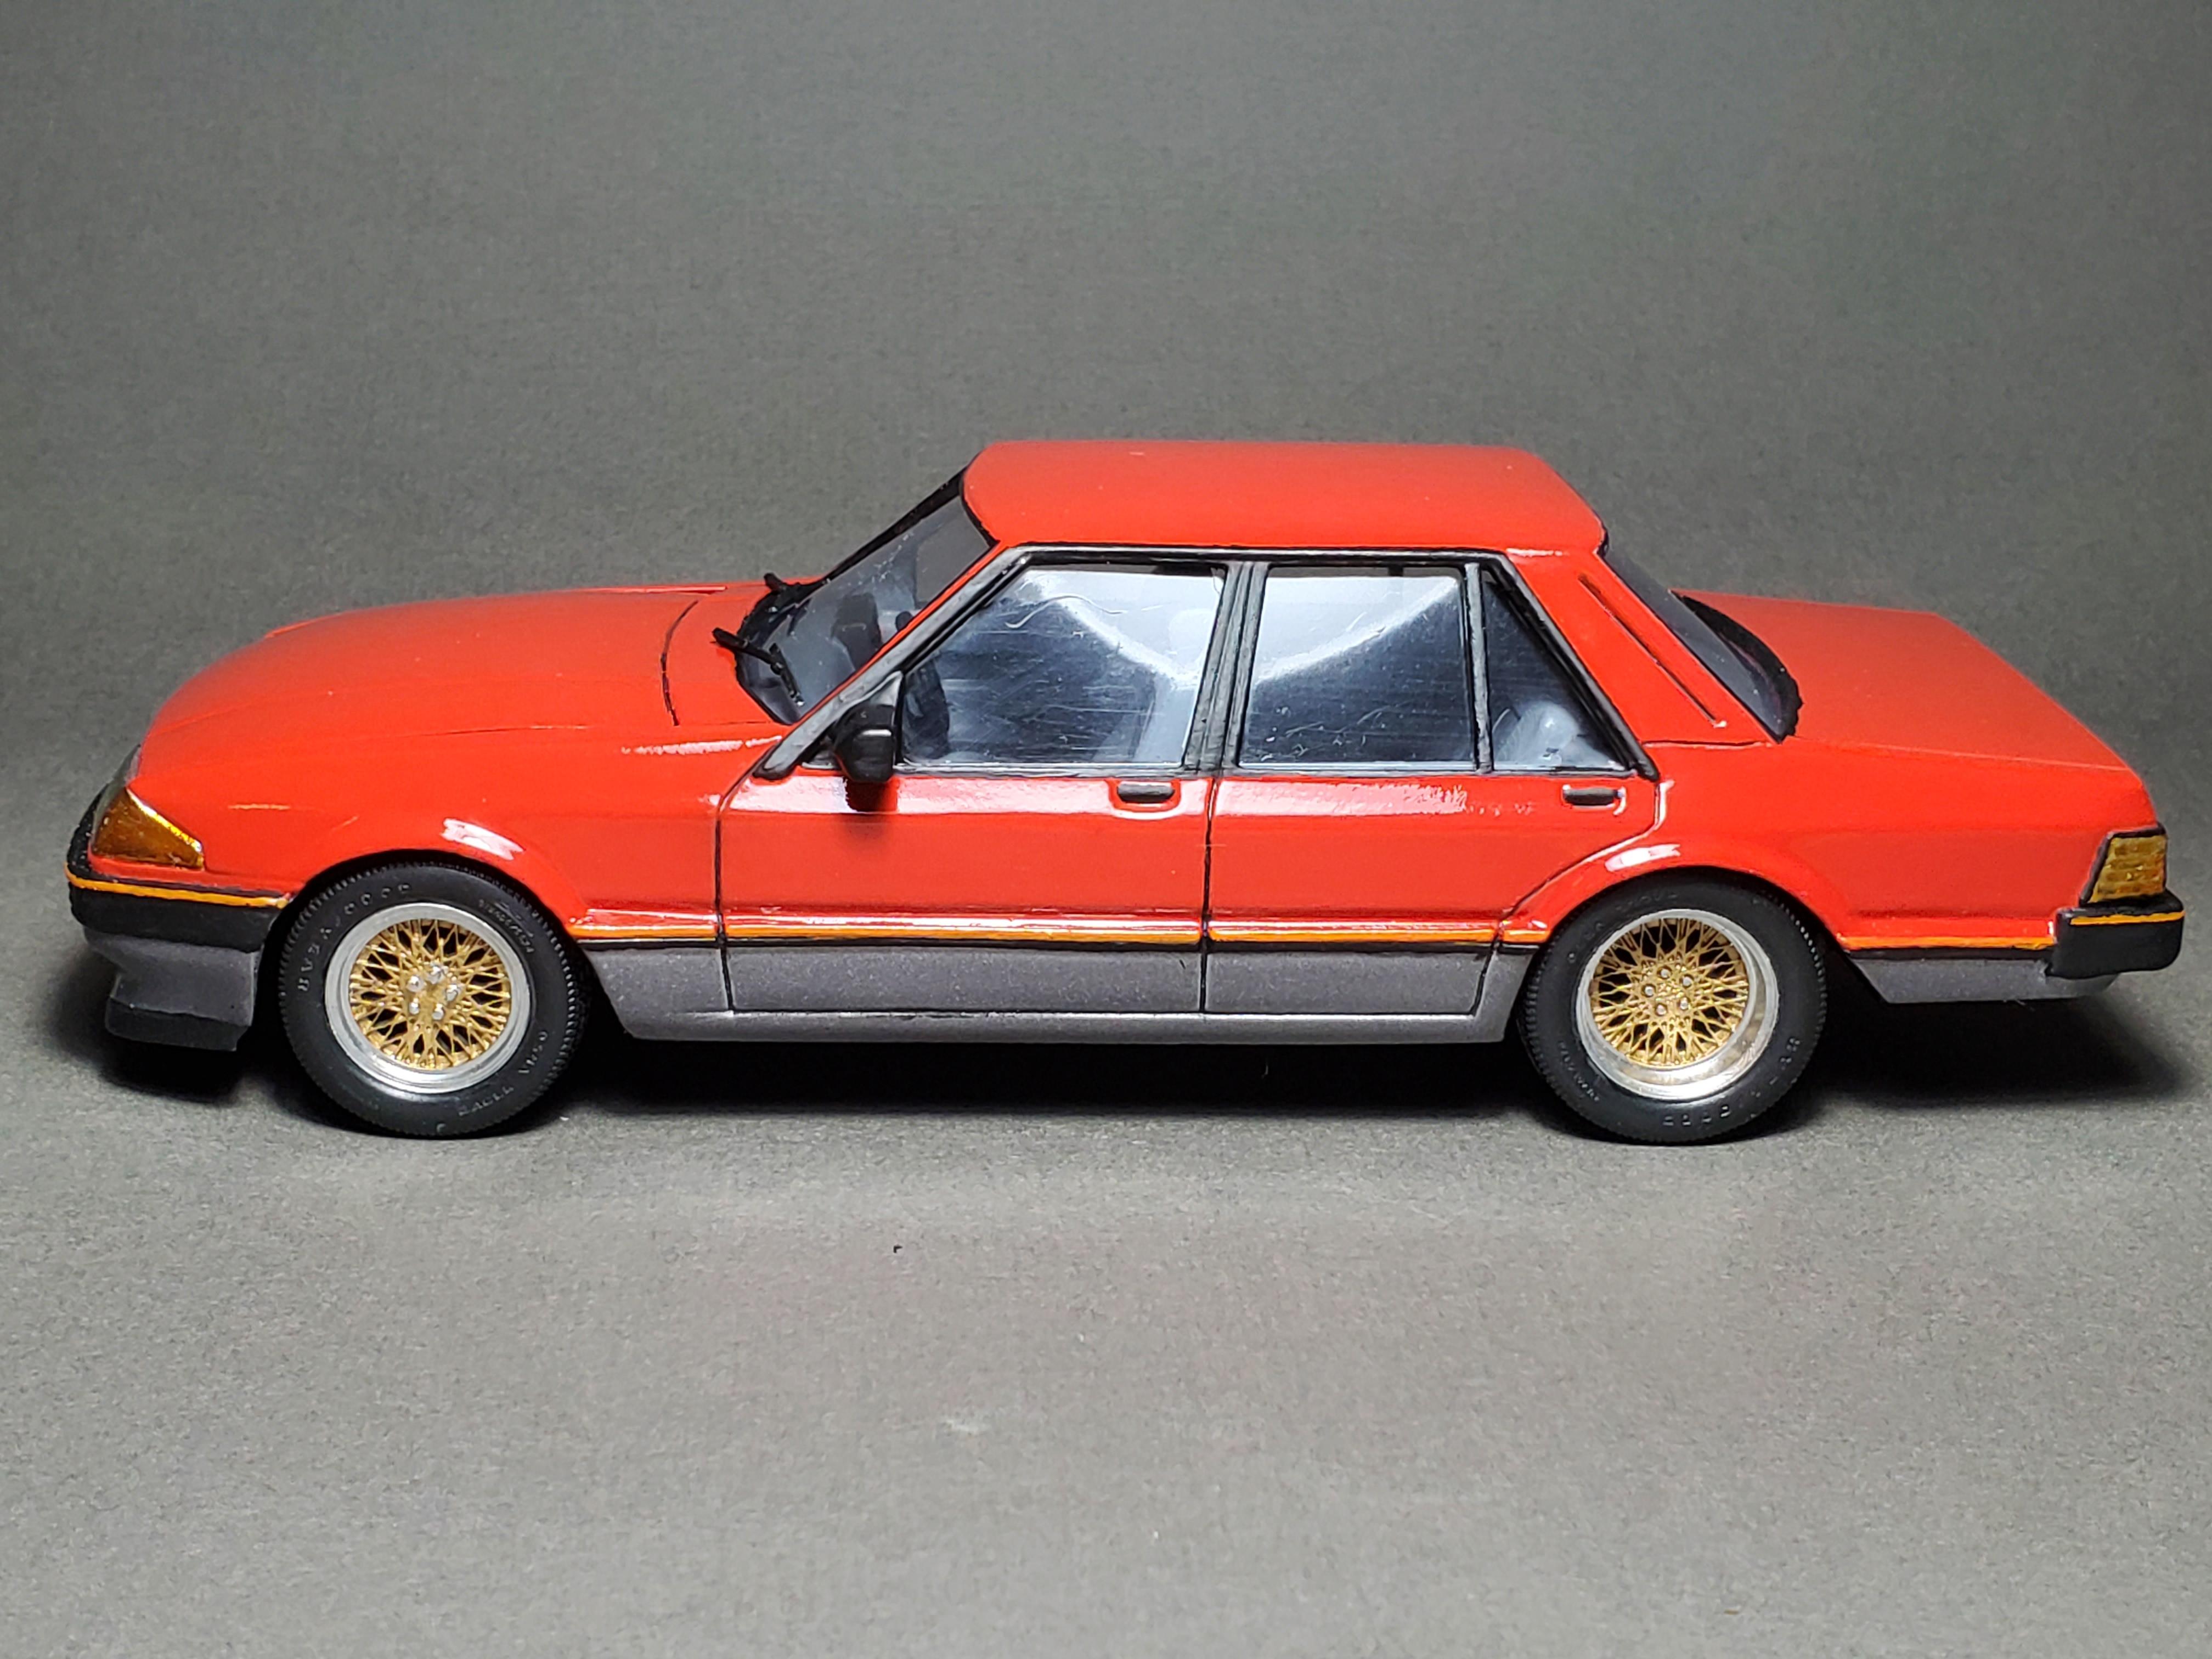
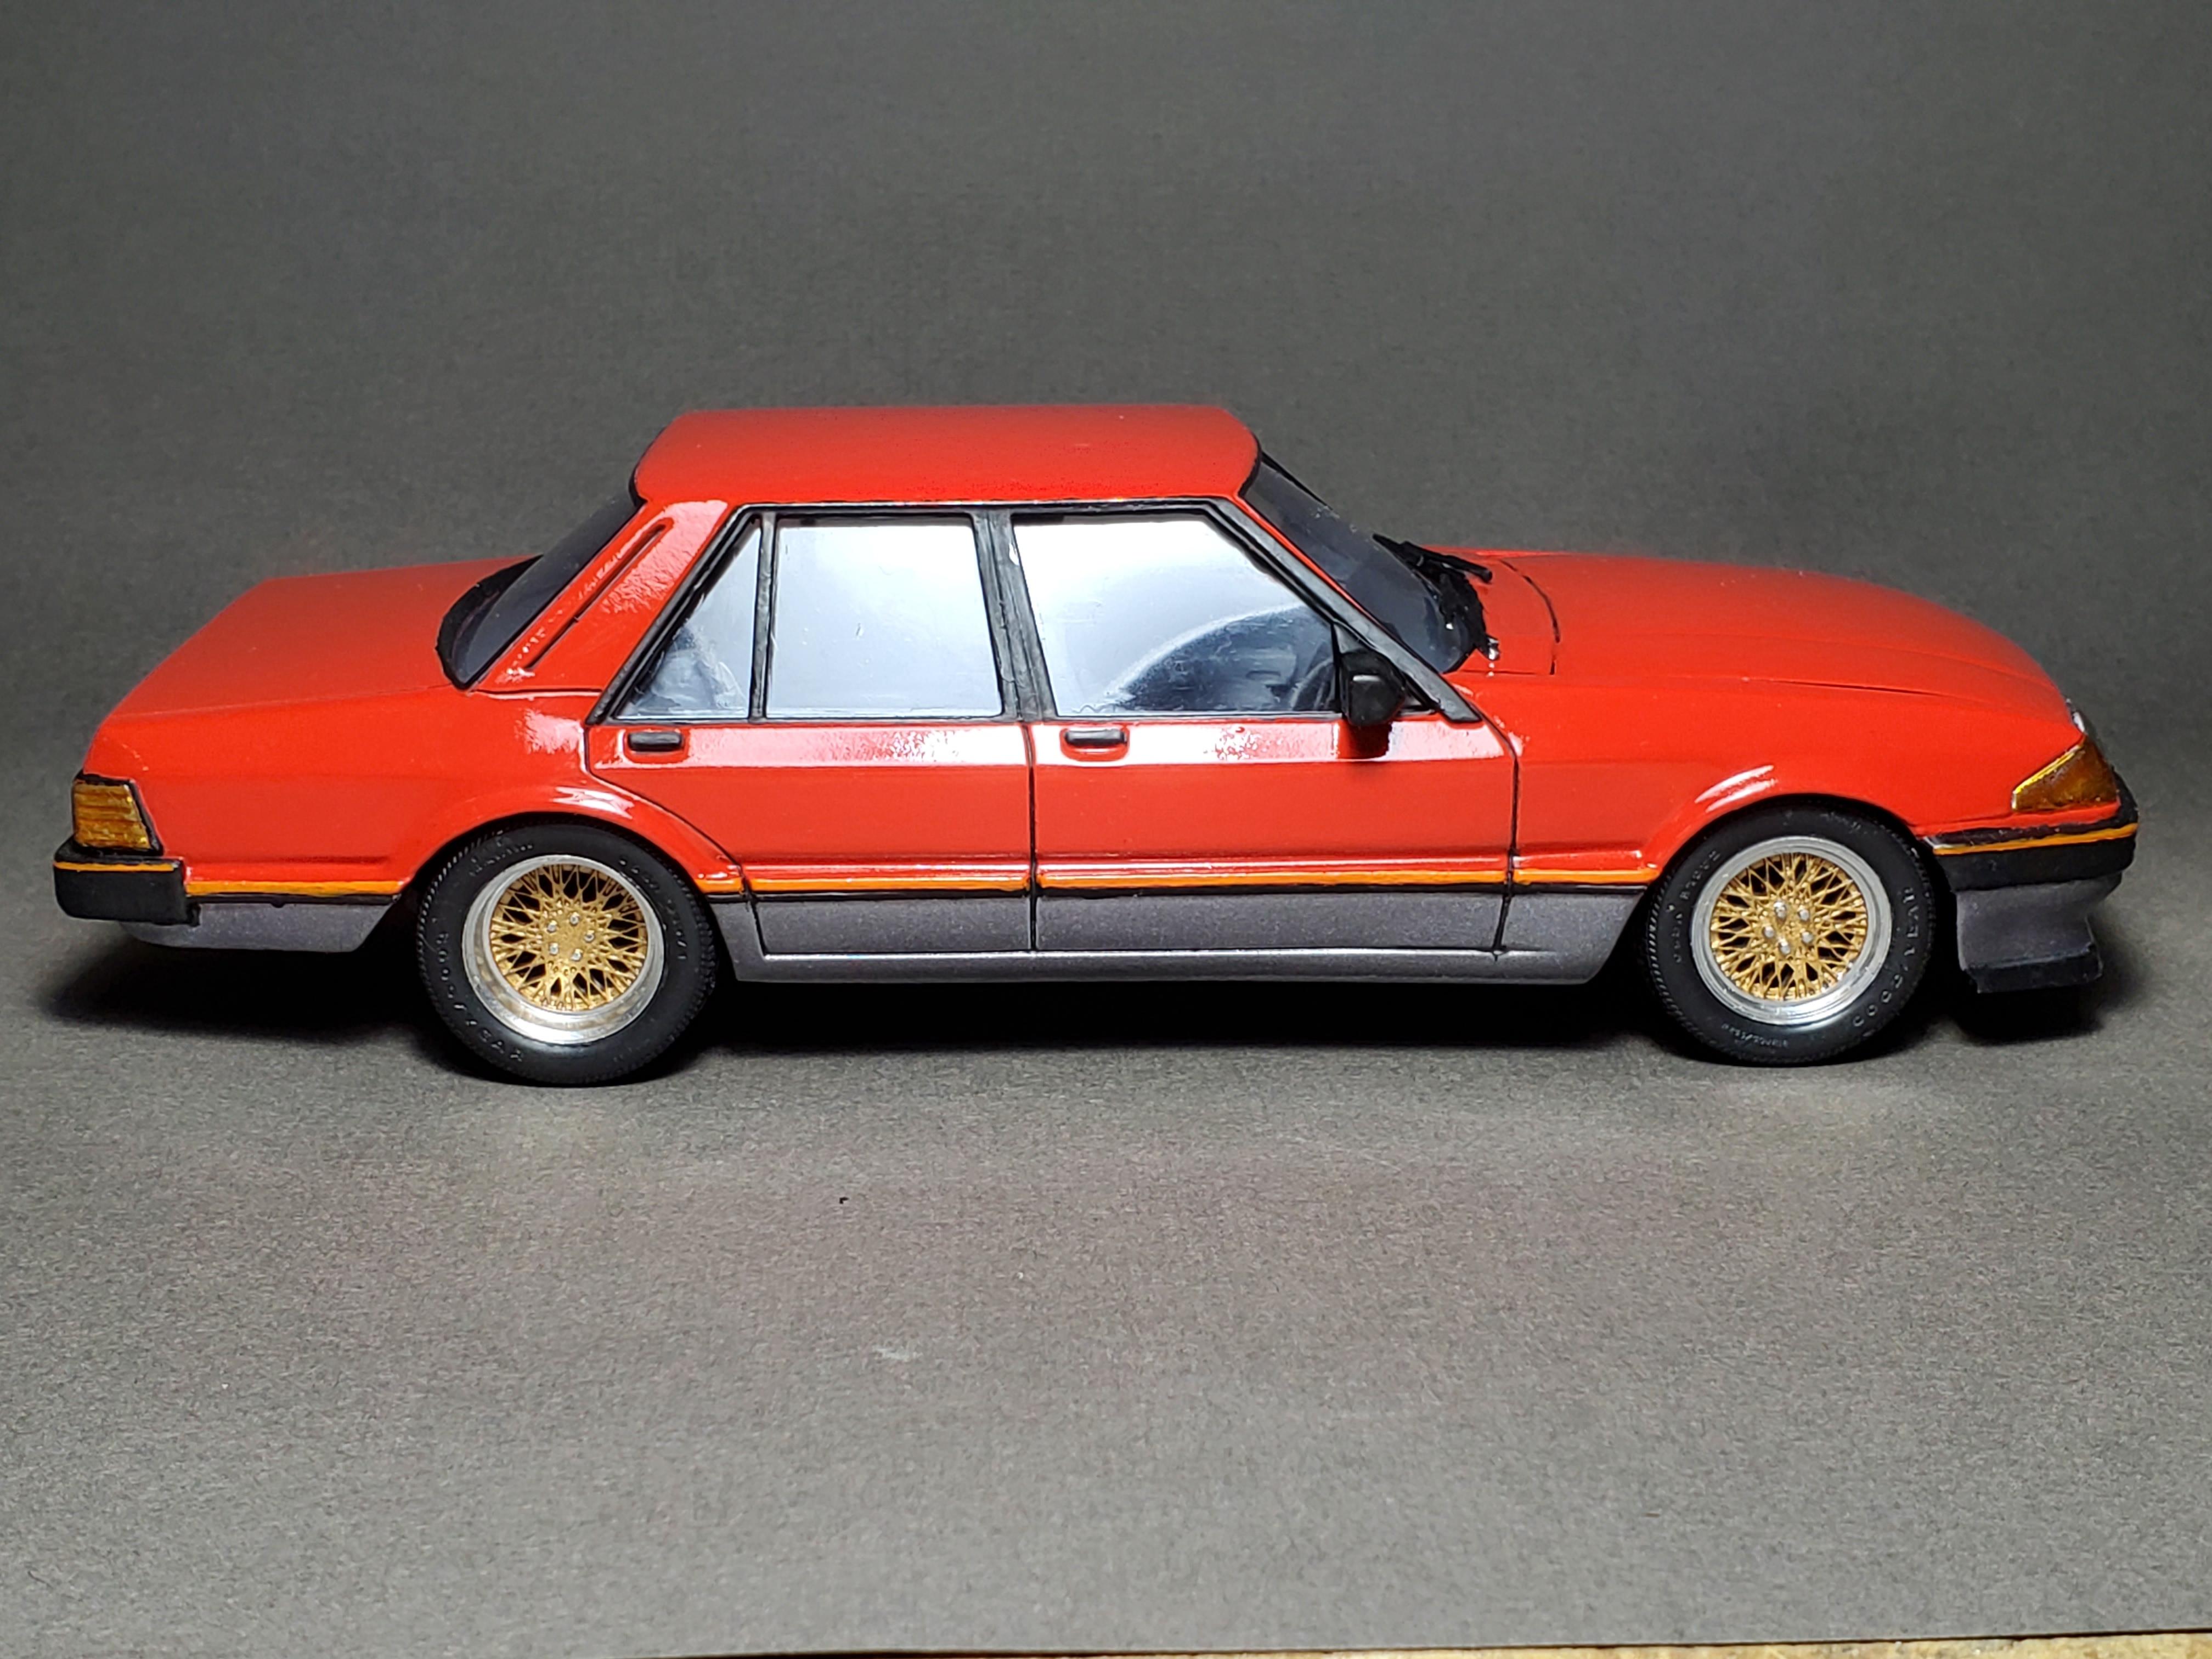
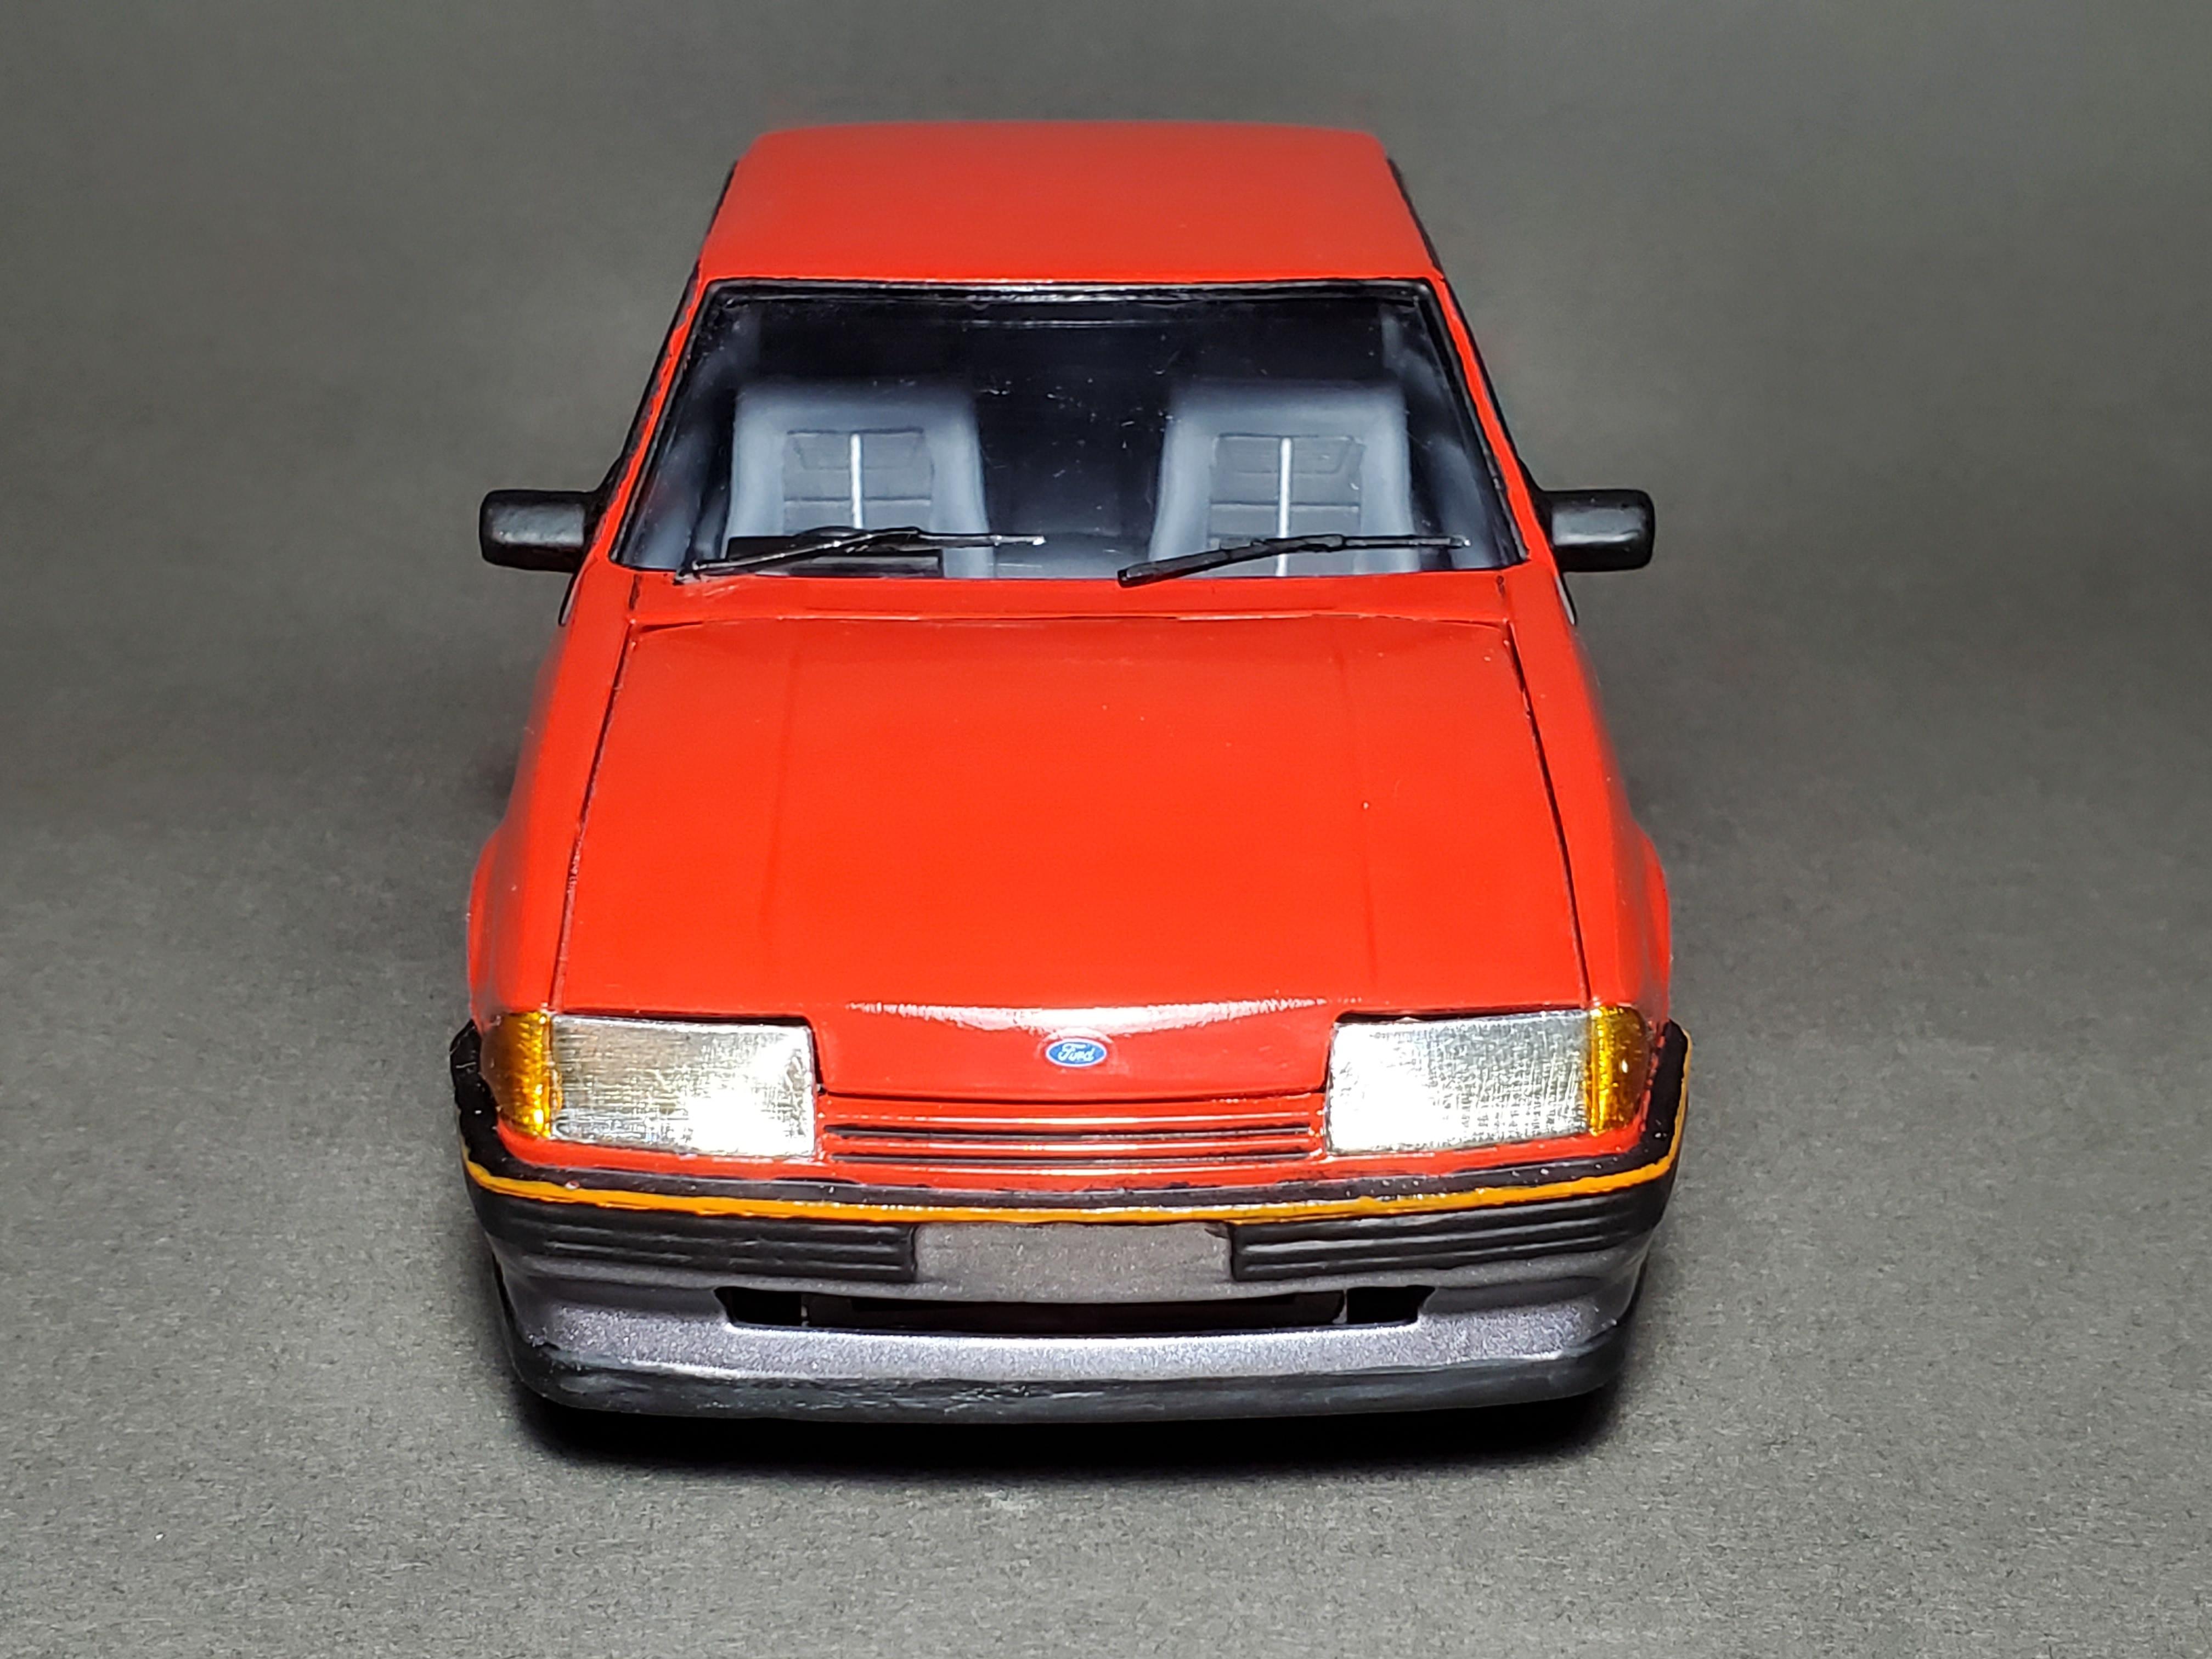
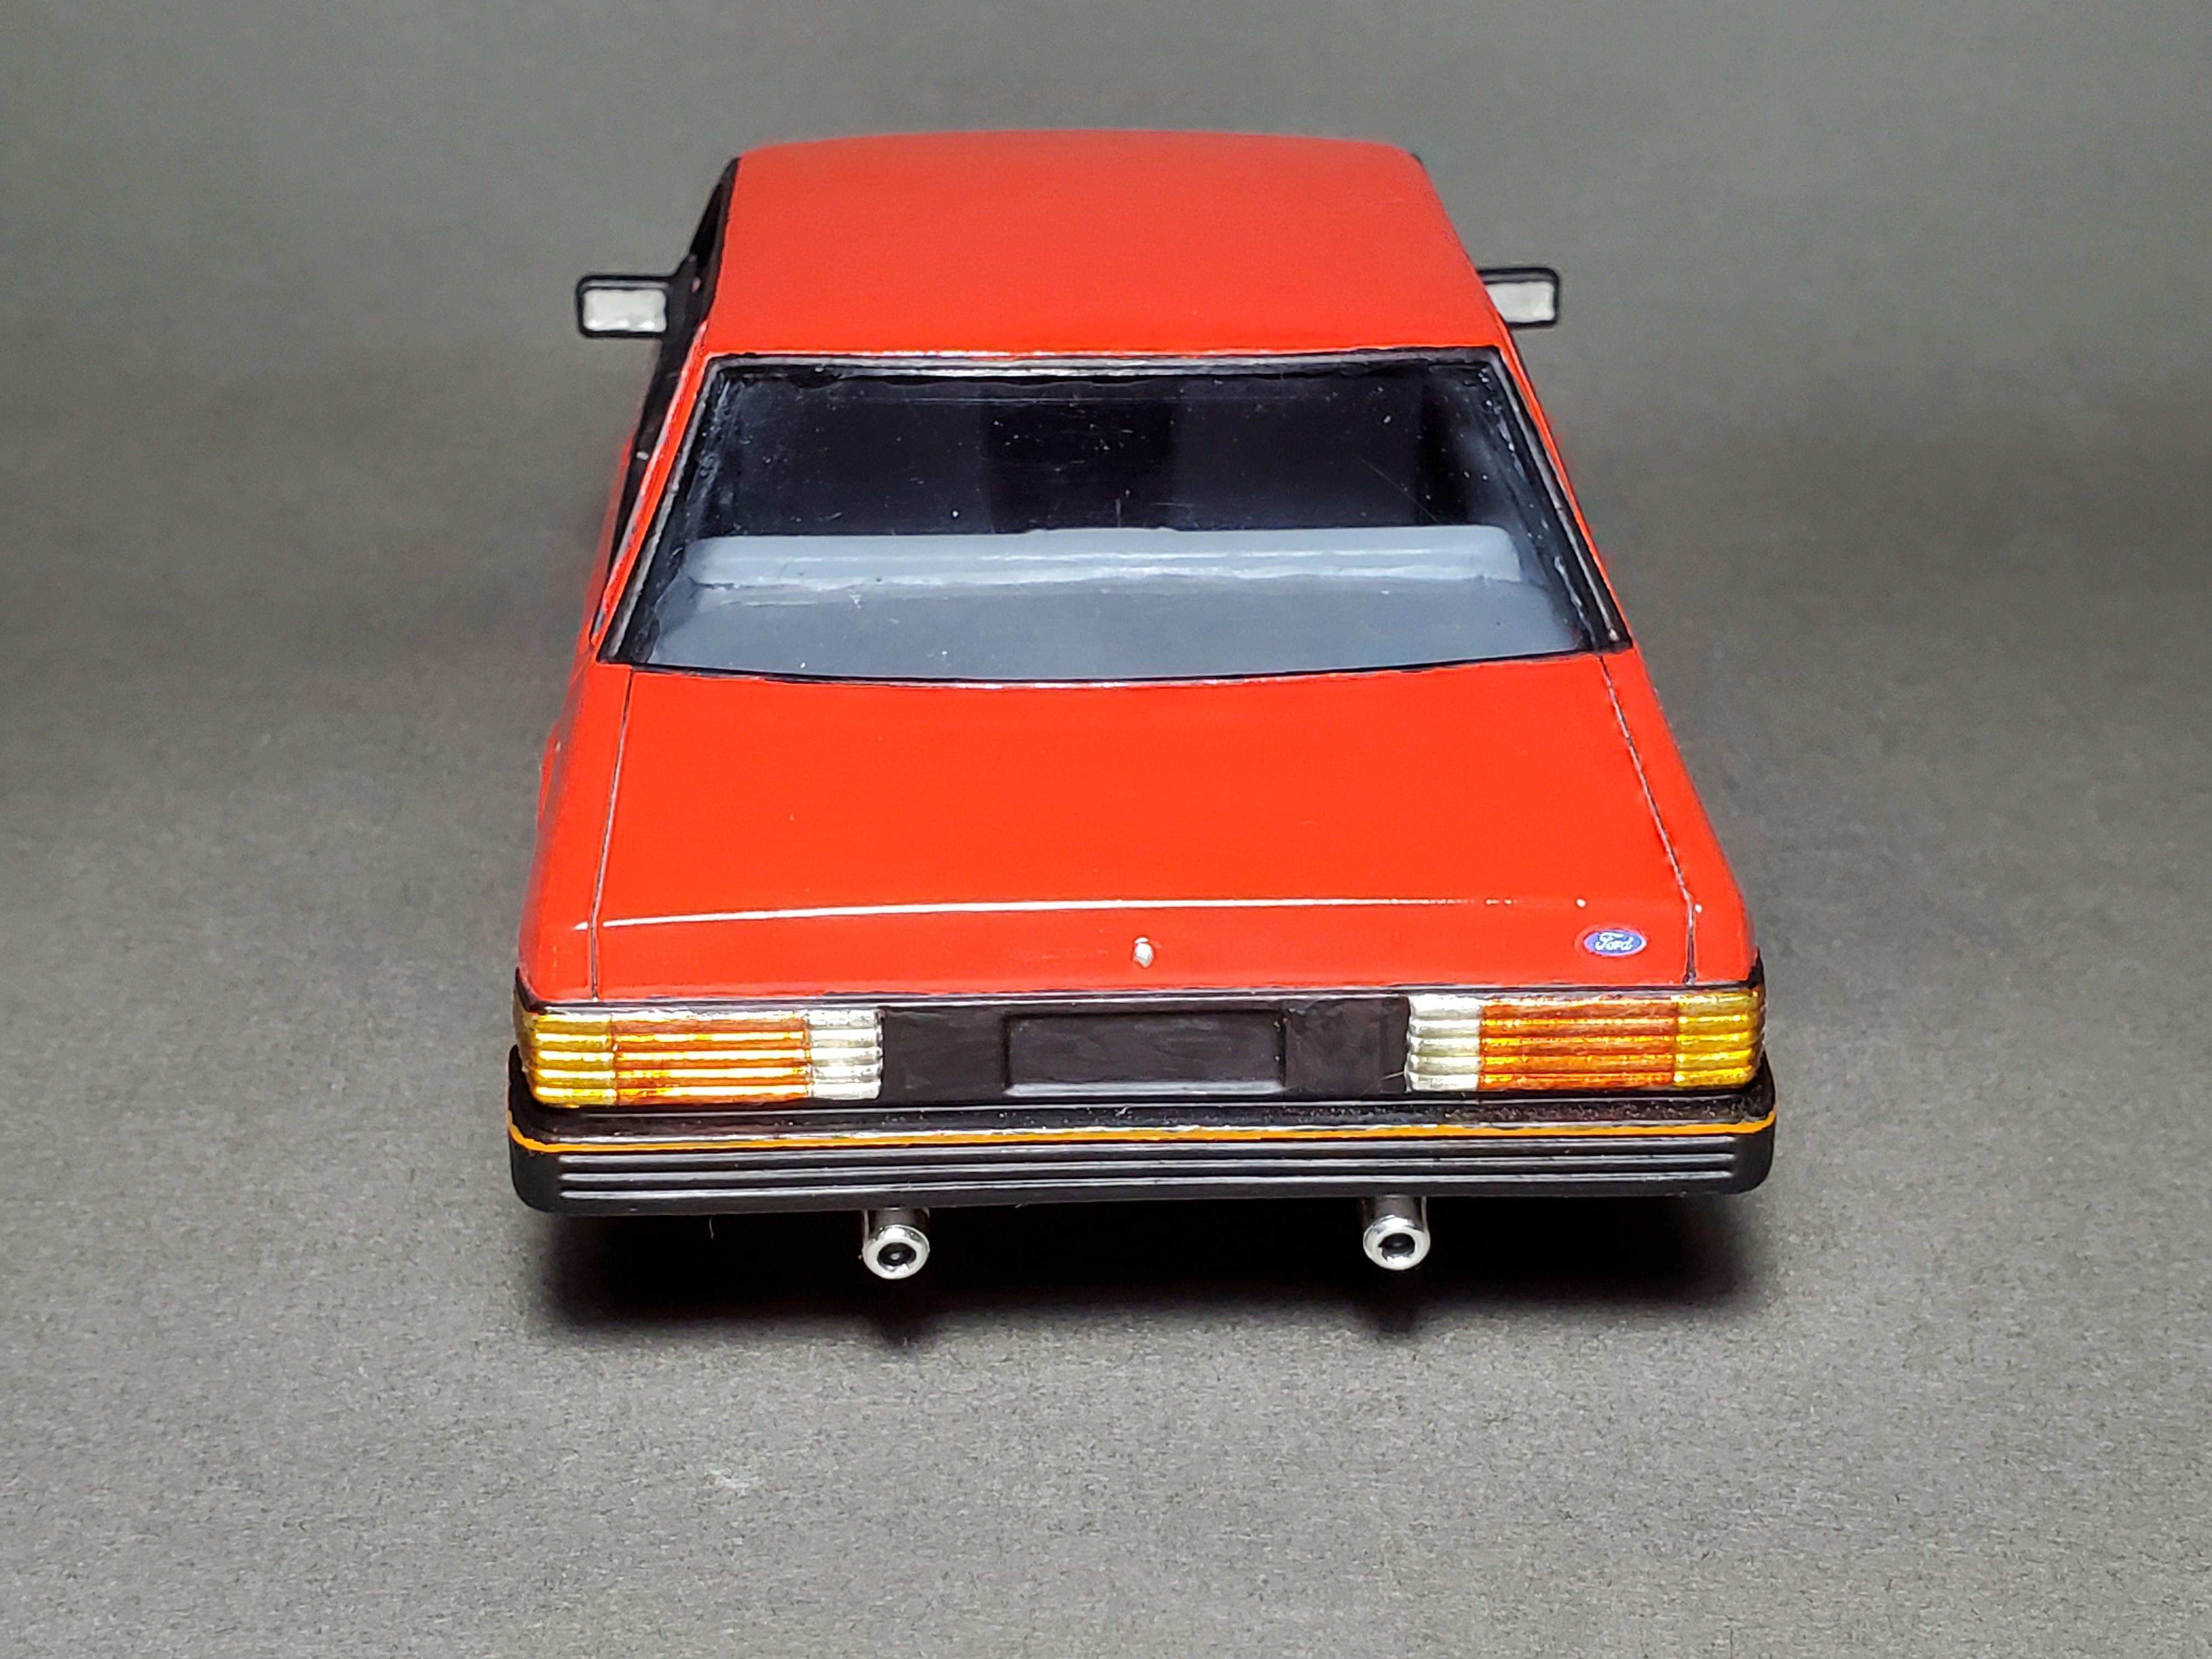
Just finished this... except for license plates. It's a reasonable facsimile of an Australian 1982 Ford Falcon XE with the ESP package. I consider it a bit of a street machine, as I printed deep wheels for the back, has dual exhaust and custom interior. Everything but the windows, tires, brass axles, exhaust tips, and the side trim is 3d printed. These cars were the last Falcons in Australia to get a V8 until the 90s if I recall correctly.... and they had 351 Clevelands in them! Colors are Tamiya Bright Red over Tamiya Light Gunmetal, with 2 heavy coats of Testors Wet Look/Extreme Lacquer clear. Tamiya lacquer bottle orange for side stripe. Tamiya acrylic for interior colors and for the headlights and taillights. Headlights and taillights are covered with bondic. Wheels are colored with Molotow for the rims, and testors gold for the centers.
-
Bump! Don't forget we had to change venues unfortunately! New address is 10995 Oakridge Drive, Harrison, OH
-
****VENUE CHANGE!!**** Cincinnati Challenge 2023 Due to reasons beyond our control, we have had to move to a new, new venue! Thankfully it's only just a few short minutes from our old, new venue. The lighting is way better here too. New location is: 10995 Oakridge Dr Harrison, OH 45030 Just off Ohio 128 (Hamilton-Cleves rd) We'll be in the far end/back half of the "Delta" building. Please share with your friends! Apologies for the change! There was nothing we could do!
-
Got any glass and headlight lenses? I want to build a "Little Drag".
-
I considered it. I really did. But, I like the charm this one has. I need a turtle deck and a windshield and I can build the blue "Drag" version. Which will be nicer than this one.
-
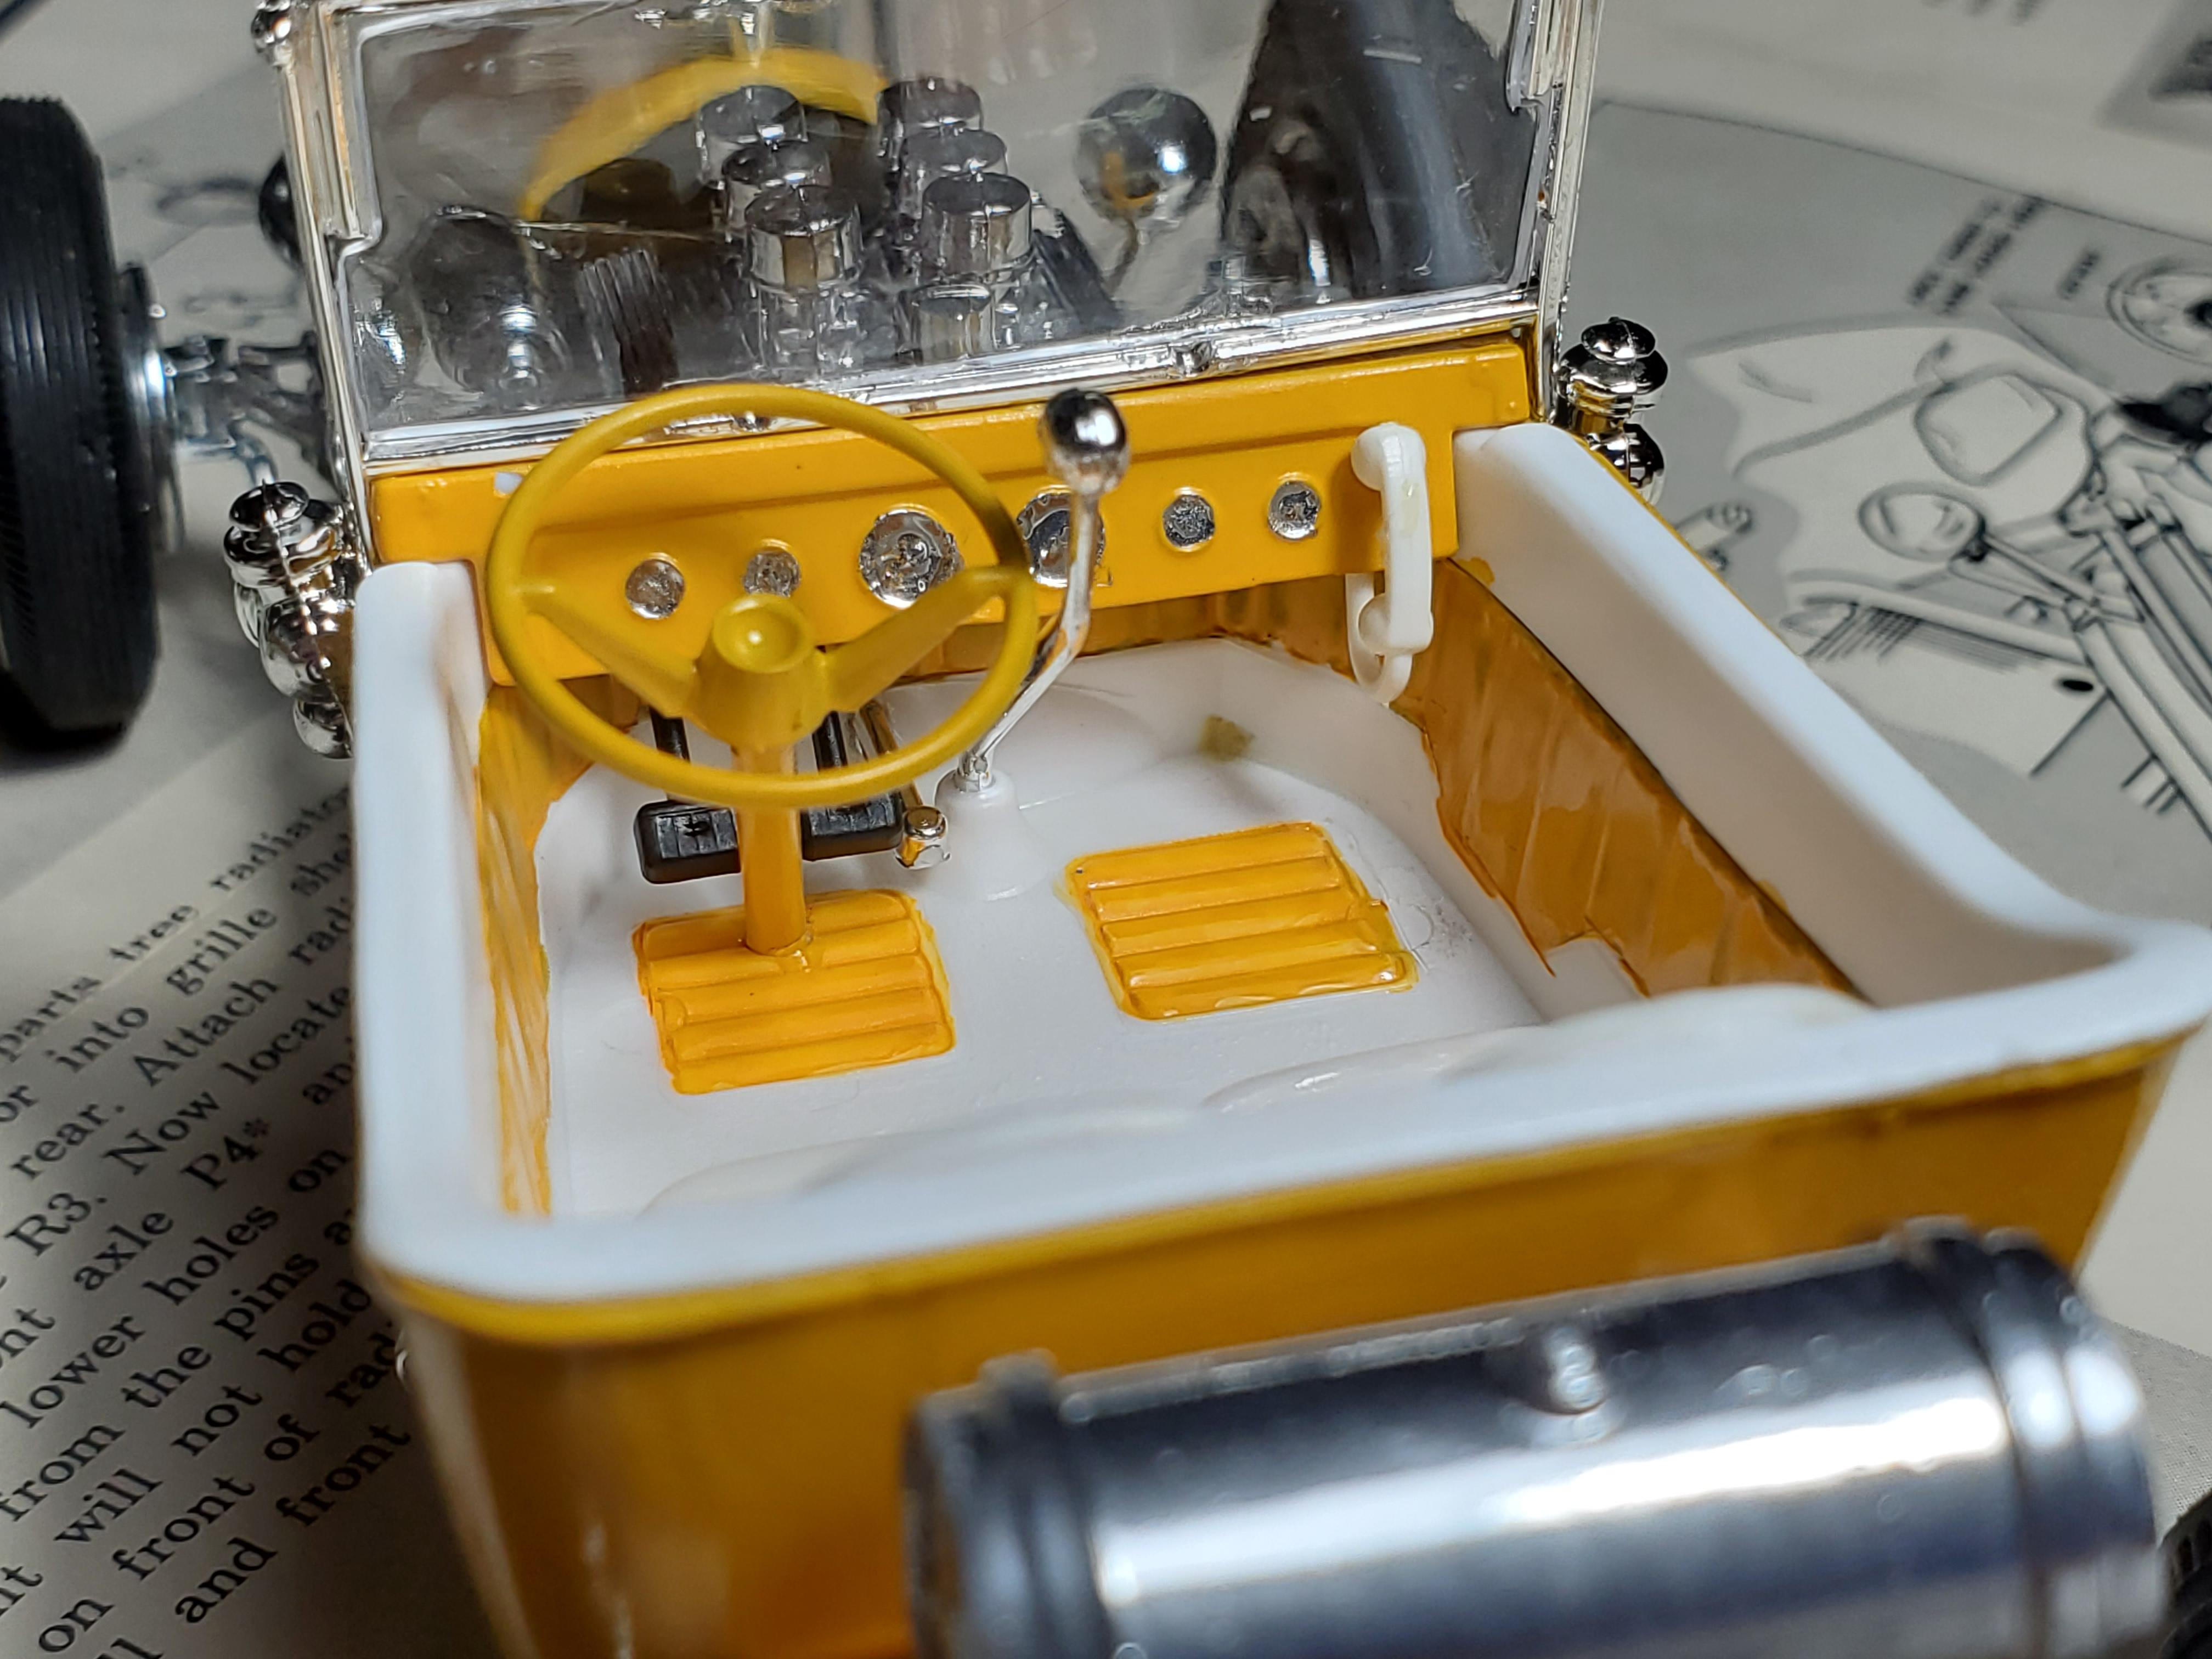
Hey all. Last year I was digging thru a parts box at a friends house and came across 98% of a Monogram Little T original issue. Unfortunately it was all in parts as it has fallen completely apart. I thought it'd be pretty neat to reassemble it as it was before it was banished to the parts box to fall completely apart. The only liberty I took was painting the radiator and hoses because I didn't like the look of red thru the radiator shell. Thanks to some help from some people on the Scale Survivors Facebook group I was able to locate the remaining parts I needed, along with a box and instructions. All of the glue had decomposed and even parts that were still together had to be taken apart and reglued. It's absolutely not a show winner, but I didn't want it to be. Hope ya enjoy it
-
Cincinnati Challenge 2023!
-
Whoa. I forgot about this one. I do need to find it. It's buried from when I had to temporarily get out of building a couple few years ago.