JTalmage
-
Posts
2,695 -
Joined
-
Last visited
Content Type
Profiles
Forums
Events
Gallery
Everything posted by JTalmage
-
 Here it is! All done. Some fitment issues that cause some warping in certain areas of the body, since the body was soo fragile I couldn't get it perfect. The body broke on me at least 10 times during the construction! Finished in Testors Tropical Turquoise and Tamiya Light Gunmetal for the roof. Cheapo spray cans for interior/roll cage/chassis. The chassis and drivetrain is an AMT 90's Pontiac Nascar. Hindsight I wish I had opened the front wheel wells up more front to rear to create the illusion that it's steerable. Used pop cans for the tin work under the hood and in the trunk to make it look more "finished". Enjoy.
-
Mishap after mishap with the paint caused me to strip it and start over. So, heres the new colors. Almost there...
-
Way cool. I have one I believe that is also molded in red flake.
-
The body will sit a little lower once fully secured.
-
Wow they could almost be twins!
-
I kept suffering paint issue after paint issue with my old can of Testors one coat purplicious. So I had to strip the car. Back to the drawing board, and so much for finishing it by Friday.
-
Thanks. If anyone is near Indianapolis Saturday, I'll have it at the circle city model car show.
-
The gray was too faint unfortunately and I saw thru it
-
A '55 2dr JoHan Pontiac was available at one time.
-
Looks great! I have been wanting to do this for a while myself
-
Beautifully done. I have resin parts to convert one of mine to an MM1 car. The resin trunk piece leaves a lot to be desired, but yours looks great. What did you do to make it look so accurate?
-
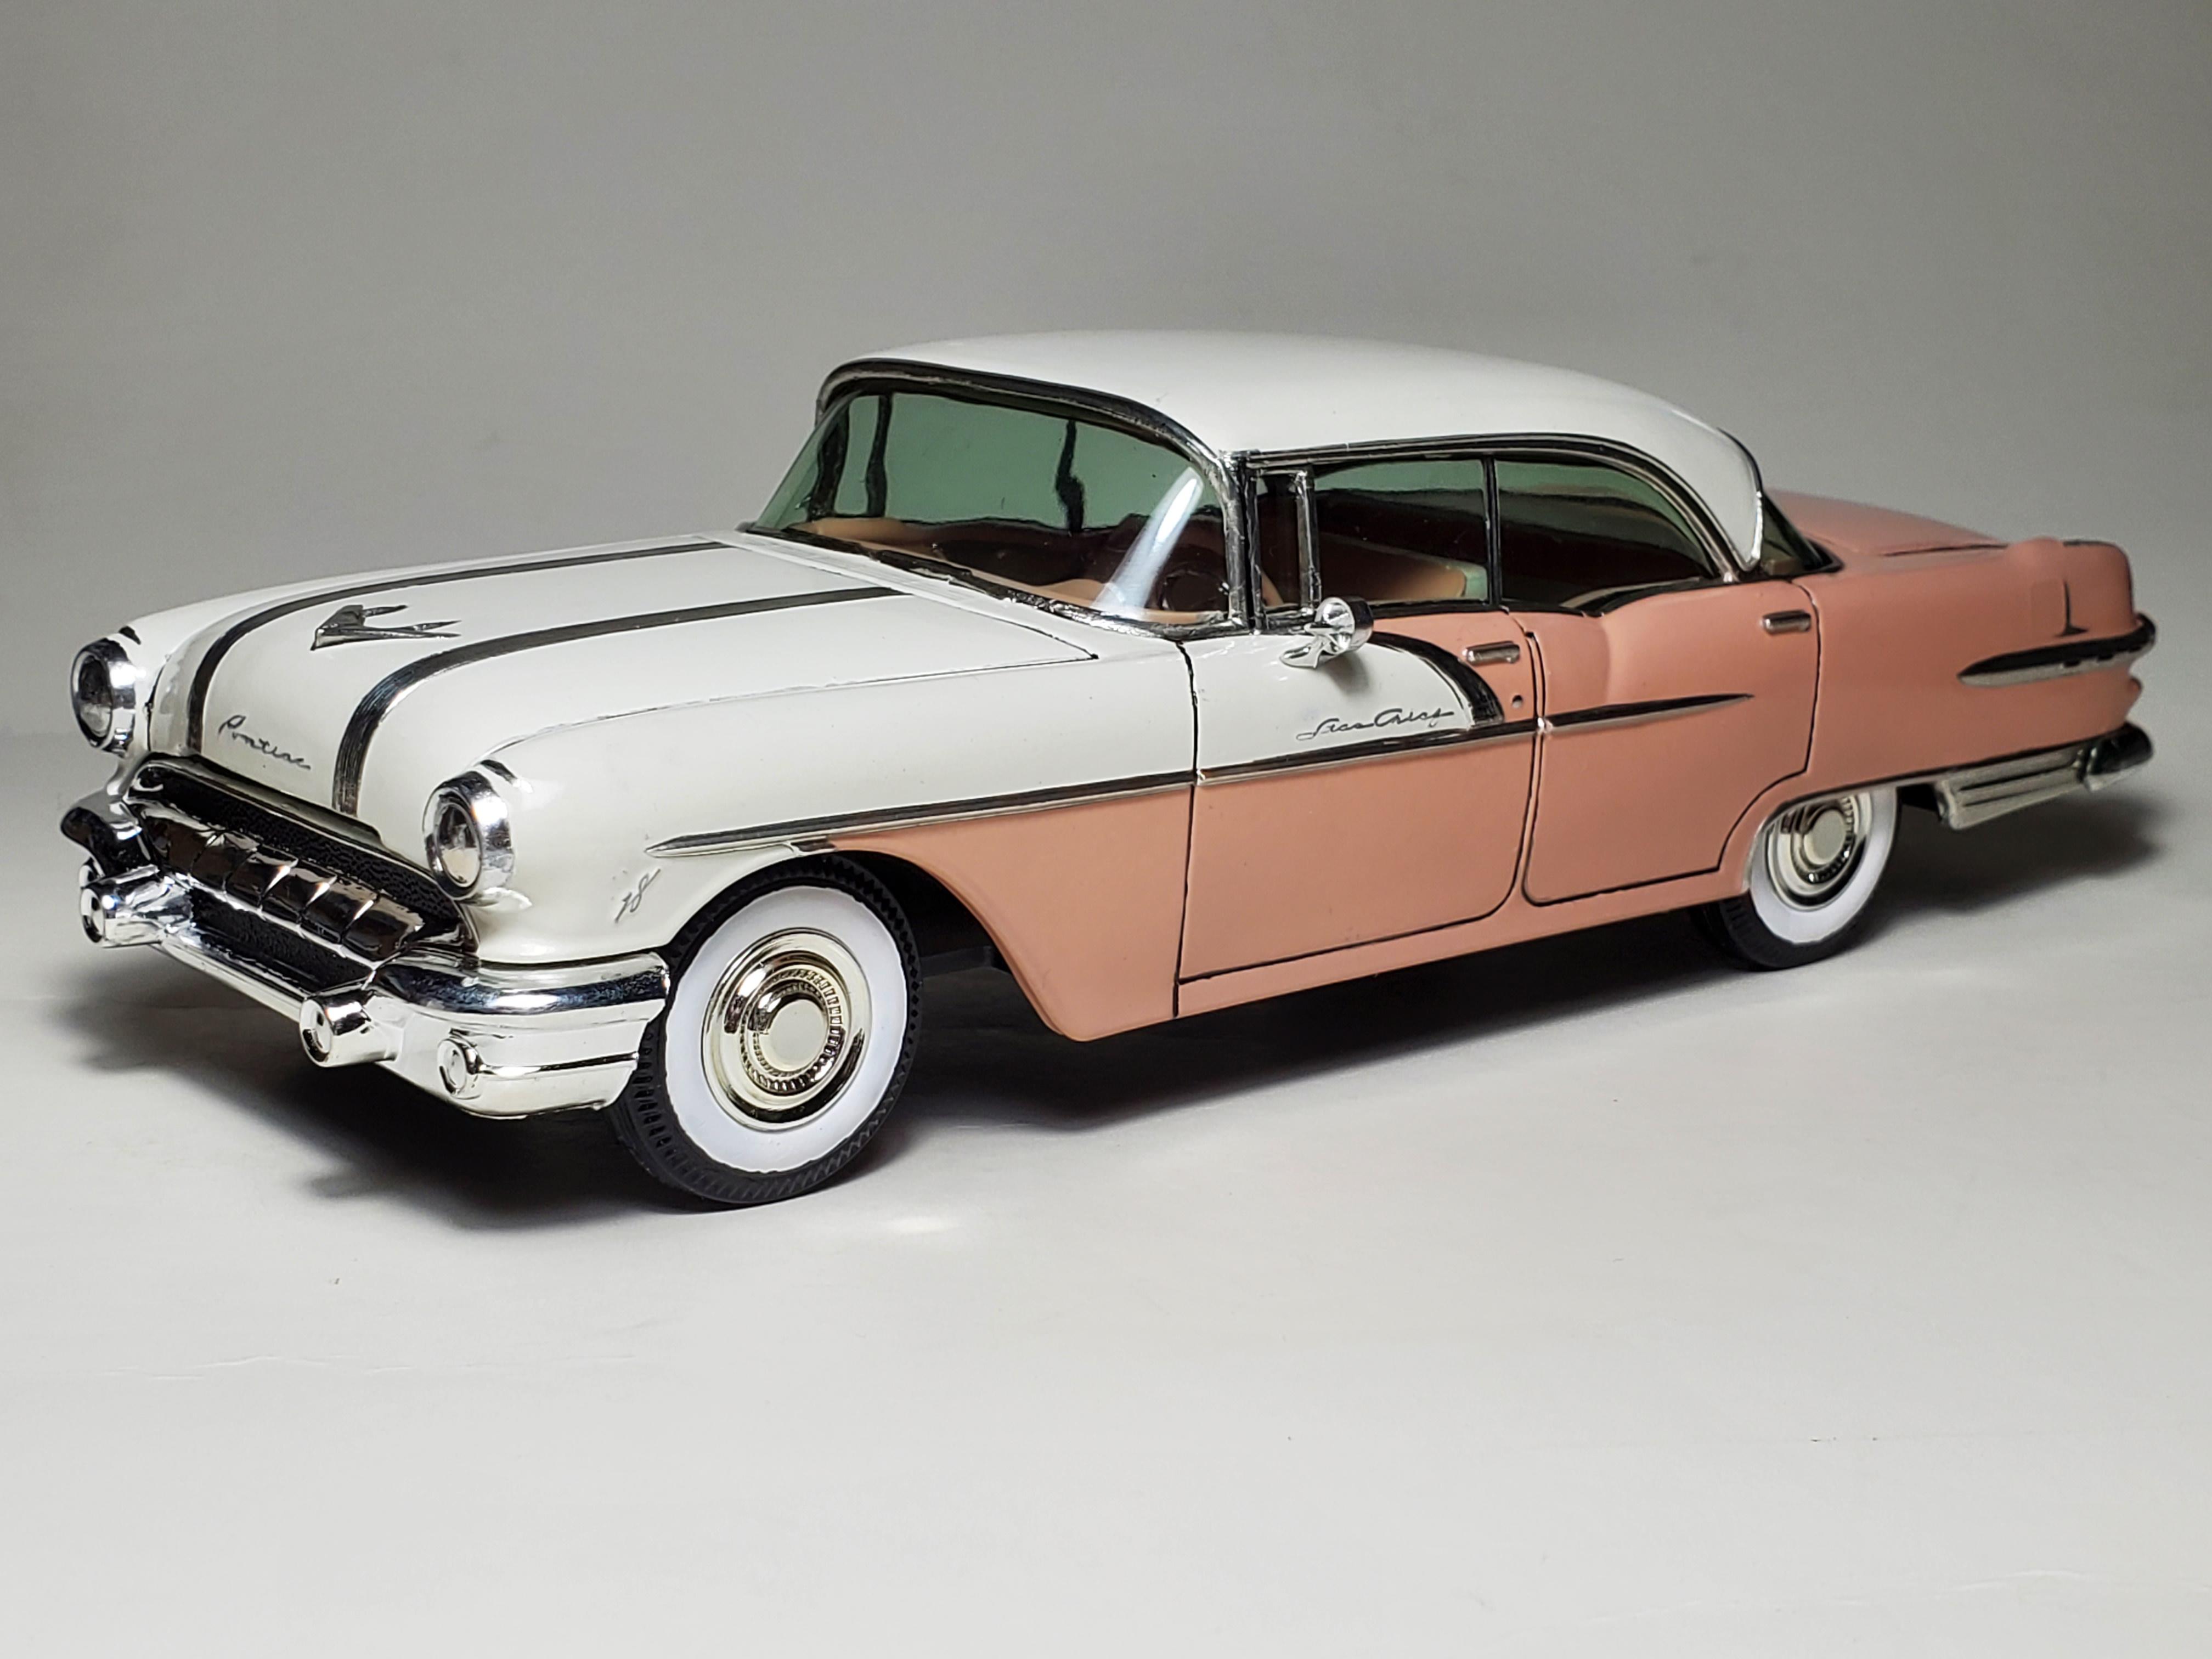
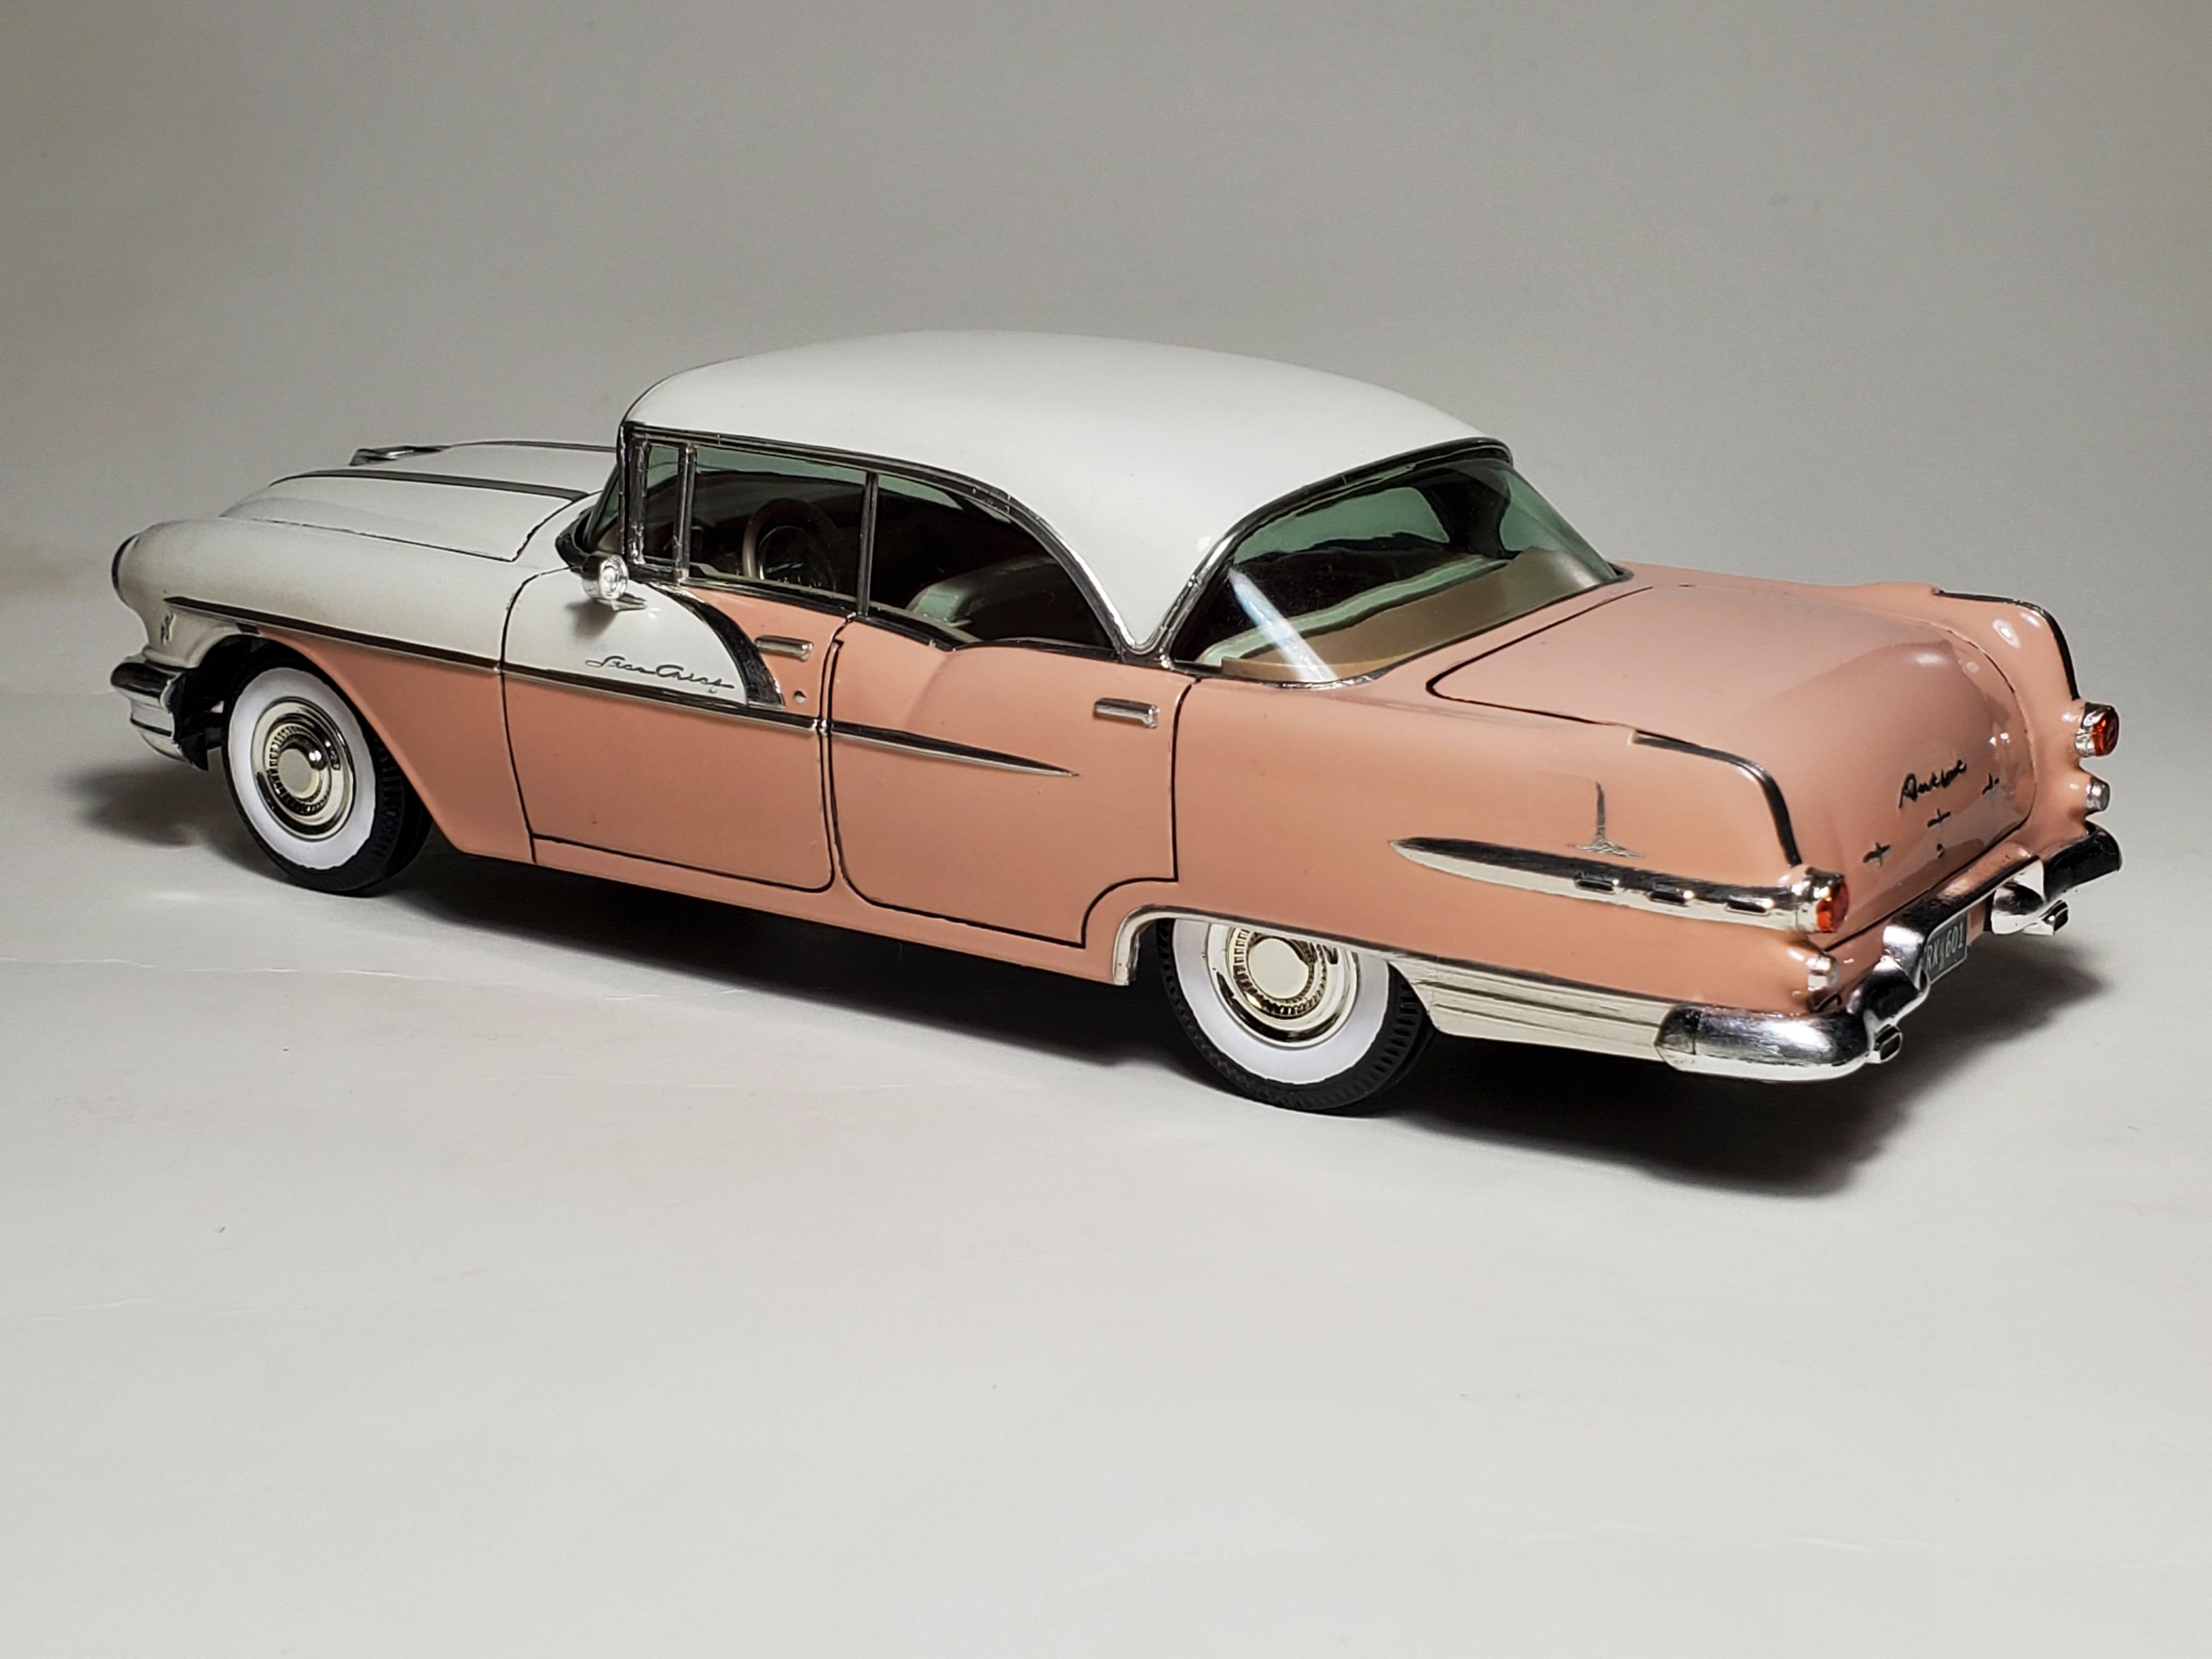
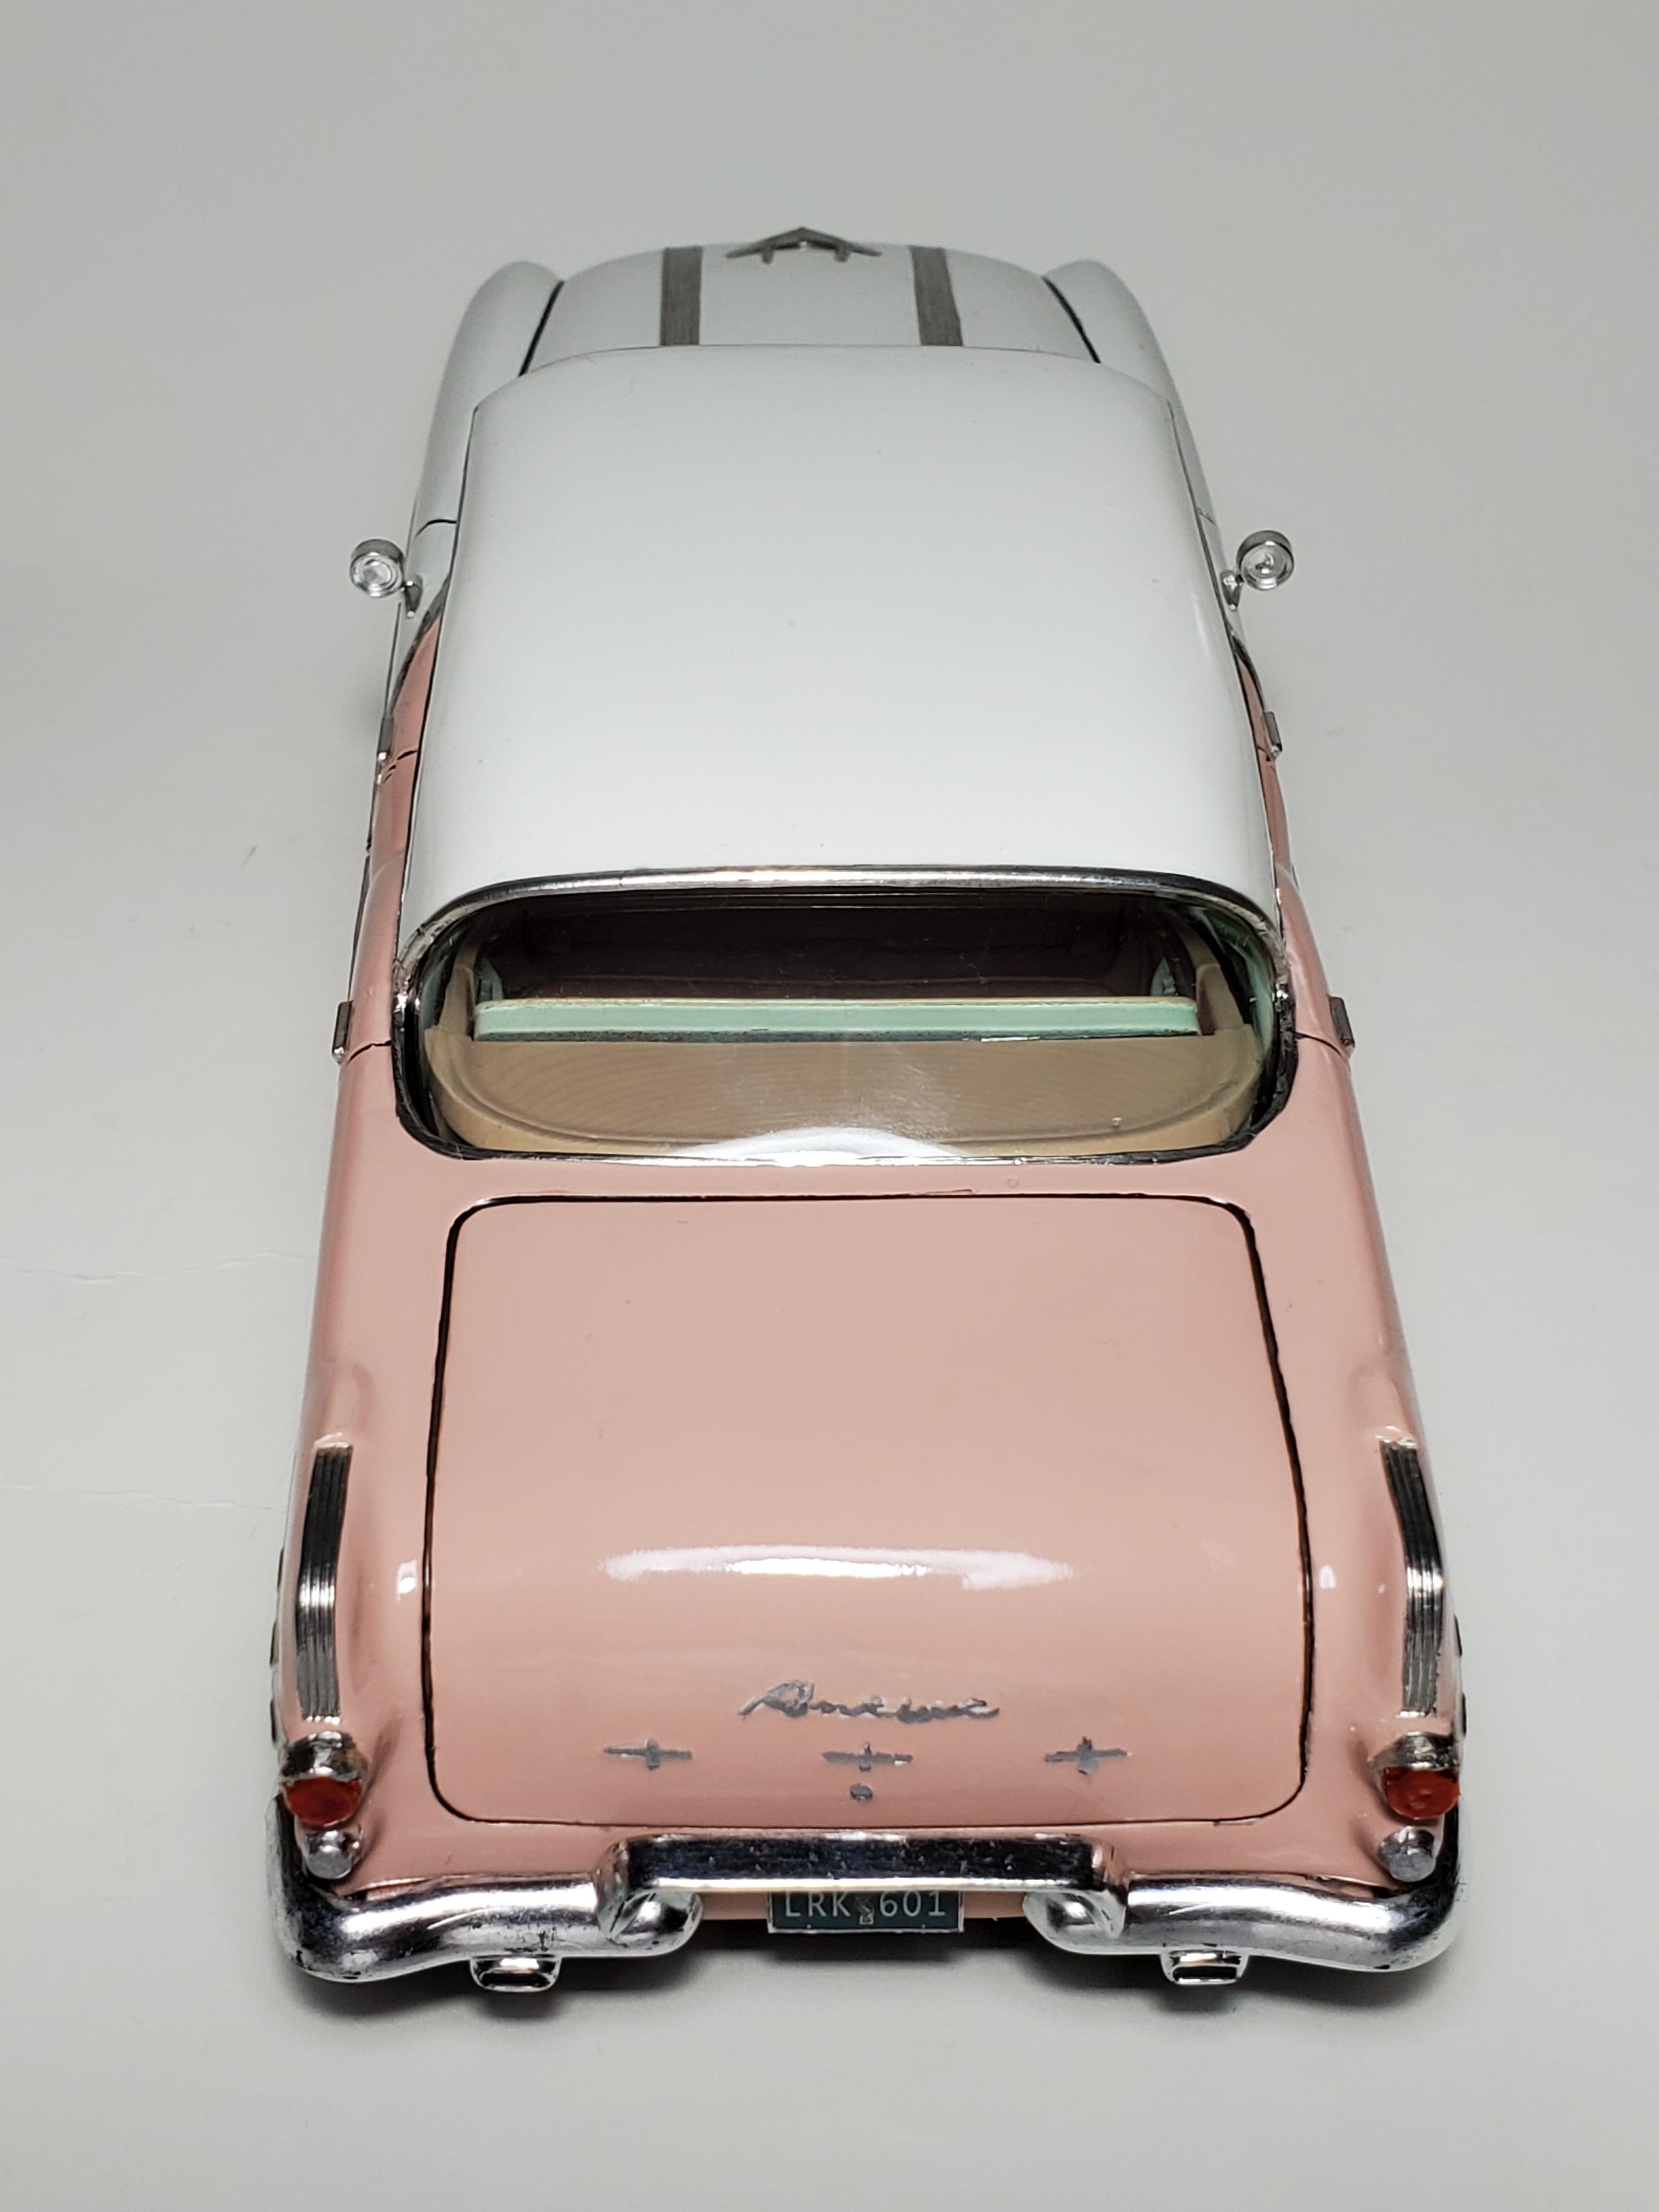
Here's a quicky build that I've been wanting to do for a while. I found some paint at walmart the other day that spoke to me. This model features the 3d printed interior for the '56 Pontiac 4dr now available by Okey of JoHan. I painted the chrome on the dash and most of the door panels with molotow with a brush. Mirrors are parts box, and not correct but look cool on it. Custom license plate I made years ago. I wish I put a mirror off the inside of the roof but oh well. My only regret is the trunk. The scripts were not proud enough to let me sand thru the paint to the foil without making it a mess so I had to detail it the best I could with Molotow. Enjoy Here's some pics of the interior before it went in the car. I painted the turn signal and shift knobs white before it went together.
-
People.
-
Breaking out of model car related publications!
JTalmage replied to JTalmage's topic in The Off-Topic Lounge
I couldn't decide really where it fell. Thanks. -
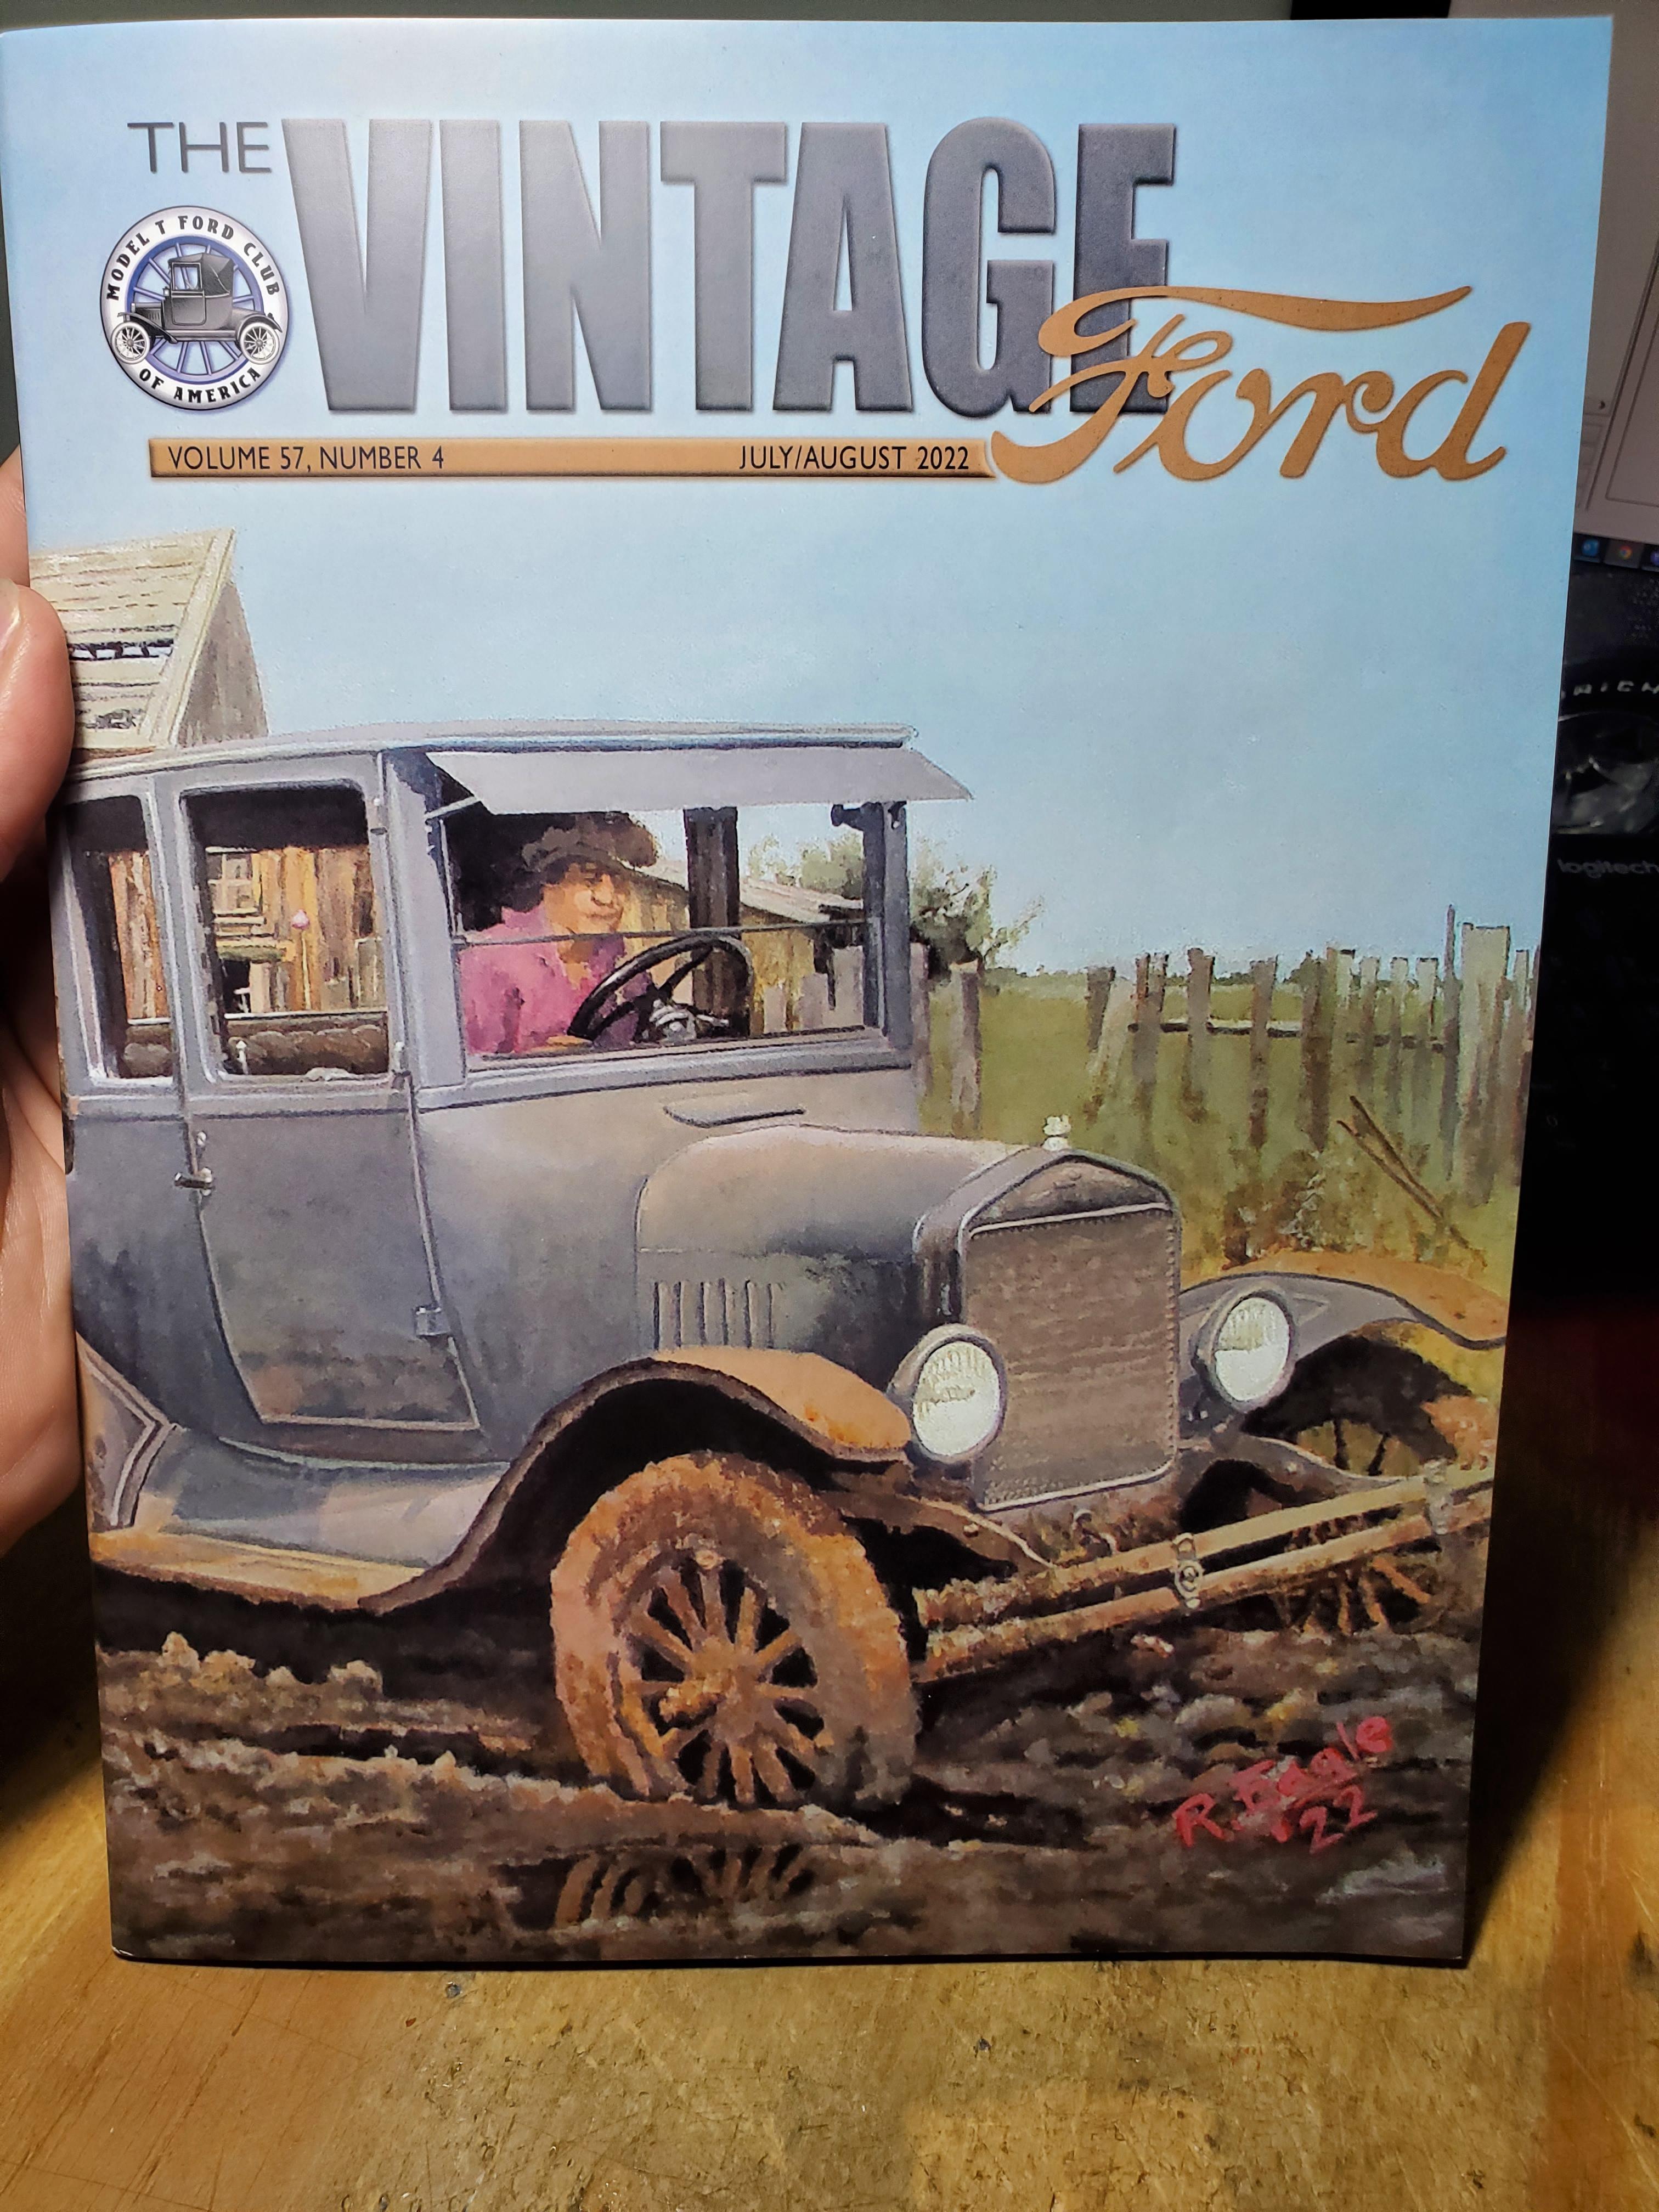
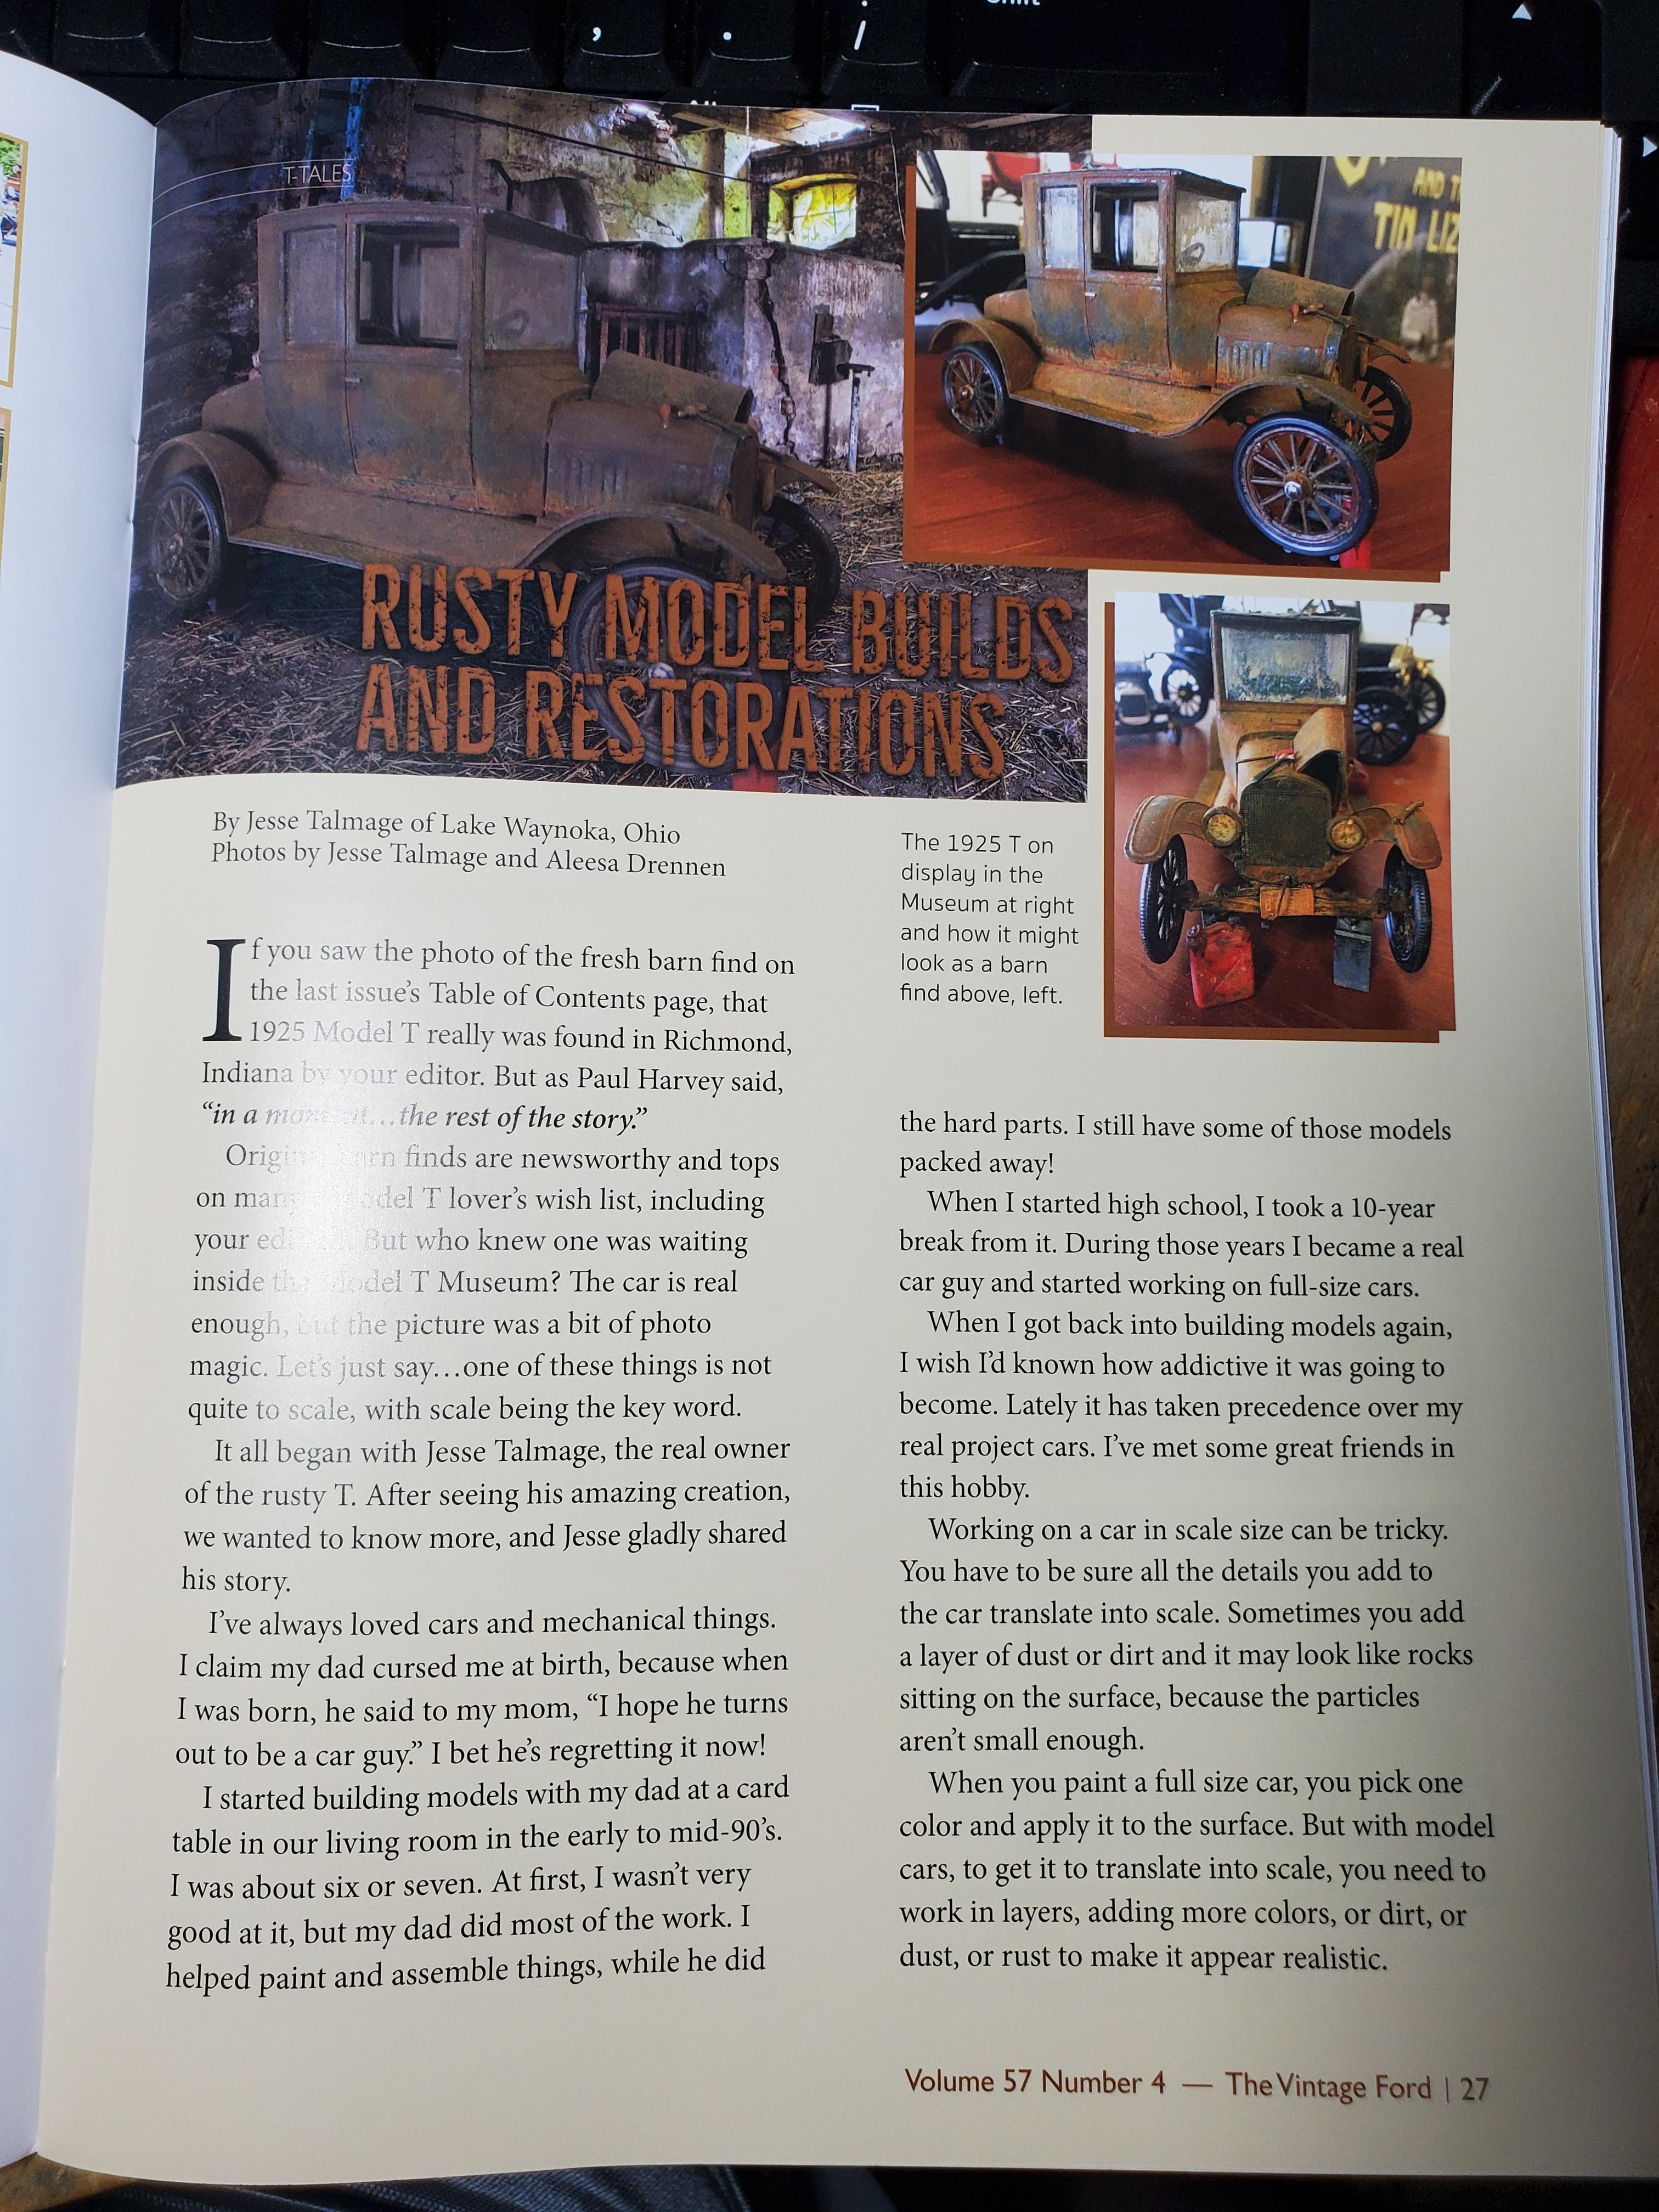
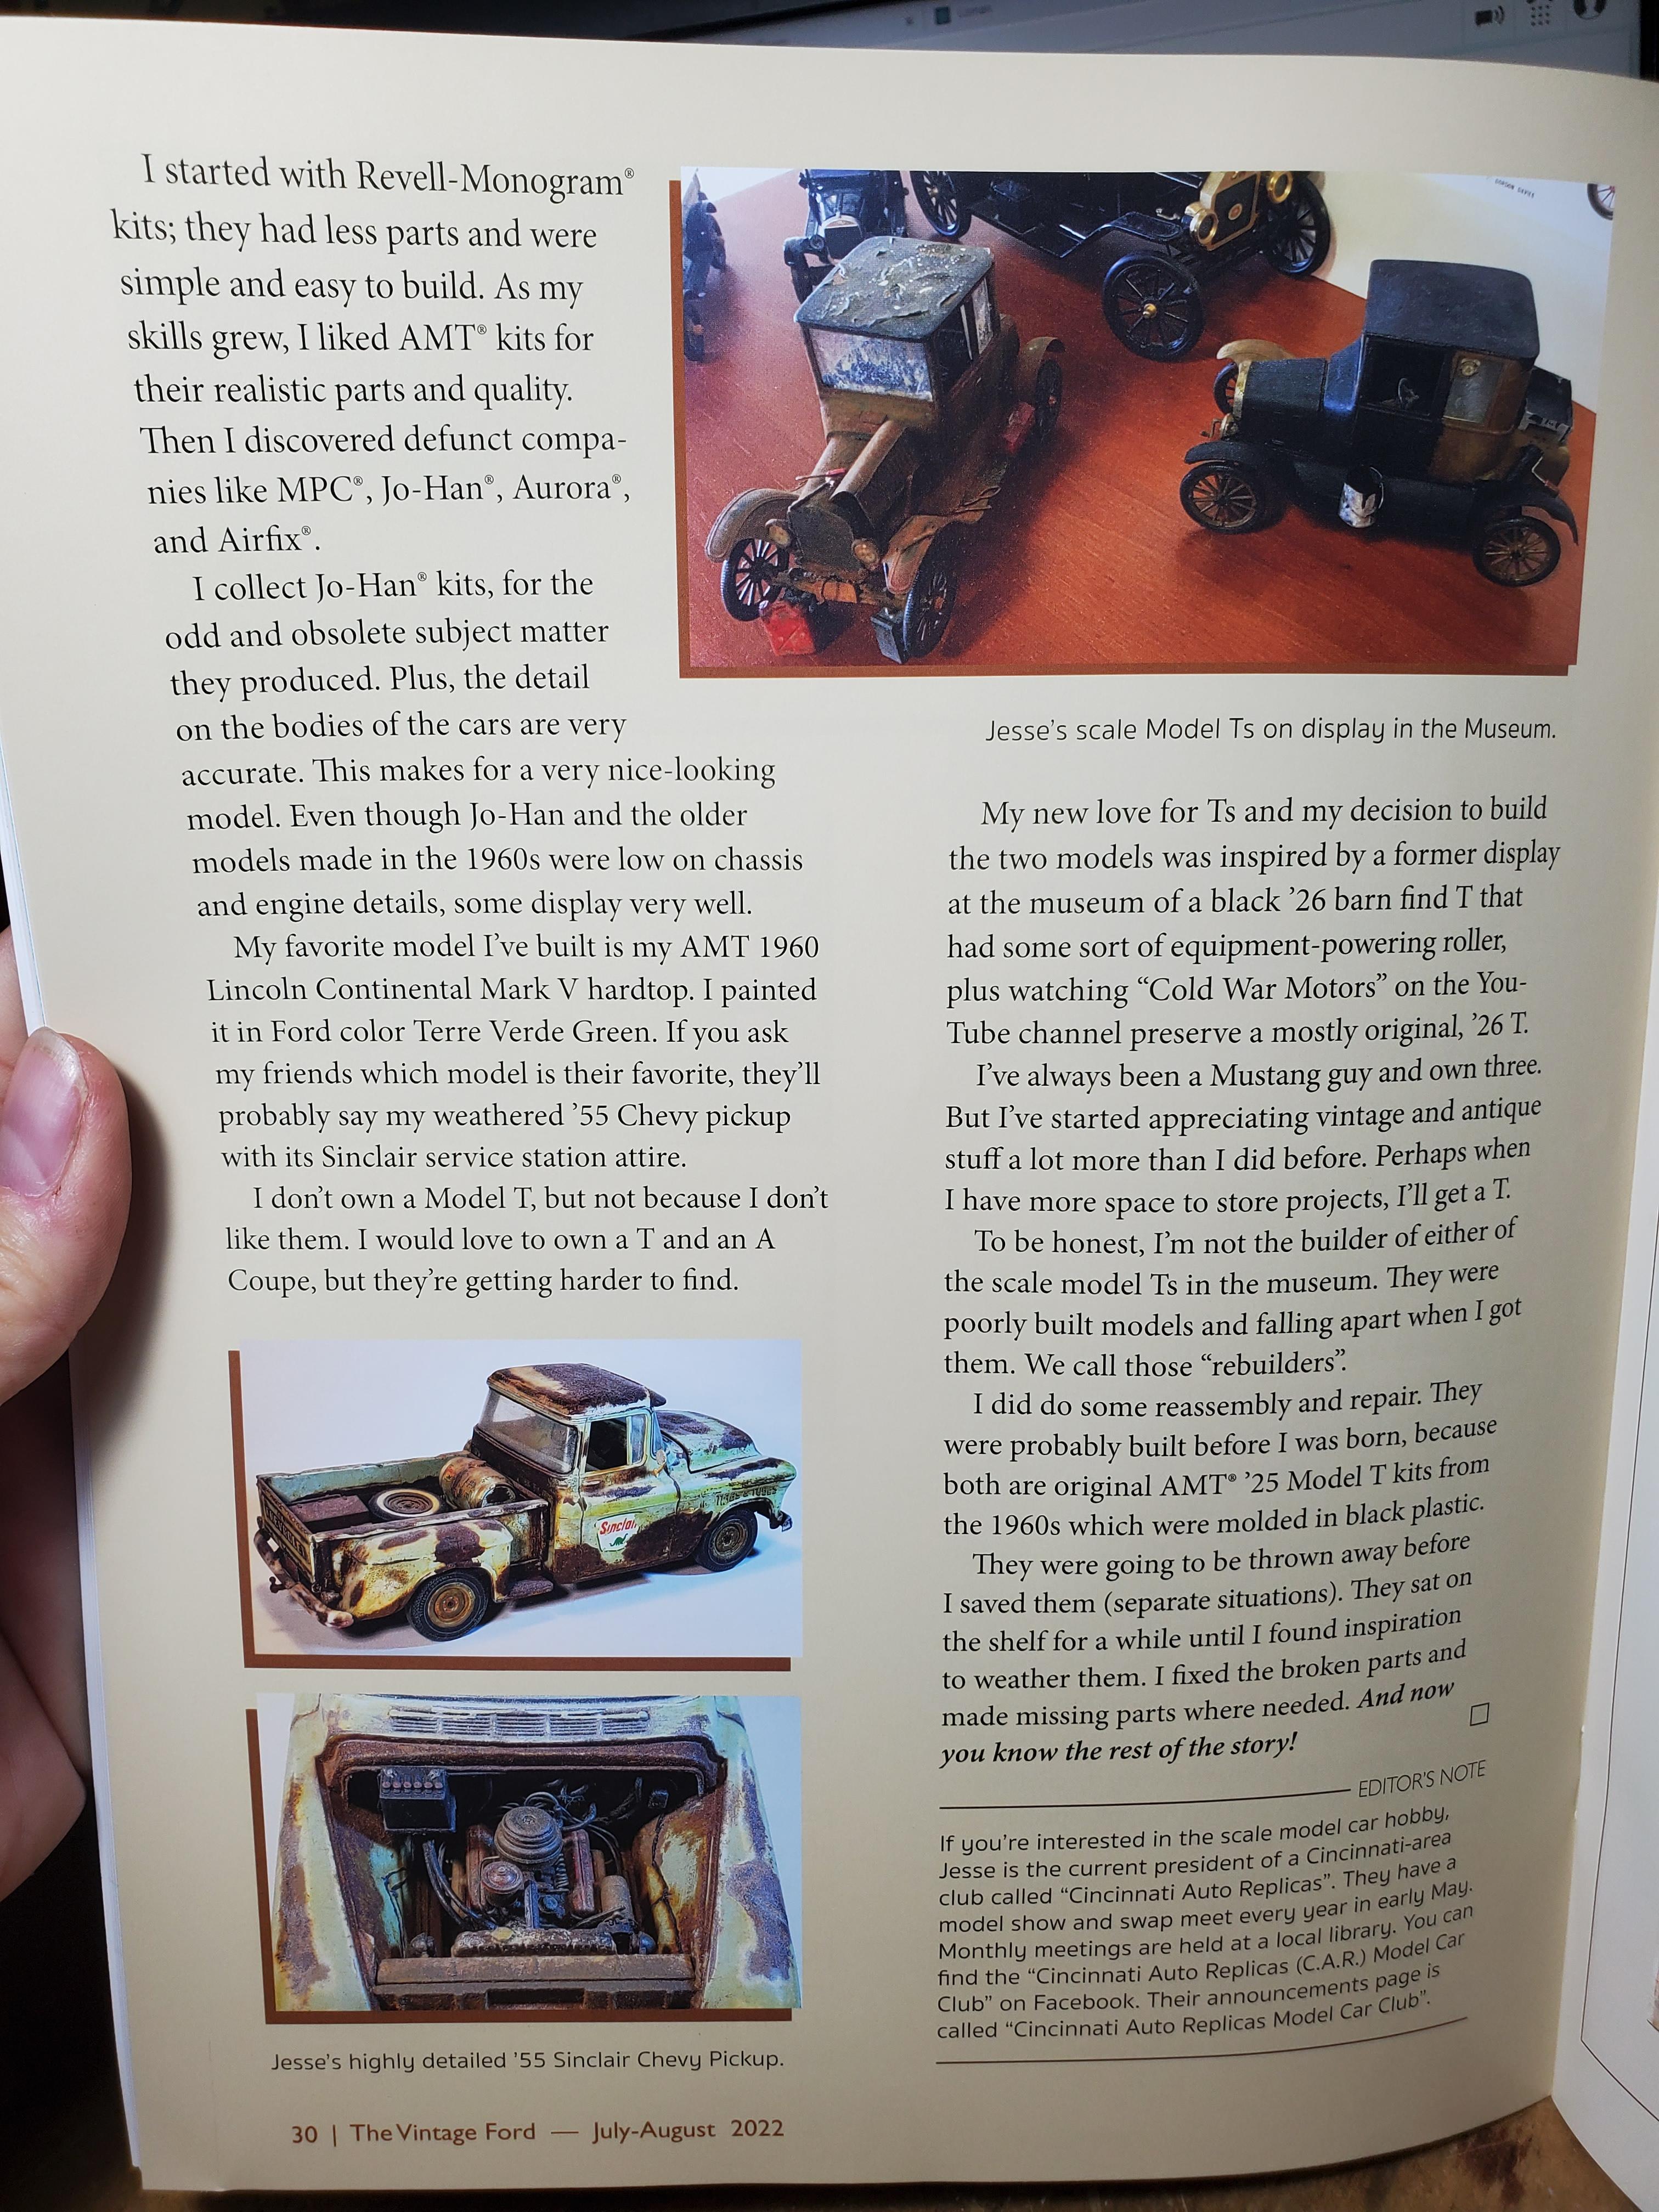
If anyone recalls the 2 Model T's I posted some months ago, I had loaned them to the Model T Museum in Richmond, IN for a year. Well, the editor of Vintage Ford Magazine came in one day and loved them soo much she wanted to do a story on them and my model building. So I obliged. The issue came out most recently and here it is! This is the 2nd time I've had a model car featured in a magazine outside of a Model Car related publication. First time was the short lived Roadkill magazine.
-
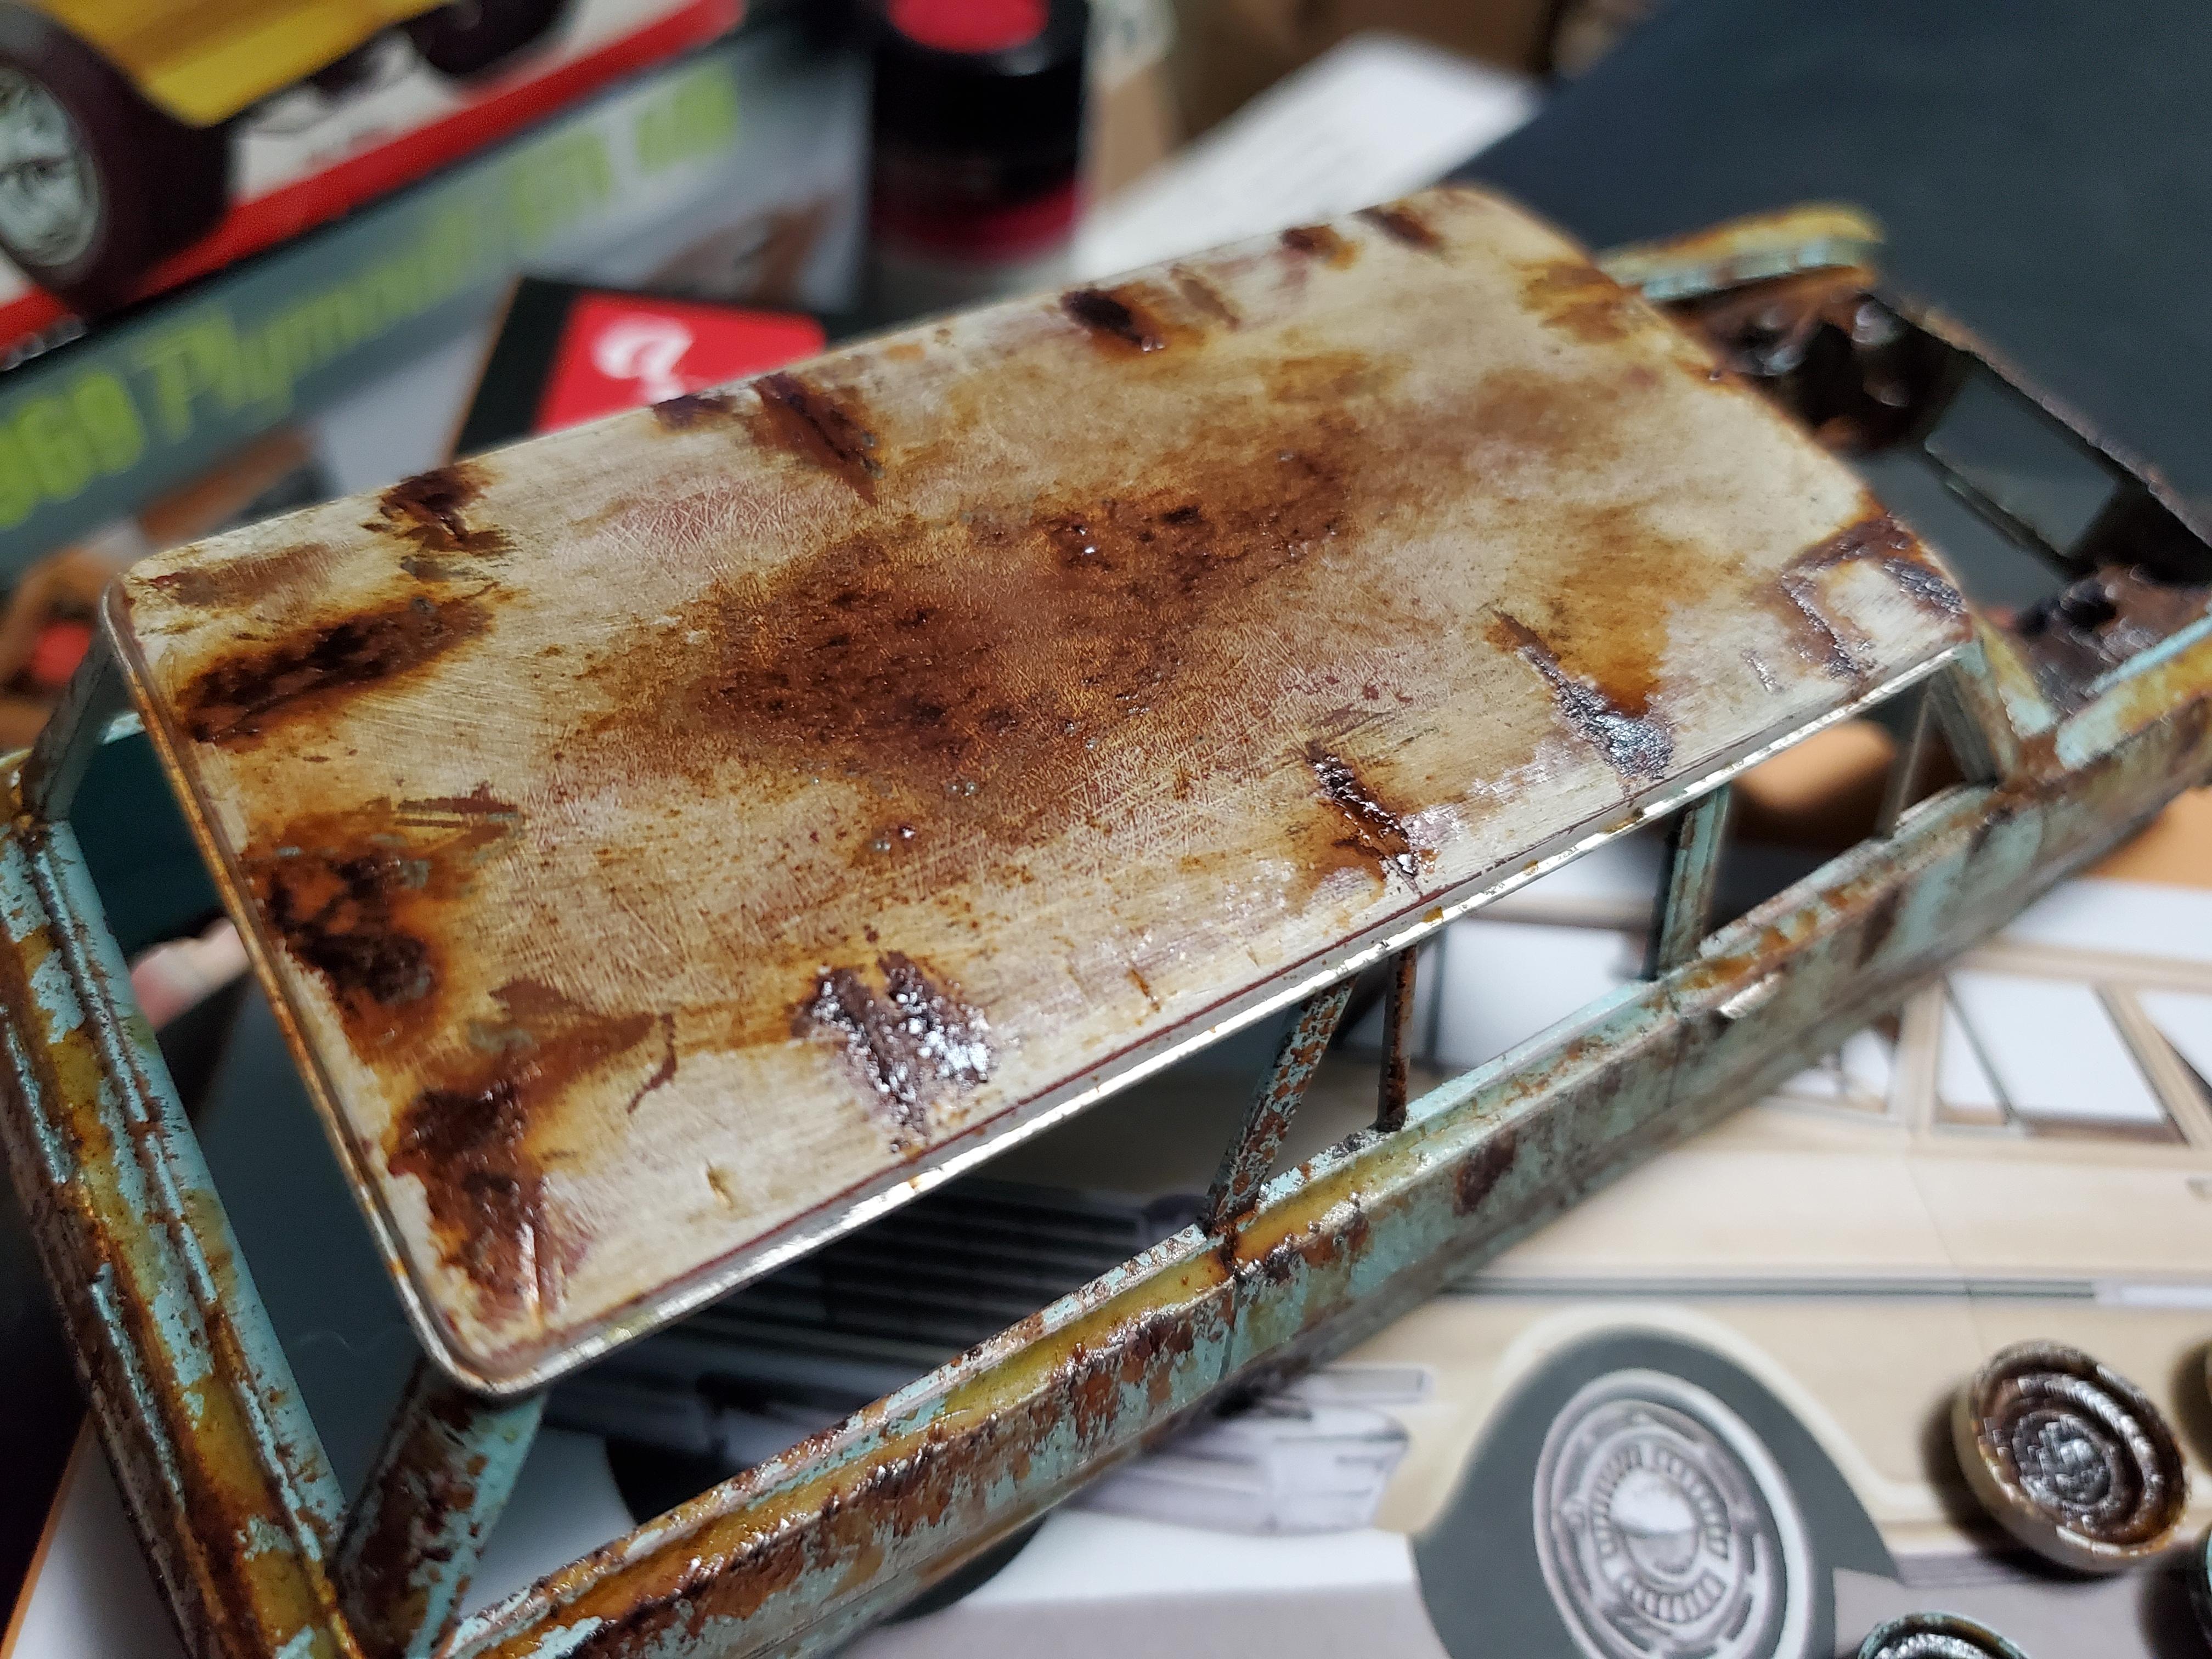
Oh also most of the surface rust will get rubbed off during the weathering process, and leave just the stain so it looks a bit overdone right now because... well.. it is
-
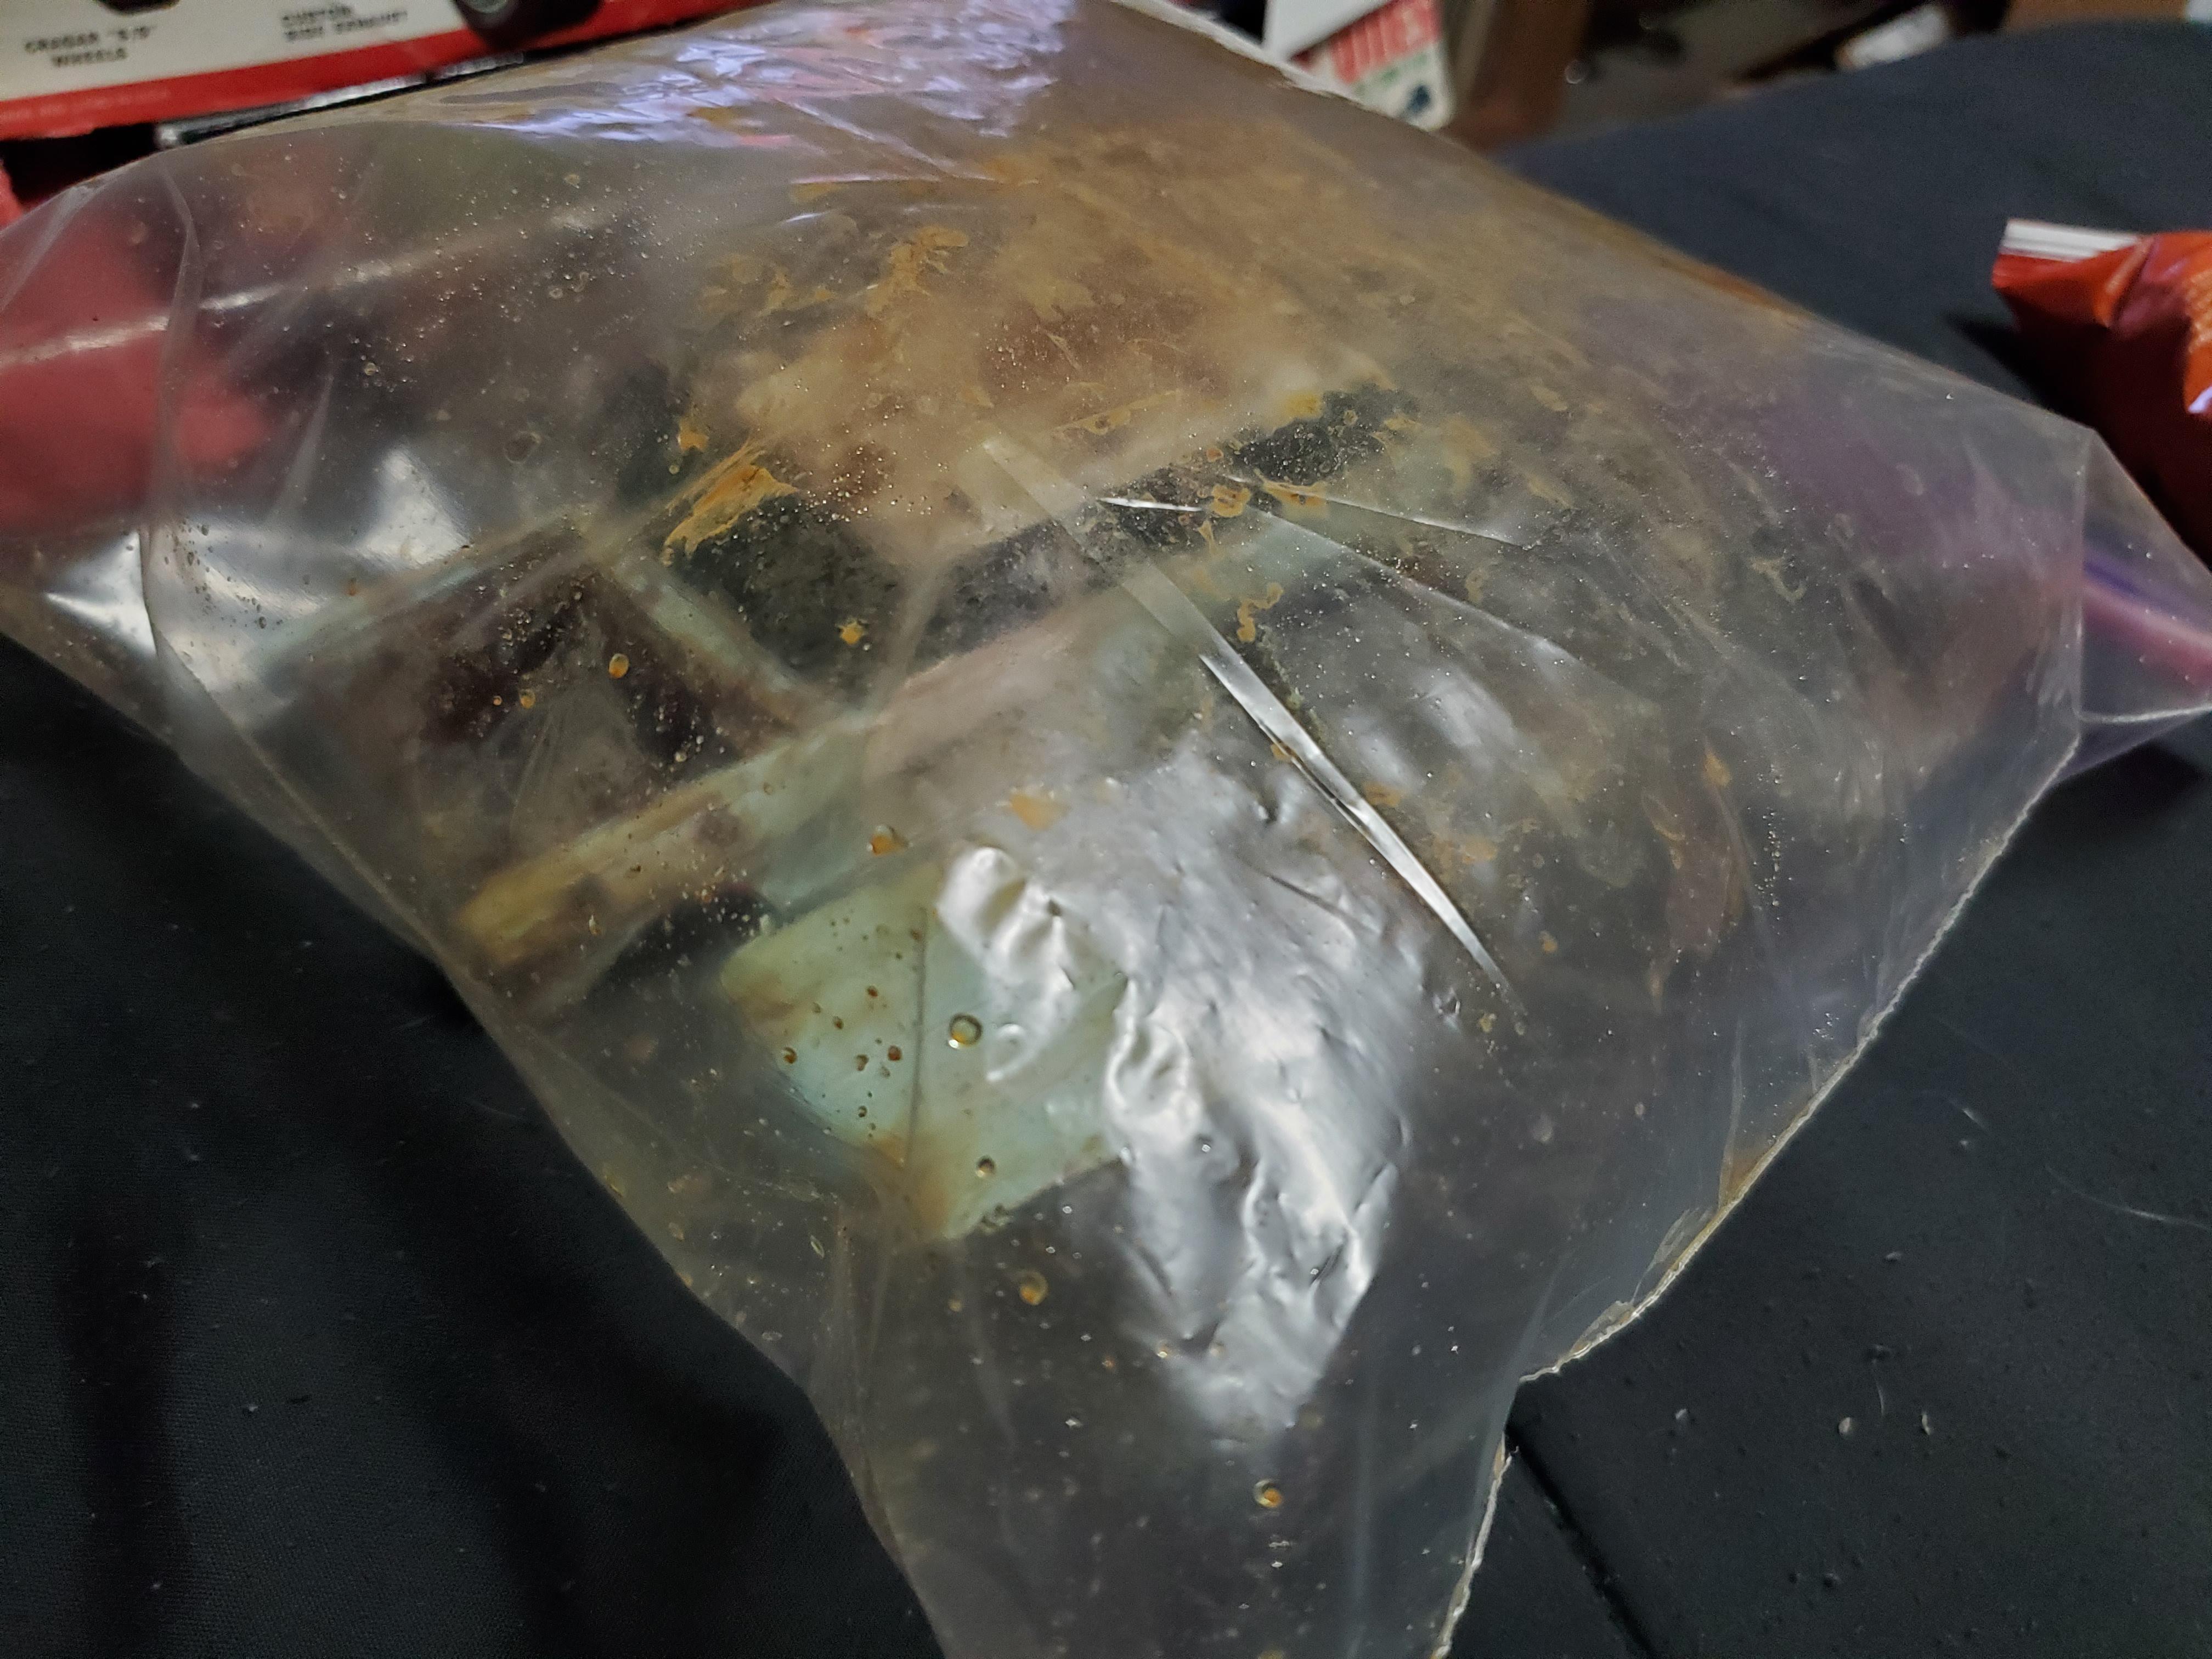
Another one I started for a club theme that I put off until last minute and didn't get done on time. I wanted to build a nice version and a rough version for the meeting but didn't even get the rough one done. Anyway here's some progress pics. I added dents and thinned out areas on the body, removed some trim and drilled holes, and created rusted out panels with an xacto knife. I started out with red oxide primer then white, masked the door and roof off, then added the blue. I added salt between the white and blue layers. I should have added salt between the primer and white/blue layers though. I also added rust solution before the white and blue layers too, but while working on the body sanding and removing salt, most of it rubbed off (bare white spots) so they got recoated w/ the rust solution (Modern Masters from HobbyLobby) I used the lowest axle setting on the back and the highest on the front to simulate worn springs. Perfect for a winter beater. For some reason these pics below look way more blue, and I think it's because I changed to an LED desk lamp bulb. I wanted to run winter grips on the back like this thing was a daily that saw a lotta hard winters before being forgotten. But the tires were 15" and the wheels were 14". I wrapped a strip of styrene around each back wheel and the mud tires slipped right on! Then, I bare metal foiled it, and started adding the rust base. So off it went into the bag after being hit with the rust activator. Here's what it looks like right outta the bag, still a bit sweaty! I wish I had put color inside the side trim before rusting but I forgot. We'll figure out how to do that later... lol
-
I just realized I posted this in the wrong sub forum.... my bad.
-
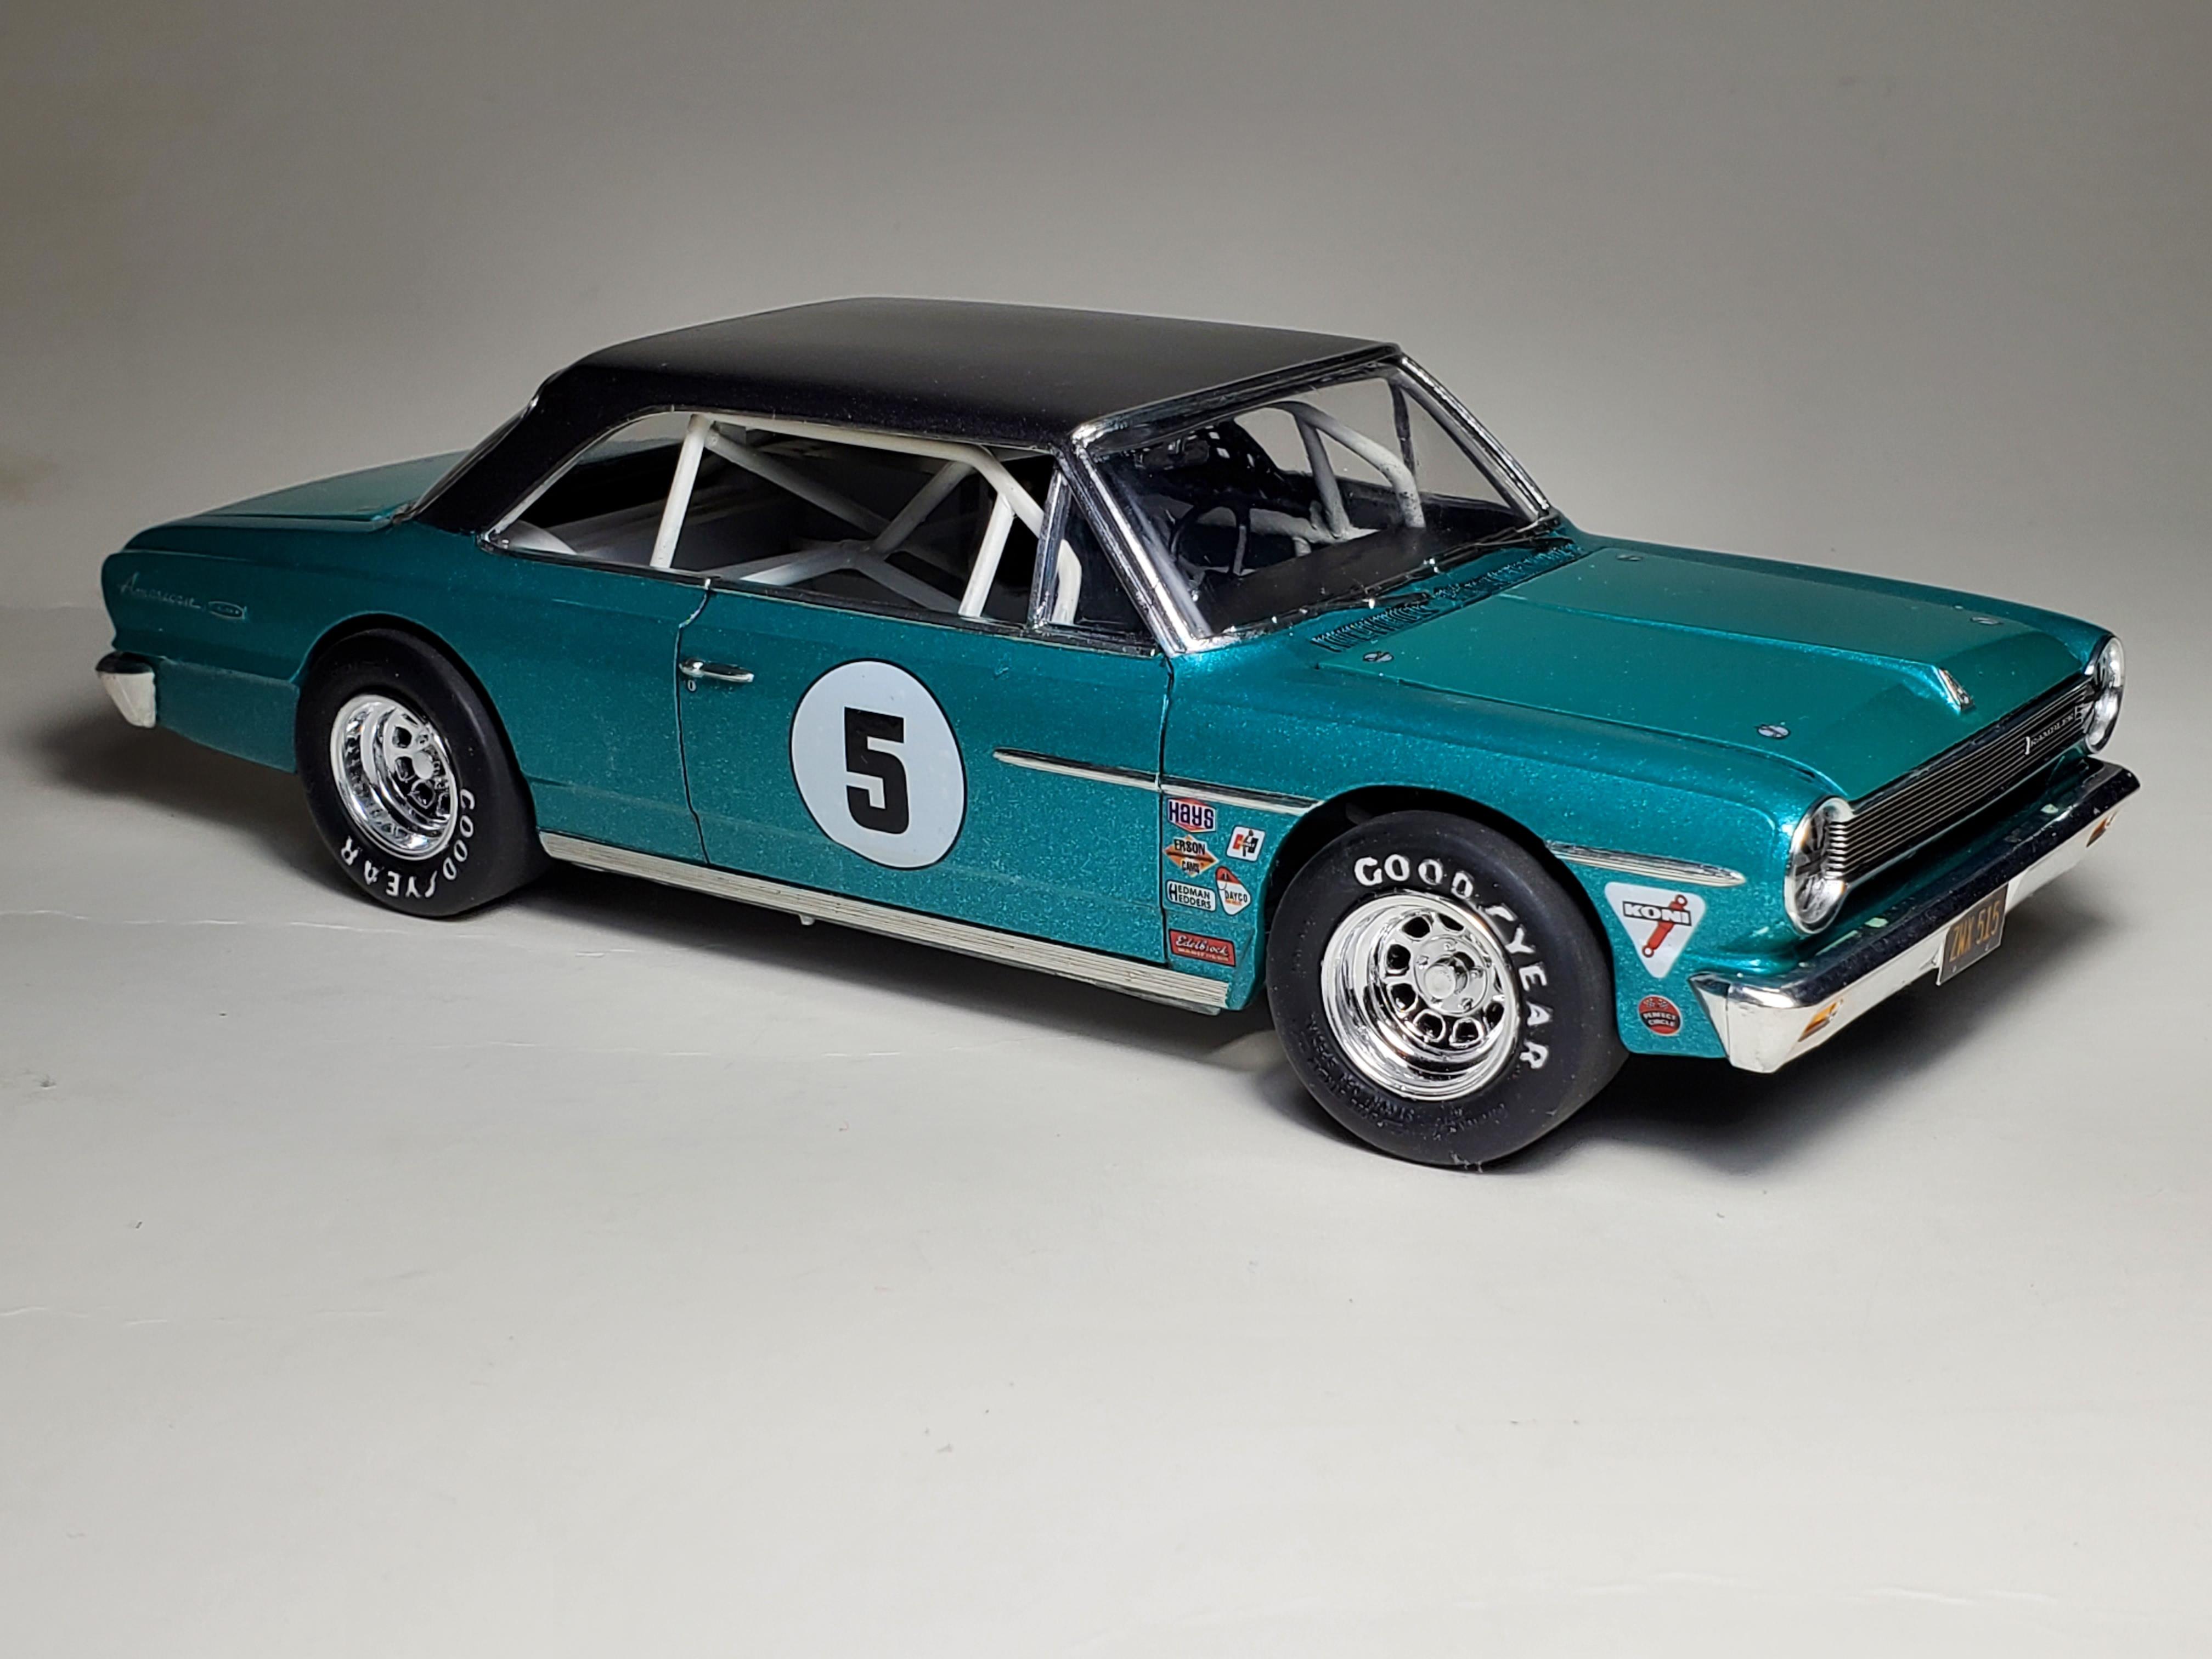
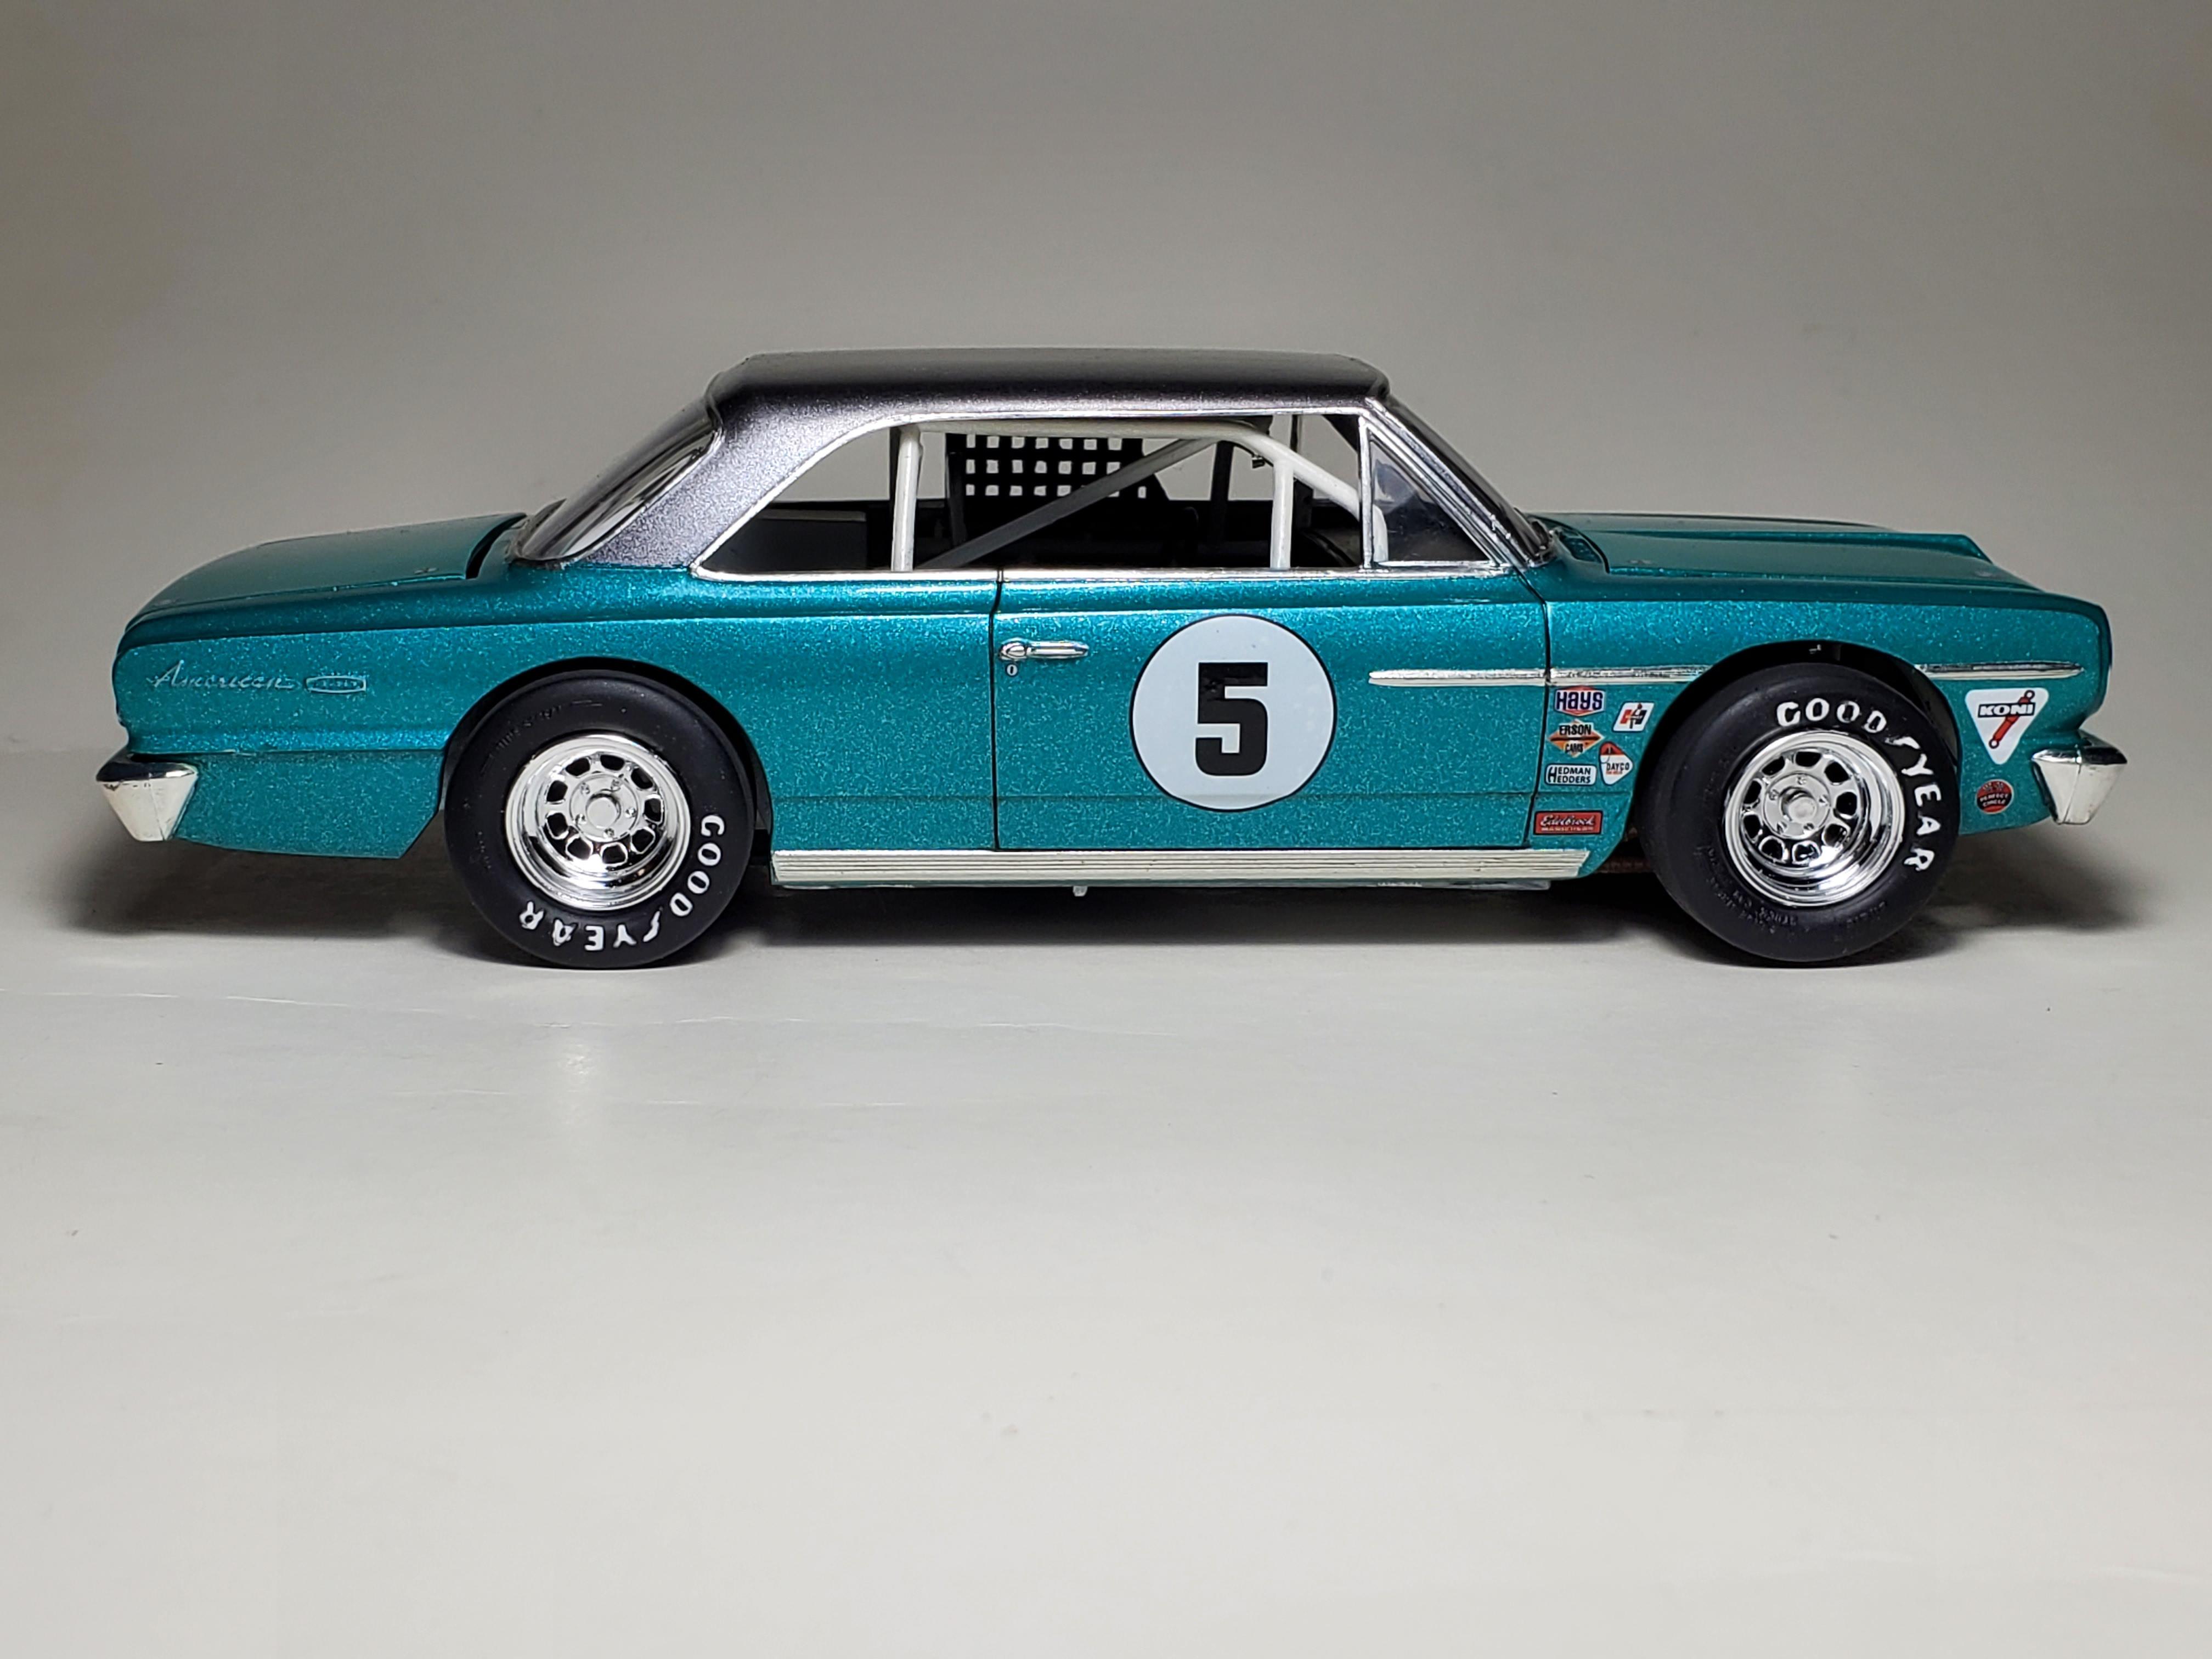
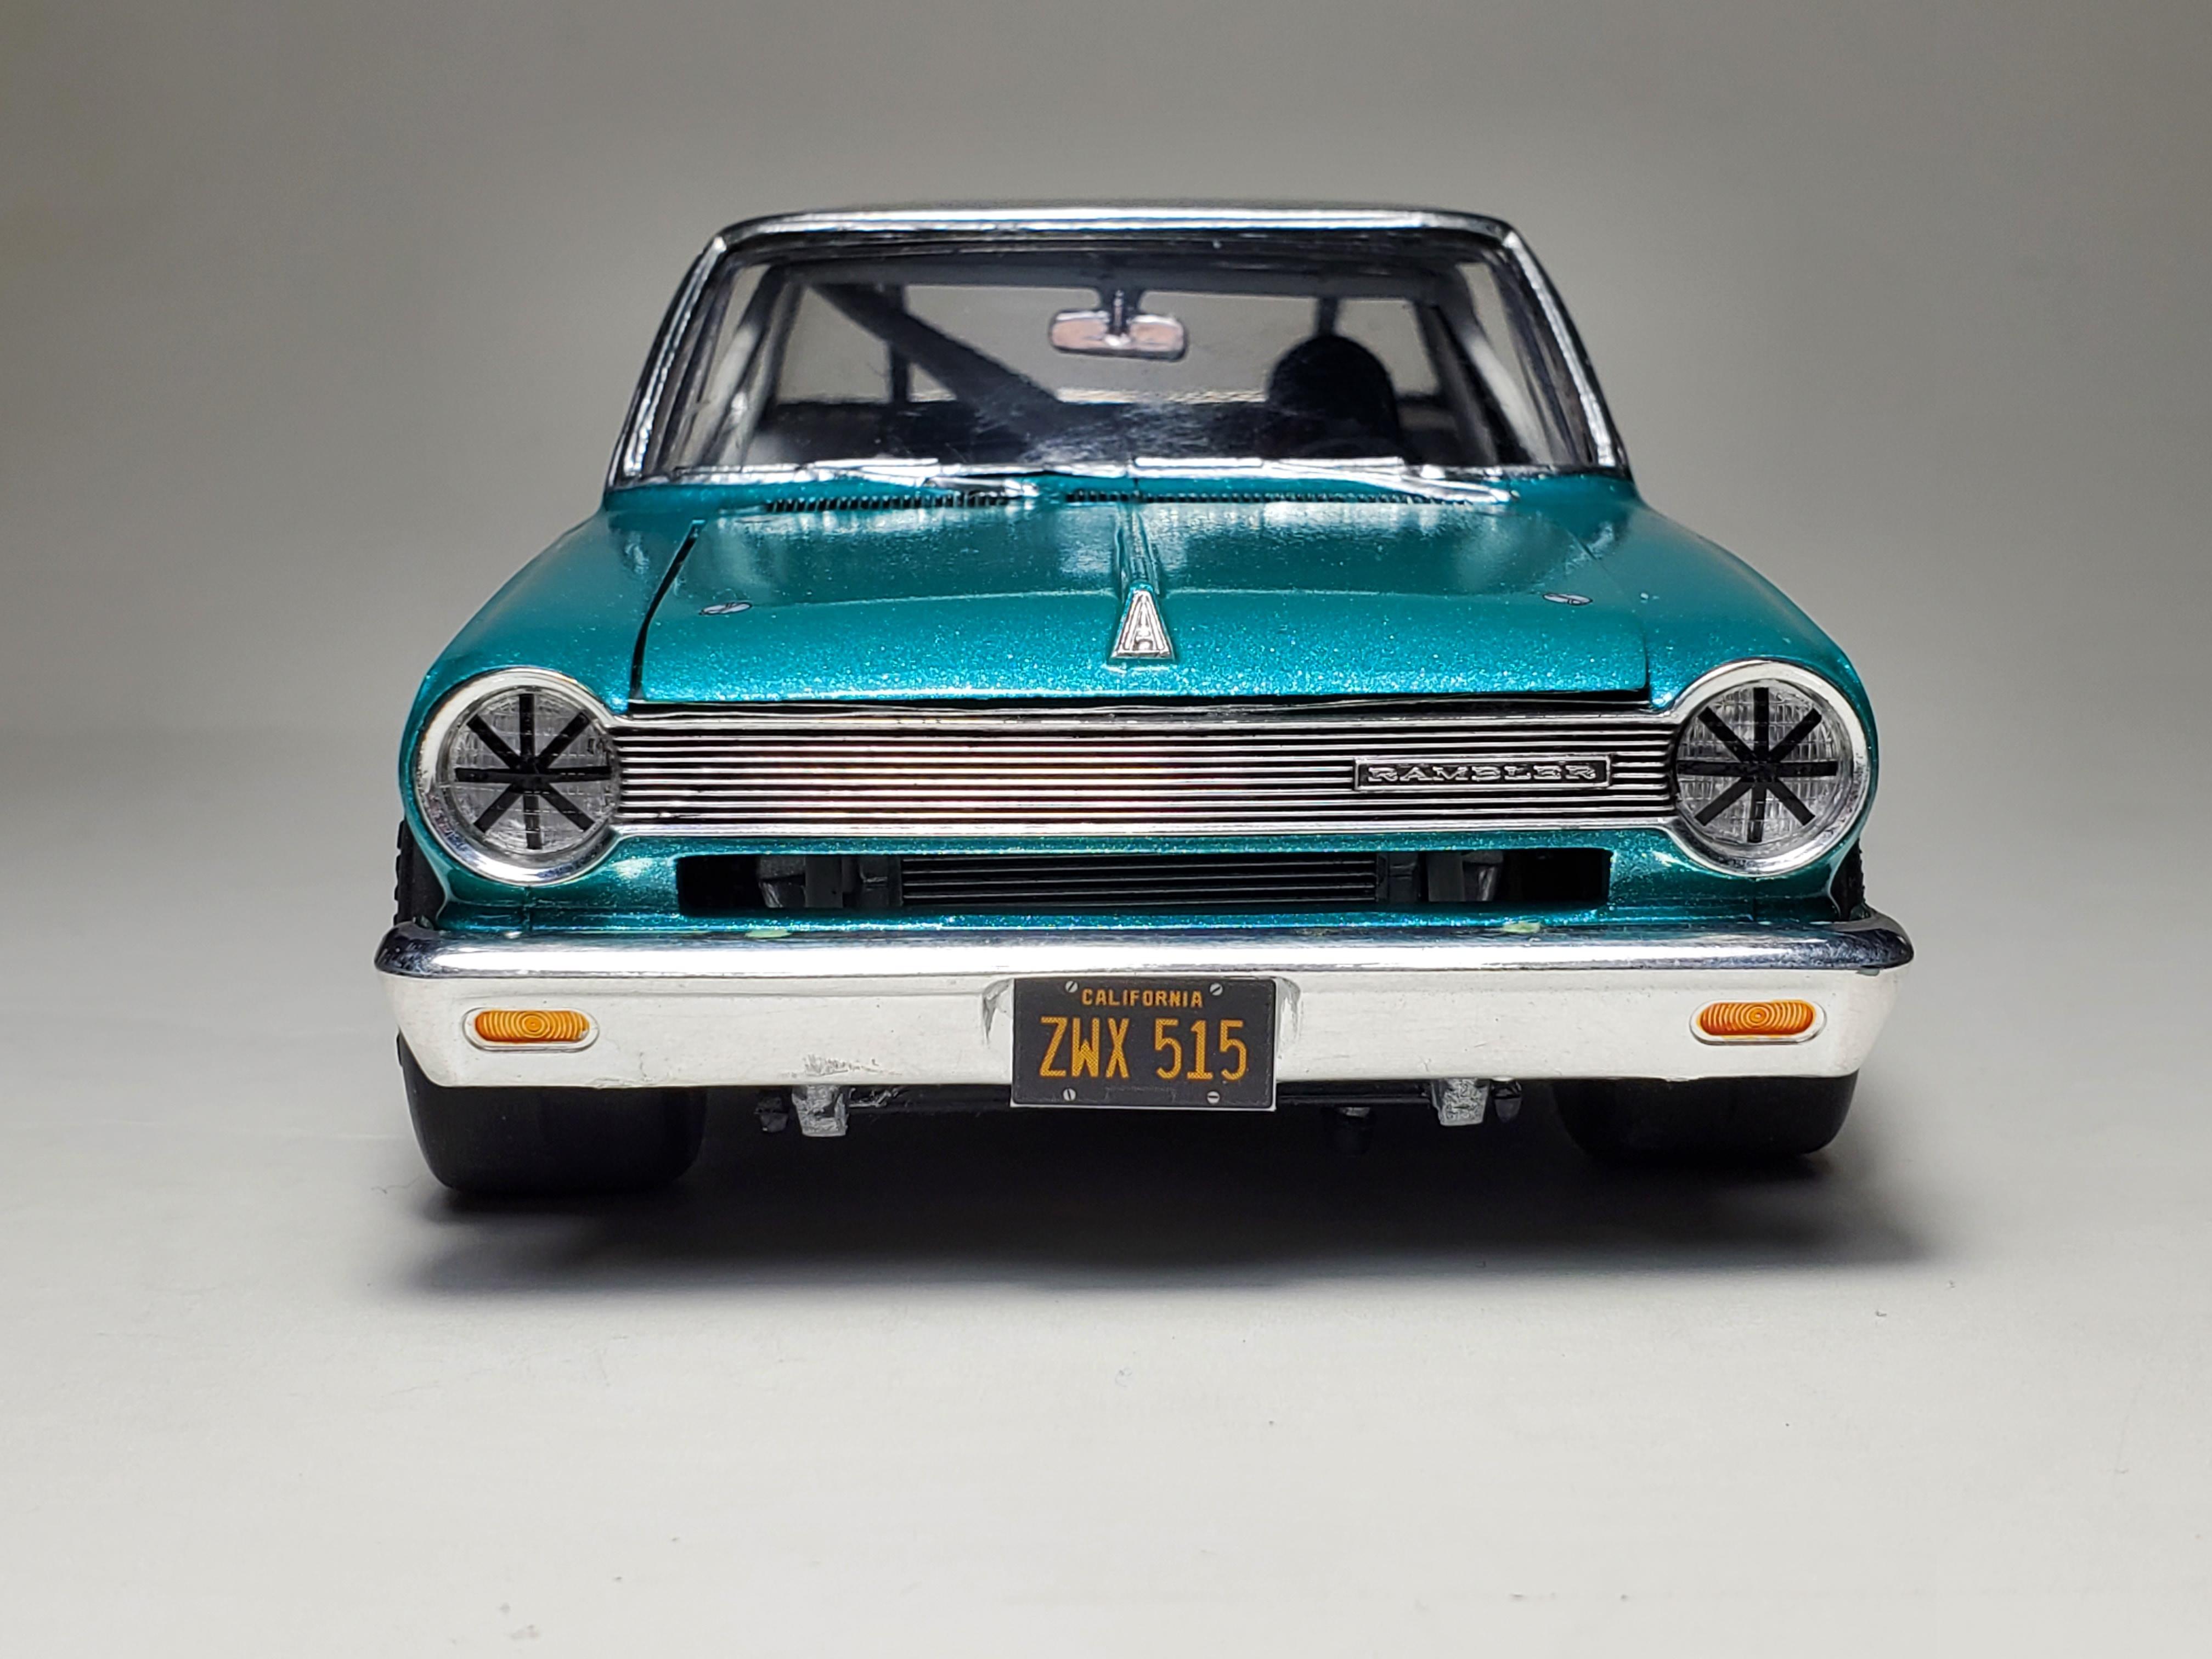
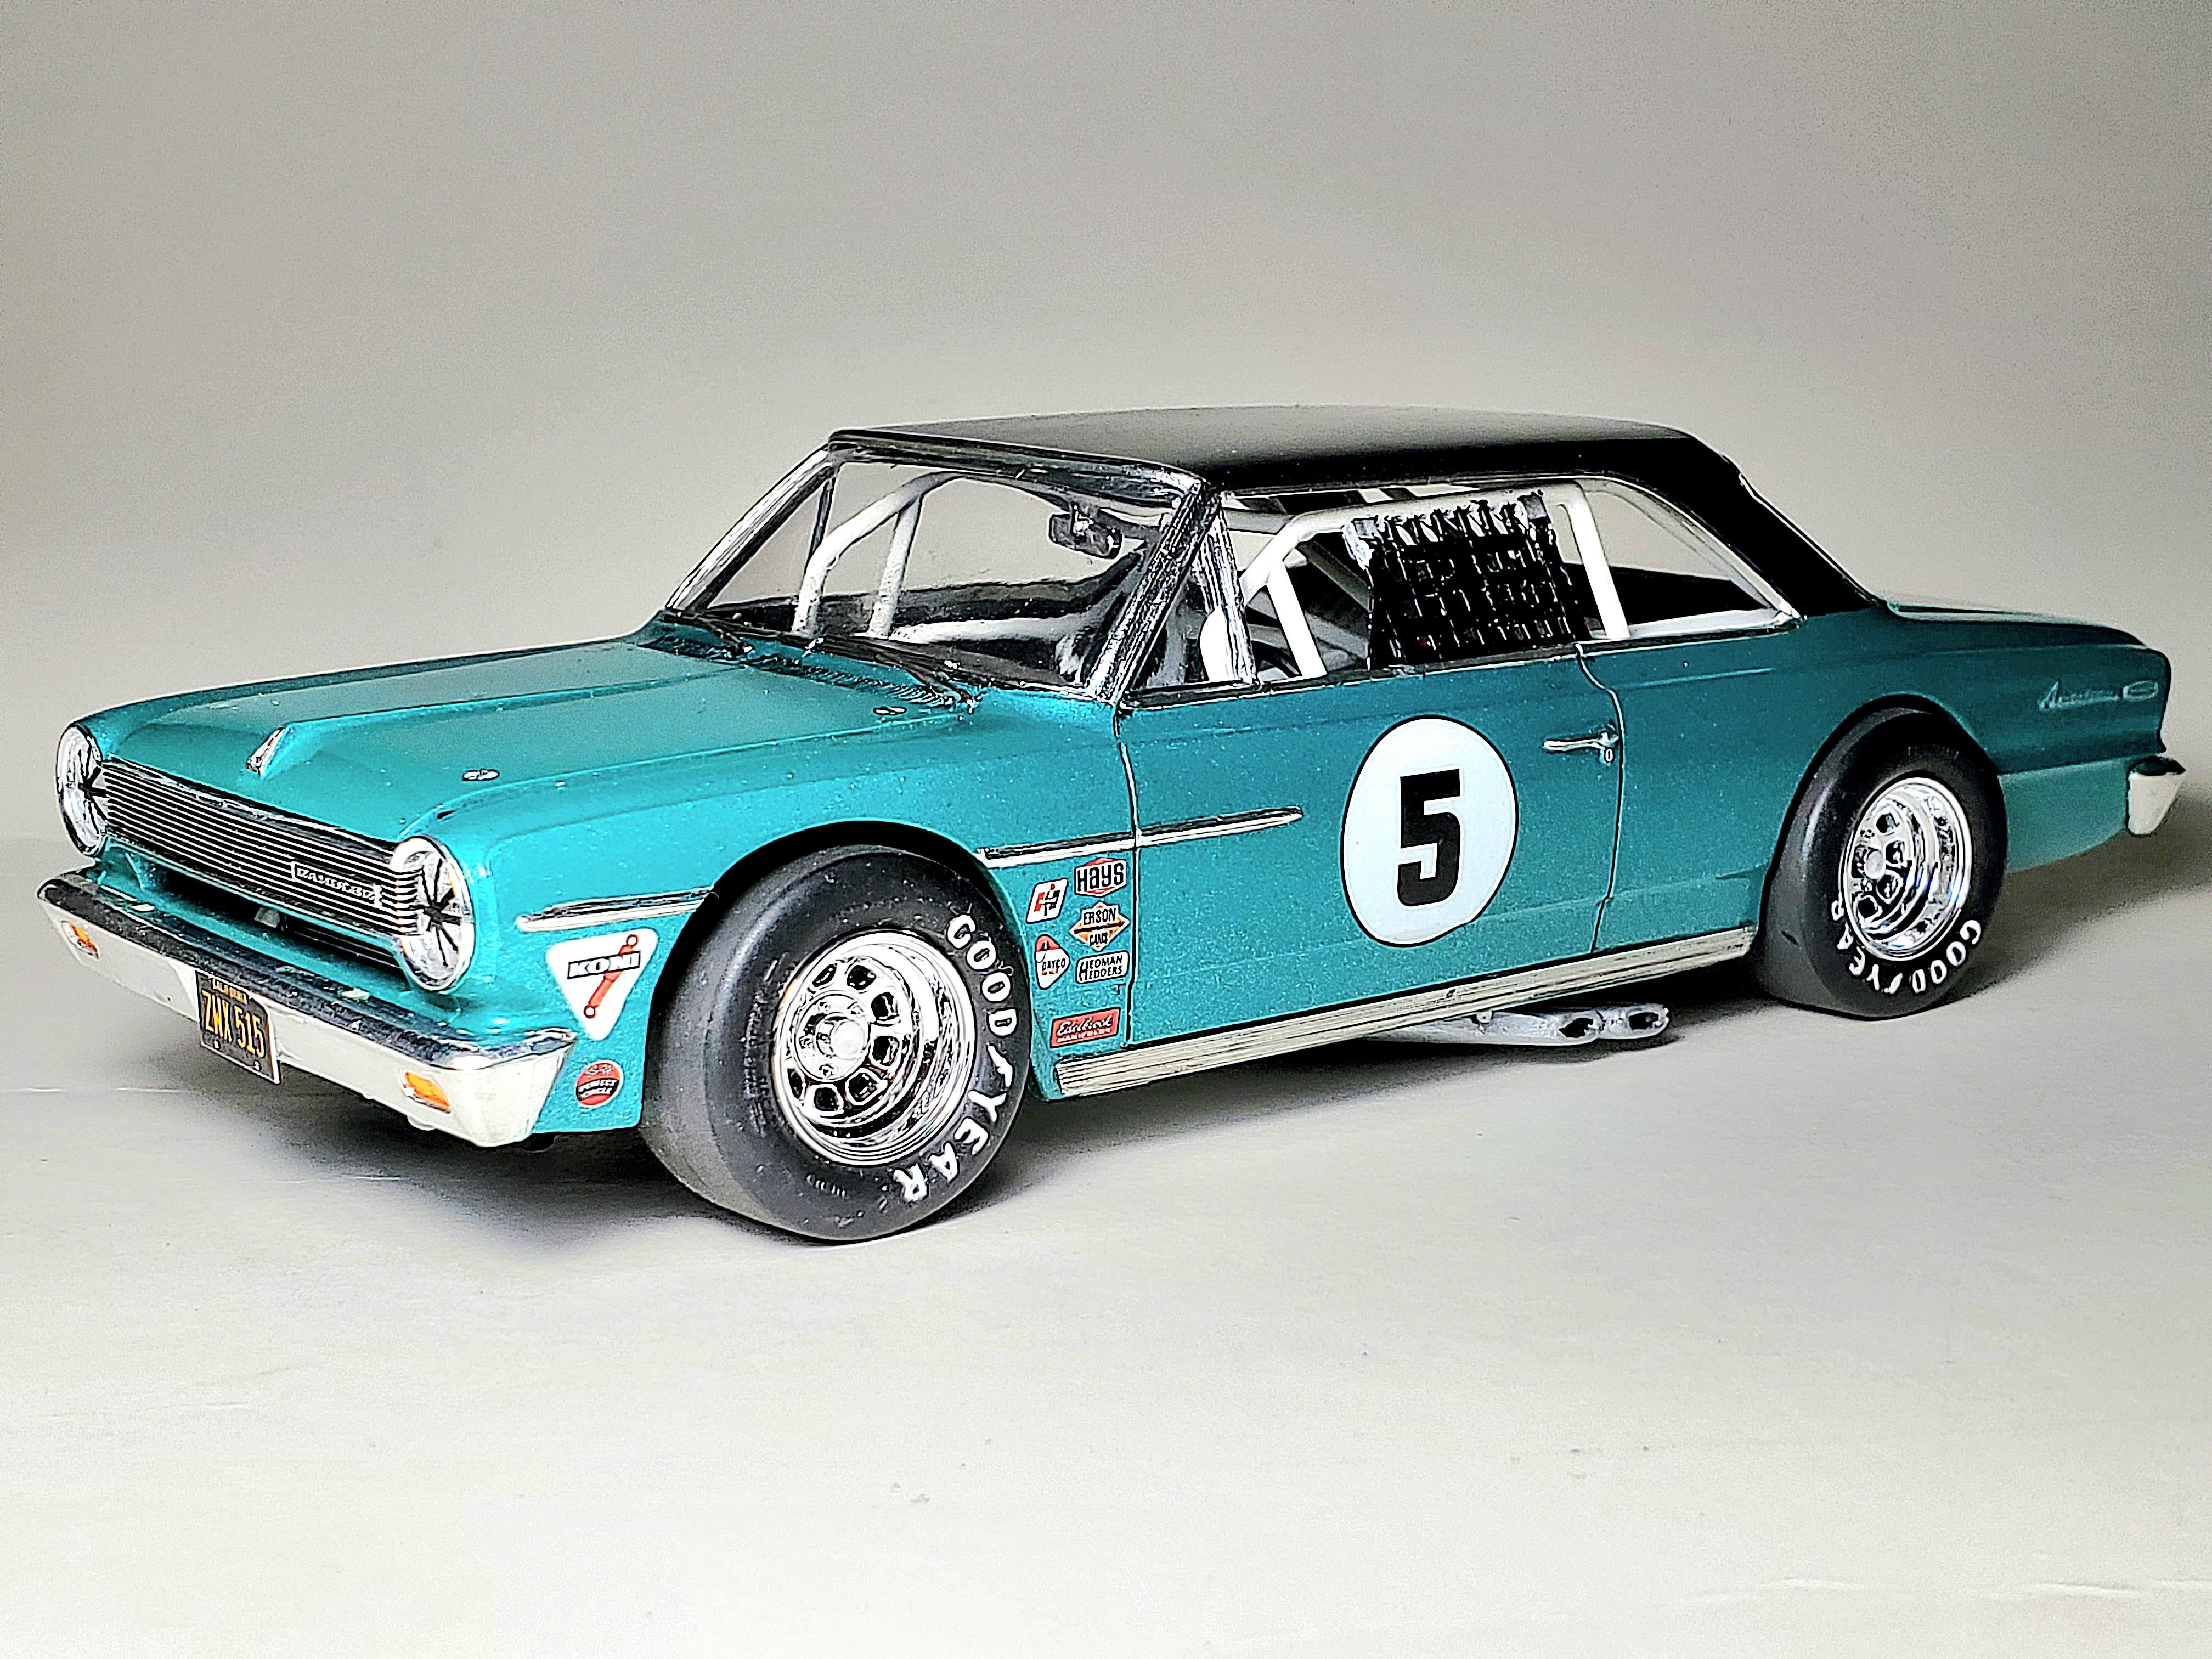
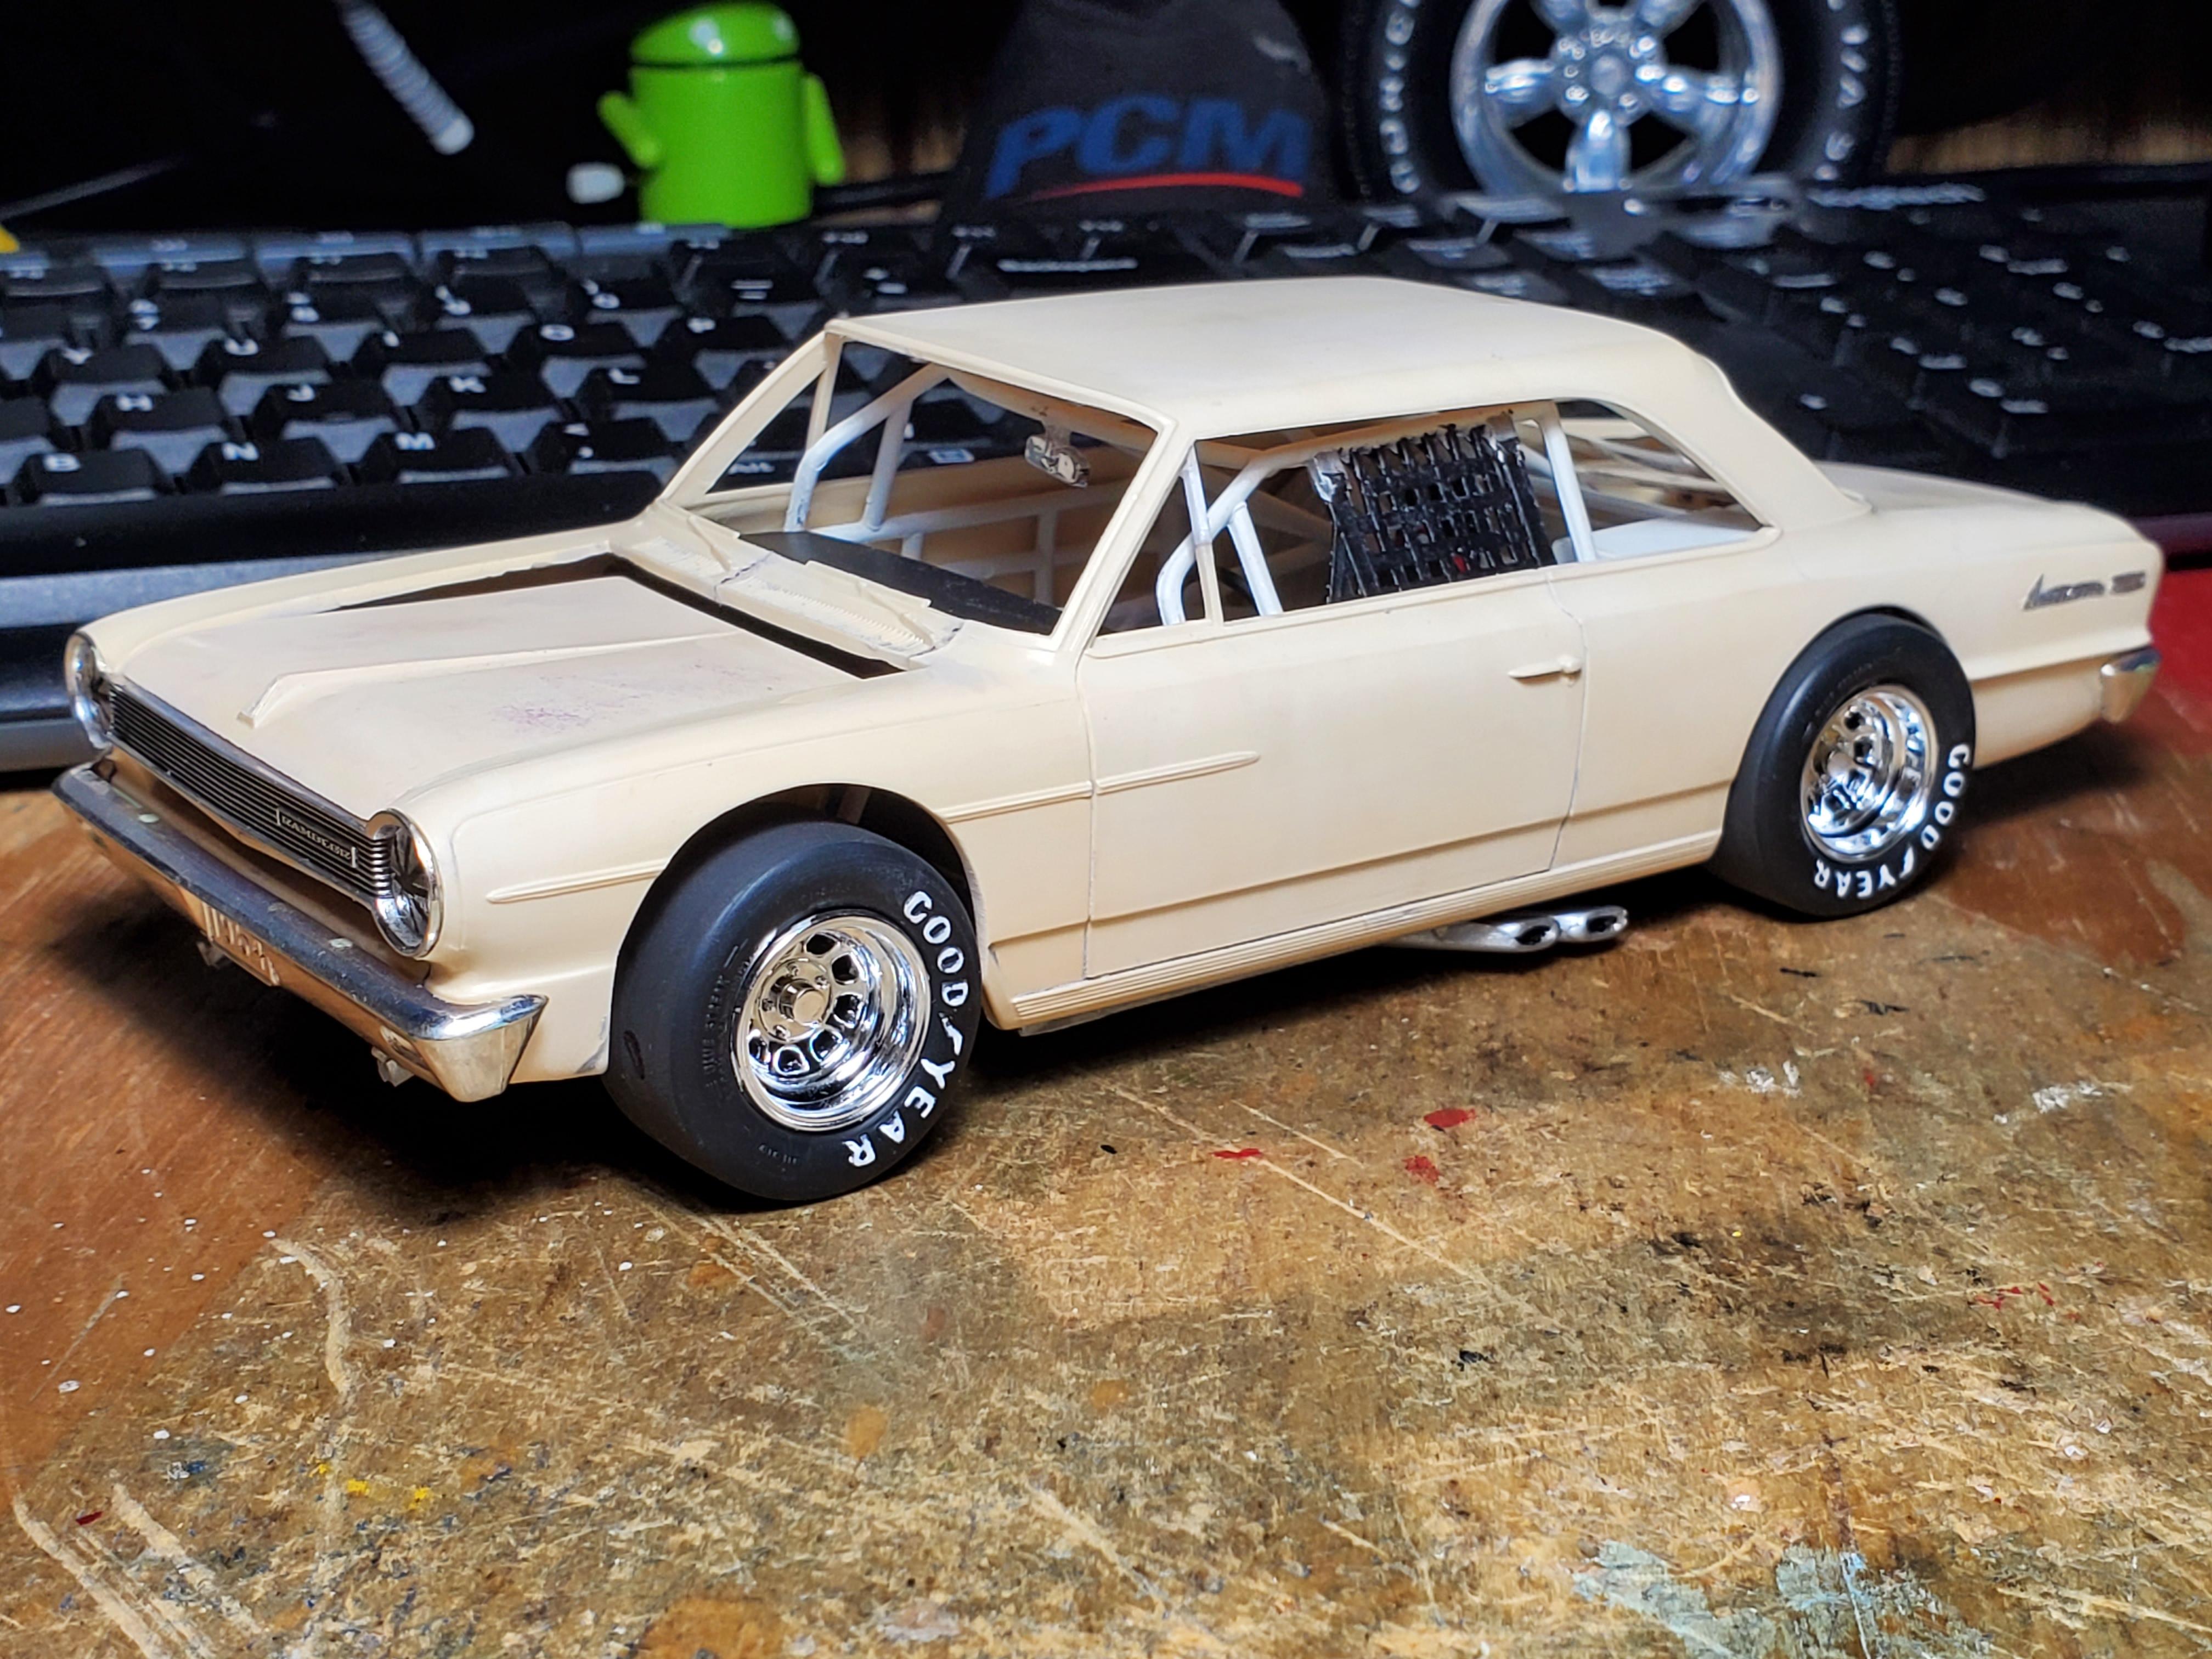
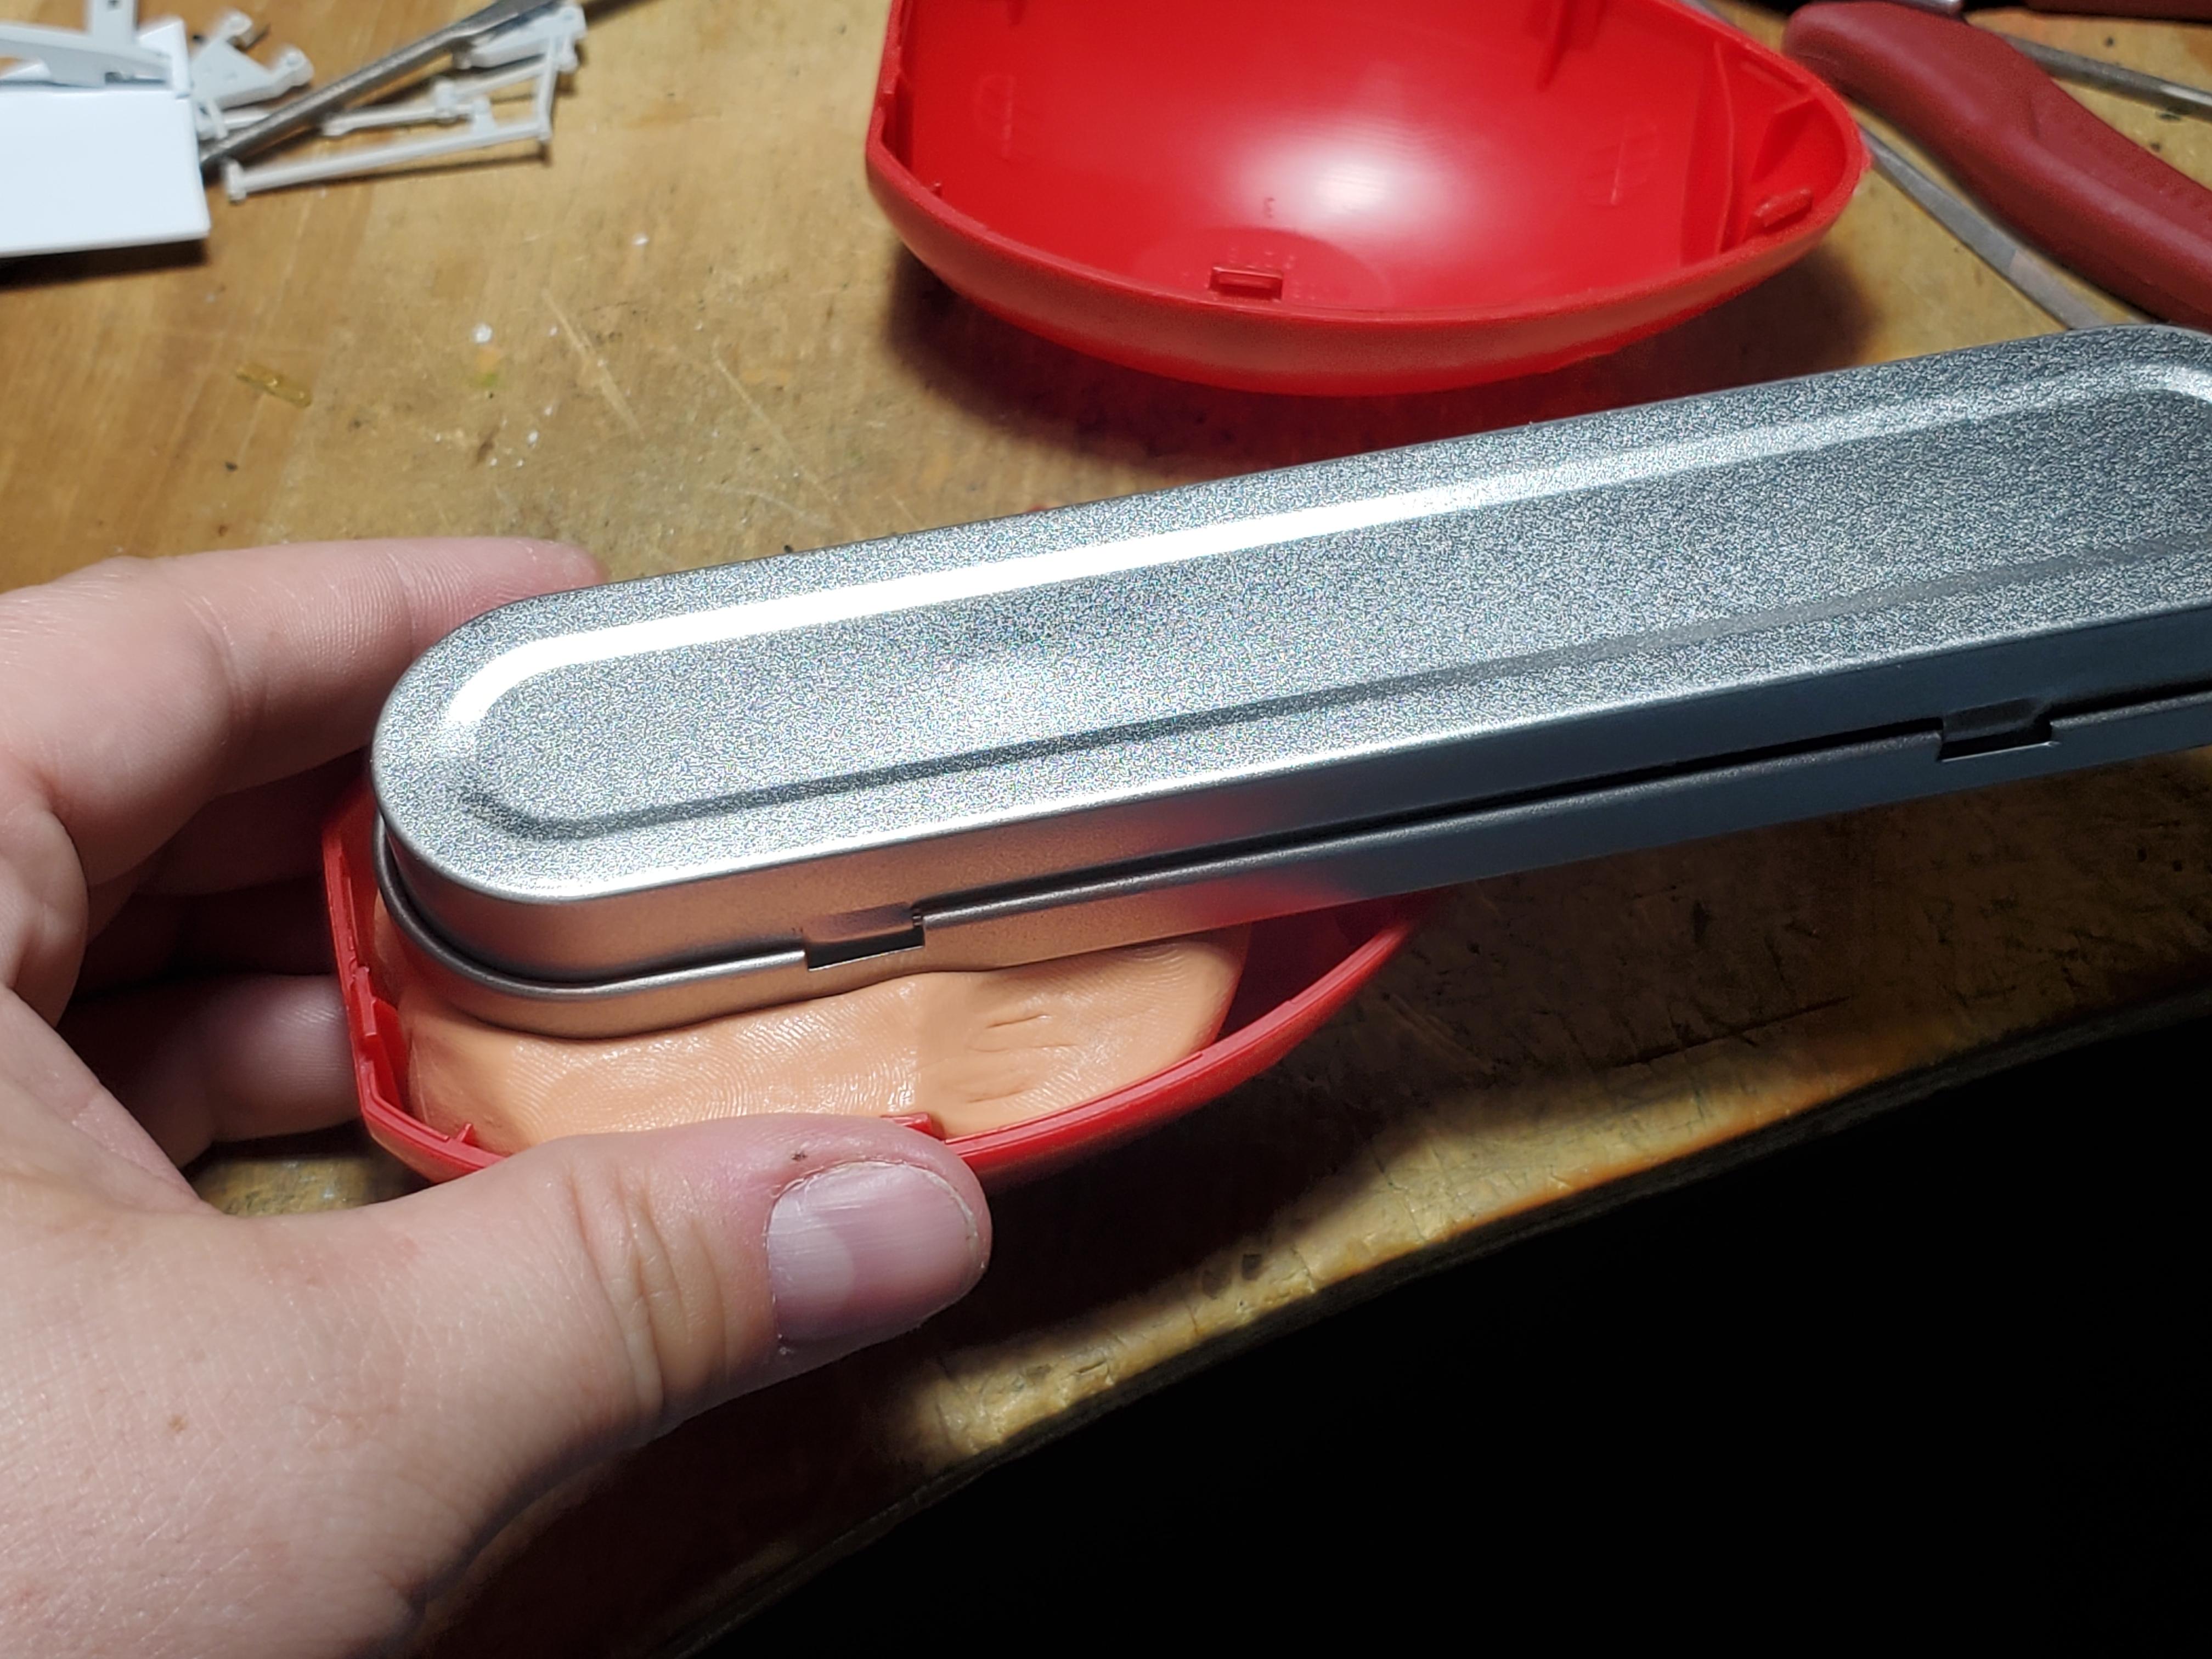
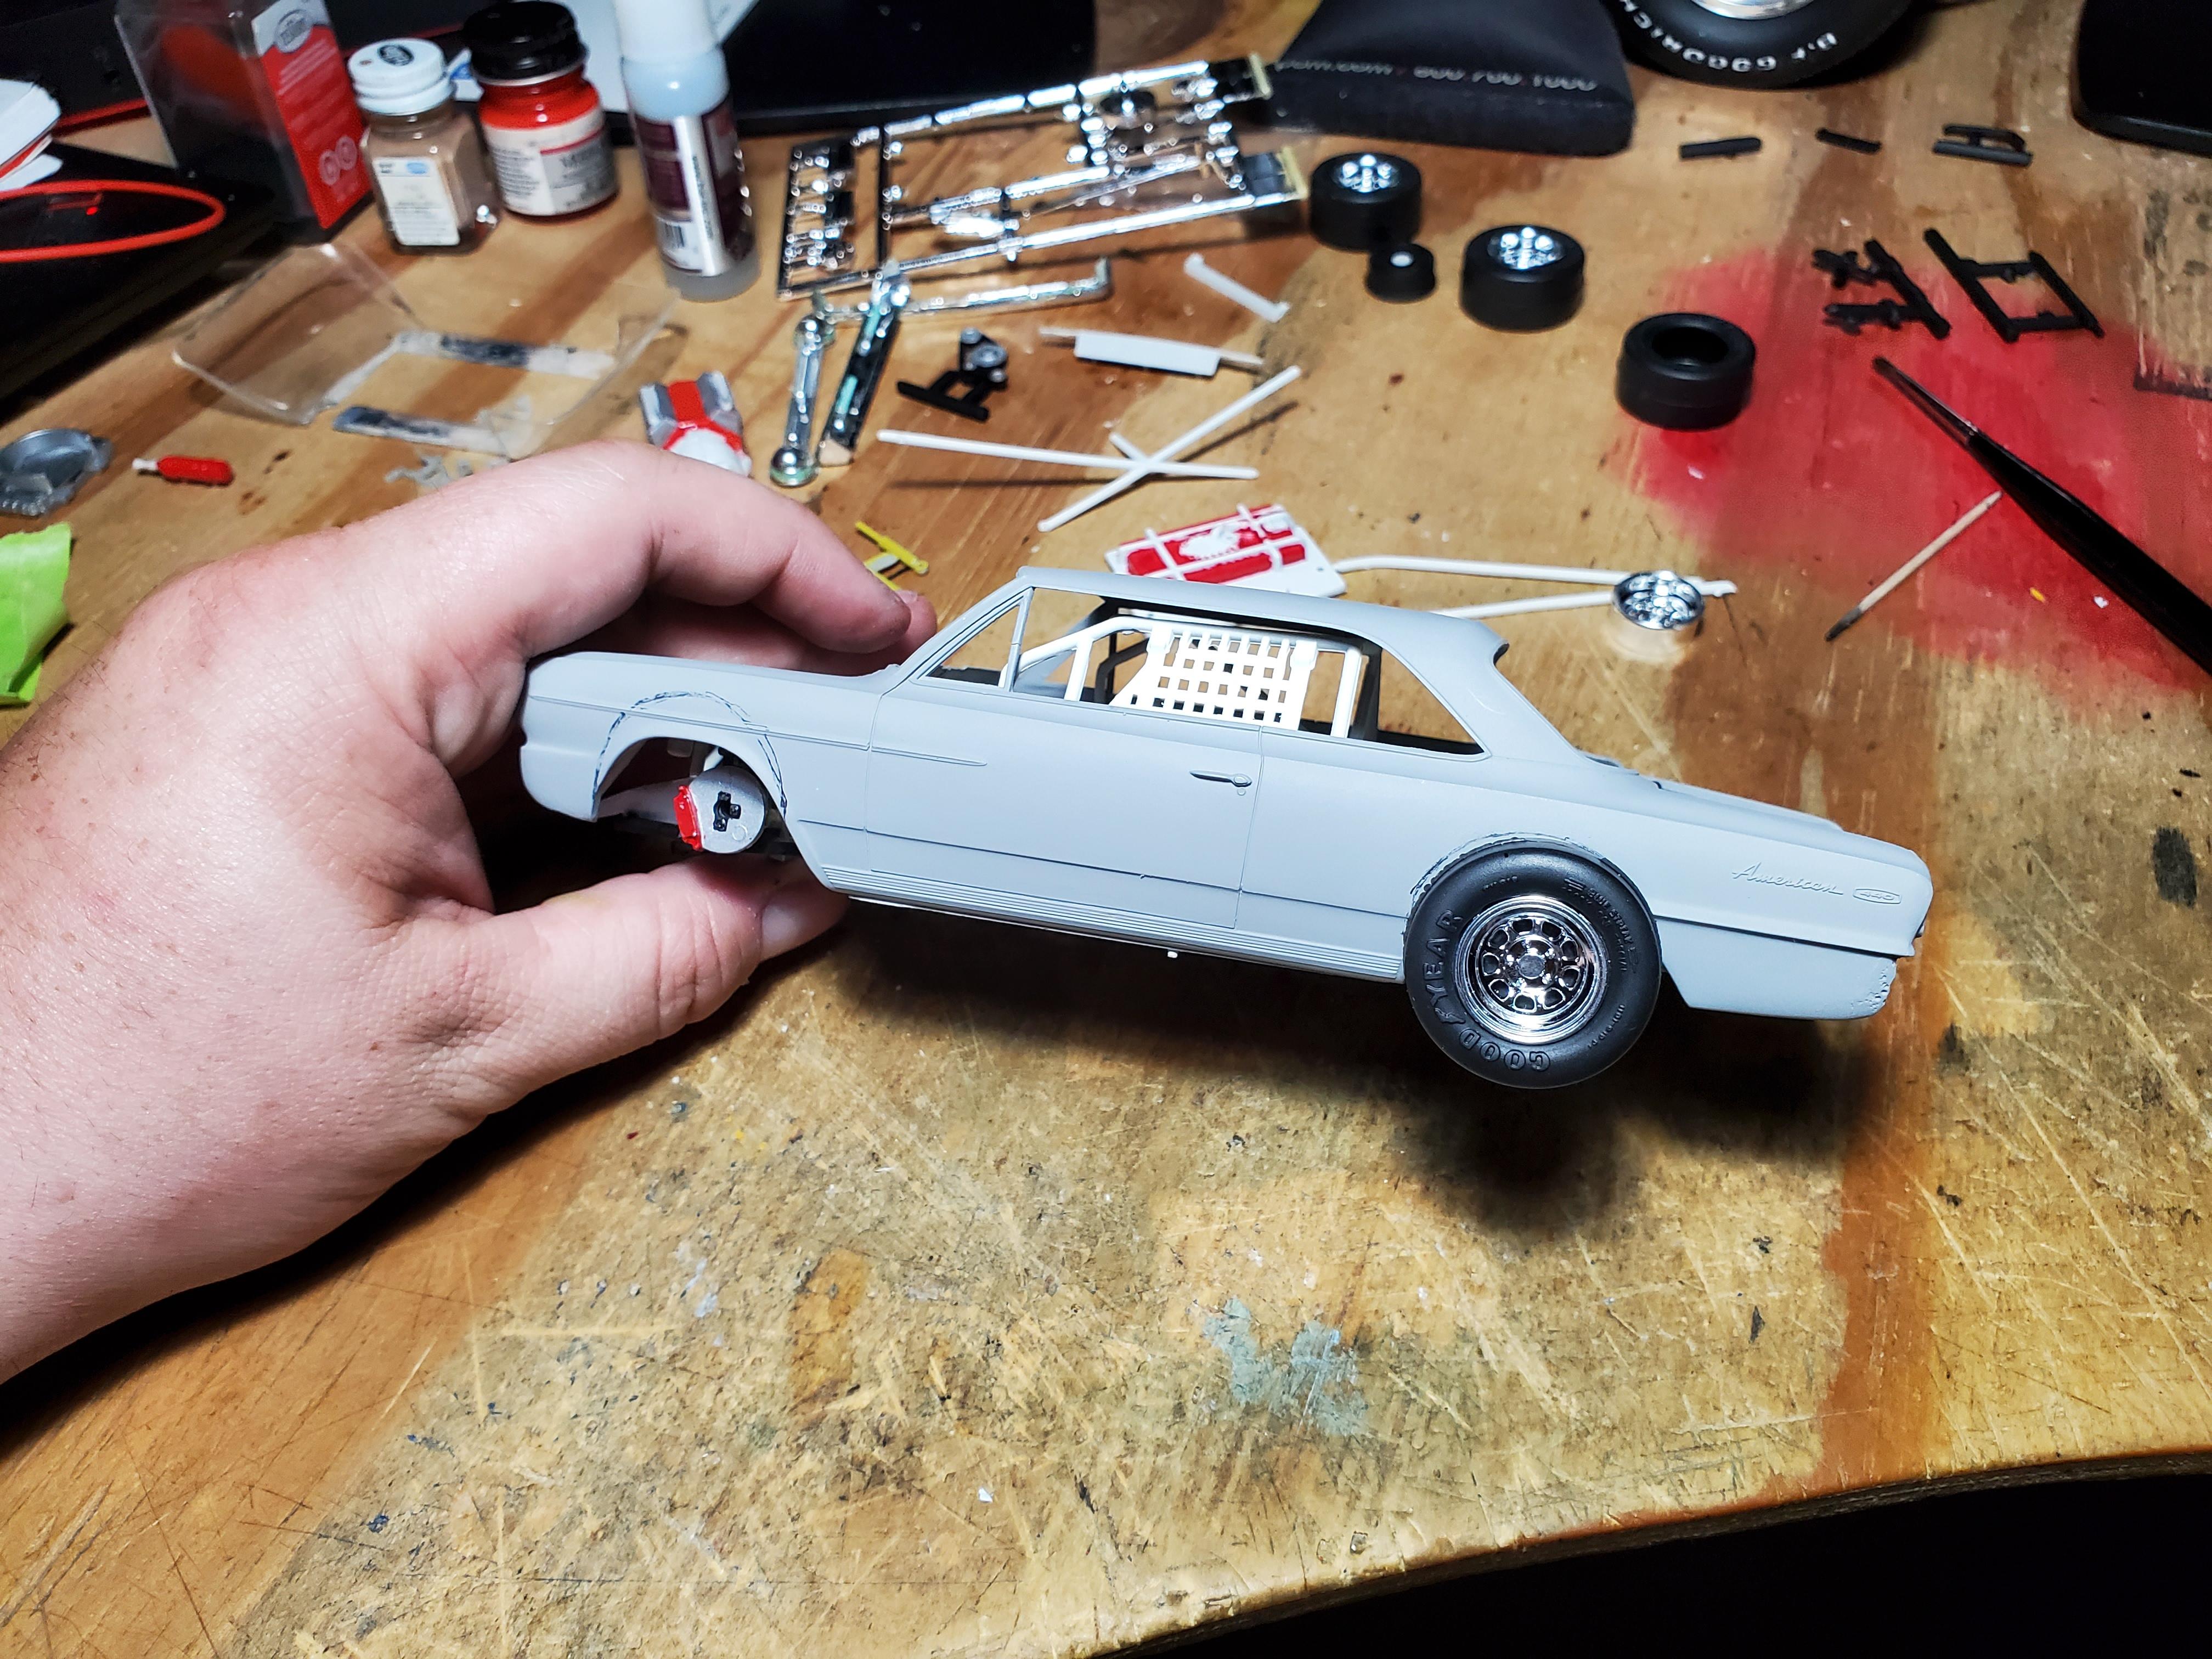
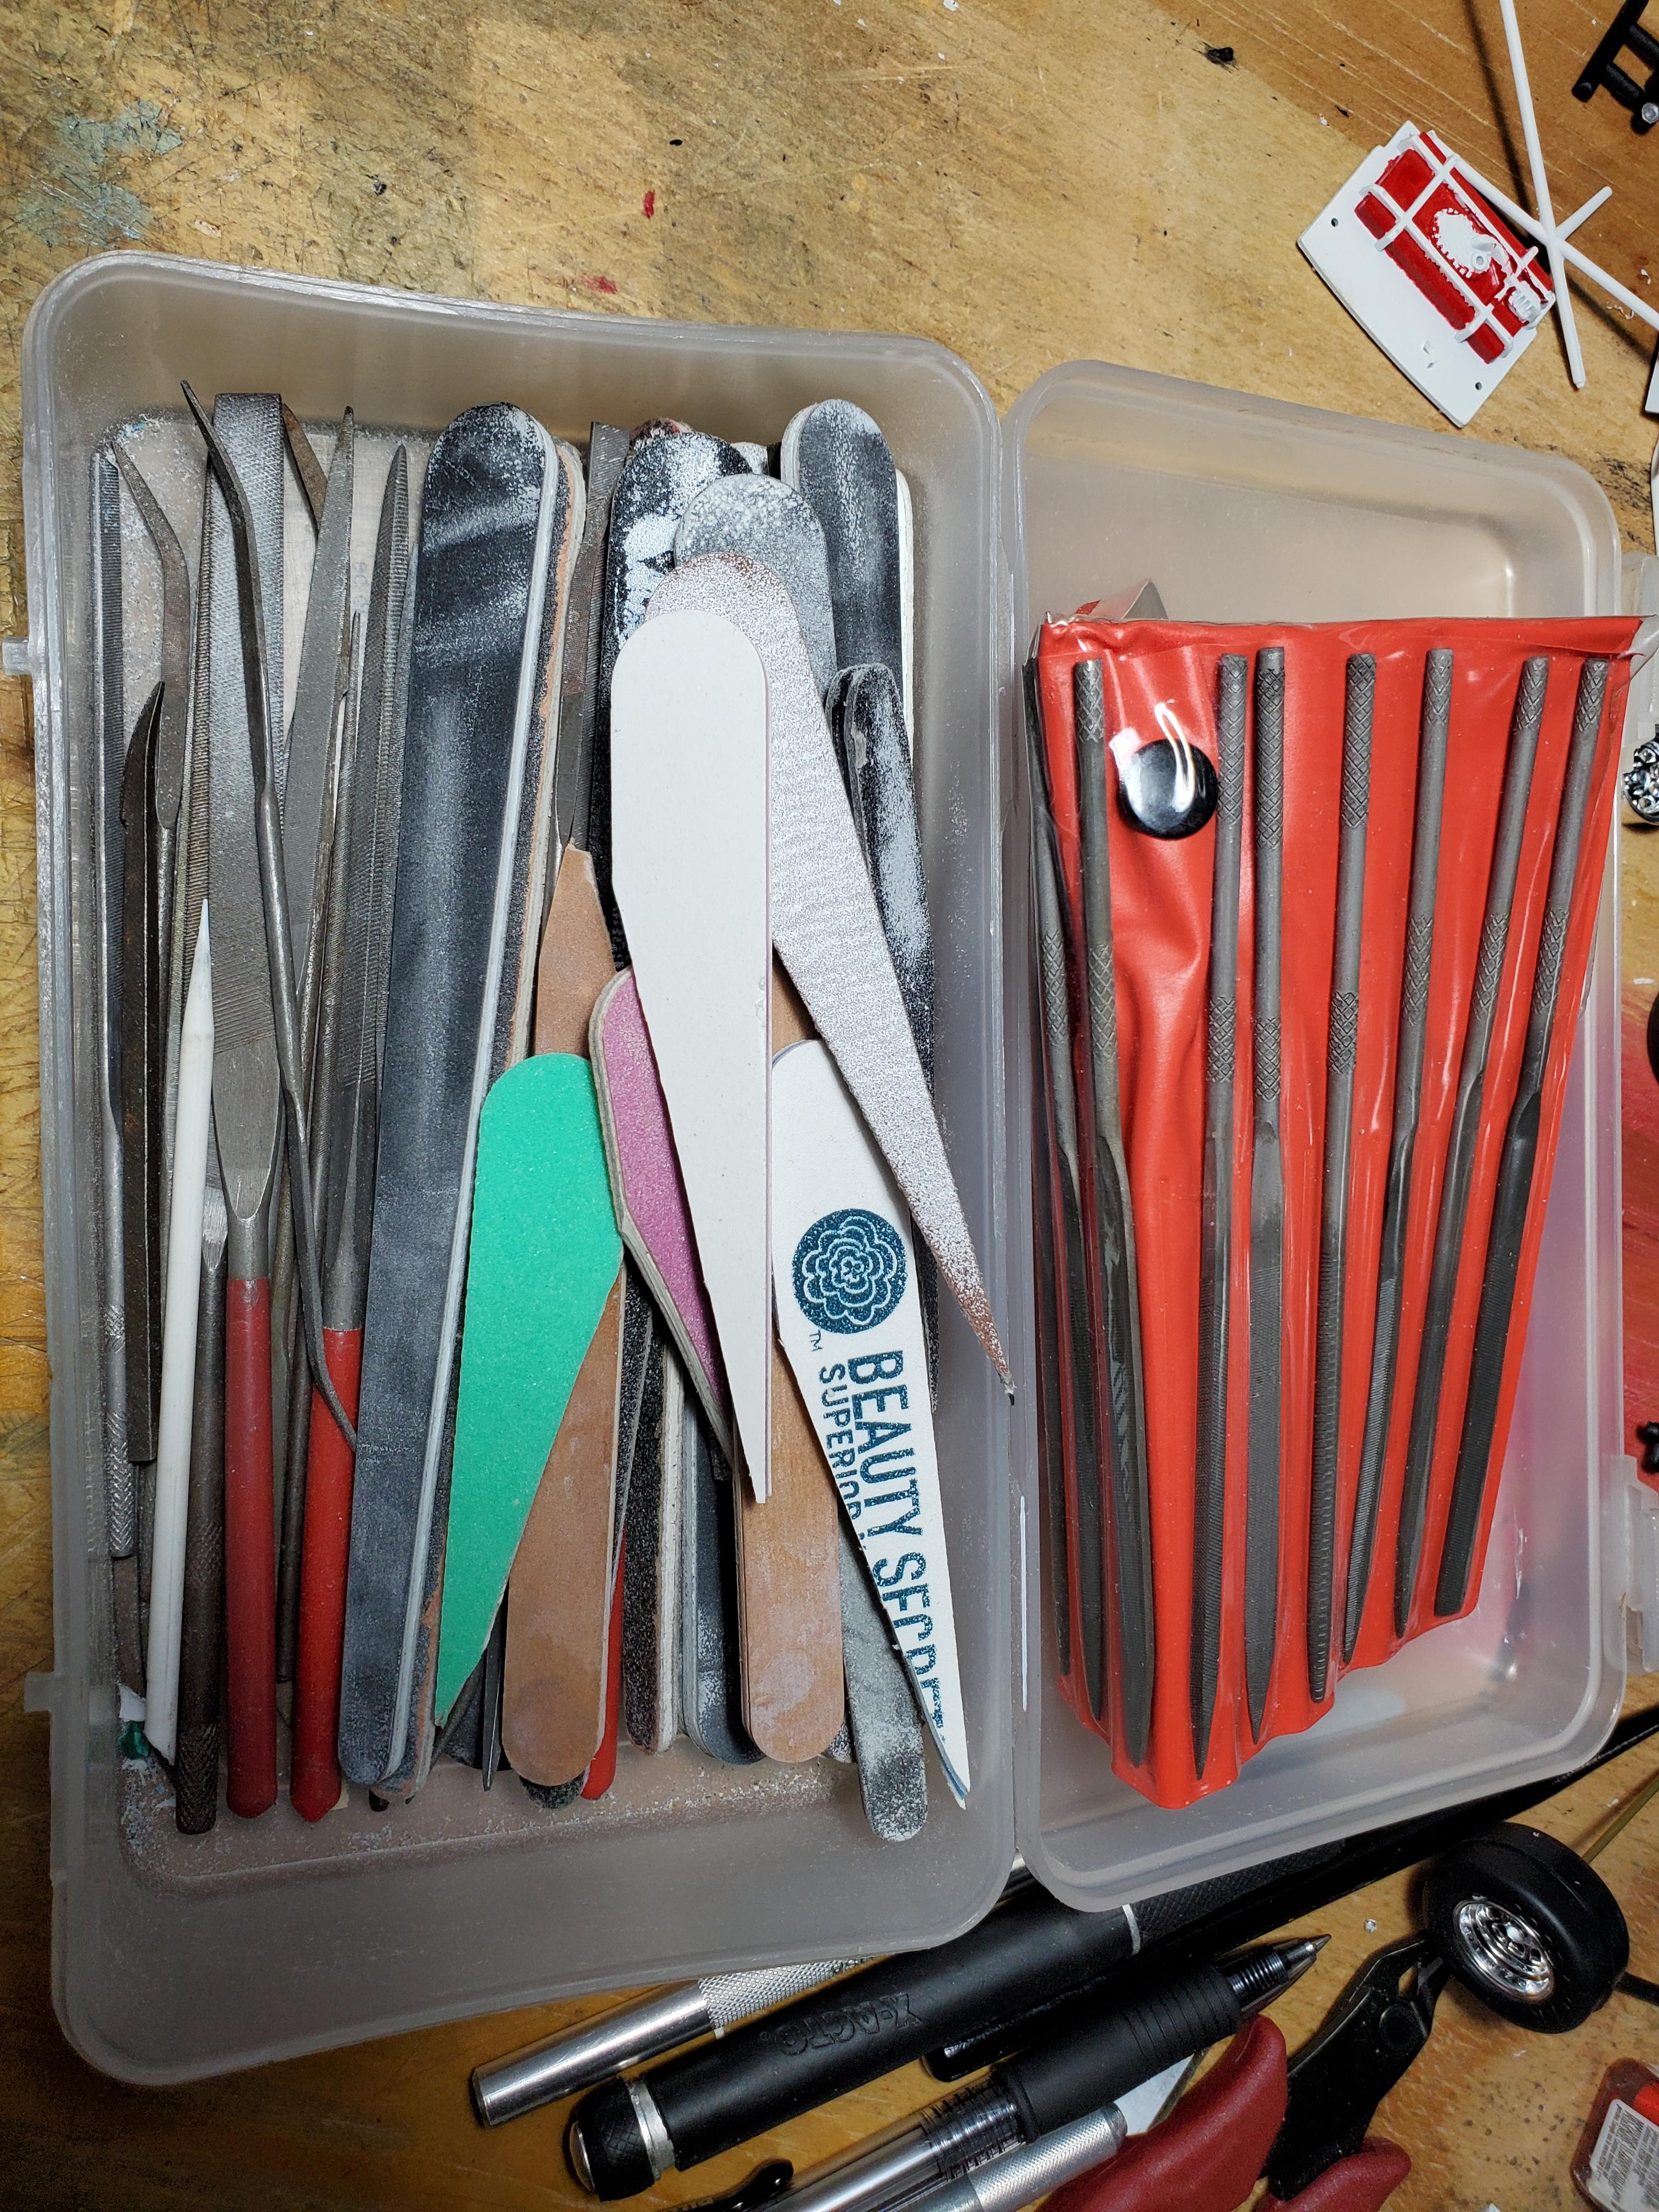
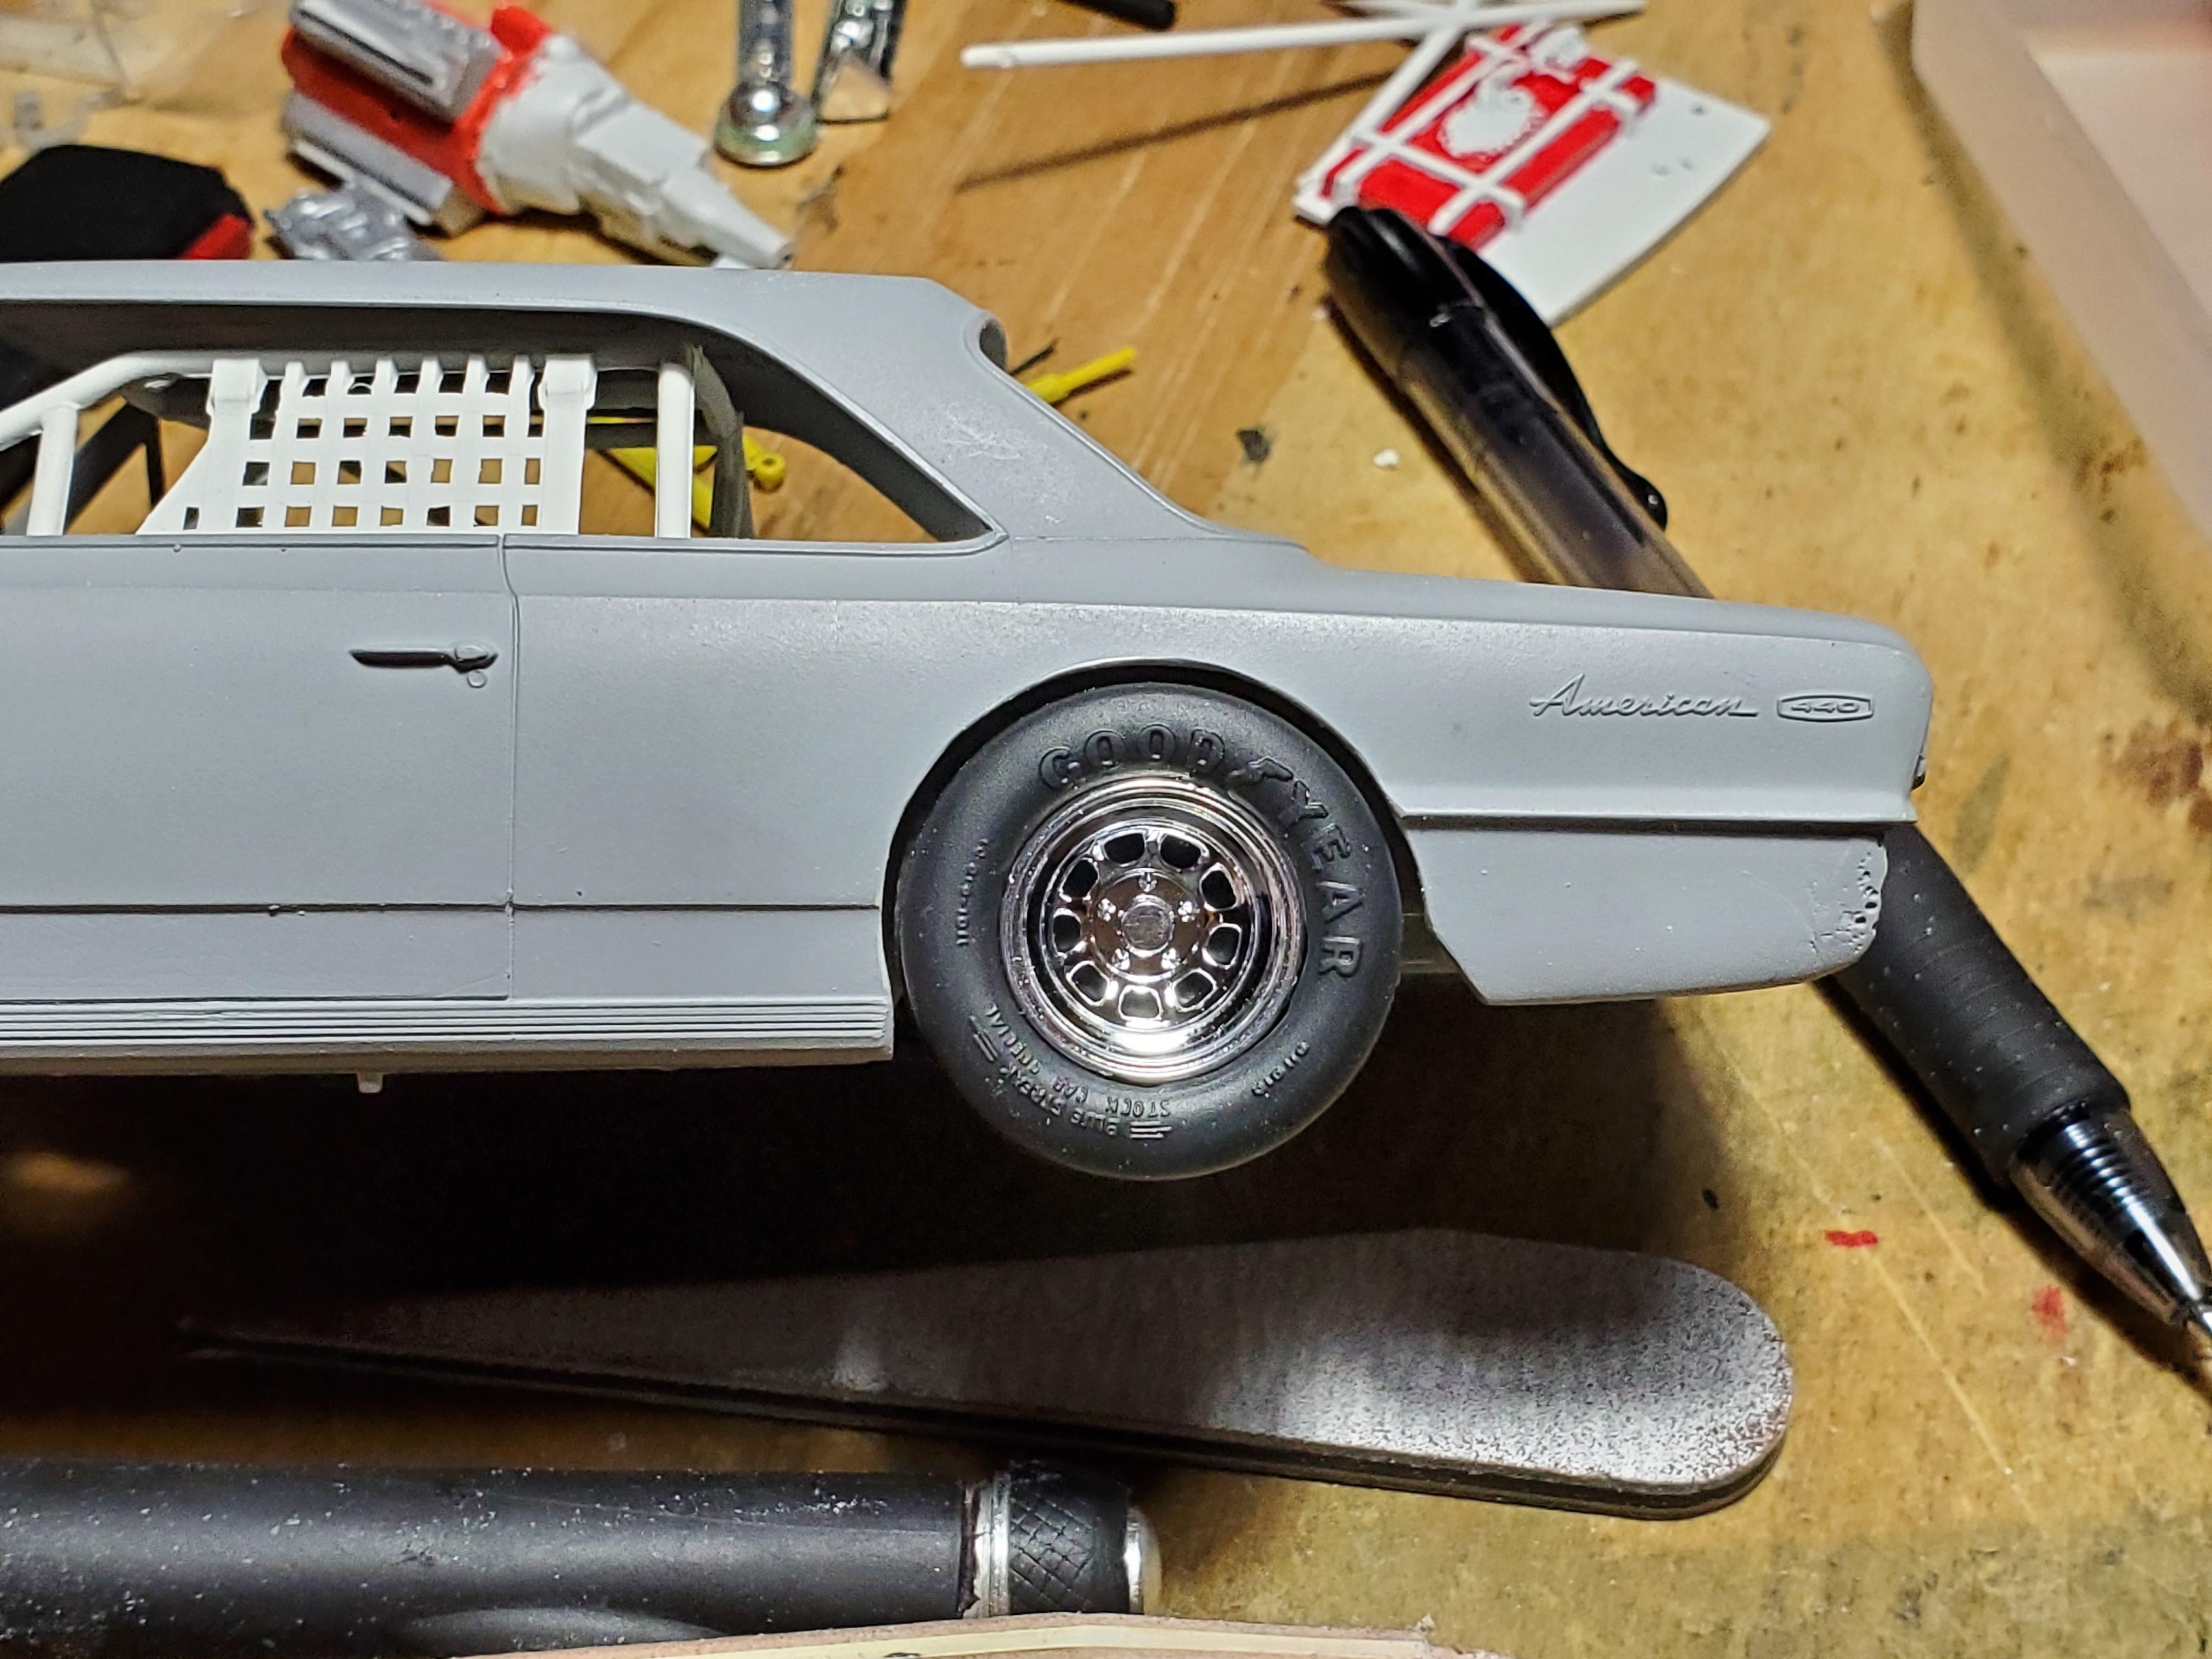
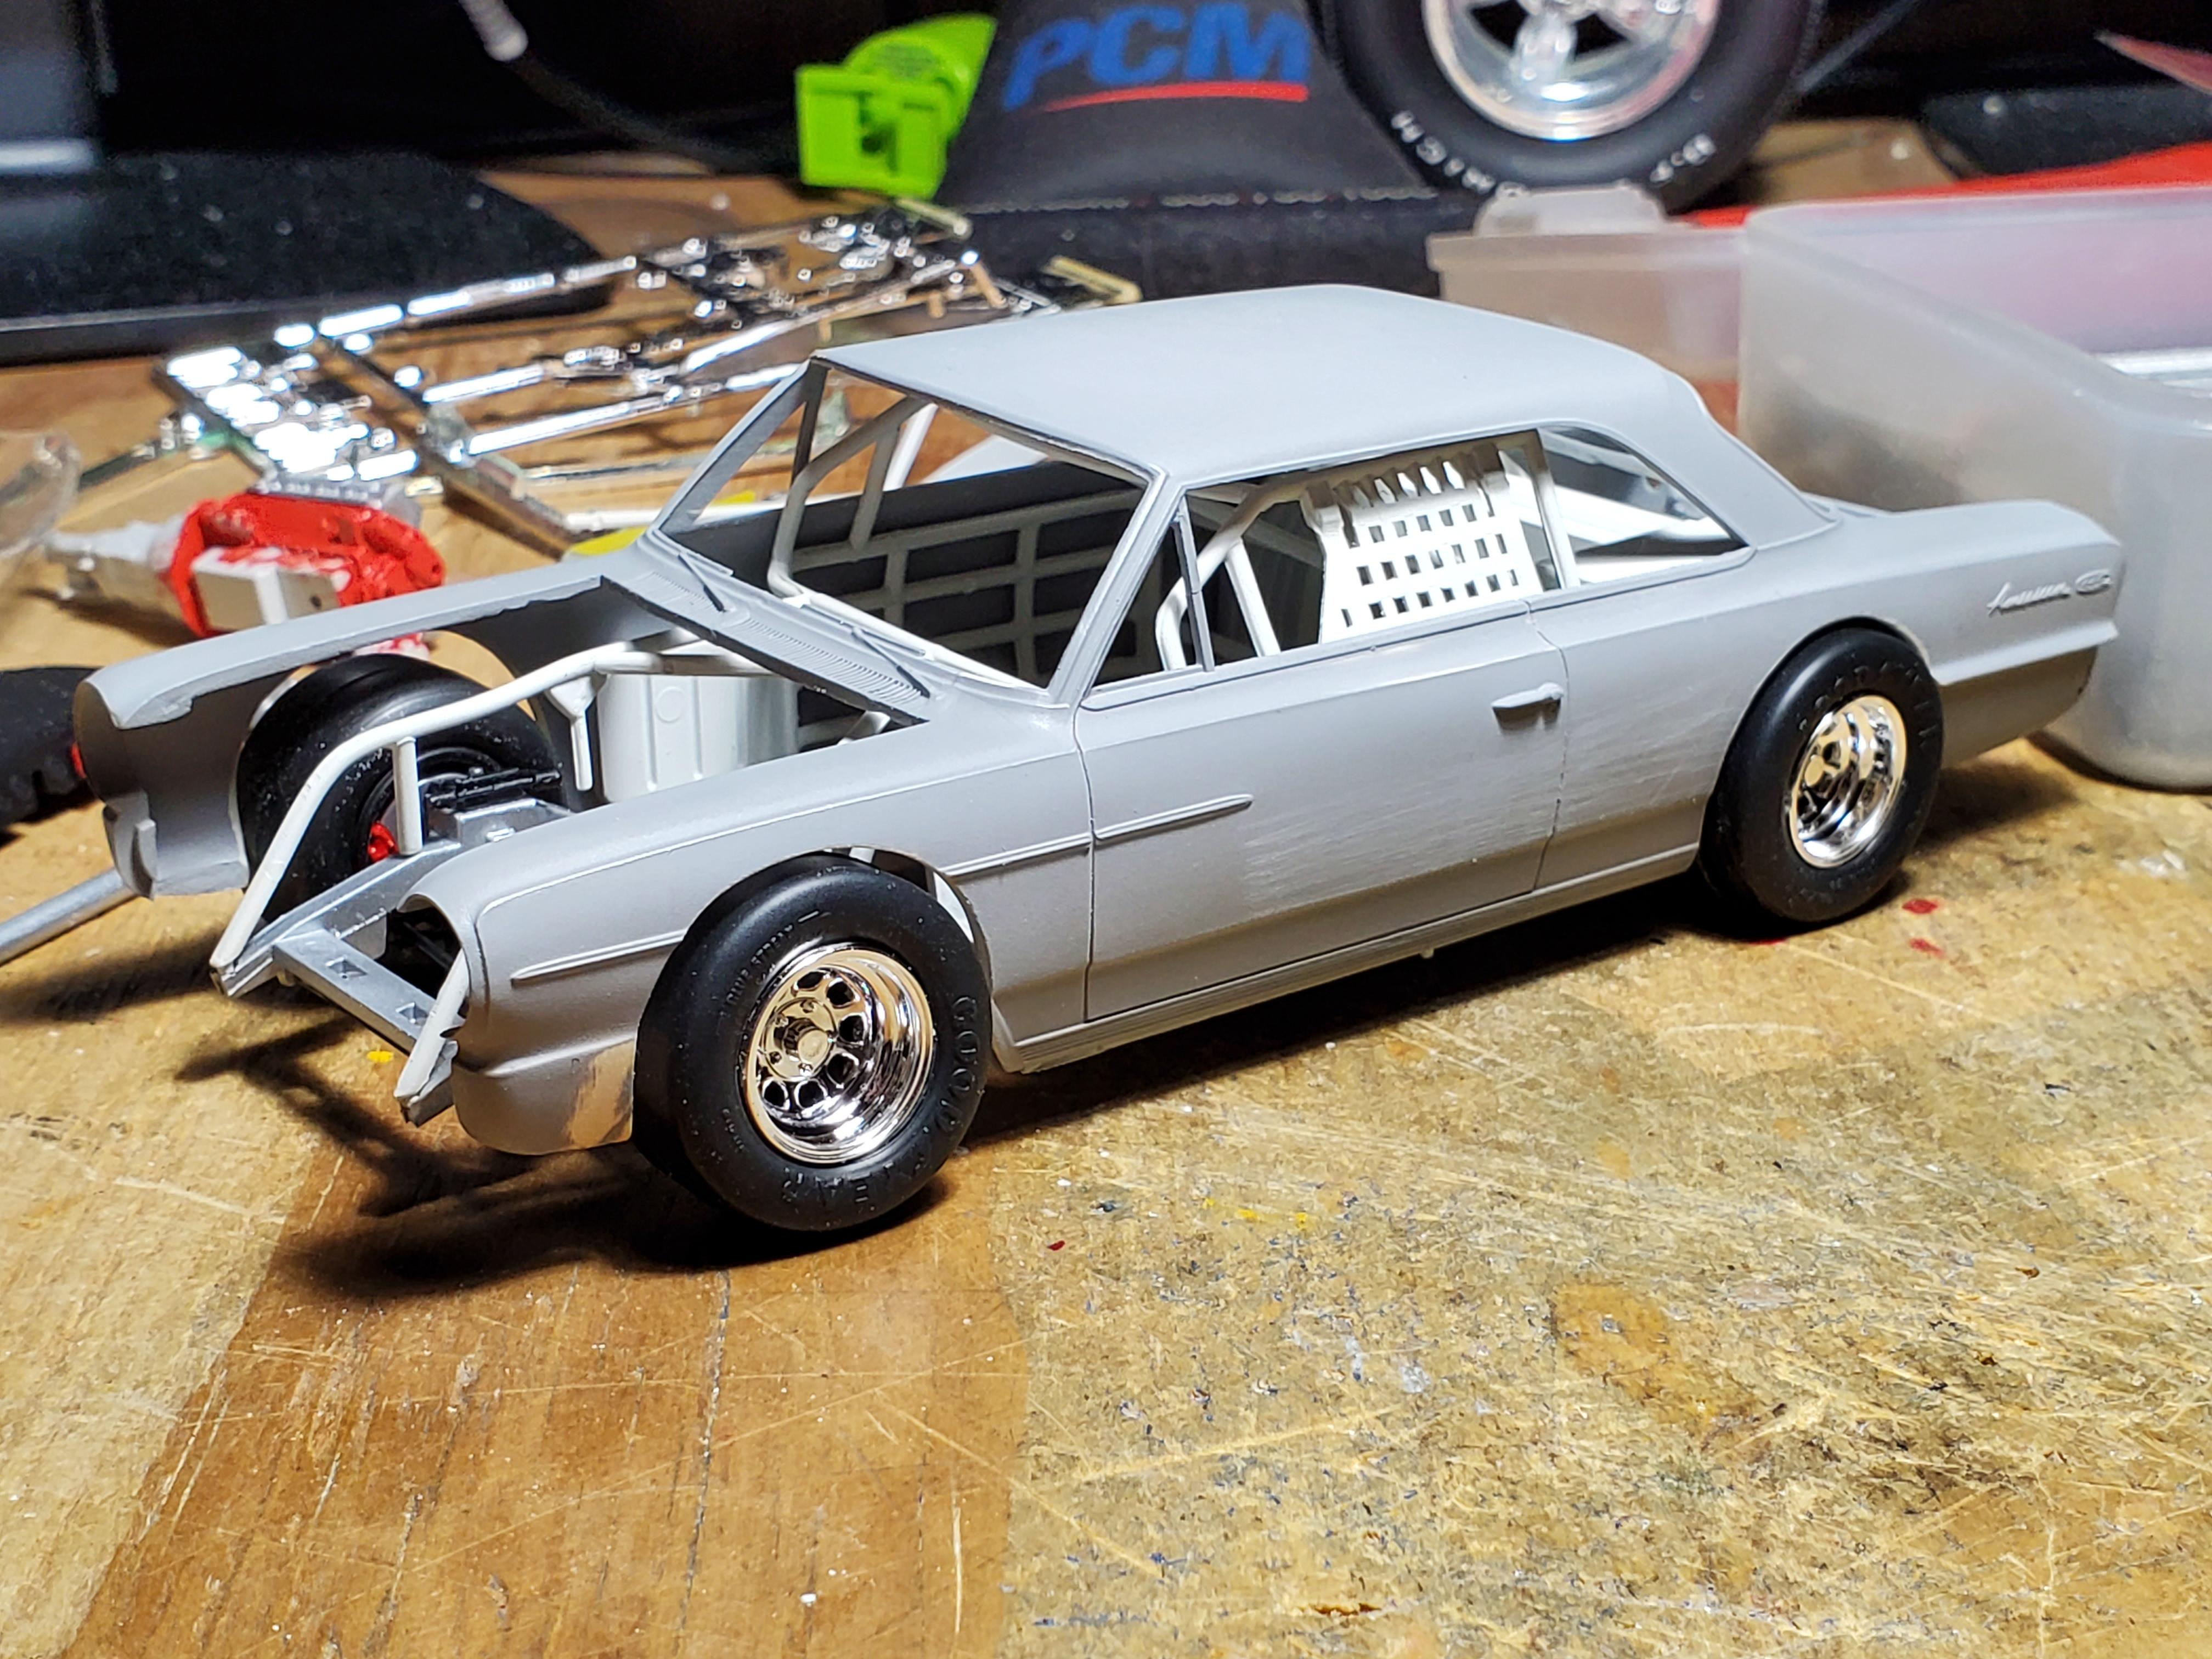
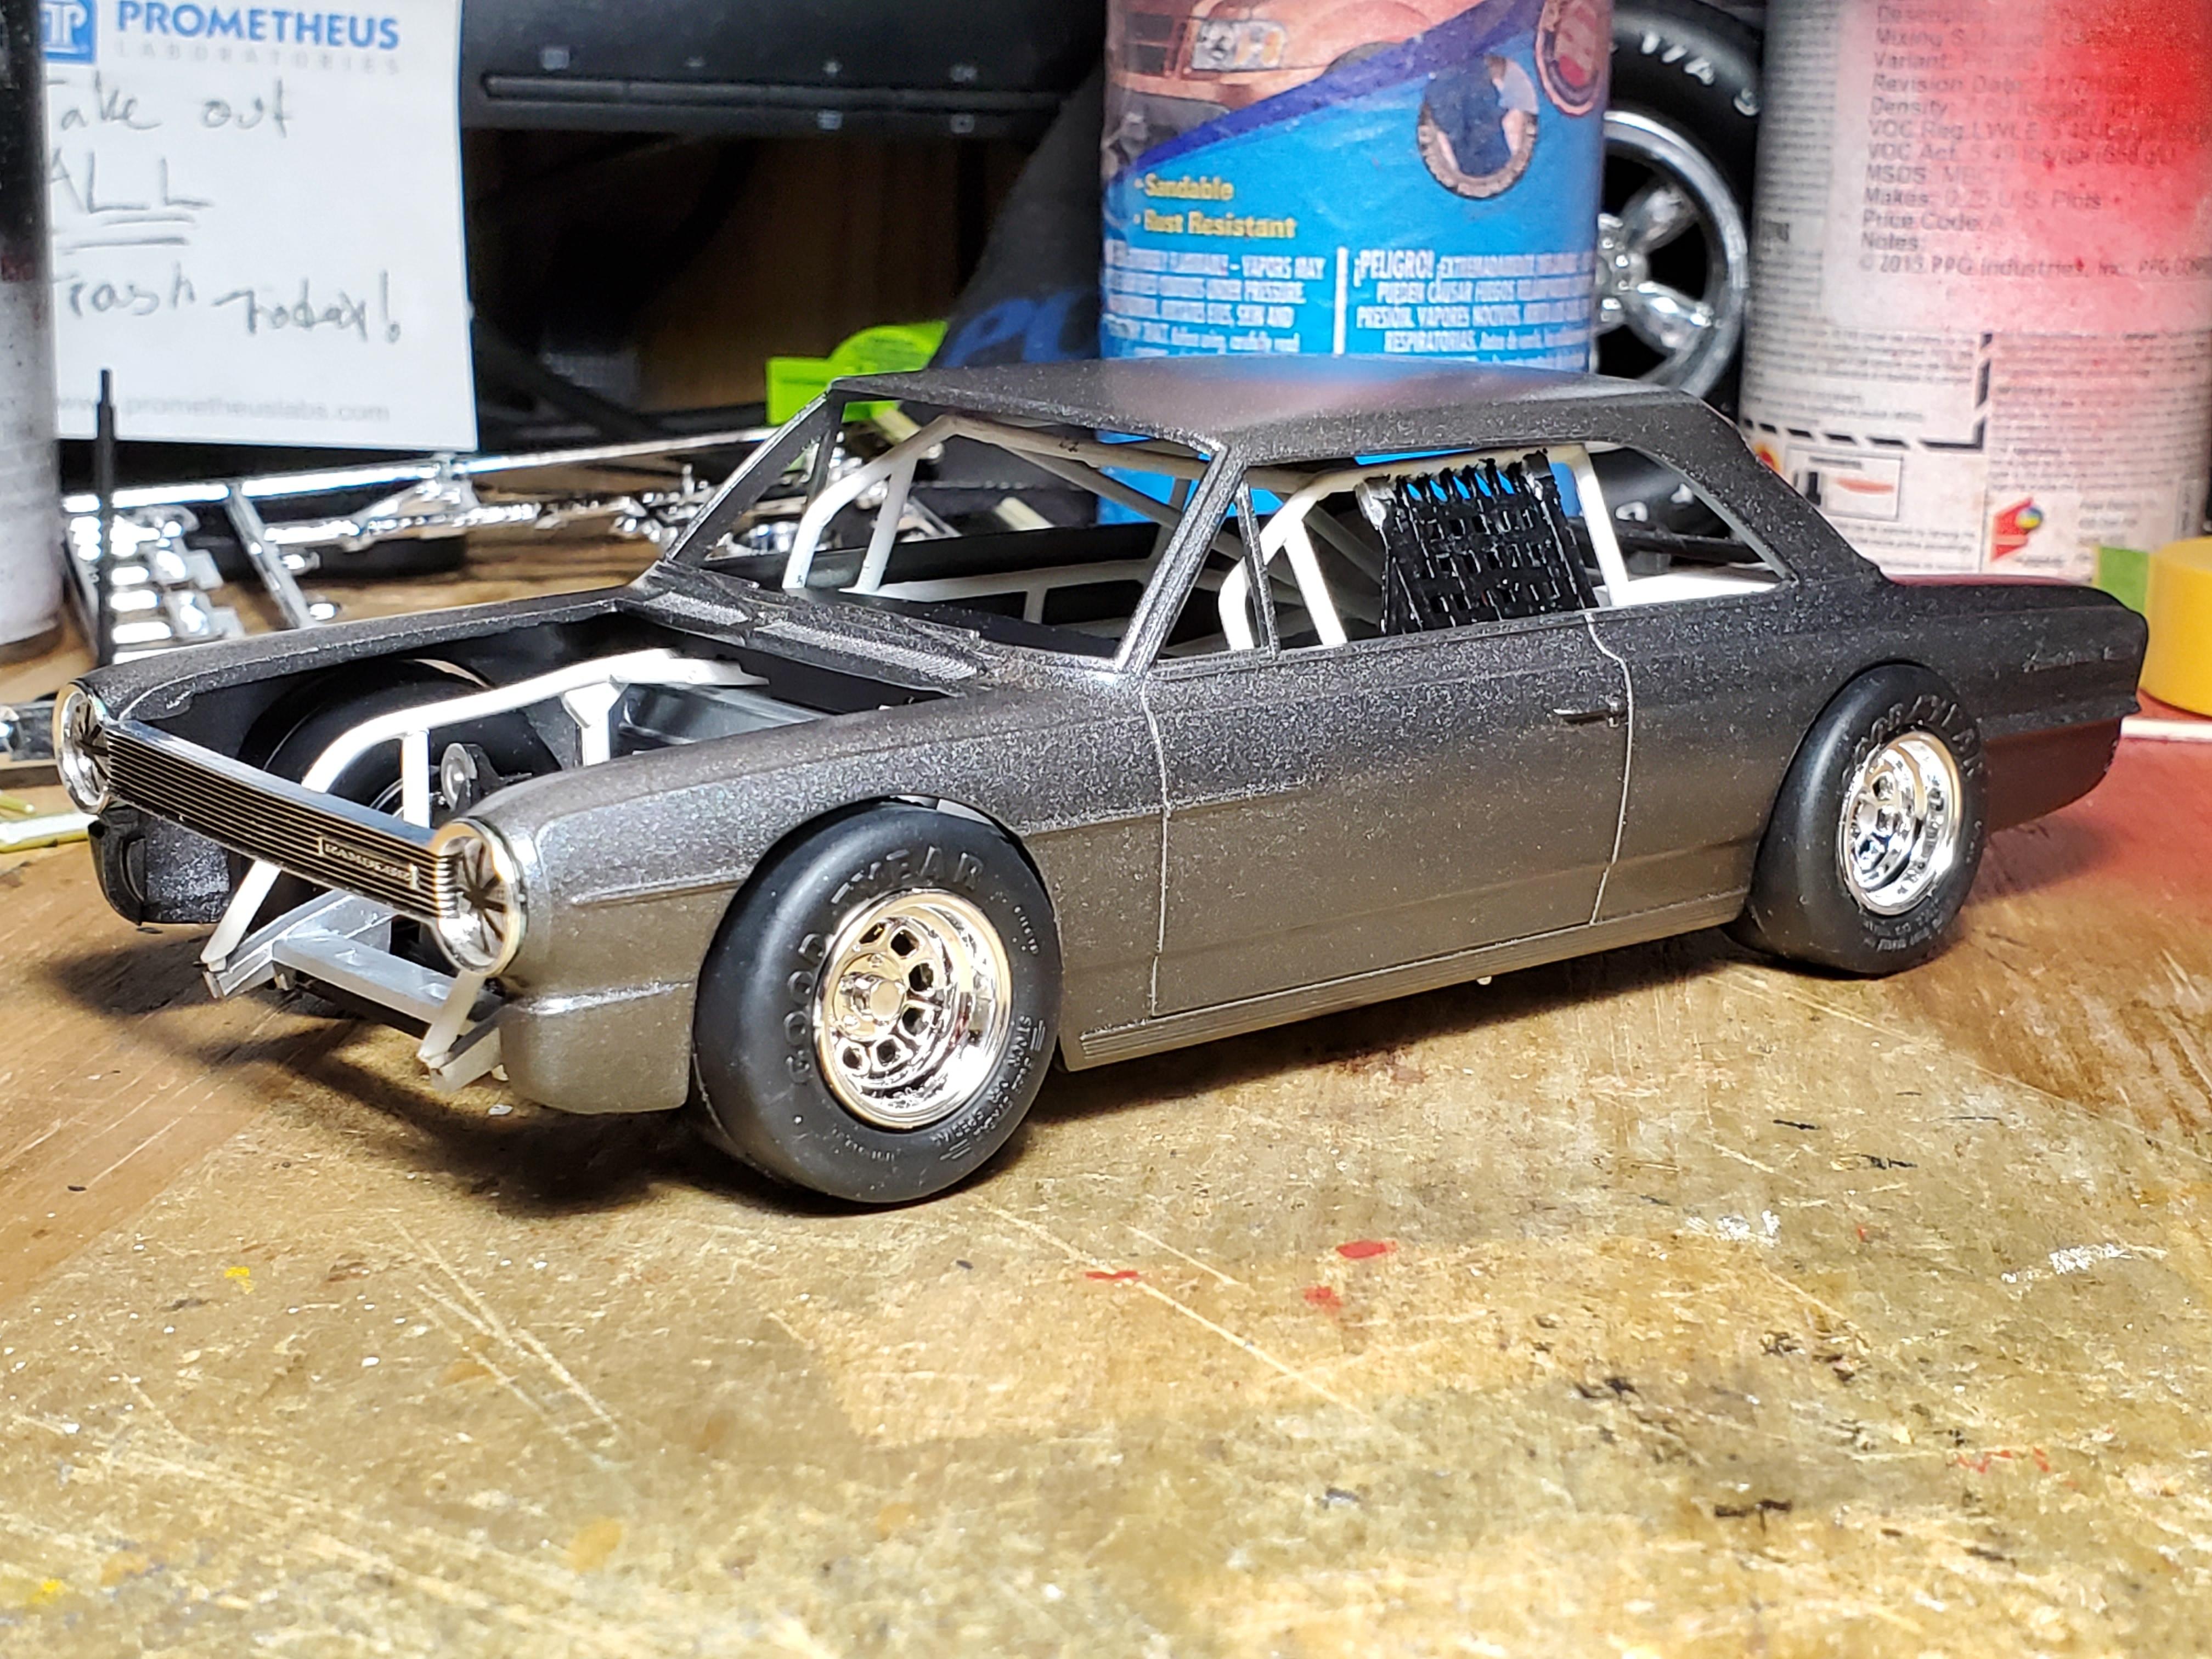
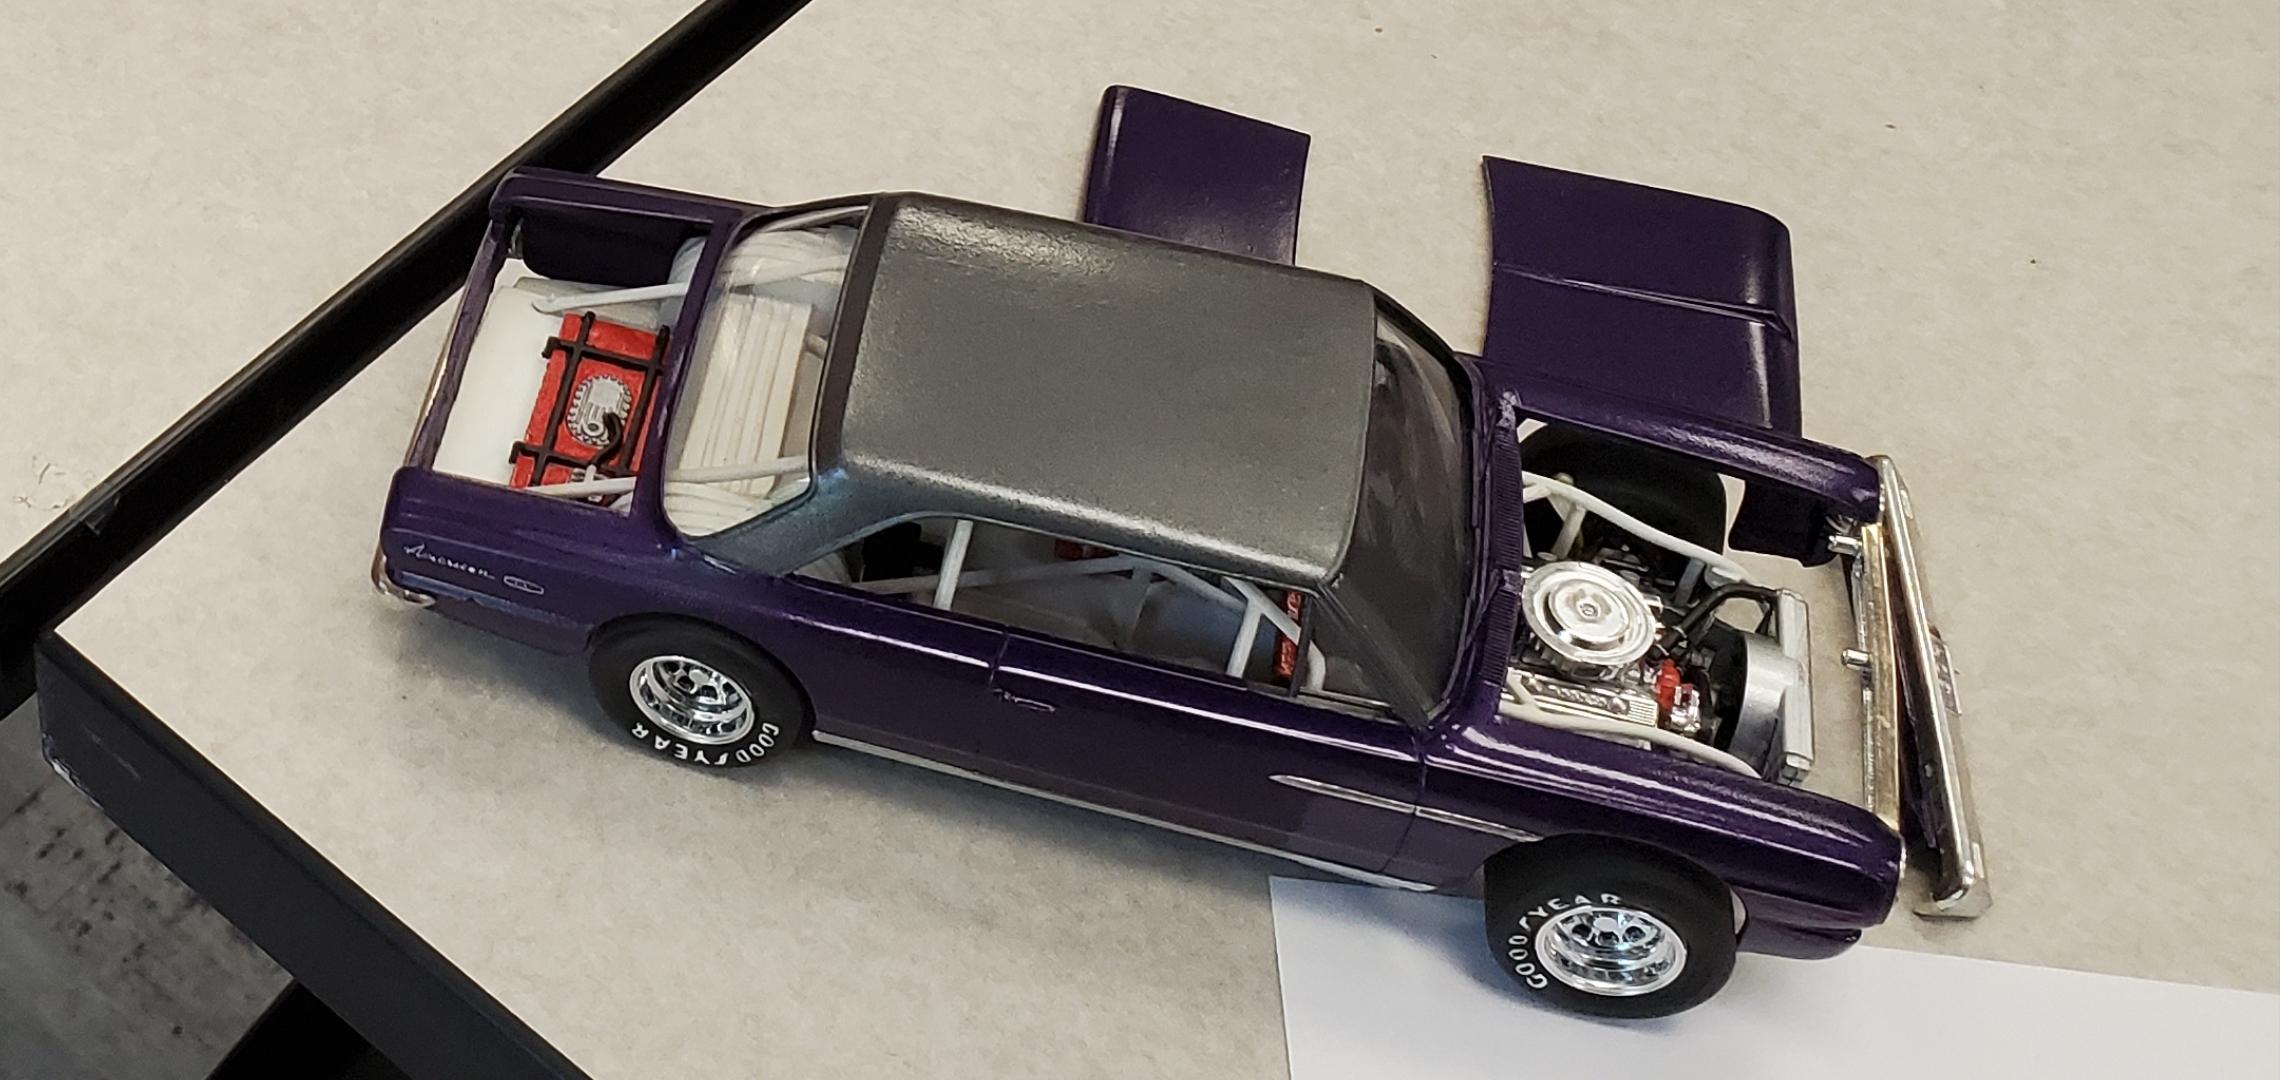
Yeah, you read that right. So I had bought an old JoHan 64 Rambler for parts of the 6cyl. It was a pretty wasted and busted glue bomb missing a lot of parts. I couldn't bring myself to throw it away! I needed to build a weird car for a theme in my club, that fit 2 different criteria. Competition Other, and Purple. I knew that I wanted to use a Nascar chassis under something but didn't know what. I tried a few different bodies and wasn't happy with any of the fit. Then I thought, well what about that crappy little Rambler I bought for parts??? The Corner Carving Rambler was born! It's an AMT Pontiac Nascar chassis and drivetrain, and the JoHan '64 Rambler body. It required a certain amount of body work to bring up to a somewhat presentable standard. The vent window was repaired, the rear panel between the trunk and glass had a piece missing completely! the rear taillight panel was broken in several places and poorly repaired the quarter panel had been completely broken off at one time and glued back on. This wasn't actually all that bad but required a little leveling. The cowl was also cracked in two spots as well. So I began my lazy bodywork by using silly putty to take a mold of the panel behind the glass that was broken so I could get the profile. I built up a pile of silly putty and used Bondic to make a replacement panel. with that glued in I began to file and sand on it. After a coat of primer I was nearly done. I worked on it more after this photo but didn't take any more pics. I had no taillights for this thing either. And I wanted it to sorta be a car that would look like it had working headlights and taillights and be street legal. So, what do you do when you need taillights? Borrow one from a mint unbuilt kit and cast them in silly putty and Bondic! My new kitten "Cheddar" always wanted to see what I was doing... I built the chassis and roll cage and got it painted and assembled because I knew I'd have to open up the wheel openings The old JoHan body was pretty brittle but I managed to get thru the wheelhouse carving pretty smoothly. This box of assorted files and flexboards really helped! It was time to get it in color, and my base was a gunmetal gray Tamiya, and I didn't get any good pics of the main body but I painted it Testors Purplicious. Taillights were painted in Tamiya clear acrylic red. I didn't finish in time for the club meeting but I stilled showed up. I still have a lot of work left to do. The last photo is a cropped pic I took of the entire table of purple cars. More to come... eventually.
-
Sorry, I was out of town for a week. Yes this is the AMT kit mentioned above. An uncommon kit nowadays
-
Soooo how about some small block Ford Motorsport valvecovers next? I could use a bunch for my personal use and projects... here they are on a 351w I have waiting in the wings. Charles could probably even add em to the lineup on his SBF engines... You don't have enough variations yet do ya Charles? lol
-
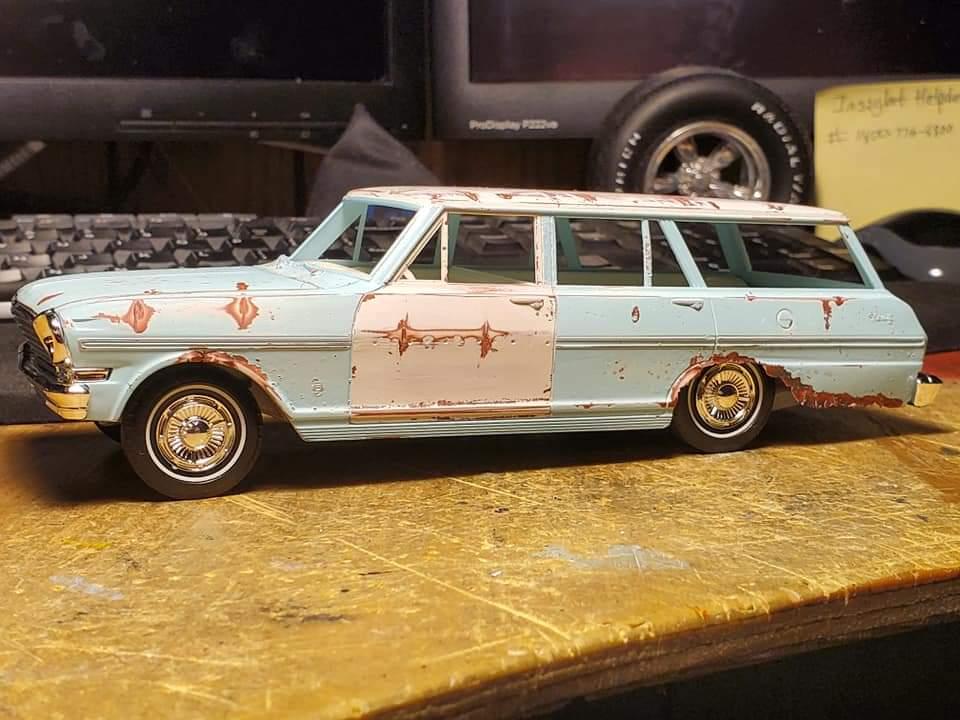
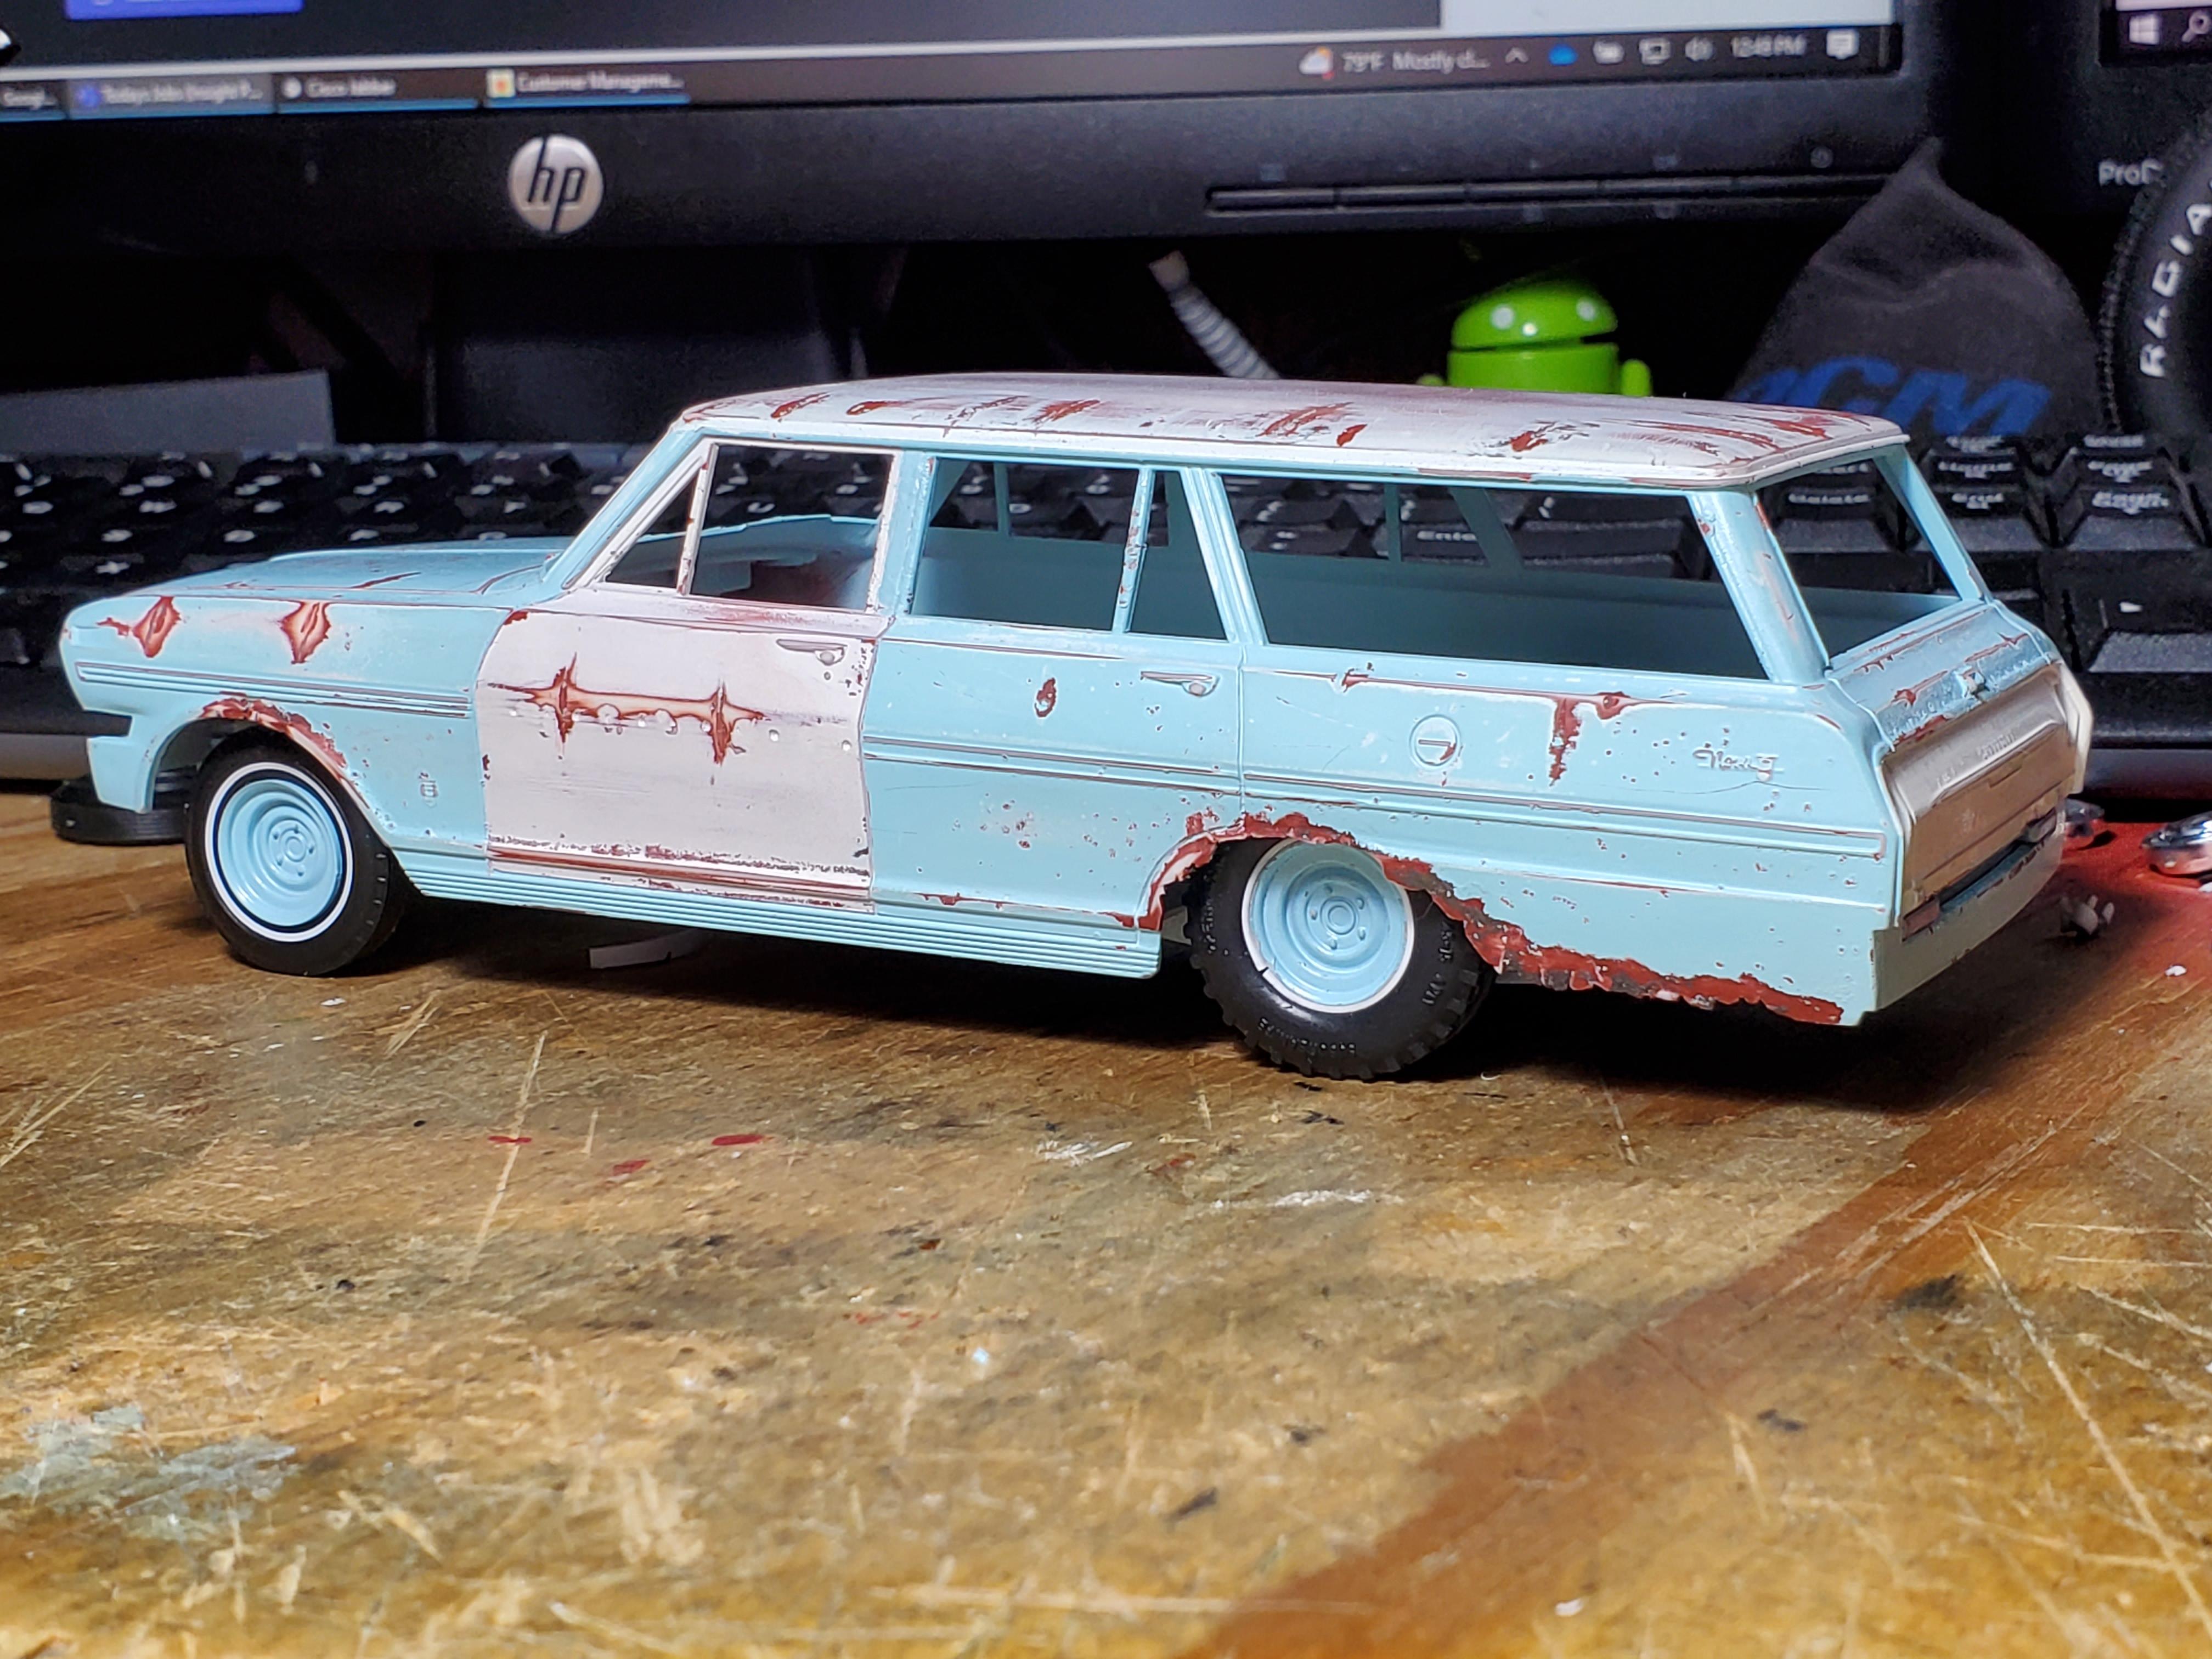
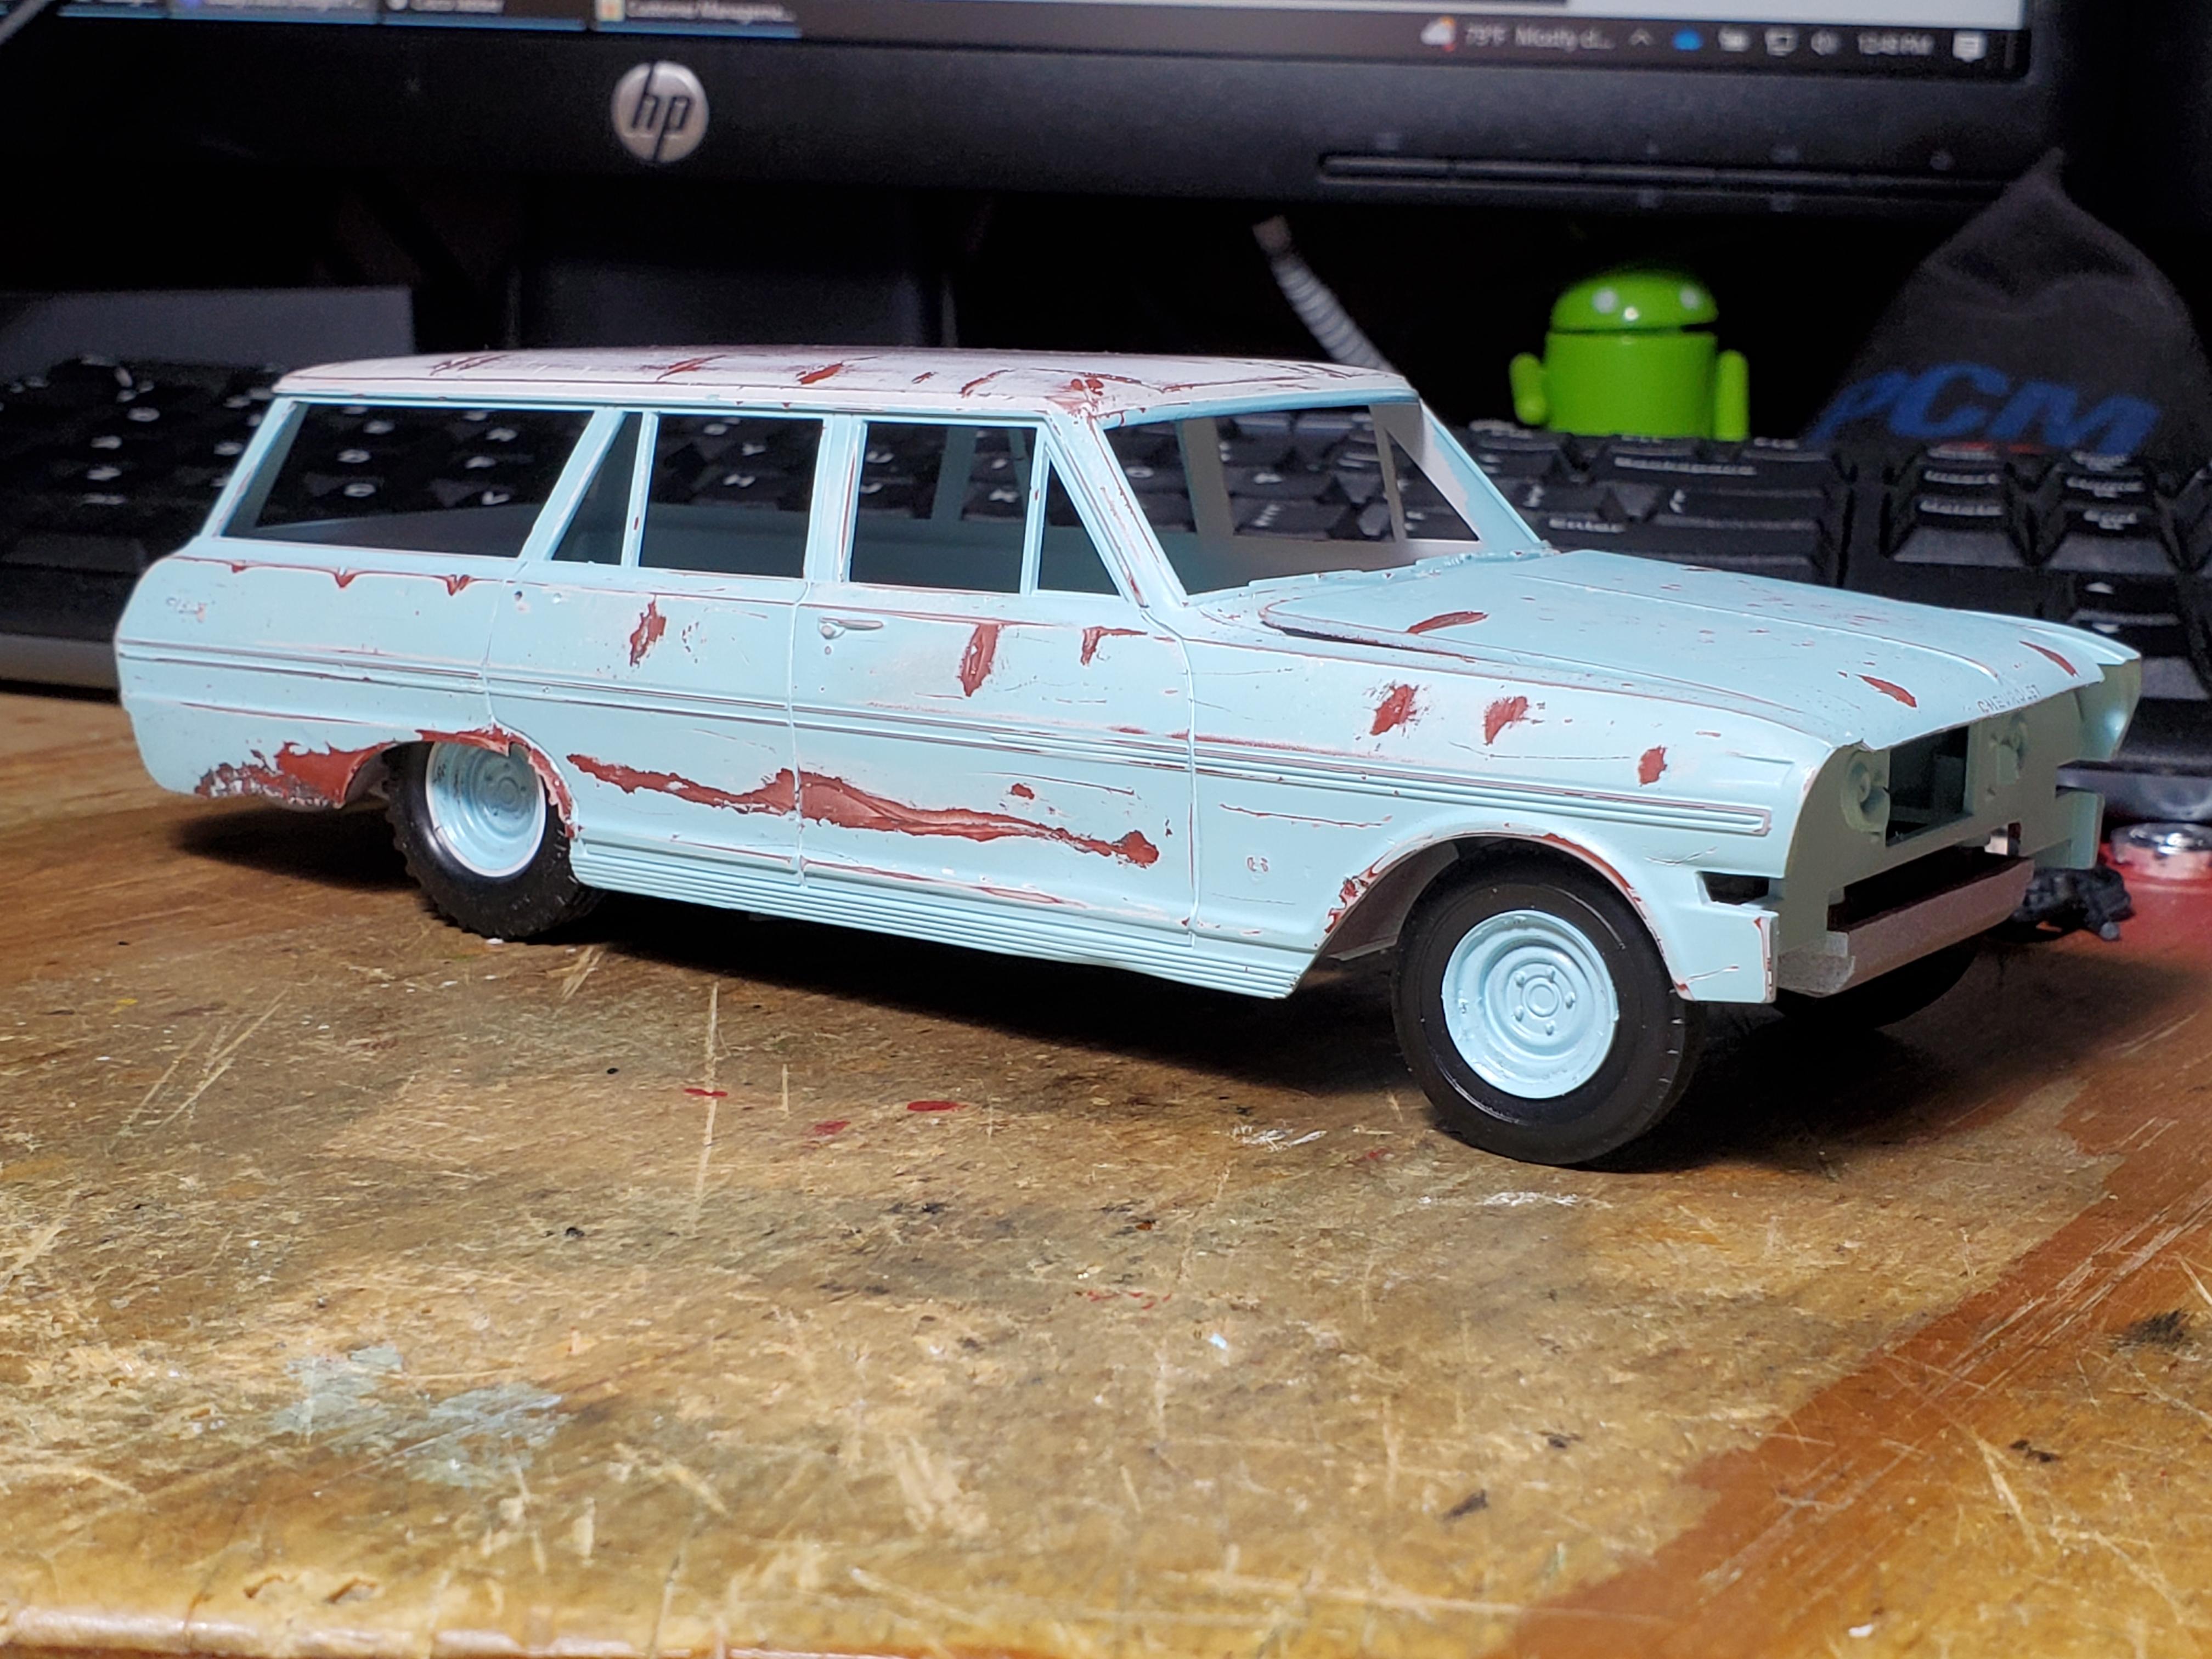
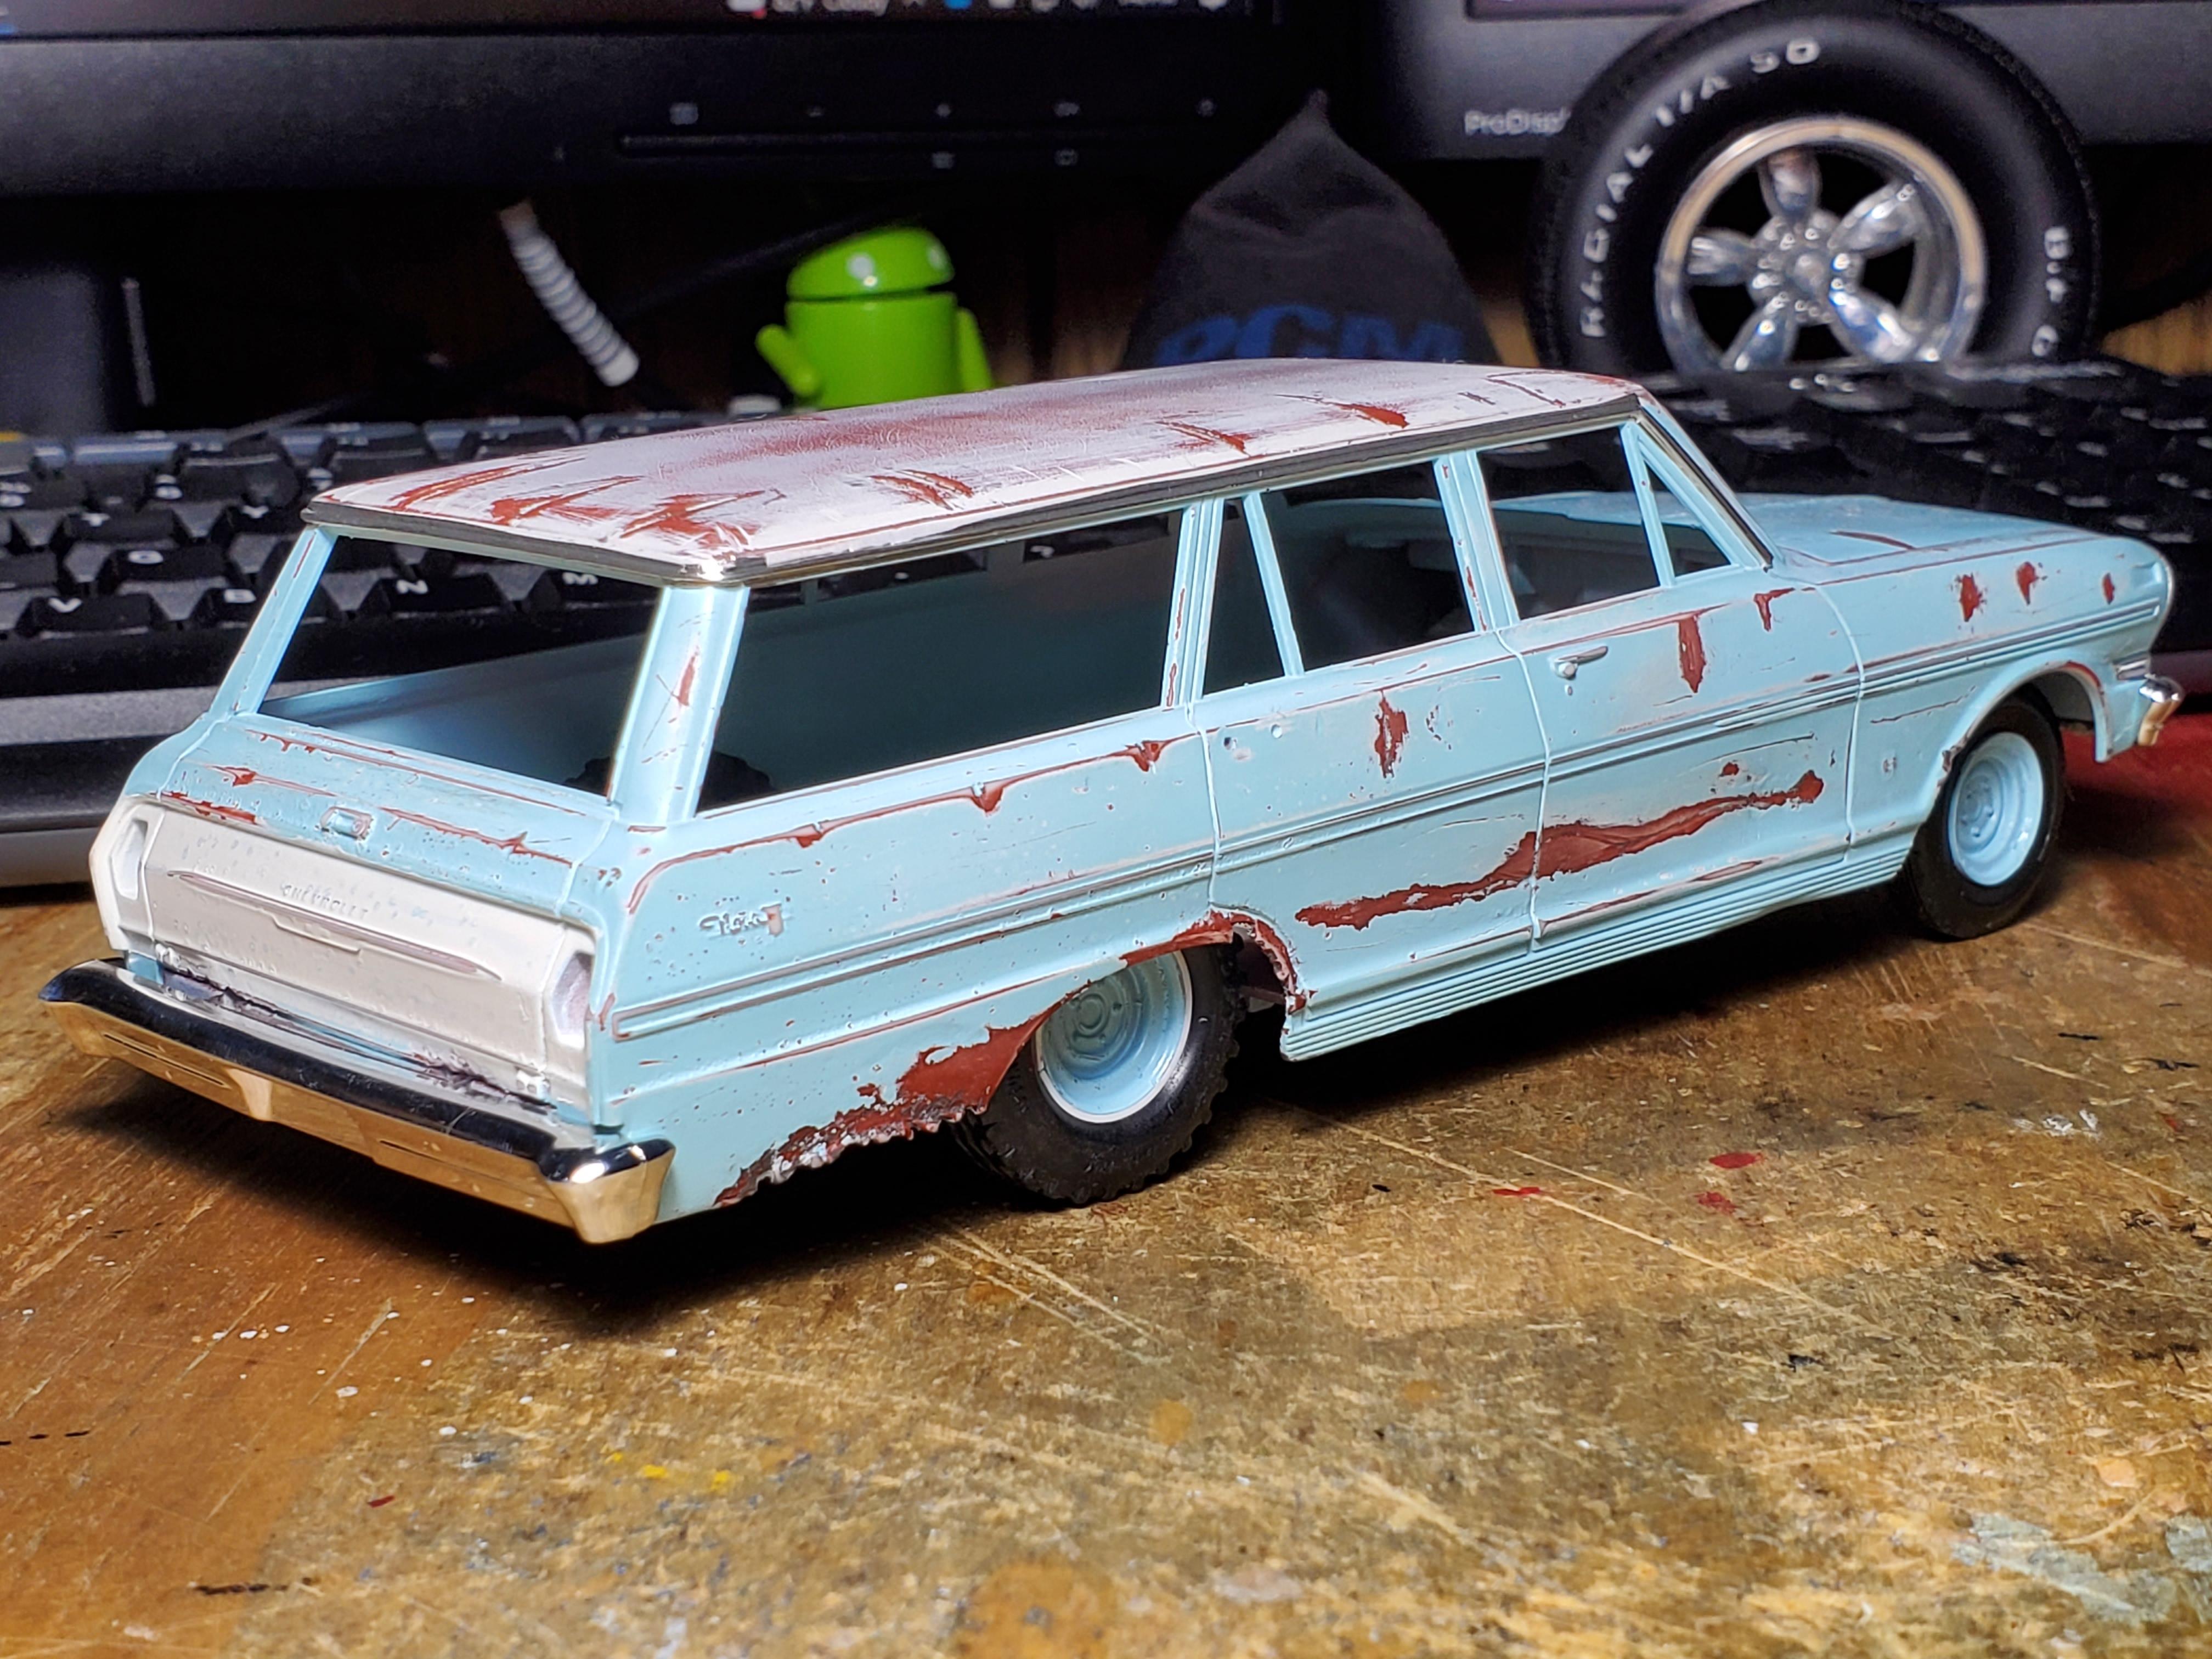
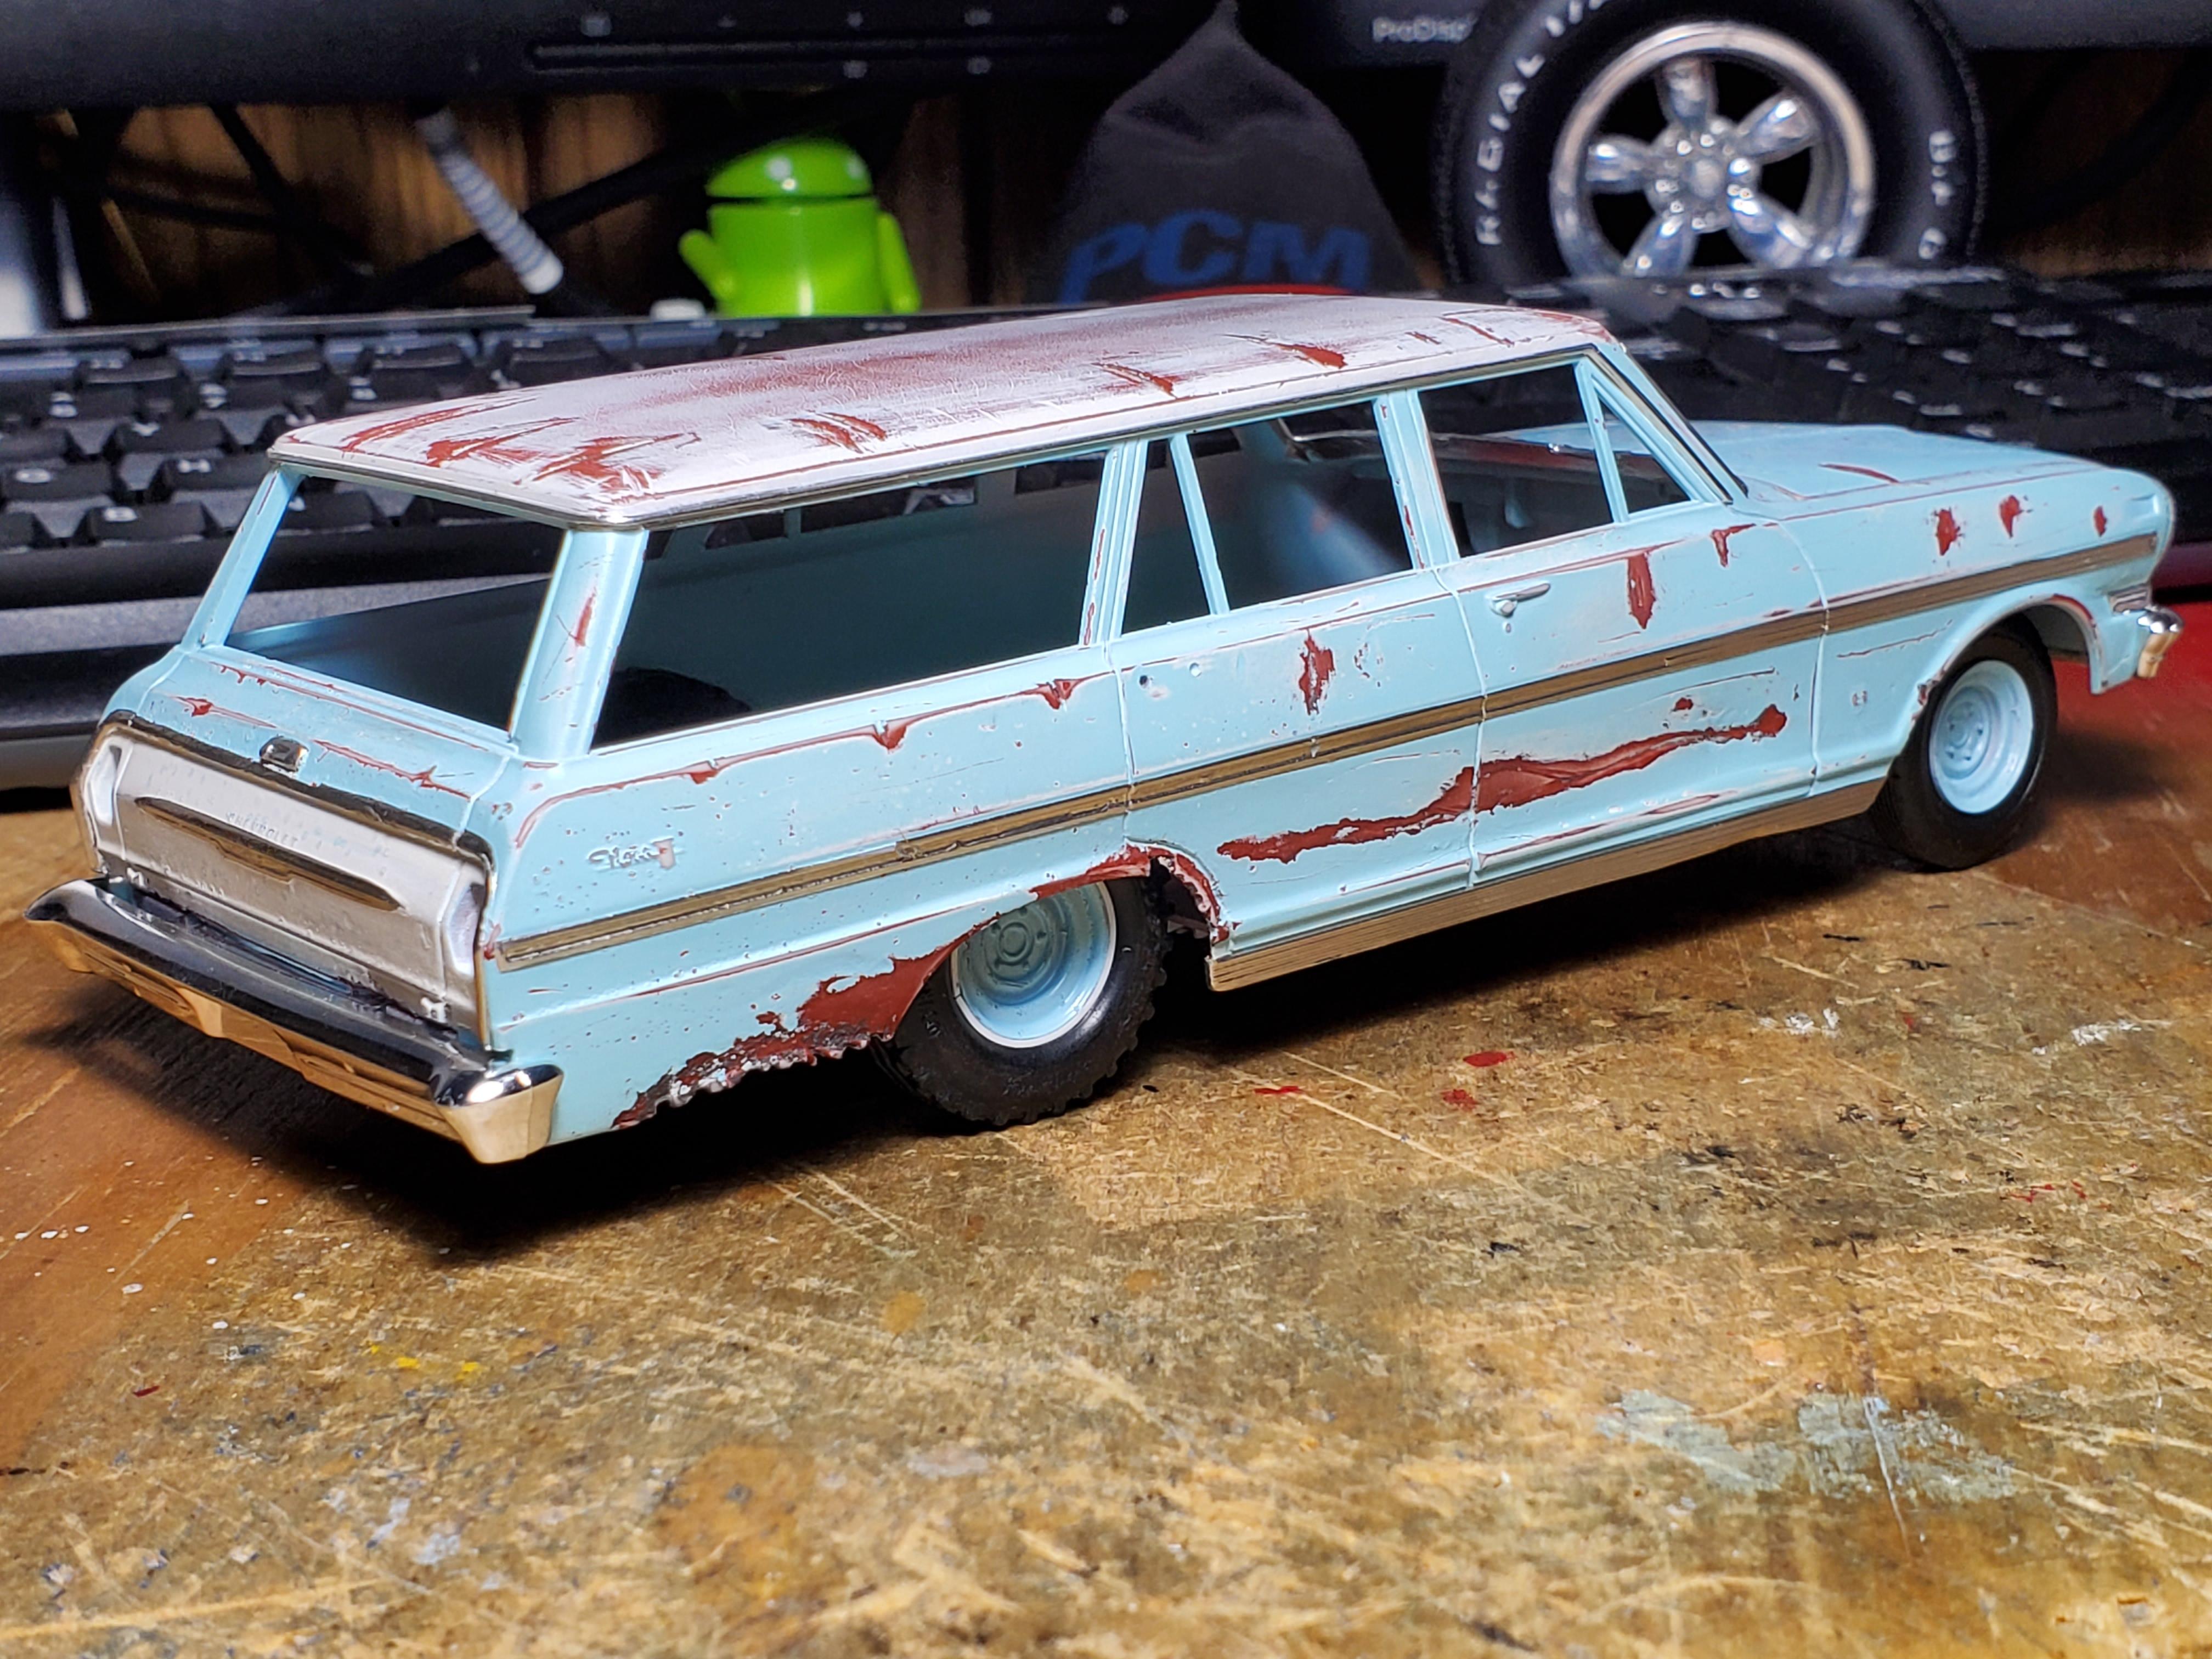
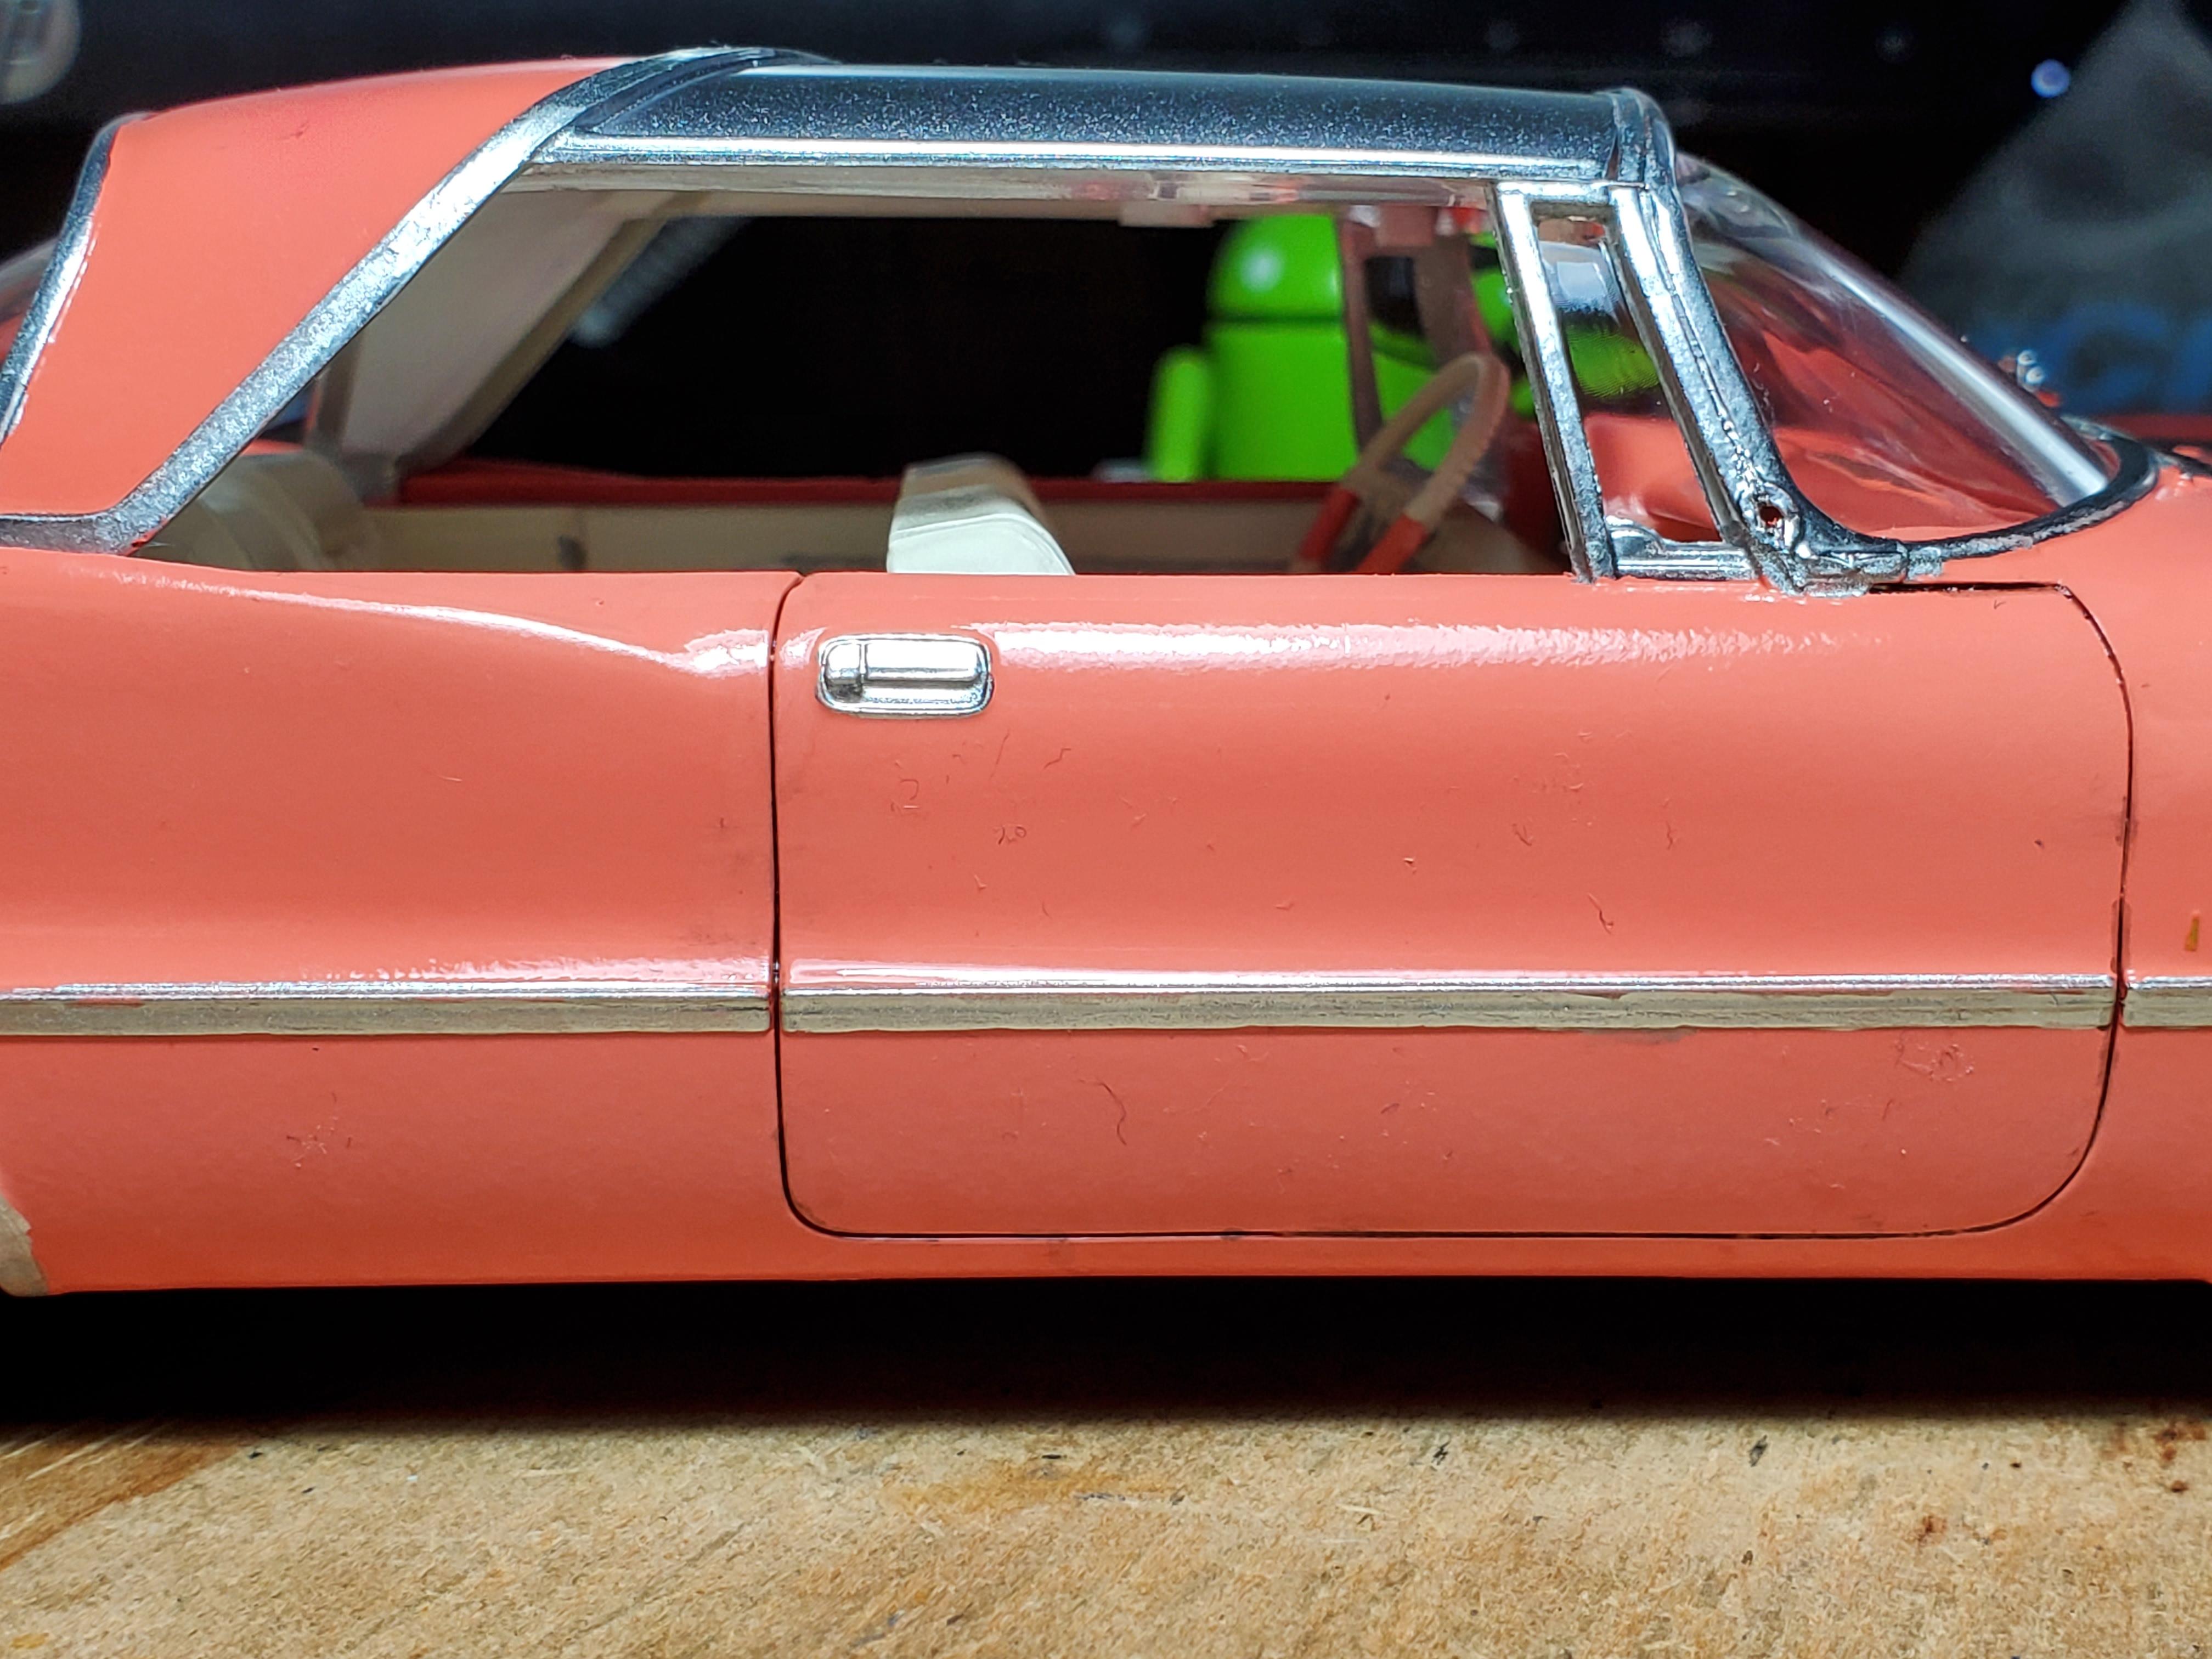
Trying to get my mojo back with this one (and others to come). I haven't built anything since right before I got the 'rona at the beginning of the year. I painted this one start to finish last night. Assembled it this morning. I built this one as "lazy" (no offense) as possible because I am not feeling it. I used Rustoleum Coral paint, Tamiya gunmetal for the roof, Molotow pen for the chrome trim, off white for the interior, some gel pens for the scripts, red sharpie for the taillights, and covered the whole thing in future floor polish.... Superglued it all together. I probably have 5-6 hours in this. But it shows. Pro tip.... don't use Tamiya blackwash on a paint job that can be affected by lacquer thinner!! That stuff only cleans up with lacquer thinner! Which, will take off cheap paint... ask me how I know... I will be using my trusty old Vallejo black wash from now on since it's water soluble. I didn't realize I had a decal for the cluster til it was already together. Maybe I'll put it on later. Boy there sure is a lot of fuzz static-clinging to that door now that I see it up close and personal!
-
A little bit of what I like to call fabricobbling. Probably some evergreen round stock of varying diameters cut down to look like a flange. A bracket made from sheet styrene. Some rust and weathering, and viola!
-
That is Exactly why I needed it! Lol Now, how may I obtain such thing?
-
No donor kit used.