

John Goschke
-
Posts
1,919 -
Joined
-
Last visited
Content Type
Profiles
Forums
Events
Gallery
Everything posted by John Goschke
-
Larry, that is just too cool! A period perfect build of one of my favorite kits! Nice job cutting out the rear wheel arch in that sweeping curve; just perfect. Where did you get the rear wheels and tires? What's under the hood?
-
I like it!
-
Very cool. I really like that air cleaner!
-
This sure looks cool! Dave, are you gonna use the intake ducting and air box, etc. from the Thunderbolt underneath that hood?
-
Beautiful!
-
-
French Quarter Voodoo 49 Merc--Rat Bit
John Goschke replied to Dr. Cranky's topic in WIP: Model Cars
Very twisted! Very Cool! Terrific techniques empoyed with great creativity; looking forward to the completion. -
Cool build! Decals are perfect for the car!
-
That is really nice! Great color! Your adjustments to the ride height are perfect, and are a must for any build with the chopped top and windshield; thanks for the heads-up!
-
Nice build. The red interior (excellent detailing there!) looks great with the black/white exterior!
-
Clean and very authentic-looking!
-
That is terrific! Love the wood grain details and the engine choice; really sets this one apart!
-
'34 Ford Coupe Custom Paint Experiment Successful!
John Goschke replied to John Goschke's topic in Model Cars
Thanks for the compliments, guys! -
'34 Ford Coupe Custom Paint Experiment Successful!
John Goschke replied to John Goschke's topic in Model Cars
The original inspiration for this came from tips posted by Bill Stillwagon on the Spotlight Hobbies forum when he debuted his beautiful '50 Chevy pickup custom... His original post is long gone but here's the description of the process I used based on his techniques. Hope this helps... The car was already painted the base red metallic. I taped out the design of the scallops freehand using my favorite black graphic masking tape (Bill used another type and you may have a favorite of your own), cut in thin (1/32" wide) strips, about 8-10" long. Starting at the tip of scallop, I layed the tape on, pulling it straight and working it around the turns as I went. For instance, the first design I layed out was the one on the body side. Starting above the rear wheel arch, I taped out the outside edge of the scallop,below the body molding, forward to the radiator, then down the front edge of the hood, and along the bottom edge and rocker panel, terminating at that sharp corner at the front edge of the rear wheel arch. Then I used another short strip of tape for the stripe that ends in the middle of the hood side. Then I taped out the inside edge of the scallop, creating the taper and curves as I went. Each design was layed out in that same basic manner, checking symmetry by eye, and occasionally with dividers. After the whole pattern was layed out I used some regular masking tape to cover the areas that would remain red. On a fresh base color, low tack masking tape is probably advisable, rather than regular. The whole taping and masking process took about 7 to 8 hours! Bill recommends shooting some clear over the design first to prevent color bleeding under the tape, and I do too, but being out of clear, and being lazy and 20 miles from the LHS, I didn't, and my luck held! Yours may not! I did follows Bill's advice and shot about two to three light coats of the gold. The idea is to build an opaque, but thin, coat of color. I didn't build it quite enough, and though I checked and reshot a couple thin spots, I also missed a couple. These became more obvious when the clear went on. I carefully pulled off the tape as soon as possible (less than a half hour) after painting to avoid chipping dry edges. The little bit of edge buildup there was, I was able to rub off with my finger the next day. The more typical treatment Bill recommended was to lightly sand the edge buildup. I just didn't think sanding, even with 12000, was a good idea on the uncoated gold, but I'm sure it'd be OK on other colors. After that the process was pretty straight forward, several coats of Tamiya Clear (after finally going to the LHS!), then wet-polish out with grits from 3600 to 12000, then a buff out with Novus plastic polish. While there is a VERY slighly perceptible edge to the scallops on the surface of the clear, it's acceptable to me for this project. Any more clear, and the car would take on too much of that "dipped in syrup" look! Give it a try! If I can do it, you can too! -
Nice save!
-
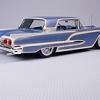
Weekend before last I took apart this snap-kit built and painted Tamiya Red Metallic a couple years ago to try doing scallops ala the late '50s-early '60s, something I've wanted to do for years! Picked up some pointers from Bill Stillwagon on "another forum" that supplied the inspiration to give it a shot. Scallops are done in Tamiya Gold Leaf with their clear over top. Wheels and tires from the Ala Kart and steering wheel and shift lever from the ex-Little Deuce kit backdate it 1961 or thereabouts. Hope you like it! 'Course you can't have a Rod without a Custom!
-
Nice job, Marcos! Makes me want to build that kit! Keep up the great work.
-
I prefer to foil after all the paint is on and polished. Looks more realistic that way.
-
Whew! That is beautiful! Super clean bodywork on well-designed mods! Perfect paint, too!
-
Wow, Dave that is cool! Really nice work on the body style conversion; the proportions are perfect!
-
'50 Olds Rocket 88 Diecast Repaint-Rebuild Finished!
John Goschke replied to John Goschke's topic in Model Cars
Thanks Bob! George is right, and from what I can tell this sucker is a true 1/25 and captures the subtleties of the '49-'52 Chevy-Olds-Pontiac roofline WAY better than the AMT Chevy Fleetline kit! As I understand it, this diecast was developed from work done by Ertl for a proposed 1/25 kit. Believe me, nobody's more biased than me against diecasts and their scale problems and clunky working features, but as soon as I saw one of these I wanted it. Granted, it does have a radically simplified interior and those kinda toy-like chrome-plated plastic moldings that fit in non-prototypical channels in the body, but you gotta love a simple model with an accurate outline of a subject you don't see everyday! When I get a chance I'll take a pic with a kit-based model for you, but meanwhile you can rest assured one of these is worth the effort. -
'50 Olds Rocket 88 Diecast Repaint-Rebuild Finished!
John Goschke replied to John Goschke's topic in Model Cars
Thanks, Tom. I got mine for $20 from a gentlemen who sells kits at our model club. However I just did a quick search on ebay for "Ertl '50 Olds" and there's apparently a whole series of them without coin slots in NFL team markings selling in the $30 range. HTH -
I thought the whole interior, not just the dash, was from the '65 Wildcat. The optional bucket seat interior for the 1/1 '66 W'cat has inserts that are like a fine (1") horizontal tuck and roll pattern. I don't remember what was in the '65.
-
Beautiful work on this one! What's the parentage of this tool? Was this originally a Johan kit, or perhaps MPC?
-
Nice! Really nice build and awesome color combo.