wisco8
-
Posts
395 -
Joined
-
Last visited
Content Type
Profiles
Forums
Events
Gallery
Everything posted by wisco8
-
1/25 Revell 1969 Dodge Charger R/T body wip pics.
wisco8 replied to wisco8's topic in WIP: Model Cars
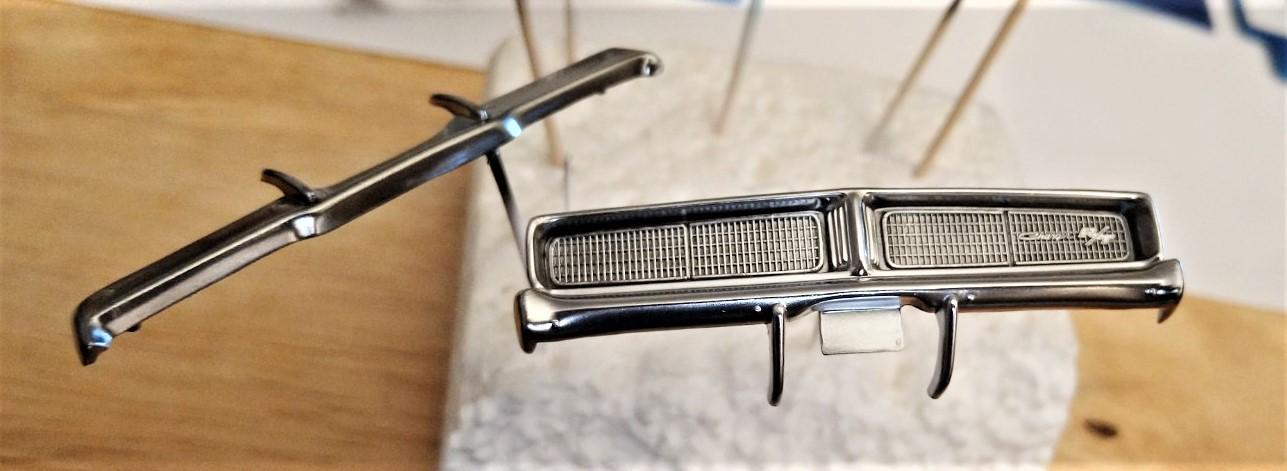
Parts chromed, they turned out beautiful.
-
1/25 Revell 1969 Dodge Charger R/T body wip pics.
wisco8 replied to wisco8's topic in WIP: Model Cars
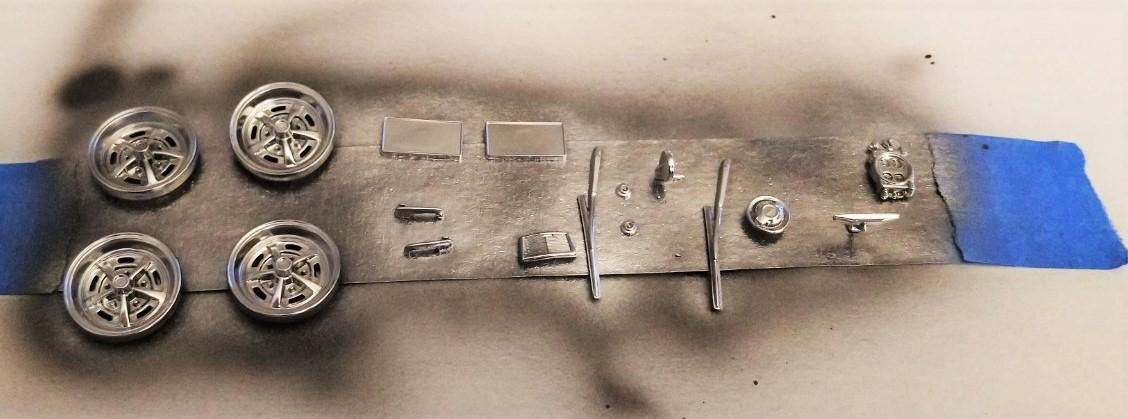
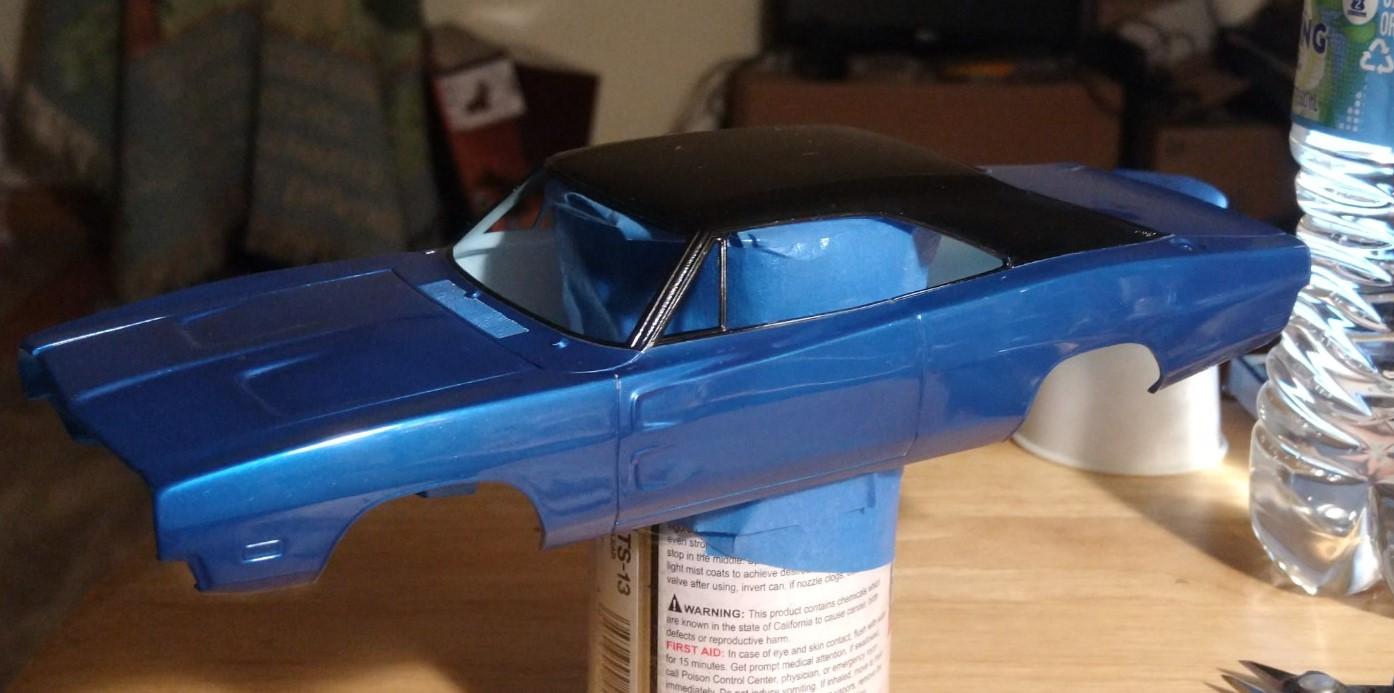
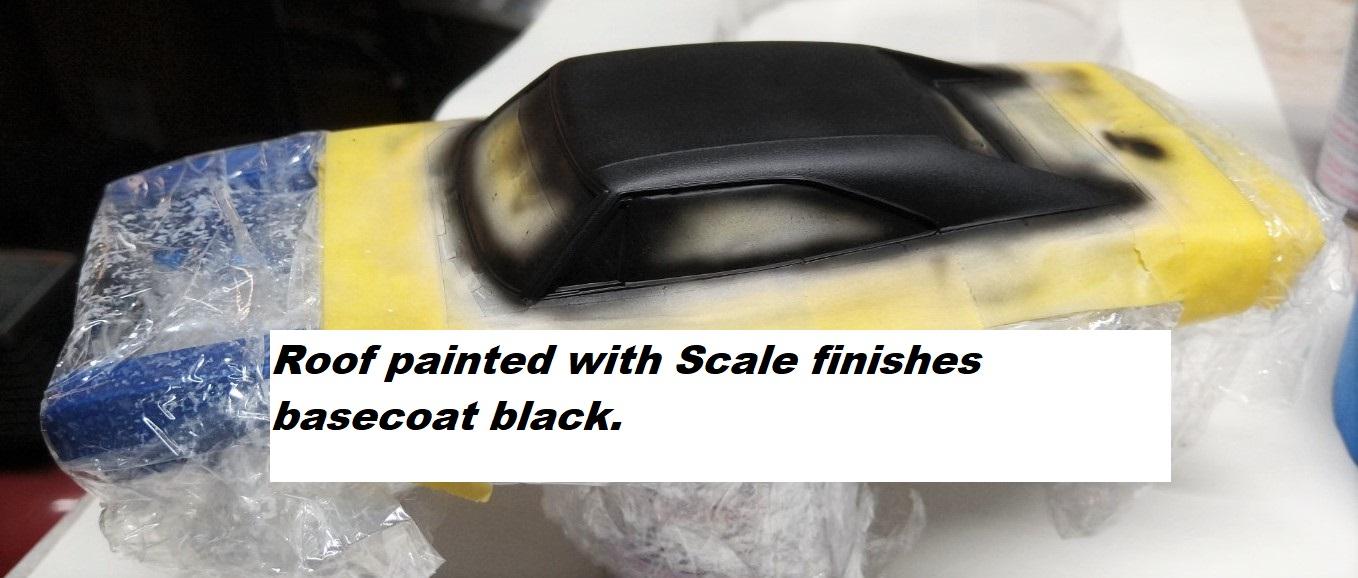
Parts ready to be chromed. Base coat will be scale finishes black followed by clear Tamiya TS-13 decanted and applied in light mist coats, followed by alclad2 chrome, and sealed in with Tamiya TS-13 applying light mist coats to seal it all in.
-
1/25 Revell 1969 Dodge Charger R/T body wip pics.
wisco8 replied to wisco8's topic in WIP: Model Cars
Thank you Jim. Here are a few more pics from this afternoon.
-
1/25 Revell 1969 Dodge Charger R/T body wip pics.
wisco8 replied to wisco8's topic in WIP: Model Cars
Thank you Monty. Steve -
1/25 Revell 1969 Dodge Charger R/T body wip pics.
wisco8 replied to wisco8's topic in WIP: Model Cars
A few more pics from last night. -
1/25 Revell 1969 Dodge Charger R/T body wip pics.
wisco8 replied to wisco8's topic in WIP: Model Cars
Thank you Carl. -
1/25 Revell 1969 Dodge Charger R/T body wip pics.
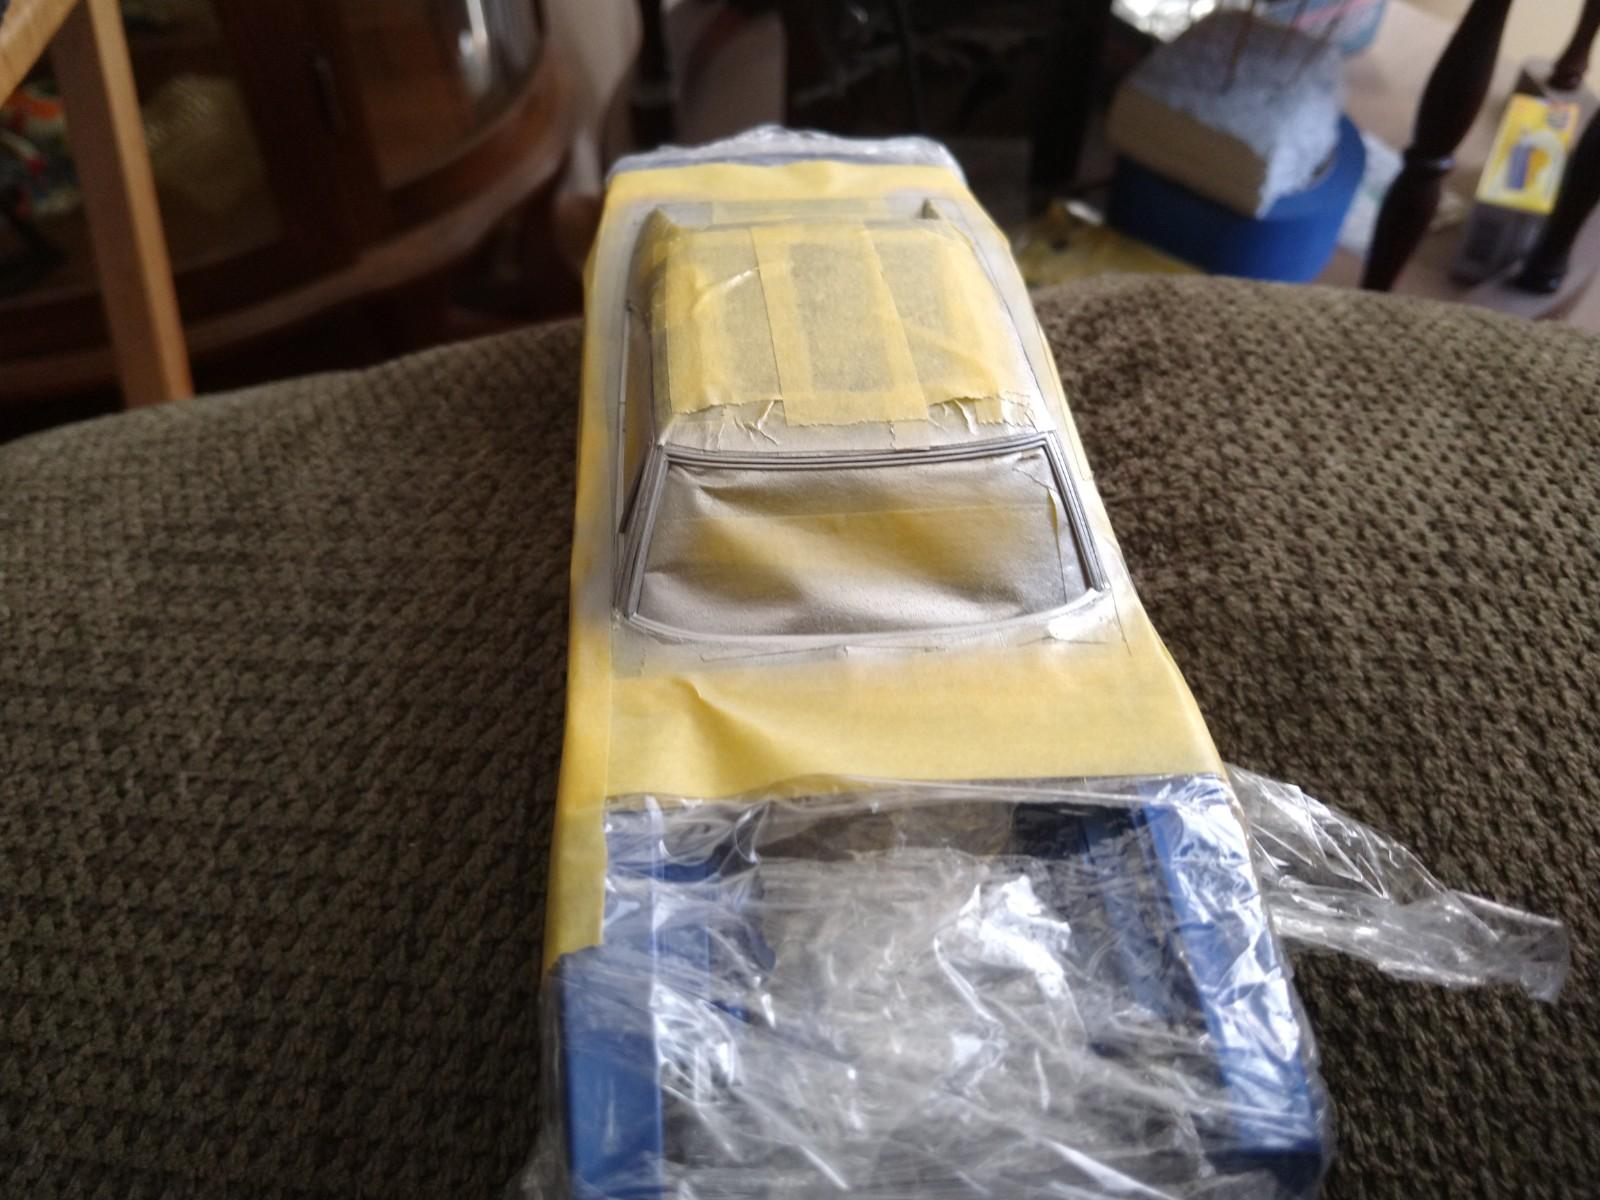
wisco8 replied to wisco8's topic in WIP: Model Cars
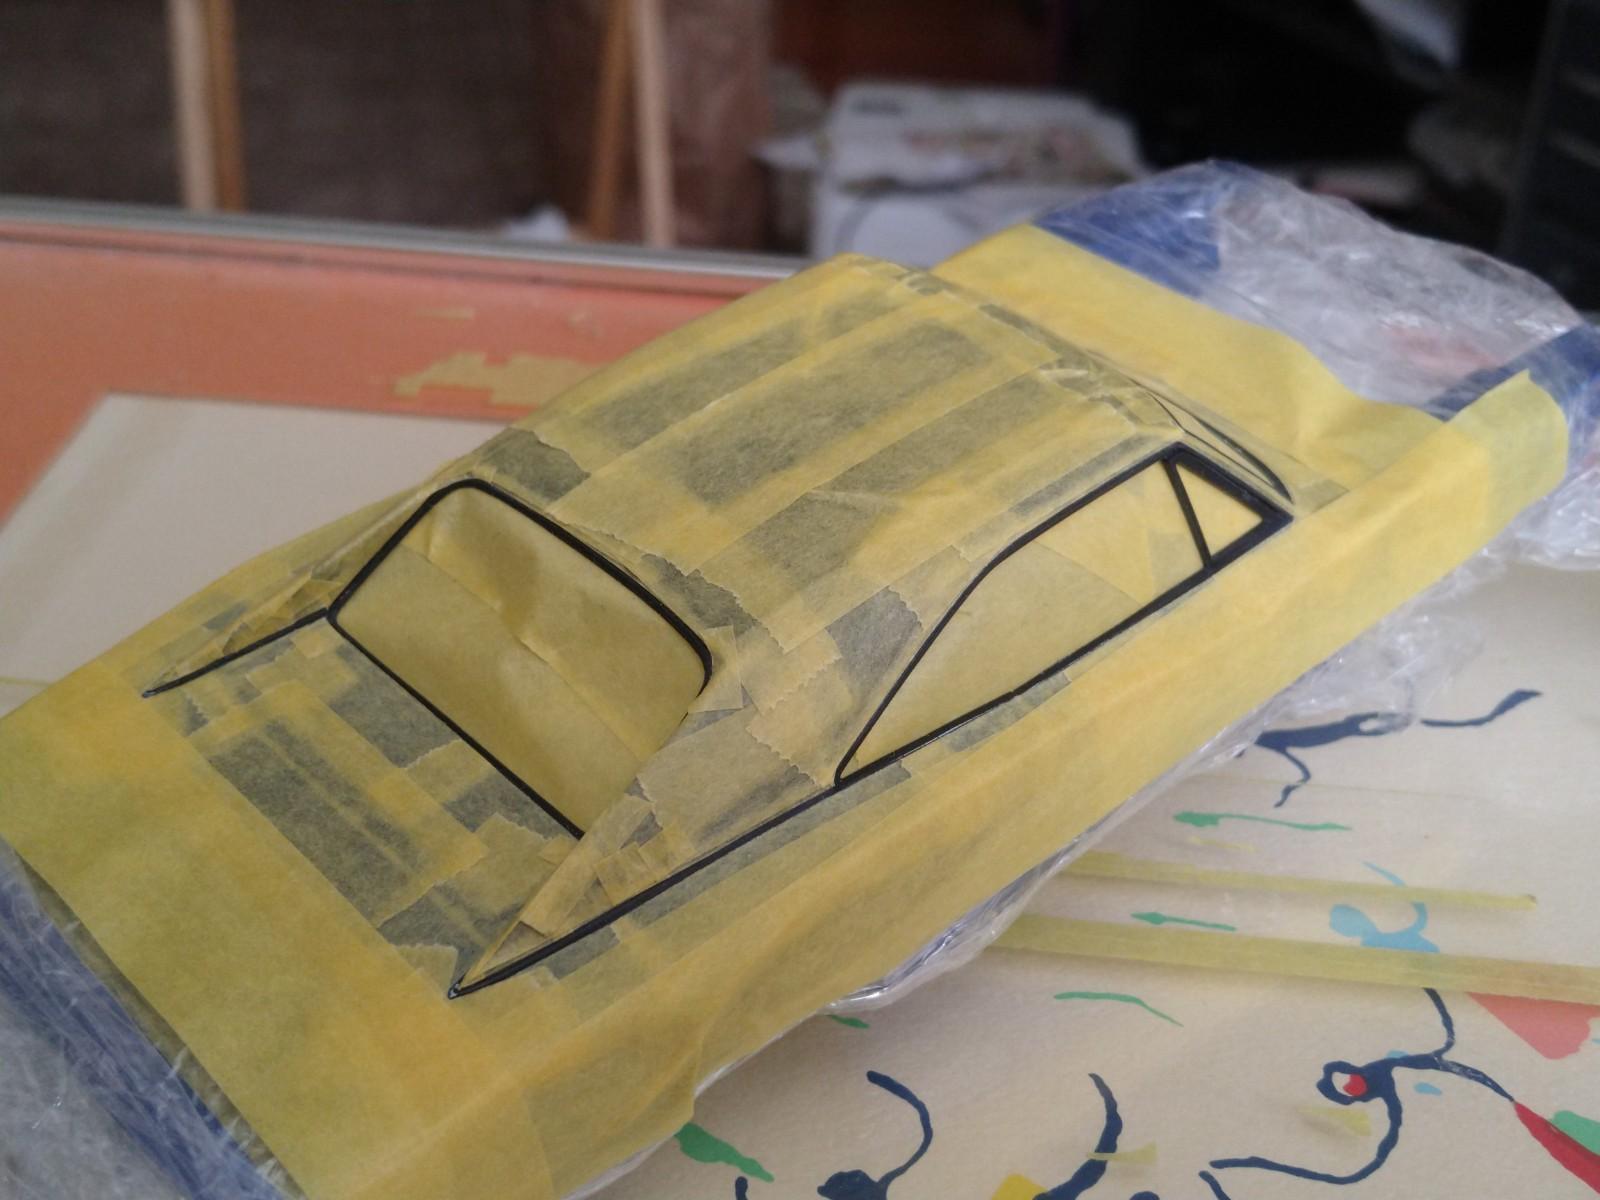
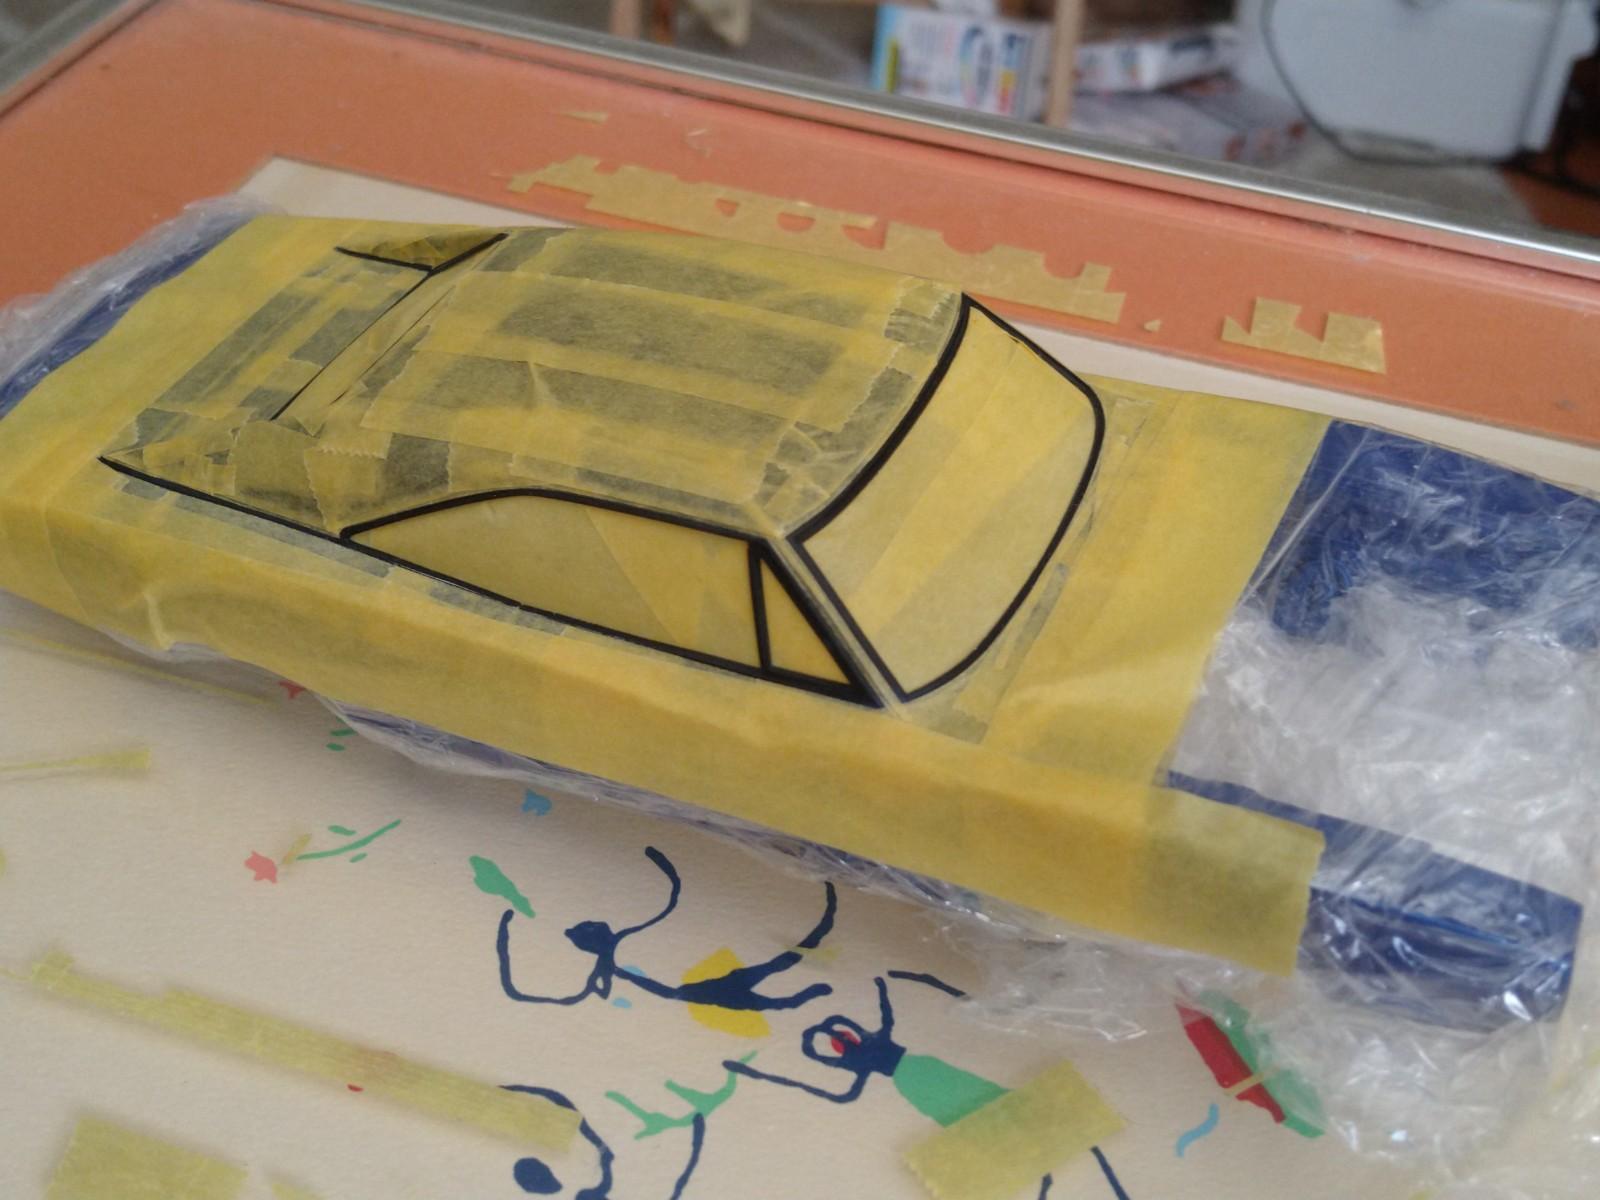
Thank you David, I had fun doing the masking job, it gave me something to do. I'm also glad that I sealed in all the trim in with TS-13, because I know from previous experience it would have rubbed off. I'm just happy to get a halfway decent finish overall. I'm going to get the engine detail set and the interior detail set to make it look a little more interesting. I see modelers here making all the custom parts and cutting up bodies etc.. and that really is awesome. I would like to make stuff like that too and I think this is the best place to learn that kind of thing. Thank you again David for the feedback, I really do appreciate it. Best regards, Steve -
1/25 Revell 1969 Dodge Charger R/T body wip pics.
wisco8 replied to wisco8's topic in WIP: Model Cars
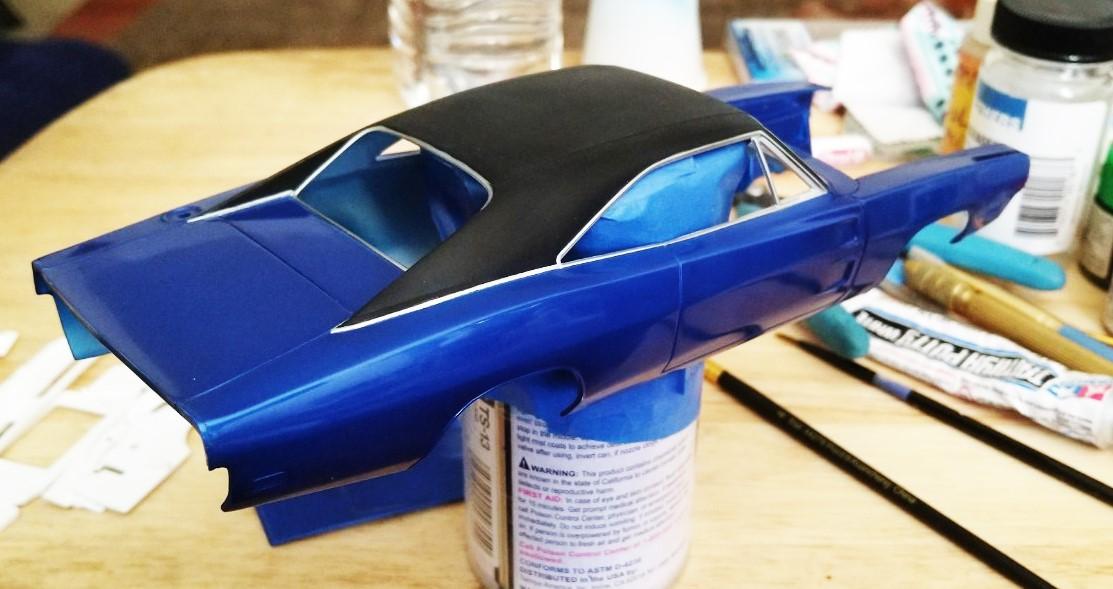
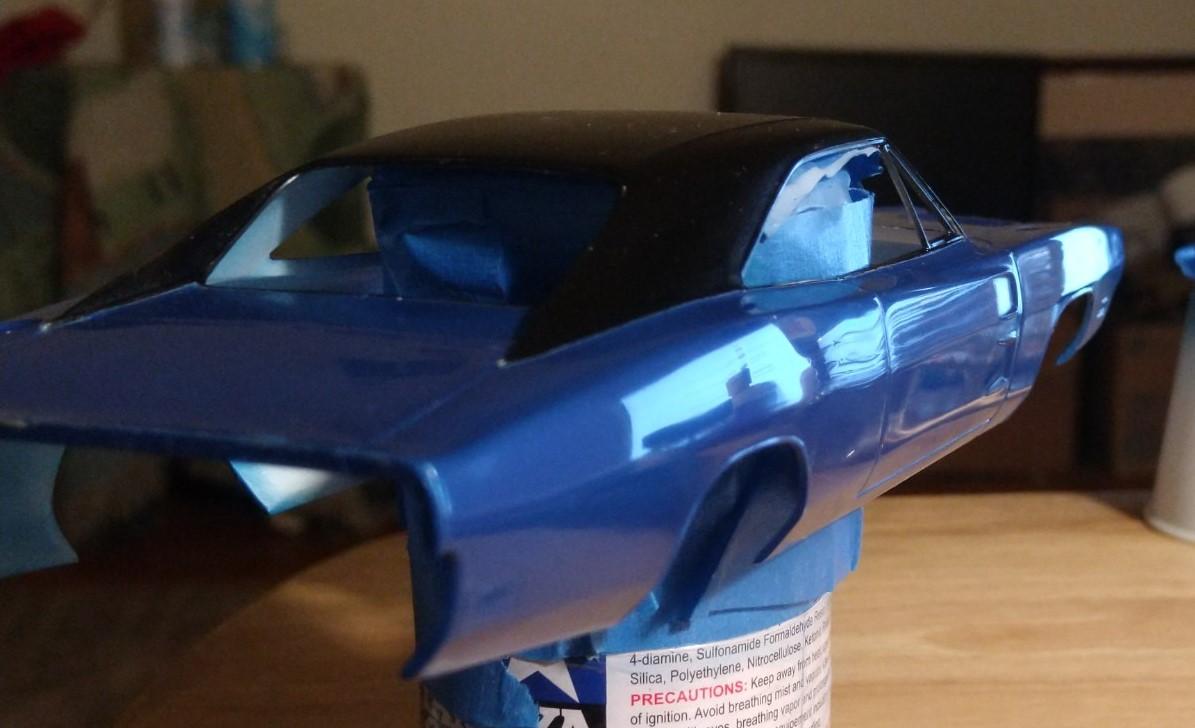
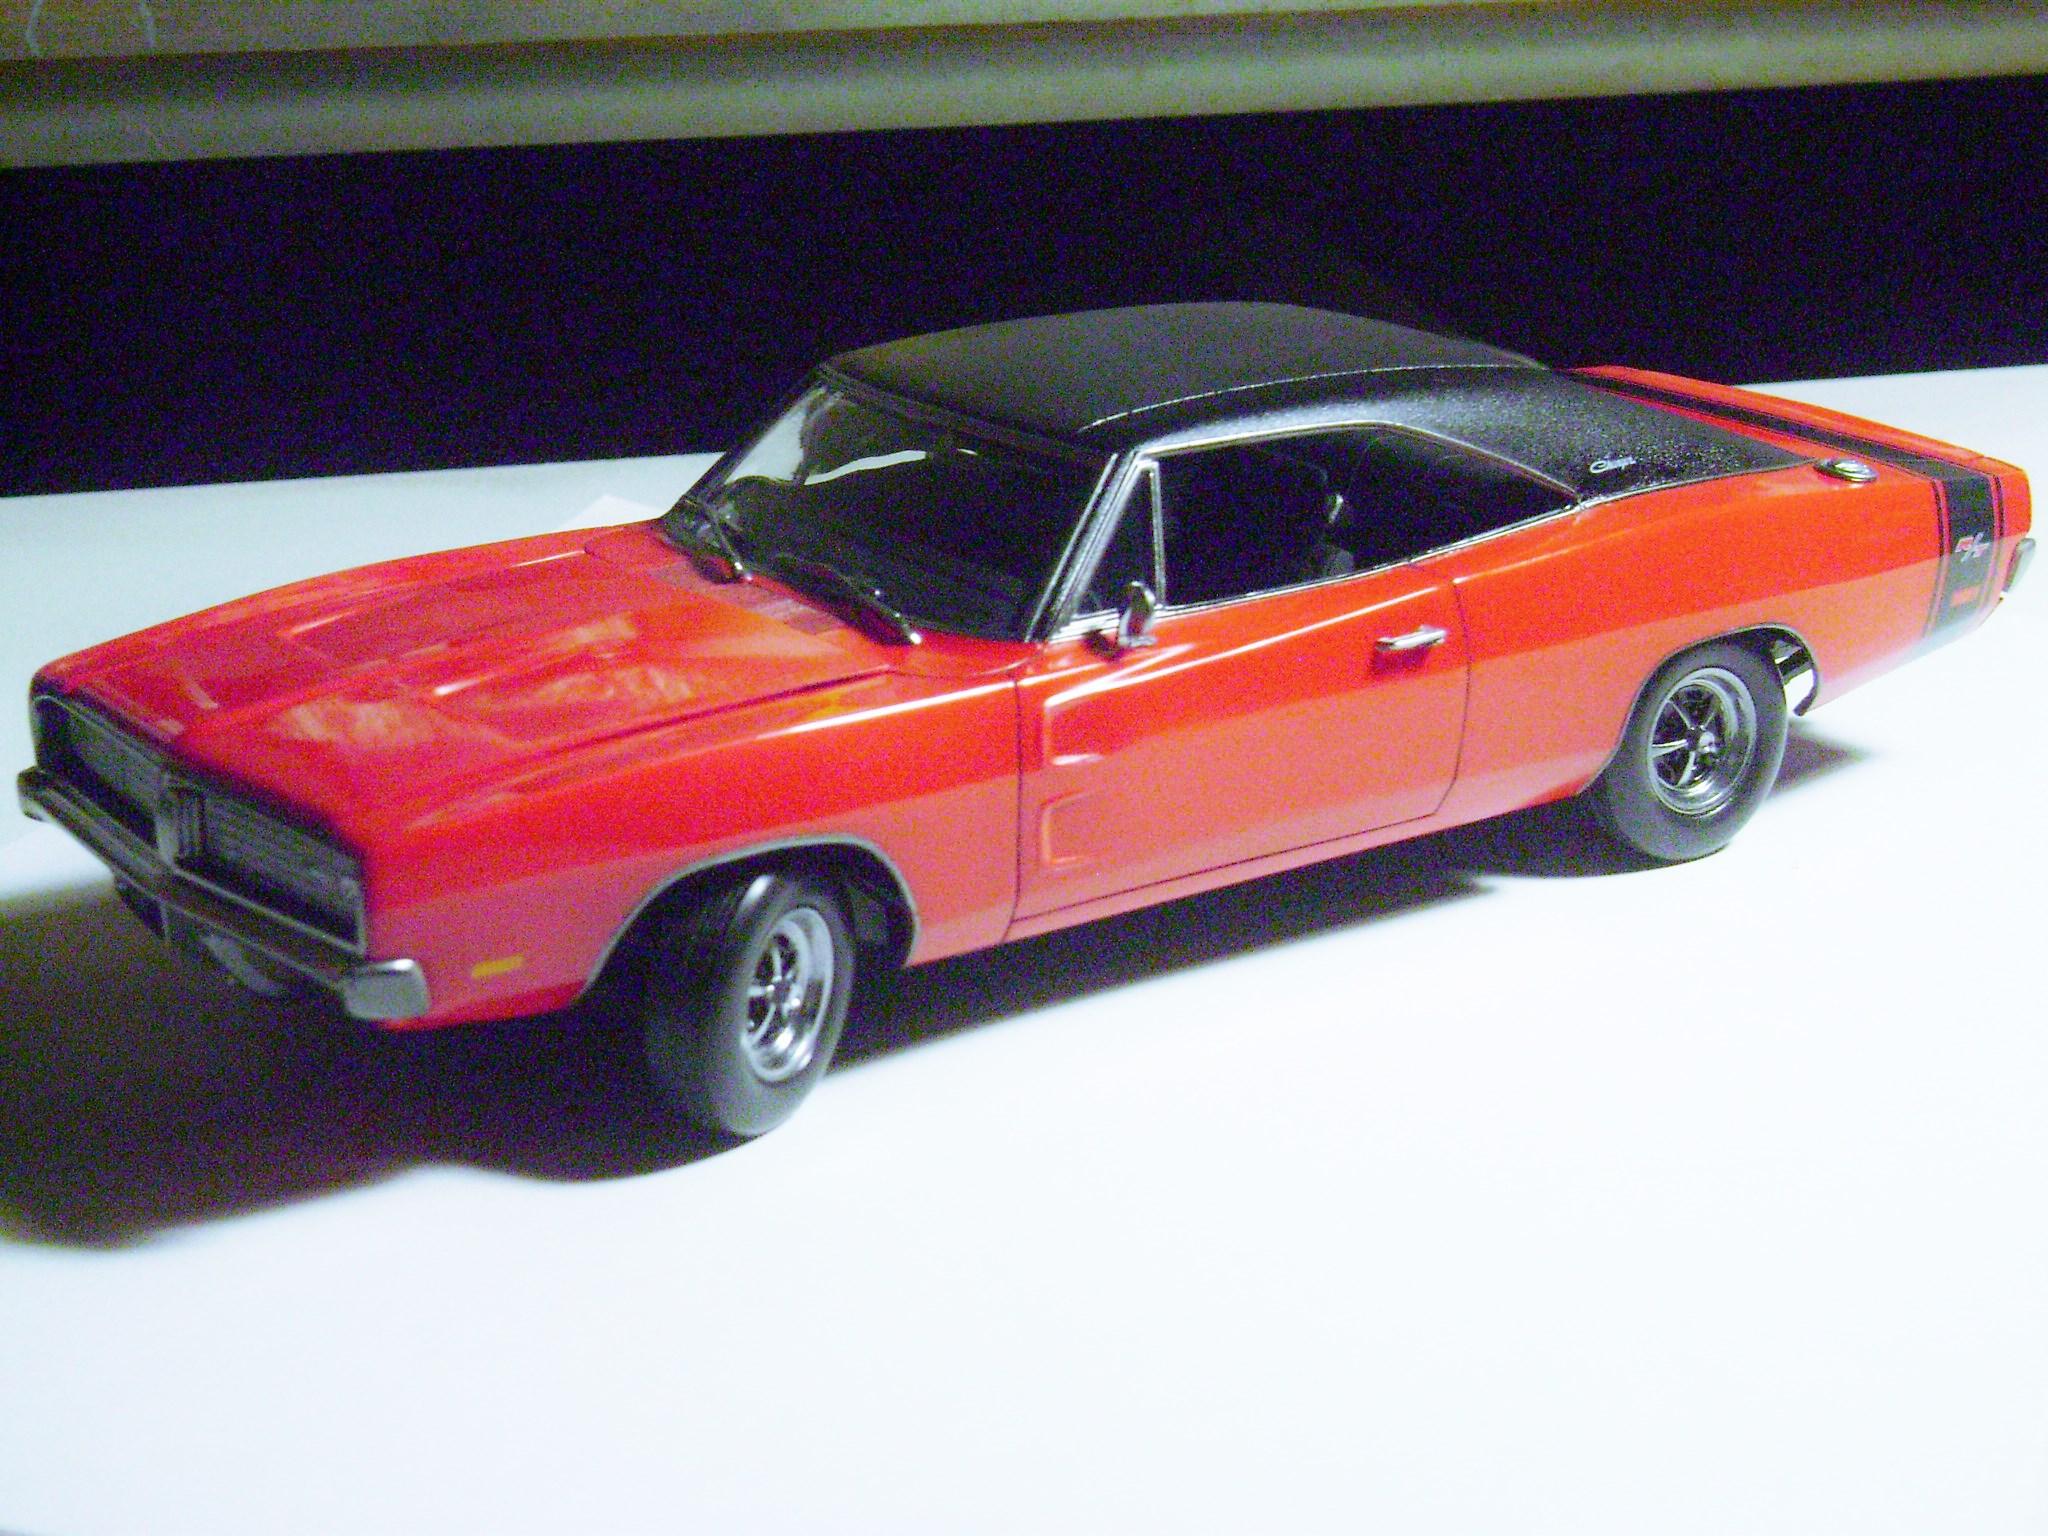
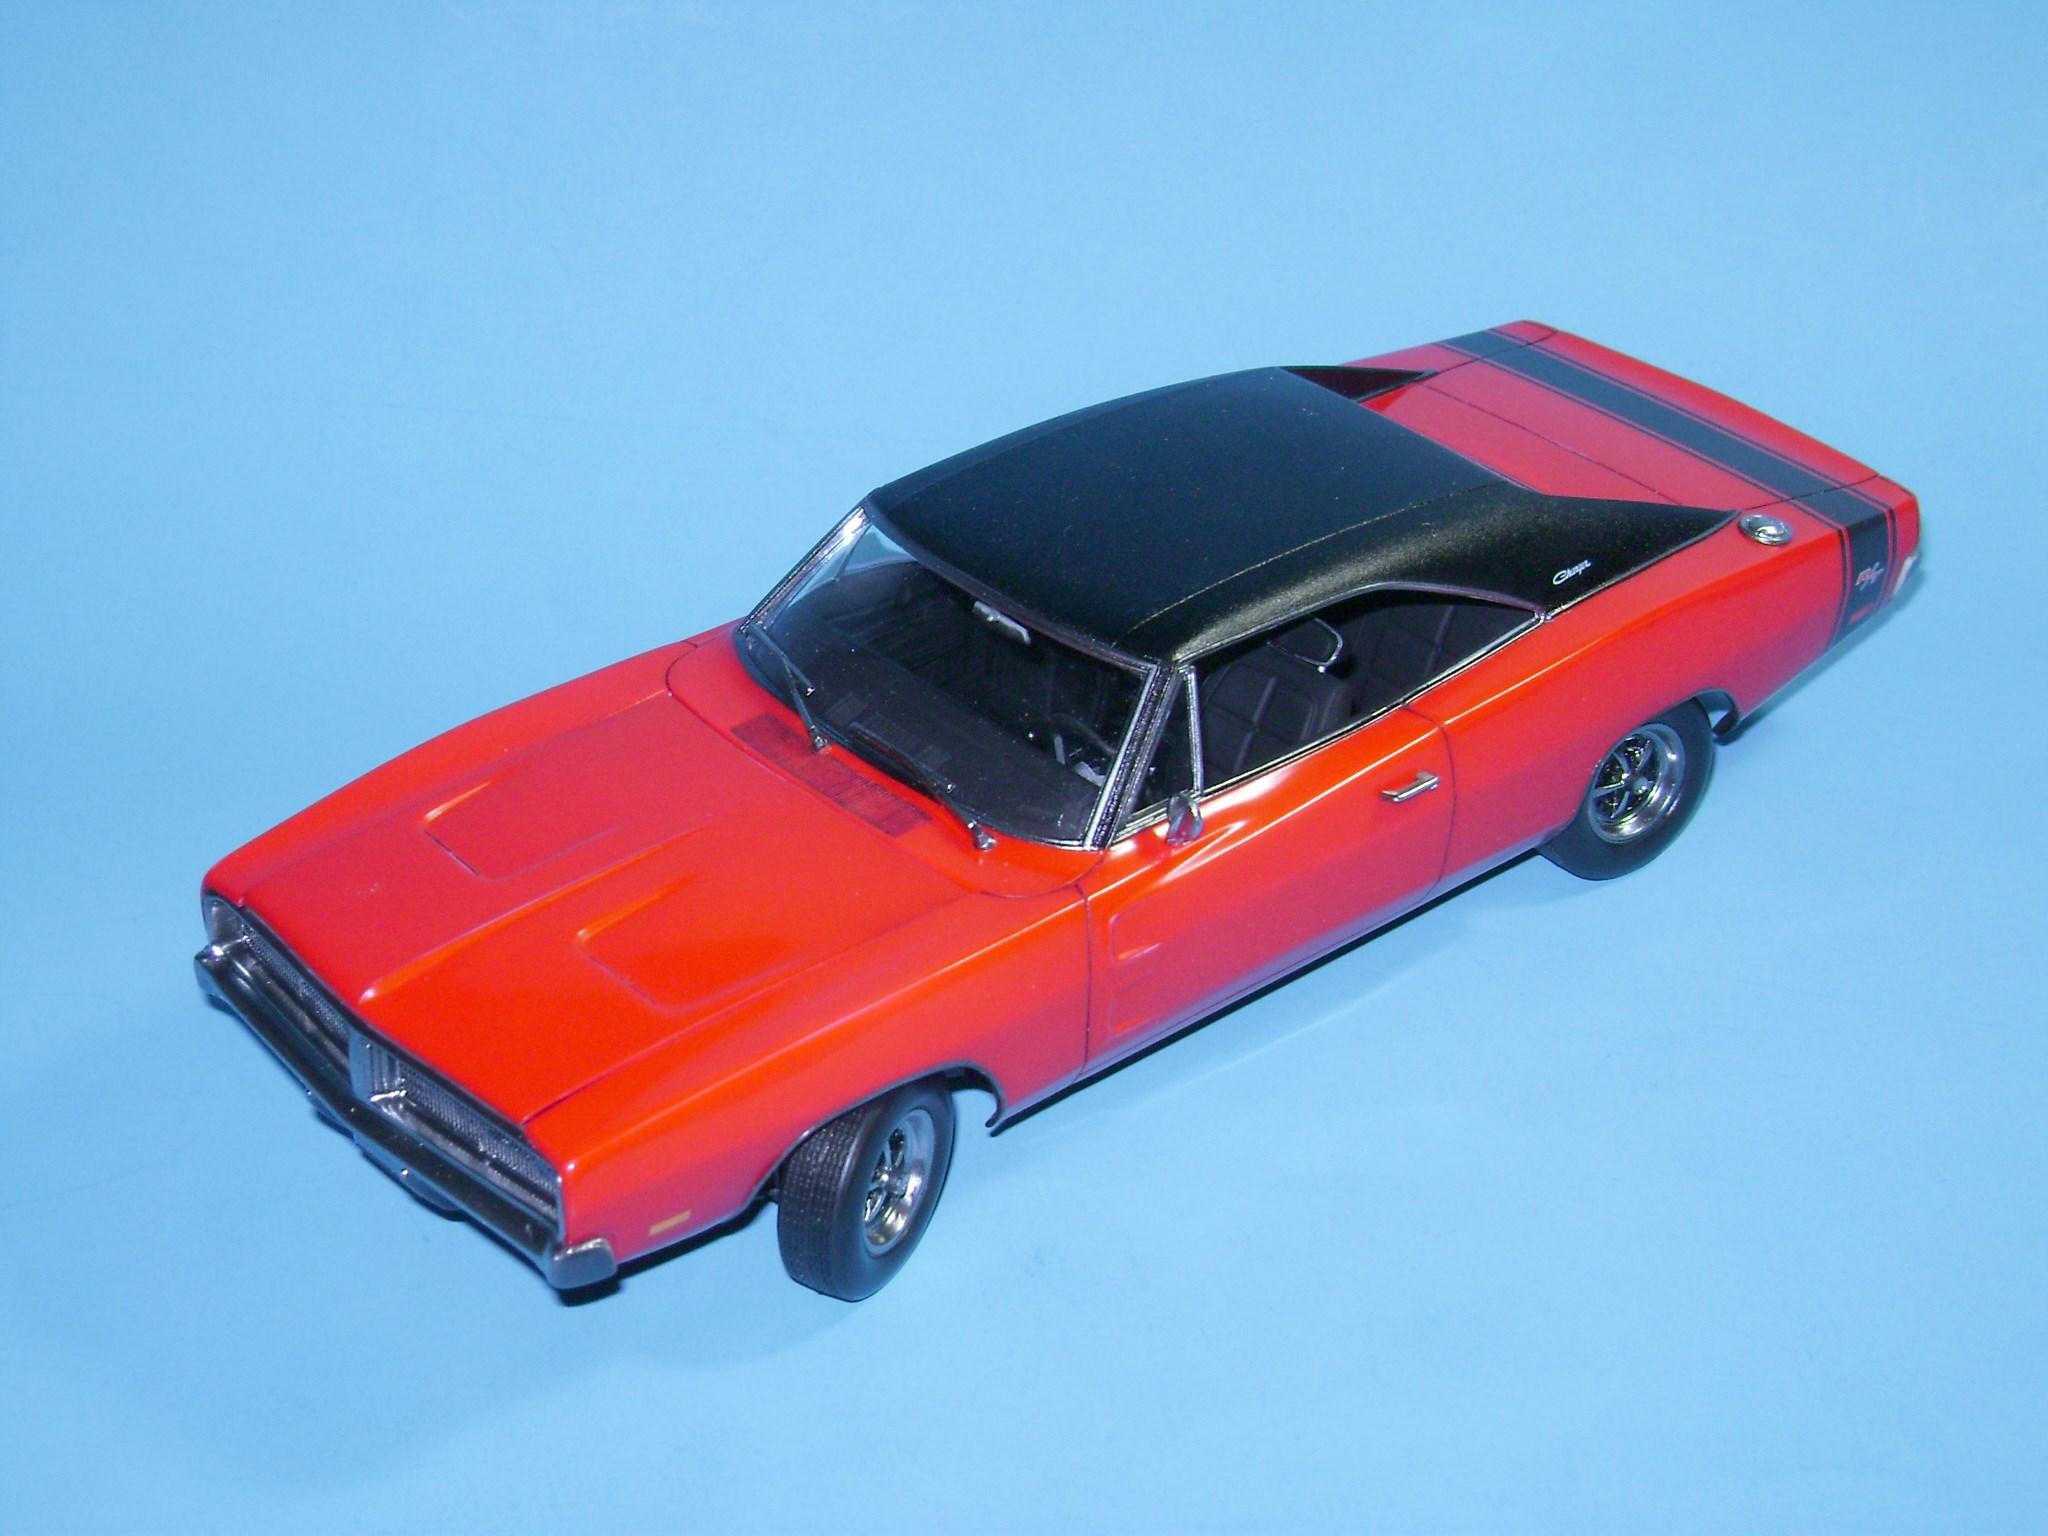
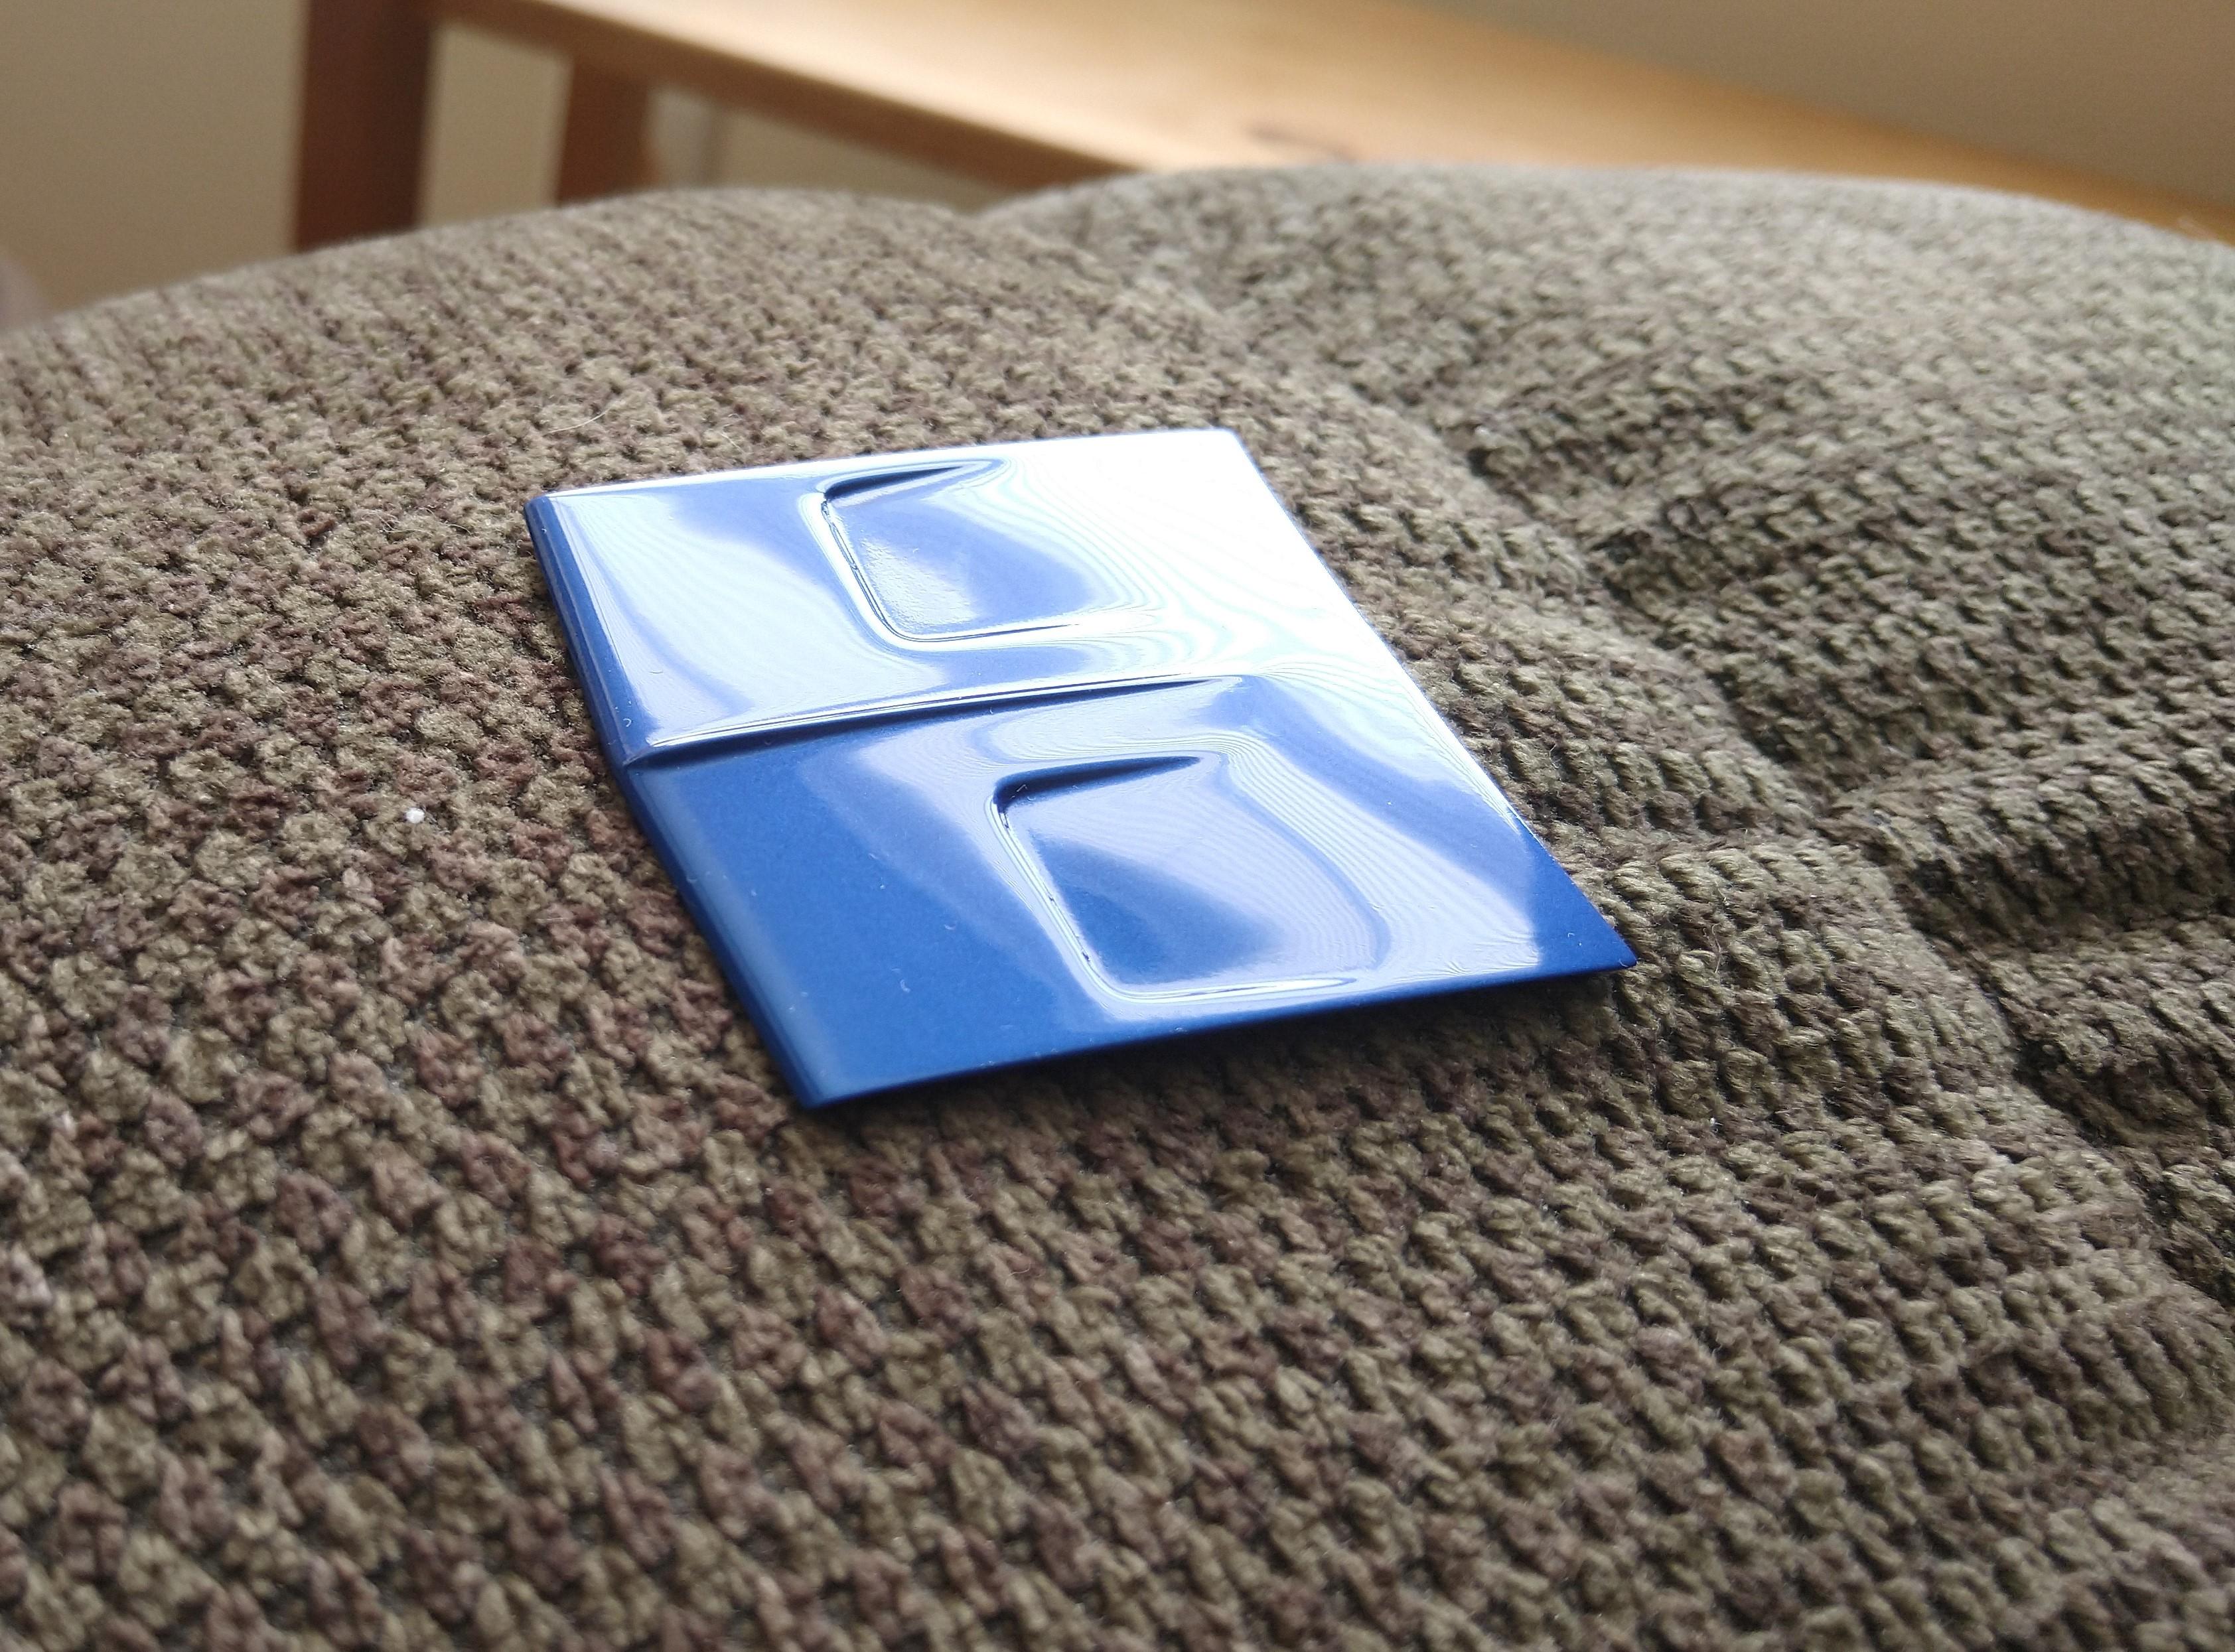
Beauty trim applied and sealed.
-
1/25 Revell 1969 Dodge Charger R/T body wip pics.
wisco8 replied to wisco8's topic in WIP: Model Cars
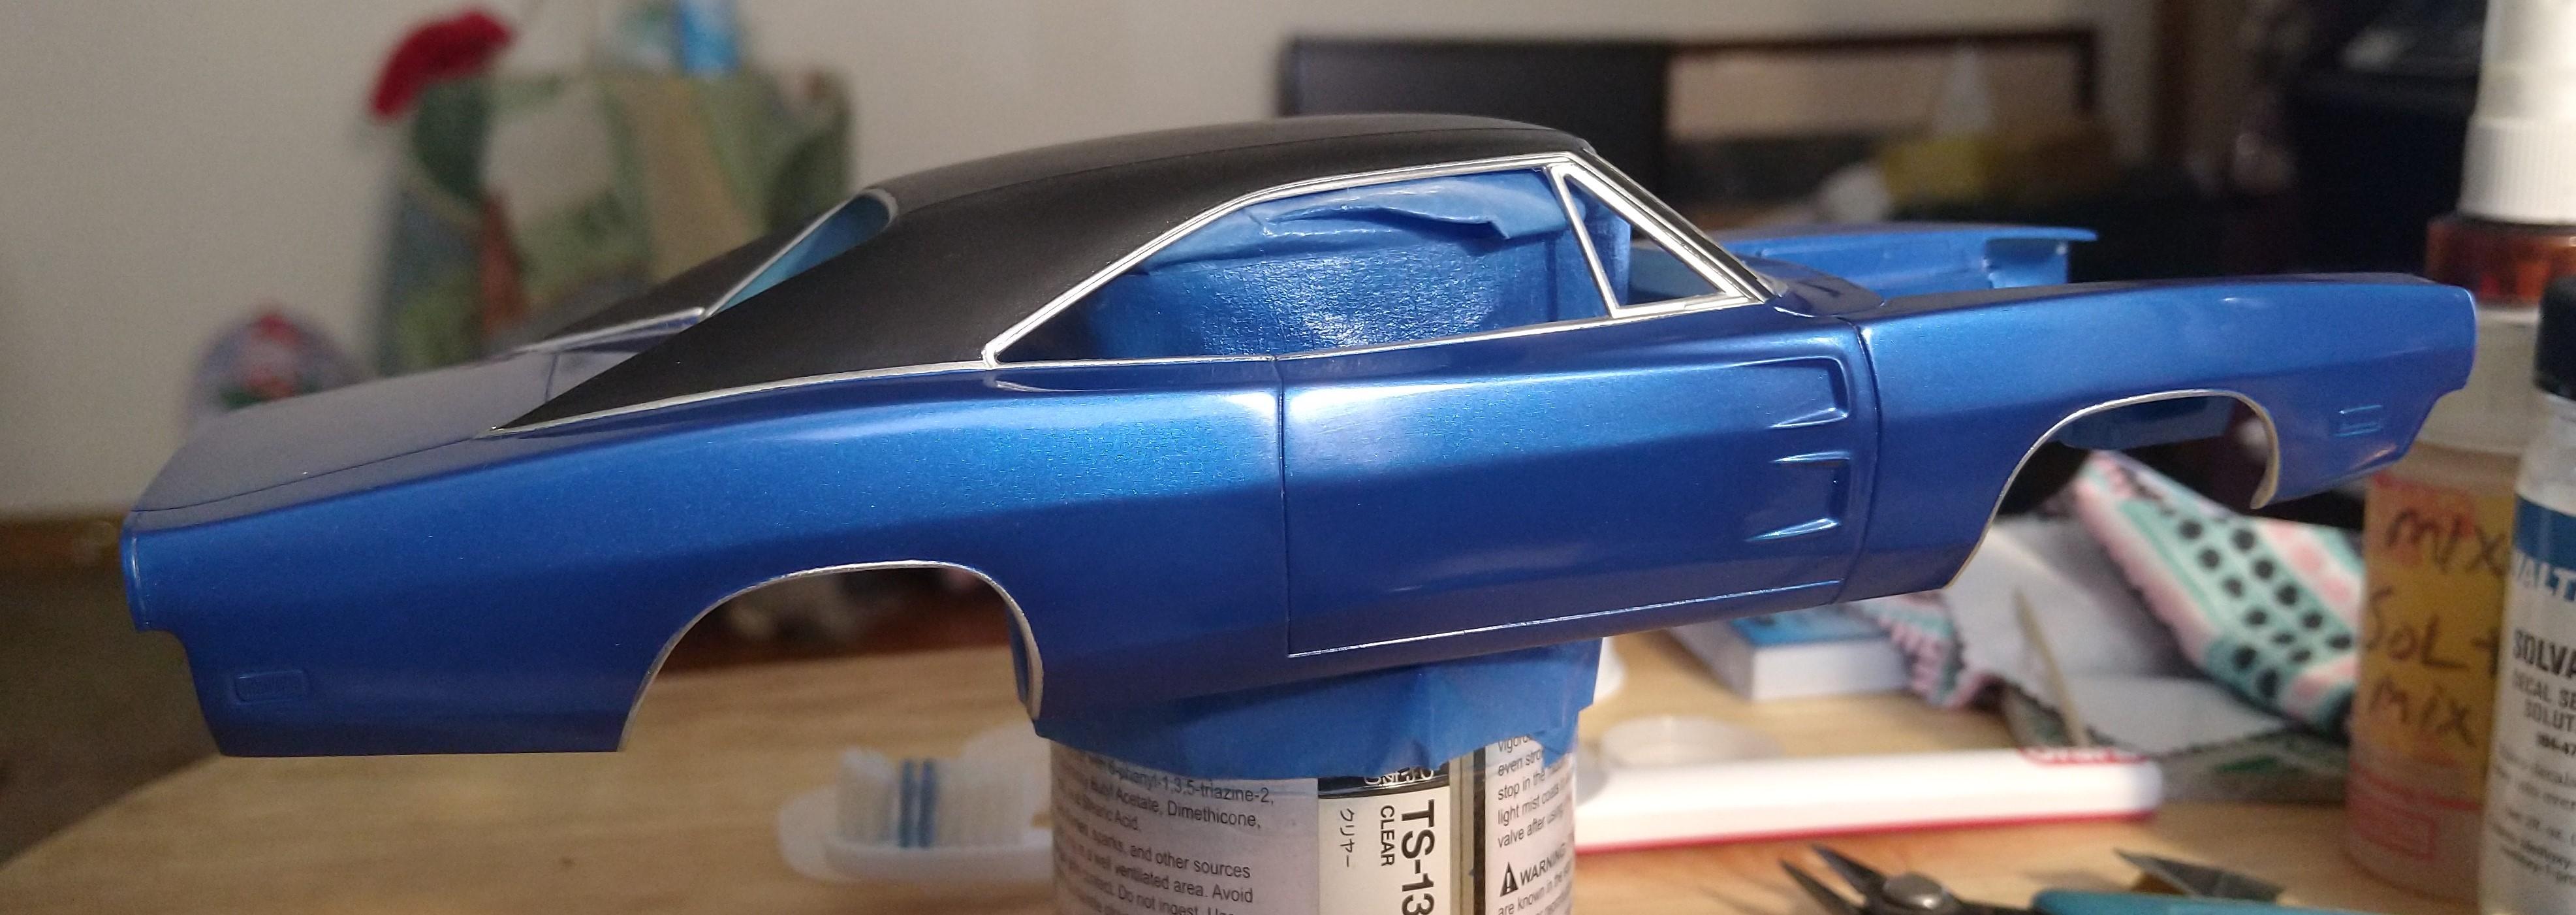
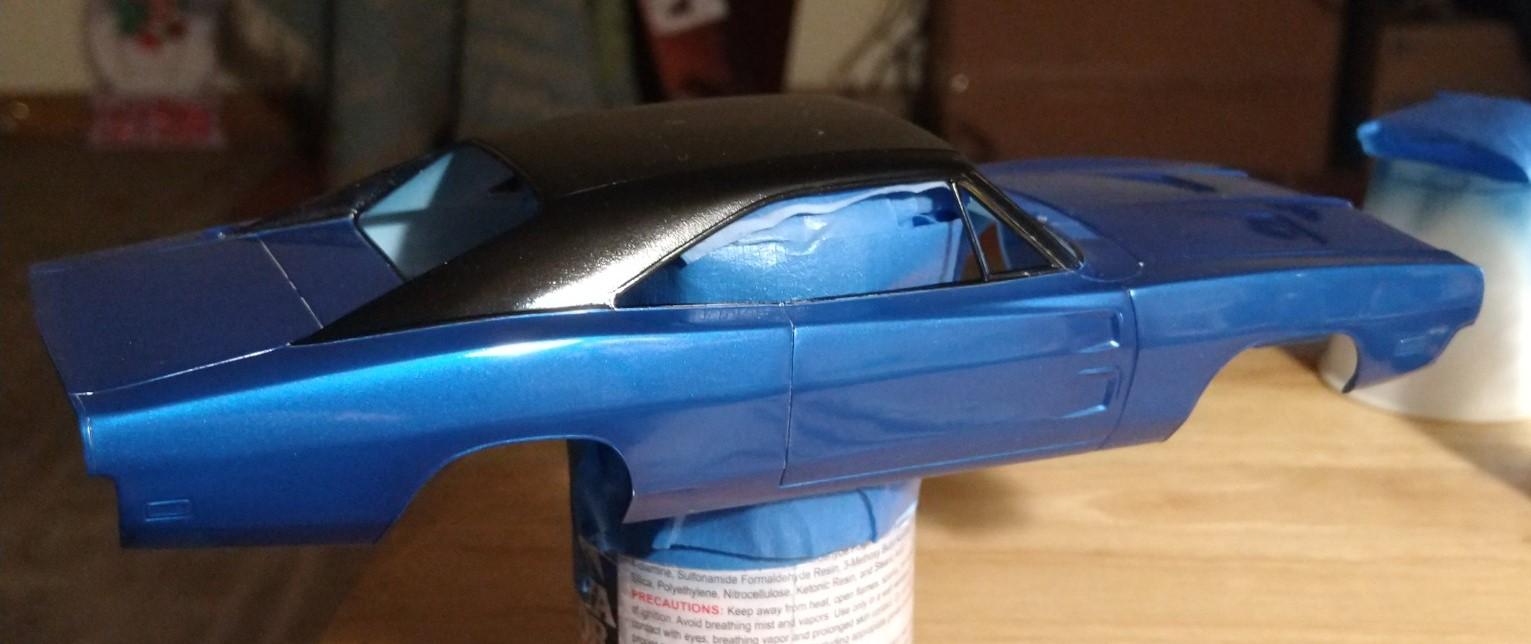
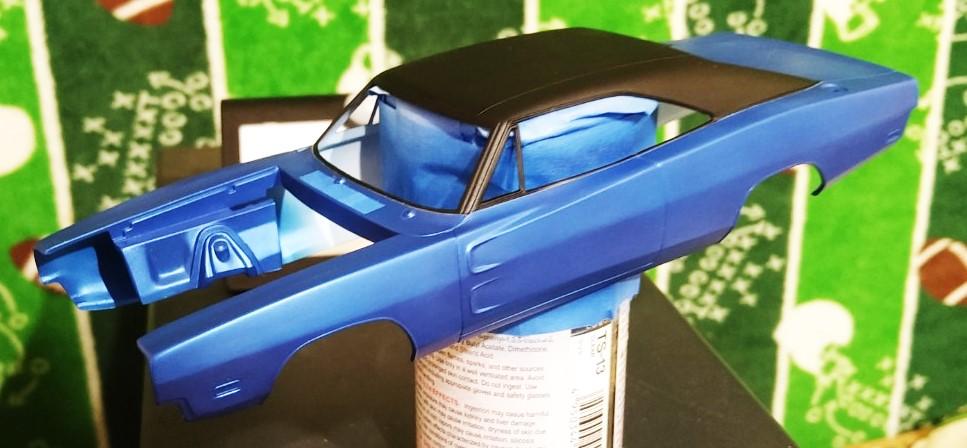
Flat coat on roof and burnished down with finger oil and Alclad2 chrome trim applied.I cleared over the chrome trim with decanted TS-13 to seal it in from accidental finger rubbing. Steve
-
Wow!! That is very excellent fine tuning. Its amazing your making all the real parts down to a smaller scale. All I can say is Ill be watching and learning. Great work Sir, Steve
-
1/25 Revell 1969 Dodge Charger R/T body wip pics.
wisco8 replied to wisco8's topic in WIP: Model Cars
-
1/25 Revell 1969 Dodge Charger R/T body wip pics.
wisco8 replied to wisco8's topic in WIP: Model Cars
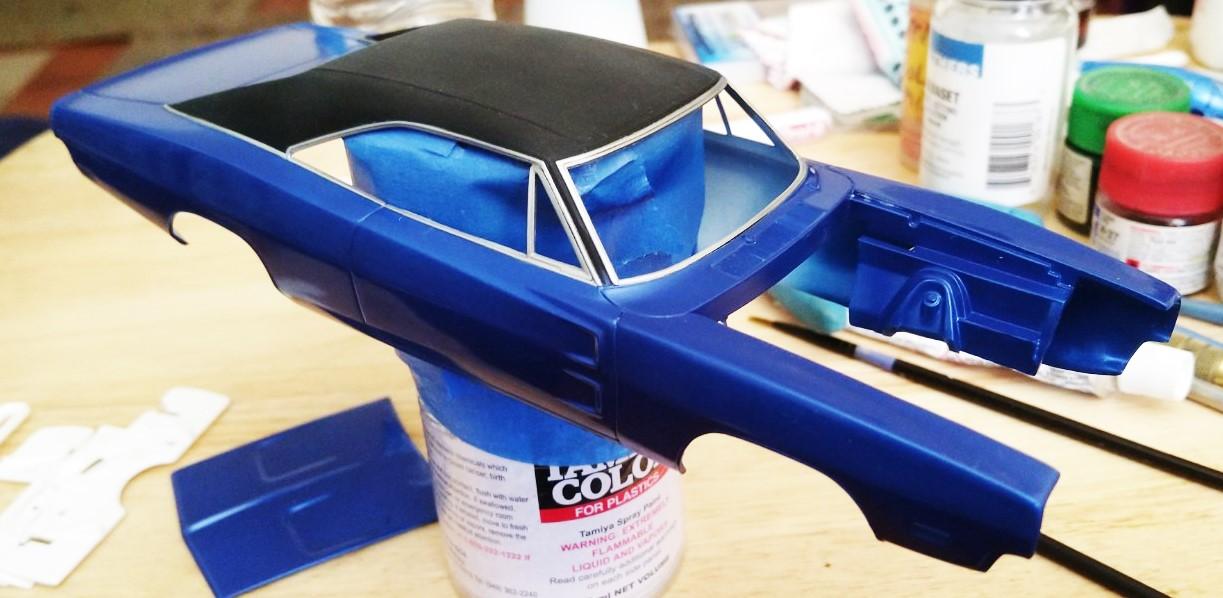
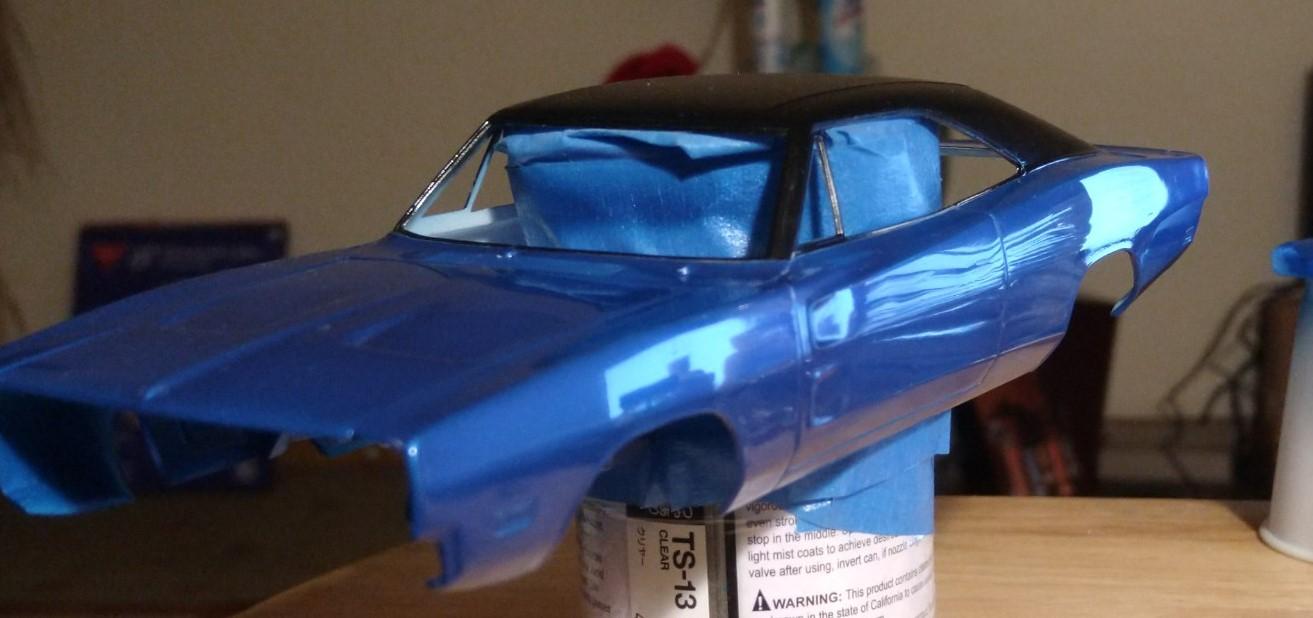
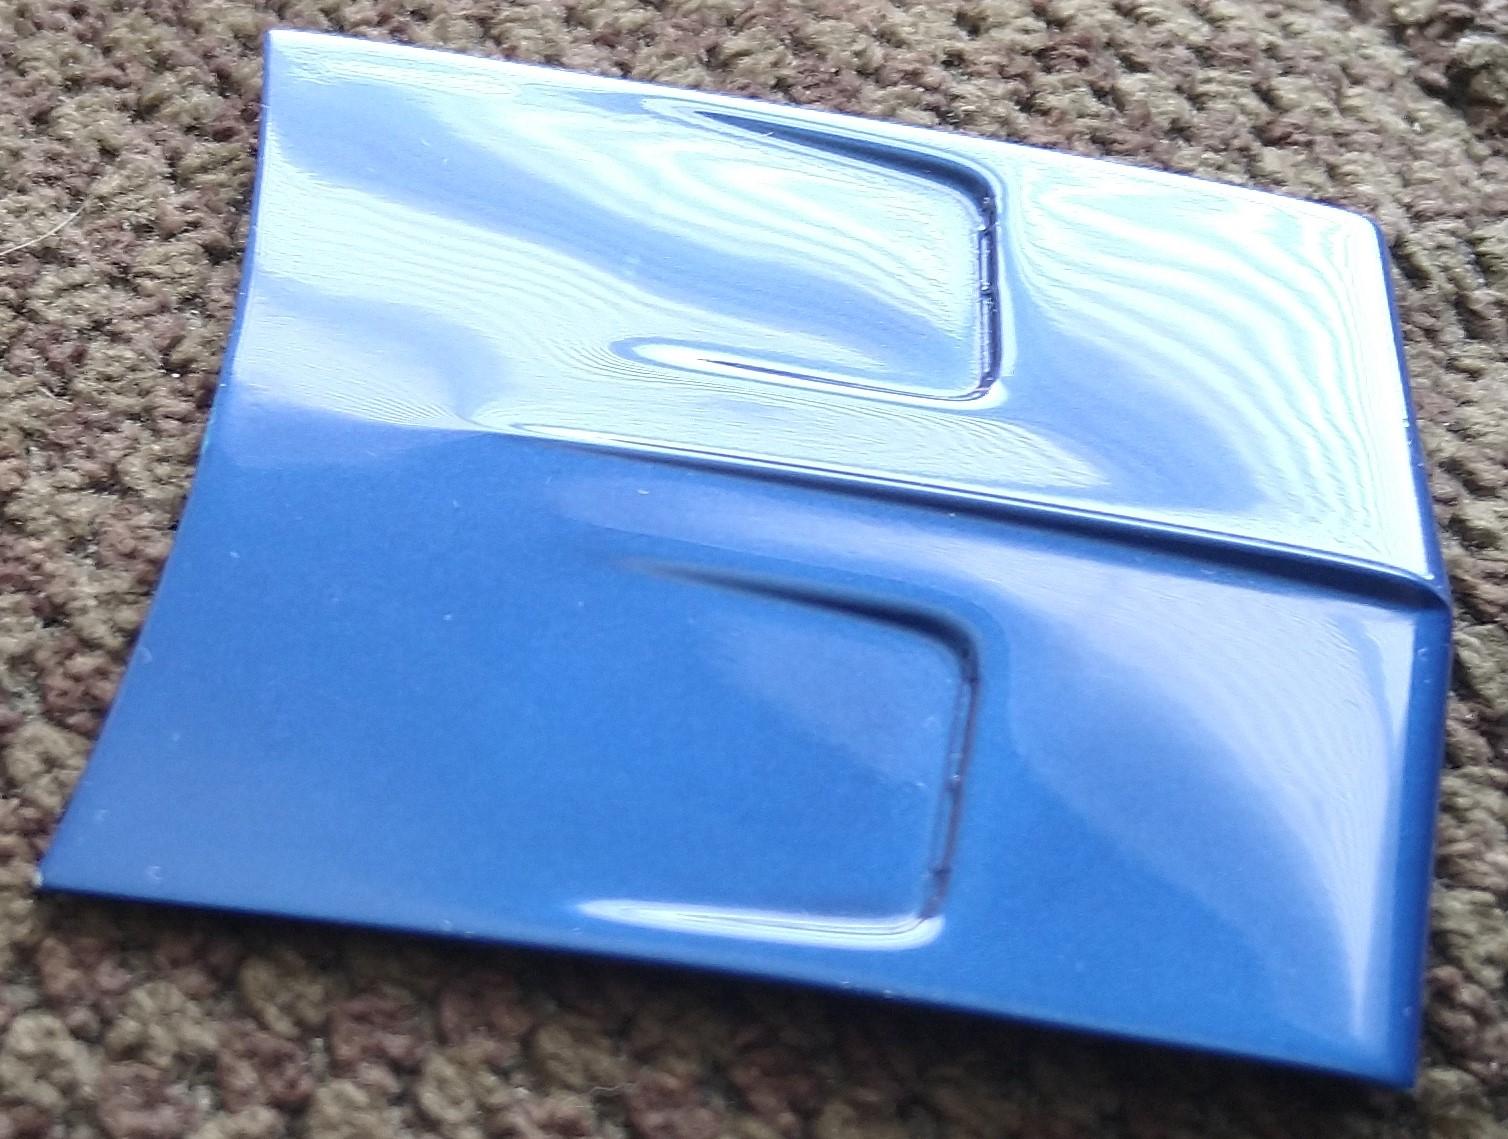
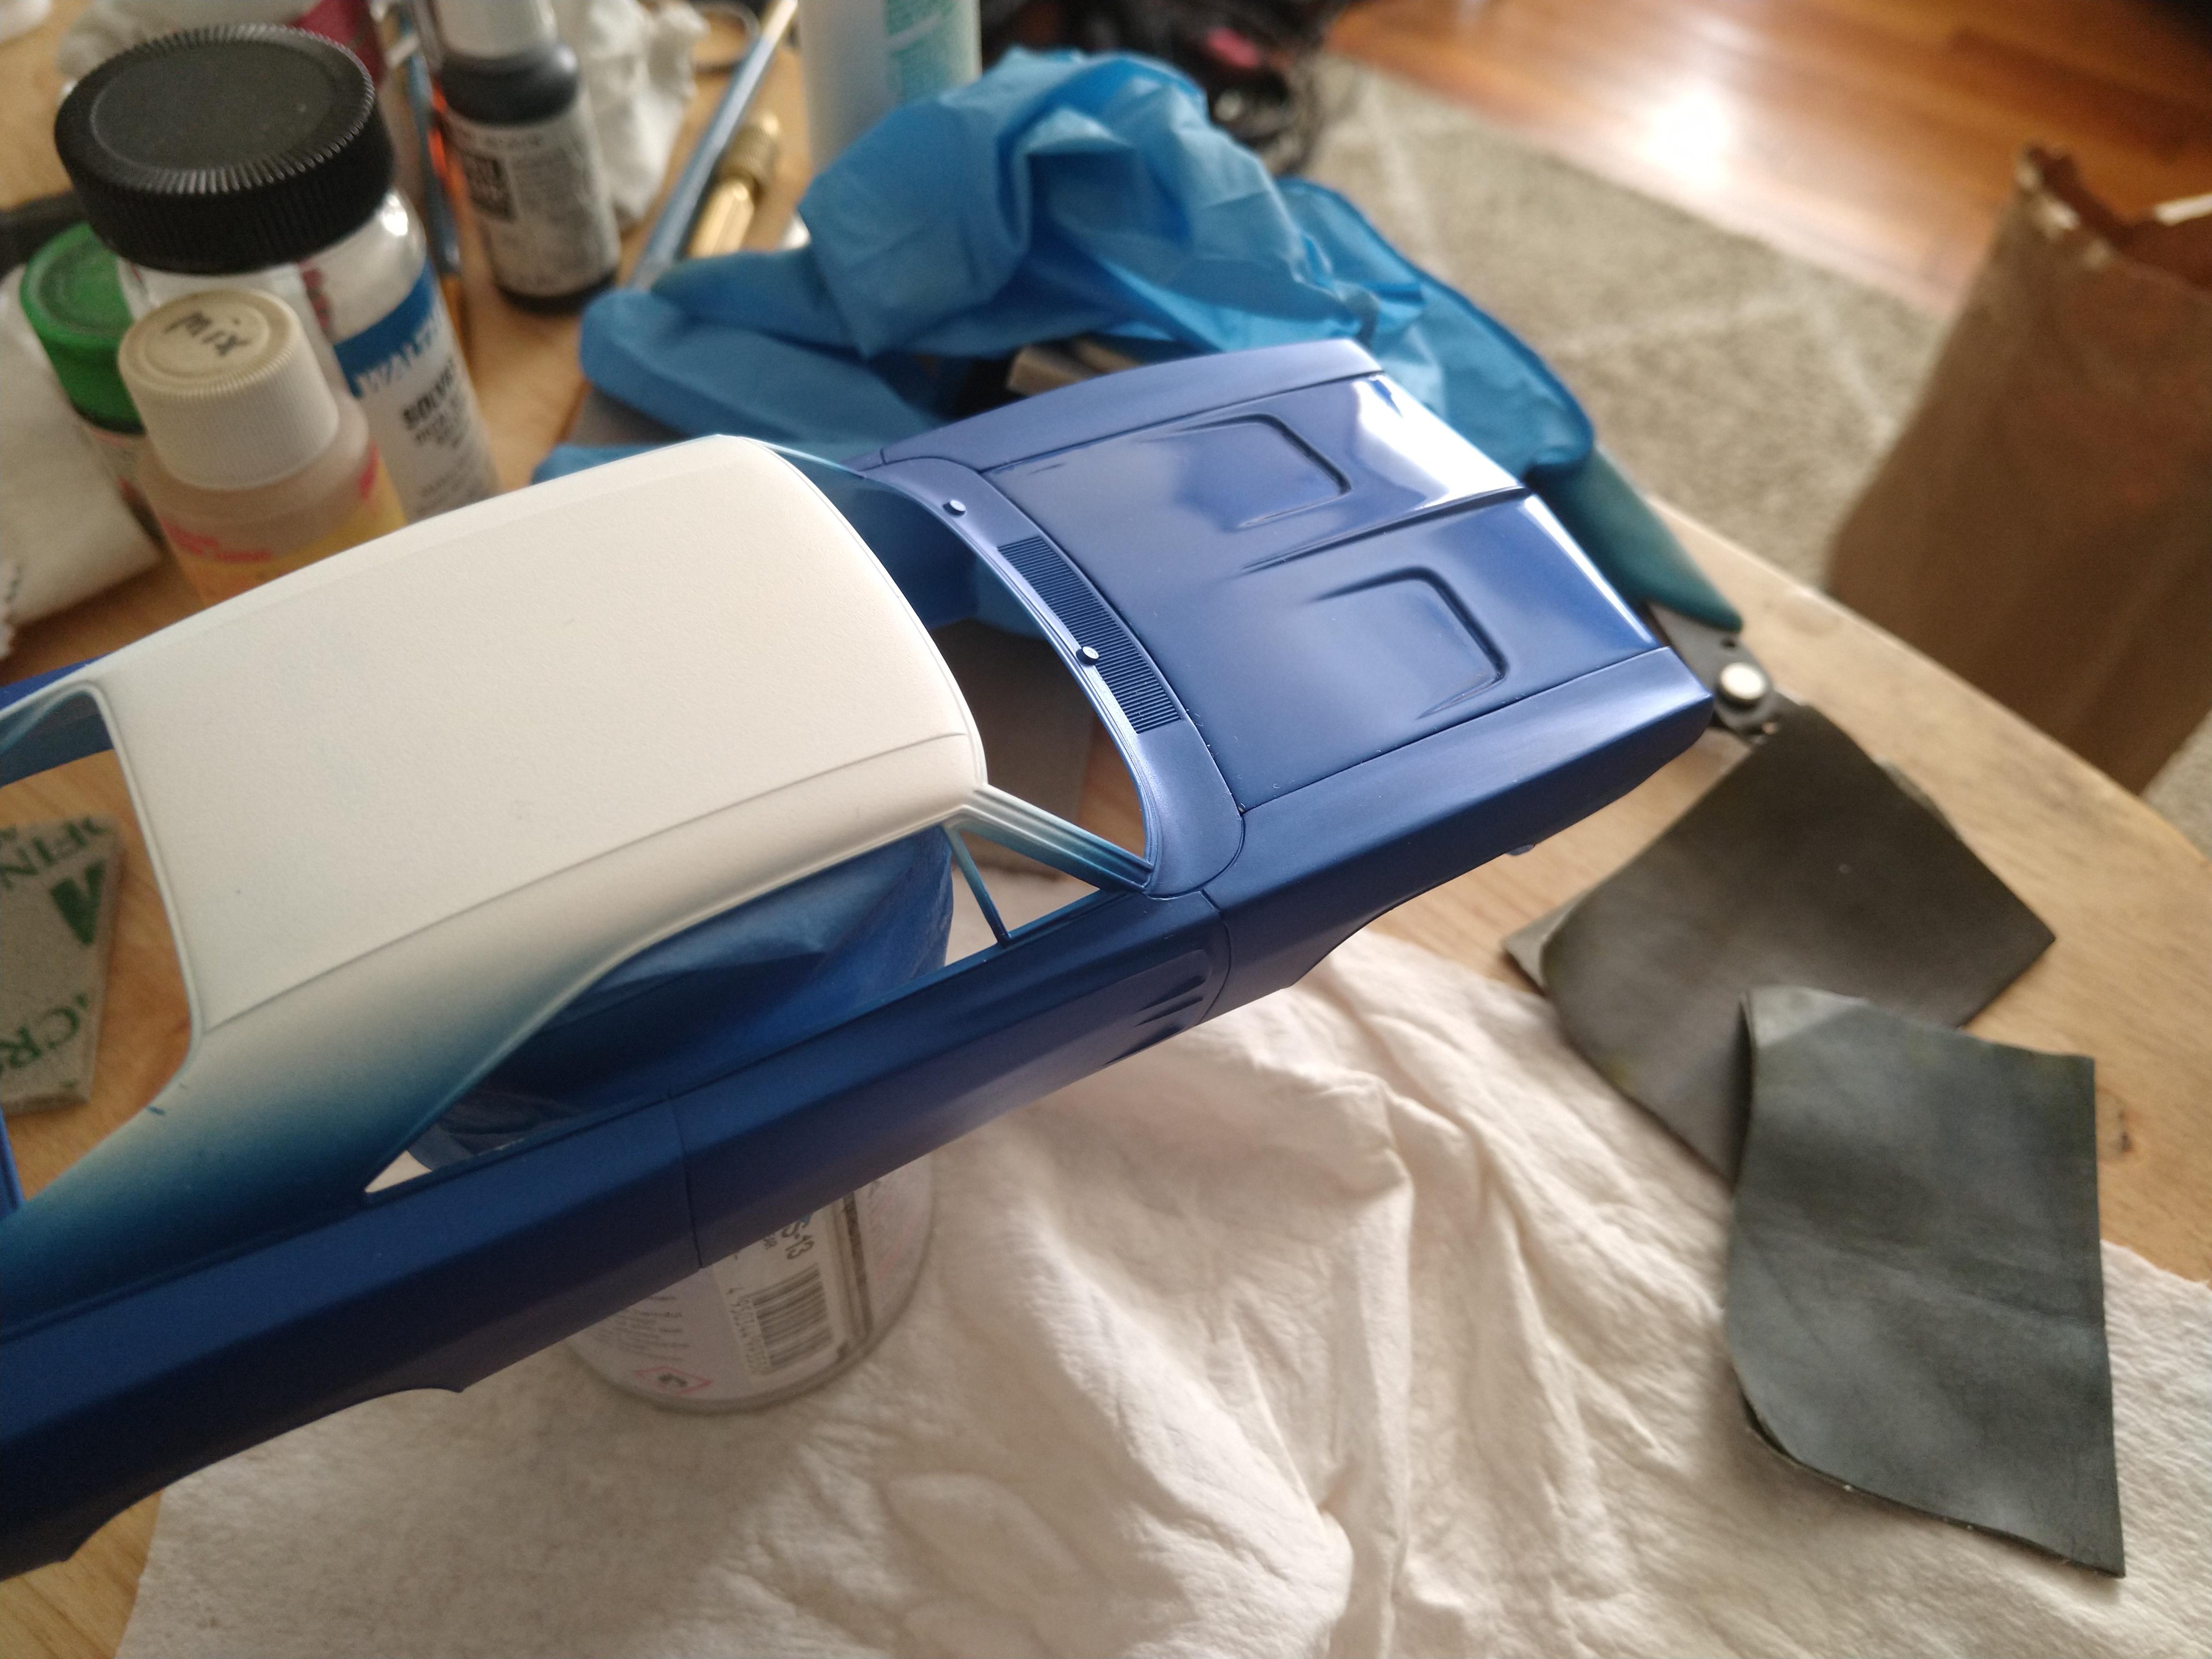
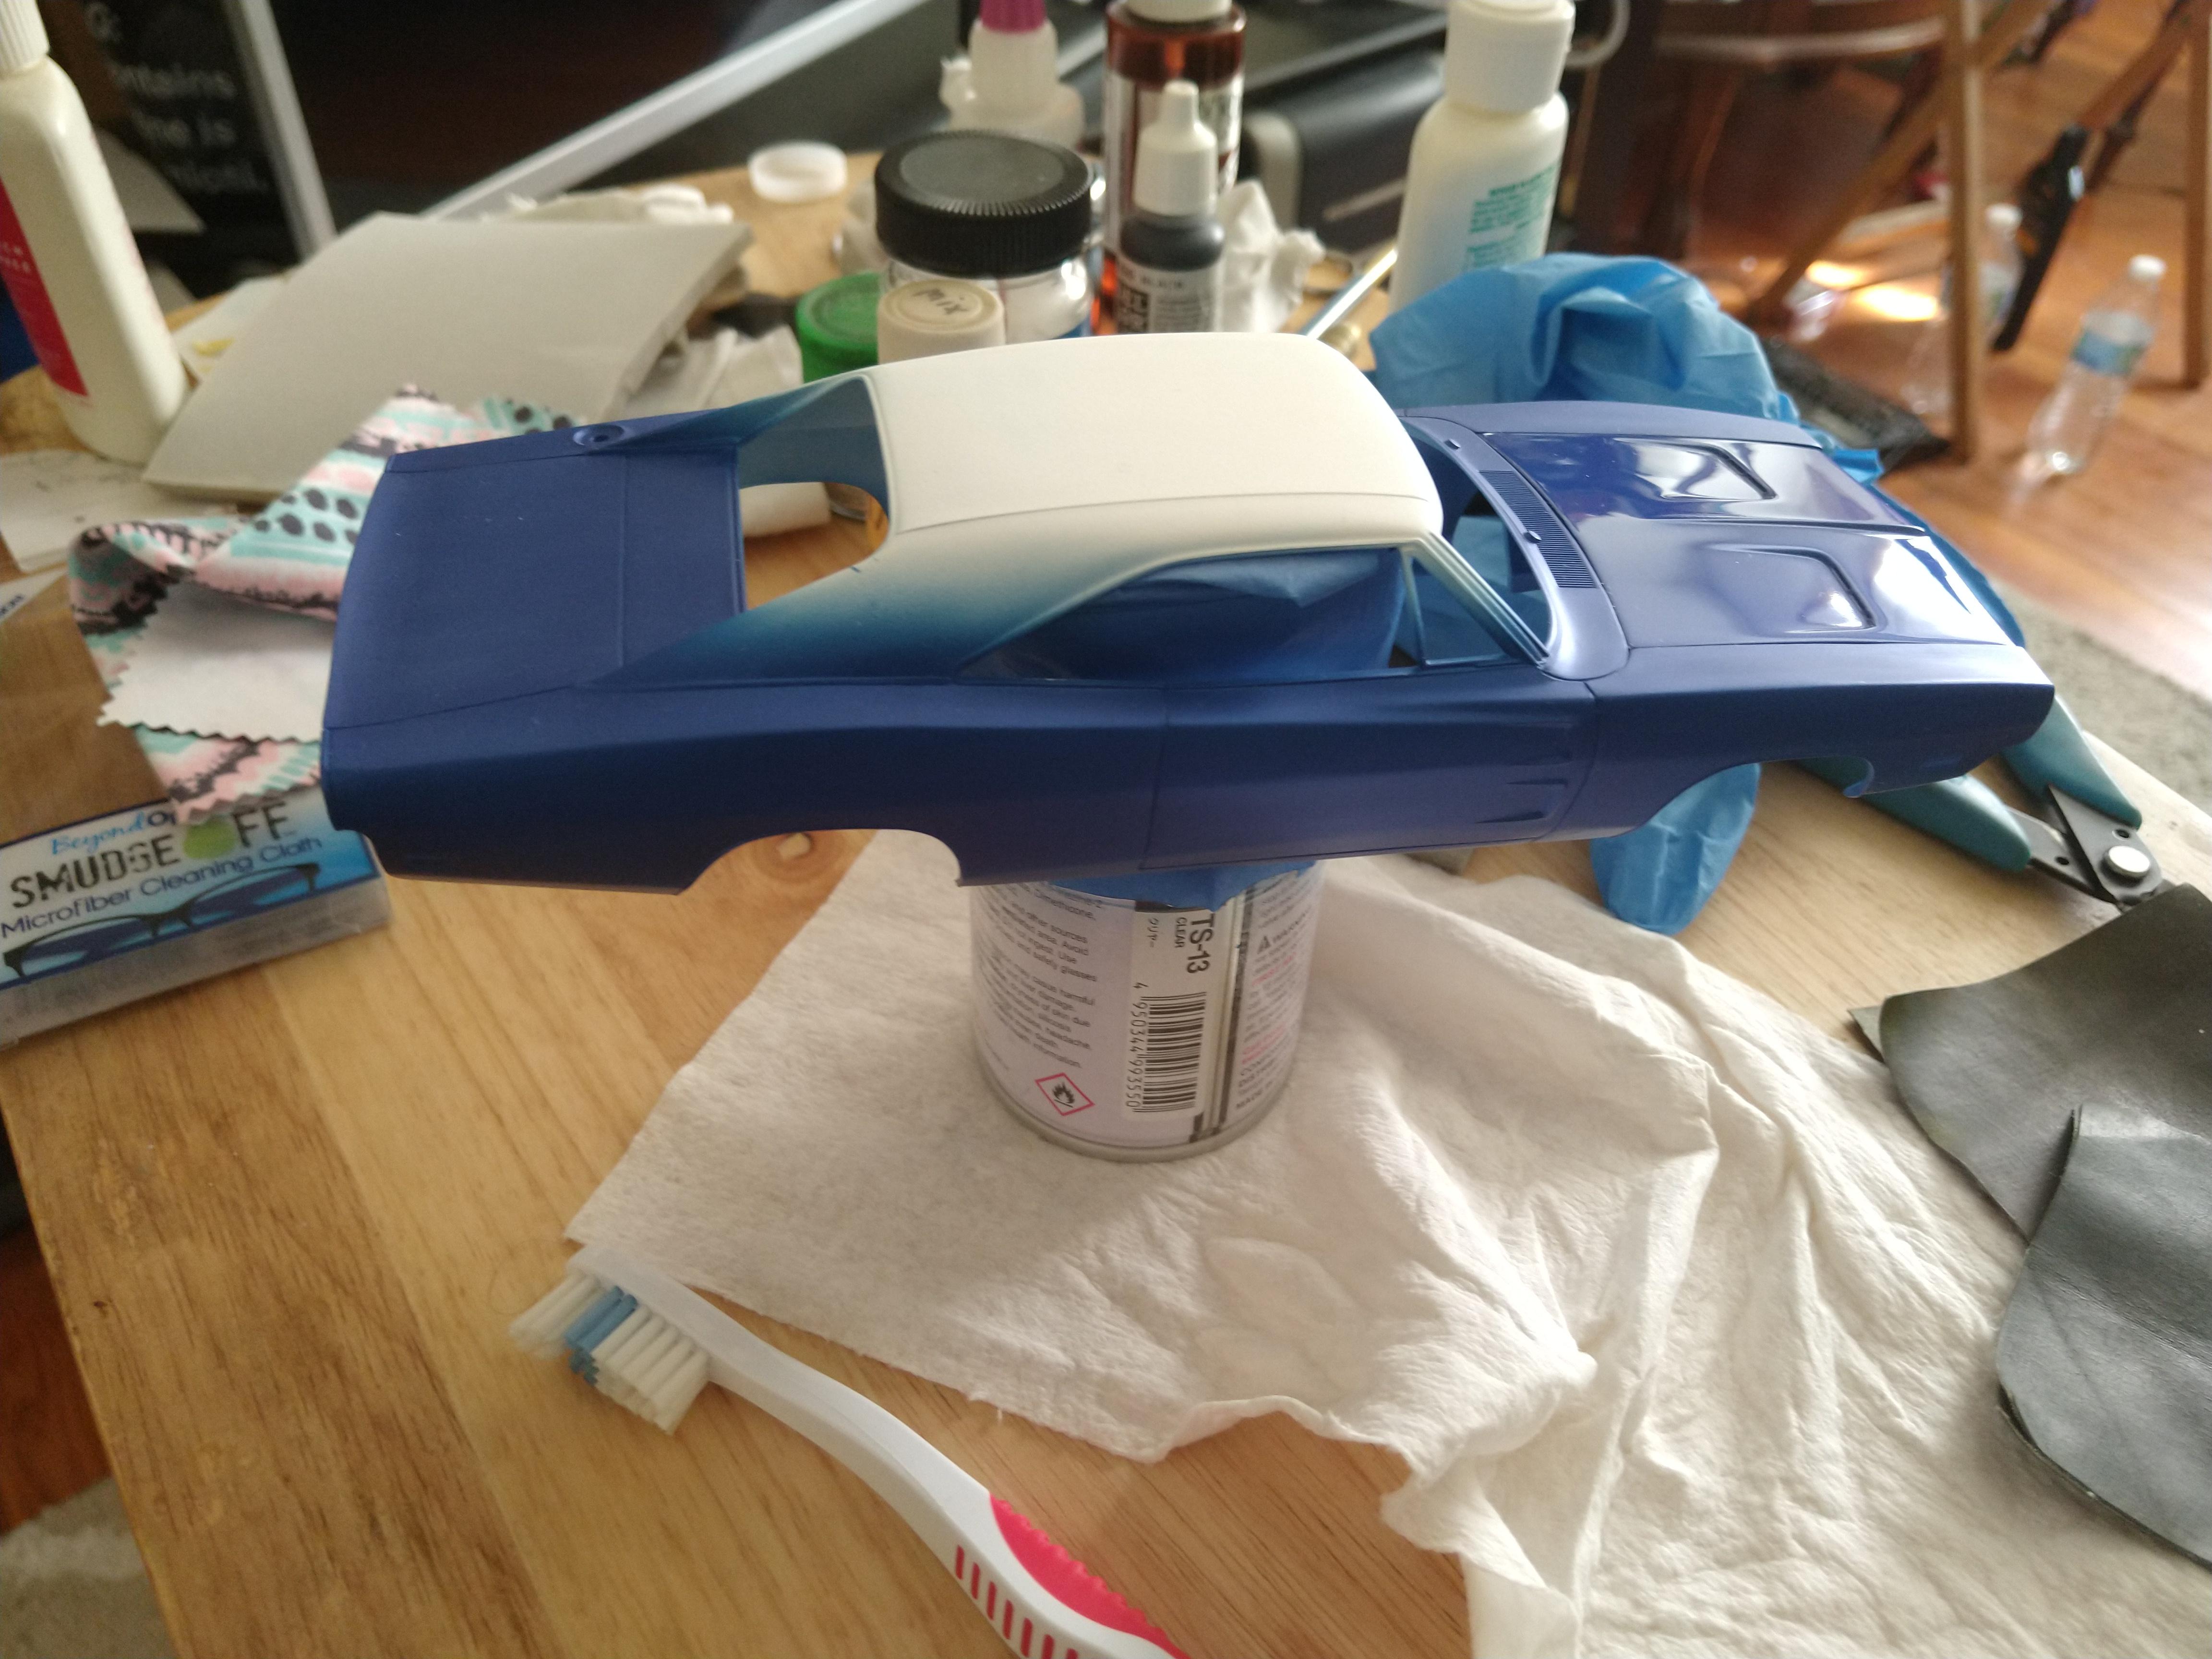
3rd clear coat applied and wet sanded. I think at this point I'm going to lay down the decal and then hide it under a few more light mist coats. Hopefully I wont destroy the decal. I think I will be safe because Ill mist coat over it with the decanted Tamiya TS-13 which is thinned with the Tamiya lacquer thinner.
-
1/25 Revell 1969 Dodge Charger R/T body wip pics.
wisco8 replied to wisco8's topic in WIP: Model Cars
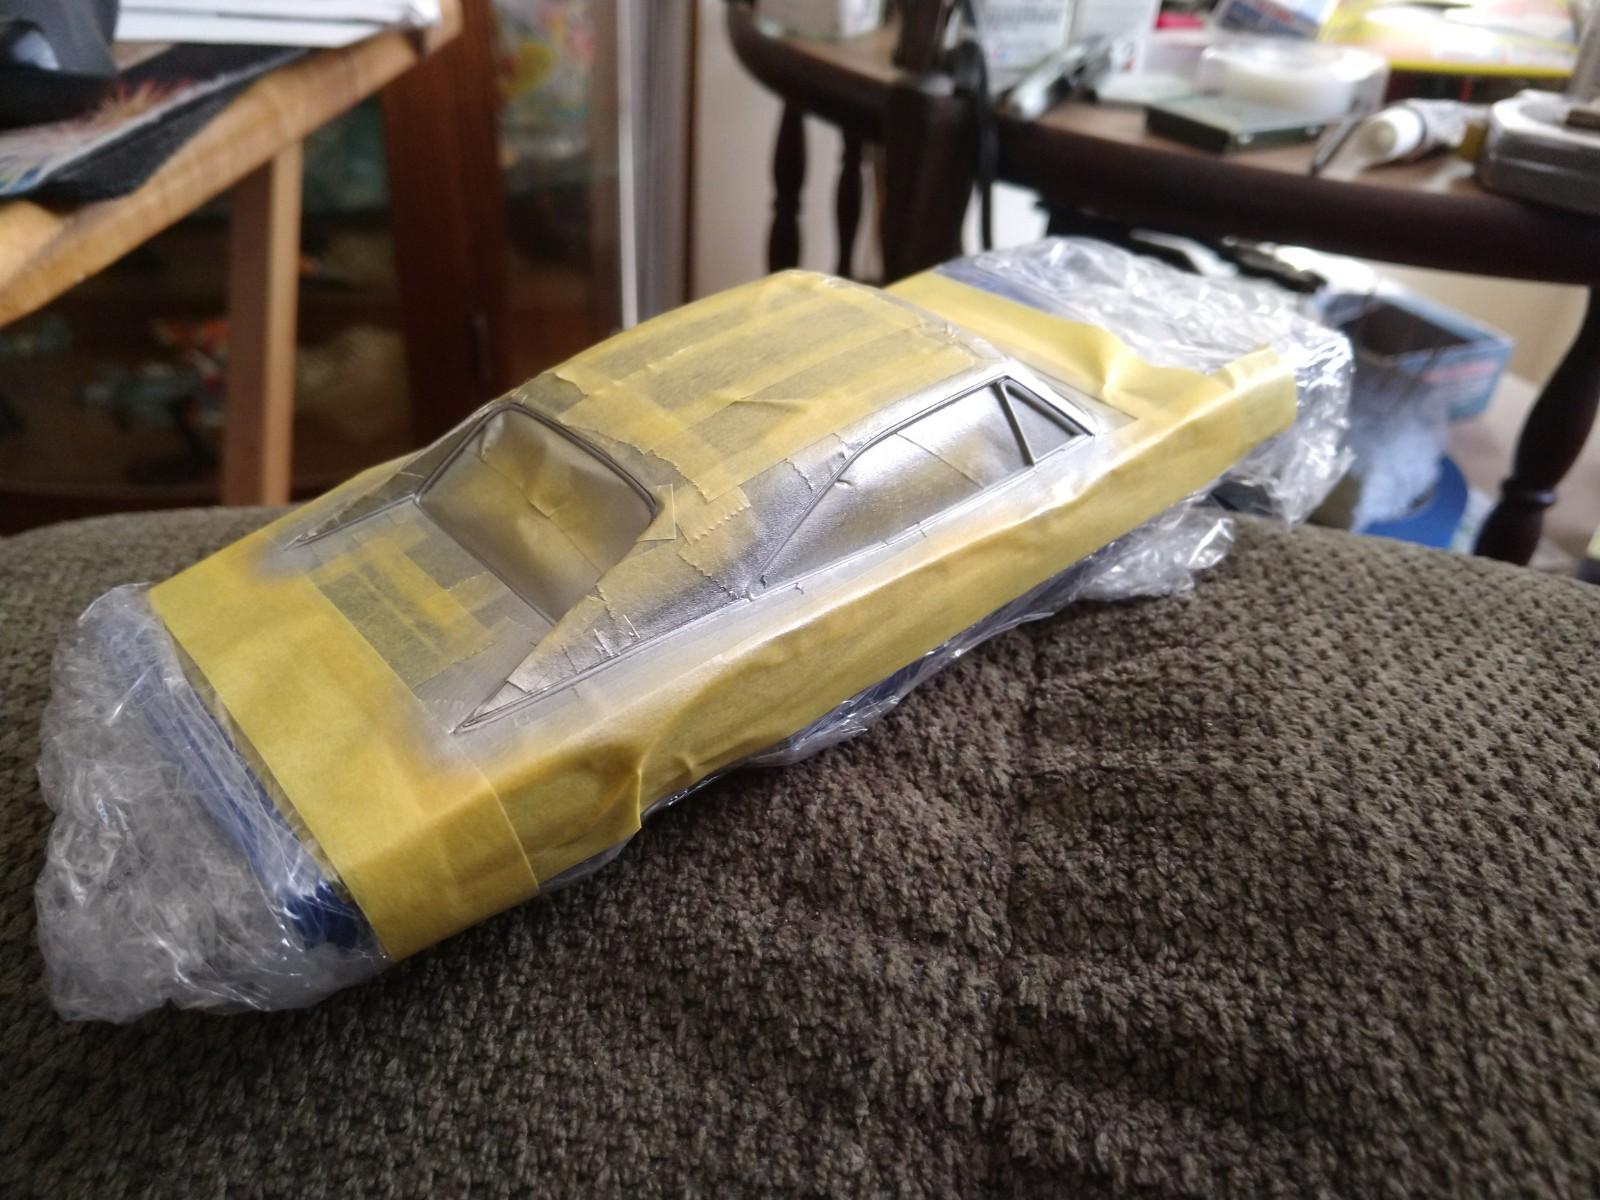
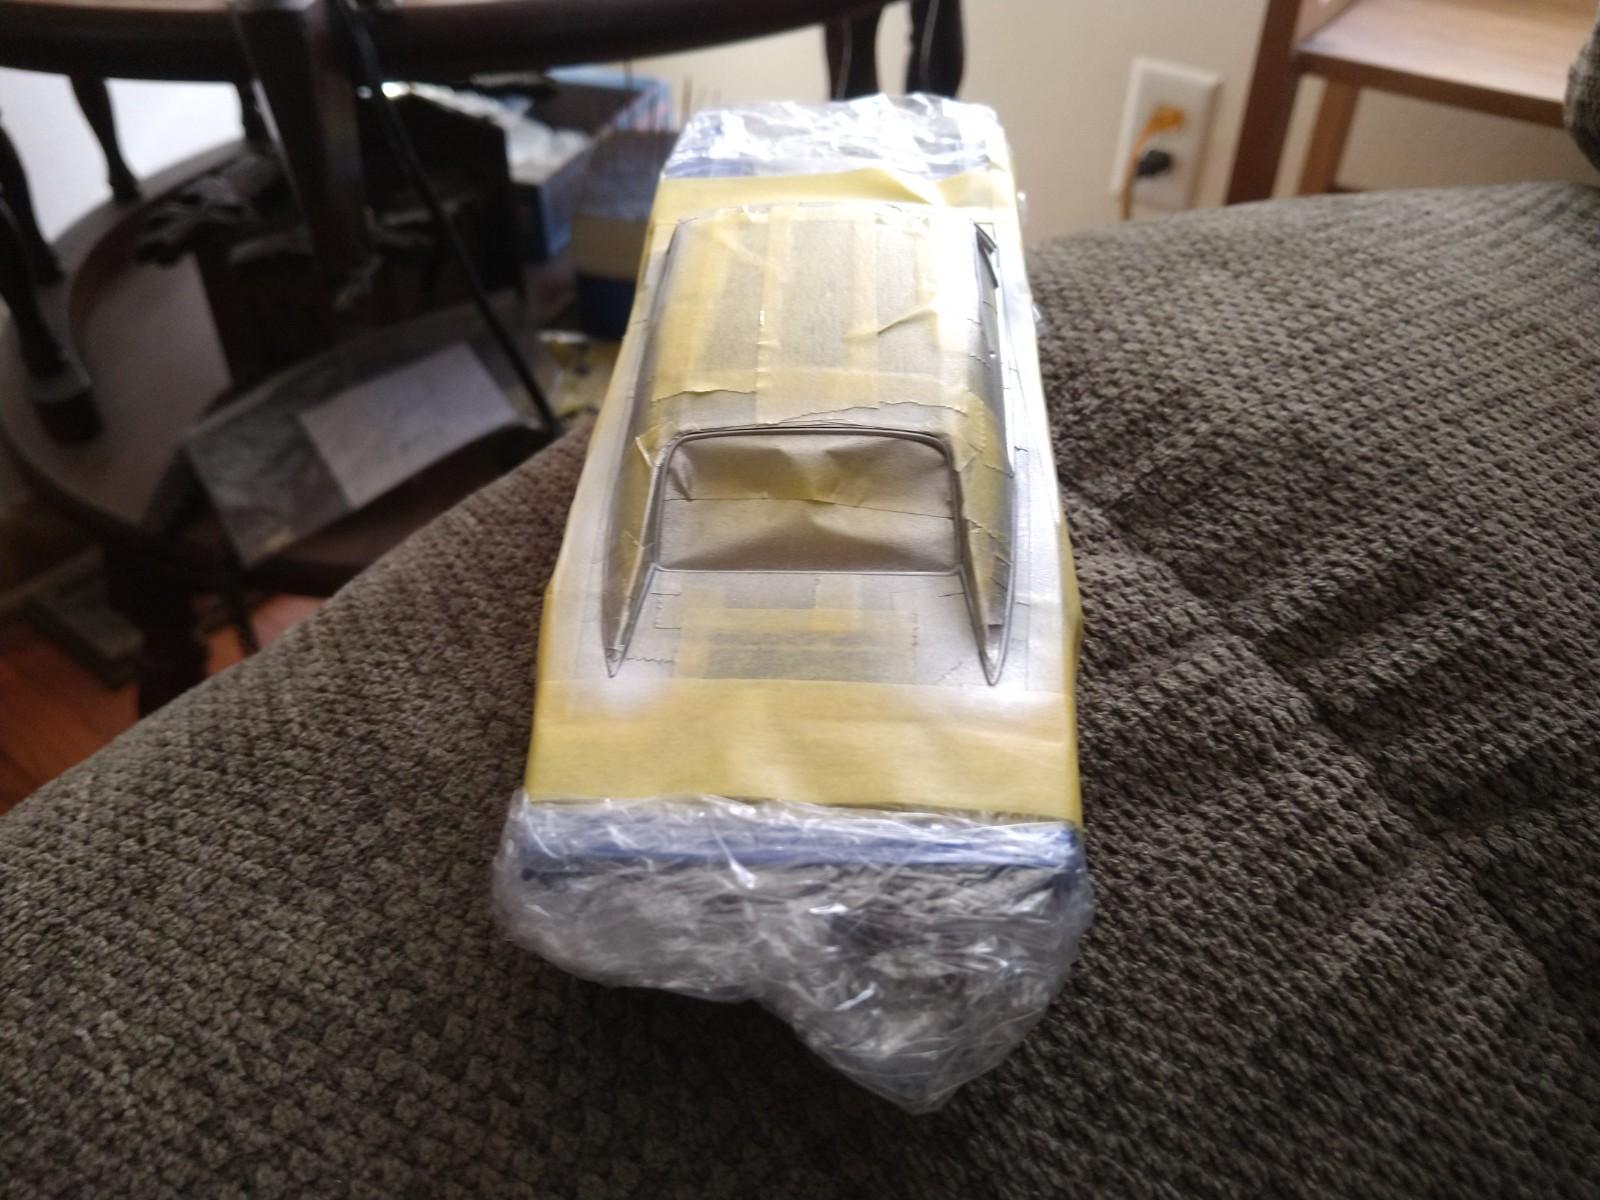
Hi Steve, thank you for the tip. I shot the whole thing clear because I want to do all the trim in Alclad2 chrome, but buy doing so, I would shoot the clear onto the roof anyway. After the body is finished Ill mask off all the trim, shoot the Alclad2 chrome, re-clear-coat the Alclad2 chrome, mask the chrome and them tone down the roof, with a flat like you said, the finger oil burnish is a great idea and I agree will look perfect. I could do the bare metal foil also. Pretty much the same way I did this one..... Steve
-
1/25 Revell 1969 Dodge Charger R/T body wip pics.
wisco8 replied to wisco8's topic in WIP: Model Cars
Thank you Shaw. Im gonna try. Steve -
1/25 Revell 1969 Dodge Charger R/T body wip pics.
wisco8 replied to wisco8's topic in WIP: Model Cars
Hi Cliff, just bought one of those 3" bench grinders with the flex shaft. I also bought some cotton bits which are safer, the dence pads will burn right through everything. -
1/25 Revell 1969 Dodge Charger R/T body wip pics.
wisco8 replied to wisco8's topic in WIP: Model Cars
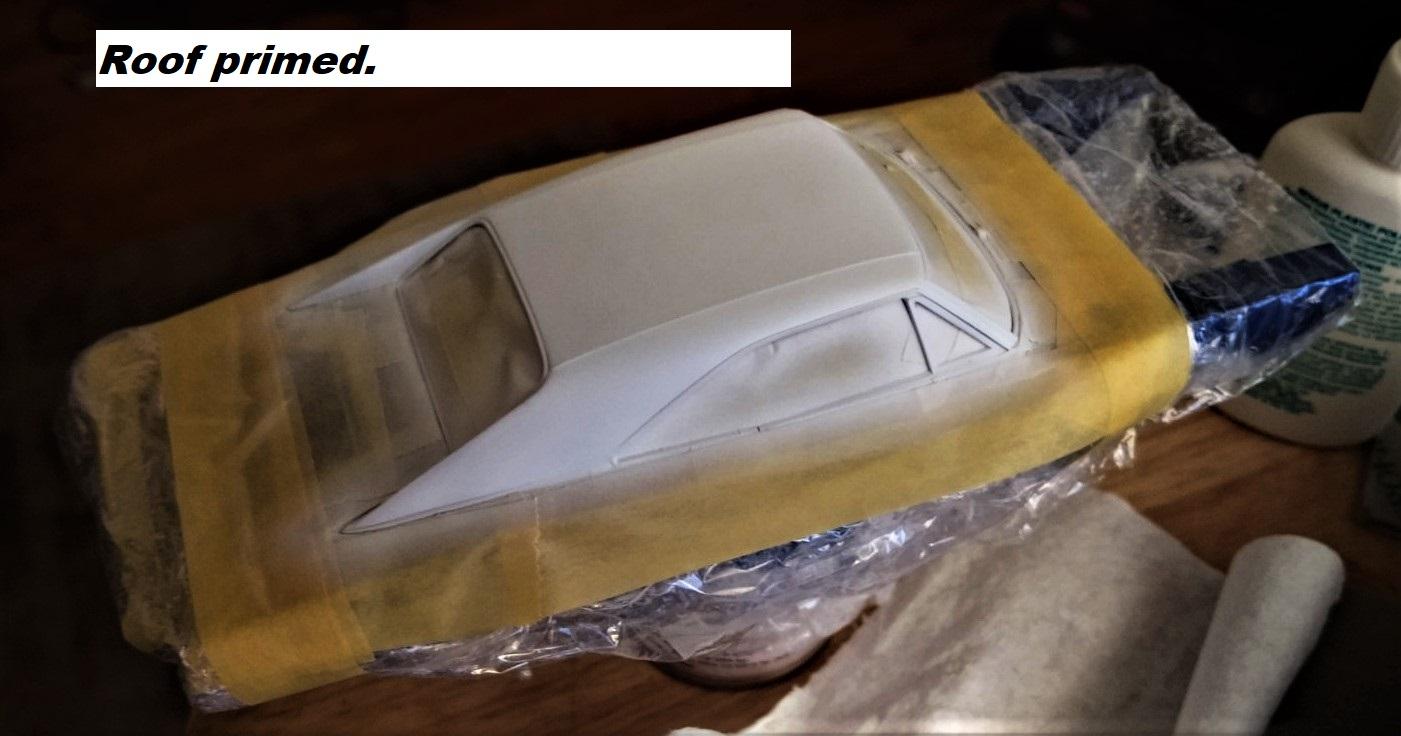
Roof will not be wet sanded. -
1/25 Revell 1969 Dodge Charger R/T body wip pics.
wisco8 replied to wisco8's topic in WIP: Model Cars
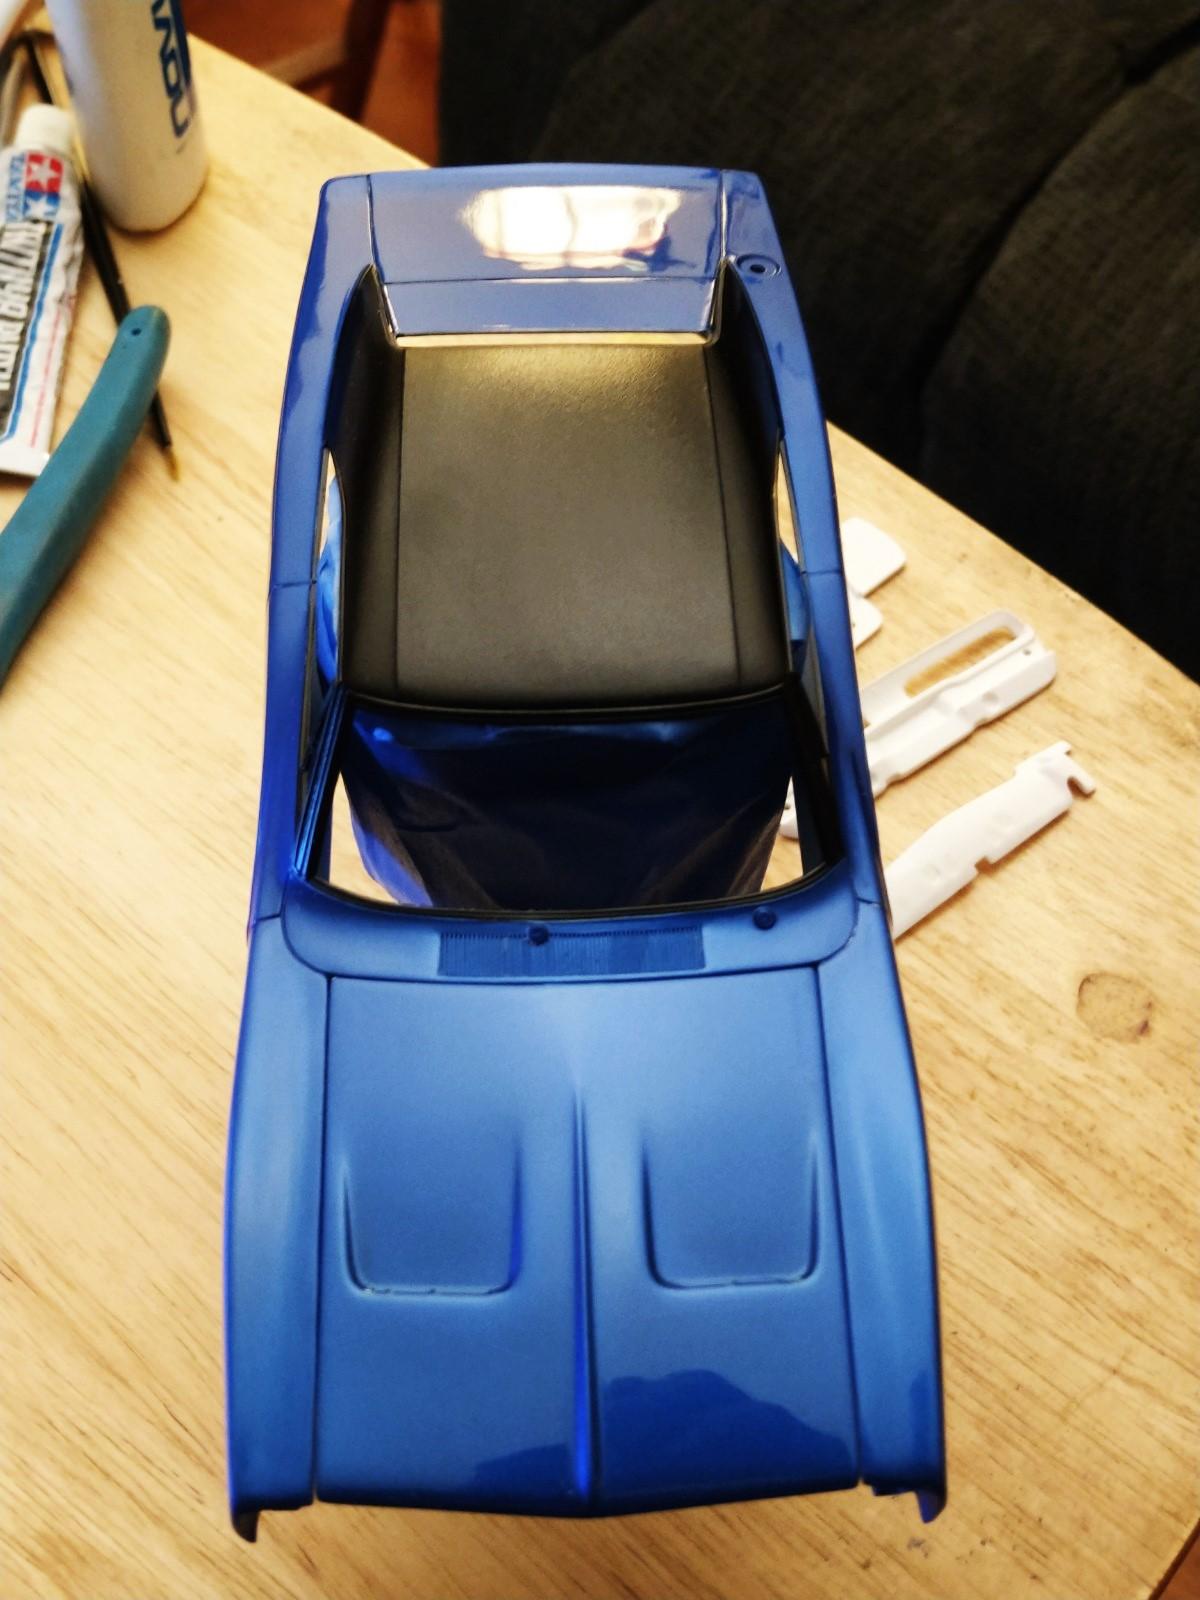
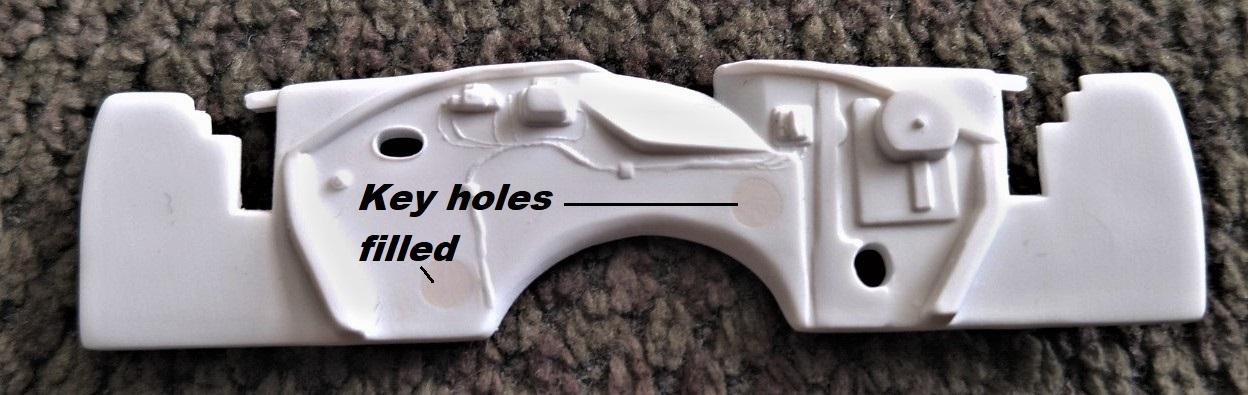
A few more pics for today. I will very lightly wet sand the first clear coat with 6000 grit micro-mesh wash up and apply the second coat until I have 3 nice clear coats applied. The third coat being buffed but not polished to a medium shine, then I will apply the decal over the deck lid and applying very light mist (decanted into airbrush) coats over it, wet sanding each subsequent coat until the decals has blended in. I filled in the firewall key holes so they are not visible. Steve
-
Very nice detail work Mike. I'm watching and learning. Steve
-
1/25 Revell 1969 Dodge Charger R/T body wip pics.
wisco8 replied to wisco8's topic in WIP: Model Cars
Thank you Sir I'll try to make it my best. Steve -
1/25 Revell 1969 Dodge Charger R/T body wip pics.
wisco8 replied to wisco8's topic in WIP: Model Cars
Thank you Sir. I think I put at least 4 hours on the hood just wet sanding and buffing. I can see after a real close inspection that I have more to do near the directionals on the hood and a small white spot near the passengers side back edge of the hood. I'm still learning.and I haven't done that many cars but following the advice of the top modelers helps to progress a little faster. I'm my own worst critic. Which I don't know if that's a good or bad thing. It seems I'm. always trying to find a better way to make it look real in scale as possible, but not so easy most of the time. I have to conclude that doing your best and accepting the fact that there is always going to be someone who does it better is just a fact, but learn from them to improve your skills. Steve -
1/25 Revell 1969 Dodge Charger R/T body wip pics.
wisco8 replied to wisco8's topic in WIP: Model Cars
That's cool, I just love learning what ever I can. Beautiful color and a super build Jim. She is going to look fabulous!!! -
1/25 Revell 1969 Dodge Charger R/T body wip pics.
wisco8 replied to wisco8's topic in WIP: Model Cars
That looks excellent!! What car is that for? -
1/25 Revell 1969 Dodge Charger R/T body wip pics.
wisco8 replied to wisco8's topic in WIP: Model Cars
Thank you Jim. I watched Many videos, a few of my favorites are Doctor Cranky's Lab-RAT-ory , Donn Yost, to mention a few... have helped me to understand major principals of finishing. With some basic knowledge you can really enjoy the models you put so much time into. Steve -
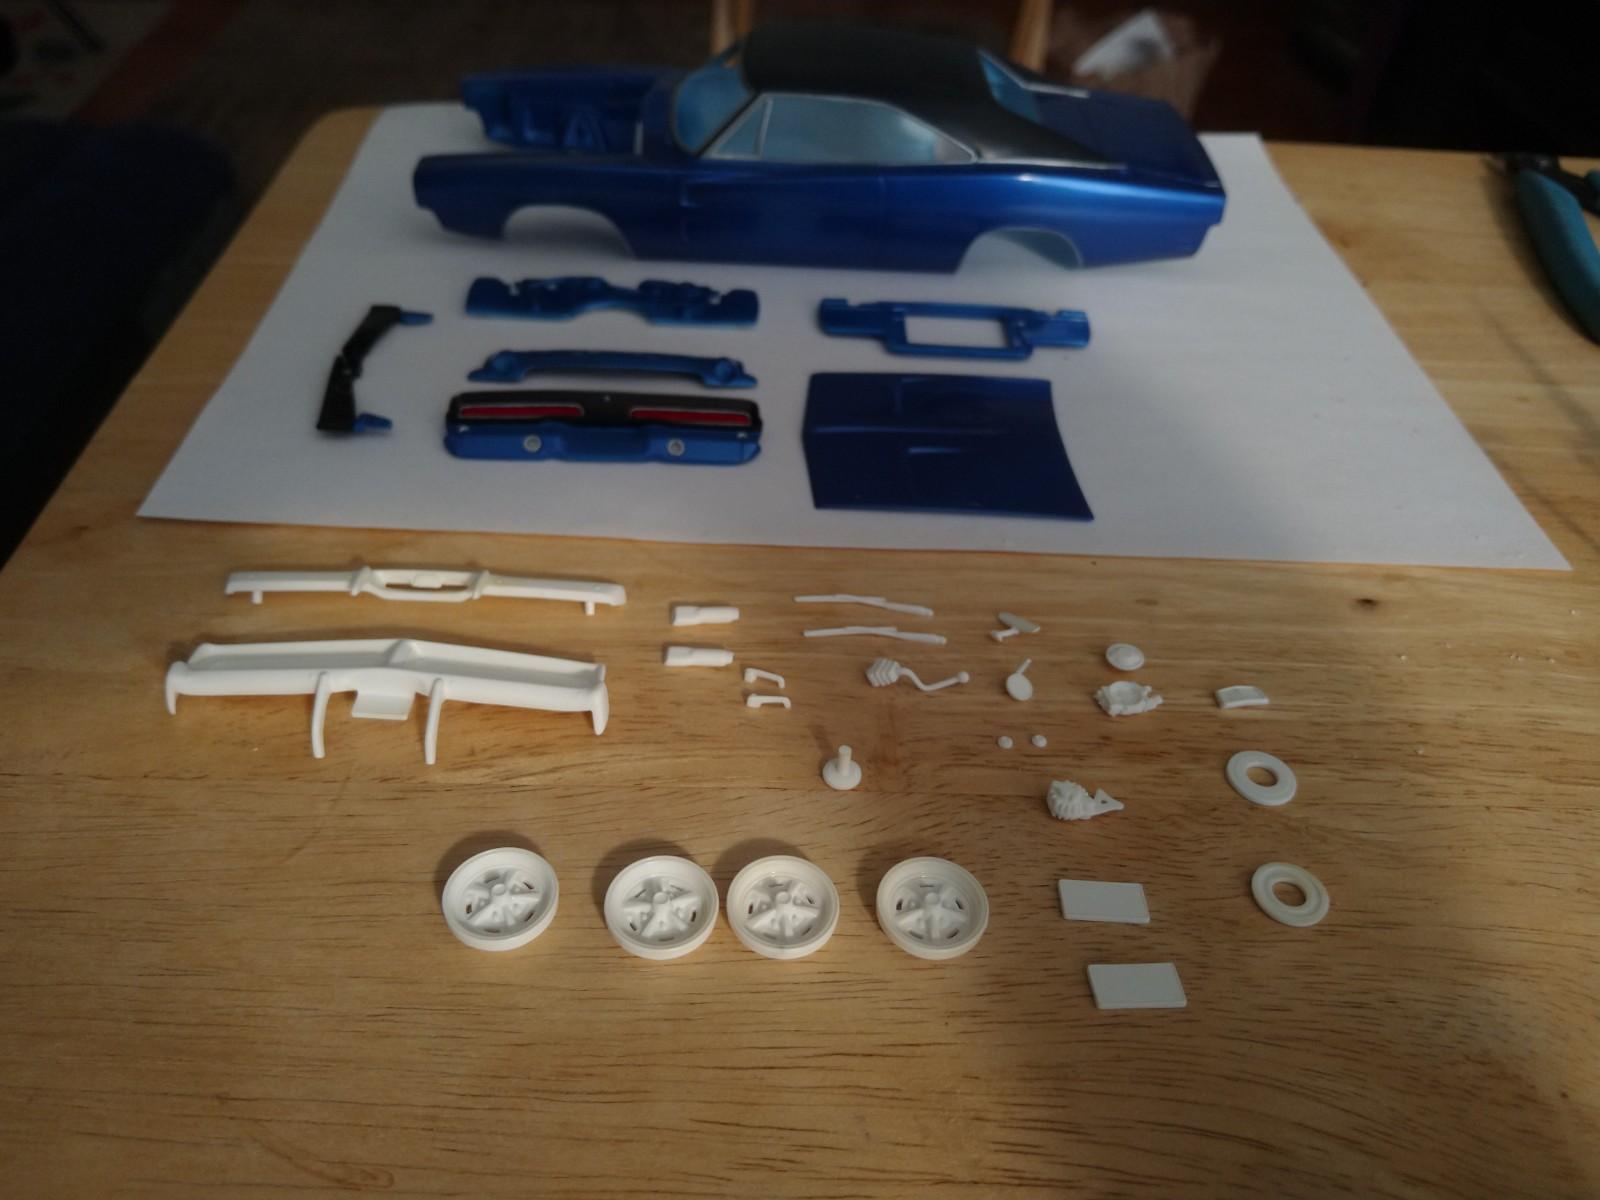
Hi, I've been learning how to get a nice finish. Here are a few pics so far. I started by washing the kit with dish soap and let dry. My next step was to remove any mold seams, flash, and sanding out minor imperfections with 3m micro-fine sanding pads, washed again and applied Tamiya fine white primer decanted into a paint jar for use in my airbrush to be thinned with Tamiya Lacquer thinner. After applying several medium coats I wet sanded with Micro mesh 4000 grit to a medium shine and smooth finish. I then used scale finishes Red Bull blue as my base coat spraying at 15-20 psi light mist coats until a nice even layer was achieved. After I was satisfied with the evenness I buffed the base-coat carefully with 4000 micro-mesh dry to remove any texture, then wash, rinse and let air dry. Re-checked for flaws or missed areas I was satisfied with the results. My next step was to apply a clear coat of Tamiya TS-13...3 times carefully, wet sanding each layer 6000 Micro-mesh. The last layer was wet sanded first with micro-mesh 6000 for a few hours, washed and then wet sanded with 8000 grit micro-mesh, at this point I started buffing down the clear with Novis#2 and finishing with Novis#1 and Tamiya finishing compound. The time that is spent on buffing and waxing, more so buffing to achieve a decent finish was critical for me. It did pay off on the hood. Any suggestions would be awesome. Best regards, Steve
-
Bobby Johns 66 Chevelle
wisco8 replied to yellowsportwagon's topic in WIP: Stock Cars (NASCAR, Super Stock, Late Model, etc.)
One of the coolest looking Chevelles I have seen in a very long time! That is really awesome Tim !!!