

Straightliner59
-
Posts
5,486 -
Joined
-
Last visited
Content Type
Profiles
Forums
Events
Gallery
Posts posted by Straightliner59
-
-
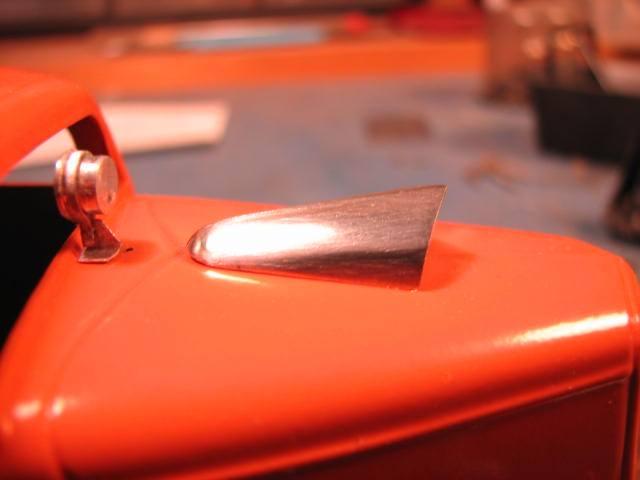
Great work, Steve. I have been enjoying watching this come together. The other day, I was thinking about the fabulous work you've done with the air cleaner, and burnished a small piece of tooling aluminum over a similar one I had in the parts boxes, and thought that I should post it, in case you were interested in making one for your Olds. It only took maybe five minutes. I didn't trim it very well, because I just wanted to see how well it would burnish. Anyway, in case you're interested...

-
18 minutes ago, cobraman said:
This came today .
That kit's worth having multiples of, just for the engine.
-
55 minutes ago, misterNNL said:
I have several sheets of printing plate and would like to be able to shape it to build model travel trailers like the Airstreams built in my home town. That would require multiple curves. How is the annealing process done that I see mentioned here and can it be done at home safely?
Here is how I learned/read how to do it: You'll need a good torch (I use a Bernzomatic MAPP gas torch), a bar of Ivory soap, and something to hold enough water to quickly quench the sheet. Coat the metal by rubbing it with the bar of Ivory soap. Light the torch, and heat the aluminum. As soon as the soap coating turns black, quench the sheet, and you should be good to go!
-
Yesterday, I got the steering put together Made the tie rod and got it mounted. Next, I have to re-hang the front axle, and install the radius rods.
-
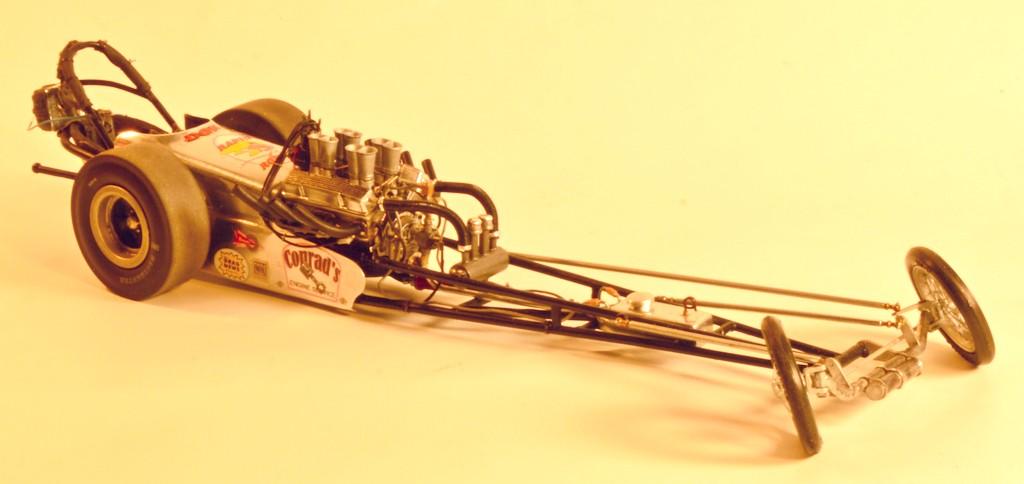
While the flashing is a little heavy (about .008", once the plastic coating is sanded off), whatever alloy it is, is perfect for creating compound curves, such as dragster cowls, once it's been annealed. I attempted the same with tooling aluminum, but, it doesn't form complex curves as readily. It tends to buckle, fold. Neither tooling aluminum or roaster pan aluminum feel really stiff/durable enough to build entire bodies with, although they do work nicely to create the odd panel, by burnishing them over a kit part. Tooling aluminum works wonderfully to make things like baby moons, and other plain hubcaps. I rubbed some down over the top of an air cleaner, and in the instance I was super-detailing one, I would definitely go that route. They all have their place, and each is better suited to some tasks, than others. The bottom line is, one can never have too many different materials! ? I skinned this vac-formed tank lakester with tooling aluminum. It was just a quickie build, but fun!
-
3 hours ago, iBorg said:
Long time printing educator here.....
At one time 3M sold E plates. These had a really nice polished surface. These were discontinued about twenty years ago as they required some pretty nasty chemicals to develop. The presses that use these were smaller sheetfeds. That market has pretty much gone to digital printing.
A newspaper press would use a hard anodized plate. This results in a rather dull gray finish. I'm not sure how usable those would be.
My suggestion is to go to a local hoe improvement store and get some aluminum flashing. If you need it softer you can always heat with a torch and effect its temper.
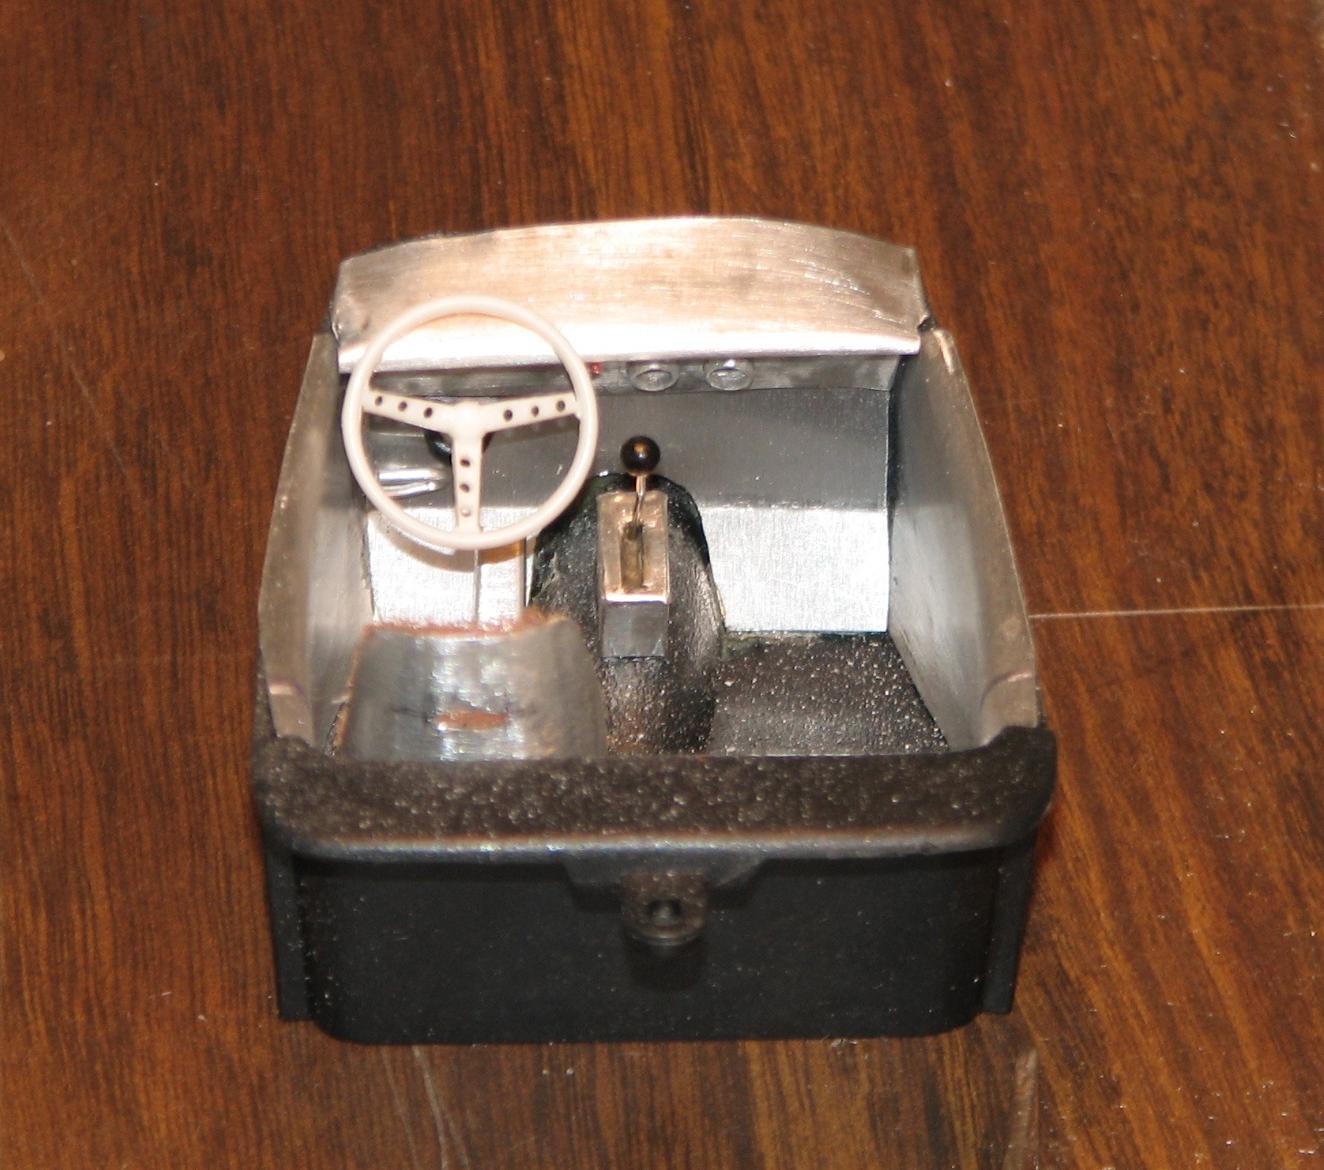
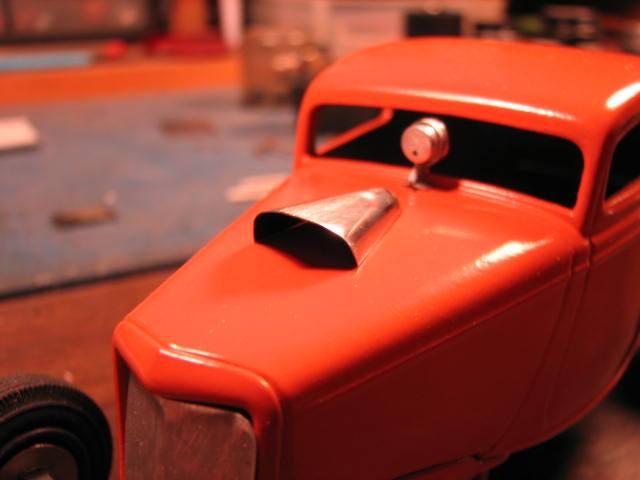
Aluminum flashing is what I have used, for years. I anneal it, if I need it softer, for more complex shapes. No need for that, for making panels, etc. It does have a thin plastic coating that needs to be sanded off,if you are going to anneal it. I made the scoop for my '34 with it, as well as the interior panels and dash. The body, seat bucket and firewall for my junior fueler. It's invaluable as a building material.
-
I'm enjoying watching these come together. Nice work, Karl!
-
Before bed, this morning, I disassembled the front suspension on my Model A, and finished the steering arms on the spindles, and made the tie rod. Now, to put it all back together!
-
Thank you, gentlemen! Your help is much appreciated!
-
Does anyone know who made this? I can't find the instructions. I am wondering where the little tabs go.
-
26 minutes ago, Ace-Garageguy said:
JAN 5, 2020 UPDATE
1) Biggest thing accomplished was shortening and reversing the steering arms on the front spindles.
2) Front suspension got bolts in place of the shirt pins holding it together previously. Shank diameter of the plastic bolts is .030", so they're actually fairly stout.
3) Steering arms were positioned so the tie rod would just clear the split wishbones, pretty common on cars like this. Several things to measure and get dead on here. Just as on a real one with this front end setup, suspension travel is limited, clearance between the frame rails, wishbones, and tie rods is very tight.
4) Tie rod mocked in place, verifies steering arms are correct now. Clearance was also checked at the engine crank pulley, is OK. Steering linkage will be functional. The attachment of the wishbones to the axle isn't entirely prototypically correct, but I'm going to leave it pretty much as Revell made it in the interest of finishing this model before I die.
5) Last part of this job is thinning the front backing plates, so the wheel offset will be right, as well as the fit of the drums. The finned Buick drums I'm using are a little underscale to work with the '40 Ford backing plates as in real life. A little optical illusion will make everything appear about right, though. With so much of the mechanical stuff visible, I try to get everything looking like a real car built by somebody who knew what he was doing.
Looking good, Bill! I just took the front suspension apart on my Model A, so I can finish the spindles. I'm going to do pretty much as you, so I'll be looking in, as you update. Thanks for all the knowledge you share. It's much appreciated.
-
Aleene's tacky glue is my choice. That's the stuff Snake displayed. Like he said, it's available at Walmart. It's also at virtually any craft store.
-
1 hour ago, mchook said:
you really can't see it once it's all together so I'm not sure if you want to build it or not.
Clearly, you don't know me! ? All kidding aside, thank you for your kind words. I'm not sure if I want to hang the pedals as they are stock, or devise some hot rodder's adaptation. Whichever way I go, I will make sure that it would work, in real life. I'm going to use a little "fruit jar" master cylinder. Your photos of your model's bellhousing/trans is very helpful! Thanks! Nice job with the clutch and brake pedal setup! Thanks for looking in, Jay.
-
11 hours ago, speedy5963 said:
Very cool build, like all the work going into an old school style hot rod you dont see so often!
Thanks, Paul! Yes, I don't want a rat rod, and I prefer the old stuff, to the high tech rods. Thanks for looking in!
-
This is a very cool project! Very nice work, sir!
-
On 1/2/2020 at 6:24 AM, afx said:
Good stuff Daniel.
Thank you, JC! I hope I can keep it rolling! It's time to start sorting out the pedals, and how I am going to mount them...
-
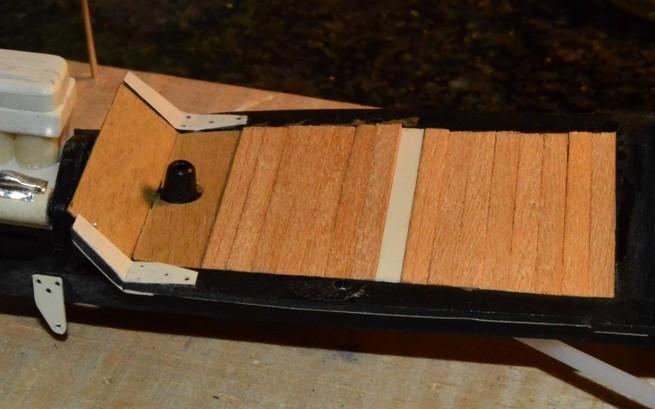
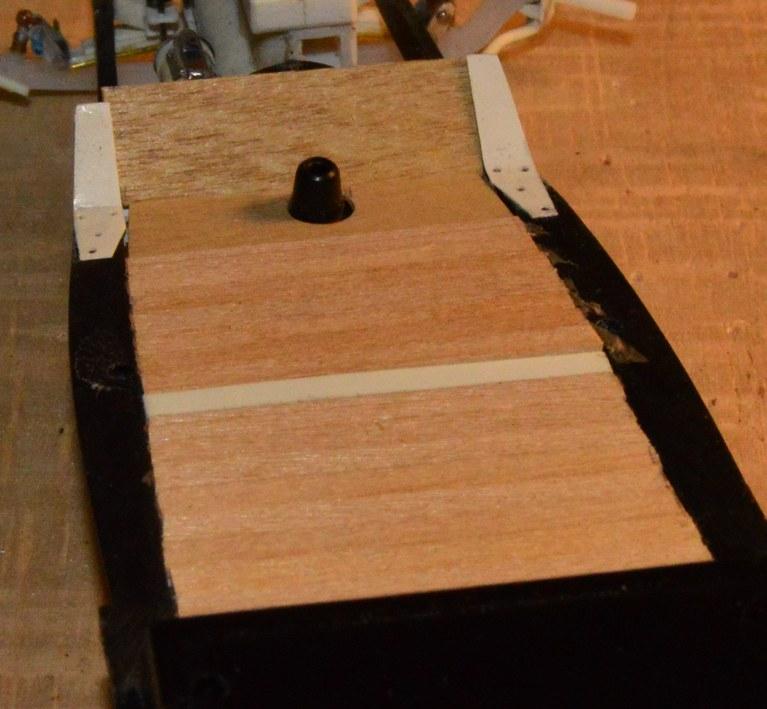
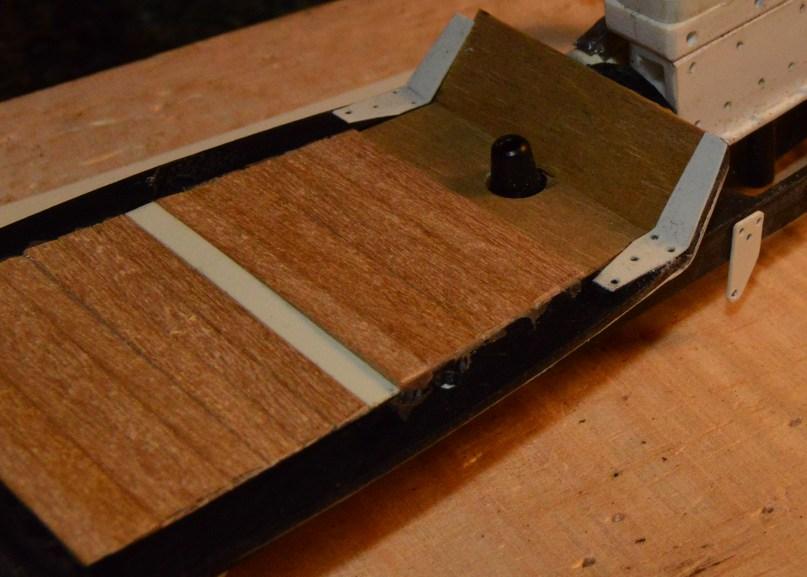
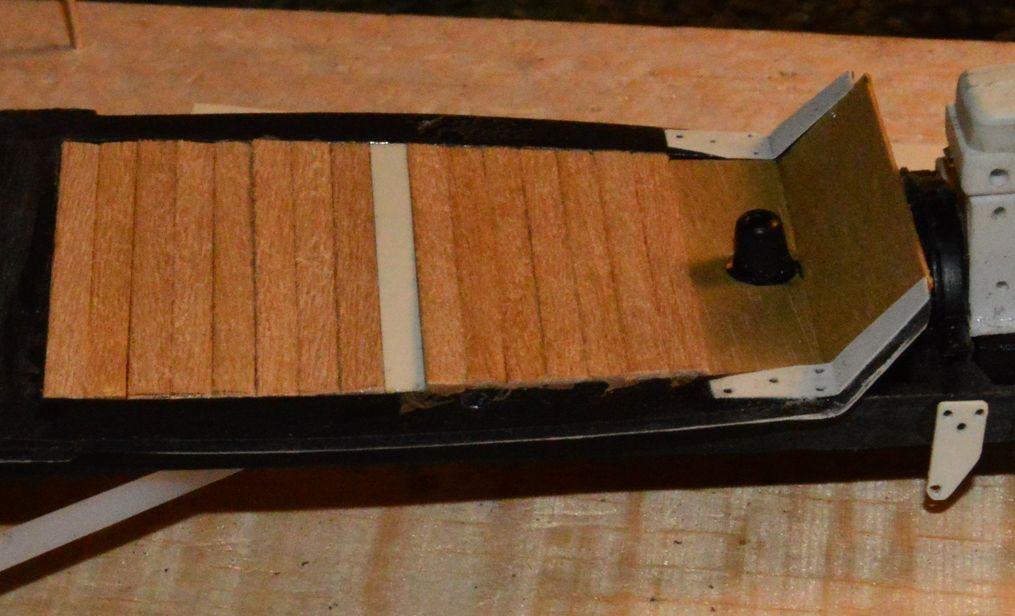
I got the toe-board made, along with the front section of floor. I couldn't figure a satisfactory way to fill the front floor area using the strips I made most of the floorboards from, because a couple of pieces would have no support, in the center of the chassis, due to the trans/shifter. I used .022" Midwest plywood to make the toe-board and the front floorboard. I think I will add another layer to the floorboard section.The toe-board will fit beautifully, once i have replaced the pedal hanger bracket. I'm pretty happy with it! Questions, comments and critiques always welcome!
-
13 minutes ago, Bernard Kron said:
Yes we should have a Round six. And boy you sure got it done just in time, although I must admit to not knowing precisely which time zone Styrenestan is in...
It's just east of the International Date Line! ?
-
30 minutes ago, Motor City said:
But you never hear of a small-block Chevy beating a Hemi!
Not since Logghe, Steffey and Rupp...that was one bad small block.
-
50 minutes ago, Mark said:
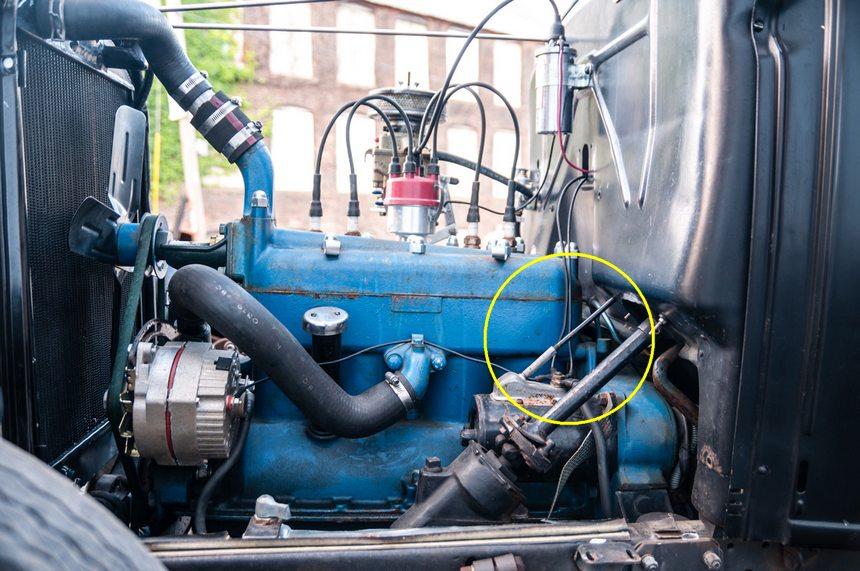
I wonder if that isn't a non-stock starter setup...the engine pictured does have an alternator also...
Thanks, Mark. I knew that was the stock type starter setup. Yeah, I'm not so fond of the alternator, on this one. I'll be using a generator, in case I want to race it at TROG!
-
35 minutes ago, Ace-Garageguy said:
You are correct. Ford began making electric start available on its cars in 1920.
This is the switch pictured above, listed as fitting 1928-1931 model A Fords. The pushrod, under it, is what goes through the firewall, and you step on it.
Thank you, Bill! That's the only way that I could figure, as to how it works. Thanks for confirming my suspicions! ?
-
Super nice scratch work, Francis! Going to keep an eye on this one!
-
I am trying to sort this thing out, and I am having a time finding out exactly how this is set up. My best guess is that the rod, coming from the tube from the starter solenoid cover simply runs to the back side of the starter foot
switch, and depresses a switch inside the housing, which actuates the starter. Does anyone know, for sure? I can't find text or photos that illustrate exactly how this works. Thanks for any advice!
-
Thanks, Bob! Thanks for looking!


Model A Five-Window Coupe
in WIP: Model Cars
Posted
I disassembled the front suspension so that I could make and install the tie rod. That's done! Now, to decide about the radius rods. The ones I made may be a bit too fine, so I may need to redo them with different ends, and 1/32" tube. Here are a couple of photos of the re-installed suspension. Questions, comments and critiques are always welcome!