

Straightliner59
-
Posts
4,722 -
Joined
-
Last visited
Content Type
Profiles
Forums
Events
Gallery
Posts posted by Straightliner59
-
-
Ah! Radiant Lime!
-
I like that Lime Ice. It reminds me of one of Pactra's old colors. I can't remember what it was called. The same line had lightning Purple and Blazing Red, too, as I recall. Nice, clean Deuce!
-
23 hours ago, DumpyDan said:
Nice work on the side light
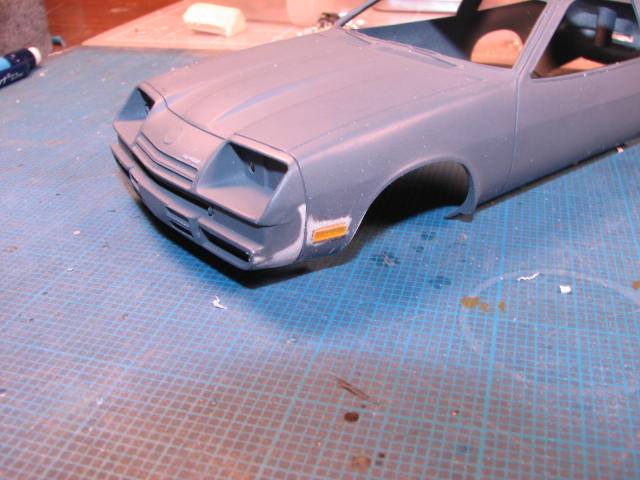
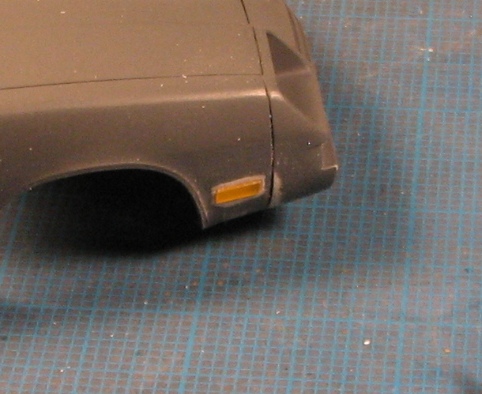
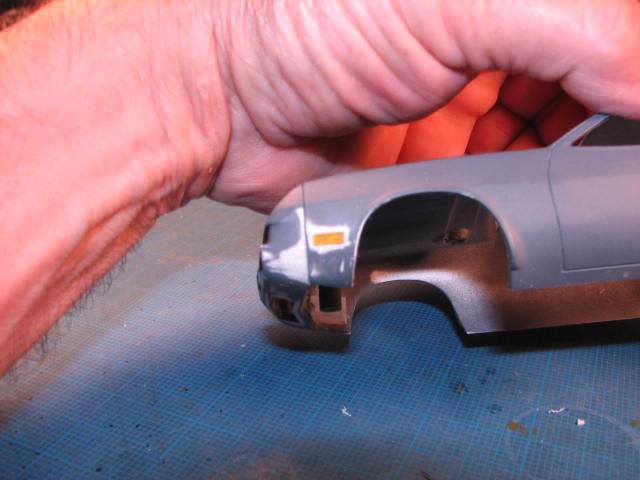
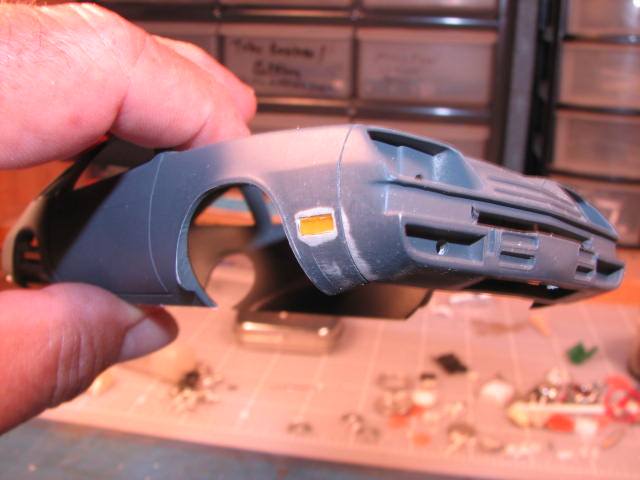
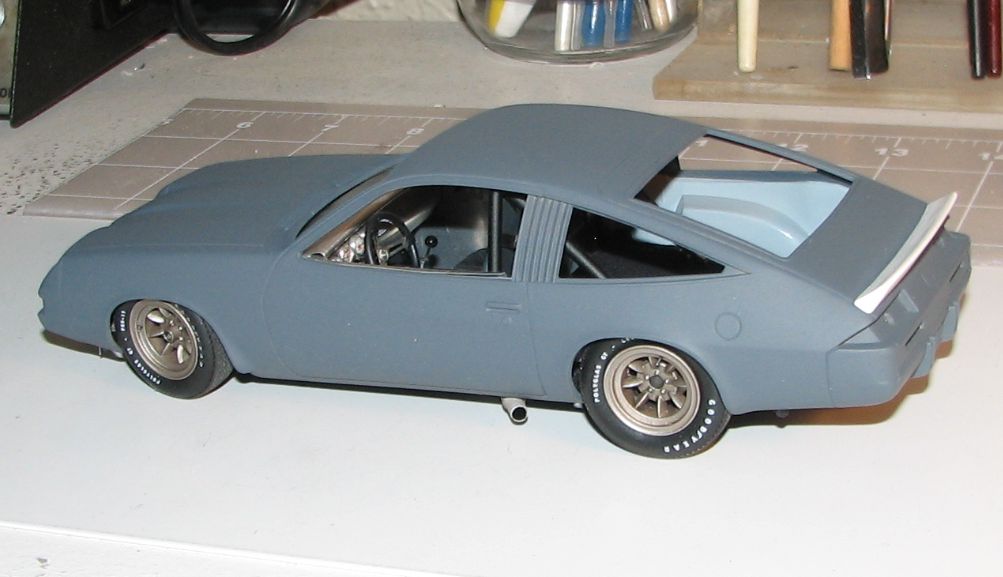
Thanks, Dan! I was hoping that trick would work! Here're a couple of shots with primer. I can't believe I got them to fit so nicely.

-
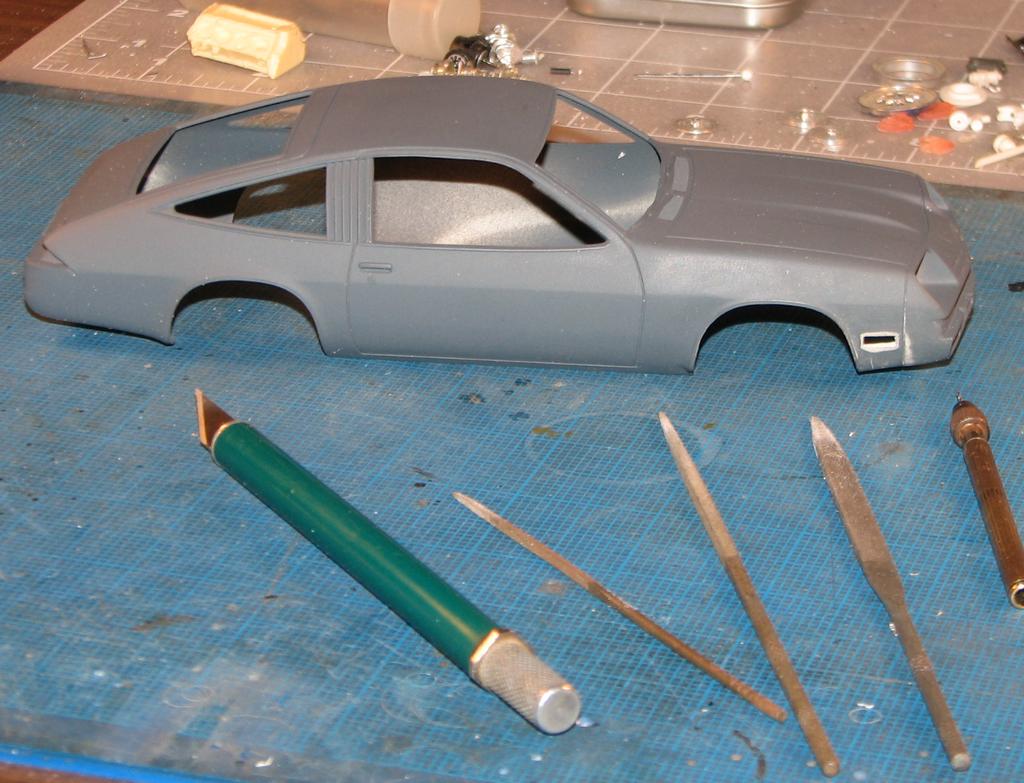
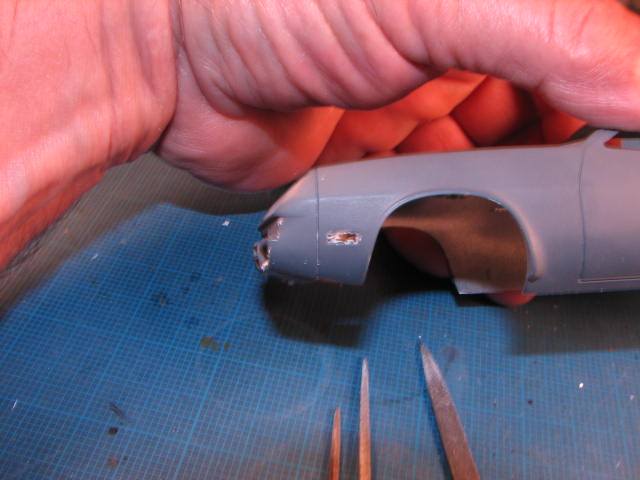
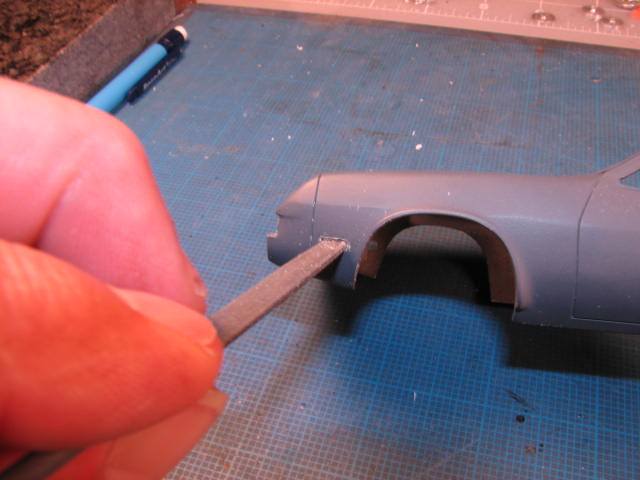
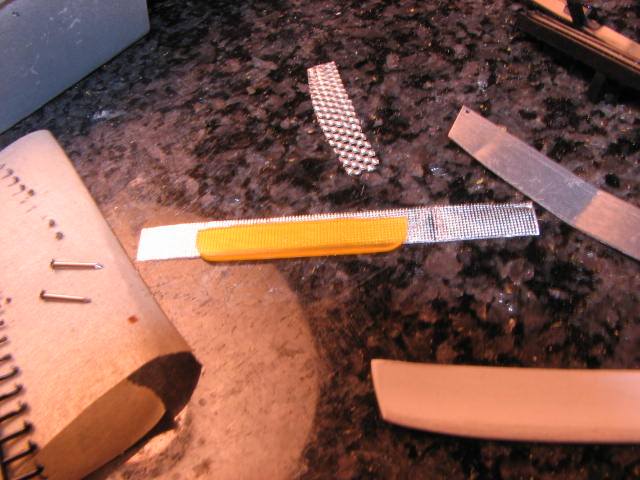
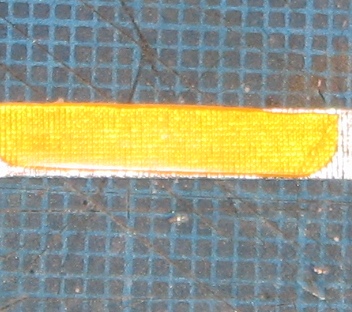
Speaking of marker lights...Here's what I did with them, and how I did it. I hope someone finds it useful! I began by measuring the recesses of the molded-in lights. In this case, they were 5/64" by a scant 1/4". Anyhoo... This first shot shows what I was hoping to accomplish, and the tools I used to do it. The files pictured are a square mini-file, a small square file and a small flat file. I also used a pin vise with a #72 bit and an X-Acto knife.
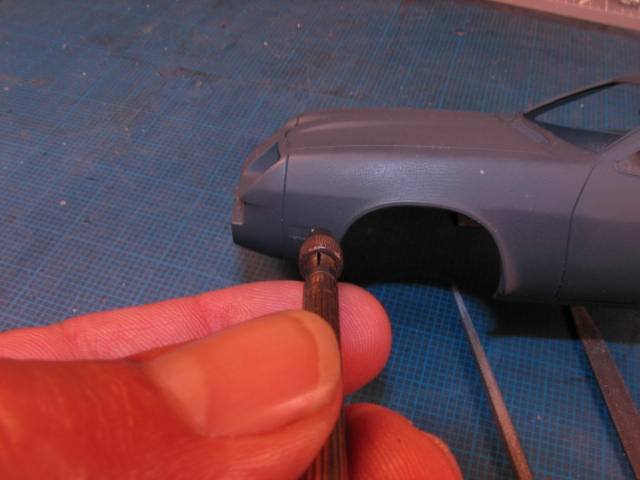
I began by drilling a series of holes along the inner perimeter of the marker/turn signal, being careful to stay within the lines, to avoid having to perform extra bodywork.
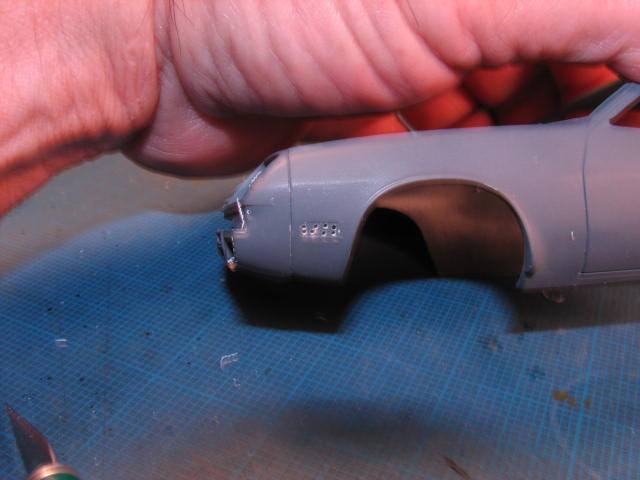
Now, using the knife, slowly and carefully begin to connect the holes, opening up the entire recess. It cannot be stressed enough to be deliberate and cautious and stay within the lines...
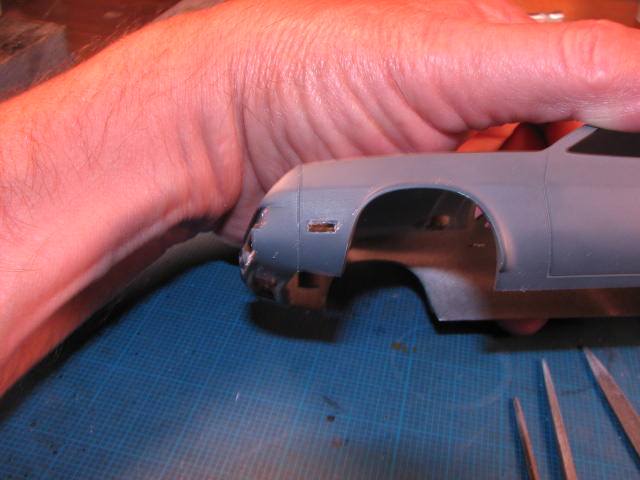
Continue working the knife until the marker opening looks like this (except probably not so blurry!):
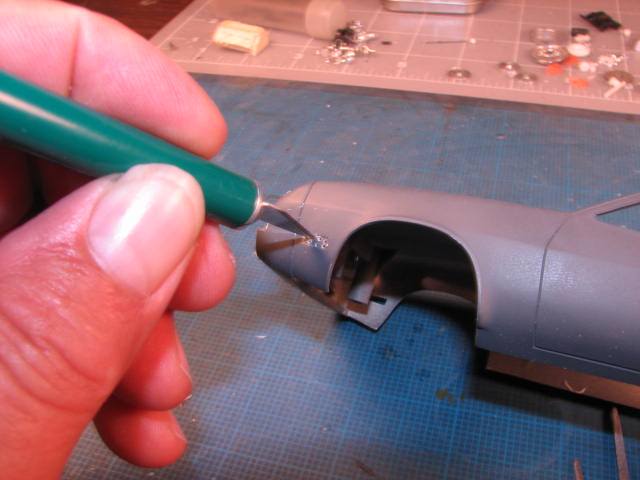
Begin working with the files to fine tune the opening. Square the corners, and straighten the ends and sides of the opening, until you are satisfied with its shape.
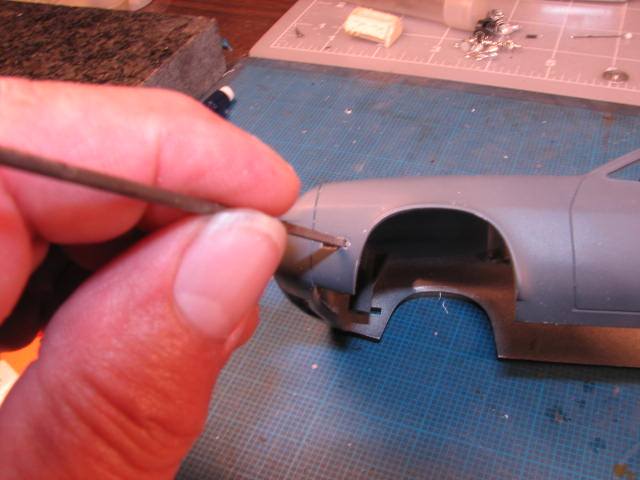
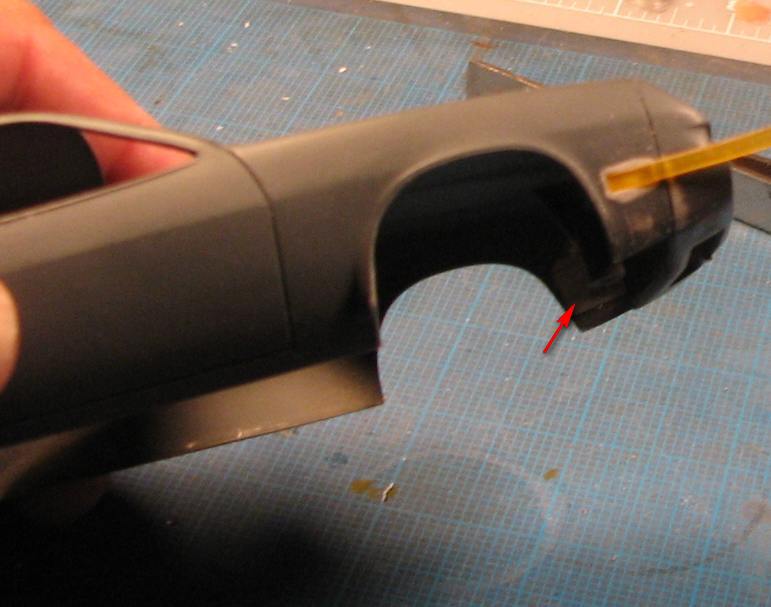
Next, cut two small sections of thin sheet, to back up the newly opened holes.
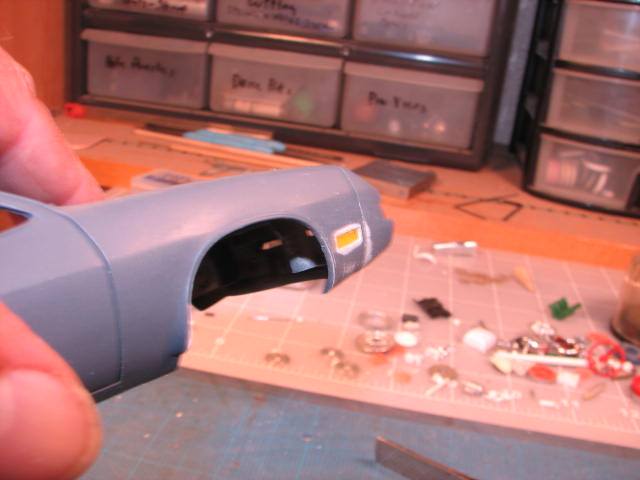
Install them inside the body. It may be helpful to curve them, to improve their fit. The red arrow points to the backer installed on the far side of the body. Also visible here is the lens itself, being fitted.
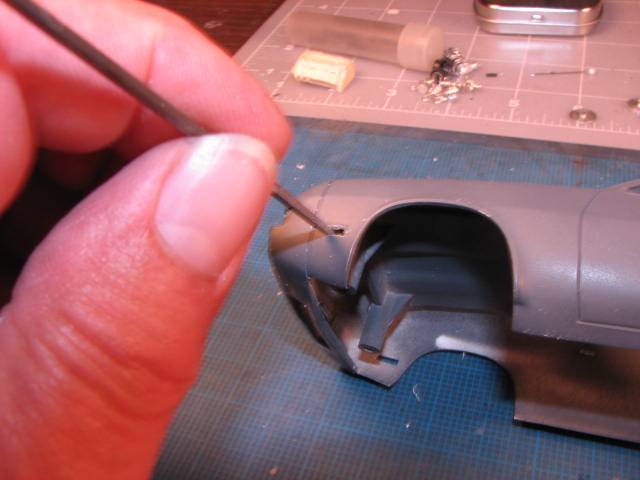
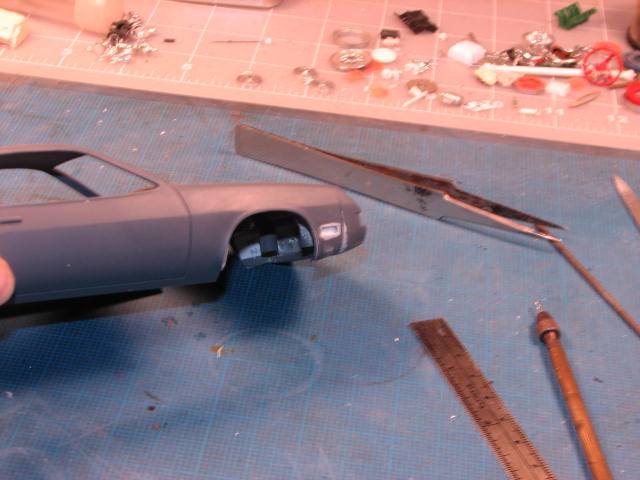
I used a tab I removed from an amber sprue. I then sanded the ID numbers off and polished it using those three-way polishing sticks. The reflective inner surface will be created using the foil from a cigarette hard pack.
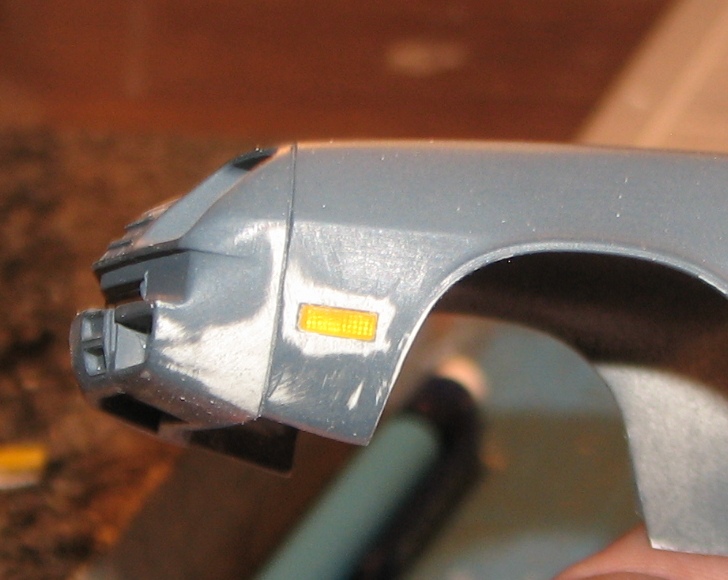
Next, I cut the amber "lens" to size and smoothed the edges, and tested the fit...
After a bit more fine sanding, the lens fits the opening, almost perfectly!
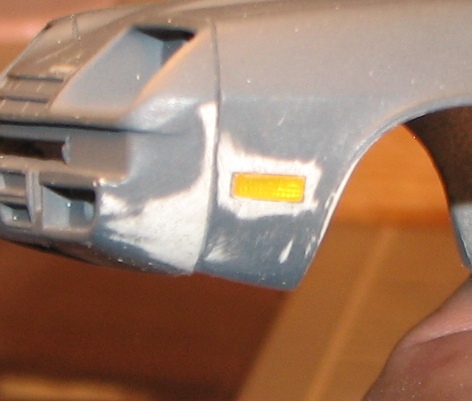
Finally, I popped them out, cut the foil to size, and dropped it in, behind the lens. It was a fair amount of work, but, I'm happy with its appearance. This effect could not be achieved using paint. Since this is a curbside build, I want to create as many interesting details that I can, in order to generate "interest" in the subject. I am considering ways I can do something similar with the head and taillights.
-
1 hour ago, cobraman said:
Is that new paint or a new style label ? I don't recall seeing one like that .
It's apparently a new label. It's in the "one coat" lacquers line. I think all the other colors' cans were the older label.
-
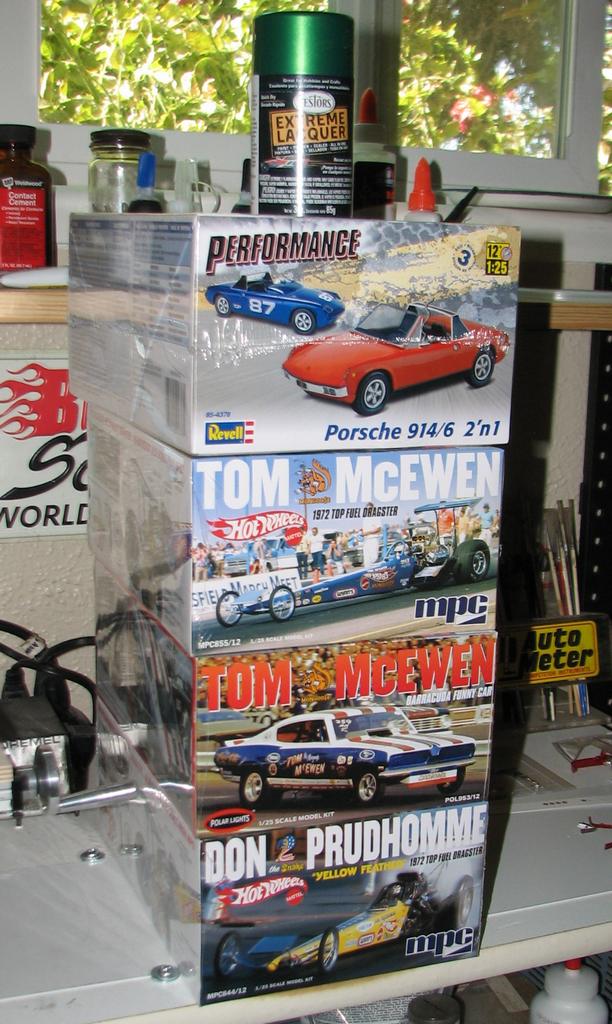
Sometimes, you can't afford NOT to buy the models!grin You are right about that, Joe. I couldn't believe it!
-
Just picked all this up at Hobby Lobby. Out the door for $36 and change! I used the coupon on the paint. All these kits were on clearance for $7.49 each!
-
2 hours ago, Snake45 said:
They're both pretty sparkly, just so you know. The Emerald is sort of like '68-'69 Rally Green, but sparklier. It's a pretty color.
I picked up the Emerald. Originally, I bought a can of Fathom Green for it, but started thinking it was darker than I wanted. Who knows? I'll have time to think about it while I'm carving on the marker lights!
-
On 6/26/2018 at 6:23 AM, Snake45 said:
That just looks badass! Drive on!
Thanks, man! Heading out in a bit to find paint. I'm thinking either Lime Ice or the Emerald green from that line--leaning more toward the emerald. Shouldn't take much longer to finish this baby, now!
-
On 6/22/2018 at 10:54 AM, Flat32 said:On 6/20/2018 at 1:46 PM, Straightliner59 said:
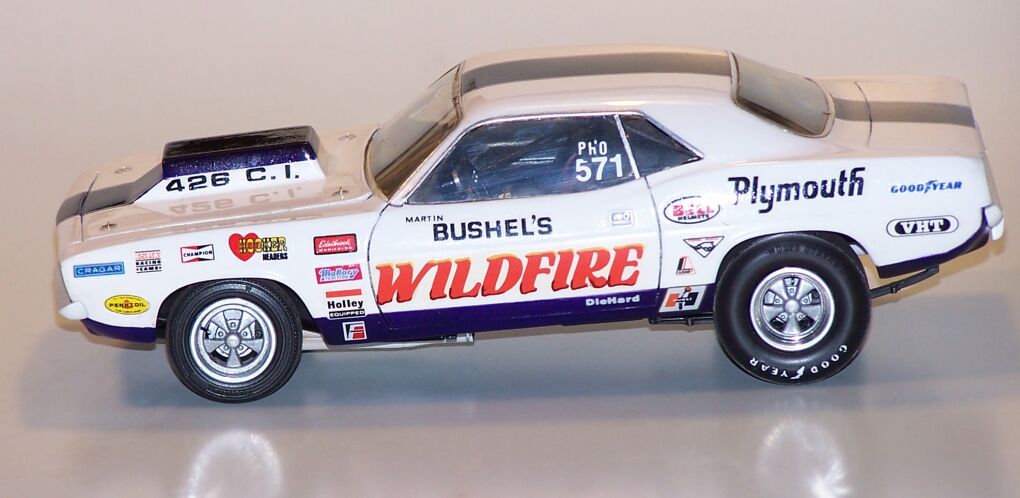
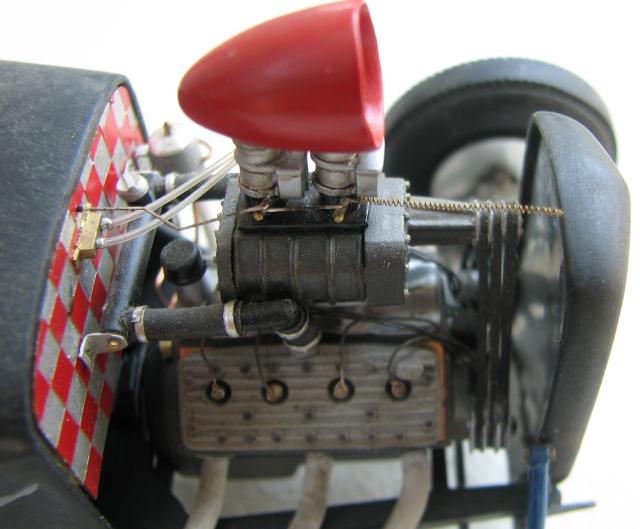
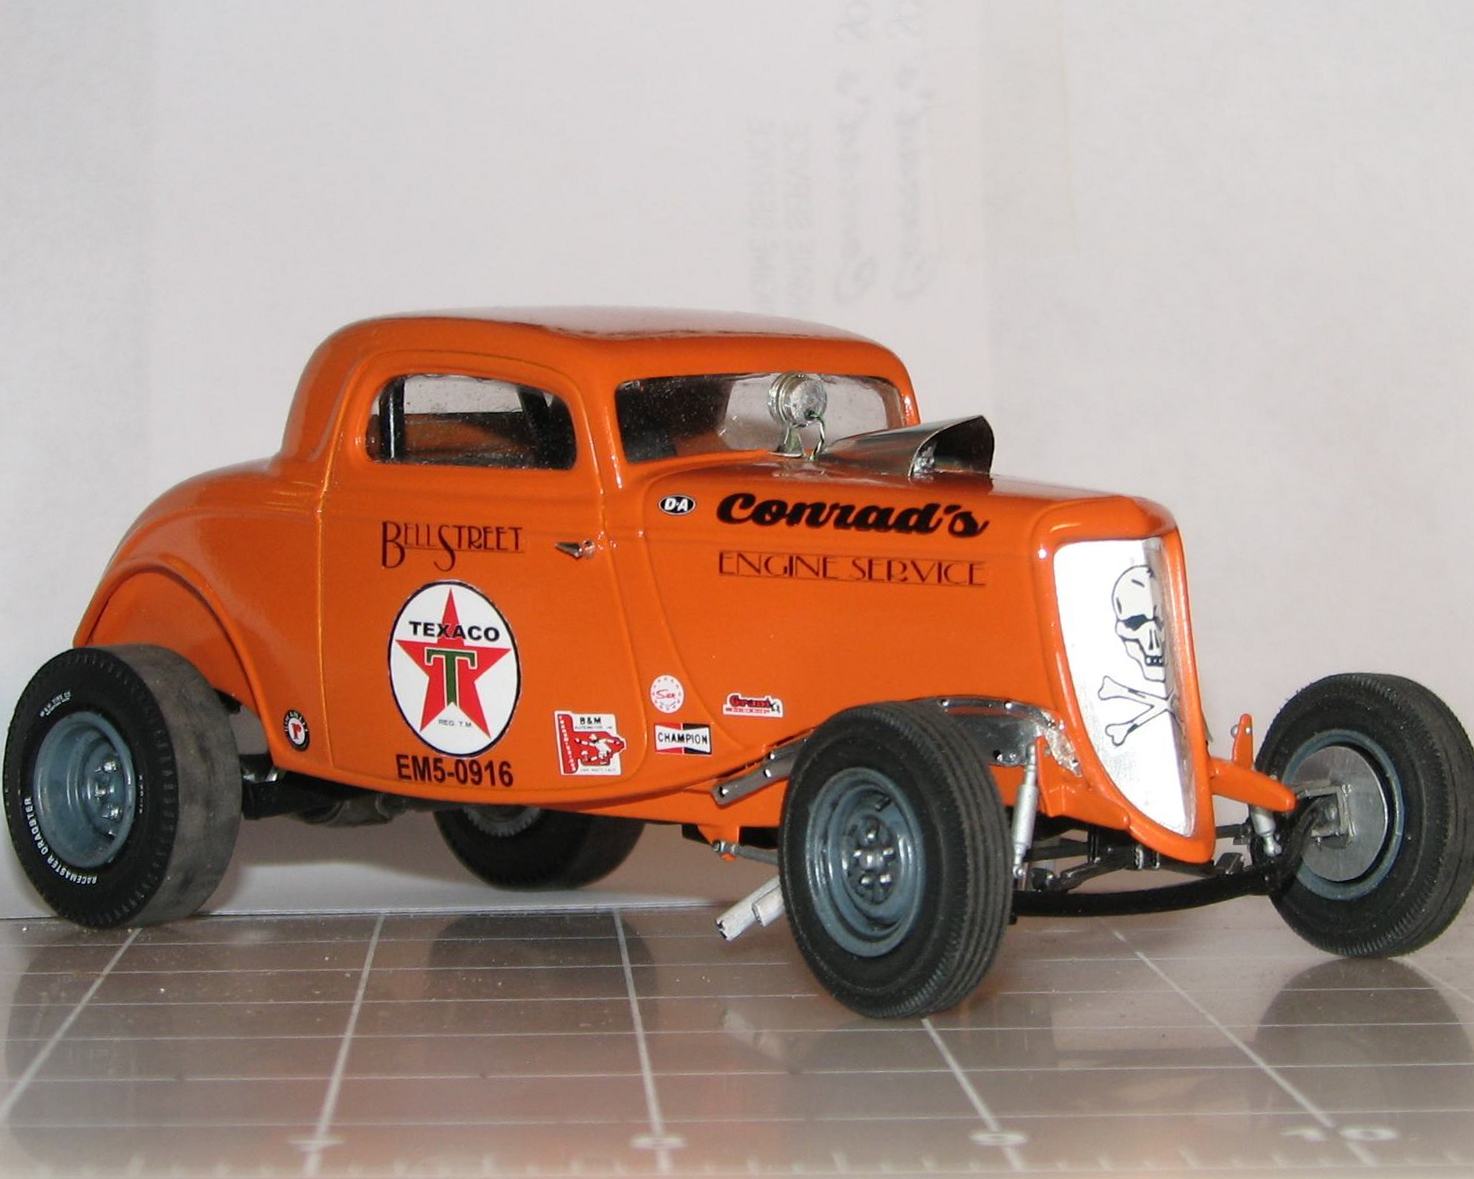
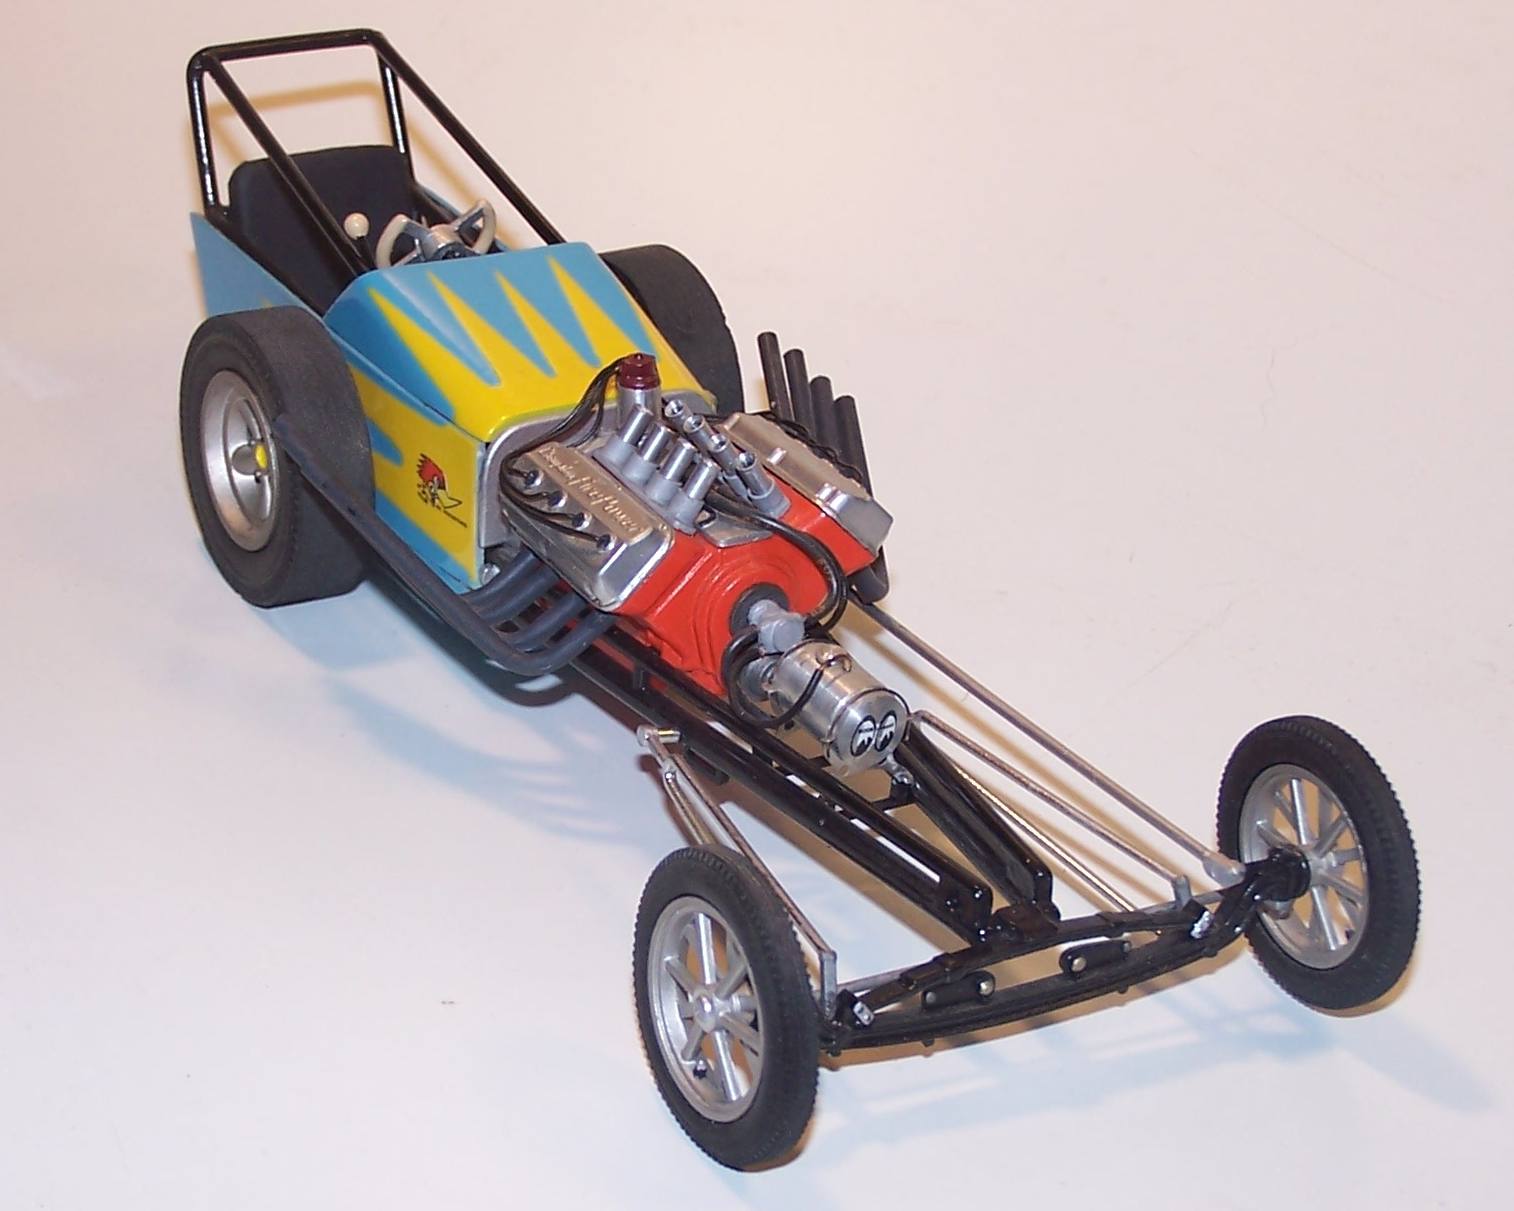
My stable of drag cars. The Sizzler, Long John and Slingshot were all junkers, when I got them. Decals for the Cook and Bedwell car were made by Jack Smith. Questions/comments welcome!
Outstanding rendition of "THE BUG". I'd be happy if mine ever gets built and turns out half as nice.
You've got a great start! Looking forward to seeing how it turns out!
-
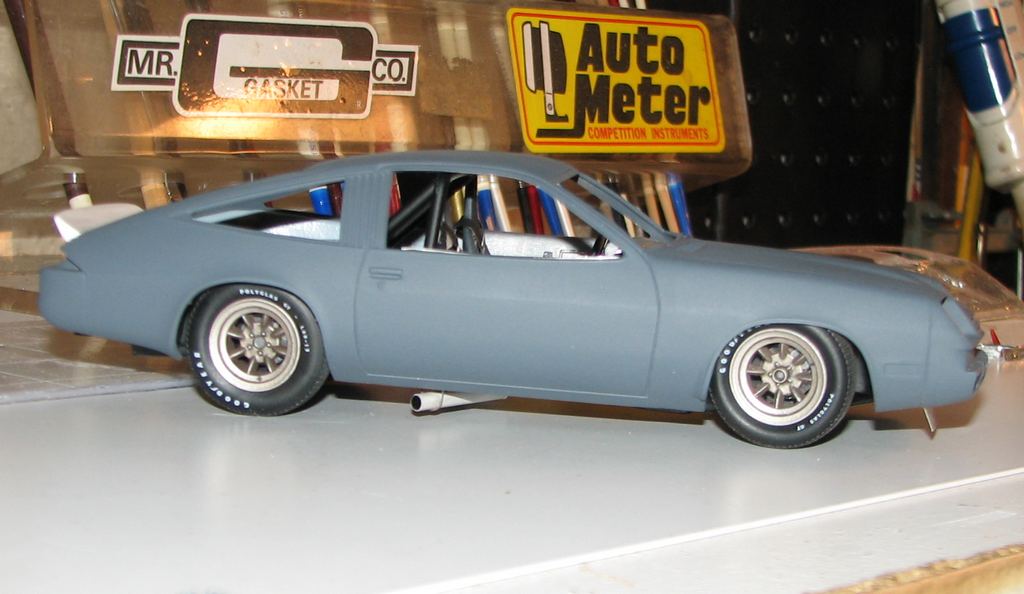
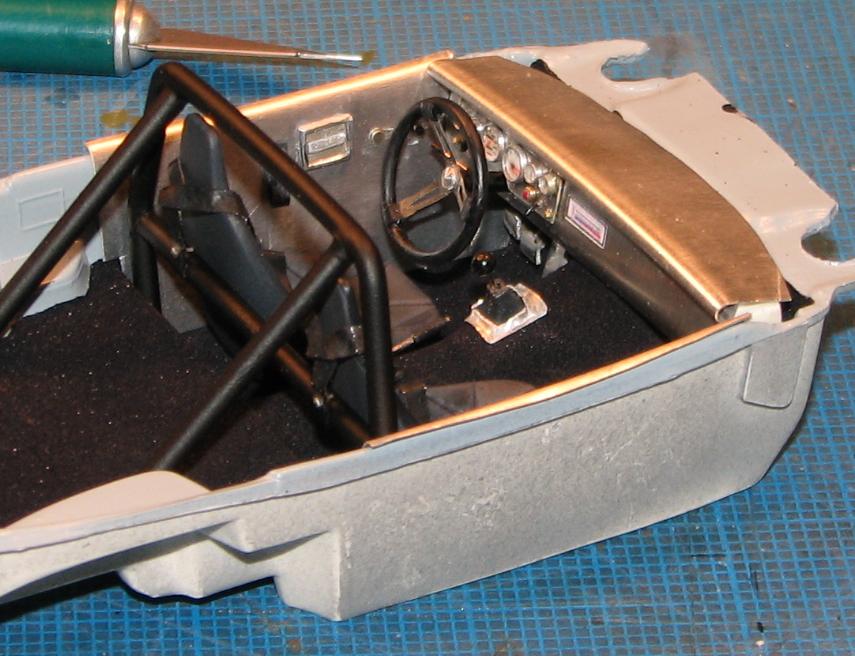
Thanks, Rooster! Just a few shots with the body in primer, and the interior in (temporarily). The spoilers really help the overall look of the theme. Shouldn't be too long until paint--once I decide what color I want it, and get out to find some, which will likely be Wednesday. Comments/questions always welcome!
-
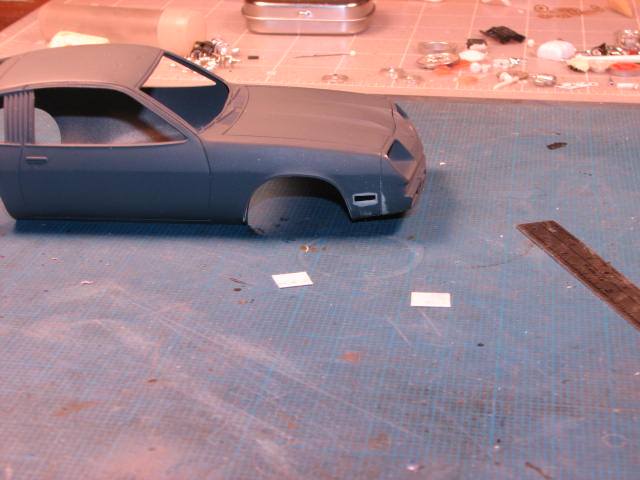
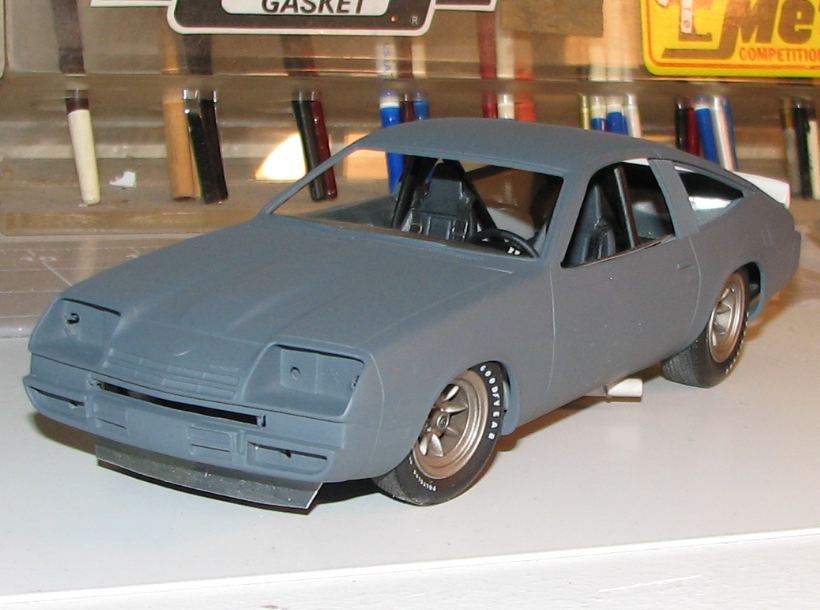
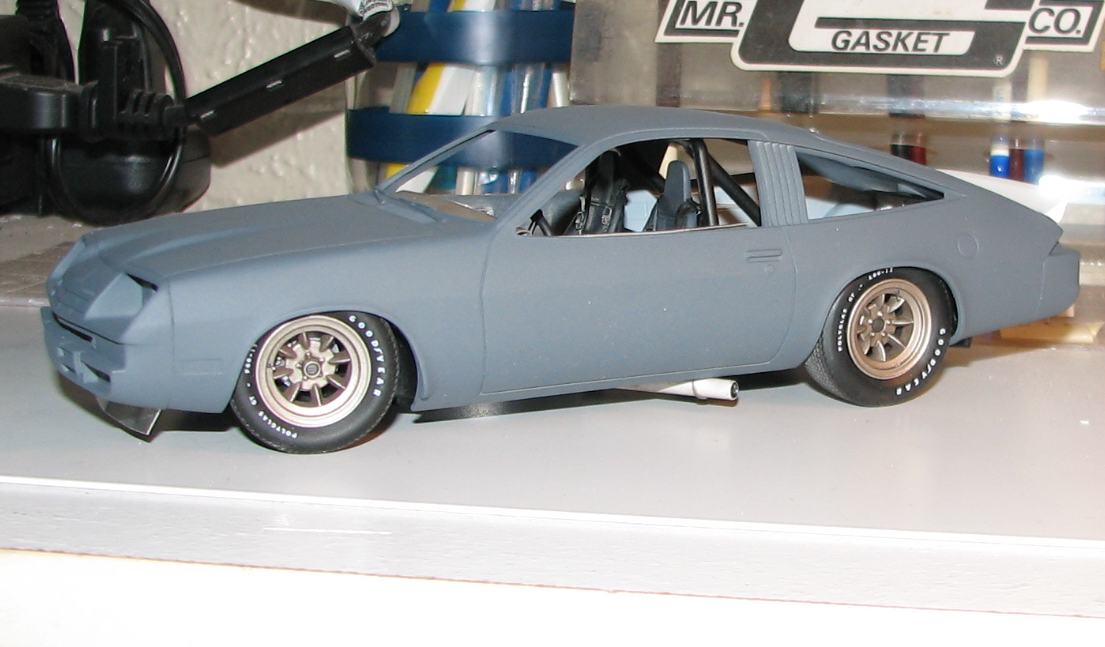
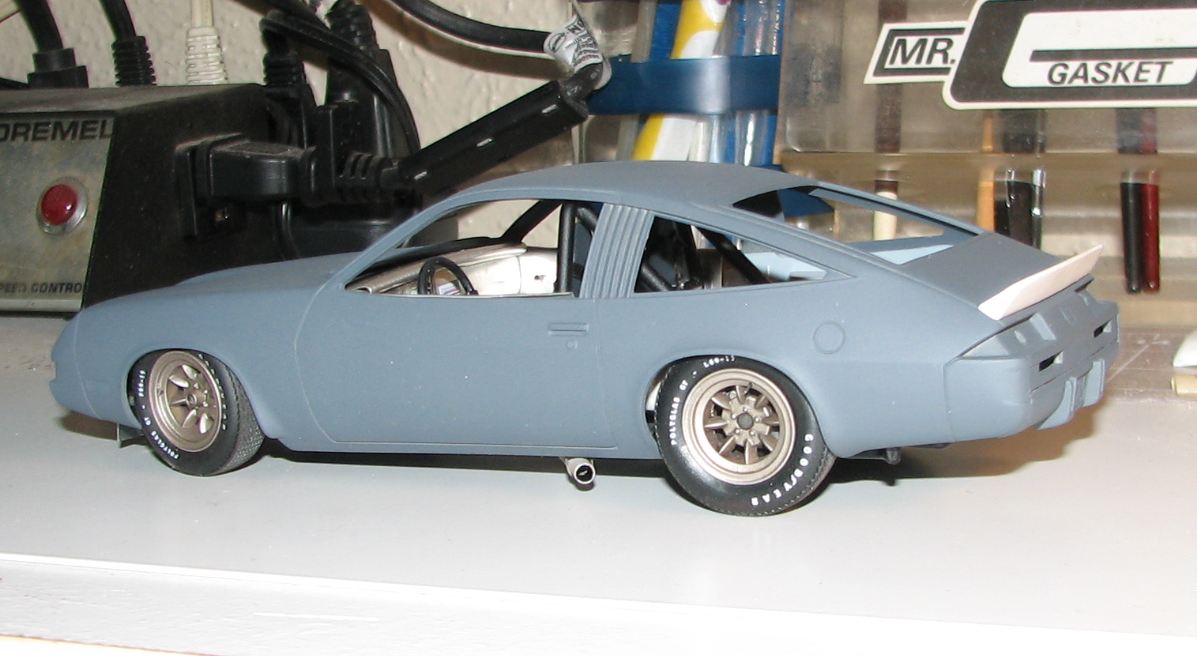
Got a bunch of sanding done, and got the body in primer, so I can see what I've missed! I'm surprised that MPC didn't get the line between the fender and the cowl. I am debating whether or not I'll attempt to scribe them, but, if I know me...I am going to open up the side marker lights and install a lens made from the materials shown. The amber is a tab from a piece of amber sprue from an AMT truck kit. I sanded off the ID numbers, and polished it up. The reflective material is foil liner from a hard pack of cigarettes. I gathered a fair amount of it years ago, when Don Fahrni used it to wrap a chute pack. I will likely use it under the taillights (where appropriate), as well. I also got the front spoiler and body drilled, so the spoiler can be pinned to the body--more on that in the next update.
-
No sweat, man! They were just gonna' keep sitting in that box of parts, so, somebody might as well use them! I like the idea of dulling the finish on the rubber sections of the bumper. I'm looking forward to finding a color that matches my vision for the car. My search may be as involved as yours! I have a couple of ideas regarding the headlights, taillights and the front running lights/turn signals, but have a bit of experimentation to do, first. Thanks for your kind words!
-
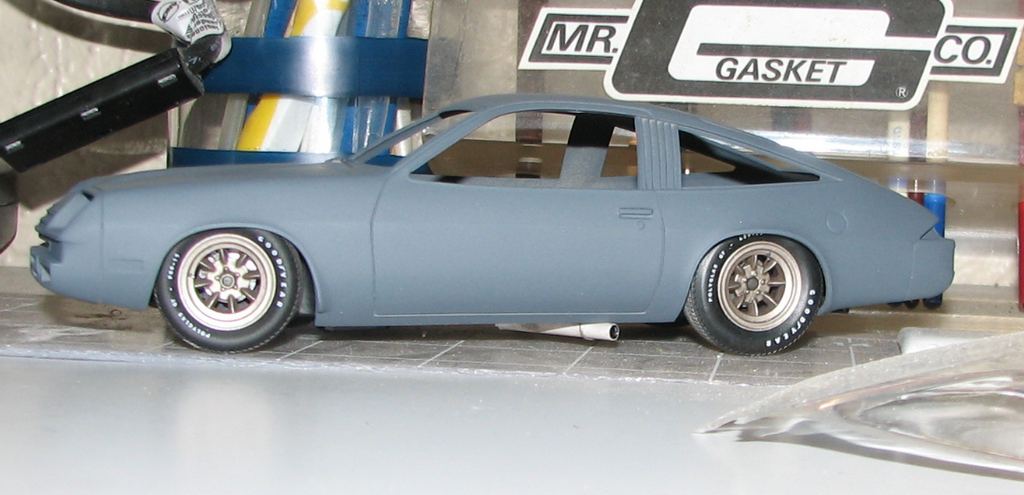
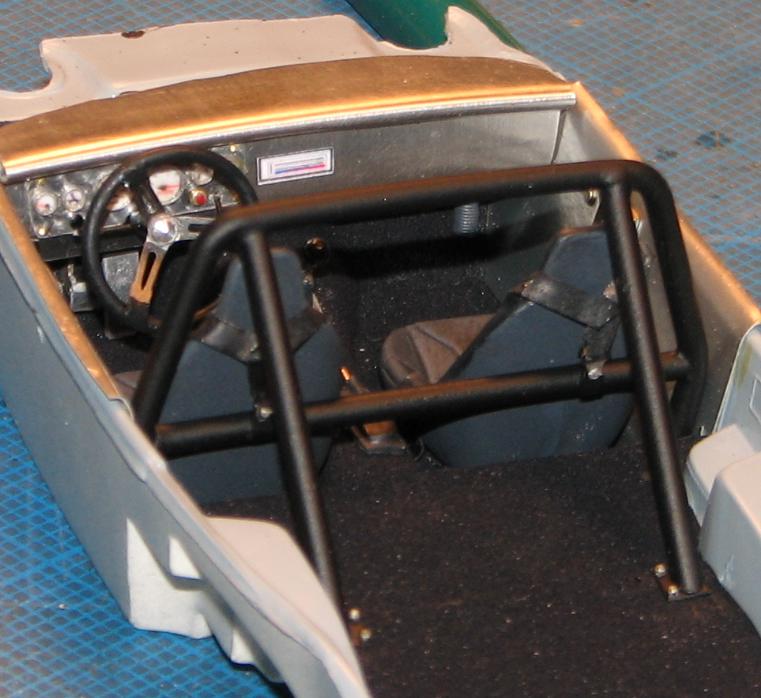
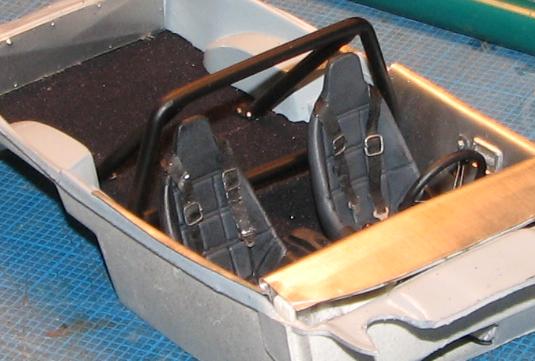
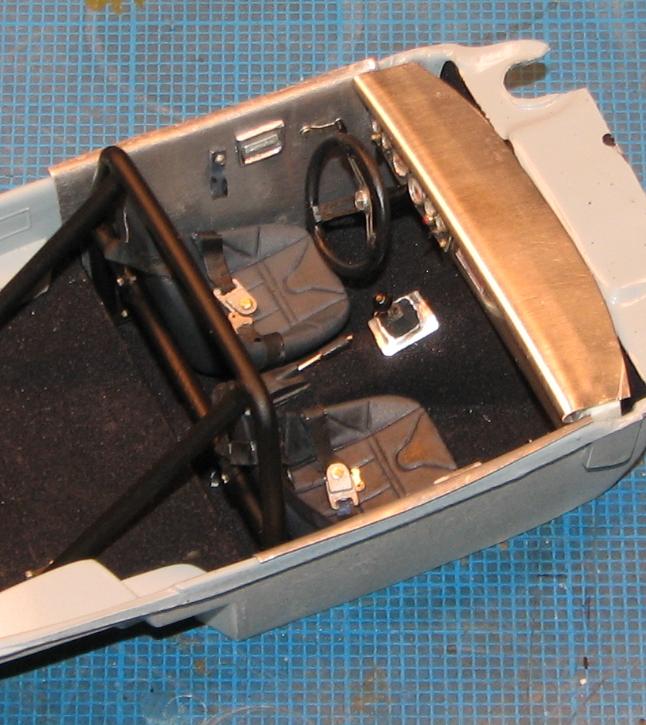
I finally got the interior finished. I'm not happy with the heater control "panel", and I may get rid of it. Now, I can go on to the body! I thought I had a color chosen, but after seeing Snake's promo, I think I want to go with a brighter shade of green than I'd planned, if not quite that bright. I've been playing around with ideas for stripes, and have a few mocked up, but nothing concrete, yet. The grey "hoses" poking down under the dash are heater ducts. I got the idea for them from the gas station job I had in high school--We did full service and washes, etc. I was cleaning a car from the oil field, and they'd spliced into the factory ducts, and had attached a pair of corrugated hoses, that laid along the trans hump, and emerged in the rear floorboard from under the front seat. I thought it was a pretty ingenious way to transfer heat to the rear passengers! So, that's the inspiration for that. Comments/questions as always welcome!
-
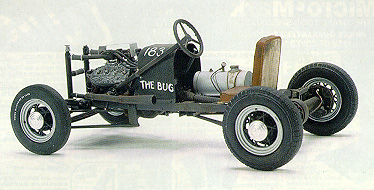
Thank you, Raymond! That model has been in Garlits' museum since 1992. I wish I could get some new photos of it.
-
Fun stuff, guys! Especially dig the stable of Ramchargers rtdes!
-
However, down nozzles at least used to be illegal in nostalgia fuel racing. That's an important point to remember, if you're building a current NFD or FC, unless the rules regarding them has changed over the last few seasons.
-
Thanks, men!
-
5 hours ago, gasser59 said:
Good gawd, those are cool Daniel. Well done.
Thanks, Brad! Much appreciated, sir!
-
Thanks, Greg! Can you tell I like that old Monogram stuff?
-
Here's something I reconstructed from the SLM files. Pertinent information should be in the captions. There are two captions that contained links to larger photos. I have attached those photos in the post. The whole point to the StraightLineModeler was to share information regarding drag race (lakes, salt, as well) modelling. Those files aren't doing anyone any good on my computer, so, I hope it's okay if I share them here, as I am able to reconstruct some of those pages.
-
My stable of drag cars. The Sizzler, Long John and Slingshot were all junkers, when I got them. Decals for the Cook and Bedwell car were made by Jack Smith. Questions/comments welcome!
-
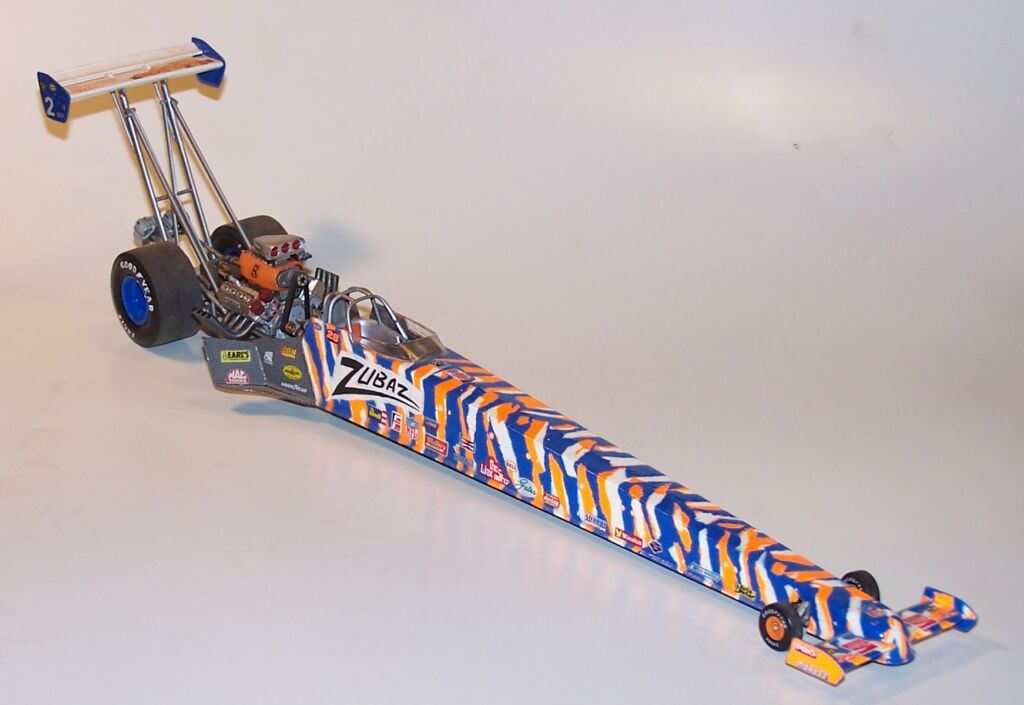
How much for the Jackson Pollock painting it's sitting on?grin
-
On 6/12/2018 at 11:48 AM, Rob Hall said:
When I lived in Colorado Springs (97-02) and the Denver area (02-08) I used to go to Colpars all the time...was my favorite shop. There was one way up in Greeley I'd go to a couple times a year.
I used to work for a distributor and hobby shop in Englewood. We sold kits and supplies to shops in the Springs, to both Colpar stores and many of the other shops along the Front Range. Colpar's stores are still run/managed by the same guy who ran them, then, except they are now Hobbytown franchises. They both still maintain an excellent supply of kits, supplies, tools, etc., including aftermarket stuff. I've known many of the people who work there for decades, now. I loved Caboose Hobbies for scratchbuilding supplies. Alas, they sold out, and what remains is a shadow of what once was, and are basically Caboose Hobbies in name only, now. That store in Greeley was Don's Hobbies. It is unfortunately gone now, as well. The coolest thing about Don's was that they had a pretty fair selection of out-of-production kits, and that was always fun to check out!


")


1975 Monza--Completed 12/25/2018
in WIP: Model Cars
Posted
Thanks, again, Dan! I may have had my settings wrong. Please try messaging again.