

Straightliner59
-
Posts
4,722 -
Joined
-
Last visited
Content Type
Profiles
Forums
Events
Gallery
Posts posted by Straightliner59
-
-
Thank you, Joe! I really appreciate that!
-
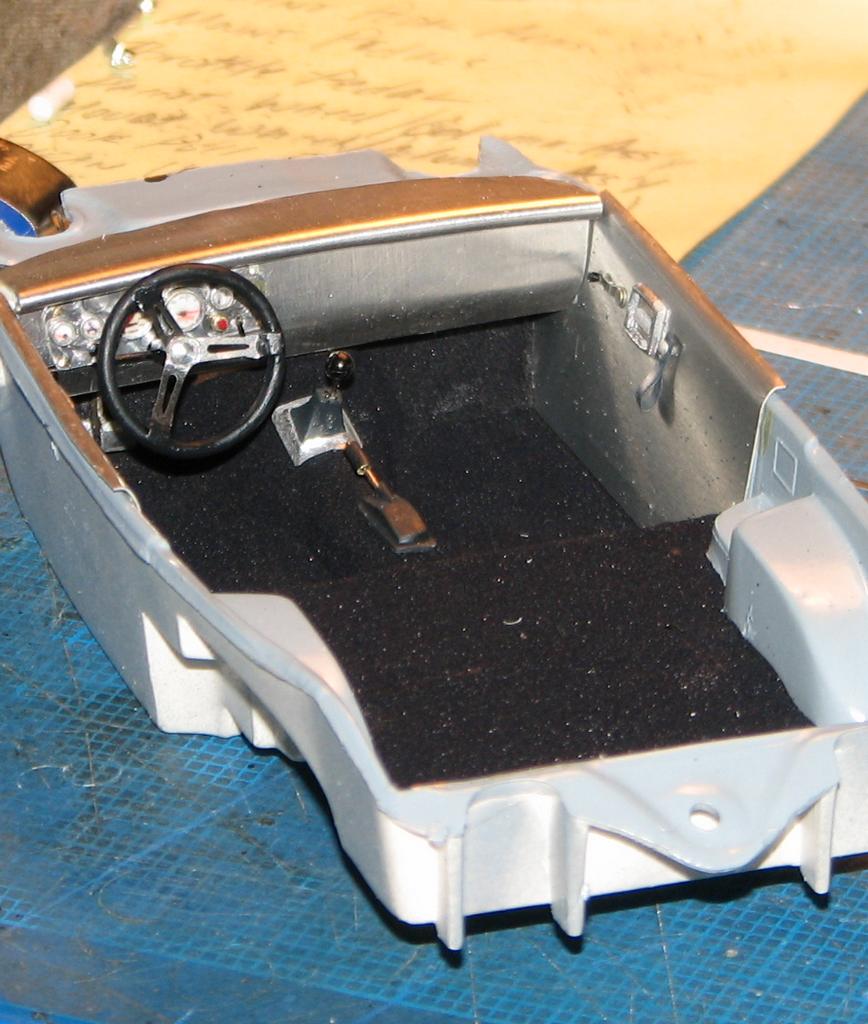
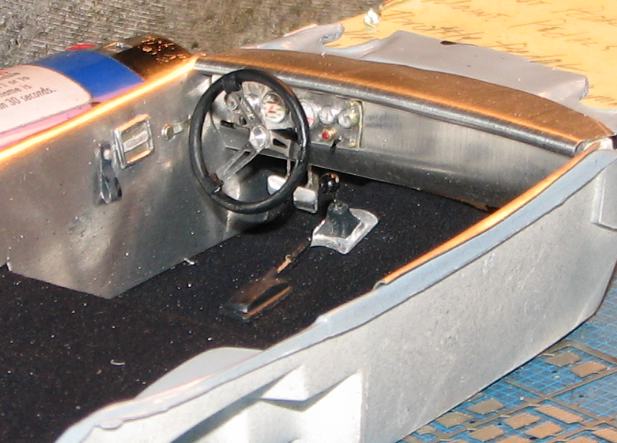
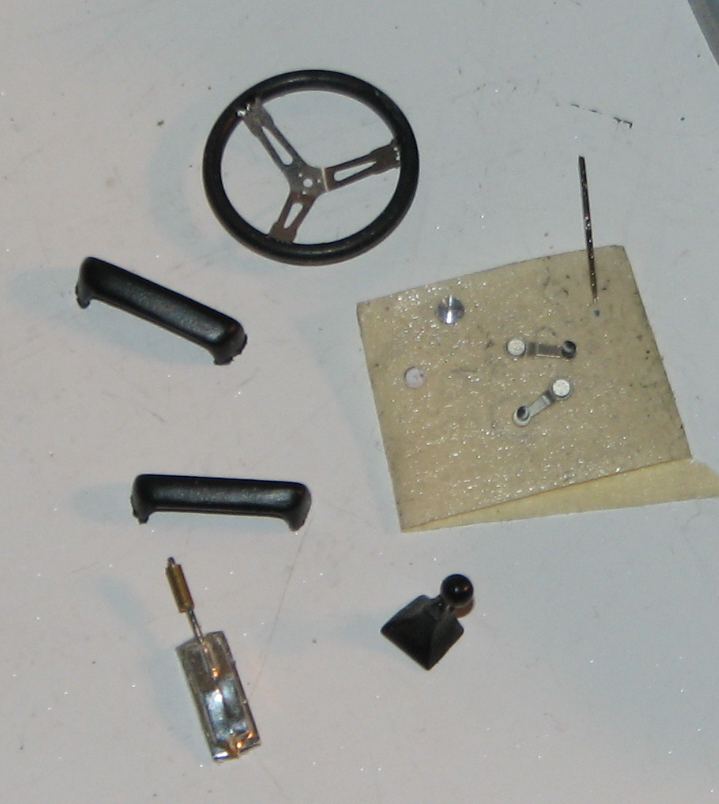
I've been picking away at this interior. I had a set of photo-etched steering wheels from Detail Master, and opted for one of them, for this model. The dash is almost finished! I made the pedals from aluminum tubing, that I quartered, then cut the sections to length, and sanded them to shape. They are mounted to arms made from .020" styrene sheet. I made door pulls from some soft aluminum foil/sheet in a drawer of scratchbuilding junk. Those are mounted to the door panel with a model RR rivet. Still a fair amount to do, but, figured I'd share the progress.

-
Very cool! I love the "little" things you have, going on, here: interior door panels, paint finishes, use of color, detail work...excellent model!
-
That car was definitely purple!
-
Chris, this is outstanding! I've been following your progress, and have remained awed. Excellent job, sir!
-
I like it! Woodgrain is especially nice. Excellent work!
-
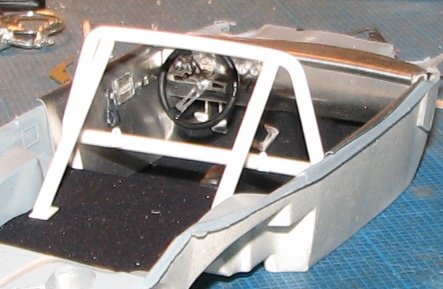
I've put together a bunch of parts and pieces for the interior. I still need to clean up the roll bar, and cut openings in the interior door panels for the door handles. Pictured here, you can see the NEW gauge panel--I am just about to add the ignition switch and the starter button. Also visible are the window cranks and armrests--it is still a street car, after all. That means the steering column will have the turn signal switch. I will add some corrugated piping just beneath the dash to provide heat on cooler days. I'm not 100% sold on the P.E. steering wheel, so that's pending. The floor has been covered with embossing powder because, even though I want to convey the image of a racer, I want it to be at least somewhat practical. I chose the leather-booted shifter because it has a more of a sports car flare, than, say, a Hurst...
-
First, I'll say that I LOVE this subject! The CAD models are very cool. It sounds like you've discovered (as did I!) that this isn't as simple a build as it first appears.grin You've got an excellent start! I'm looking forward to seeing it come together.
-
On 5/13/2018 at 4:36 PM, Snake45 said:
It's not just the front bumper. All the bodywork at that corner is just gone.
The rear bumper is missing completely, too. But it looks like it should be easy enough to scratchbuild that, especially since I can just paint it all-black to match the front (molded in black plastic).
The poor little thing is just too nice otherwise to chop up.
I was going through a box of parts, and came across this. Let me have a mailing address, and it's yours!
-
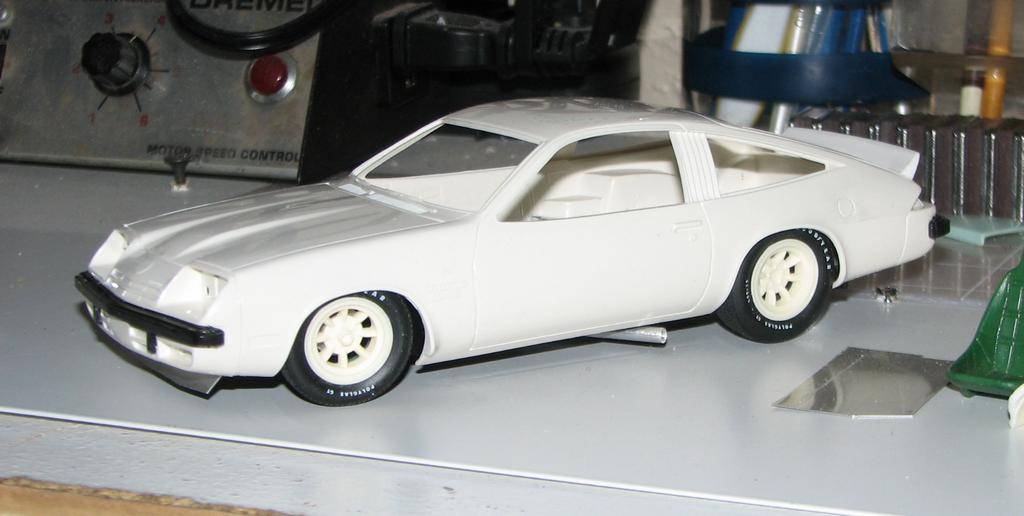
I have a whole slew of Monzas. I think I have 4 promos from '75-'77, and none of them cost more than $20. Last year I scored an MPC '75 Annual kit, but I don't recall what I paid for it. I think the AMT Monza looks too wide and kind of "flat", for lack of a better term. Robberbaron, I agree with you--the way to go would be to use the MPC body with the guts from the AMT kit.
-
17 hours ago, DISKODEE said:
Slm? What website is it your talking about and is it still up? I remember seeing this specific scratch build how to but that's a long long time ago!
Unfortunately, it's no longer posted, Daryl. I have all the old files; in fact, I have the entire website. I wouldn't re-publish it without some freshening up. I will probably do some more screen captures, like this, and share them as I have time.
-
11 hours ago, Daddyfink said:
That nose was specific to the Prudhome car. That was one of the biggest differences between these kits.
Some came with front wire wheels or with Super Tricks. The Garlits and California Special cars have slotted rear wheels
Thanks, Jesse. We probably went over this, back in the old days! When you mentioned it, I thought, "Seems like, at some point, I remember hearing that, about the Snake car." But, I certainly didn't remember it, offhand.
-
Pretty sure the only difference in the plastic may be the wheels.
-
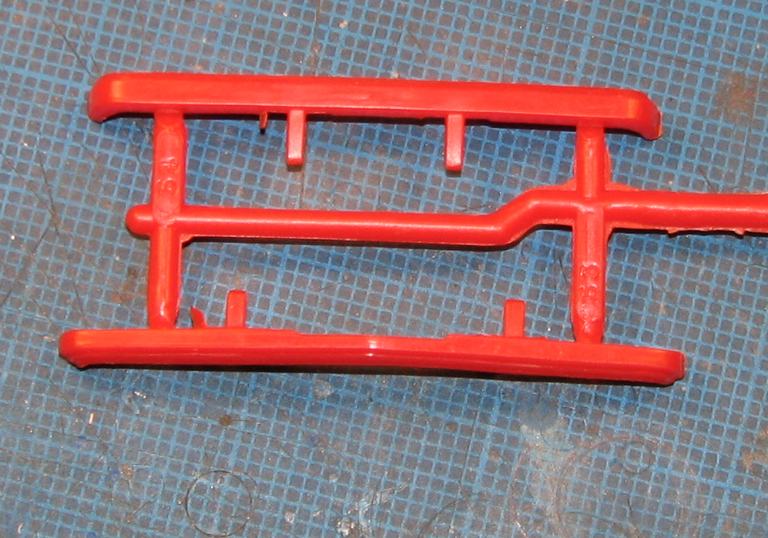
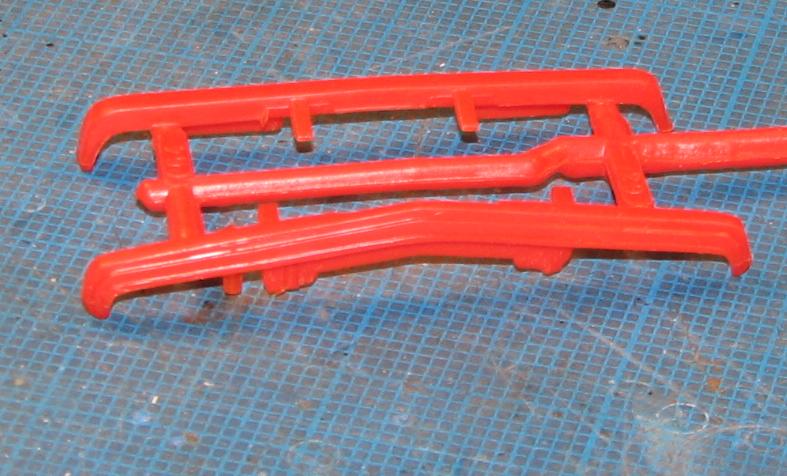
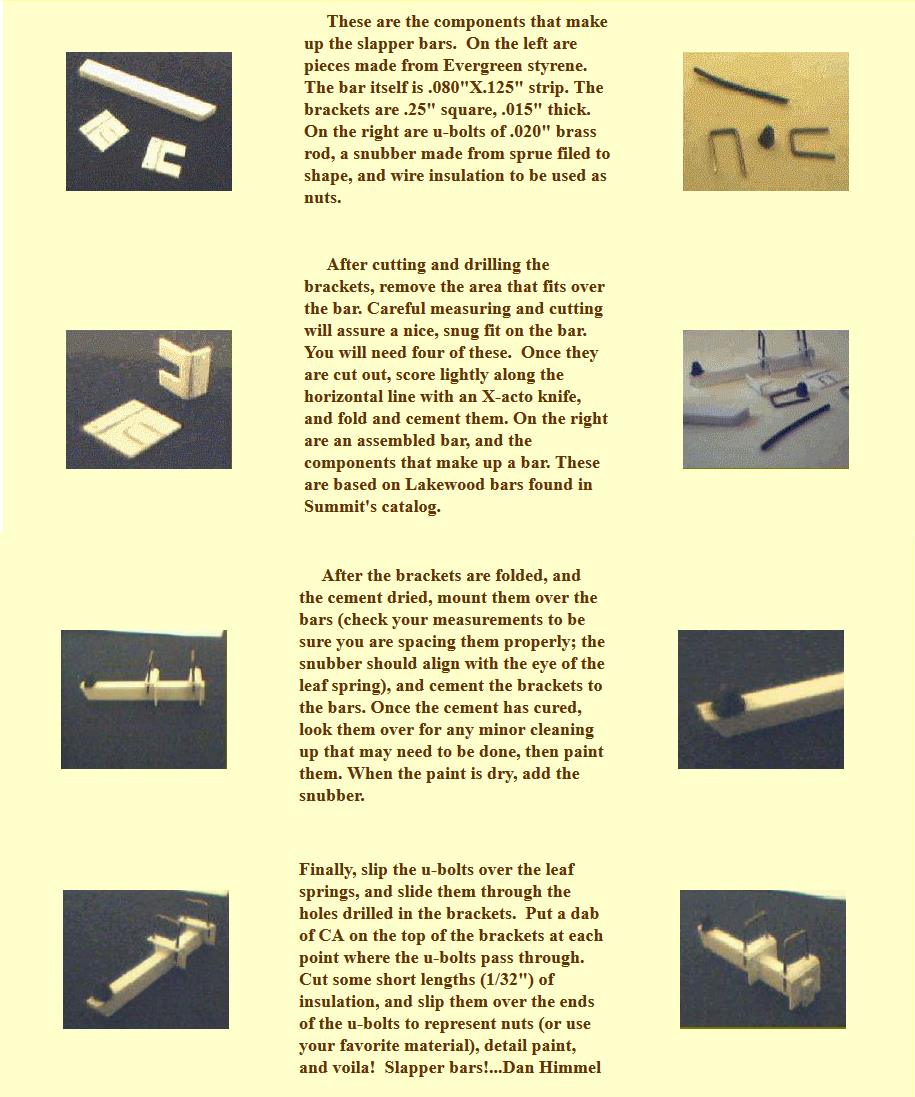
This is something from the old SLM website I thought I'd share, because that is what it's all about! I thought perhaps this should go in the tips, etc., but, they're used almost exclusively for drag racing, so, I opted for this page. I reckon an admin should feel free to move it, if that's a more appropriate location. They are so easy to build, that there's really no excuse not to, if you need a set!
-
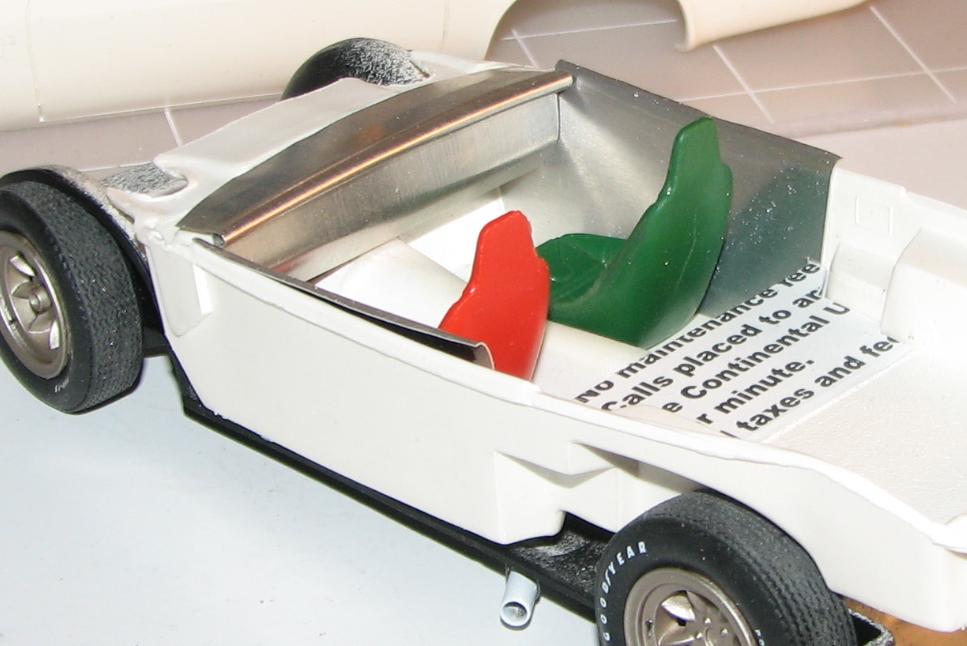
8 hours ago, SSNJim said:
That is correct - the red seat goes on the port side, green on the starboard. Oh wait, that's navigation lights on a ship.
In that case, they are in the proper position! Same for aircraft. Guess I won't be switching them, after all!
-
6 hours ago, Snake45 said:
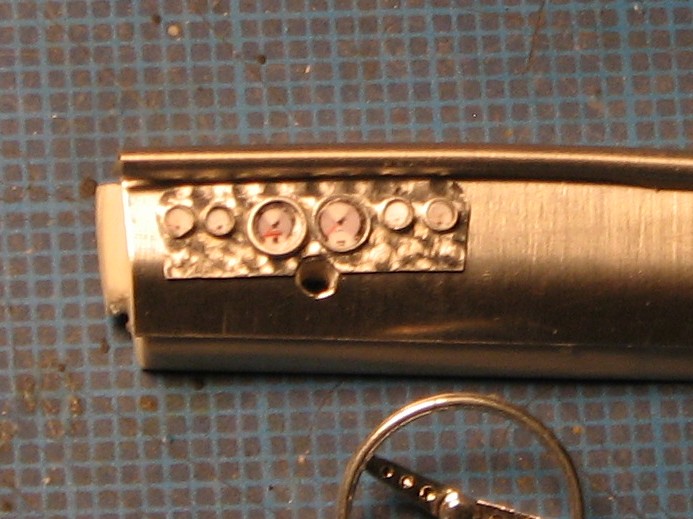
Looking very, VERY good! Your engine-turned dash panel is particularly impressive.
You might be interested to know that, influenced by you and this build, I dug out the '77 Monza I started in the mid-'80s and dragged it across the finish line a couple weekends ago. Will post pics under glass as soon as I get time. Thanks for the inspiration!
Awesome! Looking forward to seeing it! Thanks for the kind words re: the dash panel. I'd like the turned pattern to be more uniform, but, it does have the look.
-
6 hours ago, mustang1989 said:
Stance is right on and all the details are very sharp! What did you use to paint the lettering on the tires both paint wise and applicator wise?
Hi, Joe. Thanks for the kind words! Those are the AMT Parts Pack tires. They are beauties!
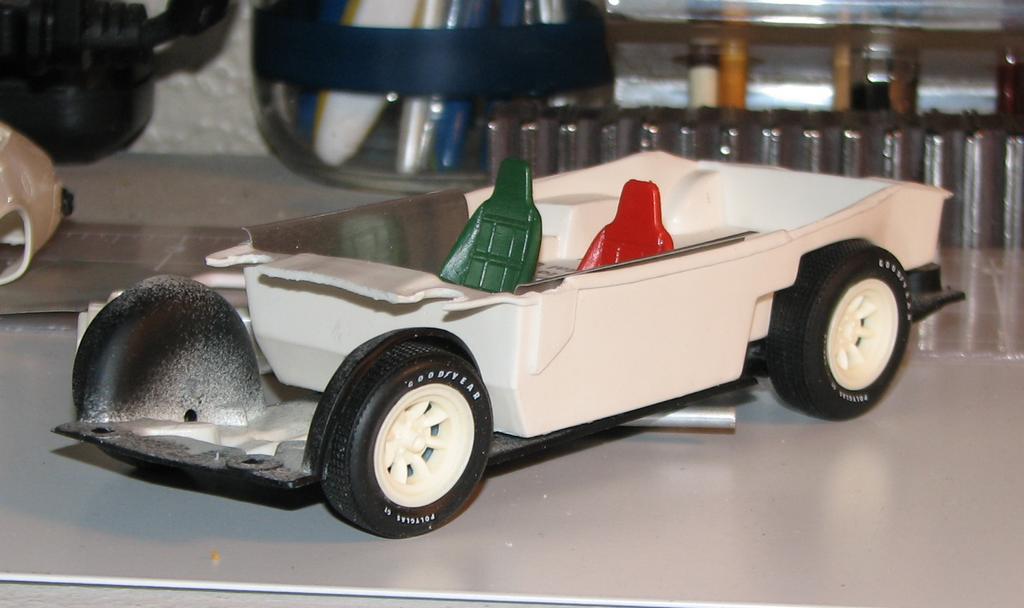
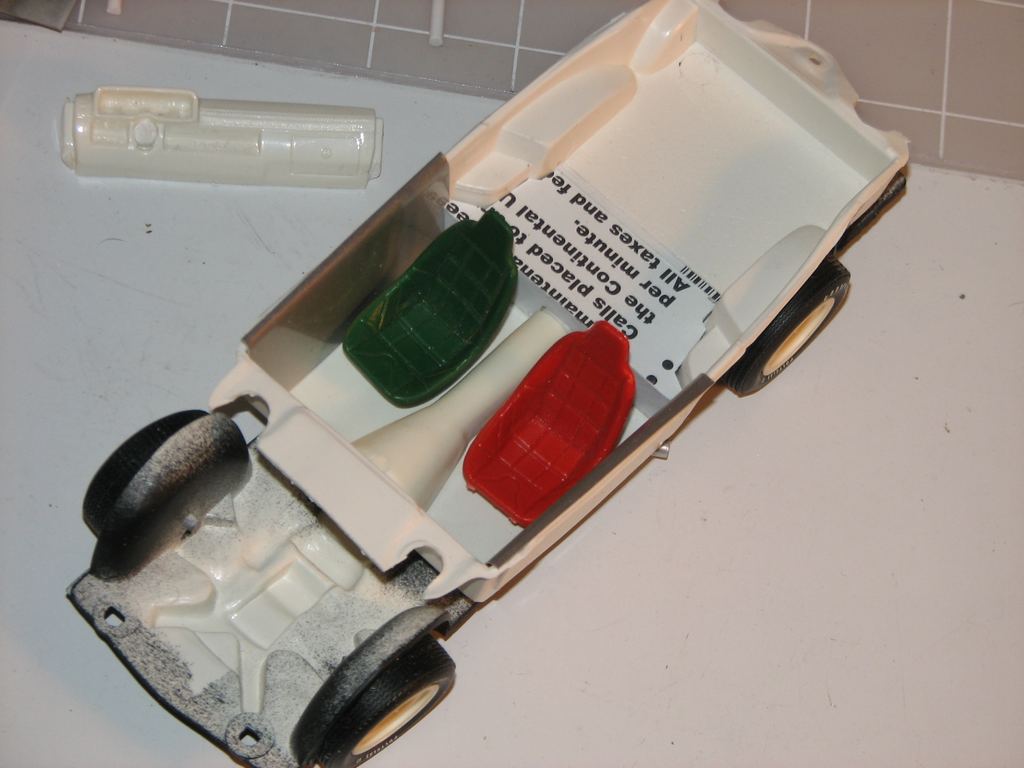
3 hours ago, James2 said:If it were me I'd switch the green seat to driver, just to help it go faster! LoL, looks good though...
Rooster, I think you have a point! I'll get that taken care of!grin
-
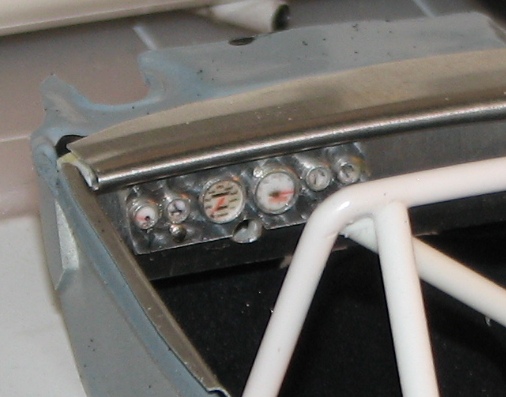
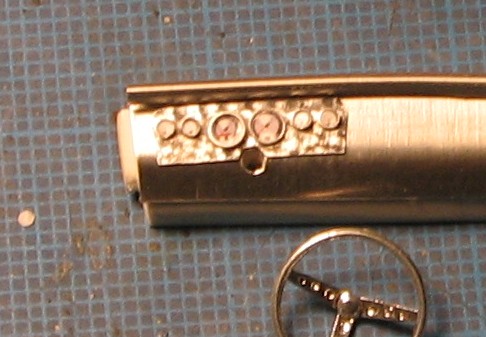
I've been playing around with gauges. I used photos from around the web for the gauge faces. The bezels are made from aluminum tubing. I have yet to install the lenses. I'm not thrilled with the engine turning on the panel, but it'll have to do, until I figure out a better way to accomplish it! I still need to add a few knobs and switches. This tool from Micro Mark was extremely helpful in cutting the bezels to thickness, as it has a bent rod that can be inserted above the clamping slot, and adjusted to regulate the length of the tubing to be cut. It made it an absolute breeze!
-
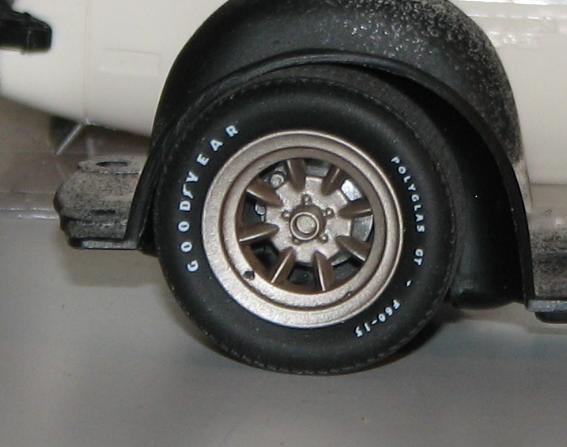
Today, I got some paint and valve stems on the wheels--still a lot to do, before they're finished, but, I like the color. It's Design Master Modern Metals "Metallic Taupe". I also got the dash panels cut and formed. Next up for that will be poking some holes in the faceplate for gauges, switches, etc. I shot some white primer on the exhaust dumps. I still need to paint their insides dark grey/brown/black, and dust them with a blend of powdered pastels. I will be washing/shading and highlighting the wheels, and dusting them, inside, with a pastel blend, along with some powdered graphite, to simulate brake dust.
-
9 hours ago, afx said:
Nice looking seats, can I ask the source?
JC, those are from Johan's Sox and Martin 'Cuda. They are very nice!
-
Snake, I hope I can inspire you to get your Monza out and work on it. Would enjoy seeing your vision! Thank you, Karl. The stance has to be right, or it just doesn't work, no? Thank you, Ron.
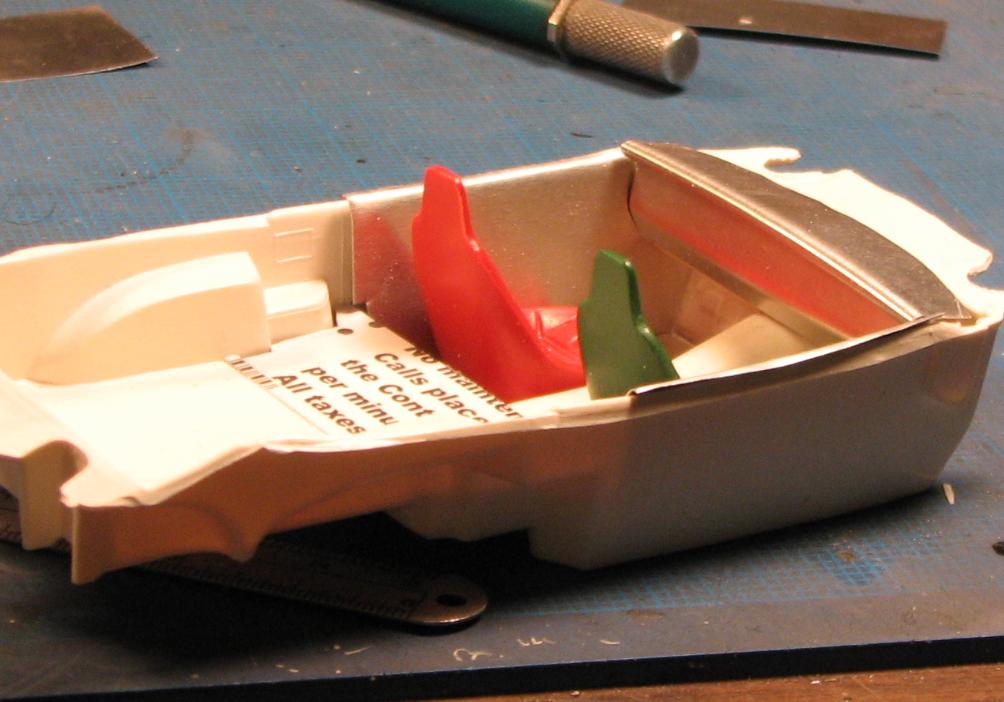
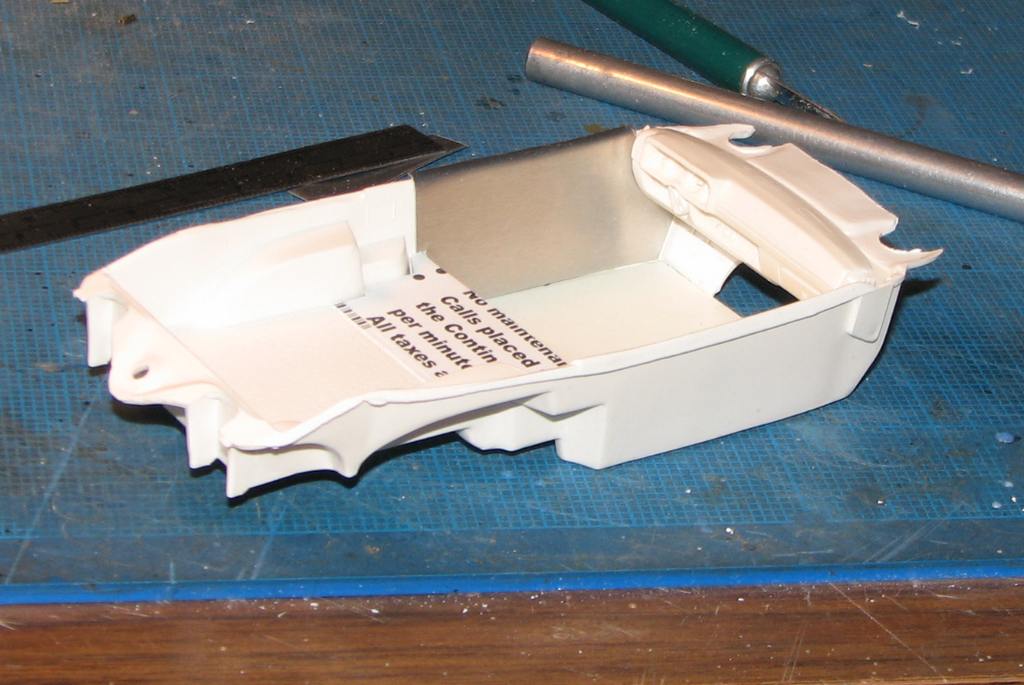
I've been spending some time on the interior; The door panels, in particular. I cut them from .005" aluminum flashing (can't say enough, how much I love this stuff!), then rolled them at the top, over a length of 1/16" brass tubing, to create a rounded bend. As you can see, that left the upper edge of the panels straight, so they didn't match the window line. To correct that, I cut a section of aluminum door threshold I'd picked up, somewhere, and cut and filed it to the desired profile. Then, using a ball peen hammer, I formed the top of the panel to more closely match the window line. I'll do some fine tuning to the panels, yet, but, the improvement is apparent. Lastly, I cut the reliefs for the dash. I'll also add some rolled beads to the panels, along with window cranks and door handles. I'm planning to smooth the bumps on the promo's dash, and form some aluminum sheet over it, to make a new dash. I've also begun work on the trans/driveline hump. Attached are a few progress photos. Comments welcome, as always!
-
Thanks, David! I agree with you, the scoop will not be part of the finished model--I want to leave the lines of the body alone.
-
Thanks, Snake! I'm kinda' liking it, too! I've added a couple of items, now: exhaust tubes, a new chin spoiler (I'm going to reshape the bottom, to eliminate the optical illusion that it's got a concave profile--I know it's straight, because I cut it against a steel straightedge.) and the rear spoiler.
-
Thanks, Dave and Joel! Much appreciated!


")


The Little Drag - A Monogram "Never Was"
in WIP: Drag Racing Models
Posted
Excellent concept! Very nicely executed!