StevenGuthmiller
-
Posts
15,071 -
Joined
-
Last visited
Content Type
Profiles
Forums
Events
Gallery
Everything posted by StevenGuthmiller
-
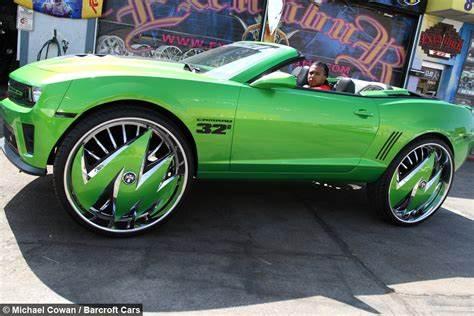
I wonder if the guy in that car knows how he looks? Steve

-
Could be worse. Could be giant plastic eye lashes on a Volkswagen Beetle! ? Steve
-
Great description! Steve
-
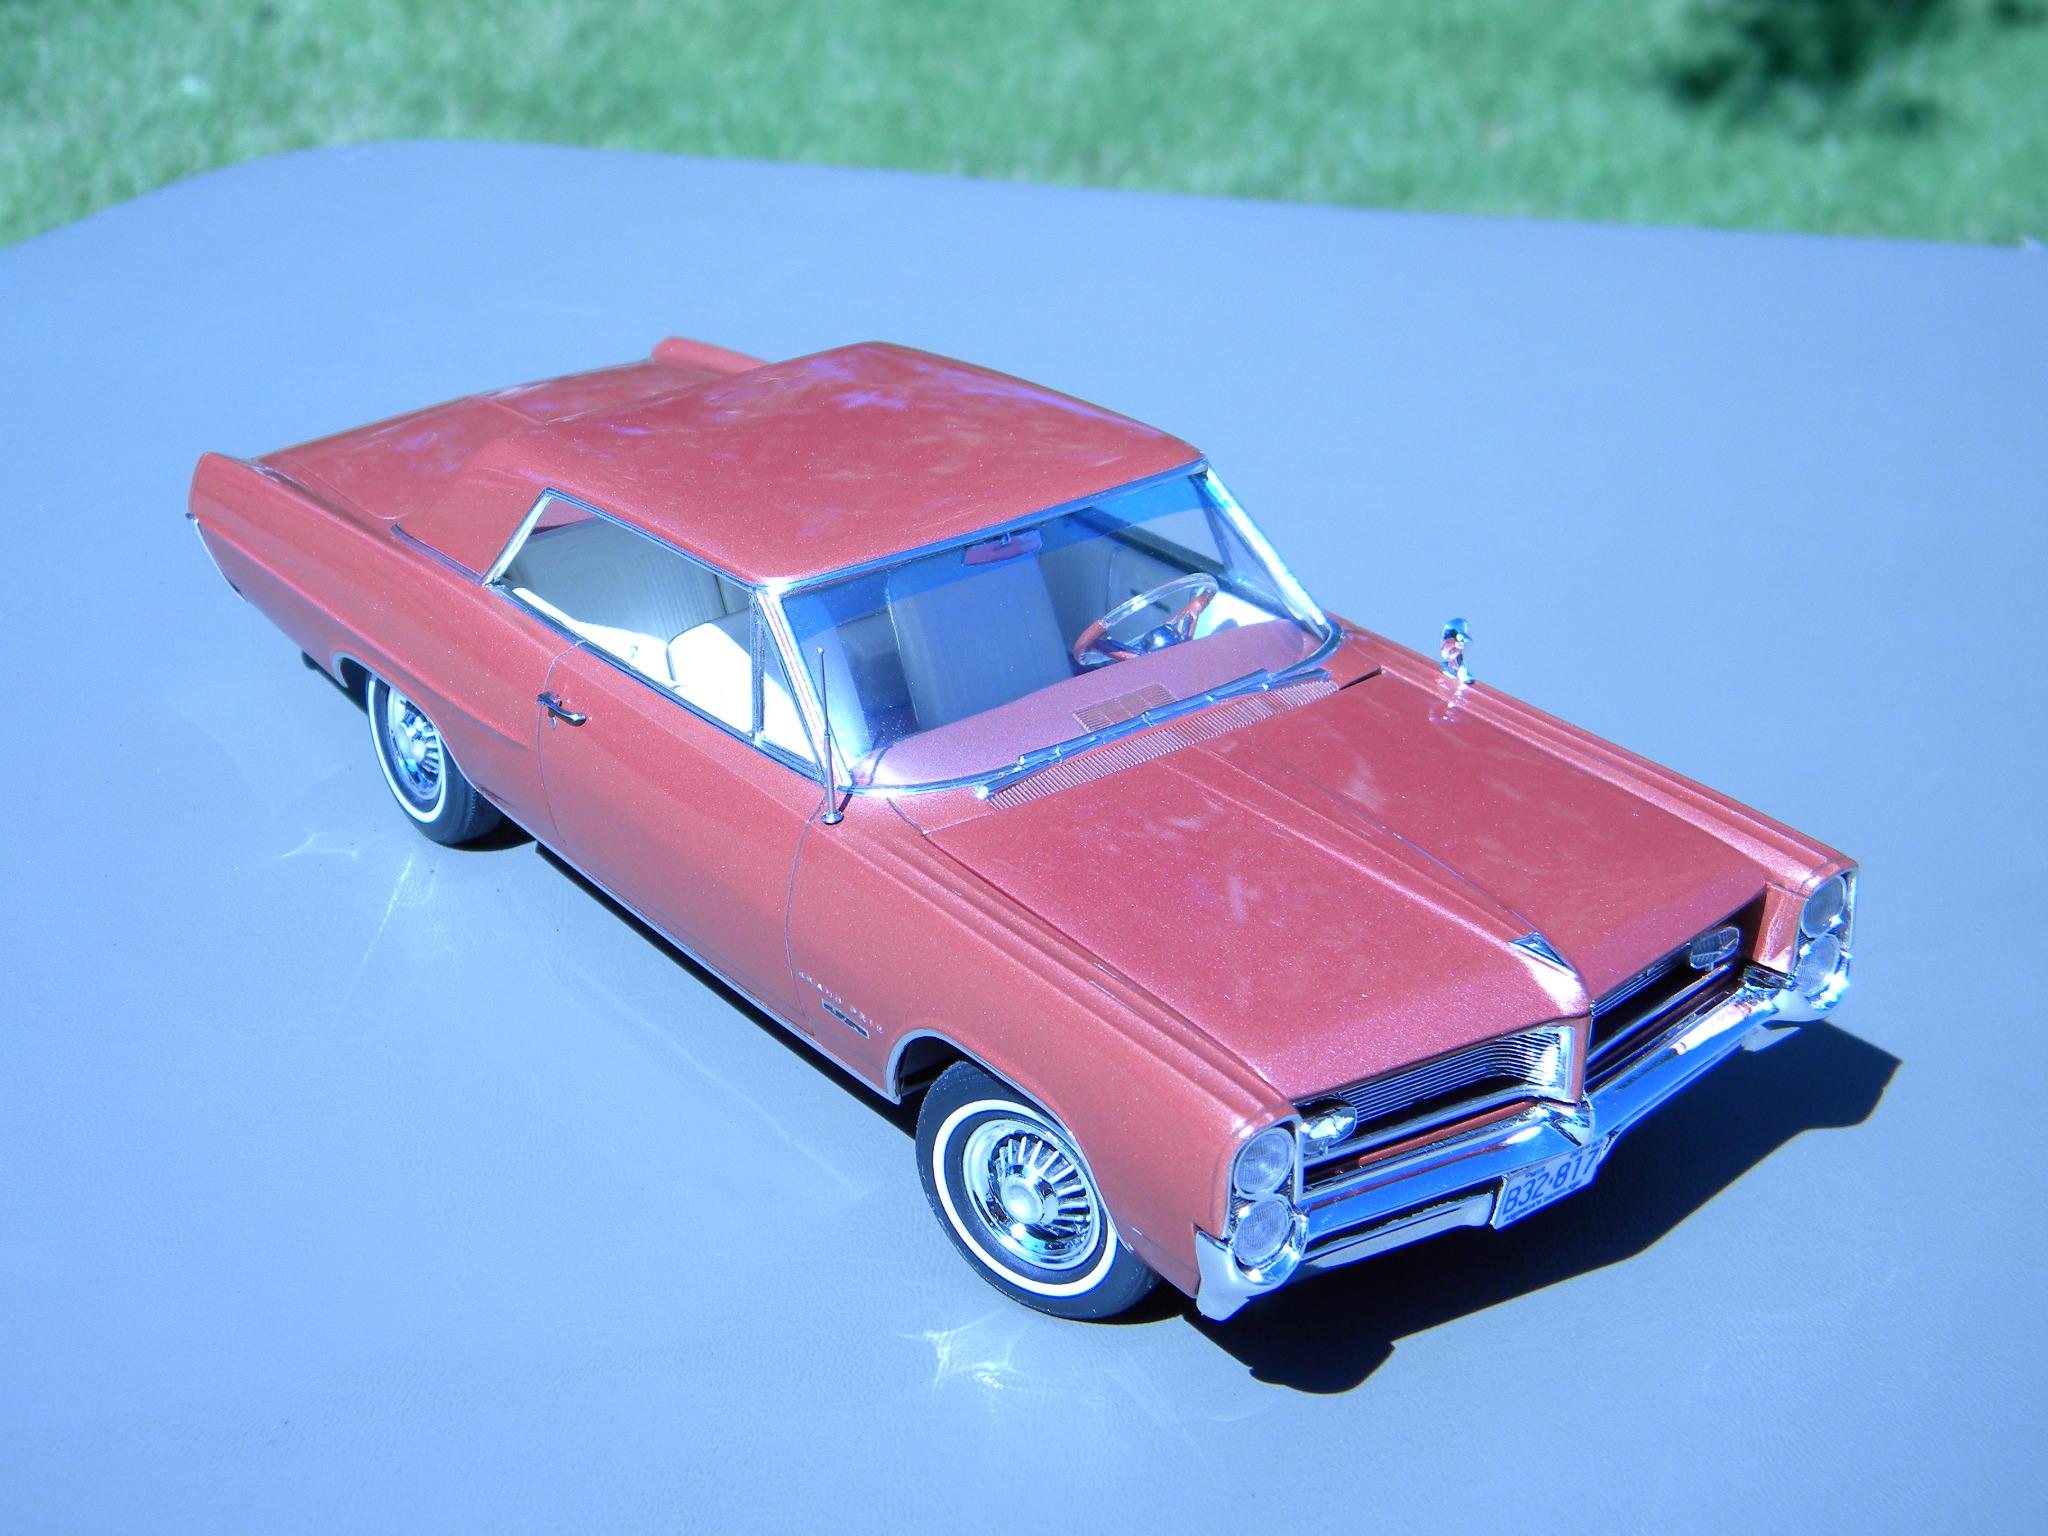
Oh c'mon. This looks nice........no? Steve
-
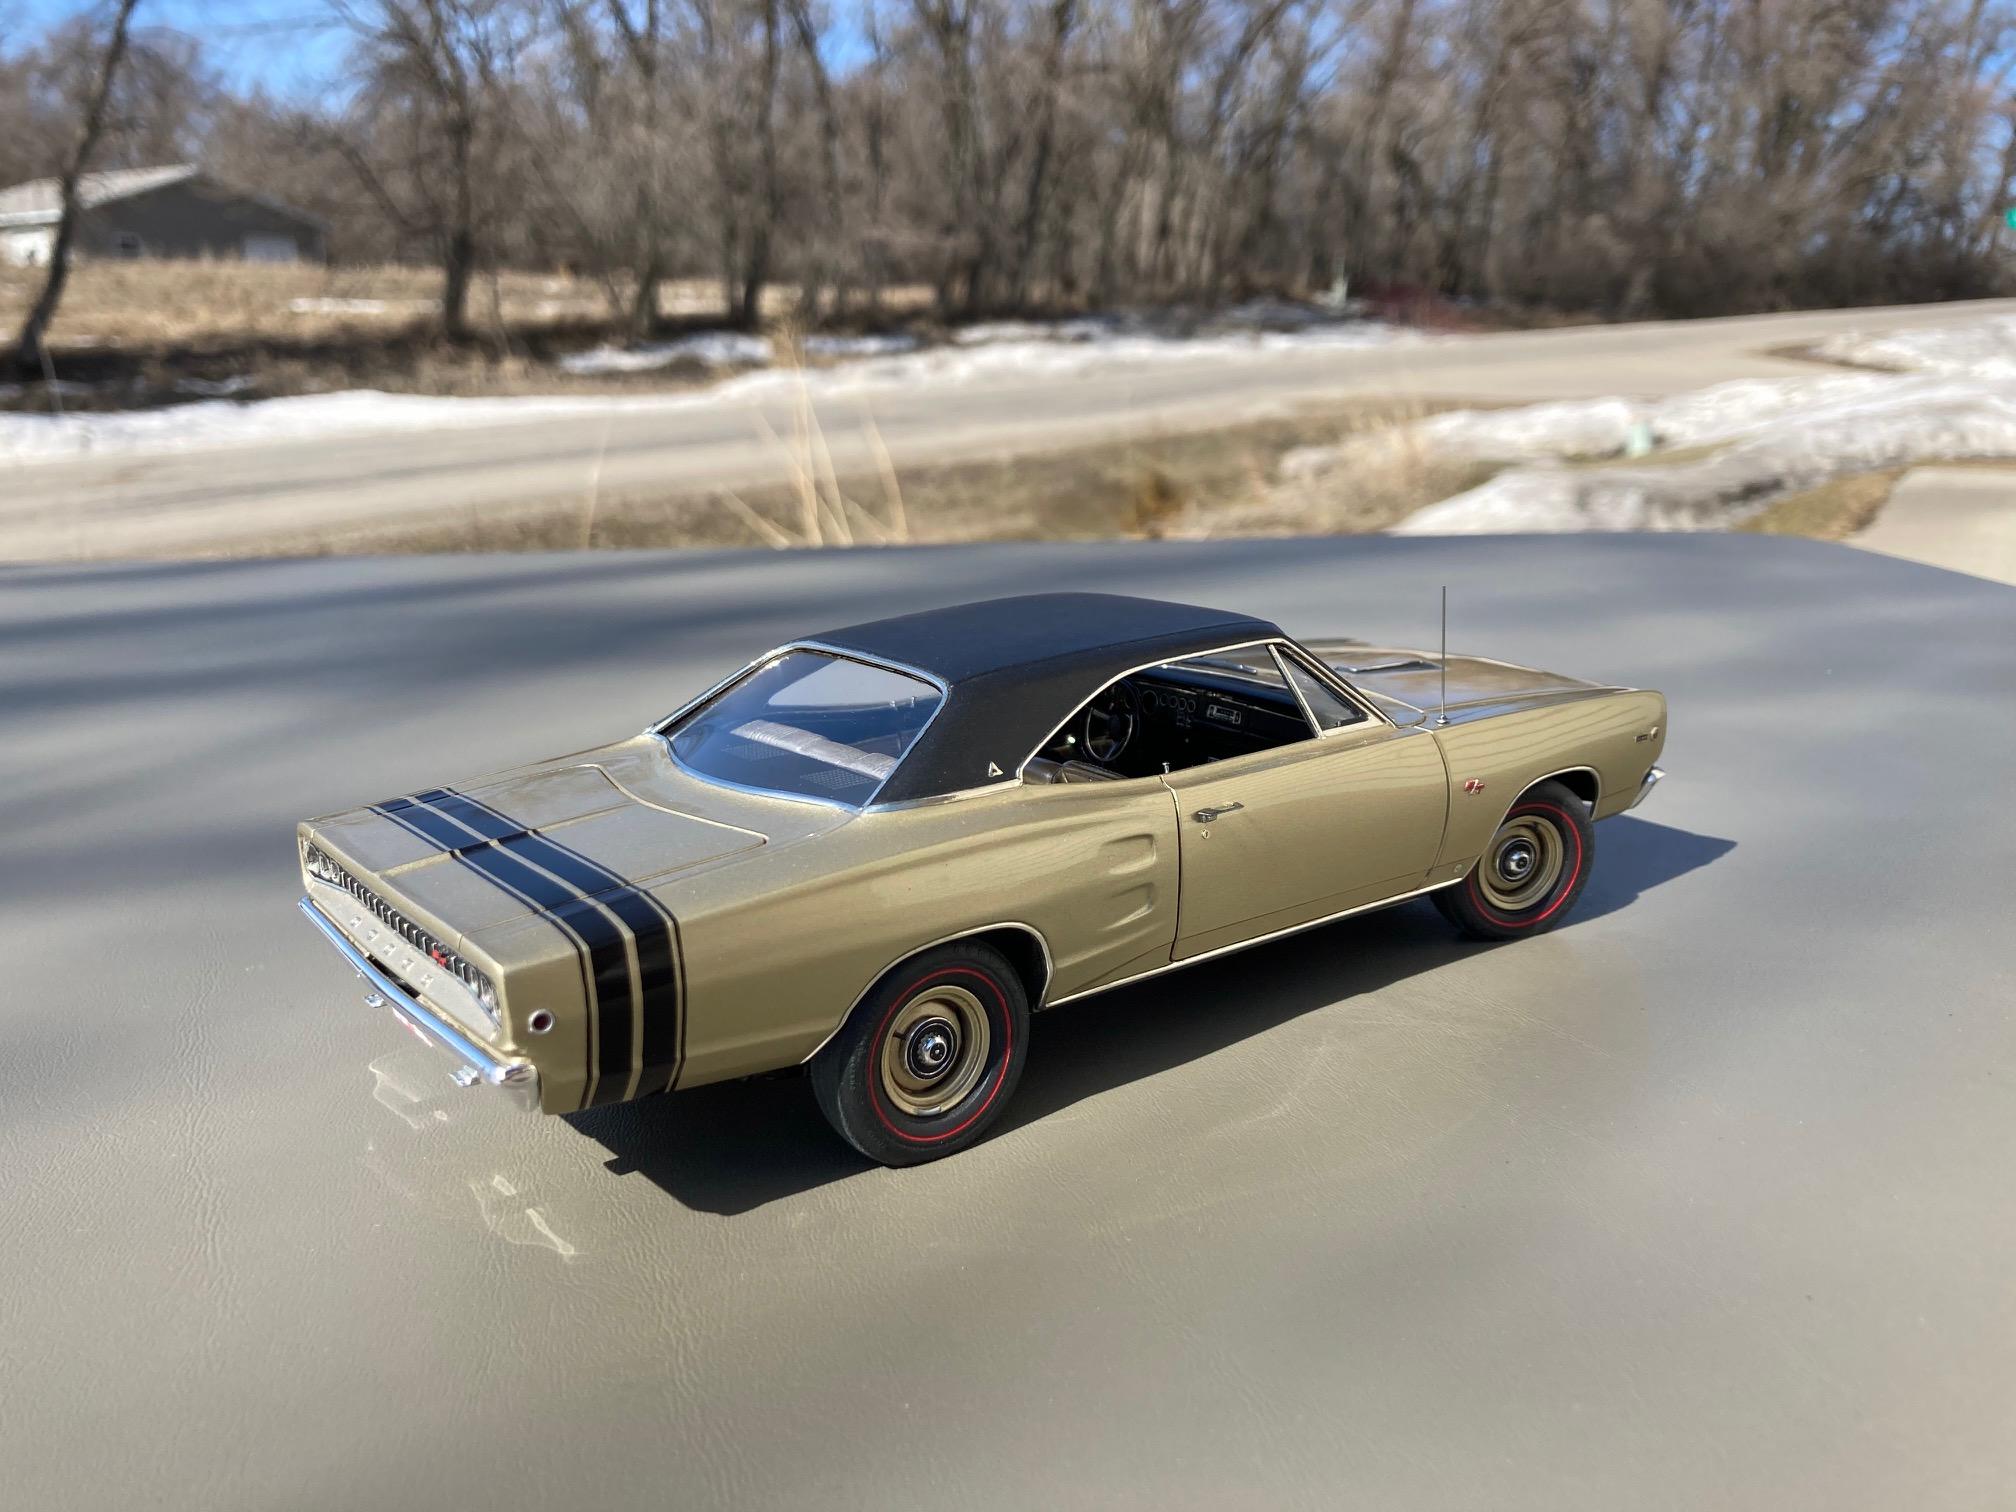
I can agree to a point, as long as it's not a glossy black. I can do these wheels all day long! (Is my age showing?) Steve
-
For me, it's not just black either. The "monochromatic" faze that cars have been going through for the past several decades, holds no interest for me. Variations in colors and finishes are what make a car interesting to me. A huge, entirely red blob just accentuates the obligatory "jelly bean" look that loses all of the styling appeal of a car in my opinion. But again, as I stated in my last post, when the styling is as dull as a butter knife to start with, why would you want to accentuate anything I suppose. Steve
-
I agree with the black rim thing. Just heinous! Non-metallic colors are okay with me, but I believe what you are referring to are colors like the clear coated primer gray that seems to be becoming somewhat popular. I'll agree in that instance. Not attractive in the least! But then again, the unattractive colors go along with the unattractive styling of most cars today, so it's a great match! Steve
-

Plymouth Obituary
StevenGuthmiller replied to Andrew D the Jolly Roger's topic in General Automotive Talk (Trucks and Cars)
That's hilarious! I love it! Steve -
Fireball Modelworks carbs have taken engine detailing to a WHOLE different level! Detailing a carbureted engine to this degree was hardly worth the effort until these carbs came along! A whole new ball game! Steve
-
If the windshields don't contain any compound curves, it's very simple to replace the kit glass with a thin clear sheet plastic as Bill suggested. You don't need a 3-D printer or a vacu-former. All you need is clear 2-part epoxy, and .010" or thinner sheet plastic. Steve
-
Great looking Buick! Almost looks good enough to leave alone........Almost. ? Steve
- 39,203 replies
-
- 1
-

-
- johan
- glue bombs
- (and 1 more)
-
The Ranchero looks pretty good, but the Buick “Everything in the Boxer” is going to take a little work. ? Steve
-
Looking for some Cragars
StevenGuthmiller replied to Dirkpitt289's topic in Model Building Questions and Answers
Be careful! His stuff is SOOOOOO good that you’ll probably wind up dropping at least a C-note before you leave the site. The best scale carburetors on the planet.....hands down!!! Steve -
Looking for some Cragars
StevenGuthmiller replied to Dirkpitt289's topic in Model Building Questions and Answers
Or you can find sets of Cragars in numerous different kits. Just off of the top of my head, the AMT 1965 El Camino, '65 Ford Galaxie, '70 Impala and '37 Chevy all had them, just to name a few. Steve -
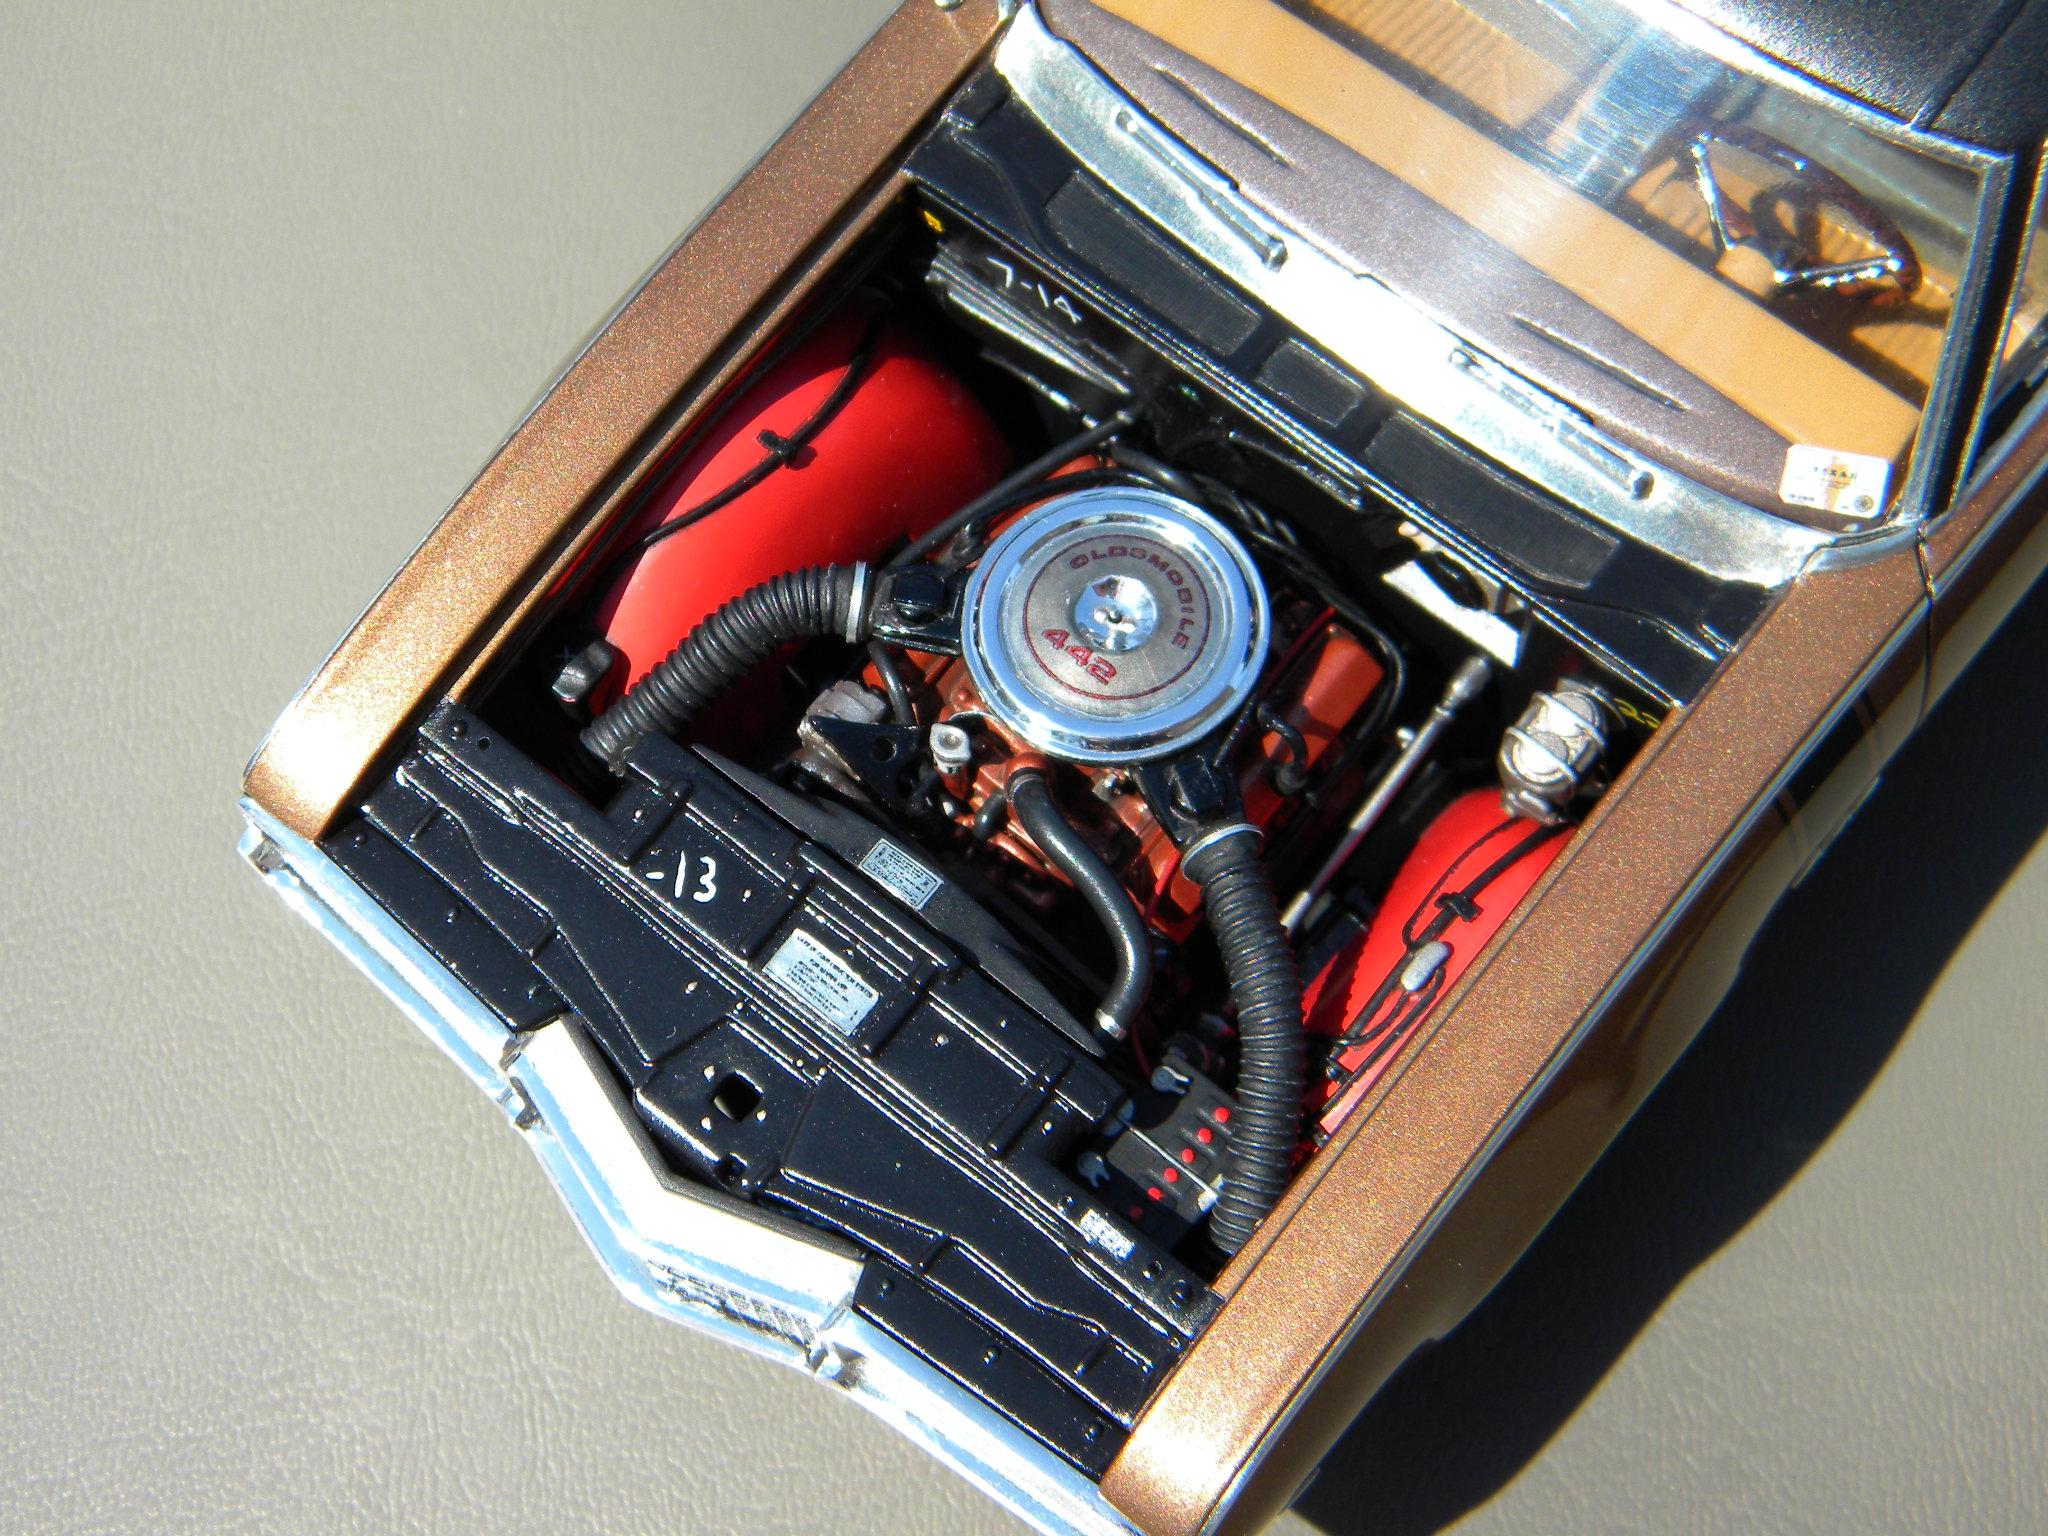
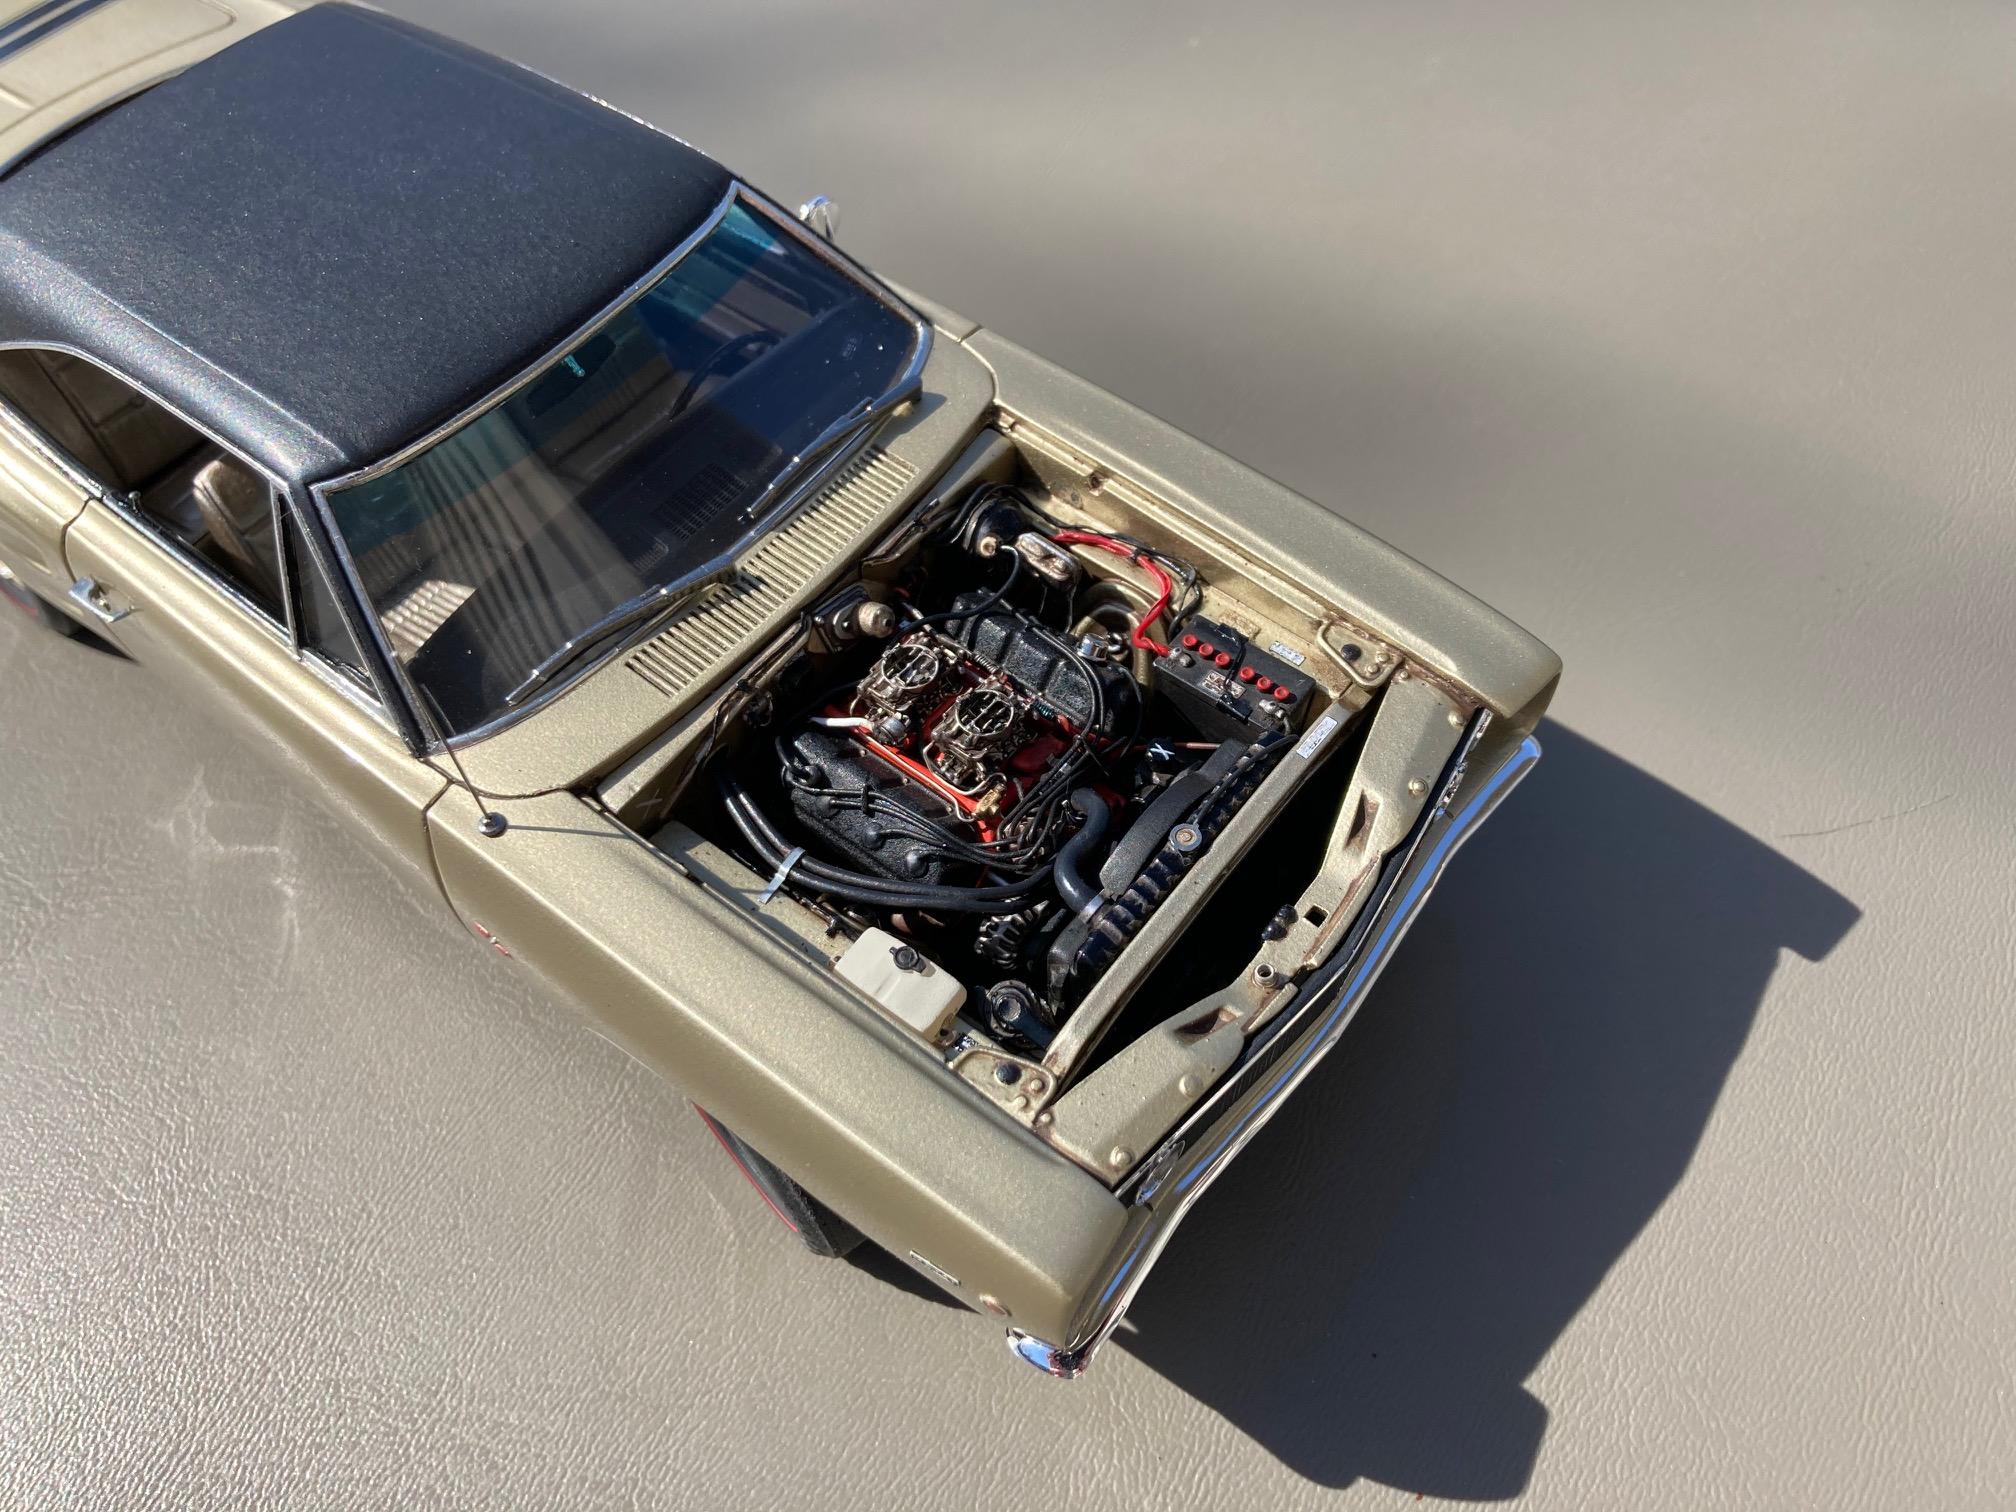
1964 Pontiac Bonneville Convertible.
StevenGuthmiller replied to StevenGuthmiller's topic in WIP: Model Cars
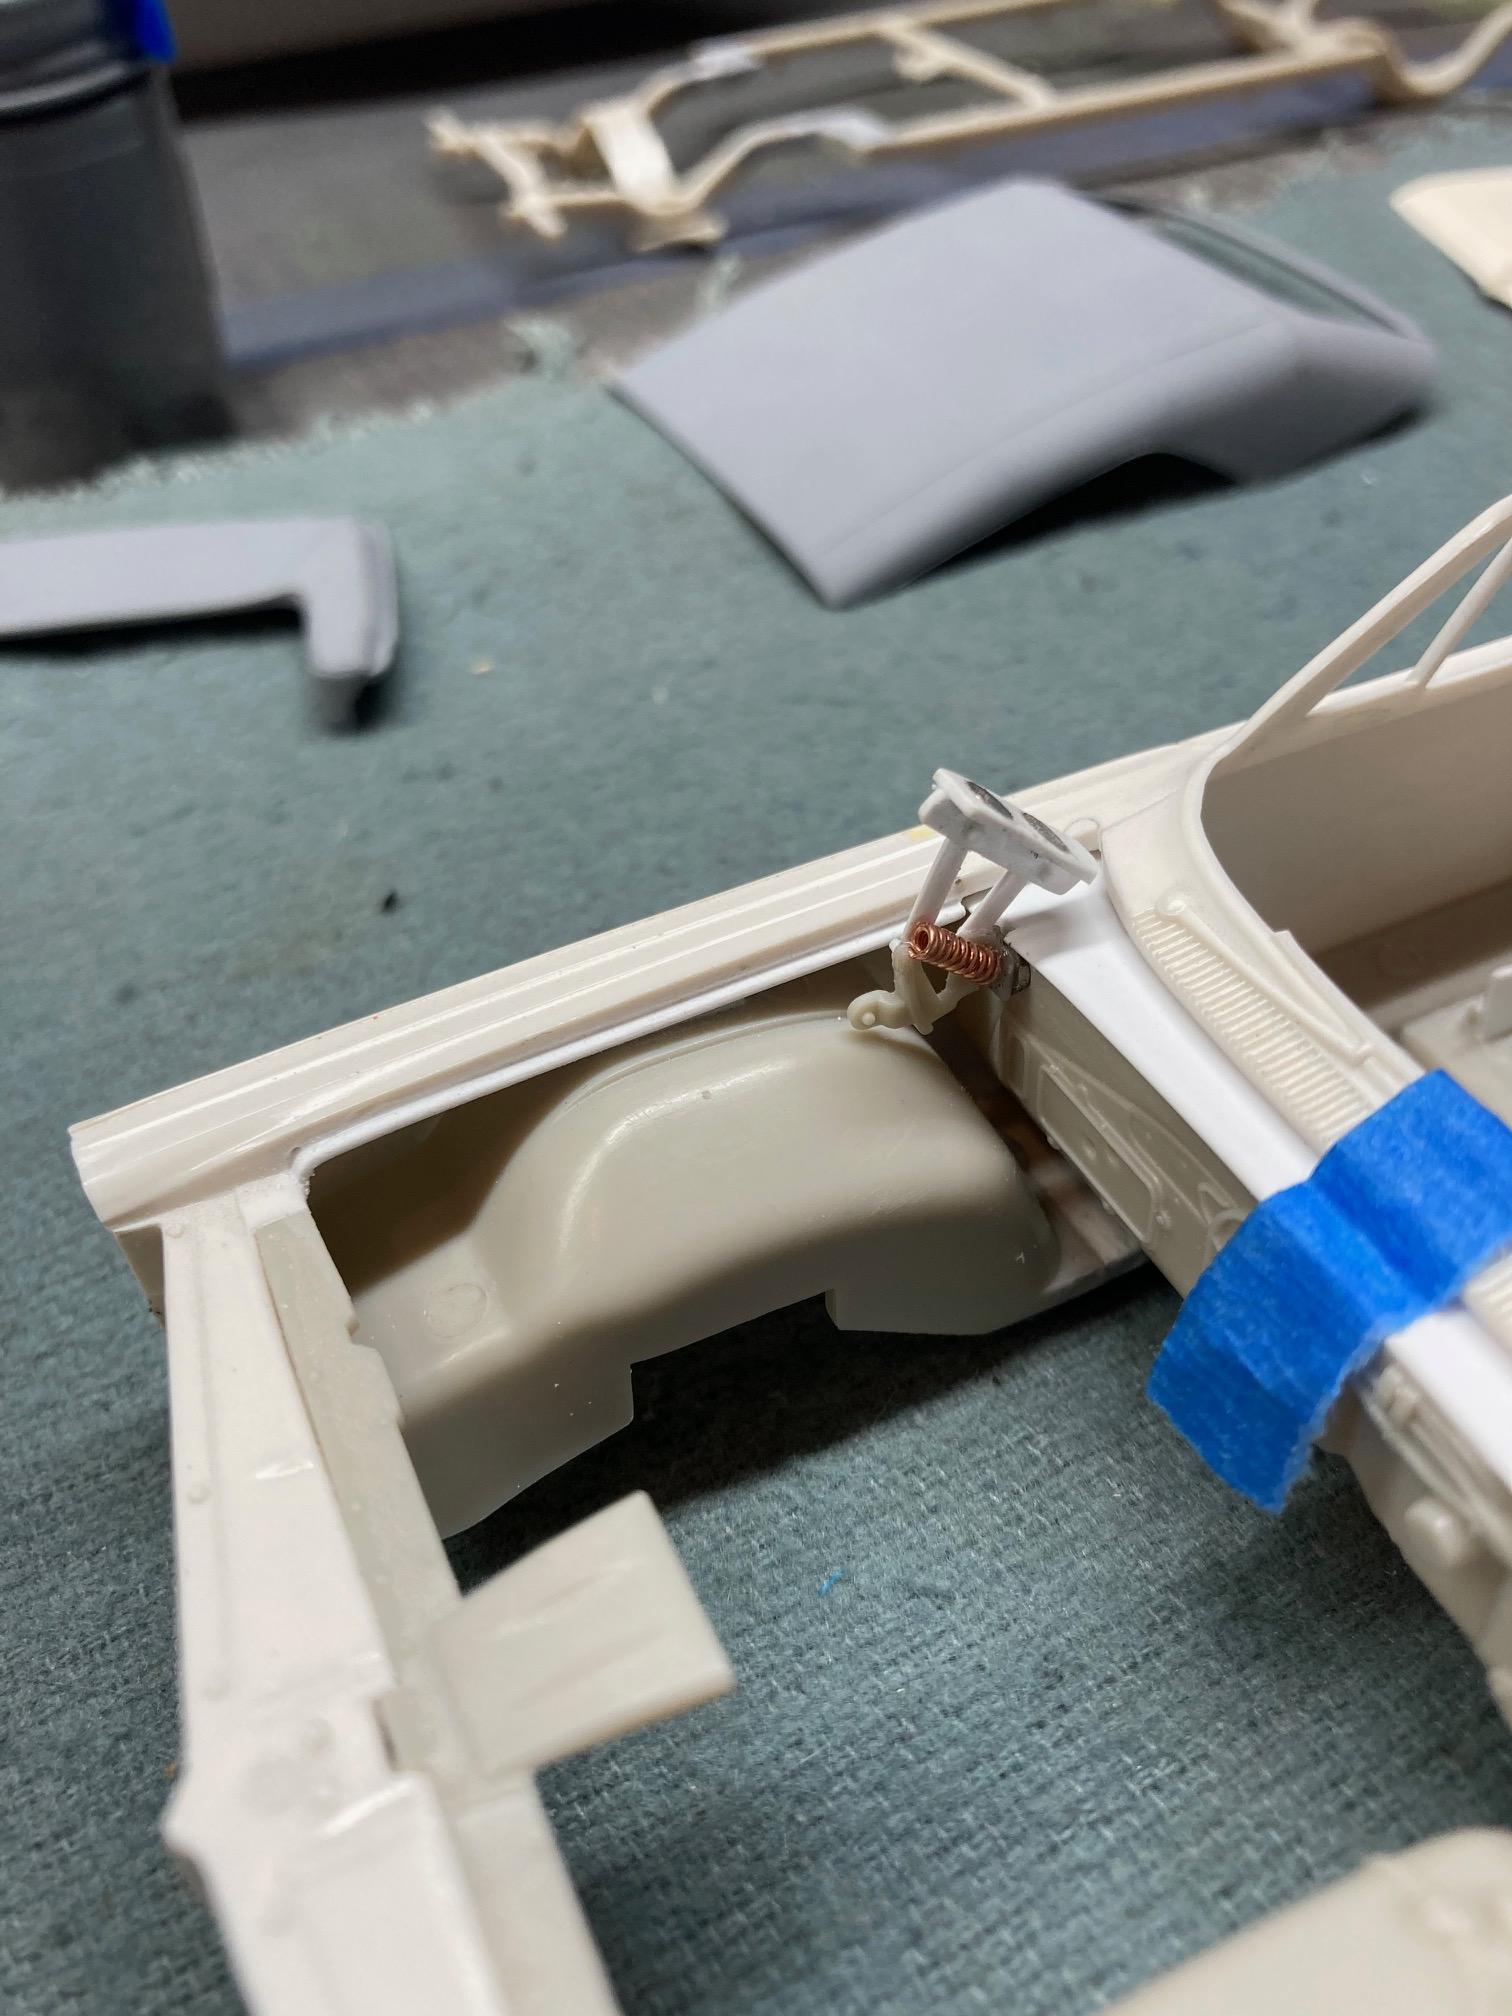
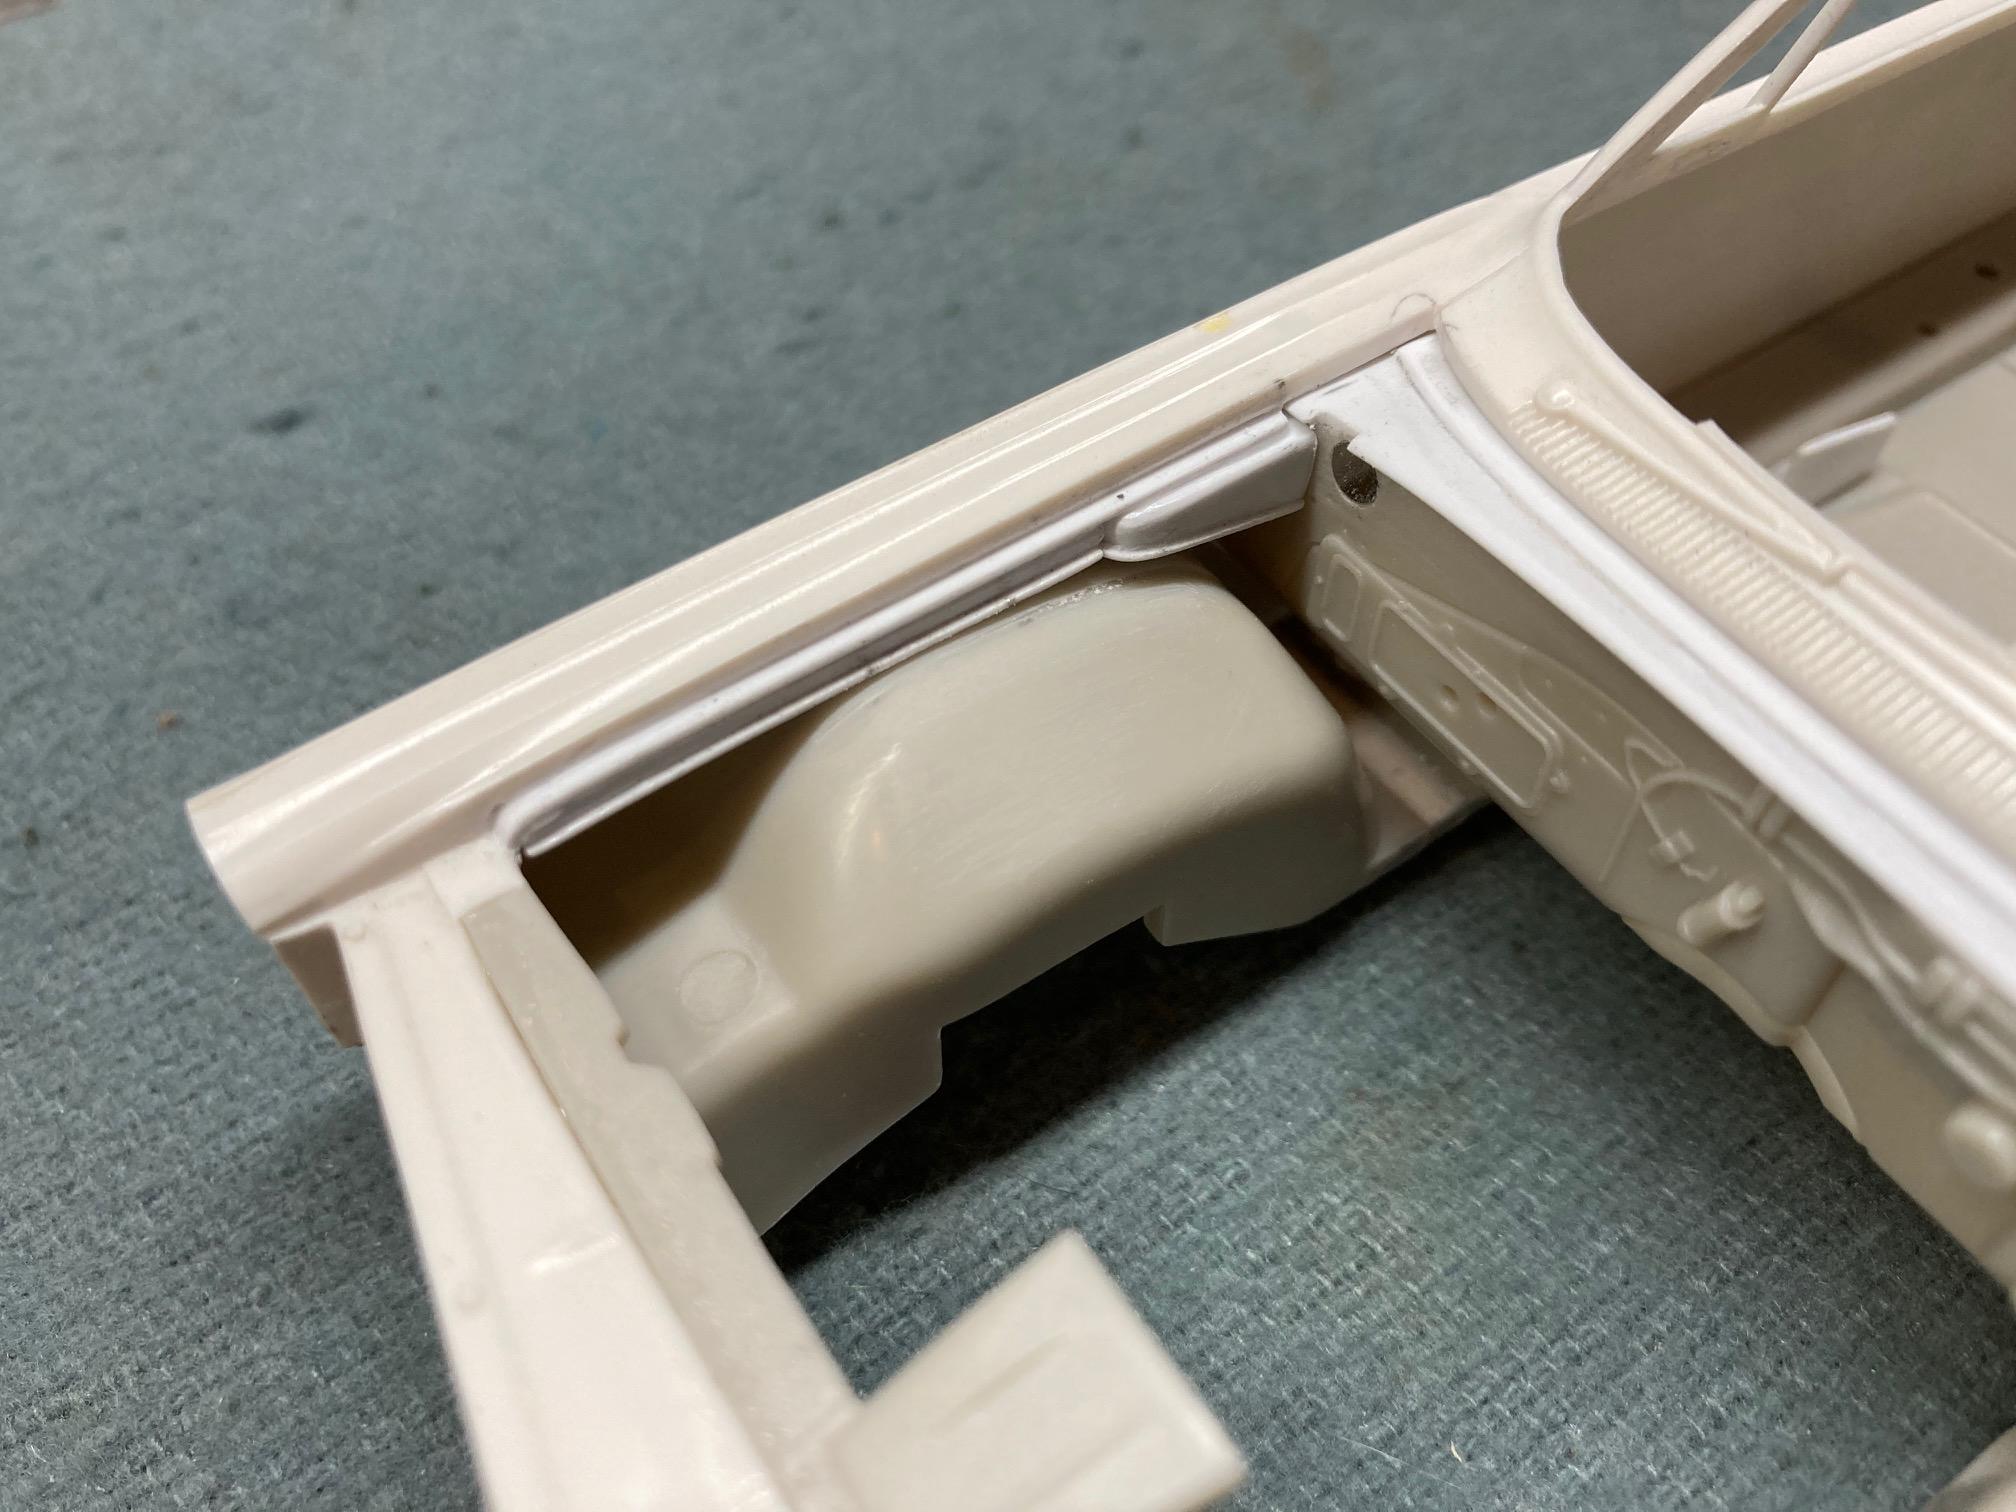
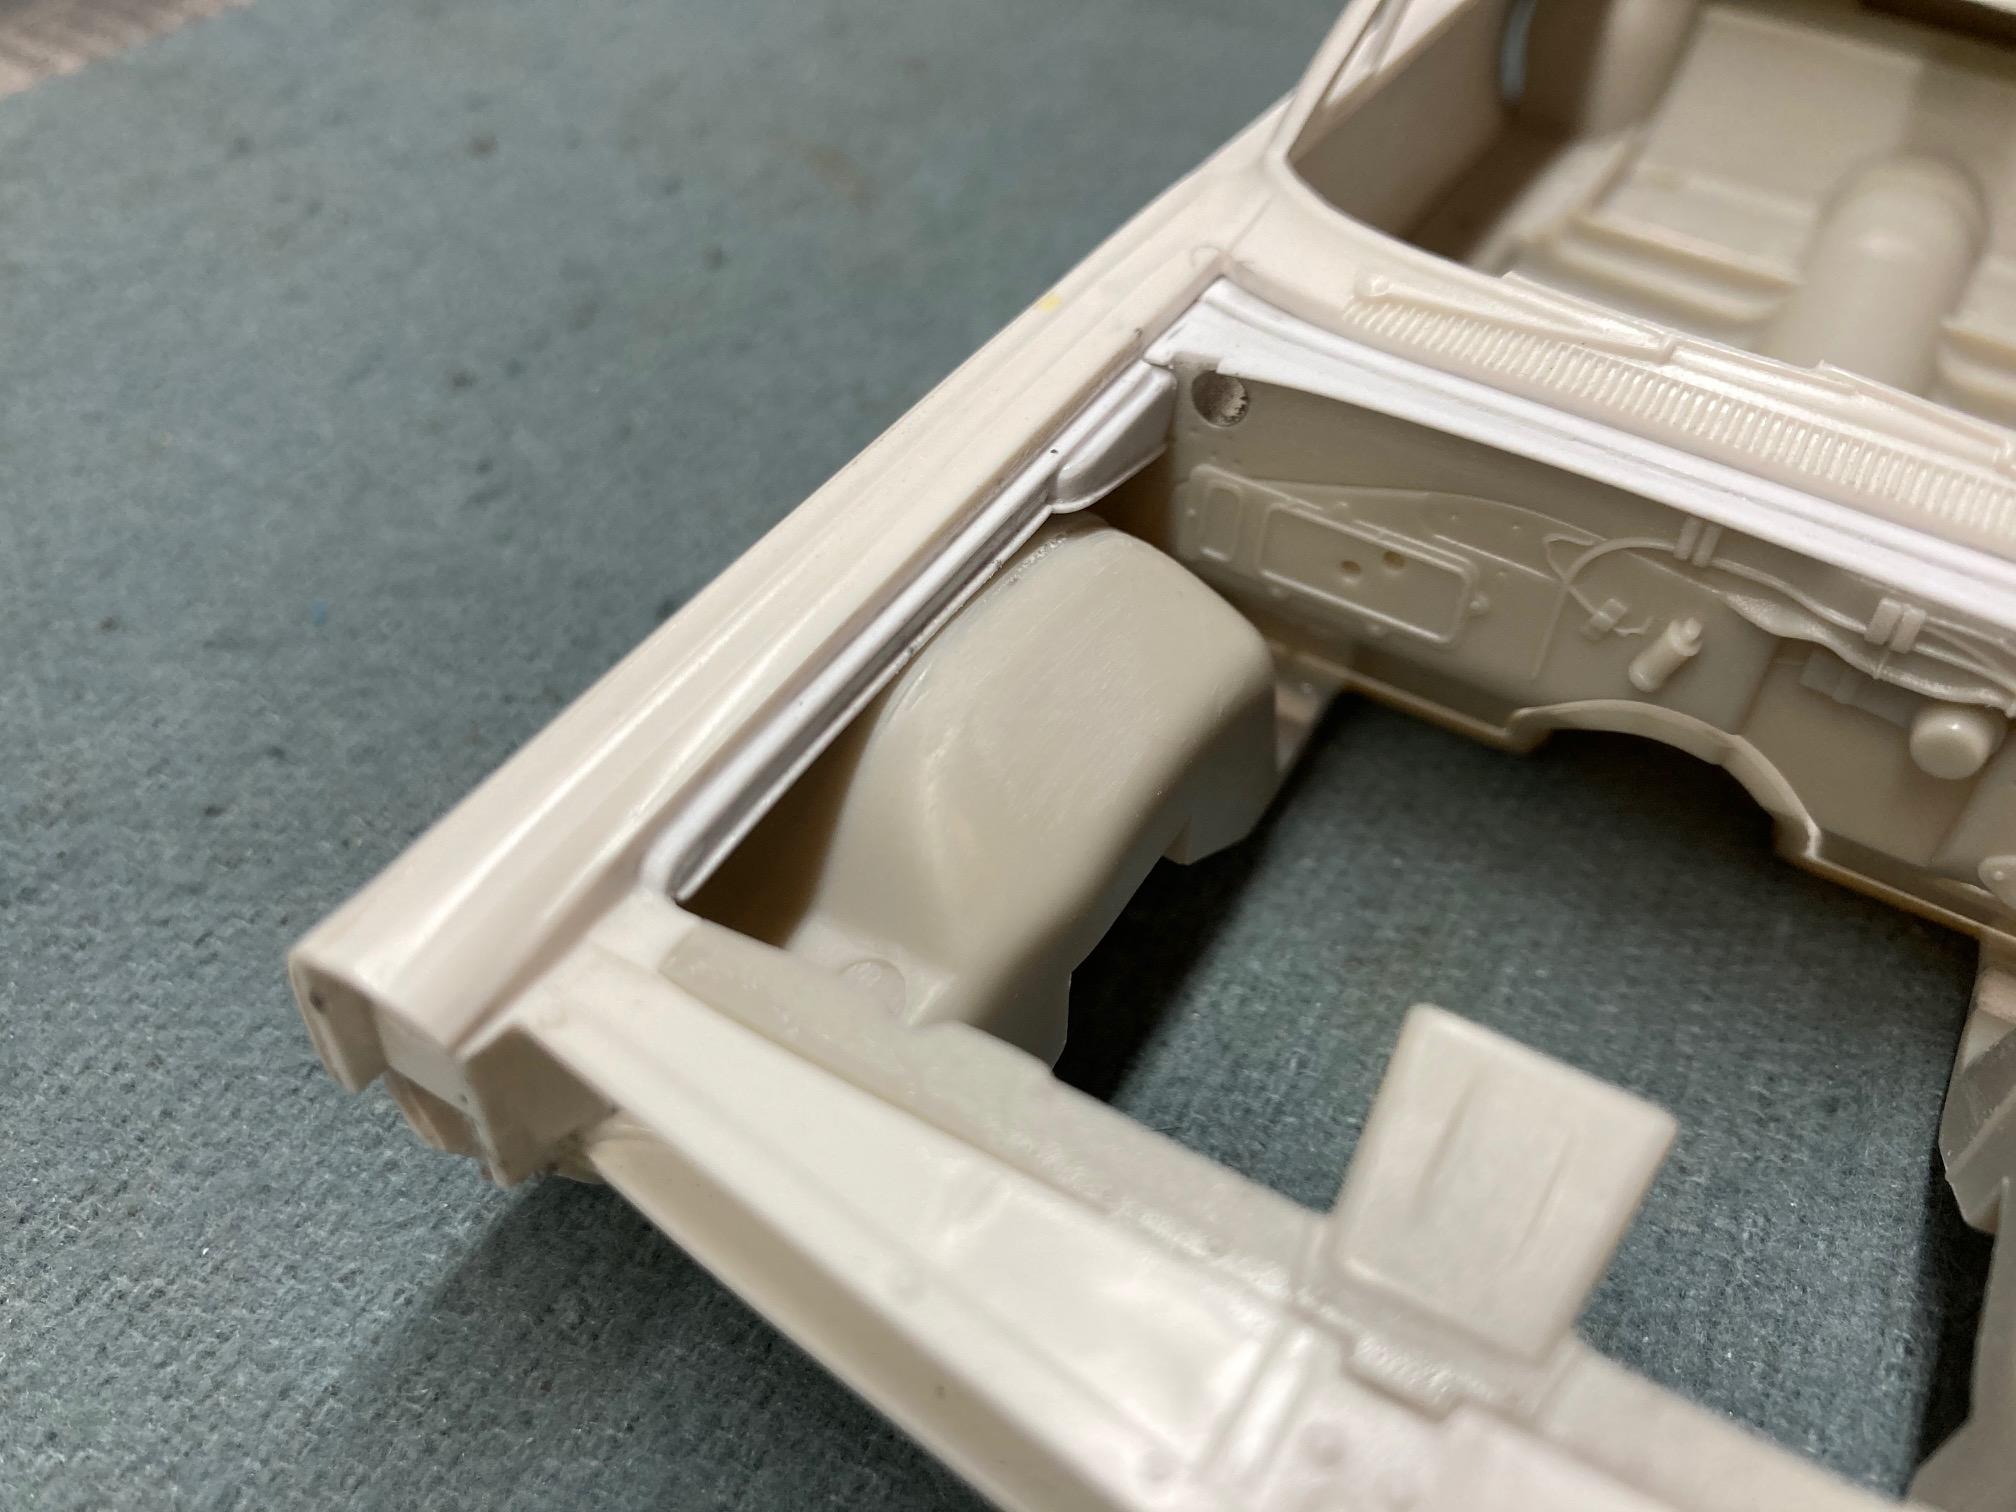
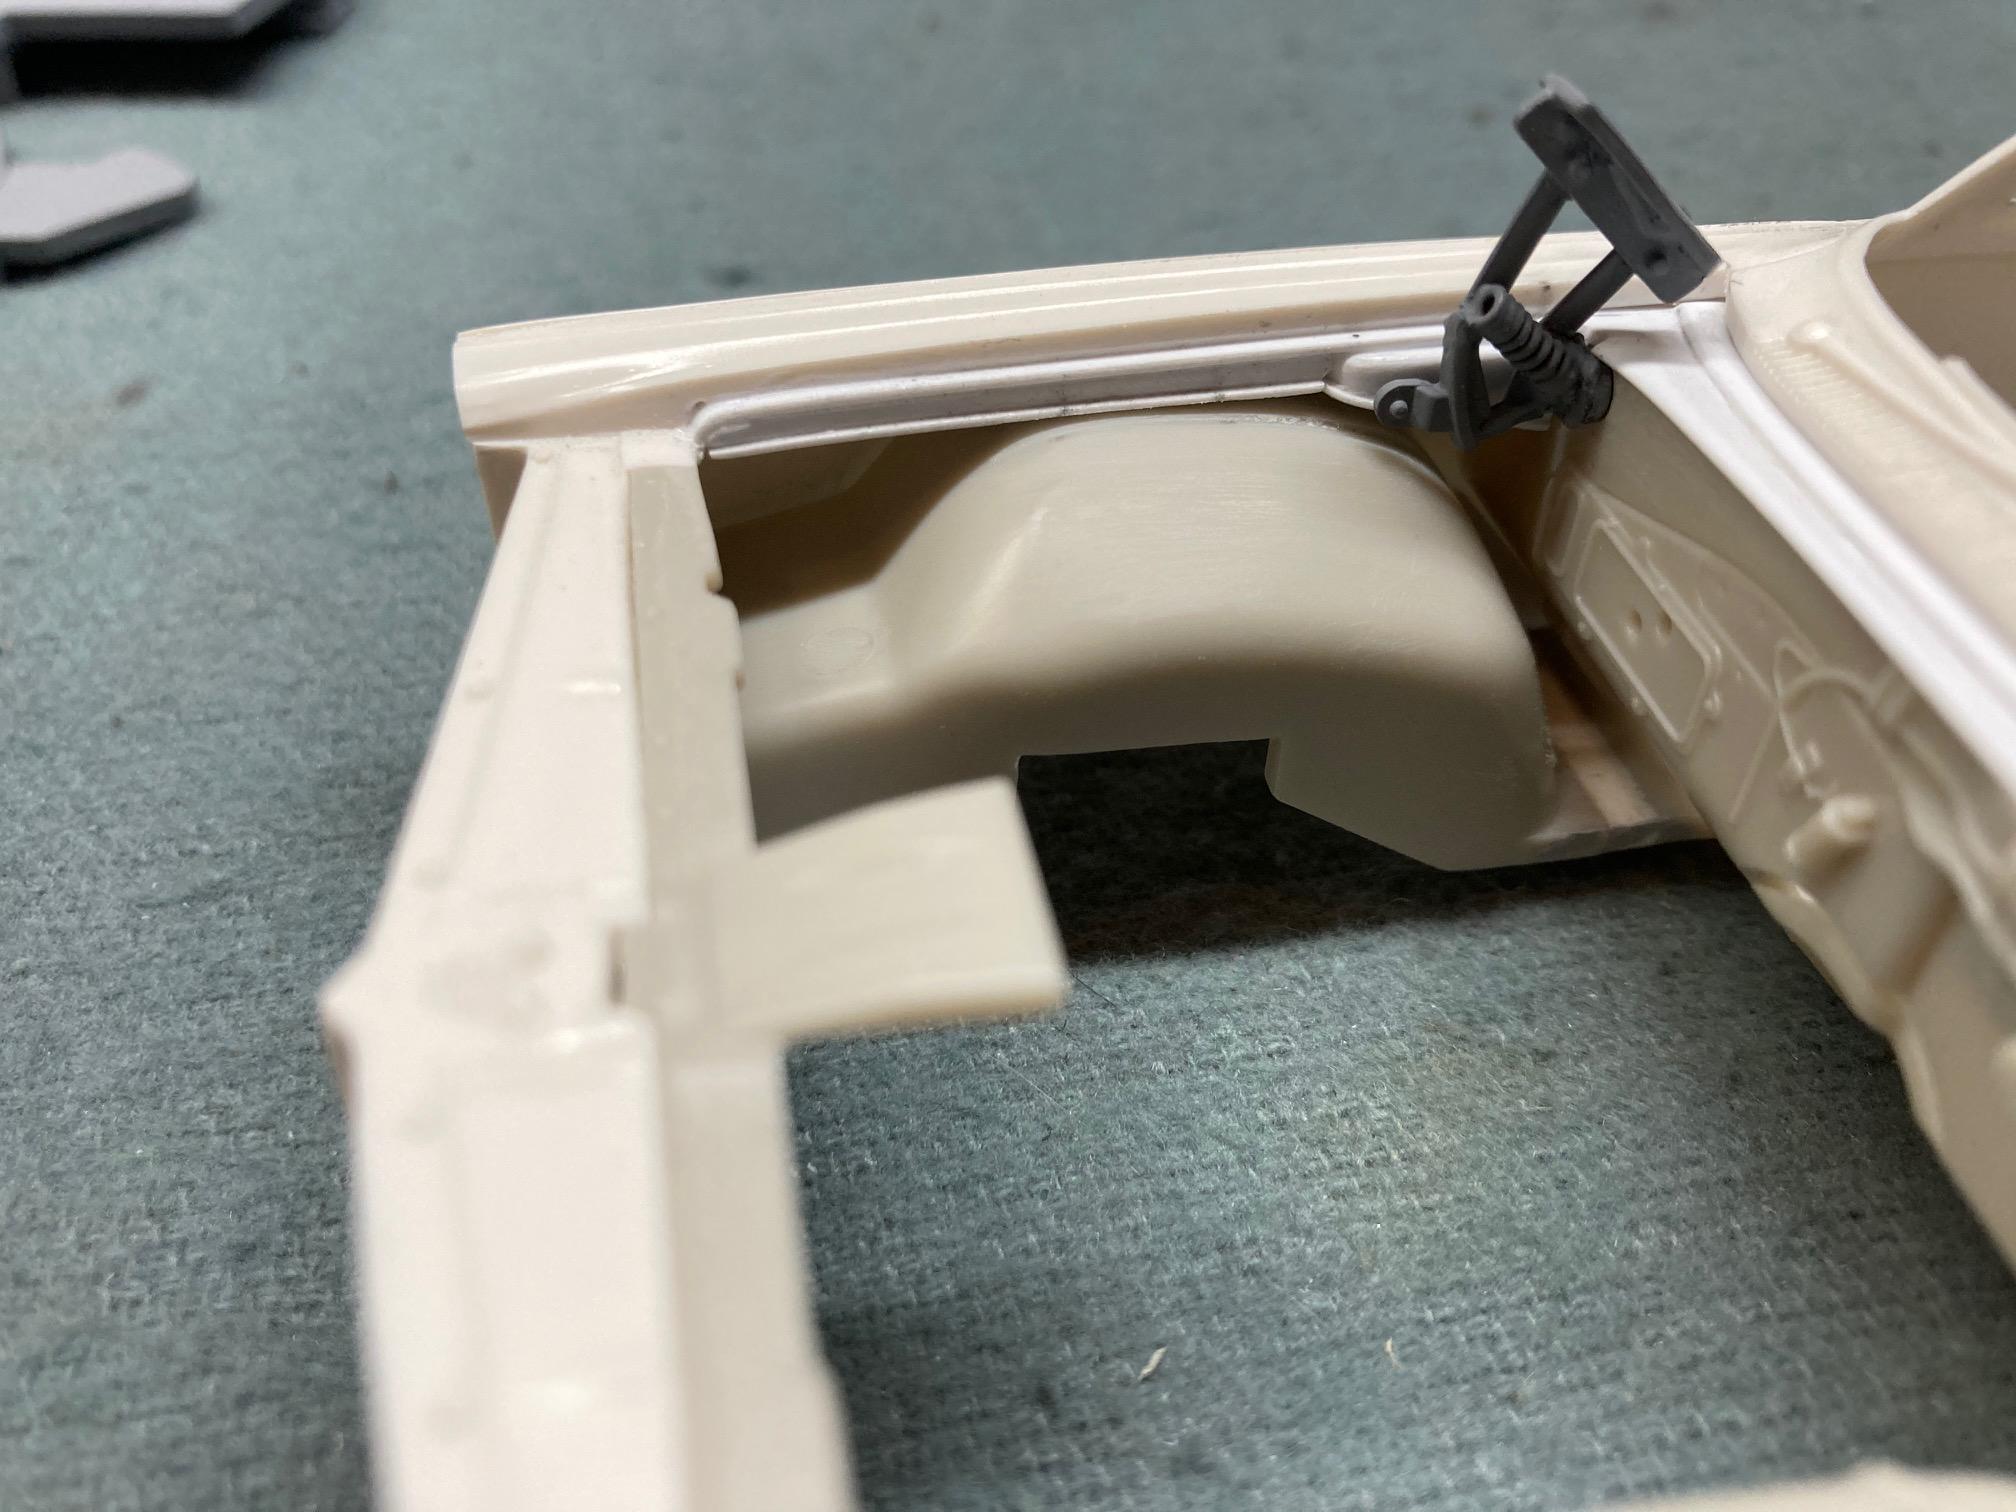
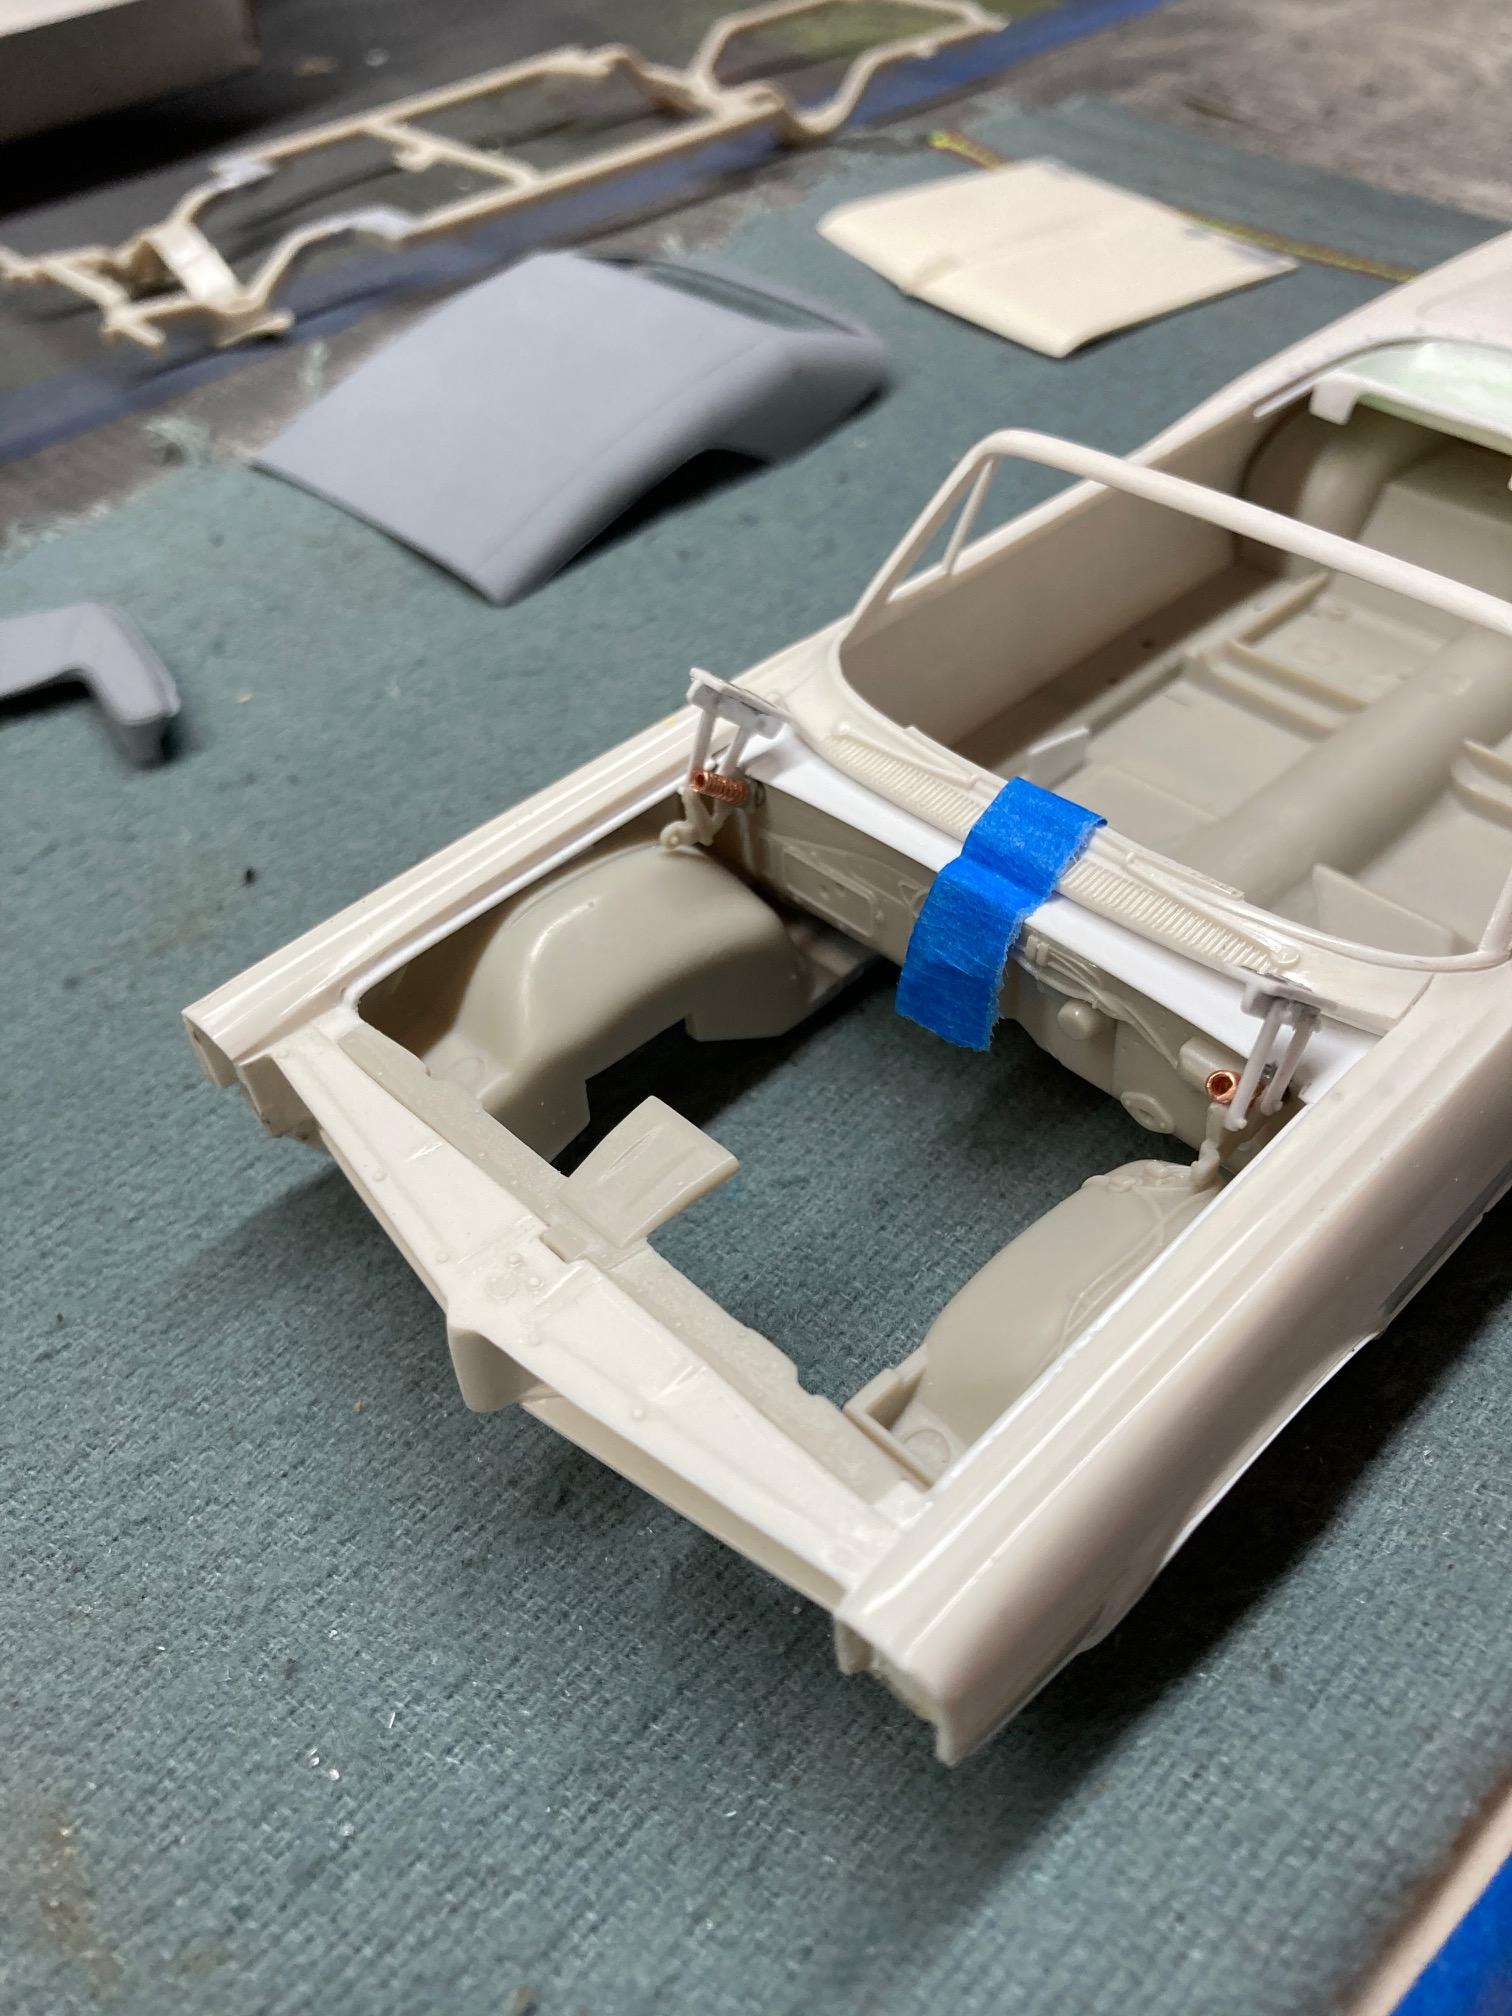
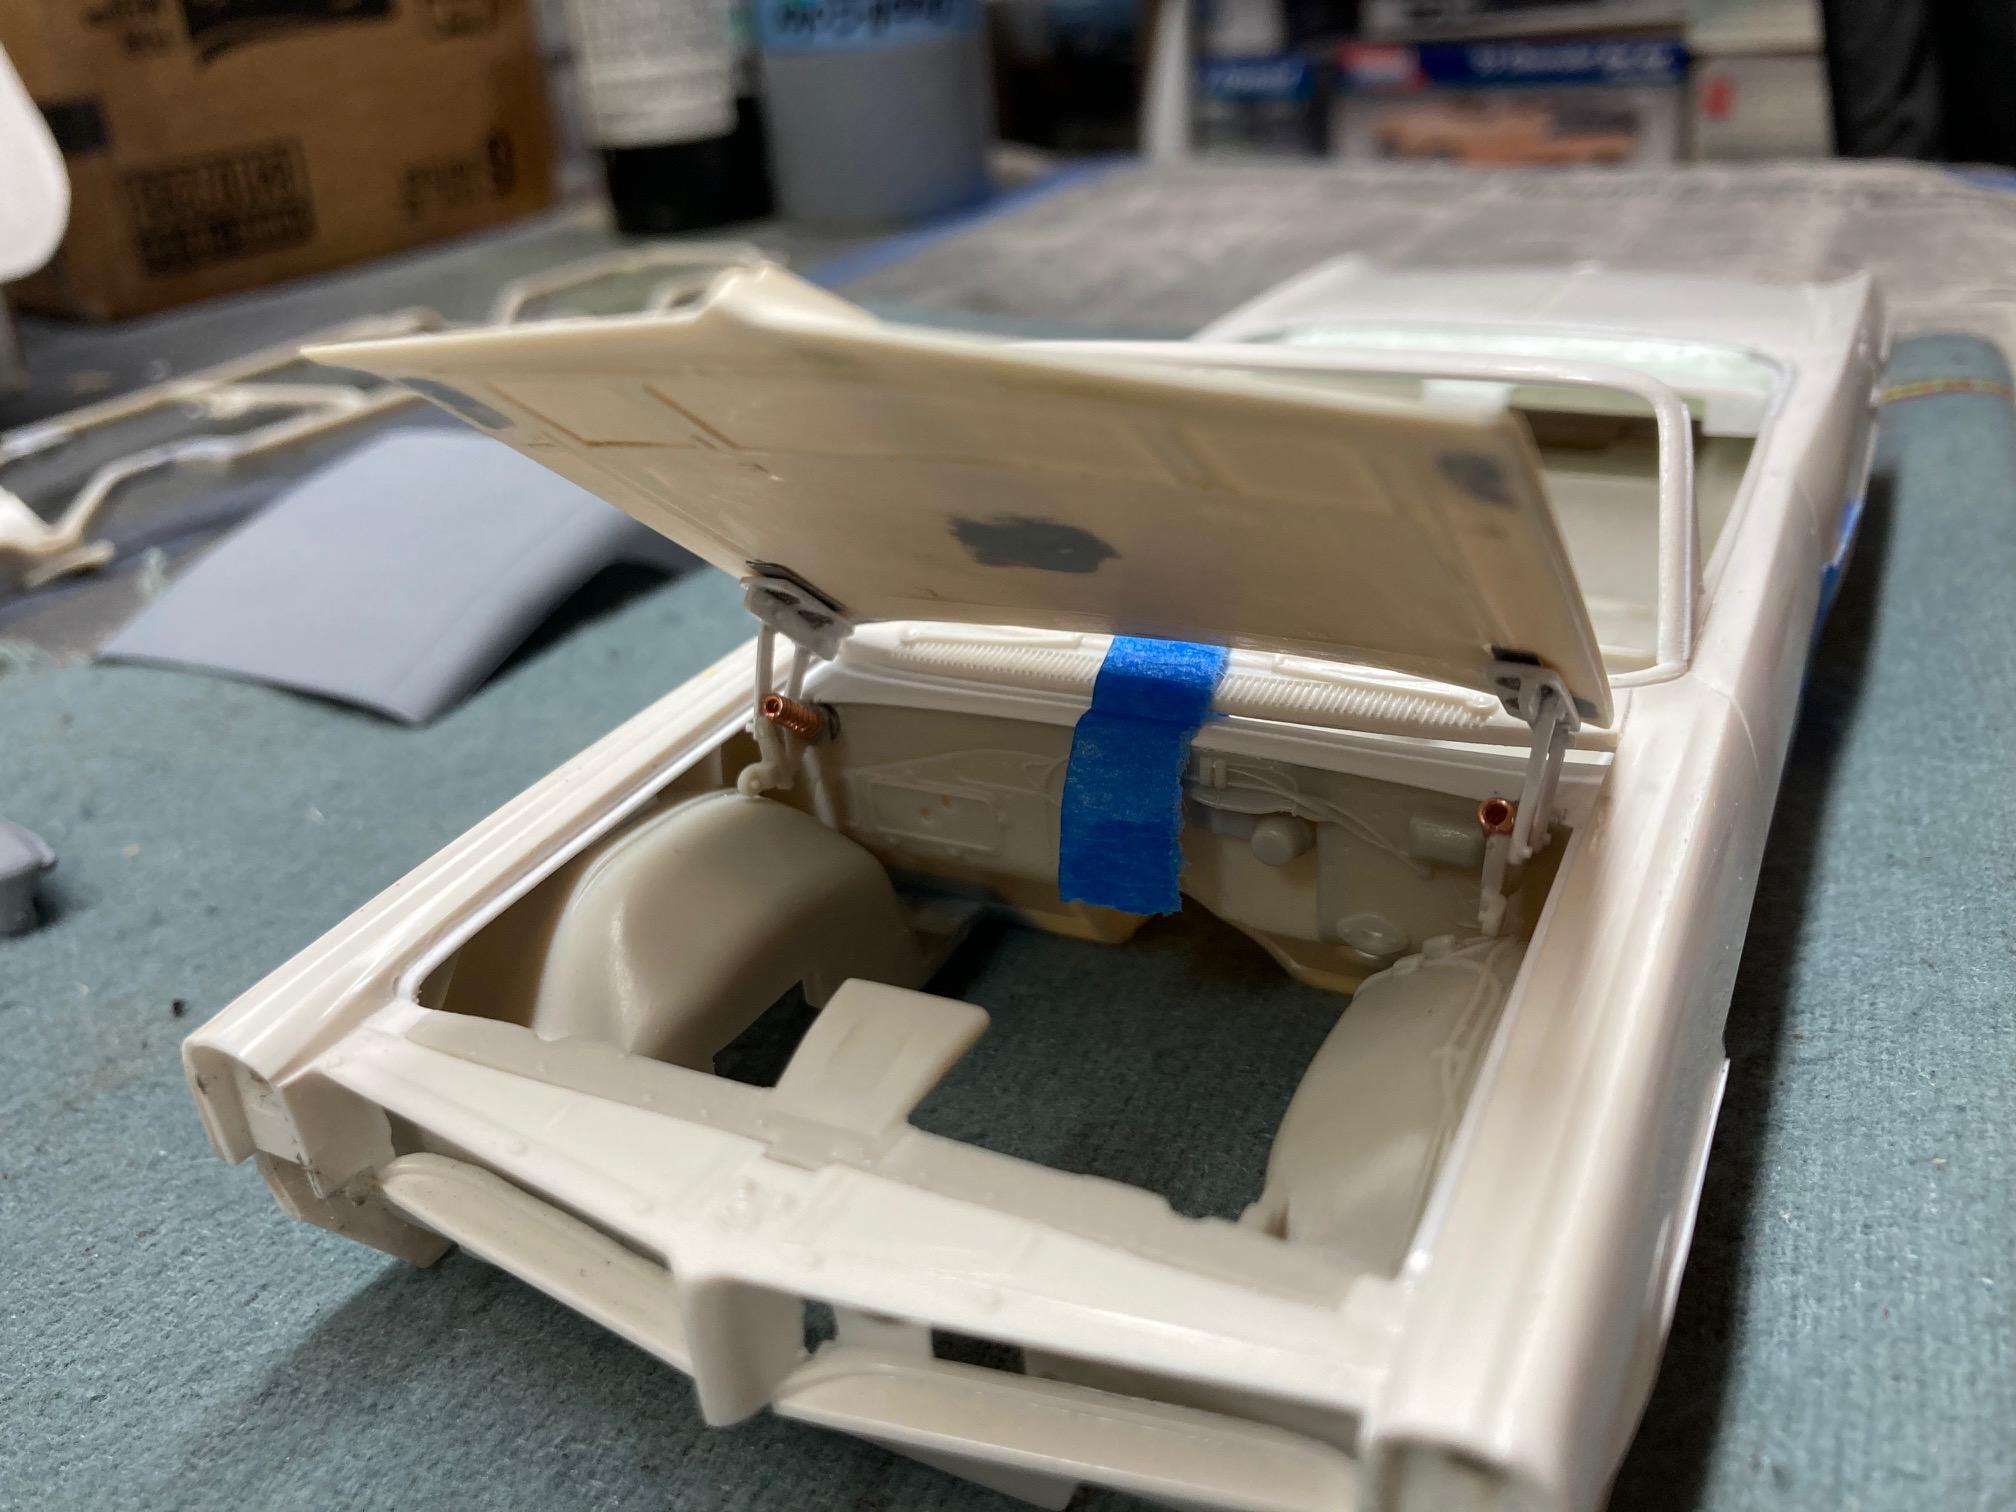
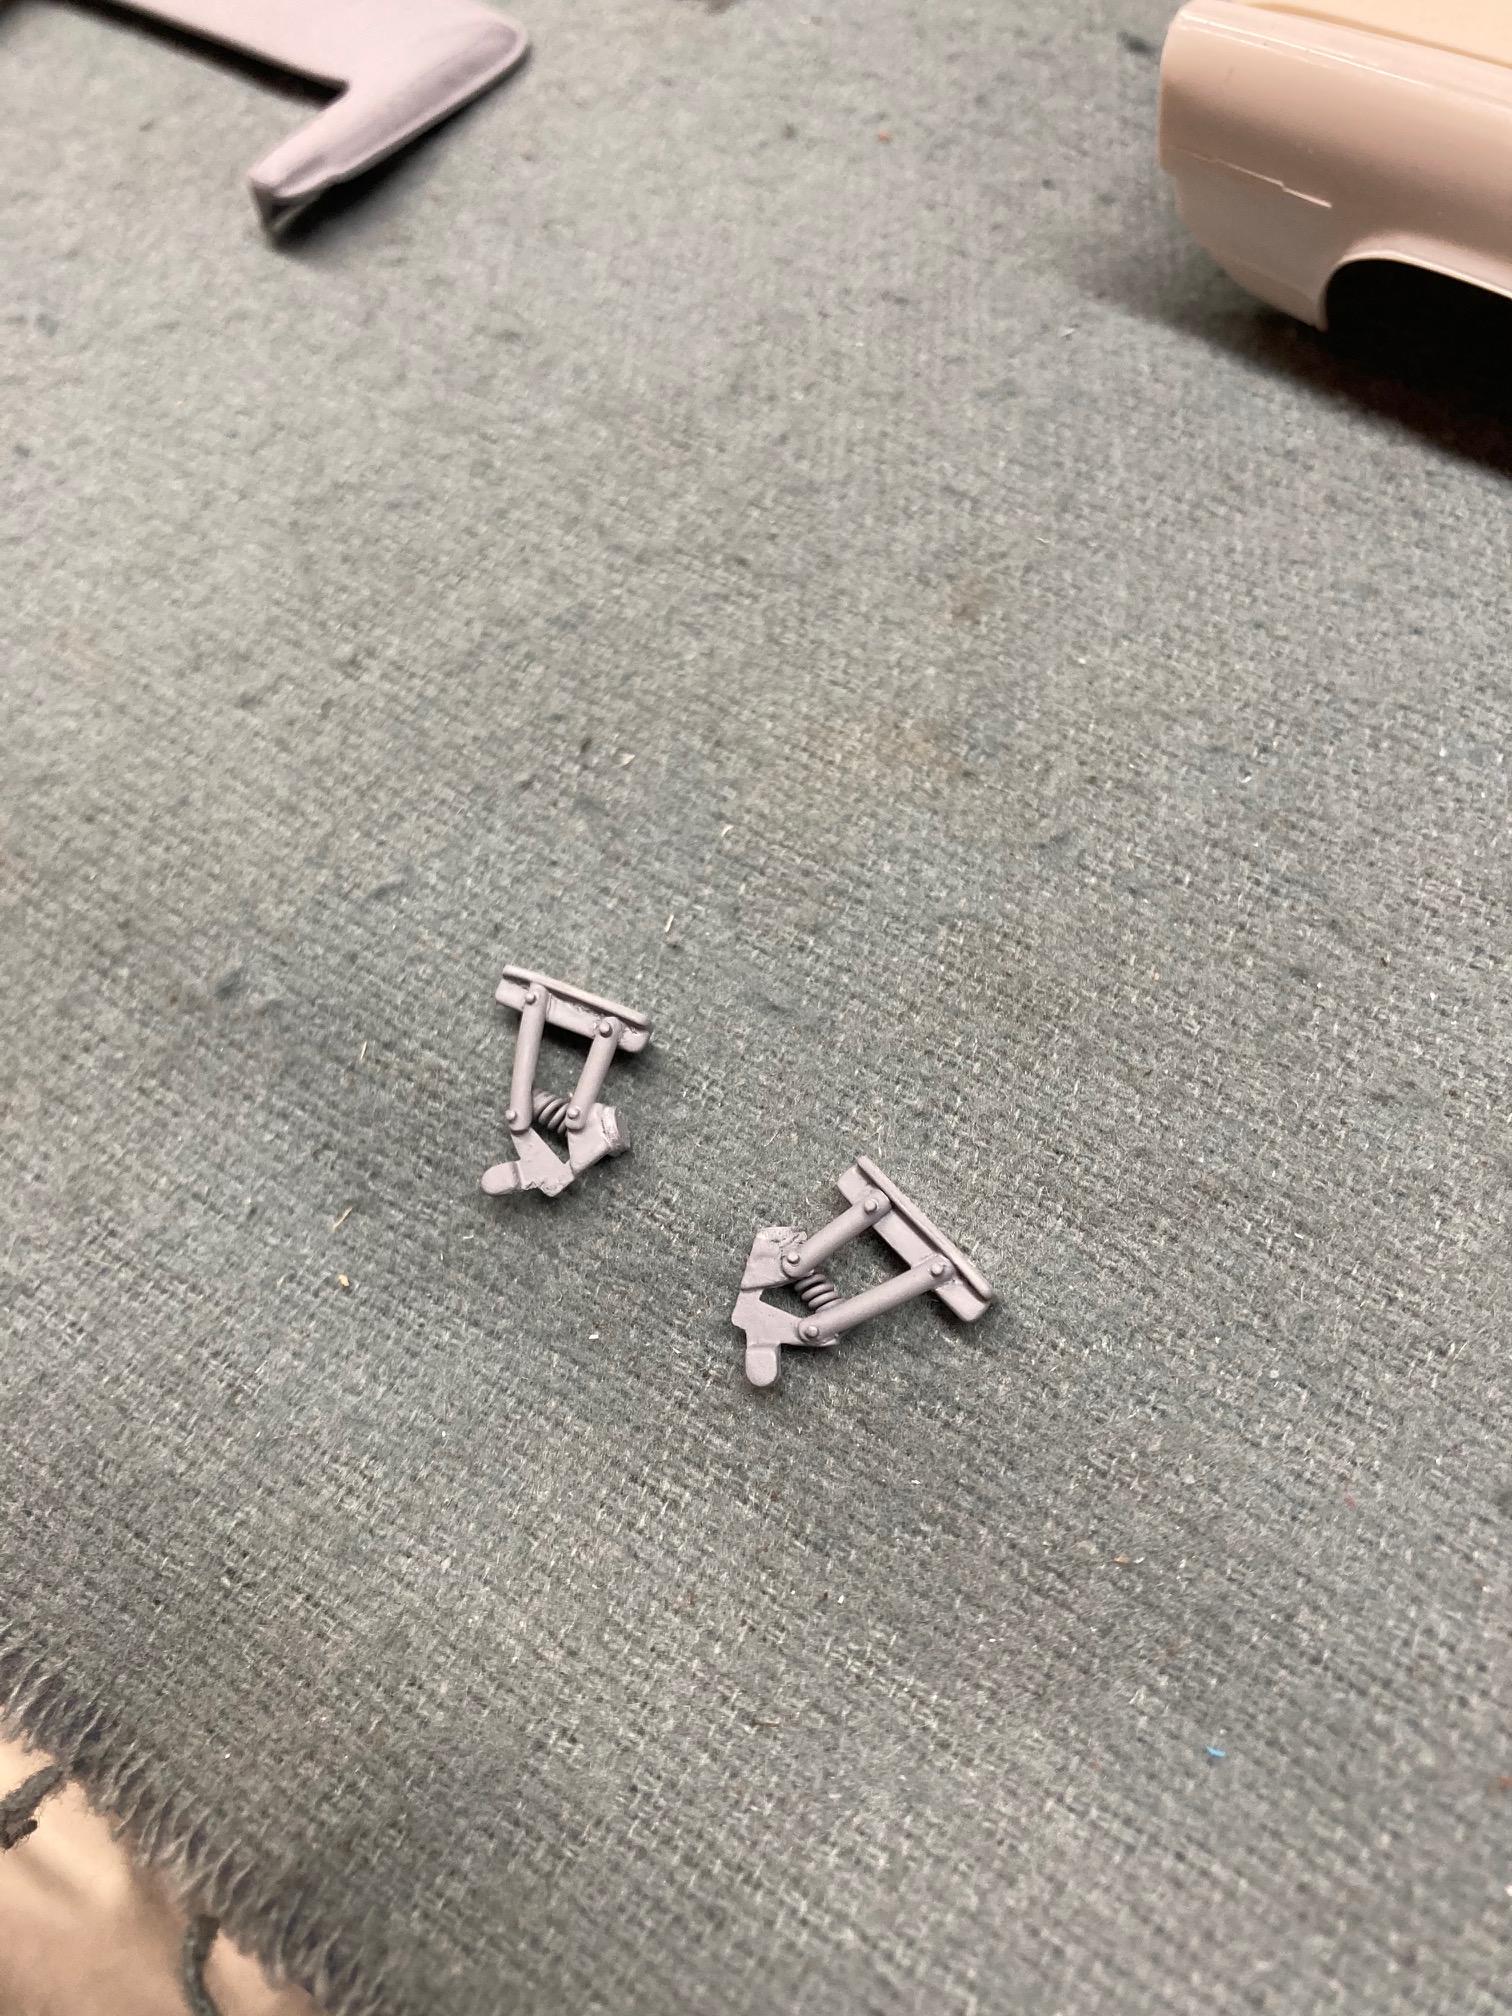
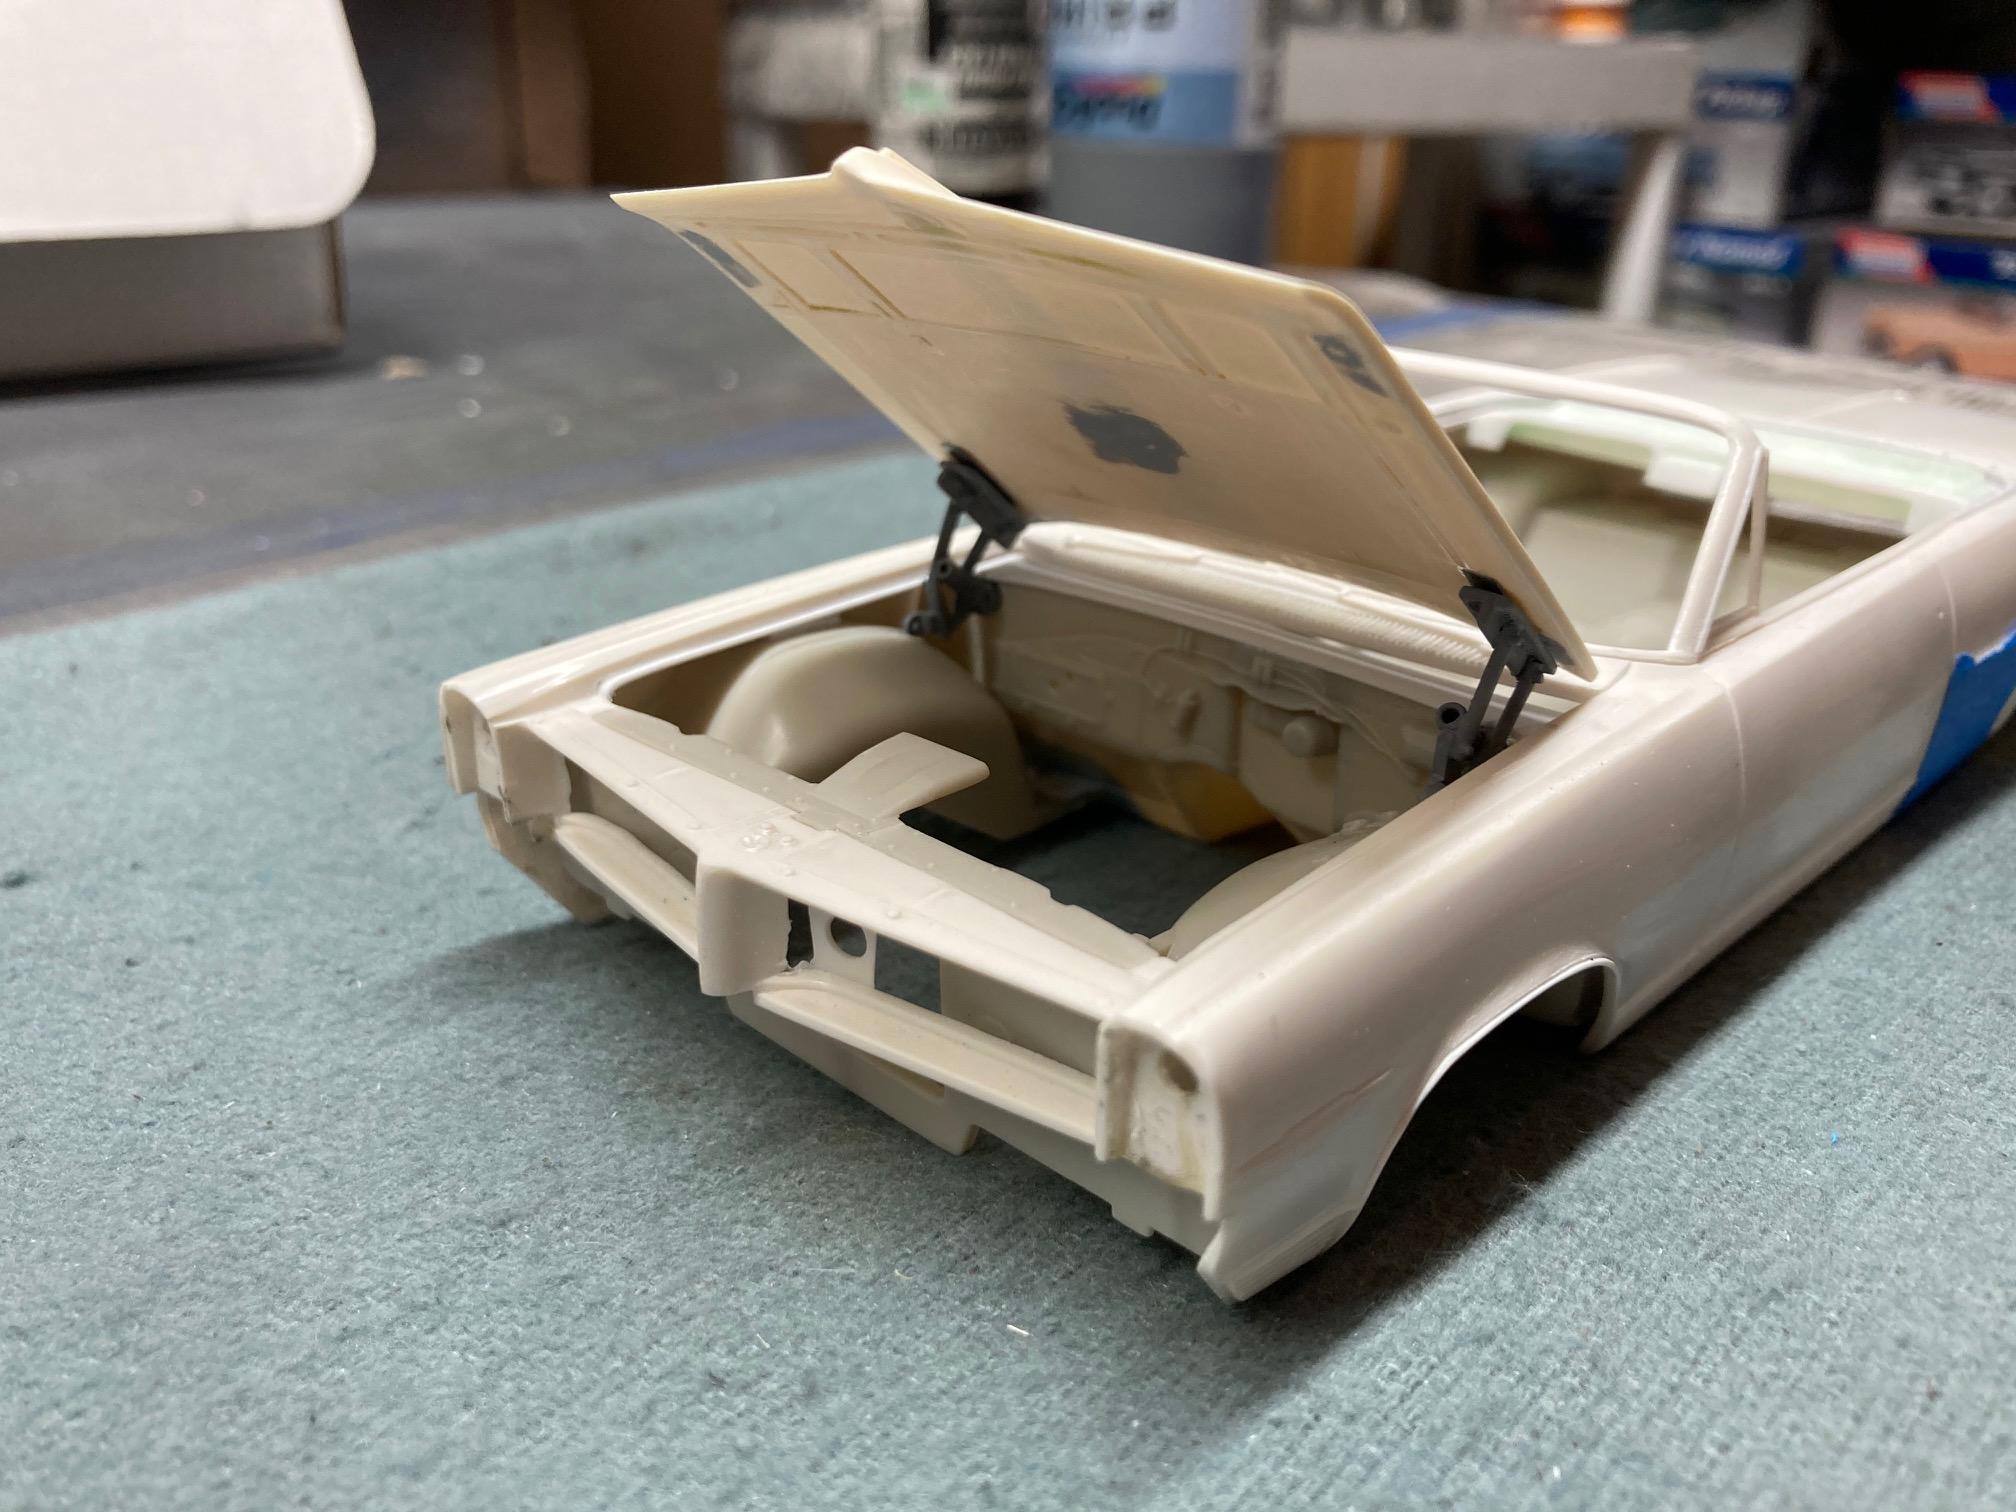
Today I spent some time scratch building some inner fender well parts to add some detail to the fender lip and the mounting area for the hood springs. Now the springs won't look like they're floating in space. Before. After. Steve
-
1964 Pontiac Bonneville Convertible.
StevenGuthmiller replied to StevenGuthmiller's topic in WIP: Model Cars
Thanks Andrew. When I reference “grinding” I’m generally speaking of removing and shaping material with a variety of tools that includes files and sand paper, but for the most part, I’m usually talking about working with a Dremel tool. I use a rechargeable, variable speed, mini Dremel with various reamer bits and grinding wheels for the heavier work, followed by filing and sanding in the majority of these types of modifications. Steve -
1964 Pontiac Bonneville Convertible.
StevenGuthmiller replied to StevenGuthmiller's topic in WIP: Model Cars
Thanks everyone! Hopefully more to come soon. Steve -
1964 Pontiac Bonneville Convertible.
StevenGuthmiller replied to StevenGuthmiller's topic in WIP: Model Cars
Trumpeter had brass photo etched folding hinges in their '60 Bonneville kit. I don't know how well they would have worked, and to be honest, I can't say that I've ever seen anyone use them. Steve -
1964 Pontiac Bonneville Convertible.
StevenGuthmiller replied to StevenGuthmiller's topic in WIP: Model Cars
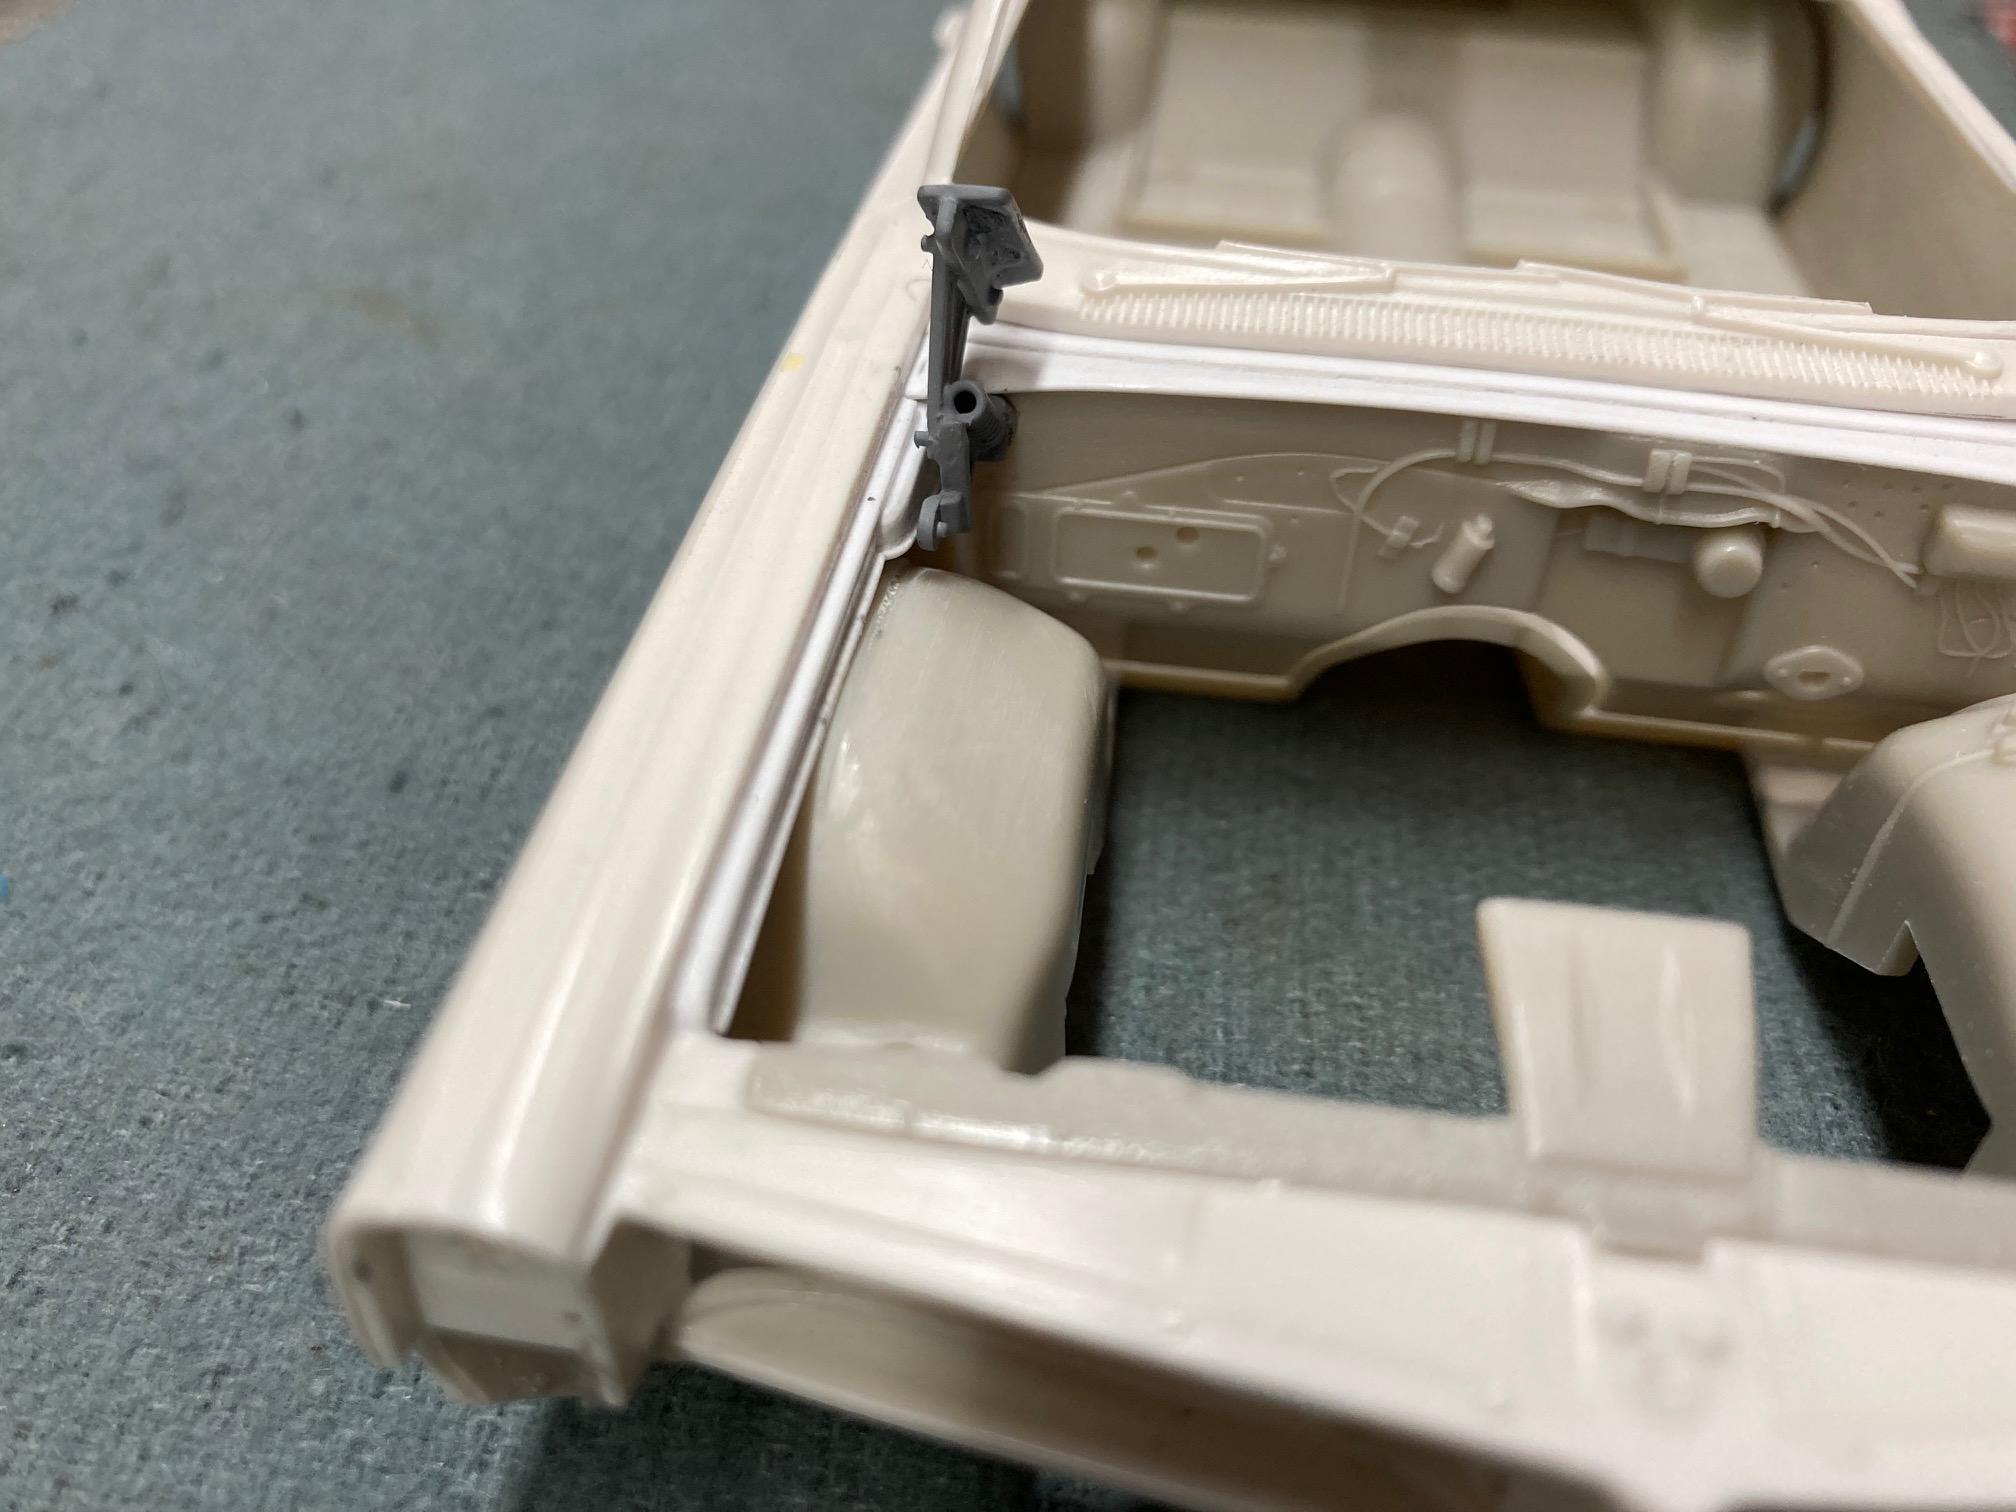
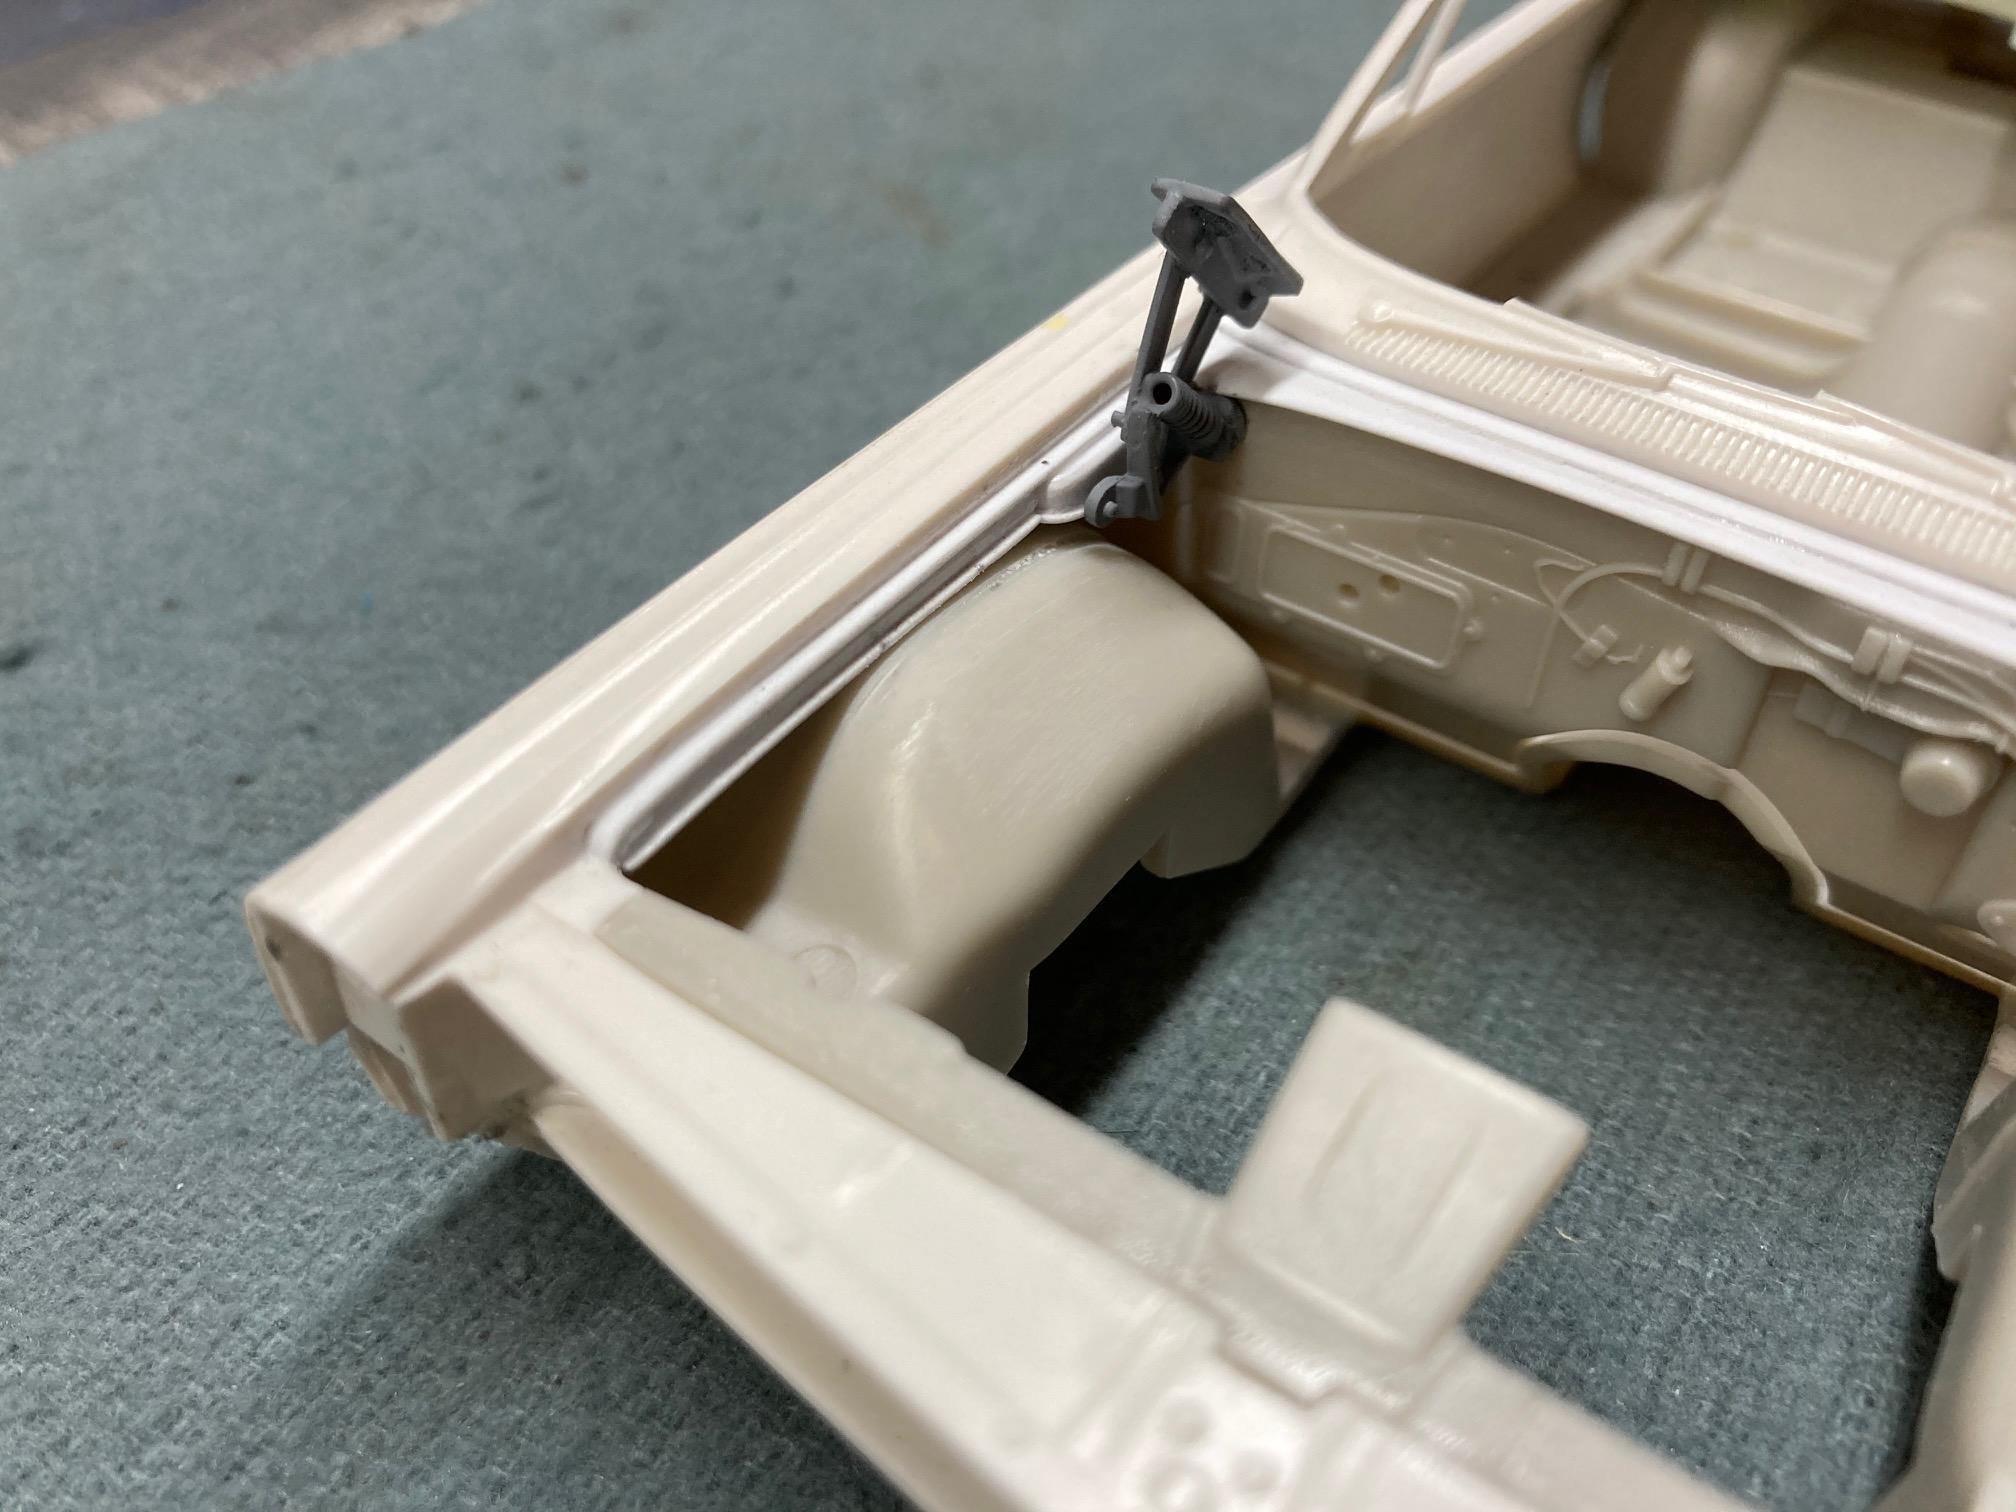
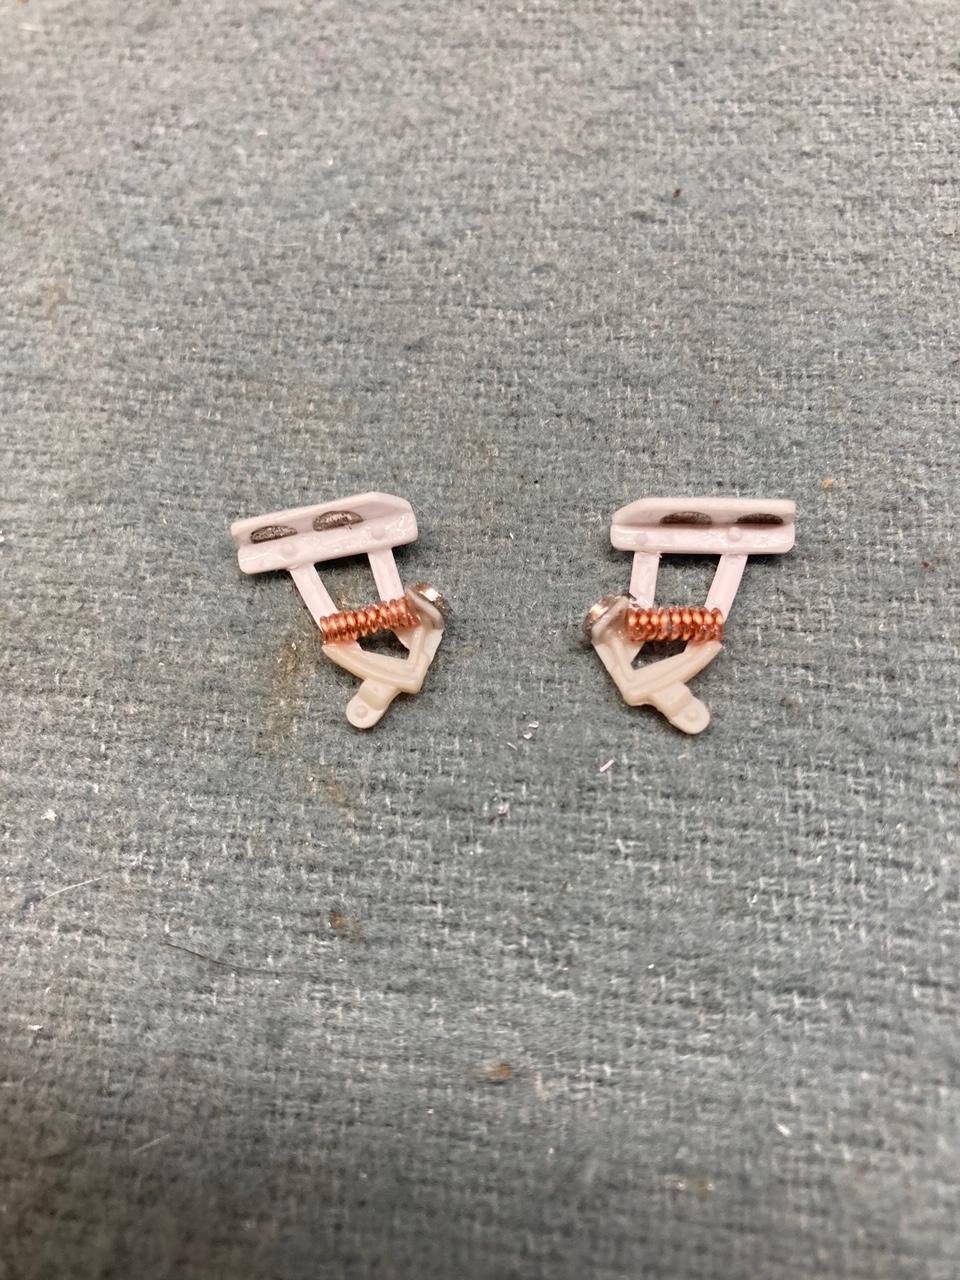
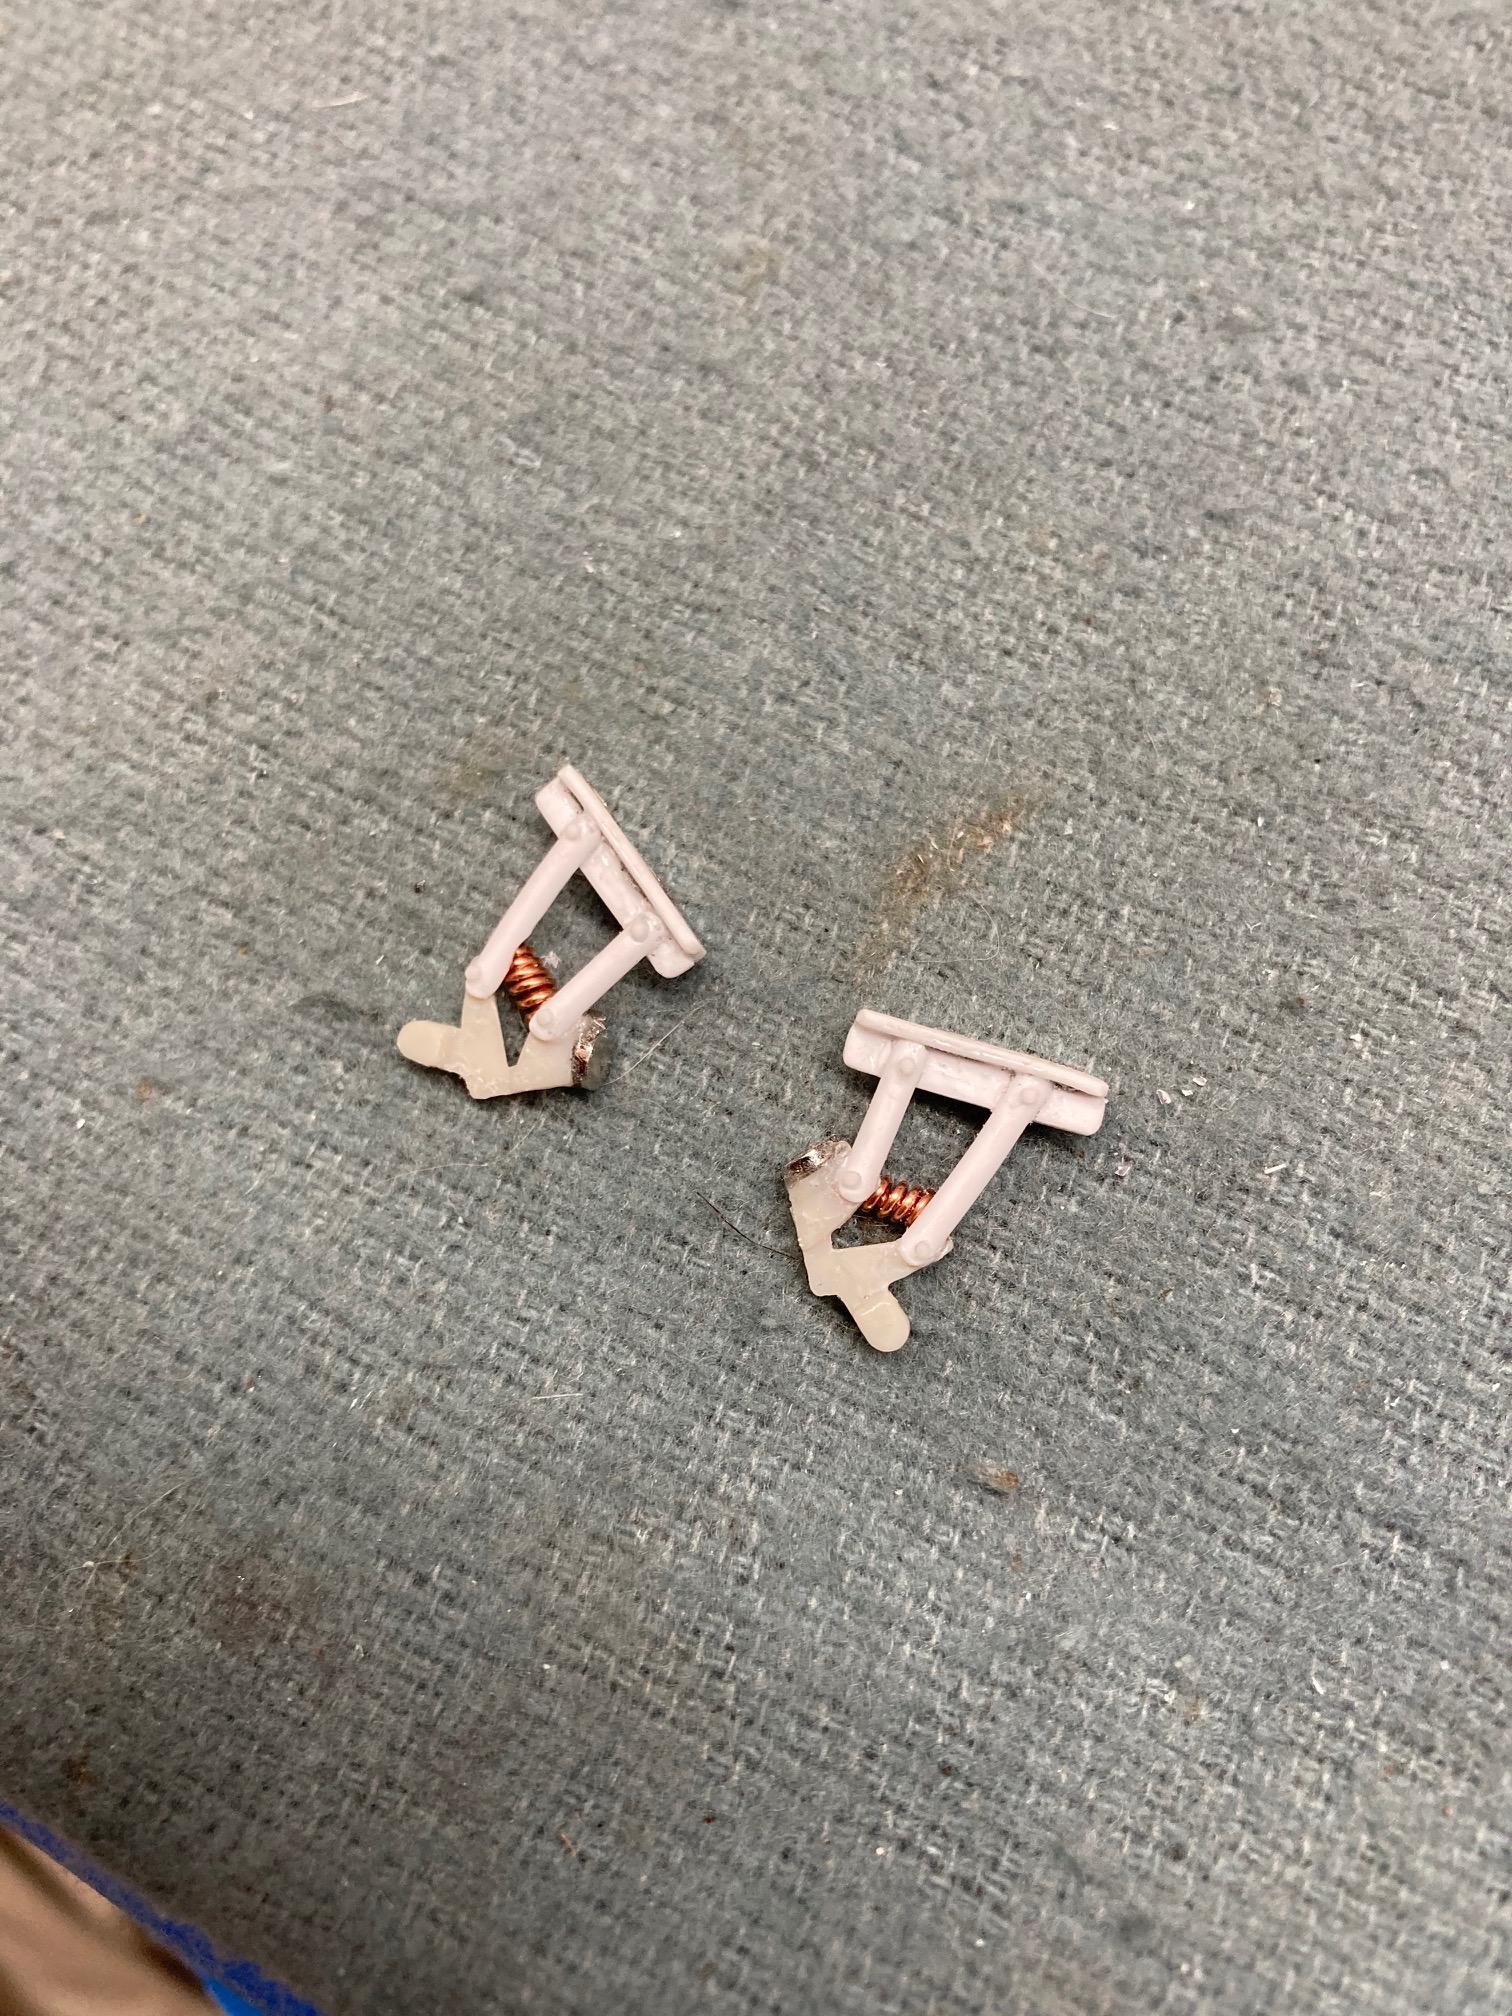
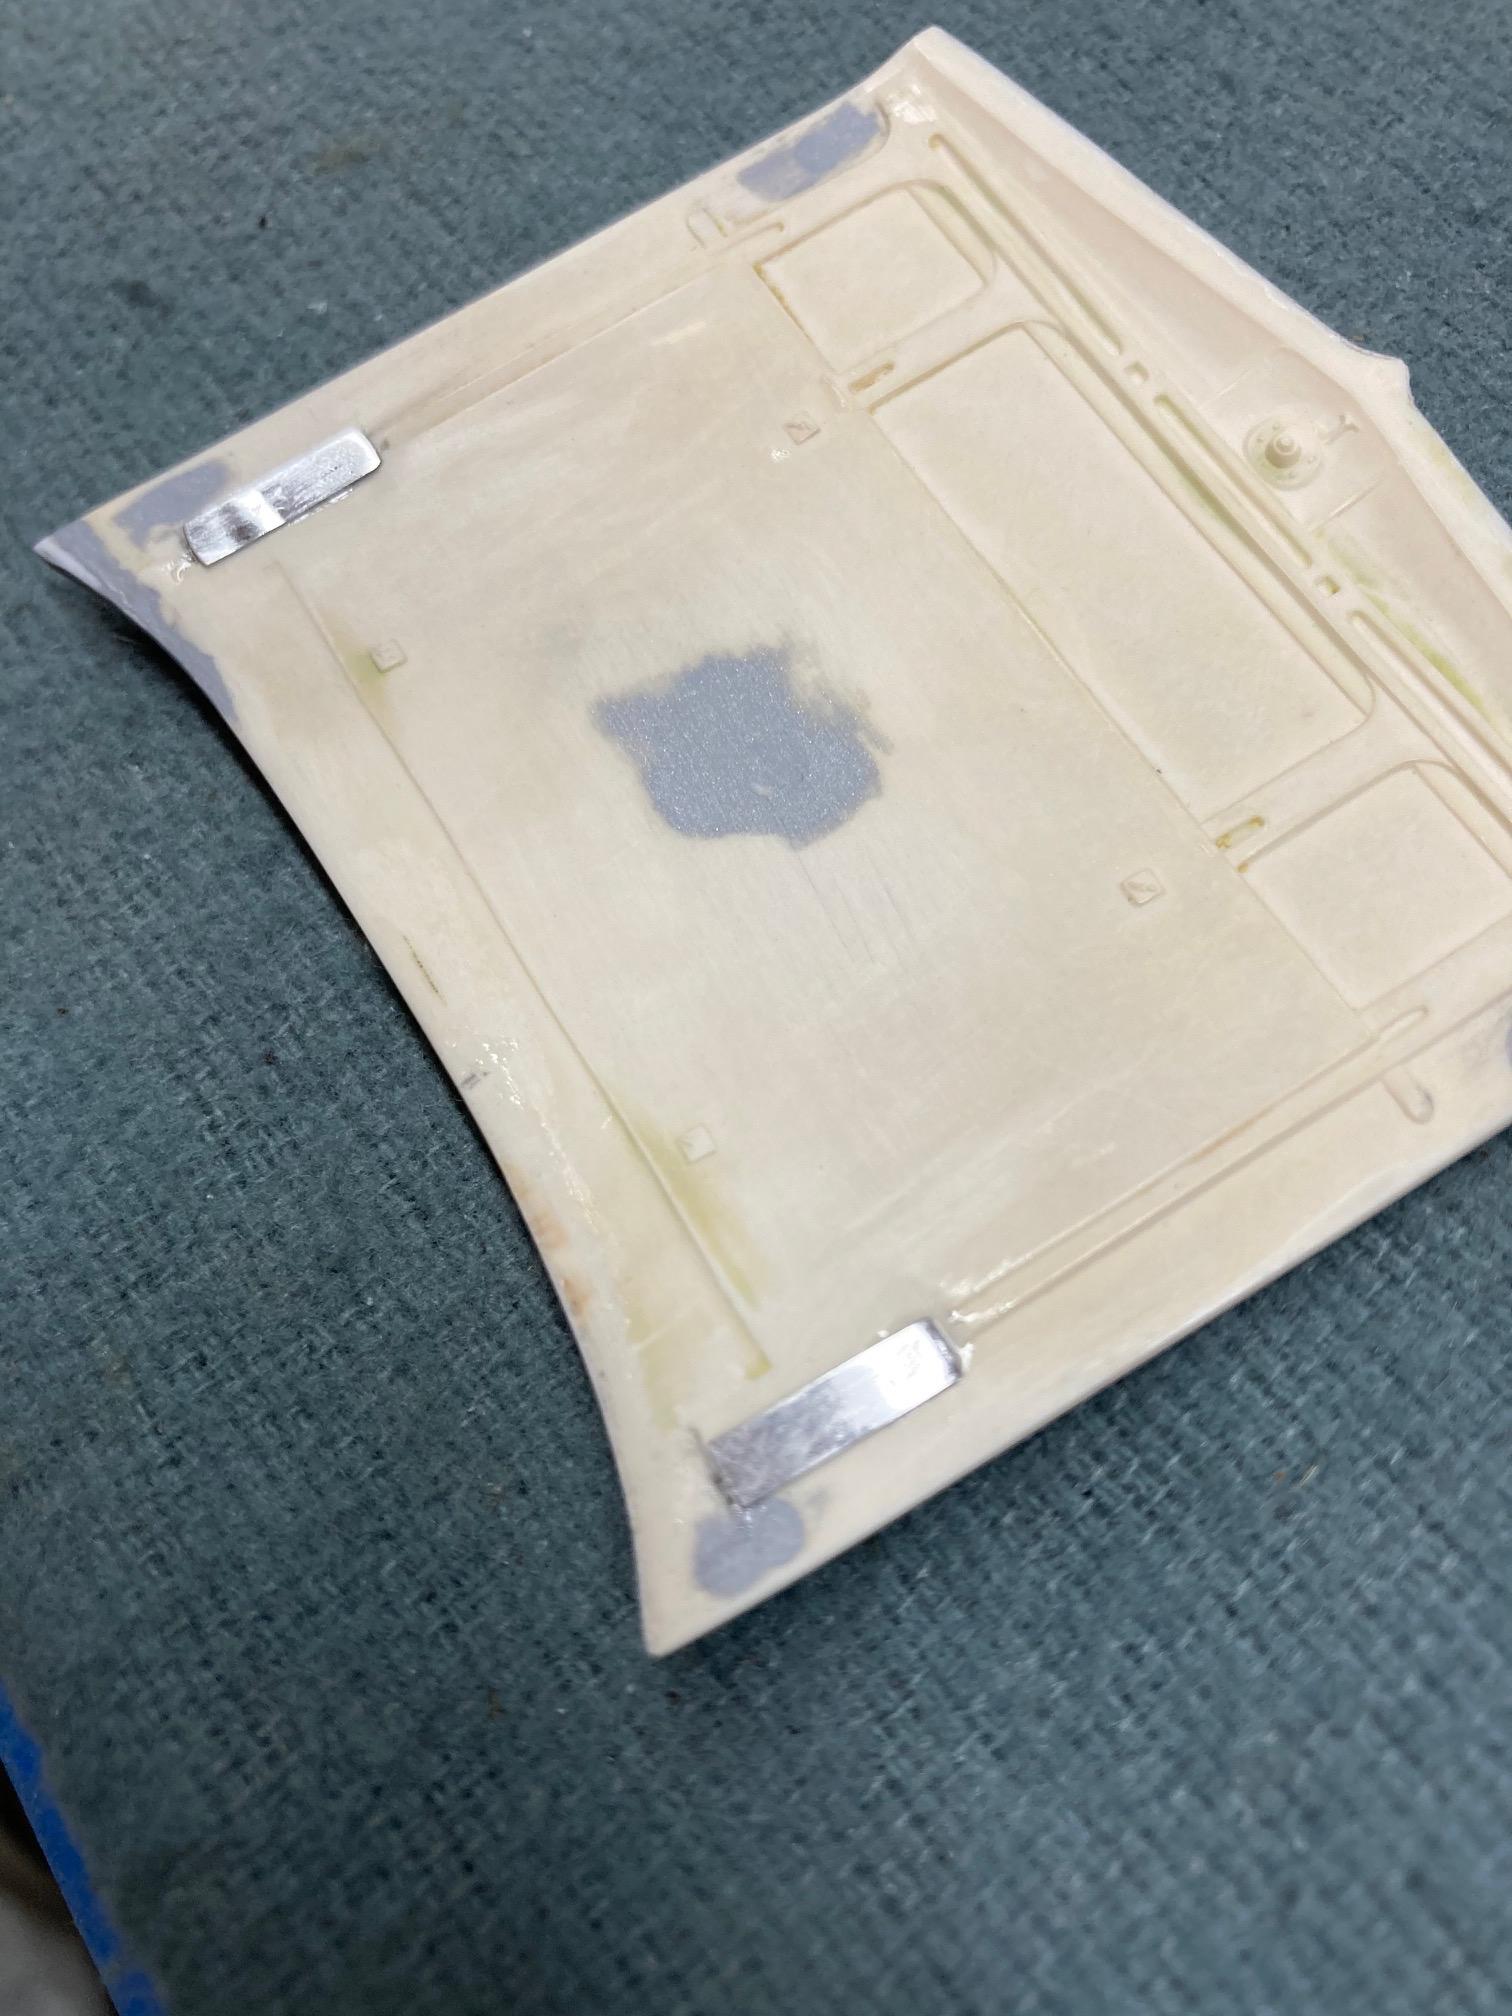
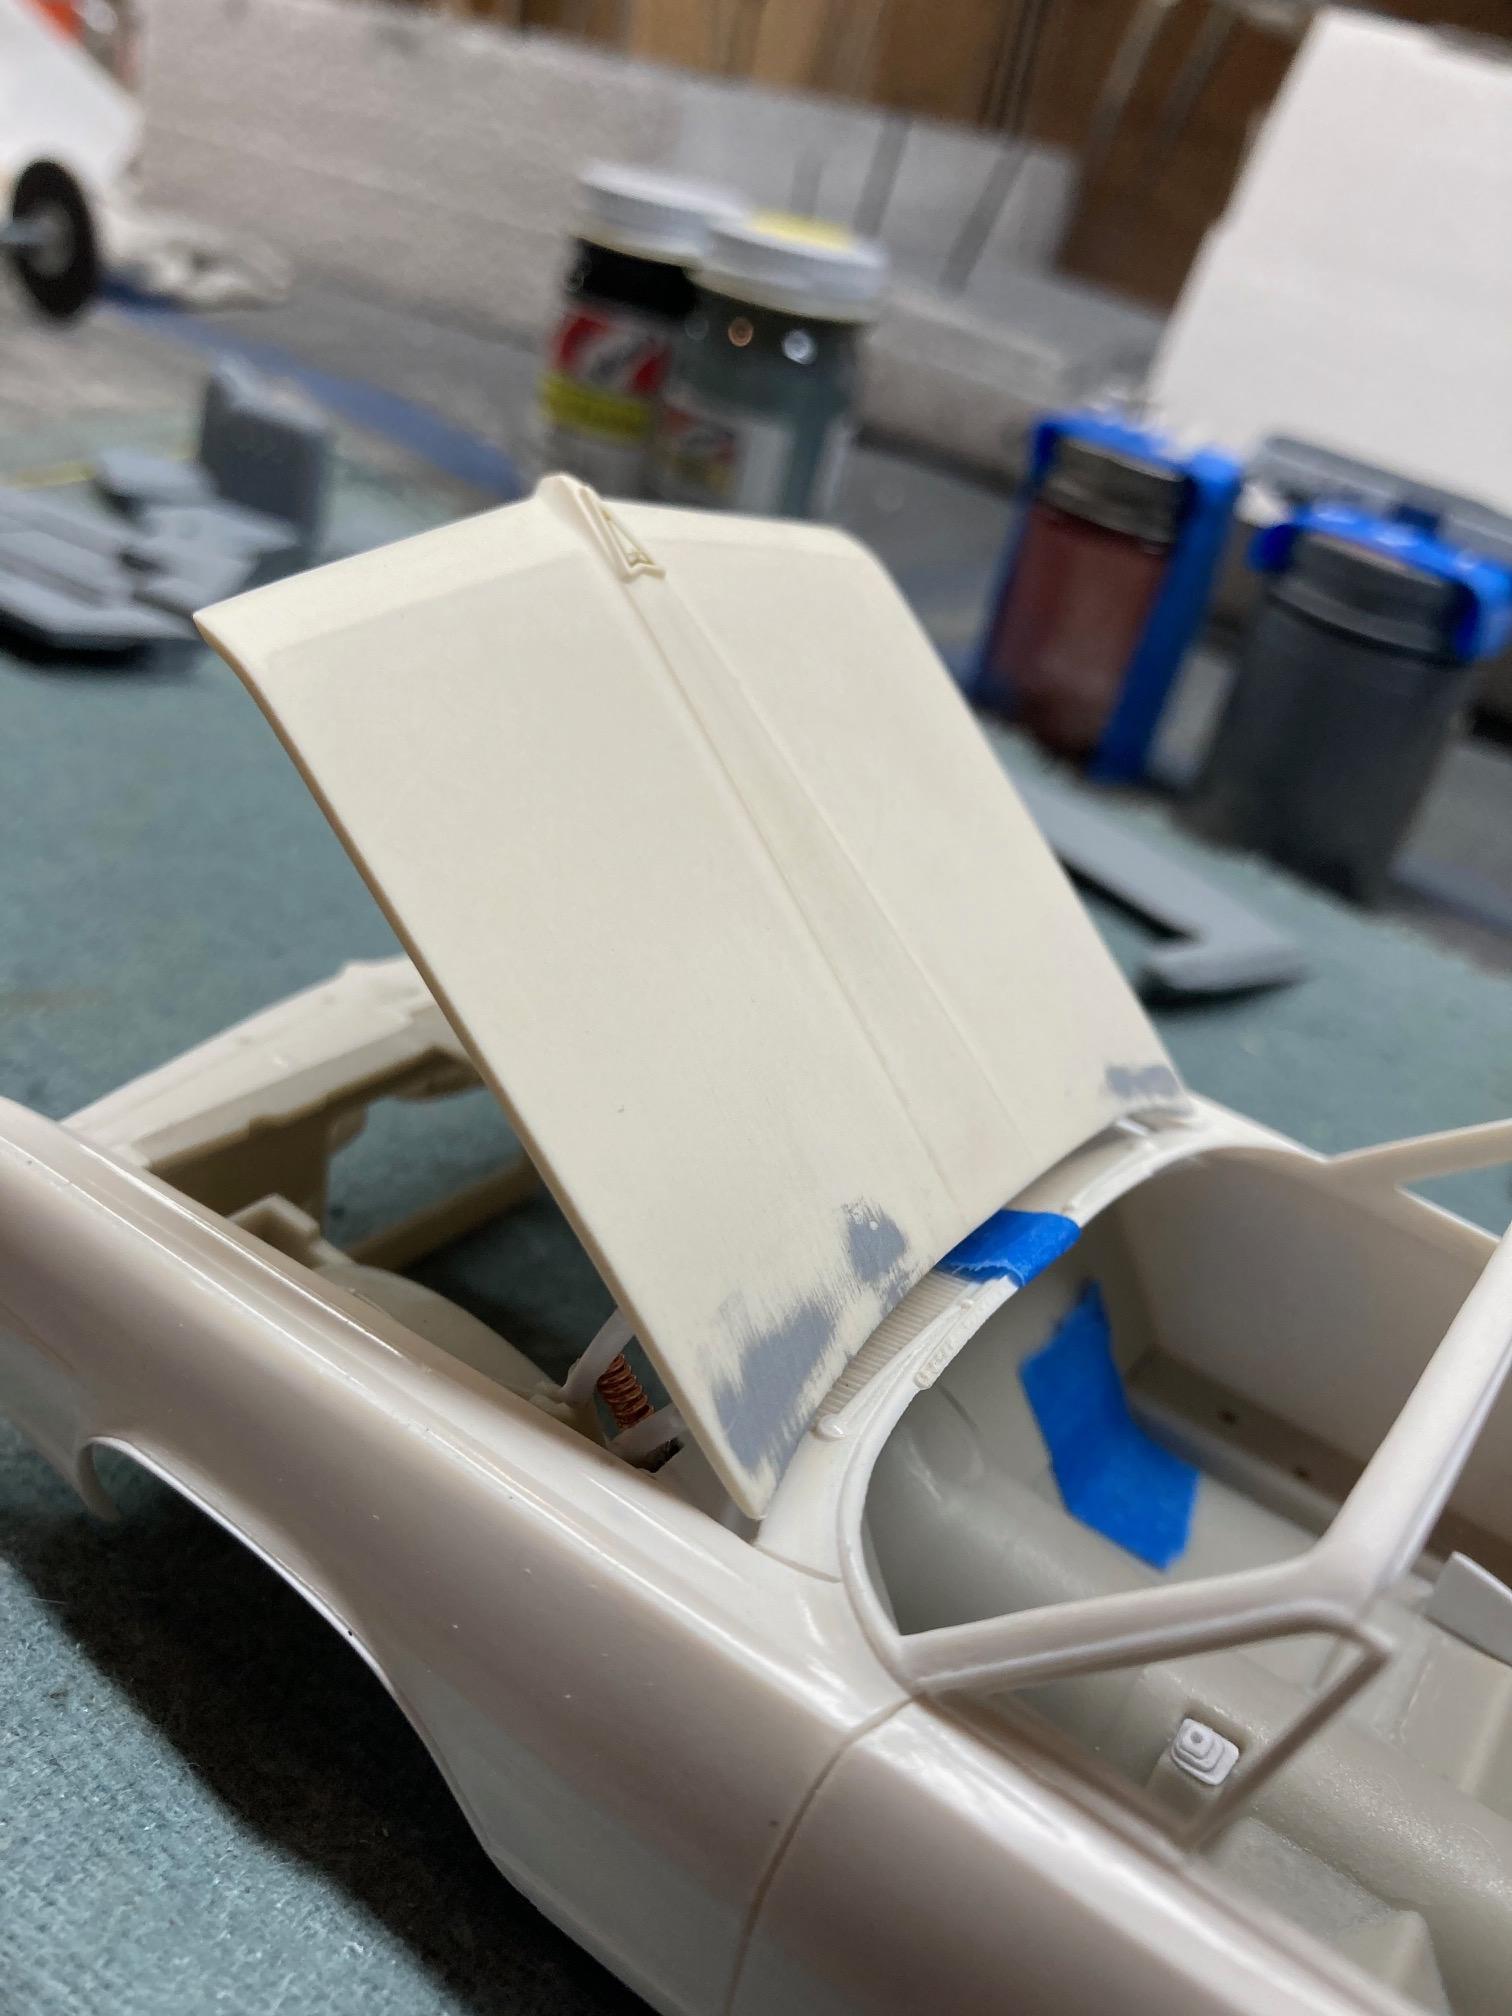
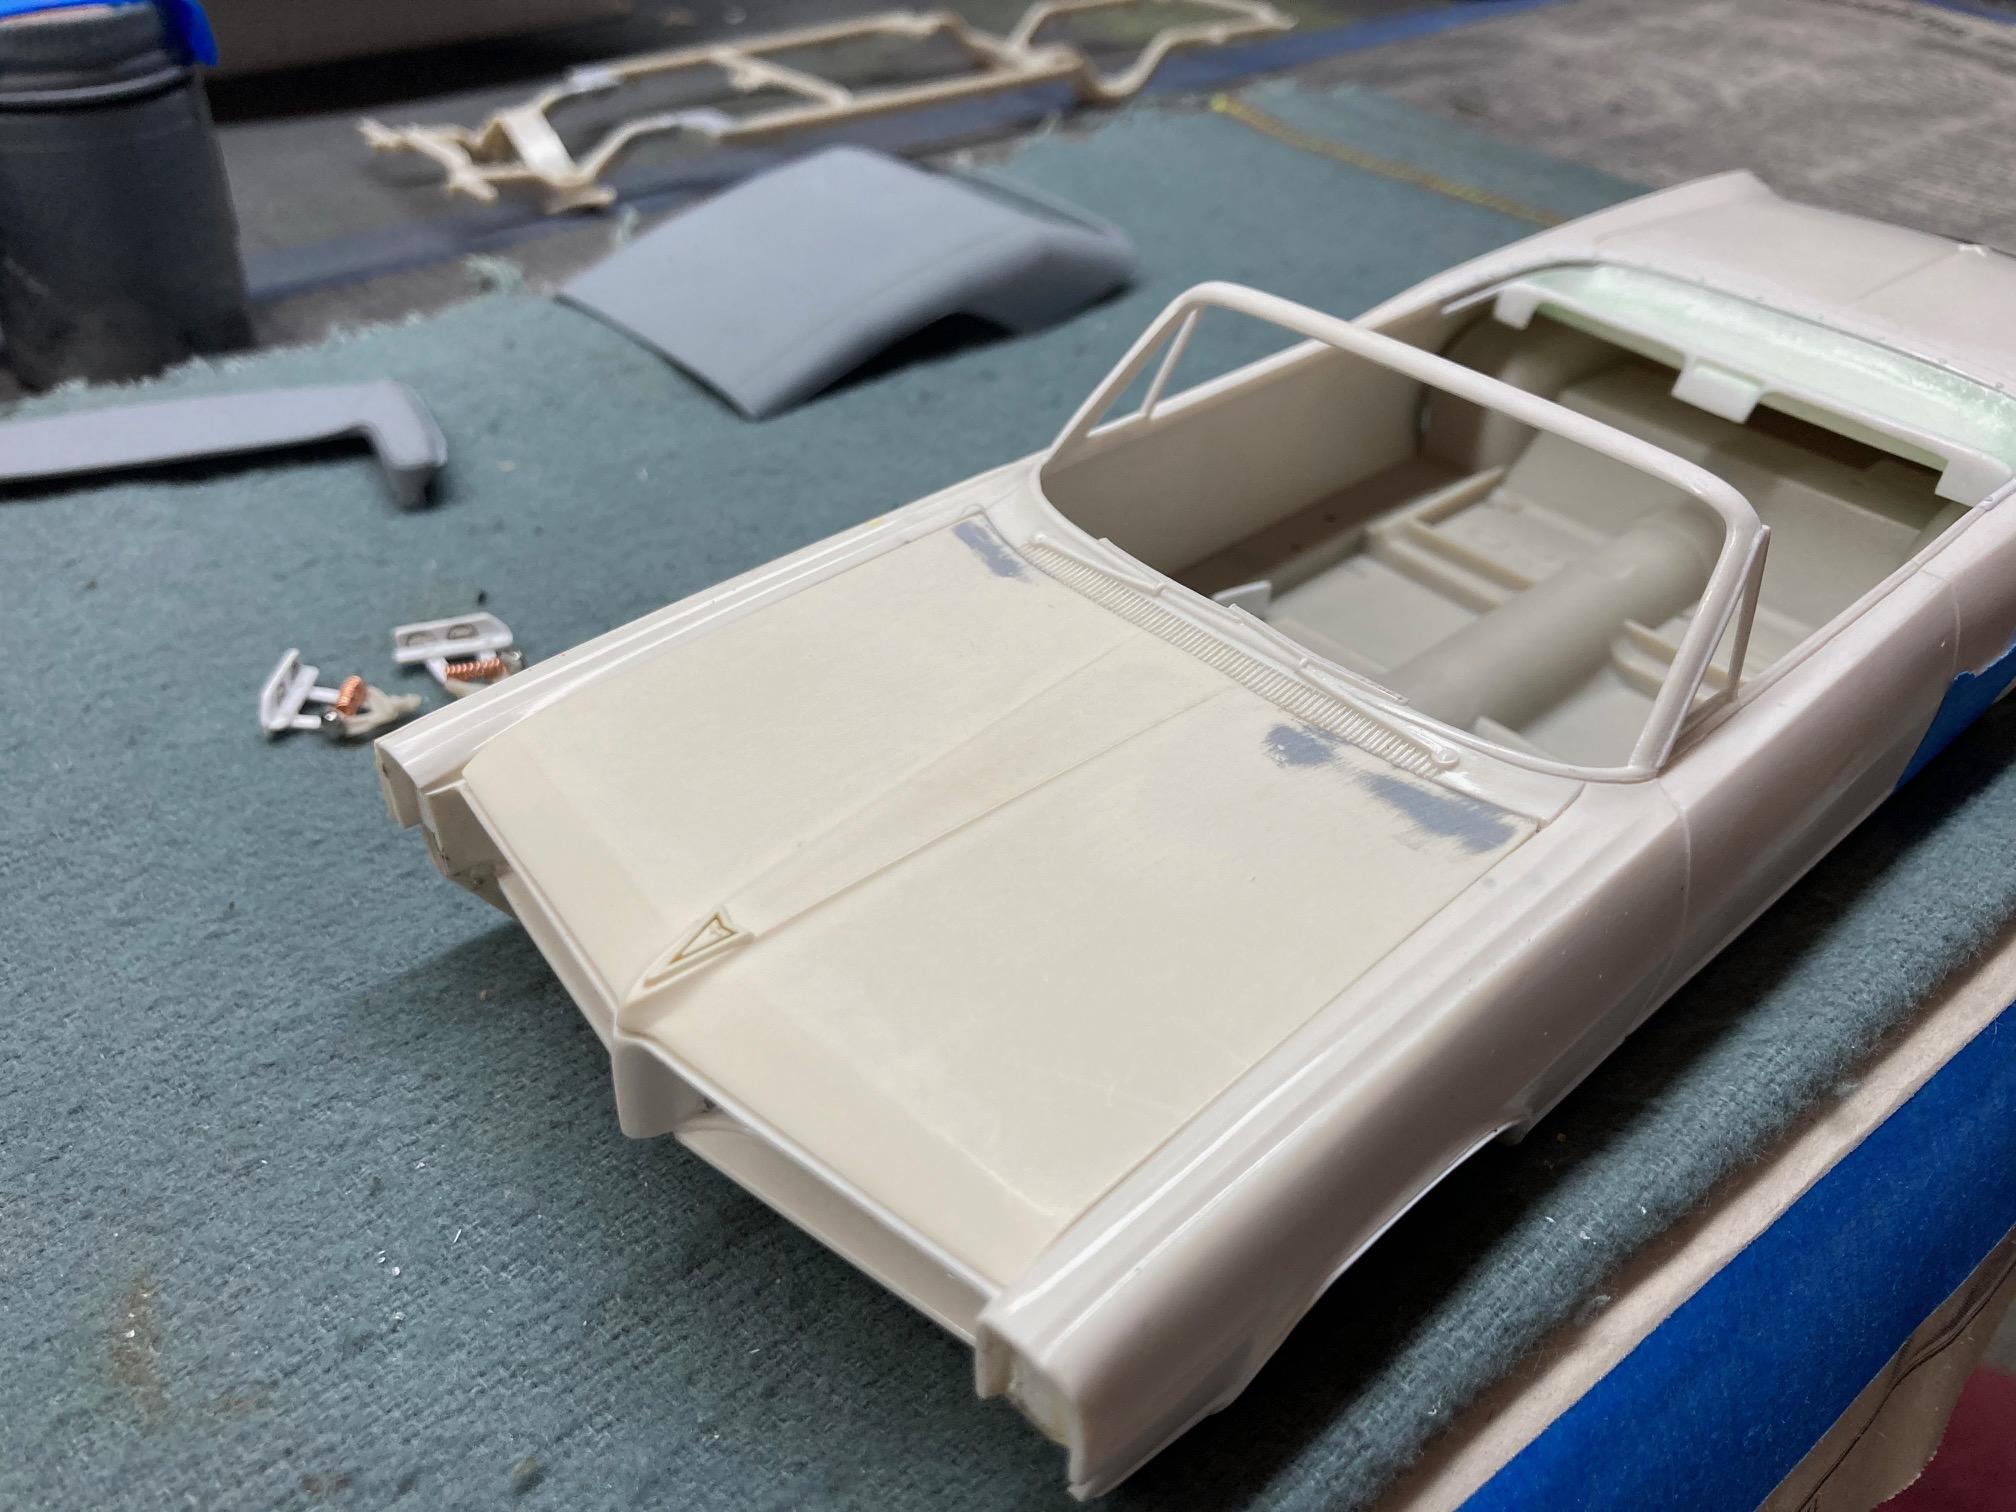
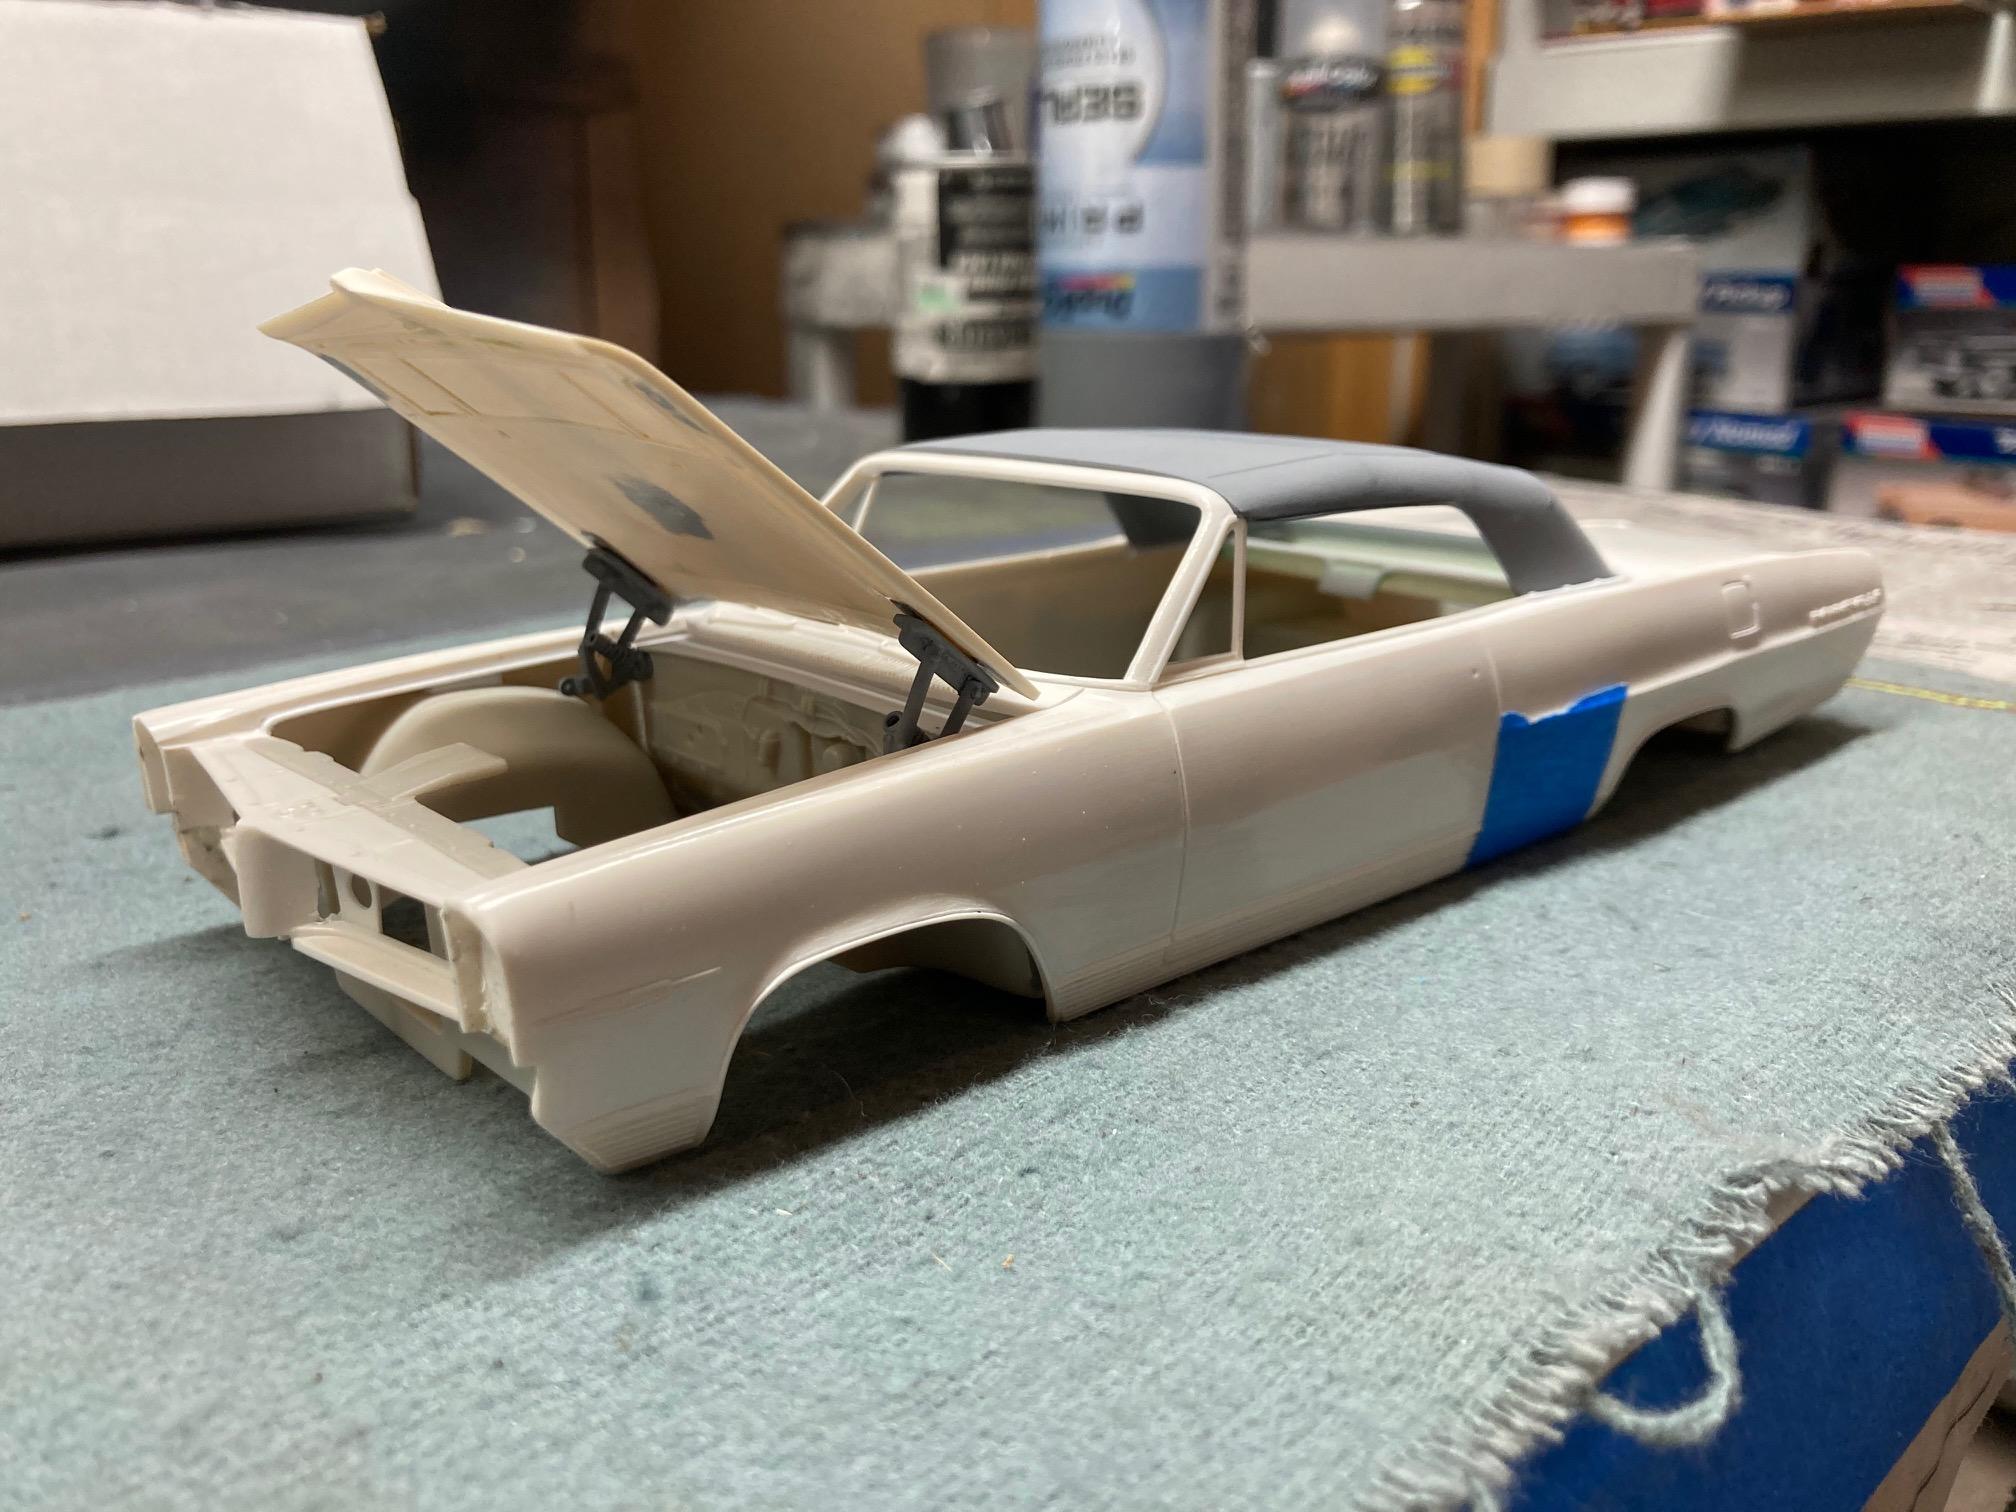
Thinking that I finally have the removable magnetic hood hinges pretty much wrapped up. Steve
-
1964 Pontiac Bonneville Convertible.
StevenGuthmiller replied to StevenGuthmiller's topic in WIP: Model Cars
Thanks much guys!! Steve -
1964 Pontiac Bonneville Convertible.
StevenGuthmiller replied to StevenGuthmiller's topic in WIP: Model Cars
I'm not certain, but I believe that the vanity mirror on this vintage of Pontiac was just a mirror fastened to the visor, unlike today's mirrors, with a hinged cover. So, I guess you could say that it is functional. Steve -
Any spare bits of wire that you can scrounge up here and there will work for various different hoses and wires. Strip the jacket off of a single strand silver wire and you have fuel line or material for carburetor linkage or return springs. As far as clamps go, you can pretty easily make your own from thin strips of aluminum from a soda can bent to shape. Steve
-
Try the Q-tip to soak the smudge, and then maybe try one of the small conical Tamiya type swabs to rub off the glue. They’re smaller and harder than a regular Q-tip. Might be just the ticket. Steve
-
If it’s just the Testors “Clear Parts Cement” it’s not much different than Elmer’s. It just tacks up a little faster. In any case, it’s a water based glue, so as others have said, get it wet with a Q-tip, let it soak for a few minutes, (maybe even let the wet Q-tip sit on the affected area for a while) and then try rubbing it off with a Q-tip before resorting to a tooth pick, or anything that could scratch the plastic. In the future, try using a few thin strips of a fairly easily removed tape like Tamiya to tape the window into position in a few key areas. Then, using a tooth pick, or other thin applicator, apply something like an epoxy glue around the perimeter in the areas that are absent of tape. Once the epoxy is solidly set, remove the tape and fill the remainder of the perimeter with more epoxy. Your glass will be permanently and very strongly fastened in place, with little possibility of smudges or finger prints. Steve
-
1960 Mercury 2 dr HT.....built stock..thanks Steven Guthmiller
StevenGuthmiller replied to thatz4u's topic in Model Cars
Looks a lot different than the last time I saw it! ? Nice job Al. Steve