
taaron76
-
Posts
806 -
Joined
-
Last visited
Content Type
Profiles
Forums
Events
Gallery
Everything posted by taaron76
-

Scale Bolts, Nuts & Hardware
taaron76 replied to taaron76's topic in Model Building Questions and Answers
You guys are awesome! Thanks for the info!!! Jim - I didn't even think of that! I'll have to hit my local hobby store and scour the aisles for those pieces. Thanks a million! The floor monster!!! lol Good one... Tim -
A pair of 66 Novas- small update for now on the wagon
taaron76 replied to microwheel's topic in WIP: Model Cars
I'm headed to California for a week next week, then Texas for a week after that. I will be having modeling withdrawals! Joe - I'll be in Corpus for a couple days starting on the 5th of June. Maybe we could meet up real quick? Tim -
Scale Bolts, Nuts & Hardware
taaron76 replied to taaron76's topic in Model Building Questions and Answers
Thanks, Greg. I found a couple of different places to purchase them from, but wasn't exactly sure on what sizes to get. Thanks, Tim -
I've been looking at some scale bolts and nuts from http://www.scalehardware.com/ and was wondering what were the appropriate sizes for different applications of a build you guys might be using. As an example, connecting rear control arms from the axle to the frame, etc. Where are you guys using nuts and bolts at in your builds? Do you have any reference pics? Not sure if its feasible to try to using them on header flanges or anywhere else, but figured I see what you guys are using and how. Thanks! Tim
-
A pair of 66 Novas- small update for now on the wagon
taaron76 replied to microwheel's topic in WIP: Model Cars
Outstanding work, Jim! You are motivating me to want to make some progress on mine. I primed the main parts last night and will hopefully get some engine color down tonight. Where did you get the pulleys and belt from? Are they pretty universal? I love the realism they bring and are a MUST HAVE on my current build. Thanks! Tim -
Great build, Ron! Nice rescue!!! Tim
-
'65 Chevelle SS 396 Z-16 (Under Glass 7-July-15)
taaron76 replied to taaron76's topic in WIP: Model Cars
Thanks Carl! I love a nice stainless steel looking exhaust. Tim -
'65 Chevelle SS 396 Z-16 (Under Glass 7-July-15)
taaron76 replied to taaron76's topic in WIP: Model Cars
If you want a stainless look, it works great. -
'65 Chevelle SS 396 Z-16 (Under Glass 7-July-15)
taaron76 replied to taaron76's topic in WIP: Model Cars
Joe - thanks buddy! Spaz Stix worked great on the spoon... Bummer! Jim - I'm going to give the Alclad II a shot. I'm still undecided on painting the bumpers metallic black. I really like that reference pic I posted. As far as the fuel cell,I'm just going to leave it stock. Other than lowering it and adding new wheels, the rest will be stock. I'll use the KISS method. Keep It Simple, Stupid! Lol. Thanks for the tips! Tim -
'65 Chevelle SS 396 Z-16 (Under Glass 7-July-15)
taaron76 replied to taaron76's topic in WIP: Model Cars
The casting lines and junk in the chrome parts of this kit were pretty bad, so I bought some Spaz Stix gloss back and mirror chrome to rechrome the bumpers and chrome parts. I primed the parts, then Spaz Stix gloss black, the Spaz Stix mirror chrome. I didn't have good results at all... the gloss back would gloss up nice, then as it started to dry, it looked like an orange. I stripped the parts and used Tamiya gloss black and then 3 very fine coats of Spax Stix mirror chrome and after the first coat I thought, "YES!!! This beautiful!" The first dust coat looked so good, but after 15 minutes I put the second dust coat on and it got duller and duller. I threw another dust coat on, let it dry and buffed it out a little and it helped, but it is not anywhere near chrome. If anything, the parts came out like a nice polished stainless steel. I did the spoon test and get it to turn out really good, but no luck on the parts. Here are the results of using the Spaz Stix process, followed by a coat of clear. I think the exhaust and exhaust manifolds turned out best and they really do have a nice stainless steel look, but couldn't get the chrome shine I was looking for like what the spoon turned out like. After feeling a little down about how the Spaz Stix was supposed to turn out, I needed a success story for the day, so I decided to lay a few base coats down. I absolutely love this metallic black and under the lights it look so nice. This is after two base coats... I will probably clear coat it tomorrow or Monday. Since I stripped the chrome off of the bumpers, anticipating the Spaz Stix working out, I got some more ideas of going in a little bit different direction that I originally planned. I was scouring the internet and stumbled upon his beauty and figured out what I want the exterior to look like. It's bold, but different and I love it! This is a '67, but I think it will look great on the '65 as well. I will probably keep the grill and rear piece above the bumper chrome, but the bumpers will be the same color as the car, metallic black. I'm just waiting for a bunch of parts I ordered to get started on the engine and hopefully next week I will have some more progress. Tim -
'65 Chevelle SS 396 Z-16 (Under Glass 7-July-15)
taaron76 replied to taaron76's topic in WIP: Model Cars
Some down time in between helps me formulate some ideas, like do I want to throw in a roll cage and the fuel cell from one of my NASCAR un-builts. It also give me time to order a few things here and there. I really like some of the things you did on your Nova engine, so I gotta order some of those T-fittings and a couple other things. No hurry I guess... I redid the trunk hinges, the first set was too big to incorporate any styrene and it wouldn't close right. I also added some sheet styrene to the underside of the trunk to clean it up a little and hide the hinges as best as I could. It may not look like the factory, but it will do for the first build attempting to hinge anything. I will probably flock the trunk floor and throw in a factory spare tire, unless I use the NASCAR fuel cell. I might relocate the battery to the trunk as well... I haven't decided yet, but here is what I have so far. Here's a mockup of the NASCAR fuel cell. The hard part will be moving the filler hose to the rear, versus the side if I decide to go that route. -
'65 Chevelle SS 396 Z-16 (Under Glass 7-July-15)
taaron76 replied to taaron76's topic in WIP: Model Cars
No problem, Jim. I haven't had much time for anything lately... its been busy as can be, but I did do some little stuff here and there on the Chevelle. I'll post some pics up later. Tim -
HAHA!
-
Here's a good read. http://www.nnjr-pca.com/index.php?option=com_content&view=article&id=444:wet-sanding-101&catid=76:concours-articles&Itemid=117
-
It keeps the sanding surface and sandpaper free of debri. Wetsanding is the default now days. Tim
-
Yes, you can wet-sand acrylics... Tim
-
A pair of 66 Novas- small update for now on the wagon
taaron76 replied to microwheel's topic in WIP: Model Cars
Amazing work as usual, Jim. You've given me some great ideas on how to spruce up the little details of the fuel lines and everything else under the hood. Fantastic work! Tim -
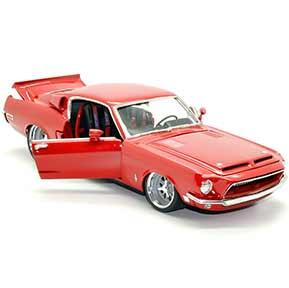
Hi Joe! So I went to my first model car show this past weekend... well, it was crazy! Never seen anything like some of these models before. Lot's of great ideas, but man there were some beauties!!! Like this one...
-
Looking good! That's a neat color combo. I did that with my '67 Fastback (Gold/Clear orange) and it turned out cool. Nice job!!! Tim
-
'65 Chevelle SS 396 Z-16 (Under Glass 7-July-15)
taaron76 replied to taaron76's topic in WIP: Model Cars
In the real world of automotive, you have gravity and you have weight and usually a lot of it. Plastic... Not so much. I build the hinges with resistance that keeps the doors and trunk open when I want them to stay open, and closed with the magnets when I need them to stay closed. I'm sure someone has built something to make the hood stay open without a prop, but that's a little bit much for me to try to consider right now. Most cars built today have prop rods... Not all of them, but most of them. There is a way to use magnet to keep the hood open, I just have to get the engineer in me to put it on paper. Tim -
'65 Chevelle SS 396 Z-16 (Under Glass 7-July-15)
taaron76 replied to taaron76's topic in WIP: Model Cars
More progress today as I finished up the trunk. I cut some styrene out and glued a piece under the trunk lid and to the bumper. I drilled out a hole for the magnet on both sides to keep the trunk closed. I also glued some styrene to the insides of the trunk area to keep it level. Works perfect! Tim -
A pair of 66 Novas- small update for now on the wagon
taaron76 replied to microwheel's topic in WIP: Model Cars
Thank you, Jim! Tim -
A pair of 66 Novas- small update for now on the wagon
taaron76 replied to microwheel's topic in WIP: Model Cars
Jim - would you mind posting your flocking method/technique? Thanks! Tim -
'65 Chevelle SS 396 Z-16 (Under Glass 7-July-15)
taaron76 replied to taaron76's topic in WIP: Model Cars
Thanks! Tim -
'65 Chevelle SS 396 Z-16 (Under Glass 7-July-15)
taaron76 replied to taaron76's topic in WIP: Model Cars
What I did was cut out some styrene and shaped it to the door and door panel. I glued and mounted the styrene to the door, that way I can paint the door jamb the same color as the body color and not have to worry about masking the door panels off. The door and door panel won't be glued together until final assembly. I will do the exact same thing for the door jamb on the quarter panel side of the car. Now that I've planned it out and tested my design, its a little easier than I anticipated. I still have to smooth out the styrene and put a dab of putty in there to cover the gap between the door and styrene itself, but I think primer might fill that void as well. I test fit the door back in and everything lines up and the door opens and closes with no issues. Tim