taaron76
-
Posts
806 -
Joined
-
Last visited
Content Type
Profiles
Forums
Events
Gallery
Everything posted by taaron76
-
I put some BMF on it last night and got the windows cut and buffed since I deleted the vent windows. I also made a roll bar and extended it to the chassis in the rear. The front bumper is just there for looks... I will probably strip it, clean it up and Alclad it. I had to order longer bolts for the 4-link, so hopefully next week I can get that mocked up and assembled. Tim
-
Hi Andrew, Unfortunately, there isn't a lot of room up front to do anything major with the suspension, but I'm adding a little to it to at least give it some detail. As far as my 1:1, I probably won't do any tubbing at all. I've got 245's on the rear now with plenty of room and the 4-link would allow more a little bit more, which I think should be enough for what I'm after. Thanks for the compliments! Tim
-
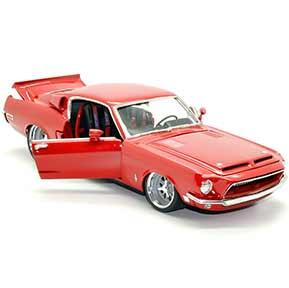
Just a quick snap of the color and wheels together. Tim
-
Sprayed some primer and color today. Gravity Colors Ferrari Rosso red with two base coats and three coats of clear. Tim
-
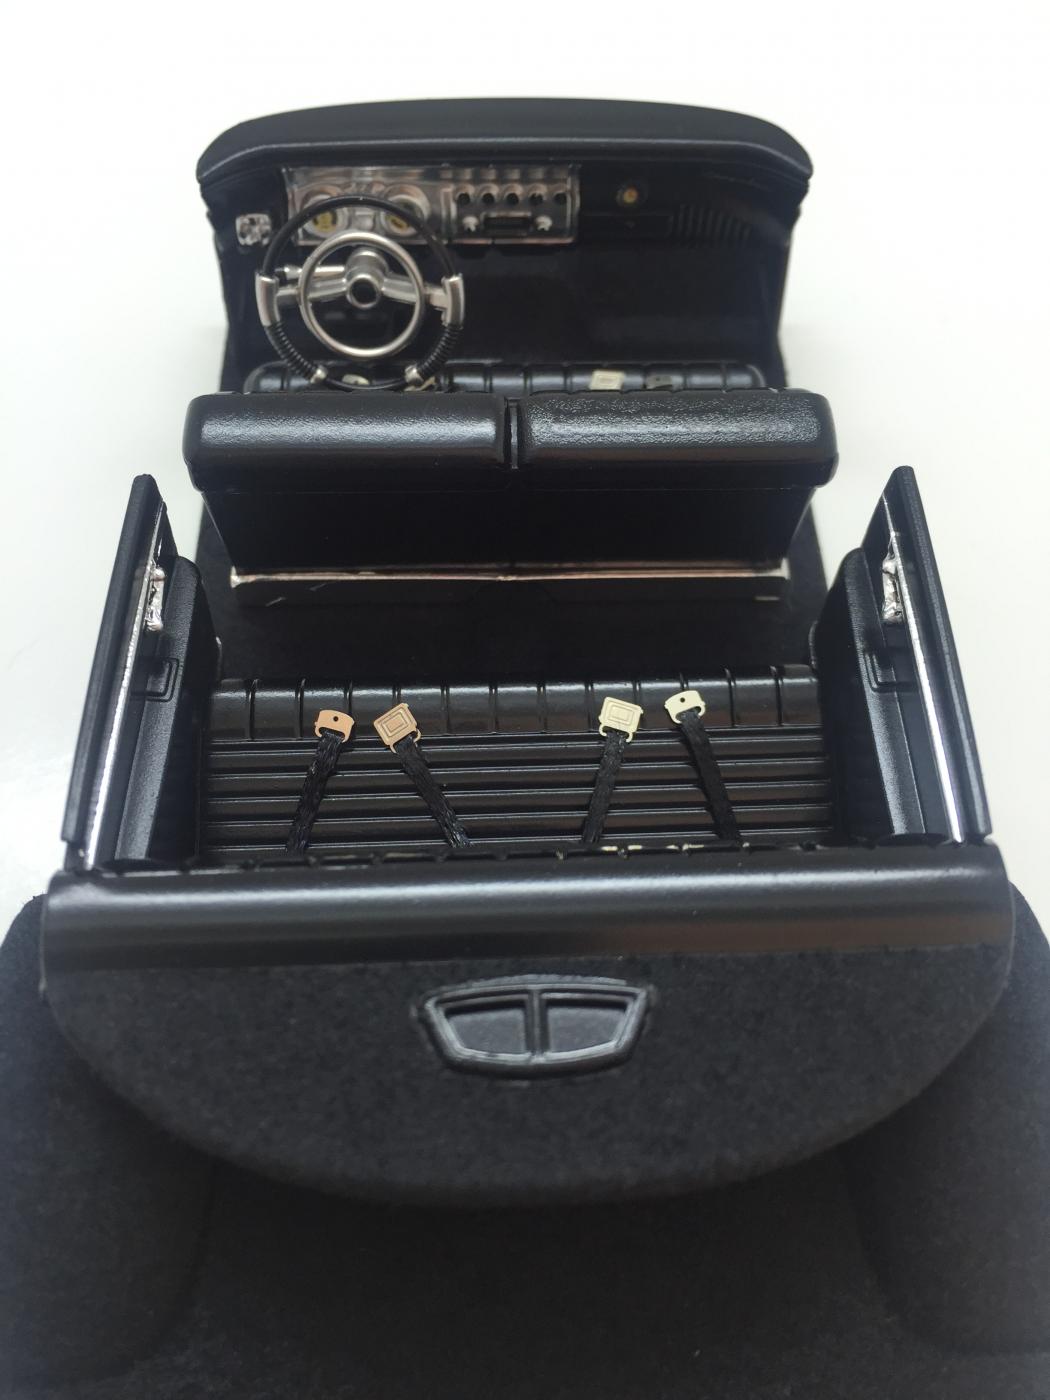
Slow progress over the last couple of weeks, but making the door jambs and everything else that doesn't magically appear when you cut and hinge the doors is tedious work. Since this will have a 4-link, I deleted the back seat and boxed the rear compartment in. All of my parts came in to make the 4-link functional, but still making the coilovers and the rest of the hardware that attaches to the axle housing and frame. The ride height isn't exactly set, but when I finish the suspension, it will be pretty close to this. The 4-link will be function, so I will be able to adjust it as needed. Still debating on putting the 427 in it, or the 5.0 Coyote engine. Tim
-
Not a major update, but progress none the less... wheels are painted and assembled. Tim
-
Took some time and cut all of the doors and trunk out, then hinged them up. I have to recreate the A-pillar vent window support because there isn't enough plastic there once you cut the doors out. The hardest part of the build is definitely hinging, followed by making all of the fitment piece to cover the gaps on the interior side to include the door panels and door jambs. Lots more to do before this one is even close to being ready for primer and paint, but one day at a time. This one will be covered with Gravity Colors Ferrari Rosso Red and then Gravity Colors Clear. Tim
-
One day I will start the replica of my '66. I am going to wait until I do the 3/4 link and coilover conversion. Thanks! Tim
-
I bought the wheels and tires from Steven Zimmerman (Z-Man, ZMan), which you should be able to search for here on the site. Thanks! Tim
-
Thanks, Ron! The Shelby will be a red with a small metallic in it. I was going to do a 1 for 1 of my car, but I will too that next round. Tim
-
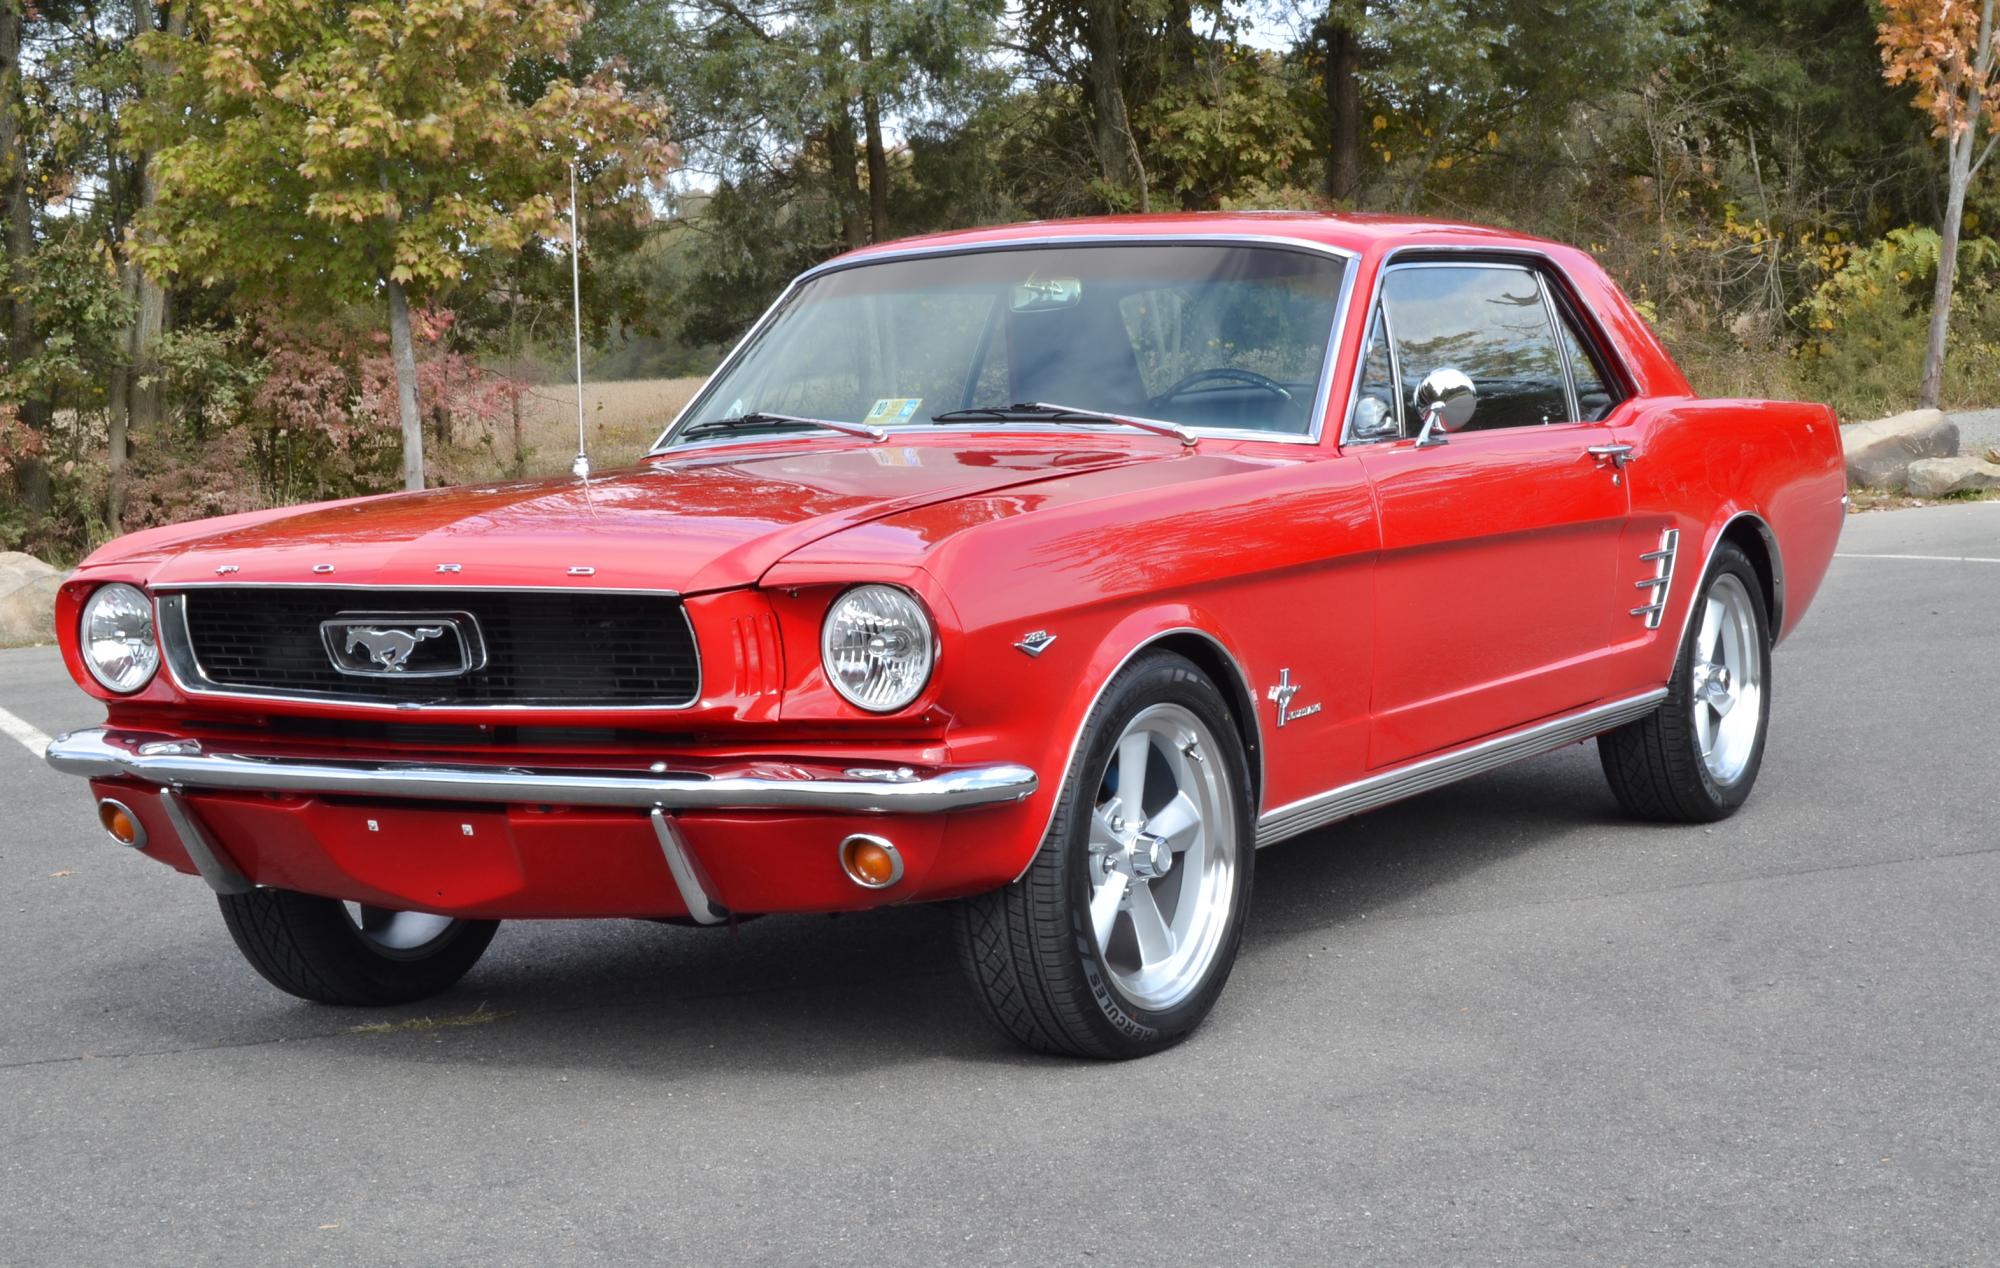
It's been almost 1 1/2 years since I picked up anything model car related, but the winter is the perfect opportunity to get started again. For the last year, I have been restoring my life size model car, my '66 Mustang. I always seem to lean on cutting the doors and trunk out in order to hinge them because I like the look of it. Once you do it once, it becomes the only way to go in my book. This kit is pretty challenging because out of the box, it really isn't a good kit to try and do anything custom on. I will be using a lot parts from different spares I've collected over the years, but this is a start of what more than likely will take 2-3 months for finish just because I don't have a lot of time at the moment. Here are a few pictures where both of them stand today. '68 Shelby GT-500 My '66 Mustang.
-
-
I was thinking the same thing, but will probably go with black interior. I'm trying to see it with tan, but I can't picture it. Any pics? Tim
-
Should I leave the bumpers chrome, or should they be gold? Should the trim be black, chrome, or gold BMF? I was thinking gold bumpers and trim. Trying to get some opinions...
-
Now that storm Jonas has hit and left around 3 feet of snow, I made some time since I couldn't leave the house and sprayed some color. Gravity Colors Crystal White Pearl and a matte finish. I wanted something different instead of a glossy finish for this one. A long ways to go yet, but hopefully this will motivate me to get it finished. It's really hard to see the pearl until you get up close and in the light, but I wanted something faint and this was exactly what I was looking for. Tim

-
 Outstanding build, Joe! Detailed and spectacular as usual!!! Tim
 -
Happy Thanksgiving, Joe! It sounds like you should have all of this stuff done by tonight. The truck looks great!!!! Tim
-
Thanks! I used the decal on the front for the letters on the grill, just hard to see them at that angle. Using BMF on those can be tough, but I'll give it a shot next time. Tim
-
I just couldn't get it to fit right, which is how I wound up breaking it. Hopefully you won't have any issues. Tim
-
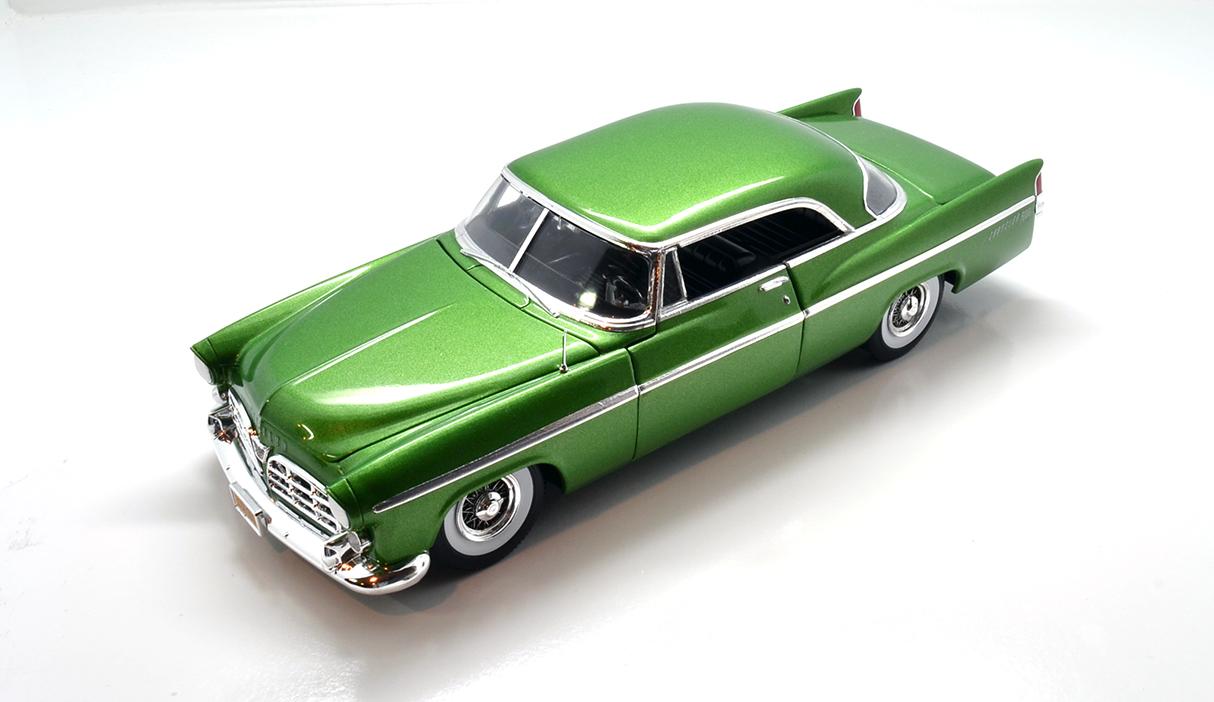
1956 Chrysler 300B (*** Finished 22 Nov 15 ***)
taaron76 replied to taaron76's topic in WIP: Model Cars
I just pick the color closest to the flock in flat and flood the surface with paint and sprinkle the flock all around. I make sure it is really covered, then brush it off a few hours later. Nikon D3300 is my camera. Thank you! Tim -
Harry - I try to open up all of them now. I can't seem to stop myself from doing it, but it makes them a little more challenging and fun. Thank you! Jim - Definitely! Lol
-
1956 Chrysler 300B (*** Finished 22 Nov 15 ***)
taaron76 replied to taaron76's topic in WIP: Model Cars
Jim - great to see you back on here. It's been insanely busy for me as well, but I'm trying to get some time in now that the holidays are here. Tim -
Thanks guys! I've been a little side tracked with work and my new toy. Tim
-
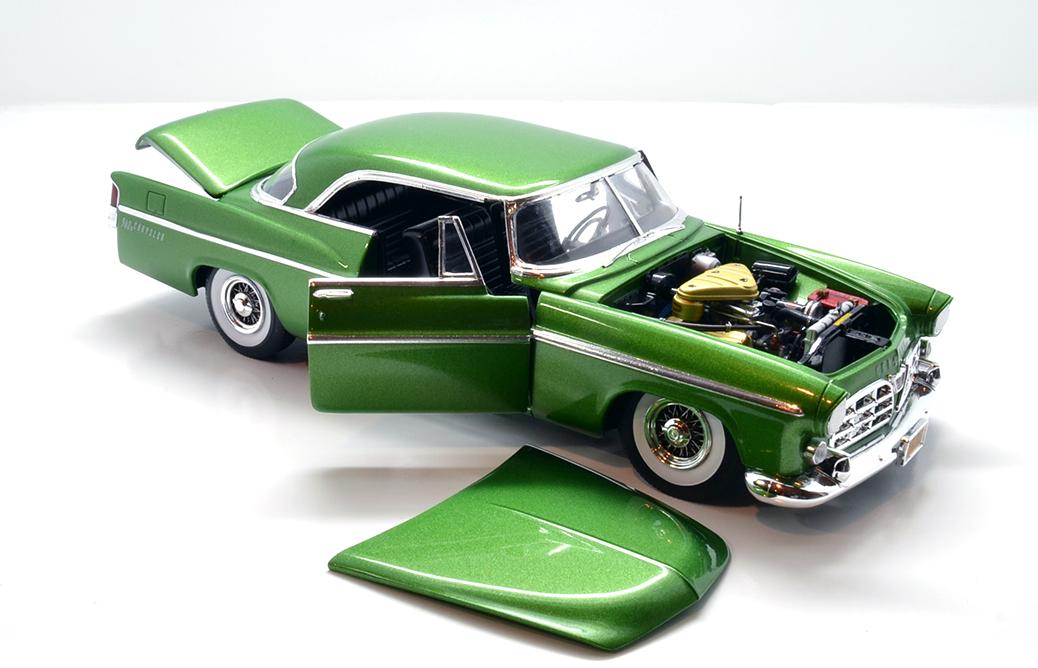
After breaking two windows, I decided to go with a split front windshield until I can find another one. Anyhow, this one is complete. Tim
-
1956 Chrysler 300B (*** Finished 22 Nov 15 ***)
taaron76 replied to taaron76's topic in WIP: Model Cars
Finally finished this one up... I broke the front windshield, ordered a new one and somehow that one got broken as well, so I ended up making due with a split window. Maybe I can run across one if the future, so I left the body/frame unglued, just in case. Tim