Mattblack
-
Posts
131 -
Joined
-
Last visited
Content Type
Profiles
Forums
Events
Gallery
Everything posted by Mattblack
-
OK, I'll 'fes up, I use an ad blocker. But in my defence I installed it because of ads on another forum, not here. I'm probably not the 'typical' user of the forum as I don't spend much time on here. I generally only look at the WIP and under glass sections for cars and 'light commercials' as they are my main interest. So I would personally say there are more than enough sections now. I think it would be difficult to police sections for 'period' builds or level of modifications as it's somewhat subjective. I am a little unsure about the drag racing section in fact, for example I wasn't sure if I should have posted my '37 Chevy build in there. But it didn't get moved, so... As others have said, a preview button would be nice, sometimes you see you've missed something or want to re-arrange things to make the post clearer.
-
Crossing Scales For Extra Detail
Mattblack replied to oldcarfan's topic in Tips, Tricks, and Tutorials
I've done the same with model railway barrels and crates. -
Loving the '70's sat nav' on the dash of the Chrysler, haven't seen one of those in a while.
-
Could make a good abandoned junker diorama with that 'shattered' glass...
-
That's definitely different! I don't know if this is any use to you: CC-Automotive History: Crosley - The Rise and Fall Of The Crosley Automobile - Curbside Classic
-
It was an early crash test in case Chevrolet developed salami-based bodywork.
-
Do you make notes/memory aids as you build?
Mattblack replied to Mattblack's topic in Model Building Questions and Answers
Well I've started my next build and although it is a pretty simple OOB job I actually remembered to dig a notebook and pen out of the drawer... and I've even made some notes! Just what colours I want to use on what parts and to drill out the exhaust before I paint it so far but who knows, it could be a game changer... 😁 -
Thanks for the positive replies, I'm glad I worked through all the issues and I'm happy with the end result. To be fair it's an old kit, I don't when this particular boxing was issued, or whether it's still a 'current' kit. I bought it from a collectors fair, in the UK we just don't have the model/hobby stores that you have in the US.

-
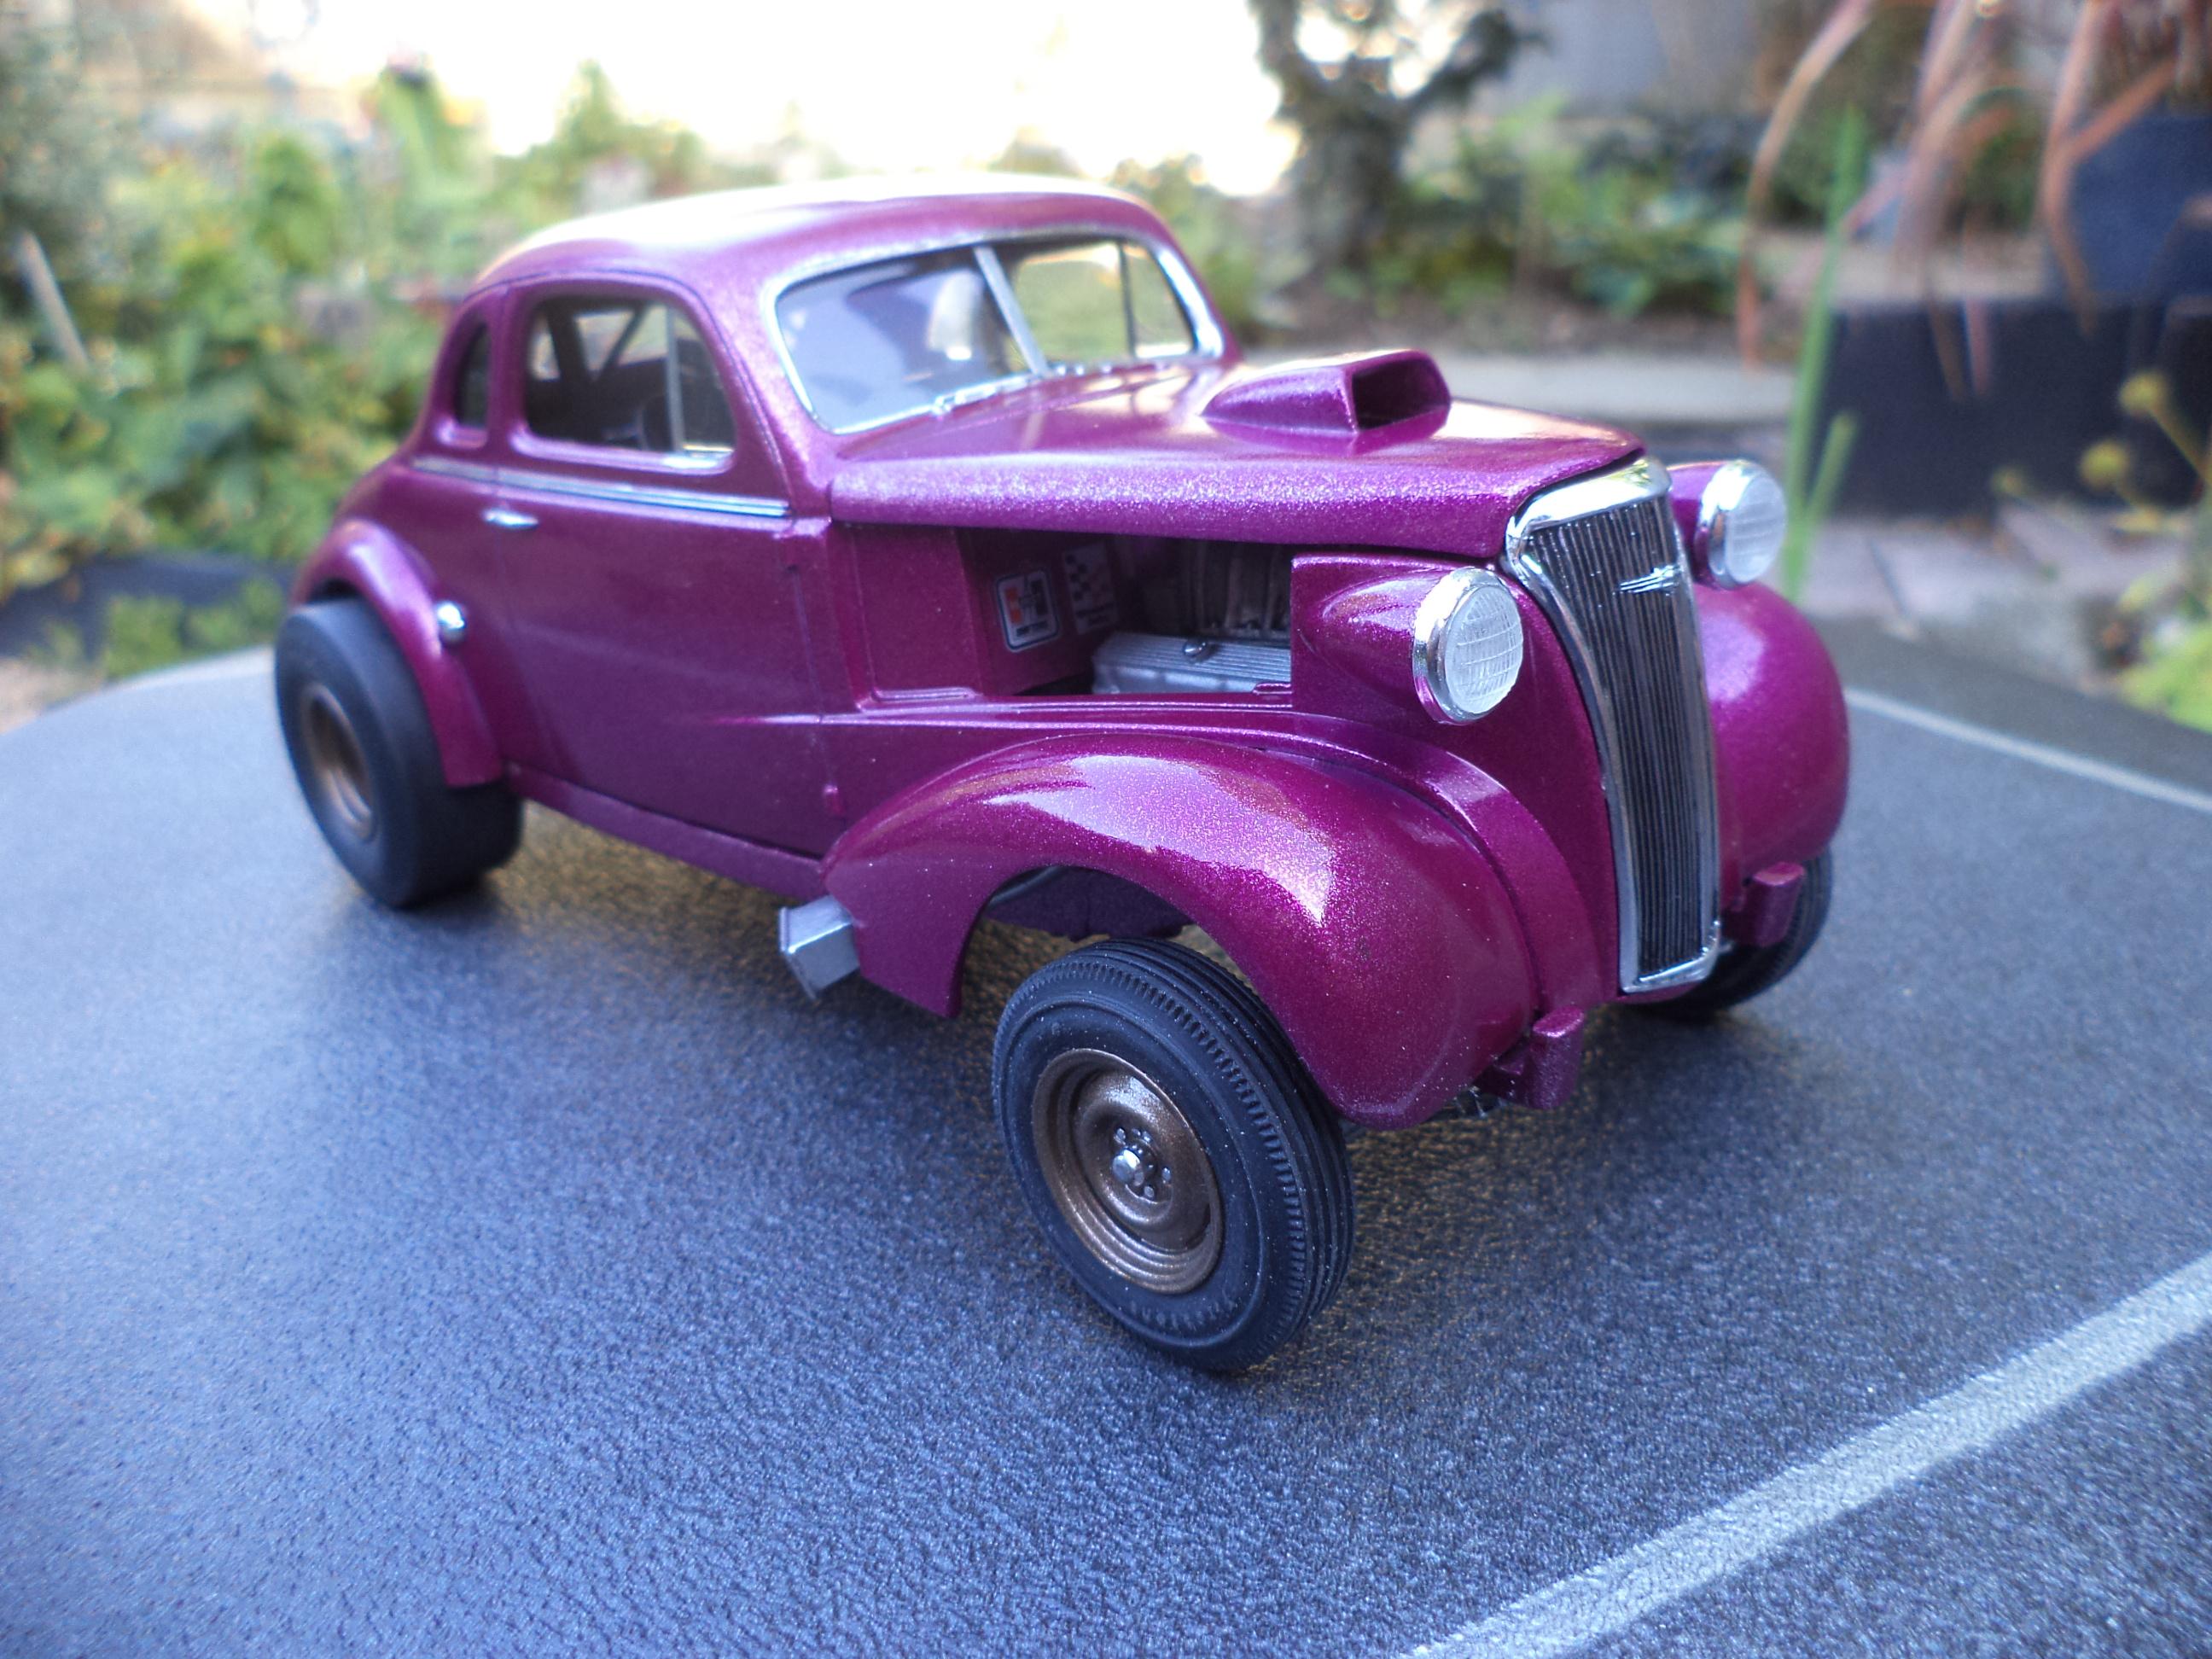
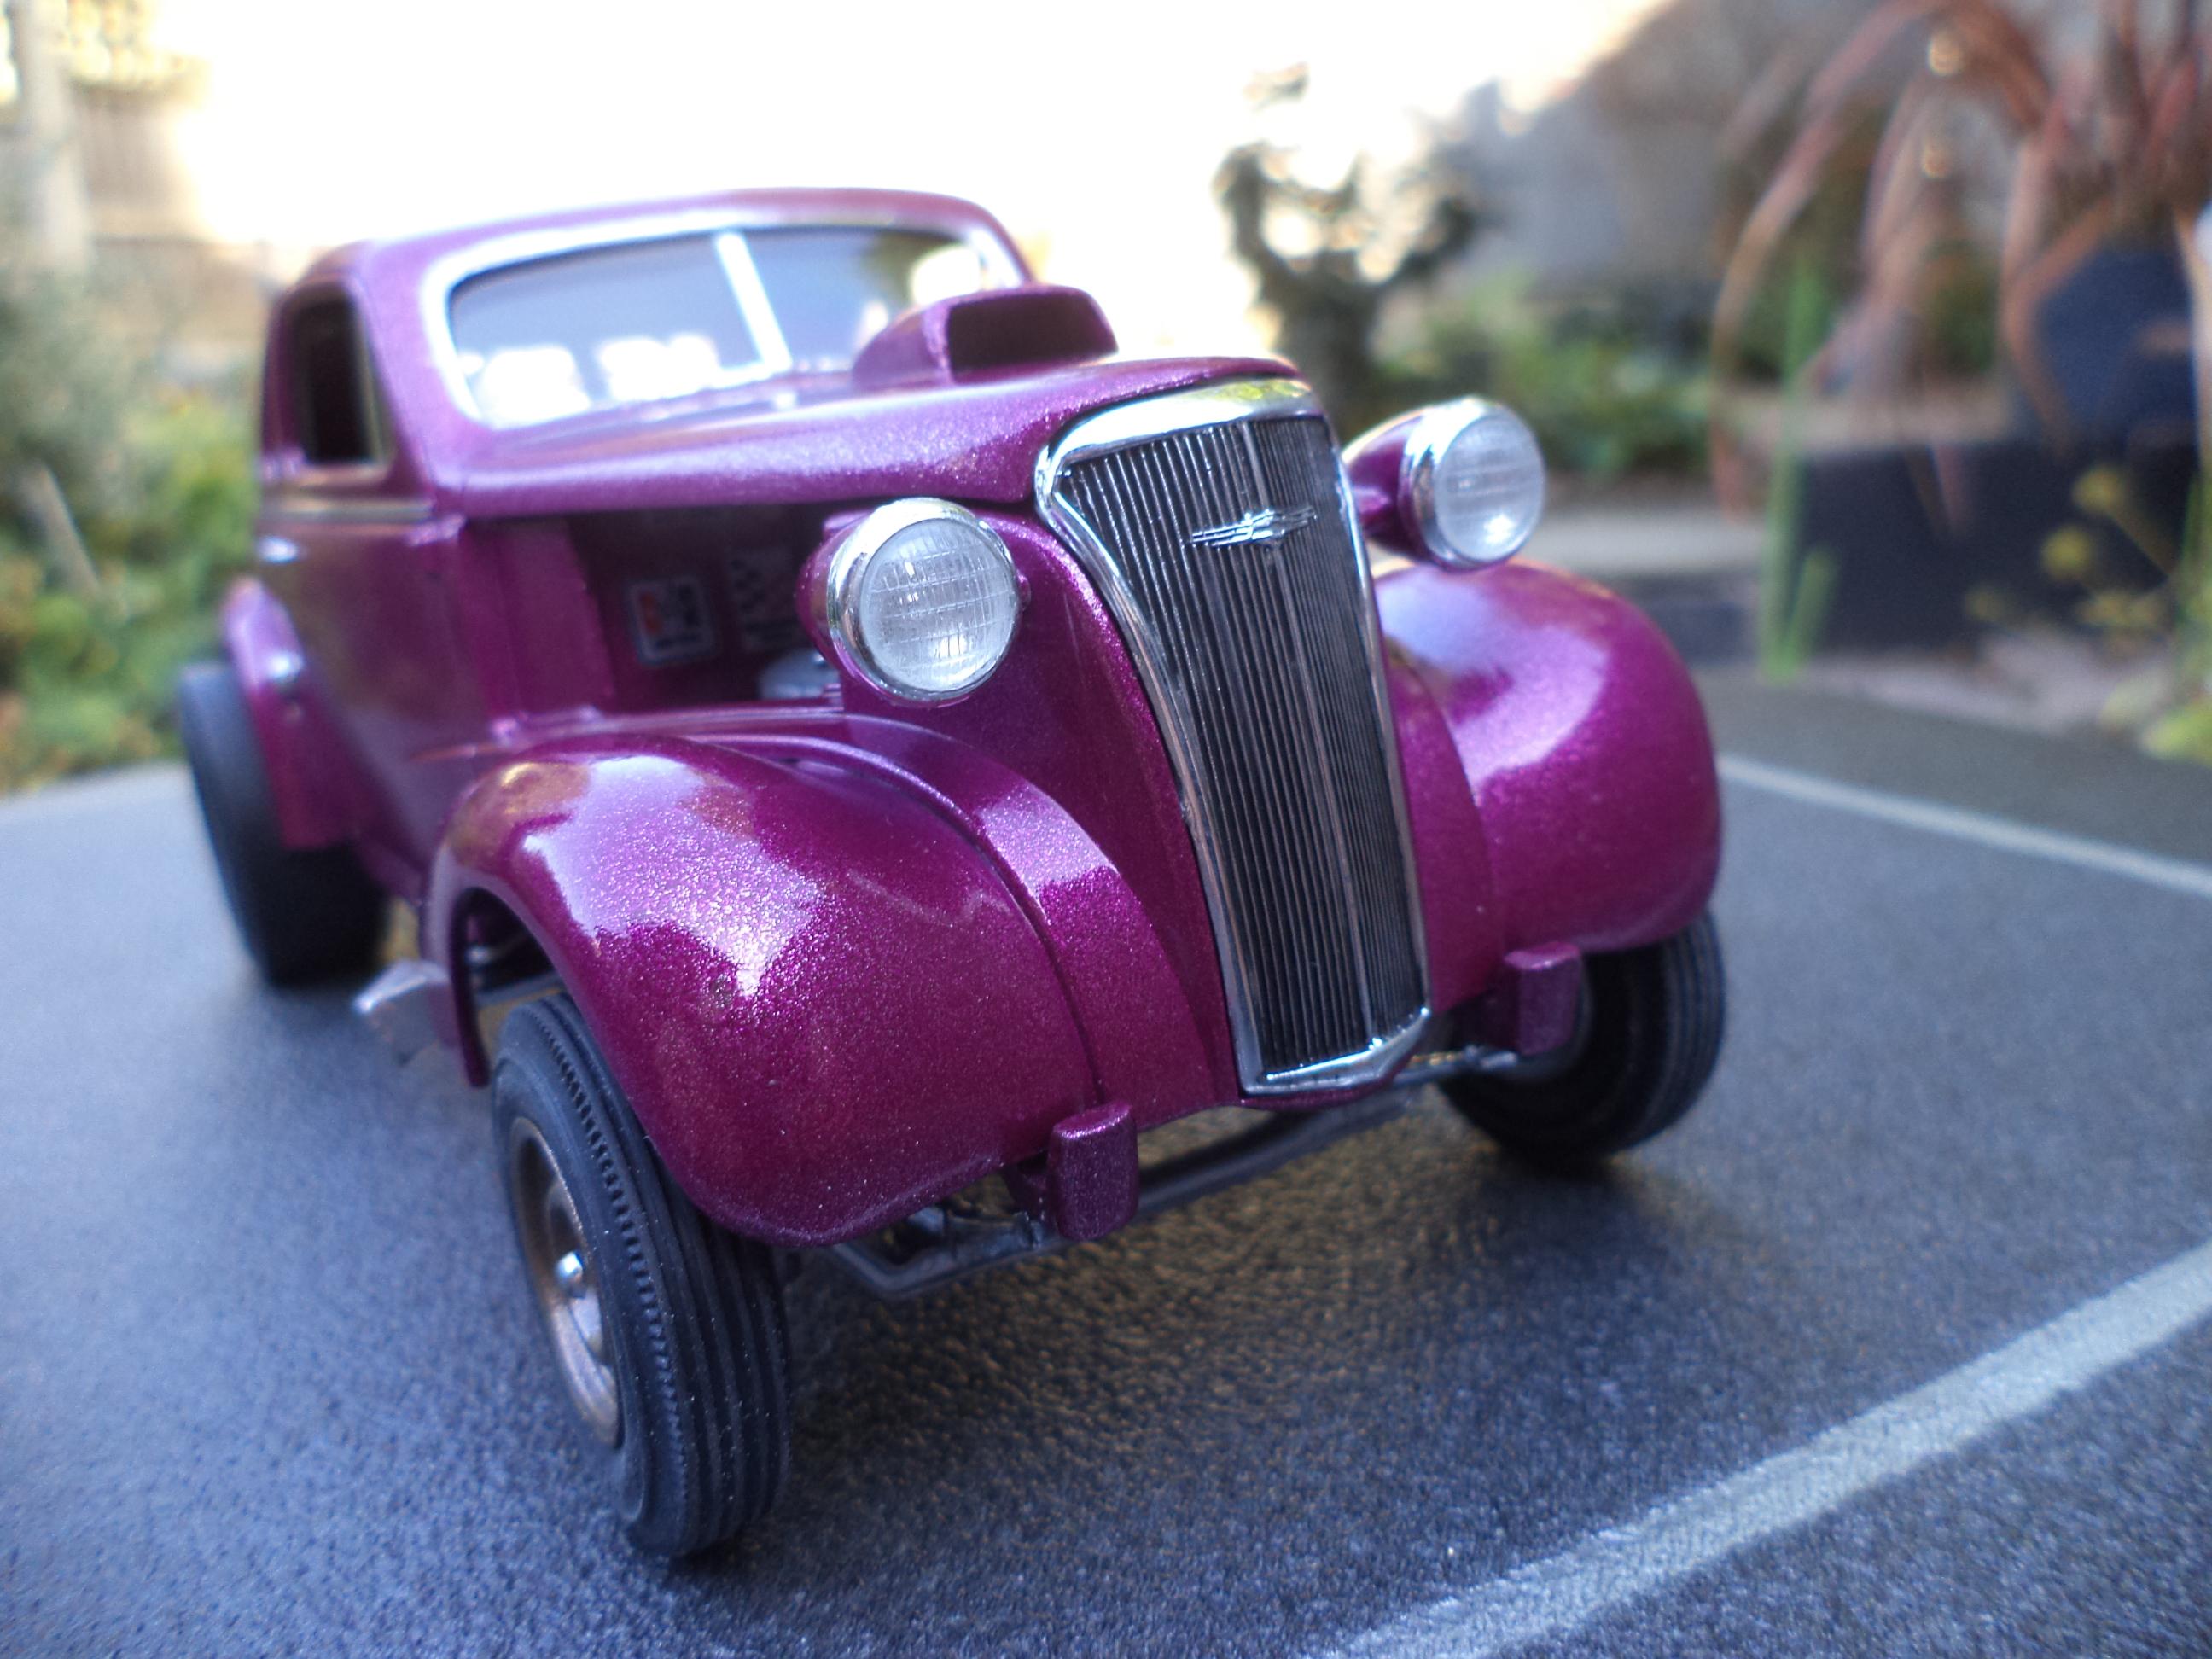
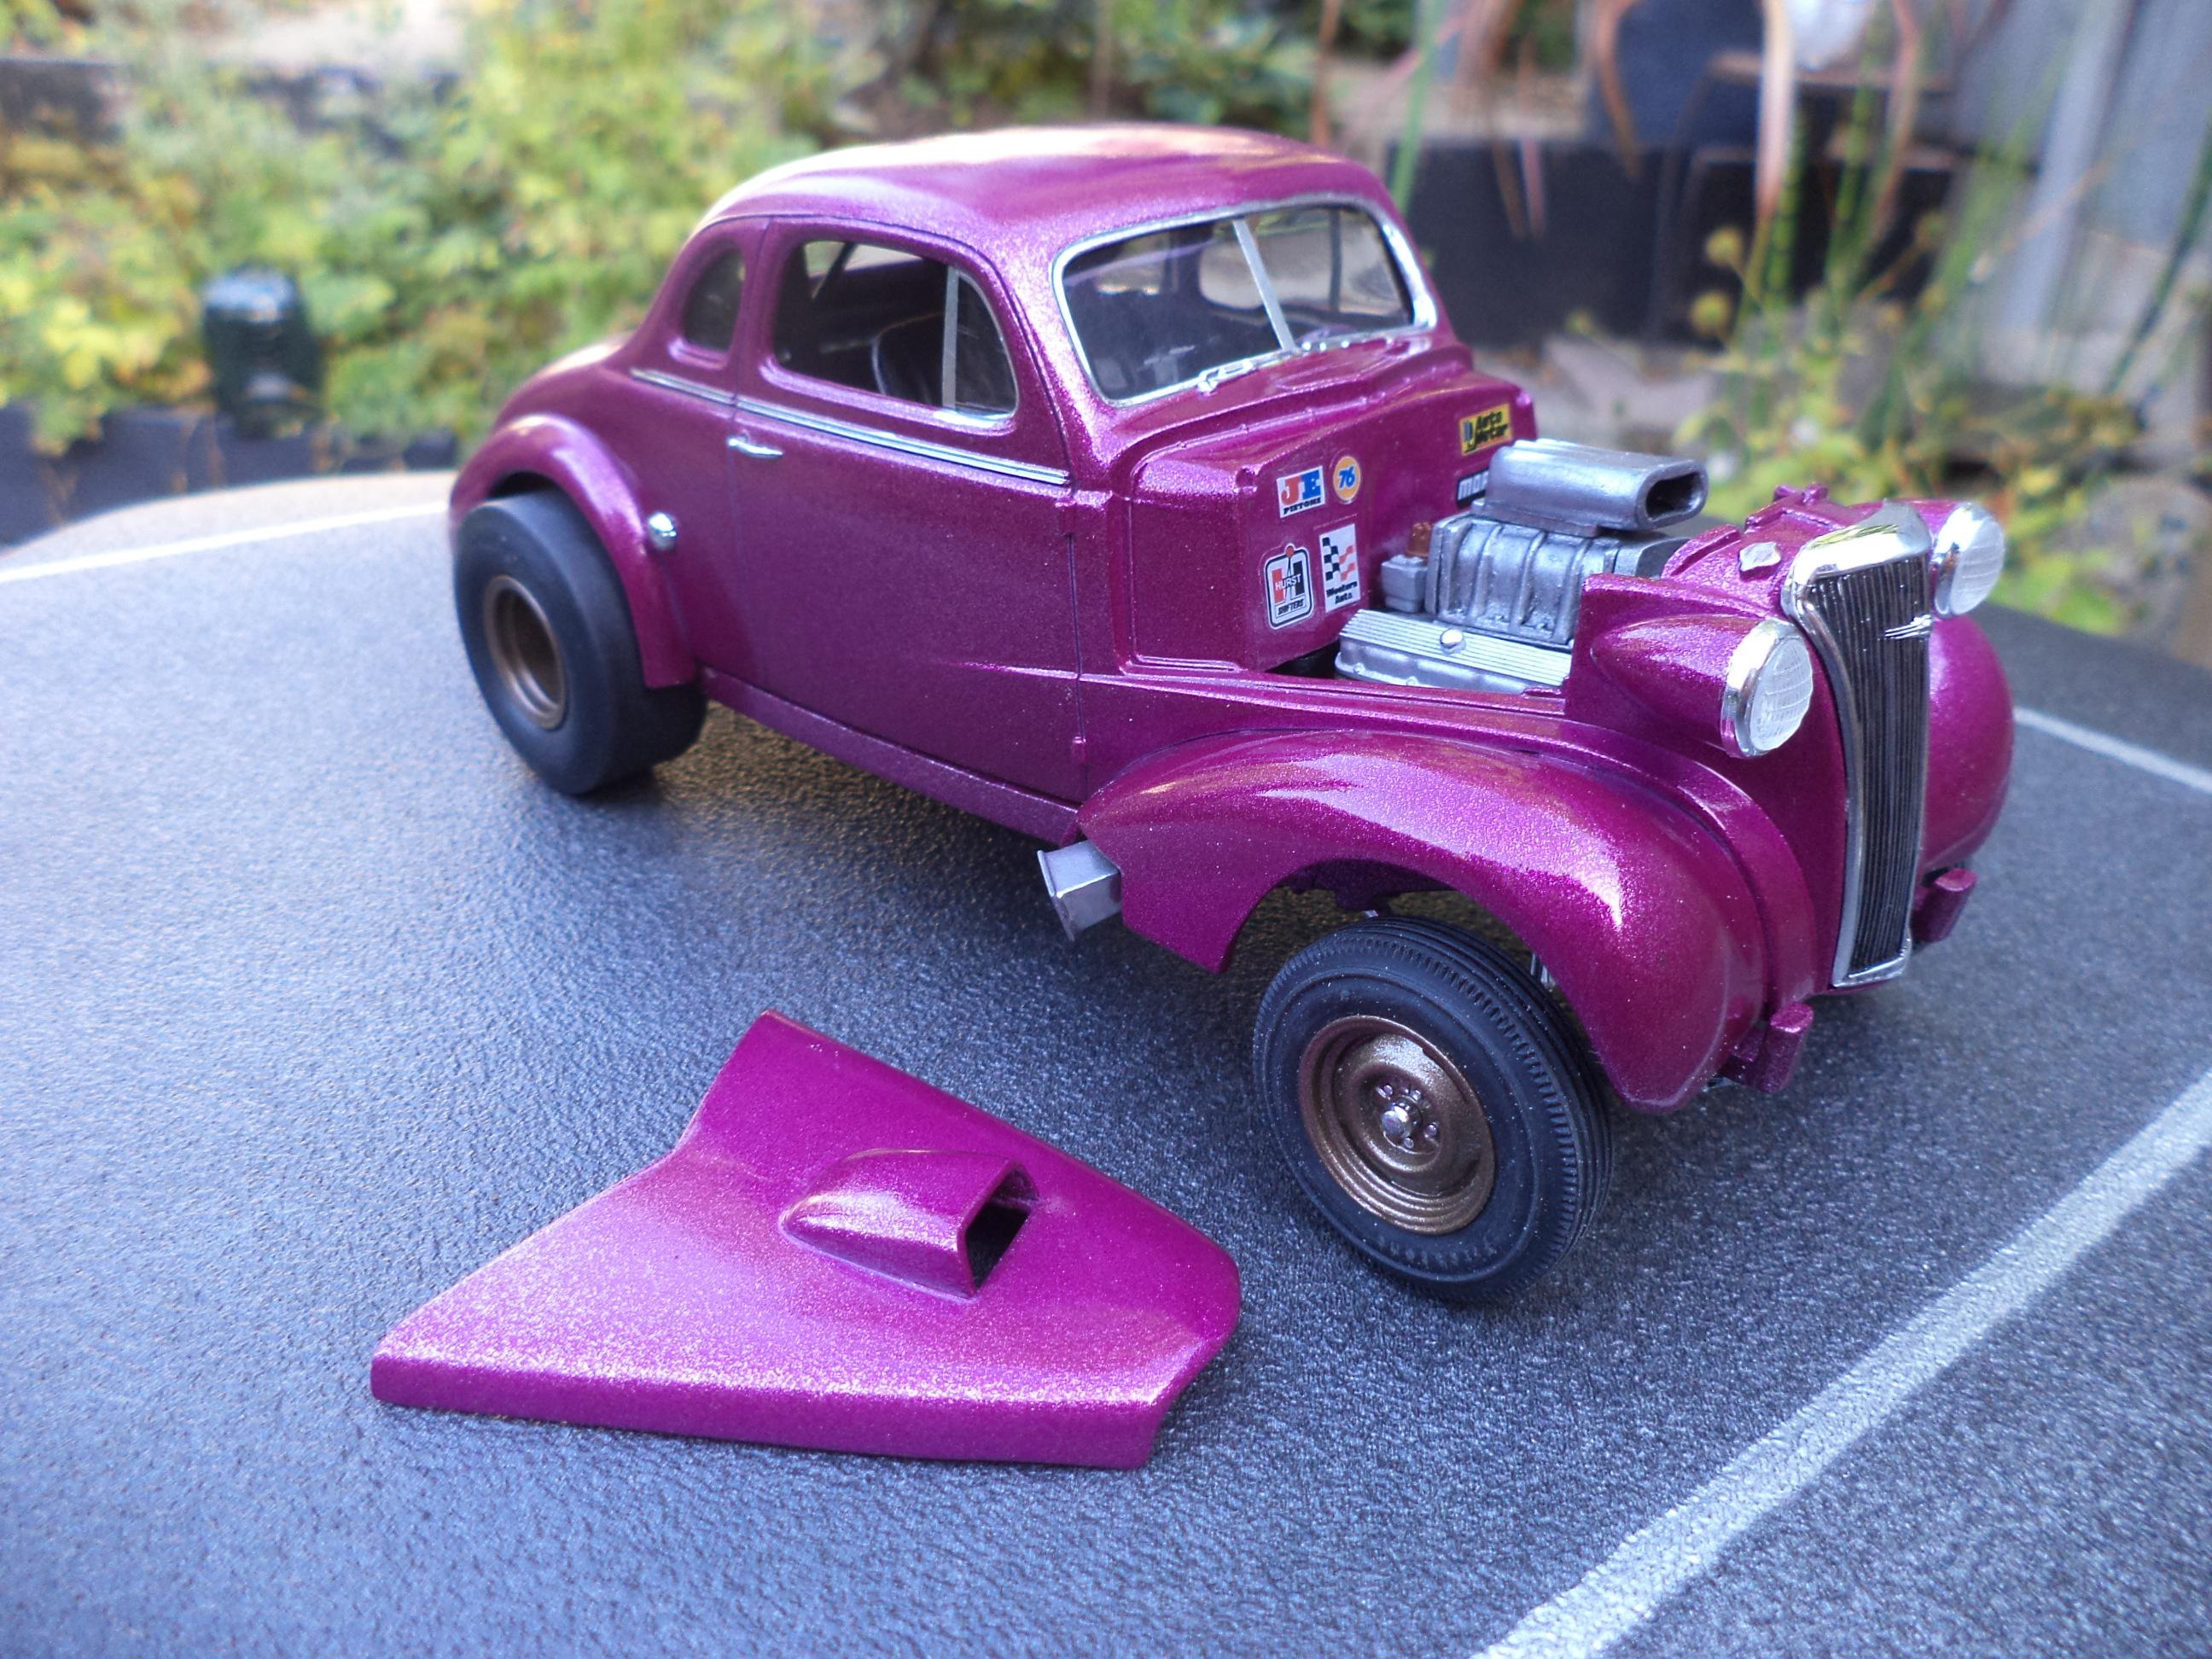
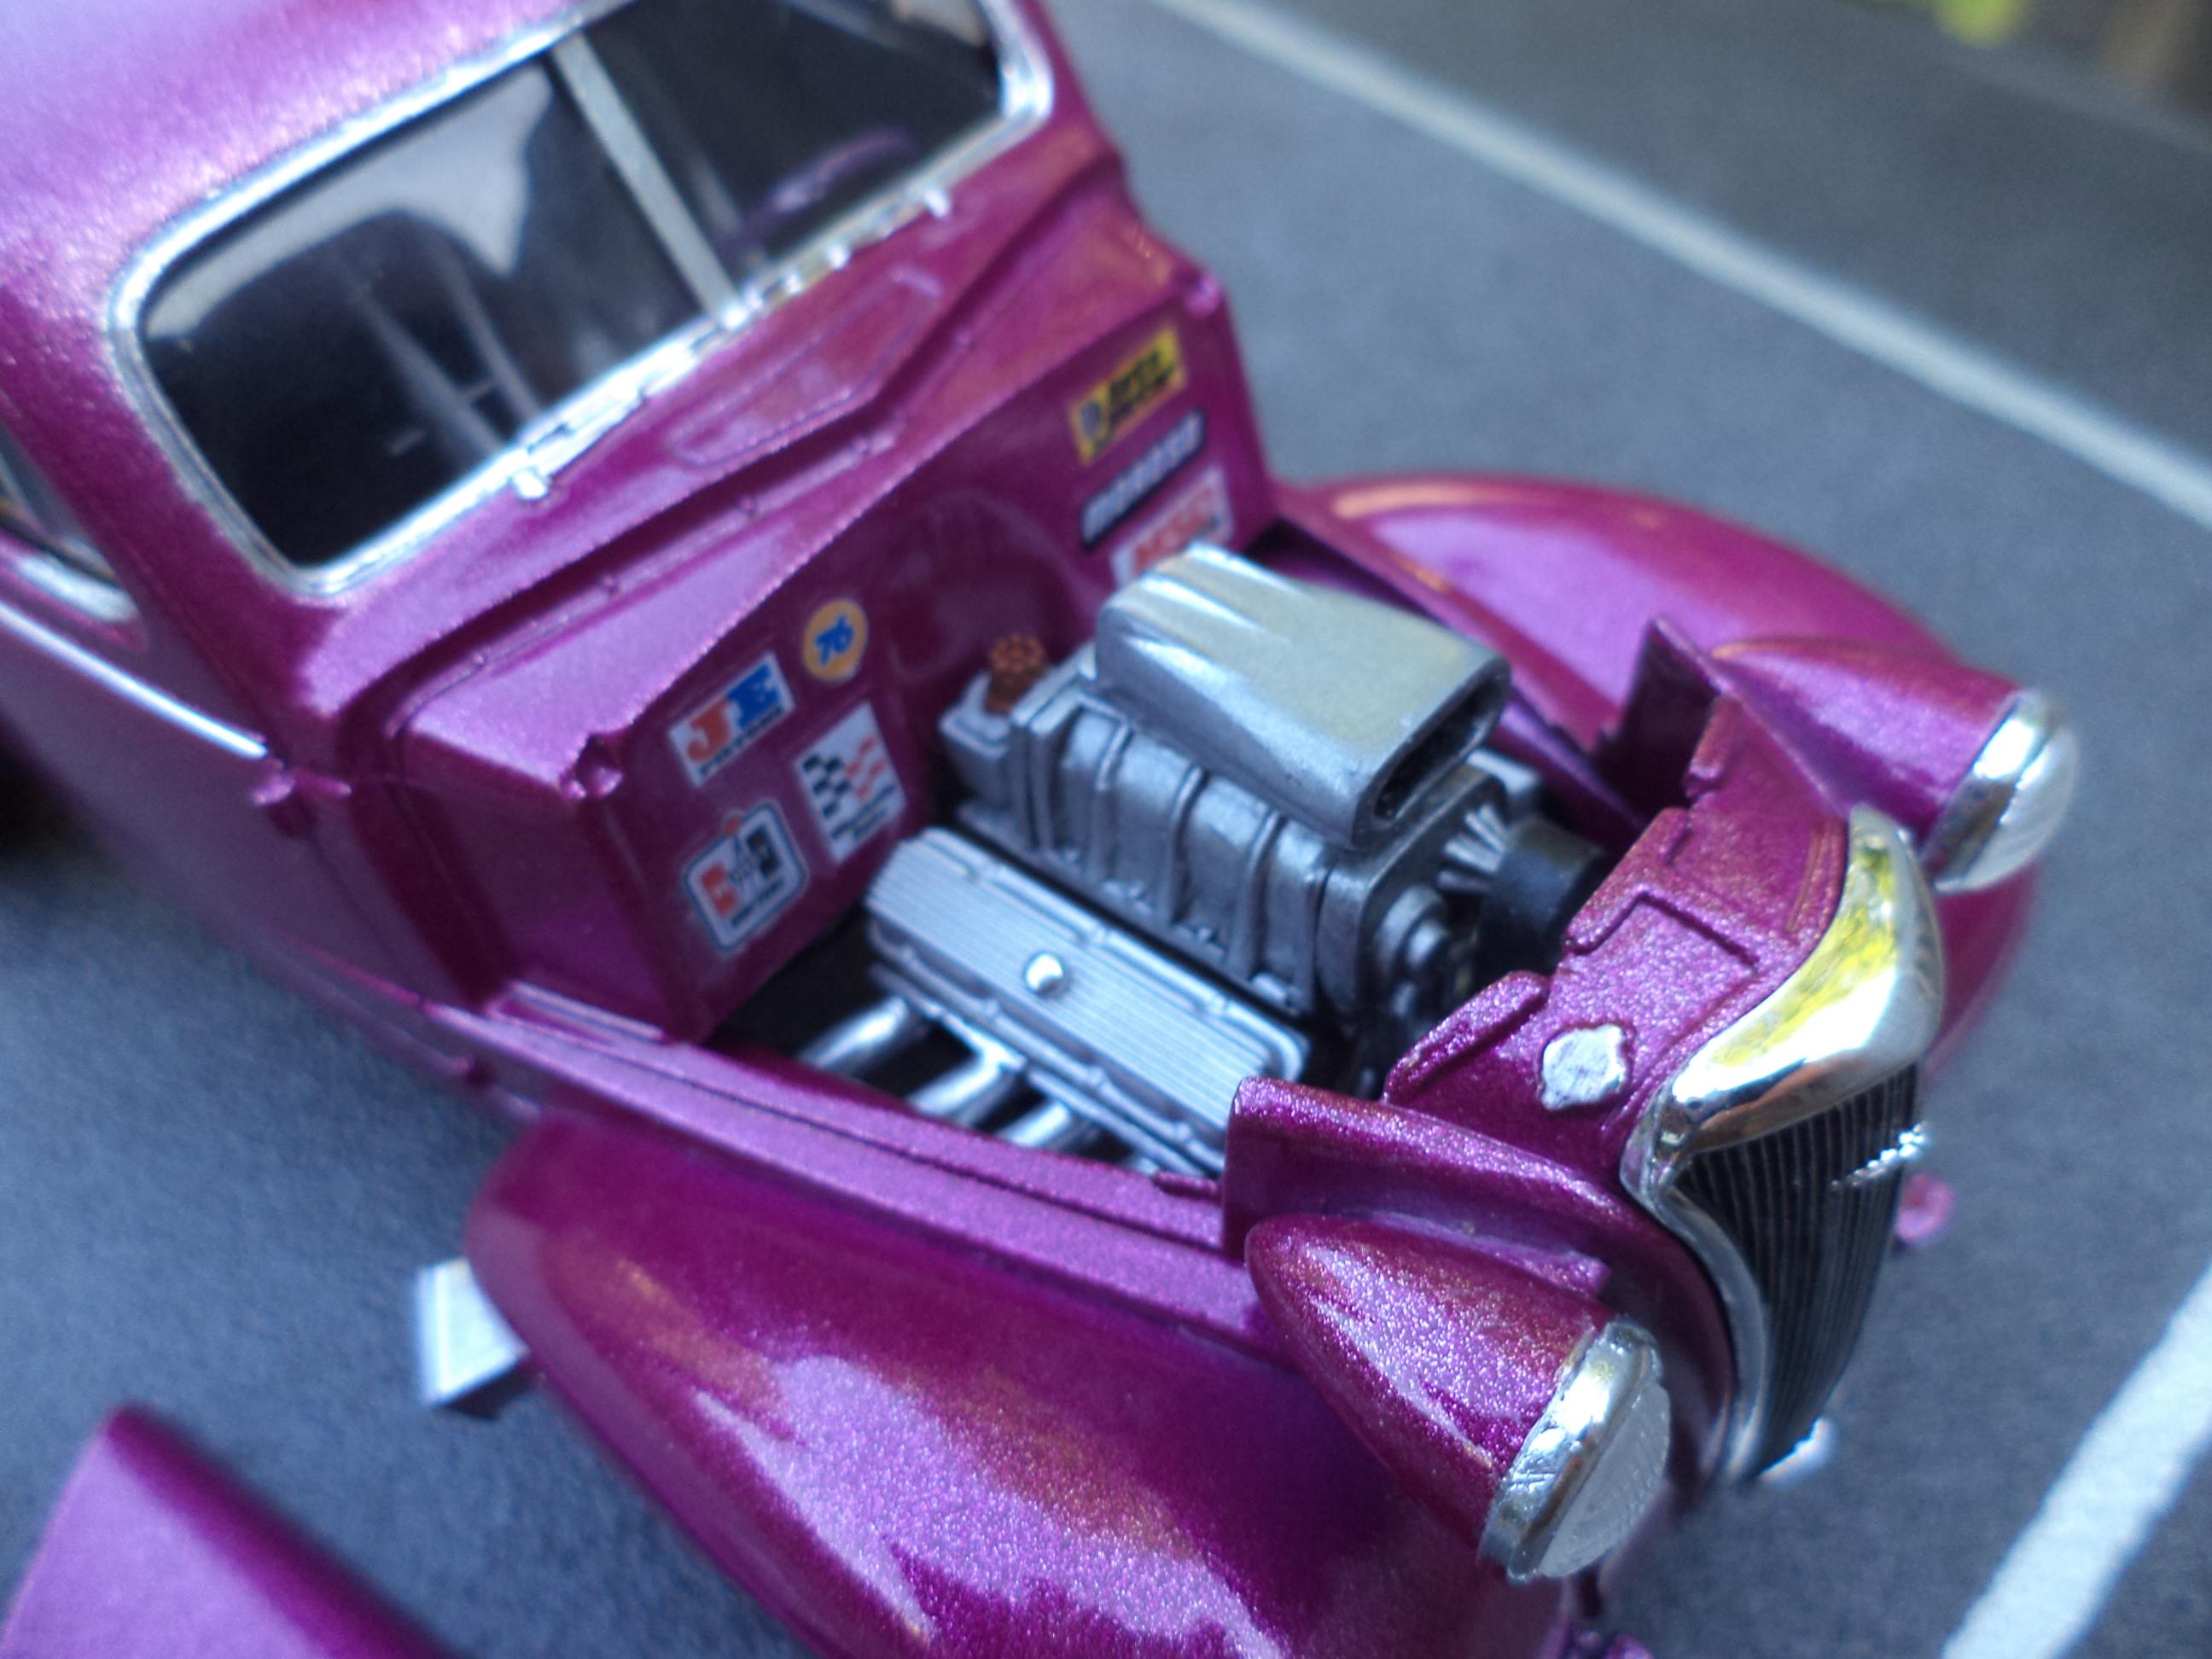
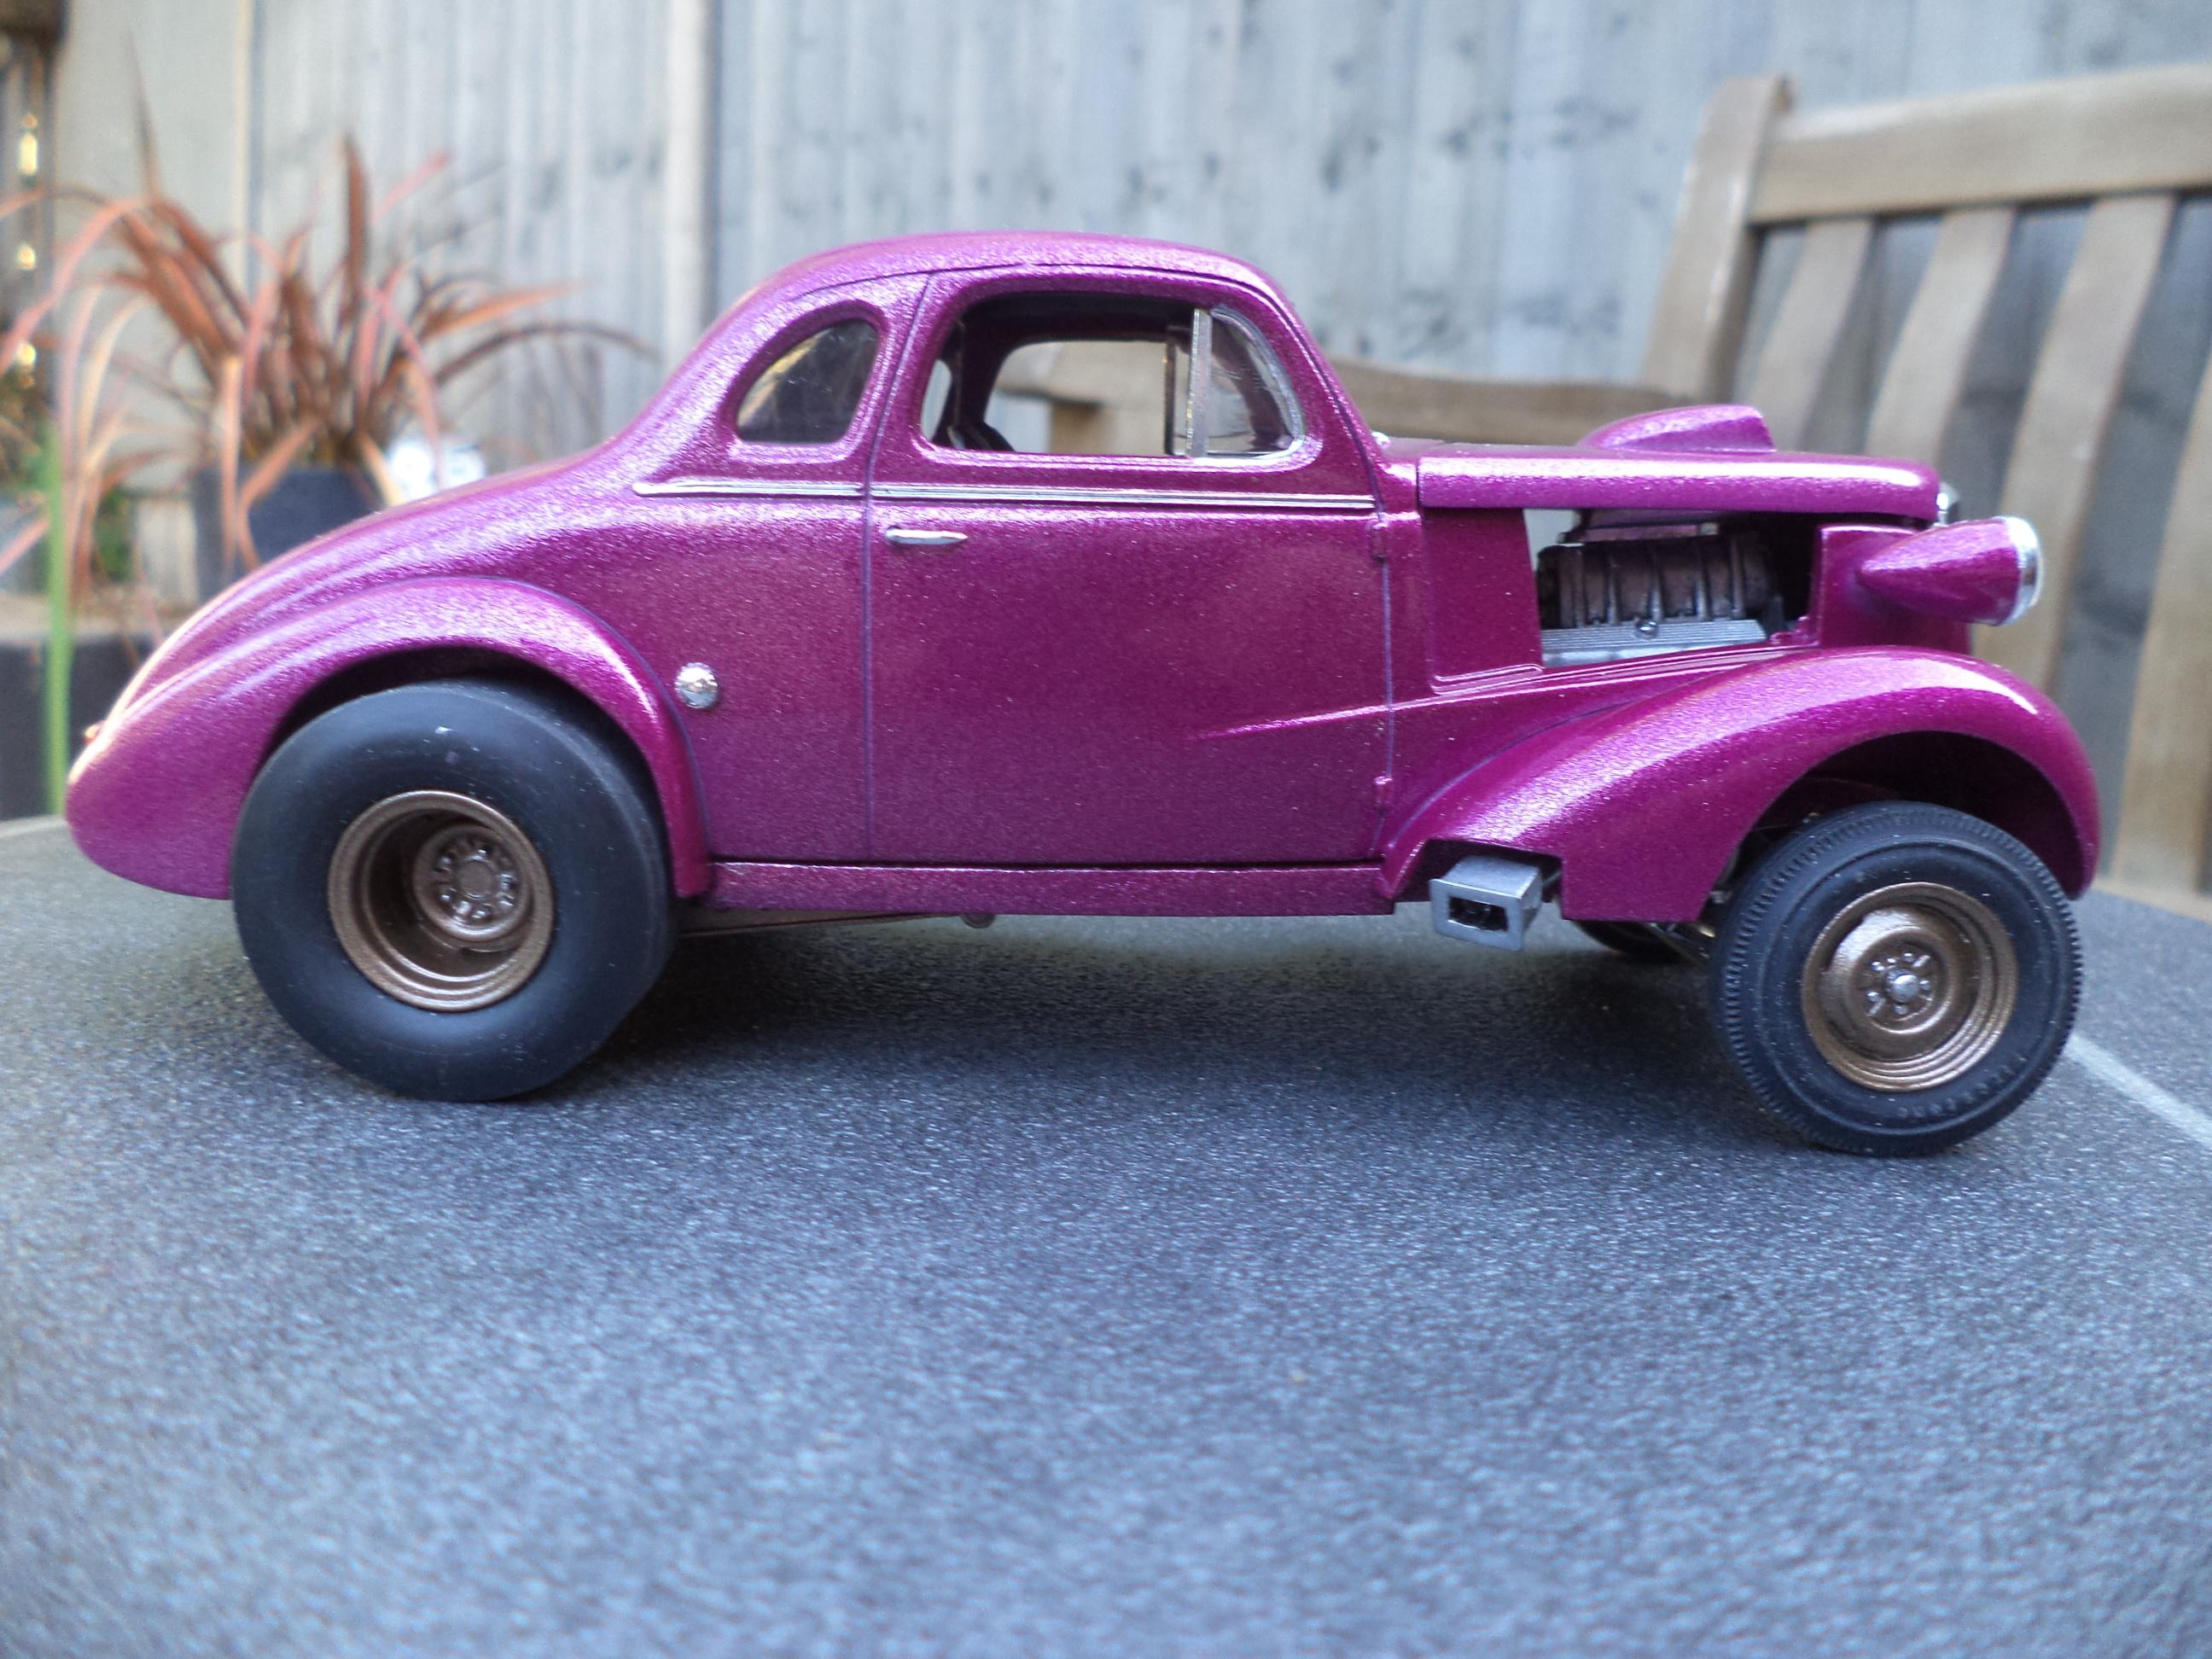
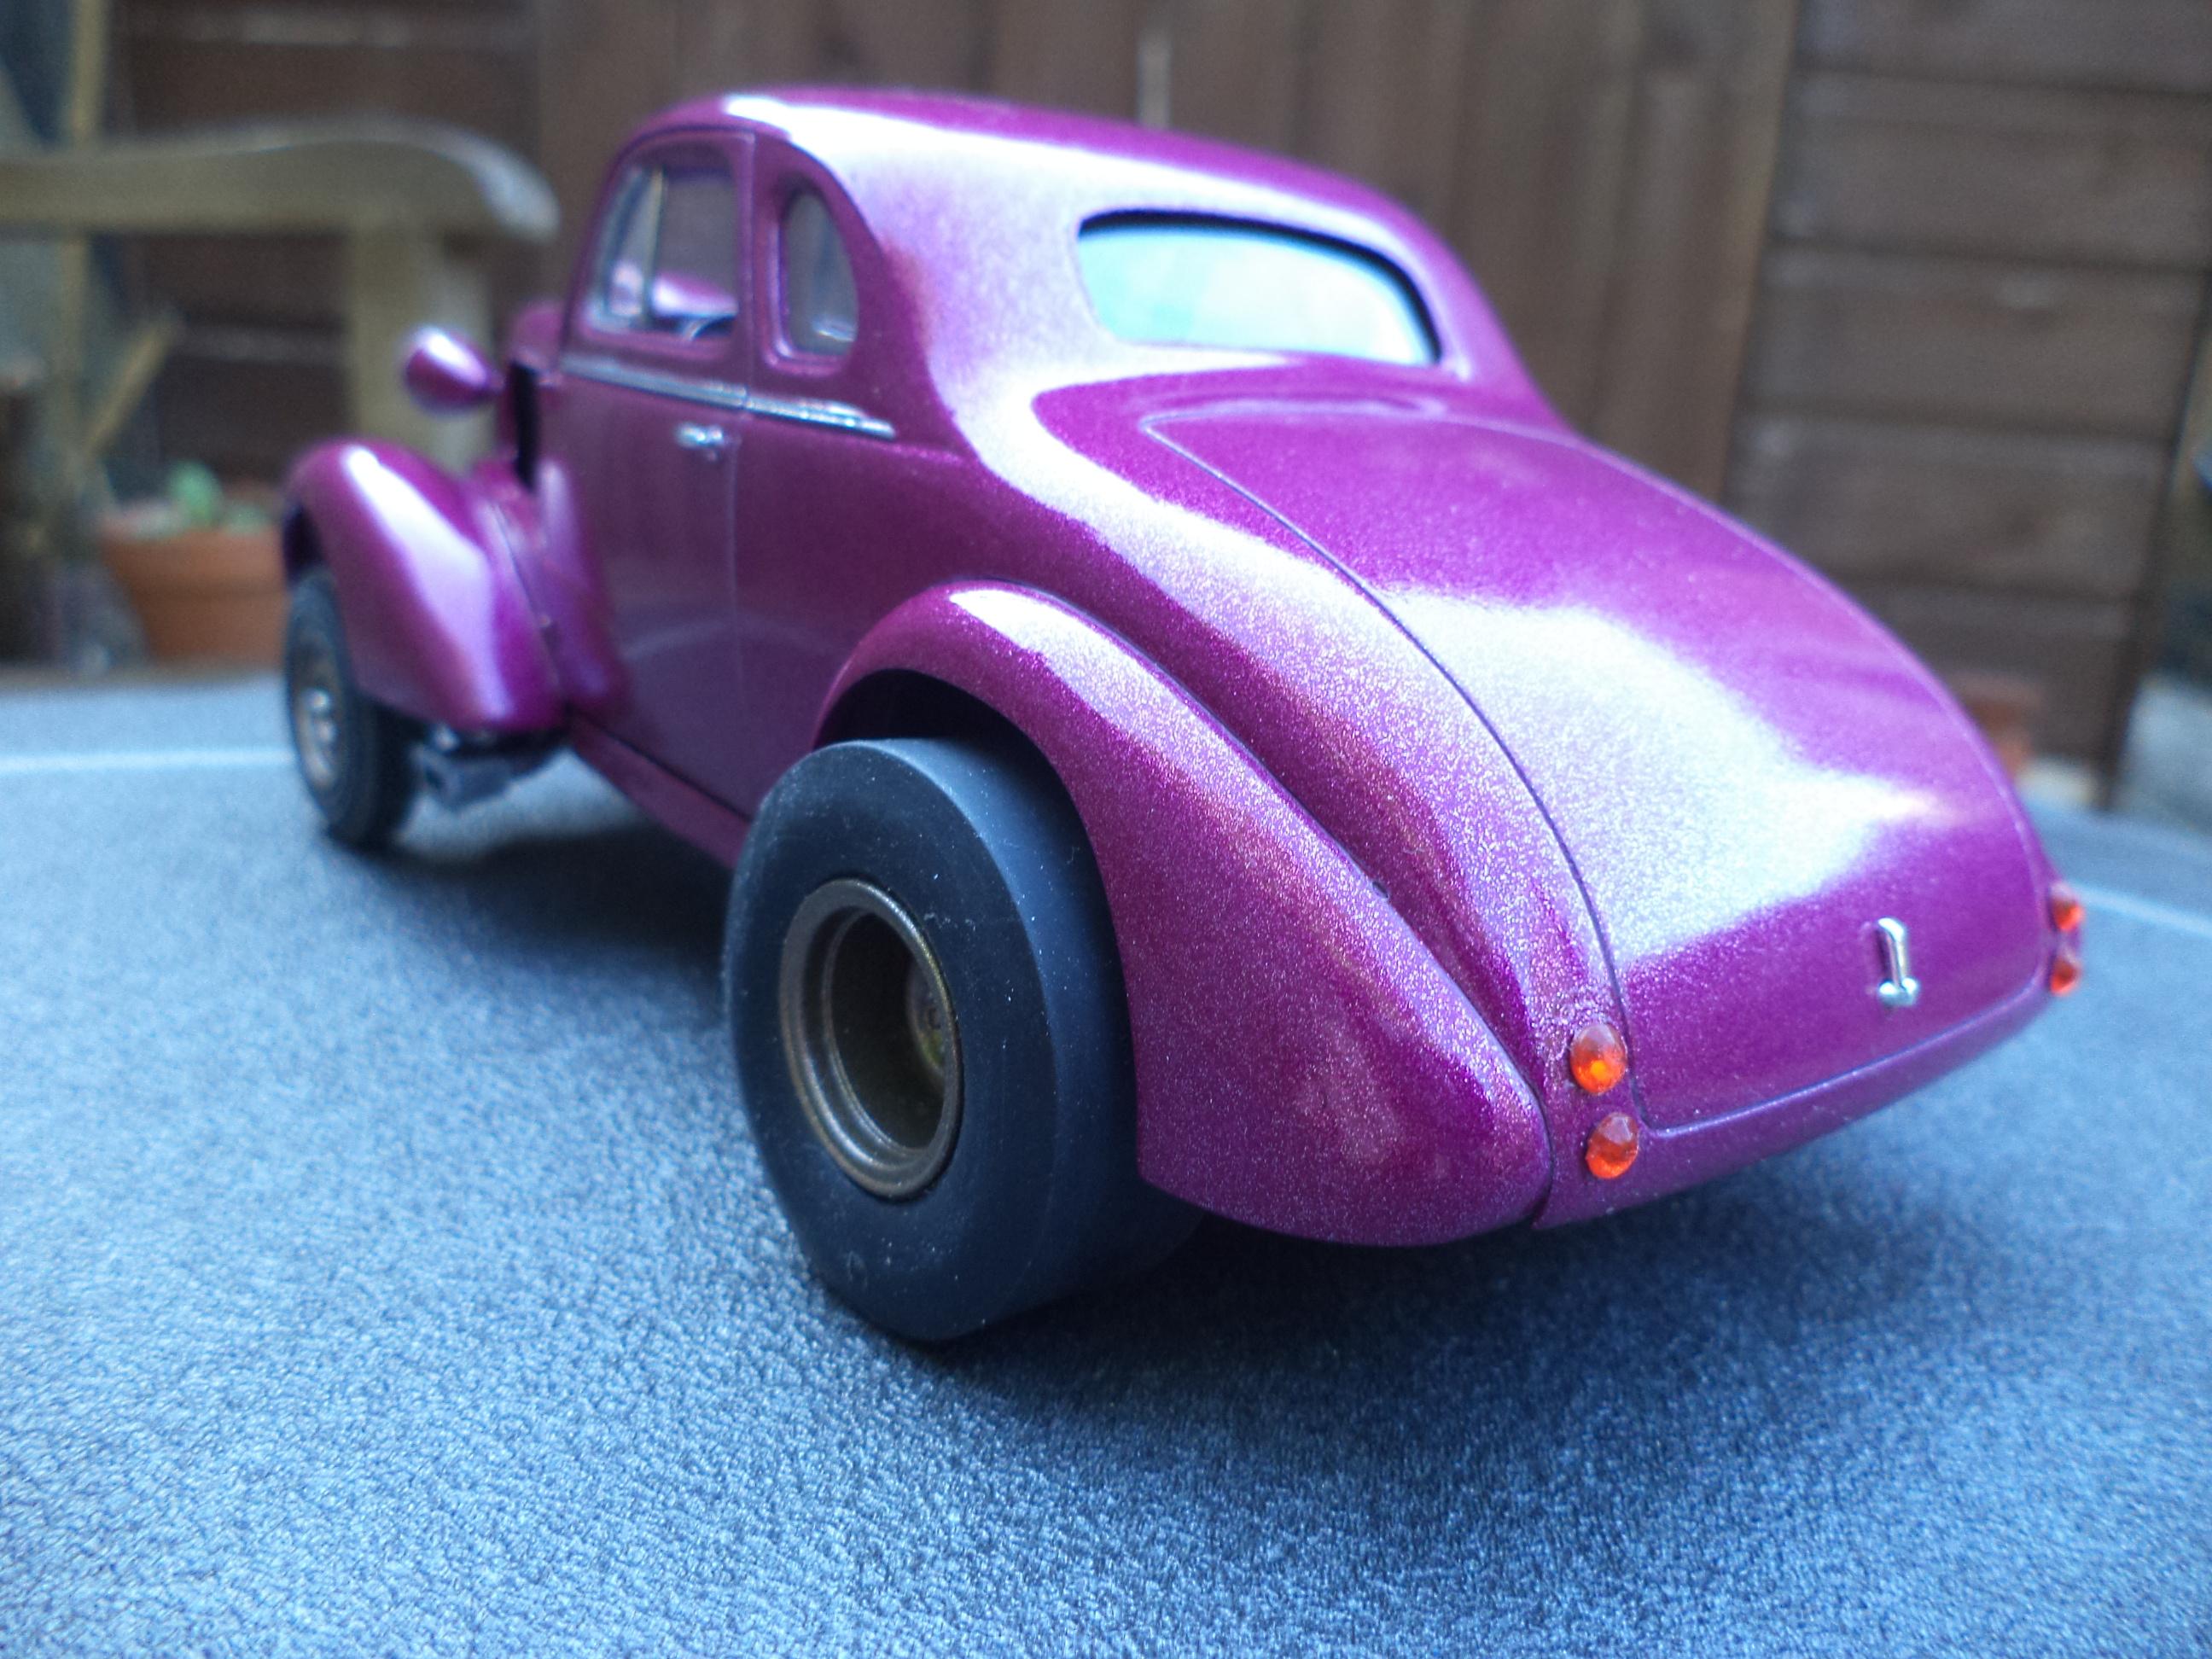
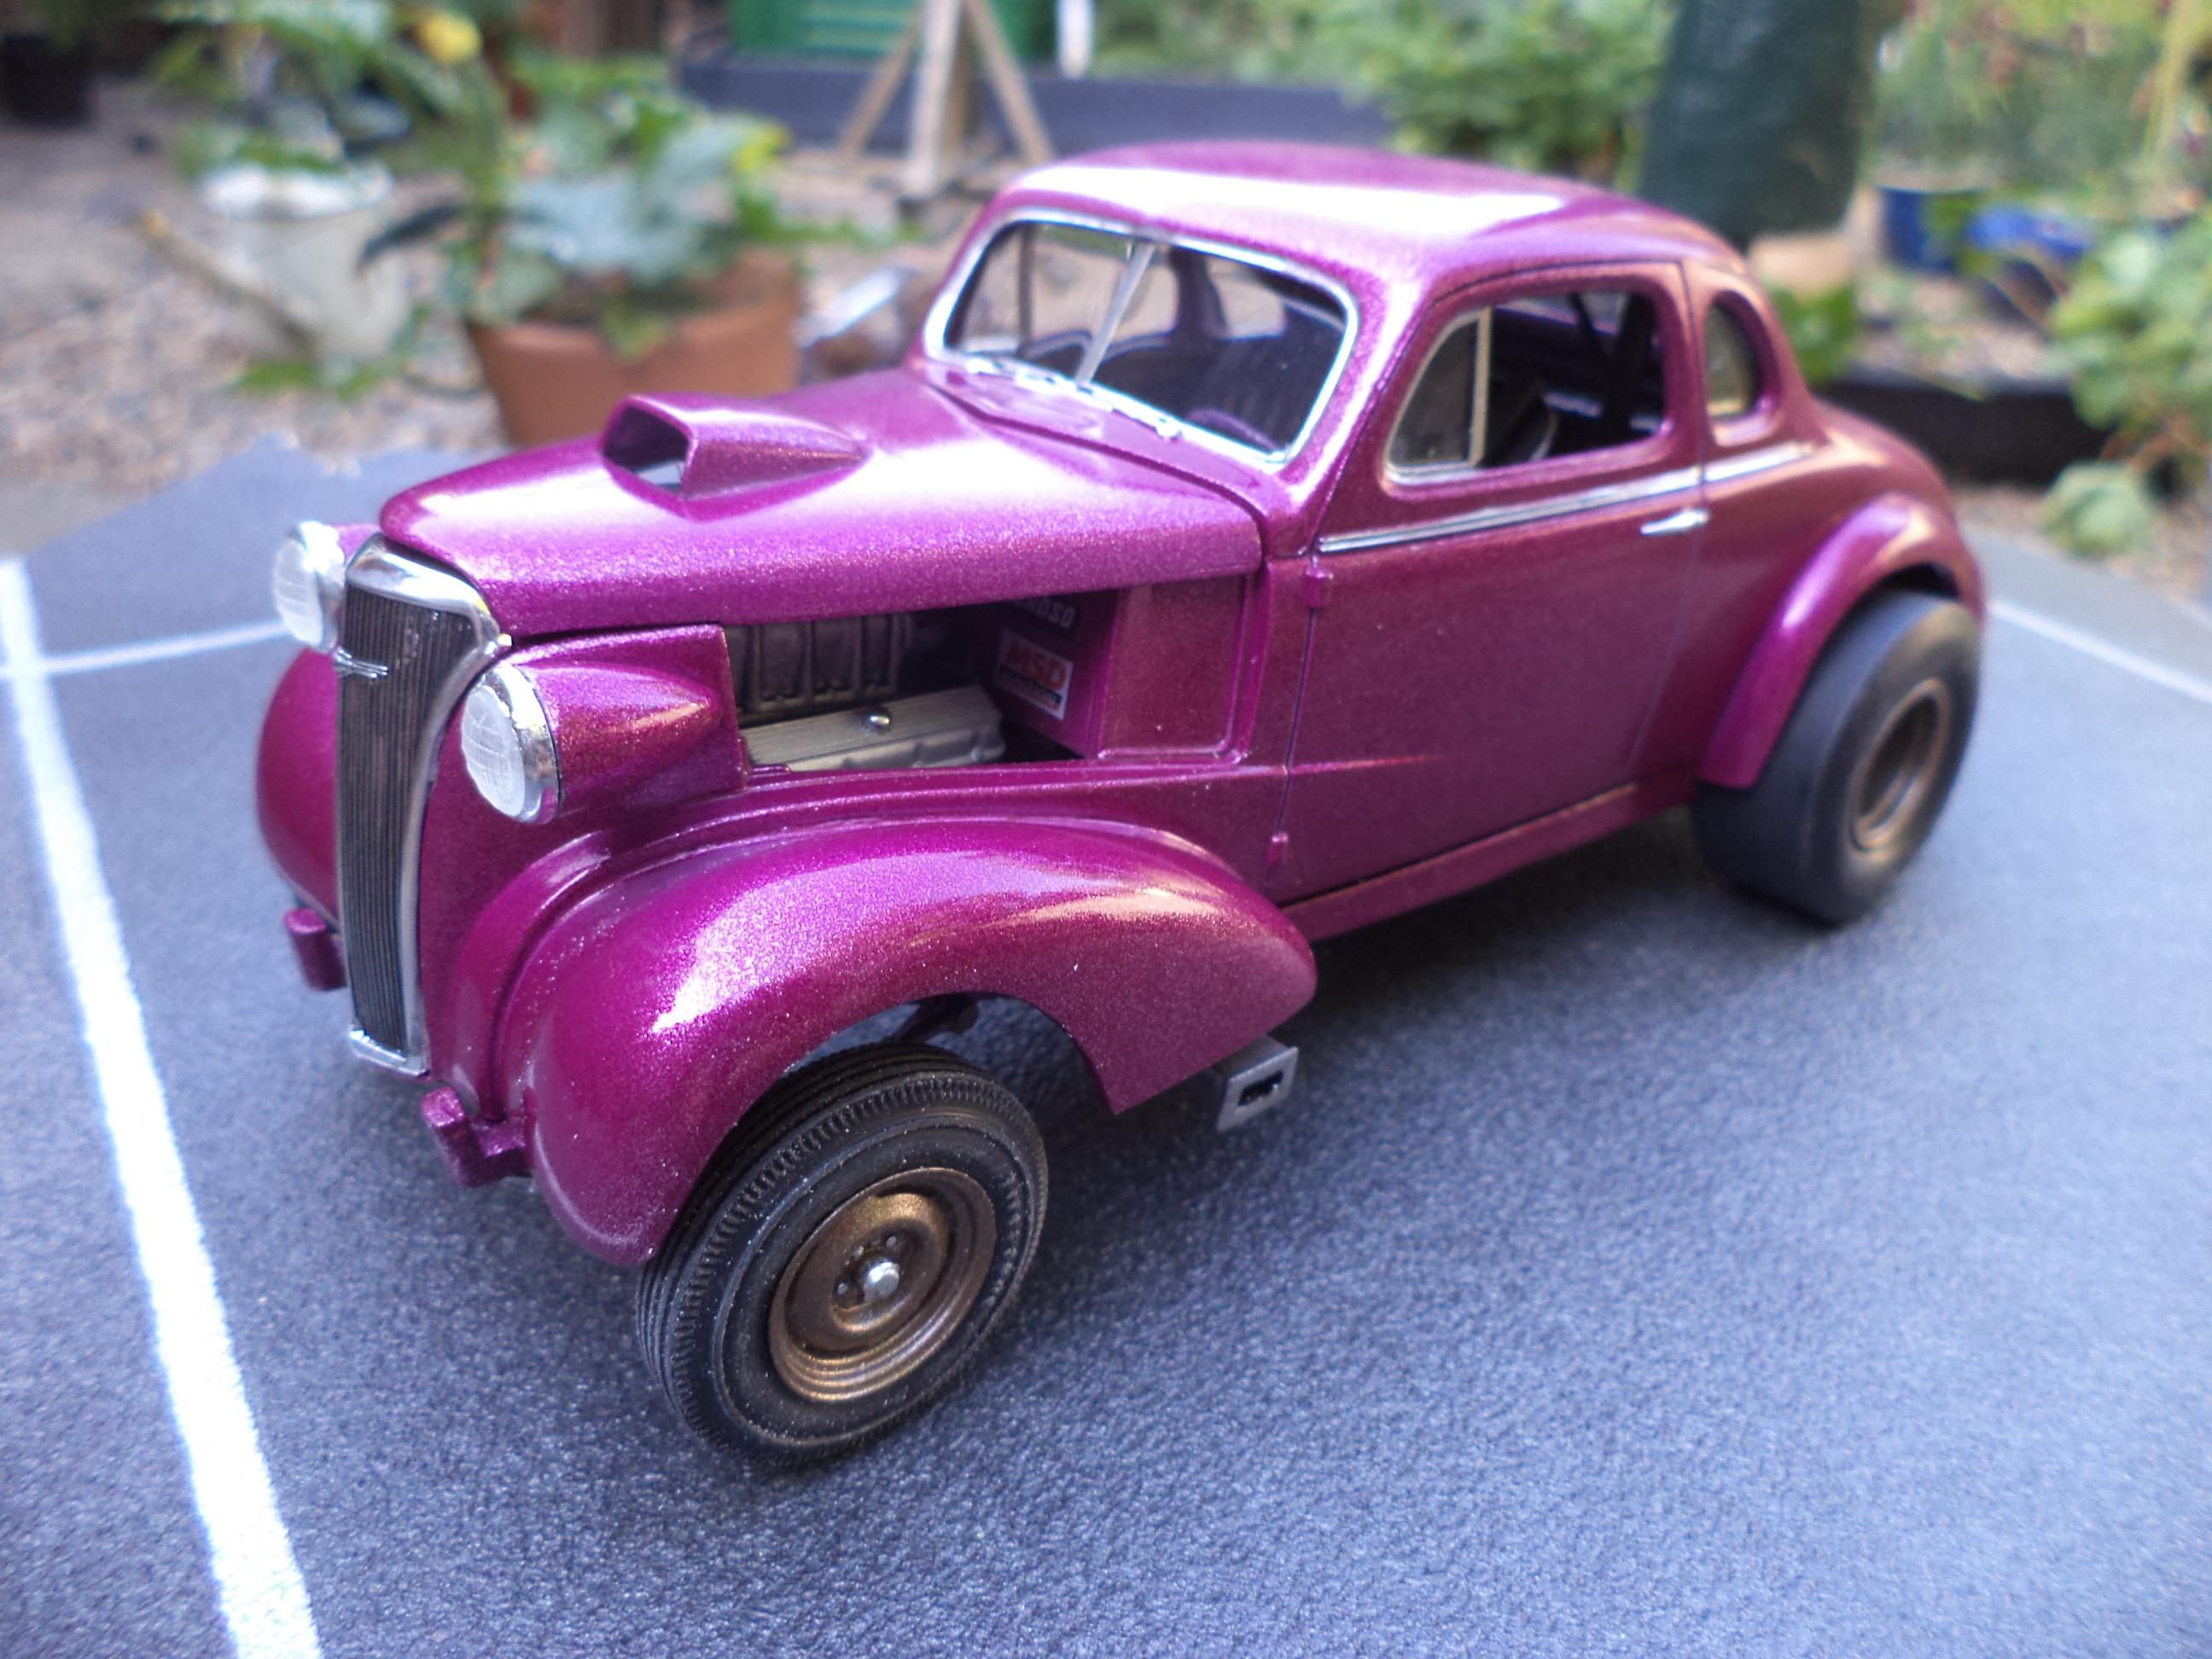
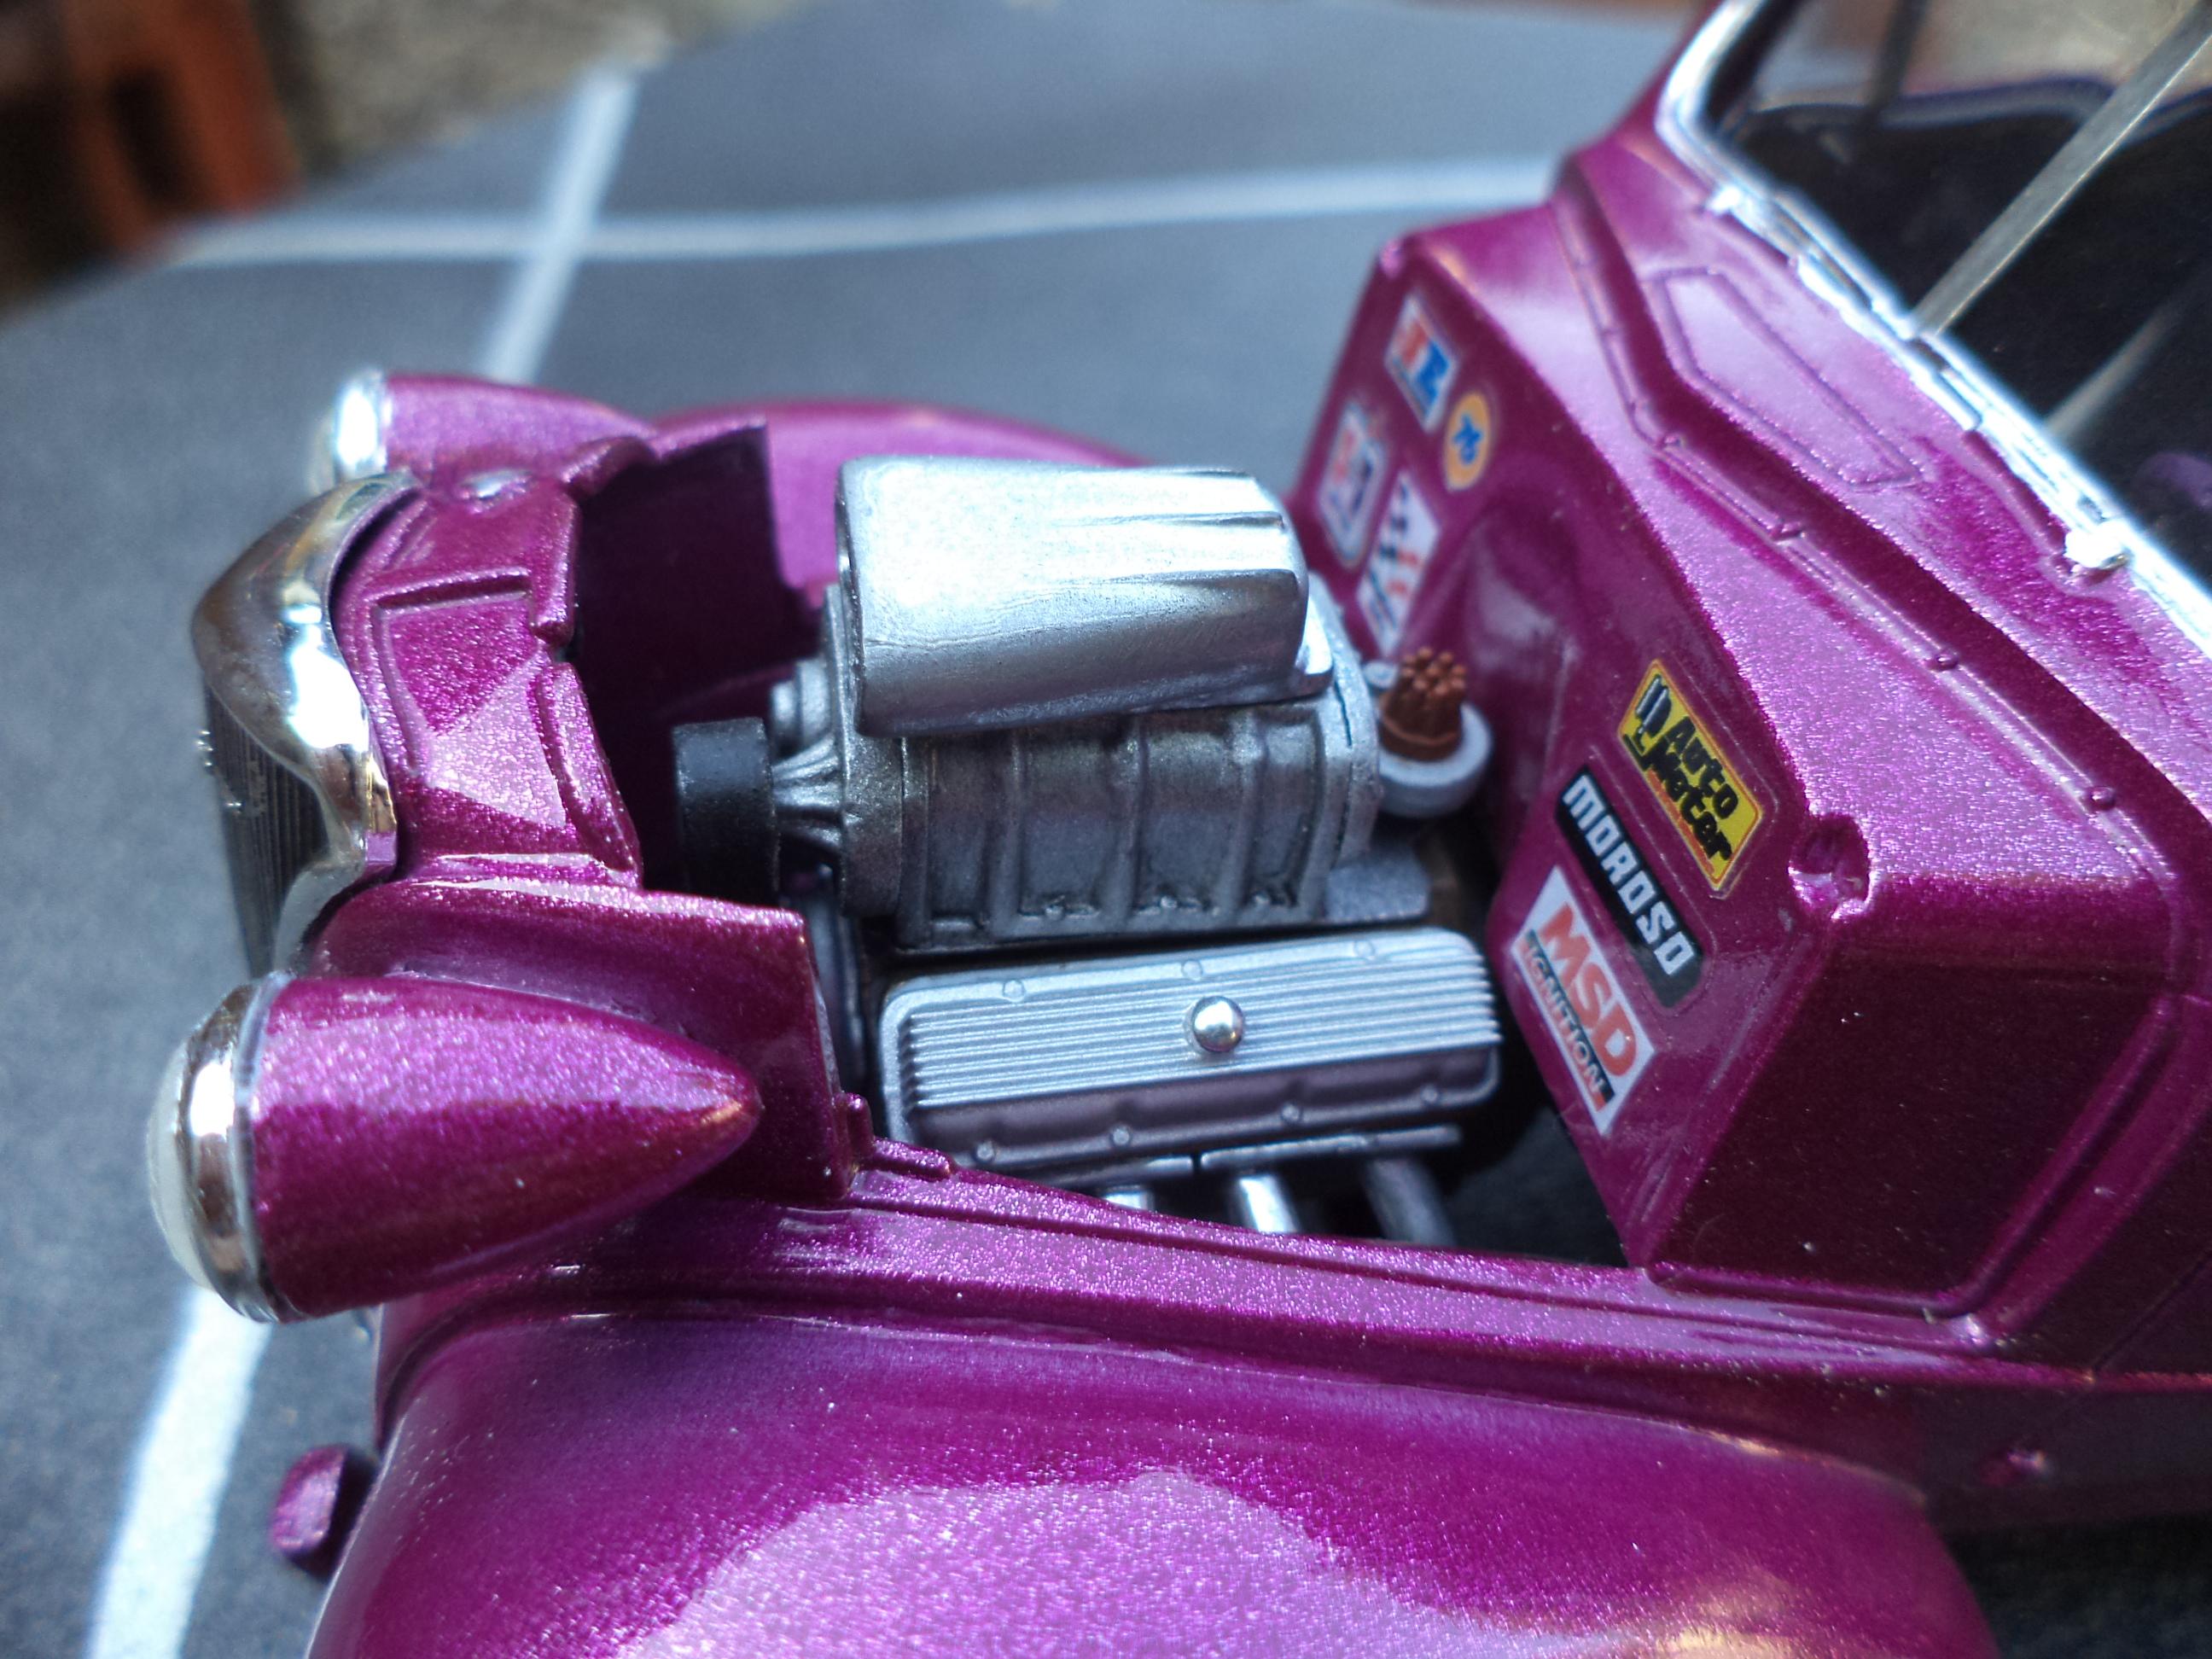
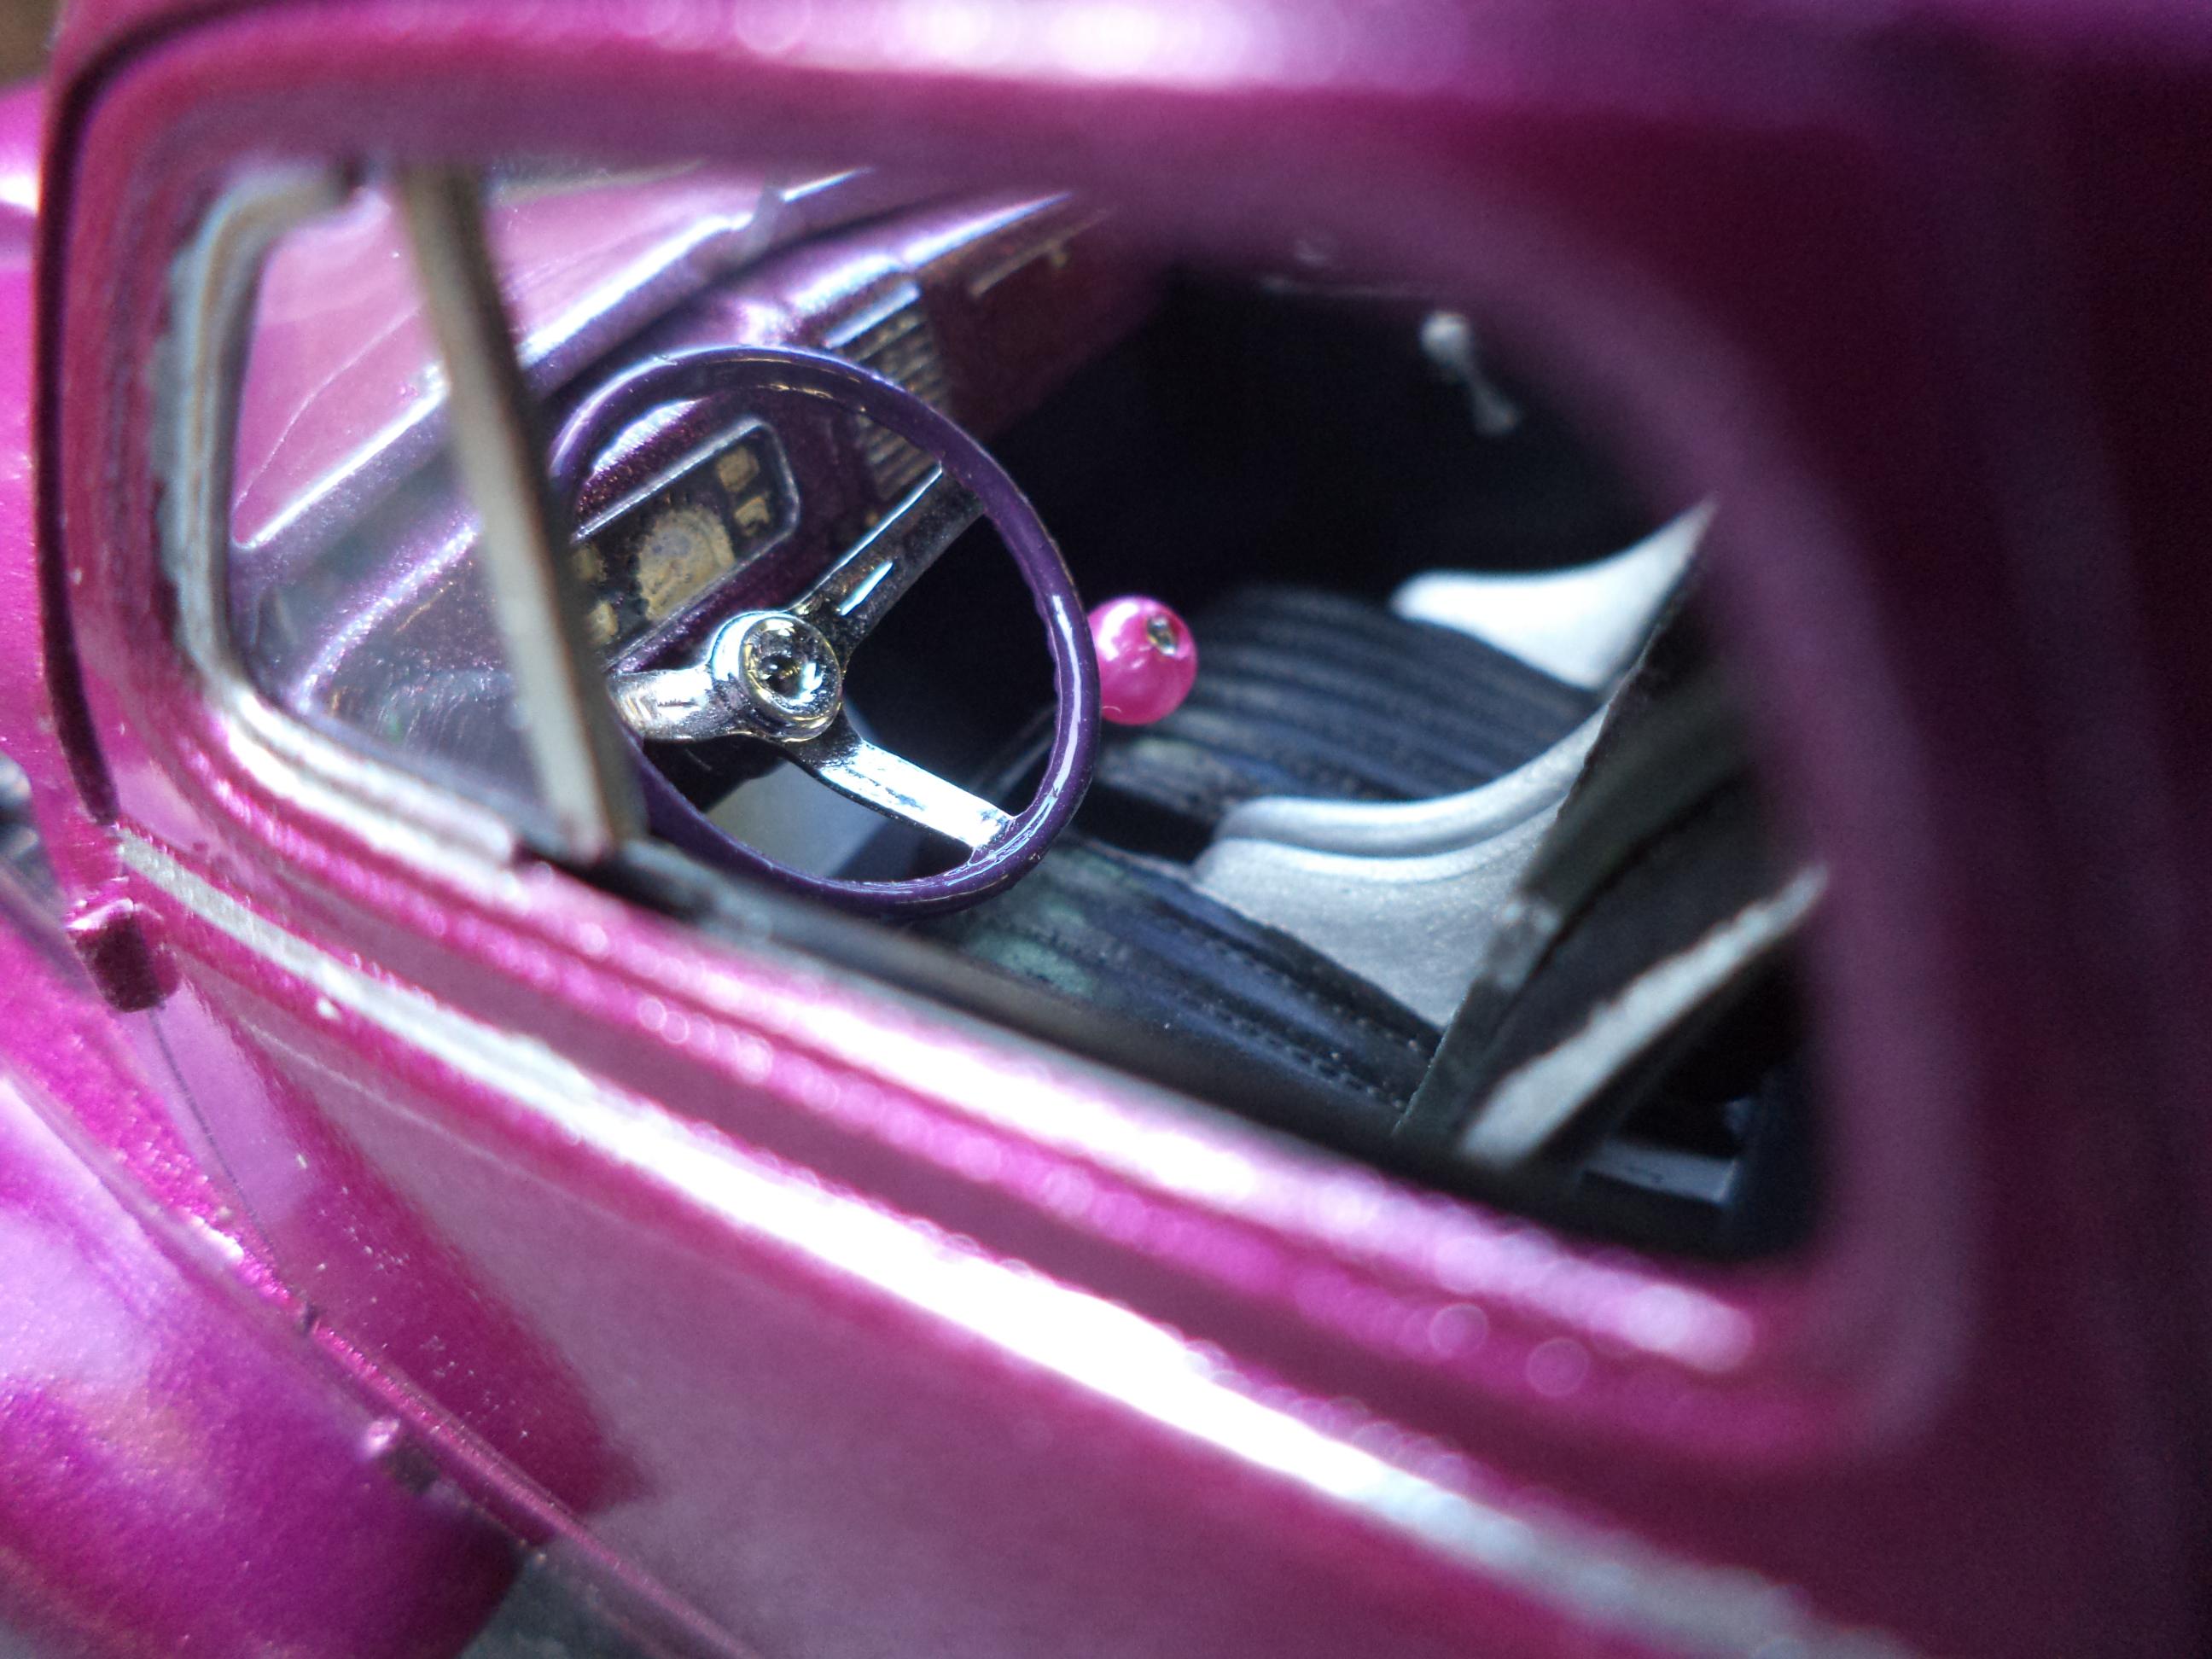
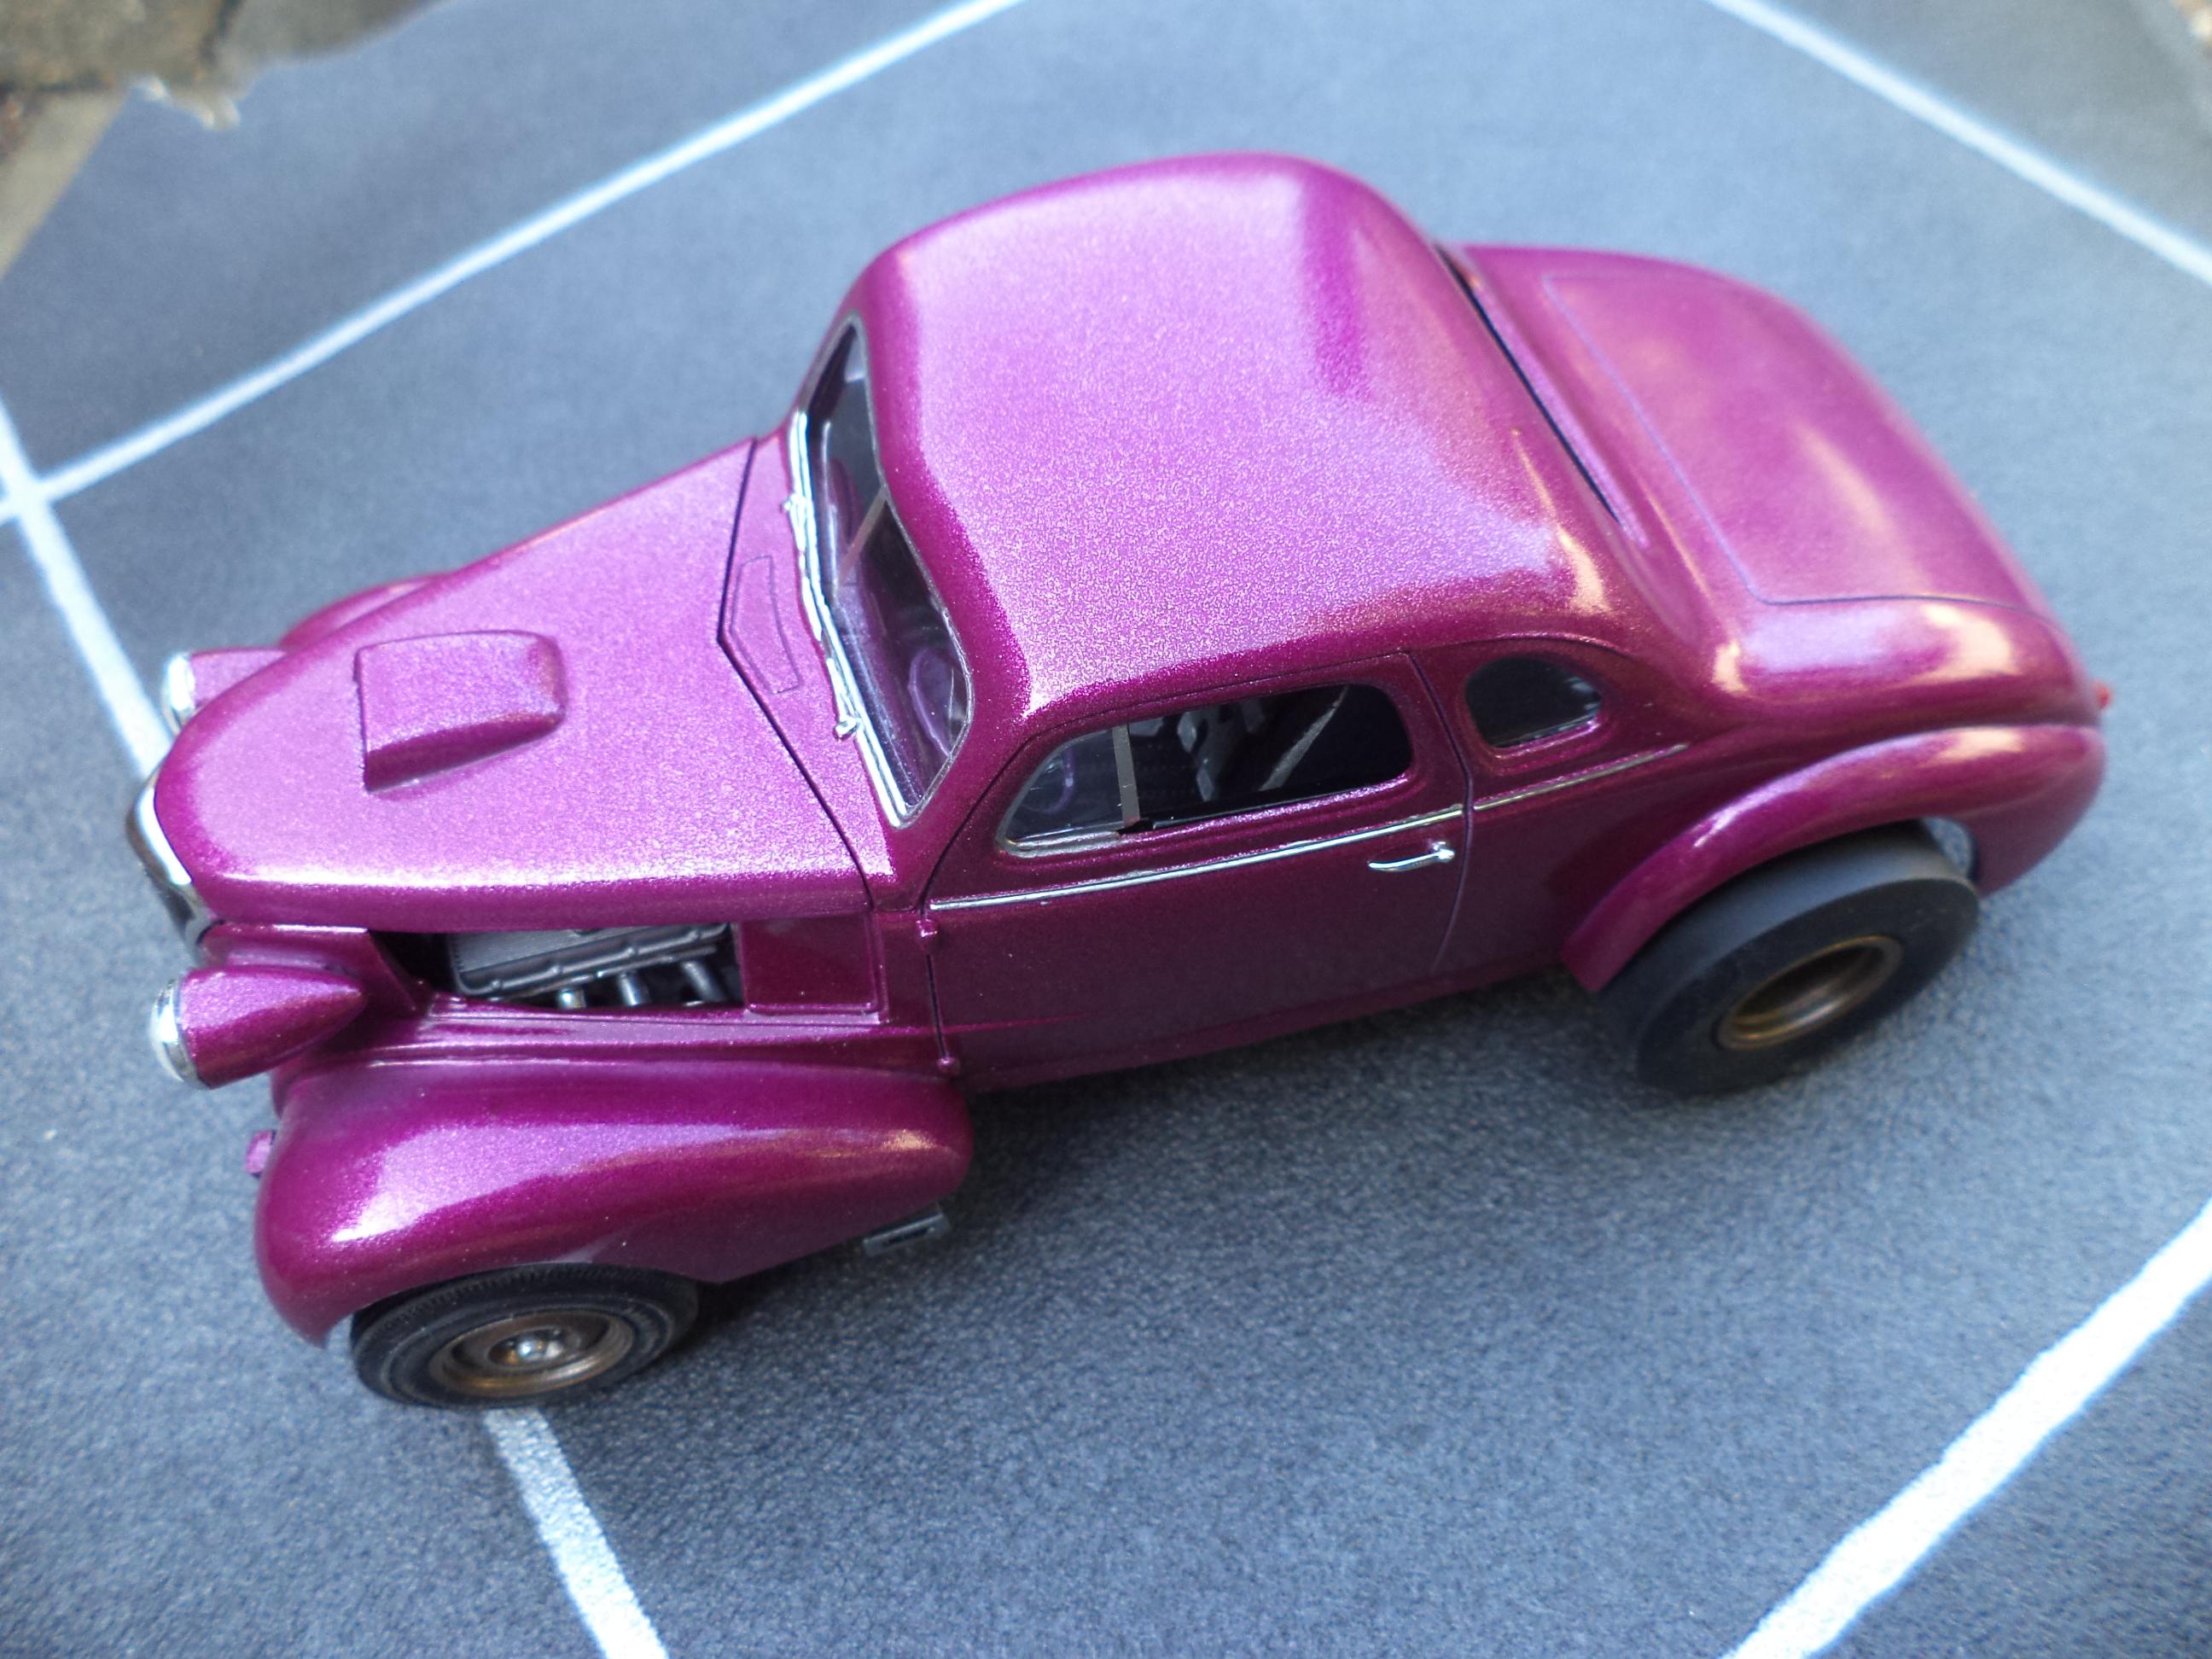
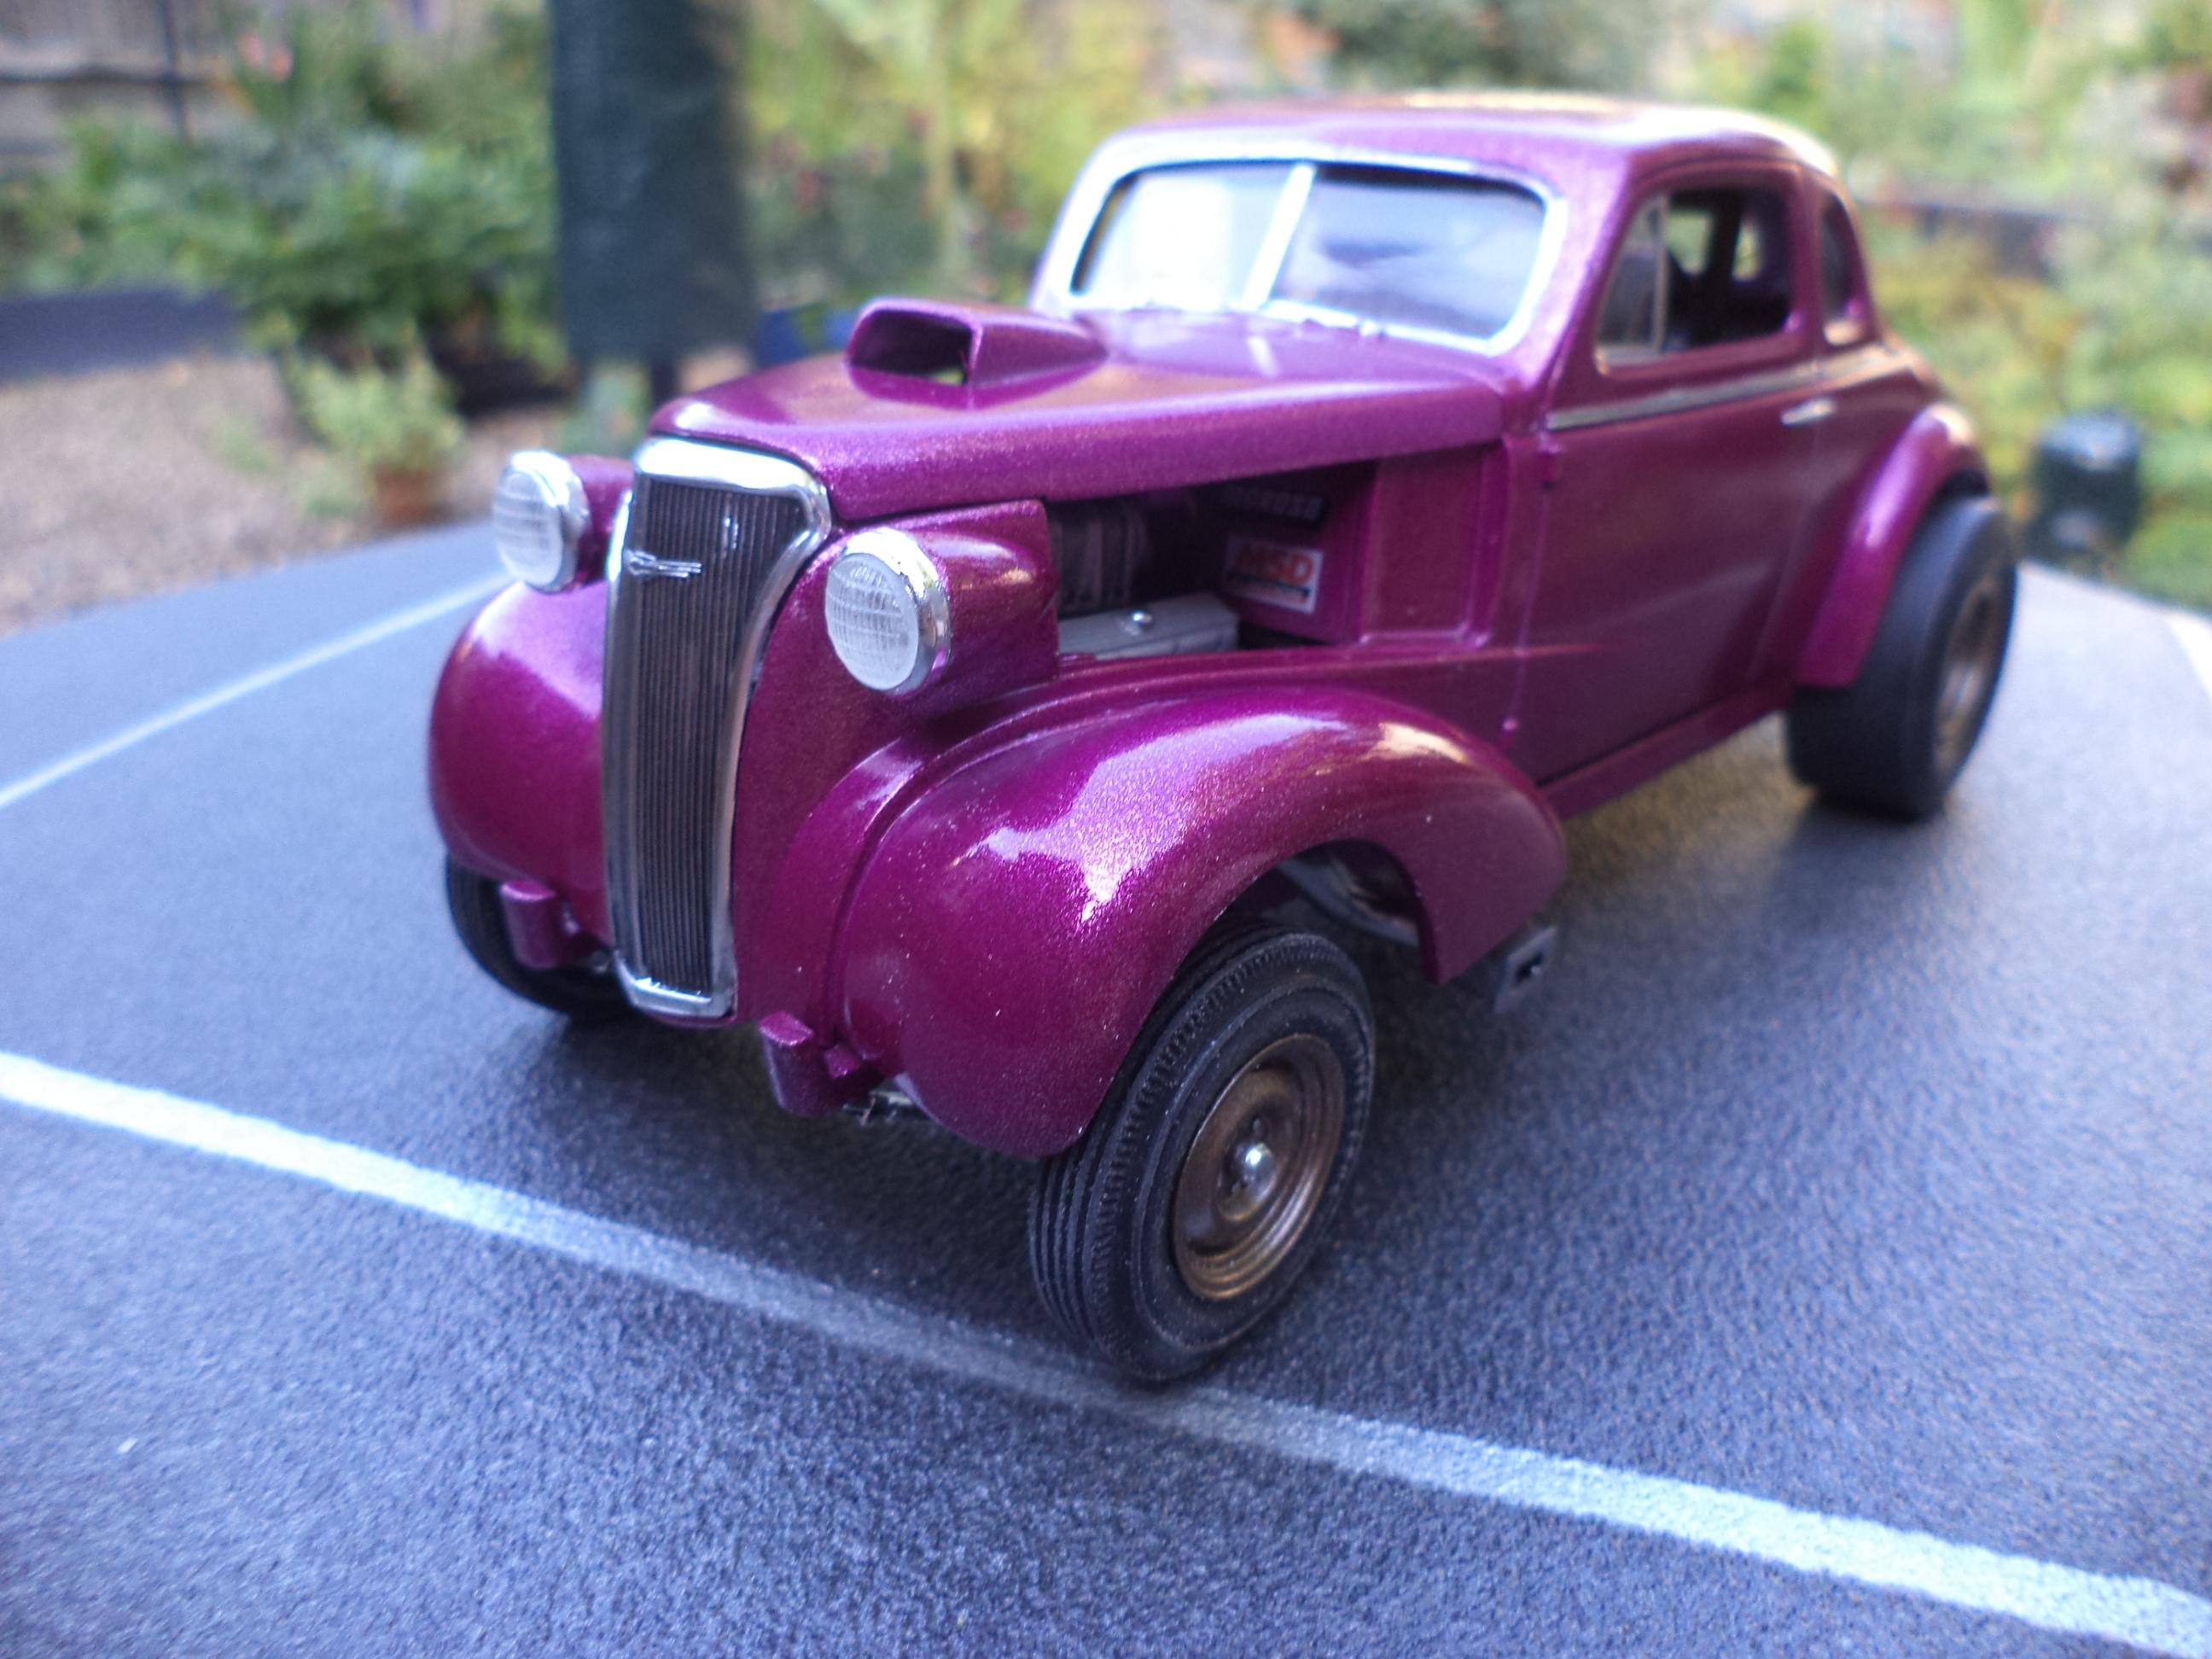
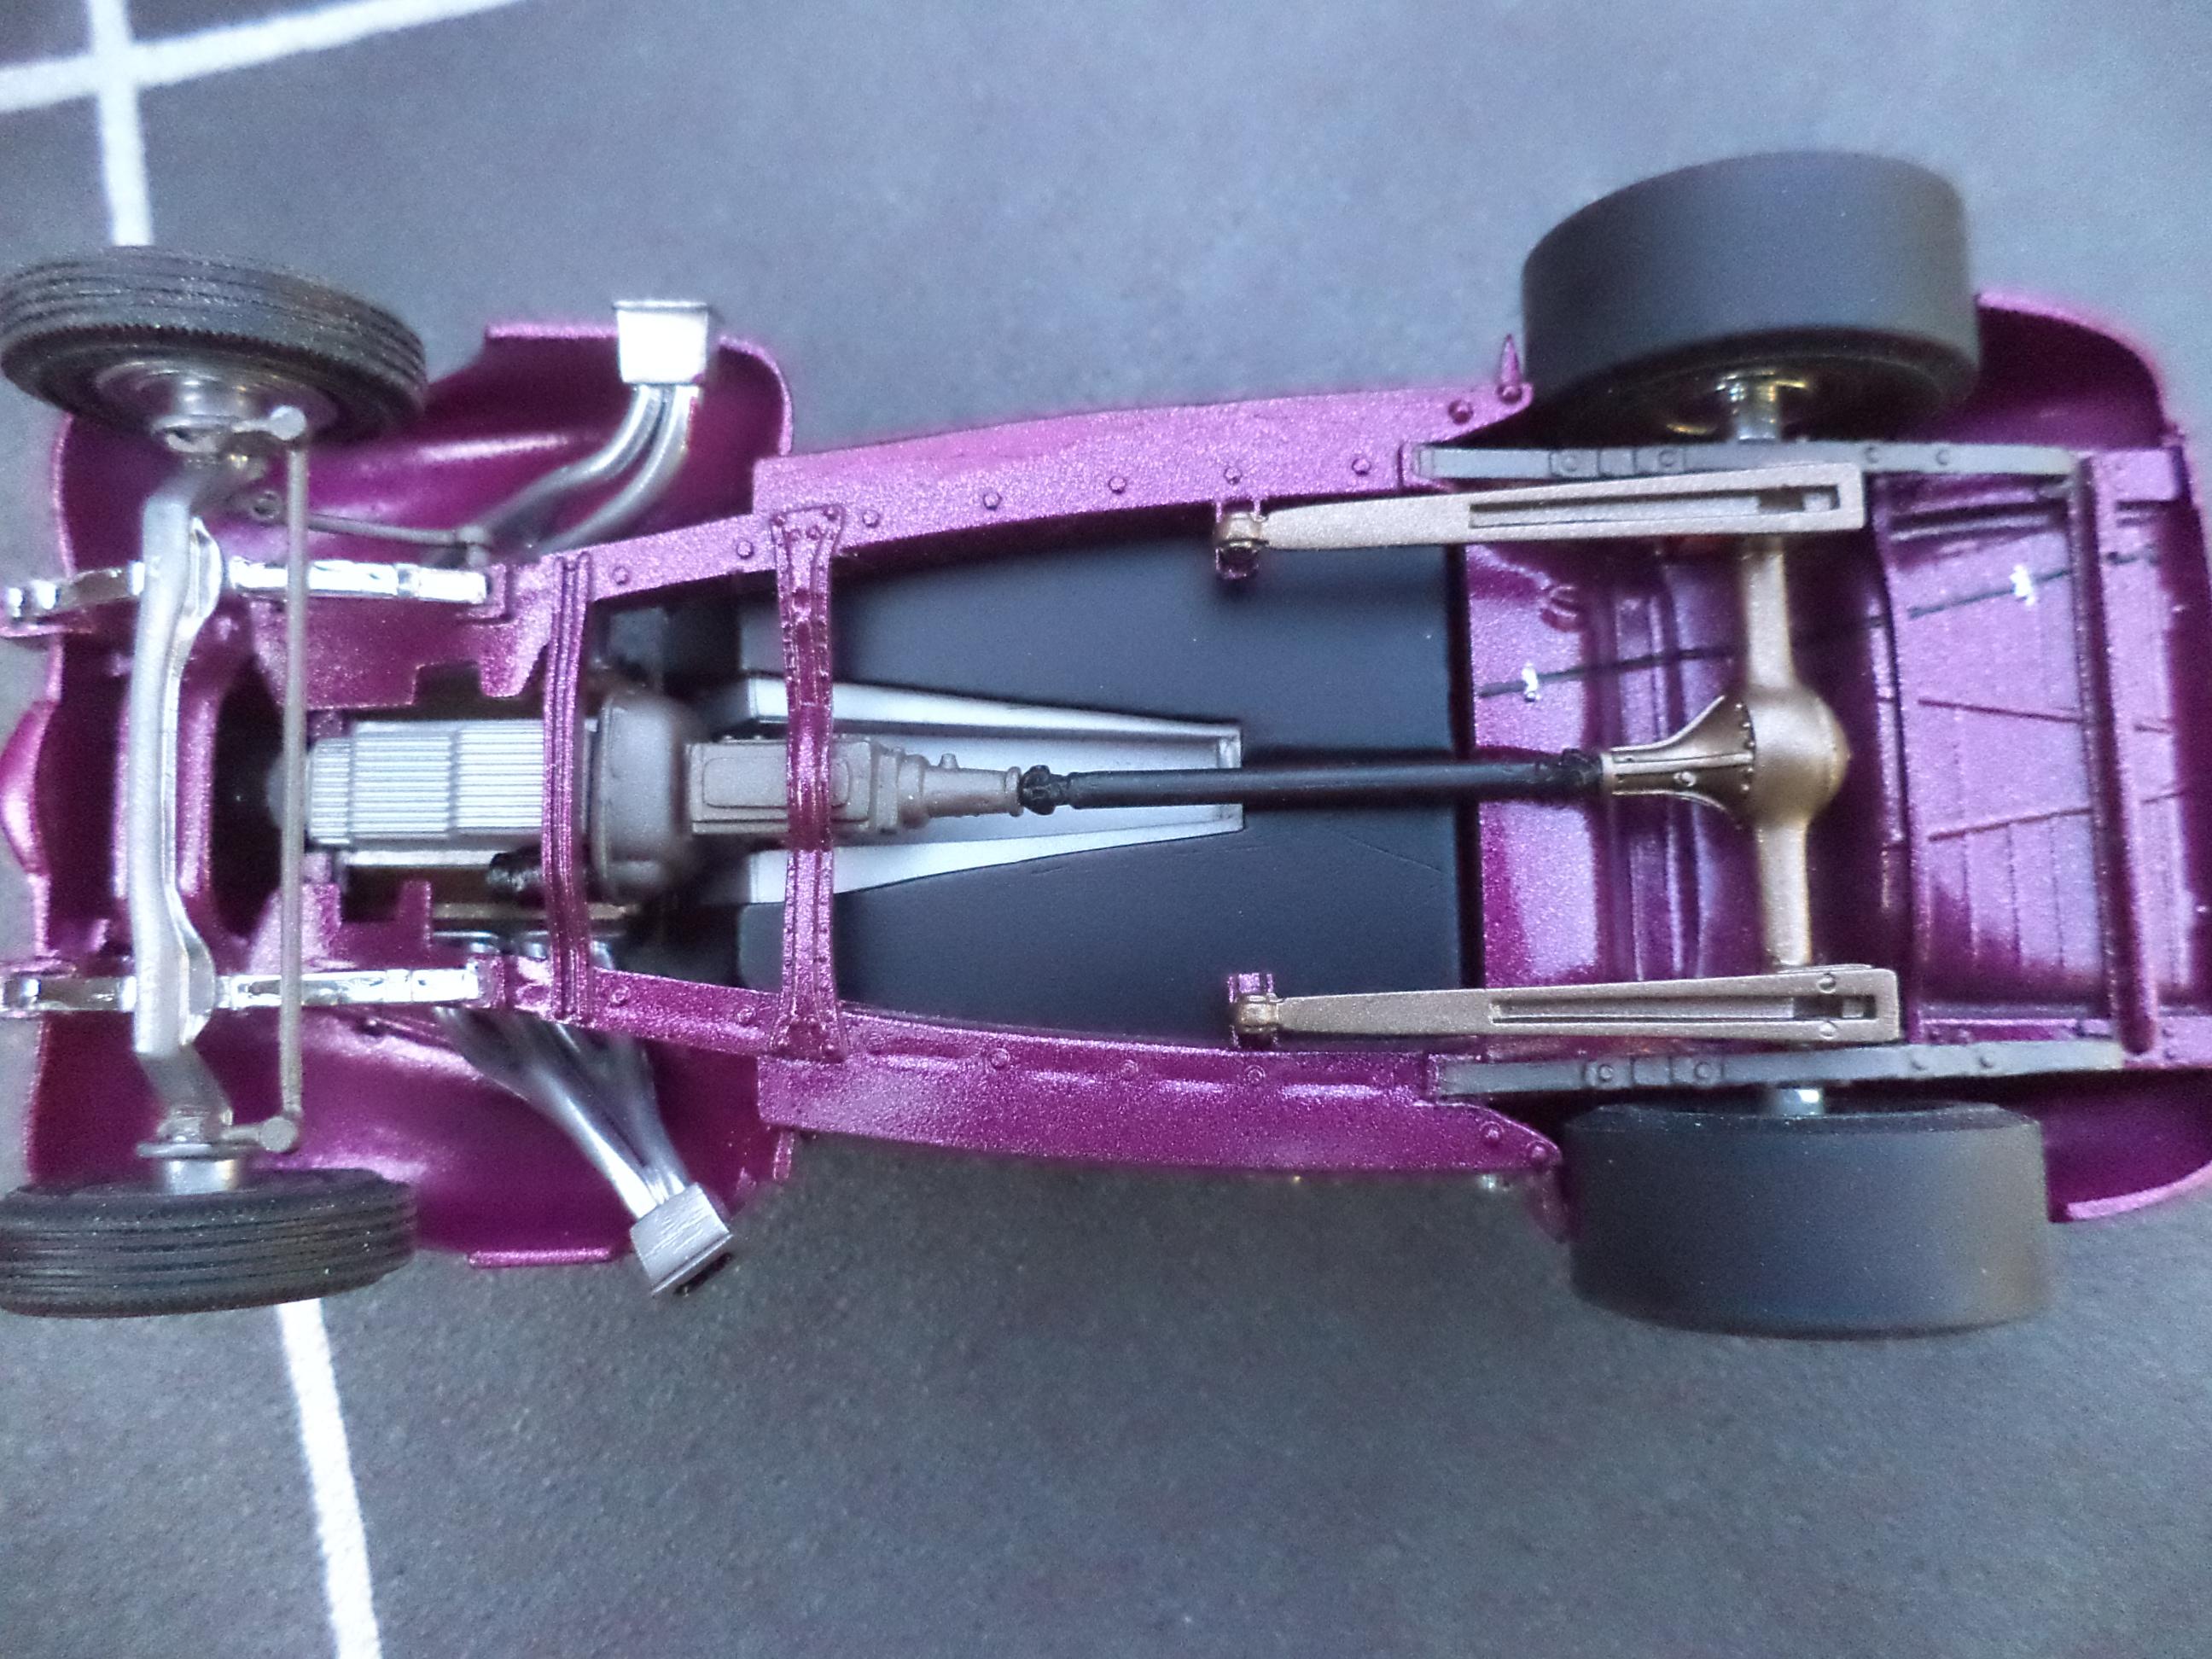
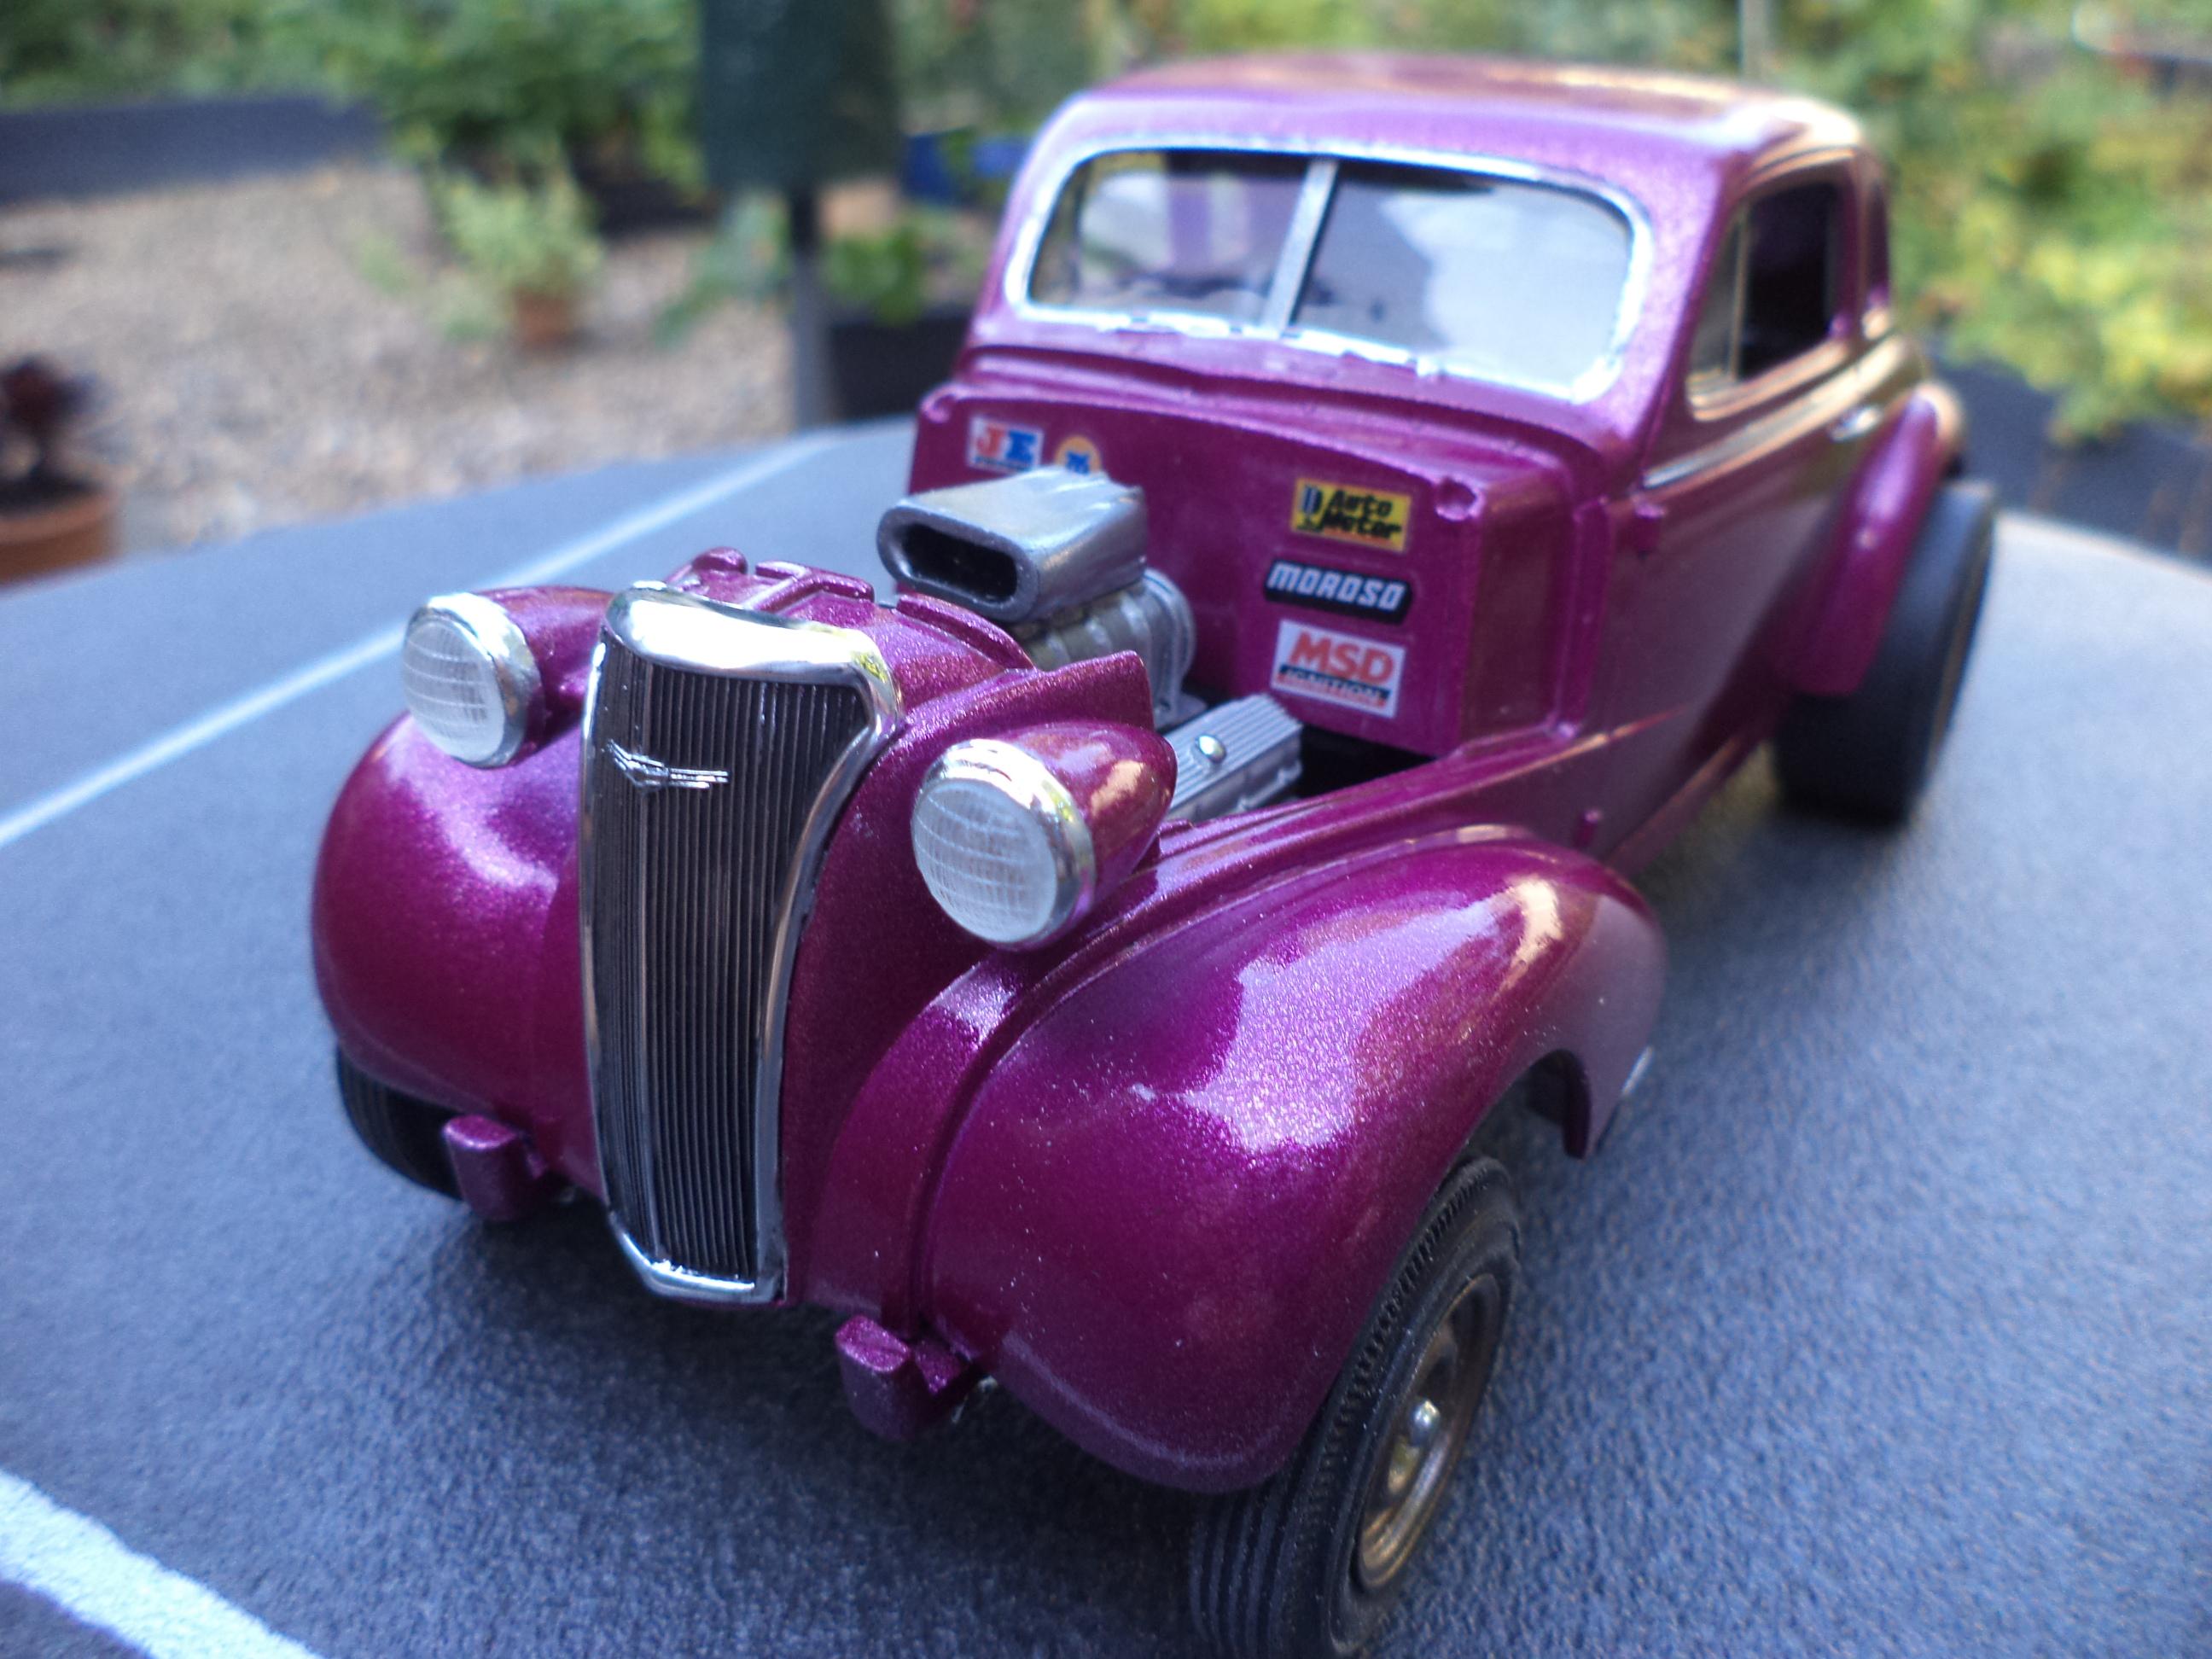
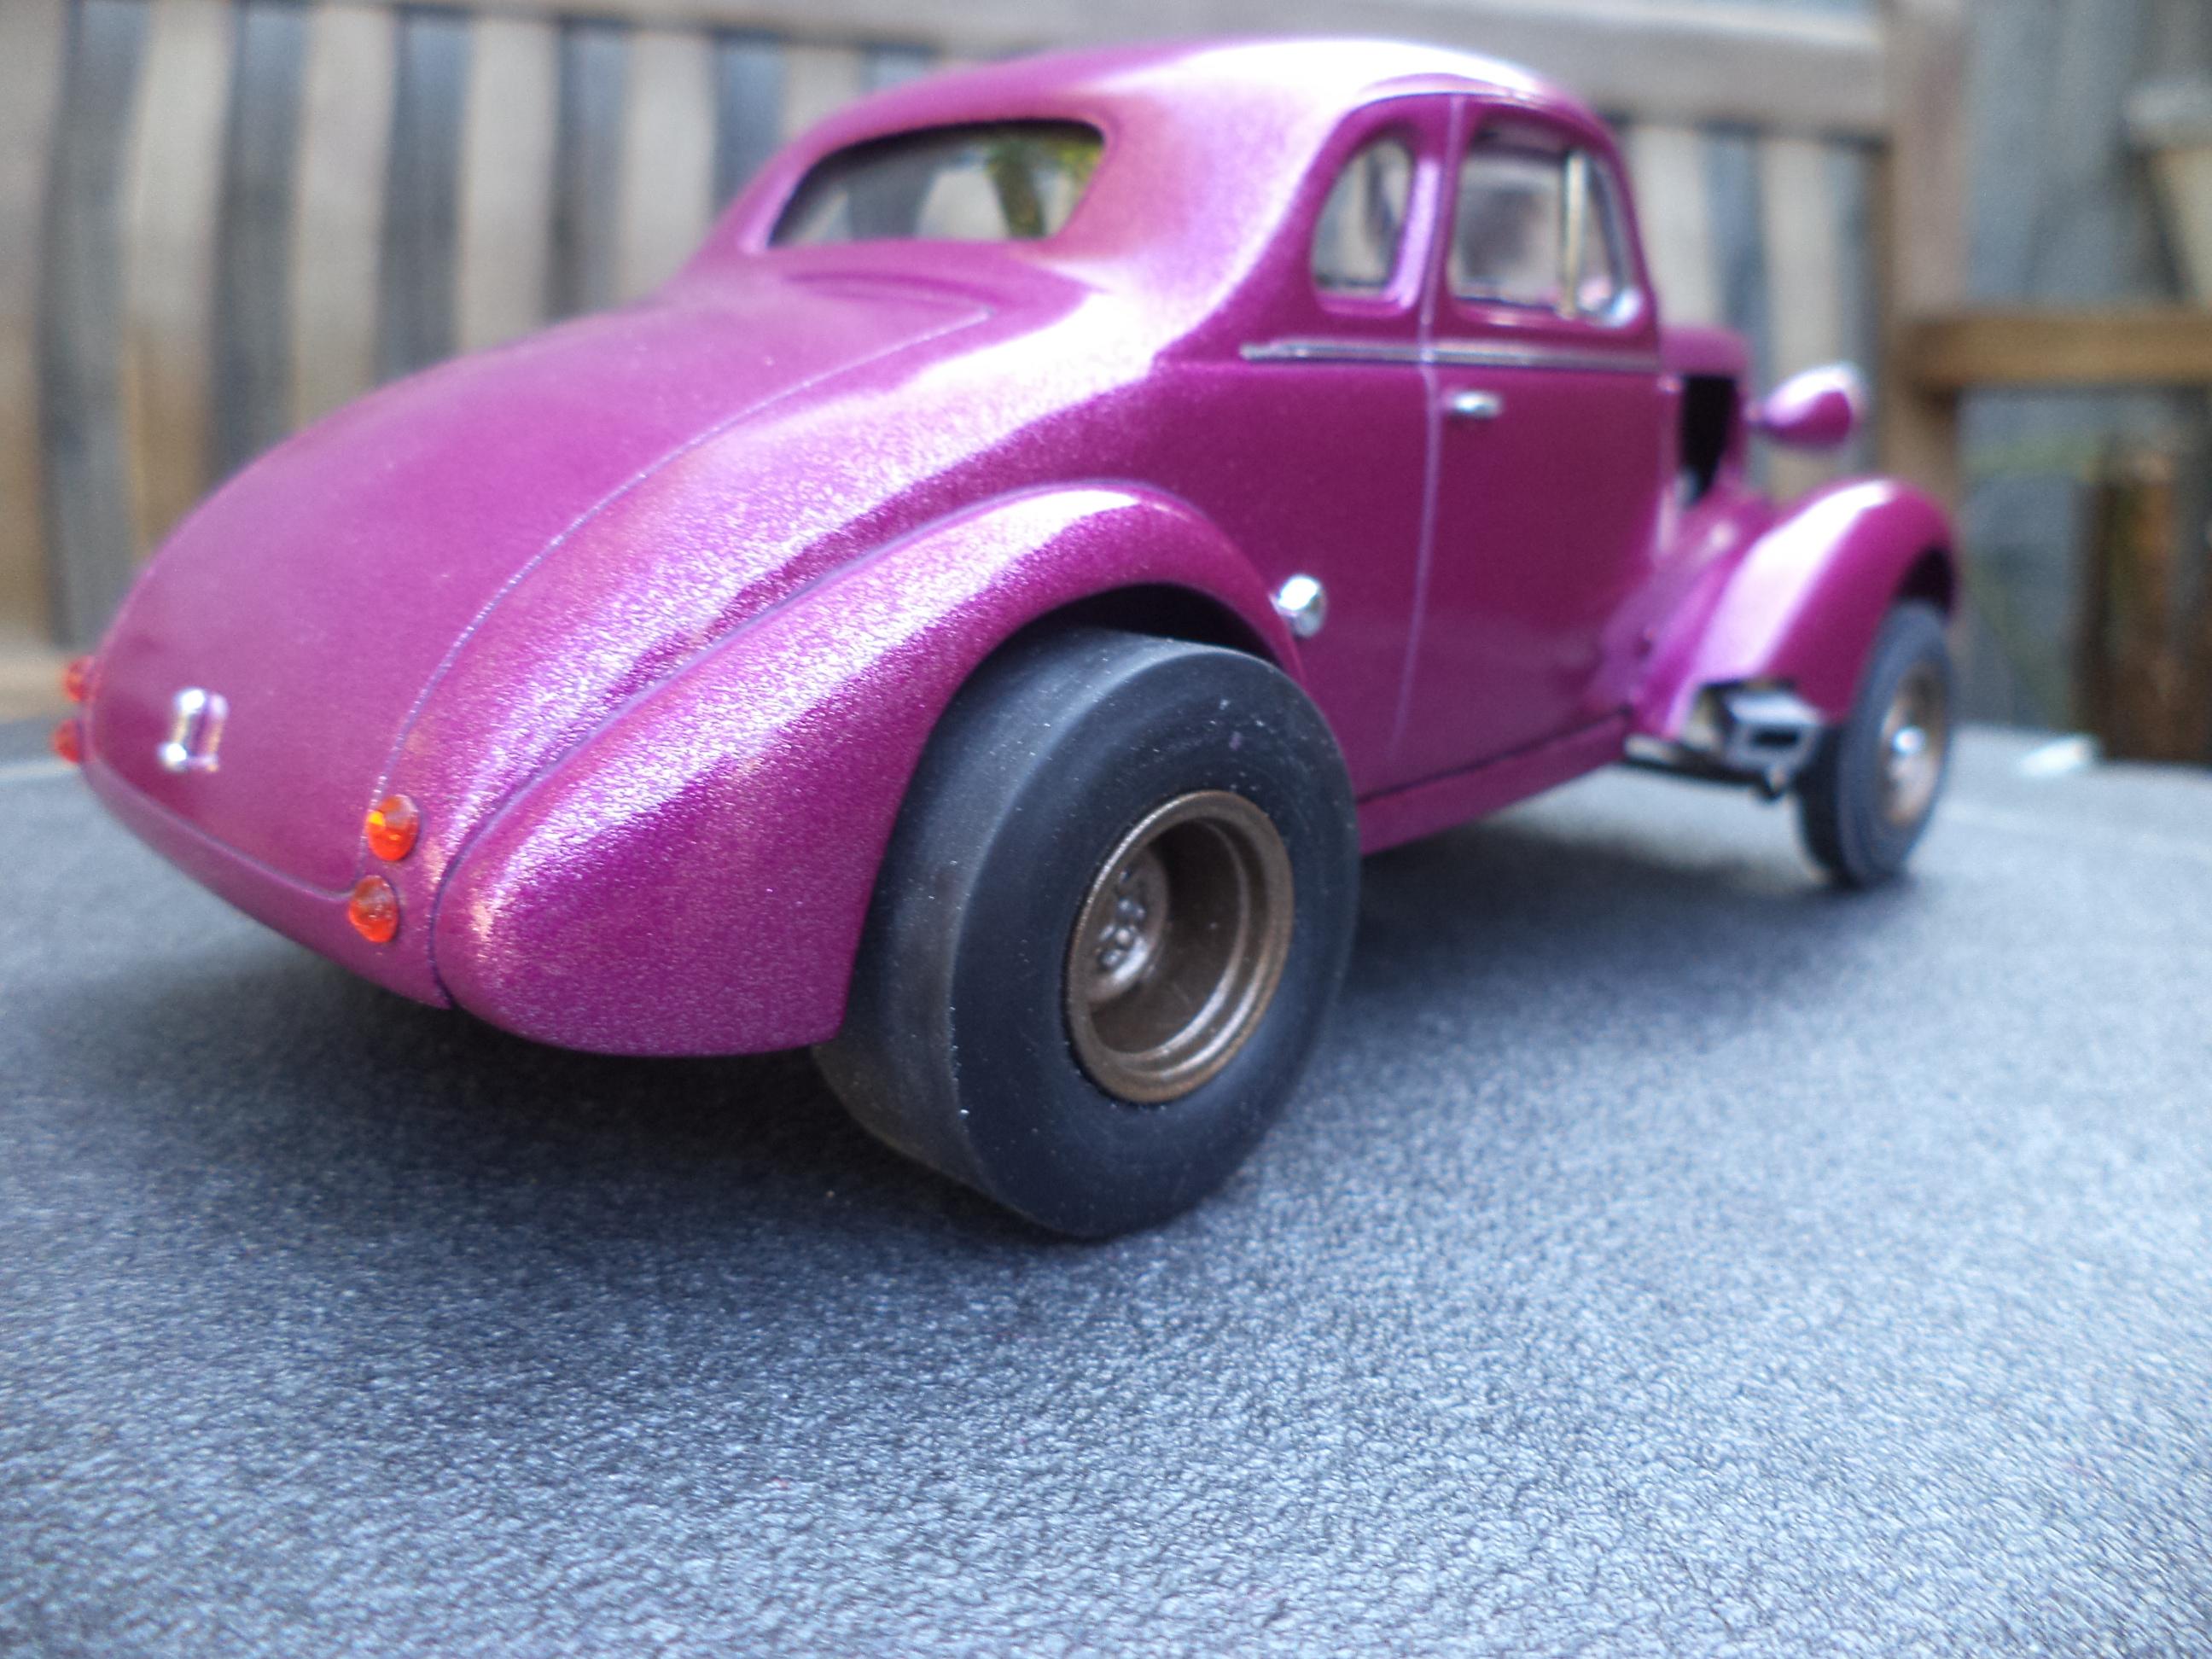
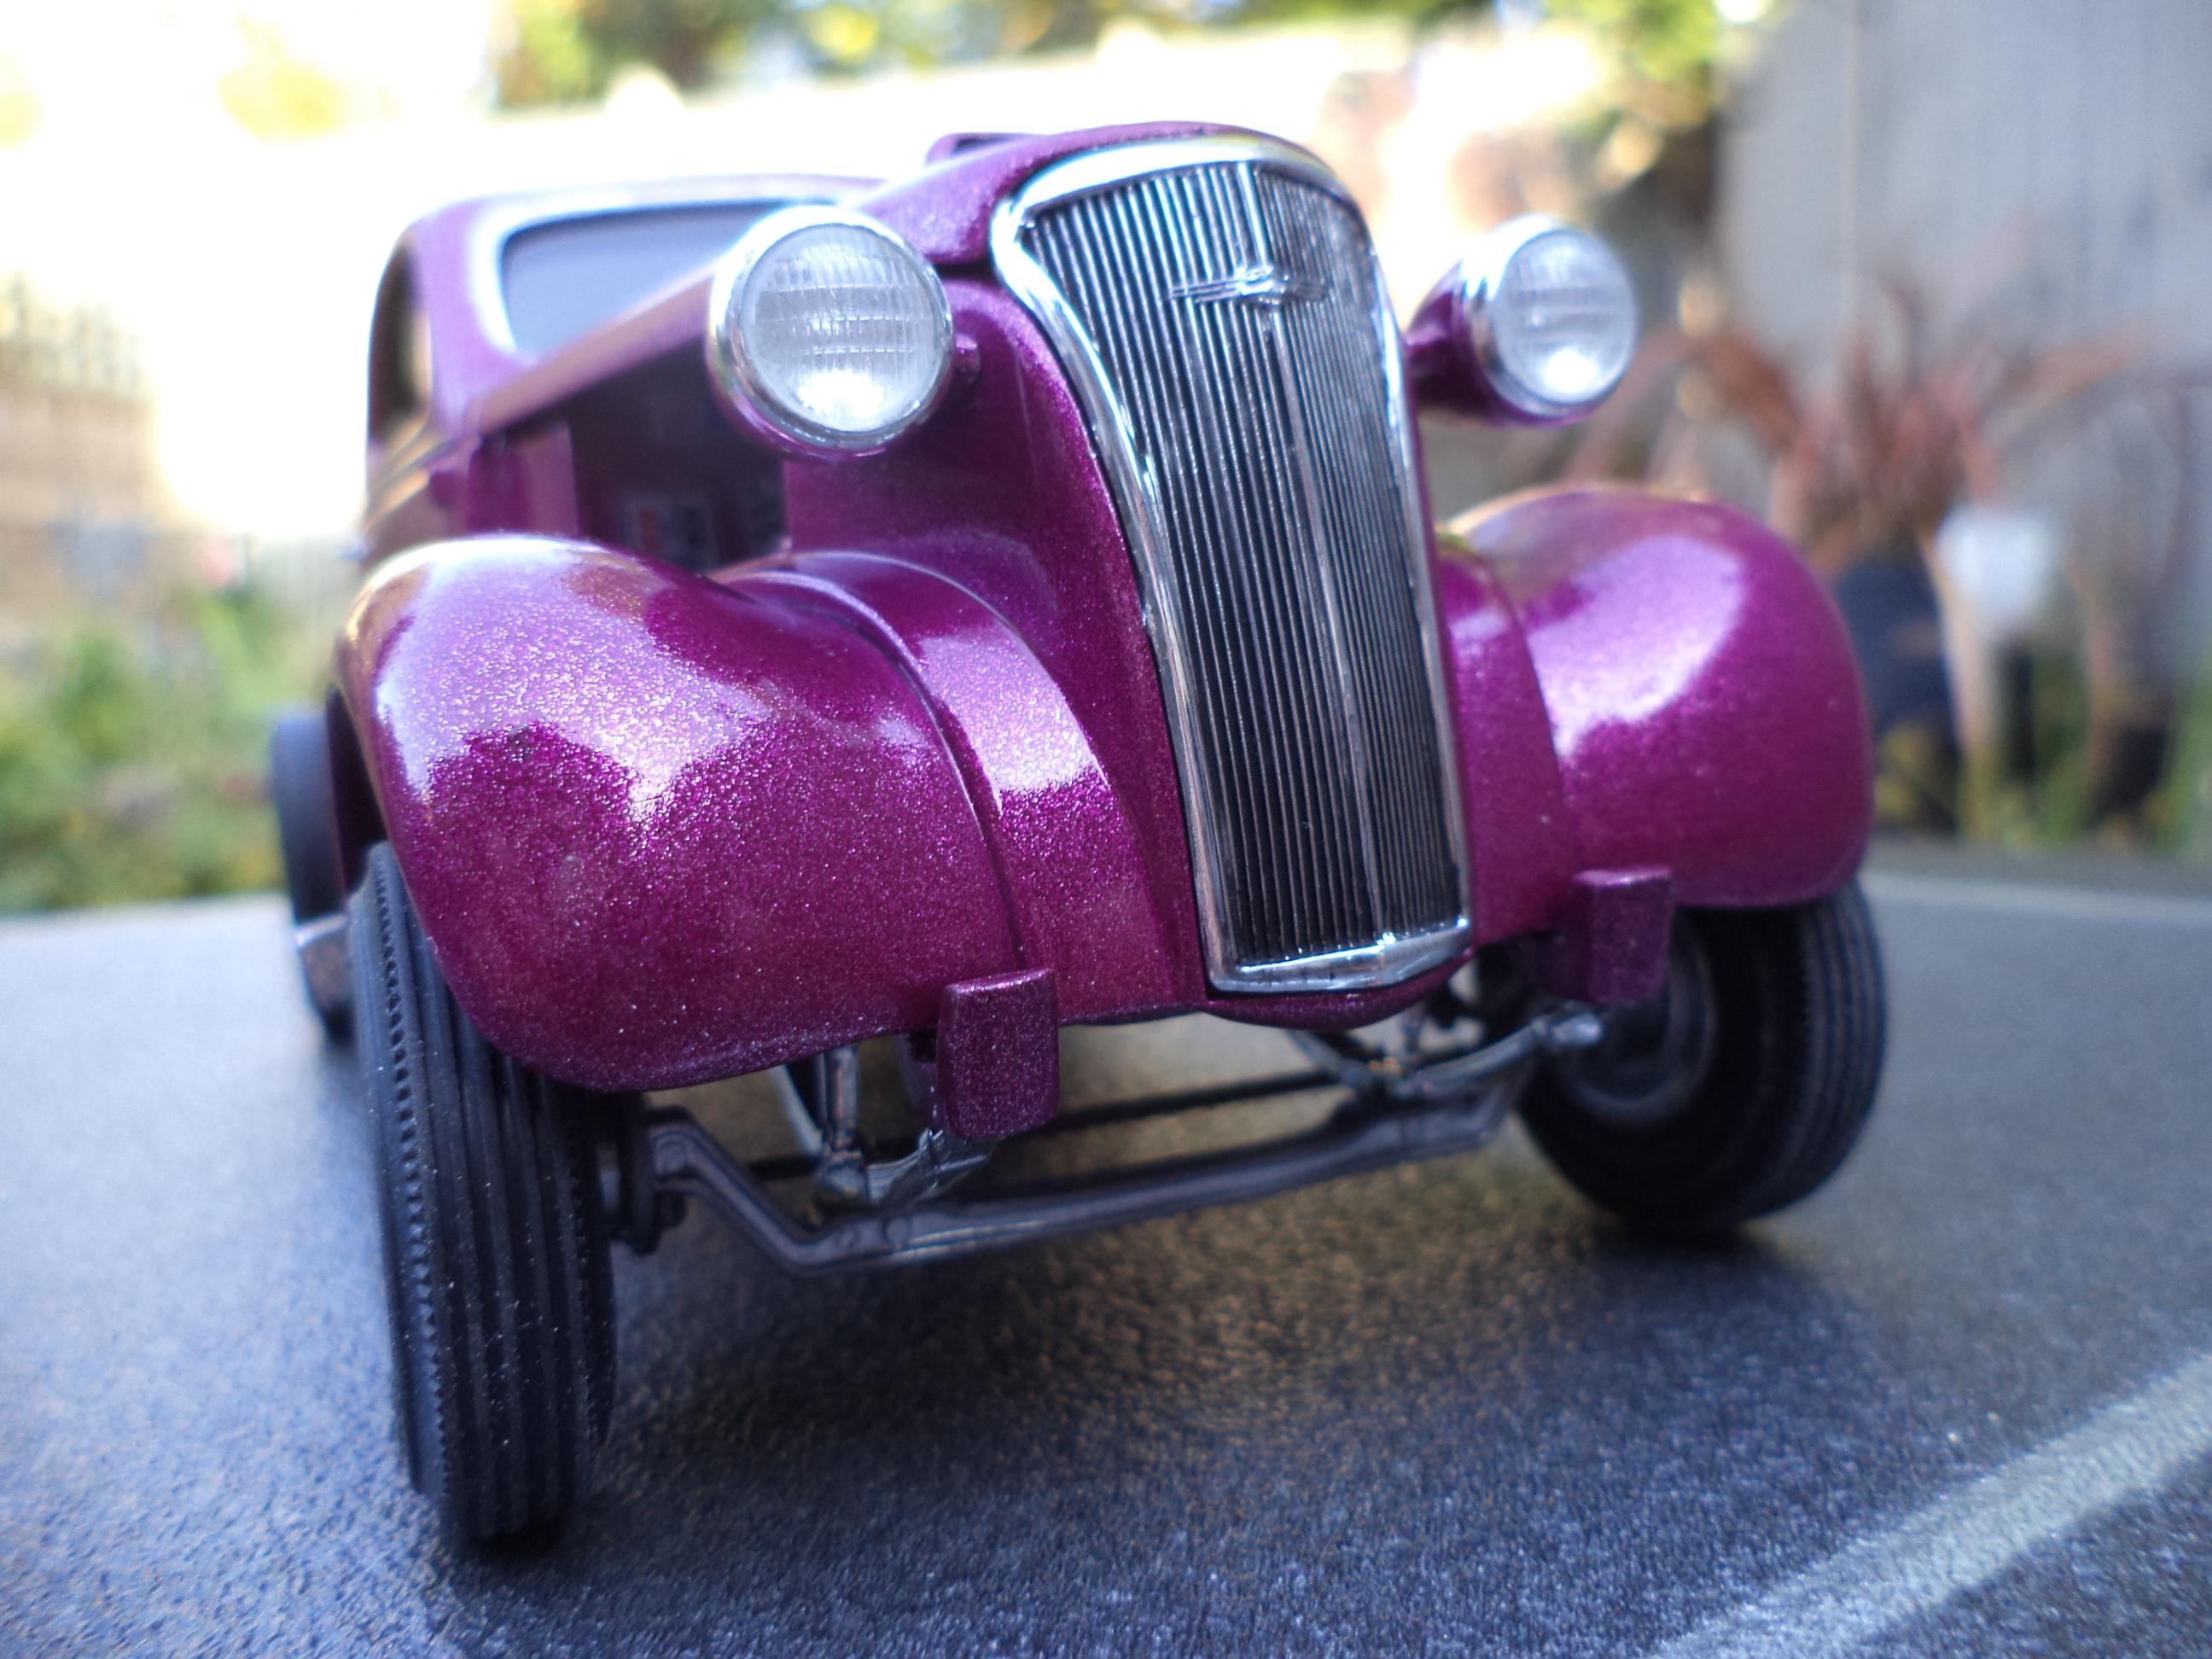
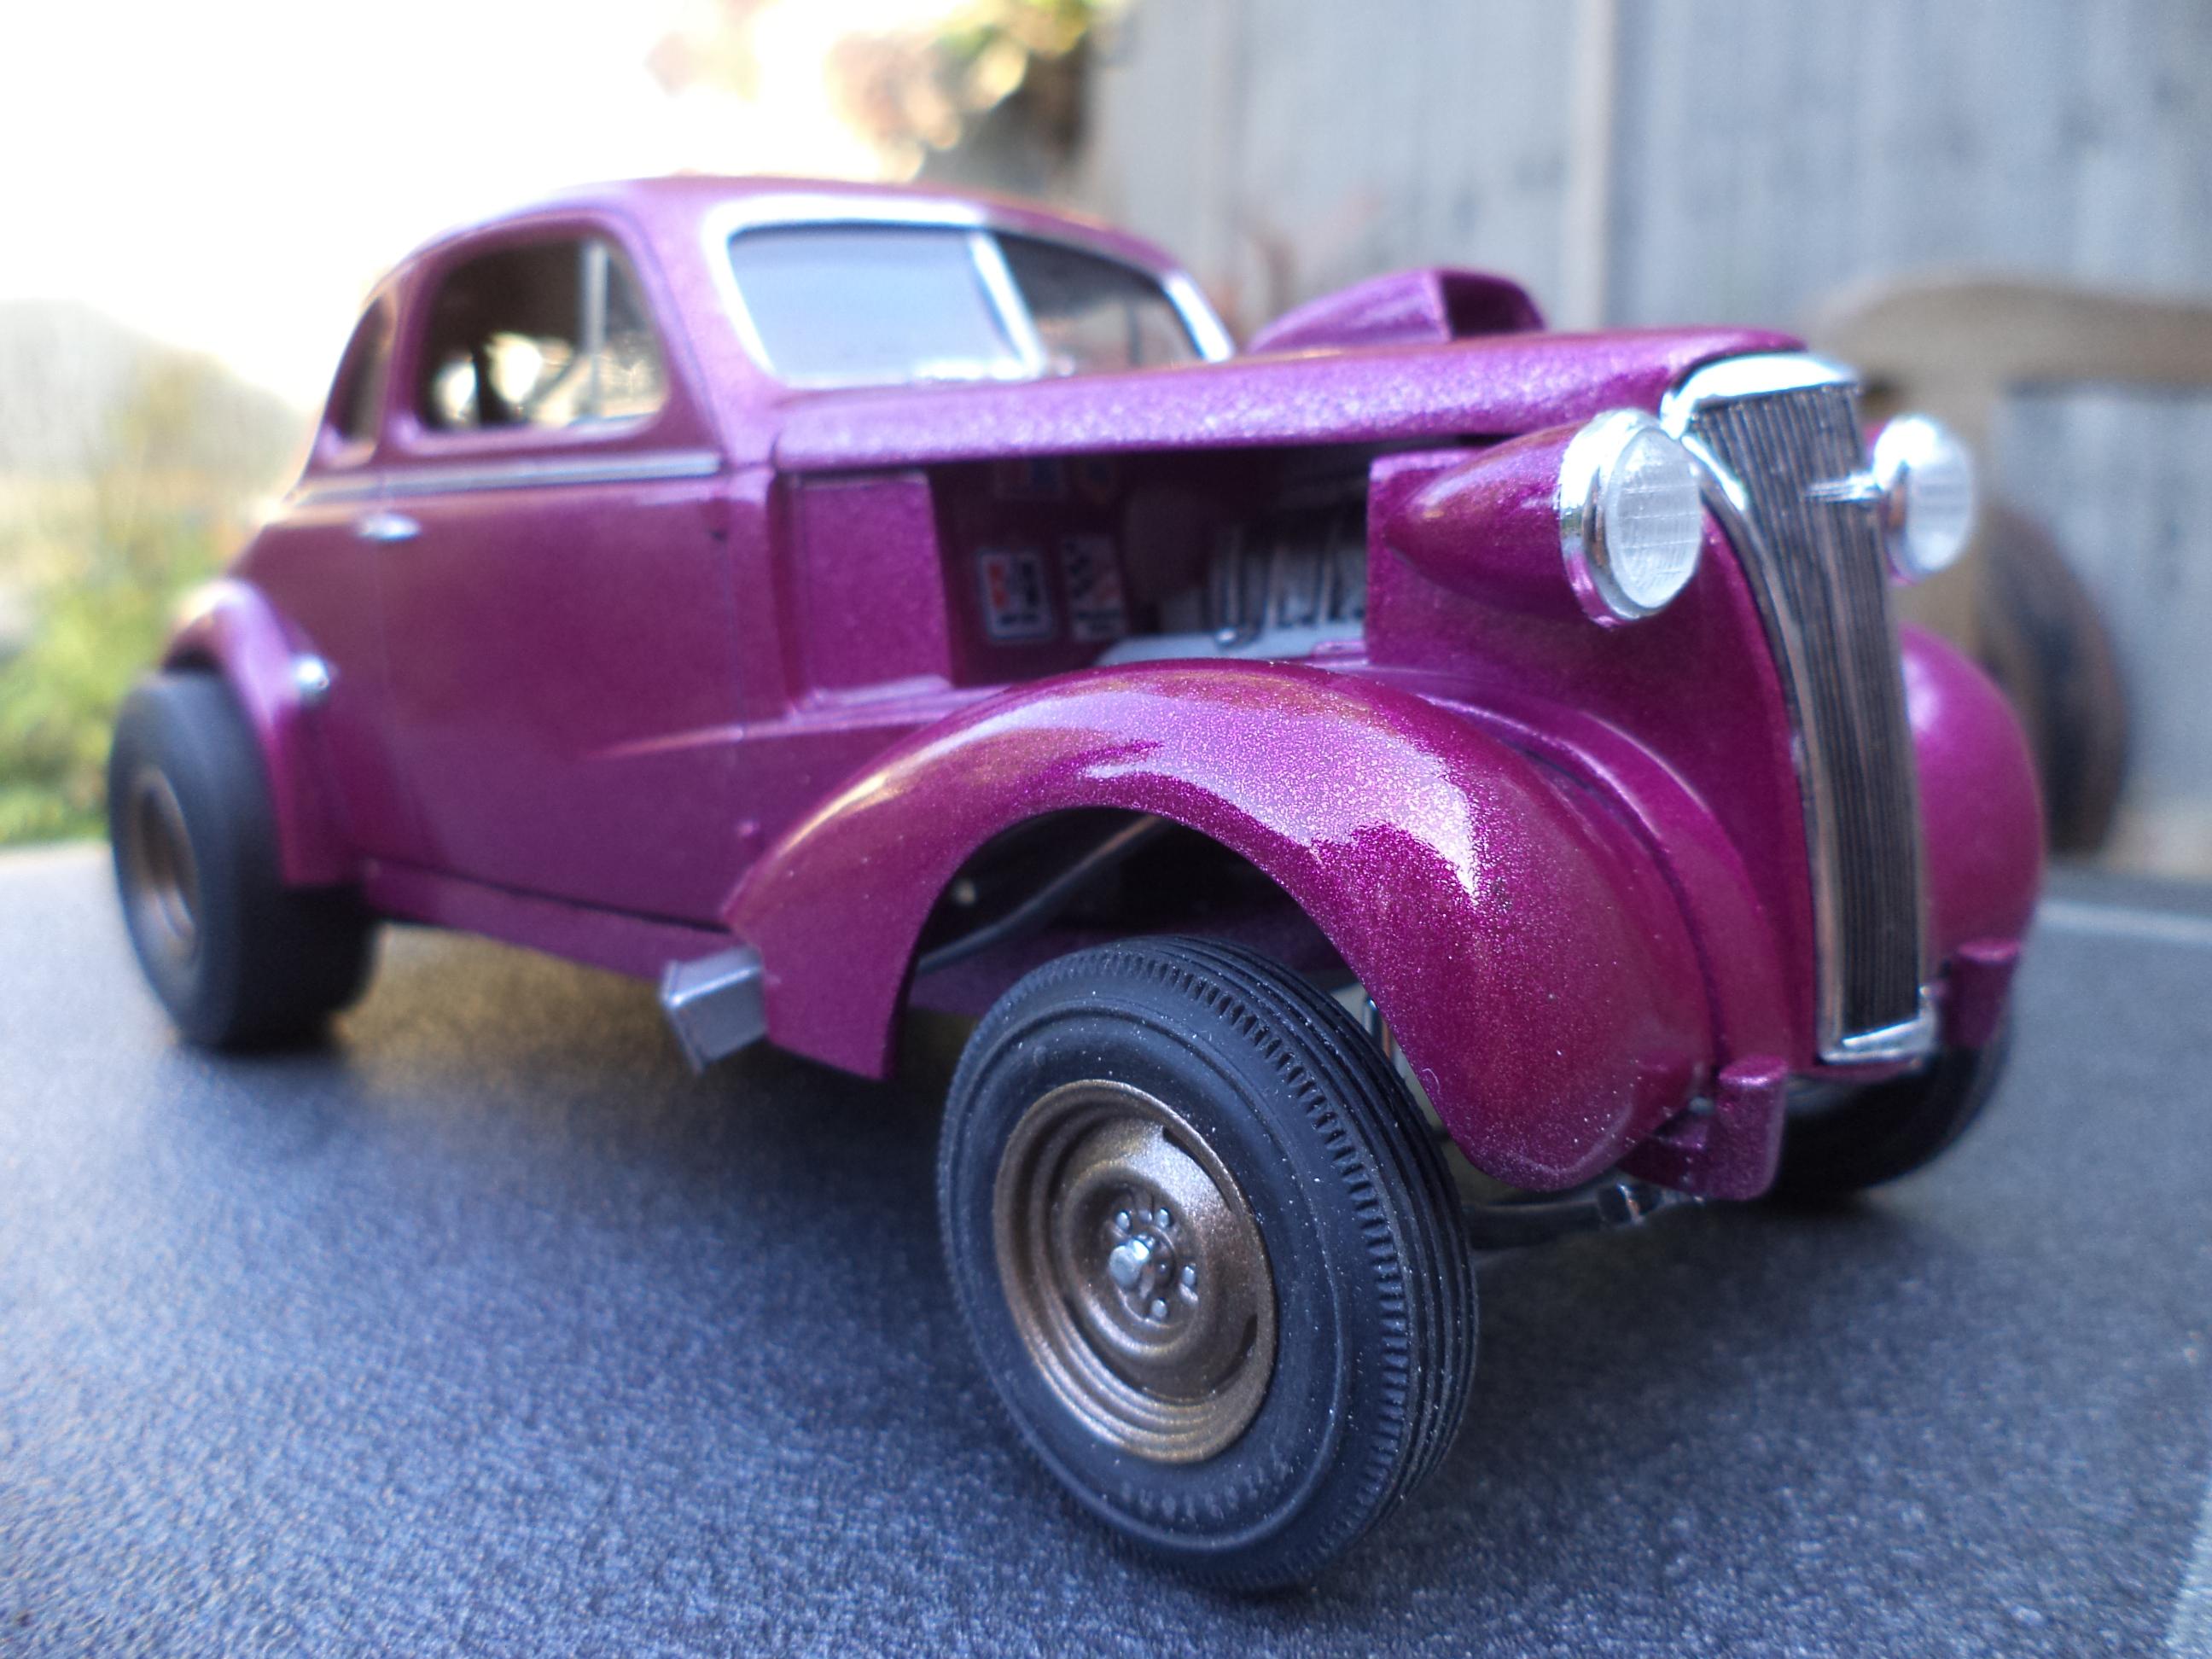
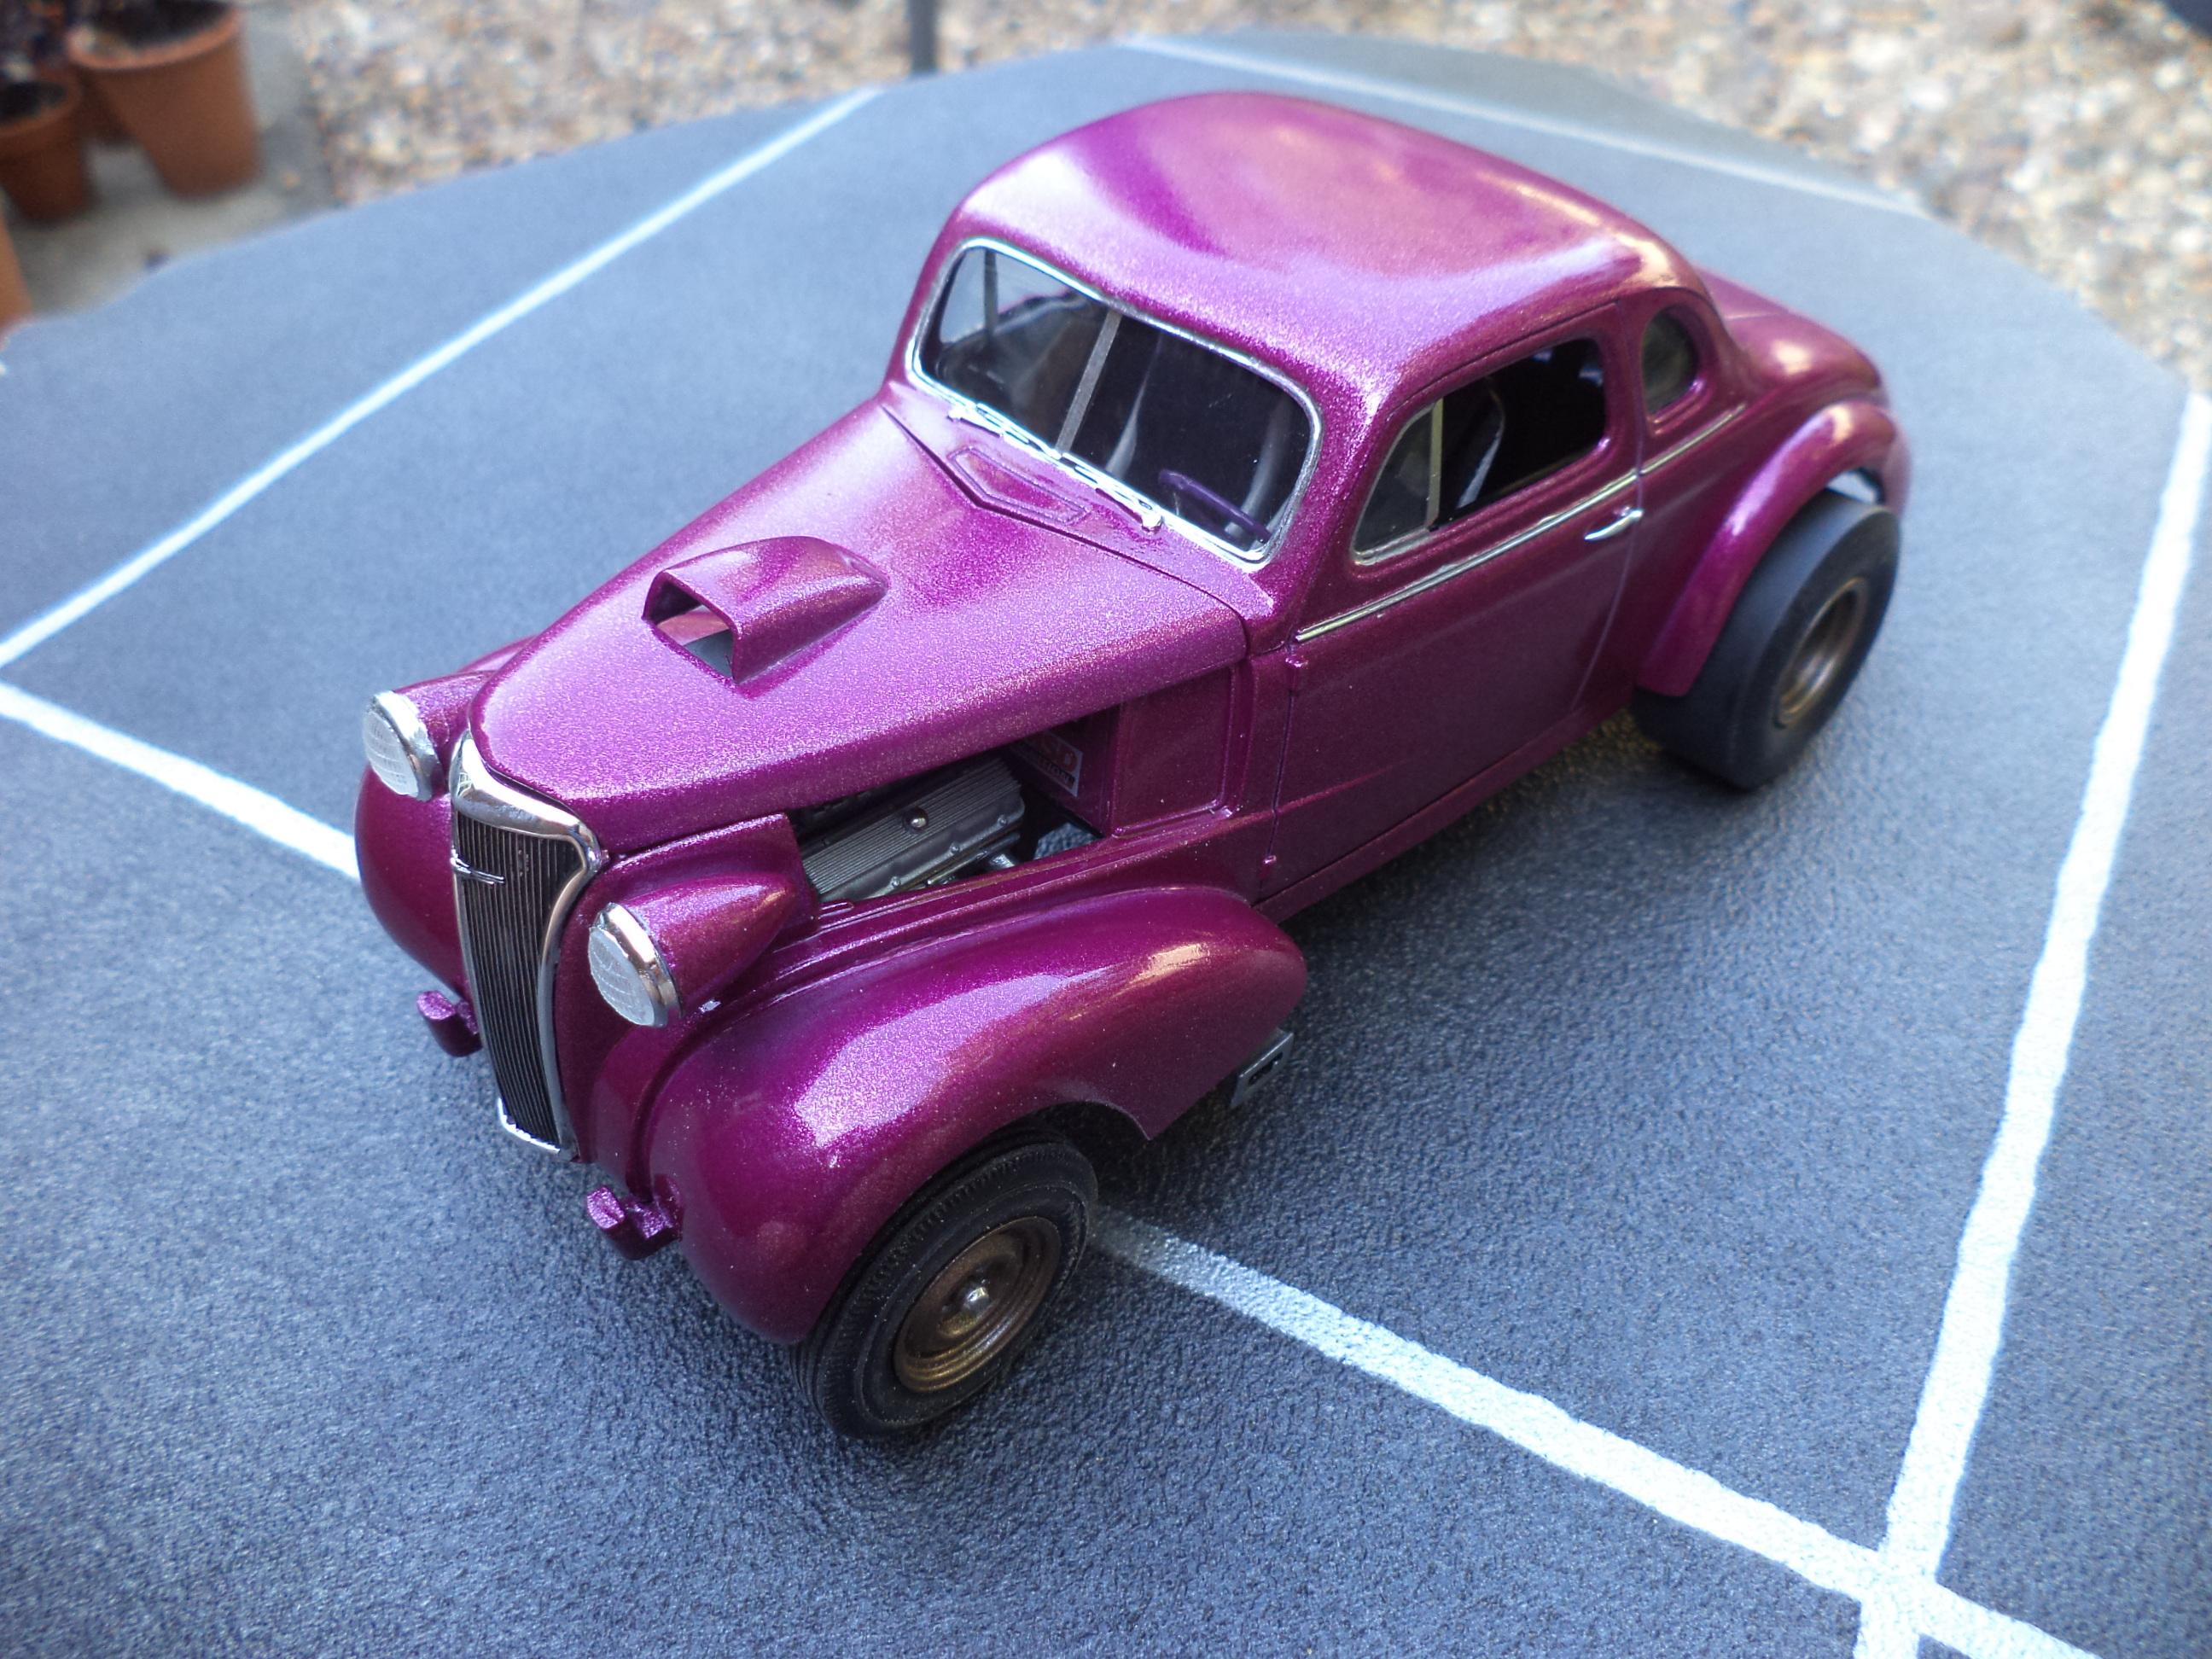
Right, I'm finally calling this hot mess done... if this car had a name it would be 'Chain reaction', or maybe 'Disaster Area'. Let's start with the things I changed by choice. I added rear inner fender walls and stripped the chrome from the engine parts. the front wheels and tyres are from the AMT '49 Ford, rear wheels are MPC Dodge Monaco with the slicks from the Revell '53 Chevy gasser. These bigger tyres meant some radical radiusing of the rear fenders. I added brackets for the rear radius arms as they didn't seem to have any mounting points. This boxing of the kit didn't include the stock tail lights so I used some craft jewels. I also added a craft bead gear knob. The paint is a generic 'metallic purple' rattle can. Wheels, engine and rear axle are Ford Aztec Gold. OK, onto the problems. First off, the frame was twisted. I got it 99% good with some 'clamp it to a board and hairdryer' action. Next I decided to re-do the vague engine mounts. This may have been the cause of the next issue, when trial fitted the frame, interior and body together I found the trans fouled the tunnel. So I chopped it out and made a new inner floor/tunnel to fit inside the interior. This meant I had to modify the seats, roll bar and steering column to fit. (see what I mean about chain reaction?). Then when I retried it the R/H header fouled the fender, so I had to take a section out of that. Oh, and flexing the body multiple times to get it to fit the frame broke the vent window frames, hence the strips of BMF. Next up was paint, this was going great until I stupidly sprayed a coat of clear on a damp day with the garage door partly open and it 'bloomed'. With nothing to loose I gave it another coat which kind of cured it... I'm calling any milky effect you can see pearl... So after that it all went well, right? Wrong. When I tried to get it all together after fitting the glass I found there was a gap between the body and frame on the L/H side, I think the roll bar touches the thick one piece glazing. So I added a piece of plastic sheet to the top of the frame that side and filed it to shape, which meant I had to repaint that side of the frame. Given the previous issues I didn't want to risk masking everything up so I brush painted it... it turned out OK-ish. I'm sure there were other issues that I've forgotten, but here's the finished heap. I tried to take some better photos than my usual efforts, as the weather is good I tried some outdoor shots for the first time:
-
^ There's an engine in there??? 😵💫
-
Hello and welcome! The only thing I would add is there are kits and there are kits... some older or reissued kits can be a real challenge compared to (say) a modern Japanese kit.
-
Now, this is scary...
Mattblack replied to Matt Bacon's topic in General Automotive Talk (Trucks and Cars)
-
Not getting into the BMF Vs Molotow thing, but I did the side trim on my latest project with Molotow and yes I went over the edge in one place. When it was dry I carefully removed the excess with a very small amount of T-cut on a piece of kitchen towel wrapped around the end of a cocktail stick.
-
That's a colour, alright... 😁 Me, I'd go satin... but that's me.
-
Do you make notes/memory aids as you build?
Mattblack replied to Mattblack's topic in Model Building Questions and Answers
Wow, some interesting takes on the subject. It's clear that a lot of you get waaaay deeper into projects than I do. My issue is not that I will need notes for a future build, just the simple fact that at the end of a modeling session I'll think "I must do X before I paint Y and assemble Z" then promptly forget... 😵💫 -
Obviously, if you are building OOB you (in theory) follow the instructions in stages until you end up with a finished model, right? But I find that if (as with my current project) the instructions aren't worth the paper they're printed on and I'm also modifying things as I go along I can miss/forget something that I meant to do/paint. For example it wasn't until I was looking for another part that I found the harness that I meant to paint and fit before fitting the driver's seat. My habit of leaving long periods between build sessions probably doesn't help either. So what I'm getting at is do other people have the same problem and do you keep a notebook or something to jot things down while it's fresh in your mind?
-
Milner 32 5 window American Graffiti build
Mattblack replied to Silvercreeker's topic in WIP: Model Cars
"File that under C.S...." Being picky, wasn't it a door pocket full of tickets? I seem to recall reading the door pocket was added just for that scene. -
Ford econoline
Mattblack replied to charger74's topic in Model Trucks: Pickups, Vans, SUVs, Light Commercial
This. -
Hello and welcome from another UK modeler! I have the E-type in my stash, got some ideas for it but maybe it will end up box stock, who knows...?
-
Looking at the engine I'm thinking bomb lowrider?
-
I don't know if it's already a 'thing' but this got me thinking that Lego may be useful for making 'custom' supports for parts while the adhesive sets?
-
Welcome from another UK member!
-
I took the 3rd and 4th photos at our local supermarket years ago.
-
Who doesn't love a mock-up? Let's see yours!
Mattblack replied to Belairconvertable's topic in WIP: Model Cars
The AMT '37 Chevy coupe I'm grinding my way through, threw the wheels on to give my mojo a boost...
-
Funny, I've been thinking the exact same thing, but you probably put it better than I would have. I'd love to have the old Airfix custom car kits back again.